

As I stood in the kitchen, the warm aroma of frying bread filled the air, instantly transporting me to the vibrant streets of Sri Lanka. Flaky Roti Canai is not just a flatbread; it’s a culinary embrace that welcomes you to its crispy, tender layers. This versatile recipe is perfect for any meal, pairing beautifully with curries or serving as a delightful wrap for your favorite fillings. It’s surprisingly easy to make, allowing you to impress both family and friends without hours in the kitchen. Whether you’re a seasoned home chef or just starting out, this recipe lends itself to creativity, and it can easily be adapted for gluten-free diets. Curious about its origins and other name variations? Let’s dive into the world of Flaky Roti Canai together!
Why is Flaky Roti Canai a Must-Try?
Irresistible Flakiness: Each bite of Flaky Roti Canai showcases crispiness on the outside and softness in the middle, making it a delightful addition to any meal.
Endless Pairing Options: This versatile dish can be served with rich curries, delightful lentils, or even turned into wraps for various fillings.
Easy to Customize: Experiment with different fats like ghee for added flavor or infuse the dough with herbs for a unique twist.
Time-Saving Approach: Despite its layered texture, this recipe is surprisingly quick to prepare, making it ideal for weeknight dinners.
Gluten-Free Friendly: Adapting this recipe for a gluten-free diet is a breeze with simple substitutions, so everyone can enjoy! Dive deeper into the culture of Flaky Roti Canai and explore how similar recipes exist around the world, like its cousin, Roti Paratha.
Flaky Roti Canai Ingredients
For the Dough
- All-Purpose Flour – This provides the essential structure; you can use a gluten-free flour mix for a gluten-free version.
- Sea Salt – Enhances the flavor of your roti; kosher salt is a great alternative too.
- Boiling Water – Helps create a pliable dough; hot water provides better gluten development.
- Room Temperature Water – Adjusts the dough’s consistency; cold water can slightly alter the texture.
For Cooking
- Vegetable Oil – A vital ingredient for coating and cooking, helping separate the flaky layers; you can substitute with ghee or butter for extra flavor.
Experience the joy of making Flaky Roti Canai with these simple yet essential ingredients!
Step‑by‑Step Instructions for Flaky Roti Canai
Step 1: Prepare Dough
In a spacious bowl, combine all-purpose flour and sea salt, mixing well. Gradually pour in the boiling water, stirring with a fork until a rough dough forms. Add room temperature water little by little until fully combined. Cover the dough with a damp cloth and let it rest for 30 minutes to 1 hour, allowing the gluten to develop for your Flaky Roti Canai.
Step 2: Knead Dough
After resting, turn the dough onto a lightly floured surface and knead it for about 2-3 minutes until it becomes smooth and elastic. Divide the kneaded dough into 8 equal portions, shaping each piece into a smooth ball. This ensures even cooking and texture for your Flaky Roti Canai, so take your time with this step.
Step 3: Rest Balls
Once shaped, lightly coat each dough ball with vegetable oil to prevent sticking and place them in an oiled bowl. Cover the bowl with a clean kitchen towel and let the dough balls rest for at least 2 hours, or up to 12 hours if you want to prepare in advance. This extended rest allows the gluten to relax and enhances the flakiness of your Roti Canai.
Step 4: Shape Roti
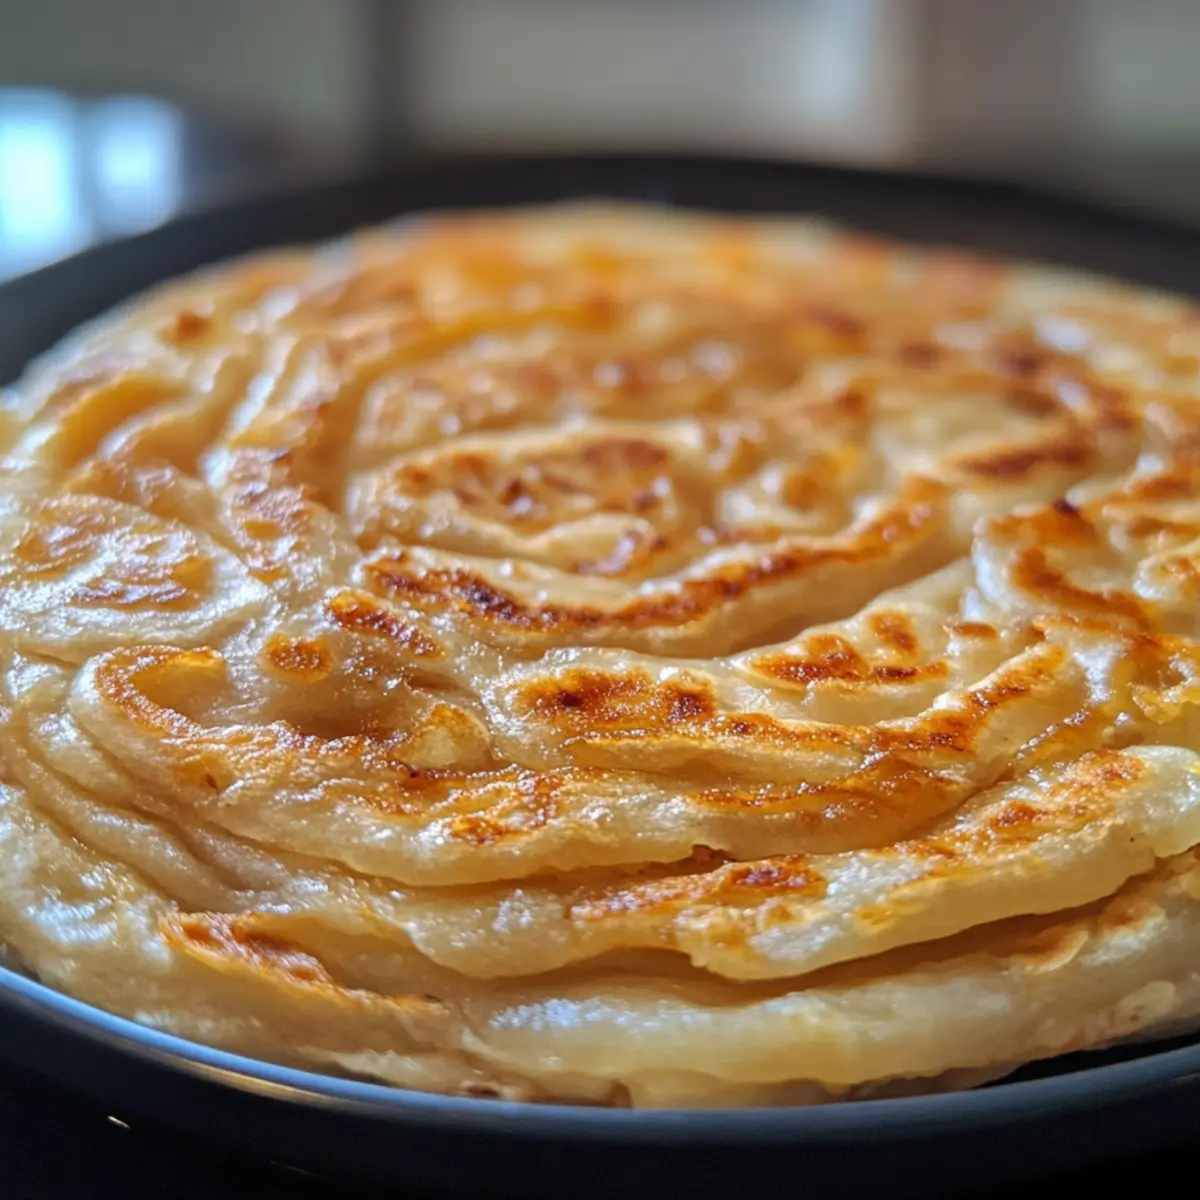
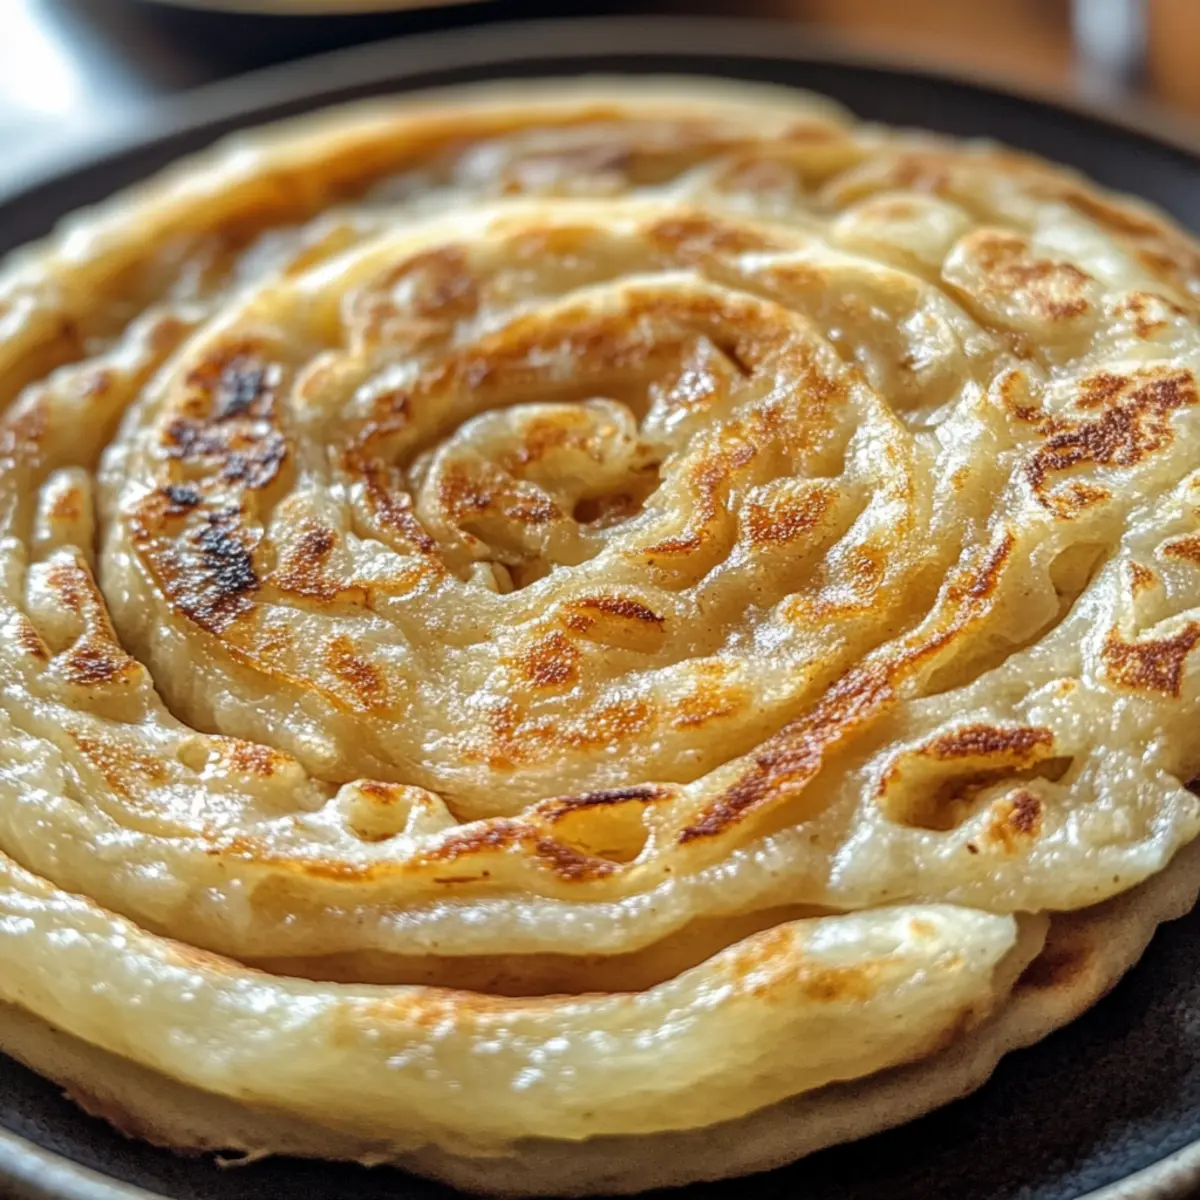
After the resting period, take a dough ball and place it on an oiled surface. Gently flatten it with your fingers, then carefully stretch it until it’s paper-thin, creating a delicate layer. Brush a thin layer of oil on top, roll the dough into a tube, and then coil it into a spiral. This coiling creates the signature flaky layers that define Flaky Roti Canai.
Step 5: Cooking
Heat a non-stick pan over medium heat until hot, then place the coiled dough into the pan. Cook each roti for about 4 minutes on one side until it turns golden brown, then flip to cook the other side. Look for a crispy exterior and a puffy shape to know your Flaky Roti Canai is cooking perfectly. Adjust the heat as necessary to avoid burning.
Step 6: Finishing Touch
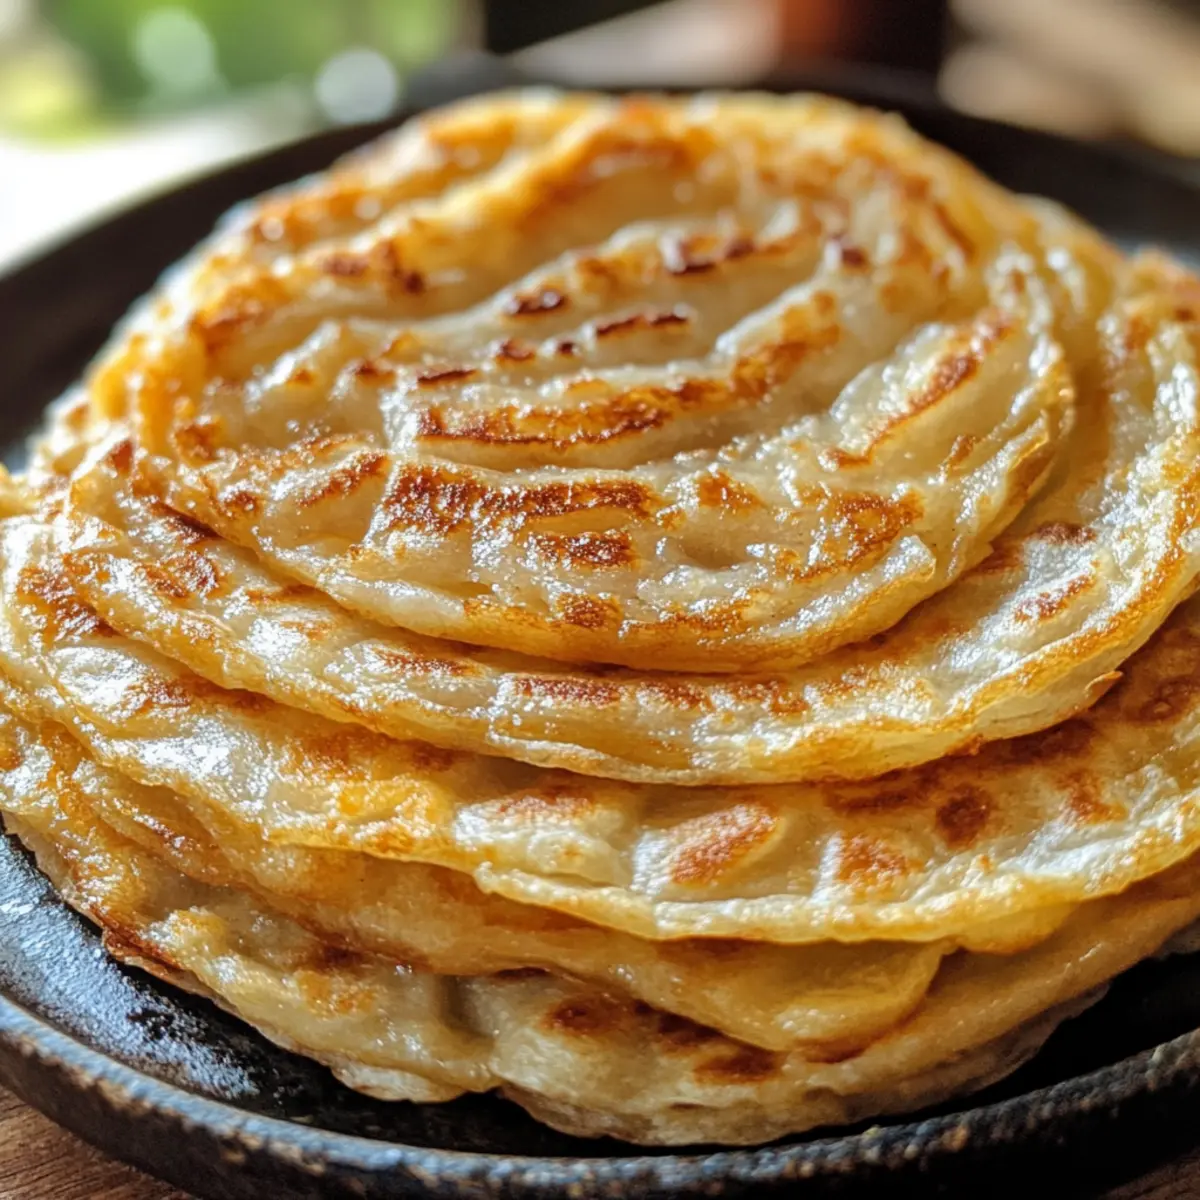
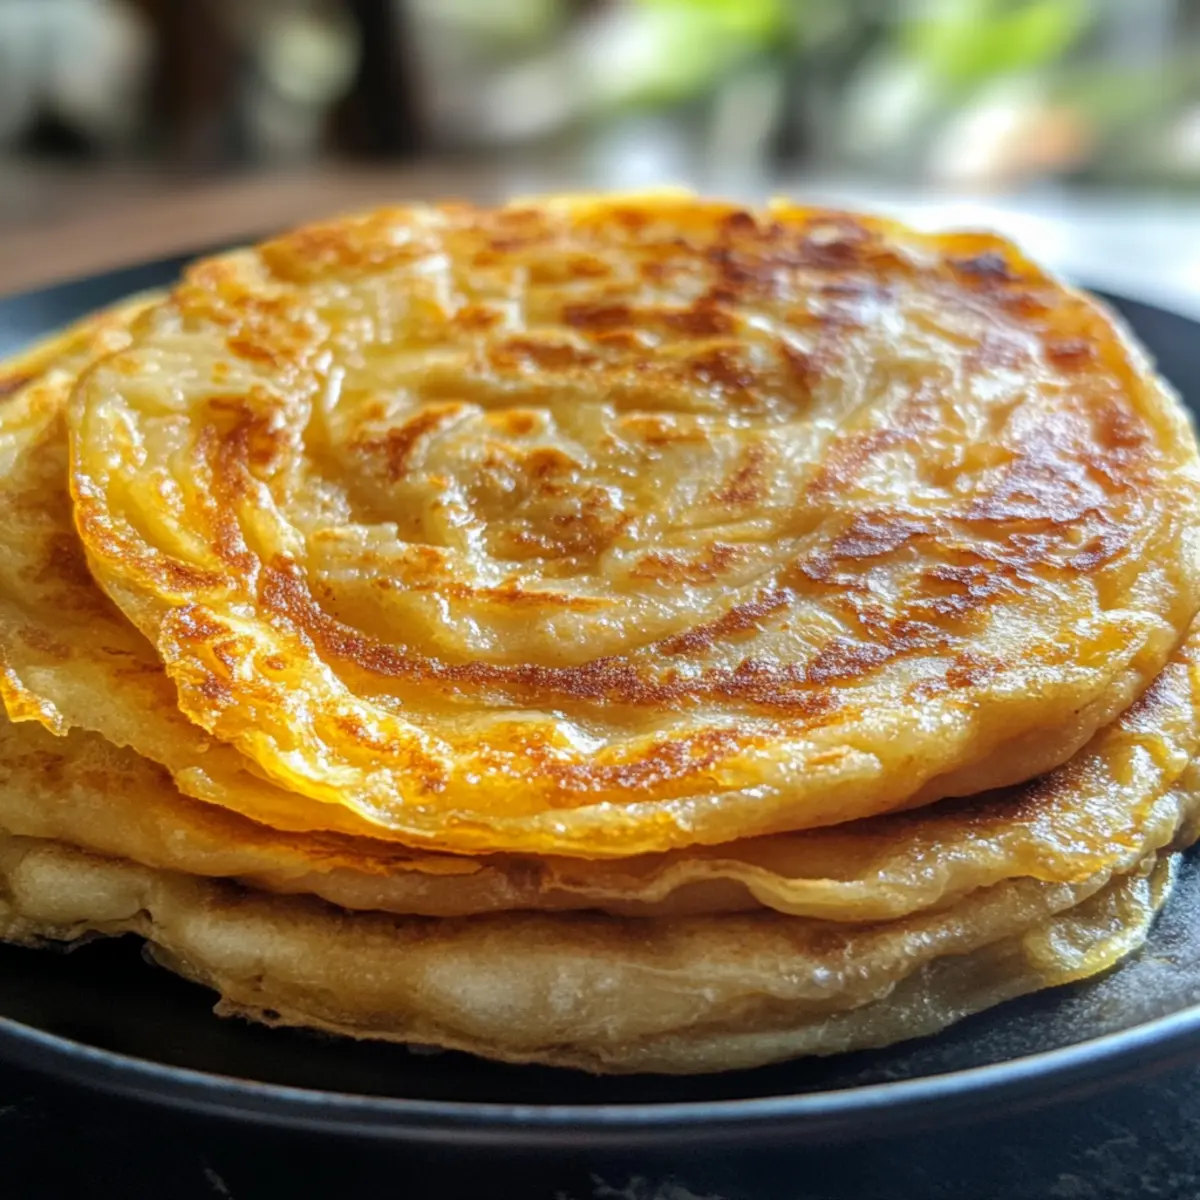
Once cooked on both sides, remove the roti from the pan and squash it slightly with your spatula to separate the flaky layers. Serve warm alongside your favorite curry or as a delightful wrap. The joy of your homemade Flaky Roti Canai shines through each crispy layer, ready to be paired with delicious accompaniments.
Expert Tips for Flaky Roti Canai
-
Oil Generously: When rolling and shaping your dough, ample oil is crucial. It ensures the layers remain separate and enhances the flakiness of your Flaky Roti Canai.
-
Perfect Resting Time: Don’t rush the resting period; letting the dough sit for at least 2 hours allows gluten relaxation, resulting in a more pliable and flaky final product.
-
Thin Is Key: Practice stretching your dough until it’s paper-thin. This technique is essential for achieving those beautiful, flaky layers in your roti.
-
Hot Pan for Cooking: Ensure your non-stick pan is sufficiently heated before adding the roti. A hot surface promotes even cooking and helps achieve that golden-brown color without burning.
-
Flip with Care: Gently flip your roti to avoid deflating the layers. A soft touch preserves the airiness, which contributes to the delightful texture of your Flaky Roti Canai.
Flaky Roti Canai Variations & Substitutions
Feel free to get creative with your Flaky Roti Canai and explore a world of delightful variations that excite your taste buds!
- Gluten-Free: Use a gluten-free flour mix instead of all-purpose flour to create a delicious, gluten-free version of this classic flatbread.
- Flavorful Fats: Substitute vegetable oil for ghee or butter to add a rich, savory taste to your roti.
- Herb-Infused: Mix chopped herbs like cilantro or parsley into the dough for a fresh, aromatic twist that pairs beautifully with various dishes.
- Spiced Up: Add spices such as cumin or chili powder to the dough for a hint of warmth and flavor that elevates the roti to new heights.
- Sweet Surprise: Serve your Flaky Roti Canai as a dessert by brushing it with honey or a sprinkle of sugar, perfect with coconut milk or fruit.
- Layered with Love: Incorporate finely grated cheese between the layers when rolling for a cheesy, indulgent version—great as a side dish!
- Vegan-Friendly: Replace ghee or butter with coconut oil to make a vegan adaptation while still enjoying the same flakiness and flavor.
- Filling Wonder: Experiment with fillings like spiced potatoes or lentils to transform your roti into a hearty main dish, inviting endless possibilities.
Don’t forget to enjoy it with a delicious Roti Paratha or a warm bowl of curry to fully appreciate its versatile nature. Let your imagination guide your kitchen adventures!
What to Serve with Flaky Roti Canai
Imagine creating a delightful spread that accentuates the warm, flaky layers of your homemade bread, inviting everyone to gather around the table.
- Rich Coconut Curry: The creamy texture and aromatic spices of coconut curry enhance the roti’s flakiness while complementing its subtle flavors.
- Spicy Lentil Dhal: A comforting dhal offers a nutritious, hearty side that melds well with the roti’s crispy texture. The rich lentils soak into the layers, creating a delightful bite.
- Savory Vegetable Stir-fry: A medley of colorful vegetables brings crunch and freshness, perfectly balancing the softness of Flaky Roti Canai. You can toss in your favorite seasonal veggies for variety.
- Grilled Chicken Satay: Tender, marinated chicken skewers with a savory peanut sauce provide a delicious protein option that pairs wonderfully with the flaky flatbread. This combination is sure to impress!
- Cucumber Salad: A refreshing side with crisp cucumbers, herbs, and a tangy dressing, adds brightness to the meal and acts as a palate cleanser.
- Tamarind Chutney: For a flavorful twist, try serving sweet and tangy tamarind chutney alongside the roti. The contrast of flavors creates a lively taste experience.
- Masala Chai: Serve a warm cup of spiced masala chai, enhancing the overall dining experience with its cozy flavors—perfect for winding down after a delicious meal.
- Pineapple Upside Down Cake: End your meal on a sweet note with this classic dessert, offering a delightful contrast to the savory elements on your plate. Each bite is a nostalgic warm hug!
- Mango Lassi: Refreshing mango lassi provides creamy sweetness that complements spicy dishes and cleanses the palate seamlessly. It’s a must-try drink for gatherings!
Make Ahead Options
Flaky Roti Canai is perfect for meal prep enthusiasts looking to save time during busy weeknights! You can prepare the dough up to 24 hours in advance, letting it rest in the fridge instead of at room temperature. After shaping the dough balls, simply coat them in oil, place them in an airtight container, and refrigerate. For a longer prep ahead option, you can freeze the shaped roti—just ensure each piece is separated with parchment to maintain their flaky layers. When you’re ready to enjoy, cook the frozen roti straight from the freezer, adding a minute or two to the cooking time for those mouthwatering results just as delicious as freshly made!
Storage Tips for Flaky Roti Canai
Room Temperature: Store cooked Flaky Roti Canai at room temperature for up to 3 days, wrapped in a clean kitchen towel to maintain softness.
Fridge: To prolong freshness, keep leftover roti in an airtight container in the fridge for up to 5 days. Reheat in a pan or microwave before serving.
Freezer: Freeze uncooked or cooked roti for up to 2 months. For best results, layer each roti with parchment paper to prevent sticking.
Reheating: To reheat frozen Flaky Roti Canai, allow it to thaw in the fridge overnight and then warm on a skillet for a few minutes on each side until heated through.
Flaky Roti Canai Recipe FAQs
What type of flour should I use for Flaky Roti Canai?
For the best results, I recommend using all-purpose flour, as it provides the necessary structure and texture for your roti. If you’re following a gluten-free diet, a gluten-free flour mix works well as a substitute; just be sure to check that it’s appropriate for high-stretch doughs.
How should I store leftover Flaky Roti Canai?
You can store cooked Flaky Roti Canai at room temperature for up to 3 days, wrapped in a clean kitchen towel to keep them soft. For longer storage, place them in an airtight container in the fridge for up to 5 days. Just remember to gently reheat them in a pan or microwave before enjoying!
Can I freeze Flaky Roti Canai?
Absolutely! You can freeze both uncooked and cooked roti. If you’re freezing cooked roti, place parchment paper between each one to prevent sticking and store in an airtight container for up to 2 months. When it’s time to enjoy, thaw them in the fridge overnight and reheat on a skillet for a few minutes until warmed through.
What if my dough is too sticky?
If you find that your dough is too sticky, don’t worry! Simply add a bit more flour, a tablespoon at a time, until you achieve the right consistency. Remember to knead the dough well after each addition to evenly incorporate the flour. The goal is to create a smooth, pliable dough that can be easily shaped into those beautiful layers.
Is Flaky Roti Canai safe for everyone to eat?
While Flaky Roti Canai is generally safe for most, keep in mind that it contains gluten due to the all-purpose flour. If someone has gluten allergies or celiac disease, opt for a gluten-free flour mix to ensure it’s safe for them. Always check for any additional ingredients that could trigger allergies, especially with substitutes like ghee or butter.
How long should I let my dough rest?
Resting is key to achieving that wonderful flakiness! Let your dough rest for at least 2 hours—though if you have time, up to 12 hours is even better. This resting period allows the gluten to relax, making your dough easier to stretch and shape beautifully. Enjoy cooking!
Flaky Roti Canai - Your New Favorite Comfort Food Delight
Ingredients
Equipment
Method
- In a spacious bowl, combine all-purpose flour and sea salt, mixing well. Gradually pour in the boiling water, stirring with a fork until a rough dough forms. Add room temperature water little by little until fully combined. Cover with a damp cloth and let it rest for 30 minutes to 1 hour.
- Turn the dough onto a lightly floured surface and knead it for about 2-3 minutes until it becomes smooth and elastic. Divide into 8 equal portions and shape into smooth balls.
- Lightly coat each dough ball with vegetable oil to prevent sticking and place them in an oiled bowl. Cover with a clean kitchen towel and let rest for at least 2 hours.
- Take a dough ball and place it on an oiled surface. Flatten and stretch until paper-thin, then brush with oil and roll into a tube, coiling it into a spiral.
- Heat a non-stick pan over medium heat. Cook each roti for about 4 minutes on one side until golden brown, then flip to cook the other side.
- Once cooked on both sides, remove from the pan and squash it slightly to separate the flaky layers. Serve warm.