

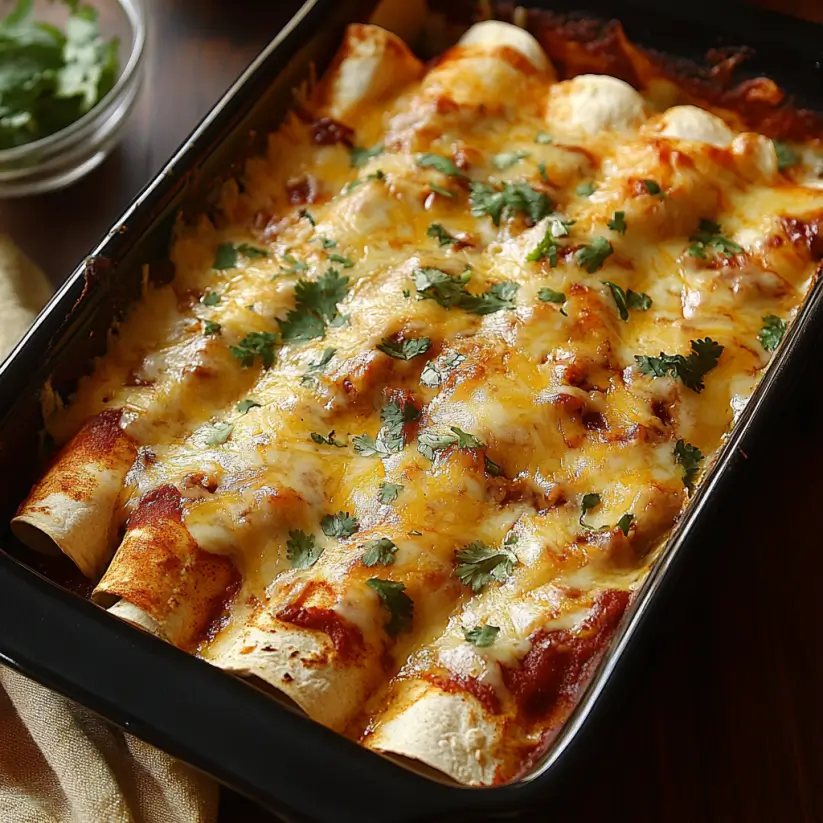
Introduction to Cheesy Queso Enchiladas
There’s something magical about a warm plate of Cheesy Queso Enchiladas that instantly transports me back to family gatherings. The aroma of melted cheese and savory chicken fills the air, making it impossible to resist. This dish is not just a meal; it’s a comforting hug on a plate. Whether you’re looking for a quick solution after a long day or a way to impress your loved ones, these enchiladas are your go-to. They’re easy to whip up, and trust me, everyone will be asking for seconds!
Why You’ll Love This Cheesy Queso Enchiladas
These Cheesy Queso Enchiladas are a game-changer for busy weeknights. They come together in just 40 minutes, making them perfect for those evenings when time is tight. The combination of creamy queso and tender chicken creates a flavor explosion that will have your taste buds dancing. Plus, they’re versatile enough to please everyone at the table, from picky eaters to spice lovers. You’ll find yourself making these again and again!
Ingredients for Cheesy Queso Enchiladas
Gathering the right ingredients is the first step to creating your delicious Cheesy Queso Enchiladas. Here’s what you’ll need:
- Cooked shredded chicken: This is the heart of the dish, providing protein and flavor. You can use rotisserie chicken for convenience or cook your own.
- Queso blanco cheese: This creamy cheese melts beautifully, adding richness. Feel free to substitute with Monterey Jack or cheddar if you prefer.
- Enchilada sauce: A flavorful sauce that ties everything together. You can use store-bought or make your own for a personal touch.
- Corn tortillas: These are the perfect vessel for your filling. Look for fresh or homemade tortillas for the best texture.
- Black beans: They add a hearty element and extra fiber. Rinse them well to remove excess sodium.
- Corn: Whether frozen or canned, corn adds sweetness and color. It’s a great way to sneak in some veggies!
- Cumin: This spice brings warmth and depth to the dish. It’s a staple in Mexican cuisine.
- Garlic powder: A must-have for flavor. Fresh garlic works too, but the powder is convenient.
- Salt and black pepper: Essential for seasoning. Adjust to your taste preferences.
- Sour cream: This creamy topping adds a cool contrast to the warm enchiladas. You can also use Greek yogurt for a healthier option.
- Fresh cilantro: A garnish that brightens up the dish. If you’re not a fan, feel free to skip it!
For exact measurements, check the bottom of the article where you can find everything listed for easy printing. Happy cooking!
How to Make Cheesy Queso Enchiladas
Creating Cheesy Queso Enchiladas is a straightforward process that anyone can master. Follow these simple steps, and you’ll have a delicious meal ready in no time!
Step 1: Preheat the Oven
Start by preheating your oven to 350°F (175°C). This step is crucial because it ensures that your enchiladas cook evenly. A hot oven helps the cheese melt beautifully and gives the dish that golden, bubbly finish we all crave.
Step 2: Prepare the Filling
In a large mixing bowl, combine the cooked shredded chicken, half of the queso blanco cheese, black beans, corn, cumin, garlic powder, salt, and black pepper. Mix everything well until the flavors meld together. The cumin and garlic powder will add a warm, aromatic touch that makes your kitchen smell amazing!
Step 3: Warm the Tortillas
Next, warm the corn tortillas. You can do this in a skillet over low heat or in the microwave for about 30 seconds. Warming them makes them pliable, which is essential for easy rolling. If they’re too stiff, they might crack, and nobody wants that!
Step 4: Assemble the Enchiladas
Now it’s time to roll! Spoon about 1/4 cup of the chicken mixture into each tortilla. Roll them up tightly and place them seam-side down in a greased 9×13 inch baking dish. This helps keep everything together and ensures a neat presentation.
Step 5: Add Sauce and Cheese
Pour the enchilada sauce evenly over the rolled tortillas, making sure they’re well covered. This sauce is what brings everything together. Then, sprinkle the remaining queso blanco cheese on top. This will create a deliciously cheesy crust as it bakes!
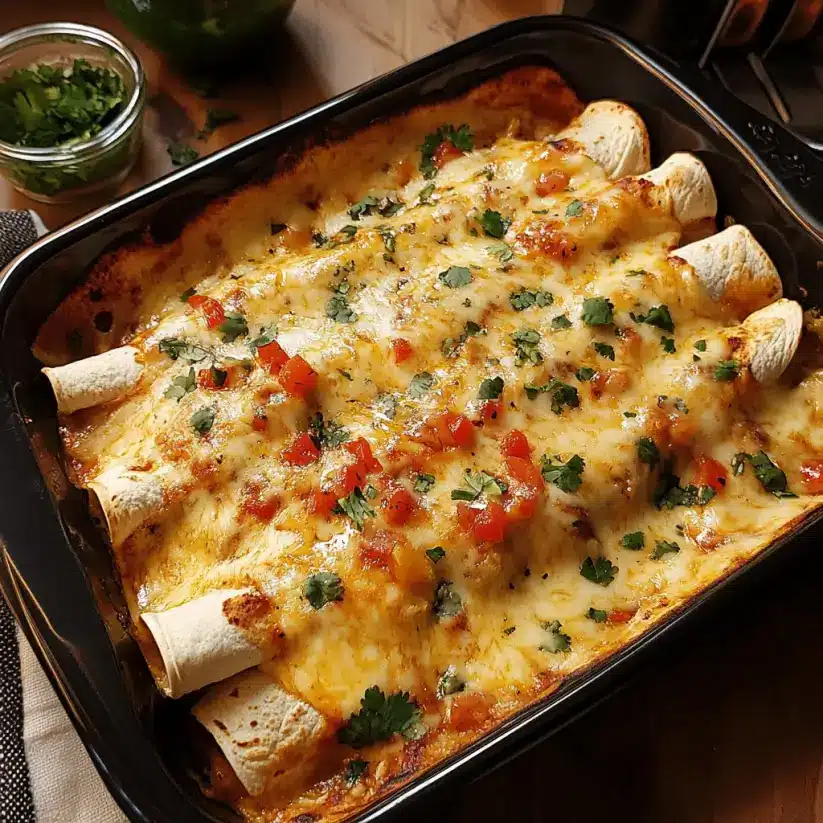
Step 6: Bake to Perfection
Place the baking dish in the preheated oven and bake for 20-25 minutes. Keep an eye on them! You’ll know they’re done when the cheese is melted and bubbly, and the edges of the tortillas start to crisp up. That’s when the magic happens!
Step 7: Serve and Enjoy
Once out of the oven, let the enchiladas cool for a few minutes. This helps the cheese set a bit, making them easier to serve. Top with sour cream and fresh cilantro before diving in. Trust me, the wait will be worth it!
Tips for Success
- Use fresh tortillas for the best texture; they roll easier and taste better.
- Don’t skip the preheating step; it ensures even cooking and perfect cheese melt.
- Feel free to customize the filling with your favorite veggies or proteins.
- Let the enchiladas cool slightly before serving to avoid a cheesy mess.
- Experiment with different toppings like avocado or salsa for added flavor.
Equipment Needed
- Baking dish: A 9×13 inch dish works best, but any oven-safe dish will do.
- Mixing bowl: Use a large bowl for combining ingredients; a sturdy one is ideal.
- Skillet: Great for warming tortillas; a microwave can also do the trick.
- Measuring cups: Handy for portioning ingredients accurately.
Variations of Cheesy Queso Enchiladas
- Vegetarian Delight: Swap the chicken for sautéed mushrooms, zucchini, or additional black beans for a hearty vegetarian option.
- Spicy Kick: Add sliced jalapeños or diced green chilies to the filling for an extra layer of heat that spice lovers will adore.
- Cheesy Spinach: Incorporate fresh spinach into the chicken mixture for a nutritious twist that adds color and flavor.
- Southwestern Style: Mix in roasted corn and diced bell peppers for a vibrant, southwestern flair that enhances the dish.
- Low-Carb Option: Use cauliflower tortillas instead of corn tortillas to create a low-carb version that still satisfies.
Serving Suggestions for Cheesy Queso Enchiladas
- Side Salad: Pair with a fresh garden salad topped with avocado and lime vinaigrette for a refreshing contrast.
- Rice: Serve alongside Mexican rice or cilantro-lime rice for a hearty meal.
- Drinks: Enjoy with a cold cerveza or a zesty margarita to elevate the experience.
- Presentation: Garnish with extra cilantro and lime wedges for a vibrant touch.
FAQs about Cheesy Queso Enchiladas
Can I make Cheesy Queso Enchiladas ahead of time?
Absolutely! You can prepare the enchiladas and assemble them in the baking dish. Just cover and refrigerate them for up to 24 hours. When you’re ready to bake, add a few extra minutes to the cooking time.
What can I substitute for queso blanco cheese?
If you can’t find queso blanco, Monterey Jack or even a mild cheddar works well. Both melt beautifully and will give you that creamy texture you crave in these enchiladas.
Can I freeze Cheesy Queso Enchiladas?
Yes, these enchiladas freeze wonderfully! Just wrap them tightly in plastic wrap and then foil. When you’re ready to enjoy, thaw in the fridge overnight and bake as directed.
How can I make these enchiladas spicier?
For a spicy kick, add diced jalapeños or a splash of hot sauce to the chicken mixture. You can also use a spicier enchilada sauce to amp up the heat!
What sides pair well with Cheesy Queso Enchiladas?
These enchiladas are delicious on their own, but they pair beautifully with a fresh salad, Mexican rice, or even some refried beans for a complete meal.
Final Thoughts
Making Cheesy Queso Enchiladas is more than just cooking; it’s about creating memories and sharing joy with those you love. The blend of flavors, the gooey cheese, and the comforting warmth of this dish can turn an ordinary evening into something special. Whether it’s a weeknight dinner or a gathering with friends, these enchiladas are sure to impress. I hope you find as much happiness in preparing and enjoying them as I do. So roll up your sleeves, gather your ingredients, and let the deliciousness unfold. Happy cooking!
Cheesy Queso Enchiladas: A Delicious Recipe to Try!
Ingredients
Method
- Preheat your oven to 350°F (175°C).
- In a large mixing bowl, combine the cooked shredded chicken, 1/2 cup of queso blanco cheese, black beans, corn, cumin, garlic powder, salt, and black pepper. Mix well until all ingredients are evenly combined.
- Warm the corn tortillas in a skillet or microwave until pliable.
- Spoon about 1/4 cup of the chicken mixture into each tortilla, roll them up tightly, and place them seam-side down in a greased 9x13 inch baking dish.
- Pour the enchilada sauce evenly over the rolled tortillas, ensuring they are well covered.
- Sprinkle the remaining 1/2 cup of queso blanco cheese on top of the enchiladas.
- Bake in the preheated oven for 20-25 minutes, or until the cheese is melted and bubbly.
- Remove from the oven and let cool for a few minutes. Serve hot, topped with sour cream and garnished with fresh cilantro.
Nutrition
Notes
- For a vegetarian option, substitute the chicken with sautéed mushrooms or additional beans.
- Add sliced jalapeños or diced green chilies to the chicken mixture for an extra kick of heat.