

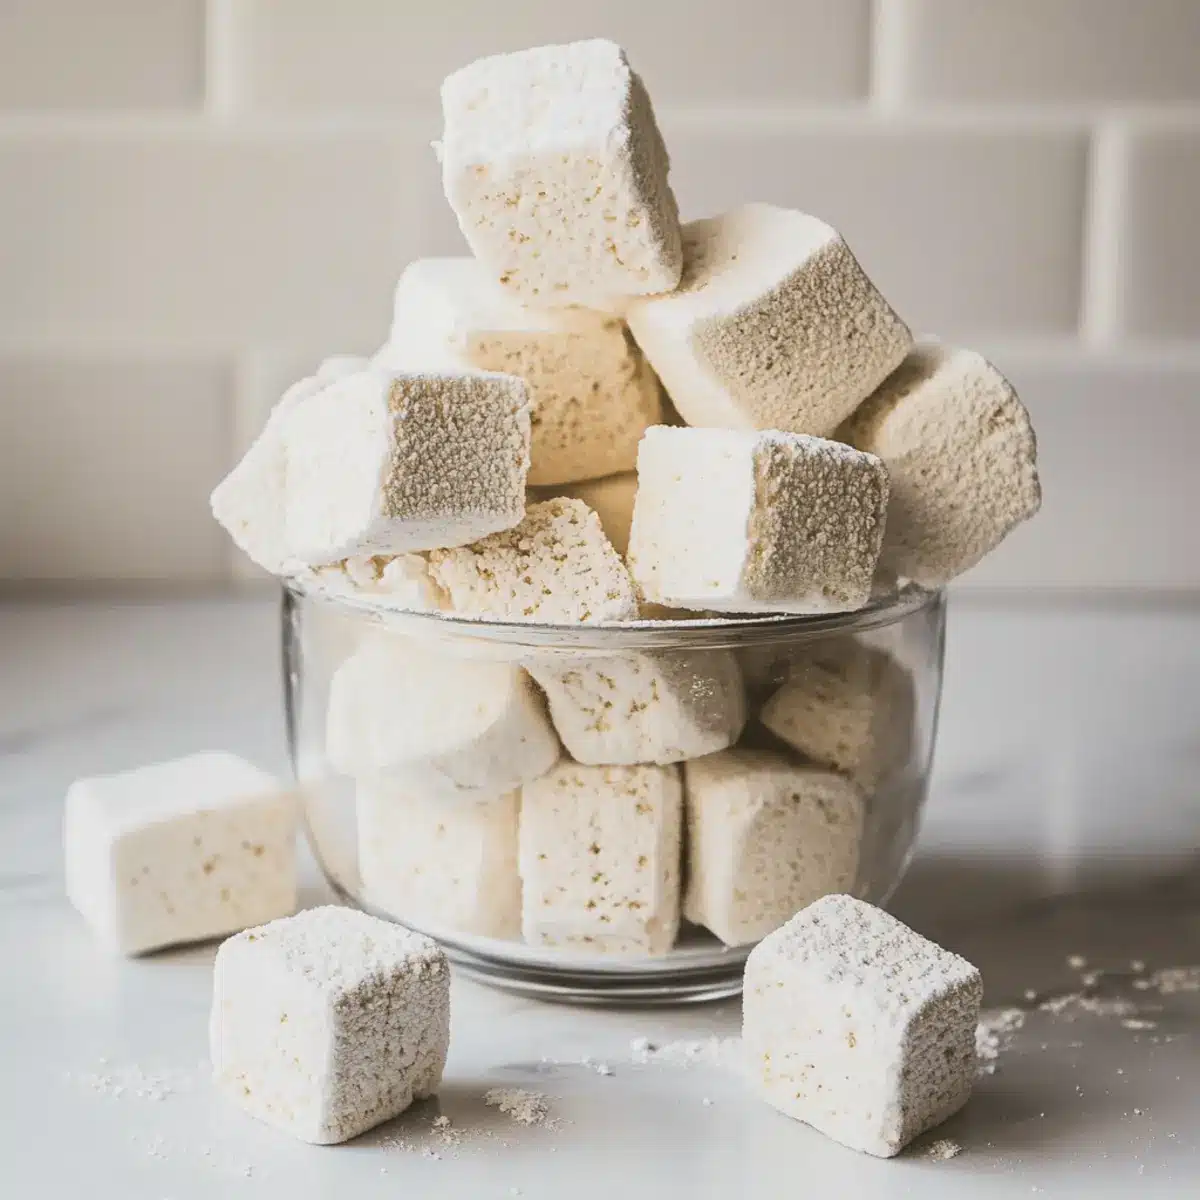
The aroma of maple syrup wafting through the kitchen is enough to take me back to chilly afternoons spent crafting sweet memories. Today, I’m excited to share my latest joy: Homemade Maple Marshmallows. These delightful treats not only bring a cozy touch to your hot cocoa or dessert table, but they also boast the wonderful perk of being gluten-free and refined sugar-free. With just a handful of natural ingredients, you’ll find these marshmallows to be an easy, guilt-free indulgence perfect for festive gatherings or treating yourself! Ready to elevate your snacking game and impress friends with your homemade creations? Let’s dive in and bring a touch of sweetness to your day!
Why are Homemade Maple Marshmallows irresistible?
Irresistible Flavor: Each bite bursts with the rich taste of maple syrup, elevating your favorite beverages.
Gluten-Free Goodness: Enjoy a delightful treat without worrying about dietary restrictions.
Easy to Make: With simple steps, anyone can whip up these airy marshmallows at home!
Perfect for Gifting: Share the joy during holidays or special occasions by packaging them beautifully.
Versatile Treat: Use them in s’mores, atop desserts, or just as a fluffy snack! Accompany them with a cup of hot cocoa for the ultimate enjoyment, or pair them with Honey Butter Brioche for an indulgent treat. You’ll wonder why you ever bought store-bought again!
Homemade Maple Marshmallows Ingredients
-
For the Marshmallow Base
-
Cold Water – Provides the essential base for blooming gelatin; no substitutes are needed.
-
Powdered Gelatin – Ensures your marshmallows are fluffy and hold their shape; agar-agar can be used as a vegetarian alternative, though texture may vary.
-
Maple Syrup – Acts as a natural sweetener, delivering a rich flavor; substitutes like agave syrup may alter the texture slightly.
-
Pinch of Salt – Balances the sweetness and enhances the flavor; it’s essential but can be omitted if necessary.
-
For Dusting
-
Confectioner’s Sugar – Prevents marshmallows from sticking together; cornstarch can be mixed in as an alternative to keep them dusted and delightful.
Let these Homemade Maple Marshmallows bring warmth and sweetness to your kitchen, and know they’re made with nothing but love and natural ingredients!
Step-by-Step Instructions for Homemade Maple Marshmallows
Step 1: Prepare the Pan
Begin by lightly buttering a 9×13 pan, then line it with parchment paper for easy removal, allowing some overhang. Dust the bottom and sides generously with confectioner’s sugar to prevent sticking. This preparation ensures your Homemade Maple Marshmallows will release smoothly once set.
Step 2: Bloom Gelatin
In the bowl of a stand mixer, combine cold water with powdered gelatin. Let this mixture sit undisturbed for about 10 minutes, allowing the gelatin to bloom and absorb the water fully. This step is crucial for achieving the fluffy texture of your marshmallows.
Step 3: Cook Syrup
In a deep saucepan, pour in the maple syrup and bring it to a rolling boil over medium heat. It’s important to monitor the syrup closely until it reaches 235°F, known as the soft ball stage, typically about 10-12 minutes. Use a candy thermometer to ensure accuracy, avoiding any stirring during this process.
Step 4: Combine Ingredients
Once the syrup has reached the desired temperature, carefully remove it from the heat. Start your mixer on low speed and add the bloomed gelatin mixture, mixing until combined. Gradually drizzle in the hot syrup, continuing to mix for about a minute. This incorporation is key to blending flavors in your Homemade Maple Marshmallows.
Step 5: Whip Mixture
Increase the mixer speed to high and beat the mixture until it becomes thick and glossy, forming stiff peaks, which should take around 8-12 minutes. Keep an eye on the texture; it’s ready when it resembles fluffy clouds. This step creates the signature airy quality of the marshmallows.
Step 6: Spread Mixture
Immediately pour the whipped marshmallow mixture into the prepared pan. Use an offset spatula to spread it evenly, smoothing the top for a flat, uniform surface. Be swift in this step as the mixture begins to set quickly, ensuring that your Homemade Maple Marshmallows are perfectly formed.
Step 7: Cure
Let the marshmallow mixture sit at room temperature for several hours or overnight, allowing it to cure thoroughly. This resting time is essential for achieving the right firmness in your marshmallows, so resist the urge to rush this part of the process.
Step 8: Cut & Dust
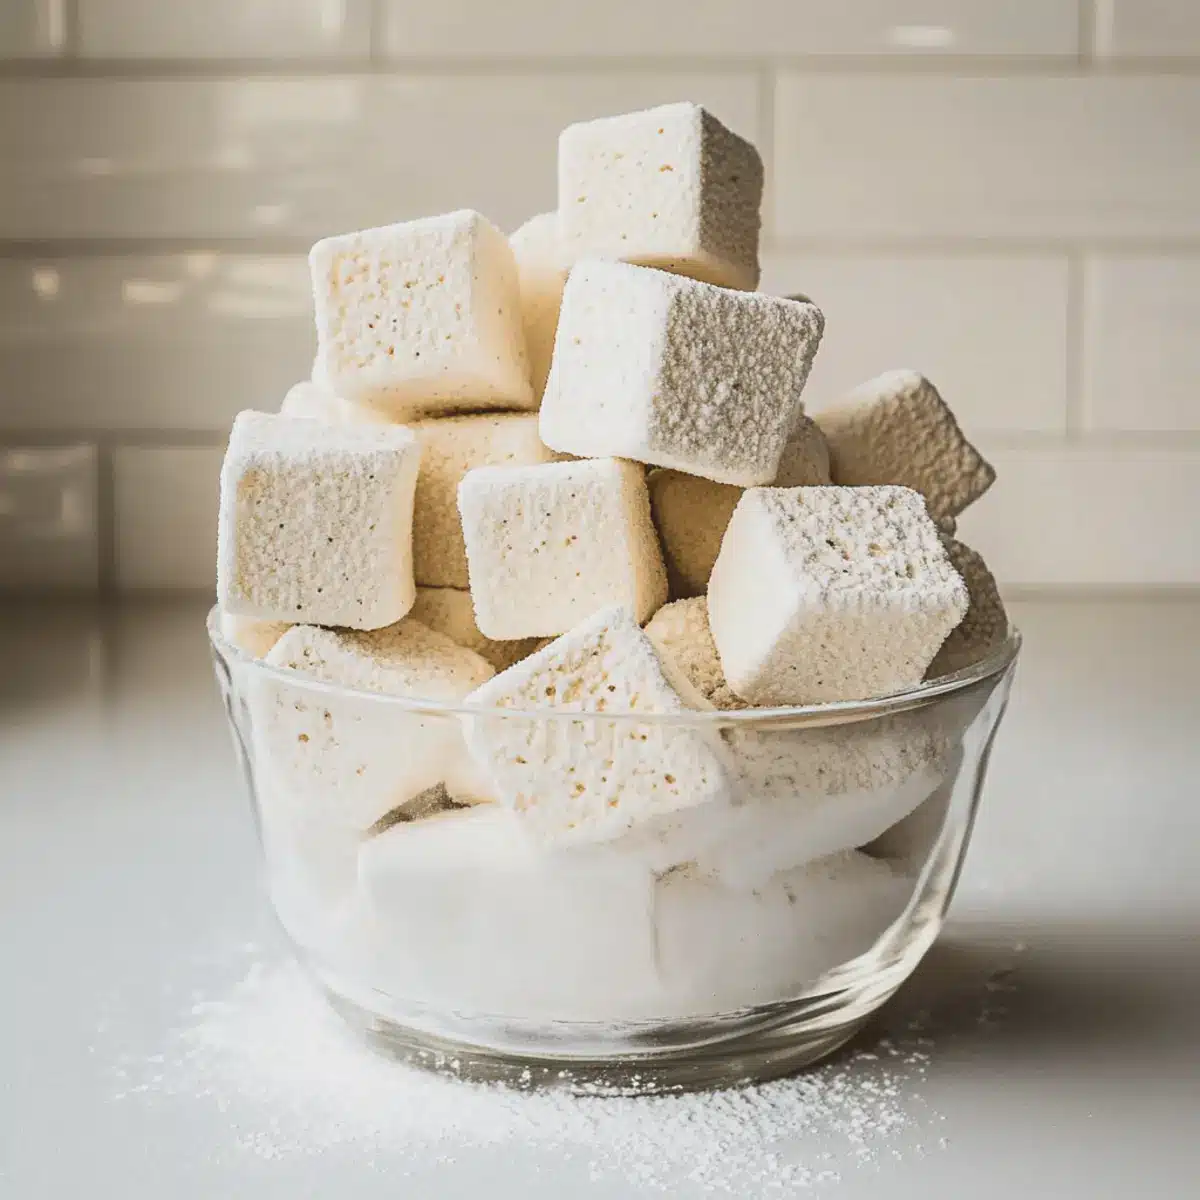
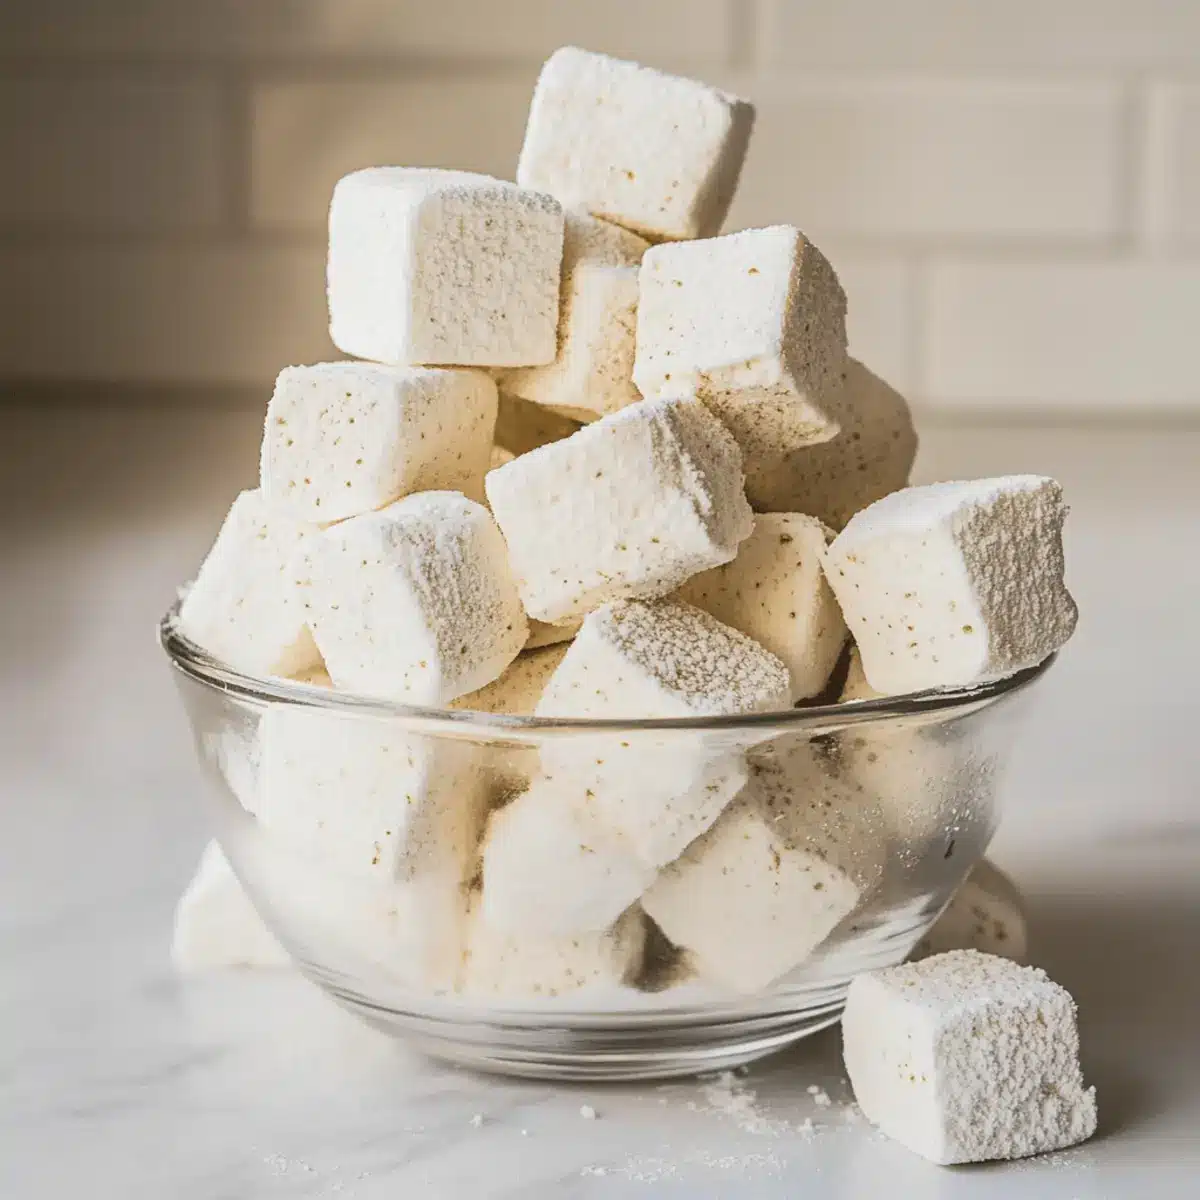
Once the marshmallows are set, invert the pan onto a clean surface dusted with more confectioner’s sugar. Gently peel off the parchment paper and cut the marshmallows into squares using a sharp knife. Remember to dust all sides with additional sugar to keep them from sticking together, completing your delightful Homemade Maple Marshmallows.
How to Store and Freeze Homemade Maple Marshmallows
- Room Temperature: Store your homemade maple marshmallows in an airtight container at room temperature for up to 2 weeks. Keep them away from direct sunlight or heat to maintain their fluffy texture.
- Fridge: While it’s best to keep them at room temperature, if you prefer them cooler, you can refrigerate them for up to a week. Just remember to wrap them tightly to prevent drying out.
- Freezer: For long-term storage, freeze your marshmallows in a single layer on a parchment-lined tray. Once frozen, transfer them to an airtight container to keep them fresh for up to 3 months.
- Reheating: If they become a bit firm after freezing, simply let them sit at room temperature for a bit before enjoying, or briefly microwave them for a few seconds to revive their fluffiness.
Homemade Maple Marshmallows Variations
Feel free to get creative with your marshmallows, customizing them to suit your taste buds and occasion!
-
Vegan Swap: Use agar-agar instead of gelatin to create a plant-based version of these fluffy delights. The texture may be a bit different, but the flavor will still shine!
-
Flavored Extracts: Add a splash of vanilla or almond extract to the mix for a delicious twist. You could even infuse them with some peppermint extract for a festive touch. These are perfect for holiday gatherings or cozy evenings at home.
-
Heat it Up: For those who love a little kick, stir in some cayenne pepper or chili powder. You’ll find that this unexpected element pairs beautifully with the sweet maple, creating a unique flavor experience.
-
Chocolate-Dipped: Once cut, dip your marshmallows in melted dark or milk chocolate. This adds a decadent layer that pairs wonderfully with their fluffy texture. A sprinkle of sea salt on top elevates the treat even further!
-
Coconut Lovers: Mix in shredded coconut before spreading the marshmallow mixture in the pan. Coconut adds a delightful chewiness that complements the fluffiness of the marshmallows beautifully.
-
Nutty Additions: Stir in finely chopped nuts like pistachios or almonds for extra crunch. This variation adds a lovely texture and can be a great conversation starter at your next gathering.
-
S’mores Delight: Incorporate crushed graham crackers into the marshmallow mixture before pouring it into the pan. It turns your marshmallows into a s’mores-inspired treat straight from the start, ideal for summer nights.
For more sensational recipes that include marshmallows, consider trying out these Honey Butter Brioche rolls to pair with your sweet creations or even incorporate marshmallows into a delightful dessert! Each variation will transform your homemade maple marshmallows into exciting new treats that everyone will love!
Expert Tips for Homemade Maple Marshmallows
-
Temperature Check: Use a candy thermometer submerged properly in syrup to prevent incorrect readings. This ensures your homemade maple marshmallows achieve the perfect texture.
-
Beat Wisely: While whipping the marshmallow mixture, keep an eye on the time. It may take less time than expected; look for thick, glossy peaks instead of just watching the clock.
-
Prevent Stickiness: To avoid having your marshmallows clump together, dust them generously with confectioner’s sugar after cutting. The texture should be sticky but manageable.
-
Cool Setting: Allow the marshmallows to set at room temperature for a minimum of several hours or overnight. This curing time is crucial for firmness and the ultimate enjoyment of your homemade treats.
-
Flavor Variations: Think outside the box! Experiment with flavored extracts like vanilla or almond to personalize your homemade maple marshmallows for special occasions.
What to Serve with Homemade Maple Marshmallows?
The perfect combination elevates the bliss of homemade marshmallows into a delightful feast for the senses.
-
Rich Hot Chocolate: The creamy texture of hot chocolate beautifully contrasts the fluffy marshmallows, making each sip a cozy experience.
-
Graham Crackers: Use them in s’mores alongside warm chocolate, where the crunch meets softness in a bittersweet balance.
-
Spiced Apple Cider: The warm spices of apple cider enhance the maple flavor, creating a heartwarming drink perfect for chilly evenings.
-
Peppermint Bark: A festive pairing where the sweetness of the marshmallows complements the refreshing coolness of the peppermint.
-
Honey Butter Brioche: The buttery richness of brioche adds indulgent layers to your sweet treat experience, making it a perfect afternoon delight.
-
Vanilla Ice Cream: Top a scoop with warm maple marshmallows to create a decadent dessert that melts in your mouth with each bite.
-
Chai Latte: The aromatic spices of chai elevate the sweet maple flavor, creating a harmonious blend that warms the soul.
-
Chocolate Fondue: Dip homemade marshmallows into rich, gooey chocolate for a delightful party treat that excites the senses.
-
Milkshake: Blend them into a milkshake for a creamy, fluffy twist that takes your favorite dessert to the next level.
Make Ahead Options
These Homemade Maple Marshmallows are perfect for busy weeknights or festive gatherings! You can prepare the marshmallow mixture up to 24 hours in advance, allowing you to save time on the day you plan to serve them. Simply complete steps 1-6, then cover the pan with plastic wrap and refrigerate. This helps maintain their fluffy texture and prevents them from becoming sticky. When you’re ready to enjoy your marshmallows, let them come to room temperature for about 30 minutes before cutting and dusting with confectioner’s sugar as mentioned in step 8. You’ll have delicious, soft marshmallows ready to elevate your hot cocoa or dessert table with minimal effort!
Homemade Maple Marshmallows Recipe FAQs
What kind of maple syrup should I use for Homemade Maple Marshmallows?
Absolutely, using pure, high-quality maple syrup is crucial for achieving the best flavor in your marshmallows. Look for grade A or grade B maple syrup, as these have a more robust taste, which will really shine in your finished treat. Avoid imitation maple syrup, as it may contain additives that won’t yield the same delicious results.
How do I store my Homemade Maple Marshmallows?
To keep your marshmallows fresh, store them in an airtight container at room temperature for up to 2 weeks. Make sure they’re in a cool, dry place away from direct sunlight. If you live in a humid environment, I recommend placing a piece of wax paper between layers to help absorb moisture.
Can I freeze Homemade Maple Marshmallows?
Certainly! To freeze your marshmallows, place them in a single layer on a parchment-lined tray and freeze until solid. Then, transfer them to an airtight container, being sure to separate layers with parchment paper if stacking. They can be stored in the freezer for up to 3 months. When ready to enjoy, allow them to thaw at room temperature.
What should I do if my marshmallow mixture isn’t thickening?
If your mixture doesn’t thicken as expected, it might be due to the syrup not reaching the proper temperature (235°F). Make sure you use a reliable candy thermometer, submerged correctly in the syrup. You can also try whipping for a few additional minutes to help achieve that fluffy texture, but keep your eye on it to avoid overmixing.
Are Homemade Maple Marshmallows safe for pets/allergies?
It’s essential to keep your homemade marshmallows away from pets, as ingredients like xylitol or chocolate can be harmful to them. As for allergies, these marshmallows are gluten-free, but always double-check the specific brands of gelatin and powdered sugar you use, especially for those with dietary restrictions.
How can I tell if my gelatin is blooming correctly?
When blooming your gelatin, look for it to absorb the water, becoming a thick, jelly-like consistency within about 10 minutes. A well-bloomed gelatin will move from grainy to a smooth, lumpy texture. If it doesn’t achieve this after a good soaking time, it may not activate properly, and you might need to start over with fresh gelatin.

Homemade Maple Marshmallows: Fluffy Treats You’ll Love
Ingredients
Equipment
Method
- Prepare the pan by lightly buttering a 9x13 pan, line it with parchment paper, and dust with confectioner’s sugar.
- In a stand mixer, combine cold water with powdered gelatin and let sit for about 10 minutes to bloom.
- In a deep saucepan, pour maple syrup and bring to a rolling boil over medium heat until it reaches 235°F.
- Remove syrup from heat, start mixer on low, add bloomed gelatin, mix, then gradually drizzle in hot syrup.
- Increase mixer speed to high and beat until thick and glossy, forming stiff peaks (8-12 minutes).
- Pour whipped marshmallow mixture into the prepared pan and spread it evenly.
- Let the mixture sit at room temperature for several hours or overnight to cure.
- Once set, invert the pan, peel off parchment, and cut into squares, dusting with additional confectioner’s sugar.