

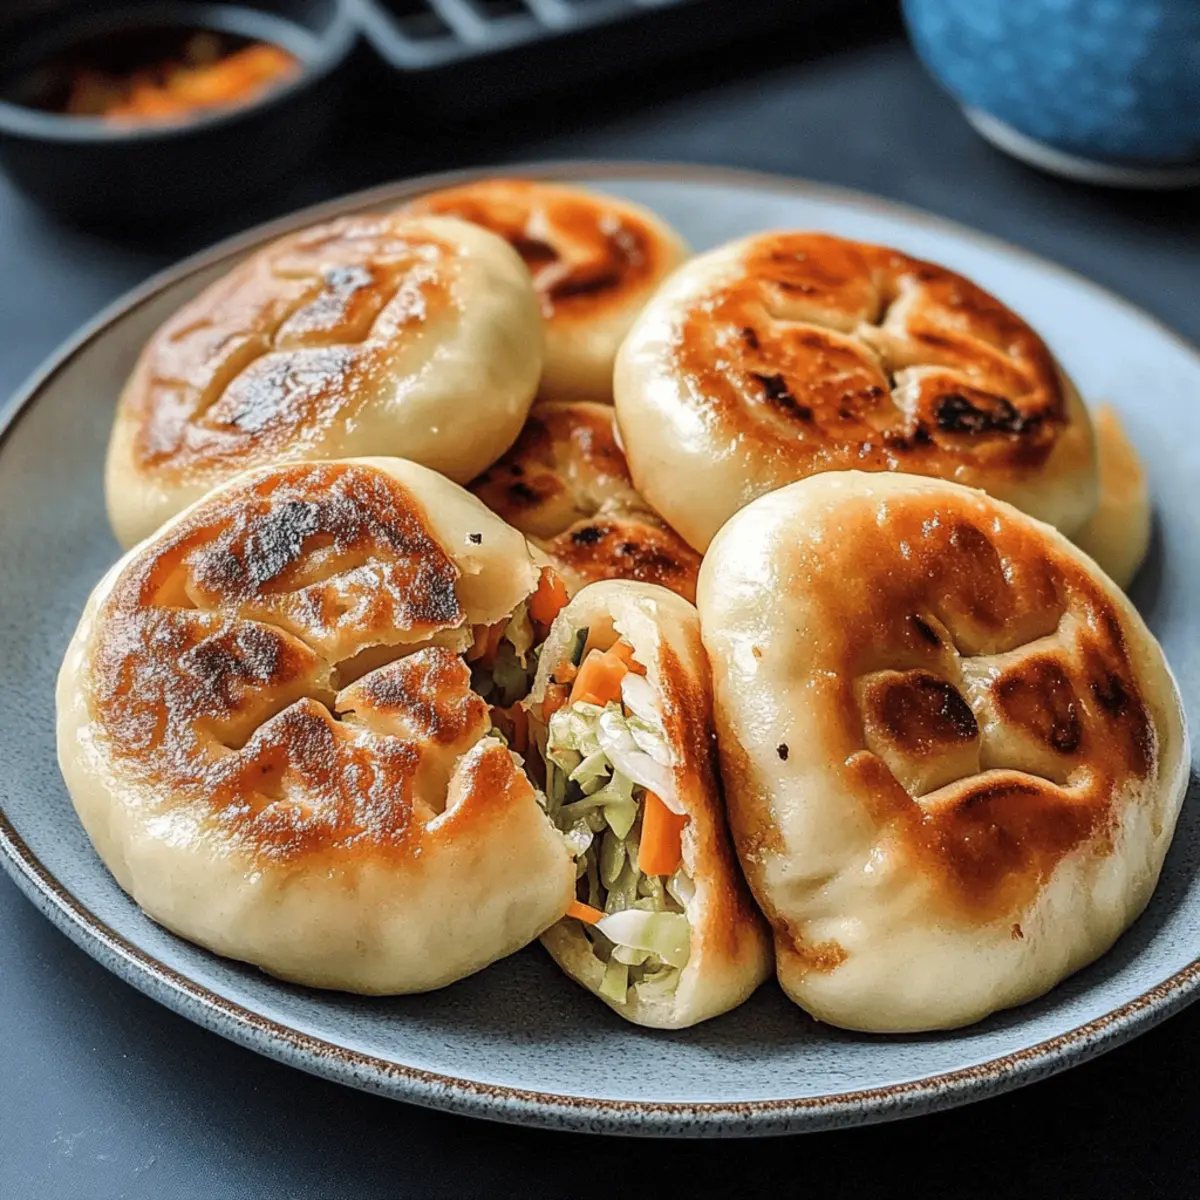
The moment I took my first bite of pan-fried buns from a bustling Taipei street vendor, I was transported to a world of crispy, chewy delight. Inspired by this unforgettable experience, I’ve created my own vegan version: Fried Cabbage Noodle Buns. These gems feature a golden, crunchy exterior that gives way to a satisfyingly soft inside, lovingly filled with a savory medley of cabbage, vermicelli noodles, and vibrant veggies. One of the best parts? This recipe is not only a breeze to whip up but also perfect for meal prepping—just freeze a batch for later, and you’ve got a quick snack ready to go. Who’s ready to dive into comfort food that’s both delicious and guilt-free? Let’s get cooking!
Why are Fried Cabbage Noodle Buns irresistible?
Deliciously Crispy: Each bun boasts a perfectly crispy exterior that contrasts beautifully with its soft, chewy center.
Flavor Explosion: Packed with a mouthwatering mix of cabbage, vermicelli noodles, and vibrant vegetables, these buns deliver a robust taste experience.
Easy to Make: Simple ingredients mean you can whip these up even on a busy weeknight—perfect for home cooks of any skill level!
Meal Prep Friendly: Freeze them for a quick snack or appetizer anytime. Just reheat and enjoy—no more boring fast food!
Crowd-Pleaser: Impress friends and family with this vegan twist on a beloved classic, sure to win over even non-vegans.
For more delicious ideas, check out my recipe for Spicy Korean Noodles. Enjoy your foray into the world of homemade comfort food!
Fried Cabbage Noodle Buns Ingredients
For the Dough
- All-Purpose Flour – Provides the ideal structure and chewiness for your buns. Can substitute with gluten-free flour for a gluten-free version.
- Instant Dry Yeast – Ensures fluffy dough by enabling it to rise. Avoid using active dry yeast without proofing; may substitute with baking powder, but the texture will differ.
- Sugar – Adds a subtle sweetness to balance flavors. Can be omitted if you prefer a savory dough.
- Salt – Enhances overall flavor in the dough. Essential in bringing all the ingredients together.
- Warm Soy Milk (or other non-dairy milk) – Hydrates and adds tenderness to the dough. Almond or oat milk are excellent alternatives.
- Toasted Sesame Oil (or neutral oil) – Infuses a delightful depth of flavor. Can use olive oil in a pinch, though it will alter the flavor slightly.
For the Filling
- Raw Shredded Cabbage – The primary filling ingredient that provides a fresh crunch. Bok choy or napa cabbage can be used as alternatives.
- Uncooked Vermicelli Noodles – Adds a chewy texture that pairs perfectly with the cabbage. Rice noodles can be utilized if needed.
- Finely Shredded Carrot – Introduces sweetness and color to the filling. Diced bell pepper can serve as a substitute.
- Chopped Scallions or Chives – Adds an onion-like flavor to the mixture. Yellow onion works if you’re out of scallions.
- Soy Sauce – Contributes umami richness to the filling. Low-sodium soy sauce is a great substitute; tamari can replace it for a gluten-free option.
- Neutral Oil (for cooking the filling) – Sauté vegetables to perfection. Can be substituted with vegetable or canola oil if necessary.
For Cooking
- Additional Neutral Oil – Required for pan-frying to achieve that crispy outer layer. An oil with a high smoke point, like canola or grapeseed oil, works well here.
This Fried Cabbage Noodle Buns recipe is not only fulfilling, but it also gives you the chance to explore flavors from the streets of Taipei right in your kitchen. Happy cooking!
Step‑by‑Step Instructions for Fried Cabbage Noodle Buns
Step 1: Prepare the Dough
In a large mixing bowl, combine the all-purpose flour, sugar, instant dry yeast, and salt. Create a well in the center and pour in warm soy milk and toasted sesame oil. Mix until a rough dough forms. Knead the dough on a lightly floured surface for about 8–10 minutes until smooth and elastic. Place the dough into a greased bowl, cover with a damp towel, and let it rise in a warm area for at least 2 hours, or until it doubles in size.
Step 2: Cook the Filling
While the dough is rising, soak the vermicelli noodles in boiling water for about 5 minutes until soft, then drain and chop them into small pieces. In a large skillet, heat 1 tablespoon of neutral oil over medium heat. Add the chopped scallions, shredded carrots, and cabbage, sautéing for 4–5 minutes until the vegetables are tender. Stir in the chopped noodles, soy sauce, and sesame oil, mixing well. Drain any excess liquid to keep the filling firm.
Step 3: Prepare the Wrappers
After the dough has risen, punch it down gently to release air. Divide the dough into 12 or 16 equal pieces, each weighing about 38g. Roll each piece into a ball, then flatten into a disc about 3–5 inches in diameter on a lightly floured surface. Aim for a thickness that is sturdy enough to hold the filling, ensuring the edges are slightly thinner than the center for the perfect Fried Cabbage Noodle Buns.
Step 4: Assemble the Buns
Place a generous spoonful of the filling in the center of each disc. Carefully fold the edges towards the center, pinch, and twist to seal the buns tightly, forming a round shape. Ensure the filling is completely enclosed to prevent it from spilling out during cooking. Arrange the assembled buns on a floured tray, covering them lightly with a towel while you prepare to cook.
Step 5: Cook the Buns
In a non-stick skillet, heat 2 tablespoons of neutral oil over medium heat. Once hot, place the sealed buns, creased-side down, into the skillet without overcrowding. Cook for about 4–5 minutes, or until the bottoms are golden brown and crispy. Carefully add 1 tablespoon of water per bun to the skillet, cover immediately, and steam for 5–6 minutes; this helps to cook the insides while keeping the exteriors crispy.
Step 6: Serve and Enjoy
Once the steaming is complete and the water has evaporated, remove the lid and check for doneness. The buns should have a beautifully crisp golden crust. Practicing your frying technique will enhance your Fried Cabbage Noodle Buns. Transfer them to a serving platter, and serve warm with soy sauce for dipping or a sprinkle of sesame seeds for an added crunch!
Make Ahead Options
These Fried Cabbage Noodle Buns are a fantastic choice for meal prep! You can prepare the filling (cooked vegetables and vermicelli noodles) up to 3 days in advance and store it in the refrigerator. Additionally, you can assemble the buns and refrigerate them for up to 24 hours; just be sure to cover them with a damp cloth to prevent drying out. When you’re ready to enjoy, simply pan-fry and steam the buns as directed. This approach allows you to savor the same deliciousness with minimal effort on busy weeknights, ensuring every bite remains just as delightful as fresh!
Variations & Substitutions for Fried Cabbage Noodle Buns
Inviting your creativity to shine, these scrumptious buns can be easily customized to fit your tastes and dietary needs.
- Gluten-Free: Swap all-purpose flour with a 1:1 gluten-free flour blend for a similar texture that everyone can enjoy.
- Spicy Kick: Add crushed red pepper flakes or minced fresh chilies to the filling for a delightful spicy twist.
- Herbaceous Burst: Mix in fresh herbs, like cilantro or basil, into the filling for an aromatic touch that brightens each bite.
- Protein Boost: Substitute half the veggie filling with mashed tofu or crumbled tempeh for added protein and a heartier filling.
- Savory Alternative: Replace the cabbage with shredded mushrooms or zucchini for a different flavor and texture profile.
- Cheesy Goodness: Stir in nutritional yeast or vegan cheese into the filling for a cheesy flavor without dairy.
- Extra Crunch: Top your buns with toasted sesame seeds or finely chopped roasted peanuts before serving for an irresistible crunch.
For even more tasty ideas, don’t miss my recipe for Spicy Korean Noodles. These additions will surely elevate your next batch of Fried Cabbage Noodle Buns to new culinary heights!
Helpful Tricks for Fried Cabbage Noodle Buns
-
Don’t Overfill: Keep the filling moderate; too much can cause the buns to burst while cooking. A generous tablespoon is usually perfect.
-
Seal Properly: Ensure each bun is tightly sealed by pinching and twisting the edges well. This prevents any filling from leaking during frying.
-
Control the Moisture: Drain excess liquid from the filling thoroughly to avoid soggy buns. A firmer filling keeps the buns crispy and delicious.
-
Wrappers’ Thickness: Roll the dough to a consistent thickness—around 1/8 inch works best. Thinner wrappers may break, while thicker ones can be doughy.
-
Frying Technique: Start with a hot pan and oil for that ideal crispy layer. Once browned, add water and cover immediately to steam, ensuring the inside is cooked.
-
Freezing Wisely: If making a batch, freeze uncooked buns in a single layer before transferring them to a container. This prevents sticking, allowing you to fry them straight from frozen when desired.
How to Store and Freeze Fried Cabbage Noodle Buns
Room Temperature: Enjoy the buns fresh out of the pan for the best texture. If leftovers remain, store them in an airtight container for up to 1 day.
Fridge: Place cooled buns in an airtight container and refrigerate for up to 5 days. Reheat in a non-stick skillet over low heat, adding a splash of water to restore moisture.
Freezer: For long-term storage, freeze uncooked buns in a single layer on a baking sheet. Once solid, transfer to a freezer-safe bag for up to 3 months. Fry them directly from frozen—no thawing needed!
Reheating: To reheat cooked buns, use a pan with a little oil, adding a tablespoon of water and covering for a few minutes to steam them back to perfection. Enjoy your Fried Cabbage Noodle Buns whenever you crave a quick snack!
What to Serve with Fried Cabbage Noodle Buns
The perfect pairing can elevate your homemade vegan buns to a delectable meal, blending flavors and textures beautifully.
- Soy Dipping Sauce: A classic combination, this savory sauce enhances the umami flavors of the buns, making each bite even more delightful.
- Crispy Garlic Greens: Sautéed greens add a burst of freshness and crunch, complementing the tender filling perfectly.
These greens can be made with bok choy or spinach. Simply toss them in garlic and a dash of soy sauce for a quick side that harmonizes with the dietary theme.
- Spicy Chili Oil: Drizzling a little spicy chili oil adds a kick, elevating the flavor profile and providing a satisfying heat that enhances the rich filling.
- Quick Pickled Vegetables: Bright, tangy pickles of cucumbers or radishes help balance the richness of the buns, refreshing your palate between bites.
This zingy side adds a vibrant crunch and adds a delightful contrast in flavors.
- Coconut Rice: Creamy coconut rice serves as a luxurious base, perfectly soaking up any leftover sauce while delivering a smooth texture that isn’t overwhelming.
- Chilled Green Tea: This refreshing beverage cools the palate and complements the dish’s flavors. Its lightness makes it an excellent drink choice.
- Mango Sticky Rice: For dessert, this sweet treat delights with its pairing of warm rice and luscious mango. A favorite wonder, it rounds out the meal beautifully.
Fried Cabbage Noodle Buns Recipe FAQs
What type of cabbage is best for the filling?
Absolutely! Raw shredded cabbage is the star here, providing crunch and freshness. You can use bok choy or napa cabbage as tasty alternatives if those are more accessible.
How should I store leftover fried cabbage noodle buns?
Stored properly, cooled buns will last in an airtight container in the fridge for up to 5 days. For the best reheating experience, just warm them in a non-stick skillet with a splash of water over low heat to bring back their crispy texture.
Can I freeze fried cabbage noodle buns?
Yes! For best results, freeze uncooked buns in a single layer on a baking sheet first. Once they are solid, transfer them to a freezer-safe bag for up to 3 months. When ready to enjoy, fry them straight from the freezer—no thawing required!
What can I do if my dough doesn’t rise?
If your dough doesn’t rise, it might be due to the yeast. Make sure your yeast is fresh and activate it by mixing it with warm liquid and sugar before adding it to the flour. Also, ensure that the environment for rising is warm (around 75°F to 85°F) to aid the process.
Are these buns safe for those with nut allergies?
Yes! This fried cabbage noodle bun recipe is nut-free as long as you ensure to use non-dairy milks that avoid nuts, like soy or oat milk. Always double-check product labels to confirm there are no cross-contaminations.
How can I tell when my buns are fully cooked?
To ensure your fried cabbage noodle buns are perfectly cooked, check for a beautifully golden crust on the outside. You can also carefully open one to see if the filling is hot and steamy. If steaming results in a crispy texture, you know you nailed it!
Crispy Fried Cabbage Noodle Buns – A Flavorful Delight
Ingredients
Equipment
Method
- In a large mixing bowl, combine the all-purpose flour, sugar, instant dry yeast, and salt. Create a well in the center and pour in warm soy milk and toasted sesame oil. Mix until a rough dough forms.
- Knead the dough on a lightly floured surface for about 8–10 minutes until smooth and elastic. Place the dough into a greased bowl, cover with a damp towel, and let it rise in a warm area for at least 2 hours, or until it doubles in size.
- While the dough is rising, soak the vermicelli noodles in boiling water for about 5 minutes until soft, then drain and chop them into small pieces.
- In a large skillet, heat 1 tablespoon of neutral oil over medium heat. Add the chopped scallions, shredded carrots, and cabbage, sautéing for 4–5 minutes until the vegetables are tender.
- Stir in the chopped noodles, soy sauce, and sesame oil, mixing well. Drain any excess liquid to keep the filling firm.
- After the dough has risen, punch it down gently to release air. Divide the dough into 12 or 16 equal pieces, each weighing about 38g.
- Roll each piece into a ball, then flatten into a disc about 3–5 inches in diameter on a lightly floured surface.
- Place a generous spoonful of the filling in the center of each disc. Carefully fold the edges towards the center, pinch, and twist to seal the buns tightly.
- Arrange the assembled buns on a floured tray, covering them lightly with a towel while you prepare to cook.
- In a non-stick skillet, heat 2 tablespoons of neutral oil over medium heat. Once hot, place the sealed buns, creased-side down, into the skillet.
- Cook for about 4–5 minutes, or until the bottoms are golden brown and crispy. Carefully add 1 tablespoon of water per bun to the skillet, cover immediately, and steam for 5–6 minutes.
- Once the steaming is complete, remove the lid and check for doneness. The buns should have a beautifully crisp golden crust.
- Transfer them to a serving platter, and serve warm with soy sauce for dipping or a sprinkle of sesame seeds for an added crunch!