


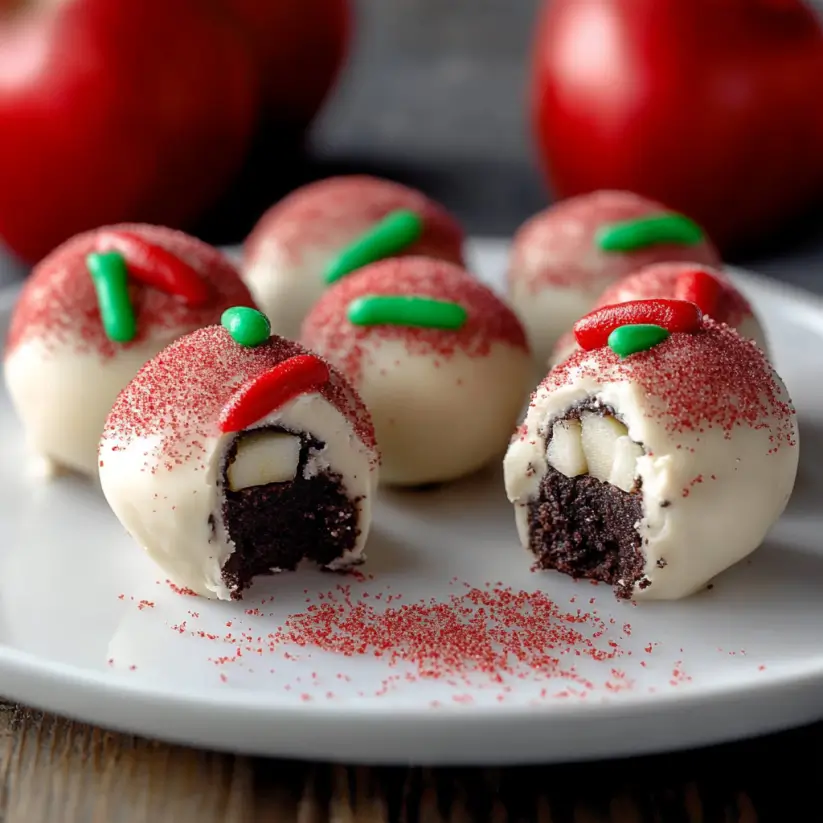
Introduction to Apple Oreo Truffles
When I think of comfort food, my mind often drifts to sweet treats that bring back fond memories. Apple Oreo Truffles are a delightful blend of nostalgia and indulgence, perfect for satisfying that sweet tooth.
These no-bake truffles are not just easy to whip up; they’re a quick solution for a busy day or a charming dessert to impress your loved ones.
With just a handful of ingredients, you can create a dessert that’s both fun and delicious. Trust me, once you try these, they’ll become a staple in your kitchen!
Why You’ll Love This Apple Oreo Truffles
These Apple Oreo Truffles are a game-changer in the dessert world.
They come together in a flash, making them perfect for those last-minute gatherings or cozy nights in.
The combination of creamy, sweet, and slightly tart flavors will have your taste buds dancing.
Plus, they’re no-bake, so you can skip the oven and still impress everyone with a delightful treat.
What’s not to love?
Ingredients for Apple Oreo Truffles
Creating these Apple Oreo Truffles is a breeze, thanks to a simple list of ingredients.
Here’s what you’ll need:
- Crushed Oreo cookies: The star of the show! They provide a rich, chocolatey base that pairs perfectly with the other flavors.
- Cream cheese: This adds a creamy texture and balances the sweetness of the Oreos.
- Dried apples: They bring a chewy, fruity element that complements the chocolate beautifully.
- Cinnamon: A dash of this spice adds warmth and enhances the apple flavor.
- White chocolate: Used for coating, it gives a sweet, smooth finish to each truffle.
- Coconut oil: This helps the chocolate melt smoothly and adds a hint of tropical flavor.
- Crushed pecans (optional): For those who love a little crunch, these nuts add texture and a nutty flavor.
Feel free to get creative! You can substitute dried apples with other dried fruits like cranberries or cherries for a different twist.
For exact measurements, check the bottom of the article where you can find everything available for printing.
How to Make Apple Oreo Truffles
Making Apple Oreo Truffles is as easy as pie—well, easier actually!
With just a few simple steps, you’ll have a batch of these delightful treats ready to impress.
Let’s dive into the process!
Step 1: Combine Ingredients
Start by grabbing a mixing bowl.
Toss in the crushed Oreo cookies, softened cream cheese, finely chopped dried apples, and a sprinkle of cinnamon.
Mix everything together until it forms a dough-like consistency.
Don’t be shy; use your hands if you need to!
This is where the magic begins.
Step 2: Form the Truffles
Once your mixture is well combined, it’s time to roll!
Take small portions of the dough and roll them into balls about one inch in diameter.
Place each ball on a baking sheet lined with parchment paper.
This step is fun, and you can even get the kids involved!
Step 3: Chill the Truffles
Now, let’s give those truffles a little chill time.
Pop the baking sheet into the freezer for about 30 minutes.
This helps them firm up, making them easier to dip later.
Trust me, this step is crucial for a perfect coating!
Step 4: Melt the Chocolate
While the truffles are chilling, it’s time to melt the white chocolate.
In a microwave-safe bowl, combine the chopped white chocolate and coconut oil.
Heat in 30-second intervals, stirring in between until smooth.
Be careful not to overheat; we want silky chocolate, not a burnt mess!
Step 5: Dip the Truffles
Once the truffles are firm, it’s dipping time!
Using a fork, dip each chilled ball into the melted white chocolate.
Make sure to coat them evenly, then gently tap the fork on the edge of the bowl to remove excess chocolate.
Place them back on the parchment-lined baking sheet.
This is where they start to look like little pieces of art!
Step 6: Add Toppings
If you’re feeling adventurous, now’s the time to add some flair!
Before the chocolate sets, sprinkle crushed pecans on top of each truffle.
This adds a delightful crunch and a nutty flavor that complements the sweetness.
Feel free to get creative with toppings—maybe some sprinkles or a drizzle of caramel?
Step 7: Refrigerate to Set
Finally, let’s finish these beauties off.
Refrigerate the truffles for at least 30 minutes to allow the chocolate to harden.
Once set, they’re ready to be enjoyed!
Serve them at parties, or keep them all to yourself—no judgment here!
Tips for Success
- Make sure your cream cheese is softened for easy mixing.
- Use a cookie scoop for uniform truffle sizes.
- Chill the truffles long enough to ensure a smooth chocolate coating.
- Experiment with different toppings like crushed cookies or sprinkles.
- Store leftovers in an airtight container in the fridge for up to a week.
Equipment Needed
- Mixing bowl: A large bowl works best, but any bowl will do.
- Fork: For dipping the truffles; a slotted spoon can be a good alternative.
- Baking sheet: Line it with parchment paper; a plate can work in a pinch.
- Microwave-safe bowl: Essential for melting chocolate; a double boiler is a great substitute.
Variations
- Nut-Free: Omit the crushed pecans and use sunflower seeds for a nut-free option.
- Vegan: Substitute cream cheese with a vegan alternative and use dairy-free chocolate for a plant-based treat.
- Spicy Kick: Add a pinch of cayenne pepper or chili powder to the mixture for a surprising heat.
- Chocolate Lovers: Use dark chocolate instead of white chocolate for a richer flavor.
- Fruit Medley: Mix in other dried fruits like apricots or figs for a unique twist on the classic recipe.
Serving Suggestions
- Pair these truffles with a hot cup of coffee or a chilled glass of milk for a delightful treat.
- Serve them on a decorative platter, garnished with fresh apple slices for a pop of color.
- For a festive touch, arrange them in a mason jar tied with a ribbon as a charming gift.
FAQs about Apple Oreo Truffles
Can I use fresh apples instead of dried apples?
While fresh apples are delicious, they contain too much moisture for this recipe. Dried apples provide the right texture and sweetness. However, if you’re feeling adventurous, you can try using freeze-dried apples for a similar effect!
How long do Apple Oreo Truffles last?
These no-bake truffles can be stored in an airtight container in the fridge for up to a week. Just make sure they’re well-chilled before serving to maintain their delightful texture.
Can I make these truffles ahead of time?
Absolutely! In fact, making them a day in advance allows the flavors to meld beautifully. Just keep them refrigerated until you’re ready to serve.
What can I substitute for cream cheese?
If you’re looking for a dairy-free option, try using a vegan cream cheese alternative. It works just as well and keeps the truffles creamy and delicious!
Are these truffles suitable for kids?
Definitely! Apple Oreo Truffles are a hit with kids. They’re fun to make and even more fun to eat. Just keep an eye on the chocolate melting process if they’re helping out in the kitchen!
Final Thoughts
Creating Apple Oreo Truffles is more than just a cooking experience; it’s a delightful journey that brings joy to both the maker and the eater.
The blend of flavors and textures creates a treat that’s not only delicious but also evokes warm memories of family gatherings and celebrations.
Whether you’re sharing them at a party or enjoying them solo, these truffles are sure to bring smiles.
So, roll up your sleeves, gather your ingredients, and dive into this sweet adventure.
Trust me, once you make these, they’ll hold a special place in your heart and kitchen!
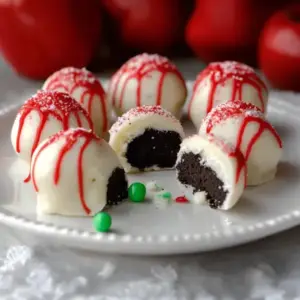
Apple Oreo Truffles: Discover the Sweet Recipe Today!
Ingredients
Method
- In a mixing bowl, combine the crushed Oreo cookies, softened cream cheese, chopped dried apples, and cinnamon. Mix until well combined and a dough forms.
- Using your hands, roll the mixture into small balls, about 1 inch in diameter, and place them on a baking sheet lined with parchment paper.
- Freeze the balls for about 30 minutes, until firm.
- While the balls are chilling, melt the white chocolate and coconut oil together in a microwave-safe bowl in 30-second intervals, stirring in between, until smooth.
- Dip each chilled ball into the melted white chocolate, using a fork to remove excess chocolate. Place them back on the parchment-lined baking sheet.
- If desired, sprinkle crushed pecans on top of the chocolate before it sets.
- Refrigerate the truffles for at least 30 minutes to allow the chocolate to harden.
Nutrition
Notes
- For a caramel flavor, drizzle melted caramel over the truffles after dipping them in white chocolate.
- Substitute the dried apples with other dried fruits like cranberries or cherries for a different taste.