

Introduction to Baked Salmon Sushi Bowls
There’s something magical about a bowl of Baked Salmon Sushi Bowls that brings back memories of family dinners and laughter. This dish is not just a meal; it’s a celebration of flavors and textures that can brighten any busy day. Whether you’re looking for a quick solution after a long workday or a dish to impress your loved ones, these bowls are the answer. With tender salmon, fluffy sushi rice, and vibrant veggies, you’ll find yourself savoring every bite. Let’s dive into this delightful recipe that’s as easy to make as it is delicious!
Why You’ll Love This Baked Salmon Sushi Bowls
These Baked Salmon Sushi Bowls are a game-changer for anyone who craves deliciousness without the fuss. They come together in just 35 minutes, making them perfect for busy weeknights. The combination of tender salmon and fresh veggies creates a flavor explosion that’s both satisfying and healthy. Plus, you can customize each bowl to suit your taste, ensuring everyone at the table leaves happy and full!
Ingredients for Baked Salmon Sushi Bowls
Gathering the right ingredients is the first step to creating your Baked Salmon Sushi Bowls. Here’s what you’ll need:
- Sushi rice: This short-grain rice is sticky and perfect for holding together in bowls.
- Water: Essential for cooking the rice to fluffy perfection.
- Rice vinegar: Adds a tangy flavor that balances the richness of the salmon.
- Sugar: Just a touch to enhance the flavor of the rice.
- Salt: A pinch to season the rice and bring out all the flavors.
- Salmon fillet: The star of the dish, providing a rich, buttery taste.
- Soy sauce: Adds umami and depth to the salmon.
- Sesame oil: A drizzle gives a nutty aroma and flavor.
- Avocado: Creamy slices that add richness and healthy fats.
- Cucumber: Fresh and crunchy, it brings a refreshing contrast.
- Shredded carrots: Adds a pop of color and sweetness.
- Sliced green onions: A sprinkle for a mild onion flavor and brightness.
- Sesame seeds: For a nutty crunch and visual appeal.
- Nori sheets: Optional, but they add a traditional sushi touch when cut into strips.
For exact measurements, check the bottom of the article where you can find everything listed for easy printing. Feel free to get creative with your ingredients; the beauty of these bowls is in their versatility!
How to Make Baked Salmon Sushi Bowls
Creating Baked Salmon Sushi Bowls is a straightforward process that anyone can master. Follow these simple steps, and you’ll have a delicious meal ready in no time!
Step 1: Prepare the Sushi Rice
Start by rinsing the sushi rice under cold water. This removes excess starch and helps achieve that perfect sticky texture. Once the water runs clear, combine the rice and water in a medium saucepan. Bring it to a boil, then reduce the heat to low. Cover and let it simmer for 18-20 minutes. When the rice is tender and the water is absorbed, remove it from heat and let it sit, covered, for 10 minutes. This resting period is crucial for fluffy rice!
Step 2: Season the Rice
While the rice is resting, mix rice vinegar, sugar, and salt in a small bowl until dissolved. This mixture adds a delightful tang to the rice. Once the rice has cooled slightly, gently fold in the vinegar mixture. Be careful not to mash the grains; you want them to stay intact. Allow the seasoned rice to cool to room temperature, and it’s ready for your bowls!
Step 3: Bake the Salmon
Preheat your oven to 400°F. Line a baking sheet with parchment paper for easy cleanup. Place the salmon fillet on the sheet and brush it with soy sauce and sesame oil. This step infuses the fish with flavor. Bake for 12-15 minutes, or until the salmon flakes easily with a fork. The aroma will fill your kitchen, making it hard to resist!
Step 4: Flake the Salmon
Once the salmon is cooked, remove it from the oven and let it cool slightly. Using a fork, flake the salmon into bite-sized pieces. This step is where the magic happens; the tender salmon will blend beautifully with the other ingredients in your bowls.
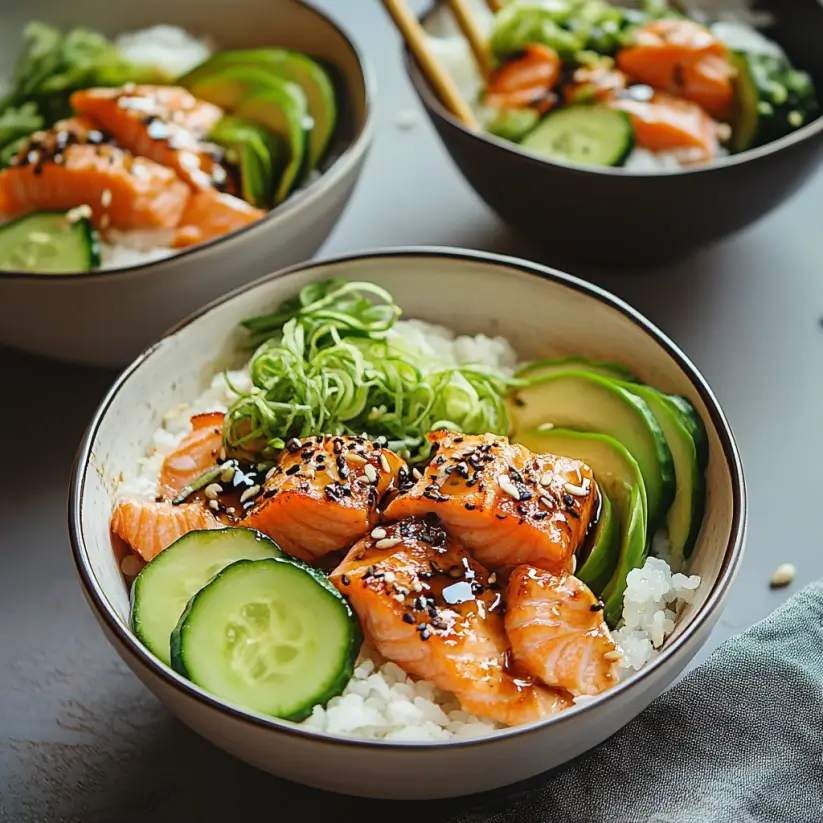
Step 5: Assemble the Bowls
Now comes the fun part! Divide the sushi rice among four bowls. Top each bowl with generous portions of flaked salmon, avocado slices, cucumber, shredded carrots, and green onions. Don’t forget to sprinkle sesame seeds on top for that extra crunch. If you’re feeling adventurous, add nori strips for a traditional touch!
Step 6: Serve and Enjoy
Your Baked Salmon Sushi Bowls are ready to be devoured! Serve them immediately for the best experience. Each bite is a delightful mix of flavors and textures that will leave you craving more. Enjoy your culinary creation!

Tips for Success
- Rinse the sushi rice thoroughly to achieve that perfect sticky texture.
- Let the rice rest after cooking; it makes a world of difference in fluffiness.
- For extra flavor, marinate the salmon before baking.
- Feel free to mix and match veggies based on what you have on hand.
- Serve with a side of soy sauce for dipping if desired.
Equipment Needed
- Medium saucepan: Essential for cooking sushi rice; a pot with a tight-fitting lid works too.
- Baking sheet: Use any flat oven-safe tray; line it with parchment for easy cleanup.
- Fork: Perfect for flaking the salmon; a spatula can work in a pinch.
- Mixing bowl: Handy for combining the vinegar mixture; any bowl will do.
Variations
- Spicy Tuna Option: Swap the salmon for spicy tuna by mixing diced raw tuna with sriracha and mayonnaise for a kick.
- Vegetarian Delight: Replace the salmon with marinated tofu or tempeh for a plant-based version that’s equally satisfying.
- Quinoa Base: Use quinoa instead of sushi rice for a protein-packed alternative that adds a nutty flavor.
- Different Veggies: Experiment with toppings like radishes, bell peppers, or snap peas for added crunch and color.
- Gluten-Free Soy Sauce: Opt for gluten-free soy sauce to accommodate dietary restrictions while keeping the flavor intact.
Serving Suggestions
- Side Salad: Pair your bowls with a light cucumber and seaweed salad for a refreshing contrast.
- Drink Pairing: Enjoy with a chilled green tea or a crisp sake to enhance the flavors.
- Presentation: Serve in colorful bowls and garnish with extra sesame seeds for a vibrant look.
FAQs about Baked Salmon Sushi Bowls
Can I use frozen salmon for this recipe?
Absolutely! Just make sure to thaw it completely before baking. Frozen salmon can be just as delicious as fresh when cooked properly.
How can I make these Baked Salmon Sushi Bowls gluten-free?
To keep your bowls gluten-free, simply use gluten-free soy sauce. It maintains the same umami flavor without the gluten.
What can I substitute for sushi rice?
If you don’t have sushi rice, short-grain brown rice or quinoa can work as alternatives. They’ll give a different texture but still taste great!
How long do leftovers last in the fridge?
Leftovers can be stored in an airtight container for up to 2 days. Just keep the toppings separate until you’re ready to enjoy them again!
Can I prepare the ingredients in advance?
Definitely! You can cook the rice and bake the salmon ahead of time. Just assemble the bowls when you’re ready to eat for a quick meal.
Final Thoughts
Creating Baked Salmon Sushi Bowls is more than just cooking; it’s about bringing joy to your table. Each bowl is a canvas, allowing you to express your culinary creativity while enjoying a healthy meal. The combination of flavors and textures makes every bite a delightful experience. Whether you’re sharing with family or savoring a quiet dinner alone, these bowls are sure to impress. Plus, the ease of preparation means you can whip them up any night of the week. Dive into this recipe, and let the deliciousness unfold in your kitchen!
Baked Salmon Sushi Bowls: Discover a Flavorful Twist!
Ingredients
Method
- Rinse the sushi rice under cold water until the water runs clear. Combine the rice and water in a medium saucepan and bring to a boil. Reduce heat to low, cover, and simmer for 18-20 minutes or until the rice is tender and water is absorbed. Remove from heat and let it sit, covered, for 10 minutes.
- In a small bowl, mix the rice vinegar, sugar, and salt until dissolved. Gently fold this mixture into the cooked rice, being careful not to mash the grains. Allow the rice to cool to room temperature.
- Preheat the oven to 400°F. Line a baking sheet with parchment paper. Place the salmon fillet on the prepared baking sheet and brush with soy sauce and sesame oil. Bake for 12-15 minutes or until the salmon flakes easily with a fork.
- Once the salmon is cooked, remove it from the oven and let it cool slightly. Flake the salmon into bite-sized pieces.
- To assemble the bowls, divide the sushi rice among four bowls. Top each bowl with flaked salmon, avocado slices, cucumber, shredded carrots, and green onions. Sprinkle with sesame seeds and add nori strips if desired.
- Serve immediately and enjoy your delicious baked salmon sushi bowls!
Nutrition
Notes
- For added flavor, marinate the salmon in a mixture of soy sauce, ginger, and garlic for 30 minutes before baking.
- Customize your bowls by adding other toppings like radishes, edamame, or pickled ginger for extra crunch and flavor.