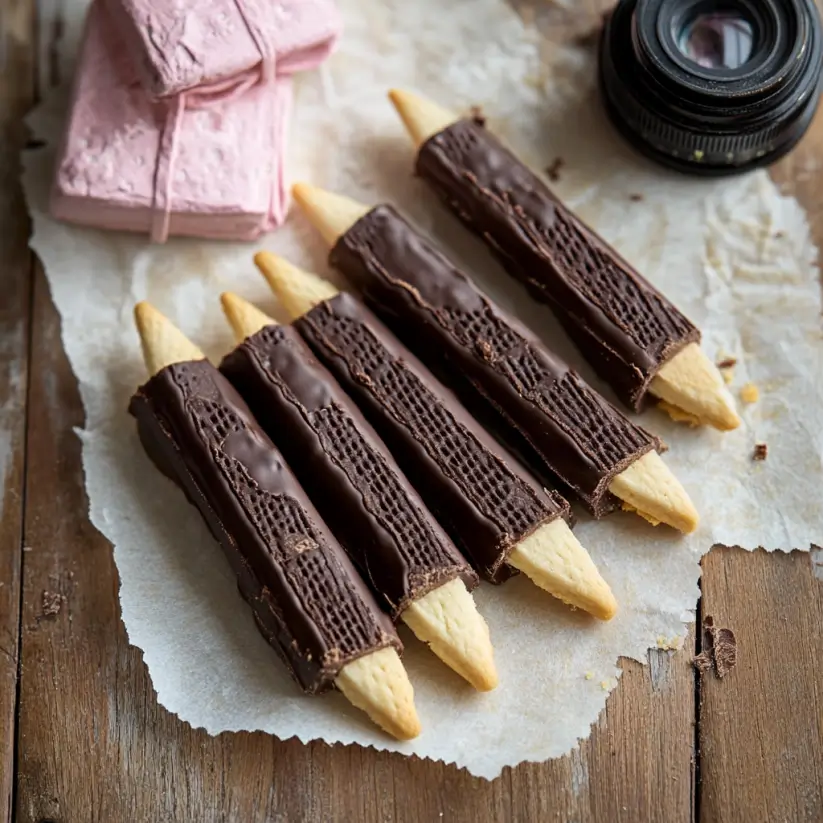
Introduction to Chocolate Wafer Pencil Cookies
There’s something magical about cookies that can transport you back to simpler times. Chocolate Wafer Pencil Cookies are not just a treat; they’re a delightful nod to childhood creativity. Picture yourself in the kitchen, surrounded by the rich aroma of chocolate, as you whip up these fun, pencil-shaped delights. Whether you’re looking for a quick solution for a busy day or a sweet surprise to impress your loved ones, this recipe is your ticket. With just a few ingredients and a sprinkle of love, you’ll create cookies that are as enjoyable to make as they are to eat.
Why You’ll Love This Chocolate Wafer Pencil Cookies
These Chocolate Wafer Pencil Cookies are a game-changer for any home cook. They’re incredibly easy to whip up, making them perfect for those busy weeknights or last-minute gatherings. The rich chocolate flavor is a crowd-pleaser, and the fun pencil shape adds a playful twist. Plus, they’re versatile enough to customize with your favorite fillings. Trust me, once you try them, they’ll become a staple in your dessert rotation!
Ingredients for Chocolate Wafer Pencil Cookies
Gathering the right ingredients is the first step to cookie success. For these Chocolate Wafer Pencil Cookies, you’ll need a few staples that you might already have in your pantry. Here’s what you’ll need:
- Unsalted butter: This is the base of your cookies, providing richness and flavor. Make sure it’s softened for easy mixing.
- Granulated sugar: Sweetness is key! This helps create that delightful texture and balances the cocoa.
- Large egg: Eggs bind everything together, giving your cookies structure and moisture.
- Vanilla extract: A splash of vanilla adds depth and enhances the chocolate flavor.
- All-purpose flour: The backbone of your cookie dough, giving it body and chewiness.
- Unsweetened cocoa powder: This is where the chocolate magic happens! It gives your cookies that rich, dark color and flavor.
- Baking powder: A leavening agent that helps your cookies rise and become light.
- Salt: Just a pinch enhances all the flavors and balances the sweetness.
- Chocolate chips: These are for the filling, adding gooey chocolate goodness between the cookies.
- Powdered sugar: A light dusting on top gives a sweet finish and a touch of elegance.
For those looking to mix things up, consider adding peppermint extract for a minty twist or swapping chocolate chips for peanut butter chips for a different flavor profile. You can find all the exact measurements at the bottom of the article, ready for printing!
How to Make Chocolate Wafer Pencil Cookies
Now that you have your ingredients ready, let’s dive into the fun part: making these delightful Chocolate Wafer Pencil Cookies! Follow these simple steps, and you’ll be on your way to cookie bliss in no time.
Step 1: Preheat and Prepare
First things first, preheat your oven to 350°F (175°C). This ensures your cookies bake evenly. While the oven warms up, line a baking sheet with parchment paper. This will prevent sticking and make cleanup a breeze.
Step 2: Cream the Butter and Sugar
In a large mixing bowl, combine the softened unsalted butter and granulated sugar. Using a hand mixer or a sturdy wooden spoon, cream them together until the mixture is light and fluffy. This process incorporates air, giving your cookies a lovely texture. It should take about 2-3 minutes.
Step 3: Add Egg and Vanilla
Next, beat in the large egg and vanilla extract. Mix until everything is well combined. The egg adds moisture, while the vanilla enhances the chocolate flavor. You’ll notice the mixture becoming smoother and more cohesive.
Step 4: Combine Dry Ingredients
In a separate bowl, whisk together the all-purpose flour, unsweetened cocoa powder, baking powder, and salt. Gradually add this dry mixture to your wet ingredients. Stir gently until a dough forms. Be careful not to overmix; you want to keep that light texture!
Step 5: Form the Dough Logs
Now it’s time to shape your dough. Divide it into two equal portions. Roll each portion into a log about 1 inch in diameter. Wrap the logs in plastic wrap and refrigerate for at least 30 minutes. Chilling the dough helps the cookies hold their shape while baking.
Step 6: Slice and Bake
Once the dough is chilled, remove the logs from the refrigerator. Slice them into 1/4-inch thick rounds. Place the rounds on your prepared baking sheet, spacing them about 2 inches apart. Bake in the preheated oven for 10-12 minutes, or until the edges are firm. Let them cool on the baking sheet for 5 minutes before transferring to a wire rack.
Step 7: Assemble the Cookies
After your cookies have cooled completely, it’s time to assemble! Spread a small amount of chocolate chips between two cookies to create a delicious sandwich. Finally, dust the finished cookies with powdered sugar for that elegant touch. Enjoy your delightful Chocolate Wafer Pencil Cookies!

Tips for Success
- Make sure your butter is at room temperature for easy creaming.
- Chill the dough logs thoroughly; this helps maintain their shape while baking.
- Don’t overmix the dough; a gentle stir is all you need.
- Use a sharp knife for clean slices of the dough logs.
- Experiment with different fillings like peanut butter chips or jam!
Equipment Needed
- Mixing bowls: A set of various sizes is ideal; you can use any large bowl you have.
- Hand mixer or wooden spoon: Either works for creaming butter and sugar.
- Baking sheet: A standard sheet will do; consider using a silicone mat for easy cleanup.
- Plastic wrap: For chilling the dough; parchment paper is great for lining the baking sheet.
- Wire rack: Essential for cooling cookies; a plate can work in a pinch.
Variations
- Mint Chocolate: Add 1/2 teaspoon of peppermint extract to the dough for a refreshing minty flavor.
- Peanut Butter Swirl: Mix in peanut butter chips instead of chocolate chips for a nutty twist.
- Gluten-Free Option: Substitute all-purpose flour with a gluten-free flour blend for a gluten-free treat.
- Nutty Delight: Fold in chopped nuts like walnuts or pecans for added crunch and flavor.
- Spicy Kick: Add a pinch of cayenne pepper or cinnamon to the dough for a surprising flavor boost.
Serving Suggestions
- Pair your Chocolate Wafer Pencil Cookies with a glass of cold milk for a classic combo.
- Serve them alongside a scoop of vanilla ice cream for an indulgent dessert.
- For a festive touch, arrange cookies on a colorful platter with fresh berries.
- Drizzle with melted chocolate for an extra decadent presentation.
FAQs about Chocolate Wafer Pencil Cookies
Can I use margarine instead of butter?
While unsalted butter is recommended for the best flavor, you can use margarine in a pinch. Just keep in mind that it may alter the texture slightly.
How do I store leftover cookies?
Store your Chocolate Wafer Pencil Cookies in an airtight container at room temperature. They’ll stay fresh for about a week, but I doubt they’ll last that long!
Can I freeze the cookie dough?
Absolutely! You can freeze the logs of dough before slicing. Just wrap them tightly in plastic wrap and store in a freezer bag. When you’re ready to bake, let them thaw in the fridge before slicing and baking.
What can I use instead of chocolate chips?
If you’re looking for a change, try using peanut butter chips, white chocolate chips, or even dried fruit for a unique twist on these cookies.
Are these cookies suitable for a gluten-free diet?
Yes! Simply substitute the all-purpose flour with a gluten-free flour blend, and you’ll have a delicious gluten-free version of these Chocolate Wafer Pencil Cookies.
Final Thoughts
Creating Chocolate Wafer Pencil Cookies is more than just baking; it’s about crafting memories. The joy of mixing, rolling, and assembling these delightful treats brings a sense of accomplishment that’s hard to beat. Each bite is a reminder of the simple pleasures in life, whether enjoyed with family or shared with friends. Plus, the playful pencil shape adds a fun twist that sparks smiles all around. So, roll up your sleeves, embrace the chocolatey goodness, and let these cookies become a cherished part of your dessert repertoire. Trust me, they’ll leave everyone asking for seconds!
Chocolate Wafer Pencil Cookies: A Delightful Treat Recipe
Ingredients
Method
- Preheat your oven to 350°F (175°C) and line a baking sheet with parchment paper.
- In a large mixing bowl, cream together the softened butter and granulated sugar until light and fluffy.
- Beat in the egg and vanilla extract until well combined.
- In another bowl, whisk together the flour, cocoa powder, baking powder, and salt. Gradually add the dry ingredients to the wet mixture, mixing until a dough forms.
- Divide the dough into two equal portions and roll each portion into a log about 1 inch in diameter. Wrap the logs in plastic wrap and refrigerate for at least 30 minutes.
- Once chilled, remove the logs from the refrigerator and slice them into 1/4-inch thick rounds. Place the rounds on the prepared baking sheet, spacing them about 2 inches apart.
- Bake in the preheated oven for 10-12 minutes, or until the edges are firm. Allow the cookies to cool on the baking sheet for 5 minutes before transferring them to a wire rack to cool completely.
- Once cooled, spread a small amount of chocolate chips between two cookies to create a sandwich. Dust the finished cookies with powdered sugar before serving.
Nutrition
Notes
- For a minty twist, add 1/2 teaspoon of peppermint extract to the dough.
- You can also substitute the chocolate chips with peanut butter chips for a different flavor profile.

