

The sound of crackling oil brings back memories of carefree summers spent at the beach, where freshly fried clams were always a highlight. This Crispy Fried Clams Recipe captures that nostalgic essence, inviting you to indulge in a delightful seafood treat right in your own kitchen. With a light and airy coating that leads to juicy, tender clams, this dish is a perfect choice for impressing friends or spoiling yourself without breaking the bank on a restaurant meal. Not only is it quick and easy to prepare, but it’s also a fun way to explore gluten-free and dairy-free options, making it a versatile crowd-pleaser. Ready to bring a taste of the shore to your table? Let’s dive in!
Why You’ll Love This Crispy Fried Clams Recipe
Nostalgic Flavor: Each bite takes you back to summer beach days, delivering a taste of tradition right at home.
Simple Process: You’ll enjoy a fuss-free cooking experience! The steps are easy enough for beginner cooks but delicious enough to impress seasoned chefs.
Versatile Options: Whether you prefer gluten-free flour or a dairy-free milk substitute, this recipe adapts beautifully to your dietary needs.
Serve with Style: Pair with classic sides like coleslaw or crispy fries for a meal that really shines. Looking to switch things up? Try these Crispy Air Fryer Chicken Wings or Zucchini Leek Fritters for a perfect sidekick.
Crowd-Pleasing Delight: Perfect for gatherings or casual family dinners, these crispy fried clams will have everyone talking! Grab some lemon wedges for that extra zing and watch your friends dive right in.
Crispy Fried Clams Ingredients
For the Clams
- Shucked Clams – Main ingredient providing the seafood flavor; can substitute with cherrystones, littlenecks, or Manila clams for variety.
For the Coating
- Corn Flour – Adds a crisp texture for a satisfying crunch; essential for achieving the perfect fried exterior.
- All-Purpose Flour – Provides structure and absorbs moisture during frying; gluten-free flour can be used as a substitute.
- Salt – Enhances overall flavor and is crucial for seasoning the batter; key for bringing out the taste in the clams.
- Freshly Ground Black Pepper – Offers a mild heat; adjust to personal preference for depth in the flavor profile.
- Cayenne Pepper – Adds spiciness for an extra kick; omit if a milder flavor is desired.
For the Batter
- Buttermilk or Evaporated Milk – Provides moisture ensuring the batter sticks to the clams; use almond or oat milk for a dairy-free option.
For Frying
- Oil for Frying – Necessary for achieving a crispy texture; peanut oil is preferred but vegetable oil can also be used.
This Crispy Fried Clams Recipe not only brings the familiar taste of summer into your kitchen but also makes it easy for everyone to enjoy. Are you ready to get cooking?
Step‑by‑Step Instructions for Crispy Fried Clams Recipe
Step 1: Prepare Clams
Rinse the shucked clams under cold running water to remove any grit, and pat them dry using paper towels. Ensuring they are clean and free of moisture helps the batter adhere better during frying, ultimately leading to a satisfying crunch in your Crispy Fried Clams.
Step 2: Mix Batter
In a large mixing bowl, combine the corn flour, all-purpose flour, salt, freshly ground black pepper, and cayenne pepper. Whisk the mixture until it is evenly blended, which will create a flavorful coating for your clams that contributes to their crispy exterior.
Step 3: Coat Clams
Take each clam and dip it into the buttermilk, ensuring it is thoroughly coated. After that, allow any excess buttermilk to drip off before transferring the clam into the flour mixture. This step is crucial for forming a flavorful and crispy crust on your delicious fried clams.
Step 4: Preheat Oven
Set your oven to 200°F and place a rack over a baking sheet inside. This setup will keep your fried clams warm and maintain their crispiness while you finish frying the batches. Keeping an eye on this warm zone is key as you prepare your Crispy Fried Clams!
Step 5: Heat Oil
In a deep, heavy pot, pour enough oil for frying and heat it to 360°F. Use a cooking thermometer to monitor the temperature closely to ensure that the oil is hot enough for frying. The right temperature is essential for achieving that perfect golden-brown color and crisp texture in your clams.
Step 6: Fry Clams
Carefully place a few coated clams into the hot oil without crowding the pot. Fry for 90 seconds to 2 minutes, until they turn a beautiful golden brown. Keep a close watch on their color, as golden crusted clams indicate they are ready to be removed and enjoyed in your Crispy Fried Clams recipe.
Step 7: Keep Warm
Once fried, transfer the crispy clams onto the rack in your preheated oven to maintain warmth and crispiness. This method helps prevent them from getting soggy while you finish frying the remaining clams.
Step 8: Serve
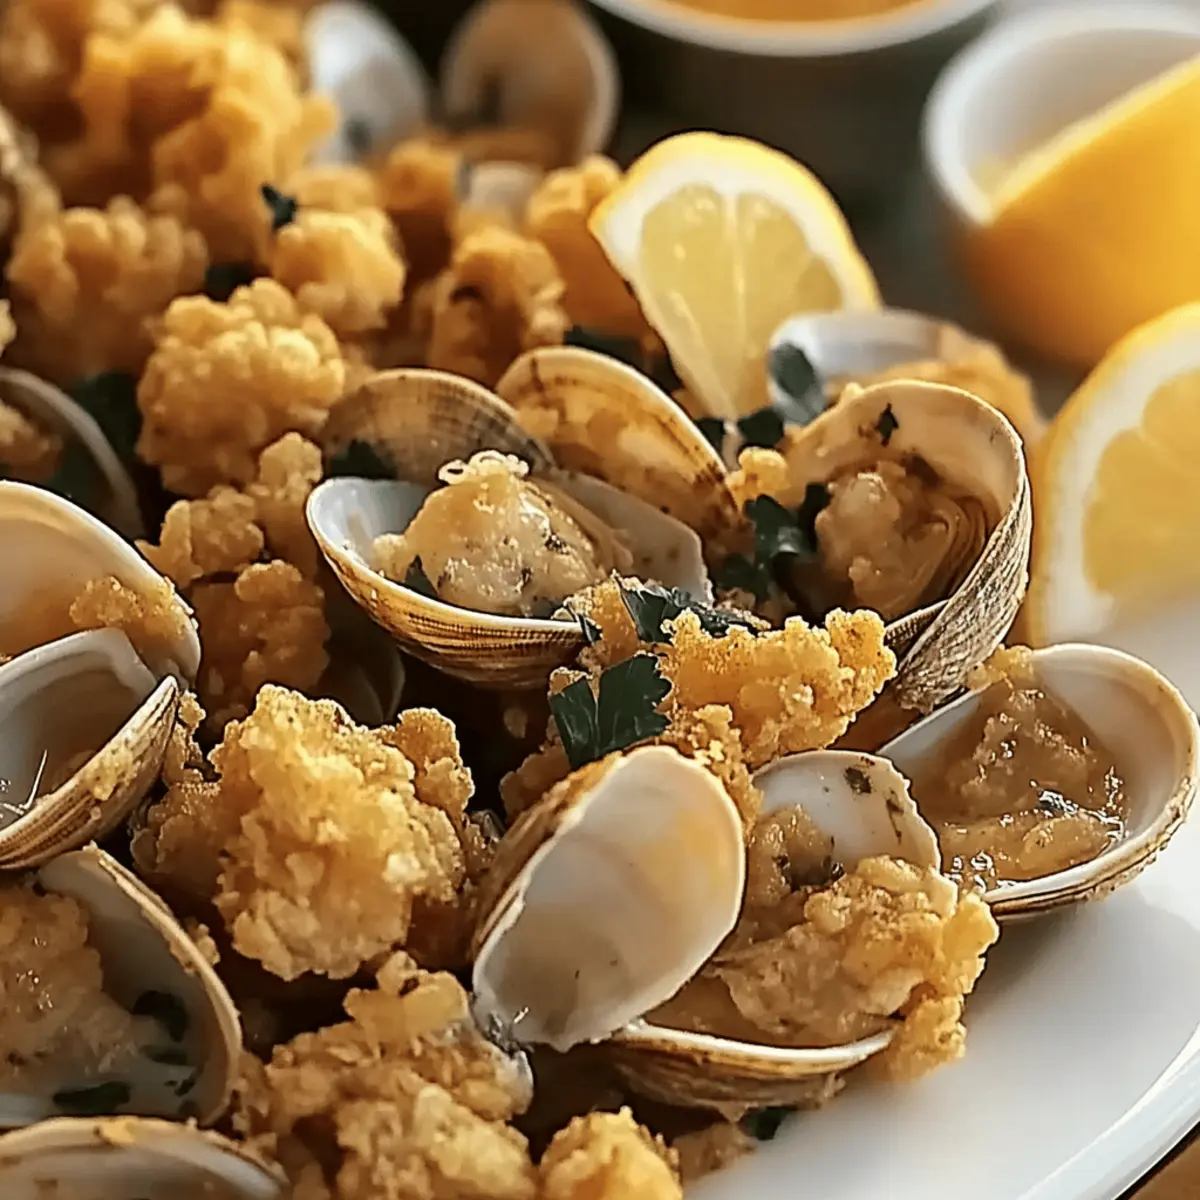
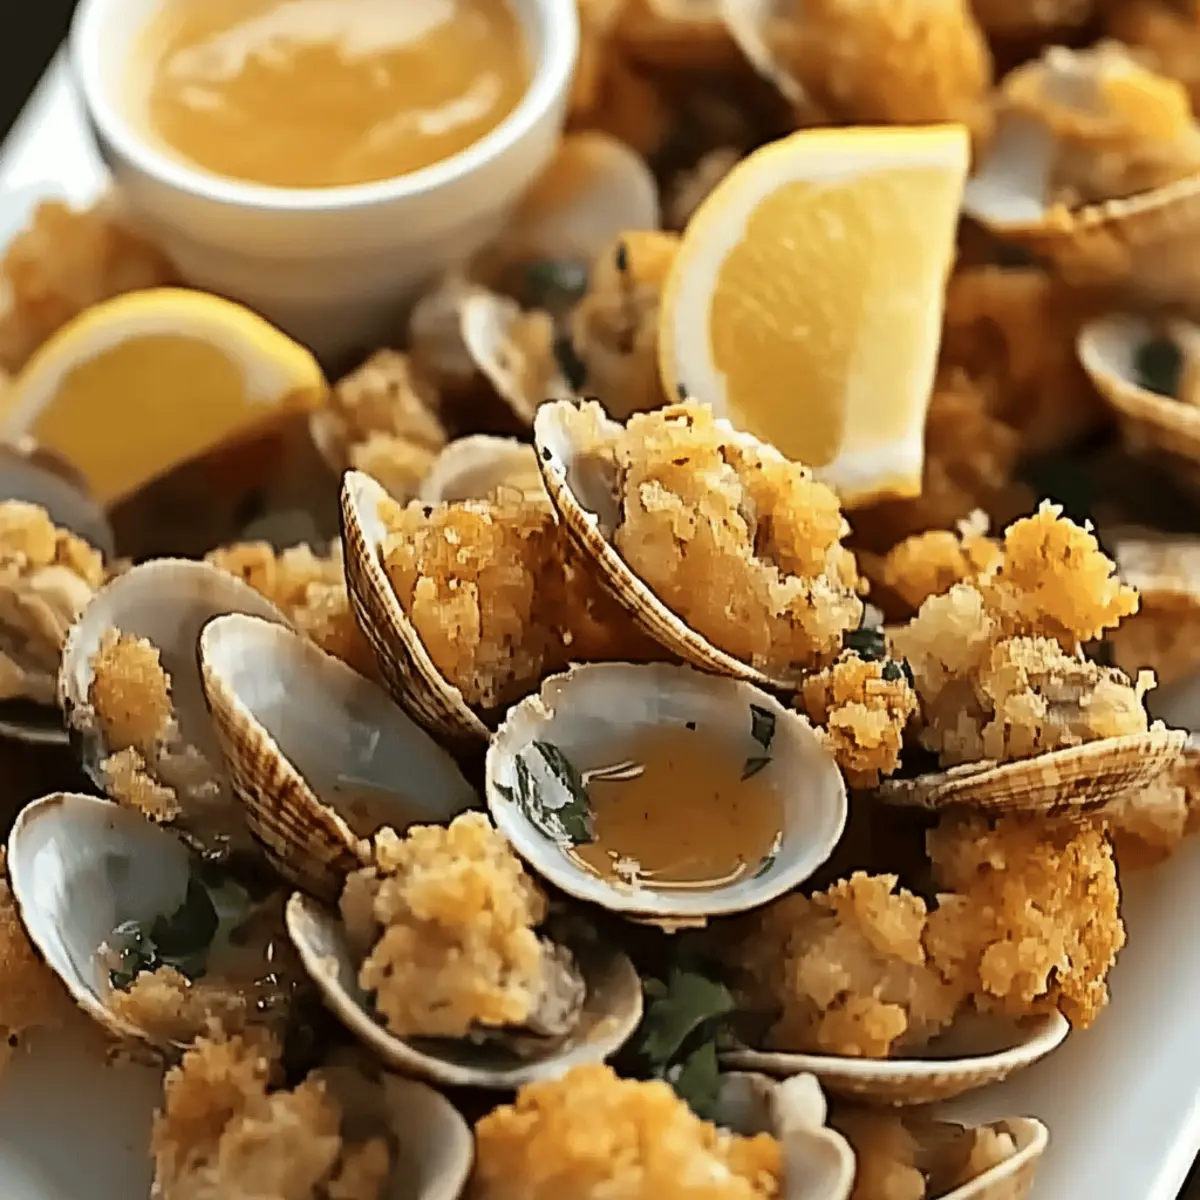
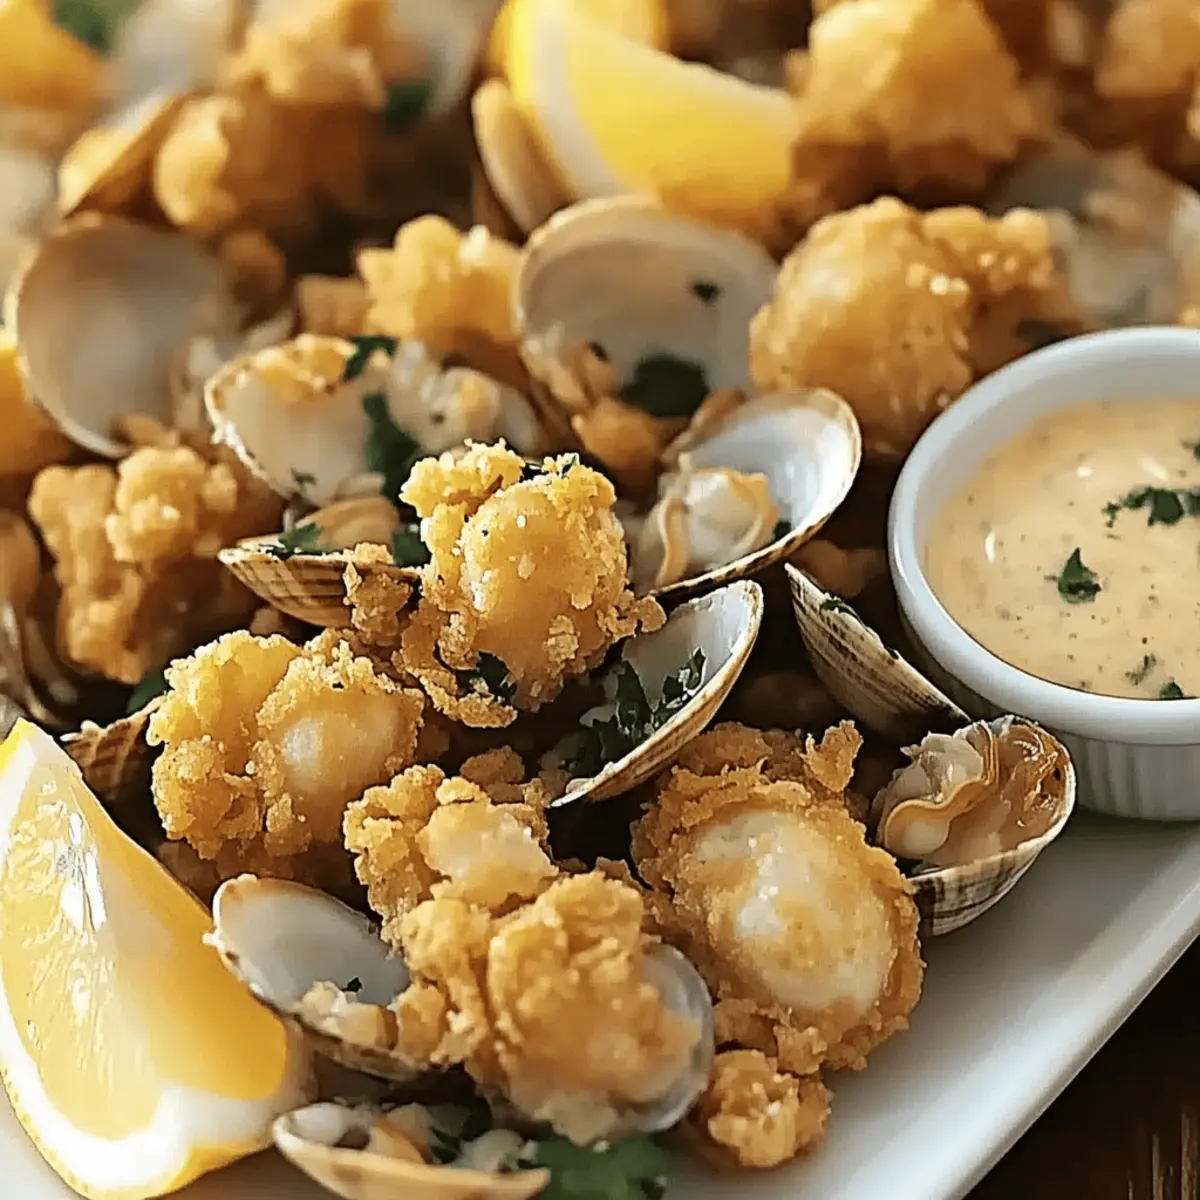
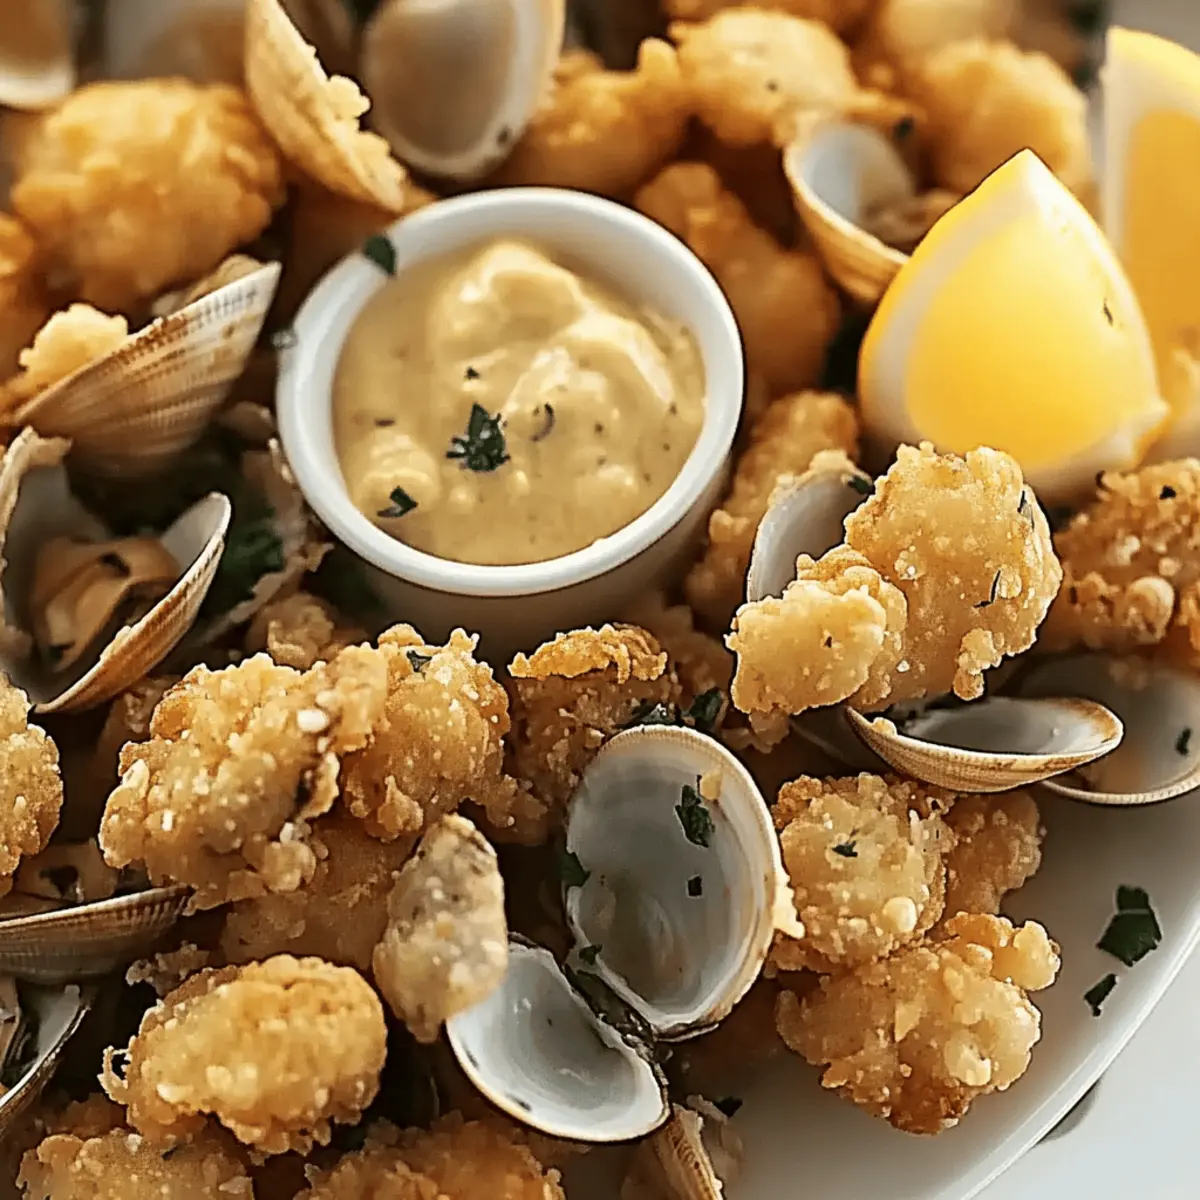
Serve your hot and crispy fried clams immediately, accompanied by zesty dipping sauces and fresh lemon wedges. Relishing this delightful dish brings the essence of summer right to your table, making every bite a delicious indulgence.
Expert Tips for Crispy Fried Clams Recipe
-
Batch Frying: Fry the clams in small batches to maintain the oil temperature—this ensures each clam gets that perfect crispy texture without becoming greasy.
-
Temperature Check: Use a cooking thermometer to monitor the oil at 360°F. If it’s too low, your clams may absorb excess oil and lose that desired crunch.
-
Avoid Sogginess: After frying, keep clams warm in the oven set at 200°F. This prevents them from becoming soggy as you cook the rest, ensuring every clam stays crispy.
-
Customize the Crunch: Feel free to mix in chopped herbs or spices into the flour for extra flavor. A little Old Bay seasoning can make your Crispy Fried Clams Recipe even more special!
-
Careful Reheating: When reheating leftovers, skip the microwave! Instead, use an oven at 375°F for a crispy finish that brings back that fresh-fried taste.
Crispy Fried Clams Recipe Variations
Feel free to unleash your creativity and customize this crispy fried clams recipe with exciting twists and substitutions!
-
Gluten-Free: Substitute all-purpose flour with gluten-free flour to enjoy a gluten-free version without sacrificing flavor.
-
Dairy-Free: Opt for almond or oat milk instead of buttermilk for a delicious, dairy-free alternative that doesn’t skimp on taste.
-
Herb-Enhanced: Incorporate finely chopped herbs like parsley or dill into the flour mixture for a fragrant and fresh flavor boost.
-
Spicy Kick: Add minced jalapeños or a splash of your favorite hot sauce to the buttermilk to elevate the heat and zest.
-
Crispy Panko: For an extra layer of crunch, mix panko breadcrumbs with the flour before coating the clams. It adds a delightful texture that’s hard to resist!
-
Zesty Citrus: Brighten up your batter by adding lemon or lime zest to the flour mixture. This citrusy addition complements the clams beautifully.
-
Seasoning Twist: Mix in some Old Bay seasoning or your favorite seafood spice blend to give your clams that iconic coastal flavor.
-
Veggie Delight: Swap out clams for slices of zucchini or eggplant to create a delicious veggie version that’s just as crispy and satisfying.
Once you’ve enjoyed your crispy fried clams, consider pairing them with refreshing sides like coleslaw or crispy fries. If you’re looking for more inspiration, give our Crispy Air Fryer Chicken Wings a try or savor the delightful flavors of Zucchini Leek Fritters for the perfect combo!
What to Serve with Crispy Fried Clams Recipe
Elevate your dining experience with complementary sides that enhance every crunchy bite, making your meal truly memorable.
- Creamy Coleslaw: This classic side provides a cool, crunchy contrast to the warm, crispy clams, adding freshness to every mouthful.
- Zesty Potato Salad: A tangy potato salad brings a hearty element to the table, perfectly balancing the lightness of the fried clams. The creaminess and zestiness will surely please your palate.
- Crispy French Fries: Golden fries add that comforting crunch while soaking up any extras from your meal. They’re like a classic companion to the seafood theme.
- Fresh Corn on the Cob: Sweet, juicy corn pairs beautifully with fried clams, offering a burst of flavor that complements the dish. A drizzle of butter with a sprinkle of salt makes each bite irresistible.
- Garlic Butter Bread: Use this flavorful bread to mop up the delicious dipping sauces, creating a rich and satisfying experience with every bite.
- Tangy Dipping Sauces: Consider serving your fried clams with classic tartar sauce, a spicy remoulade, or a refreshing lemon aioli to enhance the seafood flavor. A squeeze of lemon brings an extra zing!
- Chilled White Wine: A crisp, chilled glass of Sauvignon Blanc or a light Pinot Grigio cuts through the richness of the clams, refreshing your palate between bites.
- Lemon Wedges: Serve wedges to squeeze onto your clams, elevating the dish with a burst of citrus that brightens the flavors beautifully.
Explore these pairings to craft an unforgettable meal that brings the essence of summer closer with every bite of your crispy fried clams recipe!
Make Ahead Options
These Crispy Fried Clams are perfect for meal prep enthusiasts looking to save time on busy weeknights! You can prepare the batter by combining the corn flour, all-purpose flour, salt, black pepper, and cayenne pepper up to 24 hours in advance. Store it in an airtight container in the refrigerator to maintain freshness. Additionally, you can clean and dry the clams a day ahead and keep them refrigerated in a sealed bag. When you’re ready to serve, simply dip the prepared clams into buttermilk and proceed with frying them. This way, you’ll enjoy the same delightful taste without feeling rushed!
How to Store and Freeze Crispy Fried Clams
Fridge: Store any leftover crispy fried clams in an airtight container for up to 2 days. This helps to maintain freshness and prevent sogginess while storing.
Freezer: For longer storage, freeze cooled clams in a single layer on a baking sheet until solid, then transfer them to a freezer-safe bag. They can stay fresh for up to 2 months.
Reheating: When you’re ready to enjoy your crispy fried clams again, reheat them in a preheated oven at 375°F. This method helps to restore their crunchiness, making them just as delightful as when first cooked.
Crispy Fried Clams Recipe FAQs
What type of clams should I use for this recipe?
Absolutely! You can use shucked clams like cherrystones, littlenecks, or Manila clams for a delicious seafood flavor. Each type brings its unique taste, so feel free to experiment with what’s available or your personal favorites!
How should I store leftover crispy fried clams?
Store leftover crispy fried clams in an airtight container in the refrigerator for up to 2 days. Before storing, allow the clams to cool completely to avoid condensation inside the container. This will help maintain their freshness and prevent them from getting soggy.
Can I freeze crispy fried clams?
Very! To freeze, first place the cooled clams in a single layer on a baking sheet and freeze until solid. Once frozen, transfer them to a freezer-safe bag. They can be stored this way for up to 2 months. When you want to enjoy them again, just reheat them in a preheated oven at 375°F to regain that wonderful crisp.
What should I do if my clams turn out soggy?
If your clams come out soggy, this may be due to not maintaining the oil temperature while frying. To fix this, it’s best to avoid crowding the pot and check that your oil reaches the ideal 360°F before adding in the clams. Frying in small batches can also help prevent excess oil absorption, ensuring that every clam stays crispy!
Are there dietary considerations for this recipe?
Absolutely! You have the option to make this recipe gluten-free by substituting all-purpose flour with a gluten-free flour blend. For a dairy-free alternative, simply use almond or oat milk instead of buttermilk. These modifications allow everyone to indulge in this crispy fried clams recipe without compromise!
Crispy Fried Clams Recipe: Summer's Crunchy Delight at Home
Ingredients
Equipment
Method
- Rinse the shucked clams under cold running water to remove any grit, and pat them dry using paper towels.
- In a large mixing bowl, combine the corn flour, all-purpose flour, salt, freshly ground black pepper, and cayenne pepper. Whisk the mixture until it is evenly blended.
- Take each clam and dip it into the buttermilk, ensuring it is thoroughly coated. Allow any excess buttermilk to drip off before transferring the clam into the flour mixture.
- Set your oven to 200°F and place a rack over a baking sheet inside to keep your fried clams warm.
- In a deep pot, pour enough oil for frying and heat it to 360°F.
- Carefully place a few coated clams into the hot oil. Fry for 90 seconds to 2 minutes until they turn golden brown.
- Transfer the crispy clams onto the rack in your preheated oven to maintain warmth and crispiness.
- Serve your hot and crispy fried clams immediately, accompanied by zesty dipping sauces and fresh lemon wedges.