

As the cool autumn breeze sweeps in, it’s time to shake up your Halloween festivities with a delightfully spooky twist. Meet the Halloween Spider Bread Bowl—a recipe that not only serves as an enchanting centerpiece but also doubles as a yummy dip container. With its charming spider shape, it’s bound to spark conversations and bring a smile to both kids and adults alike. Best of all, crafting this culinary creation is a breeze, making it the perfect addition to your Halloween party menu. Whether you’re hosting a ghoulish gathering or a cozy family night, this easy party food guarantees a fun and interactive experience. What kind of dips will you fill your spooky spider with?
Why is Halloween Spider Bread a Must-Make?
Easy to Prepare: You don’t need to be a master chef to whip up this charming dish—it’s simple enough for anyone to try!
Adorable & Fun: This cute spider shape will be the star of your Halloween spread, delighting both kids and adults.
Deliciously Versatile: Fill your spider bread bowl with a variety of dips like spinach artichoke or a classic cheesy blend to cater to everyone’s taste.
Crowd-Pleasing Appeal: Perfect for parties, this recipe brings a fun, interactive twist to any gathering, inviting guests to dive right in!
Make Ahead Friendly: You can prep the bread a day in advance and simply reheat before serving, saving you precious time for fun festivities!
Get creative with your fillings and serve with an array of dippable snacks for an unforgettable Halloween celebration!
Halloween Spider Bread Ingredients
• Get ready to bake your Halloween Spider Bread with these essential ingredients!
For the Dough
- Flour – The backbone of your bread, providing structure; whole wheat or gluten-free flour make great substitutions.
- Water – Helps hydrate and activate the yeast; warm water speeds up the yeast magic!
- Yeast – The leavening hero that gives your bread its rise; instant yeast can cut your prep time in half.
- Sugar – Adds a hint of sweetness while aiding in browning; honey or agave syrup can also be used.
- Salt – Elevates the overall flavor; never skip this crucial ingredient for that delicious taste!
- Egg – Adds richness and a lovely golden color to your bread; consider a flax egg for a vegan twist.
For the Spider Features
- Coffee Beans/Peppercorns – These will create the spider’s creepy eyes; raisins or chocolate chips make a sweeter option!
For Baking
- Cooking Spray – Keeps your bread from sticking; any neutral oil will do the trick!
Step‑by‑Step Instructions for Halloween Spider Bread
Step 1: Make the Dough
In a large mixing bowl, combine 3 cups of flour, 1 cup of warm water, 2 teaspoons of instant yeast, 1 tablespoon of sugar, 1 teaspoon of salt, and 1 beaten egg. Mix with a wooden spoon until a shaggy dough forms. Gradually knead the dough on a floured surface for about 8-10 minutes until it becomes smooth and elastic, indicating that your Halloween Spider Bread will rise beautifully.
Step 2: Shape the Spiders
Once the dough is ready, divide it into three pieces: one for the main body and two smaller ones for the head and legs. Shape the larger piece into an oval for the body, then take small pieces from the remaining dough to roll out 8 thin ropes as legs. Attach them by pinching to the body and head; this will create a fun and quirky spider shape on a parchment-lined cookie sheet.
Step 3: Rise
Lightly spray the shaped spider dough with cooking spray to keep it moist and cover it gently with plastic wrap. Let it rise in a warm area for 30-45 minutes, or until it has visibly doubled in size. This crucial step ensures your Halloween Spider Bread will be fluffy and airy when baked.
Step 4: Preheat Oven
While the dough is rising, preheat your oven to 400°F (200°C). Getting your oven hot means your Halloween Spider Bread will have that beautiful golden crust when baked. This warming will ensure even cooking and perfect results—your kitchen will soon smell delightful!
Step 5: Add Eyes
After the dough has risen, it’s time to add some character to your creepy crawlers! Use coffee beans to create eyes for the large spider and peppercorns for the smaller ones. Gently press them into place; this small touch will enhance the spooky appearance of your Halloween Spider Bread.
Step 6: Egg Wash
To achieve a glossy finish on your Spider Bread, brush the surface of the dough with an egg wash—this can be a simple mixture of beaten egg with a splash of water. This step not only adds a beautiful sheen but also aids in browning during baking, crusting up your Halloween treat to a perfect golden hue.
Step 7: Bake
Carefully place your shaped spider bread in the preheated oven. Bake the large spider for 20-25 minutes or until it reaches an internal temperature of 200°F (93°C) when checked with an instant-read thermometer. The smaller spiders can bake for 15-20 minutes; keep an eye out for that enticing golden brown color.
Step 8: Cool
Once baked, transfer your Halloween Spider Bread to a cooling rack. Let it cool for about 20 minutes to ensure the interior sets properly before cutting. This cooling period also helps prevent tearing when you’re ready to hollow it out, making it perfect for serving dips.
Step 9: Hollow Out
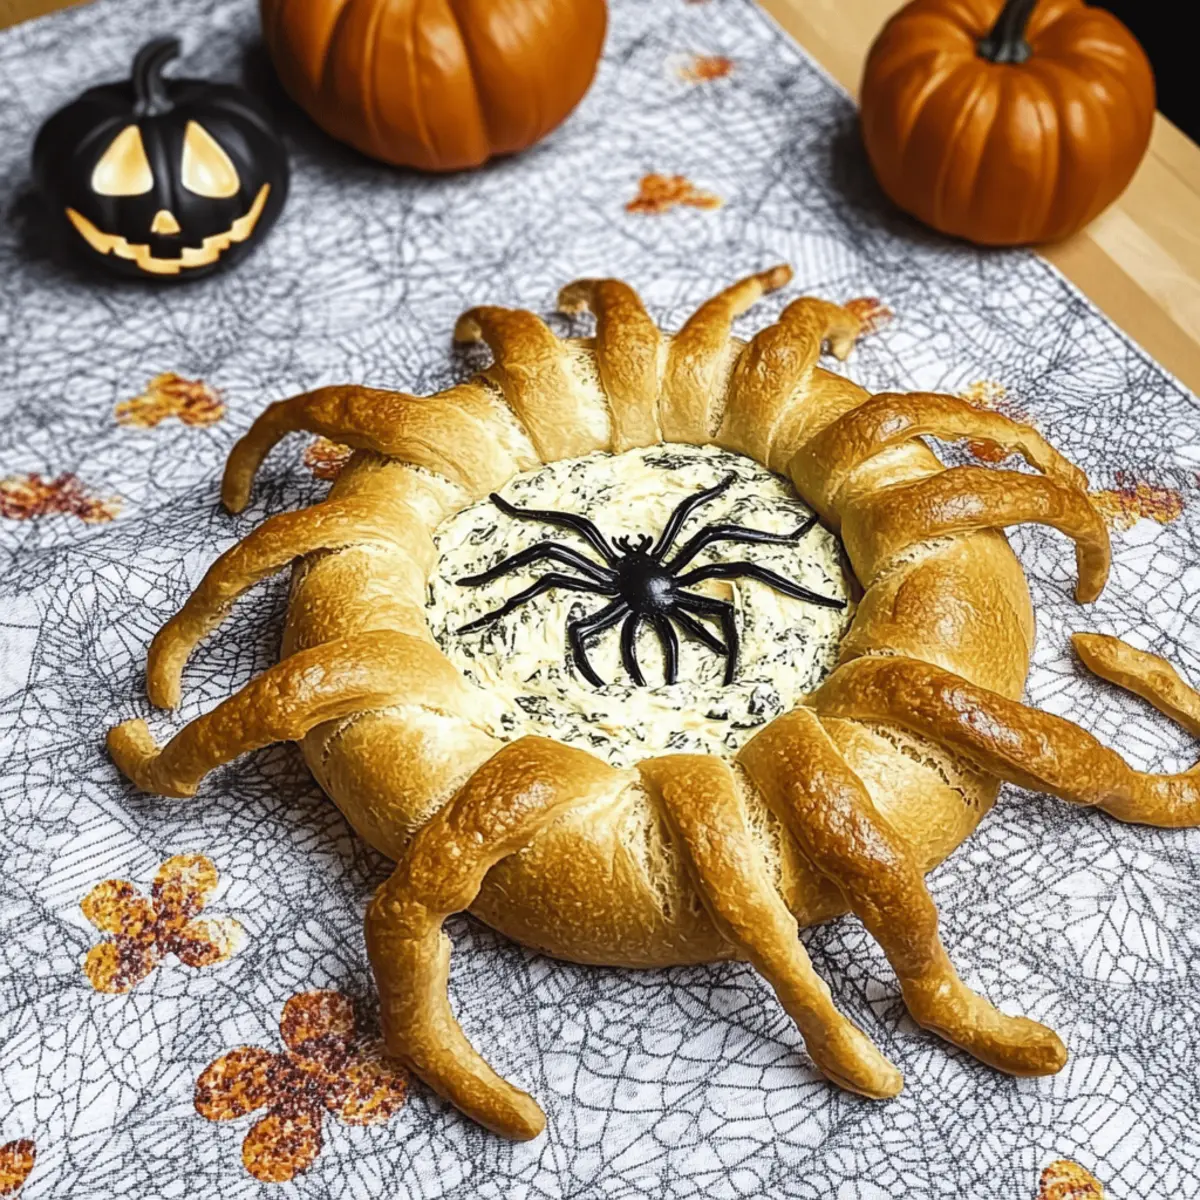
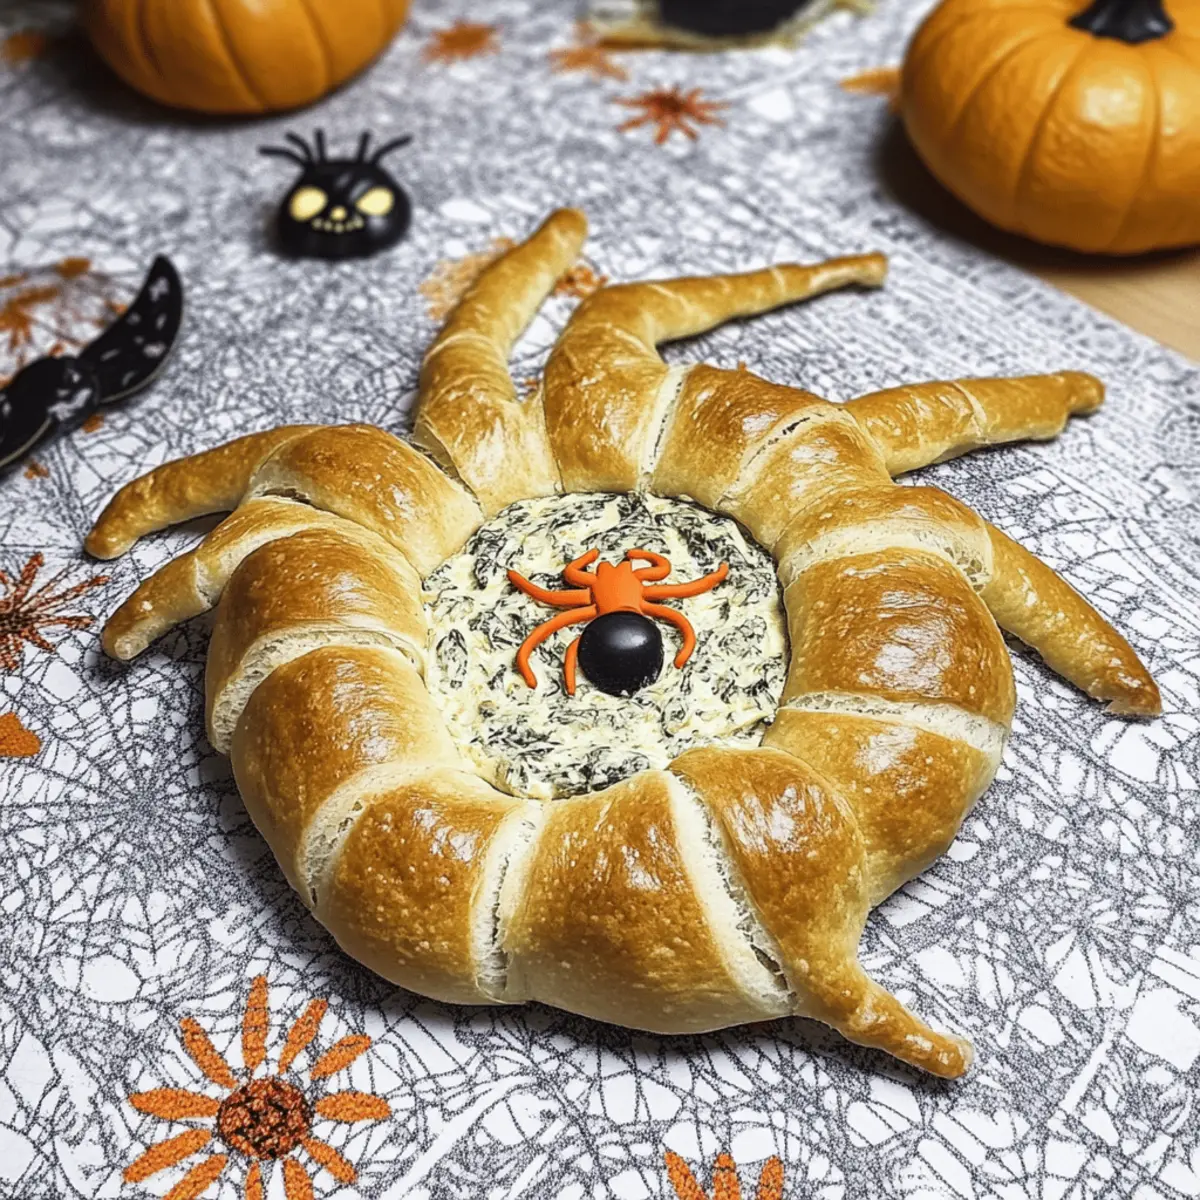
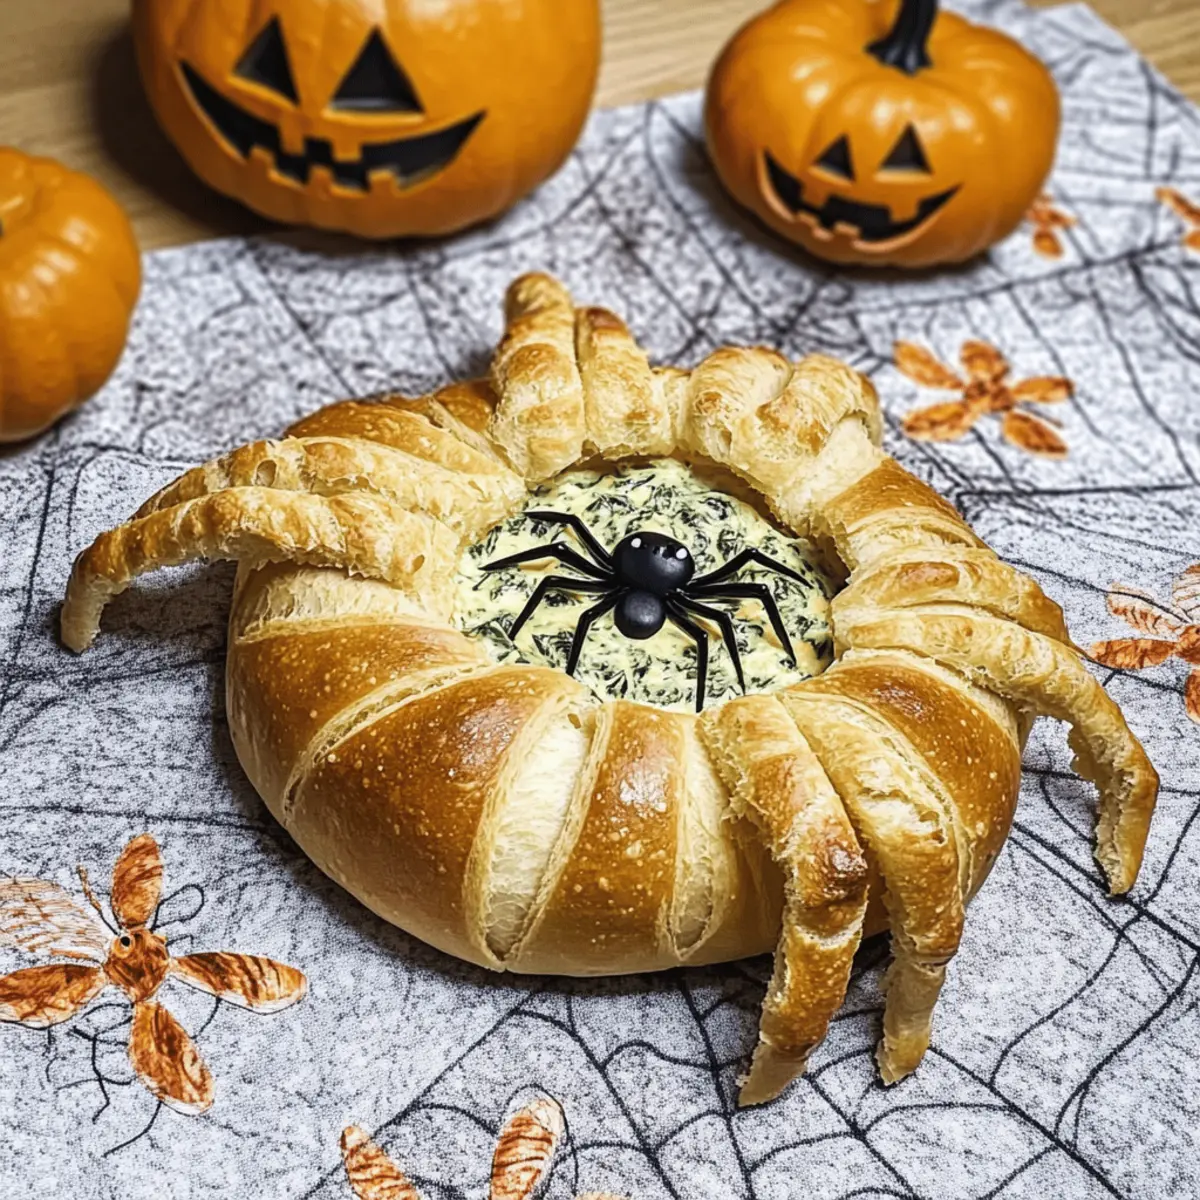
Finally, to create an enticing dip container, carefully cut the top off the large spider and hollow out the inside with a knife or spoon. Be gentle so that the bread maintains its spider shape. Now, your delightful Halloween Spider Bread is ready to be filled with your favorite dips, serving as both a delicious treat and a spooky centerpiece!
What to Serve with Halloween Spider Bread
As you prepare to celebrate Halloween, consider an array of delicious accompaniments that will truly make your spider bread shine.
-
Crispy Veggie Sticks:
Fresh carrots, celery, and bell peppers offer a crunchy contrast, perfect for dipping and adding a vibrant touch to your spooky spread. -
Savory Spinach Artichoke Dip:
This classic dip’s creamy texture pairs nicely with the soft bread, creating a delightful harmony of flavors your guests will adore. -
Cheesy Buffalo Chicken Dip:
With a zesty kick, this dip adds an exciting flavor twist that will have everyone diving into your Halloween Spider Bread! -
Garlic Herb Butter Breadsticks:
Serve warm, these buttery delight-filled breadsticks complement the spider’s whimsical shape while providing a perfect edible pairing. -
Sliced Cheese Platter:
A selection of cheeses brings elegance and great taste, balancing out the fun of your spider bread and inviting guests to indulge. -
Sweet Mini Desserts:
Delight your guests with an assortment of mini treats like chocolate-covered pretzels or cookie bites, offering a playful end to the meal after all the savory fun!
Storage Tips for Halloween Spider Bread
Room Temperature: Store your Halloween Spider Bread covered with a clean kitchen towel for up to 3 days, ensuring it maintains its freshness without drying out.
Fridge: For longer storage, wrap the bread tightly in plastic wrap or aluminum foil and place it in the fridge. It can last for up to a week; just remember to reheat before serving.
Freezer: If you want to keep your spider bread for an extended period, freeze it wrapped in plastic and then in an airtight container for up to 2 months. Thaw overnight in the fridge before reheating.
Reheating: To freshen your Halloween Spider Bread, reheat in a preheated oven at 350°F (175°C) for about 10-15 minutes until warmed through, perfect for enjoying with your favorite dips!
Make Ahead Options
These Halloween Spider Bread creations are perfect for busy cooks looking to save time without sacrificing fun! You can prepare the dough up to 24 hours in advance; simply follow the recipe up to the rising step, then cover and refrigerate the shaped spiders. This keeps the dough fresh and ready for baking when you’re ready to entertain. On the day you plan to serve, bring the dough to room temperature for about 30 minutes before proceeding to add the eyes, egg wash, and bake them. This way, your Halloween Spider Bread will be just as delicious and spooky, allowing you to enjoy stress-free preparations for your Halloween gathering!
Expert Tips for Halloween Spider Bread
-
Measure Accurately: Use a kitchen scale for precise measurements to ensure the perfect dough consistency for your Halloween Spider Bread.
-
Avoid Sticky Dough: If your dough becomes sticky while kneading, lightly flour your hands and working surface to make it manageable.
-
Cool Before Cutting: Allow your spider bread to cool completely before hollowing it out. This prevents tearing and keeps the spooky shape intact.
-
Enhance Flavor: Consider adding herbs like rosemary or thyme into the dough for extra flavor in your Halloween Spider Bread.
-
Creative Fillings: Don’t hesitate to get imaginative with dip fillings, using various options like a spicy buffalo dip or a classic spinach-artichoke mixture to cater to different tastes!
Variations & Substitutions for Halloween Spider Bread
Feel free to play around with the recipe and make it uniquely yours with these tempting twists!
-
Herb-Infused Dough: Add fresh or dried herbs like rosemary or thyme to the dough for a fragrant flavor boost. The aroma of herbs will fill your kitchen as it bakes!
-
Dairy-Free Option: Replace the egg with a flax egg made from ground flaxseed and water for a vegan-friendly version. Your guests won’t even notice the difference!
-
Spicy Kick: Mix in some crushed red pepper flakes or jalapeño bits to the dough for a thrilling heat that livens up your Halloween spread! It’s a fun surprise for those who love a bit of spice.
-
Sweet Spider Eyes: Swap out coffee beans and peppercorns for chocolate chips or raisins to create a sweeter, kid-friendly version. The cute chocolate eyes will surely bring squeals of delight!
-
Alternative Dips: Experiment with fillings by choosing from hot cheeses like queso, or try a tangy salsa; a layered dip can add a punch of flavors that everyone will adore. Explore your favorite recipes and enjoy the surprises!
-
Gluten-Free Flour: If needed, substitute the all-purpose flour with a gluten-free blend to cater to gluten-sensitive friends while maintaining great flavor and texture.
-
Cheesy Goodness: Incorporate shredded cheese into the dough for a savory twist that adds richness and melty goodness; think gooey cheddar or a blend of your favorites!
-
Seasonal Spices: Feel free to sprinkle in some pumpkin pie spice or cinnamon to embrace that cozy fall flavor. Your Halloween Spider Bread will not only look adorable but taste delightful too!
By making these variations, your Halloween feast will be bursting with flavors and surprises that everyone will savor. Looking for more fun ideas? Check out this spinach artichoke dip recipe to see how it pairs beautifully with your spider bread!

Halloween Spider Bread Recipe FAQs
How do I know if my ingredients are fresh enough?
Absolutely! For a successful Halloween Spider Bread, use fresh flour and yeast—look for yeast that is still active and bubbly when mixed with warm water and sugar. Check the flour for any off smells or visible signs of spoilage; fresh flour will smell slightly sweet and nutty. If any ingredients like your flour or yeast are close to their expiration dates, I’d recommend replacing them for the best results!
How should I store leftover Halloween Spider Bread?
Very! To keep your Halloween Spider Bread fresh, cover it with a clean kitchen towel at room temperature for up to 3 days. If you want to prolong its life, wrap it tightly in plastic wrap or aluminum foil and place it in the refrigerator for up to a week. Just remember to reheat it slightly before serving, to regain that lovely texture!
Can I freeze Halloween Spider Bread?
Absolutely! Freezing is a great option if you want to save some for later. To do this, wrap your cooled bread tightly in plastic wrap, then place it in an airtight container or freezer bag. This will keep it fresh for up to 2 months. When you’re ready to enjoy it again, simply thaw it overnight in the refrigerator. Reheat in the oven at 350°F (175°C) for about 10-15 minutes to bring it back to life!
What should I do if my dough is too sticky?
No worries! If your dough becomes too sticky while kneading, don’t panic. Lightly flour your hands and working surface, gradually adding flour little by little until the dough is manageable. Remember, it’s perfectly OK to adjust the flour amount slightly; the dough should be pliable but not overly sticky, creating a lovely structure for your Halloween Spider Bread!
Are there any dietary considerations I should keep in mind?
Very! This Halloween Spider Bread can easily be tailored for different dietary needs. For a vegan version, you can swap the egg for a flax egg made by mixing 1 tablespoon of ground flaxseed with 3 tablespoons of water. Also, selecting gluten-free flour ensures those with gluten sensitivities can enjoy this festive treat. Always check with guests beforehand if you’re serving this at a gathering, just to be safe!
Delicious Halloween Spider Bread That Dips Delightfully
Ingredients
Equipment
Method
- In a large mixing bowl, combine flour, warm water, instant yeast, sugar, salt, and a beaten egg. Mix until a shaggy dough forms. Knead on a floured surface for 8-10 minutes until smooth and elastic.
- Divide the dough into three pieces for the main body and legs. Shape the large piece into an oval for the body and roll 8 thin ropes for the legs, attaching them to create the spider shape.
- Lightly spray the shaped dough with cooking spray, cover with plastic wrap, and let it rise in a warm area for 30-45 minutes, until doubled in size.
- Preheat your oven to 400°F (200°C) while the dough rises.
- After rising, use coffee beans to create eyes on the large spider and peppercorns for the smaller ones.
- Brush the surface of the dough with an egg wash (beaten egg with water) for a glossy finish.
- Bake the large spider for 20-25 minutes and the smaller spiders for 15-20 minutes, until golden brown and internal temperature reaches 200°F (93°C).
- Transfer to a cooling rack and cool for 20 minutes before cutting.
- Carefully cut the top off the large spider and hollow out the inside to create a dip container.