

As I walked through the quaint streets of Rome, the aroma of freshly baked goods wafted through the air, beckoning me closer. The heavenly scent belonged to Italian Chocolate Maritozzi, a scrumptious twist on the classic cream-filled bun. These delightful treats boast a rich chocolate flavor that awakens the senses while offering a light, airy whipped cream filling that harmonizes beautifully with the cocoa. Not only are they a crowd-pleaser, perfect for both breakfast or a sumptuous dessert, but they also provide a fantastic balance of indulgence and homemade warmth. With each delectable bite, you’ll find yourself transported to a cozy Italian café, savoring every moment. Curious about how to create your own batch of these delightful chocolate buns? Let’s dive into the recipe together!

Why are Chocolate Maritozzi so irresistible?
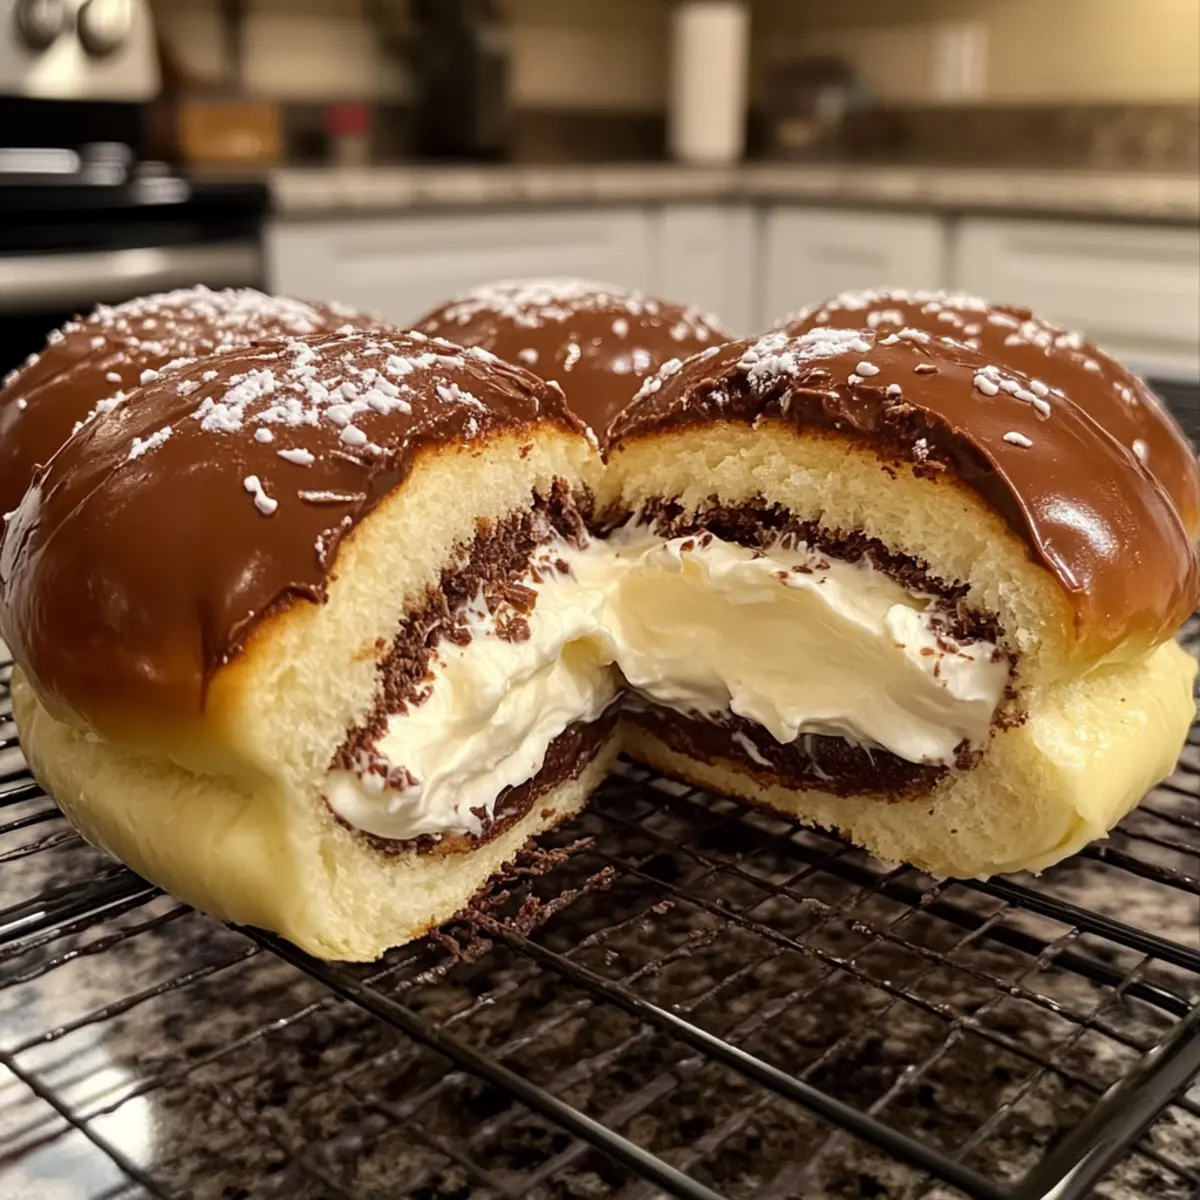
Soft, Chewy Texture: The light, fluffy dough pairs perfectly with the shiny, chocolatey crust, making every bite a delight.
Decadent Flavor: Rich chocolate flavor intertwines with the creamy filling, offering a sweet escape from your everyday treats.
Easy to Make: With straightforward steps, you’ll whip up these heavenly buns in no time!
Versatile Treat: Perfectly suited for breakfast, snacks, or desserts, they cater to every occasion.
Impressive Presentation: Dust with powdered sugar for a stunning finish that impresses family and friends. Why not enjoy them alongside a cup of espresso or pair them with a sweet Italian delight like our Patriotic Chocolate Chip for a complete treat?
Italian Chocolate Maritozzi Ingredients
For the Dough
• Bread Flour – Provides structure; aim for high-protein bread flour for the best rise.
• Unsweetened Cocoa Powder – Adds a rich chocolate flavor; Dutch-process is preferred for smoother results.
• Granulated Sugar – Enhances sweetness and moisture for a delightful taste.
• Instant Yeast – Leavens the dough for that perfect fluffy texture.
• Fine Sea Salt – Balances sweetness and intensifies flavor profiles.
• Whole Milk – Activates yeast and adds moisture; warm to 110°F for optimal results.
• Eggs – Contribute richness and act as a binding agent; use room temperature for ease of mixing.
• Unsalted Butter – Adds tenderness and flavor; make sure it’s softened for smooth integration.
For the Filling
• Heavy Cream – Creates a rich, airy filling; using cold cream yields better whipping results.
• Powdered Sugar – Sweetens and stabilizes the whipped cream for perfect consistency.
• Vanilla Extract – Infuses flavor depth, elevating the cream filling’s profile.
With these simple yet essential Italian Chocolate Maritozzi ingredients, you’re well on your way to creating irresistible chocolate buns that melt in your mouth!
Step‑by‑Step Instructions for Italian Chocolate Maritozzi
Step 1: Prepare Tangzhong
In a saucepan, whisk together 3 tablespoons of bread flour with ½ cup of water over medium heat. Stir continuously until the mixture thickens into a paste, which should take about 90 seconds. Once thickened, remove from heat and allow it to cool before moving on to the next steps in creating your Italian Chocolate Maritozzi.
Step 2: Mix Dough
In a stand mixer, combine 3 cups of bread flour, ½ cup of unsweetened cocoa powder, ¼ cup of granulated sugar, 2 teaspoons of instant yeast, and 1 teaspoon of fine sea salt. Gradually add 1 cup of warm milk (heated to 110°F), 2 room temperature eggs, and your cooled tangzhong. Mix on low speed until all ingredients form a shaggy, well-combined dough, preparing for the next integration of butter.
Step 3: Incorporate Butter
Slowly add ¼ cup of softened unsalted butter to the dough mixture while it continues to mix on low. Once the butter is incorporated, increase the speed and knead the dough for about 8-10 minutes until it reaches a glossy and elastic texture. The dough for your Italian Chocolate Maritozzi should be slightly tacky but manageable, so you know you are kneading it just right.
Step 4: First Rise
Transfer the kneaded dough into a lightly oiled bowl, ensuring it is evenly coated. Cover the bowl with a clean towel or plastic wrap, then place it in a warm area to rise. Allow the dough to double in size, which should take roughly 60 to 90 minutes. Watch for it to expand significantly, showing that the yeast is working its magic.
Step 5: Shape Buns
After the dough has risen, gently turn it out onto a floured surface. Divide the dough into 12 equal pieces, weighing about 75 grams each. Shape each piece into an oval bun form, ensuring they are smooth. Place the shaped buns on a parchment-lined baking sheet, making sure to give them enough space. Cover and let them rest while you prepare for the second rise.
Step 6: Second Rise
Let your shaped buns rise again in a warm environment until they become puffy, taking approximately 45 to 60 minutes. Meanwhile, preheat your oven to 350°F (175°C). This second rise is essential for the texture of your Italian Chocolate Maritozzi, ensuring they will be light and fluffy once baked.
Step 7: Bake
Once the buns have risen, brush their tops with a simple egg wash to achieve a glossy finish. Bake the buns in the preheated oven for about 18-22 minutes, or until they are set and have a shiny crust. Check for doneness by gently pressing the surface; it should spring back without leaving an indentation. Allow the buns to cool completely on a wire rack.
Step 8: Prepare Filling
While the buns are cooling, it’s time to make the filling. In a mixing bowl, whip 1 cup of cold heavy cream, ¼ cup of powdered sugar, and 1 teaspoon of vanilla extract. Beat the mixture until stiff peaks form, ensuring your filling has the perfect fluffy consistency to generously fill your Italian Chocolate Maritozzi.
Step 9: Assemble Buns
Once the buns have cooled, carefully slice them diagonally three-quarters through the center, ensuring they remain attached at the base. Generously fill each bun with your whipped cream mixture, allowing it to spill slightly over the edges. Finally, dust with powdered sugar for an elegant presentation before serving these delightful treats to friends and family.

Expert Tips for Italian Chocolate Maritozzi
Kneading Matters: Ensure the dough is kneaded thoroughly to develop gluten; it should be slightly tacky but not overly sticky for the best texture.
Whipping Wisely: Whip the cream to stiff peaks without overdoing it to avoid turning it into butter, ensuring a light filling for your Italian Chocolate Maritozzi.
Don’t Skip the Egg Wash: This step is key to achieving that glossy finish; your buns will look as good as they taste!
Patience is Essential: Allow extra rising time for the dough due to the cocoa; don’t rush this step for the fluffiest result.
Fill Just Before Serving: To maintain freshness, fill the buns with whipped cream just before serving; this keeps everything light and airy.
Italian Chocolate Maritozzi Variations
Feel free to get creative with this delicious recipe and make it your own!
- Chocolate Whipped Cream: Sift cocoa powder into the cream before whipping for an extra chocolatey filling that will wow your taste buds.
- Nutella Surprise: Add a layer of Nutella inside the buns to indulge your sweet tooth even further. The smooth, hazelnut spread pairs perfectly with chocolate.
- Citrus Zest: Incorporate orange or lemon zest into the whipped cream for a refreshing twist that brightens each bite—a delightful contrast to the chocolate richness.
- Grainy Twist: For a nutty flavor, fold in finely chopped hazelnuts or almonds into the dough for a delightful crunch that complements the soft texture.
- Dairy-Free Delight: Substitute the heavy cream with coconut whipped cream for a dairy-free alternative that retains the lusciousness and sweet delight of the filling.
- Fruity Layer: Spread a thin layer of raspberry jam underneath the whipped cream for a fruity note, elevating the chocolate flavor with a tangy pop.
- Spicy Kick: Add a dash of cayenne pepper or cinnamon to the dough for a hint of warmth that creates an enticing, unexpected flavor combination.
- Italian Fusion: Why not try stuffing them with mascarpone and a spoonful of your favorite Italian gelato instead of whipped cream? It’s a cream-filled dessert that takes indulgence to the next level!
If you’re looking for more sweet treats, you might enjoy making our delightful White Chocolate Cranberry cookies, or perhaps whip up an Italian Chopped Salad to balance out those desserts. Get ready to have fun in the kitchen!
Make Ahead Options
These Italian Chocolate Maritozzi are perfect for busy home cooks looking to save time during the week! You can prepare the dough up to 24 hours in advance; simply follow the initial steps, then let the dough rise and shape the buns. Place the unbaked shaped buns on a baking sheet, cover them tightly with plastic wrap, and refrigerate. When you’re ready to enjoy them, let the buns sit at room temperature for about 30 minutes before baking, and proceed with the egg wash and baking steps as per the recipe. While the buns are great for up to 2 days at room temperature or 2 months in the freezer (just thaw overnight in the fridge), it’s best to fill them with whipped cream right before serving to maintain freshness and that delightful airy texture. You’ll have scrumptious homemade treats ready with minimal effort, perfect for any occasion!
How to Store and Freeze Italian Chocolate Maritozzi
Room Temperature: Store unfilled Italian Chocolate Maritozzi in an airtight container for up to 2 days to keep them soft and fresh.
Fridge: If filled with whipped cream, keep in the fridge for no more than 1 day, as the cream may lose its texture over time.
Freezer: For longer storage, freeze unfilled buns in a single layer on a baking sheet, then transfer to an airtight container for up to 2 months.
Reheating: Warm up the frozen buns in the oven at 350°F (175°C) for about 10 minutes before serving. Fill them with whipped cream right before enjoying for a delightful treat!
What to Serve with Italian Chocolate Maritozzi
Indulging in these creamy chocolate buns opens up a world of possibilities for pairing delectable sides and drinks that enhance every bite.
-
Fresh Berries: The tartness of strawberries or raspberries cuts through the richness, providing a refreshing contrast to the chocolatey sweetness.
-
Espresso: A shot of strong espresso invigorates your senses and complements the creamy filling, making each bite of Maritozzi even more satisfying.
-
Whipped Cream Topping: For those who can’t get enough cream, top each bun with extra whipped cream to amplify the dessert experience—it’s pure bliss!
-
Chocolate Drizzle: Elevate the chocolate flavor by adding a drizzle of melted chocolate over the buns, intensifying that chocolaty goodness.
-
Gelato: That creamy Italian goodness adds a delightful balance; try pairing a scoop of vanilla or hazelnut gelato alongside your Maritozzi for an unforgettable dessert experience.
-
Sweet Wine: A glass of fruity Moscato or a rich Vin Santo complements the rich chocolate flavor while balancing the sweetness of your treats.
-
Nut-Based Spread: Spread a layer of Nutella or almond butter inside the buns before filling them with whipped cream for a nutty flavor explosion.
-
Pistachio Biscotti: These crunchy treats add a delightful textural contrast and pair perfectly when dunked into coffee or enjoyed alongside the soft Maritozzi.
Let your cozy baking adventure transform into a marvelous meal experience as you savor the delightful pairings with your Italian Chocolate Maritozzi!

Italian Chocolate Maritozzi Recipe FAQs
How do I choose ripe ingredients for my Italian Chocolate Maritozzi?
For this recipe, ensure your eggs are at room temperature for easier mixing. Choose fresh, high-protein bread flour to give your buns the best rise and texture. While the cocoa powder doesn’t require ripeness, I recommend opting for Dutch-process cocoa for the richest flavor. Fresh, high-quality heavy cream is key for achieving a perfect, billowy whipped filling.
What is the best way to store Italian Chocolate Maritozzi?
Unfilled Italian Chocolate Maritozzi can be stored in an airtight container at room temperature for up to 2 days. If you’ve filled them with whipped cream, it’s best to keep them refrigerated and consume them within 1 day to prevent the cream from losing its texture. I often leave the filling until right before serving to maintain that fresh, airy quality.
Can I freeze Italian Chocolate Maritozzi?
Absolutely! To freeze unfilled Italian Chocolate Maritozzi, place them in a single layer on a baking sheet and freeze them for about 1 hour. Once firm, transfer them to an airtight container or freezer bag. They can be stored for up to 2 months. When you’re ready to enjoy, warm them in a 350°F (175°C) oven for about 10 minutes, then fill with whipped cream just before serving.
What should I do if my dough isn’t rising properly?
If your dough isn’t rising as expected, first check the yeast’s freshness; a good way to do this is to proof it in warm water with a bit of sugar before adding it to your other ingredients. Ensure the dough is kept in a warm, draft-free environment during rising. If the dough feels too dense, it might need more kneading to develop gluten, or it could benefit from additional time to rise.
Are there any dietary considerations for making Italian Chocolate Maritozzi?
If you have allergies, keep in mind that this recipe contains gluten, dairy, and eggs. For a dairy-free version, you can experiment with alternatives like almond milk and coconut cream; just ensure they whip up nicely for the filling. Always be cautious and check for allergens if serving to others. Remember, all modifications may affect the texture and taste, so be sure to follow your intuition while baking!
Italian Chocolate Maritozzi: Indulge in Creamy Richness
Ingredients
Equipment
Method
- Prepare Tangzhong: Whisk together 3 tablespoons of bread flour with ½ cup of water in a saucepan over medium heat until it thickens into a paste, then remove from heat and cool.
- Mix Dough: Combine 3 cups of bread flour, ½ cup cocoa powder, ¼ cup sugar, 2 teaspoons yeast, and 1 teaspoon salt in a stand mixer. Gradually add 1 cup warm milk, 2 eggs, and tangzhong until a shaggy dough forms.
- Incorporate Butter: Slowly add ¼ cup softened butter to the dough while mixing on low. Increase speed and knead for 8-10 minutes until glossy and elastic.
- First Rise: Transfer kneaded dough to an oiled bowl, cover, and let rise in a warm area for 60-90 minutes until doubled in size.
- Shape Buns: Turn the risen dough onto a floured surface, divide into 12 equal pieces, and shape into ovals. Place on a parchment-lined baking sheet and cover to rest.
- Second Rise: Allow shaped buns to rise for 45-60 minutes while preheating the oven to 350°F.
- Bake: Brush tops with egg wash and bake for 18-22 minutes until set. Cool on a wire rack.
- Prepare Filling: Whip 1 cup cold heavy cream with ¼ cup powdered sugar and 1 teaspoon vanilla until stiff peaks form.
- Assemble Buns: Slice cooled buns diagonally, fill with whipped cream, and dust with powdered sugar before serving.