

Introduction to Red, White, and Blue Rice Krispie Treats
There’s something magical about a colorful dessert that brings people together. These Red, White, and Blue Rice Krispie Treats are not just a feast for the eyes; they’re a delightful way to celebrate any occasion. Whether it’s a backyard barbecue, a holiday gathering, or just a fun weekend project with the kids, this recipe is a quick solution for busy days. With just a few simple ingredients, you can whip up a batch that will impress your loved ones and satisfy your sweet tooth. Let’s dive into this festive treat that’s as easy to make as it is delicious!
Why You’ll Love This Red, White, and Blue Rice Krispie Treats
These Red, White, and Blue Rice Krispie Treats are a game-changer for anyone looking to create a festive dessert without the fuss. They come together in just 20 minutes, making them perfect for last-minute celebrations. The combination of gooey marshmallows and crispy cereal is simply irresistible. Plus, the vibrant colors add a fun twist that will have everyone reaching for seconds. Who knew something so easy could be so delightful?
Ingredients for Red, White, and Blue Rice Krispie Treats
Gathering the right ingredients is the first step to creating these festive Red, White, and Blue Rice Krispie Treats. Here’s what you’ll need:
- Rice Krispies cereal: The classic base for this treat, providing that satisfying crunch.
- Mini marshmallows: These are the magic ingredient that binds everything together, creating a gooey texture.
- Unsalted butter: Adds richness and helps the marshmallows melt smoothly. Unsalted is best to control the flavor.
- Vanilla extract: A splash of this enhances the overall flavor, making the treats even more delicious.
- Red sprinkles or red candy melts: These give the bottom layer its vibrant color. Candy melts can add a richer taste.
- Blue sprinkles or blue candy melts: Just like the red, these add a pop of color to the top layer.
- Cooking spray: A must for greasing the baking dish, ensuring easy removal of the treats.
For those looking to switch things up, consider using gluten-free cereal to make this recipe suitable for everyone. You can find all the exact measurements at the bottom of the article, ready for printing!
How to Make Red, White, and Blue Rice Krispie Treats
Creating these Red, White, and Blue Rice Krispie Treats is a breeze! Follow these simple steps, and you’ll have a colorful dessert that’s sure to impress.
Step 1: Prepare the Baking Dish
Start by greasing a 9×13 inch baking dish with cooking spray. This ensures that your treats come out easily without sticking. A light coat is all you need, so don’t go overboard!
Step 2: Melt the Butter and Marshmallows
In a large saucepan, melt the unsalted butter over low heat. Once it’s melted, add the mini marshmallows. Stir continuously until they’re completely melted and smooth. This step is crucial for achieving that gooey texture we all love!
Step 3: Add Vanilla Extract
Remove the saucepan from heat and stir in the vanilla extract. This little addition elevates the flavor, making your treats taste even more delicious. Trust me, it’s worth it!
Step 4: Combine with Rice Krispies
Gradually add the Rice Krispies cereal to the melted marshmallow mixture. Stir gently but thoroughly until every piece is well coated. This is where the magic happens, as the cereal absorbs that sweet, sticky goodness!
Step 5: Divide and Color the Mixture
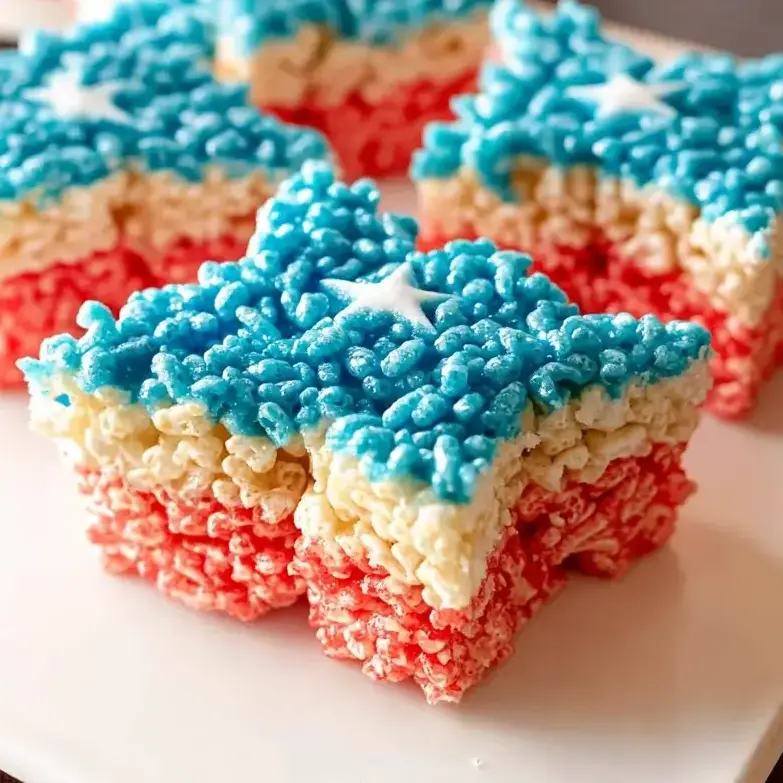
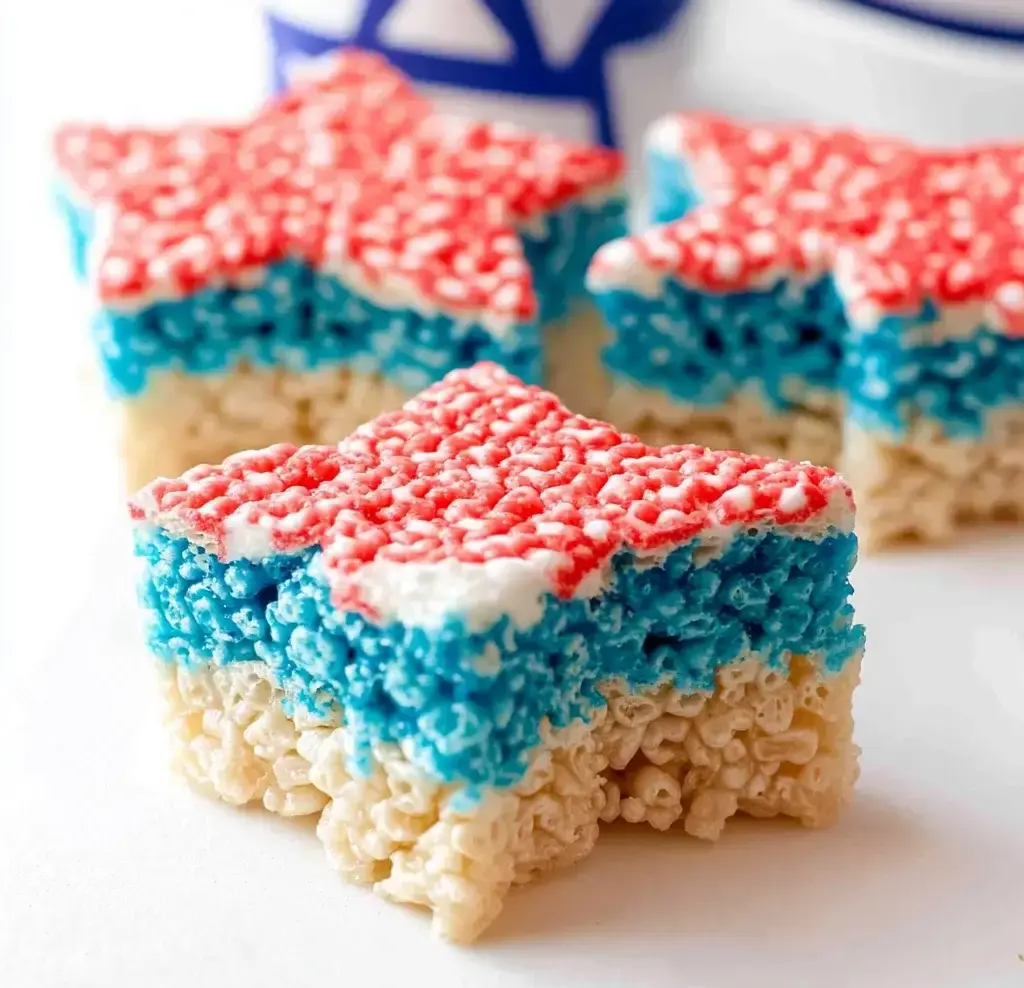
Now, it’s time to divide the mixture into three equal parts. In one part, mix in the red sprinkles or melted red candy. In the second part, do the same with the blue sprinkles or melted blue candy. Leave the third part plain for that classic white layer.
Step 6: Layer the Mixtures
Press the red mixture evenly into the bottom of the prepared baking dish. Follow this with the plain mixture, pressing it down gently. Finally, add the blue mixture on top, pressing it down to create an even layer. Each layer adds to the festive look!
Step 7: Cool and Cut
Allow the treats to cool completely at room temperature for about 30 minutes. Once they’re set, use a sharp knife to cut them into squares. Enjoy the colorful layers and the smiles they bring!
Tips for Success
- Use fresh marshmallows for the best gooey texture.
- Don’t rush the melting process; low heat is key to smooth marshmallows.
- Lightly spray your spatula with cooking spray to prevent sticking when pressing the mixtures.
- For a fun twist, add edible glitter or star-shaped sprinkles on top before they set.
- Store leftovers in an airtight container to keep them fresh.
Equipment Needed
- 9×13 inch baking dish: Essential for shaping your treats. A similar-sized dish works too.
- Large saucepan: For melting the butter and marshmallows. A pot will do just fine.
- Spatula: Perfect for mixing and pressing. A wooden spoon can be a great alternative.
- Sharp knife: For cutting the treats into squares. A pizza cutter can also work!
Variations
- Chocolate Drizzle: Drizzle melted chocolate over the top for an extra layer of flavor.
- Nutty Twist: Add chopped nuts like almonds or pecans for a crunchy texture.
- Fruit Flavors: Mix in freeze-dried strawberries or blueberries for a fruity kick.
- Gluten-Free Option: Substitute Rice Krispies with gluten-free cereal to accommodate dietary needs.
- Vegan Version: Use vegan butter and marshmallows to make these treats plant-based.
Serving Suggestions
- Pair these Red, White, and Blue Rice Krispie Treats with fresh fruit for a refreshing contrast.
- Serve alongside ice cream for a delightful dessert combo.
- Present them on a festive platter, garnished with extra sprinkles for a pop of color.
- Enjoy with a cold glass of lemonade or iced tea for a perfect summer treat.
FAQs about Red, White, and Blue Rice Krispie Treats
Can I make these treats ahead of time?
Absolutely! You can prepare these Red, White, and Blue Rice Krispie Treats a day in advance. Just store them in an airtight container at room temperature to keep them fresh.
What can I use instead of marshmallows?
If you’re looking for a substitute, you can use marshmallow fluff. Just use about 2 cups of fluff in place of the mini marshmallows for a similar gooey texture.
How do I store leftovers?
To keep your treats fresh, store them in an airtight container. They’ll stay good for about 3-5 days, but I doubt they’ll last that long!
Can I use different colors for the sprinkles?
Of course! Feel free to get creative with your colors. You can use any sprinkles or candy melts that match your theme or occasion.
Are these treats gluten-free?
Yes, you can make these Red, White, and Blue Rice Krispie Treats gluten-free by using gluten-free Rice Krispies. Just check the label to ensure they meet your dietary needs.
Final Thoughts
Creating these Red, White, and Blue Rice Krispie Treats is more than just a cooking project; it’s a chance to make memories. The joy of mixing colors, the sweet aroma wafting through the kitchen, and the smiles on your loved ones’ faces as they take that first bite are priceless. Whether you’re celebrating a holiday or just enjoying a sunny day, these treats bring a festive spirit to any occasion. So grab your ingredients, gather your family, and let’s make some delicious memories together. Trust me, you’ll be glad you did!
Red, White, and Blue Rice Krispie Treats Anyone Can Make!
Ingredients
Method
- Prepare a 9x13 inch baking dish by greasing it with cooking spray.
- In a large saucepan, melt the butter over low heat. Add the mini marshmallows and stir until completely melted and smooth.
- Remove the saucepan from heat and stir in the vanilla extract.
- Gradually add the Rice Krispies cereal to the marshmallow mixture, stirring until well coated.
- Divide the mixture into three equal parts. In one part, mix in the red sprinkles or melted red candy. In the second part, mix in the blue sprinkles or melted blue candy. Leave the third part plain.
- Press the red mixture evenly into the bottom of the prepared baking dish. Follow with the plain mixture, pressing it down gently. Finally, add the blue mixture on top, pressing it down to create an even layer.
- Allow the treats to cool completely at room temperature for about 30 minutes before cutting into squares.
Nutrition
Notes
- For a festive touch, add edible glitter or star-shaped sprinkles on top of the treats before they set.
- Substitute the Rice Krispies with a gluten-free cereal to make this recipe gluten-free.