

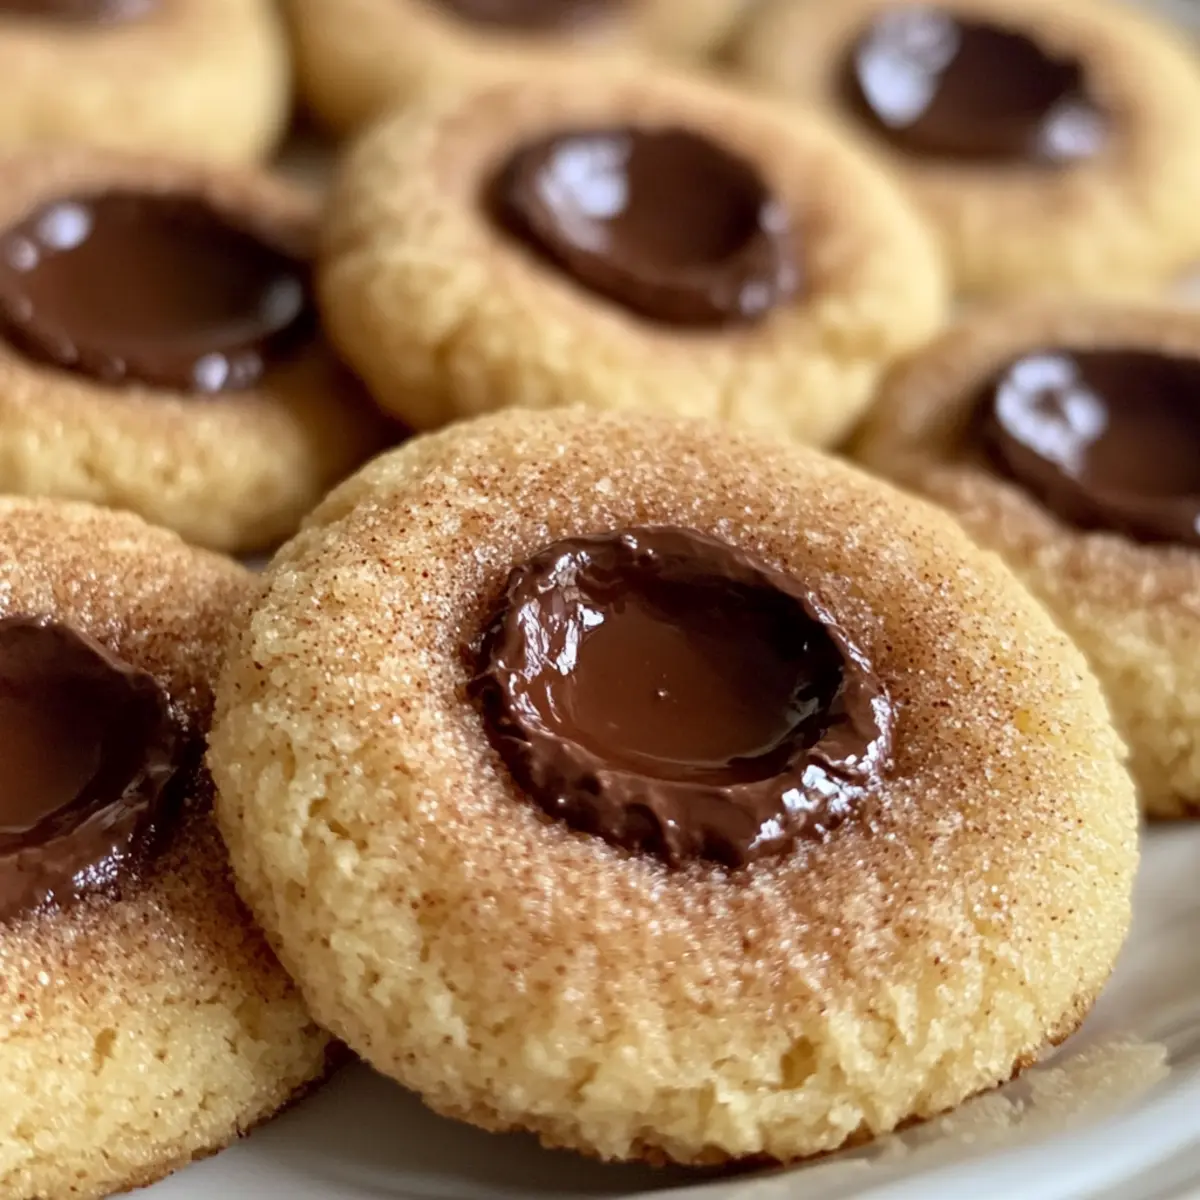
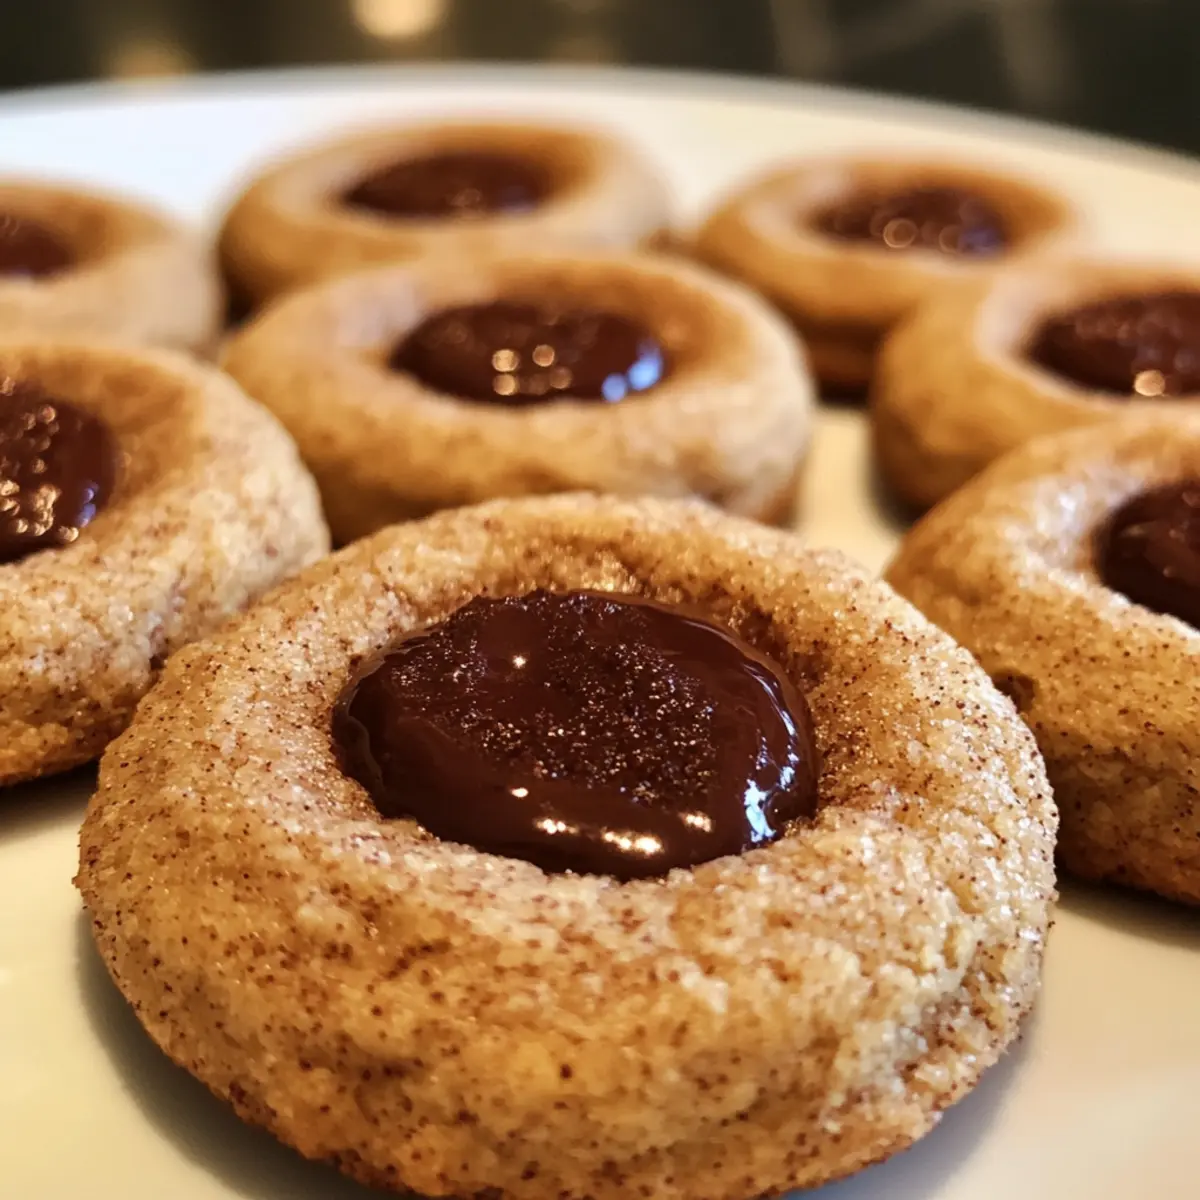
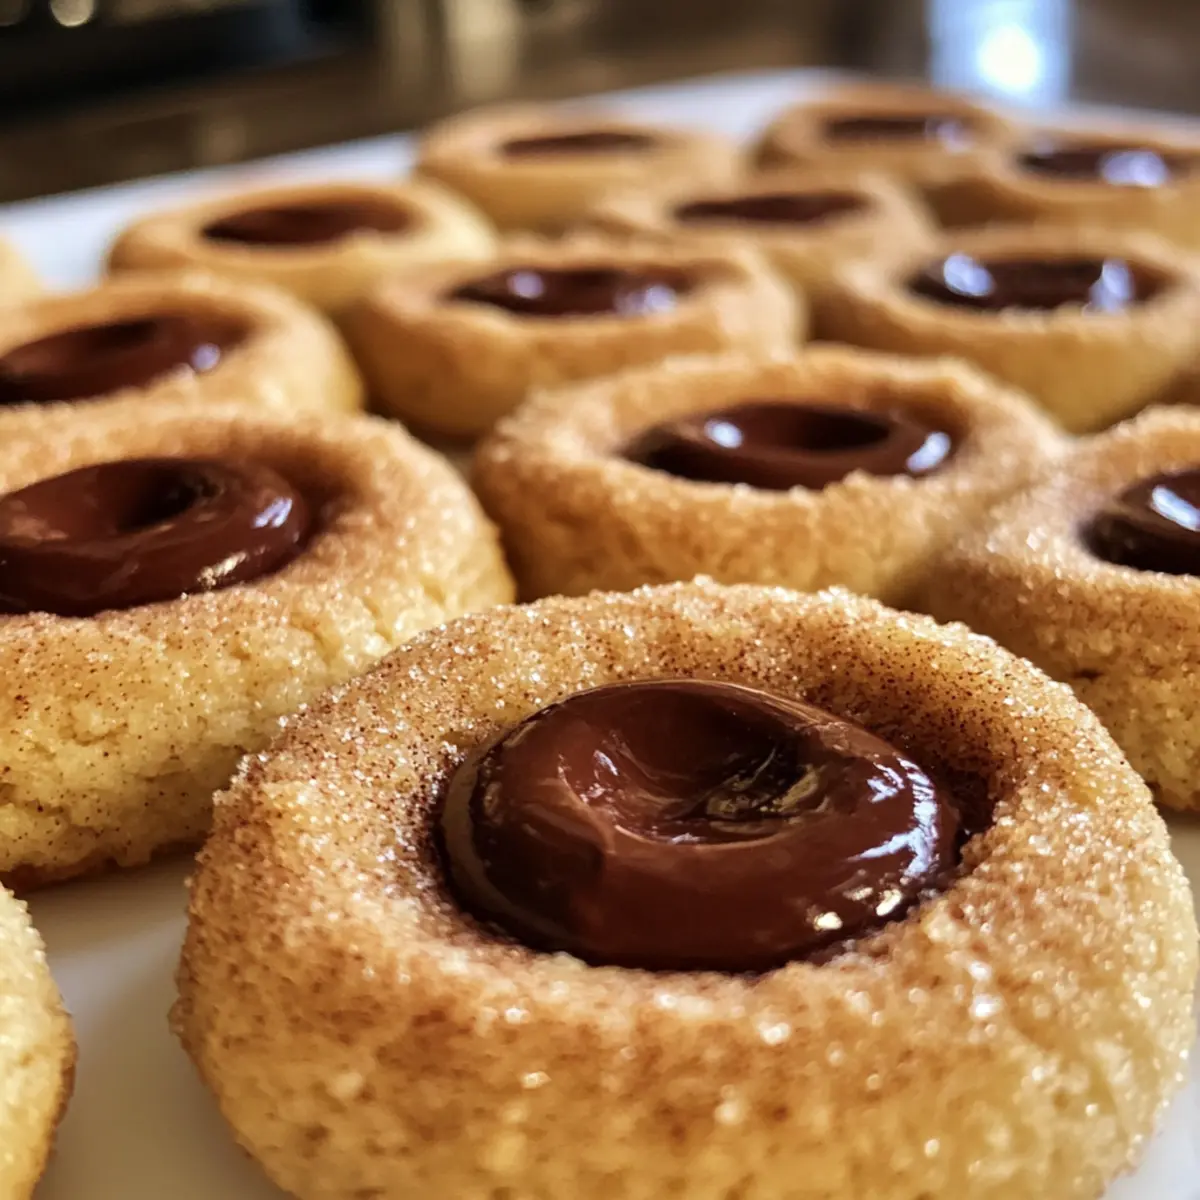
As I sifted through a fragrant cloud of cinnamon and sugar, a familiar warmth washed over me—a cherished memory of baking with loved ones. That’s exactly how these Snickerdoodle Thumbprint Cookies with Velvety Chocolate Filling pull at my heartstrings. Combining the classic elements of soft, chewy cookies with a rich, gooey chocolate center, this recipe is so comforting and surprisingly easy to whip up! Not only do they make a delightful addition to holiday gatherings or cookie swaps, but they also offer a fun twist on an all-time favorite. Whether you’re treating yourself or impressing guests, these cookies will surely spark joy for anyone who dares to indulge. Eager to find out how to bring this nostalgic treat to life? Let’s dive in!
Why Are Snickerdoodle Cookies So Irresistible?
Irresistible Combination: The classic mix of cinnamon and sugar gives these cookies a nostalgic taste that’s hard to resist!
Effortless Delight: With simple ingredients and straightforward instructions, home baking has never been easier!
Rich Chocolate Center: The luscious chocolate filling is a delightful surprise, taking each bite to new heights of indulgence.
Versatile Treat: Perfect for holiday gatherings or cozy evenings at home, these cookies cater to every sweet tooth and are sure to impress your guests!
Crowd Favorite: Whether you’re a seasoned chef or a first-time baker, these Snickerdoodle Thumbprint Cookies will be a hit! Discover more sweet delights with Chocolate Cranberry Cookies!
Snickerdoodle Thumbprint Cookies Ingredients
• Here’s everything you need to create these delightful cookies!
For the Cookie Dough
- All-Purpose Flour – Provides structure and stability to the cookie; ensure it’s spooned lightly into the measuring cup for accuracy.
- Cream of Tartar – Helps create the classic puffiness and softness; cannot be substituted easily without altering the texture.
- Baking Soda – A leavening agent that gives cookies a light texture; avoid substituting with baking powder without adjusting other ingredients.
- Salt – Balances sweetness and enhances flavor; essential for overall taste—do not omit.
- Unsalted Butter – Adds richness and moisture; can substitute with margarine, but results may vary.
- Granulated Sugar – Sweetens the dough and contributes to the cookie’s structure; brown sugar can be used for a richer flavor.
- Eggs – Bind ingredients together and provide moisture; use room temperature for better incorporation.
- Vanilla Extract – Enhances sweetness and adds flavor depth; for pure flavor, use pure vanilla extract instead of imitation.
For the Coating
- Granulated Sugar & Ground Cinnamon – Coating for rolling the cookies, adding a sweet and spicy kick; adjust ratios based on your preference.
For the Chocolate Filling
- Semi-Sweet or Dark Chocolate – The luscious filling that creates a rich centerpiece; milk chocolate can be used for a sweeter option—just consider adjusting sugar.
- Butter (optional) – Used for smoother chocolate filling; feel free to use coconut oil for a dairy-free version.
There you have it! With these ingredients, you’re all set to make irresistible Snickerdoodle Thumbprint Cookies that blend tradition with a tasty twist!
Step‑by‑Step Instructions for Snickerdoodle Thumbprint Cookies with Rich Chocolate Bliss
Step 1: Prep Dough
In a mixing bowl, cream together 1 cup of softened unsalted butter and 1 cup of granulated sugar until the mixture is light and fluffy, about 2-3 minutes. Beat in 2 room temperature eggs and 2 teaspoons of pure vanilla extract until fully incorporated. The dough should feel smooth and velvety, creating a lovely base for your Snickerdoodle Thumbprint Cookies.
Step 2: Combine Dry Ingredients
In a separate bowl, whisk together 2 cups of all-purpose flour, 1 teaspoon of cream of tartar, 1 teaspoon of baking soda, ½ teaspoon of salt, and 1 teaspoon of ground cinnamon. Gradually add this dry mixture to your wet ingredients, mixing until just combined. The dough will become slightly thick and should not be sticky, indicating it’s ready for chilling.
Step 3: Chill Dough
Cover the mixing bowl with plastic wrap or a clean kitchen towel and refrigerate the dough for about 30 minutes. This step is crucial for firming up the dough, making it easier to shape into cookies later. While waiting, preheat your oven to 350°F (175°C) so it’s ready for baking once the dough is chilled.
Step 4: Form Cookies
After chilling, transfer the dough to a clean surface and scoop it into small balls, about 1-2 tablespoons each. Pipe the dough onto a lined baking sheet, leaving about 2 inches between each cookie for spreading. This will ensure that your Snickerdoodle Thumbprint Cookies maintain their shape and don’t stick together while baking.
Step 5: Make Thumbprints
Using your thumb or the back of a spoon, gently press down in the center of each piped cookie to create an indentation. This is where the rich chocolate filling will sit once the cookies are baked. Be sure not to press too deep; the goal is to create a nice well without breaking the cookie base.
Step 6: Bake
Place your baking sheet in the preheated oven and bake the cookies for 10-12 minutes, or until the edges are lightly golden and the centers look just set. Keep a close eye on them, as you want your Snickerdoodle Thumbprint Cookies to remain soft in the center for a chewy texture.
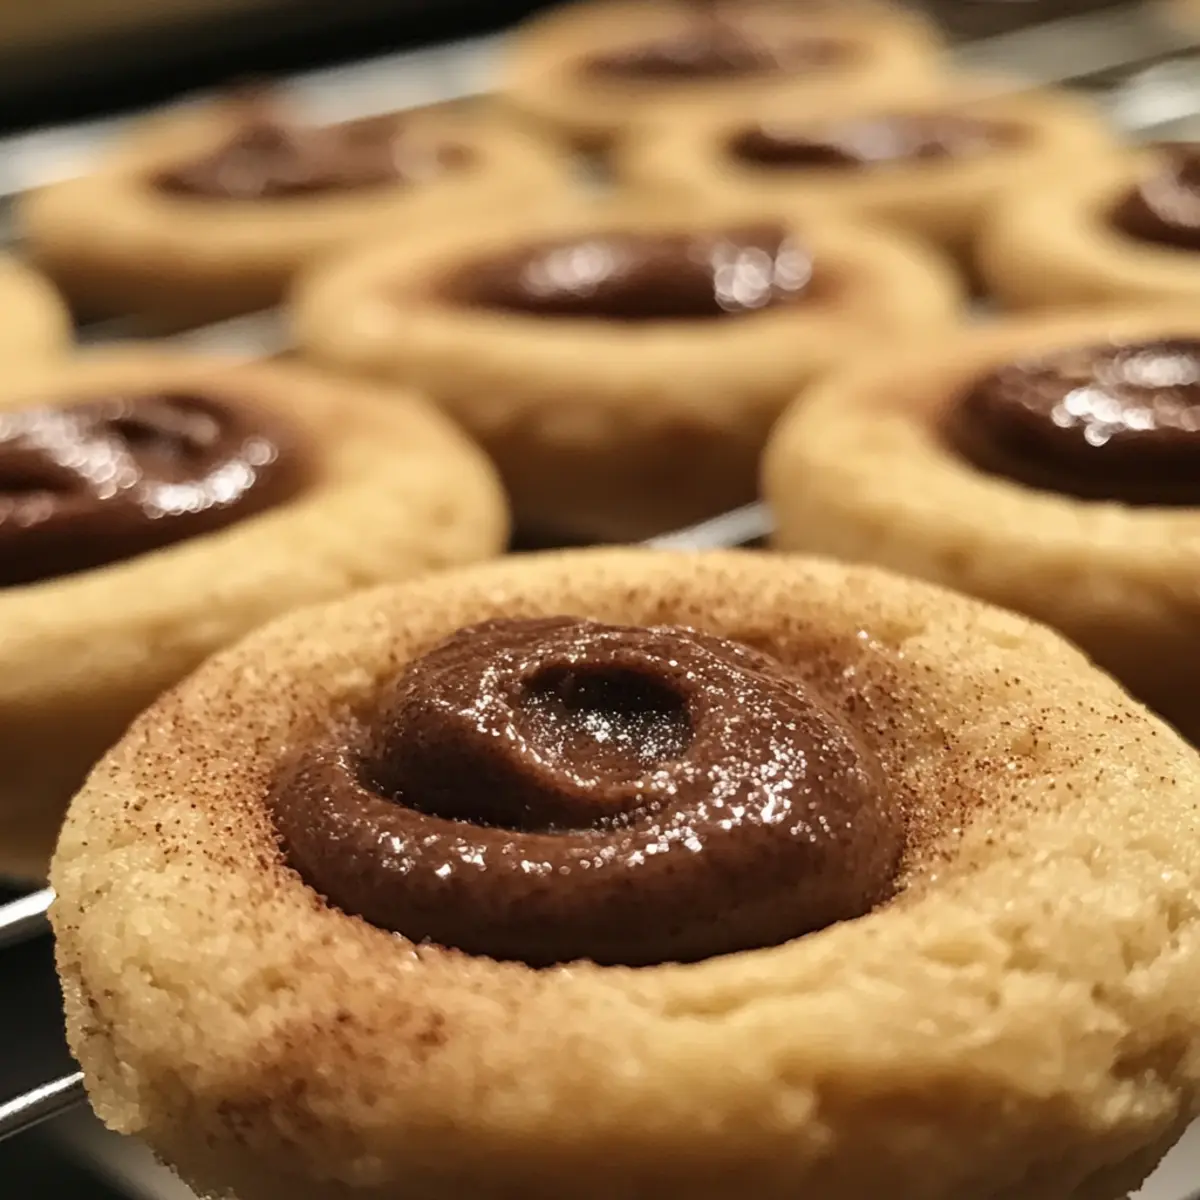
Step 7: Fill Chocolate
As the cookies cool on the baking sheet for about 5 minutes, prepare the chocolate filling. Melt 1 cup of semi-sweet or dark chocolate (and optional 1 tablespoon of butter for smoothness) in a microwave-safe bowl, heating in 30-second intervals and stirring until completely melted. Once the cookies are cool, spoon the melted chocolate into the thumbprint well of each cookie.
Step 8: Cool and Serve
Allow your Snickerdoodle Thumbprint Cookies to cool completely on the baking sheet, letting the chocolate set for about 15-20 minutes. Once the chocolate has firmed up, transfer the cookies to a serving plate. These delightful treats are now ready to be shared or enjoyed—all while bringing a little warmth and joy to your day!
Make Ahead Options
These Snickerdoodle Thumbprint Cookies are fantastic for busy home cooks looking to streamline their baking! You can prepare the cookie dough up to 24 hours in advance by following the initial steps and then wrap it tightly in plastic wrap before refrigerating. Also, consider forming the cookies but leaving them unbaked in the fridge for up to 3 days. When you’re ready to bake, simply remove them from the fridge, create the thumbprints, and bake as instructed. To ensure the best texture and flavor, allow the chocolate filling to be added fresh after baking. With these make-ahead options, you’ll enjoy all the joy of homemade cookies with minimal last-minute fuss!
What to Serve with Snickerdoodle Thumbprint Cookies
Picture a cozy gathering, the enticing aroma of cinnamon in the air, and delightful treats just waiting to be shared.
- Freshly Brewed Coffee: The rich, warm flavors of coffee enhance the sweetness of the cookies, creating a perfectly comforting pairing.
- Spiced Chai Tea: The comforting spices of chai dance beautifully with the cinnamon-sugar coating, making each bite feel extra special.
- Vanilla Ice Cream: Creamy vanilla ice cream adds a delightful contrast to the warm, chewy cookies, elevating each indulgent mouthful.
- Hot Chocolate: On a chilly day, complement your cookies with a rich cup of hot chocolate for a decadent, sweet experience.
- Berry Compote: A drizzle of tart berry compote brightens the flavors, balancing the sweetness of the cookies, making them even more irresistible.
- Cheese Platter: A mix of creamy cheeses offers a savory twist that contrasts nicely with the sweetness of these Snickerdoodle Thumbprint Cookies.
- Nutty Biscotti: For a crunchy counterpart, serve along with nutty biscotti that invite dipping, enhancing your cookie experience.
- Salted Caramel Sauce: For an extra treat, offer a small bowl of salted caramel for dipping, the sweet and salty combination is pure bliss.
Snickerdoodle Thumbprint Cookies Variations
Feel free to unleash your creativity and customize these cookies to fit your taste and dietary preferences!
-
Caramel Filling: Swap the chocolate for gooey caramel for a luscious, sweet surprise in every bite.
-
Nuts Galore: Add chopped pecans or walnuts to the cookie dough for a delightful crunch and nutty flavor.
-
Gluten-Free: Use a gluten-free all-purpose flour blend to make this recipe friendly for gluten-sensitive friends.
-
Spicy Kick: Add a pinch of cayenne pepper to the cinnamon-sugar coating for an unexpected but exciting heat.
-
Choco-Mint Twist: Mix in crushed peppermint candies with the chocolate filling for a festive, minty version!
-
Dairy-Free Delight: Substitute unsweetened applesauce for butter and use coconut oil for a delicious dairy-free treat.
-
Lemon Zest: Incorporate lemon zest into the dough for a bright, citrusy flavor that elevates the sweet cinnamon base.
-
Chocolate Cranberry Cookies: Embrace feelings of nostalgia with a twist—try combining dried cranberries with your chocolate for a sweet-tart contrast. Explore more in these Chocolate Cranberry Cookies.
No matter how you choose to make them, these variations will surely add excitement and personalization to your Snickerdoodle Thumbprint Cookies!
How to Store and Freeze Snickerdoodle Thumbprint Cookies
Room Temperature: Store cookies in an airtight container at room temperature for up to 1 week to maintain their fresh, chewy texture.
Fridge: If you’d like them to last a bit longer, place the cookies in the refrigerator for up to 2 weeks. Make sure they’re well-wrapped to prevent them from drying out.
Freezer: For longer storage, freeze the cookies before filling them with chocolate. They can last in the freezer for up to 3 months. Just allow them to thaw at room temperature before adding the filling.
Reheating: To enjoy warm cookies, briefly reheat them in the microwave for about 10-15 seconds or in the oven at 300°F (150°C) for 5-7 minutes, ensuring they’re soft and delightful with their rich chocolate bliss.
Expert Tips for Snickerdoodle Thumbprint Cookies
-
Room Temperature Ingredients: Always use room temperature eggs and butter to ensure a smooth and well-incorporated dough, which is crucial for your Snickerdoodle Thumbprint Cookies.
-
Chill Time Is Key: Don’t skip the chilling step! It helps the dough maintain its shape while baking, preventing overly spread cookies that lose their thumbprint design.
-
Consistent Size: Use a cookie scoop for uniform cookie sizes. This ensures even baking, meaning all your Snickerdoodle Thumbprint Cookies will bake consistently and look professional.
-
Check for Doneness: Keep an eye on your cookies as they bake. They should be golden around the edges yet soft in the center; remember, they’ll continue to cook slightly after you take them out!
-
Creative Fillings: Feel free to experiment with fillings! While chocolate is a delicious option, you can also try caramel or fruit preserves to create unique Snickerdoodle Thumbprint Cookies that cater to different tastes.
Snickerdoodle Thumbprint Cookies with Rich Chocolate Bliss Recipe FAQs
What type of flour is best to use for Snickerdoodle Thumbprint Cookies?
For the best results, use all-purpose flour, as it provides the right structure and stability to the cookies. Be sure to spoon the flour into the measuring cup rather than scooping directly from the bag to avoid packing it down, which can lead to drier cookies.
How should I store leftover Snickerdoodle Thumbprint Cookies?
Store the cookies in an airtight container at room temperature for up to 1 week. If you want them to stay fresh longer, you can refrigerate them for up to 2 weeks, just be sure to wrap them well to prevent drying out.
Can I freeze Snickerdoodle Thumbprint Cookies, and how do I do it?
Absolutely! For long-term storage, freeze the cookies before filling them with chocolate. To freeze, place them in a single layer on a baking sheet until solid, then transfer to an airtight freezer-safe container or bag. They can last in the freezer for up to 3 months. When you’re ready to enjoy, just thaw at room temperature before filling with chocolate.
What should I do if my cookie dough is too sticky?
If your dough is sticky, it could be due to the butter being too soft or too much liquid in the mixture. Try chilling the dough in the refrigerator for about 30 minutes; this makes it easier to work with. If it’s still sticky, you can gradually add a bit more flour, one tablespoon at a time, until it reaches the right consistency.
Are Snickerdoodle Thumbprint Cookies safe for people with nut allergies?
Yes, the traditional Snickerdoodle Thumbprint Cookies recipe does not include nuts; however, make sure to double-check the chocolate filling for any nut content if you’re using store-bought chocolate. For added safety, you can always choose chocolate brands that are explicitly labeled as nut-free.
Can I use different fillings for my Snickerdoodle Thumbprint Cookies?
Definitely! While rich chocolate filling is divine, you can get creative by substituting with caramel, fruit preserves, or even peanut butter for a twist. Just ensure whatever filling you choose complements the cinnamon-sugar flavor of the cookies!
Snickerdoodle Thumbprint Cookies with Rich Chocolate Bliss
Ingredients
Equipment
Method
- In a mixing bowl, cream together butter and sugar until light and fluffy, about 2-3 minutes. Beat in eggs and vanilla extract until fully incorporated.
- In a separate bowl, whisk together flour, cream of tartar, baking soda, salt, and cinnamon. Gradually mix into wet ingredients until just combined.
- Cover the dough and refrigerate for about 30 minutes. Preheat oven to 350°F (175°C).
- Scoop dough into small balls (1-2 tablespoons) and pipe onto lined baking sheet.
- Press down in the center of each cookie to create an indentation.
- Bake for 10-12 minutes or until edges are golden. Cool for 5 minutes.
- Melt chocolate (and butter if using) in a microwave-safe bowl until completely melted.
- Spoon melted chocolate into the thumbprint of each cookie.
- Allow cookies to cool completely on the baking sheet.