

Can you feel the magic of a family gathering in the air? That’s exactly what the Melt-in-Your-Mouth Cake brings to the table—a soft, buttery delight that’s both comforting and indulgent. Known as the Wonderful Polish Cake, this recipe is a perfect embrace of nostalgia and flavor, making it just right for any occasion. Not only is it incredibly easy to whip up, but it’s also budget-friendly, making it a go-to choice for festive celebrations or casual get-togethers. Imagine layers of tender dough complemented by a rich, creamy filling that will have your guests asking for seconds! Are you ready to dig into the secrets behind this delightful cake?
Why is Melt-in-Your-Mouth Cake irresistible?
Irresistible, comforting layers: Each bite of this cake showcases soft, buttery layers, creating a dreamy, melt-in-your-mouth experience.
Budget-friendly delight: Packed with simple ingredients, it won’t break the bank, making it an accessible treat for everyone.
Versatile flavor options: Customize your creamy filling with fruit purees or flavored extracts to match any taste or occasion.
Perfect for gatherings: This cake’s crowd-pleasing nature makes it a must-have at holidays, parties, or even casual afternoons—just like my Pistachio Carrot Cake.
Easy to make: With straightforward steps, you’ll be enjoying this delightful treat without fuss. Your friends and family will adore it as much as they do my Cookies Cream Cheesecake!
Melt-in-Your-Mouth Cake Ingredients
For the Cake
• Butter – Provides richness and moisture; substitute with margarine for a dairy-free version.
• Milk – Adds creaminess to the dough and filling; use almond milk or any non-dairy milk as a substitute.
• Water – Helps to hydrate the dough; can be replaced with more milk for added flavor.
• Salt – Balances sweetness; no common substitutions.
• Flour – Main structure; all-purpose flour is standard but can use gluten-free flour for a gluten-free variation.
• Baking Powder – Provides leavening; ensure it’s fresh for best results.
• Eggs – Adds structure and richness to both the dough and cream filling; for a vegan option, use flax eggs.
• Sugar – Sweetens the cream filling; alternative sweeteners can be used for lower sugar intake.
For the Cream Filling
• Cream – Adds richness to the filling; heavy cream preferred, but dairy-free cream can also work.
Optional Toppings
• Icing Sugar – For dusting; adds sweetness and enhances presentation.
• Fresh Fruit or Chocolate Shavings – Great for garnishing; can elevate visual appeal and flavor.
This Melt-in-Your-Mouth Cake is bound to become a cherished favorite, delighting friends and family alike!
Step‑by‑Step Instructions for Melt-in-Your-Mouth Cake
Step 1: Prepare Dough
Begin by melting 80 grams of butter in a medium saucepan over low heat. Once melted, whisk in 100 ml of milk, 100 ml of water, and ½ teaspoon of salt until well combined. Heat this mixture gently until it begins to simmer, which will help in hydrating the dough and create a smooth texture.
Step 2: Mix Dry Ingredients
In a separate large mixing bowl, sift together 500 grams of flour and 1 teaspoon of baking powder. This step ensures an even distribution of the baking powder and eliminates lumps, setting the foundation for the fluffy layers of your Melt-in-Your-Mouth Cake.
Step 3: Combine Mixtures
Once your liquid mixture is simmering, carefully pour the dry ingredients into the saucepan. Stir vigorously until the mixture forms a smooth dough. After mixing, remove from heat and allow it to cool slightly for about 5 minutes before adding eggs one at a time, ensuring each egg is fully incorporated before proceeding.
Step 4: Bake Layers
Preheat your oven to 400°F (200°C). Divide the dough into two equal portions and spread each one evenly into greased baking pans. Bake each layer in the preheated oven for about 20 minutes, or until they are lightly golden on top. Once baked, let the layers cool completely on a wire rack.
Step 5: Make Cream Filling
In a mixing bowl, beat together 4 eggs and 150 grams of sugar until frothy. Gradually add the remaining 100 ml of milk and a couple of tablespoons of flour, stirring well to avoid lumps. Pour this mixture into a saucepan and cook over medium heat, stirring constantly until it thickens, which should take about 5-7 minutes. Allow to cool before blending with 100 grams of whipped cream.
Step 6: Assemble Cake
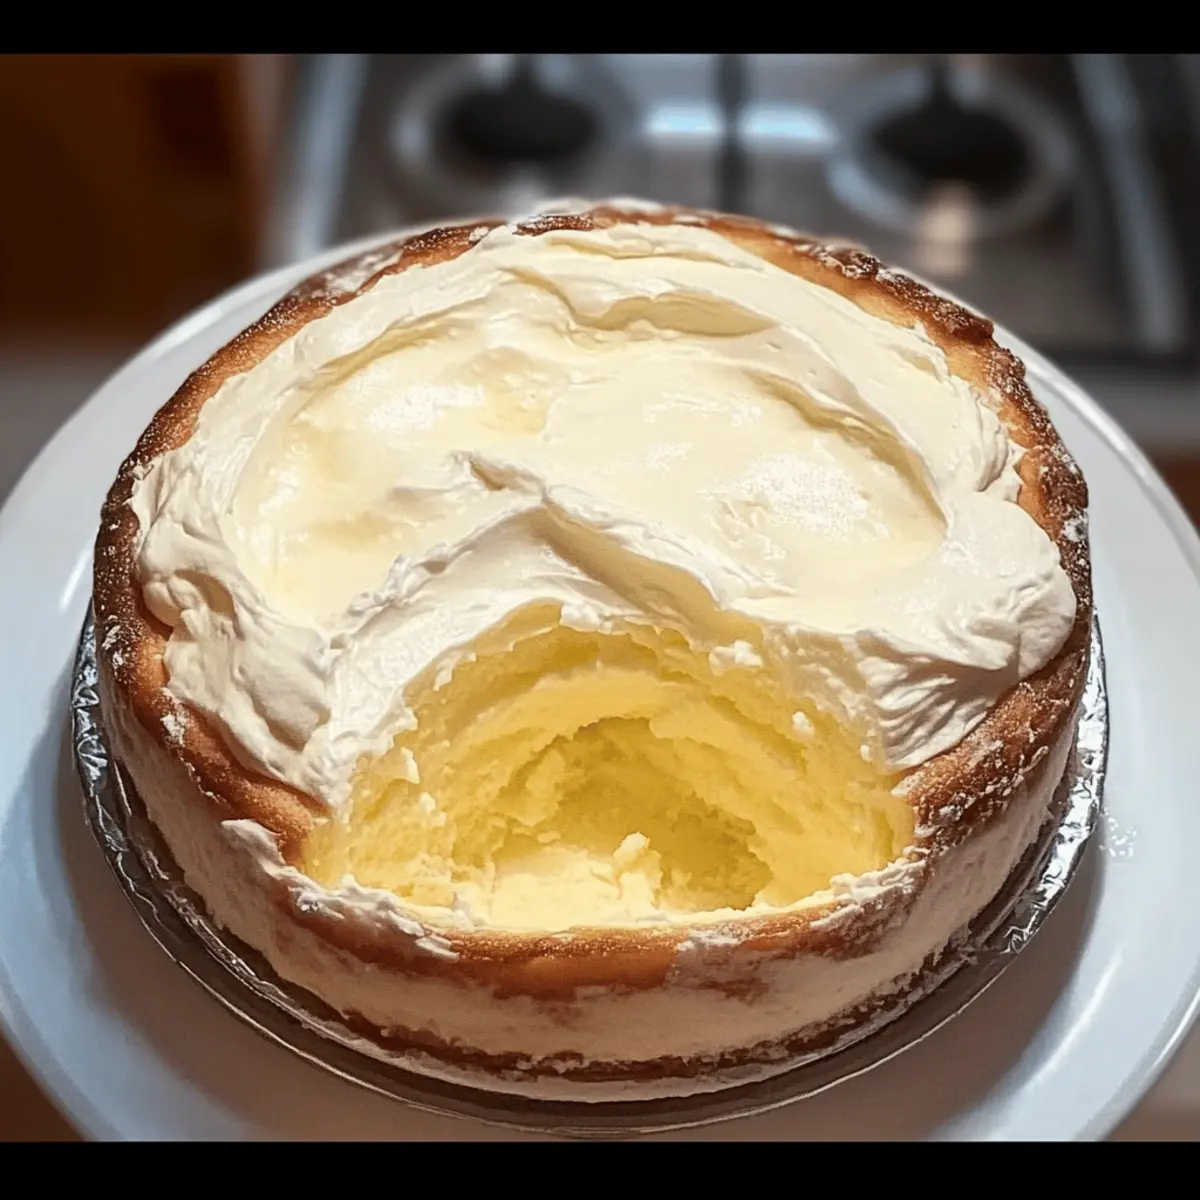
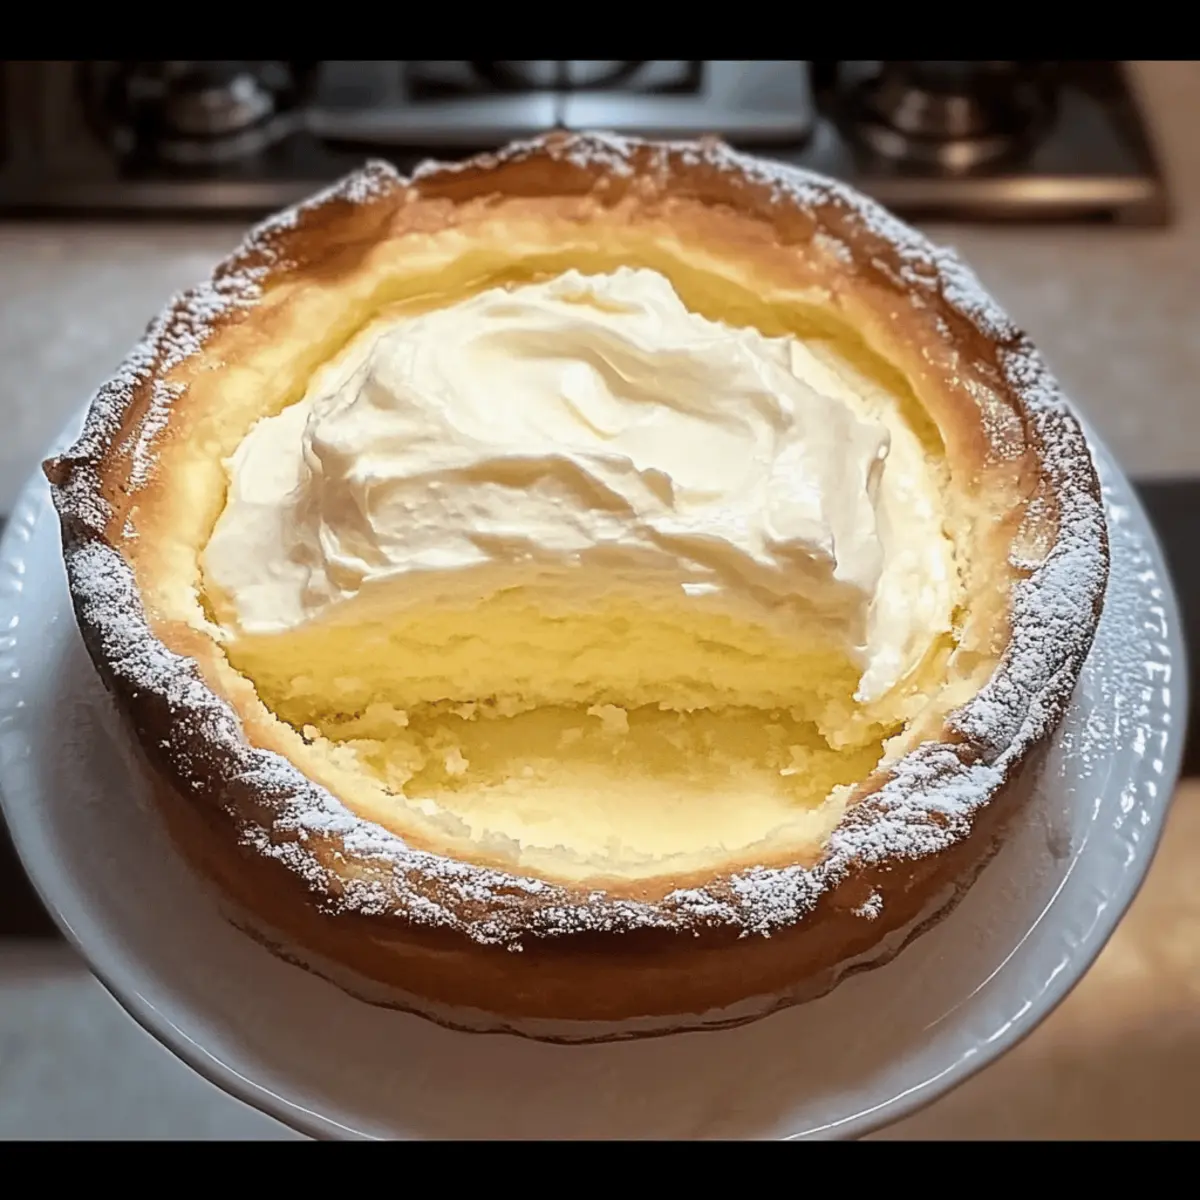
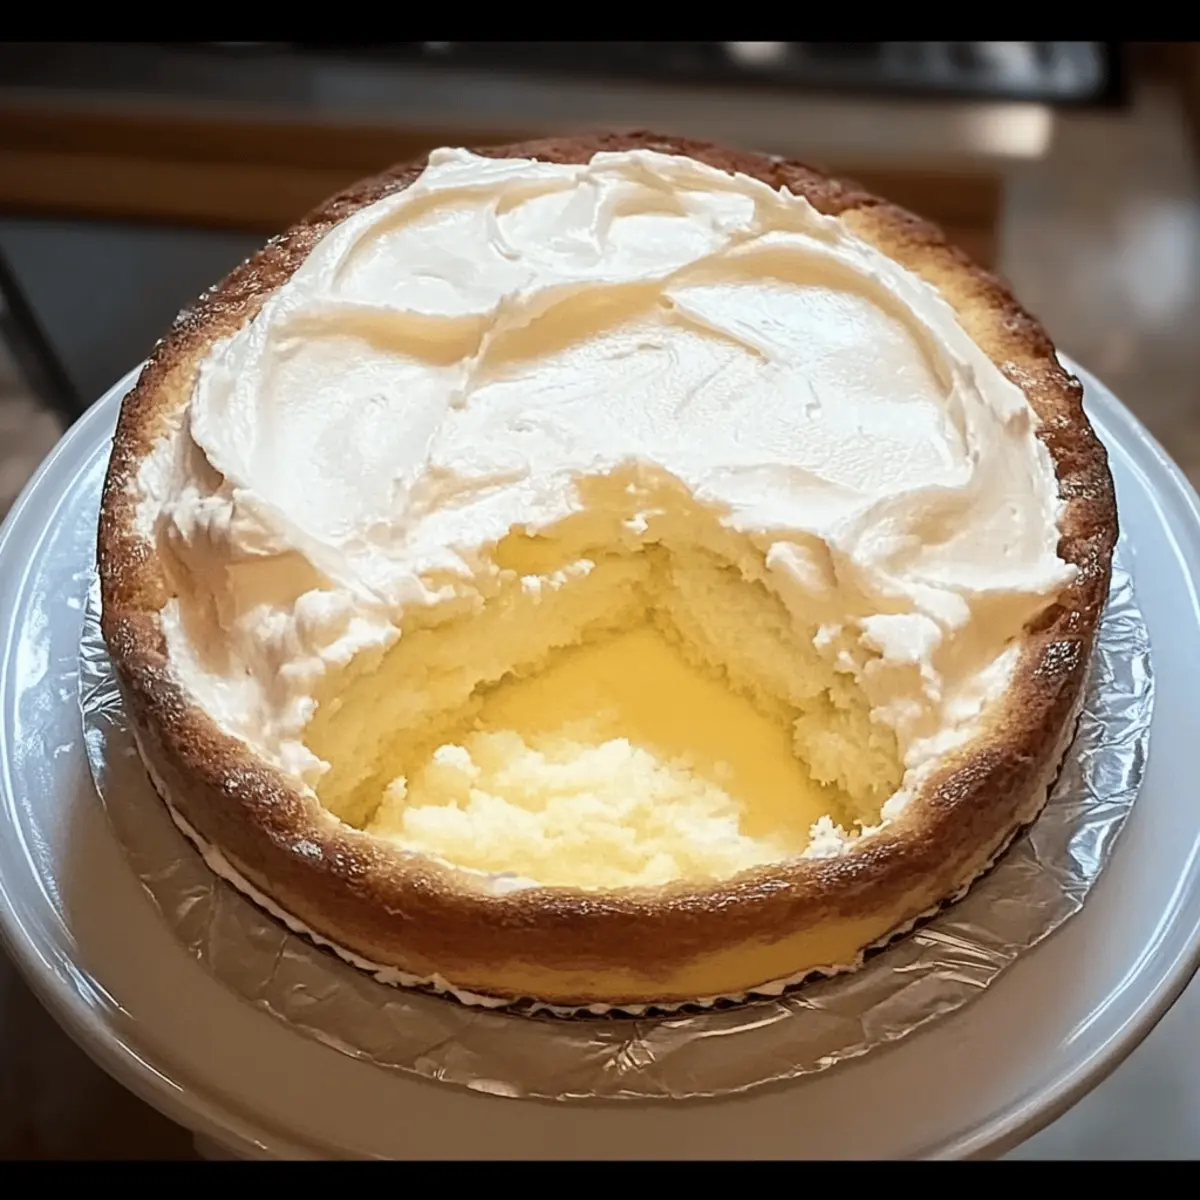
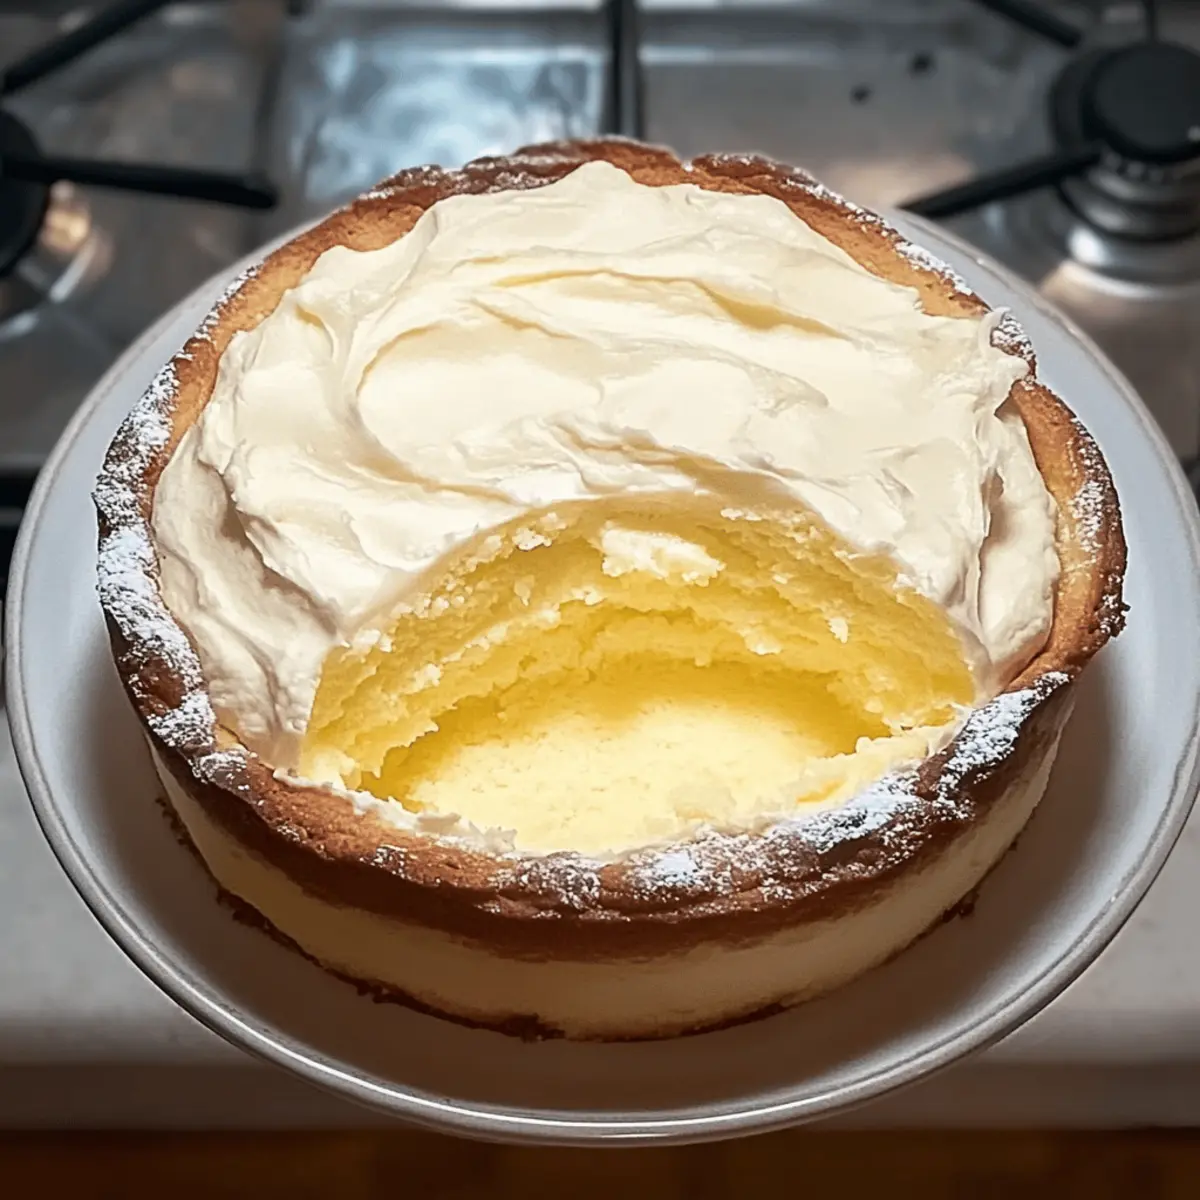
Once both the cake layers and cream filling have cooled, it’s time to assemble your Melt-in-Your-Mouth Cake. On a serving plate, place one layer of cake, generously spread half of the cream filling on top, and then add the second layer of cake. Spread the remaining cream filling over the top layer for a luscious finish.
Step 7: Garnish & Serve
Refrigerate the assembled cake for at least two hours to allow the flavors to meld and the filling to set. Just before serving, dust the top with icing sugar or garnish with fresh fruits or chocolate shavings for an elegant touch. Slice into generous pieces and enjoy the delightful layers of this Melt-in-Your-Mouth Cake!
What to Serve with Melt-in-Your-Mouth Cake
This delightful cake is perfect for pairing, elevating your dining experience to new heights.
- Whipped Cream: A dollop of freshly whipped cream adds a light and airy touch, complementing the cake’s rich cream filling.
- Fresh Berries: Raspberries or strawberries provide a refreshing burst of flavor, enhancing the sweetness and offering a lovely contrast.
- Vanilla Ice Cream: The creamy, cool taste of vanilla ice cream balances the warm, soft layers of the cake, making every bite heavenly.
- Cheesy Ricotta Crostini: Lightly toasted crostini topped with creamy ricotta offer a satisfying crunch that beautifully contrasts the tender cake.
- Herbal Tea: A warm cup of chamomile or mint tea gently complements the dessert, enhancing relaxation and comfort during dessert time.
- Chocolate Shavings: Sprinkle dark chocolate shavings on top for a sophisticated touch that adds a bitter contrast to the sweet layers, delighting the palate.
- Citrus Salad: A citrus salad brightens the meal with tangy flavors, providing a refreshing palate cleanser between bites of the cake.
- Sparkling Cider: For a festive touch, serve with sparkling cider; its bubbles and sweetness create a delightful celebration for any gathering.
Melt-in-Your-Mouth Cake Customizations
Feel free to unleash your creativity and make this cake your own with these delightful variations!
-
Dairy-Free: Substitute butter with margarine and use your favorite non-dairy milk for a delicious treat that everyone can enjoy.
-
Gluten-Free: Swap out regular flour with a 1:1 gluten-free baking blend, so everyone can indulge in this cake without worry.
-
Fruity Twist: Add a splash of pureed berries or a hint of lemon zest to the cream filling for a refreshing pop of flavor. Think about how vibrant strawberries or zesty lemons can brighten your cake!
-
Nutty Delight: Stir in finely chopped nuts like almonds or hazelnuts to the dough for added texture and flavor; they add a delightful crunch that pairs beautifully with the creamy filling.
-
Spicy Kick: Enhance the spice with a dash of cinnamon or nutmeg in the cream filling or cake layers for a warm, inviting depth that makes each bite a comforting experience.
-
Decadent Chocolate: Fold cocoa powder into the cream mixture for a luscious, chocolaty filling or drizzle melted chocolate on top for a luxurious finish. Imagine the rich flavor embracing your taste buds!
-
Frosted Finish: Top the cake with a light layer of whipped cream or a chocolate ganache for an impressive presentation that will have guests swooning.
-
Layered Flavors: Create a stunning visual by layering with colorful fruit slices or even crumbled cookies between the cake layers, much like my Strawberry Cheesecake Bars.
With these delightful variations, your Melt-in-Your-Mouth Cake can transform into an extraordinary centerpiece for any occasion!
Storage Tips for Melt-in-Your-Mouth Cake
Fridge: Store in an airtight container for up to 3 days. This helps maintain the creamy filling and moist layers of your Melt-in-Your-Mouth Cake.
Freezer: If needed, freeze slices wrapped tightly in plastic wrap for up to 2 months. Thaw in the refrigerator overnight before serving.
Reheating: For best texture, serve chilled or at room temperature. Avoid microwaving as it may affect the creamy filling quality.
Covering: Always cover the cake with plastic wrap or foil to prevent it from drying out, ensuring every bite remains deliciously soft.
Expert Tips for Melt-in-Your-Mouth Cake
• Cool the Mixture: Allow the cream mixture to cool before adding it to butter to avoid melting; this ensures a rich filling.
• Prevent Lumps: Stir constantly while heating the filling to prevent lumps from forming and achieve a silky-smooth texture.
• Chill for Flavor: Let the assembled cake chill for at least two hours, as this enhances the flavor and allows the layers to meld beautifully.
• Fresh Baking Powder: Always use fresh baking powder; old leavening agents can result in a dense cake rather than the light, airy texture you desire.
• Perfect Portions: When baking layers, make sure to spread the dough evenly; uneven layers can lead to a cake that doesn’t stack well.
• Experimenting with Flavors: Feel free to swap in different flavored extracts or fruit purees for the cream filling, adding a personal touch to your Melt-in-Your-Mouth Cake.
Make Ahead Options
These Melt-in-Your-Mouth Cake layers are perfect for meal prep enthusiasts! You can prepare the dough up to 24 hours in advance by melting the butter and combining it with milk, water, and salt. Store the mixture in the refrigerator, ensuring it is tightly covered to maintain moisture. Additionally, the cream filling can be made up to 3 days ahead; just refrigerate it in an airtight container. When you’re ready to assemble, simply bake the dough layers and let them cool completely before spreading the cream filling and refrigerating the assembled cake for at least two hours before serving. This approach not only saves you time but also means your Melt-in-Your-Mouth Cake will be just as delicious and delightful when it’s finally time to savor!
Melt-in-Your-Mouth Cake Recipe FAQs
How do I choose ripe ingredients for my Melt-in-Your-Mouth Cake?
Absolutely! For the best flavor, ensure your butter is at room temperature before melting—it should be soft but not greasy. If using fruit as a garnish, go for ripe berries or citrus that are vibrant and smell fragrant, indicating freshness!
What are the best storage methods for the cake, and how long does it last?
This cake can be stored in an airtight container in the refrigerator for up to 3 days. This keeps the creamy filling fresh and moist. Just make sure to cover it well, as exposure to air can dry it out. If you plan to keep it longer, it’s best to freeze individual slices.
Can I freeze my Melt-in-Your-Mouth Cake? If so, how?
Absolutely! To freeze your cake, wrap slices tightly in plastic wrap and then place them in a resealable freezer bag. Label them with the date, and they can stay fresh for up to 2 months. When you’re ready to enjoy, simply thaw them overnight in the refrigerator.
What should I do if the cream filling gets lumpy?
Very frustrating! If you find lumps in your cream filling, don’t worry! Simply transfer it back to the saucepan, add a splash of milk, and whisk over medium heat until it becomes smooth. Continuous stirring is key; this helps break down lumps and achieve that silky texture you’re aiming for.
Are there any dietary considerations to keep in mind while making this cake?
Yes! If you’re baking for someone with dietary restrictions, you can easily adapt this recipe. Substitute eggs with flax eggs (1 tablespoon of ground flaxseed mixed with 2.5 tablespoons of water for each egg), and feel free to use non-dairy alternatives for milk and cream. Always check ingredient labels to avoid any allergens in pre-packaged items.
Can I use different flavors in my Melt-in-Your-Mouth Cake?
Very! You can customize the cream filling by incorporating flavored extracts like vanilla or almond, or using fruit purees such as raspberry or lemon. This gives the cake a delightful twist while keeping the original soft and creamy essence intact!
Melt-in-Your-Mouth Cake: A Dreamy Delight for Every Occasion
Ingredients
Equipment
Method
- Begin by melting 80 grams of butter in a medium saucepan over low heat. Whisk in 100 ml of milk, 100 ml of water, and ½ teaspoon of salt until well combined.
- In a separate large mixing bowl, sift together 500 grams of flour and 1 teaspoon of baking powder.
- Pour the dry ingredients into the saucepan and stir vigorously until a smooth dough forms. Allow to cool slightly for about 5 minutes before adding eggs one at a time.
- Preheat your oven to 400°F (200°C). Divide the dough into two portions and spread evenly into greased baking pans. Bake for about 20 minutes until lightly golden.
- In a mixing bowl, beat together 4 eggs and 150 grams of sugar until frothy. Gradually add 100 ml of milk and a couple of tablespoons of flour, stirring to avoid lumps. Cook over medium heat until thickened.
- Once both layers and cream filling have cooled, assemble the cake by placing one layer on a plate, spreading half of the cream filling, adding the second layer, and topping with the remaining filling.
- Refrigerate for at least two hours. Before serving, dust with icing sugar or garnish with fruits or chocolate shavings.