

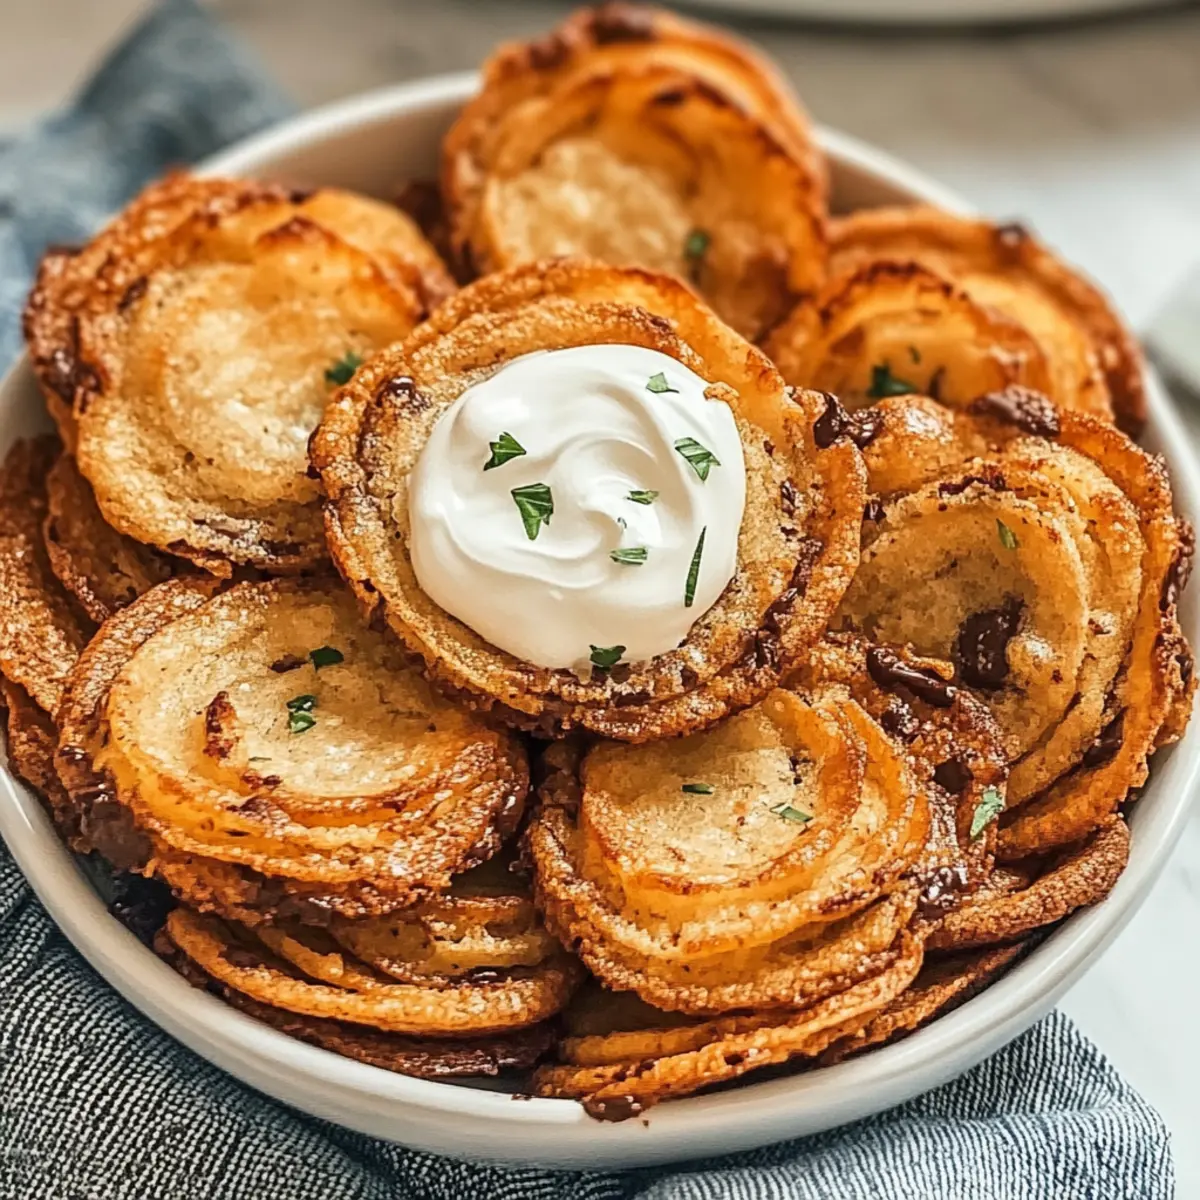
The moment those crispy, golden onion ring chips touch your tongue, it feels like a mini celebration. You won’t believe how a few simple ingredients can transform into these irresistible delights! My homemade onion ring chips are not only quick to prepare but also offer a fun twist on traditional snacks—perfect for game nights or casual gatherings. With their satisfying crunch and the option to add your favorite spices, these chips are truly versatile and sure to impress anyone you share them with. Curious about how to make these crunchy bites at home? Let’s dive into the recipe!
Why Are Onion Ring Chips So Addictive?
Irresistible Crunch: The delightful crispiness of these onion ring chips will keep you coming back for more.
Simple Ingredients: With just a handful of pantry staples, whipping up these chips is a breeze—perfect for anyone craving a homemade snack.
Versatile Flavor: Customize with your favorite spices or herbs to create a unique twist every time! Want a hint of heat? Try adding cayenne or paprika.
Crowd-Pleaser: Ideal for game nights or casual gatherings, everyone will rave about these crunchy bites. Serve them alongside Cheesy French Onion dip for the ultimate pairing!
Quick & Easy: Ready in no time, these chips are a fantastic solution for when hunger strikes. You won’t have to settle for fast food again!
Onion Ring Chips Ingredients
• Discover the joy of homemade chips!
For the Coating
- All-Purpose Flour – Forms the base for that crispy coating; make sure to season it for extra flavor!
- Cornstarch – Helps achieve a light and airy crunch; don’t skip this for the best texture!
- Salt – Enhances the flavor of the chips; adjust to your liking based on dietary needs.
- Smoked Paprika – Adds a smoky tang; feel free to swap for regular paprika for a milder taste.
- Garlic Powder – Infuses a savory kick; a great way to elevate your onion ring chips!
For the Onion Rings
- Large Onions – Sweet or yellow onions are ideal; cut them into even rings for uniform baking.
- Eggs – Acts as a binder for the coating; a vegan alternative can be flax eggs for a plant-based option.
- Buttermilk – Helps tenderize and adds flavor; easily make your own by mixing milk with vinegar!
For Baking or Frying
- Oil – Use vegetable or canola oil for frying; if baking, opt for a light brushing of olive oil instead.
Now, you’re set to create the most delicious onion ring chips that will elevate your snack game!
Step‑by‑Step Instructions for Crispy Onion Ring Chips
Step 1: Preheat the Oven or Heat Oil
Begin by preheating your oven to 425°F (220°C) if you’re baking the onion ring chips. If frying instead, heat vegetable or canola oil in a deep pan or fryer until it reaches 350°F (175°C). This initial step sets the stage for achieving that perfect, crispy texture that makes these onion ring chips so irresistible.
Step 2: Prepare the Onion Rings
While the oven or oil heats up, slice your large onions into even rings about half an inch thick. Separate the rings carefully to ensure each chip retains its shape. For an added kick, you can soak the onion rings in buttermilk for about 15 minutes to imbue them with flavor and tenderness, making your crispy onion ring chips even more delightful when baked or fried.
Step 3: Mix the Coating
In a large bowl, combine all-purpose flour, cornstarch, salt, smoked paprika, and garlic powder to create the crispy coating mixture. Stir well to ensure an even distribution of flavors. This seasoned mixture is what gives your onion ring chips their remarkable crunch and savory flavor, so don’t rush this step—make sure it’s well combined!
Step 4: Prepare the Breading Station
Set up your breading station by laying out three bowls: one with the egg (or flax egg) for binding, the second for the flour mixture, and a third to hold the finished onion ring chips. This will streamline the process of coating each onion ring. Quick transitions between bowls will help ensure an even crust on each chip, leading to perfectly crispy onion ring chips.
Step 5: Coat the Onion Rings
Dip each onion ring into the egg mixture, allowing any excess to drip off before transferring it to the flour mixture. Coat each ring thoroughly, pressing gently to ensure the coating sticks well. Repeat this process until all onion rings are coated. You’re well on your way to mouthwatering crispy onion ring chips!
Step 6: Bake or Fry the Chips
If baking, place the coated onion ring chips on a parchment-lined baking sheet, ensuring they are spaced out for even cooking. Bake for 20-25 minutes, or until golden brown, flipping halfway through. For frying, carefully immerse the coated rings in the hot oil and fry for 2-3 minutes per side, or until they’re beautifully golden and crispy.
Step 7: Drain and Cool
Once your crispy onion ring chips are baked or fried, transfer them to a wire rack or paper towels to drain excess oil. This cooling step is essential to maintain that delightful crunch while keeping the chips light. Be patient as they cool, letting the magic of flavor settle in!
Step 8: Serve and Enjoy
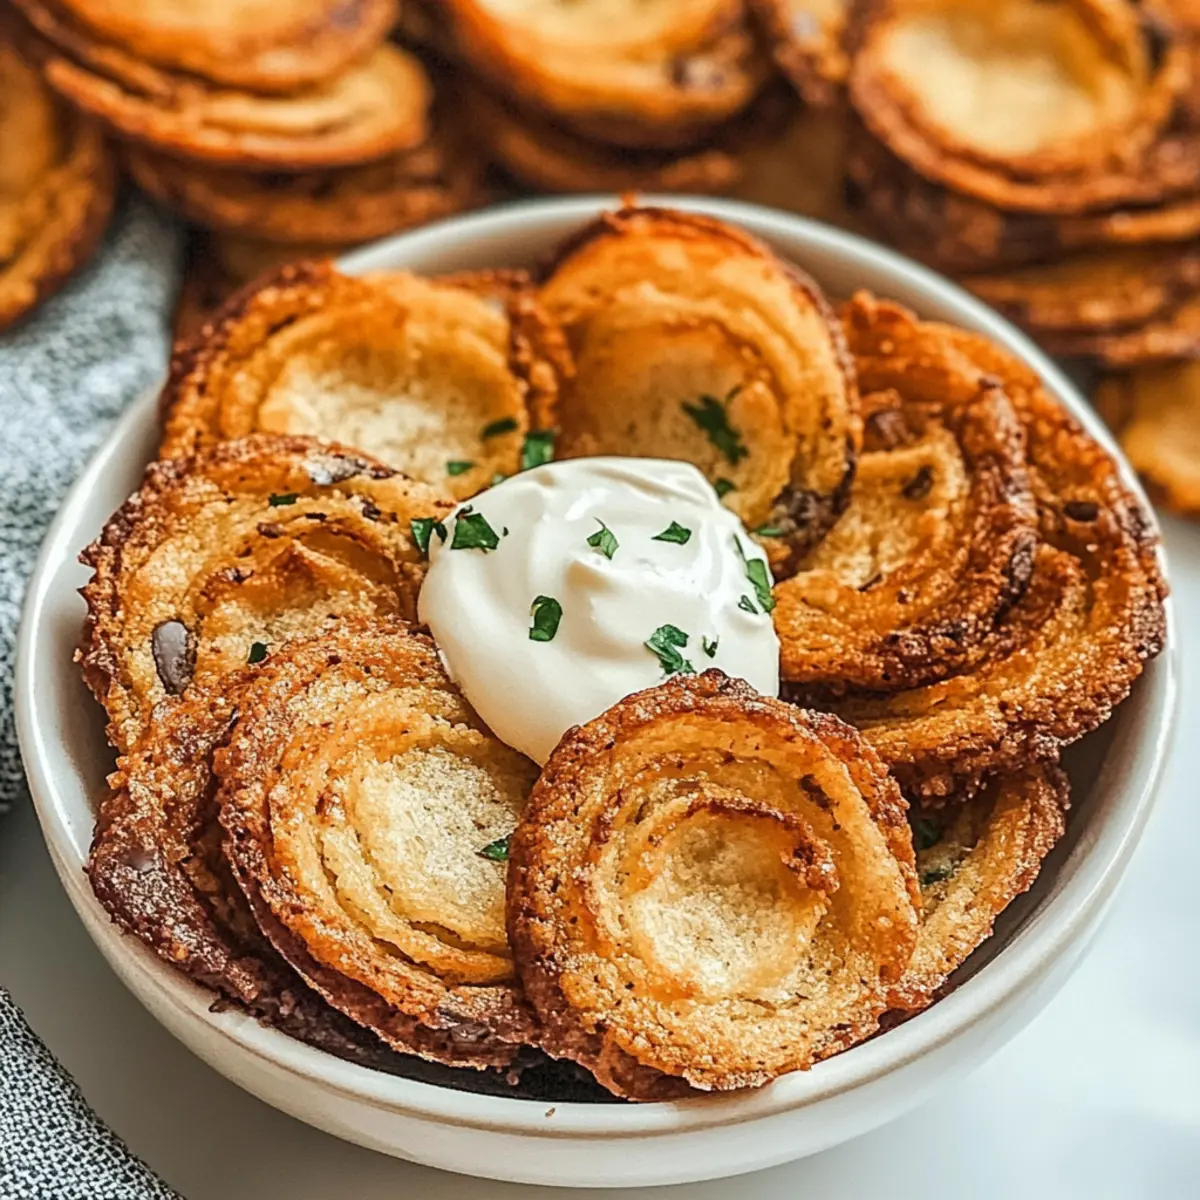
Gather your crispy onion ring chips on a serving platter and pair them with delicious dips like ranch or spicy mayo. These flavorful chips are sure to be a hit at any game night or casual gathering. Take a moment to appreciate the irresistible golden-brown perfection before sharing—everyone won’t be able to resist these homemade delights!

How to Store and Freeze Onion Ring Chips
Room Temperature: Store leftover onion ring chips in an airtight container at room temperature for up to 2 days to maintain their crunchiness.
Fridge: You can refrigerate them to extend freshness for up to 4 days, but note they may lose some crispiness. Reheat in the oven or air fryer for optimal texture.
Freezer: To freeze, place cooled onion ring chips in a single layer on a baking sheet, freeze until solid, then transfer to an airtight container or freezer bag for up to 3 months.
Reheating: When ready to enjoy, reheat frozen onion ring chips in the oven at 400°F (200°C) for about 10-15 minutes until crispy.
Variations & Substitutions for Onion Ring Chips
Feel free to get creative with these onion ring chips; your taste buds will thank you for the adventure!
-
Gluten-Free: Substitute all-purpose flour with a gluten-free flour blend to make these chips suitable for those with gluten sensitivities. The texture will remain delightful!
-
Spicy Kick: Add cayenne pepper or crushed red pepper flakes to the coating mixture for an exciting heat that elevates each chip. It’s a fantastic way to bring the flavor to life!
-
Herb-Infused: Incorporate dried herbs, such as oregano or thyme, into the coating for a fragrant twist. These herb-infused chips pair beautifully with a creamy dip like Cheesy French Onion!
-
Cheesy Flavor: Mix finely grated Parmesan cheese into the flour coating for a delicious cheesy crust that takes everything to a whole new level of scrumptiousness.
-
Baked Variation: For a lighter version, skip the frying altogether and bake them until crispy. Lightly spraying the coated chips with olive oil before baking enhances the crunchy texture.
-
Sweet & Savory: Try dipping your onion rings in a honey or maple syrup glaze after they’re cooked for a unique sweet twist that contrasts perfectly with the savory flavor.
-
Veggie Delight: Swap out half of the onions for zucchini or eggplant slices to add a veggie twist that keeps the crunch factor in play. An exciting mix is always a hit at gatherings!
-
Seasoning Swap: Experiment with different seasoning blends such as taco seasoning or buffalo spice for a completely different take. Get ready for flavor explosions that will delight your guests!
What to Serve with Classic Chocolate Chip Cookies
There’s nothing quite like the enchantment of freshly baked cookies, perfectly paired with delightful treats to create a memorable dessert spread.
-
Ice Cream: The creamy, cold texture of vanilla ice cream complements warm chocolate chip cookies beautifully, creating a classic cookie sandwich that’s simply irresistible.
-
Fresh Berries: Juicy strawberries or raspberries add a refreshing burst of flavor and a pop of color on your dessert plate, balancing the sweetness of the cookies.
-
Cold Milk: A classic pairing! The chill of cold milk enhances the chocolate richness while softening the cookies, making every bite a delightful experience.
-
Coffee: The rich, aromatic notes of brewed coffee contrast perfectly with the sweet, buttery flavors of the cookies, adding a cozy touch for adult palates.
-
Nut Butter: Spread creamy almond or peanut butter on a warm cookie for a wholesome upgrade. The nutty flavor adds depth and a satisfying texture.
-
Chocolate Sauce: Drizzle warm chocolate sauce over cookies for an extra indulgent treat. The gooey topping enhances every bite, making it even more decadent.
-
Caramel Sauce: Sweet, sticky caramel pairs beautifully with chocolate, adding a luxurious flair to your cookie experience.
-
Whipped Cream: Light and airy, a dollop of whipped cream on the side brings an elegant touch to the plate, perfect for a dessert with flair.
-
Cheesecake Dip: Dip your cookies into a light cheesecake-flavored dip for a fun and unique twist. This creamy complement will delight every guest!
-
Chocolate Milkshake: Indulge in a classic, frosty chocolate milkshake that pairs wonderfully with cookies, creating a nostalgic dessert reminiscent of diner treats.
Expert Tips for Onion Ring Chips
-
Use Fresh Onions: Always opt for fresh, firm onions for the best flavor and texture. Avoid soft onions, as they won’t provide that delightful crunch.
-
Don’t Skip Soaking: Soaking the onion rings in buttermilk not only enhances flavor but also helps the coating stick better, ensuring your onion ring chips remain crispy.
-
Coating Consistency: Ensure your coating has an even texture; lumps in your mixture can lead to unevenly coated chips. Take your time when preparing the breading station!
-
Monitor Cooking Time: Keep a close eye while baking or frying; overcooking can result in burnt edges. Perfectly timed chips will be golden brown and irresistibly crunchy.
-
Cooling Matters: Allow the chips to drain and cool properly to maintain their crunch. Avoid stacking them while cooling, as trapped steam can make them soggy.
-
Flavor with Ease: Experiment with various spices or herbs in the coating to create unique onion ring chips. Adding a pinch of chili powder can elevate the flavor profile wonderfully!
Make Ahead Options
These crispy onion ring chips are perfect for meal prep enthusiasts! You can prepare the onion rings and coat them in advance, up to 3 days ahead. Simply slice the onions, soak them in buttermilk for added flavor, and coat them with the flour mixture. Store the coated rings in an airtight container in the refrigerator to maintain their crunch. When it’s time to serve, just bake or fry them straight from the fridge, adding an extra minute or two to the cooking time for the best results. This approach allows you to enjoy delicious homemade onion ring chips with minimal effort on busy days!

Crispy Onion Ring Chips Recipe FAQs
How do I choose the best onions for my onion ring chips?
Absolutely! For the best onion ring chips, opt for large sweet or yellow onions. They provide a balanced taste and hold up wonderfully during baking or frying. Look for firm onions without any soft spots, as these will deliver that irresistible crunch you are after.
How should I store leftover onion ring chips?
Very! To keep your leftover onion ring chips crispy, store them in an airtight container at room temperature for up to 2 days. If you want to extend their freshness, you can refrigerate them for up to 4 days, but they may lose some crispiness. Just pop them back in the oven or air fryer to re-crisp before serving!
Can I freeze onion ring chips?
Absolutely! To freeze, first ensure your onion ring chips have cooled completely. Arrange them in a single layer on a baking sheet and freeze until solid. Once frozen, you can transfer them to an airtight container or freezer bag for up to 3 months. This way, you can always have crispy onion ring chips on hand!
What can I do if my onion ring chips are soggy?
The more the merrier! If you find that your onion ring chips are turning out soggy, it’s usually due to trapped moisture during cooling. To prevent this, make sure to cool them on a wire rack rather than stacking them. If they are soggy after storage, try reheating them in the oven at 400°F (200°C) for about 10-15 minutes, and they should regain their crispiness!
Are onion ring chips suitable for those with dietary restrictions?
Absolutely! If you have dietary needs, onion ring chips can be easily adapted. For a vegan version, substitute the egg with a flax egg (mix 1 tablespoon ground flaxseed with 2.5 tablespoons of water and let it sit until it thickens). Additionally, you can customize the spices to accommodate allergies—just be mindful of the ingredients in your coating mix.
Crispy Onion Ring Chips: Irresistibly Crunchy Snack Delight
Ingredients
Equipment
Method
- Preheat the oven to 425°F (220°C) if baking, or heat oil in a pan to 350°F (175°C) if frying.
- Slice large onions into even rings about half an inch thick, soaking them in buttermilk if desired.
- In a large bowl, mix flour, cornstarch, salt, smoked paprika, and garlic powder.
- Set up a breading station with bowls for egg, flour mixture, and finished chips.
- Coat onion rings, first dipping in egg and then in the flour mixture evenly.
- If baking, place on a parchment-lined baking sheet and bake for 20-25 minutes until golden.
- If frying, immerse in hot oil and fry for 2-3 minutes per side until golden.
- Drain on wire racks or paper towels to remove excess oil and cool.
- Serve with dips and enjoy the crunchy goodness!