

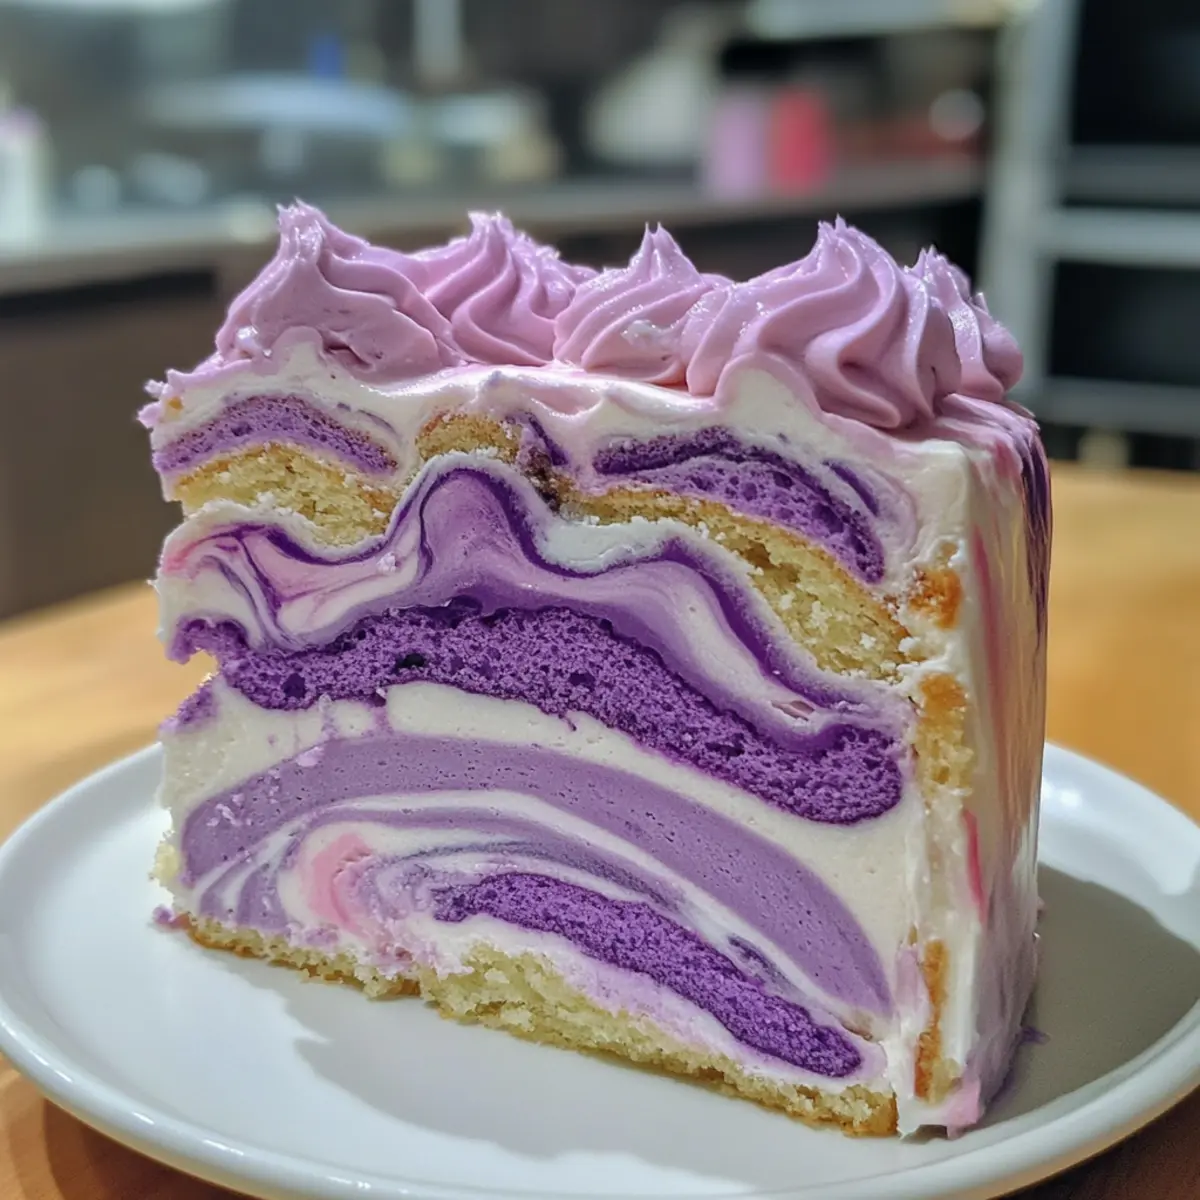
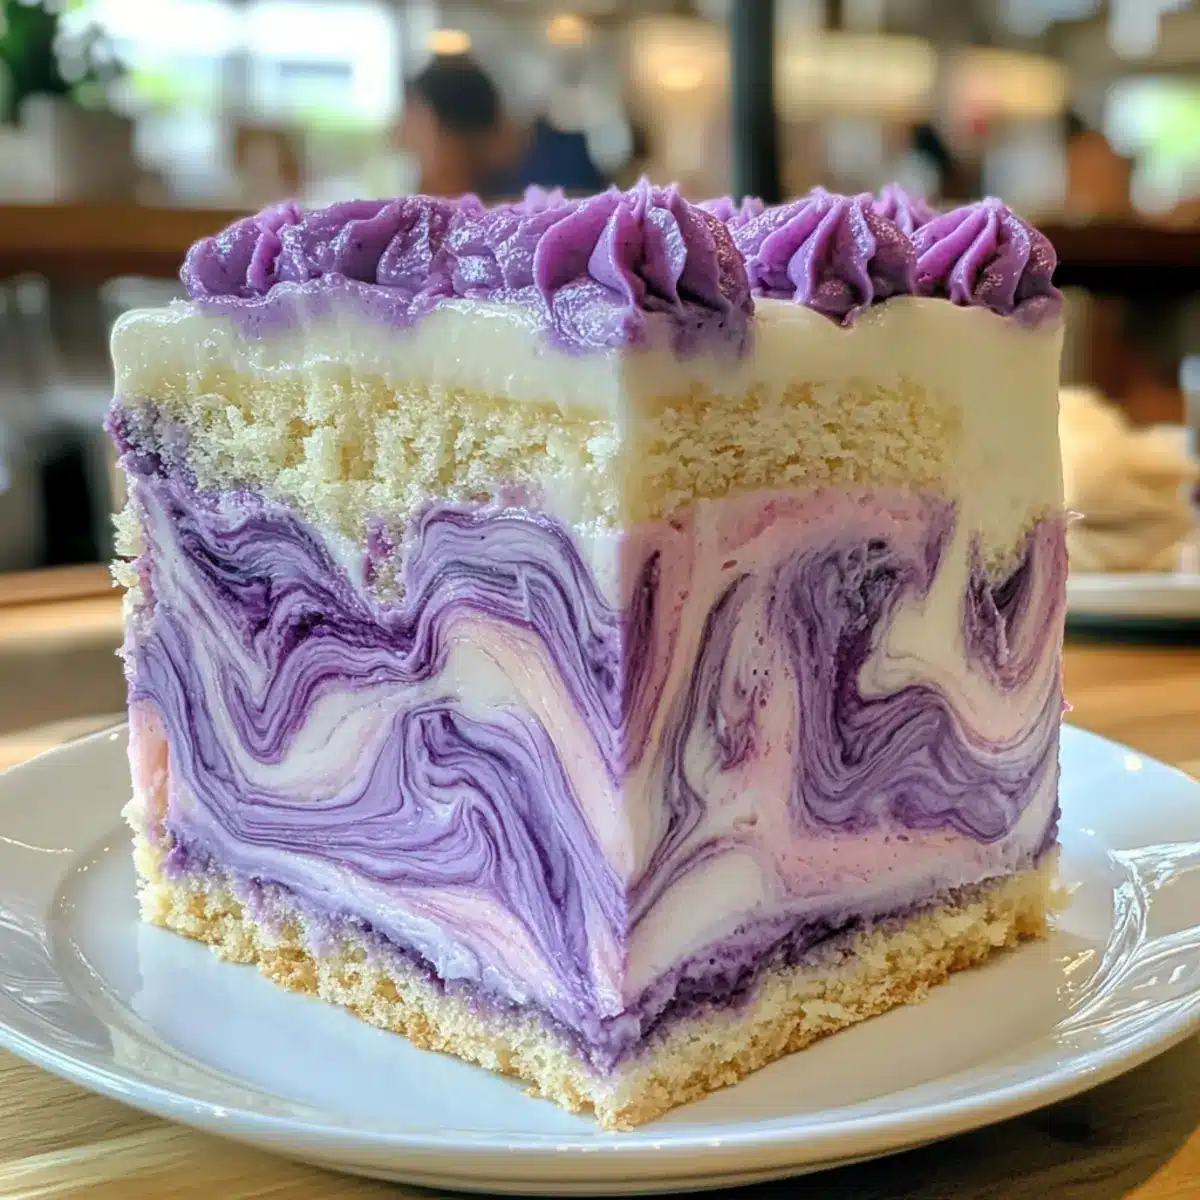
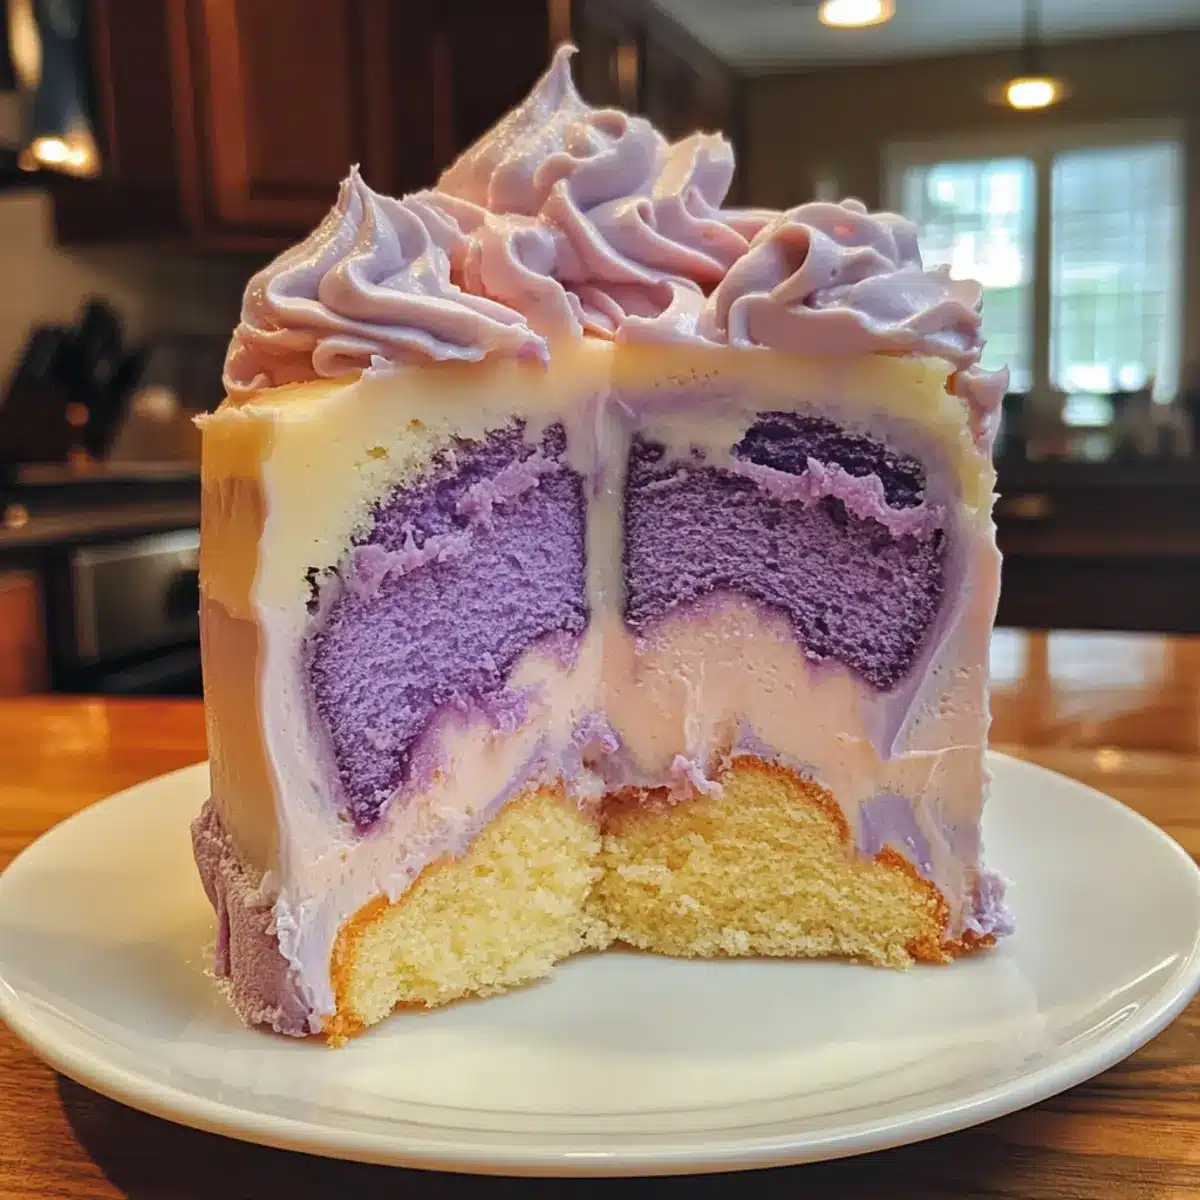
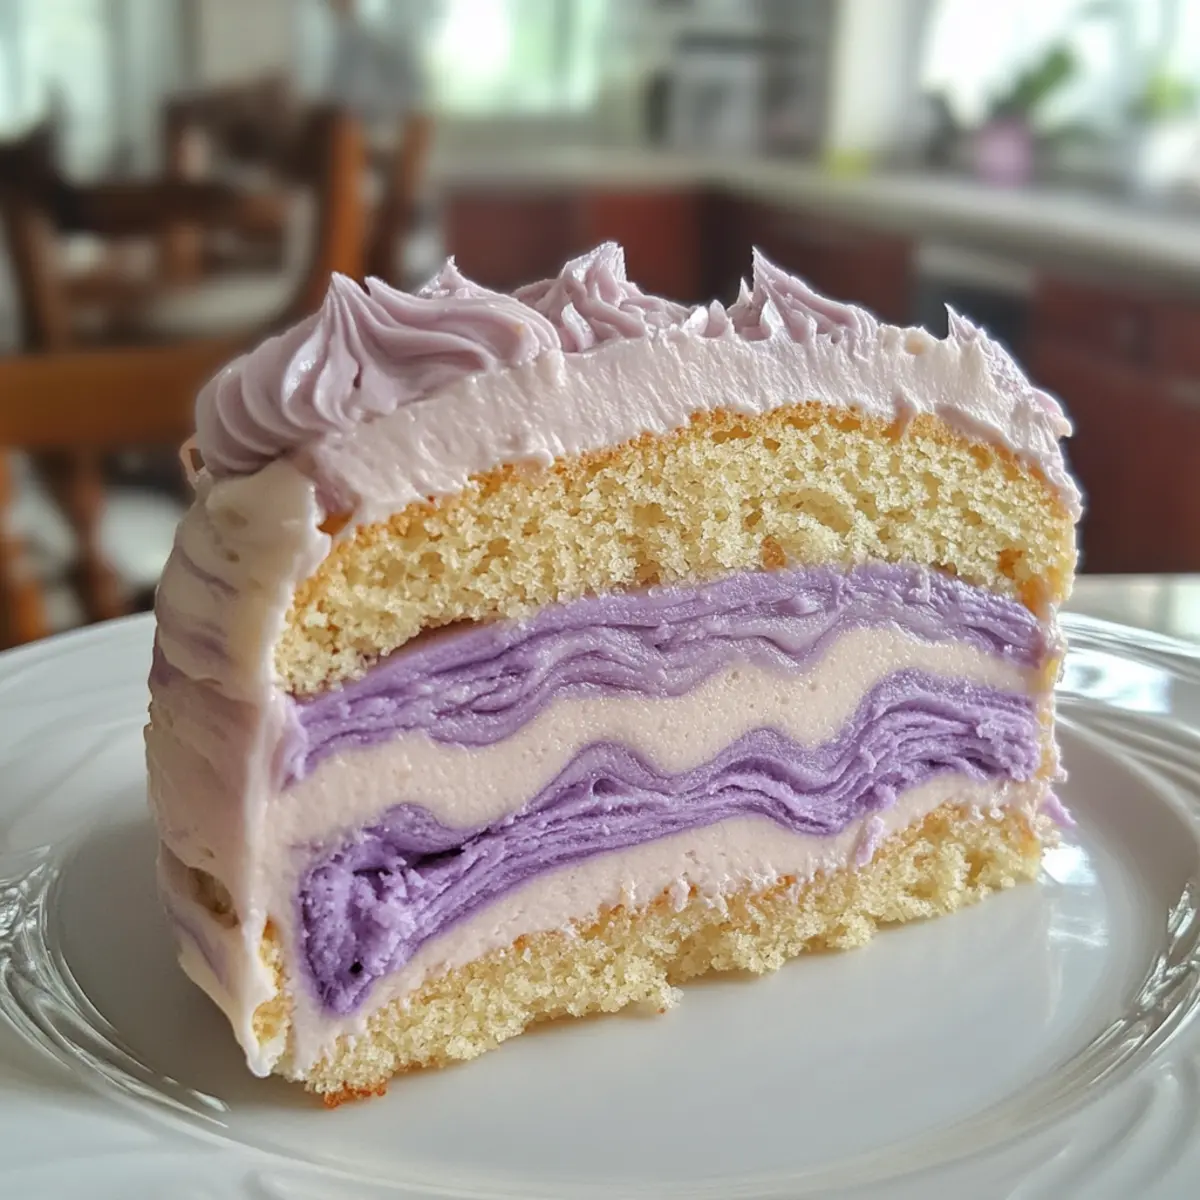
As I took my first bite of the Taro Ube Cloud Cake, an unexpected wave of nostalgia washed over me, transporting me straight to a vibrant Filipino fiesta. This delicate chiffon cake beautifully marries the nutty essence of taro with the sweet, earthy notes of ube, creating a dessert that is not only a feast for the eyes but also a joy for the palate. What makes this recipe so delightful is its light and airy texture, making it a perfect addition to any celebration without the heavy aftermath that often accompanies indulgent desserts. Plus, it’s a make-ahead gem—ideal for easing the stress of entertaining. Curious how to whip up this stunning treat? Let’s dive in!
Why is Taro Ube Cloud Cake a Must-Try?
Exquisite Flavors: The unique combination of nutty taro and sweet ube creates a delightful flavor profile that piques curiosity and tantalizes taste buds.
Light as Air: This chiffon cake boasts a fluffy texture that feels like a cloud, making each bite an ethereal experience that’s perfect for celebrations.
Make-Ahead Magic: Prepare this stunning dessert in advance to simplify your hosting duties, freeing up time for more important moments with family and friends.
Versatile Variations: Experiment with exciting additions like macapuno or a matcha swirl for a personal touch that suits any occasion. Looking for more inspiration? Try pairing it with Buttermilk Pancakes Discover for a delightful brunch spread!
Crowd Pleaser: Its beautiful pastel lavender hue and intriguing flavors make this cake a showstopper at gatherings, ensuring your guests will be talking about it long after the party ends.
Taro Ube Cloud Cake Ingredients
For the Cake
• Cake Flour – Provides the lightweight structure that is essential for a fluffy chiffon cake.
• Cooked, Mashed Taro – Adds moisture and a unique nutty flavor; ensure it’s cooled before mixing.
• Ube Halaya (ube jam) – Delivers rich sweetness and vibrant color; can be swapped with ube powder dissolved in milk.
• Eggs (separated) – Crucial for lift; separate yolks and whites carefully to stabilize your meringue.
• Granulated Sugar – Sweetens the cake and stabilizes the meringue; use in two stages for optimal results.
• Whole Milk – Keeps the cake moist; for a twist, substitute half with coconut milk.
• Vegetable Oil – Adds tenderness and moisture; use a neutral oil or coconut oil for a hint of flavor.
• Vanilla Extract – Infuses warmth and a comforting depth to your cake.
• Cream of Tartar – Ensures your egg whites achieve stiff peaks for that perfect light texture.
• Salt – Enhances all the flavors, making your Taro Ube Cloud Cake truly delicious.
For the Topping
• Heavy Cream – Whips up nicely to create a luscious and creamy topping.
• Ube Halaya – Folded into the whipped cream for a delightful and visually appealing finish.
Each ingredient plays a significant role in crafting the lovely Taro Ube Cloud Cake, so choose the best quality for the finest results!
Step‑by‑Step Instructions for Taro Ube Cloud Cake
Step 1: Preheat the Oven
Begin by preheating your oven to 325°F (163°C). Prepare a 9-inch chiffon or angel-food cake pan by leaving it ungreased; this will help the cake rise beautifully during baking. Place your pan in a convenient spot, as you’ll be pouring in the batter shortly.
Step 2: Prepare the Yolk Mixture
In a mixing bowl, whisk together the egg yolks, half of the granulated sugar, whole milk, vegetable oil, vanilla extract, cooked mashed taro, and ube halaya until the mixture is smooth and well blended. The vibrant colors should start to mingle beautifully, creating a pastel swirl that reflects the delightful Taro Ube Cloud Cake you are about to bake.
Step 3: Beat the Egg Whites
In a separate clean mixing bowl, use a hand mixer or stand mixer to whisk the egg whites along with a pinch of salt. Start beating on medium speed until the mixture becomes foamy. Gradually add the remaining granulated sugar, continuing to beat until stiff peaks form, which should take around 3-5 minutes. The meringue should be glossy and hold its shape firmly.
Step 4: Combine Mixtures
To lighten the yolk mixture, fold in one-third of the beaten egg whites. Use a spatula to gently incorporate them without deflating the mixture. Next, gradually fold in the remaining egg whites, ensuring that no streaks remain and that the light texture of your Taro Ube Cloud Cake is preserved. The batter should look airy and well-combined.
Step 5: Bake the Cake
Pour the batter into your prepared chiffon pan, smoothing the top with a spatula. Place the pan in the preheated oven and bake for 30-35 minutes. You’ll know it’s done when the cake is golden and gently springs back when touched. Avoid opening the oven door during baking to ensure a steady rise.
Step 6: Cool the Cake
Once baked, remove the cake from the oven and immediately invert the pan onto a wire rack or countertop. This cooling method helps maintain the cake’s height and airy texture. Allow it to cool completely in this upside-down position to prevent collapsing.
Step 7: Release and Top the Cake
After the cake has cooled completely, run a knife around the edges of the pan to gently release it. Carefully remove the cake from the pan and place it on a serving plate. In a separate bowl, whip the heavy cream until soft peaks form, then fold in additional ube halaya for flavor. Spread this luscious topping evenly over your Taro Ube Cloud Cake, ensuring every slice is decorated beautifully.
Expert Tips for Taro Ube Cloud Cake
• Perfect Egg Whipping: Be sure your bowl is completely clean and free from grease when beating egg whites; any residue can hinder achieving the stiff peaks essential for a successful Taro Ube Cloud Cake.
• Gentle Folding: When combining the meringue with the yolk mixture, fold gently to retain the airiness in the batter. Over-mixing can lead to a dense cake, which we want to avoid.
• Cooling Method: Invert the cake to cool it upside down in the pan; this helps maintain its height and fluffy structure. Don’t skip this step!
• Flavor Variations: Feel free to experiment! Adding coconut milk in place of half the regular milk gives an exotic twist, enhancing the flavor profile of your Taro Ube Cloud Cake.
• Quality Ingredients: Use high-quality ube halaya and freshly cooked taro for the best flavor. Their quality will make a noticeable difference in the final taste of your cake.
• Test for Doneness: Avoid opening the oven door too early, but check the cake towards the end of baking. It should be golden and spring back when touched.
What to Serve with Taro Ube Cloud Cake?
Indulging in a slice of this pastel dessert sparks the imagination of delightful pairings that can turn your gathering into a culinary celebration.
-
Coconut Whipped Cream:
Light and airy, this whipped topping enhances the tropical notes of the cake, making every bite feel like a mini-vacation. -
Fresh Fruit Salad:
A medley of colorful, juicy fruits adds a refreshing contrast, balancing the cake’s sweetness with bright acidity and natural flavors. -
Jasmine Tea:
Fragrant and soothing, a warm cup of jasmine tea will perfectly complement the delicate flavors of the Taro Ube Cloud Cake, enhancing its ethereal experience. -
Matcha Green Tea Ice Cream:
The earthy bitterness of matcha ice cream pleasantly contrasts with the sweet, nutty notes of the cake, offering a delightful taste adventure. -
Toasted Coconut Flakes:
Sprinkling toasted coconut on top adds texture and an aromatic crunch, perfectly balancing the smoothness of the cake. -
Mango Sorbet:
This naturally fruity, frozen dessert melts into the background of the cake’s flavors, adding a cool, creamy twist that everyone will love. -
Birthday Bubbly:
Celebrate with a glass of sparkling wine or champagne for an elegant touch that elevates the occasion, pairing harmoniously with the cake’s lightness. -
Ube Halaya Drizzle:
A drizzle of extra ube halaya on each slice enhances the dessert experience, providing an additional layer of sweet, earthy goodness to savor.
Taro Ube Cloud Cake Variations
Feel free to make this Taro Ube Cloud Cake your own with these fun variations that will delight your taste buds!
-
Macapuno Addition: Fold in chopped macapuno for delightful bites of texture throughout the cake. The sweet, chewy strands complement the airy cloud-like cake perfectly, making it even more indulgent.
-
Cheesy Twist: Add grated sharp cheddar on top for a sweet-savory contrast. The creaminess of the cheese balances the sweetness of the cake, creating a unique flavor experience that’s both comforting and unexpected.
-
Matcha Swirl: Introduce matcha powder into the yolk mixture for an enchanting green swirl of flavor and color. The earthiness of matcha enhances the sweetness of the ube, offering a lovely visual and palate surprise that feels fresh and vibrant.
-
Coconut Flavor: Garnish with toasted coconut flakes to bring an added crunch and tropical flair. This delightful addition pays homage to the cake’s Filipino roots and provides a delicious texture contrast to the fluffy layers.
-
Vegan Variation: Replace eggs with aquafaba from chickpeas and use a dairy-free milk alternative. Baking up a vegan Taro Ube Cloud Cake ensures everyone can enjoy this treat at your next gathering.
-
Chocolate Drizzle: Drizzle a rich chocolate ganache on top for an elegant finish. The chocolate’s bittersweetness creates a beautiful contrast with the sweet cake and will satisfy any chocolate lover’s craving.
-
Fruit Pairing: Serve with fresh mango or berries for a refreshing side. These fruits bring a lovely acidity that cuts through the sweetness, enhancing each bite.
-
Spice it Up: Incorporate a pinch of cinnamon into the batter or the whipped cream topping. The warm spice elevates the overall flavor profile, making your cake reminiscent of cozy gatherings.
If you’re looking for even more ideas, consider pairing this whimsical dessert with some delectable Cookies Cream Cheesecake for a decadent treat that your guests will love!
How to Store and Freeze Taro Ube Cloud Cake
Fridge: Store leftovers tightly covered with plastic wrap; this will keep your Taro Ube Cloud Cake fresh for up to 3 days while preserving its delightful texture.
Freezer: For longer storage, wrap individual slices in plastic wrap and then in aluminum foil, freezing them for up to 1 month. Thaw slices in the fridge overnight before serving.
Reheating: If you prefer a warm slice, microwave on low for about 10-15 seconds, just until warmed through, ensuring the airy texture remains intact.
Serving: Always let frozen slices cool to room temperature before serving to enjoy the cake’s full flavor and delicate qualities.
Make Ahead Options
These Taro Ube Cloud Cake preparations are perfect for busy home cooks looking to simplify their meal planning! You can make the cake itself up to 3 days ahead of time; just ensure it’s completely cooled before wrapping it tightly in plastic wrap. The ube halaya topping can also be prepared in advance and refrigerated for up to 24 hours. When you’re ready to serve, simply whip the heavy cream, fold in the ube halaya, and top the cake for that finishing touch. This way, you’ll have a stunning dessert ready with minimal effort, so you can focus on enjoying your time with family and friends!
Taro Ube Cloud Cake Recipe FAQs
How do I choose ripe taro for this recipe?
Absolutely! Look for taro that feels firm and has smooth skin without any dark spots or blemishes. The heavier the taro, the better, as it indicates a starchy texture. If you notice any soft spots, it may be past its prime.
What’s the best way to store Taro Ube Cloud Cake?
To keep your cake fresh, cover it tightly with plastic wrap and store it in the refrigerator for up to 3 days. This protects its delicate texture and flavor. For longer storage, follow the freezing instructions below.
Can I freeze Taro Ube Cloud Cake?
Very! To freeze, slice the cake into individual portions and wrap each slice tightly in plastic wrap, followed by aluminum foil. This prevents freezer burn and maintains quality for up to 1 month. When you’re ready to enjoy, thaw slices in the fridge overnight.
What should I do if my cake is dense?
If your Taro Ube Cloud Cake turns out dense, it may be due to under-beaten egg whites or over-mixing the batter. Ensure you whip your egg whites to stiff peaks and fold them gently into the yolk mixture. Remember, the key here is to preserve that airy texture for the cloud-like effect!
Are there any dietary considerations for this cake?
Definitely! This recipe is vegetarian-friendly, but if you’re cooking for someone with allergies, keep in mind the eggs, milk, and oil used. To make it gluten-free, swap in a 1:1 gluten-free baking blend containing xanthan gum. If you’re serving pets, ensure nobody sneaks a bite, as some human foods can be harmful to them!
Can I make variations for Taro Ube Cloud Cake?
Looking to switch things up? Absolutely! You can fold in chopped macapuno for a chewy texture or add matcha powder to the yolk mixture for a beautiful green swirl. It’s a fun way to make this cake your own and cater to different tastes!
Taro Ube Cloud Cake: A Dreamy Delight for Sweet Lovers
Ingredients
Equipment
Method
- Preheat your oven to 325°F (163°C) and prepare a 9-inch chiffon or angel-food cake pan ungreased.
- In a mixing bowl, whisk together egg yolks, half of the sugar, milk, oil, vanilla, taro, and ube halaya until smooth.
- In a separate bowl, beat egg whites with a pinch of salt until foamy, then gradually add remaining sugar until stiff peaks form.
- Fold one-third of the egg whites into the yolk mixture, then gradually fold in remaining egg whites gently.
- Pour batter into the pan and bake for 30-35 minutes until golden and springs back when touched.
- Remove cake from the oven and invert onto a wire rack immediately to cool completely.
- Once cooled, run a knife around edges to release, then whip cream and fold in ube halaya for topping.