

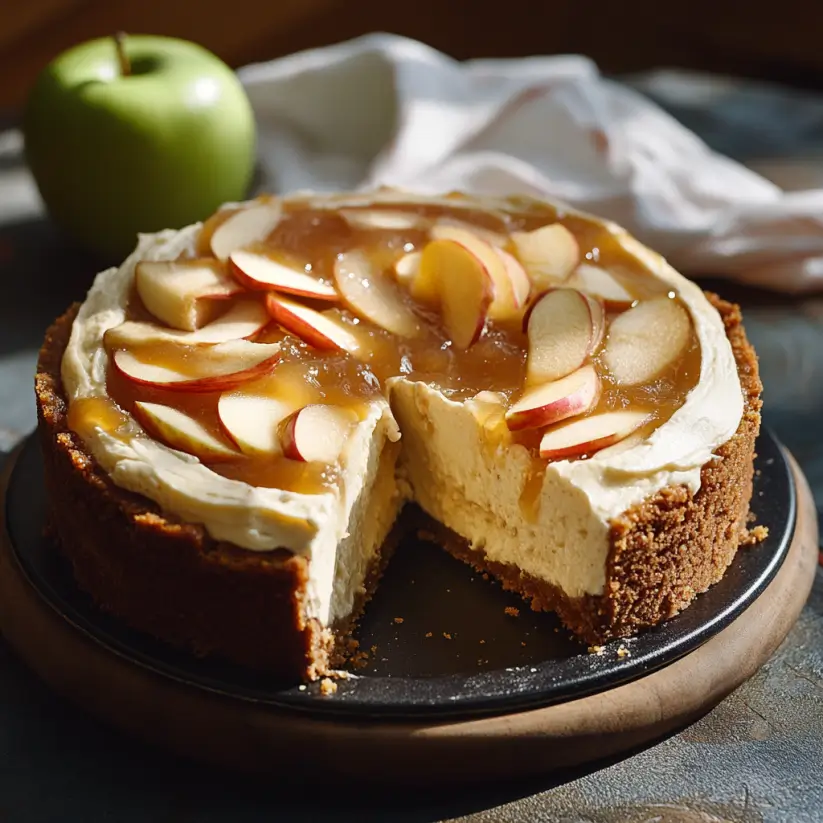
Introduction to Apple Cider Cheesecake
As the leaves turn and the air gets crisp, there’s something magical about the flavors of fall. One of my favorite ways to embrace this season is with a slice of apple cider cheesecake. This creamy dessert captures the essence of autumn, blending the warmth of spices with the sweetness of apple cider. Whether you’re looking to impress guests at a gathering or simply treat yourself after a long day, this recipe is a delightful solution. It’s easy to make and even easier to enjoy, making it the perfect addition to your fall dessert repertoire.
Why You’ll Love This Apple Cider Cheesecake
This apple cider cheesecake is a game-changer for your dessert table. It’s not just about the taste—though, trust me, it’s heavenly. The ease of preparation means you can whip it up even on a busy weeknight. Plus, the rich, creamy texture paired with the warm spices will have everyone asking for seconds. It’s a comforting slice of fall that brings smiles and warmth to any gathering.
Ingredients for Apple Cider Cheesecake
Gathering the right ingredients is the first step to creating your apple cider cheesecake masterpiece. Here’s what you’ll need:
- Graham cracker crumbs: These form the base of your crust, providing a sweet and crunchy texture.
- Unsalted butter: Melted butter binds the crumbs together, adding richness to the crust.
- Granulated sugar: A touch of sweetness enhances both the crust and the filling.
- Cream cheese: The star of the show! It gives the cheesecake its creamy, smooth texture.
- Vanilla extract: This adds a warm, aromatic flavor that complements the apple cider beautifully.
- Eggs: They help set the cheesecake, giving it structure and a rich mouthfeel.
- Apple cider: The key ingredient that infuses the cheesecake with that delightful fall flavor.
- Ground cinnamon: A classic spice that brings warmth and depth to the dessert.
- Ground nutmeg: Just a pinch adds a hint of earthiness, enhancing the overall flavor profile.
- All-purpose flour: This helps stabilize the filling, ensuring a perfect texture.
For those looking to elevate the flavor, consider adding a tablespoon of caramel sauce to the batter. If you want a spiced crust, a teaspoon of ground cinnamon mixed into the graham cracker crumbs can do wonders. You can find all the exact measurements at the bottom of the article, ready for printing!
How to Make Apple Cider Cheesecake
Creating your apple cider cheesecake is a rewarding experience. Follow these simple steps, and you’ll have a delicious dessert that captures the essence of fall. Let’s dive in!
Step 1: Preheat the Oven
Start by preheating your oven to 325°F. This step is crucial because it ensures even baking. A properly preheated oven helps the cheesecake set correctly, giving it that perfect creamy texture.
Step 2: Prepare the Crust
In a medium bowl, combine the graham cracker crumbs, melted butter, and sugar. Mix until everything is well blended. The mixture should resemble wet sand. Next, press this mixture firmly into the bottom of a 9-inch springform pan. Make sure it’s even; this will be the foundation of your cheesecake.
Step 3: Bake the Crust
Pop the crust into the oven and bake for about 10 minutes. You’ll know it’s done when it’s lightly golden and fragrant. Once baked, remove it from the oven and let it cool completely. This cooling step is essential before adding the filling.
Step 4: Make the Cheesecake Filling
In a large mixing bowl, beat the softened cream cheese with the granulated sugar until smooth and creamy. This step is vital; a well-mixed filling ensures a silky texture. Take your time here—no one likes a lumpy cheesecake!
Step 5: Add Flavorings
Now, add the vanilla extract and mix until combined. Then, add the eggs one at a time, mixing well after each addition. In a separate bowl, combine the apple cider, ground cinnamon, ground nutmeg, and flour. Gradually add this mixture to the cream cheese blend, ensuring everything is well incorporated.
Step 6: Pour and Bake
Carefully pour the cheesecake filling over the cooled crust in the springform pan. Spread it evenly with a spatula. Bake for 50-60 minutes, or until the center is set but still slightly jiggly. This slight jiggle is a sign of a perfectly baked cheesecake!
Step 7: Cooling Process
Once baked, turn off the oven and let the cheesecake cool inside with the door slightly ajar for about an hour. This gradual cooling helps prevent cracks. After that, refrigerate the cheesecake for at least 4 hours, or overnight if you can wait. Chilling is key to achieving that rich, creamy texture.
Tips for Success
- Make sure your cream cheese is at room temperature for easy mixing.
- Don’t skip the cooling step in the oven; it helps prevent cracks.
- Use a water bath for extra moisture while baking, if desired.
- For a smoother filling, blend the mixture until completely lump-free.
- Top with whipped cream and a sprinkle of cinnamon for a beautiful presentation.
Equipment Needed
- 9-inch springform pan: Essential for easy removal of the cheesecake. A regular cake pan can work, but it may be harder to serve.
- Mixing bowls: Use a large bowl for the filling and a medium one for the crust.
- Electric mixer: A hand mixer or stand mixer makes beating the cream cheese a breeze.
- Spatula: Perfect for spreading the filling evenly over the crust.
- Measuring cups and spoons: Accurate measurements are key to a successful cheesecake.
Variations
- Caramel Apple Cider Cheesecake: Swirl in some caramel sauce into the filling for a rich, sweet twist.
- Gluten-Free Option: Substitute graham cracker crumbs with gluten-free cookies or almond flour for a gluten-free crust.
- Vegan Version: Use vegan cream cheese and flax eggs to create a plant-based cheesecake that everyone can enjoy.
- Spiced Pumpkin Addition: Mix in a half cup of pumpkin puree for a delightful pumpkin-apple fusion.
- Nutty Crust: Add crushed pecans or walnuts to the graham cracker crust for an extra crunch and flavor.
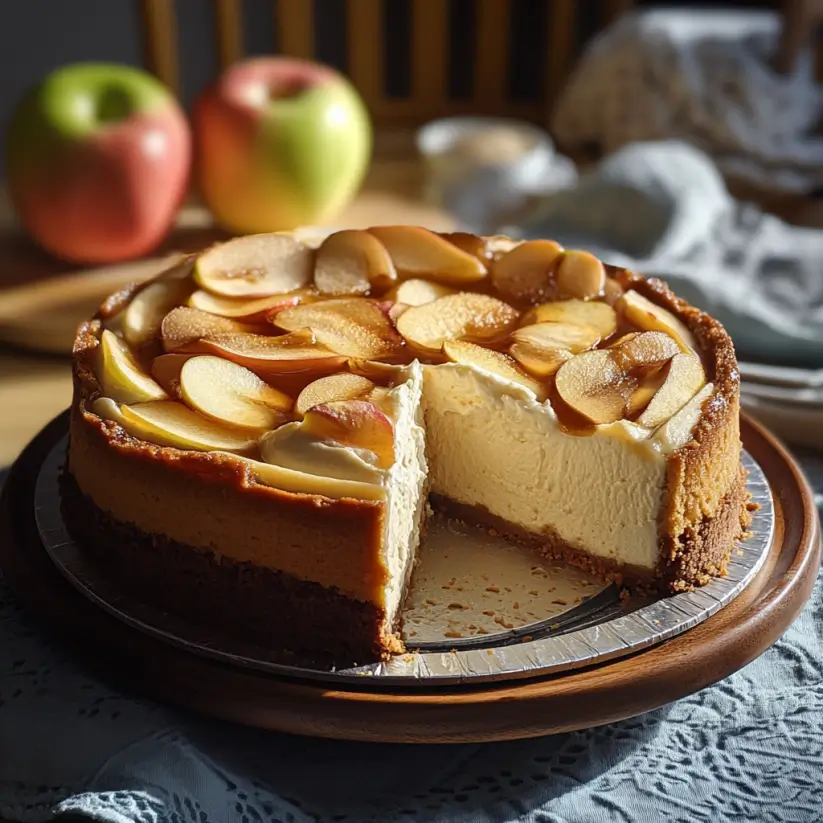
Serving Suggestions
- Pair your apple cider cheesecake with a dollop of freshly whipped cream for added richness.
- A drizzle of caramel sauce on top enhances the fall flavors beautifully.
- Serve with a side of spiced apple cider or a warm cup of coffee.
- Garnish with thin apple slices or a sprinkle of cinnamon for a lovely presentation.
FAQs about Apple Cider Cheesecake
Can I make apple cider cheesecake ahead of time?
Absolutely! In fact, making it a day in advance allows the flavors to meld beautifully. Just be sure to refrigerate it properly to keep it fresh.
What can I use instead of cream cheese?
If you’re looking for a lighter option, you can try using Greek yogurt or a vegan cream cheese alternative. Just keep in mind that the texture and flavor may vary slightly.
How do I store leftover cheesecake?
Store any leftovers in an airtight container in the refrigerator. It should stay fresh for about 3-5 days, but trust me, it’s hard to resist finishing it sooner!
Can I freeze apple cider cheesecake?
Yes, you can freeze it! Wrap the cheesecake tightly in plastic wrap and then in aluminum foil. It can last up to 2 months in the freezer. Just thaw it in the fridge before serving.
What’s the best way to serve apple cider cheesecake?
For a delightful presentation, serve it chilled with a dollop of whipped cream and a sprinkle of cinnamon. A drizzle of caramel sauce adds an extra touch of indulgence!
Final Thoughts
Creating this apple cider cheesecake is more than just baking; it’s about embracing the flavors of fall and sharing joy with those you love. Each slice offers a creamy, spiced delight that warms the heart and brings smiles to the table. Whether it’s a cozy family dinner or a festive gathering, this dessert is sure to impress. The process is simple, yet the results are nothing short of spectacular. So, roll up your sleeves, gather your ingredients, and let the aroma of apple cider and spices fill your kitchen. You won’t regret it!
Apple Cider Cheesecake: A Delightfully Creamy Recipe
Ingredients
Method
- Preheat the oven to 325°F.
- In a medium bowl, combine the graham cracker crumbs, melted butter, and 2 tablespoons of sugar. Mix until well combined.
- Press the mixture firmly into the bottom of a 9-inch springform pan to form the crust. Bake for 10 minutes, then remove from the oven and let cool.
- In a large mixing bowl, beat the softened cream cheese with 1 cup of sugar until smooth and creamy.
- Add the vanilla extract and mix until combined.
- Add the eggs one at a time, mixing well after each addition.
- In a separate bowl, combine the apple cider, ground cinnamon, ground nutmeg, and flour.
- Gradually add this mixture to the cream cheese mixture, blending until smooth and well combined.
- Pour the cheesecake filling over the cooled crust in the springform pan.
- Bake for 50-60 minutes, or until the center is set and slightly jiggly.
- Turn off the oven and let the cheesecake cool in the oven with the door slightly ajar for about 1 hour.
- Once cooled, refrigerate the cheesecake for at least 4 hours or overnight before serving.
Nutrition
Notes
- For a richer flavor, consider adding a tablespoon of caramel sauce to the cheesecake batter.
- You can also top the cheesecake with whipped cream and a sprinkle of cinnamon before serving for an extra touch.
- If you prefer a spiced crust, try adding 1 teaspoon of ground cinnamon to the graham cracker crust mixture.