

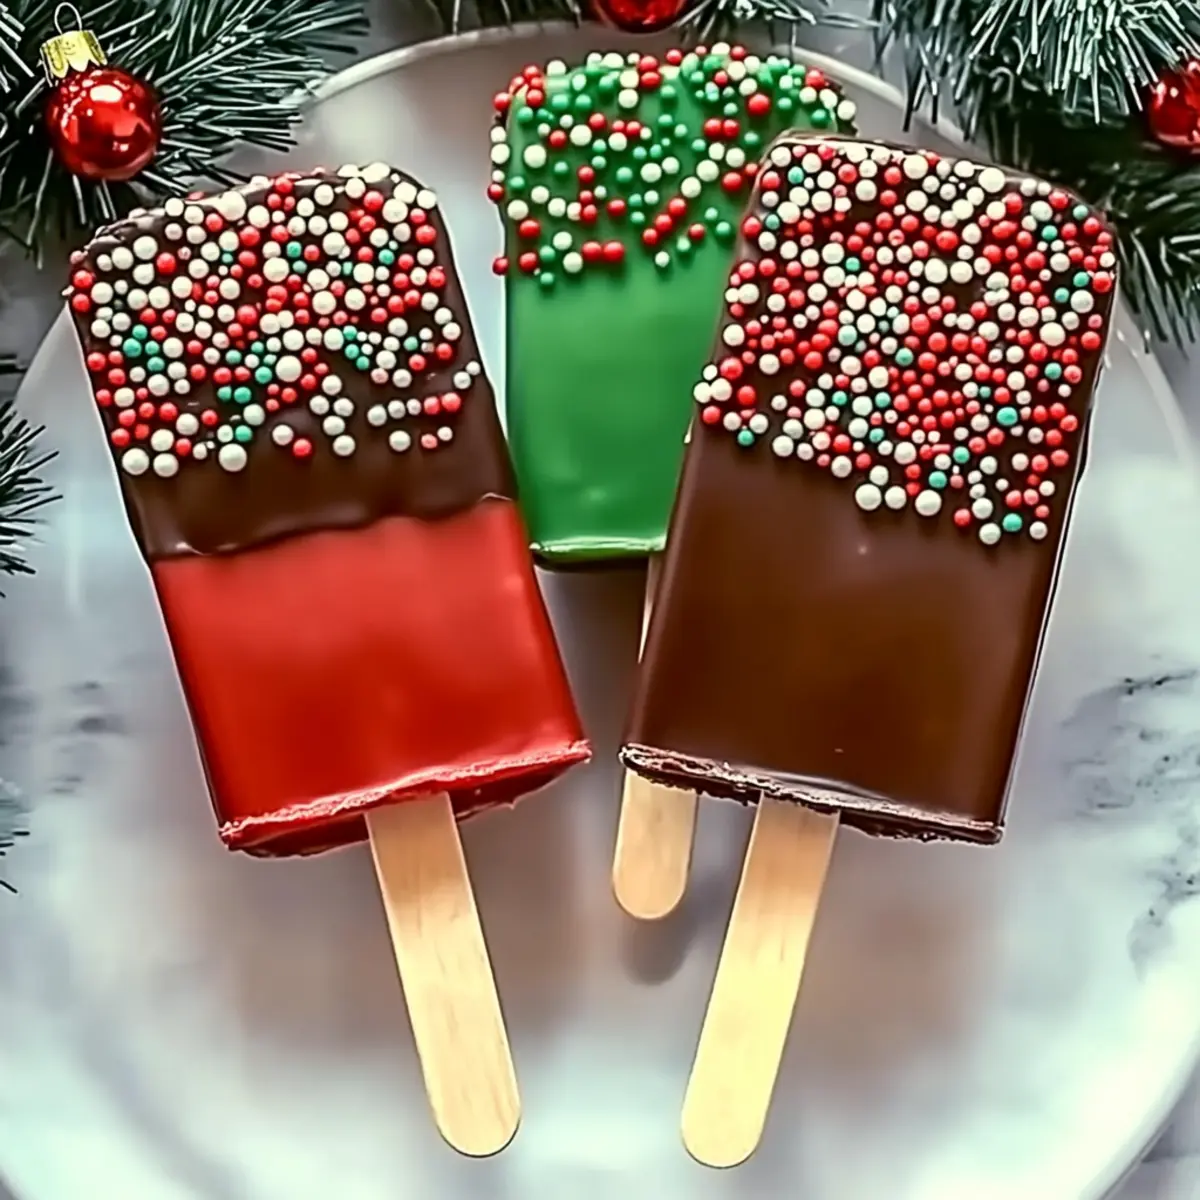
As the holiday season approaches, the kitchen becomes a symphony of scents and delights, and nothing captures that festive spirit quite like 3-Ingredient Christmas Cakesicles. These chocolate-covered treats are more than just a pop of color on your dessert table; they’re a delightful mashup of moist cake and sweet candy coating that is simply irresistible. With just three easy-to-find ingredients, this recipe opens the door to creativity, offering gluten-free and vegan adaptations that everyone can enjoy. The best part? They come together in minutes and are perfect for sharing—making them a wonderful alternative to store-bought sweets. Imagine gifting these to friends or serving them at holiday gatherings, sparking joy and sweet conversations. Are you ready to make your holidays a little sweeter with these festive treats?
Why are Christmas Cakesicles a must-try?
Rapid Preparation: With only three ingredients, you can whip up a delightful treat in no time. This is perfect for busy chefs looking to bring festive cheer without the stress!
Crowd Pleaser: Their charming appearance and sweet flavor make them an instant hit at any gathering. Picture a table filled with smiles as guests savor these delicious cakesicles!
Customizable Options: Whether you prefer gluten-free or vegan, this recipe has you covered. You can even experiment with various flavors and decorations, making each batch uniquely yours.
Fun for All Ages: Get the family involved in decorating these treats! It’s a wonderful way to bond and create festive memories together.
Perfect for Gifting: Wrap up these festive delights and share them with friends, spreading joy and sweetness this season. For more delightful holiday treats, check out our delicious cookie recipes!
Christmas Cakesicles Ingredients
For the Cakes:
- Crumpled Cake – Gives the cakesicles moisture and structure; leftover cake works perfectly for this.
- Frosting – Acts as the binding agent to hold the cake together; consider flavored frosting to enhance the overall taste.
For the Coating:
- Colored Candy Melts – Adds a festive flair and flavor; for a different twist, use dark or white chocolate instead.
- Vegetable Oil or Coconut Oil – Used to smooth out the candy melts for easy coating; coconut oil provides a subtle flavor enhancement.
For Assembly:
- Popsicle Sticks – Essential for handling the cakesicles; ensure they’re securely placed for easy dipping and munching.
- Ice Cream Silicone Molds – Key for shaping cakesicles and making them easy to remove; choose festive shapes to boost visual appeal.
Decoration (Optional):
- Sprinkles or Crushed Candy Canes – Perfect for adding color and crunch; customize according to your holiday theme.
- Piping Bags – Great for drizzling extra chocolate for a professional touch in your cakesicle designs.
Now you’re all set to create your Christmas Cakesicles and spread delicious cheer this holiday season!
Step‑by‑Step Instructions for Christmas Cakesicles
Step 1: Prepare the Dough
Begin by crumbling your leftover cake into a large mixing bowl until you achieve a fine texture. Add flavored frosting to the crumbled cake, mixing thoroughly until a moist dough forms that can be easily molded. This step ensures the cake remains deliciously soft—a perfect base for your Christmas Cakesicles!
Step 2: Melt the Candy Coating
In a microwave-safe bowl, combine your colored candy melts with a splash of vegetable or coconut oil. Heat the mixture in 30-second intervals, stirring between each until smooth and glossy, about 1-2 minutes in total. This melted candy coating will provide a delightful and festive look for your cakesicles.
Step 3: Coat Molds
Pour a thin layer of the melted candy mixture into the ice cream silicone molds, tilting them to ensure the candy coats the sides evenly. Use a spatula if needed to spread the coating. Place the molds in the freezer for 5-10 minutes until the coating is slightly firm to the touch, making way for the next step.
Step 4: Insert Sticks
Once the initial candy layer is set but not frozen solid, carefully press popsicle sticks into the centers of each mold. Ensure they’re positioned securely to support the cakesicles once filled. Return the molds to the freezer for another 10-15 minutes to fully set the coating before adding the cake dough.
Step 5: Add Dough
Take the molds out of the freezer and fill each one with the prepared cake dough. Gently press the dough down into the molds to avoid air pockets and ensure even shapes, but be careful not to overfill, as this will make sealing difficult later.
Step 6: Seal and Freeze
Pour the remaining melted candy coating over each filled mold, ensuring the dough is completely covered. This step locks in the flavors of your Christmas Cakesicles. Return the molds to the freezer, allowing them to set fully for 25-30 minutes until the candy coating is hard and secure.
Step 7: Unmold
Once the cakesicles have set, gently flex the silicone molds to release each cakesicle. The flexibility of the molds makes this process easier, and you’ll be left with beautifully shaped treats ready for decoration.
Step 8: Decorate
For the finishing touch, melt any leftover candy coating and drizzle it over the cakesicles using a piping bag for precision. Sprinkle with festive decorations like crushed candy canes or colorful sprinkles, adding a personal flair to each Christmas Cakesicle. Enjoy your festive creations!
Expert Tips for Christmas Cakesicles
-
Moisture Matters: Use leftover cake that’s moist to prevent crumbling. Dry cake won’t hold together, ruining those festive vibes!
-
Silicone Molds: Opt for flexible silicone molds for easier unmolding. They help retain the shape of your Christmas Cakesicles perfectly.
-
Melt Method: Melt candy melts in 30-second intervals to avoid burning. If they become too thick, add a teaspoon of oil to restore smoothness.
-
Mind the Fill: Avoid overfilling molds with cake dough. Too much can lead to messy cakesicles and trouble sealing them with the candy coating.
-
Freeze Time: Stick to the recommended freeze times. Proper chilling is crucial for the candy coating to harden well and maintain the treats’ integrity.
Storage Tips for Christmas Cakesicles
-
Room Temperature: Keep Christmas Cakesicles at room temperature for up to 3 days. Ensure they are placed in an airtight container to maintain freshness and prevent drying out.
-
Fridge: If stored in the refrigerator, these treats can last for up to 2 weeks. Use a covered container to protect them from absorbing any fridge odors.
-
Freezer: For longer storage, freeze the cakesicles for up to 3 months. Place them in an airtight freezer bag or container. Allow them to thaw at room temperature for a few minutes before serving.
-
Reheating: There’s no need to reheat these delicate desserts; simply enjoy them cold!
Make Ahead Options
These Christmas Cakesicles are a fantastic choice for meal prep, allowing you to enjoy the festive flavors without the last-minute rush. You can prepare the cake dough and mold them into shapes up to 24 hours in advance—simply store them tightly wrapped in the refrigerator to maintain their moisture and flavor. Additionally, you can melt the candy coating ahead of time; just refrigerate it until you’re ready to use, gently reheating it if needed. When you’re ready to serve, simply dip the cakesicles in the coating and decorate them with your favorite sprinkles. This way, you ensure delightful treats that are just as delicious, perfect for saving time during the busy holiday season!
Christmas Cakesicles Variations & Substitutions
Feel free to get creative and make these delightful treats uniquely yours with a few easy swaps!
-
Gluten-Free: Use a gluten-free cake mix or flour blend to accommodate dietary needs. This way, everyone can indulge in the festive fun!
-
Vegan Delight: Substitute the frosting and candy melts with vegan options for a plant-based treat. This ensures everyone can enjoy the sweetness of the season.
-
Flavor Boost: Add flavor extracts like almond or vanilla to your dough for a delightful twist. The extra aroma will elevate the cakesicles to a whole new level!
-
Nutty Crunch: Incorporate crushed nuts or cookies into the dough for added texture. Imagine the satisfying crunch amidst the soft cake!
-
Spiced Seasonal Touch: Use spiced cake mixes or add cinnamon and nutmeg to the dough for a cozy, holiday flavor. The warm spices will wrap you in a comforting embrace.
-
Festive Mold Shapes: Experiment with different festive mold shapes such as stars or trees to match your holiday decorations. Your presentation will wow your guests!
-
Creative Coatings: Swap colored candy melts for dark or white chocolate depending on your preference. Each variety brings a different flavor and visual appeal to your cakesicles.
-
Decorative Toppings: Use crushed candy canes, dried fruits, or even edible glitter for a dazzling finish. Add these personal touches to wow your family and friends!
These variations not only accommodate different tastes but also open up a world of exciting flavor combinations. For more inspiration on dessert ideas, check out our delightful cookie recipes!
What to Serve with Christmas Cakesicles?
Get ready to delight your holiday guests with a complete dessert spread that pairs perfectly with your festive treats.
- Creamy Hot Chocolate: Rich and velvety, hot chocolate adds warmth and complements the sweet chocolate coating of the cakesicles.
- Spiced Sugar Cookies: These soft, spiced treats bring a classic holiday flavor that balances the sweet cake pops beautifully.
- Fruit Platter: A colorful assortment of fresh fruits offers a refreshing contrast to the indulgence of cakesicles. Think tart berries and creamy bananas!
- Eggnog: This classic holiday drink, creamy and spiced, brings festive cheer and pairs perfectly with the sweet cakesicles. It’s a delightful twist to your dessert experience!
- Gingerbread Men: With their warm spices, these cookies create a nostalgic pairing that echoes holiday traditions, perfect for decorating the table.
- Peppermint Bark: This crunchy, chocolatey treat adds seasonal flair and a refreshing minty taste that harmonizes with the cakesicles’ flavors.
- Vanilla Ice Cream: A scoop of creamy vanilla ice cream serves as a luscious base, allowing cakesicles to shine with their vibrant textures.
- Chai Tea: The warmth and spices in chai tea create a comforting aura, enhancing the savory-sweet experience of the cakesicles.
- Cranberry Sauce: This tangy sauce offers a surprising twist; its tartness complements the sweetness of the cakesicles wonderfully!
- Pecan Pie: A slice of classic pecan pie introduces nutty richness and provides a delightful contrast to the lightness of cakesicles.
Christmas Cakesicles Recipe FAQs
What type of cake should I use for Christmas Cakesicles?
Absolutely! It’s best to use moist cake for a delightful texture. You can opt for any leftover cake you have on hand—chocolate, vanilla, or even spiced. Just make sure it’s not too dry, as that can lead to crumbly cakesicles that don’t hold their shape.
How should I store my Christmas Cakesicles?
Very! You can store them at room temperature in an airtight container for up to 3 days. If you want to keep them fresh for longer, refrigerate them, where they’ll last up to 2 weeks. For the best long-term storage, freeze the cakesicles in an airtight container or bag for up to 3 months. Let them thaw at room temperature before serving!
Can I freeze Christmas Cakesicles?
Absolutely! After tightly wrapping or placing them in an airtight container, your Christmas Cakesicles can be frozen for up to 3 months. It’s best to let them thaw for a few minutes at room temperature before digging in, as this ensures the perfect texture and flavor.
What if my candy melts are too thick?
No worries! If you find your melted candy coating is too thick to work with, just add a teaspoon of vegetable or coconut oil to the mixture. Reheat it in 30-second intervals until smooth. This will bring back the desired consistency and make coating your cakesicles a breeze!
Are Christmas Cakesicles safe for my pet?
It’s always better to be safe! Christmas Cakesicles contain ingredients like chocolate and sugar, which can be harmful to pets. Keep these delightful treats out of reach of your furry friends to ensure their safety and well-being.
How can I adapt this recipe for dietary needs?
Very! To make gluten-free cakesicles, simply use a gluten-free cake mix for the base. For a vegan alternative, select a vegan frosting and candy melts to maintain that festive spirit while accommodating dietary preferences. You can also enhance the flavor with extracts like vanilla or almond for a unique touch!
Delicious Christmas Cakesicles: 3 Easy Ways to Festively Celebrate
Ingredients
Equipment
Method
- Prepare the Dough: Crumble leftover cake into a large bowl and mix with flavored frosting until a moist dough forms.
- Melt the Candy Coating: Combine candy melts with oil and microwave in 30-second intervals until smooth.
- Coat Molds: Pour melted candy into molds and freeze for 5-10 minutes until slightly firm.
- Insert Sticks: Press popsicle sticks into the centers of each mold and freeze for another 10-15 minutes.
- Add Dough: Fill molds with cake dough, pressing down gently to avoid air pockets.
- Seal and Freeze: Pour remaining candy coating over the dough and freeze for 25-30 minutes until hard.
- Unmold: Flex the silicone molds to release the cakesicles.
- Decorate: Drizzle leftover candy coating and add sprinkles or crushed candy canes for decoration.