

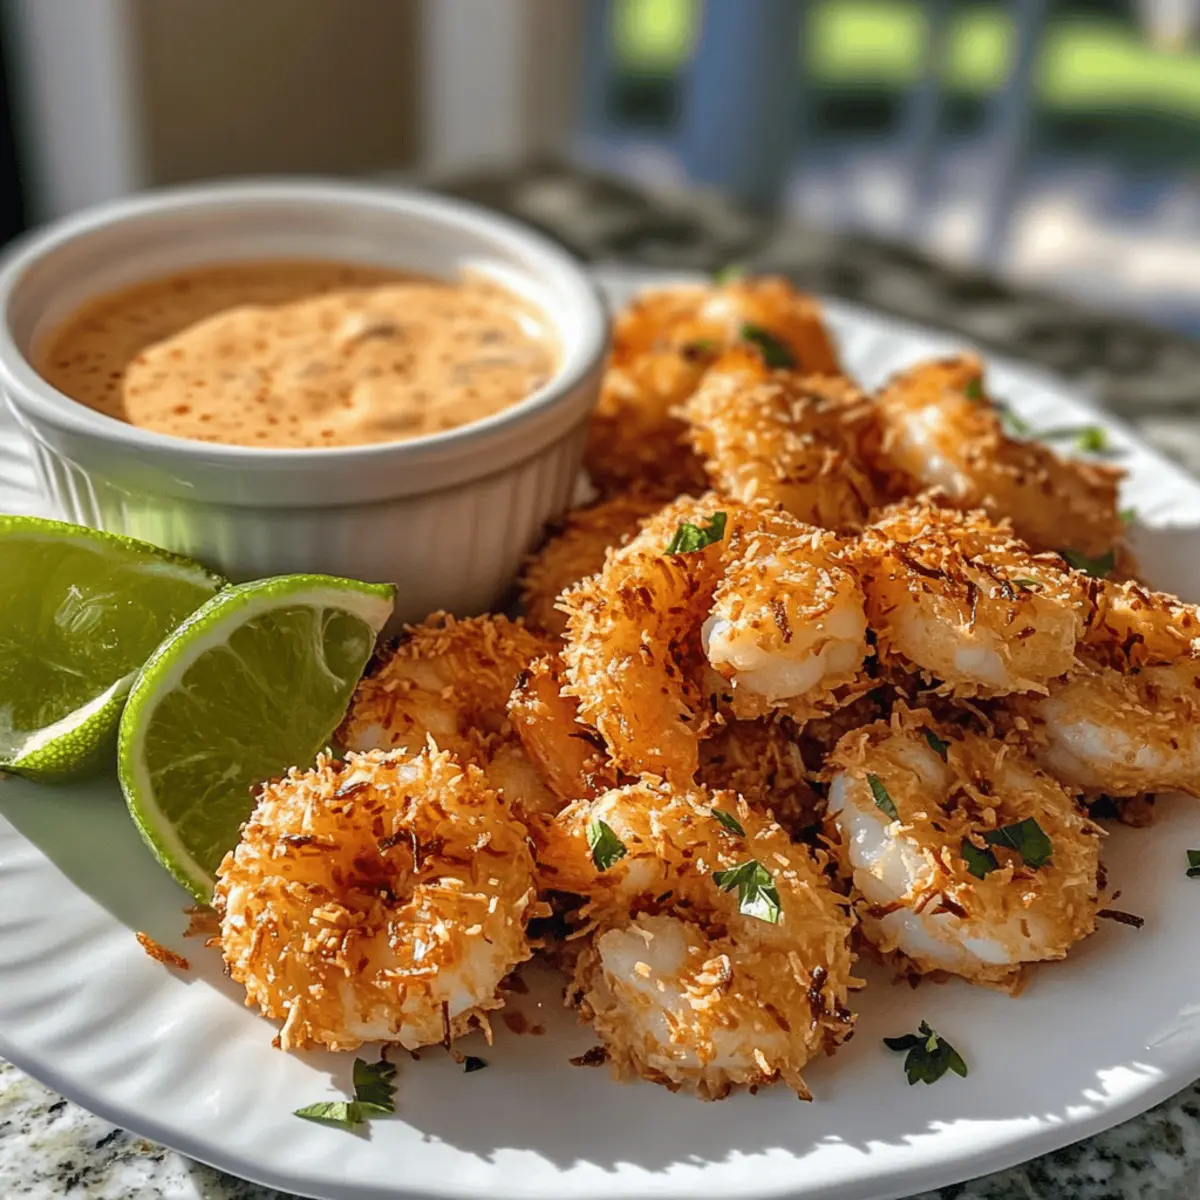
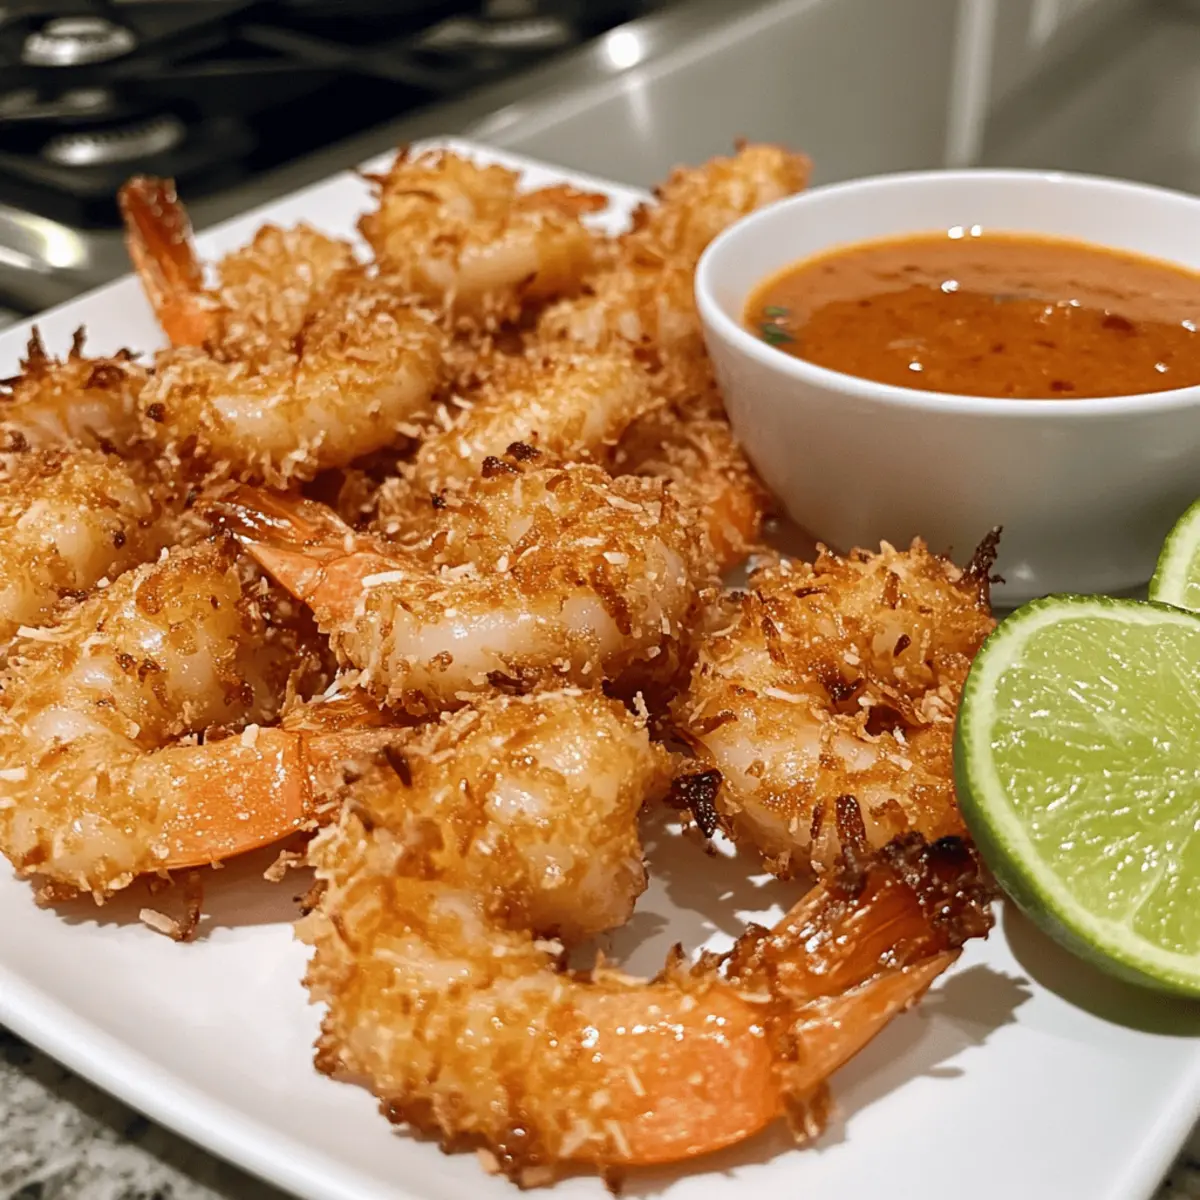
The aroma of frying shrimp wafted through the kitchen, transporting me straight to a sun-kissed beach. If you’re dreaming of a tropical getaway but stuck at home, my Crispy Coconut Shrimp with Sweet Chili Mayo will take you on a culinary escape! This delightful dish combines the amazing crunch of sweetened shredded coconut with a creamy, zesty dipping sauce that has become my go-to appetizer for any occasion. Not only is this recipe quick to prepare, making it perfect for busy weeknights, but it also elevates any gathering with its restaurant-quality flair. Ready to impress your friends and family? Let’s dive into this deliciously easy dish that promises to be a crowd-pleaser! What’s your favorite way to enjoy shrimp?
Why is Coconut Shrimp a Must-Try?
Irresistible crunch: The crispy coating of sweetened shredded coconut adds a delightful texture that makes each bite a joy.
Quick preparation: With simple steps and minimal cooking time, you can whip up this dish in no time, perfect for busy weeknights.
Versatile serving options: Enjoy it as an appetizer, a party snack, or even as a main dish paired with a fresh salad or tropical fruit salsa for a complete meal.
Flavor explosion: The combination of sweet chili mayo complements the shrimp beautifully, creating a savory and sweet balance that’s hard to resist.
Crowd favorite: This dish is sure to impress friends and family alike, providing that restaurant-quality taste right in your own kitchen. Plus, if you enjoy seafood, don’t miss out on trying the Garlic Butter Shrimp for another delicious option!
Coconut Shrimp Ingredients
For the Shrimp
• Shrimp – A tender, juicy protein that forms the star of your dish; be sure to pat dry for the best coating adherence.
• Salt & Pepper – Essential for enhancing flavors; sprinkle generously to elevate your shrimp’s taste.
• Garlic Powder – Adds a savory depth; consider substituting with fresh garlic for a different flavor profile.
• Paprika – Offers a hint of smokiness and vibrant color; replace with cayenne for added heat if desired.
For the Coating
• All-Purpose Flour – Provides a perfect base for dredging; opt for gluten-free flour if you need a suitable alternative.
• Eggs – Acts as the crucial binding agent; you can swap with a flax egg for a vegan-friendly option.
• Sweetened Shredded Coconut – Creates that irresistible crispy coating; do not use unsweetened, as it alters flavor.
For frying
• Vegetable Oil – Necessary for frying until golden and crispy; coconut oil can add a wonderful flavor twist.
For the Dipping Sauce
• Mayonnaise – The creamy base of the sauce; offers a smooth texture that’s perfect for dipping.
• Sweet Chili Sauce – Adds delightful sweetness and spice; adjust to your preference for a tailor-made kick.
• Lime Juice – Brightens the dipping sauce, balancing the richness with acidity; fresh is ideal for maximum flavor.
• Rice Vinegar – Enhances the tartness; you can switch to apple cider vinegar if needed.
Step‑by‑Step Instructions for Crispy Coconut Shrimp with Sweet Chili Mayo
Step 1: Prepare the Shrimp
Begin by patting the shrimp dry with paper towels, ensuring they are free of excess moisture for the best coating adherence. This step is crucial to achieving that crispy exterior. Set up a clean workspace so you can efficiently move through the next steps without any mess.
Step 2: Mix the Seasoning
In a shallow dish, combine all-purpose flour, salt, pepper, garlic powder, and paprika. Whisk together until well blended. This seasoned flour will create a flavorful base for the shrimp, enhancing the overall taste of your Coconut Shrimp. It’s easy to adjust the spices to suit your personal preferences, so feel free to get creative!
Step 3: Set Up the Assembly Line
Arrange an assembly line of three shallow dishes: one for the seasoned flour, one with beaten eggs, and the last with sweetened shredded coconut. This organization will make the coating process smooth and efficient, allowing you to fully enjoy the experience of preparing your crispy coconut shrimp without feeling rushed.
Step 4: Coat the Shrimp
Take each shrimp and dredge it in the seasoned flour, ensuring it is fully coated. Next, dip it into the beaten eggs, letting any excess drip off before pressing it firmly into the shredded coconut. This final coating should be generous, ensuring every inch of the shrimp is covered for maximum crunch when frying.
Step 5: Heat the Oil
In a deep skillet, heat vegetable oil to 350°F (175°C). Use a kitchen thermometer to maintain this temperature for optimal frying. The right oil temperature is key to achieving that golden, crispy finish. Once the oil is shimmering but not smoking, you’re ready to fry the shrimp in small batches.
Step 6: Fry the Shrimp
Carefully add the coated shrimp to the hot oil, frying them in batches for about 2-3 minutes per side. Watch as they turn a beautiful golden brown and become opaque; this visual cue indicates they are fully cooked and ready to be removed. Avoid overcrowding the pan to ensure each shrimp fries evenly and crisply.
Step 7: Drain the Cooked Shrimp
Once fried, use a slotted spoon to transfer the shrimp to a paper towel-lined plate or wire rack. This will help drain any excess oil, keeping your crispy coconut shrimp crunchy. Allow them to rest for a few moments while you prepare the dipping sauce, enjoying the tantalizing aroma wafting through your kitchen.
Step 8: Prepare the Dipping Sauce
In a bowl, mix mayonnaise, sweet chili sauce, lime juice, and rice vinegar until well combined. Taste the sauce and adjust the seasonings according to your preference, ensuring you achieve the perfect balance of creaminess and sweetness. This delightful sauce will complement the richness of the crispy coconut shrimp beautifully.
Step 9: Serve and Enjoy
Serve your Crispy Coconut Shrimp hot, accompanied by the sweet chili mayo and fresh lime wedges for an added burst of flavor. The vibrant presentation and tropical crunch will transport you straight to a beachside paradise, making this dish a perfect appetizer or party snack that everyone will love.

Coconut Shrimp Variations & Substitutions
Get creative with your Coconut Shrimp by customizing it to suit your taste and dietary needs!
-
Frozen Shrimp: Use frozen shrimp when fresh isn’t available; just ensure they’re properly thawed before cooking. Perfect for busy days when you need a quick meal prep.
-
Gluten-Free Flour: Swap all-purpose flour with gluten-free flour for a celiac-friendly version, maintaining that delightful crunch without any hassle.
-
Flax Egg: Replace eggs with a flax egg for a vegan option. Mix one tablespoon of flaxseed meal with three tablespoons of water and let it sit until it thickens.
-
Spiced Dipping Sauce: Add a dash of sriracha or cayenne to the sweet chili mayo to kick up the heat for those who love a spicy kick in their meal.
-
Oven-Baked Option: If you prefer a healthier twist, bake the shrimp at 425°F (220°C) for 12-15 minutes, flipping once to ensure even crispness.
-
Alternative Coatings: Get inventive by using panko breadcrumbs instead of shredded coconut for a different crunch. This will provide an exciting texture that contrasts beautifully with the sauce.
-
Herbs and Zest: Incorporate fresh herbs like cilantro or mint in the dipping sauce for an added layer of freshness, or add lime zest to enhance the brightness of flavors.
-
Savory Coconut: Try using unsweetened coconut for a slightly different flavor profile; it creates a more robust coconut taste that pairs beautifully with seafood dishes like Garlic Butter Shrimp.
By embracing these variations, you can tailor the Coconut Shrimp to fit any occasion or preference! Enjoy the adventure of flavors and textures on your culinary journey.
Expert Tips for Coconut Shrimp
-
Perfect Shrimp: Make sure your shrimp are thoroughly thawed and patted dry. Moisture can prevent the coating from adhering well.
-
Maintain Temperature: Use a thermometer to keep the oil at 350°F (175°C). This ensures your coconut shrimp fry to a crispy perfection without absorbing excess oil.
-
Coating Coverage: When coating, ensure that every part of the shrimp is covered in flour, egg, and coconut. This helps retain the crunch during frying.
-
Batch Frying: Fry shrimp in small batches to avoid overcrowding the pan. This keeps the oil temperature consistent and results in evenly crispy coconut shrimp.
-
Adjust Spice Levels: Feel free to tweak the spices in the flour mix for your taste. Experimenting with different amounts of paprika or adding cayenne can give your dish a personalized kick!
Make Ahead Options
These Crispy Coconut Shrimp with Sweet Chili Mayo are perfect for meal prep enthusiasts! You can coat the shrimp and place them on a baking sheet to freeze for up to 24 hours before frying, ensuring the coconut adheres perfectly. Alternatively, prepare the sweet chili mayo the day before and store it in the refrigerator for up to 3 days; this allows the flavors to meld beautifully. When you’re ready to serve, simply fry the shrimp directly from the freezer without thawing, allowing for a quick cook time of 2-3 minutes per side. By prepping these components ahead of time, you’ll save precious moments during busy weeknights while still delivering that restaurant-quality dish!
What to Serve with Crispy Coconut Shrimp with Sweet Chili Mayo
Transform your coconut shrimp experience into a full tropical feast with these delightful pairings.
-
Tropical Fruit Salsa: This refreshing blend of mango, pineapple, and lime adds a burst of sweetness that complements the shrimp perfectly. The tropical flavors will transport you straight to a beach paradise with each bite.
-
Crisp Green Salad: A simple green salad with lettuce, cucumbers, and a citrus vinaigrette provides a refreshing contrast to the richness of the shrimp. The crispness and acidity cut through the sweet, creamy mayo, enhancing every element of the meal.
-
Coconut Rice: Earthy coconut rice pairs beautifully with coconut shrimp, creating a cohesive theme. This soft and fragrant rice balances the crunchiness of the shrimp while delivering a subtle sweetness.
-
Garlic Butter Noodles: A side of garlic butter noodles adds a luxurious touch, with their silky texture and savory flavor complementing the crispy shrimp. The buttery richness offers a delightful contrast to the sweet chili mayo.
-
Pineapple Coconut Smoothie: A chilled pineapple coconut smoothie can enhance the tropical vibe of your dish. The creamy texture will make each sip feel like a mini-vacation, pairing well with both the shrimp and the dipping sauce.
-
Chilled White Wine: A glass of chilled Sauvignon Blanc or a light, fruity Riesling provides a crisp, refreshing beverage that can elevate your dining experience. Its acidity beautifully balances the sweetness of the shrimp and dipping sauce.
-
Key Lime Pie: Finish the meal on a sweet note with a slice of key lime pie. The tartness of the lime balances the sweetness of the shrimp, leaving a delightful taste on your palate. It’s the perfect way to round out your tropical dinner!
How to Store and Freeze Coconut Shrimp
Fridge: Store leftover coconut shrimp in an airtight container for up to 2 days. To retain crunchiness, reheat in the oven rather than the microwave.
Freezer: If you want to freeze coconut shrimp, place cooked shrimp in a single layer on a baking sheet and freeze until solid. Then transfer to a freezer bag for up to 3 months.
Reheating: For best results, reheat frozen shrimp straight from the freezer in a preheated oven at 400°F (200°C) for about 10-15 minutes until hot and crispy.
Note: Coconut shrimp is best enjoyed fresh, but these storage tips will help you enjoy leftovers without sacrificing flavor!
Coconut Shrimp with Sweet Chili Mayo Recipe FAQs
How do I know if my shrimp are fresh?
Absolutely! Fresh shrimp should have a slight ocean scent and a firm texture. Look for shrimp that are translucent, with a mild smell. Avoid shrimp with a strong fishy odor or dark spots all over, as these are signs of spoilage.
How should I store leftover coconut shrimp?
Very important! Store any leftover coconut shrimp in an airtight container in the refrigerator for up to 2 days. To retain some crispiness, it’s best to reheat them in the oven at 375°F (190°C) for about 10 minutes rather than using the microwave, which can make them soggy.
Can I freeze coconut shrimp?
Yes, you can! To freeze coconut shrimp, lay the cooked shrimp in a single layer on a baking sheet and freeze until they are firm. Then, transfer them to a freezer bag or airtight container, making sure to remove as much air as possible, and they can last up to 3 months. When you’re ready to enjoy them, you can reheat them directly from frozen in a preheated oven at 400°F (200°C) for about 10-15 minutes until heated through and crispy.
What if my coating doesn’t stick to the shrimp?
No worries! If the coating doesn’t adhere well, it may be because the shrimp were too wet. Pat the shrimp dry with paper towels before dredging and ensure you coat each piece well with flour before dipping it in the egg and coconut. A step I recommend is to let the coated shrimp rest for about 10-15 minutes before frying, which helps the coating stick better.
Is coconut shrimp safe for pets or people with allergies?
Please be cautious! Coconut shrimp is not generally recommended for pets due to the high-fat content from frying oil and potential seasoning. For people with allergies, this recipe contains shellfish (shrimp), eggs, and may contain gluten if using regular flour. You can substitute with gluten-free flour and replace eggs with a flax egg for a vegan option while still maintaining delicious flavors!
Can I bake the shrimp instead of frying?
Absolutely! If you prefer a lighter option, you can bake the shrimp. Preheat your oven to 425°F (220°C) and arrange the coated shrimp in a single layer on a baking sheet lined with parchment paper. Bake for about 12-15 minutes, flipping once halfway through, until they are golden brown and crispy. Baking not only cuts down on oil but also makes for an easier cleanup!

Crispy Coconut Shrimp with Sweet Chili Mayo Bliss
Ingredients
Equipment
Method
- Begin by patting the shrimp dry with paper towels.
- In a shallow dish, combine flour, salt, pepper, garlic powder, and paprika. Whisk until blended.
- Set up three dishes: one for flour, one with beaten eggs, and one with shredded coconut.
- Dredge each shrimp in seasoned flour, dip in eggs, and coat with coconut.
- Heat oil in a deep skillet to 350°F (175°C). Fry shrimp in small batches for 2-3 minutes per side.
- Use a slotted spoon to transfer shrimp to a paper towel-lined plate.
- Mix mayonnaise, sweet chili sauce, lime juice, and rice vinegar in a bowl for the sauce.
- Serve the shrimp hot with sweet chili mayo and lime wedges.