

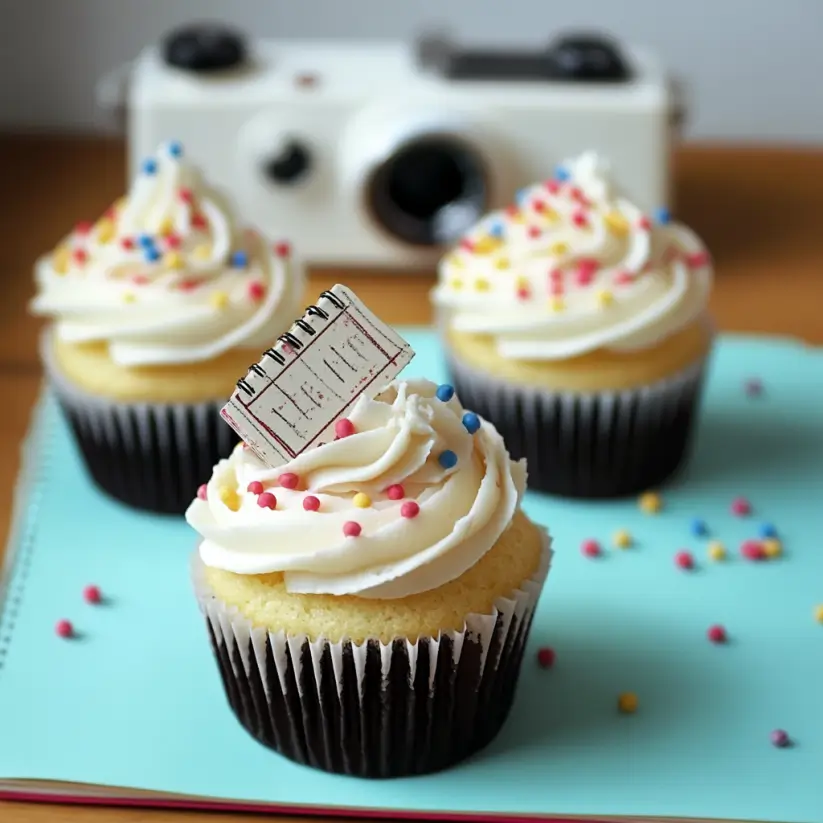
Introduction to Composition Notebook Cupcakes
There’s something magical about baking that takes me back to my childhood. The smell of chocolate wafting through the house, the excitement of licking the spoon, and the joy of sharing treats with friends. Today, I’m thrilled to share a fun twist on a classic dessert: Composition Notebook Cupcakes! Perfect for back-to-school celebrations or just a creative weekend project, these cupcakes are not only delicious but also a feast for the eyes. They’re a quick solution for busy days when you want to impress loved ones with something unique and tasty. Let’s dive into this delightful baking adventure!
Why You’ll Love This Composition Notebook Cupcakes
These Composition Notebook Cupcakes are a delightful blend of creativity and flavor. They’re easy to whip up, making them perfect for busy weeknights or last-minute gatherings. The rich chocolate cake pairs beautifully with creamy buttercream frosting, ensuring every bite is a treat. Plus, the fun design adds a playful touch that will impress kids and adults alike. You’ll love how quickly they come together and how much joy they bring!
Ingredients for Composition Notebook Cupcakes
Gathering the right ingredients is the first step to creating your masterpiece. Here’s what you’ll need for these delightful Composition Notebook Cupcakes:
- Chocolate cake mix: The base of our cupcakes, providing that rich, decadent flavor. You can use any brand you prefer, or even make your own from scratch if you’re feeling adventurous.
- Large eggs: Essential for binding the ingredients together and adding moisture. They help create a fluffy texture that’s hard to resist.
- Water: This helps to activate the cake mix and ensures the cupcakes are moist. You can substitute with milk for a richer flavor.
- Vegetable oil: Adds moisture and keeps the cupcakes tender. You can swap it with melted butter for a buttery taste.
- Buttercream frosting: The sweet, creamy topping that brings everything together. You can use store-bought or whip up your own for a personal touch.
- Black fondant: This is what gives your cupcakes that classic composition notebook look. It’s pliable and easy to work with, making it perfect for decorating.
- White fondant: Used to create the lines and labels on the notebook cover. It adds a nice contrast to the black and makes your cupcakes pop.
- Edible markers: These are the finishing touch! They allow you to add fun details and personalize your cupcakes. You can find them at baking supply stores or online.
For exact quantities, check the bottom of the article where you can find a printable version of the recipe. Now that you have your ingredients ready, let’s get baking!
How to Make Composition Notebook Cupcakes
Now that we have our ingredients ready, it’s time to roll up our sleeves and get baking! Follow these simple steps to create your own Composition Notebook Cupcakes. Each step is designed to be straightforward, ensuring you have a fun and successful baking experience.
Step 1: Preheat the Oven
First things first, preheating the oven is crucial. Set it to 350°F (175°C). This ensures that your cupcakes bake evenly and rise perfectly. A hot oven helps create that delightful dome shape we all love. Trust me, you don’t want to skip this step!
Step 2: Prepare the Cake Mix
Next, grab your chocolate cake mix and follow the package instructions. Typically, you’ll mix the cake mix with eggs, water, and vegetable oil. Stir until everything is well combined. The batter should be smooth and free of lumps. This is where the magic begins!
Step 3: Bake the Cupcakes
Now, it’s time to pour the batter into cupcake liners. Fill each liner about two-thirds full to allow room for rising. Place them in the preheated oven and bake for 18-20 minutes. You’ll know they’re done when a toothpick inserted in the center comes out clean. The aroma of chocolate will fill your kitchen, and it’s simply irresistible!
Step 4: Cool the Cupcakes
Once baked, remove the cupcakes from the oven and let them cool in the pan for about 5 minutes. Then, transfer them to a wire rack to cool completely. This step is essential! If you frost them while they’re warm, the frosting will melt away, and we want those beautiful cupcakes to shine.
Step 5: Frost the Cupcakes
When the cupcakes are completely cool, it’s time to frost! Use a spatula or a piping bag to apply the buttercream frosting evenly on top. Don’t be shy—make it as thick or as thin as you like. The frosting is the canvas for your creative notebook design!
Step 6: Create the Fondant Notebook Cover
Roll out the black fondant on a clean surface. Aim for about 1/8 inch thick. Use a sharp knife or a pizza cutter to cut rectangles that will fit on top of your cupcakes. This will mimic the cover of a composition notebook. It’s easier than it sounds, and the results are worth it!
Step 7: Add Details with White Fondant
Now, take the white fondant and roll it out as well. Cut thin strips to create the lines on the notebook cover. You can also cut out small shapes for labels. This is where you can get creative! The contrast between the black and white will make your cupcakes pop.
Step 8: Decorate with Edible Markers
Grab your edible markers and let your imagination run wild! Use them to add fun details, like doodles or even names on the labels. This is a great way to personalize each cupcake. Plus, it’s a fun activity if you have kids helping out in the kitchen!
Step 9: Assemble the Cupcakes
Finally, place the fondant pieces on top of the frosted cupcakes. Gently press them down to ensure they stick. And there you have it! Your Composition Notebook Cupcakes are ready to impress. Serve them at your next gathering, and watch everyone’s faces light up with delight!
Tips for Success
- Always preheat your oven for even baking.
- Let the cupcakes cool completely before frosting to avoid melting.
- Use a piping bag for a professional-looking frosting finish.
- Keep fondant covered to prevent it from drying out while you work.
- Experiment with different flavors of cake mix and frosting for variety.
Equipment Needed
- Oven: Essential for baking. A toaster oven can work for smaller batches.
- Mixing bowls: Use any size you have on hand; even a large pot can do the trick.
- Whisk or electric mixer: A whisk is great for a workout, but an electric mixer saves time.
- Cupcake liners: Standard liners work well; silicone liners are reusable and eco-friendly.
- Rolling pin: A wine bottle can substitute if you don’t have one!
Variations
- Flavorful Cake Mix: Swap the chocolate cake mix for vanilla, red velvet, or even funfetti for a colorful twist.
- Gluten-Free Option: Use a gluten-free cake mix to make these cupcakes suitable for those with dietary restrictions.
- Vegan Version: Replace eggs with flaxseed meal and use plant-based milk and oil for a delicious vegan treat.
- Different Frosting: Try cream cheese frosting or whipped ganache for a unique flavor profile.
- Custom Fondant Colors: Use colored fondant to match school colors or themes for special occasions.
Serving Suggestions
- Pair with Milk: A classic glass of cold milk complements the rich chocolate flavor perfectly.
- Presentation: Arrange cupcakes on a colorful platter for a festive look.
- Side Treats: Serve with fruit skewers or mini cookies for a fun dessert table.
- Theme Parties: Use school-themed decorations to enhance the back-to-school vibe.
FAQs about Composition Notebook Cupcakes
Can I use a different cake mix for these cupcakes?
Absolutely! While chocolate cake mix is a classic choice, feel free to experiment with vanilla, red velvet, or even funfetti. Each flavor brings its own unique twist to your Composition Notebook Cupcakes.
How do I store leftover cupcakes?
To keep your cupcakes fresh, store them in an airtight container at room temperature for up to three days. If you need to keep them longer, consider refrigerating them, but be aware that the fondant may become a bit firmer.
Can I make these cupcakes ahead of time?
Yes! You can bake the cupcakes a day in advance. Just frost and decorate them on the day you plan to serve them for the best presentation. This way, you can enjoy the fun of decorating without the last-minute rush!
What if I don’t have fondant?
If fondant isn’t your thing, you can use colored icing or even chocolate to create the notebook design. Just pipe the lines and labels directly onto the frosted cupcakes for a simpler approach.
Are these cupcakes suitable for kids?
Definitely! These Composition Notebook Cupcakes are a hit with kids. They can help with decorating, making it a fun family activity. Plus, who wouldn’t love a cupcake that looks like a school notebook?
Final Thoughts
Creating Composition Notebook Cupcakes is more than just baking; it’s about sparking joy and creativity in the kitchen. Each step, from mixing the batter to decorating with fondant, is an opportunity to bond with family or unleash your inner artist. These cupcakes are perfect for celebrating milestones, back-to-school events, or simply indulging in a sweet treat. The smiles on faces when they see these delightful creations are priceless. So, roll up your sleeves, gather your loved ones, and dive into this fun baking adventure. You’ll not only make delicious cupcakes but also lasting memories!
Composition Notebook Cupcakes: A Fun Baking Guide!
Ingredients
Method
- Preheat the oven to 350°F (175°C).
- Prepare the chocolate cake mix according to the package instructions.
- Pour the batter into cupcake liners and bake for 18-20 minutes.
- Allow the cupcakes to cool completely.
- Frost the cooled cupcakes with buttercream frosting.
- Roll out the black fondant and cut it into rectangles to resemble the cover of a composition notebook.
- Use white fondant to create the lines and label on the notebook cover.
- Decorate the fondant with edible markers for added detail.
- Place the fondant pieces on top of the frosted cupcakes.
- Serve and enjoy your creative composition notebook cupcakes!
Nutrition
Notes
- Make sure the cupcakes are completely cool before decorating.
- Edible markers can be found at baking supply stores.
- Feel free to customize the flavors of the cake mix and frosting.