

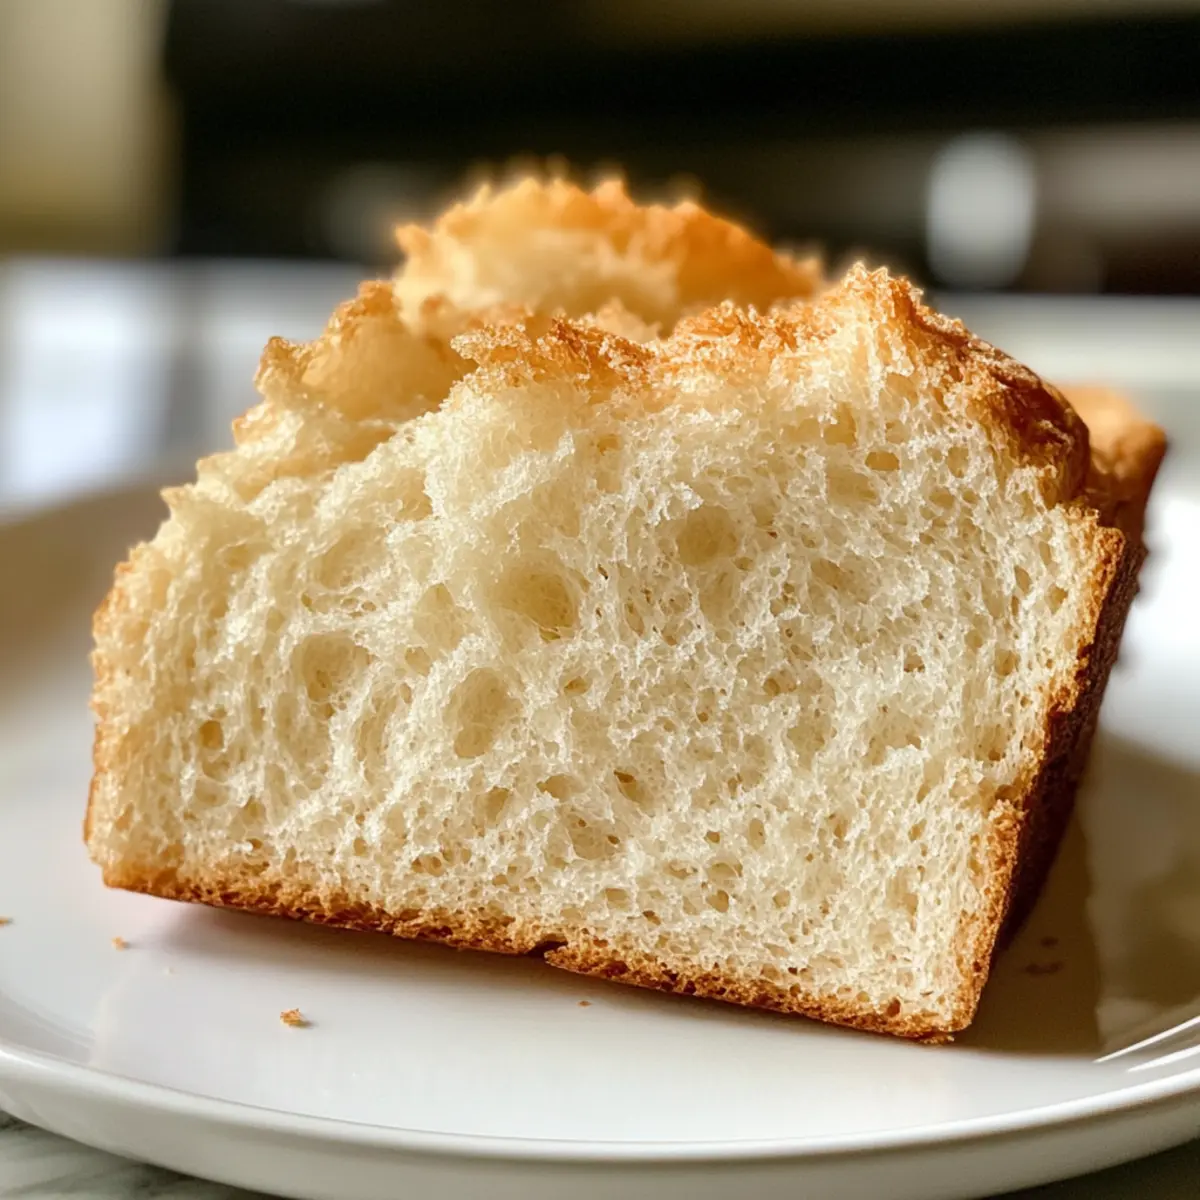
The smell of fresh bread baking in the oven has a unique way of bringing comfort and warmth into our homes. This is especially true when the bread is a Fluffiest Gluten-Free No-Yeast Bread Recipe that’s quick and simple to make! If you’re navigating a gluten-free lifestyle or simply looking to skip the yeast and still bake something delicious, this recipe will be your new go-to. Not only does it come together in a flash, but each fluffy slice is perfect for your morning toast or an afternoon sandwich, without any of the heaviness often found in gluten-free options. Plus, you can customize it to your heart’s content! How does a savory herb twist sound for your next batch?

Why is this gluten-free bread a must-try?
Simplicity, this recipe comes together in just a few easy steps, making it perfect for busy weeknights or last-minute baking needs. Fluffiness, each bite boasts an airy texture that rivals even traditional bread, ensuring you won’t miss the gluten! Versatility shines through—it’s delicious with sweet spreads or savory toppings like in our Hobo Casserole for a hearty meal. Customization means you can easily add herbs, spices, or your favorite mix-ins for a personal touch. Crowd-pleaser appeal makes it a fantastic option for gatherings, where everyone can enjoy soft, warm slices.
Gluten Free Bread Ingredients
Get ready to bake the fluffiest gluten-free bread that’s yeast-free!
- For the Batter
- Gluten-Free Flour Blend – Provides the base structure for the bread; use a blend specifically designed for baking for the fluffiest results.
- Baking Powder – Acts as the leavening agent, allowing the bread to rise quickly without yeast fermentation; make sure it’s fresh for optimal rising.
- Salt – Enhances flavor and balances sweetness; optional if you’re looking to reduce sodium intake.
- Dairy or Non-Dairy Milk – Adds moisture to the batter; almond milk or coconut milk make great dairy-free alternatives.
- Olive Oil or Melted Butter – Adds richness and moisture; use olive oil for a lighter option or butter for a richer flavor.
This gluten-free bread recipe will transform your baking game!
Step‑by‑Step Instructions for Fluffiest Gluten-Free No-Yeast Bread Recipe
Step 1: Preheat Your Oven
Begin by preheating your oven to 350°F (175°C). This temperature is essential for achieving that perfect golden crust on your gluten-free bread. As the oven heats, take a moment to gather your ingredients and equipment, ensuring you have a mixing bowl, loaf pan, whisk, and measuring tools ready for this delightful baking experience.
Step 2: Whisk the Dry Ingredients
In a large mixing bowl, combine the gluten-free flour blend, baking powder, and salt. Use a whisk to thoroughly mix these dry ingredients, ensuring no clumps remain. This step is crucial, as it distributes the baking powder evenly, allowing your bread to rise beautifully. Set this bowl aside once combined, we’re on our way to making a fluffy gluten-free bread!
Step 3: Mix the Wet Ingredients
In a separate bowl, pour in your chosen dairy or non-dairy milk and add the olive oil or melted butter. Whisk these ingredients together until well combined, creating a smooth mixture. This blend infuses moisture and richness into your batter. Once ready, it’s time to bring it all together and create that doughy goodness!
Step 4: Combine the Mixtures
Carefully pour the wet mixture into the bowl of dry ingredients. Stir gently with a spatula or wooden spoon until just combined; be cautious not to overmix, as this can affect the texture of your gluten-free bread. The batter should be thick yet smooth, resembling a traditional bread dough. Once mixed, it’s time to transfer it to the loaf pan!
Step 5: Prepare the Loaf Pan
Grease a standard loaf pan with a little olive oil or butter for easy removal later. Pour the batter into the prepared loaf pan, using a spatula to smooth the top for an even surface. This step is essential for achieving a beautiful rise and ensuring your bread cooks evenly throughout. Now that the pan is ready, let’s send it to the oven!
Step 6: Bake the Bread
Place the loaf pan in the preheated oven and bake for 30-35 minutes. You’ll know your gluten-free bread is done when it’s golden brown and a toothpick inserted in the center comes out clean. Keep an eye on it during the last few minutes, as every oven varies slightly. Once baked, remove it from the oven and let it rest for a few moments.
Step 7: Cool Before Slicing
After removing the bread from the oven, allow it to cool in the pan for 10 minutes. This resting time helps it set and makes it easier to slice. Once cooled slightly, transfer the loaf to a wire rack to cool completely. This crucial step ensures your gluten-free bread maintains its fluffy texture and doesn’t become gummy—patience is key!
What to Serve with Fluffiest Gluten-Free No-Yeast Bread
Transform your meal into a comforting feast that delights all senses with just a few complementary sides.
-
Creamy Tomato Soup: Perfectly pairs with the bread’s texture; the warm, velvety soup complements its fluffiness beautifully.
Serve a bowl of this classic with grilled cheese sandwiches for a nostalgic meal. The balanced acidity of the tomatoes enhances the subtle sweetness of the gluten-free bread. -
Garlic Herb Butter: Spread a luscious layer on warm slices to elevate the bread’s flavor.
The richness of butter infused with garlic and herbs adds a delightful contrast of flavors, perfect for snacking or indulgent breakfasts. -
Fresh Garden Salad: Bring a burst of freshness with greens and seasonal vegetables tossed in a light vinaigrette.
This adds refreshing crunch and brightness, balancing the softness of the bread while making for a wholesome meal. -
Sweet Strawberry Jam: A delightful spread that turns every slice into a treat for your taste buds.
The sweetness of this jam creates a perfect harmony with the subtle flavors of the bread, making it a delightful breakfast or snack option. -
Savory Cheese Platter: Pair with a selection of your favorite cheeses for a delightful appetizer.
The creamy, salty bites combined with the fluffy bread offer a savory indulgence that’s perfect for sharing. -
Herbed Olives: These flavorful bites bring a Mediterranean flair to your meal.
They add a burst of brininess that contrasts wonderfully with the soft texture of the gluten-free bread, making each bite exciting. -
Chilled Chardonnay: A crisp wine that enhances the meal’s overall experience.
The bright, fruity notes of this wine work seamlessly with the airy bread and complement the richness of any side dishes. -
Banana Bread Pudding: Serve this warm dessert with a scoop of ice cream for a luscious sweet ending.
Its comforting, bread-based texture resonates beautifully when paired with the fluffiness of your gluten-free bread.
Expert Tips for Fluffiest Gluten-Free Bread
-
Choose the Right Flour: Ensure your gluten-free flour blend is specifically designed for baking to achieve the ideal texture and rise in your bread.
-
Check Freshness: Use fresh baking powder for optimal leavening. Stale baking powder can lead to a flat bread, so don’t skip this step!
-
Don’t Rush Cooling: Allow the bread to cool completely in the pan before slicing. Slicing too soon can result in a gummy texture, impacting your gluten-free bread experience.
-
Mix Gently: Combine your wet and dry ingredients just until blended. Overmixing can create a dense bread that lacks the desired fluffiness.
-
Experiment with Add-ins: Customize your recipe with herbs or seeds for extra flavor and texture. Just ensure that any additions don’t weigh down the batter!
Gluten Free Bread Recipe Variations
Feel free to explore and personalize your gluten-free bread with these delightful twists and substitutions!
-
Savory Herbs: Add 1-2 teaspoons of dried herbs like rosemary or thyme for a fragrant, savory flavor. Imagine the aroma of fresh herbs wafting through your kitchen as this bread bakes!
-
Nutty Flaxseed: Stir in a tablespoon of ground flaxseed for a nutrient boost and a subtle nutty flavor. It not only adds texture but offers a great source of omega-3 fatty acids too!
-
Zesty Citrus: Mix in the zest of one lemon or orange for a refreshing and bright taste that will elevate your bread to new levels of deliciousness. A citrusy twist can make every slice feel like a sunny occasion.
-
Cheesy Goodness: Fold in ¼ cup of shredded cheese for a rich, cheesy flavor. Cheddar or parmesan can complement the bread beautifully, making it perfect for toast or sandwiches.
-
Chocolate Delight: For a sweet twist, add mini chocolate chips into the batter. They melt perfectly as the bread bakes and create little gooey pockets of chocolate heaven. This is great for breakfast or a sweet treat!
-
Spicy Kick: Incorporate a pinch of cayenne pepper or red pepper flakes for some heat. This twist will dazzle your taste buds and add a punch to your classic bread.
-
Baking Substitution: Swap the dairy milk for a flavored non-dairy milk, like vanilla almond milk, for a hint of sweetness in every bite. This can give your bread a wonderful new depth of flavor.
-
Whole Grain Twist: Try using oat flour instead of a gluten-free blend for a heartier texture. Oat flour can add a subtle sweetness and fullness that makes for delicious toast or sandwiches, especially when paired with savory spreads.
These variations not only keep things interesting but can also cater to personal dietary needs or flavor preferences. Enjoy experimenting and making this recipe truly yours! For more delightful meal ideas, consider trying out our Zucchini Sweet Skillet or savoring a warm bowl of Coconut Pudding Dessert. Happy baking!
Make Ahead Options
Preparing the Fluffiest Gluten-Free No-Yeast Bread ahead of time is a fantastic way to simplify your mealtime! To make things even easier, you can mix the dry ingredients (gluten-free flour blend, baking powder, and salt) up to 3 days in advance. Just store them in an airtight container to keep them fresh. On the day you intend to bake, simply combine your wet ingredients with the prepped dry mix, and bake as directed. This method not only saves time during busy weeknights, but ensures your gluten-free bread is just as fluffy and delicious! If you wish to slice the bread beforehand, remember to let it cool completely and store it in an airtight container, where it will stay fresh for up to 3 days.
Storage Tips for Gluten Free Bread
-
Room Temperature: Store your gluten-free bread in an airtight container at room temperature for up to 3 days. This keeps it fresh and soft, making it easy to enjoy throughout the week.
-
Freezer: If you’d like to keep your bread longer, freeze individual slices in a freezer-safe bag for up to 2 months. This allows you to take out just what you need without defrosting the entire loaf.
-
Reheating: You can toast slices directly from the freezer or warm them in the oven at 350°F for about 10 minutes. This brings back the bread’s delightful texture and flavor, making it taste freshly baked!
-
Airtight Guidance: Always ensure the bread is completely cooled before storing. This prevents moisture buildup that can lead to a gummy texture, ensuring your gluten free bread remains fluffy and delicious!
Fluffiest Gluten-Free No-Yeast Bread Recipe FAQs
What type of gluten-free flour blend should I use?
Absolutely! For the fluffiest gluten-free bread, use a blend specifically designed for baking. This typically includes a combination of rice flour, tapioca flour, and xanthan gum to mimic the structure and elasticity of traditional wheat flour. Always check the packaging to ensure it’s labeled “all-purpose baking gluten-free flour” for best results!
How should I store the gluten-free bread, and for how long?
To keep your gluten-free bread fresh, store it in an airtight container at room temperature for up to 3 days. If you don’t finish it within that time, don’t worry! You can also freeze individual slices in a freezer-safe bag for up to 2 months. This way, you can enjoy freshly toasted slices any time you crave it!
Can I freeze the gluten-free bread? How?
Yes, you can freeze your gluten-free bread! Once it’s completely cooled, slice it into individual portions. Then, wrap each slice in plastic wrap and place them in a freezer-safe bag or container. When you’re ready to eat, simply toast the slices straight from the freezer or warm them in the oven at 350°F for about 10 minutes. This preserves the fluffy texture and flavor beautifully.
What should I do if my gluten-free bread doesn’t rise properly?
If your gluten-free bread doesn’t rise, the culprit is often stale baking powder! Make sure your baking powder is fresh before you start. If your bread appears too dense, lightly mix your wet and dry ingredients; overmixing can result in a heavy texture. Lastly, always check that your oven is at the correct temperature, as variances can affect baking.
Is this recipe suitable for those with dairy allergies?
Very! You can easily make this gluten-free bread dairy-free by using almond milk, coconut milk, or any other non-dairy milk of your choice. Just remember to choose a dairy-free oil, such as olive oil, instead of butter. This way, you can enjoy the fluffy deliciousness without any concern for dairy allergies.
Can I add herbs or spices to enhance the flavor?
The more the merrier! Feel free to customize your gluten-free bread by adding dried herbs such as oregano or thyme, or even spices like garlic powder. Just mix them with your dry ingredients before combining with the wet mixture. This is a fantastic way to add depth and personality to your fluffy gluten-free delight!
Fluffy Gluten-Free Bread Recipe: No Yeast Needed for Softness
Ingredients
Equipment
Method
- Preheat your oven to 350°F (175°C). Gather your ingredients and equipment: mixing bowl, loaf pan, whisk, and measuring tools.
- In a large mixing bowl, combine the gluten-free flour blend, baking powder, and salt. Whisk until no clumps remain.
- In a separate bowl, whisk together your milk and olive oil or melted butter until combined.
- Pour the wet mixture into the dry ingredients. Stir gently until just combined; do not overmix.
- Grease a standard loaf pan with oil or butter. Pour in the batter and smooth the top.
- Bake in the preheated oven for 30-35 minutes until golden brown and a toothpick inserted comes out clean.
- Allow the bread to cool in the pan for 10 minutes before transferring it to a wire rack to cool completely.