

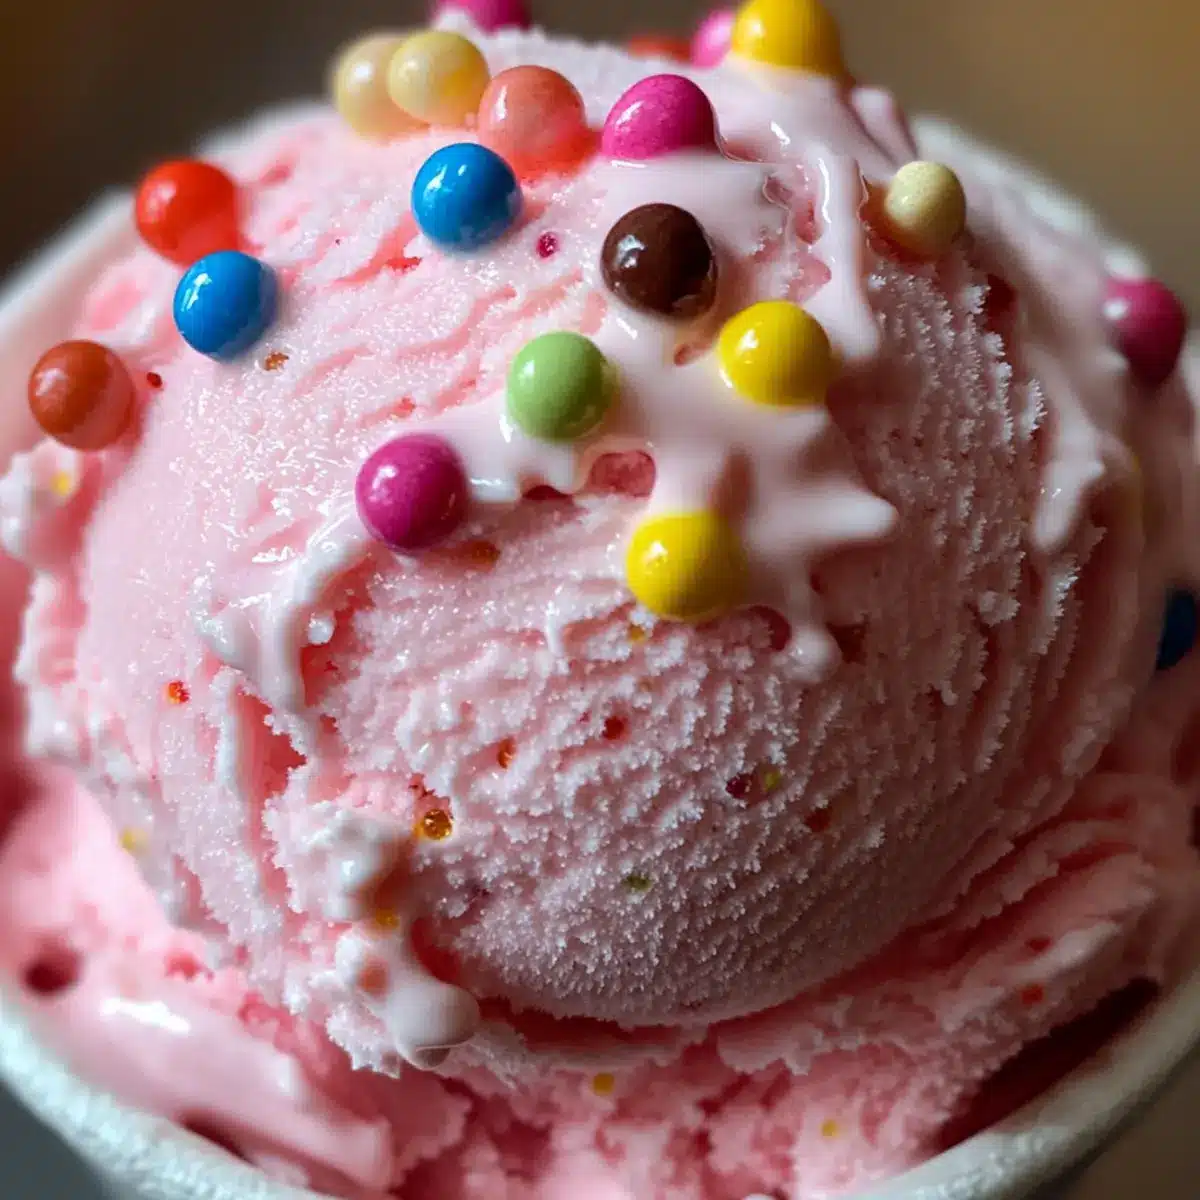
Stirring memories of childhood and carefree summer days, this nostalgic No Churn Bubblegum Ice Cream brings pure joy to your kitchen. With just six simple ingredients, you’ll create a creamy, dreamy pink treat that has everyone reminiscing about those ice cream parlor visits. Not only is this recipe perfect for warm weather, but its no-churn method ensures that even novice chefs can whip it up quickly without the need for a fancy machine. Plus, with customizable options like crunchy mini gumballs or vibrant sprinkles, you can make it uniquely yours! So, are you ready to indulge in a scoop of nostalgia? Let’s dive into this delightful recipe together!
Why is No Churn Bubblegum Ice Cream special?
Simplicity: This recipe requires no special equipment—just a mixing bowl and whisk, making it easy for everyone to enjoy homemade ice cream!
Nostalgic Flavor: Relive childhood memories with the sweet, playful taste of bubblegum, perfect for both kids and adults alike.
Customizable: Add your favorite treats like mini gumballs or rainbow sprinkles for a personal touch, ensuring every scoop is a delightful surprise!
Quick Preparation: With just six ingredients, you can whip this up in no time, allowing you to spend more moments enjoying with family and friends.
No Waiting: Unlike traditional ice cream methods, this recipe requires no churn time; simply freeze, scoop, and savor the creamy goodness right away!
Crowd Pleaser: An ice cream treat that appeals to everyone, making it perfect for parties, summer BBQs, or just a sweet indulgence at home!
No Churn Bubblegum Ice Cream Ingredients
• Get ready to create the most delightful treat!
For the Base
- Heavy Cream – A must-have for a rich and creamy texture; remember to use it chilled for the best results.
- Sweetened Condensed Milk – This provides the perfect sweetness and creaminess without the extra sugar.
- Pure Vanilla Extract – A splash enhances the overall flavor, making the ice cream taste ultra comforting.
- Bubble Gum Extract – This gives the ice cream its unique bubblegum flavor; a little goes a long way, so be cautious with the amount.
For the Color
- Pink Food Coloring – Optional, but this will add that classic bubblegum pink hue to your ice cream; add gradually for desired intensity.
For the Fun Factor
- Mini Gumballs – These add texture and whimsical appeal; feel free to chop them if they are too large but don’t skip them for a true bubblegum experience!
Step‑by‑Step Instructions for No Churn Bubblegum Ice Cream
Step 1: Whip the Cream
In a chilled mixing bowl, pour in 2 cups of cold heavy cream. Using an electric mixer, whip the cream on medium speed for about 3 minutes until stiff peaks start to form. You want the cream to be fluffy and light, resembling soft clouds. This is crucial for the creamy texture of your No Churn Bubblegum Ice Cream.
Step 2: Combine Ingredients
Gently fold in 1 can of sweetened condensed milk, 1 teaspoon of vanilla extract, and 1 to 2 teaspoons of bubble gum extract using a rubber spatula. Be careful to maintain the fluffiness of the whipped cream as you mix. Add a few drops of pink food coloring to achieve your desired pastel hue, mixing until you have a beautifully colored base.
Step 3: Add Gumballs
Once your mixture is beautifully pink and well combined, gently fold in 1 to 2 cups of mini gumballs. Ensure they are evenly distributed throughout the mixture to add delightful bursts of chewiness in each scoop. This step will enhance the playful, nostalgic feel of your No Churn Bubblegum Ice Cream, making every bite a little adventure.
Step 4: Freeze the Mixture
Transfer the mixture into an airtight container, smoothing the top with the spatula. Cover the container with a lid or plastic wrap and place it in the freezer. Allow the ice cream to freeze for at least 3 hours, or ideally overnight, to achieve a firm yet creamy consistency that holds its shape perfectly when scooped.
Step 5: Serve and Enjoy
When you’re ready to indulge, remove the No Churn Bubblegum Ice Cream from the freezer and let it sit at room temperature for about 5 minutes. This will make it easier to scoop. Serve in bowls or fluffy cones and consider adding additional gumballs on top for a whimsical touch. Enjoy your delightful, nostalgic treat!
No Churn Bubblegum Ice Cream Variations
Feel free to take this nostalgically delightful recipe and make it uniquely yours—your taste buds will thank you!
- Add Crunch: Incorporate crushed cookies or brownie pieces for added texture and indulgence. Imagine that delightful crunch enhancing each creamy bite!
- Rainbow Sprinkles: Swap mini gumballs for colorful rainbow sprinkles for a cheerful twist. This vivid addition makes the ice cream look as fun as it tastes!
- Fruit Purees: Blend in fruity purees like strawberries or raspberries for a refreshing flavor change. The vibrant colors and tastes will evoke summer fun in every scoop.
- Layered Delight: Create a layered ice cream cake by alternating layers with brownies or cake in a loaf pan. This makes for a visually stunning dessert that’s perfect for gatherings.
- Unique Flavors: Experiment with fruit extracts, like banana or strawberry, to craft different bubblegum flavors. Each variation tells a delicious story of its own!
- Chocolatey Bliss: Stir in chocolate chips for a sweet and rich contrast to the bubblegum flavor. It’s a surprising combination that brings new depth to your ice cream.
- Nutty Crunch: Add chopped nuts like pistachios or almonds for a nutty twist and delightful texture. A sprinkle of crushed nuts adds not only flavor but also an unexpected crunch.
- Spicy Touch: For an adventurous kick, mix in a pinch of cinnamon or crushed red pepper flakes. It’s an unexpected combination that tickles the taste buds in the best way!
For more delightful additions, consider serving this ice cream alongside Creamy Mushroom Pasta for a comforting meal or pair it with a slice of No Bake Cookies and Cream Cheesecake Cups to create a rich dessert platter that’s sure to impress!
How to Store and Freeze No Churn Bubblegum Ice Cream
Fridge: Enjoy your homemade No Churn Bubblegum Ice Cream for up to 3 days when stored in an airtight container, but it’s best enjoyed fresh.
Freezer: Store in an airtight container for up to 2 weeks for optimal texture and flavor. Ensure the lid is tightly sealed to prevent ice crystals.
Reheating/Softening: Before serving, let the ice cream sit at room temperature for about 5 minutes to soften for easier scooping; this helps maintain its delightful creamy consistency.
Freezer Burn Prevention: To further protect against freezer burn, you can place a piece of plastic wrap directly on the surface of the ice cream before sealing the container.
Expert Tips for No Churn Bubblegum Ice Cream
- Chill Bowl & Whisk: Refrigerate the mixing bowl and beaters for 15 minutes before whipping the cream; this enhances texture and volume.
- Gentle Folding: Always fold in the ingredients carefully; over-mixing can deflate the whipped cream and ruin the airy texture of your No Churn Bubblegum Ice Cream.
- Flavor Adjustments: Test the bubble gum extract as you go; it’s quite intense, and a little goes a long way. Start with less and adjust to taste.
- Scoop with Ease: Let the ice cream sit at room temperature for about 5 minutes before serving. This softening ensures perfect scoops without the struggle.
- Creative Add-Ins: Don’t hesitate to personalize your ice cream with nuts, chocolate chips, or different candy. Mixing in your favorites makes your No Churn Bubblegum Ice Cream uniquely yours!
- Store Properly: Ensure you store the ice cream in an airtight container to prevent freezer burn and maintain its delightful flavor and texture.
Make Ahead Options
These No Churn Bubblegum Ice Cream treats are perfect for busy home cooks looking to save time! You can prepare the ice cream mixture up to 24 hours in advance by whipping the heavy cream and folding in the other ingredients. Once mixed, transfer the batter to an airtight container and freeze it overnight for the best results. To maintain the creamy texture, ensure the container is tightly sealed to prevent ice crystals from forming. When you’re ready to serve, simply scoop the ice cream out and allow it to sit for about 5 minutes at room temperature for easier scooping. Enjoy the nostalgic flavors of your homemade ice cream without any fuss!
What to Serve with No Churn Bubblegum Ice Cream
Transform your dessert into a delightful feast with these perfect pairings that elevate the nostalgic flavors.
-
Chocolate Chip Cookies: The warm, buttery goodness of freshly baked cookies contrasts beautifully with the cool, creamy texture of bubblegum ice cream, creating a delightful synergy.
-
Berry Salad: A vibrant medley of seasonal berries adds a pop of freshness and tangy flavor, balancing the sweetness of the ice cream wonderfully. The juicy bites will awaken your palate!
-
Waffle Cones: Crispy, golden waffle cones offer a satisfying crunch that beautifully contrasts with the creamy softness of the ice cream, making for an exciting textural delight.
-
Mint Chocolate Brownies: Rich, fudgy brownies with a hint of mint complement the sweetness of the bubblegum, creating a unique flavor harmony that dessert lovers will adore.
-
Rainbow Sprinkles: A sprinkle of colorful joy on top adds a festive touch that not only enhances the visual appeal but also adds a fun crunch to each scoop of sweetness.
-
Fresh Coconut Water: This hydrating drink harmonizes the nostalgia of summertime flavors, refreshing your senses and enhancing the light-hearted spirit of enjoying a scoop of bubblegum ice cream.
-
Fizzy Fruit Punch: The effervescence of a fruity, bubbly drink makes for a party-ready duo, adding cheer to your dessert table and keeping the atmosphere lively and fun!
No Churn Bubblegum Ice Cream Recipe FAQs
How do I select the best bubble gum extract?
When choosing bubble gum extract, look for pure extracts that are rich in flavor and clear from artificial colors or preservatives. Specialty baking stores or online retailers often carry high-quality options. Remember to start with a small amount, as bubble gum extract is quite potent!
What’s the best way to store No Churn Bubblegum Ice Cream?
To preserve its delicious flavor and texture, store your No Churn Bubblegum Ice Cream in an airtight container and keep it in the freezer. It will stay fresh for up to 2 weeks, but it’s best enjoyed within the first week. Make sure the container is sealed tightly to prevent ice crystals from forming.
Can I freeze the No Churn Bubblegum Ice Cream for longer?
Absolutely! While it’s best enjoyed within two weeks, you can store it for up to 3 months in the freezer. To ensure quality, place a piece of plastic wrap directly on the surface of the ice cream before closing the container to prevent freezer burn. Just remember that the texture may slightly change after that time!
What should I do if my ice cream is icy or hard after freezing?
If your No Churn Bubblegum Ice Cream ends up icy or too hard, it might be due to the mixing process. Make sure to whip the cream until stiff peaks form without over-mixing! If it’s frozen too hard, just let it sit at room temperature for about 5-10 minutes before scooping to restore smoothness.
Is this recipe suitable for pets?
No, this No Churn Bubblegum Ice Cream is not suitable for pets. Ingredients like heavy cream and sweetened condensed milk can cause digestive issues in some animals, and the sugar content, particularly from gumballs, is not healthy for them. Always opt for pet-approved treats for your furry friends!
Can I customize this recipe for allergies or dietary preferences?
Definitely! For a dairy-free version, use coconut cream or a non-dairy whipped topping in place of heavy cream. You can substitute sweetened condensed milk with a dairy-free sweetened condensed alternative. If you’re concerned about food allergens, carefully check the labels of your ingredients, especially the gumballs, to ensure they’re safe for your needs. Enjoy experimenting!
No Churn Bubblegum Ice Cream for a Sweet Nostalgic Treat
Ingredients
Equipment
Method
- In a chilled mixing bowl, whip 2 cups of cold heavy cream on medium speed for about 3 minutes until stiff peaks form.
- Gently fold in 1 can of sweetened condensed milk, 1 teaspoon of vanilla extract, and 1 to 2 teaspoons of bubble gum extract. Add pink food coloring gradually.
- Fold in 1 to 2 cups of mini gumballs until evenly distributed.
- Transfer the mixture into an airtight container and freeze for at least 3 hours or overnight.
- Let the ice cream sit at room temperature for 5 minutes before serving.