

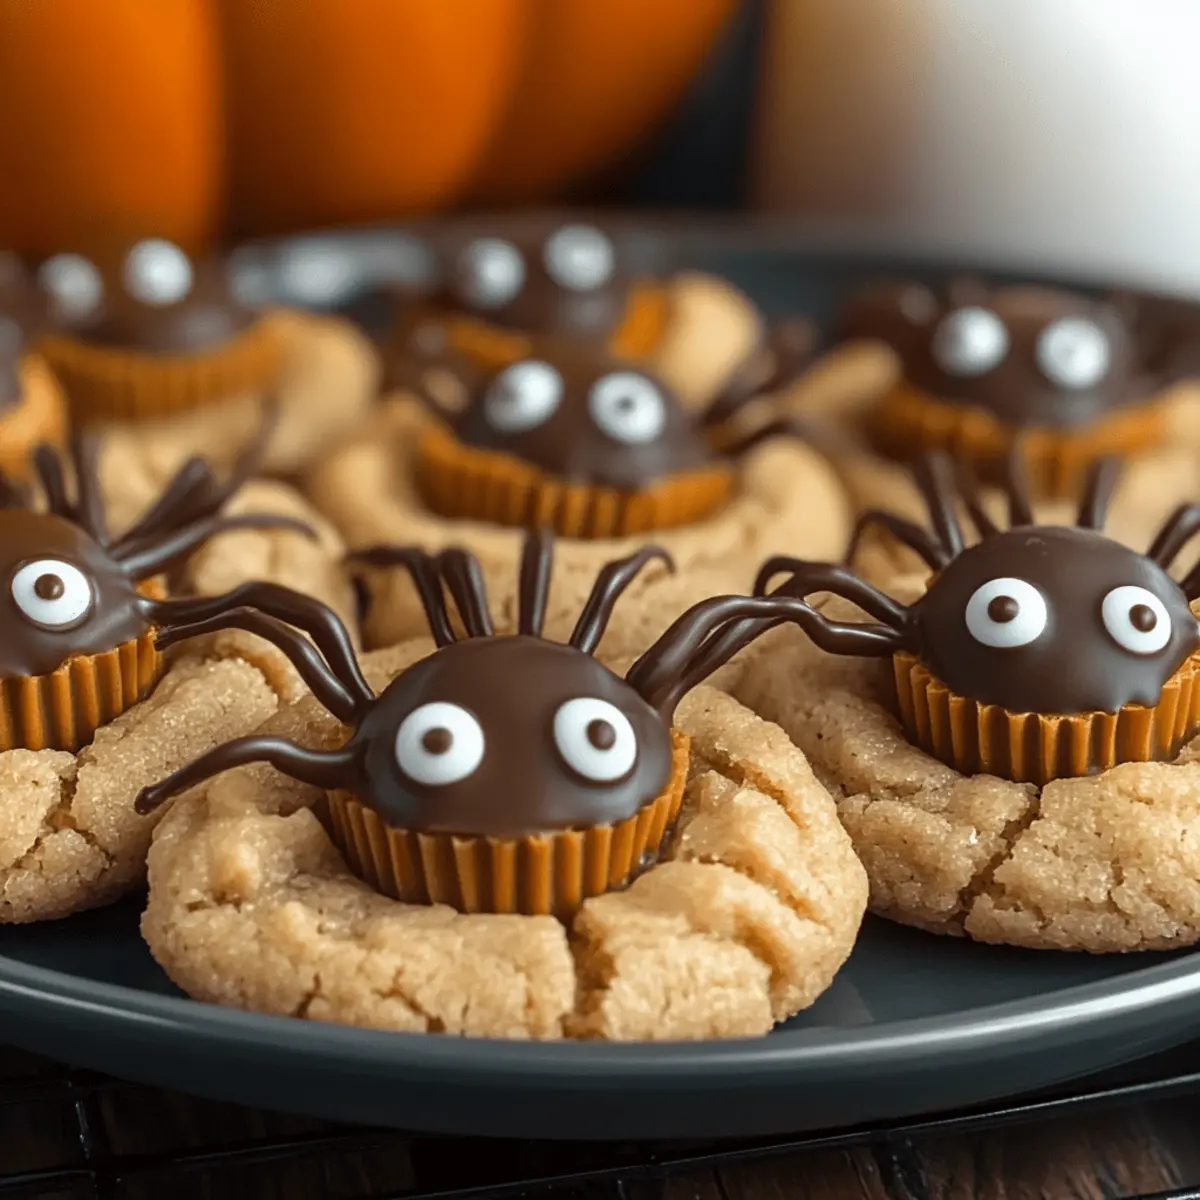
As I rummaged through my pantry last week, I stumbled upon a jar of creamy peanut butter and a few leftover Halloween treats—what a delightful surprise! Inspired by that find, I whipped up a batch of Peanut Butter Spider Cookies that are not only adorable but incredibly easy to make. These cookies are soft and chewy with a rich peanut butter flavor, topped with cute mini Reese’s cups and candy eyeballs, making them the perfect Halloween dessert. Whether you’re planning a spooky gathering or just craving a fun baking project, these tasty treats are sure to be a hit. Plus, they come together in just 26 minutes, making them as quick to whip up as they are fun to decorate! Are you ready to bring a little more sweetness to your spooky season?
What Makes These Cookies a Halloween Hit?
Irresistible cuteness: These Peanut Butter Spider Cookies are a visual delight, featuring sprightly spider designs that are sure to bring smiles to everyone.
Quick preparation: Whipping them up takes only 26 minutes from start to finish, perfect for those last-minute party plans.
Deliciously soft: Each bite bursts with rich peanut butter flavor, balanced by a delightful chewy texture.
Festive appeal: Ideal for Halloween gatherings, they’ll be the center of attention at any spooky event!
Feeling inspired? Pair these treats with my Garlic Butter Shrimp for a savory adventure as well!
Peanut Butter Spider Cookies Ingredients
• For the Cookie Dough
- Unsalted Butter – Provides moisture and richness; you can substitute with margarine if needed.
- Brown Sugar – Adds sweetness and moisture, perfectly complementing the peanut butter flavor.
- Granulated Sugar – Enhances sweetness and creates a slightly crisp texture for our delicious cookies.
- Creamy Peanut Butter – The star of the show, ensuring a soft and rich peanut butter flavor in every bite.
- Large Egg – Binds the ingredients together and adds moisture; it’s key for cookie structure.
- Vanilla Extract – Elevates the overall flavor with a hint of warmth.
- All-Purpose Flour – The foundation of the cookie that gives it structure; you can use a 1:1 gluten-free flour for a gluten-free option.
- Baking Soda & Baking Powder – Essential leavening agents for achieving the ideal cookie height and texture.
- Salt – Balances the sweetness beautifully; don’t skip this step!
• For the Decor
- Granulated Sugar (for rolling) – Coats the cookies in sweetness and gives them a lovely sparkle.
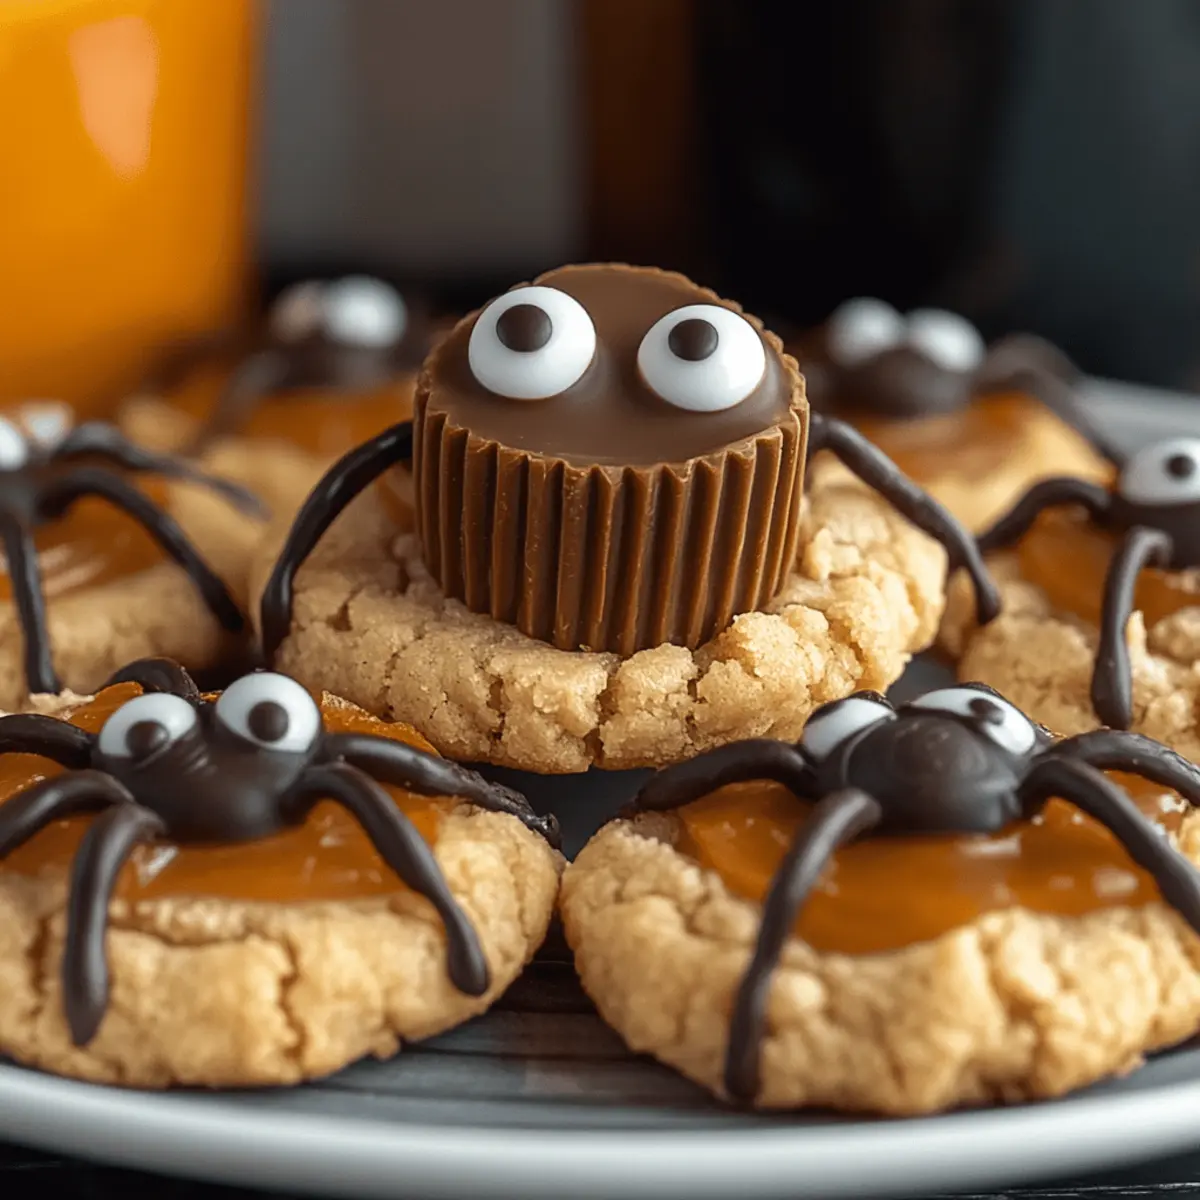
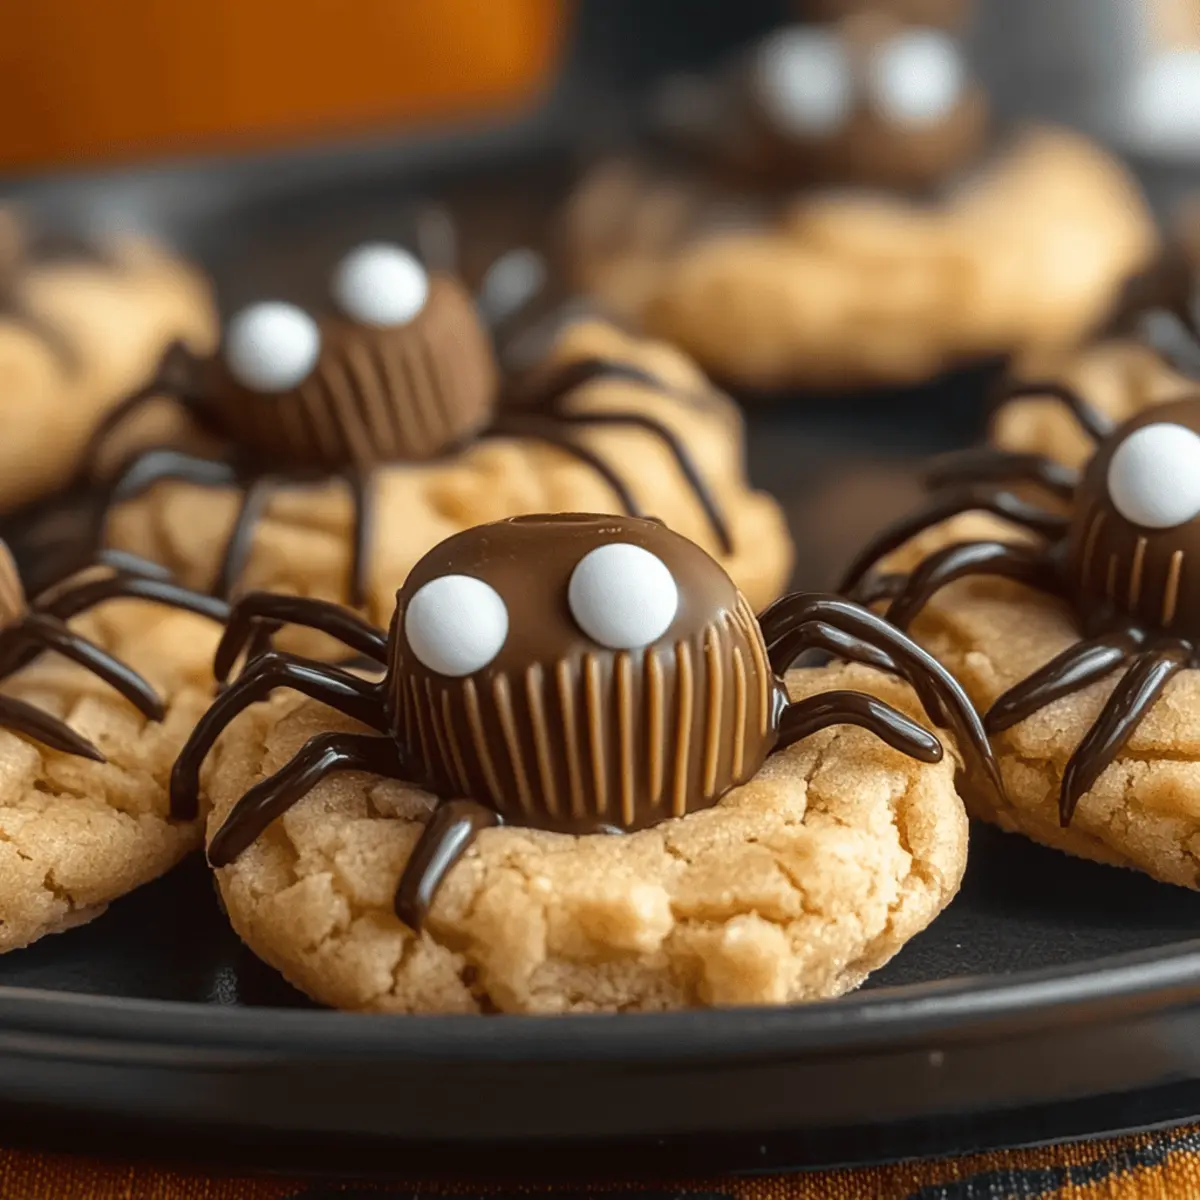
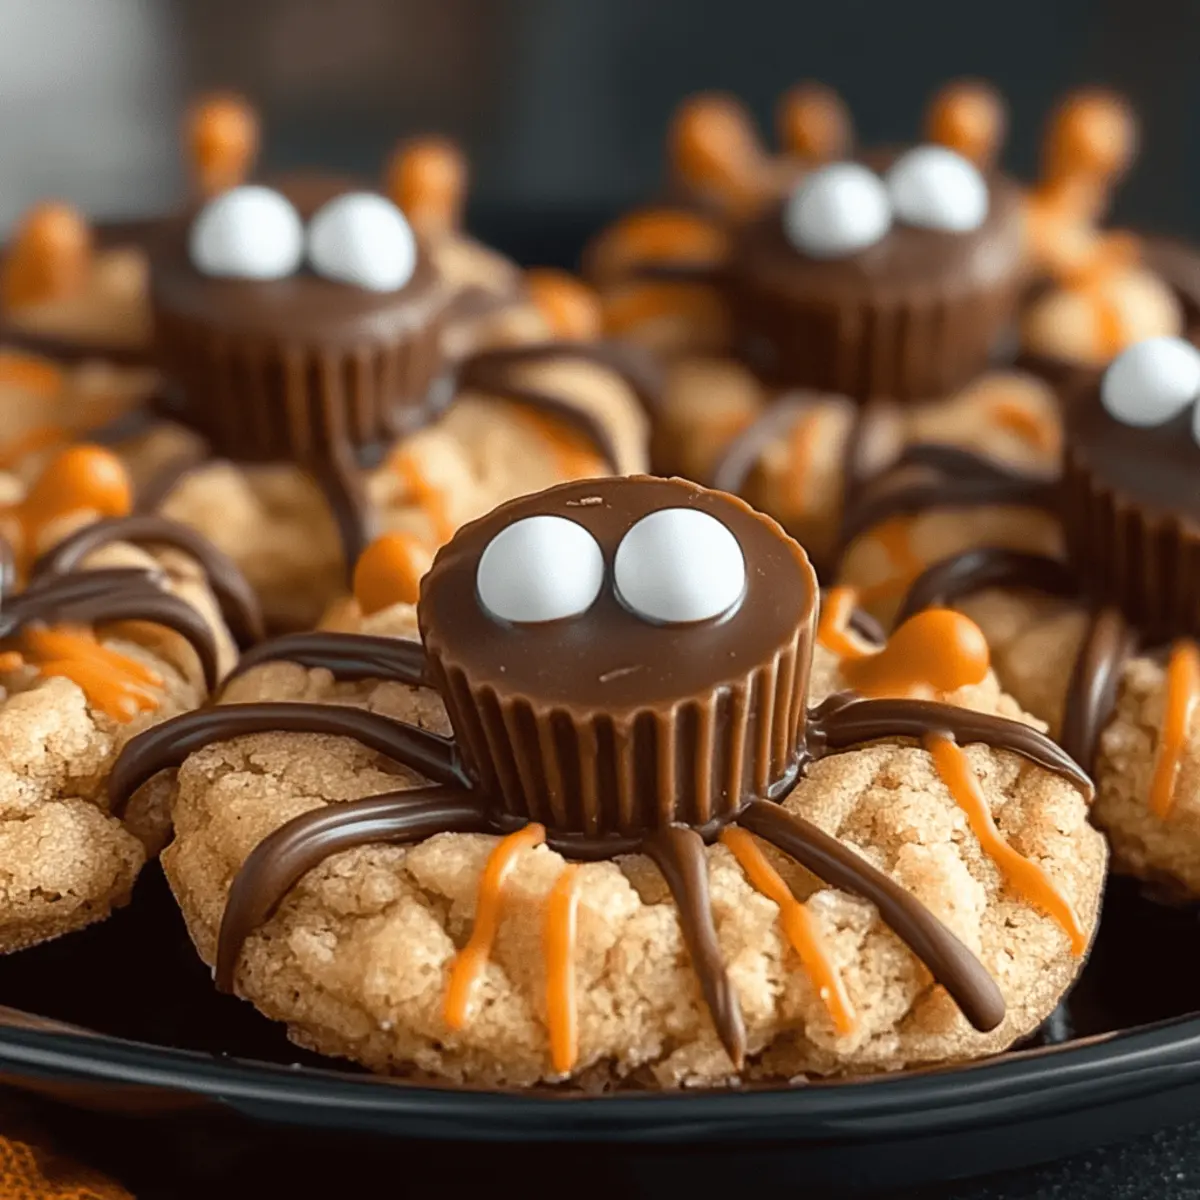
- Mini Reese’s Peanut Butter Cups – Serve as the adorable ‘spider’ body that joins the party theme perfectly!
- Semi-Sweet Chocolate Chips – Perfect for melting and crafting those whimsical spider legs; you can use any melting chocolate.
- Candy Eyeballs – Adds character and enhances the visual appeal of your spooky creations; chocolate chips can substitute in a pinch.
Dive into making these Peanut Butter Spider Cookies and bring a smile to every Halloween gathering!
Step‑by‑Step Instructions for Peanut Butter Spider Cookies
Step 1: Prepare Reese’s
Start by placing the mini Reese’s Peanut Butter Cups in the freezer for about 15 minutes. This will ensure they hold their shape when pressed into the warm cookies later. While they chill, preheat your oven to 350°F (175°C) to get it ready for baking these delicious Peanut Butter Spider Cookies.
Step 2: Cream Butter & Sugars
In a large mixing bowl, beat together ½ cup of room temperature unsalted butter, ½ cup brown sugar, and ¼ cup granulated sugar until the mixture is smooth and fluffy, about 2-3 minutes. A hand mixer or stand mixer will work well for this step, creating a light and creamy base that enhances the peanut butter flavor in your cookies.
Step 3: Add Wet Ingredients
Next, mix in ¾ cup of creamy peanut butter, 1 large egg, and 1 teaspoon of vanilla extract until well combined. It should be a thick, smooth batter. This step is crucial for ensuring every bite of your Peanut Butter Spider Cookies is rich with flavor. Make sure there are no lumps before proceeding to the dry ingredients.
Step 4: Combine Dry Ingredients
In a separate bowl, whisk together 1 ½ cups of all-purpose flour, 1 teaspoon of baking soda, ½ teaspoon of baking powder, and a pinch of salt. Gradually add this dry mixture to your peanut butter batter, mixing gently until just combined. Be careful not to overmix, as you want to keep the cookies soft and chewy.
Step 5: Shape Cookies
Using a tablespoon, scoop out dough and roll it into balls, roughly the size of a golf ball. Roll each ball in some granulated sugar for a sparkly finish, then place them on a lined baking sheet, spaced about 2 inches apart. This step is where your Peanut Butter Spider Cookies begin to take shape, ready for the oven!
Step 6: Bake
Bake the cookies in your preheated oven for 8 to 11 minutes, keeping a close eye on them. The cookies are done when the edges are set, but the centers may still look slightly underbaked. This will help create that wonderfully soft texture that makes these cookies so delightful.
Step 7: Cool & Decorate
Immediately after removing them from the oven, press a chilled Reese’s cup into the center of each cookie. Allow the cookies to cool on the baking sheet for 15 to 20 minutes, which helps retain their shape. Meanwhile, melt some semi-sweet chocolate chips in a microwave-safe bowl to create the spider legs.
Step 8: Final Touches
Once the cookies are cool, use a piping bag or a fork to drizzle melted chocolate to form spider legs extending from each Reese’s. Top it off by placing candy eyeballs on the Reese’s, ensuring each Peanut Butter Spider Cookie has its unique personality. These treats are now ready to delight your Halloween guests!
What to Serve with Peanut Butter Spider Cookies
Picture a delightful Halloween gathering filled with laughter, creativity, and the joy of sharing sweet treats that spark smiles.
- Warm Apple Cider: The cozy flavors of apple and cinnamon enhance the festive atmosphere, offering a comforting drink alongside your cookies.
- Chocolate Milkshake: Rich and creamy, this shake perfectly complements the peanut butter, adding a playful, indulgent twist that’s sure to please.
- Pumpkin Spice Cupcakes: With their moist texture and warm spices, these cupcakes echo the fall theme beautifully and create a delightful dessert triad.
- Fruit Salad: A refreshing mix of seasonal fruits balances the sweetness of the cookies while adding a vibrant, colorful element to the table.
- Popcorn Balls: Sweet and crunchy, these can serve as another fun treat for the kids, creating an enjoyable contrast to the soft cookies.
- Caramel Dipping Sauce: Drizzle warm caramel on each cookie for an extra touch of decadence, inviting guests to experiment with flavors and textures.
- Vanilla Ice Cream: The classic pairing offers a delightful way to enjoy the cookies melted and slightly warm over a scoop of creamy goodness.
- Gingerbread Cookies: Stay festive with a holiday classic that plays into the seasonal spirit and provides another comforting treat at your gathering.
- Hot Chocolate Bar: Invite guests to top their steaming cups with whipped cream or mini marshmallows, making it fun while pairing gorgeously with spider cookies.
Make Ahead Options
These Peanut Butter Spider Cookies are perfect for meal prep, allowing you to enjoy delightful treats without the last-minute rush! You can prepare the cookie dough up to 3 days in advance; just refrigerate it in an airtight container to maintain freshness. Additionally, you can freeze formed cookie dough balls for up to 3 months—just roll them in sugar before freezing. When you’re ready to bake, simply place them on a baking sheet and bake straight from the freezer, adding an extra minute to the baking time. This way, you’ll have fresh, delicious cookies that are just as delightful when you serve them!
Peanut Butter Spider Cookies Variations
Feel free to let your creativity shine by customizing these delightful cookies to suit your taste and dietary needs.
-
Almond Butter: Swap peanut butter for almond butter for a nutty twist. The flavor change can be surprisingly delightful, offering a new perspective on these spooky treats!
-
Chocolate Spider Bodies: Use chocolate-covered candies for spider bodies instead of Reese’s cups. This change adds a unique chocolatey taste that’ll appeal to chocolate lovers and fits perfectly with the Halloween theme!
-
Nut-Free: Replace peanut butter with sunbutter or a similar nut-free option to keep these cookies safe for those with allergies. This ensures everyone can enjoy the spooky fun without worry.
-
Reduced Sugar: For a healthier version, you can reduce the sugars by 25% and adjust the sweetness with a touch of honey or maple syrup. Your cookies will still be delicious, but with slightly fewer calories!
-
Gluten-Free: Use a 1:1 gluten-free flour blend instead of regular flour, making these cookies accessible for your gluten-sensitive friends. They’ll be thrilled to join in the fun!
-
Add Spices: Incorporate a dash of cinnamon or nutmeg into the cookie dough for a warm, fall flavor. This small touch can infuse the cookies with an inviting aroma that brings the festive season alive.
-
White Chocolate Legs: Replace semi-sweet chocolate chips with white chocolate for drizzling spider legs. It creates a visually striking contrast against the peanut butter cookies and caters to those who prefer a sweeter flavor.
-
Spicy Kick: Add a pinch of cayenne pepper into the dough for a surprising heat that complements the sweetness beautifully. It’s an adventurous twist that will excite thrill-seekers and spice lovers alike.
Why not whip up a batch of these Peanut Butter Spider Cookies alongside some delightful Fluffy Buttermilk Pancakes for brunch? They make for a perfect Halloween treat table!
How to Store and Freeze Peanut Butter Spider Cookies
Room Temperature: Keep these cookies in an airtight container at room temperature for up to 3 days. Layer with parchment paper if stacking to prevent sticking.
Fridge: For extended freshness, store in the fridge for up to 5 days; this will slightly alter the texture but still keep them delicious.
Freezer: Freeze baked cookies in a single layer for up to 3 months. Once frozen, transfer to a zip-top bag to save space and maintain freshness.
Reheating: To enjoy these Peanut Butter Spider Cookies warm, reheat in the microwave for 10-15 seconds, just until warmed through.
Expert Tips for Peanut Butter Spider Cookies
-
Chill the Reese’s: Make sure to freeze the mini Reese’s before baking to prevent them from melting too much when pressed into the cookies.
-
Cooling Time: Allow the cookies to cool on the baking sheet to maintain their shape and avoid spreading. This is crucial for achieving the perfect texture.
-
Don’t Overmix: Mix the dry ingredients into the wet just until combined. Overmixing can lead to tough cookies, compromising the softness of your Peanut Butter Spider Cookies.
-
Use Quality Peanut Butter: Opt for creamy, non-natural peanut butter for best results—natural varieties can create a grainy texture.
-
Storage Tips: Store cookies in an airtight container at room temperature for up to 3 days. If stacking, place parchment paper between layers to keep them fresh.
Peanut Butter Spider Cookies Recipe FAQs
How do I select the right peanut butter?
Absolutely! When choosing peanut butter for these cookies, opt for a creamy, non-natural variety. Natural peanut butter may contain oils that can alter the texture, making the cookies grainy. Brands like Jif or Skippy work wonderfully, ensuring a rich and smooth flavor.
How can I store my Peanut Butter Spider Cookies?
For optimal freshness, keep your cookies in an airtight container at room temperature for up to 3 days. If you want to extend their shelf life, consider keeping them in the fridge, where they can last up to 5 days. To prevent them from sticking together when stacked, place parchment paper between layers.
Can I freeze my Peanut Butter Spider Cookies?
Absolutely! To freeze your cookies, start by laying them in a single layer on a baking sheet and place them in the freezer for about an hour. Once they’re frozen solid, transfer them to a zip-top freezer bag or an airtight container. They can be stored this way for up to 3 months. When you’re ready to enjoy, thaw them in the fridge overnight or bring them back to room temperature on the countertop.
What do I do if my cookies are too flat?
Very good question! If your Peanut Butter Spider Cookies spread too much while baking, it might be due to several factors. Ensure your butter is at room temperature, not melted, as melted butter can lead to overly flat cookies. Also, double-check that you’re measuring your flour correctly; too little flour can contribute to spreading. It’s best to spoon flour into your measuring cup and level it off, rather than scooping directly from the bag.
Can I make these cookies gluten-free?
Yes, you can! To make your Peanut Butter Spider Cookies gluten-free, substitute the all-purpose flour for a 1:1 gluten-free flour blend. Brands like Bob’s Red Mill or King Arthur Flour offer excellent alternatives that should yield similar results. Just be sure to check that all other ingredients, like the baking powder and chocolate, are gluten-free as well.
Are there any allergy considerations I should be aware of?
Absolutely! These cookies contain common allergens like peanuts, gluten (if using regular flour), and possibly dairy. If making for a crowd or children, it’s wise to inform others of these ingredients. Alternatively, you could use almond butter instead of peanut butter and check for allergy-friendly brands of chocolate. Remember, always substitute with caution and verify labels for accuracy!
Peanut Butter Spider Cookies: Spooky Sweet Halloween Delights
Ingredients
Equipment
Method
- Prepare Reese's by placing them in the freezer for about 15 minutes. Preheat your oven to 350°F (175°C).
- In a large mixing bowl, beat together butter, brown sugar, and granulated sugar until smooth and fluffy.
- Mix in peanut butter, egg, and vanilla extract until well combined.
- In a separate bowl, whisk together flour, baking soda, baking powder, and salt. Gradually mix into the wet ingredients until just combined.
- Scoop out dough and roll into balls, rolling each ball in sugar before placing on a lined baking sheet.
- Bake in the preheated oven for 8 to 11 minutes until edges are set. The centers should look slightly underbaked.
- Press a chilled Reese's cup into the center of each cookie right after baking, then allow to cool on the baking sheet.
- Melt chocolate chips and drizzle over cookies to form spider legs, then top with candy eyeballs.