

Stepping into the kitchen, I can’t help but be excited by the comforting aroma of freshly cracked eggs—a symbol of so many memorable brunches. Today, I’d love to share my delightful recipe for Shirred Eggs, a dish that’s as elegant as it is effortless. With silky textures and the rich flavors of Parmesan and chives, this creamy treat is perfect for any home chef looking to impress without stress. Not only do these shirred eggs come together in a snap, but they also allow for plenty of creative twists, accommodating various dietary preferences wonderfully. Whether you’re lingering over a lazy Sunday morning or prepping for a cozy gathering, these eggs will undoubtedly become your new go-to. Curious about how to elevate your brunch game? Let’s dive in!
Why are Shirred Eggs so Special?
Simple to Prepare: Even if you’re new to cooking, this egg dish comes together effortlessly, requiring minimal tools and techniques.
Rich and Creamy Flavor: The combo of heavy cream and Parmesan gives every bite a luxurious feel you’ll adore.
Perfectly Textured: Enjoy silky whites paired with runny yolks—a pairing that feels indulgent yet light.
Endless Variations: From dairy-free swaps to extra veggies, you can easily customize this recipe to fit your dietary needs or mood. Check out our suggestions for variations to truly make it your own!
Brunch Showstopper: Whether it’s a relaxed family breakfast or an elegant gathering, these shirred eggs will impress everyone at the table.
Shirred Eggs Ingredients
• To whip up these silky Shirred Eggs, gather the following ingredients for a brunch that’s both easy and impressive.
For the Base
- Unsalted Butter – Adds richness and helps grease the ramekin; substitute with a dairy-free spread for a vegan version.
- Heavy Cream – Provides a creamy texture; can be swapped with high-fat oat milk or a vegan cream alternative for dairy-free options.
- Large Eggs – The star of the dish; opt for local, fresh eggs for optimal flavor.
For the Seasoning
- Salt – Enhances flavor; adjust to taste for your personal preference.
- Freshly Ground Black Pepper – Adds a mild heat; using freshly ground is preferable for maximum flavor.
- Minced Fresh Chives – Offers a fresh, mild onion flavor; can be substituted with green onions or shallots if needed.
For the Finish
- Grated Parmesan Cheese – Adds a savory and creamy element; this can be omitted for a dairy-free version.
Enjoy making your own spin on these delightful shirred eggs!
Step‑by‑Step Instructions for Shirred Eggs
Step 1: Preheat the Oven
Begin by preheating your oven to 375°F (190°C). This temperature will ensure that your Shirred Eggs bake evenly, giving you the perfect texture. While the oven warms up, gather your ramekins and grease them with butter to prepare for the creamy goodness that’s about to happen.
Step 2: Grease the Ramekin
Take a 6-ounce ramekin and add about a teaspoon of unsalted butter. Using a pastry brush or your fingers, coat the bottom and sides thoroughly to prevent the eggs from sticking. The shiny, buttered surface will help achieve a beautifully soft texture for your Shirred Eggs.
Step 3: Add the Cream
Pour a generous amount of heavy cream into the greased ramekin until it reaches about halfway. The cream will not only provide richness but also create a luscious base for the eggs. This step is essential for that lovely, creamy mouthfeel in your final dish.
Step 4: Crack the Eggs
Next, gently crack two large eggs on top of the cream, taking care to keep the yolks intact. Position them side by side in the ramekin, so they maintain their form while cooking. The contrast of the white and yolks will enhance the visual appeal of your Shirred Eggs.
Step 5: Season the Eggs
Sprinkle a pinch of salt and freshly ground black pepper over the eggs, followed by a sprinkle of minced chives and grated Parmesan cheese. The seasoning will elevate the flavor, bringing out the best in your Shirred Eggs. Be generous, but taste as you go to find your perfect balance.
Step 6: Bake the Dish
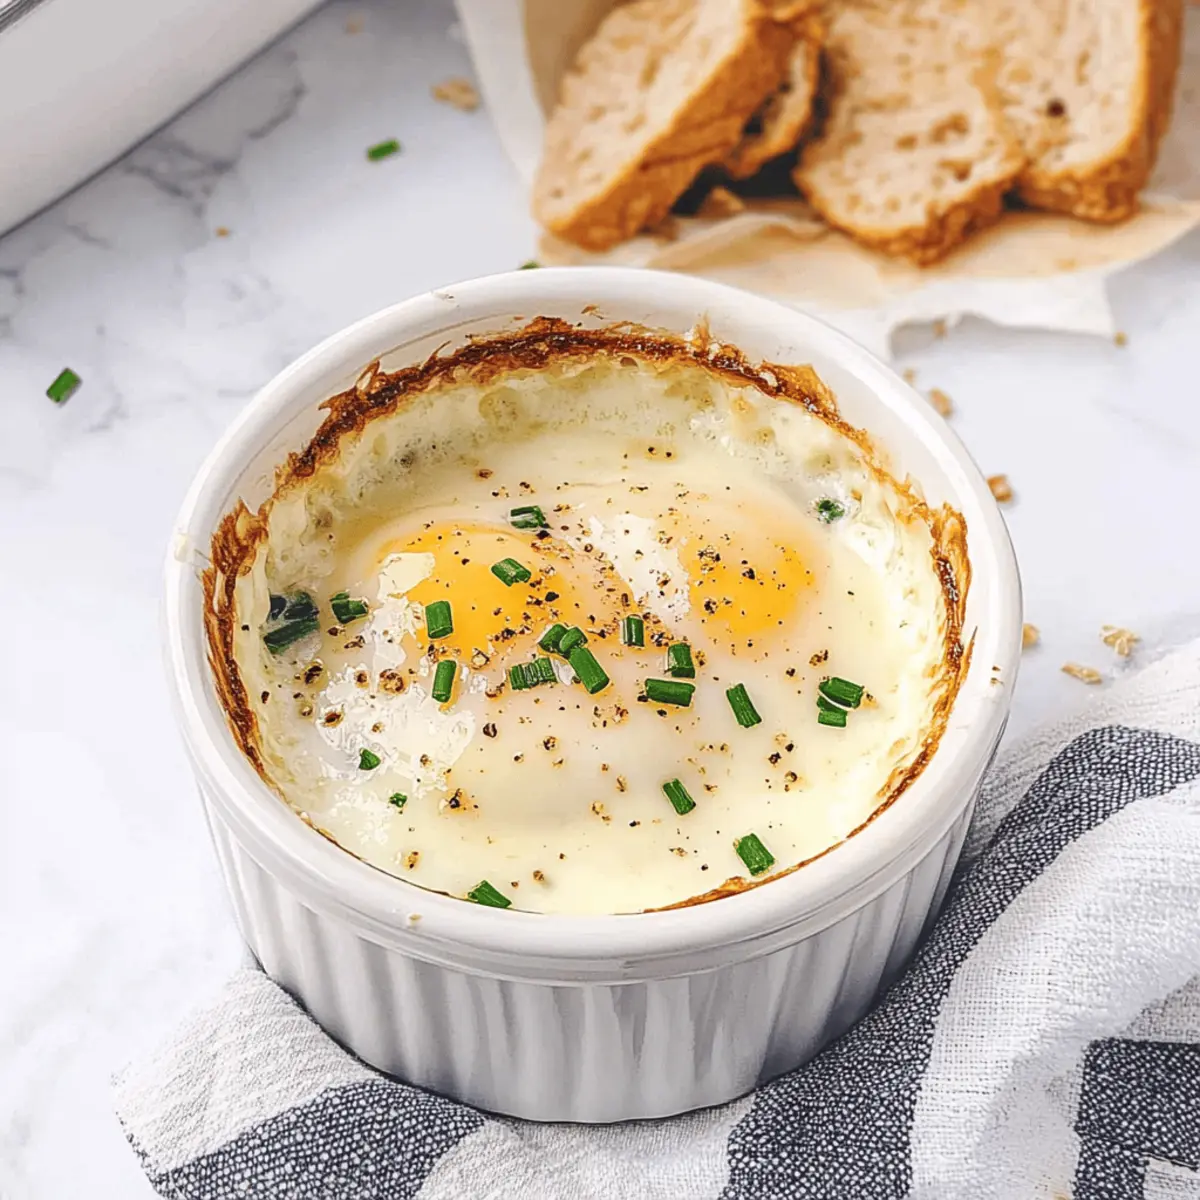
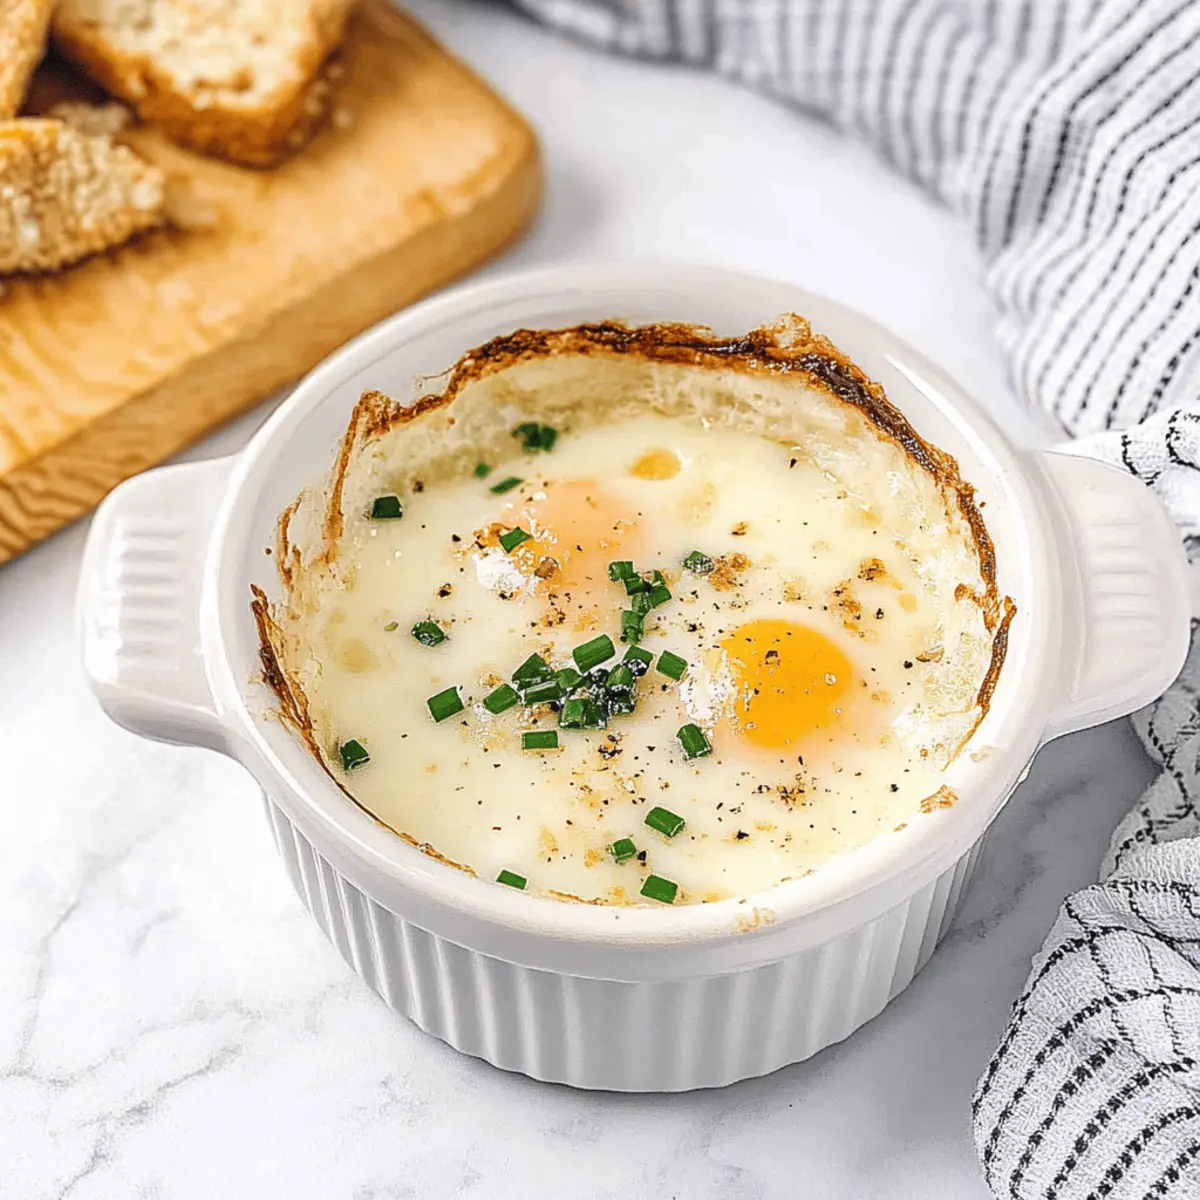
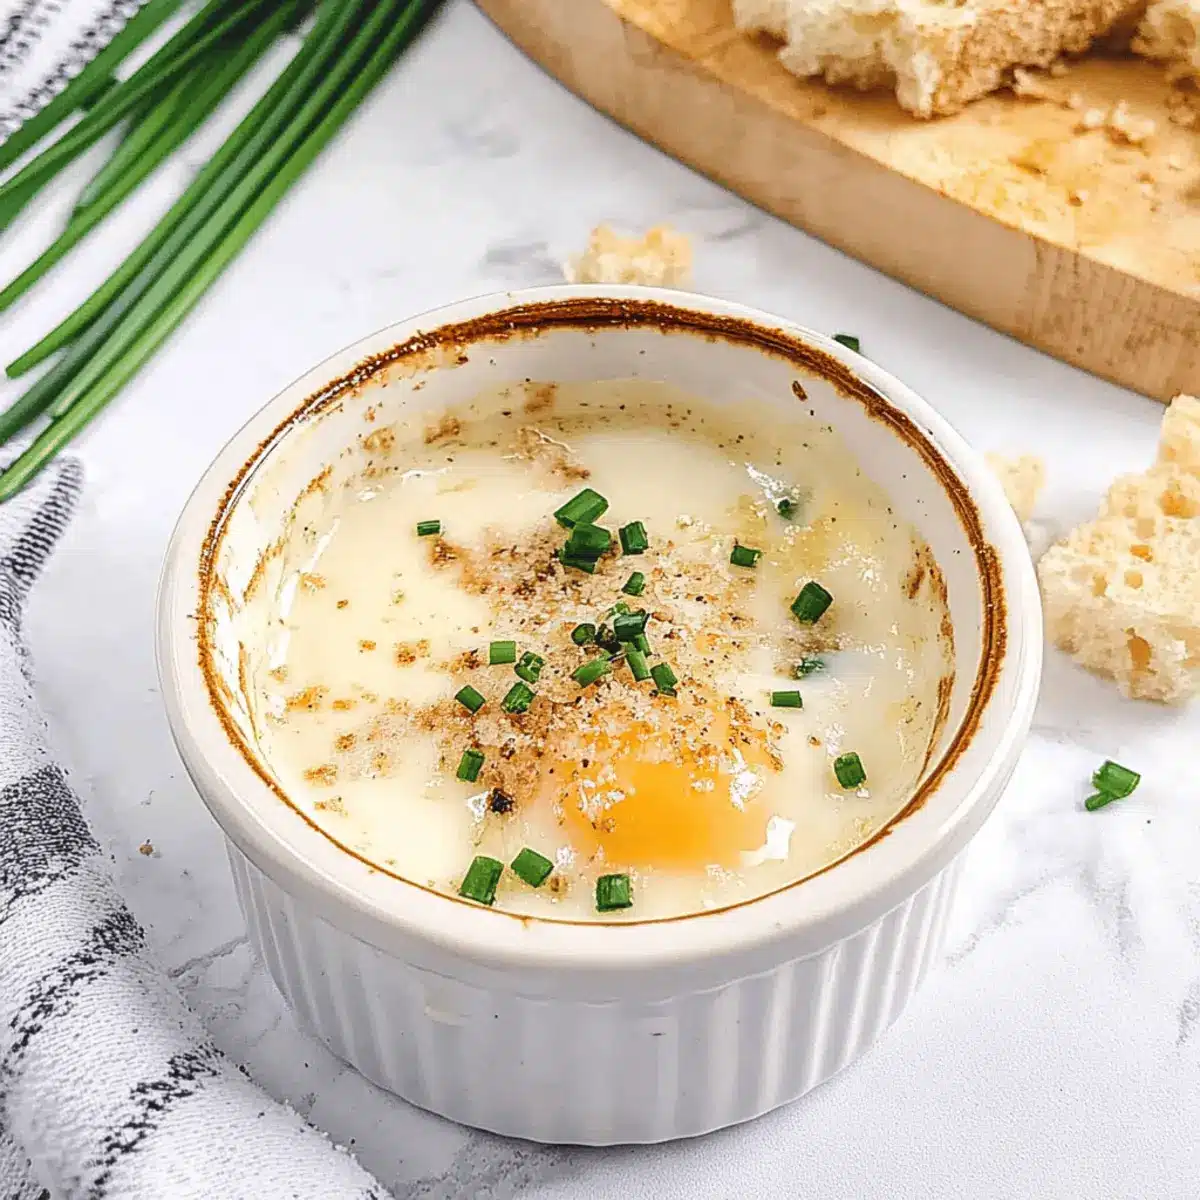
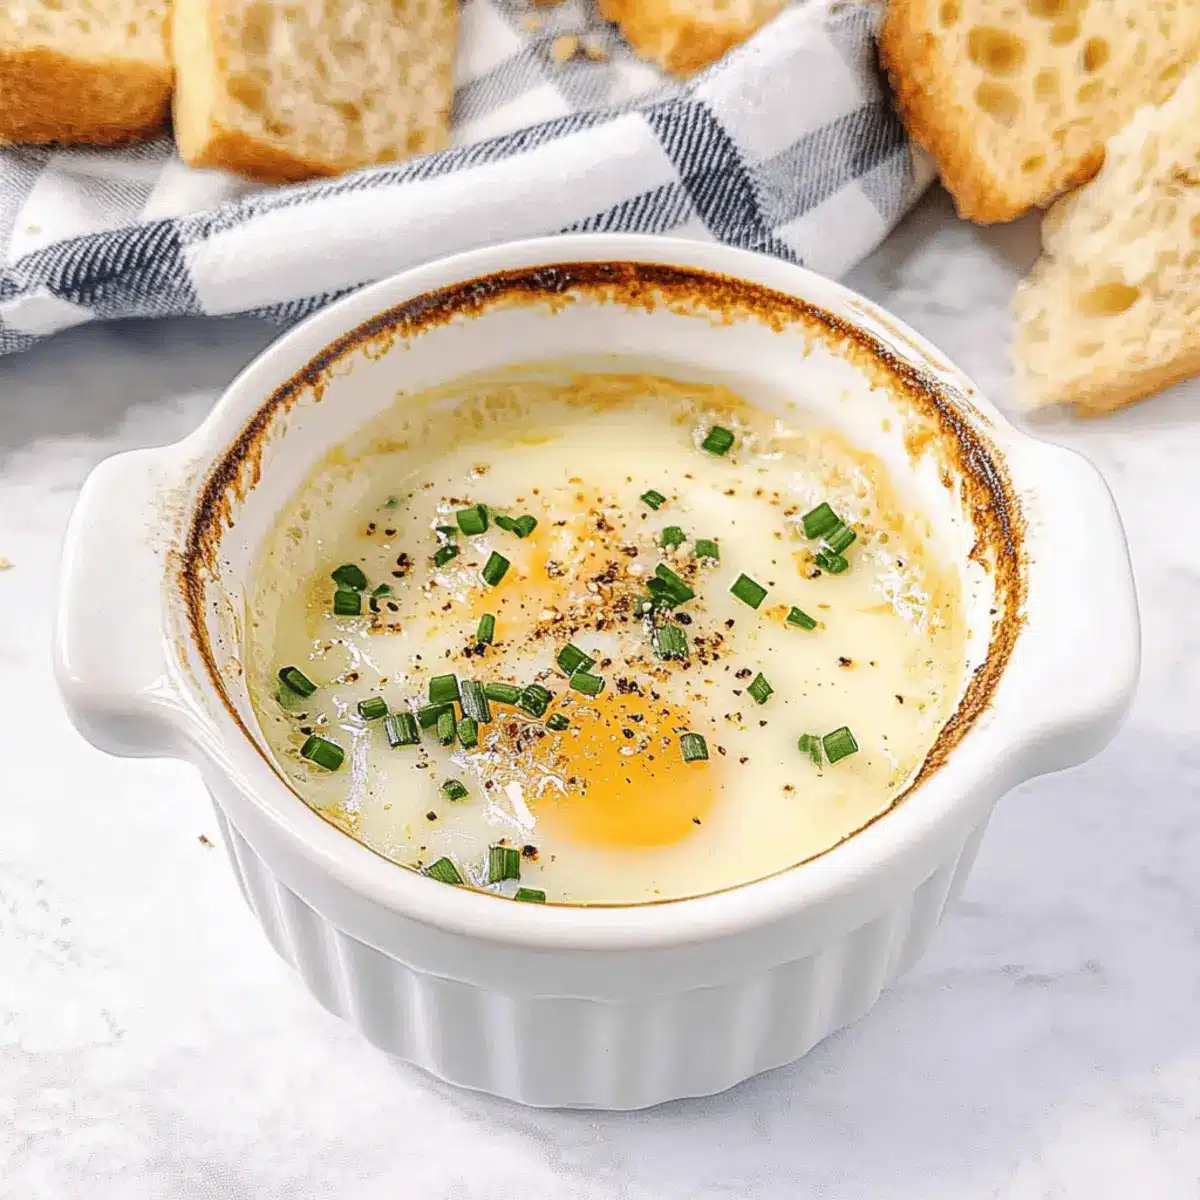
Place the ramekin on a baking sheet for easy handling, then transfer it to the preheated oven. Bake for about 12 to 15 minutes, keeping an eye on the eggs. You want the whites to be set while the yolks remain gloriously runny, resembling a silky custard.
Step 7: Rest Before Serving
Once baked, carefully remove the ramekin from the oven and let it rest for a couple of minutes. This pause allows the steam to settle and ensures your Shirred Eggs maintain their appealing, soft texture. While waiting, set the table and prepare your fresh toast or sides!
Step 8: Serve and Enjoy
With care, serve your delightful Shirred Eggs straight from the ramekin. Pair them with toasted bread or crispy potatoes for an elevated brunch experience. Enjoy the creamy richness and perfectly runny yolks while they’re fresh and warm!
What to Serve with Creamy Shirred Eggs
Start your brunch experience on a delicious note with tempting pairings that will elevate your creamy delight.
-
Air-Fryer Toast: Lightly crisped and warm, these toast slices are perfect for dipping into runny yolks, enhancing every bite.
-
Bacon-Wrapped Asparagus: This combo provides a savory crunch, with the salty bacon beautifully contrasting the creaminess of the eggs for a delightful flavor journey.
-
Mixed Greens Salad: A fresh, zesty salad balances the richness of Shirred Eggs while adding a crisp, healthful touch—perfect for that light brunch feel.
-
Sautéed Spinach: Tender, vibrant greens add an earthy note that complements the buttery eggs while packing in nutrients; it’s a match made in culinary heaven.
-
Creamy Potato Gratin: Indulgent and comforting, this dish offers a rich texture that rounds out your meal, ensuring no one leaves the table hungry.
-
Fresh Fruit Platter: A vibrant collection of seasonal fruits provides a refreshing and sweet contrast, cleansing the palate between bites of creamy eggs.
-
Sparkling Mimosa: This bubbly drink adds a touch of festivity to your brunch affair, with citrus notes brightening the flavors of the dish beautifully.
Expert Tips for Shirred Eggs
-
Use Fresh Eggs: Local, farm-fresh eggs provide the best flavor and texture. They will contribute to the creaminess of your shirred eggs.
-
Watch the Baking Time: Keep a close eye on the oven to prevent overcooking those delightful yolks; aim for 12-15 minutes for the perfect runny consistency.
-
Choose the Right Dish: Ramekins ensure even cooking. If using a larger dish, adjust the cooking time for perfectly set whites and runny yolks.
-
Season Generously: Don’t skimp on salt and pepper; proper seasoning elevates the overall flavor, making your shirred eggs a standout.
-
Serve Immediately: For the best experience, serve your shirred eggs fresh out of the oven. The texture and flavor are truly unbeatable when enjoyed right away!
Storage Tips for Shirred Eggs
- Best Enjoyed Fresh: Shirred eggs are meant to be savored right after baking; they lose their luxurious texture when reheated.
- Refrigeration: If you have leftovers, store them in an airtight container in the fridge for up to 2 hours; however, taste and quality may diminish.
- Freezing Not Recommended: Due to the delicate nature of the eggs, freezing is not advised, as it alters their texture and flavor significantly.
- Reheating Caution: If reheating is necessary, do so gently in the oven at a low temperature until warmed through, being careful not to overcook the yolks.
Make Ahead Options
These creamy Shirred Eggs are an excellent option for meal prep, making your brunch experience both delightful and stress-free! You can prepare the base by greasing the ramekins and adding heavy cream and seasonings up to 24 hours in advance. To maintain quality, cover the ramekins with plastic wrap and refrigerate until you’re ready to bake. When it’s time to serve, simply crack the eggs on top, season them as desired, and pop them in the oven. Bake as instructed, and you’ll enjoy perfectly runny yolks and silky whites with minimal effort, making your busy mornings a breeze!
Shirred Eggs: Delicious Variations to Try
Feel free to customize these Shirred Eggs to make them uniquely yours—let your creativity roam in the kitchen!
-
Dairy-Free: Replace butter with a vegan spread and use coconut cream for a luscious, dairy-free twist.
-
Veggie-Packed: Add sautéed spinach, bell peppers, or mushrooms for a delightful, colorful veggie boost that adds flavor and nutrition.
-
Herb Infusion: Swap out chives for fresh dill or parsley, creating entirely new flavor profiles that brighten your dish.
-
Cheese Alternatives: Try feta or goat cheese instead of Parmesan for a tangy surprise that pairs beautifully with the eggs.
-
Spicy Kick: Sprinkle in some red pepper flakes or diced jalapeños to bring a little heat to your brunch table.
-
Savory Touch: Consider layering in smoked salmon or crispy bacon before adding the eggs for an elegant touch that elevates this dish.
-
Healthy Grain: Serve alongside quinoa or brown rice for a hearty, nutritious brunch option that complements the creamy eggs wonderfully.
These variations not only enhance the flavor but also make the recipe more versatile! Pair them with sides like Air-Fryer Breakfast Potatoes or a refreshing Mimosa to round out your brunch experience. Enjoy experimenting!
Shirred Eggs Recipe FAQs
What should I look for when selecting eggs?
Absolutely! For the best flavor and texture in your Shirred Eggs, choose local, farm-fresh large eggs. Look for eggs with clean, uncracked shells and check the expiration date to ensure freshness.
What is the best way to store leftover Shirred Eggs?
Shirred eggs are best enjoyed fresh! If you have leftovers, place them in an airtight container and refrigerate for up to 2 hours. The texture may change and become less creamy, so it’s ideal to consume them soon after cooking.
Can Shirred Eggs be frozen?
No, I wouldn’t recommend freezing Shirred Eggs. Freezing alters the delicate texture of the eggs, leading to rubbery whites and grainy yolks when thawed. It’s best to enjoy them right after baking for that creamy, luxurious experience.
How can I fix overcooked Shirred Eggs?
If you’ve overcooked your Shirred Eggs and the yolks aren’t runny anymore, don’t fret! While there’s no magic fix for a runny yolk, you can always turn it into a delicious egg salad or add it to a savory dish for added protein. Just chop and mix with a little mayo, mustard, and seasonings for a tasty twist!
Are there any dietary considerations with this recipe?
Very! This recipe can easily be adapted for various dietary needs. For a dairy-free version, swap out the unsalted butter for a dairy-free spread, and replace heavy cream with coconut cream or vegan cashew cream. Just keep in mind that if you’re preparing these for anyone with food allergies, always double-check your ingredient labels!
Can I prepare Shirred Eggs ahead of time?
I wouldn’t recommend it, as Shirred Eggs are best enjoyed fresh. However, you can prep individual ramekins by greasing them and having your cream and eggs ready to go. Just pop them in the oven when you’re ready to serve for a quick and delightful brunch!
Indulgent Shirred Eggs: Easy Brunch Recipe to Impress
Ingredients
Equipment
Method
- Preheat the oven to 375°F (190°C) and grease ramekins with unsalted butter.
- Grease the bottom and sides of a 6-ounce ramekin with about a teaspoon of unsalted butter.
- Pour heavy cream into the greased ramekin until it is halfway full.
- Crack two large eggs on top of the cream, keeping the yolks intact.
- Season with salt, black pepper, minced chives, and grated Parmesan.
- Place the ramekin on a baking sheet and bake for 12 to 15 minutes.
- Let the baked ramekin rest for a couple of minutes before serving.
- Serve immediately with toasted bread or crispy potatoes.