

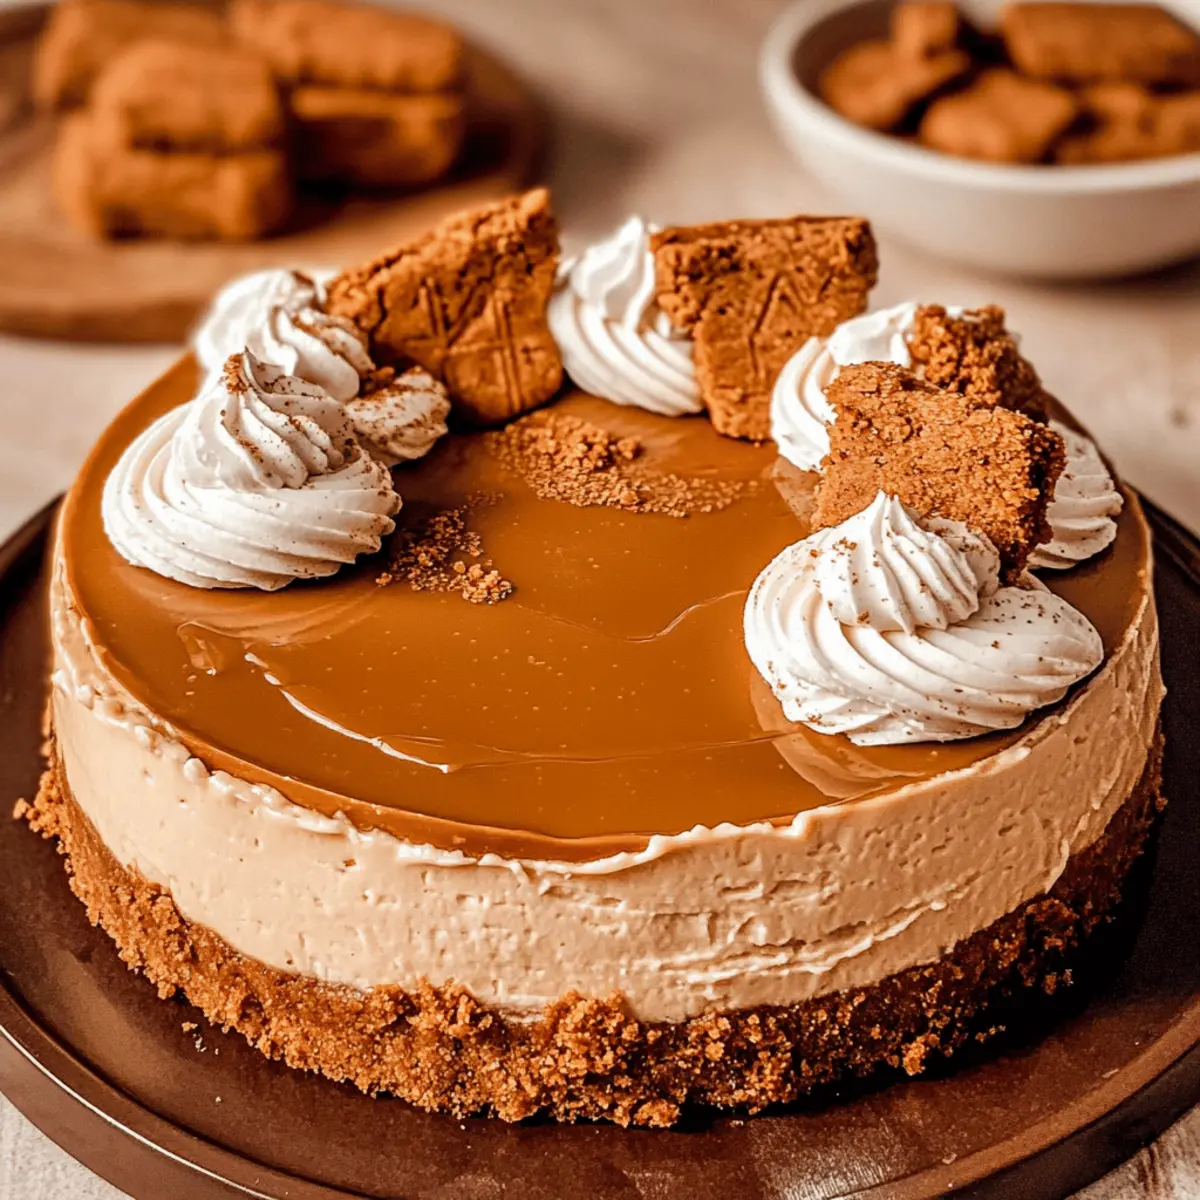
As I opened my pantry door, the familiar aroma of caramelized sugar and spice beckoned me in—Biscoff cookies, my secret weapon for building an unforgettable dessert. I’m thrilled to share my recipe for a luscious Biscoff Cheesecake that transforms those beloved cookie flavors into a creamy revelation. This cheesecake is not only incredibly indulgent but surprisingly quick to prepare, making it the perfect dessert for any occasion. With its buttery cookie crust and a melt-in-your-mouth filling that’s infused with cookie butter, it’s a crowd-pleaser that promises to impress. Whether you’re hosting a dinner party or simply treating yourself, this heavenly dessert will surely elevate your culinary adventures. Are you ready to embark on a sweet journey that’ll leave everyone craving another slice?

Why is Biscoff Cheesecake so special?
Decadence at Its Peak: This Biscoff Cheesecake offers an unforgettable dessert experience, blending rich flavors of cookie butter with a creamy filling that melts in your mouth.
Quick & Easy: Despite its impressive taste, it comes together quickly, making it perfect for both casual cookouts and formal gatherings.
Crowd-Pleasing Delight: This cheesecake is sure to be the star of any dessert table—perfect for dinner parties or family nights, it appeals to cookie lovers and cheesecake enthusiasts alike.
Texture Harmony: The contrast between the crunchy Biscoff crust and the silky filling creates a delightful bite that is simply irresistible.
Make-Ahead Marvel: Prepare this beauty in advance for optimal flavor development, allowing you to relax and enjoy your gatherings worry-free.
For more cookie-inspired indulgence, check out my Strawberry Cheesecake Bars or treat yourself to Cookies Cream Cheesecake.
Biscoff Cheesecake Ingredients
• Unleash the joy of baking with this delightful mix of ingredients.
For the Crust
- Biscoff Cookies – Perfect for a crunchy base; other speculoos cookies work well too.
- Unsalted Butter – Binds the crust beautifully; substitute with salted butter for a twist.
- Granulated White Sugar – Sweetens the crust nicely; brown sugar adds a hint of depth if desired.
For the Filling
- Cream Cheese – The heart of the cheesecake; ensure it’s at room temperature for smooth blending.
- Corn Starch – Stabilizes the filling; can be replaced with a small amount of flour if necessary.
- Biscoff Cookie Butter – Provides that irresistible flavor; feel free to swap with another cookie butter if you like.
- Sour Cream – Adds a touch of richness; plain yogurt is a suitable alternative.
- Vanilla Extract – Elevates the flavor profile; consider vanilla bean paste for a more luxurious option.
- Eggs – Vital for structure; no substitutes recommended, but flax eggs can be used for an egg-free version.
- Egg Yolks – Enhance creaminess; best if used as directed for optimal texture.
For Decoration
- Whipped Cream – For that beautiful finishing touch; you can opt for Cool Whip or skip this step if desired.
Dive into this Biscoff Cheesecake adventure with these delightful ingredients, and get ready to impress your family and friends!
Step‑by‑Step Instructions for Decadent Biscoff Cheesecake
Step 1: Preheat Your Oven
Begin by preheating your oven to 350°F (175°C) to ensure it’s hot and ready for your Biscoff cheesecake. This initial step is essential for creating the perfect texture in your cheesecake, as well as setting the crust. While the oven warms up, you can prepare your crust mixture.
Step 2: Prepare the Cookie Crust
In a food processor, pulse Biscoff cookies into fine crumbs. Combine these crumbs with melted unsalted butter and granulated sugar until well mixed. The texture should resemble wet sand. Pour this mixture into a 9-inch springform pan, pressing it firmly and evenly against the bottom. Bake in the preheated oven for 10 minutes until slightly golden, then let it cool.
Step 3: Mix the Cheesecake Filling
Using a stand mixer, combine room-temperature cream cheese, corn starch, and granulated sugar until smooth and creamy, about 2 minutes. Gradually add the Biscoff cookie butter, sour cream, and vanilla extract, mixing for an additional minute to incorporate. This luscious filling is the heart of your Biscoff cheesecake, so ensure it’s perfectly blended.
Step 4: Incorporate the Eggs
Add eggs and egg yolks one at a time into the cream cheese mixture, mixing gently after each addition; this prevents over-mixing which could affect the cheesecake’s lightness. The batter should be silky and well-combined, showcasing that delightful Biscoff flavor with every stir. Once mixed, you’re ready to pour.
Step 5: Assemble the Cheesecake
Pour the creamy cheesecake batter into the cooled Biscoff crust in the springform pan. To create a water bath, place the filled pan inside a larger roasting pan and carefully add hot water around the edges—this step helps the cheesecake bake evenly and prevents cracks.
Step 6: Bake to Perfection
Bake the Biscoff cheesecake in the oven for 1 hour. After this time, turn off the oven and leave the cheesecake inside for an additional hour; this gentle cooling period helps set the filling beautifully, giving you that perfect, creamy texture.
Step 7: Cool and Chill
Once cooled, carefully loosen the edges of the cheesecake from the springform pan using a knife. Transfer it to the refrigerator and let it chill for at least 8 hours, or preferably overnight, for the best flavor and texture to develop. This step is crucial for achieving that melt-in-your-mouth quality!
Step 8: Final Touches
When you’re ready to serve the Biscoff cheesecake, gently transfer it to a serving plate. Drizzle melted Biscoff cookie butter over the top for an indulgent finish. You can also decorate with homemade whipped cream if desired, adding a charming, festive touch to your delightful cheesecake.
Expert Tips for Biscoff Cheesecake
-
Room Temperature Ingredients: Ensure all your ingredients, especially cream cheese and eggs, are at room temperature. This helps create a smooth, lump-free batter.
-
Perfect Crust: Don’t skip the baking of the crust! Pre-baking helps it set and prevents it from becoming soggy once the filling is added.
-
Avoid Over-Mixing: When incorporating the eggs into the filling, mix just until combined. Over-mixing can introduce air, causing cracks in your Biscoff cheesecake.
-
Water Bath Method: Always use the water bath to bake your cheesecake. This technique keeps the baking environment moist and prevents drying out, which can lead to a dense texture.
-
Chill for Flavor: Allowing the cheesecake to chill overnight is key to enhancing the flavors. It ensures a richer and more cohesive taste, making each slice irresistibly creamy.
Biscoff Cheesecake Variations & Substitutions
Feel free to explore your culinary creativity with these delightful twists on the Biscoff cheesecake!
-
Dairy-Free: Use coconut cream instead of cream cheese and dairy-free sour cream for a vegan-friendly option.
-
Chocolate Lovers: Swirl in melted dark chocolate into the cheesecake filling for a rich mocha flavor that complements the Biscoff beautifully.
-
Lighter Option: Substitute Neufchâtel cheese for cream cheese and use unsweetened applesauce in place of half the sugar for a lighter dessert.
-
Nutty Addition: Fold in chopped pecans or walnuts into the filling for an added crunch that contrasts wonderfully with the smoothness of the cheesecake.
-
Caramel Drizzle: Drizzle melted caramel sauce on top just before serving for an irresistible sweet finish that complements the Biscoff flavors.
-
Mini Cheesecakes: Make individual cheesecakes in cupcake liners for a cute, portable version. Just adjust the baking time to about 20-25 minutes.
-
Spice It Up: Add a pinch of cinnamon or nutmeg to the filling for a cozy spice twist that brings warmth to your dessert table.
-
Fruit Infusion: Mix in some fresh raspberries or sliced strawberries into the filling for a tart flavor contrast that brightens every bite.
These simple swaps and variations make your Biscoff cheesecake unique and delicious. If you’re in the mood for more cookie-inspired treats, don’t miss my delightful Strawberry Cheesecake Bars or indulge in Cookies Cream Cheesecake for an equally scrumptious experience!
Make Ahead Options
Preparing this Biscoff Cheesecake ahead of time is a game-changer for busy cooks! You can make both the crust and cheesecake filling up to 24 hours in advance, allowing the flavors to meld wonderfully. To do this, prepare the crust, cool it completely, and refrigerate it. Then, mix the cheesecake filling and pour it over the crust, refrigerating it until you’re ready to bake. Not only will it save you time, but this dessert also maintains its delicious quality. On the day you plan to serve, simply follow the remaining baking instructions, and you’ll have an exquisite cheesecake that’s just as delightful, waiting to impress your friends and family!
What to Serve with Decadent Biscoff Cheesecake?
Elevate your dessert experience by pairing this indulgent cheesecake with delightful accompaniments that tease the taste buds.
- Vanilla Ice Cream: The creamy, cool texture perfectly contrasts the rich cheesecake, enhancing its flavors and adding a refreshing note.
- Fresh Berries: Juicy strawberries or raspberries provide a tart balance to the sweetness of the cheesecake, bringing in a vibrant color and flavor.
- Chocolate Drizzle: A pour of melted chocolate adds a luscious touch, deepening the dessert’s complexity and satisfying chocolate cravings.
- Coffee or Espresso: A hot cup of coffee complements the caramel notes in the Biscoff cheesecake, making each bite feel like a warm embrace.
- Chantilly Cream: Light and airy, this whipped cream topping adds an elegant finish to your cheesecake experience, making every slice feel special.
- Mint Sprigs: Sunshiny mint leaves offer a refreshing garnish, enhancing the overall presentation and adding a hint of herbal aroma.
- Dark Chocolate Shavings: Sprinkle these on top for a luxurious touch, providing a slight bitterness that balances the dessert’s sweetness beautifully.
These thoughtful pairings not only enhance your Biscoff cheesecake but create a well-rounded dessert experience that your guests will love.
How to Store and Freeze Biscoff Cheesecake
Fridge: Store leftover Biscoff cheesecake in an airtight container for up to 5 days. This will keep it fresh and delicious, ready for those late-night cravings!
Freezer: If you want to enjoy this indulgent cheesecake later, wrap individual slices tightly in plastic wrap and then foil. It can be frozen for up to 2 months.
Thawing: When you’re ready to enjoy, transfer the cheesecake to the fridge to thaw overnight. This slow thaw helps maintain its creamy texture.
Reheating: Though it’s best served chilled, if you prefer a warm slice, briefly microwave it on a low setting for about 10-15 seconds. Enjoy the melt-in-your-mouth experience!
Biscoff Cheesecake Recipe FAQs
What type of Biscoff cookies should I use?
You should use original Biscoff cookies for the best flavor in the crust, but you can substitute them with other speculoos cookies if you prefer. Just ensure they have a similar texture and spiced flavor!
How do I store leftover Biscoff cheesecake?
Store your leftover Biscoff cheesecake in an airtight container in the refrigerator for up to 5 days. This will keep it fresh and delicious, ensuring you can indulge in a slice whenever you crave something sweet.
Can I freeze Biscoff cheesecake?
Absolutely! To freeze, wrap individual slices tightly in plastic wrap, followed by a layer of foil to prevent freezer burn. It can be frozen for up to 2 months. When you’re ready to enjoy, simply transfer to the fridge to thaw overnight for the best texture.
What should I do if my cheesecake cracks while baking?
If your cheesecake cracks during baking, don’t fret! This can happen due to temperature changes. Ensure your oven is preheated correctly, and always use a water bath to maintain moisture. If a crack does appear, you can cover it with whipped cream or melted Biscoff for a delicious disguise!
Is there a way to make this Biscoff cheesecake gluten-free?
Yes! To make a gluten-free Biscoff cheesecake, use gluten-free Biscoff-style cookies and double-check that all other ingredients, particularly the cookie butter and vanilla extract, are certified gluten-free. This way, everyone can enjoy that luscious slice!
Can I use a different type of cookie butter?
Certainly! While Biscoff cookie butter is the star of this recipe, you can experiment with other cookie butters, such as speculoos or even chocolate spreads for a fun twist. Just be aware that the flavor profile will change slightly based on your choice!
Irresistible Biscoff Cheesecake That Will Melt Your Heart
Ingredients
Equipment
Method
- Preheat your oven to 350°F (175°C).
- In a food processor, pulse Biscoff cookies into fine crumbs and mix with melted butter and sugar until resembling wet sand. Press into a 9-inch springform pan and bake for 10 minutes.
- Using a stand mixer, beat cream cheese, corn starch, and sugar until smooth. Add cookie butter, sour cream, and vanilla, mixing until creamy.
- Add eggs and yolks one at a time, mixing gently to avoid over-mixing.
- Pour the filling into the crust and create a water bath. Bake for 1 hour, then turn off the oven and leave for an additional hour.
- Loosen the cheesecake from the springform pan and chill in the refrigerator for at least 8 hours or overnight.
- Before serving, drizzle melted cookie butter on top and decorate with whipped cream if desired.