

Is there anything more inviting than the scent of garlic and butter wafting through the air? As I prepared this Healthier Cheesy Garlic Butter Corn on the Cob, I was transported back to summer evenings spent laughing with friends and family at backyard barbecues. This twist on classic corn brings all the joy of that nostalgia without the guilt, thanks to lighter ingredients that still deliver a mouthwatering flavor. Perfect for satisfying your cravings while keeping to your Weight Watchers goals, this dish is a win-win: it comes together quickly and is sure to delight both your taste buds and your loved ones. Ready to elevate your corn game and make some unforgettable summer memories? Let’s dive in!
Why is this corn recipe a must-try?
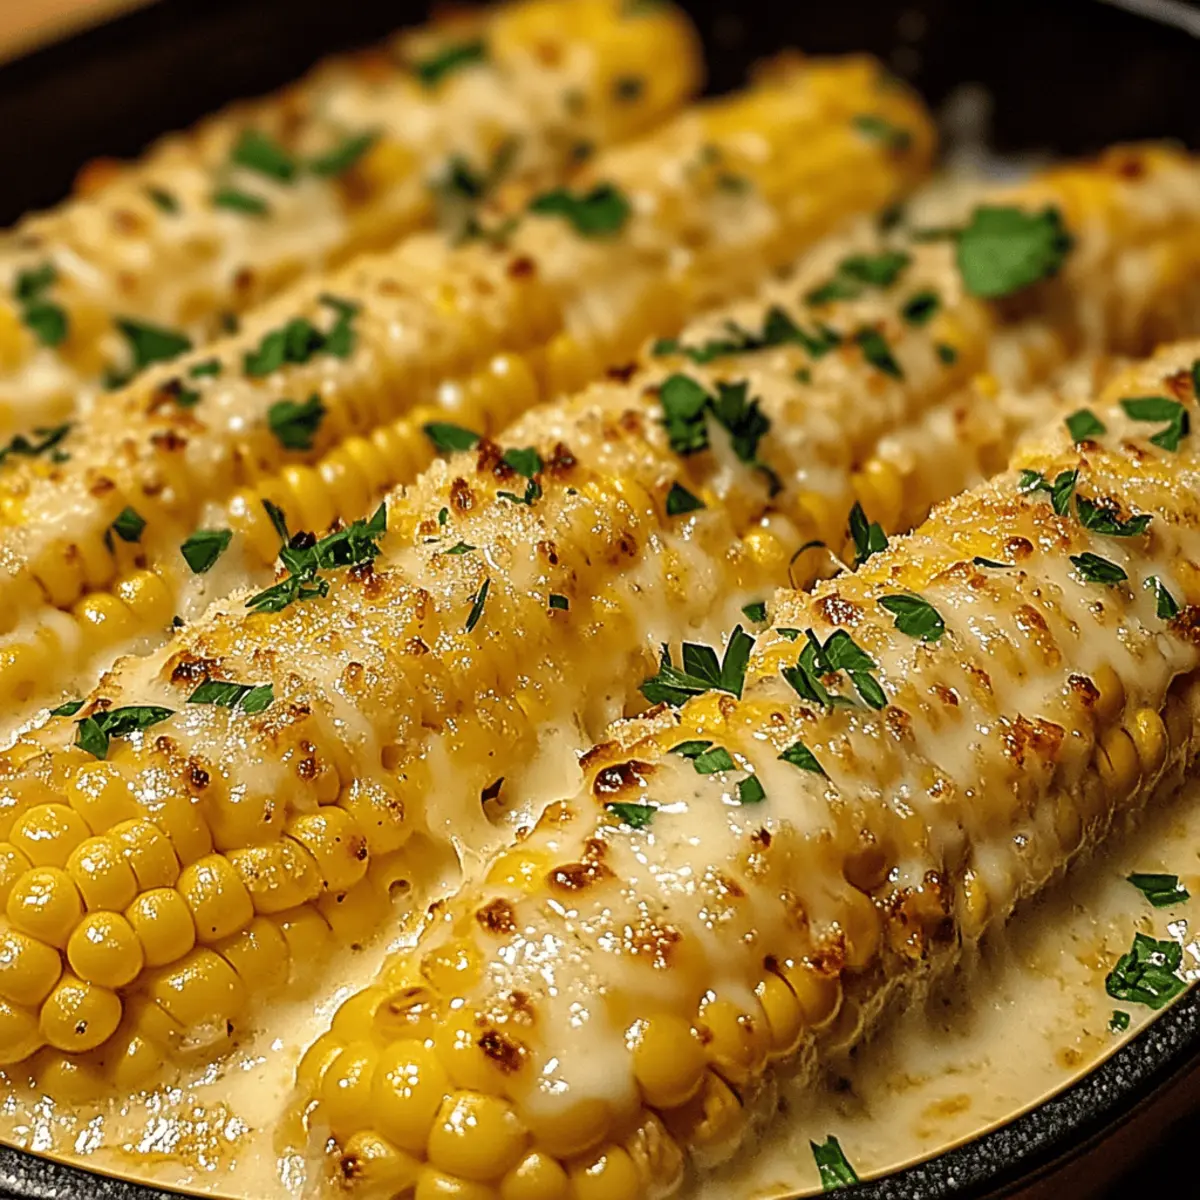
Irresistible Flavor: This recipe combines fresh corn with a luscious garlic and cheesy mix that elevates every bite to pure delight.
Guilt-Free Indulgence: With lighter ingredients like reduced-fat Parmesan and light butter, you can savor all the deliciousness without the extra calories.
Quick & Easy: In just 15 minutes, you’ll have a crowd-pleasing side dish that can transform any meal, just like my Garlic Butter Shrimp or Grilled Garlic Rosemary.
Versatile Enjoyment: Perfect at summer BBQs, yet tasty enough for a cozy weeknight dinner. This dish invites endless variations—try adding lime juice or chili powder!
Family-Friendly: Kids and adults alike will adore the comforting familiarity of cheesy, buttery corn, making it a sure hit at your next gathering.
Cheesy Garlic Butter Corn Ingredients
For the Corn
• Fresh Corn (4 ears) – The star of the dish; use sweet, juicy corn for optimal flavor.
For the Sauce
• Light Butter (2 tbsp, melted) – Adds richness without guilt; olive oil can replace it for a dairy-free version.
• Garlic (3 cloves, minced) – Imparts bold flavor; garlic powder works in a pinch.
• Garlic Powder (1 tsp) – Intensifies the garlic taste; omit if using fresh garlic generously.
• Smoked Paprika (1/2 tsp) – Brings a smoky depth to the dish; regular paprika is a fine substitute.
• Fresh Parsley (1 tbsp, chopped) – Adds freshness and vibrant color; chives make a great alternative.
For Topping
• Reduced-Fat Parmesan Cheese (1/4 cup) – Delivers cheesy goodness without excess calories; try grated mozzarella for a milder taste.
• Salt and Pepper (to taste) – Essential for balancing flavors.
• Optional – Red Pepper Flakes or Chili Powder (pinch) – Spice it up a notch; adjust to your heat preference.
This Cheesy Garlic Butter Corn is not just a recipe; it’s an invitation to gather around the table and create wonderful memories. Let’s make some delicious magic happen!
Step‑by‑Step Instructions for Cheesy Garlic Butter Corn
Step 1: Prepare the Corn
Begin by removing the husks and silk from four fresh ears of corn. Rinse them under cold water to clean any remaining silk, and pat dry with a towel. Note that fresh corn should feel firm and smell sweet; this will ensure you have the best flavor for your Cheesy Garlic Butter Corn.
Step 2: Mix the Garlic Butter Sauce
In a small bowl, combine 2 tablespoons of melted light butter with 3 minced garlic cloves, 1 teaspoon of garlic powder, and ½ teaspoon of smoked paprika. Stir in 1 tablespoon of chopped fresh parsley for a burst of color. Mix thoroughly, ensuring the garlic and spices are evenly distributed throughout the butter, which will create a flavorful coating for your corn.
Step 3: Heat the Grill or Water
Preheat your grill to medium-high heat, or alternatively, bring a large pot of water to a rolling boil. If grilling, ensure the grates are clean and lightly oiled to prevent the corn from sticking. The goal is to have even cooking while achieving a slightly charred exterior for that classic summer BBQ flavor when preparing your Cheesy Garlic Butter Corn.
Step 4: Brush the Corn with Garlic Butter
Using a basting brush, generously apply the garlic butter mixture over each ear of corn, ensuring they are well-coated. Pay special attention to get the butter into all the nooks and crannies for maximum flavor. The aroma of the garlic butter should begin to waft through the air, signaling that the dish is well on its way to being a delicious side.
Step 5: Cook the Corn
Place your corn on the preheated grill and cook for about 10 to 12 minutes, turning occasionally for even charring. If boiling, gently lower the corn into the boiling water and cook for 5 to 7 minutes until tender. The corn should turn bright yellow and have a slight snap when bitten into, ensuring it’s perfectly cooked for your Cheesy Garlic Butter Corn.
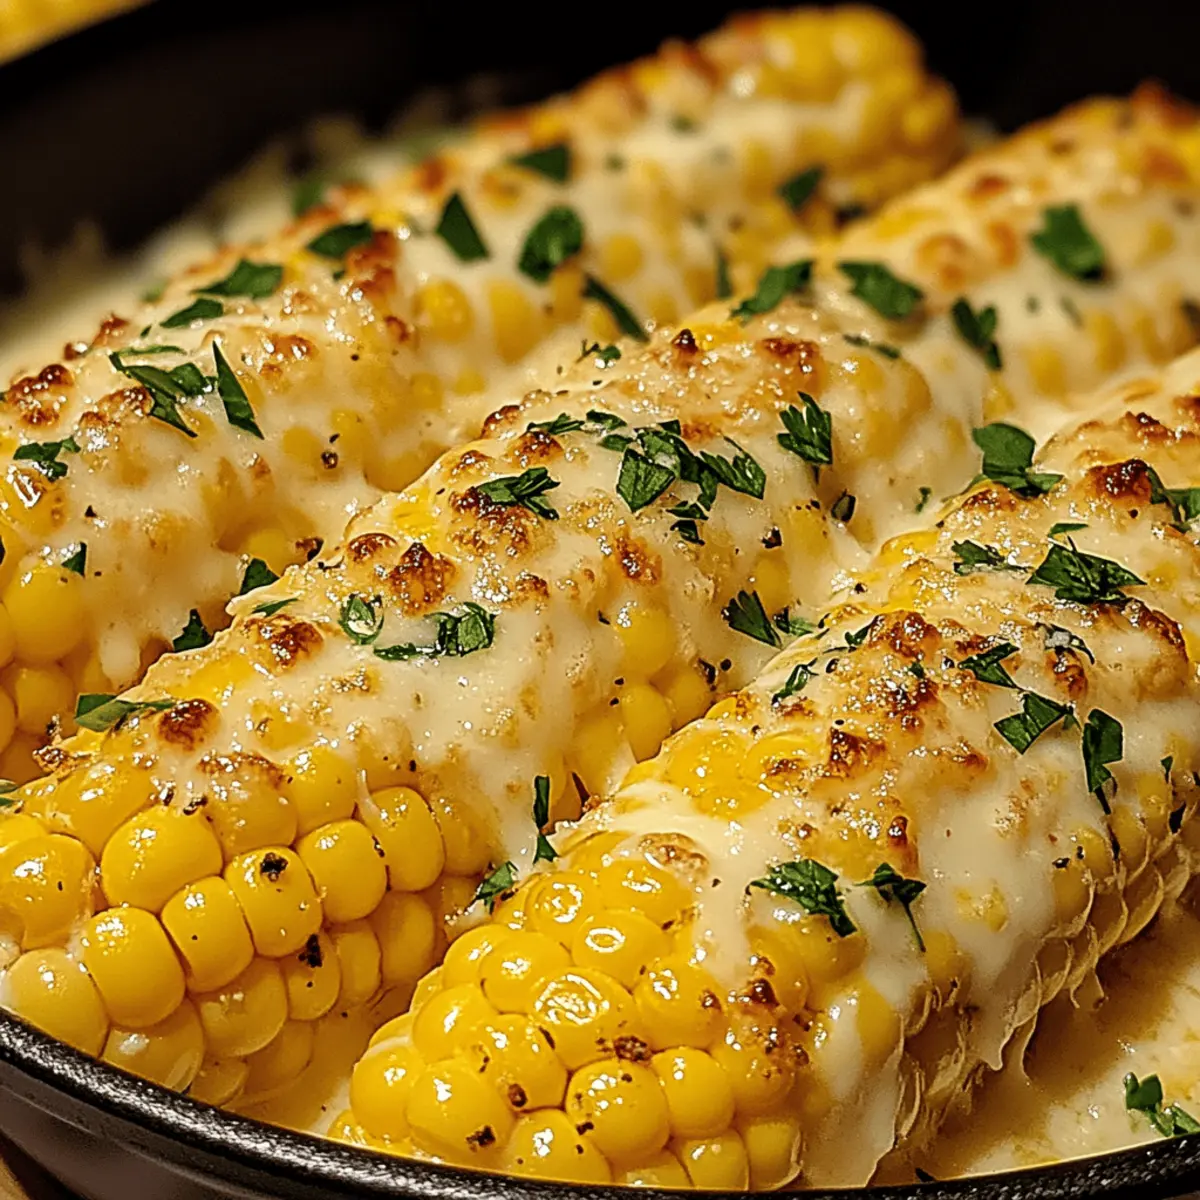
Step 6: Add the Cheese and Season
Once the corn is cooked, remove it from the grill or pot and sprinkle ¼ cup of reduced-fat Parmesan cheese generously over each ear while they are still hot. Season with salt and pepper to taste, and for an extra kick, add a pinch of red pepper flakes or chili powder if desired. The heat will help the cheese melt slightly, enhancing the overall flavor of the Cheesy Garlic Butter Corn.
What to Serve with Healthier Cheesy Garlic Butter Corn on the Cob
Elevate your dining experience by pairing this delightful corn dish with other flavors that harmonize beautifully together.
-
Grilled Chicken: Juicy and tender, grilled chicken rinses with your favorite marinade provides a perfect protein complement to the creamy corn.
-
Coleslaw: Crunchy and refreshing, a tangy coleslaw adds bright contrasts to the savory, cheesy corn, enhancing each bite’s flavor and texture.
-
Baked Beans: The sweet and smoky flavors of baked beans create a heartwarming combination that’s synonymous with summer cookouts.
-
Quinoa Salad: Light and nutty, a chilled quinoa salad with fresh veggies brings a contrasting texture while keeping the overall meal healthy.
-
Cornbread Muffins: Soft, slightly sweet cornbread muffins provide a delightful balance to the garlicky butteriness of the corn on the cob, embodying comfort in every bite.
-
Watermelon Slices: Juicy and sweet, watermelon slices offer a refreshing burst of hydration that’s perfect for warm days, balancing the savory aspects of your meal.
-
Lemonade: A cool glass of homemade lemonade with a hint of mint can brighten your palate and complement the rich flavors of the corn.
Each of these pairings enhances the essence of the Healthier Cheesy Garlic Butter Corn, creating a fulfilling feast that will satisfy all your senses!
Expert Tips for Cheesy Garlic Butter Corn
- Choose Fresh Corn: Always opt for firm, bright green corn. Fresh corn has a sweet aroma which ensures the best flavor for your Cheesy Garlic Butter Corn.
- Perfect Garlic Balance: Avoid burning the garlic in the butter mixture by keeping your heat low and stirring often. Burnt garlic can impart a bitter taste.
- Grill with Care: Turn the corn frequently on the grill to prevent charring and ensure even cooking. This will enhance the delicious flavors without sacrificing texture.
- Quick Melt Cheese: Sprinkle the Parmesan cheese on hot corn to help it melt beautifully. This creates a creamy texture that complements the garlic butter.
- Adjust Seasoning: Taste your corn before serving. Add extra salt, pepper, or spices to suit your preference and make your Cheesy Garlic Butter Corn truly unforgettable!
Variations & Substitutions for Cheesy Garlic Butter Corn
Feel free to get creative with this delicious recipe, transforming it to suit your taste buds and dietary needs!
-
Dairy-Free: Substitute light butter with olive oil for a scrumptious vegan version, providing a rich taste while keeping it plant-based.
-
Cheese Swap: Replace reduced-fat Parmesan with feta or cotija for a tangy twist that enhances the corn’s sweetness. This option adds a delightful Mediterranean flair!
-
Zesty Add-In: Squeeze fresh lime juice over the finished corn for a refreshing citrus kick. It brightens up the dish and complements the garlic beautifully.
-
Spice It Up: Introduce jalapeño slices or serrano peppers to the garlic butter mixture for a spicy kick. The heat can be adjusted based on preference to suit your audience.
-
Herb Infusion: Experiment with swapping parsley for fresh cilantro or basil, offering a different aromatic layer that pairs wonderfully with the buttery corn.
-
Smoky Flavor Boost: Add BBQ seasoning into the garlic butter for a smoky depth and complexity. This makes it perfect for those summer backyard gatherings!
-
Honey Sweetness: Drizzle a touch of honey or agave syrup over the finished corn for an unexpected sweet contrast that complements the savory garlic.
Looking to complement your Cheesy Garlic Butter Corn with more delicious dishes? Pair it with my Street Corn Chicken for a full-flavored meal, or whip up some Honey Garlic Shrimp to keep the summer vibes going!
Make Ahead Options
These Cheesy Garlic Butter Corn on the Cob are perfect for meal prep, saving you precious time on busy weeknights! You can husk and rinse the corn up to 24 hours in advance, ensuring it’s ready to cook when you are. Additionally, prepare the garlic butter mixture (light butter, minced garlic, garlic powder, smoked paprika, and parsley) and refrigerate it in an airtight container for up to 3 days to maintain its fresh flavor. When it’s time to serve, simply brush the butter mixture on the corn, grill or boil as instructed, and sprinkle with cheese right before enjoying this delicious dish. With these make-ahead tips, you’ll have delightful corn on the cob ready with minimal effort!
Storage Tips for Cheesy Garlic Butter Corn
Fridge: Store leftover Cheesy Garlic Butter Corn in an airtight container in the refrigerator for up to 2 days. This helps maintain its flavor and prevents it from drying out.
Freezer: If needed, freeze the corn by wrapping each ear tightly in plastic wrap, then placing them in a freezer bag. You can store it for up to 3 months for optimal taste.
Reheating: To reheat, simply thaw overnight in the fridge and warm it in the microwave or on the stovetop. Add a little extra light butter to rejuvenate the flavors.
Tips: Always consume leftover corn quickly, as the fresher it is, the better the flavors of garlic and cheese come through!
Cheesy Garlic Butter Corn on the Cob Recipe FAQs
How do I choose the best corn for this recipe?
Absolutely! When selecting fresh corn, look for ears that have bright green husks and feel firm to the touch. The kernels should be plump and, when you press on them, release a little juice—a sign of freshness! Avoid any ears with dark spots or dryness, as these may indicate age.
How should I store leftover Cheesy Garlic Butter Corn?
For optimal freshness, store any leftover Cheesy Garlic Butter Corn in an airtight container in the refrigerator. It will keep well for up to 2 days. If you want to enjoy it later, wrap each ear tightly in plastic wrap and place them in a freezer bag where they can last up to 3 months!
Can I freeze Cheesy Garlic Butter Corn?
Yes, you can freeze it! Once cooled, wrap each ear of corn in plastic wrap, ensuring no air pockets are present. Place them in a freezer-safe bag, and you can store them for up to 3 months. To thaw, just place them in the refrigerator overnight. Reheat using a microwave or stovetop, adding a little extra light butter for moisture.
What if my garlic burns while cooking?
Very! If your garlic burns while mixing into the butter, don’t fret. Start fresh by using a lower heat for melting the butter and stirring frequently. If you get a bitter taste from burnt garlic, sadly, there’s no remedy; simply discard it and make a new batch to ensure your Cheesy Garlic Butter Corn tastes delightful!
Are there any dietary concerns I should consider?
For those with lactose intolerance or following a vegan diet, you can easily substitute the light butter with olive oil and the reduced-fat Parmesan cheese with nutritional yeast for a flavorful, guilt-free alternative. Always verify ingredient labels for any potential allergens, especially if serving this dish to guests.
How can I adjust the spice level of the corn?
The more the merrier! If you’re looking to spice things up, you can add red pepper flakes or chili powder to your garlic butter mix before applying it to the corn. Start with a pinch and gradually add more to reach your desired heat—this allows you to customize it for everyone’s palate!
Guilt-Free Cheesy Garlic Butter Corn That You'll Crave
Ingredients
Equipment
Method
- Prepare the Corn: Remove husks and silk from corn, rinse under cold water, and pat dry.
- Mix the Garlic Butter Sauce: In a small bowl, combine melted light butter, minced garlic, garlic powder, and smoked paprika. Stir in chopped parsley.
- Heat the Grill or Water: Preheat grill to medium-high or bring a large pot of water to a boil.
- Brush the Corn with Garlic Butter: Use a basting brush to apply the garlic butter mixture over each ear of corn.
- Cook the Corn: Grill for 10-12 minutes, turning occasionally, or boil for 5-7 minutes until tender.
- Add the Cheese and Season: Remove corn and sprinkle with Parmesan cheese while hot. Season with salt, pepper, and optional spices.