

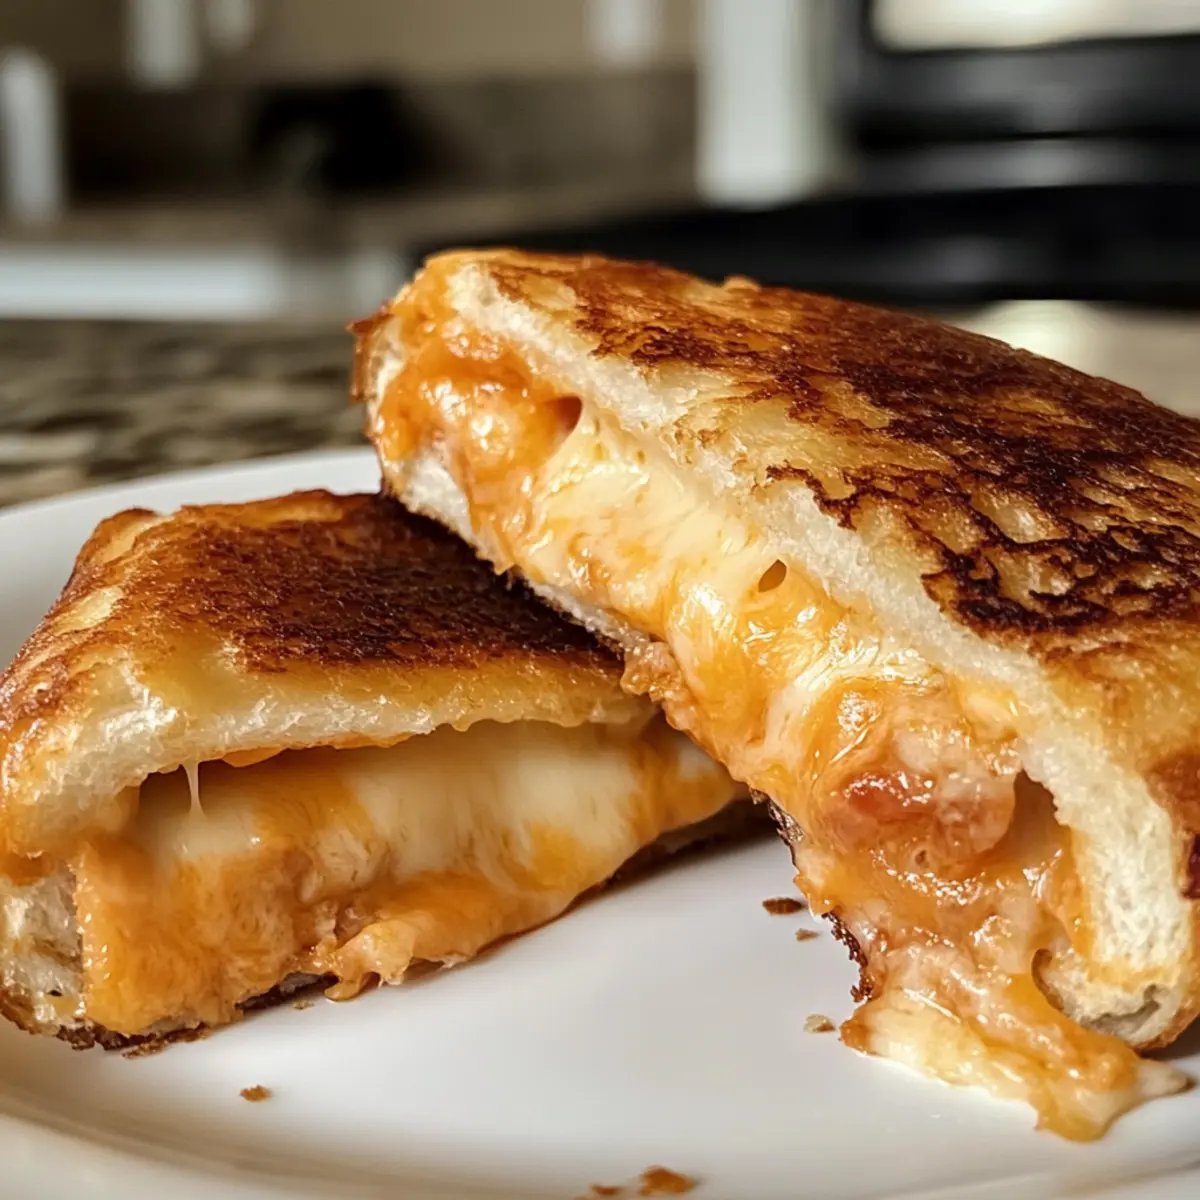
With a satisfying crunch and gooey melted cheese oozing from every bite, these Grilled Cheese Roll Ups are about to become your new go-to snack. They’re the ideal choice for a game day gathering or even a cozy lunch for the kids. What I love most about this recipe is how effortlessly they come together—requiring just a handful of ingredients and minimal prep time, they’re perfect for busy weeknights or unexpected guests. Plus, you can customize them by adding deli ham or your favorite cheese blends for a fun twist! Ready to dive into the crispy, cheesy goodness of these roll-ups? Let’s get cooking!
Why Are Grilled Cheese Roll Ups Amazing?
Deliciously Simple: With just bread and cheese, these roll-ups are a breeze to whip up, perfect for anyone new to cooking.
Customizable: Add your favorite ingredients like deli ham or even spicy jalapeños for a personalized twist that suits your taste buds.
Kid-Friendly: Kids adore them! These fun, bite-sized treats are ideal for lunch boxes or after-school snacks.
Great for Gatherings: Whether it’s game day or a casual get-together, these bite-sized wonders will impress your guests and keep them coming back for more.
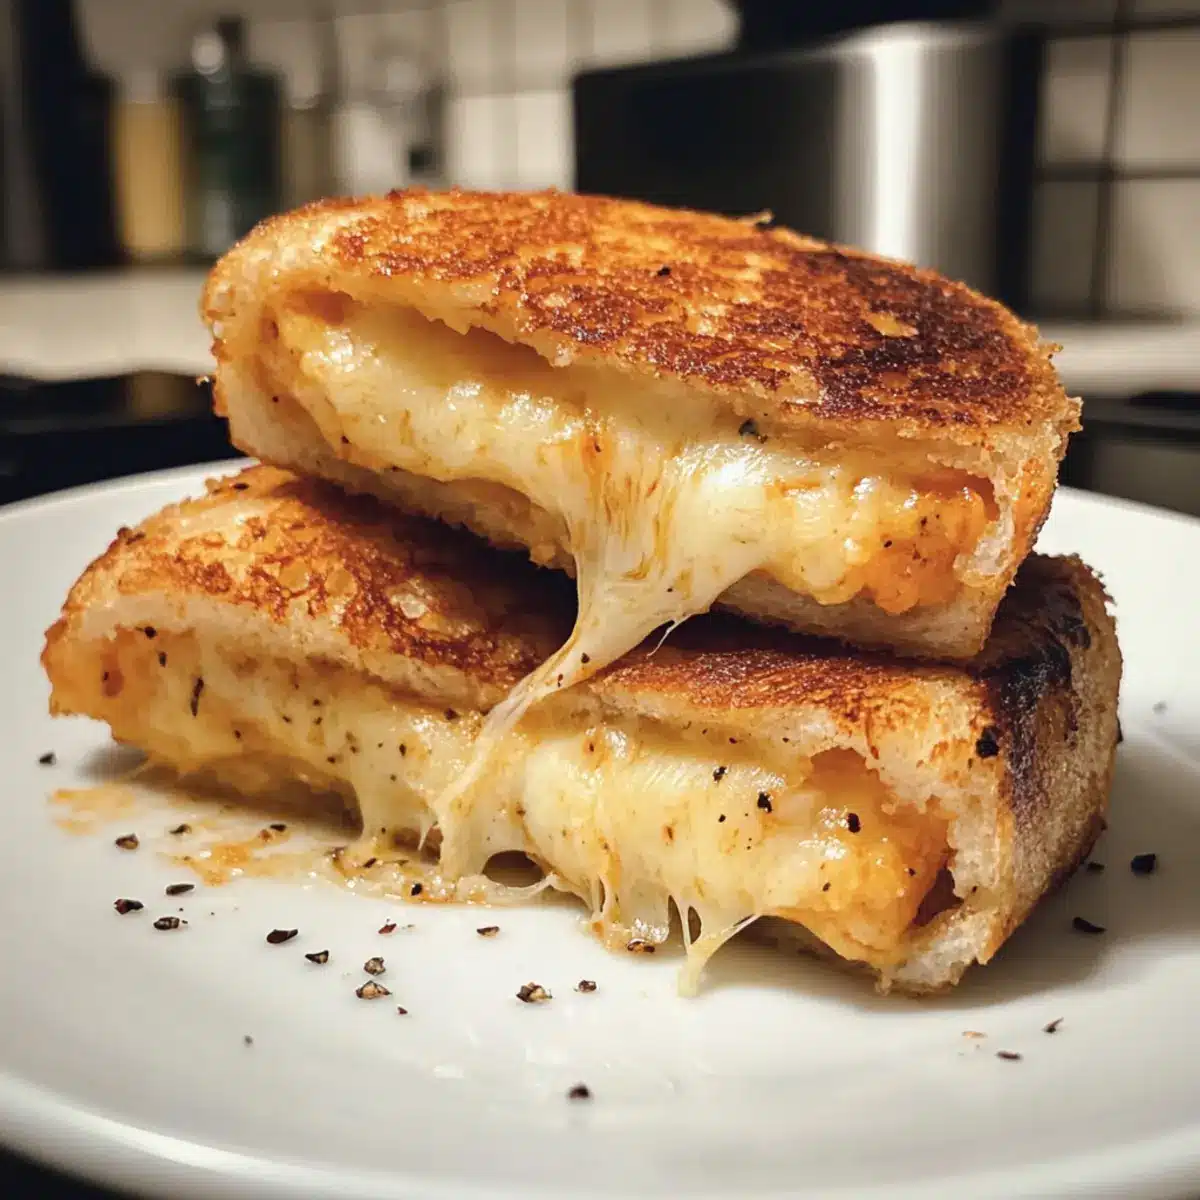
Perfectly Crunchy: Get that satisfying crunch with a golden-brown exterior that makes these roll-ups irresistible. For a complete meal, pair them with a side of homemade tomato soup, just like in our Grilled Cheese Roll Ups recipe!
Grilled Cheese Roll Ups Ingredients
• Prepare for cheesy perfection with these simple and tasty Grilled Cheese Roll Ups!
For the Roll Ups
- Bread – Use soft, fluffy sandwich bread for a perfect roll; whole wheat or multi-grain makes healthy substitutes.
- Cheese – Thinly shredded cheese ensures a gooey melt; American cheese is a favorite for its smooth melting qualities.
- Butter (or Coconut Oil/Mayo) – Adds golden richness and crispness; any can be used for basting the outside.
- Deli Ham (optional) – Provides an extra protein bump; ensure it’s sliced thin for easy rolling.
For Serving
- Tomato Soup – A classic dipping companion; pairs wonderfully for a comforting meal experience.
These Grilled Cheese Roll Ups are sure to become a cherished favorite at your dinner table!
Step‑by‑Step Instructions for Grilled Cheese Roll Ups
Step 1: Prepare the Bread
Start by trimming the crusts off your slices of soft, fluffy sandwich bread. Use a rolling pin to flatten each slice gently until it’s about ¼ inch thick. This step not only makes the bread easy to roll but also helps avoid cracking once filled. Lay the flattened bread slices aside, ready for the cheesy goodness to come.
Step 2: Add the Cheese
Evenly sprinkle your thinly shredded cheese over each slice of flattened bread, leaving a small border around the edges. If you’re feeling adventurous, layer on thin slices of deli ham as well for added flavor. The key here is to distribute the cheese so that every bite of your Grilled Cheese Roll Ups is deliciously melty.
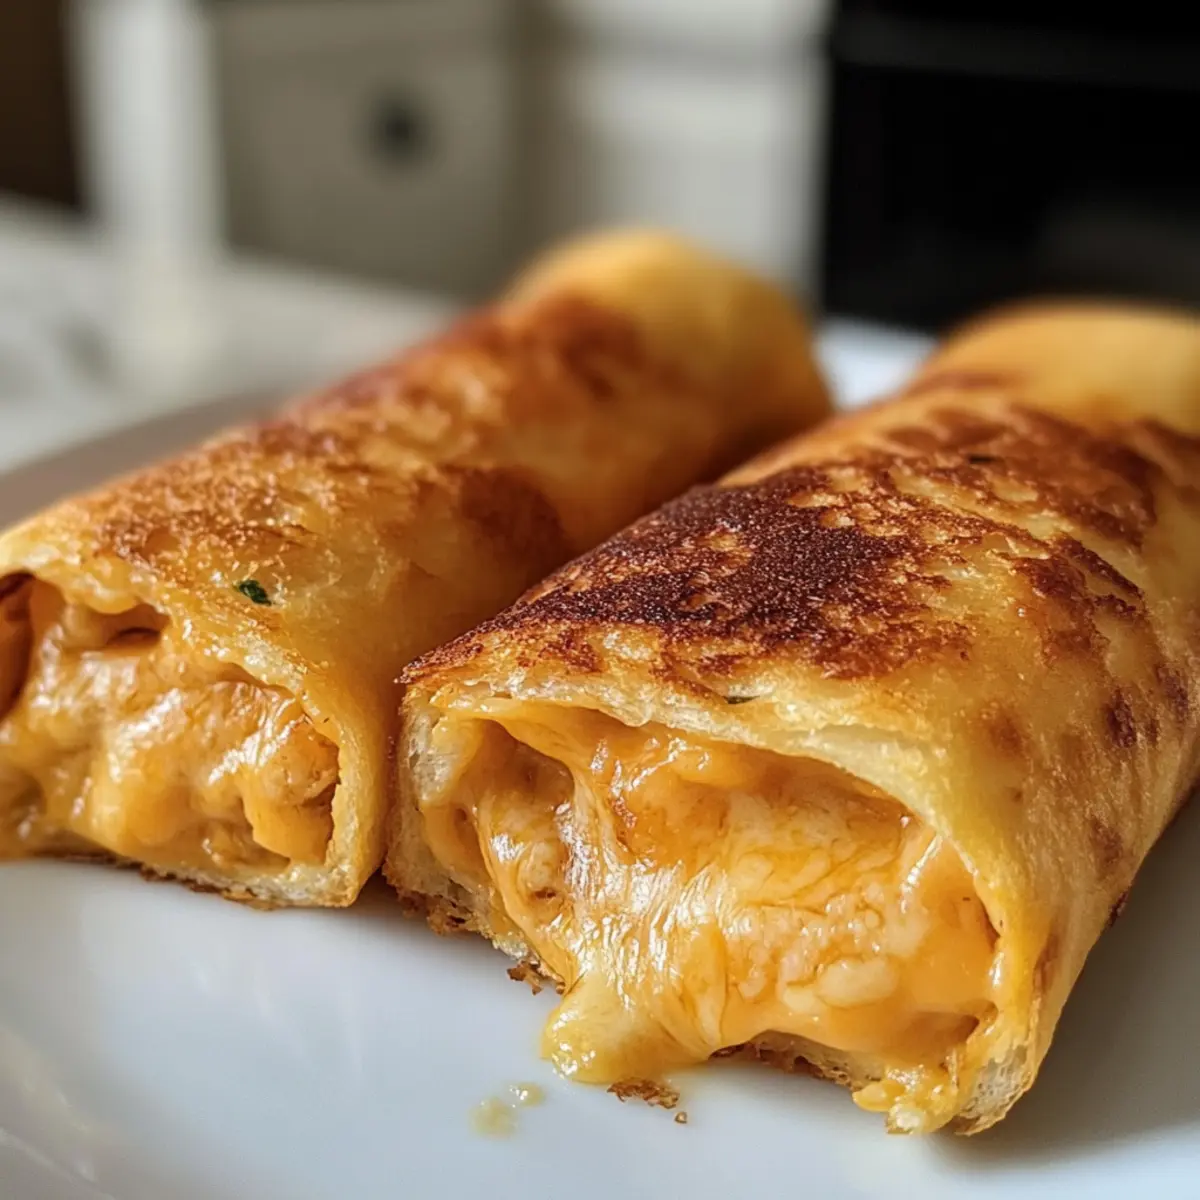
Step 3: Roll the Bread
Carefully roll each slice of bread tightly, starting at the edge closest to you and going towards the opposite end. Aim to roll it parallel to the crust edge for the best results. If necessary, secure the rolls with toothpicks to prevent them from unraveling during cooking. This step creates those delightful little bundles of cheesy joy.
Step 4: Heat the Skillet
In a skillet, melt a tablespoon or two of butter over medium-low heat (around 325°F/162°C) until it starts to bubble and foam. This will create a lovely golden crust on the outside of your Grilled Cheese Roll Ups. Swirl the butter across the skillet for even coverage and ensure your pan is hot before adding the roll-ups.
Step 5: Brown the Roll-Ups
Place the roll-ups seam-side down in the skillet and cook for about 5 to 8 minutes. Keep turning them occasionally with tongs, ensuring all sides become beautifully golden and crispy. Halfway through cooking, carefully remove any toothpicks you may have used to hold them together.
Step 6: Optional Toast Stick Finish
If you desire a little more crunch, after browning the roll-ups, allow them to sit a few moments longer to crisp up the ends without any cheese leaking out. This step is perfect if you want to turn them into finger-friendly toast sticks for dipping.
Step 7: Serve and Enjoy
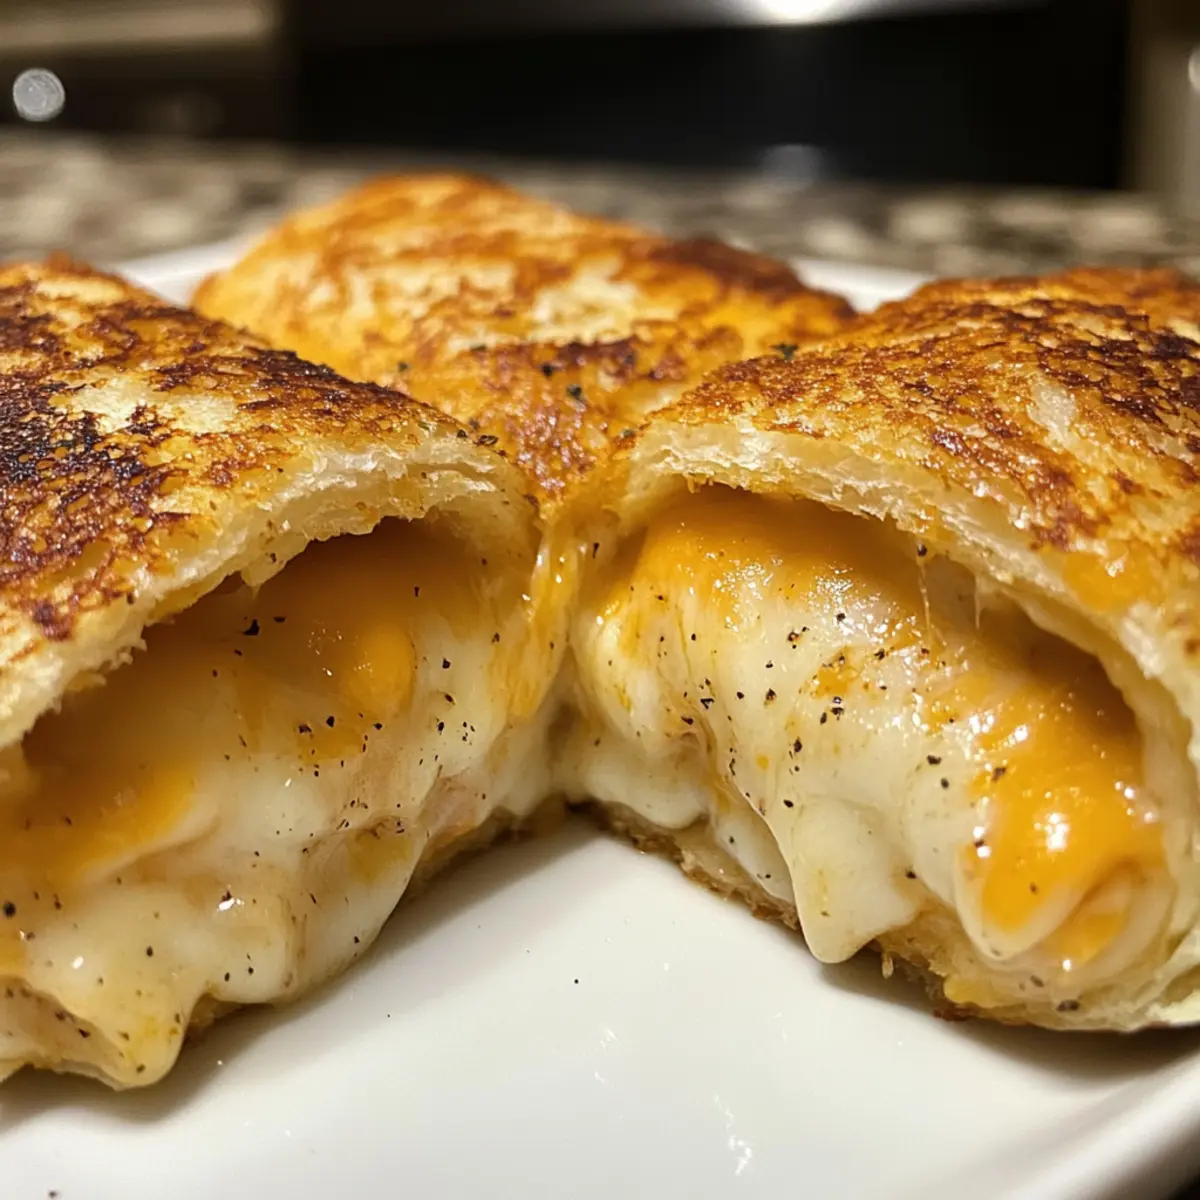
Once browned to perfection, transfer your Grilled Cheese Roll Ups to a platter. Serve them warm and perhaps pair with a bowl of homemade tomato soup for dipping. These delightful bites offer a comforting snack that’s sure to please kids and adults alike, making them a hit for any gathering!
Make Ahead Options
These Grilled Cheese Roll Ups are an ideal solution for busy home cooks looking to save time during hectic weekdays! You can prepare the roll-ups (without cooking) and refrigerate them in an airtight container for up to 24 hours. Simply trim, flatten, and fill the bread as mentioned in the recipe, then roll and secure with toothpicks before storing. To maintain their quality, ensure they are well-wrapped to prevent drying out. When you’re ready to enjoy, heat the skillet, add butter, and brown them as directed. In just a matter of minutes, you’ll have warm, melty Grilled Cheese Roll Ups ready to delight your family!
How to Store and Freeze Grilled Cheese Roll Ups
Fridge: Store leftover Grilled Cheese Roll Ups in an airtight container for up to 3 days. Make sure they’re completely cooled before sealing to avoid condensation.
Freezer: For longer storage, freeze the roll-ups in a single layer on a baking sheet, then transfer to a freezer bag for up to 2 months. This prevents them from sticking together.
Reheating: To reheat, bake from frozen at 350°F (175°C) for 10-15 minutes until warmed through and crispy. Microwave if you’re in a hurry, but be aware that the texture might not be as crispy!
Serving Tip: For the best flavor, let them sit for a minute or two after reheating, and consider pairing them with fresh tomato soup for dipping!
Tips for the Best Grilled Cheese Roll Ups
Bread Choice Matters: Use fresh, soft bread to prevent cracking and ensure a smooth roll. Avoid stale bread at all costs.
Cheese Selection: Thinly shredded cheese melts more evenly. American cheese works wonders for that ooey-gooey texture. Experiment with your favorite cheeses!
Temperature Control: Cook at medium-low heat to achieve that perfect golden crust without burning. Stay vigilant during cooking to avoid disappointment.
Secure the Rolls: Use toothpicks if needed to keep roll-ups intact while cooking. Just remember to remove them halfway through browning!
Dipping Delight: Serve these Grilled Cheese Roll Ups warm with a side of homemade tomato soup for an unforgettable pair that elevates every bite.
Grilled Cheese Roll Ups Variations
Feel free to get creative with these delightful recipes, adding personal touches to make them truly your own!
- Dairy-Free: Substitute cheese with plant-based alternatives like vegan cheddar or mozzarella for a dairy-free delight.
- Meat Lovers: Add crispy bacon or sliced turkey to the cheese before rolling for an indulgent touch.
- Spicy Twist: Incorporate jalapeños or sprinkle in hot sauce for an exciting kick that brings extra flavor.
- Veggie Boost: Add thin slices of bell peppers, spinach, or onions to the mix for a nutritious, colorful addition.
- Herb Infusion: Mix in fresh herbs like cilantro, chives, or oregano with the cheese for an aromatic burst of flavor.
- Savory Sweetness: Drizzle a bit of honey or maple syrup inside before rolling for a sweet and savory contrast.
- Cheese blend: Experiment with a mix of cheeses, like mozzarella, cheddar, and pepper jack, for a melty flavor explosion.
- Crunchy Coating: Roll the filled bread in crushed cornflakes or breadcrumbs before frying for a delightful crunch.
Don’t forget to pair these tasty bites with your favorite sides, like crispy Grilled Garlic Rosemary potatoes or a zesty Grilled Citrus Chicken for a complete meal!
What to Serve with Grilled Cheese Roll Ups
Bring your taste buds to life and create a heartwarming meal with delightful pairings that elevate your Grilled Cheese Roll Ups!
-
Tomato Soup: A classic warm companion, the acidity of tomato soup beautifully balances the richness of cheesy roll-ups.
-
Crispy Green Salad: Fresh greens with a tangy vinaigrette add a refreshing crunch, contrasting perfectly with the gooey interior of the roll-ups.
-
Garlic Butter Pasta: The rich flavors of garlic butter-coated noodles create a comforting, indulgent side that complements the snack’s crispiness.
-
Vegetable Sticks with Hummus: Bright, crunchy veggie sticks paired with creamy hummus offer a lighter bite, making for an excellent contrast.
-
Sweet Potato Fries: Crispy, slightly sweet fries bring a delightful texture and flavor twist that pairs wonderfully with the savory roll-ups.
-
Fruit Salad: A refreshing medley of seasonal fruits adds a sweet contrast, enhancing the overall flavor experience while providing a pop of color.
-
Sparkling Lemonade: The bright, fizzy drink is perfect for cutting through the richness of cheese, making each bite feel refreshingly light.
-
Chocolate Chip Cookies: End on a sweet note with warm, gooey cookies—because who can resist that perfect combination of sweet and savory?
Grilled Cheese Roll Ups Recipe FAQs
What type of bread should I use for Grilled Cheese Roll Ups?
For the best results, opt for soft, fluffy sandwich bread. This will make it easier to roll without cracking. Whole wheat or multi-grain breads can also be healthy alternatives if you want to switch it up—but the texture may differ slightly.
How should I store leftover Grilled Cheese Roll Ups?
Absolutely! Once they’ve cooled down, place your leftover Grilled Cheese Roll Ups in an airtight container. They can last in the fridge for up to 3 days. Just make sure they’re completely cooled before sealing to avoid condensation, which could lead to sogginess.
Can I freeze Grilled Cheese Roll Ups?
Yes, you can! To freeze Grilled Cheese Roll Ups, lay them out in a single layer on a baking sheet to freeze for a couple of hours. After they’re solid, transfer them to a freezer bag where they can be kept for up to 2 months. This method prevents them from sticking together, ensuring they remain easy to grab for snacking!
What are some common issues I might encounter while making Grilled Cheese Roll Ups?
If your roll-ups unravel during cooking, try using toothpicks to secure them before frying. Also, cooking them at too high a heat can lead to burning on the outside while the cheese remains unmelted. Aim for medium-low heat—this is key to achieving that perfect golden crust!
Are there any dietary considerations for Grilled Cheese Roll Ups?
Certainly! If you’re concerned about allergies, make sure to check the packaging of the bread and cheese used. For gluten-free alternatives, you can use gluten-free bread. Additionally, if you’re serving these to pets, remember that cheese can be rich for them, so limit their intake accordingly.
Can I customize the fillings of my Grilled Cheese Roll Ups?
The more the merrier! You can absolutely customize your roll-ups by adding ingredients like deli ham, pepperoni, or even jalapeños for a spicy kick. Just make sure any added ingredients are thinly sliced or shredded to maintain the roll’s structure and ensure even cooking.
Melt-in-Your-Mouth Grilled Cheese Roll Ups for Easy Snacking
Ingredients
Equipment
Method
- Prepare the Bread: Trim the crusts off your slices of soft, fluffy sandwich bread and flatten with a rolling pin.
- Add the Cheese: Sprinkle thinly shredded cheese over each flattened slice and add deli ham if desired.
- Roll the Bread: Carefully roll each slice tightly, securing with toothpicks if necessary.
- Heat the Skillet: Melt butter in a skillet over medium-low heat until it bubbles.
- Brown the Roll-Ups: Cook the roll-ups seam-side down for 5 to 8 minutes until golden, turning occasionally.
- Optional Toast Stick Finish: Allow to sit longer for crispier ends without leaking cheese.
- Serve and Enjoy: Transfer to a platter and serve warm with tomato soup for dipping.