

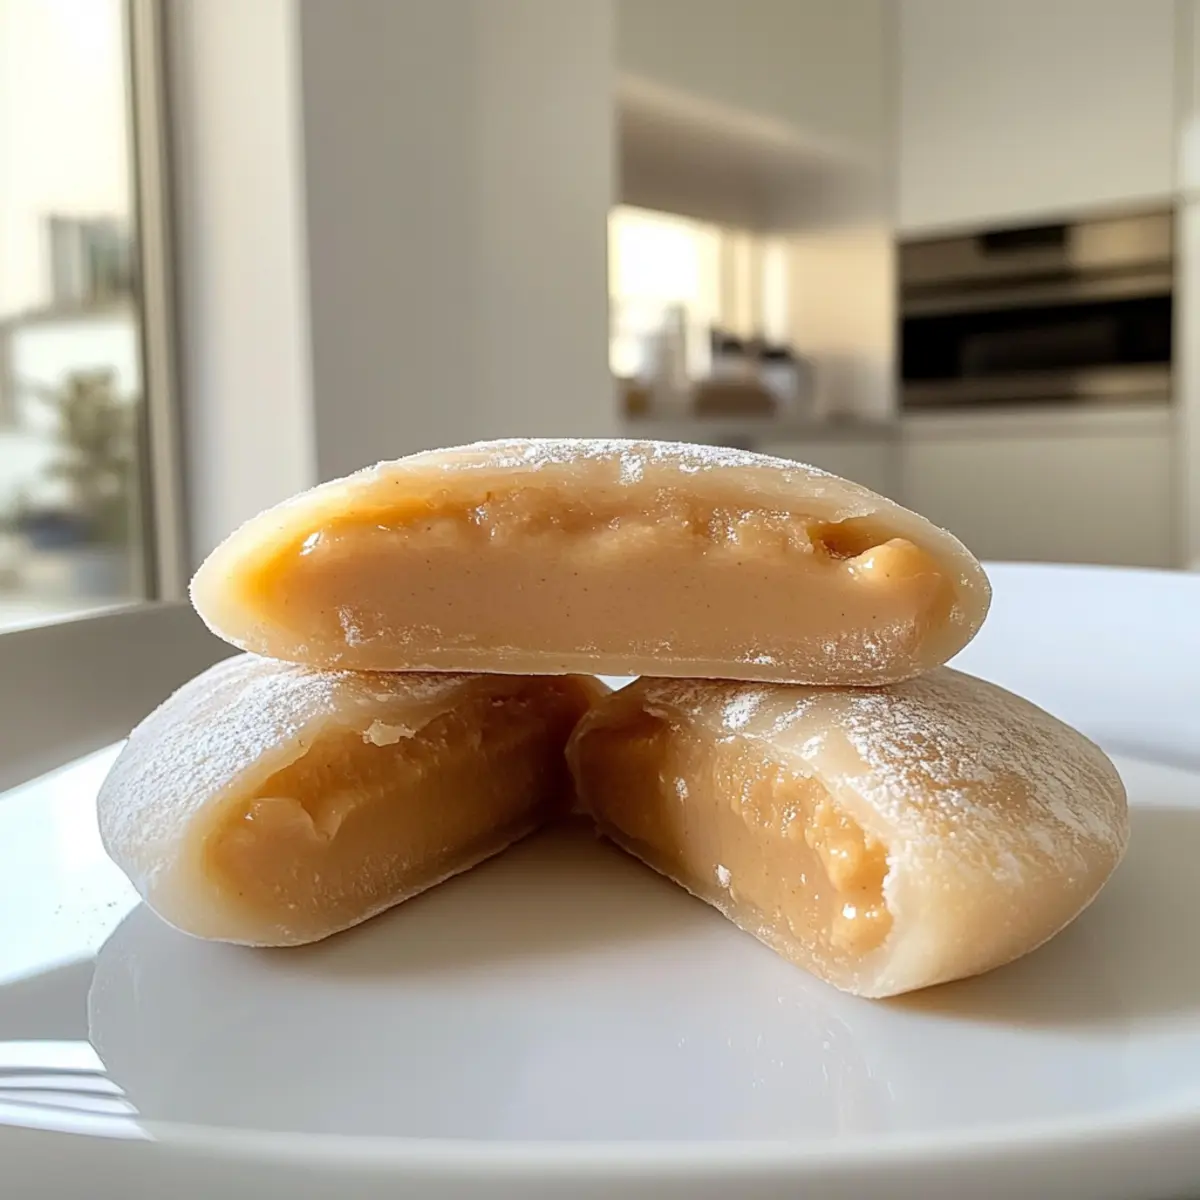
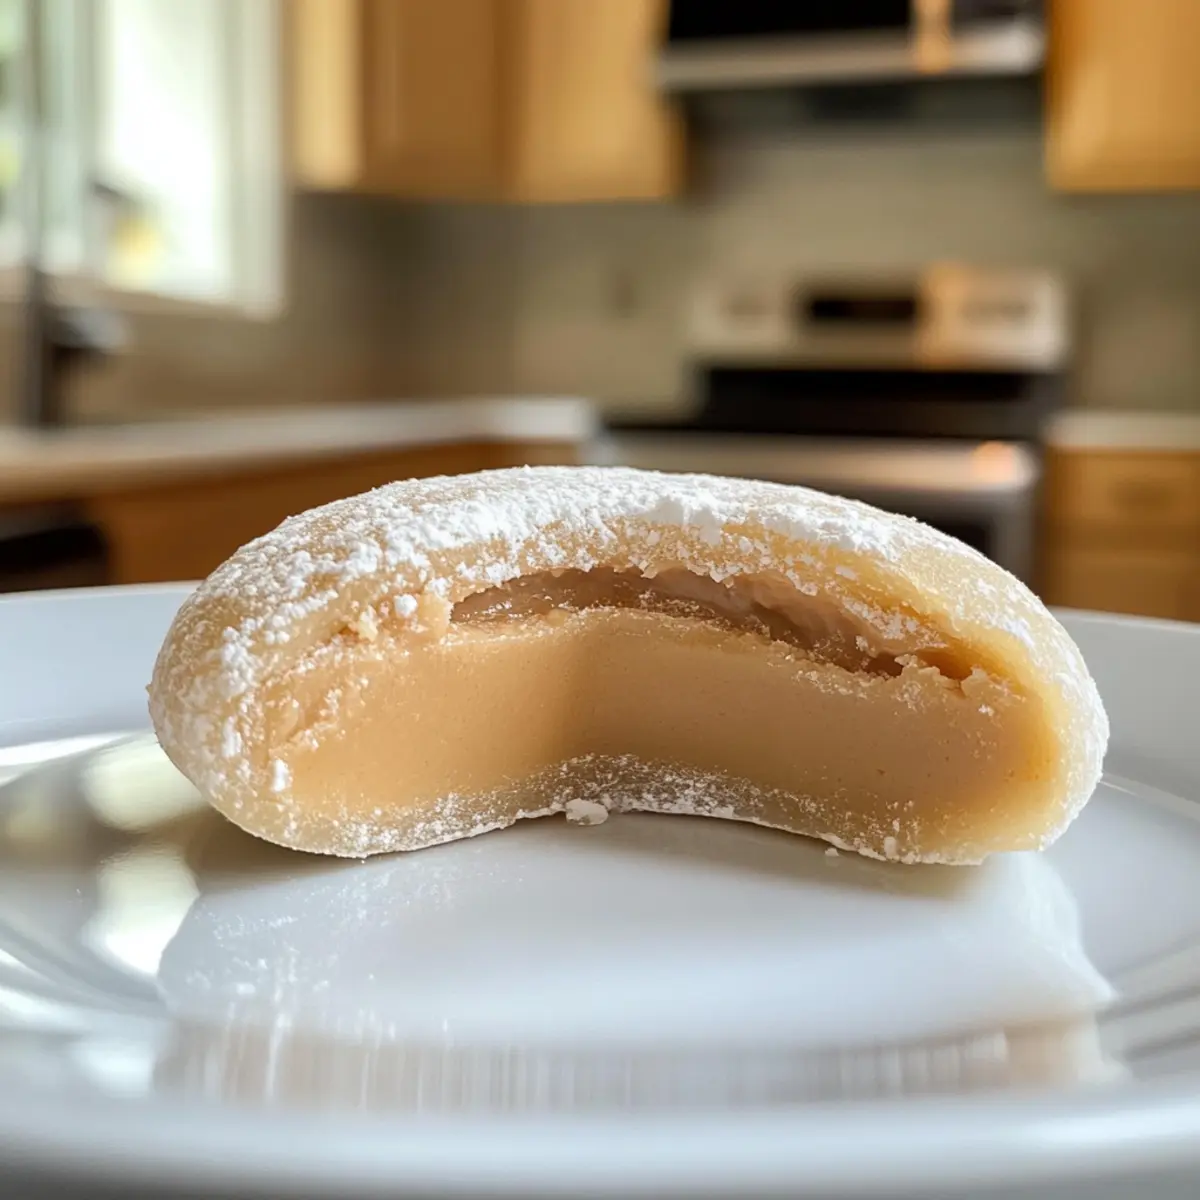
As I reached for the glutinous rice flour, I couldn’t help but feel a sense of excitement; today, I was about to create my culinary masterpiece—Peanut Butter Mochi. This irresistible Japanese dessert features a wonderfully chewy texture and combines the nutty richness of peanut butter with sweet condensed milk. What I love most about this recipe is how quick and simple it is—there’s no baking required, and you can whip it up in just under ten minutes! It’s the perfect treat for anyone looking to impress friends and family or simply indulge in a comforting dessert. Plus, it’s freezer-friendly, which means you can always have a delicious snack waiting for you. Are you ready to dive into this chewy delight? Let’s get started!
Why Choose Peanut Butter Mochi?
Irresistibly Chewy: This dessert is uniquely delightful, offering a wonderful chewy texture that melts in your mouth with every bite.
Quick and Easy: Whip up these mochi in under ten minutes! No baking, just simple stovetop cooking — perfect for those busy days.
Nutty Indulgence: The creamy peanut butter filling combined with sweet condensed milk packs a flavor punch that satisfies dessert cravings.
Endless Variability: Feel free to switch things up! Try almond or cashew butter, or even mix in chocolate chips for extra sweetness.
Crowd-Pleaser: Serve these mochi at gatherings, and watch them disappear as friends and family revel in this unique treat. If you’re looking for other delightful recipes, don’t forget to check out Buttermilk Pancakes Discover or some delicious Honey Butter Brioche.
Peanut Butter Mochi Ingredients
For the Filling
• Peanut Butter – The star ingredient that provides a creamy and nutty flavor; feel free to choose between smooth or crunchy based on your preference.
• Sweetened Condensed Milk – Adds the perfect sweetness to your filling; you can substitute it with honey for a healthier version.
For the Mochi Dough
• Glutinous Rice Flour – This is essential for that iconic chewy texture; do not use regular flour as it will not yield the same results.
• Sugar – Sweetens the dough; adjust it according to your taste.
• Water – Helps hydrate the dough for the right consistency; be precise to ensure perfect mochi.
For Dusting
• Cornstarch – A necessity for dusting your work surface, preventing the mochi from sticking; don’t forget to dust off excess to keep it neat.
These Peanut Butter Mochi come together with just a few ingredients and no baking required—let’s get cooking!
Step‑by‑Step Instructions for Peanut Butter Mochi
Step 1: Prepare the Filling
In a mixing bowl, combine peanut butter and sweetened condensed milk until smooth and well-blended. Stir vigorously to ensure the ingredients are fully incorporated. Once combined, cover the bowl with plastic wrap and refrigerate for about 15 minutes. This chilling time will firm up the filling, making it easier to shape when wrapping your Peanut Butter Mochi.
Step 2: Make the Dough
In a nonstick pan, blend glutinous rice flour, sugar, and water. Set the heat to medium and continuously stir the mixture for about 5-7 minutes until it thickens and becomes a smooth, slightly translucent dough. As it cooks, you’ll notice it pulling away from the sides of the pan. When ready, remove it from the heat and allow it to cool for around 10 minutes.
Step 3: Form the Mochi
Lightly dust your work surface with cornstarch to prevent sticking. Once the dough has cooled enough to handle, turn it out onto the surface. Using a rolling pin, roll the dough into a rectangle about ¼-inch thick. Cut the dough into 8 equal rectangular pieces, making sure they are uniform for easy filling.
Step 4: Fill the Mochi
Take a tablespoon of the refrigerated peanut butter filling and shape it into a small ball. Place this ball in the center of one piece of cut dough. Gently pull up the sides of the dough to encase the filling, pinching the edges together to seal. If needed, trim any excess dough around the filling to make a neat package.
Step 5: Finish the Mochi
With the seam side facing down, repeat the filling and sealing process with the remaining pieces of dough and filling. Once all the Peanut Butter Mochi are formed, arrange them on a tray lined with parchment paper. For a firmer texture, freeze the mochi for 1 hour, or enjoy them fresh for a soft and chewy treat.
How to Store and Freeze Peanut Butter Mochi
Room Temperature: Keep fresh Peanut Butter Mochi at room temperature for up to 2 days in a cool, dry place. However, they are best when chilled.
Fridge: Store in an airtight container in the refrigerator for up to 5 days. This keeps them fresh and ready to enjoy whenever you need a sweet treat.
Freezer: For longer storage, freeze your mochi in an airtight container for up to 1 month. Enjoy them straight from the freezer for a refreshing snack!
Reheating: If you prefer them warm, let them sit out for a few minutes to soften slightly before enjoying. Do not microwave, as it may alter their chewy texture.
Make Ahead Options
These Peanut Butter Mochi are perfect for meal prep, allowing you to enjoy their chewy delight whenever a craving hits! You can prepare the peanut butter filling and refrigerate it for up to 24 hours in advance; this ensures that it firms up nicely, making it easy to shape when you’re ready to fill. Additionally, you can make the mochi dough and keep it wrapped in plastic wrap at room temperature for up to 3 hours to avoid stickiness. When ready to serve, simply roll out the dough, fill it with the prepared peanut butter mixture, and freeze for 1 hour for a firmer texture. By prepping ahead, you can impress your family with a delicious, homemade dessert without spending too much time in the kitchen!
Expert Tips for Peanut Butter Mochi
-
Use Nonstick: A nonstick pan is key for preventing the dough from sticking and makes cleanup a breeze.
-
Filling Consistency: Ensure the filling isn’t too runny; it should be firm enough to hold its shape when encased in the mochi dough.
-
Cornstarch Magic: Dust your hands with cornstarch while shaping the mochi, as it helps to manage any stickiness and ensures a smooth process.
-
Don’t Rush Cooling: Allow the dough to cool adequately before handling. This will help prevent the mochi from becoming too sticky and ensure a perfect chewy texture.
-
Portion Control: For uniformity, weigh out the filling and dough pieces, ensuring every Peanut Butter Mochi is a delightful bite-sized treat.
Peanut Butter Mochi: Easy Twists and Swaps
Feel free to get creative with your Peanut Butter Mochi! There’s something so fulfilling about personalizing a recipe to suit your taste.
- Nut Butter Swap: Use almond or cashew butter instead of peanut butter for a unique twist. These alternatives add their own delightful flavor profiles.
- Chocolate Bliss: Mix in mini chocolate chips with the filling for an irresistible sweet explosion. The combination of chocolate and peanut butter is a classic favorite that never disappoints!
- Flavor Infusion: Try adding vanilla or almond extract to the dough for a subtle yet delicious extra depth. Just a little dash can take your mochi to the next level!
- Additional Sweetness: Sprinkle a little sea salt on top of the filled mochi before sealing for a sweet-salty contrast. It enhances the overall flavor and adds complexity to each bite.
- Textural Adventure: For more chewiness, fold in some shredded coconut or finely diced nuts into the mochi dough. Both add a delightful surprise with every mouthful!
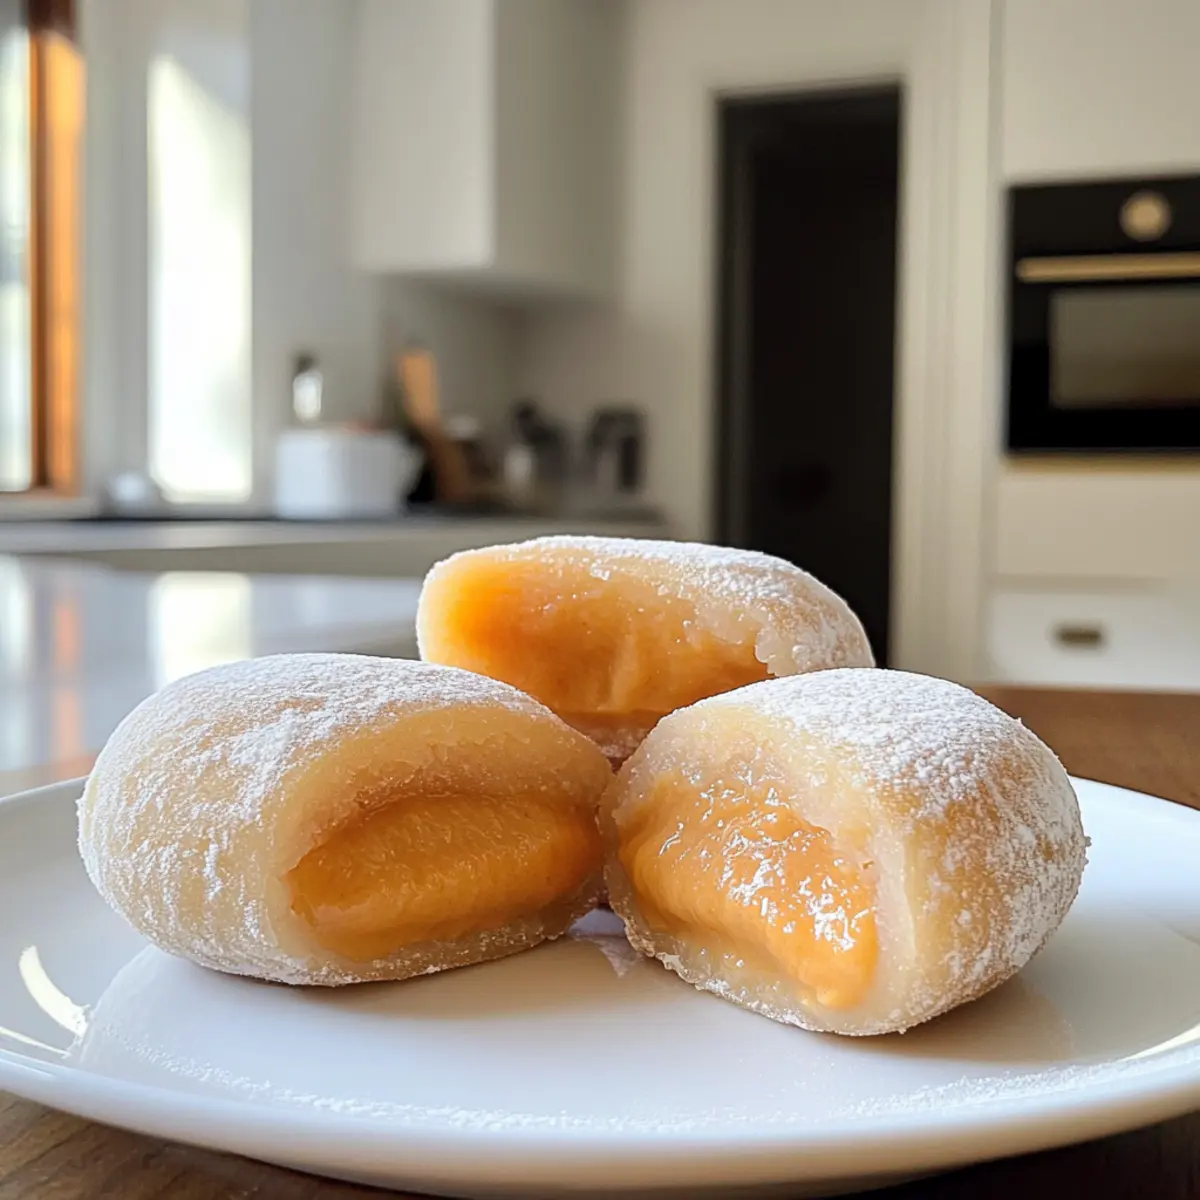
- Fruity Filling: Replace peanut butter with a fruit-flavored filling, such as blueberry cream cheese, for an exciting fruity spin. Your mochi will then take on a refreshing summer feel.
- Spicy Kick: Add a pinch of cayenne pepper or ginger to the peanut butter filling for a surprising warm kick that contrasts beautifully with the sweet condensed milk. It’s a bold and adventurous choice!
Whichever variations you choose, these Peanut Butter Mochi will surely become a staple in your dessert repertoire. If you’re looking for more mouth-watering recipes, don’t miss out on our Garlic Butter Shrimp or the delectable Honey Butter Brioche. Happy cooking!
What to Serve with Peanut Butter Mochi?
Savoring these delightful mochi is an experience best enjoyed alongside complementary sides and drinks that enhance their creamy, nutty joy.
-
Fresh Berries: The tartness of strawberries or raspberries cuts through the sweetness of the mochi, providing a bright, refreshing contrast with every bite.
-
Green Tea: A traditional pairing, the earthy notes of matcha or jasmine green tea balance the creamy texture, elevating the dessert experience.
-
Vanilla Ice Cream: Serving creamy vanilla ice cream alongside these mochi can amplify the dessert’s flavors, creating a delightful texture juxtaposition.
-
Mango Sorbet: This fruity sorbet is a refreshing palate cleanser, with its tropical sweetness beautifully complementing the rich peanut butter taste.
-
Chilled Coconut Water: Offering hydration with a hint of sweetness, coconut water serves as a light and invigorating drink that enhances the mochi’s flavors.
-
Chocolate Dipping Sauce: For a decadent twist, drizzle some warm chocolate sauce over the mochi. It adds richness and an indulgent element to this already delightful treat.
Enjoy mixing and matching these pairings for a memorable dessert experience that delights your taste buds!
Peanut Butter Mochi Recipe FAQs
How do I choose ripe ingredients for my Peanut Butter Mochi?
Absolutely! For the perfect Peanut Butter Mochi, ensure your peanut butter is fresh and creamy. If using sweetened condensed milk, look for a can that’s not expired and has a smooth consistency. It’s best to store these ingredients in a cool, dry place before use.
How long can I store Peanut Butter Mochi, and what’s the best method?
You can store fresh Peanut Butter Mochi in an airtight container at room temperature for up to 2 days. If you’re looking to keep them longer, transfer them to the refrigerator where they will stay fresh for up to 5 days. For even longer storage, freeze them in an airtight container for up to 1 month. Just remember to allow them to soften at room temperature before enjoying!
Can I freeze Peanut Butter Mochi, and how should I do it?
Definitely! Freezing is an excellent way to extend the life of your Peanut Butter Mochi. To freeze, place the mochi in a single layer on a baking sheet lined with parchment paper and freeze for about an hour until firm. Then, transfer them into an airtight container or freezer bag. This method prevents them from sticking together, allowing you to enjoy them anytime within a month!
What are some common troubleshooting tips for making Peanut Butter Mochi?
If your mochi dough is too sticky, dust your hands and work surface with cornstarch liberally; this will help with shaping. If the filling feels too runny, refrigerate it longer to firm up before wrapping it in mochi dough. In case the dough doesn’t hold together well when wrapping, it might be overcooked; ensure you’re cooking until it just pulls away from the sides of the pan but isn’t dry.
Are there any dietary considerations I need to be aware of with Peanut Butter Mochi?
Very! If you or someone you’re serving has peanut allergies, consider using alternative nut butters like almond or cashew butter, which provide a similarly delightful flavor. For those watching sugar intake, subbing sweetened condensed milk with honey or maple syrup can be a healthier option while still achieving that sweet, creamy flavor. Always check ingredient labels for hidden allergens, especially in pre-packaged items!
Irresistible Peanut Butter Mochi: Chewy Delight in Minutes
Ingredients
Equipment
Method
- In a mixing bowl, combine peanut butter and sweetened condensed milk until smooth. Cover and refrigerate for about 15 minutes.
- In a nonstick pan, blend glutinous rice flour, sugar, and water. Stir over medium heat for 5-7 minutes until thick and smooth. Allow cooling for 10 minutes.
- Dust working surface with cornstarch. Roll the dough into a rectangle about ¼-inch thick and cut into 8 pieces.
- Shape a tablespoon of filling into a ball and place it in the center of a dough piece. Seal the edges to encase the filling.
- Repeat the process with remaining pieces. Arrange on parchment paper and freeze for 1 hour for firmer texture, or enjoy fresh.