American Flag Layered Taco Dip: Easy Party Recipe to Wow!

Introduction to American Flag Layered Taco Dip

When I think of gatherings with friends and family, the first thing that comes to mind is the food. The laughter, the stories, and of course, the delicious bites that bring everyone together. That’s where my American Flag Layered Taco Dip shines. It’s not just a dip; it’s a festive centerpiece that sparks joy and conversation.

Perfect for game days, barbecues, or any celebration, this recipe is a quick solution for busy days. With layers of flavor and a vibrant presentation, it’s sure to impress your loved ones and keep them coming back for more.

Why You’ll Love This American Flag Layered Taco Dip

This American Flag Layered Taco Dip is a game-changer for any gathering.

It’s incredibly easy to whip up, taking just 15 minutes of prep time.

The vibrant layers not only look stunning but also deliver a burst of flavors in every bite.

Plus, it’s a crowd-pleaser that caters to various tastes, making it perfect for picky eaters.

Trust me, this dip will have everyone reaching for more!

Ingredients for American Flag Layered Taco Dip

Creating the American Flag Layered Taco Dip is a breeze, and the ingredients are simple yet flavorful.

Here’s what you’ll need:

  • Refried beans: This creamy base adds a hearty texture and rich flavor.
  • Sour cream: It brings a cool, tangy element that balances the spices.
  • Guacamole: Creamy and delicious, it adds a fresh twist to the dip.
  • Salsa: Choose your favorite variety for a kick of flavor and color.
  • Shredded cheddar cheese: This melty goodness adds a savory depth to each layer.
  • Shredded lettuce: A crisp layer that adds freshness and crunch.
  • Diced tomatoes: These juicy bites provide a pop of color and sweetness.
  • Black olives: Sliced for the blue field of the flag, they add a briny flavor.
  • Green onions: Chopped for a mild onion flavor and a touch of green.
  • Tortilla chips: Essential for scooping up all that deliciousness!

For those looking to spice things up, consider adding diced jalapeños or a layer of spicy salsa.

If you want a healthier option, Greek yogurt can easily replace sour cream.

You can find the exact quantities for each ingredient at the bottom of the article, ready for printing!

How to Make American Flag Layered Taco Dip

Making the American Flag Layered Taco Dip is as fun as it is delicious.

Follow these simple steps, and you’ll have a stunning dip that’s ready to impress.

Let’s dive in!

Step 1: Prepare the Base

Start by grabbing a 9×13 inch baking dish.

Spread the refried beans evenly across the bottom.

This creamy layer sets the stage for all the delicious toppings to come.

Make sure to smooth it out with a spatula for an even base.

Step 2: Layer the Sour Cream

Next, take your sour cream and layer it over the refried beans.

Use a spatula to spread it out evenly.

This cool, tangy layer adds a delightful contrast to the beans below.

Don’t rush; a smooth layer makes for a beautiful presentation.

Step 3: Add the Guacamole

Now it’s time for the guacamole!

Spoon it over the sour cream layer and spread it gently.

The creamy texture and fresh flavor of the guacamole will elevate your dip.

Feel free to use store-bought or homemade—both work great!

Step 4: Pour on the Salsa

Pour your favorite salsa over the guacamole.

Spread it evenly to ensure every bite has that zesty kick.

The salsa adds a burst of color and flavor, making the dip even more inviting.

Choose a mild or spicy salsa based on your crowd’s preference.

Step 5: Sprinkle the Cheese

Next, sprinkle the shredded cheddar cheese generously over the salsa.

This melty layer adds a savory depth that everyone loves.

Make sure to cover the salsa completely for a cheesy delight in every scoop.

Step 6: Add the Lettuce

Now, it’s time for the shredded lettuce.

Evenly distribute it over the cheese layer.

This adds a fresh crunch that balances the creaminess of the dip.

Plus, it gives a nice pop of green to your festive creation.

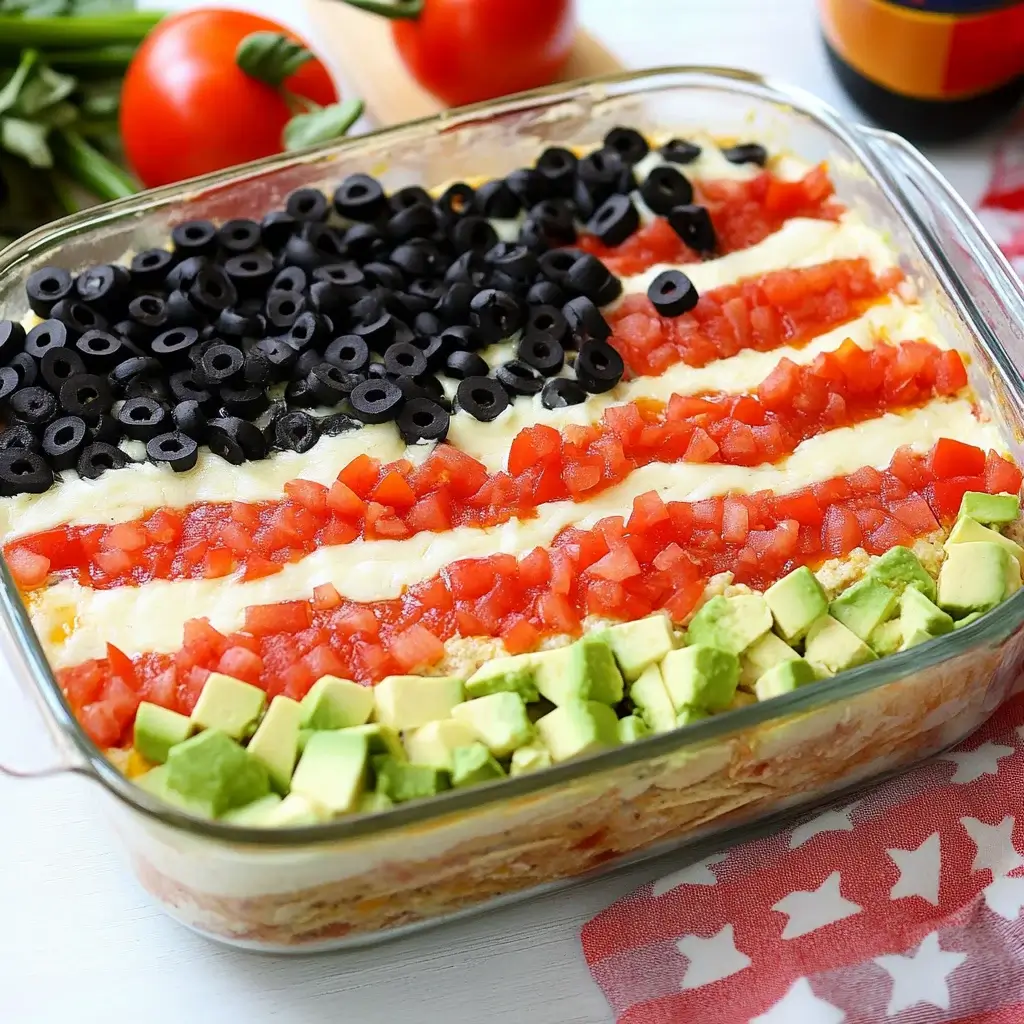
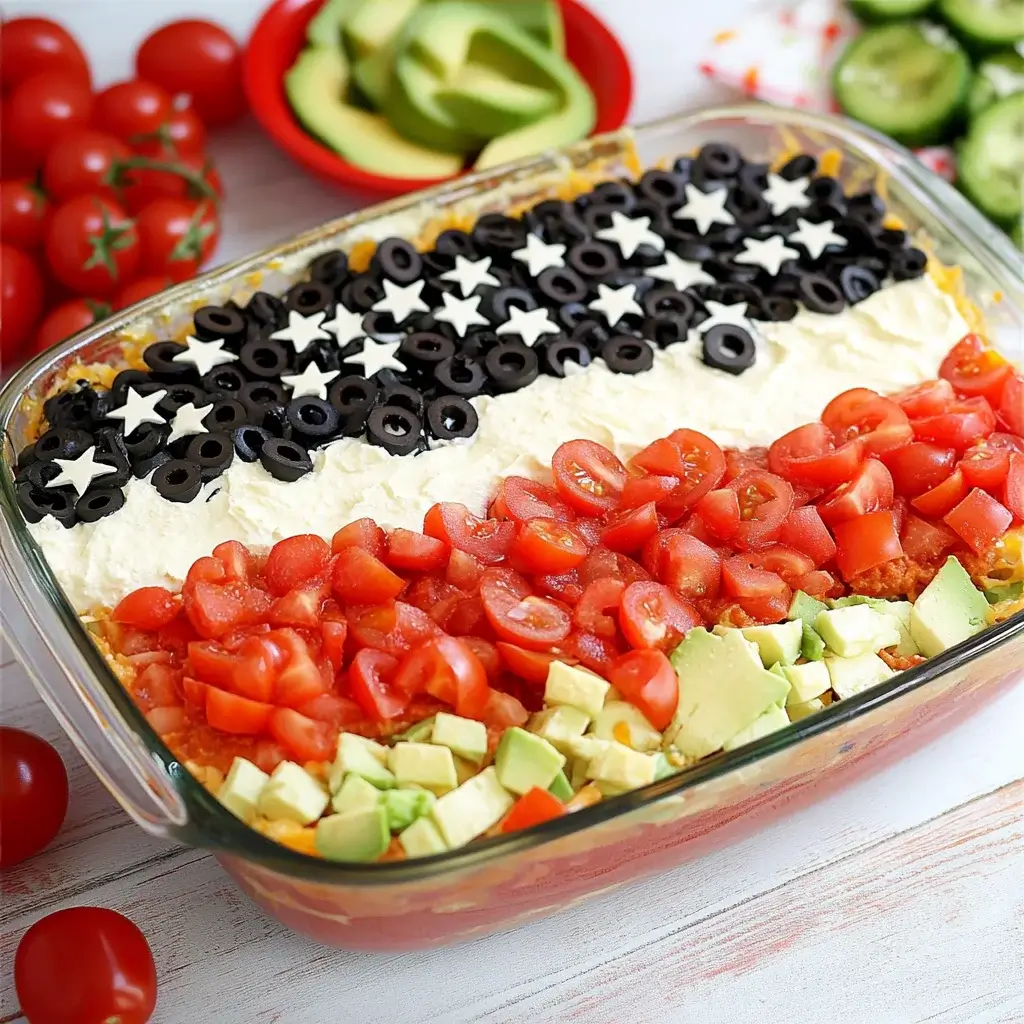
Step 7: Create the Flag Design

Here comes the fun part—decorating!

Use diced tomatoes to create the red stripes of the American flag.

Then, place the sliced black olives in the top left corner for the blue field.

Get creative! This is where your dip becomes a true centerpiece.

Step 8: Chill and Serve

Finally, cover the dip with plastic wrap and chill it in the refrigerator for at least 30 minutes.

This allows the flavors to meld beautifully.

When you’re ready to serve, set out a bowl of tortilla chips for dipping.

Your American Flag Layered Taco Dip is now ready to wow your guests!
Tips for Success

  • Prep your ingredients ahead of time to save on assembly stress.
  • Use a spatula to create smooth layers for a professional look.
  • Chill the dip for at least 30 minutes to enhance the flavors.
  • Feel free to customize the toppings based on your guests’ preferences.
  • For a spicier kick, add jalapeños or use a zesty salsa.

Equipment Needed

  • 9×13 inch baking dish: A standard size for layering; a similar-sized dish works too.
  • Spatula: Essential for spreading layers; a large spoon can also do the trick.
  • Plastic wrap: To cover the dip while chilling; a lid can be used if available.
  • Mixing bowls: Handy for prepping ingredients; any bowl will suffice.

Variations

  • Spicy Kick: Add diced jalapeños or a layer of spicy salsa for an extra kick.
  • Healthier Option: Substitute Greek yogurt for sour cream to lighten up the dip.
  • Meat Lover’s Delight: Layer in some seasoned ground beef or shredded chicken for added protein.
  • Vegan Version: Use plant-based sour cream and cheese alternatives for a vegan-friendly dip.
  • Southwestern Twist: Incorporate black beans or corn for a heartier texture and flavor.

Serving Suggestions

  • Pair the dip with a variety of tortilla chips—think blue corn or flavored options for a twist.
  • Serve alongside fresh veggies like carrot sticks and bell pepper strips for a crunchy contrast.
  • Complement with refreshing drinks like iced tea or a light beer to balance the flavors.
  • For a festive touch, arrange the dip on a red, white, and blue platter.

FAQs about American Flag Layered Taco Dip

Can I make the American Flag Layered Taco Dip ahead of time?

Absolutely! You can prepare the dip a day in advance. Just cover it tightly with plastic wrap and store it in the refrigerator. This allows the flavors to meld beautifully, making it even tastier when served.

What can I substitute for sour cream in this recipe?

If you’re looking for a healthier option, Greek yogurt works wonderfully as a substitute for sour cream. It maintains that creamy texture while adding a bit of tang.

How can I make this dip spicier?

For a spicy kick, consider adding diced jalapeños or using a spicy salsa. You can also mix in some hot sauce to the layers for an extra punch!

Is this dip suitable for vegetarians?

<pYes, this American Flag Layered Taco Dip is vegetarian-friendly! It’s packed with delicious layers that everyone can enjoy, making it a great choice for gatherings.

What should I serve with the dip?

Tortilla chips are a classic choice, but you can also serve it with fresh veggies like carrot sticks or bell pepper strips for a crunchy contrast. Pair it with refreshing drinks for a complete experience!

Final Thoughts

Creating the American Flag Layered Taco Dip is more than just a cooking task; it’s an experience that brings people together.

As you layer each ingredient, you’re not just building a dip; you’re crafting a centerpiece that sparks joy and conversation.

The vibrant colors and delicious flavors make it a hit at any gathering, whether it’s a casual get-together or a festive celebration.

Every scoop is a reminder of the good times shared with friends and family.

So, roll up your sleeves, gather your loved ones, and enjoy the deliciousness that this dip brings to your table!

Ranis

American Flag Layered Taco Dip: Easy Party Recipe to Wow!

A festive and delicious American Flag Layered Taco Dip perfect for parties and gatherings.
Prep Time 15 minutes
Total Time 45 minutes
Servings: 8 servings
Course: Appetizer
Cuisine: American
Calories: 220

Ingredients
  

  • 1 can 15 oz refried beans
  • 1 cup sour cream
  • 1 cup guacamole
  • 1 cup salsa
  • 1 cup shredded cheddar cheese
  • 1 cup shredded lettuce
  • 1 medium tomato diced
  • 1/2 cup black olives sliced
  • 1/2 cup green onions chopped
  • Tortilla chips for serving

Method
 

  1. In a 9x13 inch baking dish, spread the refried beans evenly across the bottom.
  2. Layer the sour cream over the refried beans, smoothing it out to create an even layer.
  3. Next, spread the guacamole over the sour cream layer.
  4. Pour the salsa over the guacamole, spreading it evenly.
  5. Sprinkle the shredded cheddar cheese on top of the salsa layer.
  6. Add the shredded lettuce evenly over the cheese.
  7. Decorate the top with diced tomatoes, black olives, and green onions to create an American flag design. Use the tomatoes for the red stripes and the olives for the blue field.
  8. Chill the dip in the refrigerator for at least 30 minutes before serving to allow the flavors to meld.
  9. Serve with tortilla chips for dipping.

Nutrition

Serving: 1/8 of the dipCalories: 220kcalCarbohydrates: 12gProtein: 6gFat: 16gSaturated Fat: 6gPolyunsaturated Fat: 10gCholesterol: 30mgSodium: 400mgFiber: 3gSugar: 2g

Notes

  • For a spicier kick, add diced jalapeños or a layer of spicy salsa.
  • Substitute Greek yogurt for sour cream for a healthier option.
Tried this recipe?

Let us know how it was!

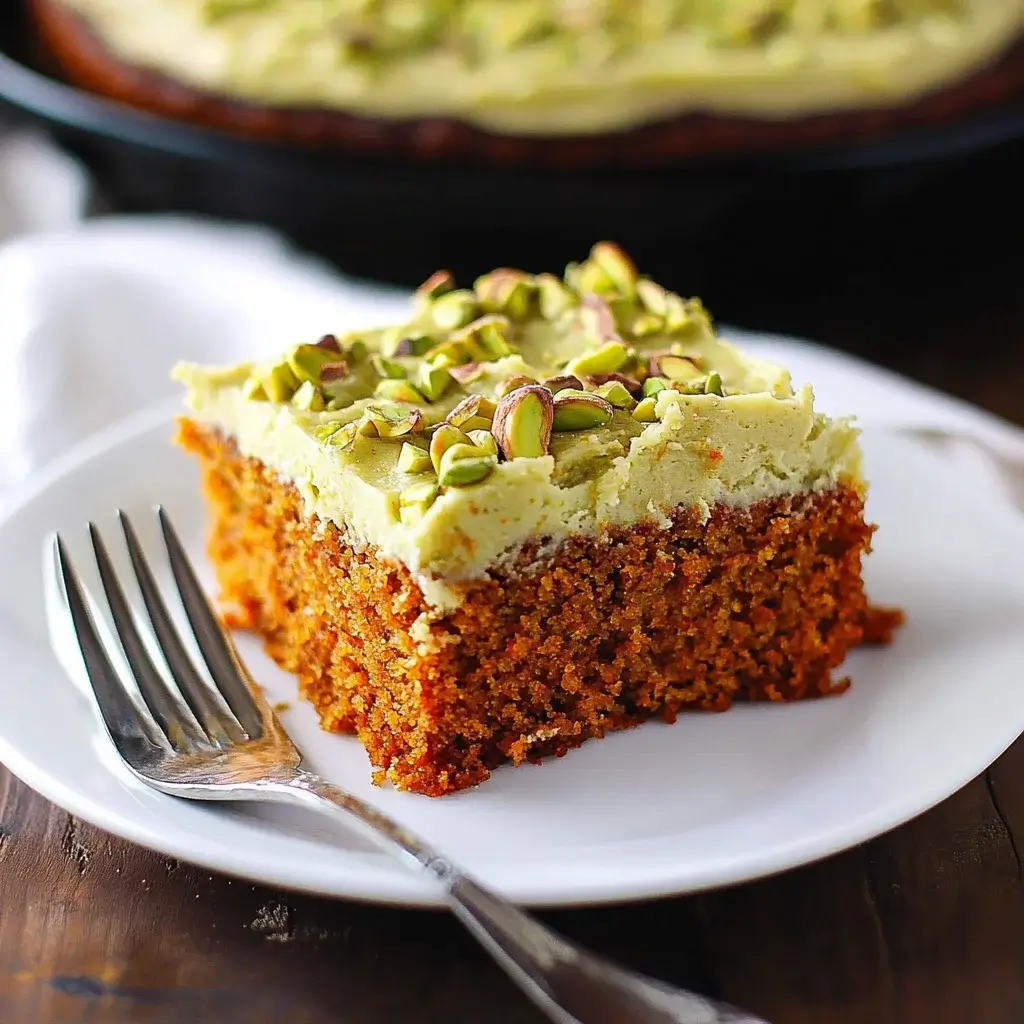
Pistachio Carrot Cake: A Delicious Twist You’ll Love!

Introduction to Pistachio Carrot Cake

There’s something magical about the aroma of freshly baked cake wafting through the kitchen.

When I first stumbled upon the idea of a Pistachio Carrot Cake, I was intrigued.

It’s a delightful twist on the classic carrot cake, combining the earthy sweetness of carrots with the nutty crunch of pistachios.

This recipe is perfect for those busy days when you want to impress your loved ones without spending hours in the kitchen.

With its vibrant colors and unique flavor, this cake is sure to become a favorite at any gathering.

Let’s dive into this delicious adventure together!

Why You’ll Love This Pistachio Carrot Cake

This Pistachio Carrot Cake is a game-changer for dessert lovers.

It’s incredibly easy to whip up, making it perfect for both novice and seasoned bakers.

The combination of flavors is simply irresistible; the sweetness of carrots pairs beautifully with the rich, nutty taste of pistachios.

Plus, it’s a crowd-pleaser that will have your friends and family asking for seconds.

What’s not to love about that?

Ingredients for Pistachio Carrot Cake

Creating a Pistachio Carrot Cake is all about gathering the right ingredients.

Here’s what you’ll need to bring this delightful dessert to life:

  • All-purpose flour: The backbone of your cake, providing structure and texture.
  • Baking powder and baking soda: These leavening agents help your cake rise, giving it that fluffy texture.
  • Salt: Just a pinch enhances the flavors and balances the sweetness.
  • Ground cinnamon and nutmeg: These warm spices add depth and a cozy aroma to your cake.
  • Granulated sugar and brown sugar: A mix of sugars gives sweetness and moisture, with brown sugar adding a hint of caramel flavor.
  • Vegetable oil: Keeps the cake moist and tender; you can also use melted coconut oil for a twist.
  • Eggs: They bind everything together and contribute to the cake’s richness.
  • Grated carrots: The star of the show! They add natural sweetness and moisture.
  • Crushed pistachios: These not only add a delightful crunch but also a unique flavor that complements the carrots.
  • Vanilla extract: A splash of vanilla rounds out the flavors beautifully.

For the frosting, you’ll need:

  • Cream cheese: This gives the frosting its rich, tangy flavor.
  • Unsalted butter: Adds creaminess and helps achieve the perfect spreadable consistency.
  • Powdered sugar: Sweetens the frosting and gives it that smooth texture.
  • Milk: Just a splash helps adjust the frosting’s consistency to your liking.

Feel free to get creative!

You can mix in optional ingredients like raisins or crushed pineapple for added flavor.

If you need a gluten-free option, simply swap the all-purpose flour with a gluten-free blend.

For exact measurements, check the bottom of the article where you can find everything available for printing.

How to Make Pistachio Carrot Cake

Making a Pistachio Carrot Cake is a delightful journey that’s easier than you might think.

Let’s break it down step by step, ensuring you have all the tips you need for success.

Step 1: Preheat and Prepare

Start by preheating your oven to 350°F (175°C).

While it warms up, grease and flour two 9-inch round cake pans.

This step is crucial; it prevents your cake from sticking and ensures a smooth release.

Step 2: Mix Dry Ingredients

In a large bowl, whisk together the all-purpose flour, baking powder, baking soda, salt, ground cinnamon, and nutmeg.

This blend of dry ingredients creates the perfect foundation for your cake.

Make sure there are no lumps; a smooth mix leads to a fluffy texture.

Step 3: Combine Wet Ingredients

In another bowl, beat together the granulated sugar, brown sugar, and vegetable oil until well combined.

Add the eggs one at a time, mixing well after each addition.

Then, stir in the grated carrots, crushed pistachios, and vanilla extract.

This mixture is where the magic begins, bringing together sweetness and flavor.

Step 4: Combine Mixtures

Gradually add the dry ingredients to the wet mixture.

Mix until just combined; overmixing can lead to a dense cake.

You want a batter that’s smooth but still has a bit of texture from the pistachios.

Step 5: Bake the Cakes

Divide the batter evenly between the prepared cake pans.

Bake for 25-30 minutes, or until a toothpick inserted in the center comes out clean.

Once done, let the cakes cool in the pans for about 10 minutes before transferring them to wire racks to cool completely.

Step 6: Make the Frosting

While the cakes cool, prepare the cream cheese frosting.

In a medium bowl, beat together the softened cream cheese and unsalted butter until smooth.

Gradually add the powdered sugar and vanilla extract, mixing until well combined.

If the frosting is too thick, add milk one tablespoon at a time until you reach your desired consistency.

Step 7: Assemble the Cake

Once the cakes are completely cool, place one layer on a serving plate.

Spread a generous layer of cream cheese frosting on top, then place the second cake layer on top.

Frost the top and sides of the cake with the remaining cream cheese frosting.

For a finishing touch, garnish with additional crushed pistachios.

Now, step back and admire your creation before diving in!

Tips for Success

  • Always measure your ingredients accurately for the best results.
  • Let your eggs and butter come to room temperature for easier mixing.
  • Don’t skip the cooling time; it helps the cake set properly.
  • Use a toothpick to check for doneness; it should come out clean.
  • For a moist cake, store leftovers in an airtight container.

Equipment Needed

  • Mixing bowls: A set of various sizes is ideal; you can also use any large bowl you have on hand.
  • Whisk: Perfect for mixing dry ingredients; a fork can work in a pinch.
  • Measuring cups and spoons: Essential for accuracy; use a kitchen scale for precision if available.
  • Spatula: Great for folding and scraping; a wooden spoon can substitute.
  • Oven mitts: Safety first! Use any thick cloth if you don’t have them.

Variations

  • Nutty Delight: Add chopped walnuts or almonds for an extra crunch and flavor contrast.
  • Fruit Fusion: Mix in 1/2 cup of crushed pineapple or raisins for added sweetness and moisture.
  • Spice It Up: Experiment with additional spices like ginger or cardamom for a unique twist.
  • Gluten-Free Option: Substitute all-purpose flour with a gluten-free flour blend for a gluten-free treat.
  • Vegan Version: Replace eggs with flaxseed meal and use a plant-based cream cheese for frosting.

Serving Suggestions

  • Pair your Pistachio Carrot Cake with a scoop of vanilla ice cream for a delightful contrast.
  • Serve with a side of fresh fruit, like berries or citrus, to brighten the plate.
  • A cup of freshly brewed coffee or tea complements the cake perfectly.
  • For a festive touch, garnish with edible flowers or mint leaves.

FAQs about Pistachio Carrot Cake

Can I make Pistachio Carrot Cake ahead of time?

Absolutely! You can bake the cakes a day in advance. Just store them in an airtight container in the fridge. Frosting can also be made ahead and kept in the fridge until you’re ready to assemble.

What can I substitute for pistachios?

If you’re not a fan of pistachios, walnuts or pecans work wonderfully as alternatives. They’ll still give you that delightful crunch and nutty flavor.

How do I store leftover cake?

To keep your Pistachio Carrot Cake fresh, store it in an airtight container at room temperature for up to three days. If you want to keep it longer, refrigerate it for up to a week.

Can I freeze Pistachio Carrot Cake?

Yes! You can freeze the cake layers wrapped tightly in plastic wrap for up to three months. Just thaw them in the fridge overnight before frosting and serving.

Is this cake suitable for special diets?

This Pistachio Carrot Cake can be adapted for various diets. Use gluten-free flour for a gluten-free version, and try a vegan cream cheese for a plant-based option. Enjoy the flexibility!

Final Thoughts

Baking this Pistachio Carrot Cake is more than just a culinary task; it’s an experience filled with joy and creativity.

The vibrant colors and delightful aromas that fill your kitchen create a warm atmosphere, perfect for sharing with loved ones.

Each slice offers a unique blend of flavors, making it a memorable treat for any occasion.

Whether you’re celebrating a special moment or simply indulging in a sweet craving, this cake is sure to bring smiles.

So, roll up your sleeves, embrace the process, and enjoy every bite of this delicious twist on a classic favorite!

Ranis

Pistachio Carrot Cake: A Delicious Twist You’ll Love!

A delicious twist on traditional carrot cake, featuring the unique flavor of pistachios.
Prep Time 20 minutes
Cook Time 30 minutes
Total Time 50 minutes
Servings: 10 servings
Course: Dessert
Cuisine: American
Calories: 350

Ingredients
  

  • 2 cups all-purpose flour
  • 1 teaspoon baking powder
  • 1 teaspoon baking soda
  • 1/2 teaspoon salt
  • 1 teaspoon ground cinnamon
  • 1/2 teaspoon ground nutmeg
  • 1 cup granulated sugar
  • 1/2 cup brown sugar packed
  • 1 cup vegetable oil
  • 4 large eggs
  • 2 cups grated carrots about 4 medium carrots
  • 1/2 cup crushed pistachios plus extra for garnish
  • 1 teaspoon vanilla extract
  • 8 ounces cream cheese softened
  • 1/2 cup unsalted butter softened
  • 4 cups powdered sugar
  • 1 teaspoon vanilla extract
  • 1-2 tablespoons milk as needed for consistency

Method
 

  1. Preheat the oven to 350°F (175°C). Grease and flour two 9-inch round cake pans.
  2. In a large bowl, whisk together the flour, baking powder, baking soda, salt, cinnamon, and nutmeg.
  3. In another bowl, beat together the granulated sugar, brown sugar, and vegetable oil until well combined. Add the eggs one at a time, mixing well after each addition. Stir in the grated carrots, crushed pistachios, and vanilla extract.
  4. Gradually add the dry ingredients to the wet ingredients, mixing until just combined. Do not overmix.
  5. Divide the batter evenly between the prepared cake pans. Bake for 25-30 minutes, or until a toothpick inserted in the center comes out clean. Let the cakes cool in the pans for 10 minutes, then transfer to wire racks to cool completely.
  6. While the cakes are cooling, prepare the cream cheese frosting. In a medium bowl, beat together the softened cream cheese and butter until smooth. Gradually add the powdered sugar and vanilla extract, mixing until well combined. If the frosting is too thick, add milk one tablespoon at a time until desired consistency is reached.
  7. Once the cakes are completely cool, place one layer on a serving plate. Spread a layer of cream cheese frosting on top, then place the second cake layer on top. Frost the top and sides of the cake with the remaining cream cheese frosting. Garnish with additional crushed pistachios if desired.
  8. Serve immediately or refrigerate for up to 3 days.

Nutrition

Serving: 1sliceCalories: 350kcalCarbohydrates: 45gProtein: 5gFat: 18gSaturated Fat: 5gPolyunsaturated Fat: 13gCholesterol: 70mgSodium: 200mgFiber: 2gSugar: 30g

Notes

  • For added flavor, consider mixing in 1/2 cup of raisins or pineapple.
  • To make this cake gluten-free, substitute the all-purpose flour with a gluten-free flour blend.

Tried this recipe?

Let us know how it was!

Roasted Carrot and Lentil Salad with Hummus: A Tasty Delight!

Introduction to Roasted Carrot and Lentil Salad with Hummus

There’s something magical about a dish that combines vibrant colors, hearty textures, and a burst of flavor. The Roasted Carrot and Lentil Salad with Hummus is just that—a delightful medley that’s not only nutritious but also incredibly satisfying. Whether you’re looking for a quick solution for a busy day or a dish to impress your loved ones, this salad checks all the boxes. It’s easy to whip up, packed with wholesome ingredients, and bursting with Mediterranean flair. Trust me, once you try it, you’ll want to make it a regular on your dinner table!

Why You’ll Love This Roasted Carrot and Lentil Salad with Hummus

This Roasted Carrot and Lentil Salad with Hummus is a game-changer for anyone seeking a quick, healthy meal. It comes together in just 40 minutes, making it perfect for busy weeknights. The combination of roasted carrots and lentils creates a satisfying dish that’s both filling and flavorful. Plus, it’s versatile enough to serve as a main course or a side, ensuring it fits seamlessly into any meal plan.

Ingredients for Roasted Carrot and Lentil Salad with Hummus

Gathering the right ingredients is the first step to creating this delicious Roasted Carrot and Lentil Salad with Hummus. Here’s what you’ll need:

  • Carrots: Fresh, vibrant carrots are the star of this dish. They add sweetness and a lovely crunch.
  • Olive Oil: A drizzle of olive oil helps to roast the carrots to perfection, enhancing their natural flavors.
  • Salt: A pinch of salt elevates the taste, bringing out the sweetness of the carrots.
  • Black Pepper: Freshly ground black pepper adds a subtle kick to the dish.
  • Ground Cumin: This spice introduces a warm, earthy flavor that complements the carrots beautifully.
  • Cooked Lentils: Green or brown lentils provide protein and fiber, making the salad hearty and filling.
  • Red Onion: Finely chopped red onion adds a sharp bite and a pop of color.
  • Fresh Parsley: Chopped parsley brings freshness and a hint of brightness to the salad.
  • Feta Cheese (optional): Crumbled feta adds a creamy, tangy element, but feel free to skip it for a vegan option.
  • Hummus: A generous dollop of hummus on top ties everything together, adding creaminess and flavor.
  • Lemon Juice: Freshly squeezed lemon juice brightens the dish, balancing the flavors perfectly.

For exact measurements, check the bottom of the article where you can find everything listed for easy printing. Feel free to get creative with your ingredients—substitutions can be made based on what you have on hand!

How to Make Roasted Carrot and Lentil Salad with Hummus

Creating this Roasted Carrot and Lentil Salad with Hummus is a straightforward process that anyone can master. Follow these simple steps, and you’ll have a delicious, nutritious meal ready in no time!

Step 1: Preheat the Oven

Start by preheating your oven to 400°F. This step is crucial for even cooking. A hot oven ensures that the carrots roast beautifully, caramelizing their natural sugars and enhancing their flavor.

Step 2: Prepare the Carrots

In a large bowl, toss the sliced carrots with olive oil, salt, black pepper, and ground cumin. Make sure every piece is well-coated. This not only adds flavor but also helps the carrots roast evenly, giving them that perfect golden-brown color.

Step 3: Roast the Carrots

Spread the carrots in a single layer on a baking sheet. Roast them in the preheated oven for 25-30 minutes. Halfway through, give them a stir to ensure they cook evenly. You’ll know they’re done when they’re tender and slightly caramelized—just the way we like them!

Step 4: Combine Ingredients

Once the carrots are roasted, it’s time to mix everything together. In a large mixing bowl, combine the cooked lentils, finely chopped red onion, fresh parsley, and those beautifully roasted carrots. This combination creates a colorful and hearty salad that’s packed with flavor.

Step 5: Add Lemon Juice

Drizzle the fresh lemon juice over the mixture. This step is essential as it brightens the flavors and adds a refreshing zing. Toss everything gently to combine, ensuring the lemon juice coats all the ingredients.

Step 6: Serve with Hummus

Now for the best part! Serve the salad on a plate or in a bowl, topped with a generous dollop of hummus. If you’re feeling fancy, sprinkle some crumbled feta cheese on top for an extra layer of flavor. Enjoy your Roasted Carrot and Lentil Salad with Hummus as a satisfying meal or a delightful side dish!

Tips for Success

  • Use fresh, seasonal carrots for the best flavor and texture.
  • Don’t overcrowd the baking sheet; give the carrots space to roast evenly.
  • Experiment with spices—try adding smoked paprika or garlic powder for a twist.
  • Let the salad sit for a few minutes before serving to allow flavors to meld.
  • Store leftovers in an airtight container for up to three days.

Equipment Needed

  • Baking Sheet: A standard baking sheet works well, but a cast-iron skillet can add a nice touch.
  • Mixing Bowl: Any large bowl will do; a glass bowl lets you see the vibrant colors.
  • Knife and Cutting Board: A sharp knife and sturdy cutting board are essential for prepping your ingredients.
  • Measuring Cups: Useful for precise ingredient amounts, but you can eyeball it if you’re feeling adventurous!

Variations

  • Spicy Kick: Add a pinch of cayenne pepper or red pepper flakes to the carrot mixture before roasting for a fiery twist.
  • Herb Infusion: Experiment with different herbs like cilantro or mint instead of parsley for a fresh flavor profile.
  • Grain Swap: Substitute lentils with quinoa or farro for a different texture and taste.
  • Nutty Crunch: Toss in some toasted nuts, like almonds or walnuts, for added crunch and healthy fats.
  • Vegan Delight: Omit the feta cheese or use a plant-based alternative to keep it vegan-friendly.

Serving Suggestions

  • Pair with Grains: Serve alongside quinoa or brown rice for a complete meal.
  • Fresh Greens: A side of mixed greens or arugula adds a refreshing crunch.
  • Drink Options: Enjoy with a crisp white wine or sparkling water with lemon.
  • Presentation: Garnish with extra parsley or a sprinkle of sesame seeds for visual appeal.

FAQs about Roasted Carrot and Lentil Salad with Hummus

Can I make this Roasted Carrot and Lentil Salad with Hummus ahead of time?

Absolutely! This salad can be made a day in advance. Just store it in an airtight container in the fridge. The flavors will meld beautifully, making it even tastier!

What type of lentils should I use?

Green or brown lentils work best for this recipe. They hold their shape well and add a hearty texture. Avoid red lentils, as they tend to become mushy.

Is this salad suitable for meal prep?

Yes! This Roasted Carrot and Lentil Salad with Hummus is perfect for meal prep. It keeps well in the fridge and can be enjoyed cold or at room temperature.

Can I add other vegetables to the salad?

Definitely! Feel free to add roasted bell peppers, zucchini, or even spinach for extra nutrition and flavor. Just make sure to adjust the roasting time as needed.

How can I make this dish gluten-free?

This salad is naturally gluten-free, as it contains no wheat products. Just ensure that any additional ingredients, like hummus, are also gluten-free to keep it safe for those with gluten sensitivities.

Final Thoughts

Creating this Roasted Carrot and Lentil Salad with Hummus is more than just cooking; it’s about bringing joy to your table. The vibrant colors and rich flavors make it a feast for the eyes and the palate. Each bite is a reminder of how simple ingredients can come together to create something truly special. Whether you’re enjoying it solo or sharing it with friends, this salad is bound to spark conversations and smiles. So, roll up your sleeves, embrace the process, and let this delightful dish become a cherished part of your culinary repertoire!

Ranis

Roasted Carrot and Lentil Salad with Hummus: A Tasty Delight!

A delicious and nutritious Roasted Carrot and Lentil Salad topped with hummus, perfect for a healthy meal.
Prep Time 10 minutes
Cook Time 30 minutes
Total Time 40 minutes
Servings: 4 servings
Course: Salad
Cuisine: Mediterranean
Calories: 280

Ingredients
  

  • 2 cups carrots peeled and sliced into 1/2-inch rounds
  • 1 tablespoon olive oil
  • 1 teaspoon salt
  • 1/2 teaspoon black pepper
  • 1 teaspoon ground cumin
  • 1 cup cooked lentils green or brown
  • 1/4 cup red onion finely chopped
  • 1/4 cup fresh parsley chopped
  • 1/4 cup feta cheese crumbled (optional)
  • 1/2 cup hummus
  • Juice of 1 lemon

Method
 

  1. Preheat the oven to 400°F.
  2. In a large bowl, toss the sliced carrots with olive oil, salt, pepper, and cumin until evenly coated.
  3. Spread the carrots in a single layer on a baking sheet. Roast in the preheated oven for 25-30 minutes, or until tender and slightly caramelized, stirring halfway through.
  4. In a large mixing bowl, combine the cooked lentils, red onion, parsley, and roasted carrots once they are done.
  5. Drizzle the lemon juice over the mixture and toss gently to combine.
  6. Serve the salad on a plate or in a bowl, topped with a dollop of hummus and crumbled feta cheese, if using.

Nutrition

Serving: 1servingCalories: 280kcalCarbohydrates: 35gProtein: 10gFat: 10gSaturated Fat: 2gPolyunsaturated Fat: 8gCholesterol: 5mgSodium: 400mgFiber: 10gSugar: 5g

Notes

  • For a spicier kick, add a pinch of cayenne pepper to the carrot mixture before roasting.
  • To make this dish vegan, simply omit the feta cheese or substitute with a plant-based alternative.

Tried this recipe?

Let us know how it was!

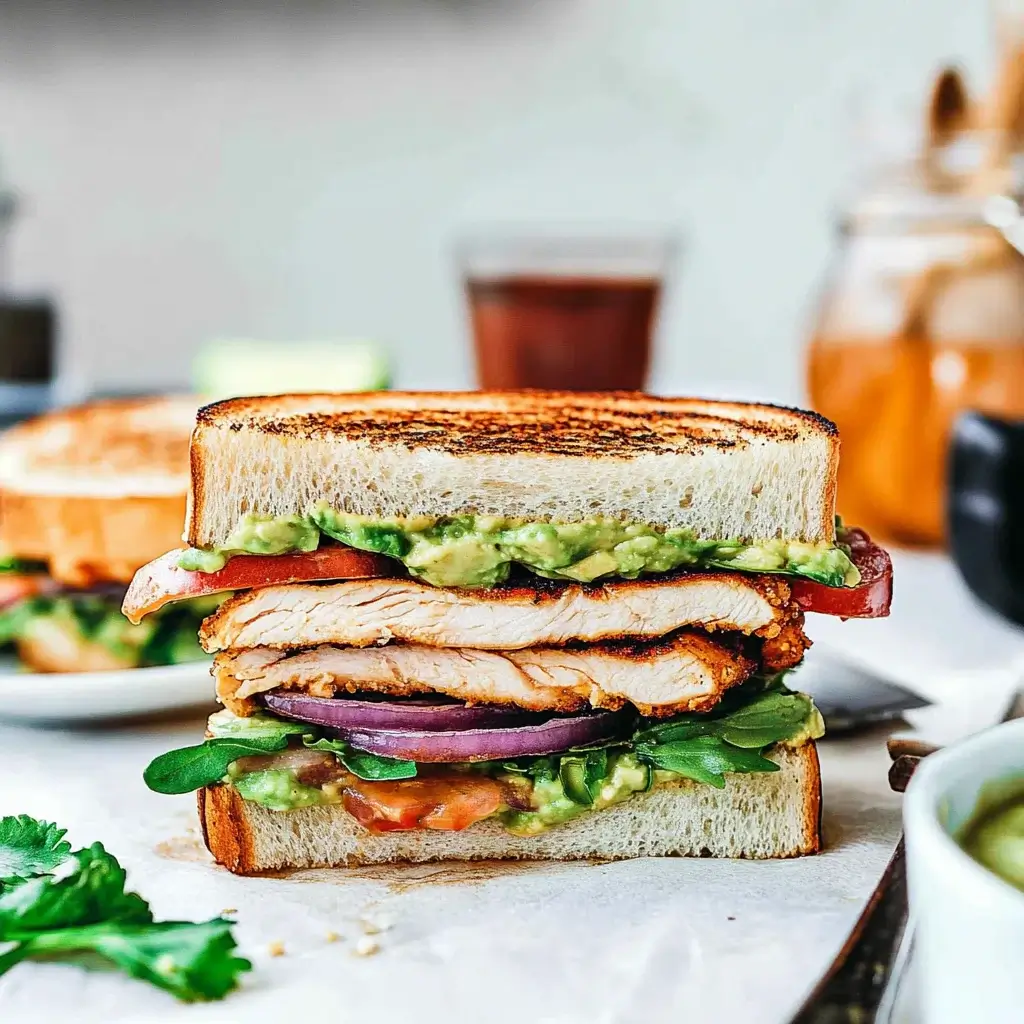
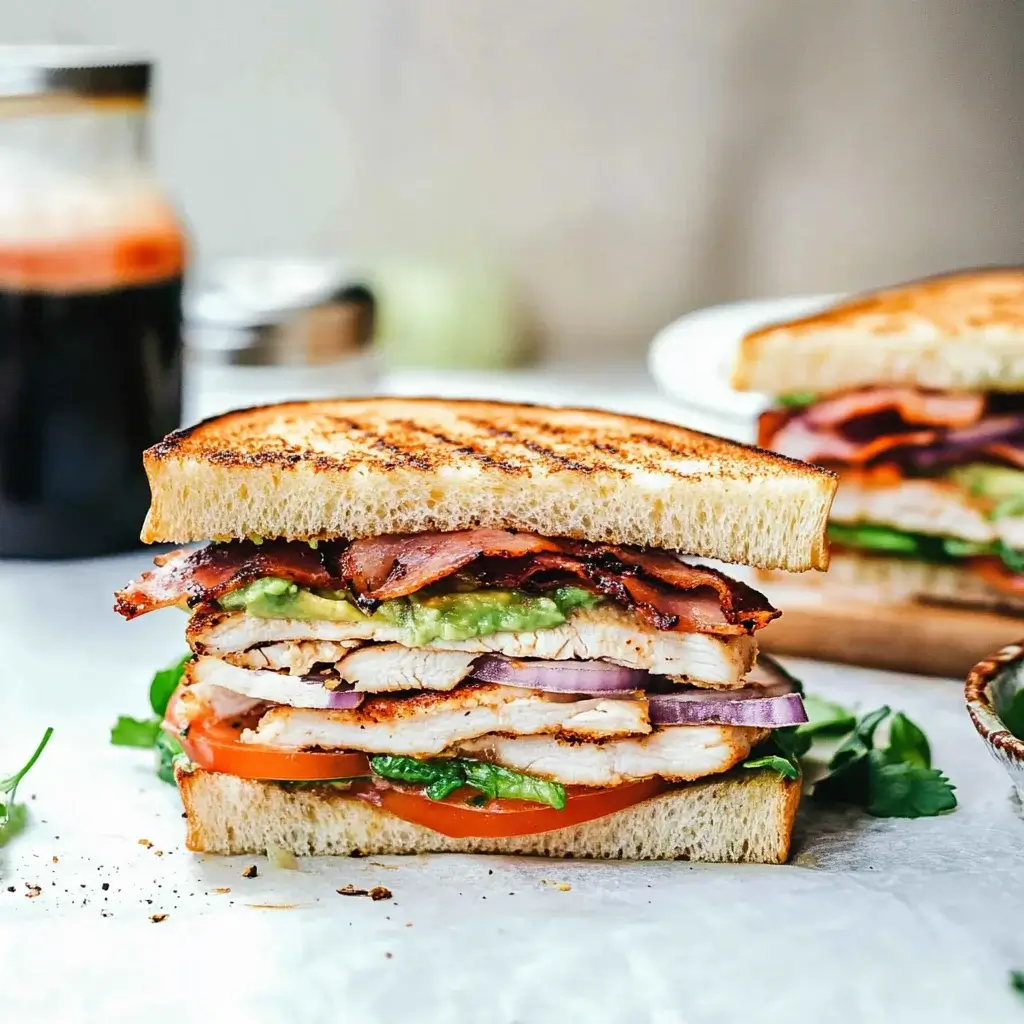
Grilled Chicken Sandwich with Avocado and Chipotle Mayo made easy!

Introduction to Grilled Chicken Sandwich with Avocado and Chipotle Mayo

There’s something undeniably satisfying about biting into a perfectly grilled chicken sandwich.

When I think of a Grilled Chicken Sandwich with Avocado and Chipotle Mayo, I’m reminded of summer barbecues and lazy weekends.

This recipe is not just a meal; it’s a quick solution for those busy days when you want something delicious without spending hours in the kitchen.

With creamy avocado and a spicy kick from the chipotle mayo, this sandwich is sure to impress your loved ones.

Let’s dive into this easy-to-make delight that will elevate your lunch game!

Why You’ll Love This Grilled Chicken Sandwich with Avocado and Chipotle Mayo

This Grilled Chicken Sandwich with Avocado and Chipotle Mayo is a game-changer for your lunch routine.

It’s quick to whip up, taking just 30 minutes from start to finish.

The combination of juicy chicken, creamy avocado, and zesty chipotle mayo creates a flavor explosion that’s hard to resist.

Plus, it’s versatile enough to please everyone at the table, making it a perfect choice for family meals or casual gatherings.

Ingredients for Grilled Chicken Sandwich with Avocado and Chipotle Mayo

Creating a mouthwatering Grilled Chicken Sandwich with Avocado and Chipotle Mayo starts with the right ingredients.

Here’s what you’ll need:

  • Boneless, skinless chicken breasts: The star of the show! They’re lean, juicy, and perfect for grilling.
  • Garlic powder: Adds a savory depth that enhances the chicken’s flavor.
  • Onion powder: A subtle sweetness that complements the garlic and spices.
  • Smoked paprika: This brings a smoky richness, making your sandwich taste like it’s been kissed by the grill.
  • Salt: Essential for bringing out all the flavors in your ingredients.
  • Black pepper: A dash of heat that balances the richness of the mayo and avocado.
  • Olive oil: Helps to keep the chicken moist while grilling and adds a touch of healthy fat.
  • Sandwich rolls: Ciabatta or brioche works beautifully, providing a soft yet sturdy base for your sandwich.
  • Ripe avocado: Creamy and rich, it adds a luxurious texture and healthy fats.
  • Lettuce: Crisp romaine or spinach adds freshness and crunch.
  • Tomato: Juicy slices bring a burst of flavor and color to your sandwich.
  • Mayonnaise: The creamy base for your chipotle mayo, adding richness.
  • Chipotle sauce: This is where the magic happens! Adjust the amount to control the spice level.
  • Lime juice: A splash of acidity that brightens the flavors and balances the richness.

Feel free to get creative! You can swap the chicken for grilled shrimp or a plant-based protein for a different twist.

For exact measurements, check the bottom of the article where you can find everything available for printing.

How to Make Grilled Chicken Sandwich with Avocado and Chipotle Mayo

Making a Grilled Chicken Sandwich with Avocado and Chipotle Mayo is a straightforward process that anyone can master.

Follow these simple steps, and you’ll be on your way to a delicious meal that’s sure to impress.

Step 1: Preheat the Grill

Preheating your grill is crucial.

It ensures that the chicken cooks evenly and gets those beautiful grill marks.

Aim for medium-high heat, around 375°F to 400°F.

This temperature will give you that perfect sear while keeping the inside juicy.

Step 2: Prepare the Chicken

Seasoning the chicken is where the magic begins.

In a small bowl, mix garlic powder, onion powder, smoked paprika, salt, and black pepper.

These spices not only enhance the chicken’s flavor but also create a delicious crust when grilled.

Rub the spice mixture evenly over both sides of the chicken breasts for maximum flavor.

Step 3: Grill the Chicken

Now it’s time to grill!

Place the seasoned chicken on the preheated grill.

Cook for about 6-7 minutes on each side.

To check for doneness, use a meat thermometer; the internal temperature should reach 165°F.

This ensures your chicken is safe to eat and perfectly juicy.

Step 4: Make the Chipotle Mayo

While the chicken is grilling, whip up the chipotle mayo.

In a small bowl, combine mayonnaise, chipotle sauce, and lime juice.

This creamy concoction adds a spicy kick that elevates your sandwich.

Feel free to adjust the chipotle sauce to your preferred spice level—more for heat, less for a milder flavor.

Step 5: Slice the Chicken

Once the chicken has rested for about 5 minutes, it’s time to slice.

Cut the chicken into strips against the grain.

This technique not only makes for a more tender bite but also looks great in your sandwich.

Step 6: Toast the Rolls

Toasting the sandwich rolls is a game-changer.

Place them on the grill for about 1-2 minutes until golden brown.

This adds a delightful crunch and enhances the overall flavor of your sandwich.

Step 7: Assemble the Sandwich

Now comes the fun part—assembly!

Spread a generous amount of chipotle mayo on the bottom half of each toasted roll.

Layer with crisp lettuce, juicy tomato slices, grilled chicken, and creamy avocado.

Top it off with the other half of the roll, and you’re ready to go!

Step 8: Serve and Enjoy

Your Grilled Chicken Sandwich with Avocado and Chipotle Mayo is ready to be devoured.

Serve it immediately for the best experience.

Don’t forget to share your creation with family and friends—they’ll be asking for seconds!

Tips for Success

  • Let the chicken rest after grilling to keep it juicy.
  • Use a meat thermometer for perfect doneness—165°F is key.
  • Experiment with different types of bread for unique flavors.
  • Customize the chipotle mayo by adding garlic or herbs.
  • Prep your ingredients ahead of time for a smoother cooking experience.

Equipment Needed

  • Grill or Grill Pan: A standard outdoor grill works best, but a stovetop grill pan is a great alternative.
  • Meat Thermometer: Essential for checking chicken doneness; a simple instant-read thermometer will do.
  • Mixing Bowl: For preparing the chipotle mayo and seasoning the chicken.
  • Cutting Board: A sturdy surface for slicing the chicken and assembling the sandwich.
  • Sharp Knife: For easy slicing of chicken and vegetables.

Variations

  • Spicy Kick: Add sliced jalapeños or a sprinkle of crushed red pepper flakes to the sandwich for an extra heat boost.
  • Herb Infusion: Mix fresh herbs like cilantro or parsley into the chipotle mayo for a fresh twist.
  • Vegetarian Option: Substitute the chicken with grilled portobello mushrooms or a hearty veggie burger for a satisfying plant-based meal.
  • Cheesy Delight: Top the chicken with a slice of pepper jack or cheddar cheese while grilling for a melty addition.
  • Gluten-Free: Use gluten-free rolls or lettuce wraps to make this sandwich suitable for gluten-sensitive diets.

Serving Suggestions

  • Side Salad: Pair your sandwich with a light side salad for a refreshing crunch.
  • Sweet Potato Fries: Crispy sweet potato fries add a delightful contrast to the savory sandwich.
  • Cold Beverages: Serve with iced tea or a cold beer to complement the flavors.
  • Presentation: Serve on a wooden board for a rustic touch, garnished with fresh herbs.

FAQs about Grilled Chicken Sandwich with Avocado and Chipotle Mayo

Can I make the chipotle mayo ahead of time?

Absolutely! You can prepare the chipotle mayo a day in advance. Just store it in an airtight container in the fridge. This allows the flavors to meld beautifully, making it even tastier when you assemble your sandwich.

What can I substitute for chicken in this recipe?

If you’re looking for alternatives, grilled shrimp or a plant-based protein like tofu or tempeh works wonderfully. Just adjust the cooking time accordingly to ensure everything is cooked perfectly.

How do I store leftovers?

To keep your Grilled Chicken Sandwich fresh, store the components separately. Place the chicken, avocado, and chipotle mayo in airtight containers in the fridge. Assemble the sandwich when you’re ready to enjoy it again!

Can I use a different type of bread?

Definitely! While ciabatta and brioche are fantastic choices, feel free to experiment with whole grain, sourdough, or even gluten-free rolls. Each type of bread will bring its own unique flavor and texture to the sandwich.

How spicy is the chipotle mayo?

The spice level of the chipotle mayo can be adjusted to your liking. Start with a tablespoon of chipotle sauce, then taste and add more if you want an extra kick. It’s all about finding that perfect balance for your palate!

Final Thoughts

Creating a Grilled Chicken Sandwich with Avocado and Chipotle Mayo is more than just cooking; it’s about bringing joy to your table.

The combination of flavors and textures makes each bite a delightful experience.

Whether you’re enjoying it solo or sharing with friends, this sandwich has a way of sparking conversation and smiles.

Plus, it’s a fantastic way to impress without breaking a sweat.

So fire up that grill, gather your ingredients, and savor the satisfaction of crafting a meal that’s both delicious and easy.

You’ll find yourself making this again and again!

Ranis

Grilled Chicken Sandwich with Avocado and Chipotle Mayo made easy!

A delicious and easy-to-make Grilled Chicken Sandwich featuring avocado and a spicy chipotle mayo.
Prep Time 15 minutes
Cook Time 15 minutes
Total Time 30 minutes
Servings: 4 servings
Course: Sandwich
Cuisine: American
Calories: 450

Ingredients
  

  • 2 boneless skinless chicken breasts (about 1 pound)
  • 1 teaspoon garlic powder
  • 1 teaspoon onion powder
  • 1 teaspoon smoked paprika
  • 1 teaspoon salt
  • ½ teaspoon black pepper
  • 2 tablespoons olive oil
  • 4 sandwich rolls ciabatta or brioche
  • 1 ripe avocado sliced
  • 1 cup lettuce romaine or spinach
  • 1 medium tomato sliced
  • ½ cup mayonnaise
  • 1 tablespoon chipotle sauce or to taste
  • 1 teaspoon lime juice

Method
 

  1. Preheat your grill or grill pan over medium-high heat.
  2. In a small bowl, mix together garlic powder, onion powder, smoked paprika, salt, and black pepper. Rub the spice mixture evenly over both sides of the chicken breasts.
  3. Drizzle olive oil over the chicken breasts and place them on the grill. Cook for about 6-7 minutes on each side, or until the internal temperature reaches 165°F. Remove from the grill and let rest for 5 minutes.
  4. While the chicken is resting, prepare the chipotle mayo by mixing mayonnaise, chipotle sauce, and lime juice in a small bowl. Adjust the chipotle sauce to your desired spice level.
  5. Slice the grilled chicken breasts into strips.
  6. Toast the sandwich rolls on the grill for about 1-2 minutes until golden brown.
  7. Assemble the sandwiches by spreading a generous amount of chipotle mayo on the bottom half of each roll. Layer with lettuce, sliced tomato, grilled chicken, and avocado. Top with the other half of the roll.
  8. Serve immediately and enjoy!

Nutrition

Serving: 1sandwichCalories: 450kcalCarbohydrates: 30gProtein: 30gFat: 25gSaturated Fat: 4gPolyunsaturated Fat: 21gCholesterol: 70mgSodium: 800mgFiber: 3gSugar: 2g

Notes

  • For a smoky flavor, consider adding sliced jalapeños or grilled onions to the sandwich.
  • Swap the chicken for grilled shrimp or a plant-based protein for a different twist.

Tried this recipe?

Let us know how it was!

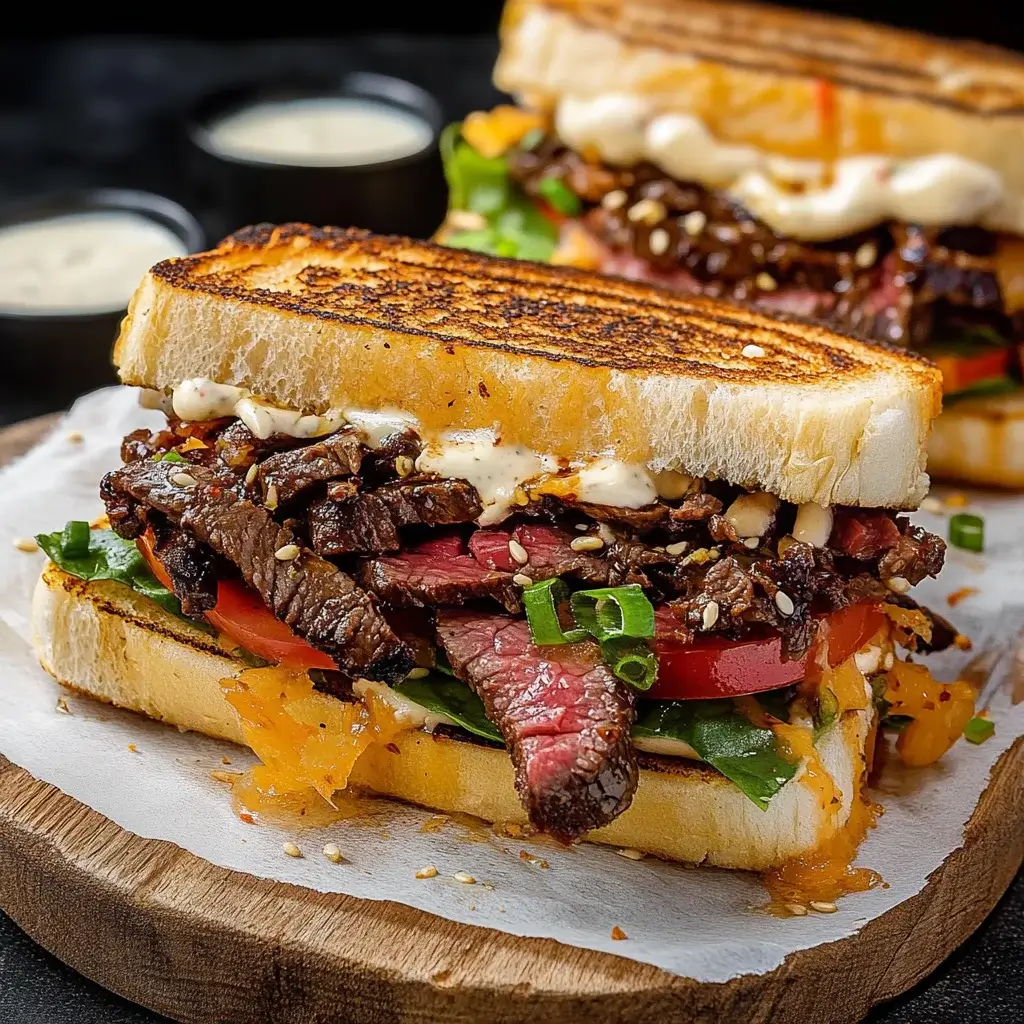
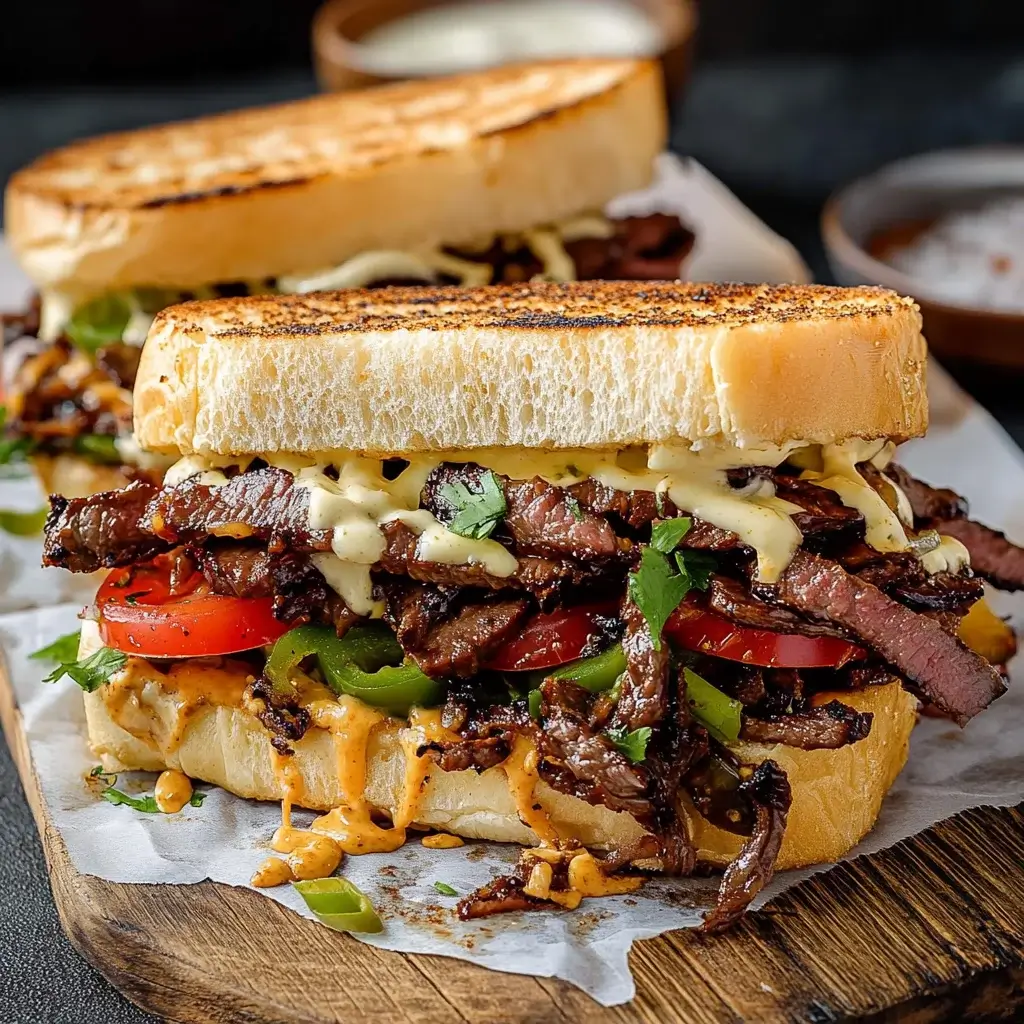
Korean Steak Sandwich with Garlic Mayo: A Must-Try Recipe!

Introduction to Korean Steak Sandwich with Garlic Mayo

There’s something magical about a sandwich that can transport you to another world with just one bite. The Korean Steak Sandwich with Garlic Mayo does just that. It’s a delightful fusion of flavors that’s perfect for a quick weeknight dinner or a weekend treat to impress your friends. I remember the first time I tried a Korean BBQ dish; the bold flavors and tender meat left me craving more. This recipe captures that essence, making it an easy go-to for busy days or casual gatherings. Trust me, your taste buds will thank you!

Why You’ll Love This Korean Steak Sandwich with Garlic Mayo

This Korean Steak Sandwich with Garlic Mayo is a game-changer for your meal rotation. It’s quick to whip up, taking just 20 minutes from start to finish. The marinated flank steak is bursting with flavor, while the spicy garlic mayo adds a creamy kick that elevates every bite. Whether you’re feeding a hungry family or hosting friends, this sandwich is sure to impress without the fuss. You’ll love how satisfying it is!

Ingredients for Korean Steak Sandwich with Garlic Mayo

Gathering the right ingredients is the first step to creating a mouthwatering Korean Steak Sandwich with Garlic Mayo. Here’s what you’ll need:

  • Flank Steak: This cut is perfect for marinating and grilling, offering a rich flavor and tenderness.
  • Soy Sauce: Adds a savory depth to the marinade, enhancing the steak’s umami flavor.
  • Sesame Oil: A little goes a long way, imparting a nutty aroma that complements the dish beautifully.
  • Brown Sugar: Balances the savory elements with a hint of sweetness, helping to caramelize the steak.
  • Minced Garlic: Fresh garlic brings a punch of flavor, making the marinade irresistible.
  • Minced Ginger: Adds a zesty kick that brightens the overall taste of the sandwich.
  • Black Pepper: A simple seasoning that enhances the flavors without overpowering them.
  • Hoagie Rolls: These sturdy rolls hold everything together, providing the perfect vessel for your delicious fillings.
  • Shredded Lettuce: Adds a refreshing crunch, balancing the richness of the steak and mayo.
  • Cucumber: Thinly sliced for a crisp texture and a cool contrast to the warm steak.
  • Carrot: Julienned for a touch of sweetness and color, making the sandwich visually appealing.
  • Jalapeño (optional): For those who like a bit of heat, these slices can spice things up!
  • Mayonnaise: The base for our garlic mayo, providing creaminess that ties the sandwich together.
  • Sriracha: Adjust to your spice preference; it adds a delightful kick to the garlic mayo.
  • Lime Juice: A splash of acidity brightens the mayo and enhances the overall flavor profile.

For exact measurements, check the bottom of the article where you can find everything listed for easy printing. Feel free to get creative with your ingredients; cooking is all about personal touches!

How to Make Korean Steak Sandwich with Garlic Mayo

Creating a Korean Steak Sandwich with Garlic Mayo is a straightforward process that packs a punch of flavor. Follow these simple steps, and you’ll have a delicious meal ready in no time. Let’s dive in!

Step 1: Marinate the Flank Steak

Start by marinating the flank steak. In a bowl, mix together soy sauce, sesame oil, brown sugar, minced garlic, minced ginger, and black pepper. This marinade is the secret to infusing the steak with rich flavors. Place the flank steak in the marinade, ensuring it’s well-coated. Let it sit for at least 30 minutes, or up to 2 hours in the fridge for maximum flavor. The longer it marinates, the more tender and tasty it becomes!

Step 2: Cook the Steak

Once the steak has marinated, it’s time to cook it. Preheat your grill or skillet over medium-high heat. Remove the steak from the marinade, letting any excess drip off. Cook the steak for about 4-5 minutes on each side, depending on your desired doneness. For medium-rare, aim for an internal temperature of 130°F. After cooking, let the steak rest for 5 minutes. This step is crucial; it allows the juices to redistribute, ensuring every bite is juicy and flavorful.

Step 3: Prepare the Garlic Mayo

While the steak is resting, let’s whip up the garlic mayo. In a small bowl, combine mayonnaise, sriracha, and lime juice. Mix well until smooth. This creamy concoction adds a zesty kick to your sandwich, balancing the savory flavors of the steak. Adjust the sriracha to your spice preference; you can make it as mild or fiery as you like!

Step 4: Assemble the Sandwich

Now comes the fun part—assembling your sandwich! Slice the hoagie rolls open and spread a generous amount of garlic mayo on each side. Layer in the shredded lettuce, followed by the thinly sliced cucumber and julienned carrot. Finally, add the sliced steak on top. If you’re feeling adventurous, toss in some jalapeño slices for an extra kick. Close the sandwich and admire your creation; it’s a feast for the eyes!

Step 5: Serve and Enjoy

Your Korean Steak Sandwich with Garlic Mayo is ready to be devoured! Serve it immediately for the best experience. If you’re not eating right away, wrap the sandwiches in foil to keep them warm. Pair them with some crispy fries or a fresh salad for a complete meal. Trust me, once you take that first bite, you’ll be hooked!

Tips for Success

  • Let the steak marinate longer for deeper flavor—up to 2 hours is ideal.
  • Use a meat thermometer to check doneness; it ensures perfectly cooked steak.
  • Don’t skip the resting time after cooking; it keeps the meat juicy.
  • Feel free to customize the veggies based on your preferences.
  • Make extra garlic mayo for dipping or spreading on other sandwiches!

Equipment Needed

  • Grill or Skillet: A grill gives a smoky flavor, but a skillet works just as well.
  • Mixing Bowl: For marinating the steak and mixing the garlic mayo.
  • Meat Thermometer: Ensures your steak is cooked to perfection.
  • Knife and Cutting Board: Essential for slicing the steak and veggies.
  • Spatula or Tongs: Handy for flipping the steak while cooking.

Variations

  • Vegetarian Option: Swap the flank steak for marinated and grilled portobello mushrooms for a hearty, meatless alternative.
  • Spicy Twist: Add more sriracha to the garlic mayo or include sliced jalapeños for an extra kick.
  • Asian-Inspired Slaw: Mix shredded cabbage with sesame oil and rice vinegar for a crunchy topping.
  • Gluten-Free Rolls: Use gluten-free hoagie rolls to accommodate dietary restrictions.
  • Herb Infusion: Incorporate fresh herbs like cilantro or mint into the sandwich for a burst of freshness.

Serving Suggestions

  • Fries: Serve with crispy sweet potato fries for a delightful contrast.
  • Salad: A light cucumber and tomato salad pairs perfectly with the sandwich.
  • Drinks: Enjoy with a cold beer or a refreshing iced tea.
  • Presentation: Wrap in parchment paper for a rustic touch.

FAQs about Korean Steak Sandwich with Garlic Mayo

Can I use a different cut of meat for this sandwich?

Absolutely! While flank steak is ideal for its tenderness and flavor, you can also use sirloin or ribeye. Just remember to adjust the cooking time based on the thickness of the cut.

How can I make this Korean Steak Sandwich gluten-free?

To make a gluten-free version, simply use gluten-free hoagie rolls and ensure your soy sauce is gluten-free. There are great alternatives available that maintain the same delicious flavor.

What can I substitute for sriracha in the garlic mayo?

If sriracha isn’t your thing, try using a different hot sauce or even a dash of chili powder for a milder kick. You can also leave it out entirely for a creamy garlic mayo.

How do I store leftovers of the Korean Steak Sandwich?

Store any leftover steak and veggies separately in airtight containers in the fridge. When you’re ready to enjoy, simply reheat the steak and assemble the sandwich fresh!

Can I prepare the garlic mayo in advance?

Yes! You can make the garlic mayo a day ahead. Just store it in the fridge in a sealed container. This allows the flavors to meld beautifully, making it even tastier!

Final Thoughts

Creating a Korean Steak Sandwich with Garlic Mayo is more than just cooking; it’s an experience that brings joy to your kitchen. The combination of marinated steak and zesty garlic mayo creates a symphony of flavors that dance on your palate. Each bite is a reminder of the simple pleasures in life—good food shared with loved ones. Whether you’re enjoying it on a busy weeknight or serving it at a gathering, this sandwich is sure to impress. So roll up your sleeves, dive into this recipe, and savor the deliciousness that awaits you!

Ranis

Korean Steak Sandwich with Garlic Mayo: A Must-Try Recipe!

A delicious Korean Steak Sandwich featuring marinated flank steak and a spicy garlic mayo, perfect for a satisfying meal.
Prep Time 10 minutes
Cook Time 10 minutes
Total Time 20 minutes
Servings: 4 servings
Course: Sandwich
Cuisine: Korean
Calories: 450

Ingredients
  

  • 1 pound flank steak
  • 1 tablespoon soy sauce
  • 1 tablespoon sesame oil
  • 1 tablespoon brown sugar
  • 1 teaspoon minced garlic
  • 1 teaspoon minced ginger
  • 1 teaspoon black pepper
  • 4 hoagie rolls
  • 1 cup shredded lettuce
  • 1 medium cucumber thinly sliced
  • 1 medium carrot julienned
  • 1 jalapeño sliced (optional)
  • 1/2 cup mayonnaise
  • 1 tablespoon sriracha adjust to taste
  • 1 teaspoon lime juice

Method
 

  1. In a bowl, combine soy sauce, sesame oil, brown sugar, minced garlic, minced ginger, and black pepper. Add the flank steak and marinate for at least 30 minutes, or up to 2 hours in the refrigerator for more flavor.
  2. Preheat a grill or skillet over medium-high heat. Remove the steak from the marinade and cook for about 4-5 minutes on each side, or until it reaches your desired level of doneness. Let the steak rest for 5 minutes before slicing it thinly against the grain.
  3. While the steak is resting, prepare the garlic mayo by mixing mayonnaise, sriracha, and lime juice in a small bowl. Adjust the sriracha to your preferred spice level.
  4. Slice the hoagie rolls open and spread a generous amount of garlic mayo on each side.
  5. Layer the shredded lettuce, sliced cucumber, julienned carrot, and sliced steak on the rolls. Top with jalapeño slices if desired.
  6. Close the sandwiches and serve immediately, or wrap them in foil to keep warm until ready to eat.

Nutrition

Serving: 1sandwichCalories: 450kcalCarbohydrates: 30gProtein: 30gFat: 25gSaturated Fat: 4gPolyunsaturated Fat: 20gCholesterol: 70mgSodium: 800mgFiber: 2gSugar: 5g

Notes

  • For a vegetarian option, substitute the steak with marinated and grilled portobello mushrooms.
  • Add sliced avocado or a sprinkle of sesame seeds for extra flavor and texture.

Tried this recipe?

Let us know how it was!

Patriotic Star Brownies: Delightful, Easy Recipe to Try!

Introduction to Patriotic Star Brownies

There’s something magical about desserts that bring people together, especially when they’re as delightful as Patriotic Star Brownies. Whether it’s a backyard barbecue, a family gathering, or a holiday celebration, these brownies are the perfect treat to impress your loved ones. They’re easy to whip up, making them a quick solution for those busy days when you want to add a festive touch. With their vibrant colors and rich chocolate flavor, these brownies not only satisfy your sweet tooth but also create a sense of joy and togetherness. Let’s dive into this delicious recipe!

Why You’ll Love This Patriotic Star Brownies

These Patriotic Star Brownies are a game-changer for any celebration. They’re incredibly easy to make, so even if you’re short on time, you can still impress your guests. The rich, fudgy texture combined with the festive colors makes them a hit with both kids and adults alike. Plus, they’re versatile enough to adapt for any occasion, ensuring you’ll always have a delicious dessert ready to go!

Ingredients for Patriotic Star Brownies

Gathering the right ingredients is the first step to creating these delightful Patriotic Star Brownies. Here’s what you’ll need:

  • Unsalted butter: This adds richness and moisture to the brownies. Melt it for a fudgy texture.
  • Granulated sugar: Sweetens the brownies and helps achieve that perfect chewy consistency.
  • Large eggs: They bind the ingredients together and provide structure. Adding them one at a time ensures even mixing.
  • Vanilla extract: A splash of this adds depth and enhances the chocolate flavor.
  • All-purpose flour: This is the backbone of the brownies, giving them body and structure.
  • Unsweetened cocoa powder: The star of the show! It provides that rich chocolate flavor we all crave.
  • Salt: Just a pinch enhances the sweetness and balances the flavors.
  • Baking powder: This helps the brownies rise slightly, giving them a nice texture.
  • Red and blue sprinkles or colored sugar: These are for decoration, adding a festive touch to your star-shaped treats.
  • Star-shaped cookie cutter: Essential for cutting out those fun star shapes that make these brownies so special.

For those looking to mix things up, consider adding chocolate chips or nuts for extra texture. You can find all the exact measurements at the bottom of the article, ready for printing!

How to Make Patriotic Star Brownies

Creating these Patriotic Star Brownies is a straightforward process that anyone can master. Follow these simple steps, and you’ll have a delicious dessert that’s sure to impress!

Step 1: Preheat the Oven

Start by preheating your oven to 350°F (175°C). This step is crucial because it ensures that your brownies bake evenly. A properly heated oven helps achieve that perfect fudgy texture we all love. So, don’t skip this step!

Step 2: Prepare the Baking Pan

Next, grab a 9×13-inch baking pan and grease it well. Use a bit of unsalted butter or cooking spray to coat the bottom and sides. This will make it easy to remove the brownies later. Trust me, there’s nothing worse than brownies that stick to the pan!

Step 3: Mix Wet Ingredients

In a large bowl, combine the melted butter and granulated sugar. Mix them together until they’re well blended. This step is important because it helps create a smooth batter. The sugar should dissolve into the butter, giving your brownies that sweet, rich flavor.

Step 4: Add Eggs and Vanilla

Now, it’s time to add the eggs. Crack them in one at a time, mixing thoroughly after each addition. This ensures that each egg is fully incorporated, which is key for a uniform texture. Don’t forget to add the vanilla extract for that extra depth of flavor!

Step 5: Combine Dry Ingredients

In a separate bowl, whisk together the all-purpose flour, cocoa powder, salt, and baking powder. This step is crucial because it helps distribute the dry ingredients evenly. A well-mixed dry mixture leads to brownies that rise perfectly and have a consistent texture.

Step 6: Mix Wet and Dry Ingredients

Gradually add the dry ingredients to the wet mixture. Stir gently until just combined. Be careful not to overmix; a few lumps are okay! Overmixing can lead to tough brownies, and we want them to be soft and fudgy.

Step 7: Bake the Brownies

Pour the brownie batter into your prepared pan and spread it evenly. Bake for 25-30 minutes. To check for doneness, insert a toothpick into the center. It should come out with a few moist crumbs. Once done, let the brownies cool completely in the pan. This cooling time is essential for the best texture!

Step 8: Cut and Decorate

Once the brownies are cool, use a star-shaped cookie cutter to cut out fun star shapes. This is where the magic happens! Decorate your stars with red and blue sprinkles or colored sugar for that festive touch. It’s a fun way to get creative and make your brownies truly stand out!

Tips for Success

  • Use room temperature eggs for better mixing.
  • Don’t overmix the batter; it should be just combined.
  • For extra fudginess, reduce baking time by a few minutes.
  • Let the brownies cool completely before cutting for clean edges.
  • Experiment with mix-ins like chocolate chips or nuts for added flavor.

Equipment Needed

  • 9×13-inch baking pan: A standard size for brownies; you can use a similar-sized dish if needed.
  • Mixing bowls: Use any large bowls you have on hand for mixing ingredients.
  • Whisk: A whisk is great for combining dry ingredients; a fork works too!
  • Spatula: Essential for spreading the batter evenly; a wooden spoon can also do the trick.
  • Cookie cutter: A star-shaped cutter is ideal; any fun shape will work for decoration.

Variations

  • Nutty Delight: Add chopped walnuts or pecans to the batter for a crunchy texture.
  • Chocolate Chip Brownies: Mix in semi-sweet or dark chocolate chips for an extra chocolatey treat.
  • Gluten-Free Option: Substitute all-purpose flour with a gluten-free flour blend for a gluten-free version.
  • Minty Fresh: Incorporate a few drops of peppermint extract for a refreshing twist.
  • Fruit Infusion: Add a handful of raspberries or cherries to the batter for a fruity flavor burst.

Serving Suggestions

  • Pair with a scoop of vanilla ice cream for a delightful contrast.
  • Serve alongside fresh berries for a pop of color and flavor.
  • Drizzle with chocolate or caramel sauce for an indulgent touch.
  • Present on a festive platter to enhance the celebration vibe.
  • Enjoy with a cold glass of milk or a refreshing iced tea.

FAQs about Patriotic Star Brownies

As you embark on your journey to create these delightful Patriotic Star Brownies, you might have a few questions. Here are some common queries that can help you along the way:

Can I make these brownies ahead of time?

Absolutely! You can bake the brownies a day in advance. Just store them in an airtight container at room temperature. They’ll stay fresh and fudgy, ready for decoration when you need them.

What can I use instead of eggs?

If you’re looking for an egg substitute, try using unsweetened applesauce or mashed bananas. About 1/4 cup of either works well for each egg. This will keep your brownies moist and delicious!

How do I store leftover brownies?

To keep your brownies fresh, store them in an airtight container. They can last up to a week at room temperature or up to two weeks in the fridge. Just make sure to let them come to room temperature before serving!

Can I freeze Patriotic Star Brownies?

Yes, you can freeze them! Wrap the brownies tightly in plastic wrap and then in aluminum foil. They’ll stay good for up to three months. Just thaw them in the fridge overnight before enjoying.

What’s the best way to cut brownies for clean edges?

For clean cuts, use a sharp knife and wipe it with a damp cloth between cuts. This prevents the brownies from sticking to the knife, giving you those perfect star shapes!

Final Thoughts

Making Patriotic Star Brownies is more than just baking; it’s about creating memories and celebrating togetherness. The joy of cutting out star shapes and decorating them with vibrant sprinkles brings out the kid in all of us. Whether you’re serving them at a holiday gathering or just enjoying a quiet evening at home, these brownies are sure to bring smiles. They’re a delicious reminder that simple ingredients can create something truly special. So, roll up your sleeves, gather your loved ones, and let the fun begin with these delightful treats!

Ranis

Patriotic Star Brownies: Delightful, Easy Recipe to Try!

Delightful and easy-to-make Patriotic Star Brownies, perfect for celebrations.
Prep Time 15 minutes
Cook Time 30 minutes
Total Time 45 minutes
Servings: 12 servings
Course: Dessert
Cuisine: American
Calories: 250

Ingredients
  

  • 1 cup unsalted butter melted
  • 2 cups granulated sugar
  • 4 large eggs
  • 1 teaspoon vanilla extract
  • 1 cup all-purpose flour
  • 1 cup unsweetened cocoa powder
  • 1/2 teaspoon salt
  • 1/2 teaspoon baking powder
  • Red and blue sprinkles or colored sugar for decoration
  • Star-shaped cookie cutter

Method
 

  1. Preheat the oven to 350°F (175°C).
  2. Grease a 9x13-inch baking pan.
  3. In a large bowl, mix the melted butter and sugar until well combined.
  4. Add the eggs one at a time, mixing well after each addition.
  5. Stir in the vanilla extract.
  6. In another bowl, whisk together the flour, cocoa powder, salt, and baking powder.
  7. Gradually add the dry ingredients to the wet mixture, stirring until just combined.
  8. Pour the brownie batter into the prepared pan and spread evenly.
  9. Bake for 25-30 minutes, or until a toothpick inserted in the center comes out with a few moist crumbs.
  10. Allow the brownies to cool completely in the pan.
  11. Once cooled, use a star-shaped cookie cutter to cut out star shapes from the brownies.
  12. Decorate with red and blue sprinkles or colored sugar.

Nutrition

Serving: 1brownieCalories: 250kcalCarbohydrates: 30gProtein: 3gFat: 12gSaturated Fat: 7gPolyunsaturated Fat: 5gCholesterol: 70mgSodium: 150mgFiber: 2gSugar: 20g

Notes

  • For a fudgier brownie, reduce the baking time by a few minutes.
  • You can also add chocolate chips or nuts to the batter for extra texture.
  • For a festive touch, serve with whipped cream and fresh berries on the side.

Tried this recipe?

Let us know how it was!

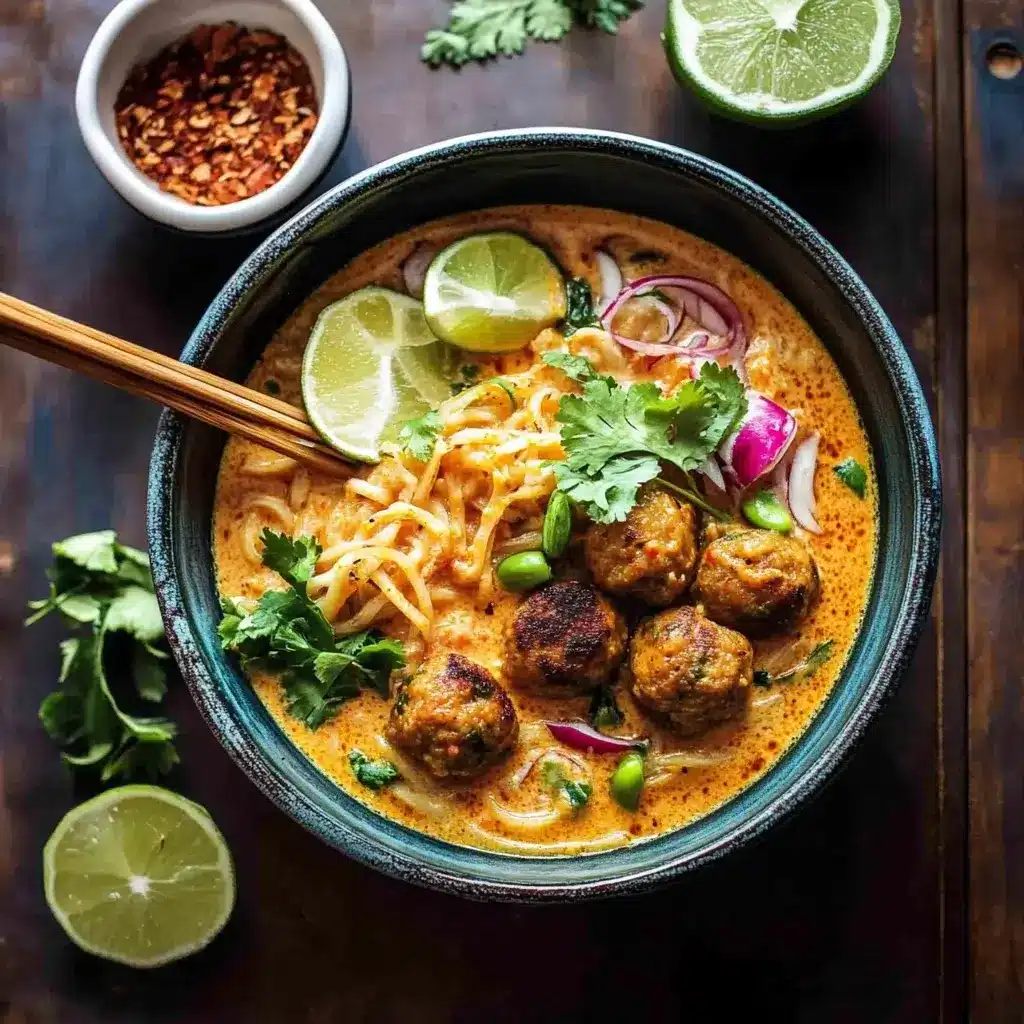
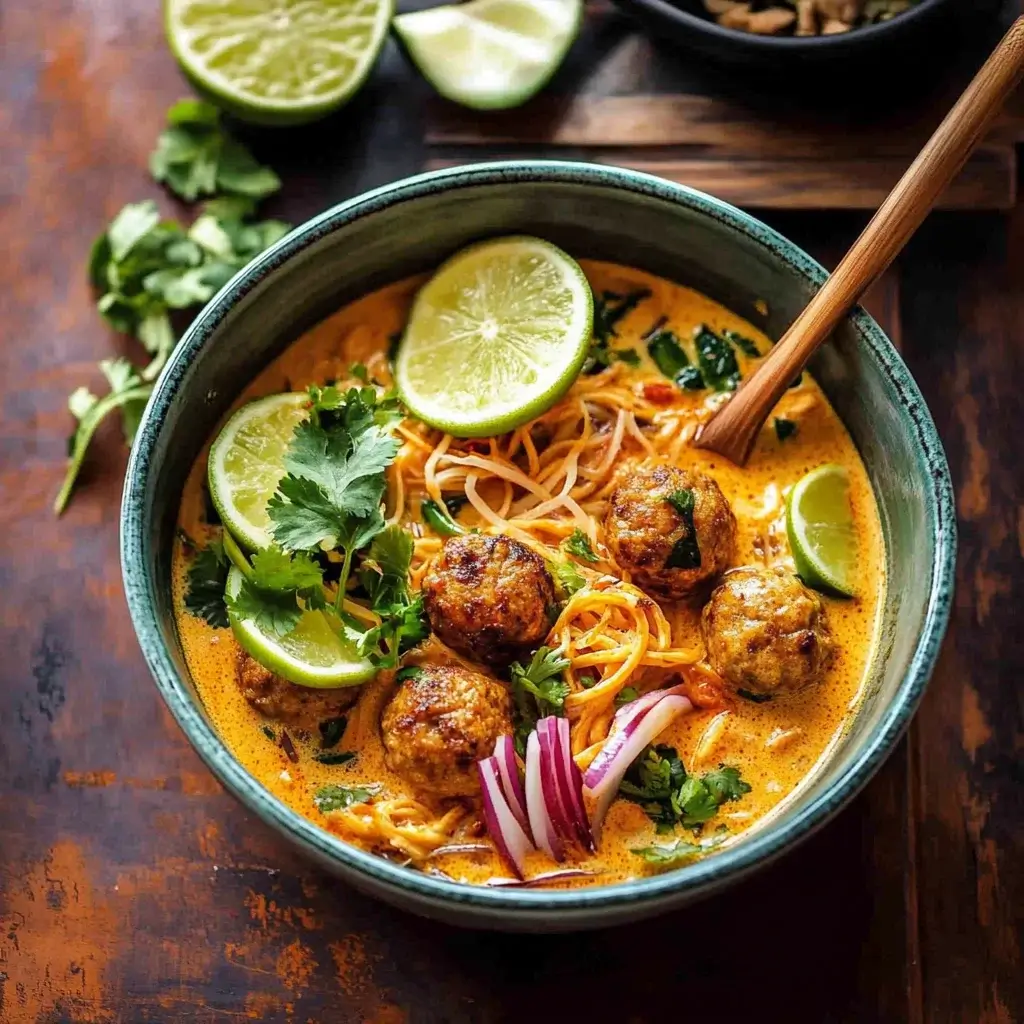
Thai Chicken Meatball Khao Soi: A Flavorful Delight!

Introduction to Thai Chicken Meatball Khao Soi

When I think of comfort food, Thai Chicken Meatball Khao Soi always comes to mind. This dish is like a warm hug on a chilly evening, combining tender chicken meatballs with a rich coconut curry soup.

It’s perfect for those busy weeknights when you want something quick yet impressive.

With its vibrant flavors and inviting aroma, this recipe is sure to win over your family and friends.

Plus, it’s a fantastic way to explore Thai cuisine without stepping out of your kitchen. Let’s dive into this delightful culinary adventure together!

Why You’ll Love This Thai Chicken Meatball Khao Soi

This Thai Chicken Meatball Khao Soi is a game-changer for your dinner routine.

It’s not just about the incredible taste; it’s also about the ease of preparation.

In under an hour, you can whip up a dish that feels gourmet.

The combination of savory meatballs and creamy coconut broth will have everyone asking for seconds.

Trust me, this recipe is a surefire way to impress without the stress!

Ingredients for Thai Chicken Meatball Khao Soi

Creating the perfect Thai Chicken Meatball Khao Soi starts with gathering the right ingredients.

Here’s what you’ll need:

  • Ground chicken: The star of the dish, providing a tender and juicy base for the meatballs.
  • Breadcrumbs: These help bind the meatballs together, ensuring they hold their shape while cooking.
  • Fresh cilantro: Adds a burst of freshness and a hint of herbal flavor that complements the dish beautifully.
  • Garlic: A must-have for depth and aroma, infusing the meatballs with savory goodness.
  • Fresh ginger: Offers a warm, zesty kick that brightens the overall flavor profile.
  • Soy sauce: Provides umami and saltiness, enhancing the taste of the meatballs.
  • Fish sauce: A staple in Thai cooking, it adds a unique depth and complexity to the broth.
  • Lime juice: Brings acidity and brightness, balancing the richness of the coconut milk.
  • Red curry paste: The heart of the Khao Soi, delivering a spicy and aromatic punch.
  • Salt and black pepper: Essential seasonings to elevate the flavors of the meatballs.
  • Vegetable oil: Used for browning the meatballs, adding a nice crisp texture.
  • Chicken broth: The base of the soup, providing a savory foundation for the coconut milk.
  • Coconut milk: This creamy ingredient makes the soup rich and indulgent, a hallmark of Thai cuisine.
  • Brown sugar: A touch of sweetness to balance the spices and acidity in the soup.
  • Egg noodles or rice: The perfect vehicle for soaking up that delicious broth.
  • Garnishes: Fresh cilantro, lime wedges, and chopped green onions add color and freshness to your dish.

For exact measurements, check the bottom of the article where you can find everything available for printing.

Feel free to get creative! You can substitute ground turkey or pork for the chicken, or add a splash of lime juice to the soup just before serving for an extra zing.

How to Make Thai Chicken Meatball Khao Soi

Making Thai Chicken Meatball Khao Soi is a delightful journey that fills your kitchen with mouthwatering aromas.

Let’s break it down step by step, ensuring you create a dish that’s as delicious as it is satisfying.

Step 1: Preheat the Oven

Start by preheating your oven to 400°F.

This step is crucial for even cooking.

A hot oven ensures that your meatballs brown nicely, locking in those juicy flavors.

Step 2: Prepare the Meatball Mixture

In a large bowl, combine the ground chicken, breadcrumbs, cilantro, garlic, ginger, soy sauce, fish sauce, lime juice, red curry paste, salt, and pepper.

Mix everything until well combined.

Each ingredient plays a role: the breadcrumbs bind, while the spices and herbs infuse flavor.

Don’t be shy—get in there with your hands for the best results!

Step 3: Form the Meatballs

Now, it’s time to shape your mixture into meatballs.

Aim for about 1 inch in diameter.

This size ensures they cook evenly.

If you find the mixture sticky, wet your hands slightly to make rolling easier.

Step 4: Brown the Meatballs

Heat vegetable oil in a large oven-safe skillet over medium heat.

Add the meatballs in batches, cooking until they’re browned on all sides, about 5 minutes.

Browning adds depth and flavor, creating a beautiful crust that enhances the overall dish.

Step 5: Bake the Meatballs

Once browned, transfer the skillet to your preheated oven.

Bake for 10-12 minutes, or until the meatballs are cooked through.

To check for doneness, cut one open; it should be no longer pink inside.

Step 6: Prepare the Khao Soi Soup

While the meatballs are baking, let’s whip up the Khao Soi soup.

In a large pot, combine chicken broth, coconut milk, red curry paste, soy sauce, fish sauce, lime juice, and brown sugar.

Bring it to a simmer over medium heat and let it cook for about 10 minutes.

This mixture is where the magic happens, creating a rich, creamy base that’s bursting with flavor.

Step 7: Combine and Serve

Once the meatballs are done, add them to the soup and stir gently to combine.

Serve hot over cooked egg noodles or rice.

Don’t forget to garnish with fresh cilantro, lime wedges, and chopped green onions.

These finishing touches elevate the dish, adding color and freshness that’s simply irresistible.

Tips for Success

  • Use fresh ingredients for the best flavor, especially herbs and spices.
  • Don’t skip the browning step; it adds a rich depth to the meatballs.
  • Adjust the spice level by adding more or less red curry paste to suit your taste.
  • For a creamier soup, let the coconut milk simmer a bit longer.
  • Garnish generously; it makes a big difference in presentation and taste!

Equipment Needed

  • Large mixing bowl: Essential for combining the meatball ingredients. A sturdy alternative is a deep plate.
  • Oven-safe skillet: Perfect for browning and baking meatballs. If you don’t have one, use a regular skillet and transfer to a baking dish.
  • Large pot: Necessary for simmering the Khao Soi soup. A Dutch oven works great too!

Variations

  • Spicy Kick: Add extra red curry paste or a dash of chili flakes for a fiery version of Khao Soi.
  • Protein Swap: Substitute ground turkey or pork for a different flavor profile while keeping it delicious.
  • Vegetarian Option: Use plant-based ground meat or chickpeas to create a meatless version that’s equally satisfying.
  • Low-Carb Twist: Serve the soup over zucchini noodles or cauliflower rice for a lighter, low-carb meal.
  • Herb Variations: Experiment with different herbs like basil or mint for a unique twist on the traditional cilantro garnish.

Serving Suggestions

  • Pair with crispy spring rolls for a delightful appetizer that complements the soup.
  • Serve alongside a refreshing Thai salad with lime dressing to balance the richness.
  • Enjoy with a cold Thai iced tea or a light beer to enhance the flavors.
  • For presentation, use vibrant bowls and garnish generously with lime wedges and cilantro.

FAQs about Thai Chicken Meatball Khao Soi

Can I make Thai Chicken Meatball Khao Soi ahead of time?

Absolutely! You can prepare the meatballs and soup in advance. Just store them separately in the fridge. When you’re ready to serve, reheat the soup and add the meatballs for a quick meal.

What can I substitute for ground chicken?

If you’re looking for alternatives, ground turkey or pork works wonderfully. You can even try plant-based ground meat for a vegetarian option that still packs a punch!

How spicy is this dish?

The spice level can vary based on the amount of red curry paste you use. If you prefer a milder flavor, start with less and adjust to your taste. You can always add more heat later!

Can I freeze leftovers?

Yes, you can freeze the soup and meatballs! Just make sure to store them in airtight containers. When you’re ready to enjoy, thaw and reheat for a comforting meal.

What should I serve with Thai Chicken Meatball Khao Soi?

This dish pairs beautifully with crispy spring rolls or a light Thai salad. A refreshing drink like Thai iced tea or a light beer complements the flavors perfectly!

Final Thoughts

Cooking Thai Chicken Meatball Khao Soi is more than just preparing a meal; it’s an experience that brings joy and warmth to your kitchen.

The rich, aromatic broth and tender meatballs create a symphony of flavors that dance on your palate.

Each bowl is a reminder of the comfort food we crave, perfect for sharing with loved ones.

Whether it’s a weeknight dinner or a special occasion, this dish is sure to impress.

So roll up your sleeves, embrace the process, and savor the delightful journey of creating this Thai masterpiece!

Ranis

Thai Chicken Meatball Khao Soi: A Flavorful Delight!

A flavorful Thai dish featuring chicken meatballs served in a rich coconut curry soup.
Prep Time 20 minutes
Cook Time 25 minutes
Total Time 45 minutes
Servings: 4 servings
Course: Main Course
Cuisine: Thai
Calories: 450

Ingredients
  

  • 1 pound ground chicken
  • 1/4 cup breadcrumbs
  • 1/4 cup chopped fresh cilantro
  • 2 cloves garlic minced
  • 1 tablespoon fresh ginger minced
  • 1 tablespoon soy sauce
  • 1 tablespoon fish sauce
  • 1 teaspoon lime juice
  • 1 teaspoon red curry paste
  • 1/2 teaspoon salt
  • 1/4 teaspoon black pepper
  • 1 tablespoon vegetable oil
  • 4 cups chicken broth
  • 1 can 13.5 ounces coconut milk
  • 2 tablespoons red curry paste
  • 1 tablespoon soy sauce
  • 1 tablespoon fish sauce
  • 1 tablespoon lime juice
  • 1 tablespoon brown sugar
  • 1 tablespoon chopped fresh cilantro for garnish
  • Lime wedges for serving
  • Chopped green onions for garnish
  • Egg noodles or rice for serving

Method
 

  1. Preheat the oven to 400°F.
  2. In a large bowl, combine ground chicken, breadcrumbs, cilantro, garlic, ginger, soy sauce, fish sauce, lime juice, red curry paste, salt, and pepper. Mix until well combined.
  3. Form the mixture into small meatballs, about 1 inch in diameter.
  4. Heat vegetable oil in a large oven-safe skillet over medium heat. Add the meatballs in batches, cooking until browned on all sides, about 5 minutes.
  5. Transfer the skillet to the oven and bake for 10-12 minutes, or until cooked through.
  6. While the meatballs are baking, prepare the Khao Soi soup. In a large pot, combine chicken broth, coconut milk, red curry paste, soy sauce, fish sauce, lime juice, and brown sugar. Bring to a simmer over medium heat and cook for 10 minutes.
  7. Once the meatballs are done, add them to the soup and stir to combine.
  8. Serve hot over cooked egg noodles or rice, garnished with fresh cilantro, lime wedges, and chopped green onions.

Nutrition

Serving: 1servingCalories: 450kcalCarbohydrates: 18gProtein: 30gFat: 28gSaturated Fat: 12gPolyunsaturated Fat: 16gCholesterol: 100mgSodium: 1200mgFiber: 2gSugar: 5g

Notes

  • For added flavor, consider adding a splash of lime juice directly to the soup just before serving.
  • You can substitute ground turkey or pork for the chicken for a different taste.
  • If you prefer a spicier dish, add more red curry paste or a dash of chili flakes to the soup.

Tried this recipe?

Let us know how it was!

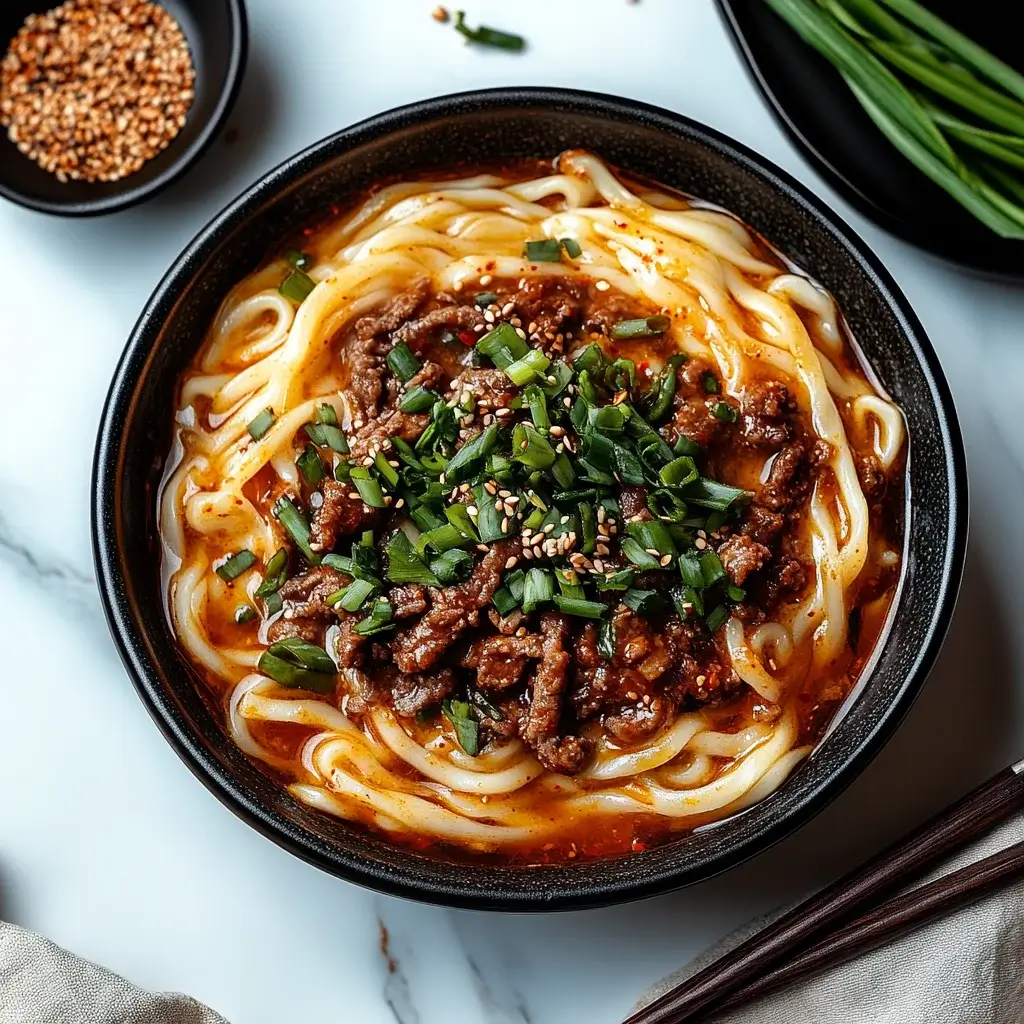
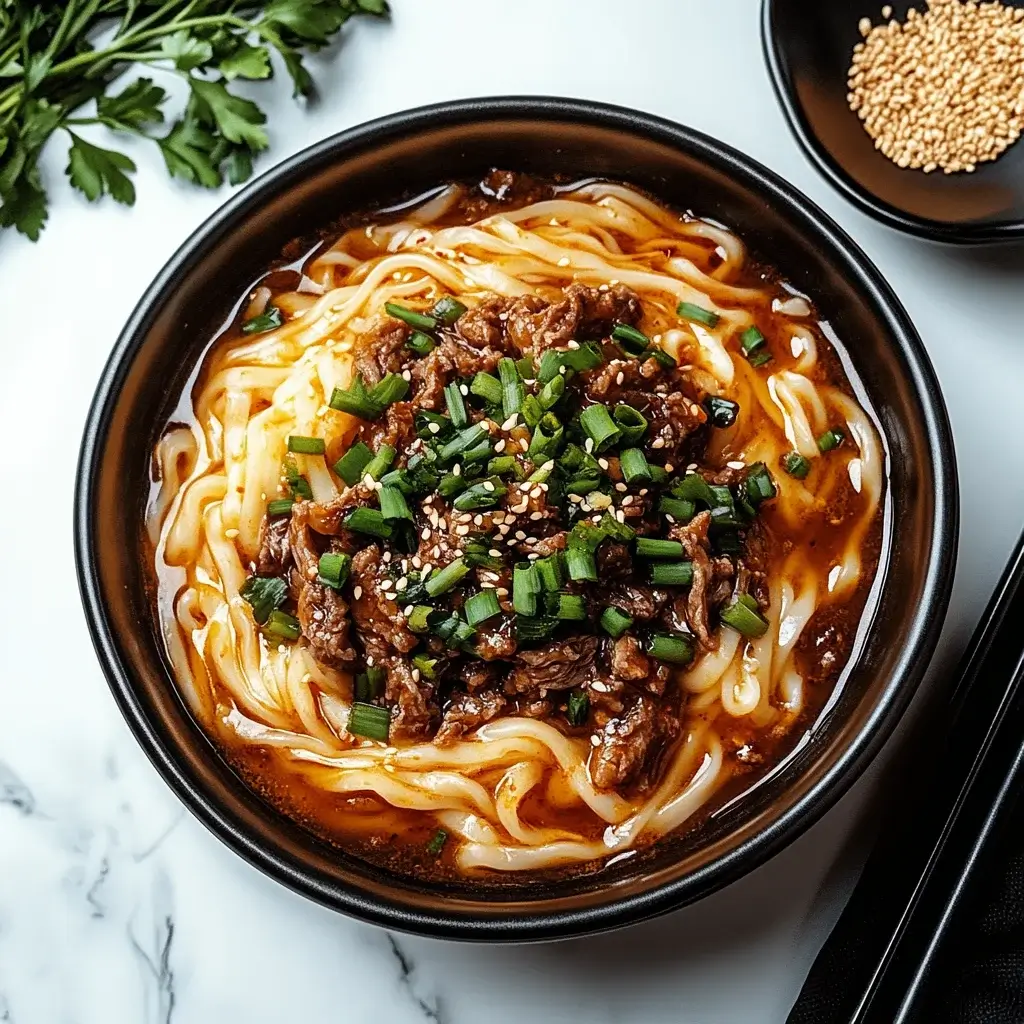
Spicy Korean Gochujang Beef Noodles: A Flavorful Delight

Introduction to Spicy Korean Gochujang Beef Noodles

There’s something magical about a dish that brings warmth and excitement to the table, and Spicy Korean Gochujang Beef Noodles does just that. Whether you’re racing against the clock after a long day or looking to impress friends with a burst of flavor, this recipe is your go-to. The combination of tender beef, vibrant vegetables, and that signature spicy gochujang sauce creates a symphony of taste that’s hard to resist. Plus, it’s quick to whip up, making it perfect for any night of the week. Let’s dive into this culinary adventure together!

Why You’ll Love This Spicy Korean Gochujang Beef Noodles

This dish is a game-changer for busy weeknights. It’s not just quick to prepare; it’s bursting with flavor that’ll make your taste buds dance. The spicy gochujang sauce adds a kick that elevates the humble beef and noodles into something extraordinary. Plus, it’s versatile! You can easily customize it with your favorite veggies or adjust the spice level. Trust me, once you try it, you’ll be hooked!

Ingredients for Spicy Korean Gochujang Beef Noodles

Gathering the right ingredients is the first step to creating a delicious dish. For Spicy Korean Gochujang Beef Noodles, you’ll need a mix of fresh and flavorful components. Here’s what you’ll need:

  • Rice noodles: These are the base of the dish, providing a chewy texture that soaks up the sauce beautifully.
  • Ground beef: A classic choice for protein, it adds richness and heartiness to the meal. You can also use ground turkey or chicken for a lighter option.
  • Vegetable oil: This is used for sautéing, helping to bring out the flavors of the ingredients.
  • Onion: Diced onions add sweetness and depth to the dish, enhancing the overall flavor profile.
  • Garlic: Minced garlic is a must for that aromatic kick that makes everything taste better.
  • Fresh ginger: A small amount of minced ginger adds a zesty warmth that complements the spice.
  • Gochujang: This Korean chili paste is the star of the show, delivering heat and umami in every bite.
  • Soy sauce: A splash of soy sauce brings saltiness and depth, balancing the sweetness of the honey.
  • Sesame oil: Just a drizzle adds a nutty flavor that rounds out the dish perfectly.
  • Honey: This natural sweetener helps to balance the heat from the gochujang, creating a harmonious flavor.
  • Bell peppers: Sliced bell peppers add color and crunch, making the dish visually appealing and nutritious.
  • Snap peas: These provide a fresh, crisp texture that contrasts nicely with the noodles.
  • Green onions: Sliced green onions are perfect for garnish, adding a pop of color and a mild onion flavor.
  • Sesame seeds: A sprinkle of sesame seeds on top adds a delightful crunch and a touch of elegance.

For those looking to switch things up, consider substituting ground beef with crumbled tofu or tempeh for a vegetarian version. You can also add more veggies like carrots or broccoli for extra nutrition and color. Remember, the exact quantities of these ingredients are listed at the bottom of the article for your convenience!

How to Make Spicy Korean Gochujang Beef Noodles

Now that you have all your ingredients ready, let’s dive into the cooking process. This is where the magic happens! Follow these simple steps to create a dish that’s bursting with flavor.

Step 1: Cook the Rice Noodles

Start by cooking the rice noodles according to the package instructions. Usually, this means boiling them in water for a few minutes until they’re tender but still have a bit of bite. Once done, drain them and set aside. This will be the base of your Spicy Korean Gochujang Beef Noodles, soaking up all that delicious sauce!

Step 2: Sauté the Onions

In a large skillet or wok, heat up the vegetable oil over medium-high heat. Add the diced onion and sauté for about 2-3 minutes until they soften and become translucent. This step is crucial; it builds the foundation of flavor for your dish. The aroma of sautéing onions is simply irresistible!

Step 3: Add Garlic and Ginger

Next, toss in the minced garlic and ginger. These two ingredients are the flavor powerhouses of this recipe. Cook them for about 1 minute until fragrant. You’ll know it’s ready when your kitchen starts to smell heavenly. This is the moment when your taste buds start to tingle with anticipation!

Step 4: Brown the Ground Beef

Now, it’s time to add the ground beef. Break it apart with a spatula as it cooks, ensuring it browns evenly. This should take about 5-7 minutes. You want it to be fully cooked and nicely browned. The beef will absorb all those wonderful flavors from the onions, garlic, and ginger, making every bite delicious.

Step 5: Mix in the Sauce

Once the beef is browned, stir in the gochujang, soy sauce, sesame oil, and honey. Mix everything well to combine. Let it simmer for about 2-3 minutes. This is where the magic happens! The sauce thickens and coats the beef, creating a rich, spicy flavor that’s simply mouthwatering.

Step 6: Add Vegetables

Now, add the sliced bell peppers and snap peas to the skillet. Cook for another 3-4 minutes until the vegetables are tender-crisp. You want them to retain some crunch for texture. The vibrant colors of the veggies will make your dish pop, making it as pleasing to the eyes as it is to the palate!

Step 7: Combine with Noodles

Finally, toss the cooked rice noodles into the skillet. Gently mix everything together, ensuring the noodles are well coated with that spicy gochujang sauce. This is the moment you’ve been waiting for! Serve hot, and watch everyone dig in with delight.

Tips for Success

  • Prep all your ingredients before starting to cook. It makes the process smoother and more enjoyable.
  • Don’t overcook the vegetables; they should be tender-crisp for the best texture.
  • Adjust the gochujang to your spice preference. Start with less if you’re unsure!
  • For extra flavor, let the sauce simmer a bit longer to deepen the taste.
  • Garnish generously with green onions and sesame seeds for a beautiful finish.

Equipment Needed

  • Large skillet or wok: Essential for sautéing and mixing everything together. A frying pan works too!
  • Pot: For boiling the rice noodles. Any large pot will do.
  • Spatula: Perfect for breaking up the beef and stirring the ingredients.
  • Measuring cups and spoons: Handy for precise ingredient measurements.

Variations

  • Vegetarian Option: Swap out ground beef for crumbled tofu or tempeh. This keeps the dish hearty while catering to plant-based diets.
  • Extra Veggies: Add in carrots, broccoli, or zucchini for more color and nutrition. They’ll enhance the dish’s texture and flavor.
  • Gluten-Free: Ensure your soy sauce is gluten-free, or use tamari as a substitute to keep it safe for gluten-sensitive eaters.
  • Spice Level: Adjust the amount of gochujang to suit your heat preference. For a milder version, start with half the amount and taste as you go.
  • Noodle Alternatives: Try using udon or soba noodles for a different texture and flavor profile. Each type brings its own unique twist!

Serving Suggestions

  • Side Dishes: Pair with a simple cucumber salad or kimchi for a refreshing contrast.
  • Drinks: Enjoy with a cold beer or a light, fruity soju to complement the spice.
  • Presentation: Serve in deep bowls, garnished with extra green onions and sesame seeds for a vibrant look.

FAQs about Spicy Korean Gochujang Beef Noodles

Can I make Spicy Korean Gochujang Beef Noodles ahead of time?

Absolutely! You can prepare the beef and sauce in advance and store them in the fridge. Just cook the noodles fresh when you’re ready to serve. This makes for a quick meal on busy nights!

What can I substitute for gochujang?

If you can’t find gochujang, you can use a mix of miso paste and chili powder as a substitute. It won’t be exactly the same, but it will still add a nice depth of flavor.

How spicy is this dish?

The spice level of Spicy Korean Gochujang Beef Noodles can be adjusted based on your preference. Start with a smaller amount of gochujang and taste as you go. You can always add more if you like it hotter!

Can I use other types of noodles?

Definitely! While rice noodles are traditional, you can experiment with udon or even whole wheat spaghetti. Each type will give a different texture and flavor to the dish.

Is this dish gluten-free?

Yes, as long as you use gluten-free soy sauce or tamari, Spicy Korean Gochujang Beef Noodles can be a delicious gluten-free option. Just double-check your noodle package as well!

Final Thoughts

Cooking Spicy Korean Gochujang Beef Noodles is more than just preparing a meal; it’s about creating an experience that brings joy to your table. The vibrant colors, enticing aromas, and bold flavors come together to create a dish that’s not only satisfying but also a conversation starter. Whether you’re sharing it with family or enjoying a quiet night in, this recipe has a way of making any moment feel special. So roll up your sleeves, embrace the spice, and let this delightful dish become a staple in your culinary repertoire. You won’t regret it!

Ranis

Spicy Korean Gochujang Beef Noodles: A Flavorful Delight

Spicy Korean Gochujang Beef Noodles is a flavorful dish that combines rice noodles with ground beef and a spicy gochujang sauce, topped with fresh vegetables.
Prep Time 10 minutes
Cook Time 20 minutes
Total Time 30 minutes
Servings: 4 servings
Course: Main Course
Cuisine: Korean
Calories: 480

Ingredients
  

  • 8 ounces of rice noodles
  • 1 pound of ground beef
  • 2 tablespoons of vegetable oil
  • 1 small onion diced
  • 3 cloves of garlic minced
  • 1 tablespoon of fresh ginger minced
  • 1/4 cup of gochujang Korean chili paste
  • 2 tablespoons of soy sauce
  • 1 tablespoon of sesame oil
  • 1 tablespoon of honey
  • 1 cup of bell peppers sliced (any color)
  • 1 cup of snap peas
  • 2 green onions sliced
  • Sesame seeds for garnish

Method
 

  1. Cook the rice noodles according to package instructions. Drain and set aside.
  2. In a large skillet or wok, heat the vegetable oil over medium-high heat. Add the diced onion and sauté for 2-3 minutes until softened.
  3. Add the minced garlic and ginger to the skillet and cook for an additional 1 minute until fragrant.
  4. Add the ground beef to the skillet, breaking it apart with a spatula. Cook until browned and cooked through, about 5-7 minutes.
  5. Stir in the gochujang, soy sauce, sesame oil, and honey. Mix well to combine and let it simmer for 2-3 minutes.
  6. Add the sliced bell peppers and snap peas to the skillet. Cook for another 3-4 minutes until the vegetables are tender-crisp.
  7. Toss the cooked rice noodles into the skillet, mixing everything together until the noodles are well coated with the sauce.
  8. Serve hot, garnished with sliced green onions and sesame seeds.

Nutrition

Serving: 1servingCalories: 480kcalCarbohydrates: 45gProtein: 25gFat: 25gSaturated Fat: 6gPolyunsaturated Fat: 19gCholesterol: 70mgSodium: 800mgFiber: 3gSugar: 8g

Notes

  • For a vegetarian version, substitute ground beef with crumbled tofu or tempeh.
  • Add more vegetables like carrots or broccoli for extra nutrition and color.
  • Adjust the amount of gochujang to control the spice level according to your preference.

Tried this recipe?

Let us know how it was!

Honey Sriracha Ground Chicken and Broccoli: A Delicious Recipe!

Introduction to Honey Sriracha Ground Chicken and Broccoli

When life gets hectic, finding a quick and delicious meal can feel like a challenge. That’s where my Honey Sriracha Ground Chicken and Broccoli comes in. This dish is not just a feast for the taste buds; it’s a lifesaver for busy weeknights.

With its sweet and spicy sauce, it’s sure to impress your loved ones while keeping your kitchen time to a minimum. Plus, it’s packed with protein and veggies, making it a wholesome choice. Let’s dive into this flavorful adventure that’s as easy as it is satisfying!

Why You’ll Love This Honey Sriracha Ground Chicken and Broccoli

This dish is a game-changer for anyone who craves flavor without the fuss.

In just 25 minutes, you can whip up a meal that’s both satisfying and nutritious.

The balance of sweet honey and spicy sriracha creates a taste explosion that keeps you coming back for more.

Plus, it’s versatile enough to please picky eaters, making it a perfect weeknight winner for the whole family!

Ingredients for Honey Sriracha Ground Chicken and Broccoli

Gathering the right ingredients is the first step to culinary success.

For this Honey Sriracha Ground Chicken and Broccoli, you’ll need a few staples that pack a punch.

Here’s what you’ll need:

  • Ground chicken: The star of the show! It’s lean, flavorful, and cooks quickly.
  • Broccoli florets: These vibrant green gems add crunch and nutrition, making the dish colorful and healthy.
  • Olive oil: A must for sautéing. It adds richness and helps the aromatics bloom.
  • Honey: This sweet nectar balances the heat of the sriracha, creating a delightful harmony.
  • Sriracha sauce: The fiery kick that brings the dish to life. Adjust to your spice preference!
  • Soy sauce: Adds depth and umami, enhancing the overall flavor profile.
  • Rice vinegar: A splash of acidity that brightens the dish and complements the sweetness.
  • Garlic: Minced for that aromatic punch, it’s a flavor powerhouse.
  • Ginger: Fresh ginger adds warmth and a hint of spice, elevating the dish.
  • Salt and black pepper: Essential seasonings to enhance all the flavors.
  • Cooked rice or quinoa: Perfect for serving, these grains soak up the delicious sauce.

Feel free to get creative!

You can swap ground chicken for turkey or beef if you prefer.

And if you want to sneak in more veggies, bell peppers or snap peas work beautifully.

For exact measurements, check the bottom of the article where you can find everything ready for printing!

How to Make Honey Sriracha Ground Chicken and Broccoli

Cooking this Honey Sriracha Ground Chicken and Broccoli is a breeze.

With just a few simple steps, you’ll have a delicious meal ready in no time.

Let’s get started!

Step 1: Sauté Aromatics

Begin by heating a tablespoon of olive oil in a large skillet over medium heat.

Once the oil is shimmering, toss in the minced garlic and ginger.

Sauté them for about a minute until they release their fragrant aroma.

This step sets the stage for a flavor-packed dish!

Step 2: Cook the Ground Chicken

Next, add the pound of ground chicken to the skillet.

Use a spatula to break it apart as it cooks.

Stir occasionally for about 5 to 7 minutes, until the chicken is browned and fully cooked.

This is where the magic begins, as the chicken absorbs those aromatic flavors.

Step 3: Add Broccoli

Now, it’s time to introduce the broccoli florets.

Add them to the skillet and stir well.

Cook for an additional 3 to 4 minutes, allowing the broccoli to become tender yet still vibrant green.

You want that perfect crunch to complement the chicken!

Step 4: Prepare the Sauce

In a small bowl, whisk together the honey, sriracha sauce, soy sauce, rice vinegar, salt, and black pepper.

This sweet and spicy sauce is the heart of the dish.

Make sure everything is well combined before pouring it over the chicken and broccoli mixture.

Step 5: Combine and Thicken

Pour the sauce over the chicken and broccoli in the skillet.

Stir everything together, ensuring the sauce coats every piece.

Cook for another 2 to 3 minutes, allowing the sauce to thicken slightly.

This is when the flavors meld together beautifully!

Step 6: Serve

Finally, serve your Honey Sriracha Ground Chicken and Broccoli hot over cooked rice or quinoa.

The grains soak up the delicious sauce, making every bite a delight.

Enjoy this quick and satisfying meal that’s sure to become a favorite!

Tips for Success

  • Prep all your ingredients before starting to cook. It makes the process smoother and more enjoyable.
  • Don’t overcook the broccoli; you want it tender but still bright green for that perfect crunch.
  • Adjust the sriracha to your spice level. Start small and add more if you like it hot!
  • For a thicker sauce, let it simmer a bit longer after combining.
  • Serve immediately for the best flavor and texture.

Equipment Needed

  • Large skillet: Essential for cooking the chicken and broccoli. A non-stick pan works great too.
  • Spatula: Perfect for breaking up the chicken and stirring the ingredients.
  • Small bowl: Needed for mixing the sauce ingredients.
  • Measuring cups and spoons: Handy for precise ingredient measurements.

Variations

  • Protein Swap: Try using ground turkey or beef for a different flavor profile. Each option brings its own unique taste to the dish.
  • Vegetable Medley: Add bell peppers, snap peas, or carrots for extra color and nutrition. These veggies not only enhance the dish but also add delightful crunch.
  • Spice it Up: For those who love heat, consider adding red pepper flakes or a dash of chili oil to the sauce for an extra kick.
  • Low-Carb Option: Serve the dish over cauliflower rice instead of traditional rice or quinoa for a lighter, low-carb meal.
  • Gluten-Free Soy Sauce: If you’re avoiding gluten, opt for tamari or coconut aminos as a substitute for soy sauce.

Serving Suggestions

  • Rice or Quinoa: Serve over fluffy white rice or nutty quinoa to soak up the sauce.
  • Fresh Herbs: Garnish with chopped cilantro or green onions for a burst of freshness.
  • Drink Pairing: Enjoy with a cold beer or a refreshing iced tea to balance the spice.
  • Presentation: Serve in a colorful bowl to make the dish visually appealing.

FAQs about Honey Sriracha Ground Chicken and Broccoli

Can I use a different protein instead of ground chicken?

Absolutely! Ground turkey or beef can be great alternatives. Each brings its own flavor, so feel free to experiment with what you have on hand.

How can I make this dish spicier?

If you’re a heat lover, simply increase the amount of sriracha in the sauce. You can also add red pepper flakes or a dash of chili oil for an extra kick!

Can I prepare this dish in advance?

Yes! You can cook the chicken and broccoli ahead of time and store them in the fridge. Just reheat and add the sauce when you’re ready to serve.

What can I serve with Honey Sriracha Ground Chicken and Broccoli?

This dish pairs wonderfully with rice or quinoa. You can also serve it alongside a fresh salad or steamed vegetables for a complete meal.

Is this recipe gluten-free?

Yes, it can be gluten-free! Just make sure to use gluten-free soy sauce or tamari in the recipe. Enjoy your flavorful meal without worry!

Final Thoughts

Cooking Honey Sriracha Ground Chicken and Broccoli is more than just preparing a meal; it’s about creating a moment of joy in your kitchen.

The sweet and spicy flavors dance together, making each bite a delightful experience.

Whether you’re feeding a hungry family or enjoying a solo dinner, this dish brings warmth and satisfaction.

Plus, it’s quick enough to fit into your busy schedule, proving that delicious doesn’t have to mean complicated.

So grab your skillet and let the aromas fill your home.

You’re in for a treat that’s sure to become a staple in your culinary repertoire!

Ranis

Honey Sriracha Ground Chicken and Broccoli: A Delicious Recipe!

A delicious and spicy dish featuring ground chicken and broccoli, coated in a sweet and tangy honey sriracha sauce.
Prep Time 10 minutes
Cook Time 15 minutes
Total Time 25 minutes
Course: Main Dish
Cuisine: Asian
Calories: 320

Ingredients
  

  • 1 pound ground chicken
  • 2 cups broccoli florets
  • 1 tablespoon olive oil
  • 1/4 cup honey
  • 2 tablespoons sriracha sauce
  • 2 tablespoons soy sauce
  • 1 tablespoon rice vinegar
  • 2 cloves garlic minced
  • 1 teaspoon ginger minced
  • 1/2 teaspoon salt
  • 1/4 teaspoon black pepper
  • Cooked rice or quinoa for serving

Method
 

  1. In a large skillet, heat olive oil over medium heat. Add minced garlic and ginger, sautéing for about 1 minute until fragrant.
  2. Add the ground chicken to the skillet, breaking it apart with a spatula. Cook for about 5-7 minutes, or until the chicken is browned and cooked through.
  3. Stir in the broccoli florets and cook for an additional 3-4 minutes, until the broccoli is tender but still bright green.
  4. In a small bowl, whisk together honey, sriracha, soy sauce, rice vinegar, salt, and black pepper. Pour this sauce over the chicken and broccoli mixture, stirring well to combine.
  5. Cook for another 2-3 minutes, allowing the sauce to thicken slightly and coat the chicken and broccoli.
  6. Serve hot over cooked rice or quinoa.

Nutrition

Serving: 1servingCalories: 320kcalCarbohydrates: 25gProtein: 28gFat: 12gSaturated Fat: 2gPolyunsaturated Fat: 10gCholesterol: 80mgSodium: 600mgFiber: 2gSugar: 20g

Notes

  • For a spicier kick, increase the amount of sriracha or add red pepper flakes to taste.
  • Substitute ground turkey or beef for the ground chicken for a different flavor profile.
  • You can also add other vegetables like bell peppers or snap peas for extra nutrition.

Tried this recipe?

Let us know how it was!

Italian Stuffed Flank Steak: A Delicious Recipe to Try!

Introduction to Italian Stuffed Flank Steak

When I think of comfort food, Italian stuffed flank steak always comes to mind. This dish is like a warm hug on a plate, perfect for those busy weeknights or when you want to impress your loved ones.

The combination of tender flank steak, creamy cheeses, and vibrant spinach creates a symphony of flavors that dance on your palate.

Plus, it’s surprisingly easy to make! With just a few simple steps, you can whip up a hearty meal that feels gourmet. Trust me, this recipe will quickly become a favorite in your kitchen.

Why You’ll Love This Italian Stuffed Flank Steak

This Italian stuffed flank steak is a game-changer for your dinner routine.

It’s not just about the incredible taste; it’s also about the ease of preparation.

In under an hour, you can serve a dish that looks and tastes like it came from a five-star restaurant.

Whether you’re cooking for family or hosting friends, this recipe guarantees smiles and satisfied appetites.

It’s a hearty meal that brings everyone together around the table.

Ingredients for Italian Stuffed Flank Steak

Creating the perfect Italian stuffed flank steak starts with gathering the right ingredients.

Here’s what you’ll need:

  • Flank steak: This cut is lean and flavorful, making it ideal for stuffing.
  • Fresh spinach: Adds a pop of color and a nutritious boost to the filling.
  • Ricotta cheese: Creamy and mild, it binds the filling together beautifully.
  • Shredded mozzarella cheese: Melts wonderfully, giving that gooey texture we all love.
  • Grated Parmesan cheese: Adds a sharp, nutty flavor that elevates the dish.
  • Garlic: A must for that aromatic kick; it enhances the overall flavor.
  • Dried oregano and basil: These herbs bring an authentic Italian essence to the filling.
  • Salt and black pepper: Essential for seasoning, enhancing all the flavors.
  • Olive oil: Used for searing, it adds richness and helps achieve a golden crust.
  • Balsamic vinegar: A drizzle before baking adds a tangy depth to the dish.
  • Fresh basil leaves: Optional for garnish, they add a fresh touch and vibrant color.

Feel free to get creative!

For a smoky flavor, consider adding chopped sun-dried tomatoes to the cheese mixture.

If you prefer a richer filling, cream cheese can be a delightful substitute for ricotta.

You can find the exact quantities for each ingredient at the bottom of the article, ready for printing.

How to Make Italian Stuffed Flank Steak

Making Italian stuffed flank steak is a delightful journey that transforms simple ingredients into a mouthwatering meal.

Let’s break it down step by step, ensuring you have all the tips you need for success.

Step 1: Preheat the Oven

Start by preheating your oven to 375°F.

This step is crucial because it ensures even cooking.

A hot oven helps the steak develop a beautiful crust while keeping the inside juicy and tender.

Step 2: Prepare the Flank Steak

Next, lay the flank steak flat on a cutting board.

Using a meat mallet, pound it to an even thickness, about half an inch.

This is important because it allows the steak to cook uniformly, preventing some parts from being overcooked while others remain underdone.

Step 3: Make the Filling

In a medium bowl, combine the chopped spinach, ricotta, mozzarella, Parmesan, minced garlic, oregano, basil, salt, and pepper.

Mix everything until well combined.

The creamy cheeses blend beautifully with the fresh spinach, creating a filling that’s both flavorful and satisfying.

Step 4: Stuff the Steak

Spread the cheese and spinach mixture evenly over the flank steak, leaving a small border around the edges.

Then, roll the steak tightly from one end to the other, securing the filling inside.

Use kitchen twine to tie the rolled steak at 1-inch intervals.

This helps keep everything together during cooking.

Step 5: Sear the Steak

In a large oven-safe skillet, heat the olive oil over medium-high heat.

Sear the stuffed flank steak for about 3-4 minutes on each side until it’s nicely browned.

Searing locks in the flavors and gives the steak a delicious crust that enhances the overall taste.

Step 6: Bake the Steak

Drizzle balsamic vinegar over the seared steak, then transfer the skillet to the preheated oven.

Bake for 20-25 minutes or until the steak reaches an internal temperature of 145°F for medium-rare.

Use a meat thermometer for accuracy; it’s the best way to ensure perfect doneness.

Step 7: Rest and Slice

Once baked, remove the skillet from the oven and let the steak rest for 5-10 minutes.

This resting period is essential for optimal juiciness.

When you slice into the steak, the juices will stay inside, making each bite tender and flavorful.

Tips for Success

  • Always use a meat thermometer to check for doneness; it takes the guesswork out of cooking.
  • Let the steak rest after baking to keep it juicy and flavorful.
  • Experiment with different cheeses for unique flavor profiles.
  • Don’t skip the searing step; it adds a delicious crust.
  • Use fresh herbs whenever possible for the best taste.

Equipment Needed

  • Meat mallet: A rolling pin can work in a pinch.
  • Cutting board: Any sturdy surface will do.
  • Oven-safe skillet: A regular skillet can be used, but transfer to a baking dish for the oven.
  • Kitchen twine: Toothpicks can substitute for tying the steak.

Variations

  • Vegetarian Option: Replace the meat with a large portobello mushroom cap, stuffed with the same cheese and spinach mixture for a hearty vegetarian dish.
  • Spicy Kick: Add crushed red pepper flakes to the cheese filling for a bit of heat that complements the savory flavors.
  • Herb Infusion: Experiment with fresh herbs like thyme or rosemary in the filling for a fragrant twist.
  • Cheese Lovers: Swap out the ricotta for goat cheese or feta for a tangy flavor that pairs beautifully with the steak.
  • Low-Carb Version: Serve the stuffed steak over a bed of sautéed zucchini noodles instead of traditional pasta for a lighter meal.

Serving Suggestions

  • Pair with roasted vegetables like asparagus or Brussels sprouts for a colorful plate.
  • Serve alongside a fresh arugula salad drizzled with lemon vinaigrette for a zesty contrast.
  • A glass of Chianti or a light Pinot Grigio complements the flavors beautifully.
  • Garnish with extra fresh basil for a vibrant presentation.

FAQs about Italian Stuffed Flank Steak

Can I make Italian stuffed flank steak ahead of time?

Absolutely! You can prepare the stuffed steak a day in advance. Just follow the steps up to the baking point, then cover and refrigerate. When you’re ready to cook, simply sear and bake as directed. This makes it a great option for meal prep or entertaining.

What can I serve with Italian stuffed flank steak?

This dish pairs wonderfully with roasted vegetables, a fresh salad, or even creamy mashed potatoes. A glass of red wine, like Chianti, enhances the meal beautifully. The options are endless!

How do I store leftovers?

Store any leftover Italian stuffed flank steak in an airtight container in the fridge for up to three days. Reheat gently in the oven or microwave to maintain its juicy texture.

Can I freeze Italian stuffed flank steak?

Yes, you can freeze the cooked steak! Wrap it tightly in plastic wrap and then in aluminum foil. It will keep well for up to three months. Just thaw in the fridge overnight before reheating.

What’s the best way to check for doneness?

The best way to ensure your steak is cooked perfectly is to use a meat thermometer. Aim for an internal temperature of 145°F for medium-rare. This guarantees a juicy and flavorful steak every time!

Final Thoughts

Cooking Italian stuffed flank steak is more than just preparing a meal; it’s about creating memories around the dinner table.

The aroma of seared steak mingling with melted cheese and fresh herbs fills the kitchen, inviting everyone to gather and share stories.

Each slice reveals a beautiful swirl of flavors, making every bite a delightful experience.

Whether it’s a weeknight dinner or a special occasion, this dish brings warmth and joy to any gathering.

I hope you enjoy making this recipe as much as I do, and may it become a cherished favorite in your home!

Ranis

Italian Stuffed Flank Steak: A Delicious Recipe to Try!

A delicious Italian stuffed flank steak recipe filled with cheese and spinach, perfect for a hearty meal.
Prep Time 15 minutes
Cook Time 30 minutes
Total Time 45 minutes
Servings: 4 servings
Course: Main Course
Cuisine: Italian
Calories: 350

Ingredients
  

  • 1 ½ pounds flank steak
  • 1 cup fresh spinach chopped
  • ½ cup ricotta cheese
  • ½ cup mozzarella cheese shredded
  • ¼ cup grated Parmesan cheese
  • 1 clove garlic minced
  • 1 teaspoon dried oregano
  • 1 teaspoon dried basil
  • ½ teaspoon salt
  • ¼ teaspoon black pepper
  • 2 tablespoons olive oil
  • 1 tablespoon balsamic vinegar
  • Fresh basil leaves for garnish optional

Method
 

  1. Preheat the oven to 375°F.
  2. Lay the flank steak flat on a cutting board and pound it to an even thickness using a meat mallet.
  3. In a medium bowl, combine the chopped spinach, ricotta cheese, mozzarella cheese, Parmesan cheese, minced garlic, oregano, basil, salt, and pepper. Mix until well combined.
  4. Spread the cheese and spinach mixture evenly over the flank steak, leaving a small border around the edges.
  5. Roll the steak tightly from one end to the other, securing the filling inside. Use kitchen twine to tie the rolled steak at 1-inch intervals.
  6. In a large oven-safe skillet, heat the olive oil over medium-high heat. Sear the stuffed flank steak for about 3-4 minutes on each side until browned.
  7. Drizzle the balsamic vinegar over the steak, then transfer the skillet to the preheated oven.
  8. Bake for 20-25 minutes or until the steak reaches an internal temperature of 145°F for medium-rare.
  9. Remove the skillet from the oven and let the steak rest for 5-10 minutes before slicing.
  10. Garnish with fresh basil leaves if desired.

Nutrition

Serving: 1sliceCalories: 350kcalCarbohydrates: 5gProtein: 30gFat: 22gSaturated Fat: 10gPolyunsaturated Fat: 12gCholesterol: 80mgSodium: 500mgFiber: 1gSugar: 2g

Notes

  • For a smoky flavor, add some chopped sun-dried tomatoes to the cheese mixture.
  • You can also substitute the ricotta with cream cheese for a richer filling.

Tried this recipe?

Let us know how it was!