Coconut Salmon Curry: A Delicious Recipe You Must Try!

Introduction to Coconut Salmon Curry

There’s something magical about a dish that warms your soul and fills your kitchen with delightful aromas. Coconut Salmon Curry is just that—a creamy, flavorful meal that’s perfect for busy weeknights or impressing guests. I remember the first time I tried a coconut curry; it was like a tropical vacation on my plate. This recipe is not only easy to whip up, but it also brings a burst of flavor that will have everyone asking for seconds. Whether you’re a seasoned chef or a kitchen novice, this Coconut Salmon Curry is a dish you won’t want to miss!

Why You’ll Love This Coconut Salmon Curry

This Coconut Salmon Curry is a game-changer for your dinner routine. It’s quick to prepare, taking just 30 minutes from start to finish, making it perfect for those hectic evenings. The creamy coconut milk melds beautifully with the spices, creating a rich flavor that dances on your palate. Plus, it’s packed with nutritious ingredients, ensuring you’re not just feeding your hunger but also nourishing your body. Trust me, this dish will become a staple in your kitchen!

Ingredients for Coconut Salmon Curry

Gathering the right ingredients is the first step to creating a delicious Coconut Salmon Curry. Here’s what you’ll need:

  • Coconut oil: This adds a rich, tropical flavor and helps sauté the aromatics.
  • Onion: Diced onion provides a sweet base that enhances the overall flavor.
  • Garlic: Minced garlic brings a punch of flavor and aroma to the dish.
  • Fresh ginger: Grated ginger adds warmth and a hint of spice, elevating the curry.
  • Curry powder: A blend of spices that gives the dish its signature flavor.
  • Ground turmeric: This not only adds color but also a subtle earthiness.
  • Coconut milk: The star of the show, providing creaminess and a hint of sweetness.
  • Vegetable broth: This adds depth and richness to the curry base.
  • Fish sauce: A little goes a long way in enhancing umami flavors.
  • Brown sugar: Balances the spices and adds a touch of sweetness.
  • Salmon fillets: Fresh salmon is the main protein, offering a buttery texture.
  • Cherry tomatoes: These add a burst of freshness and acidity.
  • Spinach leaves: A nutritious addition that wilts beautifully into the curry.
  • Salt and pepper: Essential for seasoning to taste.
  • Fresh cilantro: For garnish, adding a pop of color and freshness.
  • Lime wedges: A squeeze of lime brightens the dish and enhances flavors.

For those looking to spice things up, consider adding a chopped jalapeño or a pinch of red pepper flakes when sautéing the onions. If you want to make it a complete meal, serve the curry over cooked rice or quinoa for added texture and flavor. Exact measurements for these ingredients can be found at the bottom of the article, ready for printing!

How to Make Coconut Salmon Curry

Step 1: Sauté the Aromatics

Start by heating the coconut oil in a large skillet over medium heat. As the oil melts, it releases a delightful aroma that sets the stage for your Coconut Salmon Curry. Add the diced onion and sauté for about 5 minutes until it becomes soft and translucent. Then, stir in the minced garlic and grated ginger, cooking for an additional minute. This step is crucial; the aromatics create a flavorful foundation for the entire dish, making your kitchen smell heavenly!

Step 2: Add Spices

Next, it’s time to bring in the spices! Sprinkle in the curry powder and ground turmeric, stirring them into the onion mixture. Cooking the spices for just a minute allows their flavors to bloom, enhancing the overall taste of your curry. This brief sautéing step is essential; it transforms the spices from mere ingredients into the heart of your Coconut Salmon Curry.

Step 3: Create the Base

Now, pour in the creamy coconut milk and vegetable broth, followed by the fish sauce and brown sugar. Stir well to combine all the ingredients, ensuring the flavors meld together beautifully. This mixture will form the rich base of your curry. Bring it to a gentle simmer, allowing the ingredients to harmonize. The coconut milk adds a luscious creaminess, while the fish sauce introduces a savory depth that makes this dish truly irresistible.

Step 4: Cook the Salmon

It’s time to add the star of the show—salmon! Gently place the bite-sized salmon pieces and halved cherry tomatoes into the simmering sauce. Cook for about 5-7 minutes, or until the salmon is cooked through and flakes easily with a fork. This step is key; you want the salmon to absorb all those wonderful flavors while remaining tender and juicy.

Step 5: Finish with Spinach

Finally, stir in the fresh spinach leaves and let them wilt for about 2 minutes. This not only adds a vibrant color but also boosts the nutritional value of your Coconut Salmon Curry. Season with salt and pepper to taste, adjusting the flavors to your liking. With this last step, you’re just moments away from enjoying a delicious, homemade meal!

Tips for Success

  • Prep all your ingredients before starting to cook. It makes the process smoother and more enjoyable.
  • Don’t rush the sautéing of the aromatics; it builds a flavorful base for your curry.
  • Use fresh salmon for the best texture and taste; frozen can work, but it may alter the flavor.
  • Adjust the spice level to your preference by adding more curry powder or fresh chilies.
  • Serve immediately for the best flavor and texture; reheating can change the consistency.

Equipment Needed

  • Large skillet: A non-stick skillet works well, but any large pan will do.
  • Wooden spoon: Perfect for stirring and ensuring nothing sticks.
  • Measuring cups and spoons: Essential for accurate ingredient portions.
  • Knife and cutting board: For chopping vegetables and salmon.

Variations

  • Vegetarian Option: Substitute salmon with chickpeas or tofu for a plant-based twist that still packs a protein punch.
  • Spicy Kick: Add chopped jalapeños or a teaspoon of red pepper flakes to the sauté for an extra layer of heat.
  • Different Proteins: Try shrimp or chicken instead of salmon for a different flavor profile while keeping the same creamy base.
  • Herb Infusion: Experiment with fresh herbs like basil or mint for a refreshing twist on the traditional curry.
  • Low-Carb Version: Serve over cauliflower rice instead of regular rice for a lighter, low-carb meal.

Serving Suggestions

  • Serve the Coconut Salmon Curry over fluffy jasmine rice or quinoa for a hearty meal.
  • Pair with a crisp green salad dressed in a light vinaigrette to balance the richness.
  • A cold, refreshing beer or a glass of chilled white wine complements the flavors beautifully.
  • Garnish with extra cilantro and lime wedges for a vibrant presentation.

FAQs about Coconut Salmon Curry

Can I use frozen salmon for this recipe?

Yes, you can use frozen salmon, but fresh salmon will yield the best texture and flavor. If using frozen, make sure to thaw it completely before cooking to ensure even cooking.

What can I substitute for coconut milk?

If you’re looking for a substitute, you can use almond milk or cashew cream for a lighter option. However, keep in mind that the flavor will differ slightly from the rich creaminess of coconut milk.

How can I make this Coconut Salmon Curry spicier?

To add some heat, consider incorporating chopped jalapeños or a pinch of red pepper flakes when sautéing the onions. You can also increase the amount of curry powder for a bolder flavor.

Can I make this dish ahead of time?

While it’s best enjoyed fresh, you can prepare the curry base ahead of time and store it in the fridge. Just add the salmon and spinach when you’re ready to serve for the best results.

What sides pair well with Coconut Salmon Curry?

This dish pairs wonderfully with jasmine rice or quinoa. A light salad or steamed vegetables can also complement the rich flavors of the curry, making for a balanced meal.

Final Thoughts

Cooking Coconut Salmon Curry is more than just preparing a meal; it’s an experience that brings joy and warmth to your kitchen. The vibrant colors, enticing aromas, and rich flavors create a feast for the senses. Each bite transports you to a tropical paradise, making it a perfect dish for family gatherings or cozy nights in. Plus, the ease of preparation means you can enjoy this culinary adventure without spending hours in the kitchen. I hope this recipe becomes a cherished part of your cooking repertoire, bringing smiles and satisfaction to your table for years to come!

Ranis

Coconut Salmon Curry: A Delicious Recipe You Must Try!

A delicious and creamy Coconut Salmon Curry that is easy to make and packed with flavor.
Prep Time 10 minutes
Cook Time 20 minutes
Total Time 30 minutes
Servings: 4 servings
Course: Main Course
Cuisine: Asian
Calories: 350

Ingredients
  

  • 2 tablespoons coconut oil
  • 1 medium onion diced
  • 3 cloves garlic minced
  • 1 tablespoon fresh ginger grated
  • 1 tablespoon curry powder
  • 1 teaspoon ground turmeric
  • 1 can 14 ounces coconut milk
  • 1 cup vegetable broth
  • 1 tablespoon fish sauce
  • 1 tablespoon brown sugar
  • 1 pound salmon fillets cut into bite-sized pieces
  • 1 cup cherry tomatoes halved
  • 1 cup spinach leaves
  • Salt and pepper to taste
  • Fresh cilantro for garnish
  • Lime wedges for serving

Method
 

  1. In a large skillet, heat the coconut oil over medium heat. Add the diced onion and sauté for about 5 minutes until softened.
  2. Stir in the minced garlic and grated ginger, cooking for an additional minute until fragrant.
  3. Add the curry powder and ground turmeric, stirring to coat the onions evenly. Cook for another minute.
  4. Pour in the coconut milk and vegetable broth, followed by the fish sauce and brown sugar. Stir well to combine.
  5. Bring the mixture to a gentle simmer, then add the salmon pieces and cherry tomatoes. Cook for about 5-7 minutes, or until the salmon is cooked through and flakes easily with a fork.
  6. Stir in the spinach leaves and cook for an additional 2 minutes until wilted. Season with salt and pepper to taste.
  7. Serve the curry hot, garnished with fresh cilantro and lime wedges on the side.

Nutrition

Serving: 1servingCalories: 350kcalCarbohydrates: 8gProtein: 30gFat: 22gSaturated Fat: 18gPolyunsaturated Fat: 4gCholesterol: 70mgSodium: 600mgFiber: 2gSugar: 5g

Notes

  • For a spicier kick, add a chopped jalapeño or a pinch of red pepper flakes when sautéing the onions.
  • To make it a complete meal, serve the curry over cooked rice or quinoa for added texture and flavor.
Tried this recipe?

Let us know how it was!

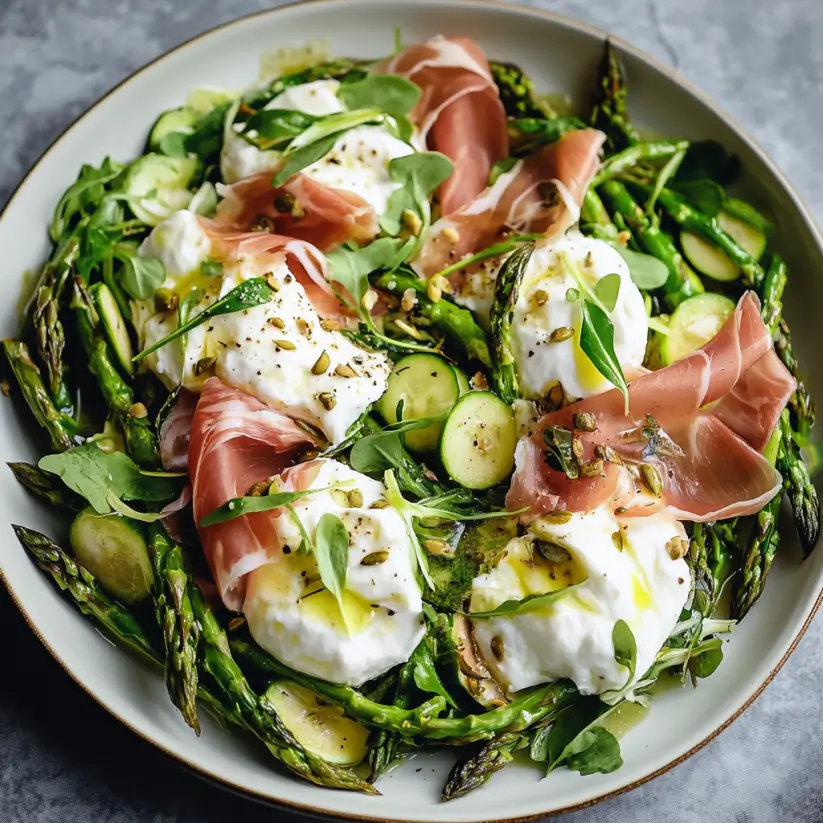
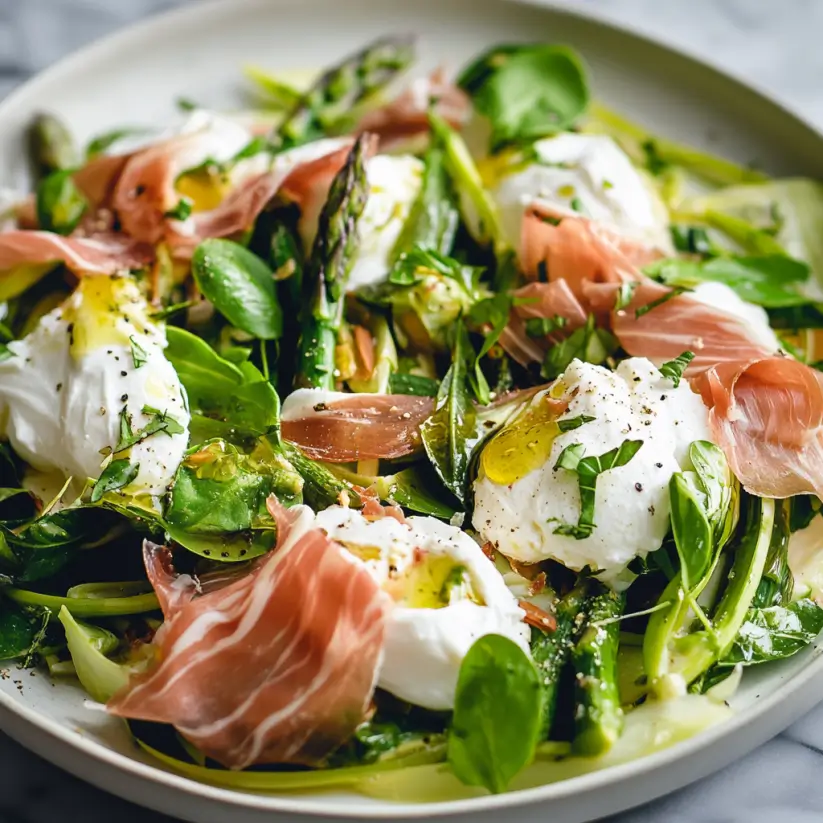
Shaved Asparagus Salad with Burrata and Prosciutto is divine!

Introduction to Shaved Asparagus Salad with Burrata and Prosciutto

When I think of spring, my mind drifts to vibrant colors and fresh flavors, and nothing captures that essence quite like a Shaved Asparagus Salad with Burrata and Prosciutto. This dish is a delightful way to celebrate the season, combining the crispness of asparagus with the creaminess of burrata and the savory touch of prosciutto.

Whether you’re looking for a quick solution for a busy day or a dish to impress your loved ones, this salad fits the bill perfectly. It’s light, refreshing, and takes just minutes to prepare, making it an ideal choice for any occasion.

Why You’ll Love This Shaved Asparagus Salad with Burrata and Prosciutto

This Shaved Asparagus Salad with Burrata and Prosciutto is a game-changer for your meal rotation.

It’s incredibly easy to whip up, taking only 15 minutes from start to finish.

The combination of flavors is simply divine—crunchy asparagus, creamy burrata, and salty prosciutto create a symphony in your mouth.

Plus, it’s a light dish that won’t weigh you down, making it perfect for warm days or casual gatherings.

Ingredients for Shaved Asparagus Salad with Burrata and Prosciutto

Creating a Shaved Asparagus Salad with Burrata and Prosciutto is all about using fresh, quality ingredients. Here’s what you’ll need:

  • Fresh asparagus: Look for firm, bright green stalks. They should snap easily when bent, indicating freshness.
  • Burrata cheese: This creamy delight adds a rich texture. If you can’t find burrata, fresh mozzarella is a great substitute.
  • Prosciutto: Thinly sliced, this Italian ham brings a savory, salty flavor that complements the salad beautifully.
  • Olive oil: A good quality extra virgin olive oil enhances the salad’s flavor. It’s worth splurging a little here.
  • Lemon juice: Freshly squeezed lemon juice brightens the dish and balances the richness of the cheese.
  • Salt and pepper: Essential for seasoning, these staples elevate the flavors of the ingredients.
  • Fresh basil leaves: These fragrant leaves add a pop of color and a burst of flavor. You can also use arugula for a peppery twist.
  • Shaved Parmesan cheese: This adds a nutty flavor and a touch of elegance to the salad.

For those who want to experiment, consider adding toasted pine nuts or walnuts for extra crunch.

All ingredient quantities are listed at the bottom of the article for easy reference and printing.

How to Make Shaved Asparagus Salad with Burrata and Prosciutto

Making a Shaved Asparagus Salad with Burrata and Prosciutto is a breeze.

Follow these simple steps, and you’ll have a stunning dish ready in no time.

Let’s dive in!

Step 1: Shave the Asparagus

Start by trimming the tough ends off the asparagus.

Using a vegetable peeler, shave the asparagus into thin ribbons.

If your asparagus is on the thicker side, slice it very thinly instead.

Place the shaved asparagus in a large bowl.

This step is crucial; the thinner the ribbons, the more tender they’ll be.

Step 2: Prepare the Dressing

In a small bowl, whisk together the olive oil, lemon juice, salt, and pepper.

This dressing is simple yet flavorful, enhancing the salad without overpowering it.

Drizzle the dressing over the shaved asparagus and toss gently to combine.

Make sure every piece is coated; it makes a world of difference!

Step 3: Assemble the Salad

On a serving platter, arrange the dressed asparagus in a beautiful mound.

Take your time here; presentation matters!

The vibrant green of the asparagus will pop against the white burrata.

Step 4: Add Burrata and Prosciutto

Tear the burrata into pieces and place it on top of the asparagus.

The creamy texture will melt into the salad, creating a luscious experience.

Next, drape the prosciutto slices over the salad.

The salty, savory notes of the prosciutto balance the creaminess of the burrata perfectly.

Step 5: Garnish and Serve

Sprinkle the shaved Parmesan cheese and fresh basil leaves over the top.

These final touches add flavor and a touch of elegance.

Serve immediately for the best taste and texture.

This Shaved Asparagus Salad with Burrata and Prosciutto is not just a dish; it’s an experience!

Tips for Success

  • Choose asparagus that is bright green and firm for the best flavor.
  • Use a sharp vegetable peeler for even, thin ribbons.
  • Let the salad sit for a few minutes after dressing to enhance the flavors.
  • Experiment with different cheeses or nuts for a unique twist.
  • Serve the salad immediately for the freshest taste and texture.

Equipment Needed

  • Vegetable peeler: Essential for shaving the asparagus. A mandoline can also work for uniform slices.
  • Large bowl: For mixing the salad. A mixing bowl or even a salad spinner can do the job.
  • Small bowl: For whisking the dressing. Any bowl will suffice, even a coffee mug!
  • Serving platter: To present your salad beautifully. A large plate works just as well.

Variations

  • Nutty Crunch: Add toasted pine nuts or walnuts for an extra layer of texture and flavor.
  • Herb Infusion: Experiment with different herbs like mint or dill for a fresh twist.
  • Vegan Option: Substitute burrata with a creamy cashew cheese or avocado for a plant-based version.
  • Grilled Asparagus: For a smoky flavor, grill the asparagus before shaving it.
  • Fruit Addition: Toss in some sliced strawberries or peaches for a sweet contrast to the savory elements.

Serving Suggestions

  • Pair this salad with a crisp white wine, like Sauvignon Blanc, to enhance the flavors.
  • Serve alongside grilled chicken or fish for a complete meal.
  • For a stunning presentation, use a wooden board or slate platter.
  • Accompany with crusty bread to soak up the delicious dressing.

FAQs about Shaved Asparagus Salad with Burrata and Prosciutto

Can I make this salad ahead of time?

While this Shaved Asparagus Salad with Burrata and Prosciutto is best enjoyed fresh, you can prepare the asparagus and dressing in advance. Just toss everything together right before serving to keep the ingredients crisp and vibrant.

What can I substitute for burrata cheese?

If burrata isn’t available, fresh mozzarella is a fantastic alternative. It won’t have the same creamy texture, but it will still provide a delicious flavor that complements the salad beautifully.

Is this salad suitable for a vegetarian diet?

Yes! This salad is vegetarian-friendly, as it features fresh vegetables and cheese. Just be mindful of the prosciutto if you’re serving it to strict vegetarians; you can easily omit it or replace it with a plant-based protein.

How do I store leftovers?

If you have any leftovers, store them in an airtight container in the fridge. However, keep in mind that the asparagus may lose its crunch, so it’s best to enjoy this salad fresh.

Can I add other vegetables to this salad?

Absolutely! Feel free to get creative. Thinly sliced radishes, cucumbers, or even cherry tomatoes can add extra flavor and color to your Shaved Asparagus Salad with Burrata and Prosciutto.

Final Thoughts

Creating a Shaved Asparagus Salad with Burrata and Prosciutto is more than just preparing a meal; it’s about embracing the joy of fresh ingredients and simple pleasures.

Each bite offers a delightful contrast of textures and flavors, making it a memorable dish for any gathering.

Whether you’re enjoying it on a sunny patio or sharing it with friends, this salad brings a touch of elegance to your table.

So, roll up your sleeves, gather your ingredients, and let this vibrant salad brighten your day.

Trust me, your taste buds will thank you!

Ranis

Shaved Asparagus Salad with Burrata and Prosciutto is divine!

A refreshing Shaved Asparagus Salad topped with creamy burrata and savory prosciutto, perfect for a light meal or appetizer.
Prep Time 15 minutes
Total Time 15 minutes
Servings: 4 servings
Course: Salad
Cuisine: Italian
Calories: 320

Ingredients
  

  • 1 pound fresh asparagus trimmed
  • 8 ounces burrata cheese
  • 4 ounces thinly sliced prosciutto
  • 2 tablespoons olive oil
  • 1 tablespoon lemon juice
  • Salt and pepper to taste
  • Fresh basil leaves for garnish
  • 1/4 cup shaved Parmesan cheese

Method
 

  1. Using a vegetable peeler, shave the asparagus into thin ribbons. If the asparagus is thick, you can also slice it very thinly. Place the shaved asparagus in a large bowl.
  2. In a small bowl, whisk together the olive oil, lemon juice, salt, and pepper. Drizzle the dressing over the shaved asparagus and toss gently to combine.
  3. On a serving platter, arrange the dressed asparagus. Tear the burrata into pieces and place it on top of the asparagus.
  4. Drape the prosciutto slices over the salad.
  5. Sprinkle the shaved Parmesan cheese and fresh basil leaves over the top. Serve immediately.

Nutrition

Serving: 1servingCalories: 320kcalCarbohydrates: 4gProtein: 14gFat: 28gSaturated Fat: 10gPolyunsaturated Fat: 18gCholesterol: 40mgSodium: 600mgFiber: 1gSugar: 2g

Notes

  • For a twist, try adding toasted pine nuts or walnuts for extra crunch.
  • You can also substitute the burrata with fresh mozzarella for a different flavor profile.

Tried this recipe?

Let us know how it was!

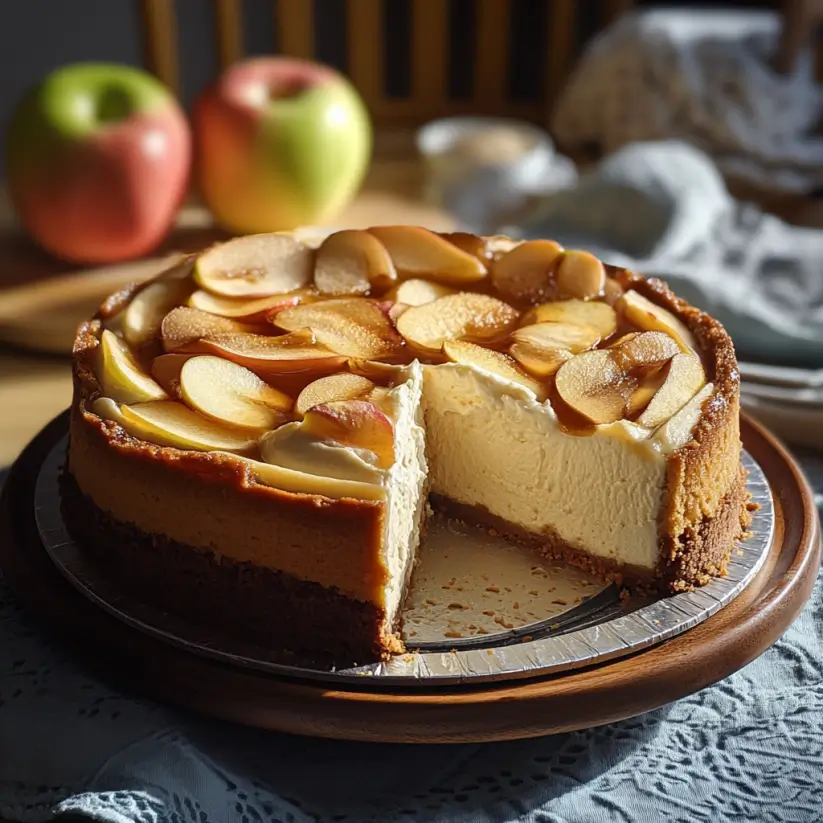
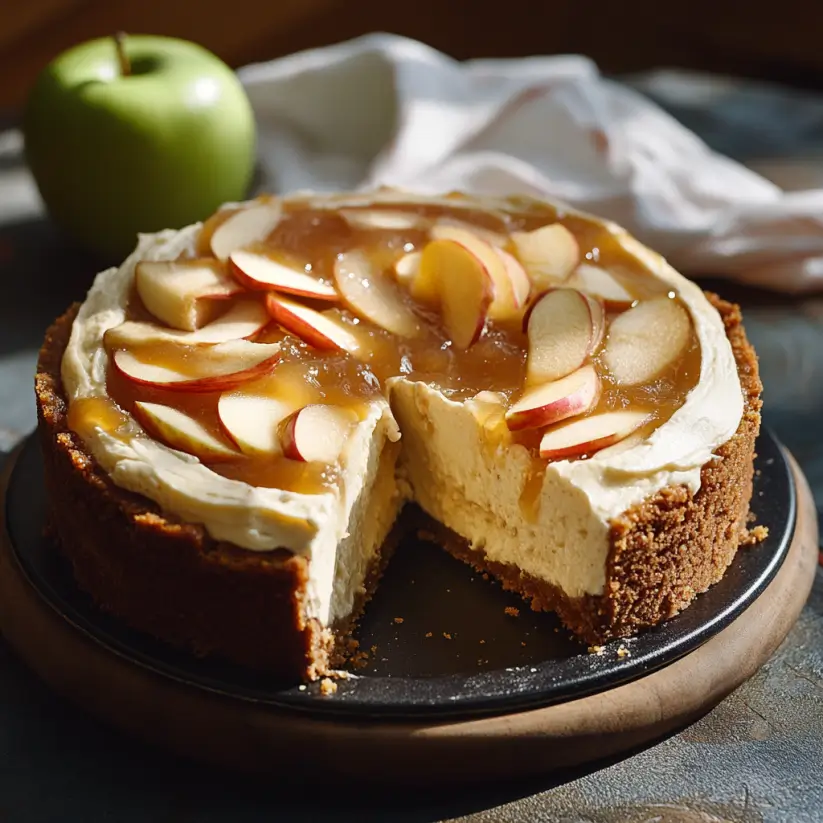
Apple Cider Cheesecake: A Delightfully Creamy Recipe

Introduction to Apple Cider Cheesecake

As the leaves turn and the air gets crisp, there’s something magical about the flavors of fall. One of my favorite ways to embrace this season is with a slice of apple cider cheesecake. This creamy dessert captures the essence of autumn, blending the warmth of spices with the sweetness of apple cider. Whether you’re looking to impress guests at a gathering or simply treat yourself after a long day, this recipe is a delightful solution. It’s easy to make and even easier to enjoy, making it the perfect addition to your fall dessert repertoire.

Why You’ll Love This Apple Cider Cheesecake

This apple cider cheesecake is a game-changer for your dessert table. It’s not just about the taste—though, trust me, it’s heavenly. The ease of preparation means you can whip it up even on a busy weeknight. Plus, the rich, creamy texture paired with the warm spices will have everyone asking for seconds. It’s a comforting slice of fall that brings smiles and warmth to any gathering.

Ingredients for Apple Cider Cheesecake

Gathering the right ingredients is the first step to creating your apple cider cheesecake masterpiece. Here’s what you’ll need:

  • Graham cracker crumbs: These form the base of your crust, providing a sweet and crunchy texture.
  • Unsalted butter: Melted butter binds the crumbs together, adding richness to the crust.
  • Granulated sugar: A touch of sweetness enhances both the crust and the filling.
  • Cream cheese: The star of the show! It gives the cheesecake its creamy, smooth texture.
  • Vanilla extract: This adds a warm, aromatic flavor that complements the apple cider beautifully.
  • Eggs: They help set the cheesecake, giving it structure and a rich mouthfeel.
  • Apple cider: The key ingredient that infuses the cheesecake with that delightful fall flavor.
  • Ground cinnamon: A classic spice that brings warmth and depth to the dessert.
  • Ground nutmeg: Just a pinch adds a hint of earthiness, enhancing the overall flavor profile.
  • All-purpose flour: This helps stabilize the filling, ensuring a perfect texture.

For those looking to elevate the flavor, consider adding a tablespoon of caramel sauce to the batter. If you want a spiced crust, a teaspoon of ground cinnamon mixed into the graham cracker crumbs can do wonders. You can find all the exact measurements at the bottom of the article, ready for printing!

How to Make Apple Cider Cheesecake

Creating your apple cider cheesecake is a rewarding experience. Follow these simple steps, and you’ll have a delicious dessert that captures the essence of fall. Let’s dive in!

Step 1: Preheat the Oven

Start by preheating your oven to 325°F. This step is crucial because it ensures even baking. A properly preheated oven helps the cheesecake set correctly, giving it that perfect creamy texture.

Step 2: Prepare the Crust

In a medium bowl, combine the graham cracker crumbs, melted butter, and sugar. Mix until everything is well blended. The mixture should resemble wet sand. Next, press this mixture firmly into the bottom of a 9-inch springform pan. Make sure it’s even; this will be the foundation of your cheesecake.

Step 3: Bake the Crust

Pop the crust into the oven and bake for about 10 minutes. You’ll know it’s done when it’s lightly golden and fragrant. Once baked, remove it from the oven and let it cool completely. This cooling step is essential before adding the filling.

Step 4: Make the Cheesecake Filling

In a large mixing bowl, beat the softened cream cheese with the granulated sugar until smooth and creamy. This step is vital; a well-mixed filling ensures a silky texture. Take your time here—no one likes a lumpy cheesecake!

Step 5: Add Flavorings

Now, add the vanilla extract and mix until combined. Then, add the eggs one at a time, mixing well after each addition. In a separate bowl, combine the apple cider, ground cinnamon, ground nutmeg, and flour. Gradually add this mixture to the cream cheese blend, ensuring everything is well incorporated.

Step 6: Pour and Bake

Carefully pour the cheesecake filling over the cooled crust in the springform pan. Spread it evenly with a spatula. Bake for 50-60 minutes, or until the center is set but still slightly jiggly. This slight jiggle is a sign of a perfectly baked cheesecake!

Step 7: Cooling Process

Once baked, turn off the oven and let the cheesecake cool inside with the door slightly ajar for about an hour. This gradual cooling helps prevent cracks. After that, refrigerate the cheesecake for at least 4 hours, or overnight if you can wait. Chilling is key to achieving that rich, creamy texture.

Tips for Success

  • Make sure your cream cheese is at room temperature for easy mixing.
  • Don’t skip the cooling step in the oven; it helps prevent cracks.
  • Use a water bath for extra moisture while baking, if desired.
  • For a smoother filling, blend the mixture until completely lump-free.
  • Top with whipped cream and a sprinkle of cinnamon for a beautiful presentation.

Equipment Needed

  • 9-inch springform pan: Essential for easy removal of the cheesecake. A regular cake pan can work, but it may be harder to serve.
  • Mixing bowls: Use a large bowl for the filling and a medium one for the crust.
  • Electric mixer: A hand mixer or stand mixer makes beating the cream cheese a breeze.
  • Spatula: Perfect for spreading the filling evenly over the crust.
  • Measuring cups and spoons: Accurate measurements are key to a successful cheesecake.

Variations

  • Caramel Apple Cider Cheesecake: Swirl in some caramel sauce into the filling for a rich, sweet twist.
  • Gluten-Free Option: Substitute graham cracker crumbs with gluten-free cookies or almond flour for a gluten-free crust.
  • Vegan Version: Use vegan cream cheese and flax eggs to create a plant-based cheesecake that everyone can enjoy.
  • Spiced Pumpkin Addition: Mix in a half cup of pumpkin puree for a delightful pumpkin-apple fusion.
  • Nutty Crust: Add crushed pecans or walnuts to the graham cracker crust for an extra crunch and flavor.

Serving Suggestions

  • Pair your apple cider cheesecake with a dollop of freshly whipped cream for added richness.
  • A drizzle of caramel sauce on top enhances the fall flavors beautifully.
  • Serve with a side of spiced apple cider or a warm cup of coffee.
  • Garnish with thin apple slices or a sprinkle of cinnamon for a lovely presentation.

FAQs about Apple Cider Cheesecake

Can I make apple cider cheesecake ahead of time?

Absolutely! In fact, making it a day in advance allows the flavors to meld beautifully. Just be sure to refrigerate it properly to keep it fresh.

What can I use instead of cream cheese?

If you’re looking for a lighter option, you can try using Greek yogurt or a vegan cream cheese alternative. Just keep in mind that the texture and flavor may vary slightly.

How do I store leftover cheesecake?

Store any leftovers in an airtight container in the refrigerator. It should stay fresh for about 3-5 days, but trust me, it’s hard to resist finishing it sooner!

Can I freeze apple cider cheesecake?

Yes, you can freeze it! Wrap the cheesecake tightly in plastic wrap and then in aluminum foil. It can last up to 2 months in the freezer. Just thaw it in the fridge before serving.

What’s the best way to serve apple cider cheesecake?

For a delightful presentation, serve it chilled with a dollop of whipped cream and a sprinkle of cinnamon. A drizzle of caramel sauce adds an extra touch of indulgence!

Final Thoughts

Creating this apple cider cheesecake is more than just baking; it’s about embracing the flavors of fall and sharing joy with those you love. Each slice offers a creamy, spiced delight that warms the heart and brings smiles to the table. Whether it’s a cozy family dinner or a festive gathering, this dessert is sure to impress. The process is simple, yet the results are nothing short of spectacular. So, roll up your sleeves, gather your ingredients, and let the aroma of apple cider and spices fill your kitchen. You won’t regret it!

Ranis

Apple Cider Cheesecake: A Delightfully Creamy Recipe

A creamy and delicious apple cider cheesecake that combines the flavors of fall with a rich, smooth texture.
Prep Time 20 minutes
Cook Time 1 hour
Total Time 4 hours 20 minutes
Servings: 8 servings
Course: Dessert
Cuisine: American
Calories: 350

Ingredients
  

  • 1 ½ cups graham cracker crumbs
  • ½ cup unsalted butter melted
  • 2 tablespoons granulated sugar
  • 16 ounces cream cheese softened
  • 1 cup granulated sugar
  • 1 teaspoon vanilla extract
  • 3 large eggs
  • 1 cup apple cider
  • 1 teaspoon ground cinnamon
  • ½ teaspoon ground nutmeg
  • 1 tablespoon all-purpose flour

Method
 

  1. Preheat the oven to 325°F.
  2. In a medium bowl, combine the graham cracker crumbs, melted butter, and 2 tablespoons of sugar. Mix until well combined.
  3. Press the mixture firmly into the bottom of a 9-inch springform pan to form the crust. Bake for 10 minutes, then remove from the oven and let cool.
  4. In a large mixing bowl, beat the softened cream cheese with 1 cup of sugar until smooth and creamy.
  5. Add the vanilla extract and mix until combined.
  6. Add the eggs one at a time, mixing well after each addition.
  7. In a separate bowl, combine the apple cider, ground cinnamon, ground nutmeg, and flour.
  8. Gradually add this mixture to the cream cheese mixture, blending until smooth and well combined.
  9. Pour the cheesecake filling over the cooled crust in the springform pan.
  10. Bake for 50-60 minutes, or until the center is set and slightly jiggly.
  11. Turn off the oven and let the cheesecake cool in the oven with the door slightly ajar for about 1 hour.
  12. Once cooled, refrigerate the cheesecake for at least 4 hours or overnight before serving.

Nutrition

Serving: 1sliceCalories: 350kcalCarbohydrates: 25gProtein: 6gFat: 24gSugar: 25g

Notes

  • For a richer flavor, consider adding a tablespoon of caramel sauce to the cheesecake batter.
  • You can also top the cheesecake with whipped cream and a sprinkle of cinnamon before serving for an extra touch.
  • If you prefer a spiced crust, try adding 1 teaspoon of ground cinnamon to the graham cracker crust mixture.

Tried this recipe?

Let us know how it was!

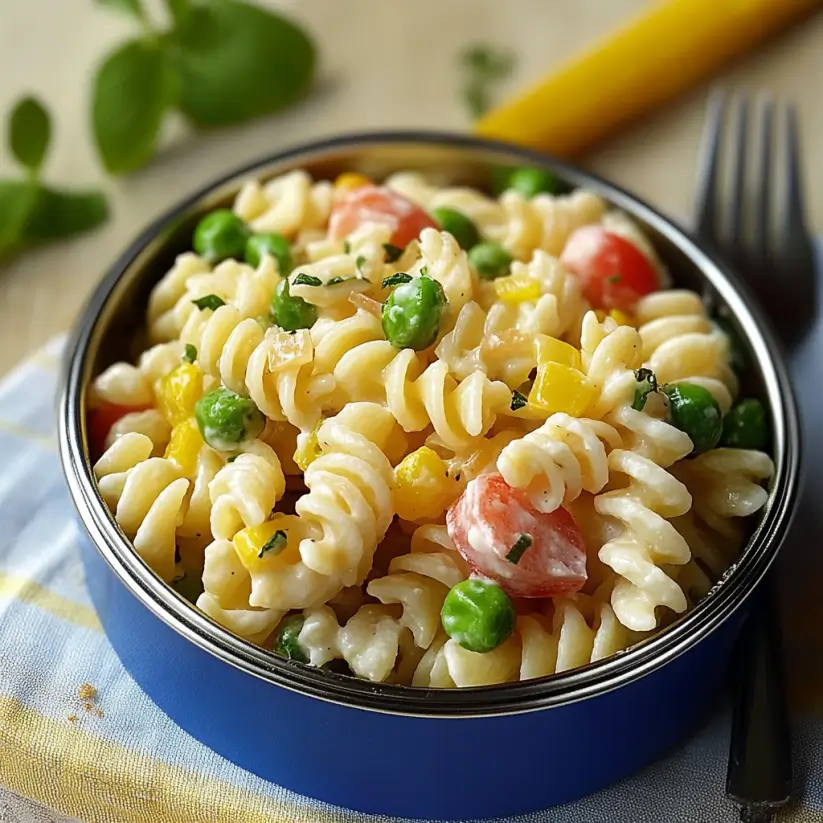
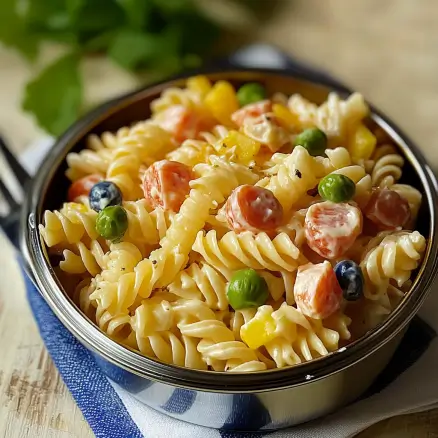
Kid-Friendly Pasta Salad: A Colorful Delight for Kids!

Introduction to Kid-Friendly Pasta Salad

When I think back to my childhood, I remember summer picnics filled with laughter and colorful dishes. One standout was always a vibrant pasta salad that seemed to bring everyone together. This Kid-Friendly Pasta Salad is just that—a delightful mix of flavors and textures that kids adore.

It’s a quick solution for busy weeknights or a fun dish to impress at family gatherings. Packed with fresh veggies and cheese, it’s not just tasty; it’s a way to sneak in some nutrition without the fuss. Let’s dive into this colorful delight that will have your little ones asking for seconds!

Why You’ll Love This Kid-Friendly Pasta Salad

This Kid-Friendly Pasta Salad is a lifesaver for busy parents. It’s quick to whip up, taking just about 25 minutes from start to finish. The vibrant colors and fresh flavors make it appealing to kids, ensuring they’ll actually want to eat their veggies. Plus, it’s versatile! You can easily customize it based on what you have on hand. It’s a delicious way to make mealtime fun and stress-free!

Ingredients for Kid-Friendly Pasta Salad

Creating this Kid-Friendly Pasta Salad is a breeze, and the ingredients are simple yet delightful. Here’s what you’ll need:

  • Rotini pasta: This fun, spiral shape holds onto the dressing and veggies perfectly, making each bite a burst of flavor.
  • Cherry tomatoes: Sweet and juicy, they add a pop of color and freshness that kids love.
  • Cucumber: Crisp and refreshing, cucumbers provide a nice crunch and balance the flavors.
  • Bell pepper: Any color works! They bring sweetness and a vibrant hue to the salad.
  • Black olives: These add a savory touch and a bit of tang, making the salad more exciting.
  • Shredded cheddar cheese: Creamy and rich, cheese is always a hit with kids and adds a comforting element.
  • Red onion: Finely chopped, they give a slight bite that enhances the overall taste.
  • Italian dressing: This zesty dressing ties everything together, infusing the salad with flavor.
  • Salt and pepper: Essential for seasoning, they help elevate the dish to perfection.
  • Fresh parsley: A sprinkle on top adds a touch of color and freshness, making it look appealing.

For those looking to mix things up, consider adding diced cooked chicken or chickpeas for extra protein. If Italian dressing isn’t your thing, ranch or vinaigrette can be great alternatives.

You can find the exact quantities for each ingredient at the bottom of the article, ready for printing!

How to Make Kid-Friendly Pasta Salad

Making this Kid-Friendly Pasta Salad is as easy as pie. With just a few simple steps, you’ll have a colorful dish that kids will love. Let’s get started!

Step 1: Cook the Pasta

Begin by boiling a pot of water. Add a pinch of salt to enhance the flavor. Once it’s bubbling, toss in the rotini pasta. Cook it according to the package instructions until it’s al dente.

This usually takes about 8 to 10 minutes. When it’s done, drain the pasta and rinse it under cold water. This stops the cooking process and cools it down, making it perfect for the salad.

Step 2: Combine the Ingredients

In a large mixing bowl, combine the cooled pasta with the cherry tomatoes, diced cucumber, bell pepper, black olives, shredded cheddar cheese, and red onion.

The colors will pop, making it visually appealing. Plus, the mix of textures will keep things interesting for the kids.

Step 3: Dress the Salad

Now it’s time to add the Italian dressing. Pour it over the pasta mixture and gently toss everything together.

Make sure every piece of pasta and veggie is coated in that zesty goodness. This is where the magic happens, as the flavors meld together beautifully.

Step 4: Season to Taste

After dressing the salad, it’s important to season it. Sprinkle in some salt and pepper to taste.

This step is crucial! A little seasoning can elevate the dish, making it even more delicious.

Step 5: Chill and Serve

Cover the bowl with plastic wrap or a lid and pop it in the refrigerator. Let it chill for at least 30 minutes.

This allows the flavors to blend and intensify. When you’re ready to serve, give it a good stir and garnish with fresh parsley.

Your Kid-Friendly Pasta Salad is now ready to be enjoyed!

Tips for Success

  • Always rinse the pasta after cooking to prevent it from sticking together.
  • Use seasonal vegetables for the freshest flavors and colors.
  • Let the salad chill longer if possible; it enhances the taste.
  • Involve your kids in the preparation; they’ll be more excited to eat what they helped make.
  • Experiment with different dressings to keep things interesting!

Equipment Needed

  • Large pot: For boiling the pasta. A deep skillet can work too.
  • Colander: To drain the pasta. A slotted spoon can be a handy alternative.
  • Mixing bowl: A big bowl for combining ingredients. Any large container will do.
  • Measuring cups: For precise ingredient amounts. You can use regular cups if needed.

Variations

  • Protein Boost: Add diced cooked chicken, chickpeas, or even tuna for a heartier salad.
  • Cheese Swap: Try feta or mozzarella for a different flavor profile that kids will still enjoy.
  • Veggie Mix: Incorporate other veggies like carrots, peas, or corn for added nutrition and color.
  • Gluten-Free Option: Use gluten-free pasta to make this dish suitable for those with dietary restrictions.
  • Herb Infusion: Mix in fresh herbs like basil or dill for an aromatic twist that elevates the taste.

Serving Suggestions

  • Pair with Grilled Chicken: A simple grilled chicken breast complements the salad beautifully.
  • Serve with Fresh Fruit: A side of watermelon or berries adds a refreshing touch.
  • Drink Options: Lemonade or iced tea are perfect thirst quenchers.
  • Presentation: Serve in colorful bowls to make it visually appealing for kids.

FAQs about Kid-Friendly Pasta Salad

Can I make this Kid-Friendly Pasta Salad ahead of time?

Absolutely! This salad tastes even better after sitting in the fridge for a few hours or overnight. Just give it a good stir before serving to refresh the flavors.

What can I substitute for Italian dressing?

If Italian dressing isn’t your favorite, feel free to swap it out for ranch or a light vinaigrette. Each option brings its own unique flavor to the salad!

How can I make this salad more nutritious?

To boost the nutrition, consider adding diced cooked chicken or chickpeas for protein. You can also sneak in more veggies like spinach or kale for added vitamins.

Is this pasta salad suitable for picky eaters?

Definitely! The colorful ingredients and fun shapes make it appealing. Plus, you can customize it based on your child’s preferences, ensuring they’ll enjoy every bite.

How long will leftovers last in the fridge?

Leftovers can be stored in an airtight container for up to three days. Just remember to give it a stir before serving again!

Final Thoughts

Creating this Kid-Friendly Pasta Salad is more than just a cooking task; it’s an opportunity to bond with your kids over food. The vibrant colors and fresh flavors make mealtime a joyful experience, turning even the pickiest eaters into enthusiastic diners.

As you watch them enjoy each bite, you’ll feel a sense of accomplishment. This dish is not just a meal; it’s a canvas for creativity and a way to introduce healthy eating habits. So, roll up your sleeves, gather your little helpers, and let the kitchen become a place of laughter and delicious memories!

Ranis

Kid-Friendly Pasta Salad: A Colorful Delight for Kids!

A colorful and delicious pasta salad that kids will love, packed with fresh vegetables and cheese.
Prep Time 15 minutes
Cook Time 10 minutes
Total Time 55 minutes
Servings: 6 servings
Course: Salad
Cuisine: American
Calories: 220

Ingredients
  

  • 8 ounces rotini pasta
  • 1 cup cherry tomatoes halved
  • 1 cup cucumber diced
  • 1 cup bell pepper diced (any color)
  • 1/2 cup black olives sliced
  • 1/2 cup shredded cheddar cheese
  • 1/4 cup red onion finely chopped
  • 1/2 cup Italian dressing
  • Salt and pepper to taste
  • Fresh parsley chopped (for garnish)

Method
 

  1. Cook the rotini pasta according to package instructions until al dente. Drain and rinse under cold water to cool.
  2. In a large bowl, combine the cooled pasta, cherry tomatoes, cucumber, bell pepper, black olives, cheddar cheese, and red onion.
  3. Pour the Italian dressing over the pasta mixture and toss gently to combine.
  4. Season with salt and pepper to taste.
  5. Cover the bowl and refrigerate for at least 30 minutes to allow the flavors to meld.
  6. Before serving, give the salad a good stir and garnish with fresh parsley.

Nutrition

Serving: 1servingCalories: 220kcalCarbohydrates: 25gProtein: 7gFat: 10gSaturated Fat: 4gPolyunsaturated Fat: 6gCholesterol: 20mgSodium: 400mgFiber: 2gSugar: 3g

Notes

  • For added protein, consider mixing in diced cooked chicken or chickpeas.
  • Swap out the Italian dressing for a ranch or vinaigrette for a different flavor profile.

Tried this recipe?

Let us know how it was!

Two-Ingredient Greek Yogurt Bread: Easy and Delicious!

Introduction to Two-Ingredient Greek Yogurt Bread

There’s something magical about the smell of fresh bread wafting through the house. It takes me back to my childhood, where my mom would bake loaves on lazy Sunday afternoons. Now, as a busy adult, I crave that same comfort but with less fuss. Enter the Two-Ingredient Greek Yogurt Bread. This recipe is a game-changer! With just Greek yogurt and flour, you can whip up a delicious loaf in no time. Perfect for impressing guests or simply enjoying a warm slice with butter, it’s a quick solution for any day of the week.

Why You’ll Love This Two-Ingredient Greek Yogurt Bread

This Two-Ingredient Greek Yogurt Bread is a revelation for anyone who loves homemade bread but dreads the time and effort involved. It’s incredibly easy to make, requiring minimal ingredients and just a few simple steps. The taste? Absolutely delightful! You’ll enjoy a soft, fluffy texture with a hint of tang from the yogurt. Plus, it’s versatile enough to pair with any meal or stand alone as a snack. What’s not to love?

Ingredients for Two-Ingredient Greek Yogurt Bread

Gathering the right ingredients is the first step to creating your Two-Ingredient Greek Yogurt Bread. Here’s what you’ll need:

  • All-purpose flour: The backbone of this recipe, it gives the bread structure and a lovely texture.
  • Plain Greek yogurt: This is the star ingredient! It adds moisture and a subtle tang, making the bread soft and flavorful.
  • Baking powder: A must for leavening, it helps the bread rise and become fluffy.
  • Salt: Just a pinch enhances the flavors and balances the sweetness of the yogurt.
  • Honey (optional): If you like a touch of sweetness, a tablespoon of honey can elevate the flavor profile.

Feel free to get creative! You can swap in whole wheat flour for a heartier loaf or use a gluten-free blend if needed. For a savory twist, consider adding herbs or spices to the mix. The exact quantities for each ingredient are available at the bottom of the article for easy printing.

How to Make Two-Ingredient Greek Yogurt Bread

Making Two-Ingredient Greek Yogurt Bread is a breeze! Follow these simple steps, and you’ll have a warm, delicious loaf ready in no time. Let’s get started!

Step 1: Preheat the Oven

First things first, preheat your oven to 375°F (190°C). This ensures your bread bakes evenly. While the oven heats up, line a baking sheet with parchment paper. This will prevent sticking and make cleanup a snap.

Step 2: Mix Dry Ingredients

In a large mixing bowl, combine the all-purpose flour, baking powder, and salt. If you’re feeling adventurous, add the honey now for a hint of sweetness. Mix everything well until it’s evenly combined. This is the foundation of your Greek yogurt bread.

Step 3: Combine with Greek Yogurt

Next, it’s time to bring in the star of the show! Gradually add the plain Greek yogurt to your dry ingredients. Stir gently until a dough begins to form. Don’t worry if it looks a bit shaggy at first; that’s perfectly normal!

Step 4: Knead the Dough

Now, transfer the dough to a floured surface. Knead it gently for about 1-2 minutes until it becomes smooth. This step is crucial for developing the bread’s texture. Just be careful not to over-knead; we want it soft and fluffy!

Step 5: Shape the Loaf

Shape the dough into a round loaf. It doesn’t have to be perfect—rustic is charming! Place it on your prepared baking sheet. This is where the magic happens, so make sure it’s ready for the oven.

Step 6: Score the Top

Grab a sharp knife and make a few shallow slashes on the top of the loaf. This isn’t just for looks; it helps the bread rise evenly while baking. Plus, it gives your bread that artisanal touch!

Step 7: Bake the Bread

Pop the loaf into your preheated oven and bake for 25-30 minutes. You’ll know it’s done when it’s golden brown and sounds hollow when tapped on the bottom. The aroma will be irresistible!

Step 8: Cool and Serve

Once baked, allow the bread to cool for a few minutes before slicing. This helps the texture set. Serve it warm, and enjoy every delicious bite of your homemade Two-Ingredient Greek Yogurt Bread.

Tips for Success

  • Use room temperature Greek yogurt for easier mixing.
  • Don’t over-knead the dough; a gentle touch keeps it fluffy.
  • Experiment with different herbs or spices for unique flavors.
  • Check the bread a few minutes before the timer goes off to avoid overbaking.
  • Store leftovers in an airtight container to keep them fresh.

Equipment Needed

  • Mixing bowl: A large bowl for combining ingredients. Any size will do!
  • Measuring cups: Essential for accurate ingredient amounts. Use a kitchen scale if you prefer.
  • Baking sheet: A flat surface for baking. A cast-iron skillet works too!
  • Parchment paper: For easy cleanup. Aluminum foil can be a substitute.
  • Sharp knife: For scoring the loaf. A kitchen scissors can work in a pinch.

Variations

  • Herb-Infused: Add dried herbs like rosemary, thyme, or oregano to the dough for a savory twist.
  • Cheesy Delight: Mix in shredded cheese, such as cheddar or feta, for a rich, flavorful bread.
  • Olive and Sun-Dried Tomato: Incorporate chopped olives or sun-dried tomatoes for a Mediterranean flair.
  • Whole Wheat Option: Substitute half of the all-purpose flour with whole wheat flour for a heartier loaf.
  • Sweet Variation: Add cinnamon and raisins for a sweet breakfast bread that pairs perfectly with coffee.

Serving Suggestions

  • Enjoy warm slices with a pat of butter or a drizzle of honey for a delightful treat.
  • Pair with a hearty soup or salad for a complete meal.
  • Serve alongside dips like hummus or tzatziki for a Mediterranean-inspired snack.
  • For breakfast, top with fresh fruit and yogurt.

FAQs about Two-Ingredient Greek Yogurt Bread

Can I use non-fat Greek yogurt for this recipe?

Absolutely! Non-fat Greek yogurt works just as well. It may slightly alter the texture, but your Two-Ingredient Greek Yogurt Bread will still turn out delicious.

How do I store leftovers?

Store any leftover bread in an airtight container at room temperature for up to three days. For longer storage, slice and freeze it. Just pop it in the toaster when you’re ready to enjoy!

Can I make this bread gluten-free?

Yes! Substitute the all-purpose flour with a gluten-free flour blend. Just ensure it contains xanthan gum for the best results in your Greek yogurt bread.

What can I serve with this bread?

This bread pairs wonderfully with soups, salads, or spreads like hummus and tzatziki. You can also enjoy it with butter or jam for a tasty breakfast treat!

How can I make this bread sweeter?

If you prefer a sweeter loaf, simply add more honey or even a sprinkle of sugar to the dough. You can also mix in chocolate chips or dried fruits for a delightful twist!

Final Thoughts

There’s a certain joy that comes from baking your own bread, especially when it’s as simple as this Two-Ingredient Greek Yogurt Bread. The process is quick, the ingredients are minimal, and the results are nothing short of delightful. Each warm slice brings back memories of family gatherings and cozy evenings. Whether you enjoy it fresh out of the oven or as part of a meal, this bread is sure to impress. So roll up your sleeves, embrace the simplicity, and let the aroma of homemade bread fill your kitchen. You won’t regret it!

Ranis

Two-Ingredient Greek Yogurt Bread: Easy and Delicious!

A simple and delicious bread recipe made with just two main ingredients: Greek yogurt and flour.
Prep Time 10 minutes
Cook Time 30 minutes
Total Time 40 minutes
Servings: 8 servings
Course: Bread
Cuisine: Greek
Calories: 150

Ingredients
  

  • 2 cups all-purpose flour
  • 1 cup plain Greek yogurt
  • 1 teaspoon baking powder
  • 1 teaspoon salt
  • 1 tablespoon honey optional for sweetness

Method
 

  1. Preheat your oven to 375°F (190°C) and line a baking sheet with parchment paper.
  2. In a large mixing bowl, combine the flour, baking powder, and salt. If using, add the honey and mix well.
  3. Gradually add the Greek yogurt to the dry ingredients, stirring until a dough forms.
  4. Transfer the dough to a floured surface and knead gently for about 1-2 minutes until smooth.
  5. Shape the dough into a round loaf and place it on the prepared baking sheet.
  6. Use a sharp knife to make a few shallow slashes on the top of the loaf for decoration and to help it rise evenly.
  7. Bake in the preheated oven for 25-30 minutes, or until the bread is golden brown and sounds hollow when tapped on the bottom.
  8. Allow the bread to cool for a few minutes before slicing and serving.

Nutrition

Serving: 1sliceCalories: 150kcalCarbohydrates: 26gProtein: 5gFat: 1gSodium: 200mgFiber: 1g

Notes

  • For a savory twist, add herbs like rosemary or thyme to the dough before baking.
  • You can also incorporate shredded cheese or diced olives for added flavor.

Tried this recipe?

Let us know how it was!

Apple Oreo Truffles: Discover the Sweet Recipe Today!

Introduction to Apple Oreo Truffles

When I think of comfort food, my mind often drifts to sweet treats that bring back fond memories. Apple Oreo Truffles are a delightful blend of nostalgia and indulgence, perfect for satisfying that sweet tooth.

These no-bake truffles are not just easy to whip up; they’re a quick solution for a busy day or a charming dessert to impress your loved ones.

With just a handful of ingredients, you can create a dessert that’s both fun and delicious. Trust me, once you try these, they’ll become a staple in your kitchen!

Why You’ll Love This Apple Oreo Truffles

These Apple Oreo Truffles are a game-changer in the dessert world.

They come together in a flash, making them perfect for those last-minute gatherings or cozy nights in.

The combination of creamy, sweet, and slightly tart flavors will have your taste buds dancing.

Plus, they’re no-bake, so you can skip the oven and still impress everyone with a delightful treat.

What’s not to love?

Ingredients for Apple Oreo Truffles

Creating these Apple Oreo Truffles is a breeze, thanks to a simple list of ingredients.

Here’s what you’ll need:

  • Crushed Oreo cookies: The star of the show! They provide a rich, chocolatey base that pairs perfectly with the other flavors.
  • Cream cheese: This adds a creamy texture and balances the sweetness of the Oreos.
  • Dried apples: They bring a chewy, fruity element that complements the chocolate beautifully.
  • Cinnamon: A dash of this spice adds warmth and enhances the apple flavor.
  • White chocolate: Used for coating, it gives a sweet, smooth finish to each truffle.
  • Coconut oil: This helps the chocolate melt smoothly and adds a hint of tropical flavor.
  • Crushed pecans (optional): For those who love a little crunch, these nuts add texture and a nutty flavor.

Feel free to get creative! You can substitute dried apples with other dried fruits like cranberries or cherries for a different twist.

For exact measurements, check the bottom of the article where you can find everything available for printing.

How to Make Apple Oreo Truffles

Making Apple Oreo Truffles is as easy as pie—well, easier actually!

With just a few simple steps, you’ll have a batch of these delightful treats ready to impress.

Let’s dive into the process!

Step 1: Combine Ingredients

Start by grabbing a mixing bowl.

Toss in the crushed Oreo cookies, softened cream cheese, finely chopped dried apples, and a sprinkle of cinnamon.

Mix everything together until it forms a dough-like consistency.

Don’t be shy; use your hands if you need to!

This is where the magic begins.

Step 2: Form the Truffles

Once your mixture is well combined, it’s time to roll!

Take small portions of the dough and roll them into balls about one inch in diameter.

Place each ball on a baking sheet lined with parchment paper.

This step is fun, and you can even get the kids involved!

Step 3: Chill the Truffles

Now, let’s give those truffles a little chill time.

Pop the baking sheet into the freezer for about 30 minutes.

This helps them firm up, making them easier to dip later.

Trust me, this step is crucial for a perfect coating!

Step 4: Melt the Chocolate

While the truffles are chilling, it’s time to melt the white chocolate.

In a microwave-safe bowl, combine the chopped white chocolate and coconut oil.

Heat in 30-second intervals, stirring in between until smooth.

Be careful not to overheat; we want silky chocolate, not a burnt mess!

Step 5: Dip the Truffles

Once the truffles are firm, it’s dipping time!

Using a fork, dip each chilled ball into the melted white chocolate.

Make sure to coat them evenly, then gently tap the fork on the edge of the bowl to remove excess chocolate.

Place them back on the parchment-lined baking sheet.

This is where they start to look like little pieces of art!

Step 6: Add Toppings

If you’re feeling adventurous, now’s the time to add some flair!

Before the chocolate sets, sprinkle crushed pecans on top of each truffle.

This adds a delightful crunch and a nutty flavor that complements the sweetness.

Feel free to get creative with toppings—maybe some sprinkles or a drizzle of caramel?

Step 7: Refrigerate to Set

Finally, let’s finish these beauties off.

Refrigerate the truffles for at least 30 minutes to allow the chocolate to harden.

Once set, they’re ready to be enjoyed!

Serve them at parties, or keep them all to yourself—no judgment here!

Tips for Success

  • Make sure your cream cheese is softened for easy mixing.
  • Use a cookie scoop for uniform truffle sizes.
  • Chill the truffles long enough to ensure a smooth chocolate coating.
  • Experiment with different toppings like crushed cookies or sprinkles.
  • Store leftovers in an airtight container in the fridge for up to a week.

Equipment Needed

  • Mixing bowl: A large bowl works best, but any bowl will do.
  • Fork: For dipping the truffles; a slotted spoon can be a good alternative.
  • Baking sheet: Line it with parchment paper; a plate can work in a pinch.
  • Microwave-safe bowl: Essential for melting chocolate; a double boiler is a great substitute.

Variations

  • Nut-Free: Omit the crushed pecans and use sunflower seeds for a nut-free option.
  • Vegan: Substitute cream cheese with a vegan alternative and use dairy-free chocolate for a plant-based treat.
  • Spicy Kick: Add a pinch of cayenne pepper or chili powder to the mixture for a surprising heat.
  • Chocolate Lovers: Use dark chocolate instead of white chocolate for a richer flavor.
  • Fruit Medley: Mix in other dried fruits like apricots or figs for a unique twist on the classic recipe.

Serving Suggestions

  • Pair these truffles with a hot cup of coffee or a chilled glass of milk for a delightful treat.
  • Serve them on a decorative platter, garnished with fresh apple slices for a pop of color.
  • For a festive touch, arrange them in a mason jar tied with a ribbon as a charming gift.

FAQs about Apple Oreo Truffles

Can I use fresh apples instead of dried apples?

While fresh apples are delicious, they contain too much moisture for this recipe. Dried apples provide the right texture and sweetness. However, if you’re feeling adventurous, you can try using freeze-dried apples for a similar effect!

How long do Apple Oreo Truffles last?

These no-bake truffles can be stored in an airtight container in the fridge for up to a week. Just make sure they’re well-chilled before serving to maintain their delightful texture.

Can I make these truffles ahead of time?

Absolutely! In fact, making them a day in advance allows the flavors to meld beautifully. Just keep them refrigerated until you’re ready to serve.

What can I substitute for cream cheese?

If you’re looking for a dairy-free option, try using a vegan cream cheese alternative. It works just as well and keeps the truffles creamy and delicious!

Are these truffles suitable for kids?

Definitely! Apple Oreo Truffles are a hit with kids. They’re fun to make and even more fun to eat. Just keep an eye on the chocolate melting process if they’re helping out in the kitchen!

Final Thoughts

Creating Apple Oreo Truffles is more than just a cooking experience; it’s a delightful journey that brings joy to both the maker and the eater.

The blend of flavors and textures creates a treat that’s not only delicious but also evokes warm memories of family gatherings and celebrations.

Whether you’re sharing them at a party or enjoying them solo, these truffles are sure to bring smiles.

So, roll up your sleeves, gather your ingredients, and dive into this sweet adventure.

Trust me, once you make these, they’ll hold a special place in your heart and kitchen!

Ranis

Apple Oreo Truffles: Discover the Sweet Recipe Today!

Delicious Apple Oreo Truffles made with crushed Oreo cookies, cream cheese, and dried apples, coated in white chocolate.
Prep Time 15 minutes
Cook Time 10 minutes
Total Time 55 minutes
Servings: 12 servings
Course: Dessert
Cuisine: American
Calories: 150

Ingredients
  

  • 1 cup crushed Oreo cookies
  • 1/2 cup cream cheese softened
  • 1 cup finely chopped dried apples
  • 1 teaspoon cinnamon
  • 8 ounces white chocolate chopped
  • 1 tablespoon coconut oil
  • 1/4 cup crushed pecans optional

Method
 

  1. In a mixing bowl, combine the crushed Oreo cookies, softened cream cheese, chopped dried apples, and cinnamon. Mix until well combined and a dough forms.
  2. Using your hands, roll the mixture into small balls, about 1 inch in diameter, and place them on a baking sheet lined with parchment paper.
  3. Freeze the balls for about 30 minutes, until firm.
  4. While the balls are chilling, melt the white chocolate and coconut oil together in a microwave-safe bowl in 30-second intervals, stirring in between, until smooth.
  5. Dip each chilled ball into the melted white chocolate, using a fork to remove excess chocolate. Place them back on the parchment-lined baking sheet.
  6. If desired, sprinkle crushed pecans on top of the chocolate before it sets.
  7. Refrigerate the truffles for at least 30 minutes to allow the chocolate to harden.

Nutrition

Serving: 1truffleCalories: 150kcalCarbohydrates: 15gProtein: 2gFat: 8gSaturated Fat: 4gPolyunsaturated Fat: 3gCholesterol: 10mgSodium: 50mgFiber: 1gSugar: 8g

Notes

  • For a caramel flavor, drizzle melted caramel over the truffles after dipping them in white chocolate.
  • Substitute the dried apples with other dried fruits like cranberries or cherries for a different taste.

Tried this recipe?

Let us know how it was!

Crab Crunchies: Discover a Delightful Recipe Today!

Introduction to Crab Crunchies

Crab Crunchies are more than just a dish; they’re a delightful experience waiting to happen. I remember the first time I made these little bites of joy for a gathering. The aroma of baked crab and cheese filled the kitchen, drawing everyone in like moths to a flame. If you’re looking for a quick solution for a busy day or a dish to impress your loved ones, these seafood bites are your answer. With just a handful of ingredients and minimal prep time, you’ll have a crowd-pleaser that’s both delicious and satisfying. Let’s dive into this culinary adventure!

Why You’ll Love This Crab Crunchies

Crab Crunchies are the ultimate seafood appetizer that combines ease and flavor in one delightful package. They come together in just 30 minutes, making them perfect for busy weeknights or last-minute gatherings. The crispy exterior and cheesy, crab-filled center create a taste sensation that’s hard to resist. Plus, they’re gluten-free, so everyone can enjoy these tasty bites without worry. Trust me, once you try them, they’ll become a staple in your kitchen!

Ingredients for Crab Crunchies

Gathering the right ingredients is key to making these Crab Crunchies a hit. Here’s what you’ll need:

  • Lump crab meat: The star of the show! Look for fresh or canned crab meat, ensuring it’s drained and free of shells for a smooth texture.
  • Shredded cheddar cheese: This adds a creamy, cheesy goodness that pairs perfectly with the crab. Feel free to experiment with sharp or mild varieties.
  • Mayonnaise: It binds everything together, adding moisture and richness. You can swap it with Greek yogurt for a lighter option.
  • Green onions: These bring a fresh, mild onion flavor. Chopped finely, they add a nice crunch and color.
  • Garlic powder: A sprinkle of this enhances the overall flavor without overpowering the dish.
  • Worcestershire sauce: Just a dash adds depth and umami, elevating the taste of the crab.
  • Old Bay seasoning: A classic seafood seasoning that brings a hint of spice and complexity. If you’re feeling adventurous, try a different seafood blend!
  • Crushed Ritz crackers: These create a delightful crunch on the outside. You can substitute with gluten-free crackers if needed.
  • Parsley: Chopped for garnish, it adds a pop of color and freshness to your finished dish.
  • Salt and pepper: Essential for seasoning, adjust to your taste preference.

For exact measurements, check the bottom of the article where you can find a printable version of the recipe!

How to Make Crab Crunchies

Step 1: Preheat the Oven

Let’s kick things off by preheating your oven to 350°F (175°C). This step is crucial because it ensures your Crab Crunchies bake evenly and come out perfectly golden. While the oven warms up, you can gather your ingredients and get ready for the fun part!

Step 2: Mix the Ingredients

In a large mixing bowl, combine the lump crab meat, shredded cheddar cheese, mayonnaise, green onions, garlic powder, Worcestershire sauce, Old Bay seasoning, salt, and pepper. Mix everything together until well combined. The mixture should be creamy and packed with flavor. Don’t be shy—get in there and use your hands if you need to!

Step 3: Fold in the Crackers

Now, gently fold in the crushed Ritz crackers. This is where the magic happens! The crackers will add that delightful crunch we all love. Make sure they’re evenly distributed throughout the mixture, but be careful not to overmix. We want those crunchy bits to stay intact!

Step 4: Form the Mounds

Next, spoon the mixture into a greased baking dish or onto a lined baking sheet. Form small mounds or patties, about the size of a golf ball. This helps them cook evenly and gives you those perfect bite-sized pieces. If you want to impress, try to make them look uniform!

Step 5: Bake to Perfection

It’s time to bake! Place your baking dish or sheet in the preheated oven and let them bake for 15-20 minutes. Keep an eye on them; you’re looking for a golden brown color and a bubbly texture. The aroma will fill your kitchen, and trust me, it’s hard to resist sneaking a taste!

Step 6: Garnish and Serve

Once they’re out of the oven, let your Crab Crunchies cool slightly. This will help them hold their shape. Before serving, garnish with chopped parsley for a pop of color. Serve them warm, and watch as your friends and family dive in. Enjoy the compliments!

Tips for Success

  • Use fresh lump crab meat for the best flavor; canned works too, but fresh is unbeatable.
  • Don’t skip the resting time after baking; it helps the Crab Crunchies firm up.
  • Experiment with different cheeses like pepper jack for a spicy twist.
  • For extra crunch, add more crushed crackers on top before baking.
  • Serve with a zesty dipping sauce for an added flavor boost!

Equipment Needed

  • Mixing bowl: A large bowl for combining ingredients. A sturdy plastic or glass bowl works well.
  • Baking dish or sheet: Use a greased baking dish or a lined baking sheet. A cast-iron skillet can add a nice touch!
  • Spoon or spatula: For mixing and forming the mounds. A rubber spatula is great for gentle folding.
  • Oven mitts: Essential for safely handling hot dishes.

Variations

  • Spicy Crab Crunchies: Add a few dashes of hot sauce or diced jalapeños to the mixture for a fiery kick.
  • Shrimp or Mixed Seafood: Substitute lump crab meat with shrimp or a combination of your favorite seafood for a different flavor profile.
  • Herb-Infused: Incorporate fresh herbs like dill or cilantro for an aromatic twist that brightens the dish.
  • Cheese Variations: Swap cheddar for other cheeses like gouda or feta to create unique flavor combinations.
  • Vegan Option: Use plant-based crab alternatives and vegan mayonnaise for a delicious, cruelty-free version.

Serving Suggestions

  • Pair your Crab Crunchies with a refreshing cucumber salad for a light, crunchy contrast.
  • Serve with a zesty cocktail sauce or a tangy remoulade for dipping.
  • Complement with a chilled glass of white wine, like Sauvignon Blanc, to enhance the flavors.
  • For a fun presentation, arrange them on a platter with lemon wedges and fresh herbs.

FAQs about Crab Crunchies

Can I use imitation crab meat instead of lump crab meat?

Absolutely! Imitation crab meat can be a budget-friendly alternative. Just keep in mind that the flavor and texture will differ slightly, but they’ll still be delicious!

How do I store leftover Crab Crunchies?

Store any leftovers in an airtight container in the fridge for up to three days. Reheat them in the oven for a few minutes to regain that crispy texture.

Can I freeze Crab Crunchies?

Yes, you can freeze them! Just make sure they’re fully cooled before placing them in a freezer-safe container. They can last up to three months. Bake from frozen, adding a few extra minutes to the cooking time.

What can I serve with Crab Crunchies?

These seafood bites pair wonderfully with a fresh salad, a zesty dipping sauce, or even a light pasta dish. They’re versatile enough to complement many sides!

Are Crab Crunchies gluten-free?

Yes, they can be gluten-free! Just use gluten-free crackers instead of Ritz, and you’re good to go. Enjoy these tasty bites without worry!

Final Thoughts

Creating Crab Crunchies is more than just cooking; it’s about bringing people together. The joy of watching friends and family savor these delightful bites is unmatched. Each crunchy morsel is a reminder of the simple pleasures in life—good food, laughter, and shared moments. Whether you’re hosting a gathering or enjoying a quiet night in, these seafood bites will elevate your dining experience. So, roll up your sleeves, embrace the process, and let the aroma of baked crab and cheese fill your home. Trust me, once you make these, they’ll become a cherished recipe in your kitchen!

Ranis

Crab Crunchies: Discover a Delightful Recipe Today!

Crab Crunchies are delightful seafood bites made with lump crab meat, cheddar cheese, and a blend of seasonings, baked to golden perfection.
Prep Time 10 minutes
Cook Time 20 minutes
Total Time 30 minutes
Servings: 6 servings
Course: Appetizer
Cuisine: American
Calories: 210

Ingredients
  

  • 1 cup lump crab meat drained and picked over for shells
  • 1 cup shredded cheddar cheese
  • 1/2 cup mayonnaise
  • 1/4 cup green onions finely chopped
  • 1 teaspoon garlic powder
  • 1 teaspoon Worcestershire sauce
  • 1/2 teaspoon Old Bay seasoning
  • 1 cup crushed Ritz crackers
  • 1/4 cup parsley chopped (for garnish)
  • Salt and pepper to taste

Method
 

  1. Preheat your oven to 350°F (175°C).
  2. In a large mixing bowl, combine the lump crab meat, shredded cheddar cheese, mayonnaise, green onions, garlic powder, Worcestershire sauce, Old Bay seasoning, salt, and pepper. Mix until well combined.
  3. Gently fold in the crushed Ritz crackers until evenly distributed throughout the mixture.
  4. Spoon the mixture into a greased baking dish or onto a lined baking sheet, forming small mounds or patties.
  5. Bake in the preheated oven for 15-20 minutes, or until golden brown and bubbly.
  6. Remove from the oven and let cool slightly before garnishing with chopped parsley. Serve warm.

Nutrition

Serving: 1servingCalories: 210kcalCarbohydrates: 8gProtein: 12gFat: 15gSaturated Fat: 5gPolyunsaturated Fat: 10gCholesterol: 50mgSodium: 400mgSugar: 1g

Notes

  • For a spicier kick, add a few dashes of hot sauce to the mixture before baking.
  • Substitute the lump crab meat with shrimp or a combination of seafood for a different flavor profile.

Tried this recipe?

Let us know how it was!

Air Fryer Hibachi Chicken and Vegetables: Easy Recipe Awaits!

Introduction to Air Fryer Hibachi Chicken and Vegetables

After a long day, the last thing I want is to spend hours in the kitchen. That’s where my love for Air Fryer Hibachi Chicken and Vegetables comes in. This dish is not just a quick solution for a busy weeknight; it’s a delightful way to bring the flavors of a Japanese steakhouse right to your home. With tender chicken and vibrant veggies, it’s a meal that impresses without the fuss. Plus, it’s healthy and gluten-free, making it perfect for anyone looking to enjoy a delicious dinner without the guilt.

Why You’ll Love This Air Fryer Hibachi Chicken and Vegetables

This Air Fryer Hibachi Chicken and Vegetables is a game-changer for busy nights. It’s incredibly easy to whip up, taking just 35 minutes from start to finish. The air fryer locks in flavors while keeping everything juicy and tender. Plus, the vibrant colors of the veggies make your plate pop. You’ll savor every bite, and your family will think you’ve become a culinary wizard overnight!

Ingredients for Air Fryer Hibachi Chicken and Vegetables

Gathering the right ingredients is the first step to creating a delicious Air Fryer Hibachi Chicken and Vegetables. Here’s what you’ll need:

  • Boneless, skinless chicken breasts: The star of the dish, providing lean protein that cooks up tender and juicy.
  • Soy sauce: Adds a savory umami flavor, enhancing the overall taste of the chicken.
  • Sesame oil: A little drizzle brings a nutty aroma and richness that’s quintessential in hibachi cooking.
  • Vegetable oil: Helps achieve that perfect sear and crispiness in the air fryer.
  • Garlic powder: A must-have for that aromatic kick, making every bite more flavorful.
  • Onion powder: Complements the garlic and adds depth to the marinade.
  • Ground black pepper: A simple seasoning that elevates the dish with a hint of spice.
  • Broccoli florets: These vibrant green gems add color and crunch, plus they’re packed with nutrients.
  • Sliced bell peppers: Any color works! They bring sweetness and a pop of color to your plate.
  • Sliced zucchini: This versatile veggie cooks quickly and adds a lovely texture.
  • Chopped green onions: For garnish, they add a fresh, zesty finish to your dish.
  • Lemon wedges: A squeeze of lemon brightens the flavors and adds a refreshing touch.

For those looking to spice things up, consider adding red pepper flakes to the marinade. If you prefer a different protein, shrimp or tofu can be excellent substitutes. You can find the exact measurements for each ingredient at the bottom of the article, ready for printing!

How to Make Air Fryer Hibachi Chicken and Vegetables

Now that you have your ingredients ready, let’s dive into the steps for making this delicious Air Fryer Hibachi Chicken and Vegetables. Each step is straightforward, ensuring you can whip this up even on the busiest of nights. Let’s get cooking!

Step 1: Marinate the Chicken

Start by placing the bite-sized chicken pieces in a large bowl. Add the soy sauce, sesame oil, vegetable oil, garlic powder, onion powder, and black pepper. Mix everything well, ensuring each piece is coated. This marinade is where the magic happens, so let it sit for at least 15 minutes. If you have time, marinating longer will deepen the flavors.

Step 2: Preheat the Air Fryer

While the chicken is marinating, preheat your air fryer to 400°F (200°C). This step is crucial for achieving that perfect crispy texture. Preheating takes about 5 minutes, so use this time to clean up your workspace or sip on a drink. A little multitasking never hurt anyone!

Step 3: Cook the Chicken

Once the air fryer is hot, add the marinated chicken to the basket in a single layer. Avoid overcrowding; this ensures even cooking. Cook the chicken for 10 minutes, shaking the basket halfway through. This little shake helps everything cook evenly and prevents sticking.

Step 4: Add the Vegetables

After the chicken has cooked for 10 minutes, it’s time to add the veggies. Toss in the broccoli, bell peppers, and zucchini. Gently mix them with the chicken in the basket. This step not only adds color but also infuses the vegetables with that delicious hibachi flavor.

Step 5: Final Cooking

Continue cooking for another 8-10 minutes. Shake the basket halfway through again. You want the chicken to reach an internal temperature of 165°F and the veggies to be tender yet crisp. Keep an eye on them; the air fryer works quickly!

Step 6: Serve and Enjoy

Once everything is cooked to perfection, remove the basket from the air fryer. Let it rest for a couple of minutes. This helps the juices settle. Serve your Air Fryer Hibachi Chicken and Vegetables hot, garnished with chopped green onions and lemon wedges on the side. A squeeze of lemon adds a refreshing zing that elevates the dish!

Tips for Success

  • Always marinate the chicken for at least 15 minutes to enhance flavor.
  • Don’t overcrowd the air fryer basket; cook in batches if necessary.
  • Shake the basket halfway through cooking for even results.
  • Use a meat thermometer to ensure chicken reaches 165°F.
  • Experiment with different vegetables based on your preference or what’s in season.

Equipment Needed

  • Air Fryer: The star of the show! Any model will do, but a basket-style air fryer works best for even cooking.
  • Mixing Bowl: For marinating the chicken; a large bowl is ideal.
  • Meat Thermometer: To check the chicken’s doneness; a simple kitchen thermometer will suffice.
  • Spatula or Tongs: For tossing and serving the chicken and veggies.

Variations

  • Spicy Kick: Add a teaspoon of red pepper flakes to the marinade for a fiery twist.
  • Protein Swap: Substitute chicken with shrimp or tofu for a different protein option.
  • Vegetable Medley: Mix in other veggies like snap peas, carrots, or mushrooms for added flavor and nutrition.
  • Gluten-Free Soy Sauce: Use tamari instead of regular soy sauce to keep it gluten-free.
  • Citrus Zest: Incorporate lime or orange zest into the marinade for a refreshing citrus flavor.

Serving Suggestions

  • Steamed Rice: Serve your hibachi chicken over a bed of fluffy steamed rice for a classic pairing.
  • Salad: A light cucumber or seaweed salad complements the meal beautifully.
  • Drinks: Pair with a cold Japanese beer or green tea for a refreshing touch.
  • Presentation: Garnish with sesame seeds and extra green onions for a vibrant look.

FAQs about Air Fryer Hibachi Chicken and Vegetables

Can I use frozen chicken for this recipe?

While fresh chicken is ideal for marinating, you can use frozen chicken. Just make sure to thaw it completely before marinating. This ensures the flavors penetrate the meat effectively.

What vegetables can I use in Air Fryer Hibachi Chicken and Vegetables?

You can get creative with your veggies! Besides broccoli, bell peppers, and zucchini, consider adding snap peas, carrots, or even mushrooms. The air fryer cooks them quickly, keeping them tender and flavorful.

How do I store leftovers?

Store any leftovers in an airtight container in the fridge for up to three days. Reheat in the air fryer for a few minutes to regain that crispy texture!

Can I make this dish ahead of time?

Yes! You can marinate the chicken a day in advance and store it in the fridge. Just remember to cook it fresh when you’re ready to enjoy your Air Fryer Hibachi Chicken and Vegetables.

Is this recipe suitable for meal prep?

Absolutely! This dish is perfect for meal prep. Portion it out into containers for quick lunches or dinners throughout the week. Just reheat and enjoy!

Final Thoughts

Cooking Air Fryer Hibachi Chicken and Vegetables is more than just a meal; it’s an experience that brings joy to the table. The vibrant colors, enticing aromas, and satisfying crunch of the veggies create a feast for the senses. I love how this dish transforms a simple weeknight into something special, making it feel like a celebration. Plus, it’s quick and easy, allowing you to spend more time with loved ones. Whether you’re impressing guests or enjoying a cozy dinner at home, this recipe is sure to become a favorite in your culinary repertoire.

Ranis

Air Fryer Hibachi Chicken and Vegetables: Easy Recipe Awaits!

A delicious and easy recipe for Air Fryer Hibachi Chicken and Vegetables, perfect for a quick weeknight dinner.
Prep Time 15 minutes
Cook Time 20 minutes
Total Time 35 minutes
Servings: 4 servings
Course: Main Course
Cuisine: Japanese
Calories: 280

Ingredients
  

  • 1 pound boneless skinless chicken breasts, cut into bite-sized pieces
  • 2 tablespoons soy sauce
  • 1 tablespoon sesame oil
  • 1 tablespoon vegetable oil
  • 1 teaspoon garlic powder
  • 1 teaspoon onion powder
  • 1 teaspoon ground black pepper
  • 1 cup broccoli florets
  • 1 cup sliced bell peppers any color
  • 1 cup sliced zucchini
  • 1 tablespoon chopped green onions for garnish
  • Lemon wedges for serving

Method
 

  1. In a large bowl, combine the chicken pieces, soy sauce, sesame oil, vegetable oil, garlic powder, onion powder, and black pepper. Mix well to coat the chicken evenly. Let it marinate for at least 15 minutes for better flavor.
  2. Preheat the air fryer to 400°F (200°C) for about 5 minutes.
  3. Add the marinated chicken to the air fryer basket in a single layer. Cook for 10 minutes, shaking the basket halfway through to ensure even cooking.
  4. After 10 minutes, add the broccoli, bell peppers, and zucchini to the basket with the chicken. Toss gently to combine.
  5. Continue cooking for an additional 8-10 minutes, shaking the basket halfway through, until the vegetables are tender and the chicken is cooked through (internal temperature should reach 165°F).
  6. Remove from the air fryer and let it rest for a couple of minutes. Serve hot, garnished with chopped green onions and lemon wedges on the side.

Nutrition

Serving: 1servingCalories: 280kcalCarbohydrates: 7gProtein: 30gFat: 15gSaturated Fat: 2gPolyunsaturated Fat: 13gCholesterol: 70mgSodium: 600mgFiber: 2gSugar: 3g

Notes

  • For a spicier version, add a teaspoon of red pepper flakes to the marinade.
  • You can substitute the chicken with shrimp or tofu for a different protein option.

Tried this recipe?

Let us know how it was!

Crab Salad Delight: A Refreshing Recipe to Try Today!

Introduction to Crab Salad Delight

Crab Salad Delight is more than just a dish; it’s a celebration of fresh flavors and simple pleasures. I remember the first time I tasted a crab salad at a family picnic, the sun shining down, laughter filling the air. It was refreshing and light, just like this recipe. Perfect for a quick lunch or a fancy dinner, this salad is a go-to for impressing friends or simply treating yourself. With minimal prep time and maximum flavor, it’s a delightful way to enjoy seafood without the fuss. Let’s dive into this culinary adventure together!

Why You’ll Love This Crab Salad Delight

This Crab Salad Delight is a game-changer for busy days or casual gatherings. It comes together in just 15 minutes, making it a breeze to whip up. The combination of creamy dressing and tender crab meat creates a flavor explosion that’s hard to resist. Plus, it’s versatile enough to serve as a light lunch or a stunning appetizer. Trust me, your taste buds will thank you!

Ingredients for Crab Salad Delight

Gathering the right ingredients is key to making this Crab Salad Delight shine. Here’s what you’ll need:

  • Lump crab meat: The star of the show! Look for fresh or canned crab meat, ensuring it’s drained and checked for shells.
  • Mayonnaise: This creamy base brings richness to the salad. You can use regular or light mayo, depending on your preference.
  • Dijon mustard: Adds a tangy kick that balances the creaminess of the mayo. It’s a must for flavor depth.
  • Lemon juice: Freshly squeezed is best! It brightens the dish and enhances the seafood flavor.
  • Red bell pepper: For a pop of color and crunch. It’s sweet and adds a nice texture contrast.
  • Celery: This brings a refreshing crunch. It’s a classic addition that complements the crab beautifully.
  • Green onions: These add a mild onion flavor and a bit of freshness. They’re perfect for garnishing too!
  • Old Bay seasoning: A quintessential seafood seasoning that adds a unique blend of spices. It’s what makes this salad truly special.
  • Salt and pepper: Essential for seasoning. Adjust to your taste for the perfect balance.
  • Mixed greens: Serve the salad on a bed of these for added freshness and color.
  • Lemon wedges: For garnish and an extra squeeze of citrus when serving.

For those looking to spice things up, consider adding a teaspoon of hot sauce or a pinch of cayenne pepper to the dressing. If crab isn’t your thing, shrimp or lobster can be delightful substitutes. You’ll find the exact quantities at the bottom of the article, ready for printing!

How to Make Crab Salad Delight

Creating this Crab Salad Delight is as easy as pie, and trust me, it’s just as satisfying! Follow these simple steps, and you’ll have a refreshing dish ready in no time.

Step 1: Prepare the Dressing

Start by grabbing a large mixing bowl. In it, combine the mayonnaise, Dijon mustard, lemon juice, and Old Bay seasoning. Whisk everything together until it’s smooth and creamy. This dressing is the heart of your salad, so make sure it’s well mixed. The tangy flavor will elevate the crab meat beautifully!

Step 2: Combine the Ingredients

Now, it’s time to bring in the star of the show: the lump crab meat. Gently fold it into the dressing, being careful not to break it apart too much. Add in the finely chopped red bell pepper, celery, and sliced green onions. Each ingredient adds its own unique texture and flavor, making this seafood salad truly delightful.

Step 3: Season to Taste

Once everything is combined, it’s time to season! Sprinkle in some salt and pepper, adjusting to your taste. This step is crucial, as it enhances all the flavors. Don’t be shy—taste as you go to find that perfect balance!

Step 4: Chill the Salad

Cover the bowl with plastic wrap and pop it in the fridge for at least 30 minutes. This chilling time allows the flavors to meld together, creating a more delicious salad. Plus, it’s a great way to keep the salad cool and refreshing for serving!

Step 5: Serve the Salad

When you’re ready to serve, take a generous handful of mixed greens and place them on each plate. Top with a hearty scoop of your crab salad. For that final touch, garnish with lemon wedges. A squeeze of fresh lemon juice right before eating adds a zesty kick that’s simply irresistible!

Tips for Success

  • Use fresh crab meat for the best flavor; canned works in a pinch.
  • Chill the salad longer if you can; it enhances the taste.
  • Don’t overmix the crab; you want those lovely lumps intact.
  • Experiment with herbs like dill or parsley for added freshness.
  • Serve with crusty bread for a satisfying meal.

Equipment Needed

  • Mixing bowl: A large bowl is essential. If you don’t have one, any deep dish will do.
  • Whisk: Perfect for blending the dressing. A fork can work in a pinch!
  • Spatula: Use it to gently fold in the ingredients. A wooden spoon is a great alternative.
  • Plastic wrap: To cover the bowl while chilling. A lid or plate can also work.

Variations of Crab Salad Delight

  • Spicy Crab Salad: Add a teaspoon of sriracha or a pinch of cayenne pepper to the dressing for a fiery twist.
  • Avocado Addition: Incorporate diced avocado for a creamy texture and healthy fats.
  • Herbed Version: Mix in fresh herbs like dill, cilantro, or parsley for an aromatic boost.
  • Low-Carb Option: Serve the salad in lettuce wraps instead of mixed greens for a keto-friendly meal.
  • Fruit Fusion: Toss in diced mango or pineapple for a sweet and tropical flavor contrast.

Serving Suggestions for Crab Salad Delight

  • Pair with crispy tortilla chips for a satisfying crunch.
  • Serve alongside a chilled glass of white wine, like Sauvignon Blanc.
  • For a light meal, add a side of fresh fruit salad.
  • Garnish with fresh herbs for an elegant touch.
  • Consider crusty bread or baguette slices for a delightful contrast.

FAQs about Crab Salad Delight

Can I use imitation crab meat instead of lump crab meat?

Absolutely! Imitation crab meat is a budget-friendly alternative. While it won’t have the same flavor, it can still create a tasty Crab Salad Delight.

How long can I store leftover crab salad?

You can keep leftover Crab Salad Delight in the fridge for up to two days. Just make sure it’s stored in an airtight container to maintain freshness.

Can I make this salad ahead of time?

Yes! In fact, making it a few hours in advance allows the flavors to meld beautifully. Just remember to keep it chilled until serving.

What can I serve with crab salad?

This salad pairs wonderfully with crusty bread, tortilla chips, or a light fruit salad. A chilled glass of white wine also complements it perfectly!

Is this crab salad gluten-free?

Yes! This Crab Salad Delight is naturally gluten-free, making it a great option for those with dietary restrictions. Enjoy without worry!

Final Thoughts

Creating this Crab Salad Delight is more than just preparing a meal; it’s about savoring the moments that come with it. Each bite is a reminder of sunny days and shared laughter, making it perfect for gatherings or quiet evenings at home. The blend of flavors and textures brings joy to the table, inviting everyone to dig in. Whether you’re impressing guests or treating yourself, this salad is a delightful way to enjoy seafood. So, roll up your sleeves, gather your ingredients, and let this refreshing dish bring a little sunshine into your kitchen!

Ranis

Crab Salad Delight: A Refreshing Recipe to Try Today!

A refreshing and delicious crab salad recipe perfect for any occasion.
Prep Time 15 minutes
Total Time 45 minutes
Servings: 4 servings
Course: Salad
Cuisine: American
Calories: 280

Ingredients
  

  • 1 pound lump crab meat drained and picked over for shells
  • 1/2 cup mayonnaise
  • 1 tablespoon Dijon mustard
  • 1 tablespoon lemon juice
  • 1/4 cup red bell pepper finely chopped
  • 1/4 cup celery finely chopped
  • 1/4 cup green onions sliced
  • 1 teaspoon Old Bay seasoning
  • Salt and pepper to taste
  • 2 cups mixed greens for serving
  • Lemon wedges for garnish

Method
 

  1. In a large mixing bowl, combine the mayonnaise, Dijon mustard, lemon juice, and Old Bay seasoning. Mix well until smooth.
  2. Gently fold in the lump crab meat, red bell pepper, celery, and green onions until evenly coated. Be careful not to break up the crab meat too much.
  3. Season with salt and pepper to taste. Adjust the seasoning as needed.
  4. Cover the bowl with plastic wrap and refrigerate for at least 30 minutes to allow the flavors to meld.
  5. To serve, place a generous handful of mixed greens on each plate and top with the crab salad. Garnish with lemon wedges.

Nutrition

Serving: 1servingCalories: 280kcalCarbohydrates: 3gProtein: 22gFat: 20gSaturated Fat: 3gPolyunsaturated Fat: 15gCholesterol: 80mgSodium: 500mgSugar: 1g

Notes

  • For a spicy kick, add a teaspoon of hot sauce or a pinch of cayenne pepper to the dressing.
  • Substitute the lump crab meat with shrimp or lobster for a different seafood twist.

Tried this recipe?

Let us know how it was!

Cinnamon Coffee Crinkles: Your New Favorite Cookie Recipe!

Introduction to Cinnamon Coffee Crinkles

There’s something magical about the aroma of freshly baked cookies wafting through the house. It takes me back to my childhood, where every Sunday was a baking day with my mom. Today, I want to share a delightful recipe that combines two of my favorite flavors: cinnamon and coffee. These Cinnamon Coffee Crinkles are not just cookies; they’re a warm hug in dessert form. Perfect for a quick treat after a long day or to impress friends at your next gathering, these cookies are sure to become a staple in your baking repertoire.

Why You’ll Love This Cinnamon Coffee Crinkles

These Cinnamon Coffee Crinkles are a game-changer for any home cook. They’re incredibly easy to whip up, making them perfect for busy weeknights or last-minute gatherings. The rich flavors of cinnamon and coffee create a delightful taste that’s hard to resist. Plus, the crinkly tops and powdered sugar coating give them a charming appearance. You’ll find yourself reaching for these cookies again and again, whether for a cozy night in or a sweet surprise for guests.

Ingredients for Cinnamon Coffee Crinkles

Gathering the right ingredients is the first step to creating these delightful Cinnamon Coffee Crinkles. Here’s what you’ll need:

  • All-purpose flour: The backbone of any cookie, providing structure and chewiness.
  • Baking powder: This leavening agent helps the cookies rise and become fluffy.
  • Baking soda: Another leavening agent that adds a bit of lift and helps with browning.
  • Salt: A pinch enhances the flavors and balances the sweetness.
  • Ground cinnamon: The star of the show, adding warmth and a cozy aroma.
  • Unsweetened cocoa powder: This gives the cookies a rich chocolate flavor, complementing the coffee.
  • Granulated sugar: Sweetens the dough and helps create that lovely crinkle effect.
  • Brown sugar: Adds moisture and a hint of caramel flavor, making the cookies chewy.
  • Unsalted butter: Provides richness and helps bind the ingredients together.
  • Large eggs: Essential for structure and moisture, giving the cookies a tender crumb.
  • Vanilla extract: A splash of vanilla enhances the overall flavor profile.
  • Brewed coffee: This is where the magic happens! It infuses the cookies with a deep coffee flavor.
  • Powdered sugar: For rolling the cookie dough balls, adding a sweet, snowy finish.

For those looking to mix things up, consider adding chocolate chips for an extra layer of flavor. If you prefer a stronger coffee taste, espresso can be a fantastic substitute for brewed coffee. You can find the exact measurements for these ingredients at the bottom of the article, ready for printing!

How to Make Cinnamon Coffee Crinkles

Now that you have all your ingredients ready, let’s dive into the fun part: making these delightful Cinnamon Coffee Crinkles! Follow these simple steps, and you’ll have a batch of cookies that will impress everyone.

Step 1: Preheat and Prepare

First things first, preheat your oven to 350°F (175°C). This ensures your cookies bake evenly. While the oven warms up, line two baking sheets with parchment paper. This will prevent the cookies from sticking and make cleanup a breeze.

Step 2: Mix Dry Ingredients

In a medium bowl, whisk together the all-purpose flour, baking powder, baking soda, salt, and ground cinnamon. This step is crucial as it evenly distributes the leavening agents and spices. Set this mixture aside for now; it’ll come into play shortly.

Step 3: Cream Butter and Sugars

In a large mixing bowl, cream together the softened butter, granulated sugar, and brown sugar. Use an electric mixer or a sturdy wooden spoon to beat them until the mixture is light and fluffy. This process incorporates air, giving your cookies that perfect texture.

Step 4: Add Eggs and Coffee

Next, beat in the eggs one at a time. Then, add the vanilla extract and cooled brewed coffee. Mix until everything is well combined. The coffee adds a rich depth of flavor that pairs beautifully with the cinnamon.

Step 5: Combine Wet and Dry Ingredients

Gradually add the dry ingredients to the wet mixture. Stir gently until just combined. Be careful not to overmix; you want your cookies to be tender and soft, not tough.

Step 6: Chill the Dough

Now, it’s time to chill the dough. Cover the bowl with plastic wrap and place it in the refrigerator for about 30 minutes. Chilling makes the dough easier to handle and helps the cookies maintain their shape while baking.

Step 7: Shape and Coat

Once the dough is chilled, scoop tablespoon-sized portions and roll them into balls. Then, roll each ball in powdered sugar until fully coated. This gives your cookies that signature snowy finish and adds a touch of sweetness.

Step 8: Bake

Place the dough balls on the prepared baking sheets, spacing them about 2 inches apart. Bake for 10-12 minutes, or until the edges are set and the tops are crinkled. Let them cool on the baking sheets for a few minutes before transferring them to wire racks to cool completely. Enjoy the heavenly aroma filling your kitchen!

Tips for Success

  • Make sure your butter is softened for easy creaming; it should be at room temperature.
  • Don’t skip the chilling step; it helps the cookies hold their shape and enhances flavor.
  • Use a cookie scoop for uniform dough balls, ensuring even baking.
  • Keep an eye on the baking time; cookies can go from perfect to overbaked quickly.
  • Store leftover cookies in an airtight container to maintain freshness.

Equipment Needed

  • Mixing bowls: A set of various sizes is ideal; you can use any large bowl if needed.
  • Electric mixer: A hand mixer works great, but a whisk and some elbow grease will do.
  • Baking sheets: Use any flat baking tray; just line it with parchment paper.
  • Cookie scoop: A tablespoon works well if you don’t have one.
  • Wire racks: If you don’t have these, a plate will suffice for cooling.

Variations

  • Nutty Delight: Add 1/2 cup of chopped walnuts or pecans for a crunchy texture that complements the soft cookies.
  • Gluten-Free Option: Substitute all-purpose flour with a gluten-free flour blend to make these cookies suitable for gluten-sensitive friends.
  • Spicy Twist: Incorporate a pinch of cayenne pepper or nutmeg for an unexpected kick that pairs well with the cinnamon.
  • Vegan Version: Replace eggs with flaxseed meal (1 tablespoon flaxseed meal + 2.5 tablespoons water per egg) and use coconut oil instead of butter.
  • Chocolate Lovers: Mix in 1/2 cup of chocolate chips or chunks for a rich, decadent treat that enhances the cocoa flavor.

Serving Suggestions

  • Pair these Cinnamon Coffee Crinkles with a hot cup of coffee or a creamy latte for a delightful afternoon treat.
  • Serve them warm with a scoop of vanilla ice cream for an indulgent dessert.
  • For a festive touch, arrange them on a decorative platter dusted with extra powdered sugar.

FAQs about Cinnamon Coffee Crinkles

As you embark on your baking adventure with these delightful Cinnamon Coffee Crinkles, you might have a few questions. Here are some common queries that can help you along the way:

Can I use instant coffee instead of brewed coffee?

Absolutely! Instant coffee can work in a pinch. Just dissolve it in a bit of hot water to mimic brewed coffee’s flavor.

How do I store leftover cookies?

Keep your Cinnamon Coffee Crinkles in an airtight container at room temperature. They’ll stay fresh for about a week—if they last that long!

Can I freeze the cookie dough?

Yes! You can freeze the dough before rolling it in powdered sugar. Just scoop the dough balls onto a baking sheet, freeze until solid, then transfer to a freezer bag. Bake straight from the freezer, adding a minute or two to the baking time.

What can I substitute for eggs in this recipe?

If you’re looking for an egg substitute, try using flaxseed meal mixed with water or unsweetened applesauce. Each egg can be replaced with 1 tablespoon of flaxseed meal mixed with 2.5 tablespoons of water or 1/4 cup of applesauce.

Can I make these cookies gluten-free?

Definitely! Just swap out the all-purpose flour for a gluten-free flour blend. Make sure it’s a 1:1 substitute for the best results.

Final Thoughts

Creating these Cinnamon Coffee Crinkles is more than just baking; it’s about crafting memories and sharing joy. The moment you pull them from the oven, the warm, inviting aroma fills your kitchen, wrapping you in a cozy embrace. Each bite offers a delightful blend of flavors that dance on your palate, making them perfect for any occasion. Whether you’re enjoying them solo with a cup of coffee or sharing them with loved ones, these cookies are sure to bring smiles. So, roll up your sleeves and let the magic of baking transform your day!

Ranis

Cinnamon Coffee Crinkles: Your New Favorite Cookie Recipe!

Cinnamon Coffee Crinkles are delicious cookies that combine the rich flavors of cinnamon and coffee, perfect for any occasion.
Prep Time 30 minutes
Cook Time 12 minutes
Total Time 42 minutes
Servings: 24 cookies
Course: Dessert
Cuisine: American
Calories: 130

Ingredients
  

  • 2 cups all-purpose flour
  • 1 teaspoon baking powder
  • 1 teaspoon baking soda
  • 1/2 teaspoon salt
  • 1 tablespoon ground cinnamon
  • 1/2 cup unsweetened cocoa powder
  • 1 cup granulated sugar
  • 1/2 cup packed brown sugar
  • 1/2 cup unsalted butter softened
  • 2 large eggs
  • 1 teaspoon vanilla extract
  • 1/2 cup brewed coffee cooled
  • 1 cup powdered sugar for rolling

Method
 

  1. Preheat your oven to 350°F (175°C) and line two baking sheets with parchment paper.
  2. In a medium bowl, whisk together the flour, baking powder, baking soda, salt, and ground cinnamon. Set aside.
  3. In a large mixing bowl, cream together the softened butter, granulated sugar, and brown sugar until light and fluffy.
  4. Beat in the eggs one at a time, followed by the vanilla extract and cooled brewed coffee, mixing until well combined.
  5. Gradually add the dry ingredients to the wet ingredients, mixing until just combined. Do not overmix.
  6. Chill the dough in the refrigerator for about 30 minutes to make it easier to handle.
  7. Once chilled, scoop tablespoon-sized portions of dough and roll them into balls. Roll each ball in powdered sugar until fully coated.
  8. Place the dough balls on the prepared baking sheets, spacing them about 2 inches apart.
  9. Bake for 10-12 minutes, or until the edges are set and the tops are crinkled. Let cool on the baking sheets for a few minutes before transferring to wire racks to cool completely.

Nutrition

Serving: 1cookieCalories: 130kcalCarbohydrates: 18gProtein: 2gFat: 5gSaturated Fat: 3gPolyunsaturated Fat: 2gCholesterol: 30mgSodium: 100mgFiber: 1gSugar: 10g

Notes

  • For a richer flavor, try adding 1/2 cup of chocolate chips to the dough before chilling.
  • You can also substitute the brewed coffee with espresso for a stronger coffee flavor.

Tried this recipe?

Let us know how it was!