Drunken Monkey Banana Rum Jam: A Irresistible Sweet Treat

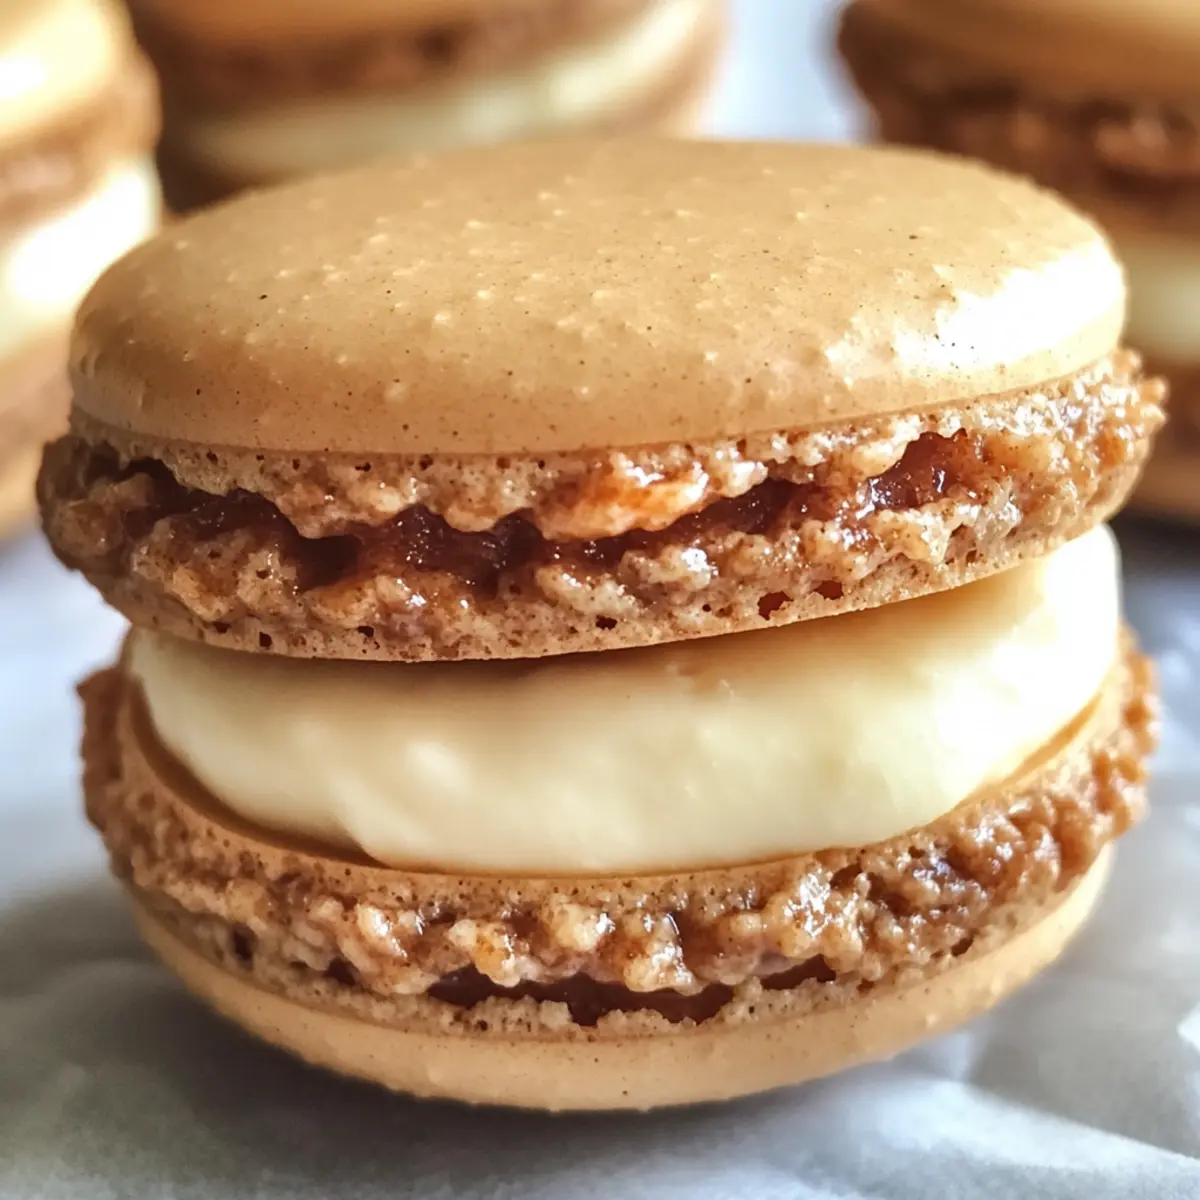
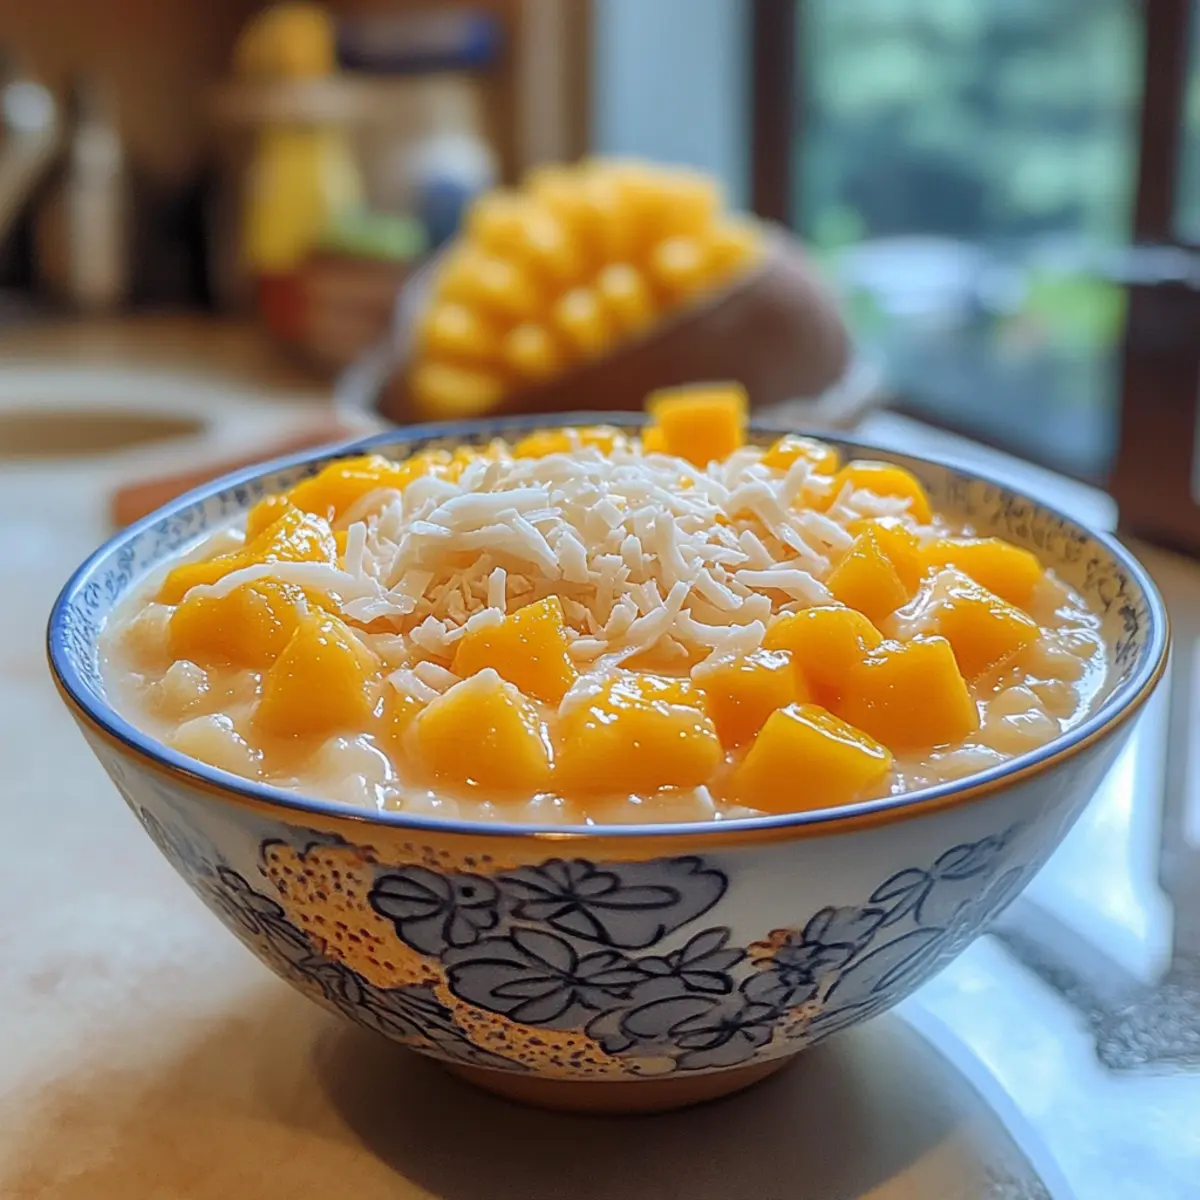
As I stood in my kitchen, the sweet scent of ripe bananas wafted through the air, sparking a delicious idea: creating Drunken Monkey Banana Rum Jam. This playful blend of overripe bananas, a generous splash of rum, and a hint of lemon is just the ticket to elevate your favorite breakfast staples or dessert. Not only is this banana jam incredibly easy to whip up, but it also makes a delightful addition to your pantry—perfect for those moments when you crave something special! Imagine spreading it on warm toast, drizzling it over pancakes, or even spooning it onto ice cream. It’s a fun way to bring a tropical twist into your cooking, and the flavors will leave your taste buds dancing! Ready to embark on this flavorful journey? Let’s dive in!

Why is This Jam So Unique?

Irresistible Flavor: With hints of rum and lemon, your taste buds will be in for a treat!

Easy to Make: In just a few simple steps, you can craft this sweet indulgence without fancy equipment or extensive skills.

Versatile Use: Perfect for spreading on toast, drizzling over pancakes, or simply topping your favorite ice cream, this jam elevates any dish.

Crowd-Pleasing Delight: Serve it at brunch or family gatherings, and watch it disappear in minutes! Check out our Crispy Air Fryer Chicken Drumsticks for an accompanying dish that will have everyone raving!

Customizable Options: Feeling adventurous? Experiment with adding spices or using different fruits to suit your taste.

This Drunken Monkey Banana Rum Jam is not just a condiment; it’s a culinary adventure waiting to happen!

Drunken Monkey Banana Rum Jam Ingredients

For the Jam

  • Overly Ripe Bananas – Use very ripe bananas for optimal sweetness and texture in your banana jam.
  • Lemon Juice – Fresh lemon juice adds brightness and balances the sweetness of the jam.
  • Granulated Sugar – Sweetens the mix, but you can swap it with a low-calorie sweetener if desired.
  • Brown Sugar – Enhances flavor with a rich, caramel-like depth; dark brown sugar offers a deeper taste.
  • Water – Provides the base for creating the syrup that holds all your ingredients together.
  • Vanilla Extract – Infuses a warm aroma; consider using rum extract for an extra punch of flavor.
  • Cinnamon – Adds warmth and spice to the jam; adjust quantity based on your flavor preferences.
  • Rum (or Rum Extract) – Key to giving this jam its unique racy flavor; omit for a non-alcoholic version or stick with rum extract.

Now that you have all the essential ingredients, you’re ready to create the truly unique Drunken Monkey Banana Rum Jam that elevates any dish!

Step‑by‑Step Instructions for Drunken Monkey Banana Rum Jam

Step 1: Prepare Bananas
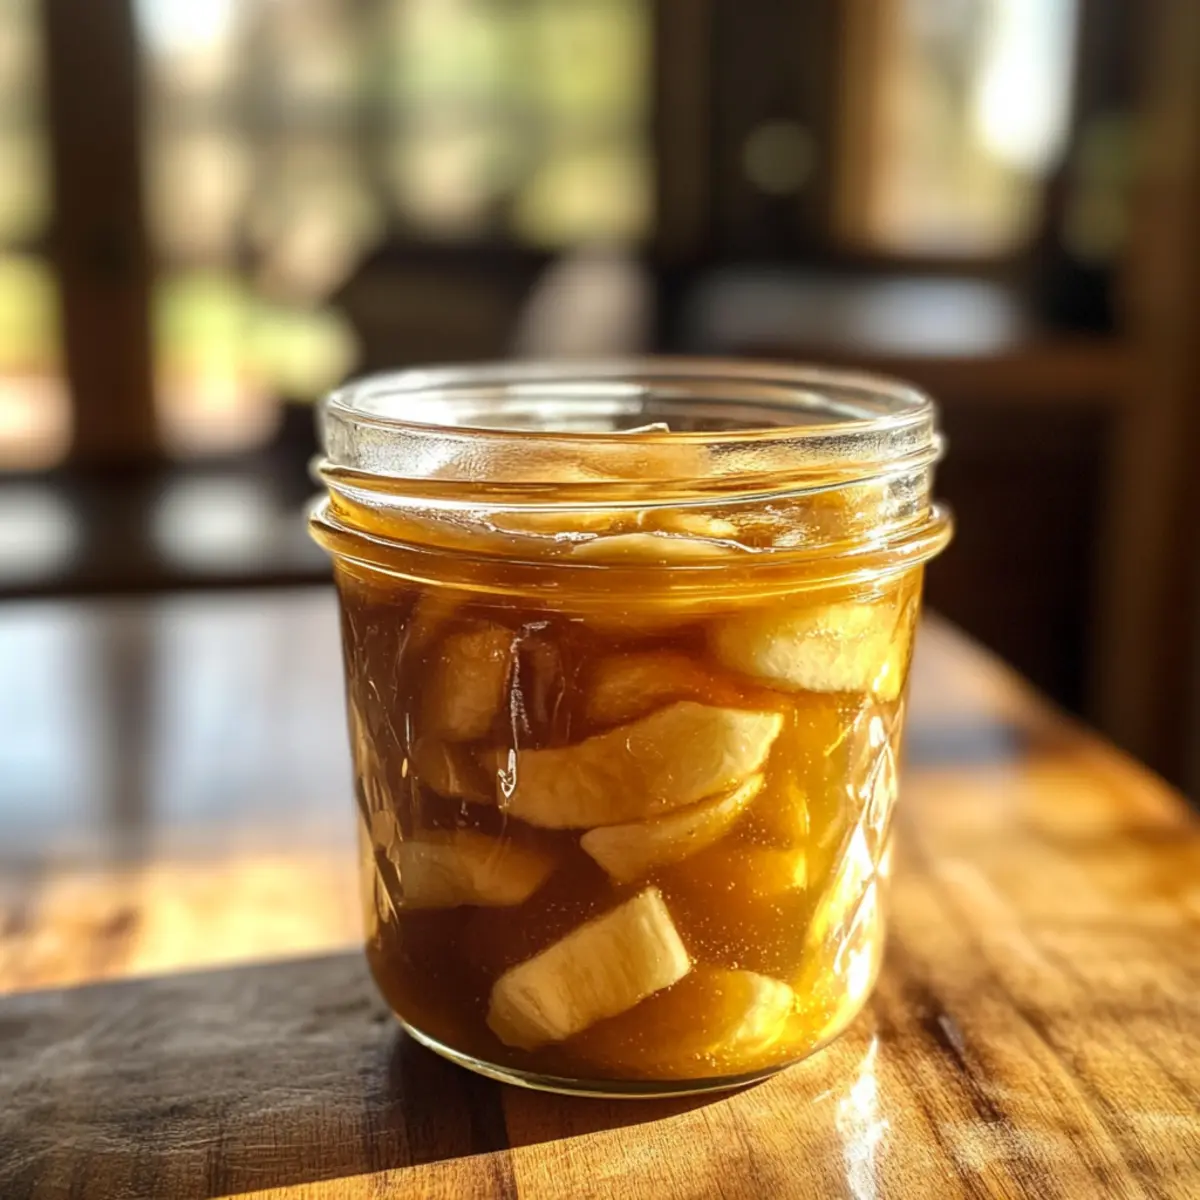
Peel and roughly chop 4–5 overly ripe bananas into a medium bowl. Drizzle with fresh lemon juice to add brightness and prevent browning. Set the bowl aside while you prepare the other ingredients, ensuring the bananas remain vibrant and ready for the delicious Drunken Monkey Banana Rum Jam.

Step 2: Make Sugar Syrup
In a medium-large skillet, add about ½ cup of water and place it over medium-high heat. Whisk in ½ cup of granulated sugar and continue stirring until fully dissolved. Bring the mixture to a low boil, watching for a slight bubbling, which indicates the sugar syrup is ready for the mashed bananas.

Step 3: Combine Ingredients
Once the sugar syrup is bubbling, carefully stir in the prepared bananas, 1 teaspoon of vanilla extract, a pinch of cinnamon, and ½ cup of rum. Mix well, ensuring the bananas are fully incorporated into the syrup. This combination is crucial for achieving the depth of flavor in your Drunken Monkey Banana Rum Jam.

Step 4: Simmer
Reduce the heat to low and allow the mixture to simmer gently for about 30 minutes. Stir occasionally to prevent sticking and continue mashing the bananas as the mixture thickens. You’ll know it’s done when the jam starts to coat the back of a spoon, achieving that luscious, gooey consistency.

Step 5: Final Texture Check
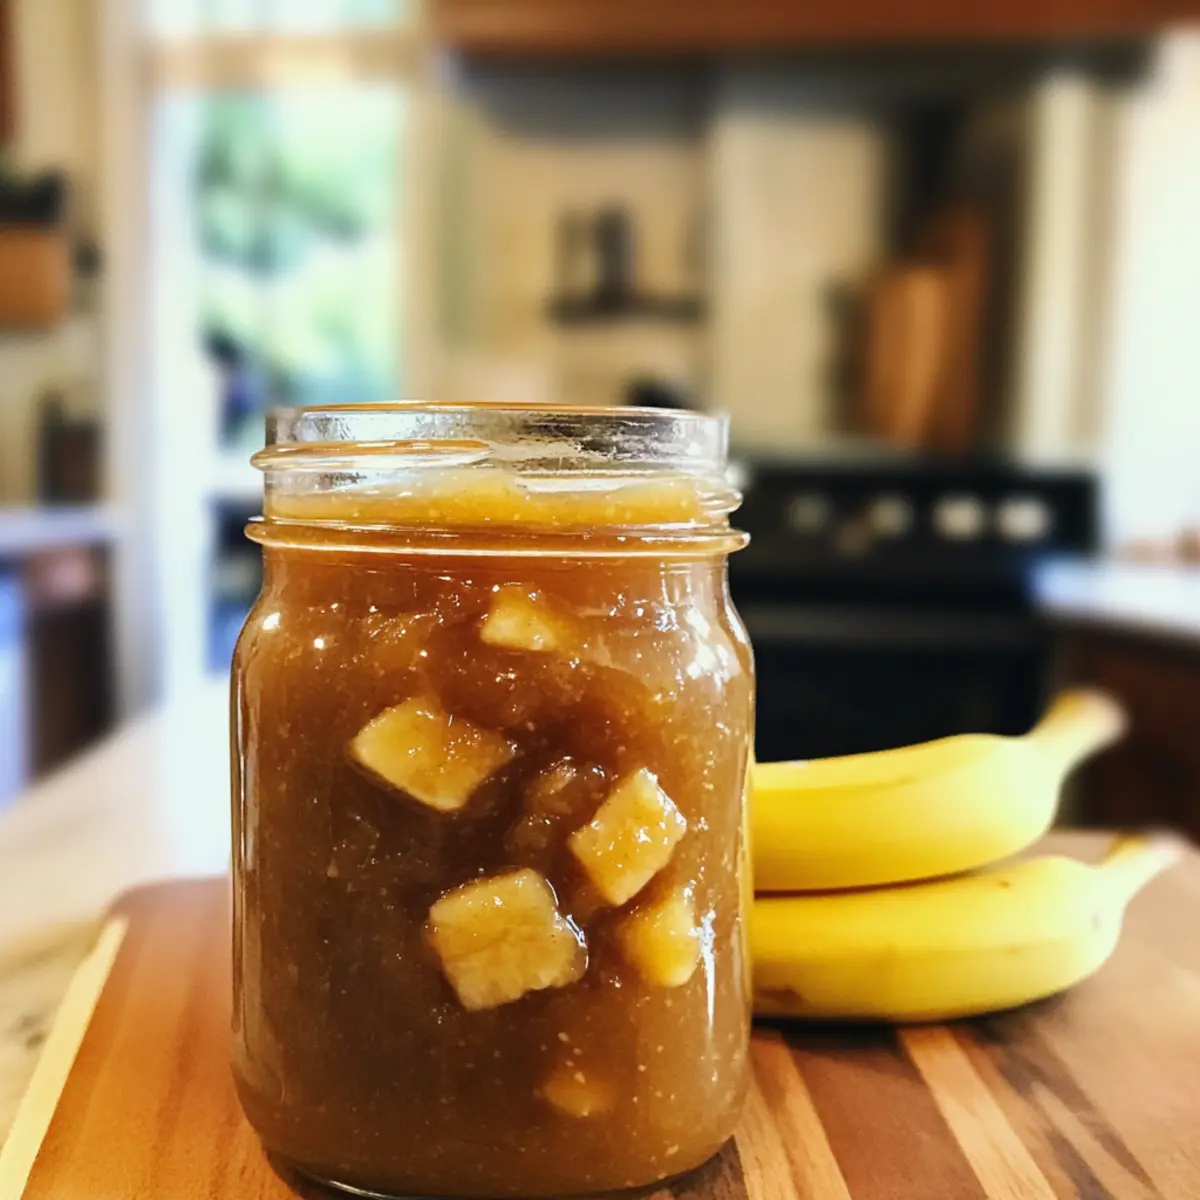
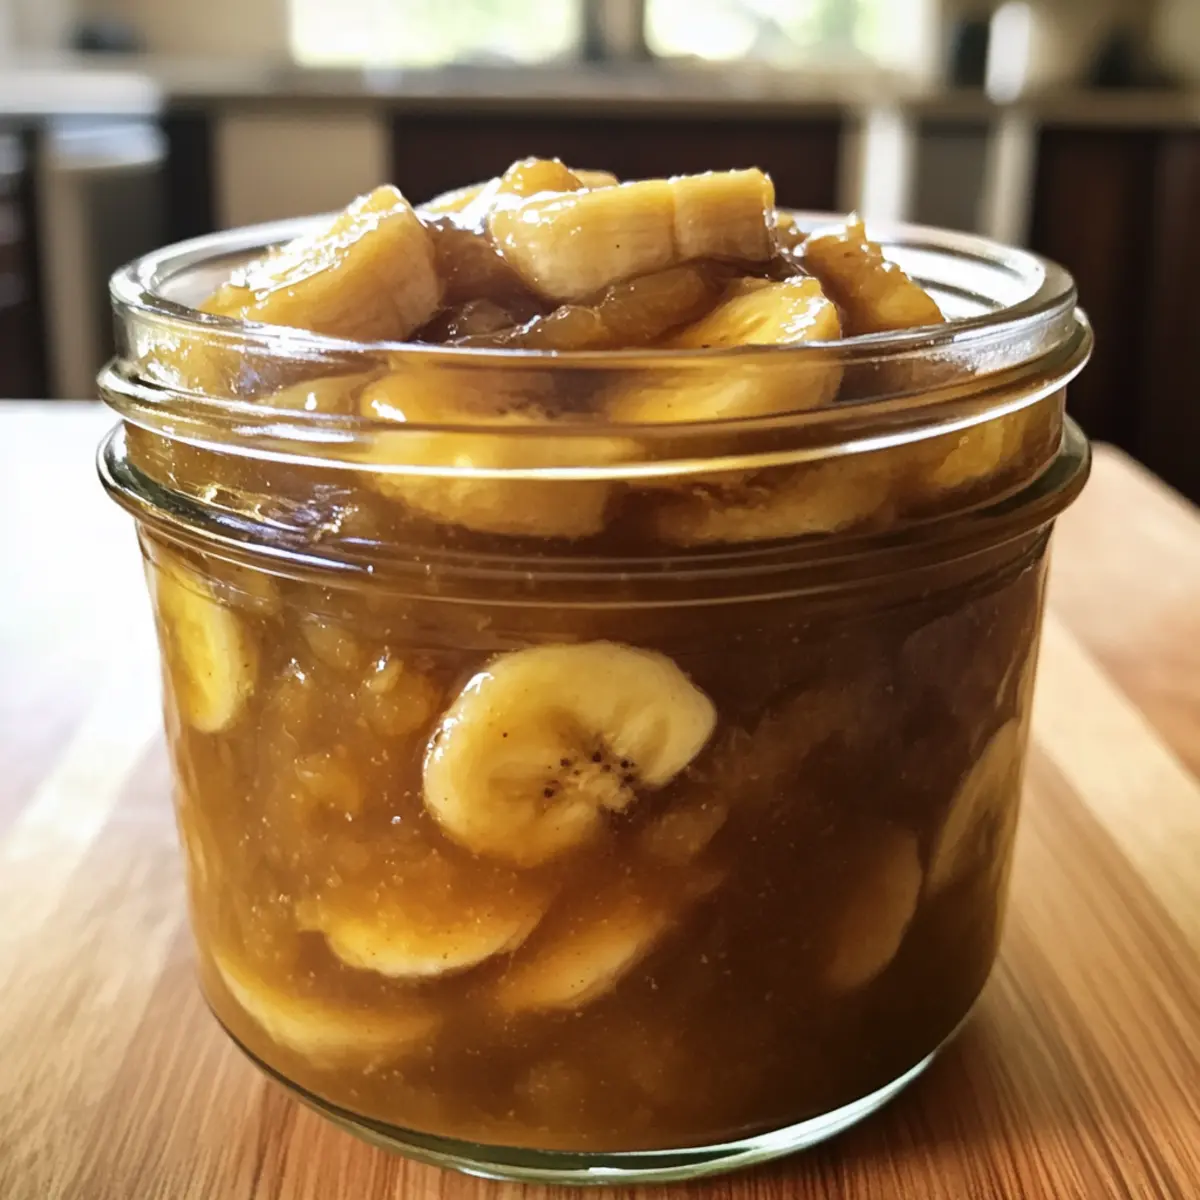
After 30 minutes, check the texture of the Drunken Monkey Banana Rum Jam; it should be thick and glossy with soft banana chunks throughout. Remove the skillet from heat and prepare your sterilized glass jars for pouring. This step ensures you’ll have a delightful treat ready to store or share.

Step 6: Store
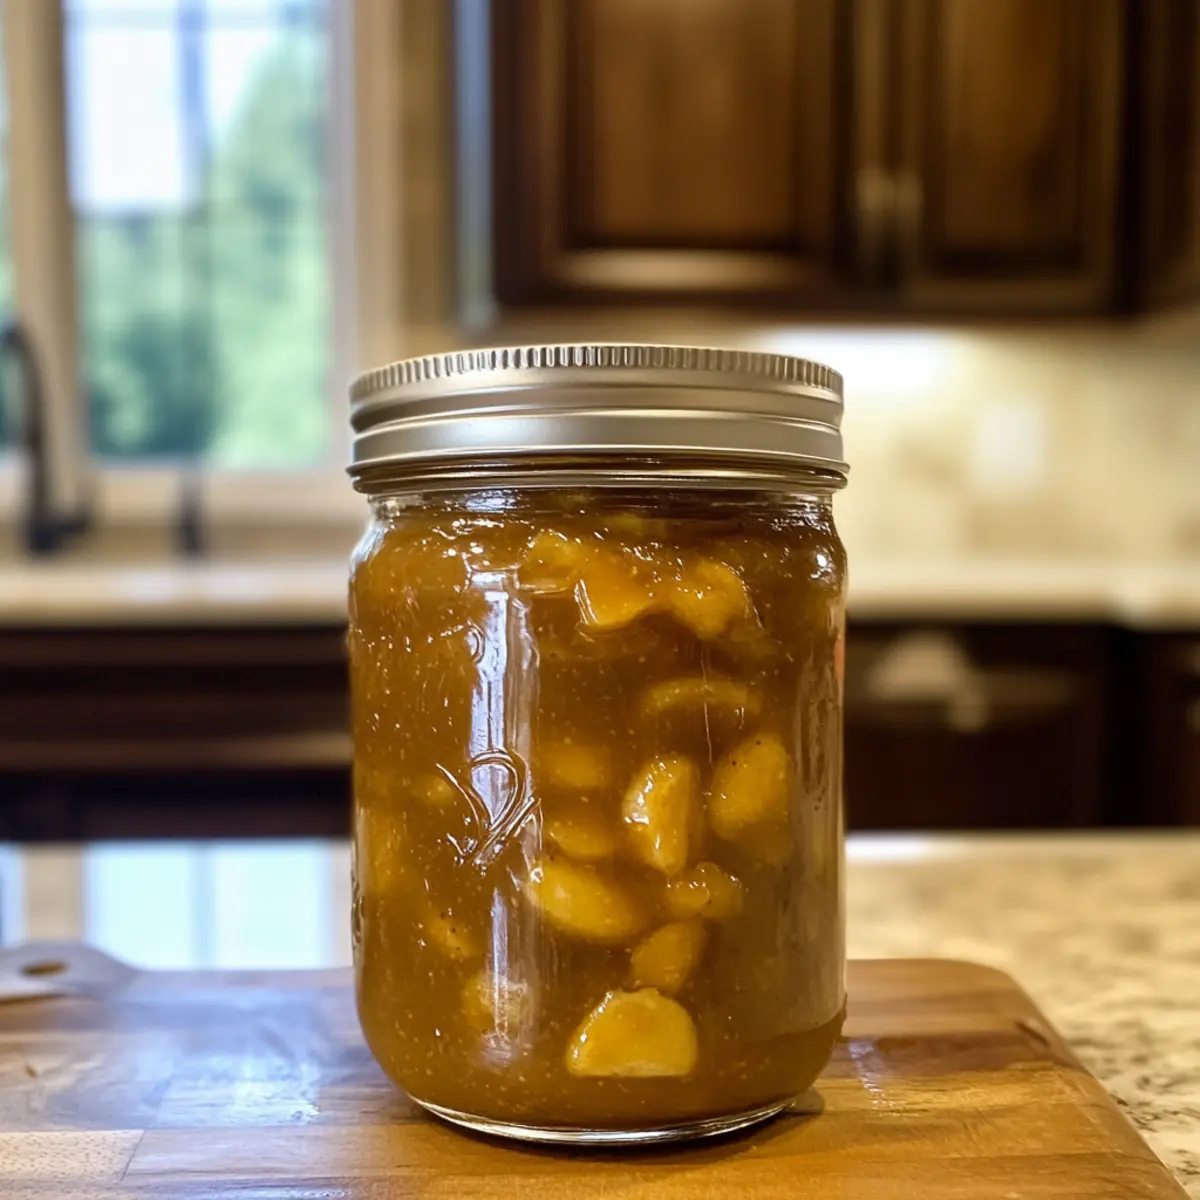
Carefully spoon the warm jam into sterilized glass jars, sealing them promptly once filled. Allow the jars to cool to room temperature before refrigerating. This tropical indulgence can be enjoyed within a month, complementing your breakfast or dessert creations perfectly.

How to Store and Freeze Drunken Monkey Banana Rum Jam

Fridge: Store your Drunken Monkey Banana Rum Jam in an airtight container in the refrigerator for up to one month. Ensure the container is sealed tightly to maintain freshness.

Freezer: For long-term storage, freeze the jam in freezer-safe containers or bags. It can last up to six months in the freezer. Just leave some space for expansion!

Defrosting: When ready to enjoy, transfer the frozen jam to the fridge for several hours or overnight to thaw. Stir well before serving to restore its creamy texture.

Shelf Stability: If canning your jam, follow proper procedures to achieve a vacuum seal. Properly canned, it can last up to a year in a cool, dark place.

Expert Tips for Drunken Monkey Banana Rum Jam

  • Banana Ripeness: Use very ripe bananas for the best sweetness and flavor. Under-ripe bananas will result in a less tasty jam.
  • Stirring Matters: Keep stirring the mixture while it simmers to prevent it from sticking to the bottom of the skillet. This ensures a smooth, delicious Drunken Monkey Banana Rum Jam.
  • Storage Tips: Allow the jam to cool completely before sealing the jars. This helps achieve a proper vacuum seal, ensuring freshness for longer.
  • Custom Flavoring: Feel free to experiment with other spices or fruits; adding a dash of nutmeg or replacing bananas with peaches could create delightful variations!
  • Use Fresh Ingredients: For the best flavor, always opt for fresh lemon juice and high-quality rum or rum extract. They make a world of difference in the taste.

What to Serve with Drunken Monkey Banana Rum Jam?

Indulge in a meal that brings joy and delight to your table with flavorful pairings that enhance this sweet condiment.

  • Fluffy Pancakes: Light and airy, pancakes become a luxurious breakfast treat when topped with this rum-infused jam.

  • Vanilla Ice Cream: A scoop of creamy vanilla ice cream drizzled with the jam creates an unforgettable sundae experience.

  • French Toast Stacks: Add a playful twist to classic French toast by layering it with this tropical banana rum goodness.

  • Crispy Bacon: The sweet and salty combination of bacon alongside the jam makes for a delicious contrast that excites the palate.

  • Yogurt Parfaits: Layer tangy yogurt with fresh fruits and a generous spoonful of this jam for a refreshing breakfast option.

  • Cheesecake Slices: Swap traditional toppings with a spoonful of jam for a fruit-forward twist that elevates your cheesecake experience.

  • Hot Tea or Coffee: Pair this jam with a cozy cup of tea or coffee for a comforting afternoon treat, balancing sweet flavors with warmth.

  • Bakery Croissants: Flaky croissants spread with this jam create a café-inspired breakfast that feels indulgent and satisfying.

Feel free to mix and match to discover your favorite combinations that make every bite special!

Make Ahead Options

These Drunken Monkey Banana Rum Jam preparations are perfect for busy home cooks looking to save time without sacrificing flavor! You can prepare the banana mixture, including peeling, chopping, and drizzling with lemon juice, up to 24 hours in advance; simply refrigerate it to maintain freshness. Additionally, the sugar syrup can be made ahead of time and stored in an airtight container for up to 3 days, ensuring you have the essential base ready to go. When you’re ready to finish the jam, combine the prepared bananas and syrup, add your rum, and simmer for about 30 minutes. You’ll have a delightful dessert topping in no time, all while keeping the flavors just as delicious!

Drunken Monkey Banana Rum Jam Variations

Customize your jam adventure with these delightful twists that will leave your taste buds singing!

  • Low-Sugar: Substitute granulated sugar with a low-calorie sweetener to fit your dietary preferences without sacrificing sweetness.
  • Tropical Twist: Add 1 teaspoon of coconut extract for a fresh, island-inspired flavor that complements the rum beautifully.
  • Spicy Kick: Include a pinch of cayenne pepper for a surprising heat that will elevate your jam from sweet to sizzle!
    Incorporating a touch of spice can transform the ordinary into the extraordinary, impressing your guests with every bite.
  • Nutty Addition: Stir in ¼ cup of chopped walnuts or pecans for a delightful crunch and added texture. It brings an unexpected twist that makes your jam even more special.
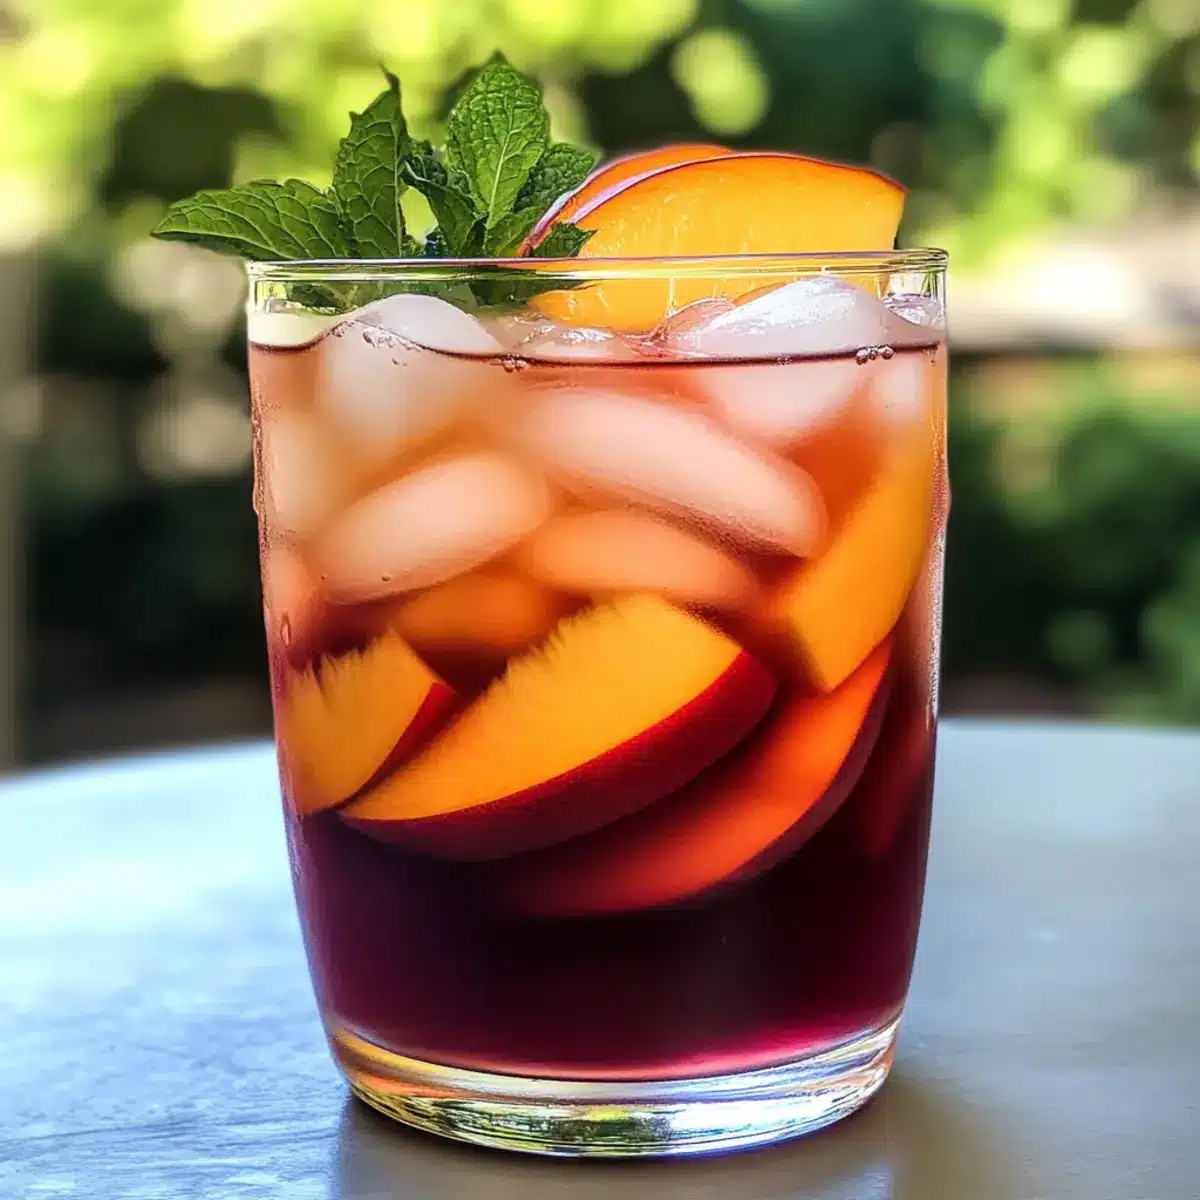
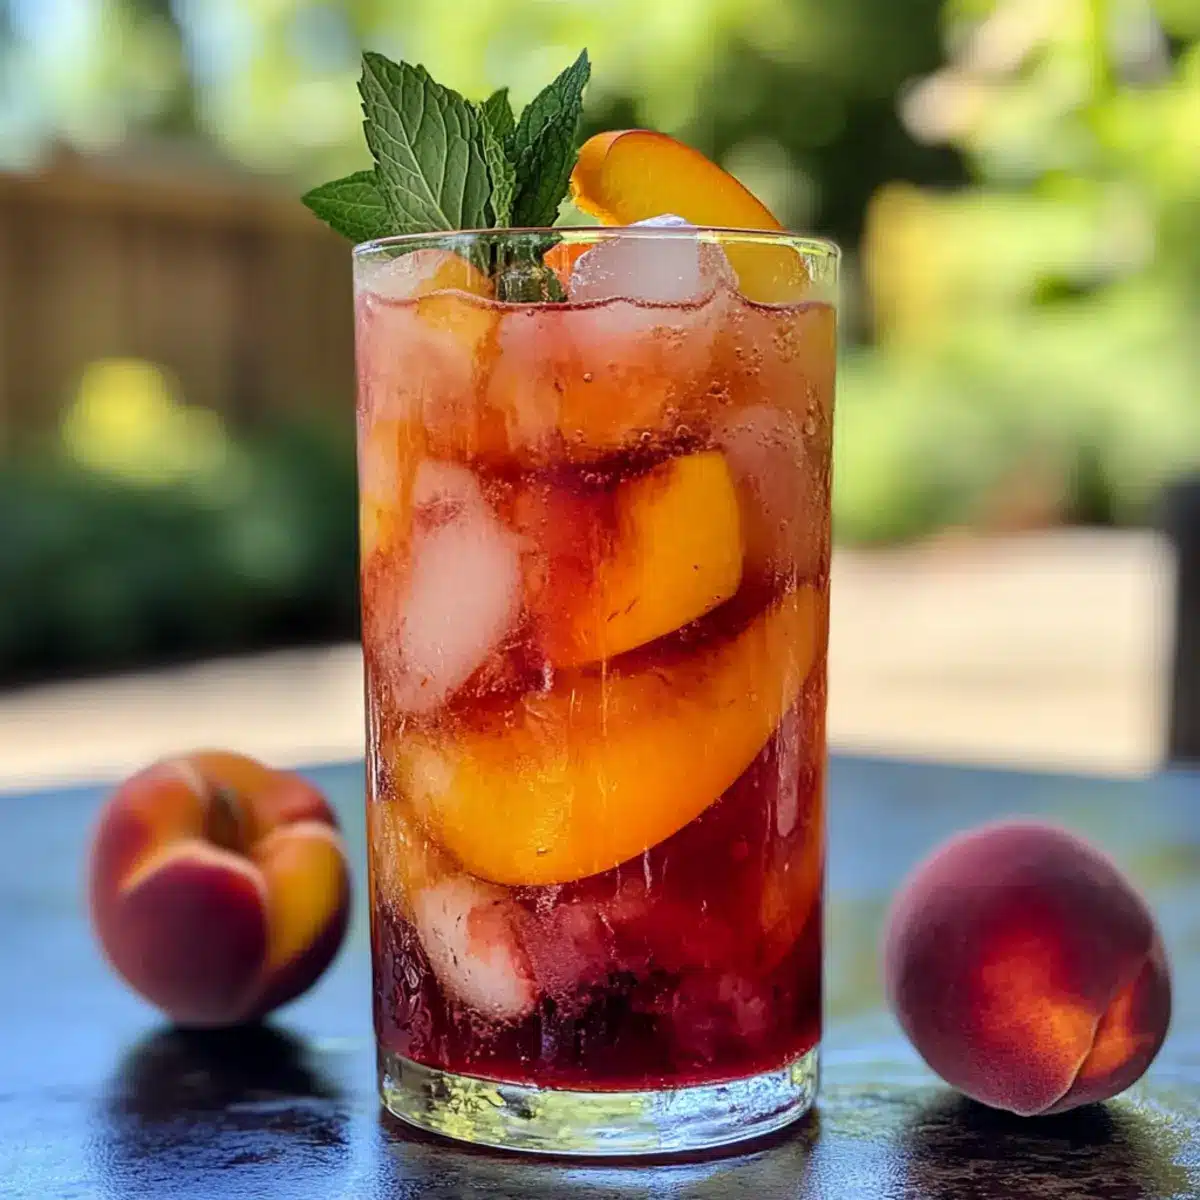
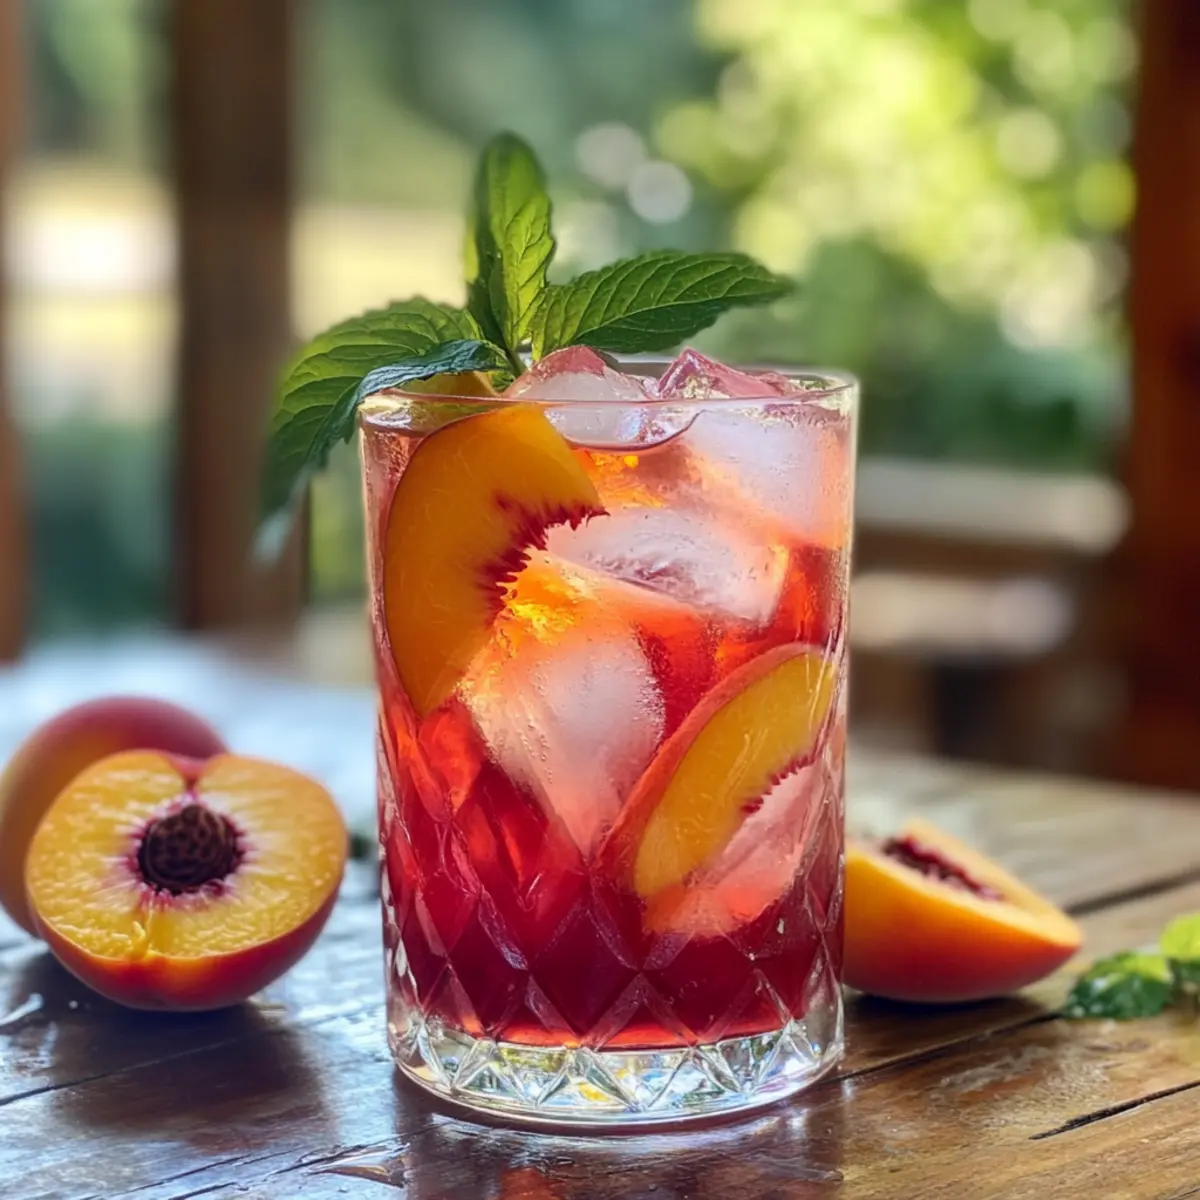
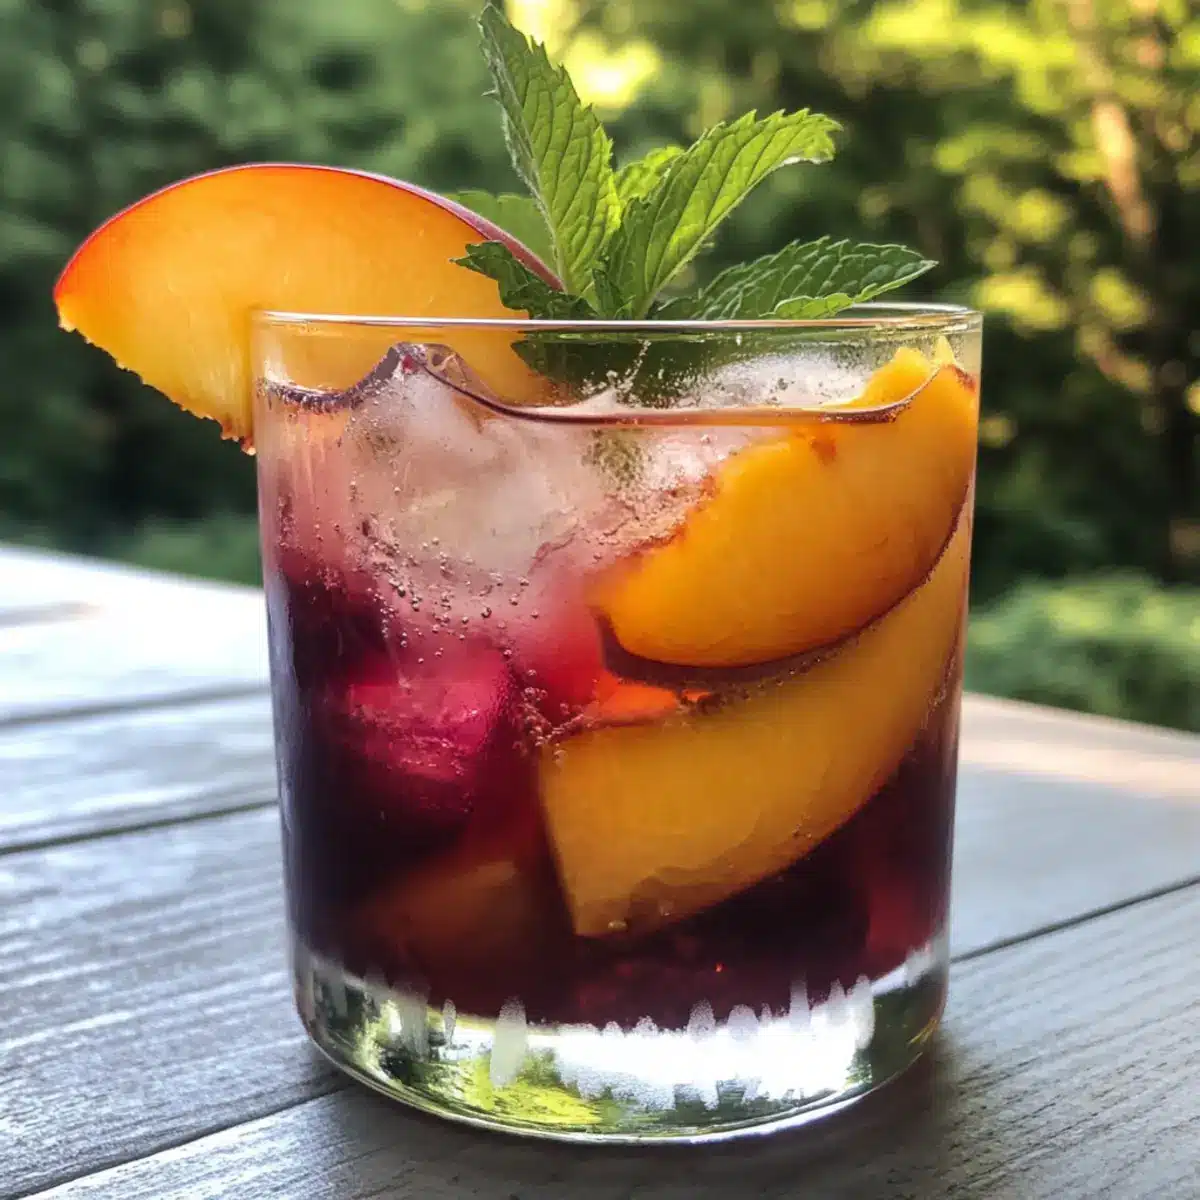
  • Fruit Fusion: Experiment by replacing bananas with ripe peaches or apricots for a fresh fruity upgrade. This alternative will create a unique jam that’s equally delightful.
  • Zesty Flavor: Toss in a teaspoon of orange zest for that bright citrus note, which pairs beautifully with the rum and spices.
  • Herbal Herbal: Add fresh mint leaves during cooking for a refreshing finish. Strain out the leaves before storing for a lovely herbal hint.
  • Chocolate Delight: For an indulgent twist, mix in a tablespoon of cocoa powder or chocolate chips just before storing the jam. This will add a rich depth that pairs perfectly with desserts.

Feel free to get creative, and for more exceptional recipes, check out our delightful Crispy Air Fryer Chicken Drumsticks. You might just find your new favorite pairing!

Drunken Monkey Banana Rum Jam Recipe FAQs

What type of bananas should I use for this recipe?
Absolutely, for the Drunken Monkey Banana Rum Jam, you should use very ripe bananas. Those with dark spots or even a few blackened patches are perfect, as they provide the best sweetness and ideal texture for a rich, flavorful jam.

How long can I store the jam once it’s made?
You can store your Drunken Monkey Banana Rum Jam in an airtight container in the refrigerator for up to one month. Make sure the container is sealed tightly to help maintain its delightful flavor throughout!

Can I freeze Drunken Monkey Banana Rum Jam for later use?
Yes, you can freeze this delicious banana jam! Transfer it to freezer-safe containers or bags, leaving a bit of space at the top for expansion. It can last up to six months in the freezer. When you’re ready to enjoy it, simply transfer it to the fridge for several hours or overnight to thaw.

What should I do if my jam is too runny?
If your jam turns out runny, don’t fret! Simply return it to the skillet, bring it to a gentle boil, and let it simmer uncovered for another 10-15 minutes, stirring frequently—this will allow some of the liquid to evaporate and thicken your jam to the desired consistency.

Can I make this jam without rum?
Absolutely! If you’re looking for a non-alcoholic version, just omit the rum and replace it with rum extract for flavor. Alternatively, a splash of vanilla extract can also be used for a different yet delightful taste.

Is this jam suitable for dietary restrictions like allergies or pets?
While the Drunken Monkey Banana Rum Jam is generally safe for most diets, be cautious with allergies—particularly to tree nuts or gluten, as ingredients vary. It’s always best to check specific dietary needs, especially if sharing with pets, as bananas are safe in moderation; however, avoid the rum entirely when giving any to pets!

Drunken Monkey Banana Rum Jam

Drunken Monkey Banana Rum Jam: A Irresistible Sweet Treat

Drunken Monkey Banana Rum Jam is a delightful blend of bananas and rum, perfect for breakfast or dessert.
Prep Time 15 minutes
Cook Time 30 minutes
Total Time 45 minutes
Servings: 4 jars
Course: Dessert
Cuisine: Tropical
Calories: 50

Ingredients
  

For the Jam
  • 4-5 pieces Overly Ripe Bananas Use very ripe bananas for optimal sweetness and texture.
  • 1 tablespoon Lemon Juice Fresh lemon juice adds brightness.
  • ½ cup Granulated Sugar Sweetens the mix.
  • ½ cup Brown Sugar Enhances flavor with rich depth.
  • ½ cup Water Provides the base for the syrup.
  • 1 teaspoon Vanilla Extract Infuses a warm aroma.
  • 1 pinch Cinnamon Adjust based on your flavor preferences.
  • ½ cup Rum Key for unique flavor; can use rum extract.

Equipment

  • Medium Bowl
  • Medium-Large Skillet
  • Whisk
  • sterilized glass jars

Method
 

Step-by-Step Instructions
  1. Peel and roughly chop the bananas. Drizzle with lemon juice and set aside.
  2. In a skillet, heat water and whisk in granulated sugar until dissolved. Bring to a low boil.
  3. Stir in bananas, vanilla extract, cinnamon, and rum. Mix well.
  4. Reduce heat and simmer for about 30 minutes, stirring occasionally until thick.
  5. Check the jam's texture; it should be thick and glossy. Prepare jars for pouring.
  6. Spoon the jam into jars, seal, and cool to room temperature before refrigerating.

Nutrition

Serving: 1tablespoonCalories: 50kcalCarbohydrates: 13gSodium: 1mgPotassium: 30mgSugar: 10gVitamin C: 1mgCalcium: 1mg

Notes

Ensure to use fresh ingredients for the best flavor. For longer storage, jam can be frozen.

Tried this recipe?

Let us know how it was!

Delicious Coconut Mochi: A Chewy Delight You Can Make at Home

As the afternoon sun filters through my kitchen window, I can almost taste the sweet, tropical breeze that comes with a delightful batch of Coconut Mochi filled with red bean paste. This unique dessert is a crowd-pleaser, combining chewy bliss with a creamy center that’s sure to impress family and friends. With its simple, gluten-free ingredients, making coconut mochi becomes an easy culinary adventure that allows you to stray from the typical fast food rut. The joy of crafting these little bundles of joy not only brings a subtle holiday spirit but also opens up a world of flavorful variations—think luscious mango or nut-infused surprises! Who else is ready to dive into this soft and delightful treat?

Why is Coconut Mochi a Must-Make?

Irresistible Flavor: The combination of coconut milk and sweet red bean paste creates an unforgettable taste that’s both rich and satisfying.

Easy to Make: With just a few straightforward steps, you can create these chewy delights—even beginners will feel like pros!

Versatile Fillings: Don’t stop at red bean—try filling your mochi with mango or sweet nuts for a different twist.

A Fun Activity: Making coconut mochi can be a delightful way to involve friends or kids in the kitchen!

Experience the joy of homemade desserts that break free from the fast food cycle. For more delightful recipes, check out this refreshing Pineapple Coconut Mojito or treat yourself to a luscious Mango Coconut Pudding.

Coconut Mochi Ingredients

  • For the Mochi Dough
    Glutinous Rice Flour – Essential for that signature sticky texture; find it at Asian grocery stores or online.
    Cornstarch – Prevents sticking and enhances texture; no substitutes required here.
    White Sugar – Sweetens the dough beautifully; feel free to use alternative sweeteners if needed.
    Coconut Milk – Adds a creamy coconut flavor; can be swapped with any plant-based milk for a dairy-free version.
    Coconut Oil (or Butter) – Provides richness and aids in dough consistency; use a neutral oil as a substitute if you like.

  • For the Filling
    Red Bean Paste – The star filling that delivers sweetness; opt for homemade or store-bought for ease.

  • For the Coating
    Shredded Coconut – This adds a delightful tropical touch; choose between sweetened or unsweetened, based on your preference.

With these Coconut Mochi ingredients on hand, you’re all set to create a dessert that’s as exciting to make as it is to eat!

Step‑by‑Step Instructions for Coconut Mochi

Step 1: Prepare the Batter
In a mixing bowl, whisk together the glutinous rice flour, cornstarch, and white sugar until well combined. Gradually pour in the coconut milk while continuously stirring to create a smooth batter. Once blended, strain the mixture through a fine sieve to remove any lumps, ensuring a velvety texture for your Coconut Mochi.

Step 2: Steam Mixture
Set up a steamer by bringing water to a boil in a pot. Pour the smooth batter into a heatproof dish lined with parchment paper, then place the dish in the steamer basket. Cover and steam the batter for 25 minutes until it’s firm and cooked through—test doneness by inserting a chopstick; it should come out clean.

Step 3: Cool Dough
After steaming, carefully remove the dish from the steamer and let the dough cool for about 10 minutes. Once slightly cooled, add the coconut oil and mix thoroughly until fully incorporated. Allow the dough to cool even more by wrapping it in plastic wrap, which helps maintain moisture while you prepare for shaping the mochi.

Step 4: Shape Mochi
Once the dough is cool enough to handle, divide it into 10 equal pieces. Roll each piece into a ball, then flatten it into a circle on a lightly dusted surface. Place a small ball of red bean paste in the center of each circle, carefully fold over the edges to seal, and gently roll the filled mochi in shredded coconut to finish.

Step 5: Finish
To serve your freshly made Coconut Mochi, place each piece in a cupcake liner for a charming presentation. Allow them to come to room temperature, which enhances the soft, chewy texture of the mochi. Enjoy these delightful treats with family and friends!

Expert Tips for Coconut Mochi

  • Use Gloves: Handling mochi dough can get sticky! Wearing gloves will prevent the dough from clinging to your hands during shaping.

  • Check Consistency: If your mochi dough is too dry, mix in a bit more coconut milk. Conversely, if it’s too wet, add a little more cornstarch for that perfect texture.

  • Seal Well: Ensure the edges of your mochi are tightly sealed after adding the red bean paste to avoid spills while rolling in shredded coconut.

  • Chill Before Serving: For the best texture, chill your coconut mochi in the fridge for about 30 minutes before serving. This will enhance the chewy experience!

  • Experiment with Fillings: Don’t be afraid to try different fillings! Coconut Mochi can be delicious with mango puree or nut mixes for exciting flavor variations.

How to Store and Freeze Coconut Mochi

Fridge: Store your coconut mochi in an airtight container in the fridge for up to 3–4 days. This keeps them fresh while maintaining their chewy texture.

Freezer: For long-term storage, freeze the mochi by wrapping each piece in plastic wrap and placing them in a freezer-safe bag. They can last for up to 3 months this way.

Reheating: To enjoy your frozen coconut mochi, thaw them in the fridge overnight, then microwave for about 10-15 seconds to restore their soft, chewy goodness.

Wrapping: For best results, ensure the mochi is wrapped well before freezing to prevent freezer burn and preserve flavor.

What to Serve with Coconut Mochi Filled with Red Bean Paste

Indulge your senses by creating a full meal that pairs perfectly with the tender sweetness of this delightful treat.

  • Green Tea: The subtle bitterness of green tea balances the sweetness beautifully, making it a timeless accompaniment to your mochi.
  • Mango Sticky Rice: This dessert shares similar textural delights and tropical flavors, enhancing the experience of both treats.
  • Sweetened Coconut Chia Pudding: Creamy and rich, this pudding adds a nourishing touch to your dessert table, complementing the coconut flavor of the mochi.
  • Fruity Sorbet: A refreshing scoop of mango or passionfruit sorbet provides a fruity contrast that enlivens your palate between bites of mochi.
  • Steamed Dumplings: Serve a savory option alongside your coconut mochi; the contrasting flavor profiles create a harmonious tasting experience.
  • Fruit Salad: Use fresh, vibrant fruits like strawberries or kiwi to introduce brightness and a hint of acidity, refreshing your palate after the sweet mochi.
  • Iced Matcha Latte: The creamy, earthy tones of matcha pair smoothly with the sweet, chewy delight of coconut mochi, making for a delightful combination.

Make Ahead Options

Preparing the delightful Coconut Mochi ahead of time is a savvy way to save those precious minutes during busy weeks! You can make the mochi dough up to 24 hours in advance by following the first three steps of the recipe, then wrapping the cooled dough tightly in plastic wrap and refrigerating it. This helps maintain its delightful texture. When you’re ready to shape the mochi, simply take the dough out, divide, and proceed to fill with red bean paste as instructed. For ultimate freshness, enjoy the mochi within 3 days after making, or freeze them for up to 3 months—just remember to wrap them well to prevent freezer burn. Reheat any refrigerated mochi in the microwave for a soft, chewy treat that tastes just as delicious as the day you made it!

Coconut Mochi: Creative Variations

Feel free to get adventurous in the kitchen! Customizing your coconut mochi allows you to explore delightful new flavors and textures.

  • Mango Bliss: Substitute red bean paste with luscious mango puree for a tropical twist that’s bursting with sweetness.
  • Nutty Delight: Incorporate finely chopped nuts like almonds or cashews into the filling for a delightful crunch and increased texture.
  • Dairy-Free: Replace coconut milk with almond milk for a nuttier flavor profile that still celebrates coconut’s charm.
  • Choco-Lover: Add cocoa powder to the dough for a chocolatey variation, filling it with chocolate ganache for a heavenly treat.
  • Spicy Kick: Mix in a pinch of ground cinnamon or cayenne pepper into the filling for a warm, bold flavor that surprises the palate.
  • Coconut Magic: Enhance the coconut flavor by using toasted shredded coconut in the dough for extra depth and texture.
  • Fruit Fusion: Experiment with other fruit purees such as passion fruit or berry blends for vibrant, colorful fillings!
  • Matcha Twist: Blend matcha powder into the dough for a unique green tea flavor, pairing beautifully with red bean or a sweet white chocolate filling.

For a refreshing drink to serve alongside your coconut mochi, try whipping up a Pineapple Coconut Mojito. And for an indulgent dessert option, don’t miss the creamy goodness of our Mango Coconut Pudding.

Coconut Mochi Recipe FAQs

What type of glutinous rice flour should I use?
Absolutely! Look for sweet rice flour or glutinous rice flour specifically labeled for mochi, available at Asian grocery stores or online. This is crucial for achieving that signature chewy texture in your Coconut Mochi.

How should I store leftover mochi?
Very! To keep your coconut mochi fresh, store them in an airtight container in the fridge for up to 3-4 days. This method retains their delightful chewiness, making them just as enjoyable when you’re ready to indulge again!

Can I freeze Coconut Mochi? What’s the best way?
Absolutely! To freeze, wrap each mochi piece tightly in plastic wrap and then place them in a freezer-safe bag. This will keep them fresh for up to 3 months. When you’re ready to enjoy them, thaw in the fridge overnight, then pop them in the microwave for 10-15 seconds to restore their delectable texture.

What if my mochi dough is too sticky?
If you find yourself in this sticky situation, don’t worry! You can sprinkle a bit more cornstarch into the mix, kneading it gently until you achieve the desired consistency. If it’s too dry, mixing in a small amount of coconut milk will help. Remember, keep your hands and work surface lightly dusted with cornstarch while shaping to prevent sticking!

Are there any dietary considerations for pets or allergies?
Definitely! While coconut mochi is vegetarian and gluten-free, always be cautious about ingredients if serving to others. The red bean paste should be checked for added sugars or preservatives that might not be pet-friendly. Furthermore, if anyone has allergies to coconut or nuts, try alternative fillings with caution—perhaps use fruit purees instead!

How do I know when the three mixtures are properly combined?
A great question! Start by mixing glutinous rice flour, cornstarch, and sugar in a bowl. Once you gradually add the coconut milk, you’ll know they’re well combined when the batter is smooth and free of lumps. Straining it through a fine sieve is a good practice for an impeccable texture, ensuring each bite of your Coconut Mochi is a delight!

Coconut Mochi

Delicious Coconut Mochi: A Chewy Delight You Can Make at Home

Experience the joy of making Coconut Mochi, a gluten-free dessert filled with sweet red bean paste that brings a tropical twist to your table.
Prep Time 15 minutes
Cook Time 25 minutes
Cooling Time 10 minutes
Total Time 50 minutes
Servings: 10 pieces
Course: Dessert
Cuisine: Asian
Calories: 120

Ingredients
  

For the Mochi Dough
  • 1 cup Glutinous Rice Flour Essential for that signature sticky texture.
  • 2 tablespoons Cornstarch Prevents sticking and enhances texture.
  • 1/4 cup White Sugar Sweetens the dough beautifully.
  • 1 cup Coconut Milk Adds creamy coconut flavor, can use plant-based milk.
  • 2 tablespoons Coconut Oil Provides richness and aids in dough consistency.
For the Filling
  • 1 cup Red Bean Paste Delivers sweetness; opt for homemade or store-bought.
For the Coating
  • 1 cup Shredded Coconut Adds a delightful tropical touch.

Equipment

  • Mixing Bowl
  • steamer
  • heatproof dish
  • Fine sieve
  • Plastic Wrap
  • cupcake liners

Method
 

Step‑by‑Step Instructions for Coconut Mochi
  1. In a mixing bowl, whisk together the glutinous rice flour, cornstarch, and white sugar until well combined. Gradually pour in the coconut milk while continuously stirring to create a smooth batter. Once blended, strain the mixture through a fine sieve to remove any lumps.
  2. Set up a steamer by bringing water to a boil. Pour the batter into a heatproof dish lined with parchment paper, then place the dish in the steamer basket. Cover and steam for 25 minutes until it's firm and cooked through.
  3. After steaming, remove the dish and let the dough cool for about 10 minutes. Add the coconut oil and mix thoroughly. Wrap in plastic wrap to maintain moisture.
  4. Divide the dough into 10 equal pieces. Roll each piece into a ball, flatten it, and place a small ball of red bean paste in the center. Fold edges to seal and roll in shredded coconut.
  5. Place each piece in a cupcake liner for presentation and allow to come to room temperature before serving.

Nutrition

Serving: 1pieceCalories: 120kcalCarbohydrates: 30gProtein: 2gFat: 1gSaturated Fat: 1gSodium: 5mgPotassium: 50mgFiber: 1gSugar: 5gCalcium: 10mgIron: 1mg

Notes

Use gloves while handling the sticky dough. Chill mochi in the fridge before serving for best texture.

Tried this recipe?

Let us know how it was!

Crispy Korean Croquette Bread That’s Easy and Irresistible

As I pulled the golden-brown Korean Croquette Bread from the fryer, the intoxicating aroma of savory potatoes and lightly crisped dough enveloped my kitchen, making me wonder why I ever settled for store-bought snacks. This delightful dish features a slightly sweet, crispy exterior that cradles a creamy potato filling, bursting with comforting flavors and home-cooked charm. With its simple preparation that skips the long waiting times typical of bread-making, this recipe is a lifesaver for anyone looking to indulge in a quick yet satisfying treat. The best part? You can easily customize the filling to match your taste preferences, making it a versatile choice for any occasion. Are you ready to take your snacking game to the next level with this irresistible Korean Croquette Bread?

Why Make Korean Croquette Bread?

Irresistible Crunch: The golden-brown exterior gives this snack an amazing crunch that you can’t resist.

Customizable Filling: You can mix and match ingredients in the filling, whether you want it vegetarian or loaded with proteins.

Quick Preparation: This recipe skips lengthy proofing times, making it easy and fast for a delightful homemade treat.

Comforting Flavors: Expect a warm embrace of savory potato goodness in every bite—it’s comfort food at its finest.

Perfect for Snacking: Great for gatherings, this croquette bread is sure to impress your guests (and your stomach!). Want another exciting Korean treat? Check out my Spicy Korean Gochujang for a flavor boost!

Korean Croquette Bread Ingredients

Here’s everything you need to create this delightful treat!

For the Dough

  • Bread Flour – Provides structure and chewiness; use all-purpose or bread flour for the right texture.
  • Sugar – Adds slight sweetness; reduce when adjusting the potato filling.
  • Salt – Enhances flavor; it’s essential for balance in the dough.
  • Instant Yeast – For leavening, creating a light texture.
  • Egg – Binds ingredients and contributes to a richer dough; ensure it’s at room temperature.
  • Water – Hydrates the dough; remember to use room temperature water.
  • Unsalted Butter – Adds richness; use softened butter for ease of mixing.

For the Filling

  • Potatoes – The base for the savory filling, providing creaminess when mashed; sweet potatoes can be substituted for a different flavor.
  • Boiled Eggs – Enriches the filling and ensures creaminess; cool and mash them before adding.
  • Onion, Carrot, Green Onion, Ham – Adds flavor and texture; feel free to substitute based on preference (e.g., swap ham for mushrooms).
  • Soy Sauce – Deepens the flavor profile of the filling.

For Coating & Frying

  • Breadcrumb Coating – Creates a crispy exterior when fried; panko is recommended for a lighter texture.
  • Baking Soda – Activates the water dip to enhance crispiness when frying.

Enjoy your journey making this delicious Korean Croquette Bread!

Step‑by‑Step Instructions for Crispy Korean Croquette Bread with Savory Potato Filling

Step 1: Dough Preparation
In a stand mixer, combine bread flour, instant yeast, sugar, salt, water, and room temperature egg. Mix on medium speed until the ingredients come together into a cohesive dough, about 10 minutes. Gradually add softened unsalted butter, mixing until the dough is smooth and elastic, which may take an additional 5 minutes.

Step 2: Resting Dough
Once your dough is ready, turn it out onto a lightly floured surface and divide it into 9 equal pieces, each weighing about 50 grams. Roll each piece into a smooth ball and place them on a parchment-lined baking sheet. Cover with a damp kitchen towel and let them rest for about 20 minutes to allow the gluten to relax.

Step 3: Filling Preparation
While the dough is resting, prepare the savory filling for your Korean Croquette Bread. Boil potatoes until tender, about 15-20 minutes, then mash them while still hot. In a separate pot, boil eggs until hard (about 10 minutes), cool them, and mash finely. Sauté chopped onion, green onion, carrot, and ham in a little oil, adding soy sauce for flavor before mixing it all with the mashed potatoes and eggs in a bowl.

Step 4: Assemble Croquettes
After the resting period, flatten each dough ball into a circle about 3-4 inches in diameter. Place 2-3 tablespoons of the potato filling in the center of each circle. Carefully fold the dough over the filling, pinching the edges tightly to seal. Gently flatten the filled dough slightly to form a croquette shape, making sure the filling is secure inside.

Step 5: Coating
Prepare the coating by mixing water, flour, salt, and baking soda in a shallow dish until smooth. Dip each assembled croquette into the mixture, ensuring it is well-coated, and then roll them in panko breadcrumbs, pressing lightly to adhere. Allow them to rest on the baking sheet for about 15 minutes, which helps the coating stick better during frying.

Step 6: Frying
Heat vegetable oil in a deep pan or fryer to 340°F (170°C). Carefully place the croquettes into the hot oil, frying them in batches for about 2 minutes on each side, or until they turn golden brown and crispy. Use a slotted spoon to remove them, draining on paper towels. Serve your crispy Korean Croquette Bread warm and enjoy the delightful crunch inside!

Make Ahead Options

Busy home cooks will love how easy it is to prepare Korean Croquette Bread ahead of time! You can make the dough and filling components up to 24 hours in advance. Simply prepare the dough and filling as directed, then wrap the dough tightly in plastic wrap and refrigerate. You can also store the filling in an airtight container, keeping it fresh and flavorful. When you’re ready to enjoy your croquettes, just assemble and coat them before frying. For the best results, allow the assembled croquettes to rest for about 15 minutes at room temperature before frying to ensure they maintain their delightful texture. With these make-ahead options, you’ll have a delicious snack with minimal effort!

What to Serve with Crispy Korean Croquette Bread?

Nourish your mealtime with delightful sides that enhance the comforting flavors of this crispy treat.

  • Fresh Cucumber Salad: A light, refreshing side that counters the croquettes’ richness, adding a delightful crunch and tang.

  • Spicy Ketchup: This zesty dip complements the savory filling, giving each bite an exciting kick that tantalizes your taste buds.

  • Creamy Coleslaw: The crunchiness and creaminess blend perfectly with the croquettes, providing a cool contrast that balances comfort and zest.

  • Pickled Radish: The tangy-sour notes of pickled radish cut through the savory richness of the croquettes, refreshing your palate with each bite.

  • Savory Miso Soup: A warm, umami-rich soup that adds depth to the meal and comforts your soul, pairing beautifully with the crispy texture.

  • Sesame Soy Noodles: These flavorful noodles bring a touch of nuttiness and fiber, creating a satisfying, well-rounded plate.

Pairing these delightful sides with your Korean Croquette Bread will elevate your meal, turning it into a heartwarming feast!

Expert Tips for Korean Croquette Bread

  • Perfectly Crisp: Ensure the oil is heated to 340°F (170°C) to achieve that delightful, crispy exterior. Test with a breadcrumb; it should sizzle and float.

  • Avoid Sticky Dough: If your dough feels too sticky, don’t add extra flour! Instead, let it rest; it’ll become easier to handle as the gluten relaxes.

  • Seal Well: When assembling, make sure to pinch the edges tightly to ensure the filling doesn’t escape while frying. A properly sealed croquette equals a perfect Korean Croquette Bread!

  • Filling Flexibility: Experiment with your fillings! Feel free to substitute ingredients in the potato mixture for a unique twist, like adding spicy kimchi or a dash of curry powder.

  • Batch Frying: Fry croquettes in batches to avoid crowding the pan, which can cause them to steam instead of fry. Enjoy each bite as they turn golden brown!

Variations & Substitutions for Korean Croquette Bread

Customize this delightful treat with flavorful twists that’ll make your taste buds dance!

  • Sweet Potato: Use mashed sweet potatoes instead of regular ones for a naturally sweeter filling. This substitution creates a vibrant and colorful treat that feels like a cozy hug on a plate.

  • Vegetable Medley: Add a mix of sautéed mushrooms, zucchini, or bell peppers to the filling for extra texture and freshness. The combination offers a delightful crunch that contrasts beautifully with the creamy inside.

  • Tofu: For a vegetarian option, swap out ham with silken or firm tofu, crumbled and seasoned. This provides a protein-packed filling that’s satisfying without sacrificing flavor.

  • Spicy Kick: Incorporate chopped kimchi or a dash of gochujang into the potato filling for a zesty twist. This fiery addition brings a bold heat that complements the savory goodness of the potatoes beautifully! Thinking of another exciting Korean dish? You might enjoy my Korean Steak Sandwich with Garlic Mayo for some delicious variety!

  • Herb Infusion: Mix in fresh herbs like chives, parsley, or cilantro into the filling to elevate the flavors. The herbs bring a refreshing aroma and adds depth to each bite, making it feel gourmet.

  • Cheesy Delight: Introduce shredded cheese, such as mozzarella or cheddar, into the filling for a melty, luscious experience. Each bite will surprise you with that gooey goodness!

  • Tempura Crispy: After coating with panko, consider a brief tempura batter dip before frying for an extra crunch. This technique wraps the croquettes in an airy crispness, elevating their texture to new heights.

  • Nutty Addition: Add finely chopped nuts like walnuts or almonds to the filling for added crunch and richness. This twist gives a delightful surprise in texture that tantalizes the senses!

How to Store and Freeze Korean Croquette Bread

Room Temperature: Store leftover Korean Croquette Bread in an airtight container at room temperature for up to 1 day. Enjoy them fresh for the best flavor and texture.

Fridge: If not consumed within a day, refrigerate in an airtight container for up to 3 days to maintain freshness. Reheat before serving for the best taste.

Freezer: Freeze individually wrapped croquettes in plastic wrap, then place in a zip-top bag. They’ll keep for up to 2 months. To reheat, bake from frozen at 375°F (190°C) for about 20-25 minutes until heated through.

Reheating: For the crispiest results, reheat in an oven or air fryer instead of a microwave, bringing back their golden crunch.

Crispy Korean Croquette Bread with Savory Potato Filling Recipe FAQs

How do I know if my potatoes are ripe enough for the filling?
Absolutely! For the best results, choose potatoes that are firm and free of dark spots or blemishes. Look for potatoes that feel heavy for their size; this typically indicates high moisture content, making for a creamy filling. Russets or Yukon Golds work wonderfully, and aim for those that are about medium-sized for easy mashing.

What’s the best way to store my Korean Croquette Bread?
Store your leftover Korean Croquette Bread in an airtight container at room temperature for up to 1 day for the best flavor and texture. If you have some left after that, refrigerate them in a sealed container for up to 3 days. For reheating, give them a quick warm-up in the oven to restore their crispiness.

Can I freeze Korean Croquette Bread?
Certainly! For freezing, individually wrap each croquette in plastic wrap and place them in a zip-top bag. This way, they’ll stay fresh for up to 2 months. To reheat, bake them directly from frozen in the oven at 375°F (190°C) for about 20-25 minutes, until they’re heated through and regain their golden crunch.

What if my dough feels too sticky when mixing?
No worries! If your dough is sticky, it’s best not to add extra flour at this point. Instead, let it rest covered for about 10 minutes; this allows the gluten to relax, making the dough easier to handle. Remember, the dough should feel slightly dry but should come together nicely!

Are there any common allergens in this recipe?
Yes, this recipe contains several common allergens, including wheat (from bread flour), eggs, and potentially dairy (from unsalted butter). If you need to adapt for a specific dietary need, consider using gluten-free flour or dairy-free substitutes like coconut oil. Always ensure the ingredients align with your dietary restrictions.

Can I use different fillings for my croquettes?
Very! Feel free to get creative with your fillings. Options like stir-fried kimchi, sautéed mushrooms, or sweet creamed corn can add a delightful twist. Just remember to keep the proportions similar to ensure a good consistency and structural integrity when frying. Enjoy the exploration!

Korean Croquette Bread

Crispy Korean Croquette Bread That's Easy and Irresistible

This Korean Croquette Bread features a crispy exterior and a creamy potato filling, perfect for snacking.
Prep Time 30 minutes
Cook Time 10 minutes
Resting Time 20 minutes
Total Time 1 hour
Servings: 9 pieces
Course: Appetizer
Cuisine: Korean
Calories: 250

Ingredients
  

For the Dough
  • 500 grams Bread Flour Use all-purpose or bread flour for the right texture.
  • 1 tablespoon Sugar Slight sweetness; reduce when adjusting the filling.
  • 1 teaspoon Salt Essential for balance in the dough.
  • 7 grams Instant Yeast For leavening.
  • 1 whole Egg At room temperature.
  • 250 ml Water Room temperature.
  • 50 grams Unsalted Butter Softened for mixing.
For the Filling
  • 4 medium Potatoes Or sweet potatoes for a different flavor.
  • 2 whole Boiled Eggs Cool and mash before adding.
  • 1 medium Onion Chopped.
  • 1 medium Carrot Chopped.
  • 2 stalks Green Onion Chopped.
  • 100 grams Ham Or substitute with mushrooms.
  • 2 tablespoons Soy Sauce For flavor.
For Coating & Frying
  • 100 grams Breadcrumb Coating Panko recommended for crispiness.
  • 1 teaspoon Baking Soda Enhances crispiness.

Equipment

  • Stand Mixer
  • Deep pan or fryer

Method
 

Dough Preparation
  1. In a stand mixer, combine bread flour, instant yeast, sugar, salt, water, and egg. Mix until cohesive, about 10 minutes. Gradually add softened butter, mixing until smooth and elastic, about 5 minutes.
Resting Dough
  1. Turn the dough out onto a floured surface and divide into 9 equal pieces. Roll each into a ball and place on a parchment-lined baking sheet. Cover with a towel and let rest for 20 minutes.
Filling Preparation
  1. Boil potatoes until tender, about 15-20 minutes, then mash them. Boil eggs for 10 minutes, cool, and mash. Sauté onion, green onion, carrot, and ham; add soy sauce. Mix with mashed potatoes and eggs.
Assemble Croquettes
  1. Flatten each dough ball into a circle. Place 2-3 tablespoons of filling in the center, fold the dough over, and pinch edges to seal. Flatten gently to form a croquette shape.
Coating
  1. Mix water, flour, salt, and baking soda in a dish. Dip each croquette, then roll in breadcrumbs. Let them rest for 15 minutes.
Frying
  1. Heat oil in a deep pan to 340°F (170°C). Fry croquettes in batches for about 2 minutes per side or until golden brown. Drain on paper towels.

Nutrition

Serving: 1pieceCalories: 250kcalCarbohydrates: 30gProtein: 6gFat: 12gSaturated Fat: 7gPolyunsaturated Fat: 2gMonounsaturated Fat: 3gCholesterol: 70mgSodium: 400mgPotassium: 300mgFiber: 3gSugar: 2gVitamin A: 5IUVitamin C: 10mgCalcium: 4mgIron: 8mg

Notes

Store leftovers in an airtight container. Best enjoyed fresh. Can freeze for up to 2 months and reheat in the oven for optimal crispiness.

Tried this recipe?

Let us know how it was!

Peach Hibiscus Sunset Tea: Your Refreshing Summer Sip

As I stirred a pot of steaming water, I caught a whiff of something uplifting—like a summer breeze whispering through blooming flowers. That’s when I realized I was about to transform this simple moment into a vibrant celebration with my Peach Hibiscus Sunset Tea. This delightful beverage combines the tartness of hibiscus with the succulent sweetness of fresh peaches, creating an enchanting refreshment perfect for warm afternoons. Not only is it a beautiful nod to summertime, with stunning amber and magenta colors, but this drink is also an effortless way to relax and unwind after a hectic day. Whether you’re hosting friends or simply treating yourself, this recipe is a great reminder that homemade joys can be both nourishing and delicious. Curious to learn how to bring this summer oasis to life in your kitchen? Let’s dive into the magic of this Peach Hibiscus Sunset Tea!

Why is this drink a summer essential?

Vibrant Hues: Your glass will glow with stunning amber and magenta colors, making it as pleasing to the eyes as it is to the palate.

Refreshing Twist: This Peach Hibiscus Sunset Tea is perfect for hot summer days, offering a refreshing alternative to sugary sodas.

Versatile Flavor: Enjoy it hot or cold, and feel free to experiment with fruits like mango or strawberries for a personal touch.

Easy to Make: With just a few simple steps, you can whip up this delightful drink in no time; it’s perfect for both relaxed afternoons and gatherings.

Antioxidant Power: Thanks to the hibiscus, this tea is not just delicious but also packed with antioxidants, making it a health-conscious choice.

Sip with Style: Serve in clear glasses garnished with fresh peach slices or mint for a beautiful presentation that impresses guests—ideal for summer get-togethers!

Peach Hibiscus Sunset Tea Ingredients

• Bring the summer spirit to your glass!

For the Tea Base

  • Dried Hibiscus Flowers – A vibrant flower that adds tartness and a delightful floral aroma. Use whole or loosely packed flowers for depth of flavor.
  • Water – The essential base for brewing; purified water is recommended for a clean taste.

For the Sweetness

  • Large Peach – Fresh sweetness and fruity flavor; ripe peaches are best for optimal taste and can be substituted with mango or nectarine.
  • Honey or Sugar – Sweetener of your choice; honey enhances floral notes while sugar provides a clean sweetness. Adjust to taste.

Let the colors and flavors whisk you away as you prepare your own refreshing Peach Hibiscus Sunset Tea!

Step‑by‑Step Instructions for Peach Hibiscus Sunset Tea

Step 1: Prepare the Hibiscus Base
In a medium saucepan, combine 2 cups of purified water and 1 cup of dried hibiscus flowers over medium heat. Bring this mixture to a gentle simmer, observing the vibrant color transform from clear to a deep crimson as it heats. This should take about 5 minutes, ensuring you don’t allow it to boil to preserve the flower’s delicate flavor.

Step 2: Steep for Maximum Flavor
Once the hibiscus tea reaches a gentle simmer, remove it from the heat. Cover the saucepan with a lid and let it steep for 10–15 minutes, during which you’ll notice the liquid transitioning to a rich magenta hue. This steeping process allows the tartness and floral notes of the hibiscus to fully develop, filling your kitchen with a delightful aroma.

Step 3: Chop the Peaches
While the hibiscus tea is steeping, wash and peel 1 large ripe peach. Chop the peach into small, bite-sized cubes. Using ripe peaches will enhance the sweet flavor of your Peach Hibiscus Sunset Tea, offering a perfect contrast to the tartness of the hibiscus. Set the chopped peaches aside to integrate into the tea shortly.

Step 4: Strain the Hibiscus Tea
After steeping, take a fine mesh sieve and place it over a large pitcher. Carefully pour the steeped hibiscus tea through the sieve, pressing gently to extract any remaining liquid from the flowers. This will leave you with a clear, bright tea, ready to be infused with the sweet essence of peach, reflecting the beautiful colors of the Peach Hibiscus Sunset Tea.

Step 5: Incorporate the Peaches
With the strained hibiscus tea in the pitcher, add the chopped peaches. Stir gently to combine, ensuring the sweet peach flavor infuses into the tea, creating a harmonious blend of fruity and floral notes. The vibrancy of the peaches will complement the magenta hue of the tea, making it visually enticing.

Step 6: Sweeten to Taste
While the mixture is still warm, stir in honey or sugar according to your sweetness preference. Start small, and taste as you go, allowing the sweetness to enhance the flavors without overpowering them. Since you’re preparing Peach Hibiscus Sunset Tea, finding that perfect balance will delight your taste buds.

Step 7: Chill and Serve
If you prefer a cold beverage, let the tea cool to room temperature, then refrigerate until chilled, about an hour. Alternatively, serve the Peach Hibiscus Sunset Tea hot in a lovely mug, or pour it over ice for a refreshing summertime sip. The bright colors and delightful aroma will make each serving shine.

Make Ahead Options

These Peach Hibiscus Sunset Tea preparations are fantastic for busy home cooks looking to save time! You can brew the hibiscus tea base up to 24 hours in advance. Simply follow the initial steeping process, strain the tea, and store it in an airtight container in the refrigerator. When you’re ready to serve, chop the peaches and add them just before pouring to maintain their freshness. For optimal flavor, sweeten the tea just prior to serving, as this will ensure it tastes just as delightful as when freshly made. This way, you can enjoy a refreshing sip without the last-minute fuss!

What to Serve with Peach Hibiscus Sunset Tea

Enhance your delightful tea experience with these perfect pairings that harmonize beautifully with the refreshing notes of your homemade drink.

  • Savory Cheese Platter: A selection of creamy brie and tangy goat cheese brings a rich, savory contrast to the tea’s fruity sweetness.
  • Light Finger Sandwiches: Cucumber or smoked salmon sandwiches add a delicate bite, making each sip and nibble a refreshing delight.
  • Fresh Fruit Salad: A vibrant medley of seasonal fruits, like berries and citrus, enhances the tea’s fruity essence and adds a burst of freshness.
  • Minty Quinoa Salad: The lightness of quinoa mixed with fresh herbs creates a textural contrast, making it a perfect complement to the beverage’s flavors.
  • Coconut Macaroons: These chewy treats provide a hint of sweetness and a tropical flair that beautifully echoes the peach notes in the tea.
  • Lemon Sorbet: With its zesty appeal, this dessert’s brightness pairs wonderfully, cleansing the palate after each sip.

Each suggested pairing not only enhances the joyful experience of sipping Peach Hibiscus Sunset Tea but also brings together diverse textures and flavors that celebrate the essence of summer.

Expert Tips for Peach Hibiscus Sunset Tea

  • Quality Ingredients: Use high-quality dried hibiscus flowers and ripe peaches for the most vibrant flavors. Fresh, seasonal ingredients make a significant difference in taste.

  • Temperature Matters: Avoid boiling the hibiscus flowers to maintain their delicate flavor. Gentle simmering is your best friend in crafting the perfect Peach Hibiscus Sunset Tea.

  • Taste as You Go: Always taste the tea before adding more sweetener. It’s much easier to add sweetness than to fix an overly sweetened beverage.

  • Experiment Freely: Don’t hesitate to mix in other fruits like strawberries or mangos to create your signature twist on this refreshing drink.

  • Chill for Refreshment: Chilling this tea enhances its refreshing qualities, making it the perfect cooling drink for hot summer days—serve your Peach Hibiscus Sunset Tea ice-cold for the ultimate experience!

Peach Hibiscus Sunset Tea Variations

Customize your Peach Hibiscus Sunset Tea and create delightful twists that excite the palate and brighten your summer gatherings!

  • Fruity Swap: Replace the peach with mango for a tropical flair. Diced mango adds a luscious sweetness that brilliantly complements the hibiscus.

  • Berry Bliss: Incorporate fresh strawberries or raspberries for a tart twist. These vibrant berries not only enhance the flavor but also add a pop of color to your drink.

  • Agave Alternative: Opt for agave syrup instead of honey for a vegan-friendly sweetener. It blends smoothly, providing a subtle sweetness that won’t overpower the delicate floral notes.

  • Minty Refresh: Add a few fresh mint leaves to the tea for an invigorating twist. The mint infuses a refreshing aroma, making every sip feel like a breezy summer day.

  • Zesty Citrus: Squeeze in a splash of lemon or lime juice to brighten the flavors. The citrus brings a delightful zing that balances the sweetness beautifully, enhancing the drink’s overall freshness.

  • Chai Spice: For a warm, comforting version, sprinkle in some cinnamon or cardamom. This addition will create a unique spiced tea experience reminiscent of cozy evenings.

  • Chill with Bubbles: Mix with sparkling water or soda for a fizzy delight. The bubbles elevate the refreshing qualities, making this a fun summer beverage choice for gatherings.

  • Iced Tea Treat: Freeze the tea into ice cubes for a refreshing addition to other drinks. Use these cubes in lemonade or cocktails for a fantastic flavor boost!

Feel free to explore these variations, and don’t forget to pair your Peach Hibiscus Sunset Tea with delicious snacks like my Korean Steak Sandwich or a vibrant Steak Fajita Salad for a perfect summer spread!

Storage Tips for Peach Hibiscus Sunset Tea

Fridge: Store any leftover Peach Hibiscus Sunset Tea in an airtight container in the refrigerator for up to 3 days. The flavors may become more intense and enjoyable as it sits.

Freezer: If you want to keep the tea longer, pour it into ice cube trays and freeze. Pop a few hibiscus tea cubes into your favorite drinks for a fruity twist later on!

Reheating: To enjoy hot, simply reheat the chilled tea gently on the stove or in the microwave until warm. Be careful not to boil, as this can alter the delicate flavors.

Serving Tip: Before serving chilled, give the tea a gentle stir to redistribute the flavors that may have settled. Enjoy with fresh fruit or herbs to enhance the presentation!

Peach Hibiscus Sunset Tea Recipe FAQs

What type of peaches should I use for this recipe?
Absolutely! For the best flavor, select ripe, juicy peaches that give slightly when pressed. Avoid any with dark spots or wrinkles, as these may not have the sweetness desired. If peaches aren’t available, mangoes or nectarines can be delicious substitutes.

How long can I store leftover Peach Hibiscus Sunset Tea?
You can store any leftover Peach Hibiscus Sunset Tea in an airtight container in the refrigerator for up to 3 days. As it sits, the flavors may intensify, offering a delightful taste with each sip. Just remember to give it a gentle stir before serving again!

Can I freeze Peach Hibiscus Sunset Tea?
Very much so! To freeze your tea, pour the cooled mixture into ice cube trays, filling each compartment about three-quarters full. Once frozen, transfer the cubes to a zip-top bag and store in the freezer for up to 3 months. These tea cubes can be added to drinks for a flavorful twist later on.

What if my hibiscus tea tastes too tart?
No worries! If you find your Peach Hibiscus Sunset Tea too tart, you can easily balance it out. Start by adding a little more sweetener (honey or sugar) to taste. If the tartness persists, consider diluting the tea with a bit of water or a splash of juice! Taste it as you go to find the perfect balance.

Is this drink suitable for kids or those avoiding caffeine?
Absolutely! Peach Hibiscus Sunset Tea is caffeine-free and low in calories, making it a fantastic option for all ages. Just be mindful of your sweetener choice; using honey is suitable for older children, but for toddlers or very young kids, opt for sugar or agave syrup instead.

Can I serve this tea warm?
Yes, you can! While it’s wonderfully refreshing iced, serving it warm is just as delightful, especially on cooler days or when you’re looking for soothing comfort. Simply prepare the tea, and instead of chilling, pour it directly into cups and enjoy its aromatic floral notes!

Peach Hibiscus Sunset Tea

Peach Hibiscus Sunset Tea: Your Refreshing Summer Sip

Enjoy a delightful and vibrant Peach Hibiscus Sunset Tea that combines tart hibiscus and sweet peaches, perfect for summer relaxation.
Prep Time 15 minutes
Cook Time 5 minutes
Total Time 20 minutes
Servings: 4 cups
Course: Drinks
Cuisine: American
Calories: 50

Ingredients
  

For the Tea Base
  • 1 cup dried hibiscus flowers Use whole or loosely packed for depth of flavor.
  • 2 cups water Purified water is recommended for a clean taste.
For the Sweetness
  • 1 large peach Fresh and ripe for optimal taste; can substitute with mango or nectarine.
  • to taste honey or sugar Adjust sweetness according to preference.

Equipment

  • Medium saucepan
  • fine-mesh sieve
  • Large pitcher

Method
 

Step-by-Step Instructions
  1. In a medium saucepan, combine 2 cups of purified water and 1 cup of dried hibiscus flowers over medium heat. Bring to a gentle simmer for about 5 minutes.
  2. Once simmering, remove from heat, cover, and steep for 10–15 minutes.
  3. Wash and peel 1 large peach, then chop into bite-sized cubes.
  4. Strain the hibiscus tea through a fine mesh sieve into a pitcher.
  5. Add the chopped peaches into the strained hibiscus tea and stir gently.
  6. While warm, stir in honey or sugar to taste.
  7. If serving cold, let the tea cool to room temperature, then refrigerate until chilled.

Nutrition

Serving: 1cupCalories: 50kcalCarbohydrates: 13gSodium: 1mgPotassium: 200mgFiber: 1gSugar: 10gVitamin A: 500IUVitamin C: 15mgCalcium: 15mgIron: 0.5mg

Notes

Use high-quality dried hibiscus flowers and ripe peaches for the best flavor. Adjust sweetness as necessary. Can serve iced or hot.

Tried this recipe?

Let us know how it was!

Irresistible Candied Orange Peel: A Sweet Citrus Delight

The first time I tasted candied orange peel, it was as if a burst of sunshine filled my mouth, transforming a simple orange into a delightful candy. This easy dessert not only offers a sweet and tangy flavor but also brings a touch of elegance to any occasion—whether you’re indulging yourself or crafting homemade gifts for loved ones. You’ll find that this recipe for Candied Orange Peel is not just about the delightful morsels themselves; it’s also an opportunity to embrace the joy of DIY cooking, with customizable options like rolling in sugar or dipping in rich chocolate. Plus, you can make it fit your dietary needs with alternative sweeteners. Are you ready to explore the sweet transformation of everyday oranges into a beautiful treat that will leave everyone asking for more?

Why Make Candied Orange Peel?

Delightful Texture: Each bite offers a chewy center paired with a crisp sugar crust, creating an irresistible treat.
Customizable Flavors: You can easily modify this recipe by using different citrus peels or experimenting with sweeteners like raw or monk fruit sugar.
Perfect for Gifting: These homemade candies make thoughtful presents that show you care, perfect for the holidays or special occasions.
Quick and Easy: In just a few simple steps, you can create gourmet-style treats right in your own kitchen, elevating your dessert game effortlessly.
Aromatic Bliss: Infusing with vanilla bean enhances that fragrant essence, turning the process into a delightful sensory experience.
Healthy Indulgence: With low-carb options available, you can enjoy this sweet treat without the guilt. Discover more about making delectable homemade candies that satisfy cravings in a fun-filled DIY session.

Candied Orange Peel Ingredients

For the Peels
Oranges – Fresh fruit for candying; opt for organic since you will be consuming the peel.
Water – Essential for boiling the peels to soften their texture.

For the Syrup
Sugar – This sweetens and preserves the peels; any sugar works, but consider using raw or coconut for alternative flavors.
Vanilla Bean (optional) – Adds a delightful aromatic infusion to the syrup for added depth in flavor.

For Coating (Optional)
Granulated Sugar – Roll the dried peels in sugar for a sweet crunch on each bite.
Chocolate – Dip finished candied peels in melted chocolate to elevate the flavor and create a decadent treat.

This recipe for Candied Orange Peel is a simple yet elegant way to transform ordinary oranges into extraordinary sweets!

Step‑by‑Step Instructions for Candied Orange Peel

Step 1: Prepare Oranges
Begin by washing the organic oranges thoroughly using a vegetable brush to remove any residue. Cut off both ends of each orange, creating a stable base. Next, score the peel lengthwise in quarters, carefully slicing through the zest without puncturing the flesh. Remove the peel in sections, ensuring that larger pieces are intact for the candying process.

Step 2: Boil Peels
Place the strips of orange peel into a saucepan and cover them with water. Bring the water to a rolling boil over medium-high heat and then drain the peels in a colander. To reduce bitterness, repeat this boiling process two more times, ensuring the peels become softer and more palatable. This essential step enhances the flavor of your Candied Orange Peel.

Step 3: Make Syrup
After boiling, return the softened orange peels to the pot. Add an equal amount of water and sugar (along with the optional vanilla bean for extra flavor) to the pot. Heat this mixture until it reaches a boil, then reduce to low heat and let it simmer for 30 to 35 minutes. Stir occasionally, watching as the peels become translucent, absorbing the syrup.

Step 4: Cool Peels
Once the peels are delightfully translucent, remove the pot from the heat and allow the peels to cool in the syrup for an additional 5 minutes. This step helps them absorb more flavor. Carefully transfer the peels to a drying rack or parchment paper, allowing any excess syrup to drip off. This creates the perfect base for your homemade candied treat.

Step 5: Dry Time
Leave the orange peels to dry at room temperature for at least 8 hours, and ideally let them sit for 24 hours. You’ll know they’re ready when they feel tacky but firm to the touch. This drying process is crucial for achieving the proper texture in your Candied Orange Peel, ensuring a delightful chewiness and sugar coating that enhances the overall taste.

Step 6: Coating
In the final step, take the dried candied orange peels and either roll them in granulated sugar for a sweet crust or dip them into melted chocolate for a gourmet touch. If coating with chocolate, ensure the peels are completely cool before dipping. Once coated, set them aside on parchment paper to cool completely, allowing the chocolate to firm up nicely.

Expert Tips for Candied Orange Peel

Choose Organic Oranges: Using organic oranges ensures that you’re not consuming any harmful pesticides from the peel, allowing for a safer and healthier treat.

Repeat Boiling: Don’t skip the multiple boiling processes! This crucial step significantly reduces any bitterness and enhances the sweetness of your Candied Orange Peel.

Syrup Consistency: Keep an eye on the syrup while simmering; if it seems too runny, increase the heat slightly to promote evaporation, ensuring the peels become perfectly translucent.

Proper Drying Time: Be patient during the drying stage; allowing your peels to mesh with the syrup and dry thoroughly ensures a chewy texture and prevents stickiness.

Coating Options: Experiment with different coatings; rolling in granulated sugar offers a crunchy finish, while chocolate dipping elevates your Candied Orange Peel to gourmet status!

Candied Orange Peel Variations & Substitutions

Feel free to explore these delightful variations and make this vibrant treat uniquely yours!

  • Low-Carb Sweetener: Substitute regular sugar with monk fruit or erythritol for a guilt-free version without sacrificing sweetness.
  • Citrus Blend: Mix different citrus peels like lemon or grapefruit for a refreshing twist on flavor. A medley of peels delivers an exciting zest and transforms your classic recipe into a vibrant experience.
  • Spicy Kick: Sprinkle a pinch of cayenne pepper in the syrup for a surprising heat that elevates the sweet tanginess of your candied peels.
  • Vanilla Bean Boost: Enhance the aroma by doubling the vanilla bean for a deeper, richer flavor profile that will delight the senses. Remember, the fragrance of vanilla infusing with citrus is absolutely heavenly!
  • Chocolate Lover’s Dream: For an even more decadent treat, try using dark chocolate when dipping; the bittersweet notes perfectly contrast the sweetness of the peels.
  • Herbal Infusion: Infuse the syrup with fresh mint or basil leaves while simmering for a refreshing herbal twist that brightens the flavor profile significantly.
  • Sugar Options: Experiment with flavored sugars like lavender or citrus-infused sugars for a unique take on the classic crunchy coating. Your candied peels will be a showstopper at any gathering!
  • Gifting Presentation: Don’t forget to package your candied peels in pretty jars or wrap them in decorative cellophane for a lovely gift that’s sure to impress. A touch of ribbon can add just the right finishing touch.

Dive into these suggestions, and let your culinary creativity shine! If you want to elevate your dessert skills further, why not check out our guide on making gourmet-style treats?

Make Ahead Options

These Candied Orange Peel treats are perfect for busy home cooks looking to save time! You can prepare the orange peels and boil them up to 24 hours in advance, keeping them covered in the refrigerator to maintain their freshness. After boiling, you’ll want to make the syrup and let the peels soak for those five minutes; this can be done the day before you want to enjoy the candy. The drying process can take another 8 to 24 hours, but you can leave them out to dry while you’re away at work. When ready to serve, simply roll the dried peels in sugar or dip them in chocolate, and voilà—gourmet treats with minimal effort!

What to Serve with Homemade Candied Orange Peel?

Elevate your candied orange peel experience with delightful pairings that excite the palate and complement the vibrant flavors.

  • Creamy Cheesecake: The rich, dense texture of cheesecake balanced by the tangy sweetness of the orange peels creates a harmonious dessert.
  • Dark Chocolate: The bitter notes of dark chocolate pair beautifully with the sweet citrus, making for an indulgent treat. They can also be dipped!
  • Spiced Hot Cocoa: A warm mug of spiced hot cocoa brings out the festive vibes, providing a cozy backdrop to the sweet bites of candied peel.
  • Tea or Infused Water: A refreshing cup of herbal tea or citrus-infused water enhances the bright notes of the orange peel, making hydration enjoyable.
  • Vanilla Ice Cream: The cool creaminess of vanilla ice cream contrasts perfectly with the chewy texture of candied orange peel, delivering a delightful dessert experience.
  • Fruit Salad: Mix in candied peels with fresh fruit for a vibrant, sweet-tangy salad that brightens up any meal and adds a textural crunch.
  • Nut Tarts: The nutty flavors of a pecan or almond tart pair exquisitely with the sweet notes of the candied orange peel, enhancing the overall richness.
  • Champagne or Prosecco: Celebrate with a glass of bubbly! The effervescence of these drinks beautifully complements the sweetness of the peels, perfect for special occasions.

How to Store and Freeze Candied Orange Peel

Room Temperature: Store your candied orange peel in a cool, dry place, ideally in an airtight container. They will stay fresh for up to 1 month.

Fridge: For enhanced freshness, you can refrigerate the candied peels, which will help maintain their texture for about 2 months. Just ensure they are properly sealed.

Freezer: If you want to preserve your candied orange peel for longer, freeze them in a single layer on a baking sheet, and then transfer to an airtight container or freezer bag. They can last for up to 3 months.

Reheating: When you’re ready to enjoy, allow frozen candied peels to thaw in the fridge or at room temperature. If desired, refresh them by rolling again in sugar.

Candied Orange Peel Recipe FAQs

What type of oranges should I use for candied orange peel?
Absolutely! It’s best to use organic oranges since you’ll be eating the peel. Organic oranges are free from harmful pesticides and chemicals, making them a safer choice for candy-making. The zest offers a vibrant flavor, so picking fresh, firm oranges with a bright color is essential.

How should I store my candied orange peel?
To keep your candied orange peel fresh, store it in an airtight container in a cool, dry place. They should last up to 1 month at room temperature. Alternatively, for extended freshness, you can refrigerate them for about 2 months or freeze them for up to 3 months. Just make sure they’re well-sealed to prevent any moisture from ruining their texture.

Can I freeze candied orange peel, and how?
Certainly! To freeze your candied orange peel, lay them out in a single layer on a baking sheet and place them in the freezer for a couple of hours until they’re solid. Then, transfer the frozen peels to an airtight container or a freezer bag. They can stay fresh for up to 3 months. When you’re ready to enjoy them, just let them thaw in the fridge or at room temperature, and you can roll them in sugar again for a refreshing sweetness.

What should I do if my candied orange peel is too bitter?
Very important! If you find that your candied orange peel is too bitter, consider repeating the boiling process. Boil the strips in fresh water two more times, draining in between, which will help to remove some of that bitterness. Additionally, adjusting the drying time based on your environment can help achieve that perfect, chewy texture without the unwanted bitterness.

Can pets eat candied orange peel?
While candied orange peel may seem appealing to share, it’s best to keep it away from pets. The sugar and high concentration of citrus can upset their stomachs. If you’re looking to treat your pets, consider giving them small pieces of fresh fruit instead! Always check with your veterinarian for suitable snack options.

Are there low-carb options for the sweeteners?
Absolutely! If you’re looking for low-carb options, substitute regular sugar with sweeteners like monk fruit or erythritol. These alternatives not only reduce the sugar content but can also provide unique flavors to your candied orange peel. Just make sure to adjust the quantities as needed—most low-carb sweeteners can be used in a 1:1 ratio for sugar but check the packaging for specific conversions.

Candied Orange Peel

Irresistible Candied Orange Peel: A Sweet Citrus Delight

Transform ordinary oranges into delightful candied orange peel, a sweet treat perfect for gifting or indulging yourself.
Prep Time 15 minutes
Cook Time 35 minutes
Dry Time 24 minutes
Total Time 1 hour 14 minutes
Servings: 8 pieces
Course: Dessert
Cuisine: American
Calories: 100

Ingredients
  

For the Peels
  • 4 oranges Fresh organic oranges Choose organic since you will be consuming the peel.
  • 2 cups Water Essential for boiling the peels.
For the Syrup
  • 2 cups Sugar Can use raw or coconut sugar for alternative flavors.
  • 1 bean Vanilla Bean Optional, for aromatic infusion.
For Coating (Optional)
  • 1 cup Granulated Sugar For rolling the dried peels.
  • 1 cup Chocolate For dipping candied peels.

Equipment

  • Saucepan
  • colander
  • Vegetable Brush
  • Drying Rack

Method
 

Step-by-Step Instructions
  1. Wash the organic oranges thoroughly using a vegetable brush. Cut off both ends.
  2. Score the peel lengthwise in quarters and remove in sections.
  3. Place the orange peel strips into a saucepan and cover with water. Boil, then drain the peels. Repeat two more times to soften.
  4. Return peels to the pot, add equal water and sugar, and optional vanilla bean. Boil and then simmer for 30 to 35 minutes.
  5. Remove from heat and let cool in syrup for 5 minutes, then transfer to drying rack or parchment paper.
  6. Dry at room temperature for at least 8 hours, ideally 24 hours.
  7. Roll in granulated sugar or dip in melted chocolate, then cool completely.

Nutrition

Serving: 1pieceCalories: 100kcalCarbohydrates: 20gProtein: 1gSodium: 1mgPotassium: 50mgFiber: 1gSugar: 15gVitamin A: 1IUVitamin C: 15mgCalcium: 1mgIron: 1mg

Notes

Using organic oranges ensures safety. Do not skip the boiling process to reduce bitterness. Allow sufficient drying time for the best texture.

Tried this recipe?

Let us know how it was!

Irresistible Pumpkin and Goat Cheese Galette for Cozy Fall Nights

As the leaves turn golden and the air gets crisp, I find myself craving the comforting flavors of fall. Enter the Savory Pumpkin Galette with Goat Cheese and Caramelized Onions—my secret weapon for impressing guests during cozy gatherings. This delightful dish features a flaky, buttery crust that cradles a creamy pumpkin filling, perfectly complemented by the sweetness of caramelized onions and the tang of goat cheese. Not only is it a stunning centerpiece for any Thanksgiving table, but it also offers an easy, fuss-free preparation that lets you spend more time with loved ones and less time in the kitchen. Whether you’re a seasoned home chef or simply looking to elevate your cooking game, this rustic galette is sure to become a seasonal favorite. Curious how to pull this all together? Let’s dive into the recipe!

Why is This Pumpkin Galette a Must-Try?

Rustic Charm: The Savory Pumpkin Galette brings the essence of fall into your kitchen with its warm, inviting flavors and stunning presentation.

Easy Preparation: With a straightforward recipe, you’ll spend more time enjoying the company of friends than stressing over complicated steps.

Flavor Harmony: The creamy goat cheese combined with sweet caramelized onions creates a flavor explosion that will impress your guests.

Versatile Options: Feel free to swap ingredients like using sweet potato or different cheeses for a unique twist.

Perfect for Gatherings: This galette serves beautifully as an appetizer or light meal, making it ideal for cozy gatherings or festive celebrations.

Pair it with a refreshing arugula salad for an elevated dining experience, or check out my delicious Cheddar Mac Cheese for the ultimate comfort food combo!

Pumpkin and Goat Cheese Galette Ingredients

For the Crust
All-Purpose Flour – Structure for the crust; can substitute with whole wheat flour for a nuttier flavor.
White Whole Wheat Flour – Adds earthiness to the crust; regular whole wheat flour is a viable substitute.
Unsalted Butter – Tenderizes and flavors the crust; be sure it’s cold and cut into cubes for the best results.
Salt – Enhances overall flavor; Diamond Crystal Kosher is recommended, adjust if using regular salt.
Large Egg – Provides structure and richness in the crust.
Cold Water – Helps bring dough together without making it tough; adjust as needed.

For the Filling
Unsalted Butter (for filling) – Adds a nutty flavor through browning; keep an eye on it to avoid burning.
Fresh Sage – Offers an aromatic herbaceous note; dried sage can be used in a pinch, but fresh is preferred.
Pumpkin Purée – The main filling ingredient; fresh pumpkin is suggested for better flavor, though canned works too.
Kosher Salt – Seasoning for filling; adjust based on taste to bring out the flavors.
Caramelized Onions – Adds sweetness and depth; prepare them in advance for convenience.
Goat Cheese – Provides creamy tang; brie, blue cheese, or ricotta can serve as substitutes.
Honey – Adds a hint of sweetness; optional but enhances overall flavor.
Flaky Sea Salt – Optional for sprinkling on top at the end for a delightful textural contrast.

This Pumpkin and Goat Cheese Galette is comfort food at its finest, ready to bring warmth and joy to your table!

Step‑by‑Step Instructions for Pumpkin and Goat Cheese Galette

Step 1: Make the Crust
In a large mixing bowl, combine all-purpose and white whole wheat flours with salt. Cut in cold unsalted butter using a pastry cutter until the mixture resembles coarse crumbs, about 3 minutes. In a separate bowl, whisk together the egg and cold water, then gradually add to the flour mixture until a dough forms. Wrap the dough in plastic wrap and refrigerate for at least 30 minutes.

Step 2: Prepare Caramelized Onions
While the dough chills, slice onions thinly and heat a skillet over medium-low heat with unsalted butter. Add the onions and stir occasionally, allowing them to cook slowly for about 45 minutes. The onions should turn golden brown and sweeten in flavor. Set aside once caramelized, as they will add a delightful depth to your Pumpkin and Goat Cheese Galette.

Step 3: Create Brown Butter
In the same skillet, melt additional unsalted butter over medium heat. Swirl the pan occasionally until the butter becomes golden brown and begins to emit a nutty aroma, around 5-7 minutes. Just before removing from heat, stir in minced fresh sage for the final 30 seconds. This brown butter will bring an enriching flavor to the galette filling.

Step 4: Make the Filling
In a mixing bowl, combine the pumpkin purée, browned butter (with the sage), egg, and kosher salt. Mix until smooth and fully combined. This creamy filling will be the star of your Pumpkin and Goat Cheese Galette, providing warmth and a rich texture that balances perfectly with the sweetness of the caramelized onions.

Step 5: Assemble Galette
Preheat your oven to 425°F (220°C). On a floured surface, roll out the chilled dough into a rustic circle about 12 inches in diameter. Spread the pumpkin filling evenly across the center, leaving a 2-inch border for the crust. Top with caramelized onions, crumbled goat cheese, a drizzle of honey, and whole sage leaves, then fold the edges of the dough gently over the filling.

Step 6: Bake
Brush the exposed crust with beaten egg for a golden finish, and sprinkle flaky sea salt over the top for added flavor. Transfer the assembled galette to a parchment-lined baking sheet and bake in the preheated oven for 25-30 minutes, or until the crust is golden brown and flaky. Allow to cool for 20 minutes before slicing into this savory Pumpkin and Goat Cheese Galette, and serve warm.

What to Serve with Savory Pumpkin Galette with Goat Cheese

As the warmth of this delightful galette fills your home, consider pairing it with these complementary dishes to create a heartwarming meal experience.

  • Simple Arugula Salad: Fresh peppery arugula dressed with balsamic vinaigrette adds a bright contrast to the rich flavors of the galette. It’s a refreshing palate cleanser.

  • Roasted Brussels Sprouts: Sweet and caramelized Brussels sprouts bring a savory crunch. Their slight bitterness beautifully balances the creamy goat cheese.

  • Creamy Polenta: Smooth and buttery polenta provides a comforting base, perfectly soaking up the pumpkin filling’s delightful flavors. It’s a great alternative for extra heartiness.

  • Herbed Quinoa: The nutty flavor and chewy texture of quinoa paired with fresh herbs offer a wholesome side that complements the rustic charm of the galette.

  • Cranberry Sauce: A tangy burst of cranberry sauce enhances the earthy tones of the galette, making every bite feel festive and seasonal.

  • Chilled White Wine: A glass of crisp Sauvignon Blanc or Chardonnay elevates the entire meal, with refreshing acidity that cuts through the richness of the goat cheese.

  • Maple Pecan Pie: For dessert, this sweet treat with its crunchy topping offers a delightful finish to the meal, melding well with the fall flavors in the galette.

  • Hot Apple Cider: Embrace the season with warm spiced apple cider, a comforting beverage that pairs beautifully with your savory pumpkin galette.

Each of these pairings adds its own unique touch, ensuring a cozy and delicious fall gathering everyone will remember.

Expert Tips for Pumpkin and Goat Cheese Galette

  • Prevent Tough Dough: Keep ingredients cold: Make sure your butter and water are chilled to ensure a flaky crust in your Pumpkin and Goat Cheese Galette.

  • Caramelize Ahead: Prepare caramelized onions early: Cooking these sweet gems in advance saves time and enhances flavors, allowing them to develop sweetness.

  • Avoid Burning: Watch the brown butter closely: It can go from golden to burnt quickly, so stir regularly and remove from heat once it releases a nutty aroma.

  • Chill Before Baking: Freeze the assembled galette: Placing it in the freezer for 10 minutes before baking helps maintain its shape during cooking.

  • Balance Flavors: Adjust seasoning to taste: Always sample the filling mixture and adjust salt and honey levels to strike the right balance of savory and sweet.

Pumpkin and Goat Cheese Galette Variations

Feel free to explore these delightful twists on the classic Pumpkin and Goat Cheese Galette, allowing your creativity to shine in the kitchen!

  • Sweet Potato Addition: Mix in roasted sweet potato for added sweetness and creaminess; it pairs beautifully with the pumpkin.

  • Herb Swaps: Try fresh thyme or rosemary instead of sage for a different herbaceous flavor that will elevate your galette.

  • Cheese Variety: Substitute goat cheese with creamy brie or tangy blue cheese for a bold twist that adds depth.

  • Nuts & Seeds: Sprinkle toasted pumpkin seeds or walnuts on top before baking for an enjoyable crunch and a nutty flavor contrast.

  • Spicy Kick: Add a pinch of red pepper flakes to the filling for a slight heat that balances the sweetness of the caramelized onions.

  • Vegan Version: Replace egg with a flaxseed meal slurry and use vegan butter for a deliciously plant-based version of this galette.

  • Savory Twist: Incorporate sautéed mushrooms with the onions for a rich, umami flavor that turns this galette into a gourmet dish.

If you’re looking for a delicious pairing, consider serving this galette with a fresh arugula salad tossed in a balsamic vinaigrette, or explore other comforting recipes like Cheddar Mac Cheese for a cozy meal!

Make Ahead Options

These Savory Pumpkin Galette with Goat Cheese and Caramelized Onions are perfect for meal prep enthusiasts! You can caramelize the onions up to 3 days in advance, saving time on assembly. Additionally, the crust can be made 24 hours ahead and stored tightly wrapped in the refrigerator. To maintain the crust’s flakiness, make sure it is well chilled. For the filling, you can mix the pumpkin, browned butter, and egg up to 24 hours in advance as well, just refrigerate it in an airtight container. When you’re ready to bake, simply assemble the galette and pop it in the oven for a fresh, flavorful dish that’s just as delicious as if made right away!

Storage Tips for Pumpkin and Goat Cheese Galette

Fridge: Store leftovers in an airtight container in the refrigerator for up to 3 days. Reheat in the oven at 350°F until warmed through for the best texture.

Freezer: If you have unbaked galette leftovers, wrap it tightly in plastic wrap and foil and freeze for up to 3 months. Bake directly from the freezer, adding a few extra minutes to the baking time.

Reheating: For previously baked pumpkin and goat cheese galette, slice and reheat individual pieces in a toaster oven or oven to maintain its flaky crust.

Room Temperature: Serve your galette warm or at room temperature; however, it’s best enjoyed fresh for optimal flavor and texture.

Pumpkin and Goat Cheese Galette Recipe FAQs

What type of pumpkin should I use for the filling?
You can use either fresh pumpkin or canned pumpkin purée. I recommend fresh for the best flavor, especially during autumn. If using fresh, roast the pumpkin first until tender, then purée it. Canned pumpkin works well if you’re short on time, but make sure to choose pure pumpkin, not pumpkin pie filling.

How can I store the pumpkin and goat cheese galette?
Leftovers can be stored in an airtight container in the refrigerator for up to 3 days. When you’re ready to enjoy again, reheat it in the oven at 350°F until warmed through for the best texture and flavor.

Can I freeze the pumpkin and goat cheese galette?
Absolutely! If you have unbaked galettes, wrap them tightly in plastic wrap and foil, and you can freeze them for up to 3 months. When you’re ready to bake, you can place it directly from the freezer into the oven, adding a few extra minutes to the baking time to ensure it’s cooked through.

What should I do if my crust is tough?
If your galette crust turns out tough, it likely means the dough was overworked or the ingredients were too warm. To avoid this, ensure your butter and water are chilled. Mix the dough just until it comes together, and remember to refrigerate for at least 30 minutes before rolling out.

Is the galette safe for those with food allergies?
This galette contains gluten (from the flour) and dairy (from the butter and goat cheese). If you have allergies or dietary restrictions, you can substitute gluten-free flour blends and dairy alternatives like plant-based butter and cheese. Just keep in mind the flavor profile may alter slightly.

Can I prepare components ahead of time?
Yes! You can caramelize the onions a day in advance and store them in an airtight container in the fridge. Additionally, you can mix the filling ingredients ahead of time. Just keep everything cold until you’re ready to assemble and bake the galette for the best result.

Pumpkin and Goat Cheese Galette

Irresistible Pumpkin and Goat Cheese Galette for Cozy Fall Nights

Delight your guests with this Pumpkin and Goat Cheese Galette, a stunning fall centerpiece featuring a flaky crust and rich filling.
Prep Time 30 minutes
Cook Time 30 minutes
Chilling Time 30 minutes
Total Time 1 hour 30 minutes
Servings: 8 slices
Course: Appetizer
Cuisine: American
Calories: 290

Ingredients
  

For the Crust
  • 1 cup All-Purpose Flour Can substitute with whole wheat flour for a nuttier flavor.
  • 1 cup White Whole Wheat Flour Regular whole wheat flour is a viable substitute.
  • 1 stick Unsalted Butter Cold and cut into cubes for best results.
  • 1 tsp Salt Diamond Crystal Kosher recommended.
  • 1 large Egg Provides structure and richness.
  • 3-4 tbsp Cold Water Adjust as needed.
For the Filling
  • 2 tbsp Unsalted Butter (for filling) Adds a nutty flavor through browning.
  • 2 tbsp Fresh Sage Dried sage can be used in a pinch.
  • 1 cup Pumpkin Purée Fresh pumpkin suggested for better flavor.
  • 1 tsp Kosher Salt Adjust based on taste.
  • 1 cup Caramelized Onions Prepare in advance for convenience.
  • 4 oz Goat Cheese Brie, blue cheese, or ricotta can serve as substitutes.
  • 1 tbsp Honey Optional but enhances overall flavor.
  • 1 pinch Flaky Sea Salt Optional for sprinkling on top.

Equipment

  • Mixing Bowl
  • Skillet
  • pastry cutter
  • Oven
  • Parchment paper

Method
 

Preparation
  1. In a large mixing bowl, combine all-purpose and white whole wheat flours with salt. Cut in cold unsalted butter until the mixture resembles coarse crumbs, about 3 minutes.
  2. In a separate bowl, whisk together the egg and cold water, then gradually add to the flour mixture until a dough forms. Wrap the dough in plastic wrap and refrigerate for at least 30 minutes.
  3. While the dough chills, slice onions thinly and heat a skillet over medium-low heat with unsalted butter. Add the onions and stir occasionally, allowing them to cook slowly for about 45 minutes.
  4. In the same skillet, melt additional unsalted butter over medium heat until golden brown. Stir in minced fresh sage for the final 30 seconds.
  5. In a mixing bowl, combine the pumpkin purée, browned butter (with sage), egg, and kosher salt. Mix until smooth.
  6. Preheat your oven to 425°F (220°C). Roll out the chilled dough into a rustic circle about 12 inches in diameter.
  7. Spread the pumpkin filling evenly across the center, leaving a 2-inch border for the crust. Top with caramelized onions, crumbled goat cheese, a drizzle of honey, and whole sage leaves, then fold the edges of the dough gently over the filling.
  8. Brush the exposed crust with beaten egg for a golden finish, and sprinkle flaky sea salt over the top. Transfer to a parchment-lined baking sheet and bake in the preheated oven for 25-30 minutes.
  9. Allow to cool for 20 minutes before slicing and serve warm.

Nutrition

Serving: 1sliceCalories: 290kcalCarbohydrates: 32gProtein: 6gFat: 15gSaturated Fat: 9gPolyunsaturated Fat: 1gMonounsaturated Fat: 5gCholesterol: 40mgSodium: 400mgPotassium: 200mgFiber: 2gSugar: 5gVitamin A: 500IUVitamin C: 2mgCalcium: 50mgIron: 1mg

Notes

Store leftovers in an airtight container in the refrigerator for up to 3 days. For unbaked leftovers, freeze tightly wrapped for up to 3 months. Bake directly from the freezer, adding extra baking time.

Tried this recipe?

Let us know how it was!

Delicious Creme Brûlée Macarons That Impress Every Time

The moment you pull a tray of freshly baked Crème Brûlée Macarons from the oven, you can almost hear the applause of your taste buds! These exquisite French treats combine the delicate crunch of classic macaron shells with a luscious vanilla bean buttercream, finished with a perfectly caramelized sugar crust that’s simply irresistible. What’s even better? The journey from kitchen to table is both rewarding and fun, making these macarons a delightful way to impress your friends or elevate your dessert game. With just a few simple steps, you’ll create a gourmet masterpiece that’s not only a feast for the eyes but also a comforting nod to a beloved dessert. Are you ready to elevate your baking skills and indulge in a taste of Paris?

Why Are Crème Brûlée Macarons So Special?

Unique Combination: These macarons bring together the beloved qualities of a classic crème brûlée and the elegant design of a macaron.

Irresistible Flavor: The rich vanilla bean buttercream perfectly complements the caramelized sugar topping, creating a symphony of tastes in each bite.

Stunning Presentation: Serve these beauties on a tiered cake stand for a show-stopping centerpiece at any gathering.

Perfect for Any Occasion: Whether it’s a dinner party or a special treat for yourself, these macarons are sure to impress friends and family.

Easy to Customize: Feel free to experiment with different flavors, like adding citrus or nut extracts, making every batch uniquely yours!

With your newfound skills, you’ll be inspired to try more decadent creations, perhaps even our Almond Flour Cookies or indulge your chocolate cravings with Classic Flourless Brownies!

Crème Brûlée Macarons Ingredients

For the Macaron Shells

  • Powdered Sugar – Provides sweetness and structure to the macaron shells; always sift to avoid lumps.
  • Almond Flour – Adds a nutty flavor and helps create a delicate texture; ground hazelnuts can be used for a different flavor profile.
  • Egg Whites – Essential for creating a light and stable meringue; ensure no yolk is mixed in and consider aging them for improved results.
  • Granulated Sugar – Stabilizes the meringue, ensuring superior volume; add it gradually to prevent deflation.

For the Vanilla Bean Buttercream

  • Unsalted Butter – Forms the creamy base of the buttercream; must be very soft for the smoothest texture.
  • Vanilla Bean/Extract – Enhances the buttercream’s flavor with aromatic notes; fresh vanilla bean adds richness, but good-quality extract works too.
  • Heavy Cream – Helps achieve the desired buttercream consistency; adjust the amount based on your thickness preference.

For the Caramelized Sugar Crust

  • Granulated Sugar (for caramelizing) – Creates the signature crispy top once torched; make sure to shake off any excess before caramelizing.
  • Water – Used during the assembly to help the sugar adhere properly on the macaron shells.

Prepare to impress with these Crème Brûlée Macarons that beautifully combine classic flavors and exquisite textures!

Step‑by‑Step Instructions for Crème Brûlée Macarons

Step 1: Prepare Sheets
Begin by lining two cookie sheets with silicone mats or parchment paper, ensuring they are flat and secure. This will provide a perfect non-stick surface for your Crème Brûlée Macarons. Preheat your oven to 280°F (139°C) while you prepare the batter, so it’s ready by the time the macarons are piped.

Step 2: Mix Dry Ingredients
In a food processor, pulse together the powdered sugar and almond flour until well combined. This should take about 30 seconds. Sift the mixture into a bowl to eliminate lumps, ensuring your macaron shells will be smooth and delicate. Set this dry mix aside while you prepare the meringue.

Step 3: Make Meringue
In a clean mixing bowl, beat the egg whites on medium speed until they become foamy. Gradually add the granulated sugar, increasing to high speed once half is added. Continue whisking until stiff peaks form, about 5-7 minutes. You should see glossy peaks that hold their shape.

Step 4: Macaronage
Gently fold the meringue into the dry ingredients using a spatula, employing a scoop-and-turn motion. This process should take about 30–45 seconds, ensuring the batter is smooth and flows gently off your spatula while still holding a figure 8 shape. Be careful not to over-mix, as this will affect the structure of your Crème Brûlée Macarons.

Step 5: Pipe Disks
Transfer the macaron batter into a piping bag fitted with a round tip. Pipe 1-inch circles onto the prepared sheets, leaving space between each one as they will spread slightly. Aim for uniform shapes to achieve a professional look. Once piped, tap the trays gently on the counter to release any air bubbles.

Step 6: Rest and Dry
Let the piped macarons sit at room temperature for about 60 minutes, or until a dry skin forms on the surface. You’ll know they’re ready when you can lightly touch them without any batter sticking to your finger. This resting period is crucial for achieving that signature macaron foot.

Step 7: Bake
Once dry, place the sheets in the preheated oven and bake for 15 minutes, rotating the trays halfway through for even baking. You’re looking for the shells to rise gently and develop a lovely pale color. When done, they should be firm to the touch but soft inside.

Step 8: Cool Shells
Remove the macarons from the oven and let them cool completely on the trays before attempting to peel them off. This step ensures that they retain their delicate structure and glossy finish, hallmarks of a perfect Crème Brûlée Macaron.

Step 9: Prepare Buttercream
While the shells cool, prepare the vanilla bean buttercream. Beat the softened unsalted butter in a bowl until creamy, then gradually add the powdered sugar, mixing until combined. Finally, incorporate the vanilla extract and heavy cream to achieve a smooth and fluffy consistency.

Step 10: Assemble
To assemble your Crème Brûlée Macarons, lightly moisten the bottom of one macaron shell with a few drops of water. Dip it into granulated sugar, ensuring even coverage, then use a kitchen torch to caramelize the sugar until it forms a lovely golden crust. Fill with buttercream and cap it with another macaron shell, creating a delectable sandwich.

Step 11: Serve or Store
These exquisite Crème Brûlée Macarons can be served immediately or allowed to mature in the refrigerator for flavors to meld, ideally overnight. When ready to enjoy, present them on a beautiful platter, and watch everyone savor each luxurious bite!

Storage Tips for Crème Brûlée Macarons

Room Temperature: Store your macarons in an airtight container at room temperature for up to 3 days. This keeps them fresh and helps maintain their delightful texture.

Fridge: If you want to extend their lifespan, refrigerate your macarons for up to 1 week in an airtight container. This allows the flavors to meld beautifully.

Freezer: For long-term storage, freeze the filled macarons for up to 2 months. Ensure they are well-wrapped to prevent freezer burn.

Reheating: When ready to enjoy, let frozen macarons thaw in the refrigerator for a few hours before serving; this preserves their exquisite texture.

Expert Tips for Crème Brûlée Macarons

Humidity Awareness: Macarons can be sensitive to humidity; avoid making them on rainy days to ensure the perfect shell texture.

Perfect Egg Whites: Ensure your egg whites are free of any fat; this is crucial for achieving stiff peaks in your meringue for the ideal Crème Brûlée Macarons.

Macaronage Mastery: When folding your meringue into the dry ingredients, be gentle. Overmixing can lead to flat or spread-out shells.

Resting Period: Don’t skip the 60-minute resting time after piping; this helps develop the signature foot that makes macarons recognizable and delightful!

Cooling Time: Wait until the macarons are completely cool before peeling them off the mat to prevent damage. This is key for maintaining their characteristic texture.

With these expert tips, your Crème Brûlée Macarons are sure to impress everyone at your next gathering!

What to Serve with Crème Brûlée Macarons?

Elevate your dessert experience with these delightful pairings that complement the exquisite flavors of your freshly baked treats.

  • Rich Espresso: A deep, bold coffee balances the sweet creaminess of the macarons, enhancing the entire flavor profile.

  • Fresh Berries: Juicy strawberries or raspberries add a refreshing tartness that brightens each bite, perfect for contrasting the sweetness.

  • Italian Meringue Cookies: For a cohesive dessert table, these light and airy cookies echo the macaron’s textures while offering a subtle twist in flavor.

  • Vanilla Ice Cream: The creamy, cool softness of vanilla ice cream creates a luscious pairing with the warm caramelized sugar top of the macarons.

  • Peach Bellini: A bubbly peach cocktail serves as a fantastic refreshment, bringing a refreshing, fruity note that complements the buttery richness of the macarons.

  • Chocolate Ganache Tartelettes: Serve alongside these rich tarts that indulge chocolate lovers, offering both decadence and textural contrast to your dessert spread.

These thoughtful pairings turn your Crème Brûlée Macarons into the star of an unforgettable meal!

Make Ahead Options

These Crème Brûlée Macarons are perfect for busy home cooks looking to save time! You can prepare the macaron shells up to 24 hours in advance; simply store them in an airtight container at room temperature after they cool. The vanilla bean buttercream can be made up to 3 days ahead; refrigerate it in a sealed container, and re-whip before using to regain its fluffy texture. To maintain the quality of the caramelized sugar topping, it’s best to brûlée the sugar just before serving for that delightful crispy texture. Assemble your macarons right before enjoying to ensure every bite is as fresh and delicious as possible!

Variations & Substitutions for Crème Brûlée Macarons

Feel free to explore new flavors and textures with these delightful variations that make this recipe even more fun!

  • Citrus Twist: Add fresh lemon or orange zest to the buttercream for a refreshing, zesty kick. This brightens each bite, making them perfect for spring gatherings!

  • Nutty Delight: Substitute almond flour with ground hazelnuts for the macaron shells, introducing a new flavor profile to the classic recipe. Each bite will be both tender and wonderfully nutty.

  • Chocolate Shells: Replace a portion of the almond flour with cocoa powder for an indulgent chocolatey twist. Pair these with a dark chocolate ganache filling for a rich dessert experience!

  • Spicy Kick: Mix in a pinch of cayenne pepper to the buttercream to create a surprising heat that pairs beautifully with the sweetness of the macarons. This twist adds intrigue that guests will love!

  • Caramel Buttercream: Use caramel sauce instead of vanilla extract in the buttercream for an extra layer of sweetness that beautifully complements the caramelized sugar topping. Each bite will be decadently creamy!

  • Savory Option: Consider adding a hint of sea salt to the buttercream for a delightful salted caramel flavor. This simple tweak can elevate your macarons to gourmet status, making every bite uniquely satisfying.

  • Decorative Toppings: Experiment with alternative toppings like edible gold leaf or flavored sugars to add a personal touch to your macarons. This will not only look spectacular but also bring a unique twist to the flavor!

  • Flavor Infusion: Infuse your buttercream with herbal teas or floral essences, like Earl Grey or lavender, for an aromatic approach. This unique touch will surely captivate anyone who tries them.

For more delicious ideas, why not also try our mouthwatering Almond Flour Cookies or indulge your sweet tooth with our irresistible Classic Flourless Brownies? Happy baking!

Crème Brûlée Macarons Recipe FAQs

What kind of egg whites should I use for macarons?
You want to use aged egg whites for the best results. To age them, simply crack them into a bowl and refrigerate them for about 24 hours. This helps to dry them out a bit, which allows for better meringue formation—perfect for achieving those lofty, stable peaks you want in your Crème Brûlée Macarons.

How should I store my Crème Brûlée Macarons?
Absolutely! Keep your macarons in an airtight container. They can last at room temperature for up to 3 days, a week in the refrigerator, or up to 2 months in the freezer. If freezing, ensure they are well-wrapped to avoid freezer burn.

Can I freeze Crème Brûlée Macarons?
Yes! To freeze, place the filled macarons in a single layer in an airtight container, separating layers with parchment paper if needed. They can stay fresh for up to 2 months. When ready to enjoy, simply thaw in the fridge for a few hours before serving to preserve their delightful texture.

Why did my macaron shells crack during baking?
Cracked tops can be a result of a few things. Firstly, ensure your egg whites are whipped to stiff peaks, but not over-beaten. Secondly, the resting period is crucial; if they don’t dry properly, moisture can lead to cracks. Lastly, avoid baking on humid days, as excess moisture in the air can affect their baking.

What if my macaron shells are too soft or spread out?
This often happens due to overmixing during the macaronage stage or when the egg whites contain too much moisture. Remember to fold the meringue into the dry ingredients gently until the mixture flows like thick lava but still retains some body. A proper resting time is also crucial to developing that perfect crust.

Are there any allergy considerations for Crème Brûlée Macarons?
Yes, these macarons contain almonds and eggs, which are common allergens. Additionally, if you’re making these for someone with nut allergies, consider using a nut flour substitute, like sunflower seed flour, though it may alter the color and flavor slightly. Always confirm with your guests about their allergies before serving.

Creme Brûlée Macarons

Delicious Creme Brûlée Macarons That Impress Every Time

Discover the exquisite flavor and elegant presentation of Creme Brûlée Macarons, a delightful French dessert that impresses every time.
Prep Time 1 hour
Cook Time 15 minutes
Resting Time 1 hour
Total Time 2 hours 15 minutes
Servings: 12 macarons
Course: Dessert
Cuisine: French
Calories: 120

Ingredients
  

For the Macaron Shells
  • 1 cup Powdered Sugar Always sift to avoid lumps.
  • 1 cup Almond Flour Ground hazelnuts can be used for a different flavor profile.
  • 3 large Egg Whites Ensure no yolk is mixed in and consider aging them for improved results.
  • 1/4 cup Granulated Sugar Add gradually to prevent deflation.
For the Vanilla Bean Buttercream
  • 1/2 cup Unsalted Butter Must be very soft for the smoothest texture.
  • 1 tbsp Vanilla Bean/Extract Fresh vanilla bean adds richness.
  • 1/4 cup Heavy Cream Adjust the amount based on your thickness preference.
For the Caramelized Sugar Crust
  • 1 cup Granulated Sugar (for caramelizing) Shake off any excess before caramelizing.
  • 1 tbsp Water Used during assembly to help sugar adhere.

Equipment

  • piping bag
  • Food processor
  • Mixing Bowl
  • Oven
  • Silicone mats or parchment paper
  • Kitchen Torch

Method
 

Step‑By‑Step Instructions
  1. Line two cookie sheets with silicone mats or parchment paper and preheat your oven to 280°F (139°C).
  2. Pulse together powdered sugar and almond flour in a food processor until well combined, about 30 seconds. Sift into a bowl and set aside.
  3. Beat egg whites in a clean mixing bowl until foamy. Gradually add granulated sugar, increasing to high speed until stiff peaks form, about 5-7 minutes.
  4. Gently fold the meringue into the dry ingredients using a spatula, ensuring the batter is smooth and flows gently.
  5. Transfer the batter into a piping bag and pipe 1-inch circles onto prepared sheets, leaving space in between.
  6. Let the piped macarons sit at room temperature for about 60 minutes until a dry skin forms.
  7. Bake for 15 minutes, rotating the trays halfway through. The shells should rise gently and become firm.
  8. Let the macarons cool completely on the trays before attempting to peel them off.
  9. Prepare the vanilla bean buttercream by beating softened unsalted butter until creamy, then adding powdered sugar, vanilla extract, and heavy cream until smooth.
  10. Assemble by moistening the bottom of one macaron shell with water, dipping it into granulated sugar, and caramelizing it with a kitchen torch. Fill with buttercream and cap with another shell.
  11. Serve immediately or refrigerate for flavors to meld, ideally overnight, and present them elegantly.

Nutrition

Serving: 1macaronCalories: 120kcalCarbohydrates: 15gProtein: 1.5gFat: 7gSaturated Fat: 4.5gPolyunsaturated Fat: 0.5gMonounsaturated Fat: 2gCholesterol: 30mgSodium: 15mgPotassium: 50mgSugar: 12gVitamin A: 200IUCalcium: 5mgIron: 0.5mg

Notes

Humidity can affect macarons; avoid making them on rainy days. Ensure egg whites are free of fat for ideal meringue. Do not skip the resting time for the signature foot, and wait until completely cool before peeling off the mat.

Tried this recipe?

Let us know how it was!

Spicy Korean Chicken Stew: A 30-Min Comfort Food Classic

As the chilly evening air creeps in, there’s nothing quite like curling up with a bowl of heartwarming stew. This Easy Dakdoritang, or Spicy Korean Chicken Stew, is my go-to recipe for those cozy nights. With its robust blend of savory, spicy, and subtly sweet flavors all simmered in a rich, chili-infused broth, it’s the ultimate comfort food ready in just 30 minutes. Tender pieces of chicken mingle with soft potatoes and colorful carrots, transforming into a deliciously satisfying dish that instantly warms the soul. Plus, it’s a fabulous one-pot meal that makes cleanup a breeze! So, what are you waiting for? Let’s dive into making this delightfully spicy stew that could easily become your new favorite. Are you ready to cook up some warmth?

Why is This Stew a Must-Try?

Comforting Warmth: This Easy Dakdoritang is like a warm hug on a cold evening, combining tender chicken with heartwarming potatoes and carrots in a rich broth.

Quick and Simple: In just 30 minutes, you’ll have a delicious meal that doesn’t compromise on flavor, making it perfect for those busy weeknights.

Flavor Explosion: The balance of savory, spicy, and sweet notes from gochugaru and gochujang creates a complex taste that will have your taste buds dancing.

One-Pot Wonder: Say goodbye to excessive cleanup! This stew lets you focus on savoring your meal instead of worrying about dishes, similar to other one-pot favorites like Spicy Thai Basil or Chicken Cashew Broccoli.

Versatile Ingredients: Feel free to modify components, whether you’re swapping chicken for tofu or using seasonal veggies, ensuring there’s always something new to try.

Get ready to warm your heart and home with this deliciously spicy stew!

Spicy Korean Chicken Stew Ingredients

• Get ready to gather what you need for this comforting dish!

For the Stew Base

  • Chicken – Use bone-in, skin-on pieces for a richer flavor in your spicy Korean chicken stew.
  • Onion – Chopped into chunks to enhance sweetness and depth in the broth.
  • Potatoes – Cut into large chunks to absorb the delicious chili flavors; sweet potatoes work as a great substitute!
  • Carrot – Add vibrant color and sweetness, chopped to match the potatoes’ cooking time.
  • Water (or stock) – Acts as the stew’s base; try using anchovy stock or dashi for an umami boost.

For the Seasoning

  • Gochugaru (Korean chili flakes) – Essential for that signature spice, adjust according to your heat preference.
  • Soy Sauce – This adds a rich umami and salty element that rounds out the flavors.
  • Garlic – Minced for a better mix in the stew, it amplifies the overall aroma.
  • Honey (or sugar) – Balances the heat beautifully with a pinch of sweetness; maple syrup is a nice alternative.
  • Gochujang (Korean chili paste) – Adds complexity and depth to this comforting stew.
  • Black Pepper – Freshly ground is best for that extra layer of flavor.

For the Finish

  • Green Onions – Chopped and added right at the end for a fresh, bright touch.
  • Green Chili Pepper – Adjust to your spice level; it brings an additional kick to the stew.

Gather these ingredients, and you’ll be well on your way to creating this delightful Spicy Korean Chicken Stew!

Step‑by‑Step Instructions for Spicy Korean Chicken Stew

Step 1: Prepare Sauce
In a small bowl, combine the gochugaru, soy sauce, minced garlic, honey (or sugar), gochujang, and black pepper. Stir the ingredients together until you achieve a smooth, cohesive mixture. This flavorful sauce is the heart of the Spicy Korean Chicken Stew, so ensure it’s well blended and set aside to concentrate while you sauté.

Step 2: Sauté Base
In a large pot or Dutch oven, add the bone-in, skin-on chicken pieces along with the chopped onion. Pour the prepared sauce over the chicken and onion, then heat over medium heat. Sauté for about 2 minutes, allowing the sauce to coat the chicken thoroughly and infuse its flavors, creating a delightful aromatic base for your stew.

Step 3: Simmer Chicken
Next, pour enough water or stock into the pot to fully submerge the chicken pieces. Gently stir to combine and cover the pot. Increase the heat to bring it to a simmer, then reduce to medium-low and cook for about 10 minutes. Stir occasionally, and watch for the chicken to be cooked through and tender, ensuring the broth is beautifully seasoned.

Step 4: Add Vegetables
Now, add the large chunks of potatoes and carrots to the pot, stirring well to ensure they are submerged in the stew. Cover the pot again, reduce the heat to low, and allow it to simmer for 20 minutes, stirring occasionally. The vegetables should become tender while maintaining their shape, soaking up the rich flavors of your spicy Korean chicken stew.

Step 5: Finalize and Serve
Before serving, incorporate the chopped green onions and sliced green chili pepper into the stew, stirring gently. Allow it to simmer for an additional minute. Once everything is hot and fragrant, ladle the Spicy Korean Chicken Stew into bowls and serve with steamed rice, ready to warm your heart and satisfy your hunger!

Make Ahead Options

These Easy Dakdoritang (Spicy Korean Chicken Stew) are a lifesaver for busy weeknights! You can prep the sauce and chop all the vegetables (onion, potatoes, carrots) up to 24 hours in advance, just be sure to store them in airtight containers to maintain freshness. Additionally, you can marinate the chicken in the sauce for up to 3 days in the refrigerator; this will enhance the flavors. When you’re ready to cook, simply combine the marinated chicken and sauté it with onion, add the prepped vegetables, and follow the simmering steps. This way, you’ll have a deliciously comforting stew on the table with minimal effort, perfectly suited for your hectic schedule!

What to Serve with Easy Dakdoritang?

The perfect accompaniment can elevate your spicy Korean chicken stew to a whole new experience of warmth and flavor.

  • Steamed White Rice: Light and fluffy, it perfectly absorbs the rich, chili-infused broth, making every bite delightful. Every spoonful of stew accompanied by rice is a hug for your taste buds.
  • Kimchi: This traditional Korean side brings a tangy crunch that contrasts beautifully with the stew’s warmth, adding a zingy kick that enhances the overall meal.
  • Crispy Asian Slaw: A fresh, vibrant mix of cabbage, carrots, and sesame dressing adds texture and balances the spiciness, making it a refreshing partner to the Dakdoritang.
  • Pickled Vegetables: These tangy bites offer a crisp contrast, cleansing the palate while enhancing the flavors of the stew.
  • Korean Pancakes (Pajeon): These savory pancakes provide a delightful crispy texture and are great for dunking into the spicy stew, creating a fun dining experience.
  • Sesame Oil Drizzled Broccoli: Lightly steamed and dressed with sesame oil, this green side dish adds a nutty flavor and extra nutrients, harmonizing with the heartiness of the stew.
  • Mango Salad: Sweet and slightly tart, a mango salad can bring a refreshing brightness that pairs wonderfully with warm, spicy dishes.

Enjoy crafting a well-rounded meal with your Dakdoritang that satisfies both heart and palate!

Expert Tips for Spicy Korean Chicken Stew

Perfect Chicken Sear: Ensure the chicken pieces are thoroughly seared before adding the sauce to lock in flavors and moisture.

Stir Occasionally: To prevent sticking and burning, stir the stew every few minutes during the simmering phase.

Adjust Spice Level: Modify the amount of gochugaru and green chili pepper according to your heat tolerance, so everyone can enjoy this spicy Korean chicken stew.

Let it Rest: Allow the stew to sit for a few minutes after cooking; this allows flavors to meld beautifully.

Fresh Ingredients: Use fresh vegetables and high-quality gochujang for the best taste; stale ingredients can lead to a flat flavor profile.

Substitution Flexibility: Feel free to swap out ingredients to suit dietary preferences, like using tofu instead of chicken for a vegetarian option.

Spicy Korean Chicken Stew Variations & Substitutions

Feel free to make this dish truly your own with these fun and flexible variations!

  • Vegetarian: Swap chicken for tofu or seitan for a hearty, plant-based twist that retains the rich flavors of the stew.

  • Sweet Potato: Replace traditional potatoes with sweet potatoes for a naturally sweeter taste and a pop of color.

  • Heat Booster: Add more green chili pepper or a pinch of cayenne for those who crave an extra kick in their stew.

  • Umami Lift: Incorporate mushrooms for added depth and a savory component that beautifully complements the other flavors.

  • Seasonal Twist: Use butternut squash instead of potatoes during autumn for a festive flavor, enhancing the stew’s creaminess.

  • Coconut Cream: Stir in a dollop of coconut cream just before serving for a rich, tropical undertone that balances the spice perfectly.

  • Thai Fusion: Experiment by adding a splash of fish sauce or Thai basil, turning your stew into a delightful blend of Korean and Thai flavors, reminiscent of dishes like Spicy Thai Basil.

  • Cold Weather Extra: Toss in a handful of kale or spinach at the end for a nutritious boost, reminiscent of hearty choices like Chicken Cashew Broccoli that warm you right up.

With these variations, there’s no end to the delicious possibilities for your Spicy Korean Chicken Stew—let your culinary creativity flourish!

How to Store and Freeze Easy Dakdoritang

Fridge: Leftover Spicy Korean Chicken Stew can be stored in an airtight container in the refrigerator for up to 3 days. Ensure it cools down before sealing to prevent condensation.

Freezer: For longer storage, this stew freezes wonderfully! Place it in a freezer-safe container and it will maintain its flavor for up to 3 months.

Reheating: To reheat, thaw overnight in the fridge, then warm gently on the stovetop until heated through. You may want to add a splash of water or stock to restore its original consistency.

Serving Suggestions: Enjoy your reheated stew with fresh steamed rice or garnish with extra green onions for a delightful touch!

Easy Dakdoritang (Spicy Korean Chicken Stew) Recipe FAQs

How do I select the right chicken for Dakdoritang?
Absolutely! For the best flavor and texture in your Easy Dakdoritang, opt for bone-in, skin-on chicken pieces. This combination ensures the chicken stays moist and infuses the stew with a rich, savory depth. If you’re in a pinch, boneless chicken thighs can work too, just be aware that they may cook a bit quicker.

What’s the best way to store leftovers?
Very simple! Leftover Spicy Korean Chicken Stew can be stored in an airtight container in the refrigerator for up to 3 days. Make sure to let it cool down to room temperature before sealing to avoid condensation and sogginess.

Can I freeze Easy Dakdoritang?
Yes, indeed! Dakdoritang freezes beautifully. To freeze, allow the stew to cool completely, then transfer it to a freezer-safe container, ensuring there’s some room for expansion. It will keep well in the freezer for up to 3 months. When you’re ready to enjoy it again, just thaw it overnight in the fridge before reheating.

What if the stew is too spicy for my taste?
If you find your Spicy Korean Chicken Stew has turned out hotter than you’d like—no worries! You can easily tone down the spice by adding a splash of coconut milk or even a touch of cream. Another option is to add more vegetables or some extra water or broth to dilute the heat. Remember, always taste as you go!

Are there any dietary considerations I should keep in mind?
Definitely! If you have dietary restrictions or allergies, make sure to adjust your ingredients accordingly. For gluten-free needs, use tamari instead of soy sauce. Additionally, if someone in your household has a garlic allergy, you could use garlic powder or omit it altogether, just be aware it will affect the flavor profile.

How can I ensure all ingredients cook evenly?
Great question! To ensure that your potatoes and carrots cook evenly, cut them into similarly sized chunks—about 1 to 2 inches each. This helps them cook through at the same rate as the chicken. Stir occasionally while simmering to redistribute the heat and flavors throughout the stew for a harmonious result!

Spicy Korean Chicken Stew

Spicy Korean Chicken Stew: A 30-Min Comfort Food Classic

This Spicy Korean Chicken Stew is a delicious one-pot meal ready in just 30 minutes, perfect for warming up chilly evenings.
Prep Time 10 minutes
Cook Time 20 minutes
Total Time 30 minutes
Servings: 4 bowls
Course: Chicken
Cuisine: Korean
Calories: 350

Ingredients
  

For the Stew Base
  • 1 kg bone-in chicken skin-on pieces for richer flavor
  • 1 medium onion chopped into chunks
  • 2 medium potatoes cut into large chunks
  • 1 large carrot chopped to match potatoes' cooking time
  • 4 cups water or stock consider using anchovy stock or dashi for umami
For the Seasoning
  • 2 tablespoons gochugaru Korean chili flakes, adjust for spice level
  • 3 tablespoons soy sauce
  • 4 cloves garlic minced
  • 1 tablespoon honey or sugar
  • 2 tablespoons gochujang Korean chili paste
  • 1 teaspoon black pepper freshly ground
For the Finish
  • 2 stalks green onions chopped
  • 1 medium green chili pepper sliced, adjust to spice level

Equipment

  • large pot or Dutch oven

Method
 

Step-by-Step Instructions
  1. In a small bowl, combine gochugaru, soy sauce, minced garlic, honey, gochujang, and black pepper. Stir until smooth and set aside.
  2. In a large pot, add chicken and chopped onion. Pour prepared sauce over, heat over medium and sauté for 2 minutes.
  3. Pour enough water or stock to fully submerge chicken. Cover and bring to a simmer, then reduce heat and cook for 10 minutes.
  4. Add potatoes and carrots, stirring to submerge. Cover, reduce heat to low, and simmer for 20 minutes.
  5. Incorporate chopped green onions and sliced green chili. Simmer for another minute, then serve with rice.

Nutrition

Serving: 1bowlCalories: 350kcalCarbohydrates: 30gProtein: 25gFat: 15gSaturated Fat: 4gPolyunsaturated Fat: 1gMonounsaturated Fat: 5gCholesterol: 70mgSodium: 800mgPotassium: 800mgFiber: 5gSugar: 5gVitamin A: 300IUVitamin C: 15mgCalcium: 50mgIron: 2mg

Notes

For best taste, use fresh ingredients and allow flavors to rest after cooking.

Tried this recipe?

Let us know how it was!

Mango Sago: A Refreshing Summer Dessert You’ll Love

On a sweltering summer afternoon, nothing beats the temptation of a cool, creamy dessert that dances on your taste buds. Enter my refreshing Mango Sago with Coconut Jelly, an invigorating Asian delight that not only brightens up your day but also introduces a delightful texture punch with chewy sago pearls and luscious coconut jelly. As a fan of homemade treats, I love how this recipe is easily customizable—swap in your favorite fruits for a refreshing twist! Plus, it’s a perfect crowds-pleaser for your next gathering, effortlessly capturing the essence of summer and warmth. Are you ready to dive into this delectable paradise of flavors? Let’s get started!

Why is Mango Sago a Must-Try?

Refreshing, this dessert is a burst of tropical delight that perfectly balances sweetness and texture—ideal for summer! Customizable to your liking, swap mango with strawberries or bananas to create your favorite flavor combinations. Quick and easy, it can be whipped up in no time, making it a favorite for picnics or gatherings. Crowd-pleaser guaranteed; everyone will rave about the creamy coconut milk and chewy sago pearls! Have you tried pairing it with Mango Coconut Pudding for a dessert spread? The options are endless!

Mango Sago Ingredients

• Dive into this refreshing dessert!

For the Coconut Base

  • Coconut Milk – Provides creaminess and rich coconut flavor; opt for unsweetened for a less sweet version.
  • Sweetened Condensed Milk – Adds sweetness and creaminess; adjust to taste or swap with coconut cream for a dairy-free option.

For the Sago Mixture

  • Sago Pearls – Provides chewy texture; can be substituted with tapioca pearls if needed, but may slightly alter the flavor.
  • Ripe Mangoes – The star ingredient for natural sweetness and tropical flavor; feel free to substitute with strawberries, bananas, or even a touch of matcha for variety.

For the Jelly

  • Coconut Jelly – Contributes texture and a subtle coconut taste; fruit-flavored jelly can also be used for an exciting twist.

Make this Mango Sago dessert your own with delightful variations!

Step‑by‑Step Instructions for Mango Sago

Step 1: Prepare Coconut Milk
In a medium saucepan, combine one can of coconut milk with half a can of water. Heat over medium flame until it reaches a gentle boil, stirring occasionally to prevent lumps. Once boiling, mix in sweetened condensed milk to taste, ensuring the mixture is smooth and well-incorporated. Remove from heat and allow it to cool while you prepare the sago.

Step 2: Cook Sago Pearls
In a large pot, bring about four cups of water to a rolling boil. Carefully add in the sago pearls and reduce the heat to low, allowing them to simmer for 10 minutes. After cooking, remove the pot from heat, cover, and let it sit for an additional 10 minutes. The pearls should appear translucent and chewy; drain and rinse them under cold water to stop the cooking process.

Step 3: Combine Ingredients
In a spacious mixing bowl, combine the cooled coconut milk mixture, diced ripe mangoes, the cooked sago pearls, and coconut jelly cut into small pieces. Stir everything gently but thoroughly, letting the flavors meld together. The Mango Sago should appear creamy and colorful, with the mango providing a lovely contrast against the white coconut.

Step 4: Chill and Serve
Transfer the Mango Sago mixture into individual serving bowls or a large dish, then cover with plastic wrap. Refrigerate for at least 3 hours to allow the flavors to harmonize and the dessert to chill completely. When ready to serve, dish out the Mango Sago over ice to keep it refreshing, enjoying within two days for the best texture and taste.

What to Serve with Mango Sago with Coconut Jelly

Brighten your meal with complementary dishes that enhance the tropical delight of this refreshing dessert.

  • Savory Spring Rolls: These light and crispy rolls provide a perfect contrast to the creamy sweetness of Mango Sago. Filled with fresh herbs and vegetables, they are delightful bite-sized snacks that will leave everyone satisfied.

  • Grilled Chicken Salad: The smoky flavor of grilled chicken paired with crispy greens offers a satisfying base. Drizzle some citrus dressing for a balancing zing to the sweet, creamy fruit dessert.

  • Coconut Rice: A fragrant side dish that echoes the subtle coconut flavors of your Mango Sago. The textures harmonize beautifully, making each bite a tropical escape.

  • Fruit Platter: Serve a vibrant selection of tropical fruits like kiwi, pineapple, and berries alongside your dessert. This adds freshness and further enhances the fruity notes in your Mango Sago.

  • Iced Green Tea: This refreshing drink complements the richness of the dessert. The earthy tones of the green tea provide a calming balance to the sweet and creamy Mango Sago.

  • Chia Seed Pudding: For a wholesome and fruity pairing, try serving chia pudding topped with seasonal fruits. The chewiness of the chia seeds mirrors the texture of the sago pearls, creating a delightful contrast.

  • Coconut Macaroons: These chewy delights echo the coconut theme, providing a sweet, textural complement. Their crisp exterior and soft, sweet center will make them a perfect ending to your summer meal.

  • Mango Lassi: Cool down with this creamy yogurt drink that enhances the mango flavors in your dessert. It’s a refreshing and fragrant way to top off a simple, satisfying meal.

How to Store and Freeze Mango Sago

Fridge: Store Mango Sago in an airtight container in the refrigerator for up to 2 days to maintain optimal freshness and texture.

Freezer: While it’s best enjoyed fresh, you can freeze Mango Sago for up to a month. However, the texture may change, so divine thawed portions with a little coconut milk for creaminess.

Reheating: If you’ve frozen it, thaw in the fridge overnight and stir before serving. For a delightful experience, add extra fresh fruit to enhance flavor after thawing.

Serving Tip: Serve the chilled Mango Sago over ice for a refreshing treat that captures summer vibes, ensuring a light and creamy dessert experience!

Expert Tips for Mango Sago

Storage Advice: Store Mango Sago in an airtight container in the refrigerator to keep it fresh for up to two days—after that, the texture may change.

Customizable Sweetness: Adjust the amount of sweetened condensed milk based on your preference. Taste the coconut milk mixture before adding all of it to avoid overwhelming sweetness.

Rinse Sago: Don’t skip rinsing the cooked sago pearls under cold water. This step removes excess starch and prevents the pearls from becoming overly sticky.

Presentation Matters: For a stunning visual appeal, layer colorful fruits like strawberries or kiwis on top before serving. This not only enhances flavor but makes for a great Instagram shot!

Avoid Overcooking: Keep an eye on the sago pearls while cooking—they should be chewy but not mushy. The key to perfect Mango Sago is finding that delightful balance!

Enjoy your refreshing dessert, and feel free to get creative with flavors by substituting ingredients!

Mango Sago Variations & Substitutions

Feel free to tailor this refreshing dessert to suit your tastes and cravings!

  • Fruity Twists: Substitute mangoes with strawberries, bananas, or even peaches for a delightful flavor change. Each fruit brings its unique sweetness and charm to this dish.

  • Matcha Magic: Stir in a bit of matcha powder into the coconut milk for a vibrant green color and earthy flavor that’s beautiful and unique. It’s a fun way to add depth to your dessert!

  • Dairy-Free Delight: Replace sweetened condensed milk with coconut cream or a plant-based sweetener for a creamy, dairy-free version that everyone can enjoy.

  • Texture Change: Try using tapioca pearls instead of sago for a different chewy experience, although the flavor will vary slightly. It’s like a new dessert in every bite!

  • Flavored Jellies: Instead of coconut jelly, experiment with fruit-flavored jellies like lychee or passion fruit. This adds a fun twist and plays up the tropical vibe!

  • Tropical Showstopper: Mix in some diced pineapple for more tropical flavors or shredded coconut to elevate the coconut taste. It’s like a party in each spoonful!

  • Chili Kick: For those who love a bit of heat, sprinkle some chili flakes on top before serving. The spicy contrast with the creamy sweetness can be a delightful surprise.

  • Layered Delight: Create a layered dessert by alternately layering Mango Sago with Mango Coconut Pudding. The creamy texture combined with the chewy sago makes for a visually stunning treat!

Get creative and enjoy evolving your Mango Sago experience!

Make Ahead Options

Mango Sago is perfect for meal prep, allowing busy cooks to enjoy a refreshing dessert with minimal effort! You can prepare the coconut milk mixture and sago pearls up to 24 hours in advance by storing them separately in airtight containers in the refrigerator. The coconut milk can be mixed and cooled, while the sago should be cooked and rinsed as instructed. Just remember to add the diced mangoes and coconut jelly shortly before serving to maintain their fresh flavors and textures. When it’s time to serve, simply combine everything in a bowl, chill again if desired, and you’ll have a delicious dessert ready to impress, just as delectable as if made fresh!

Mango Sago with Coconut Jelly Recipe FAQs

How do I know if my mangoes are ripe enough to use?
Absolutely! To choose ripe mangoes, look for ones that are slightly soft when gently squeezed and have a rich, sweet aroma. They should also have a deep yellow or orange color without any dark spots all over. If they’re too firm, leave them at room temperature for a couple of days to ripen.

What is the best way to store leftover Mango Sago?
Very! Store your Mango Sago in an airtight container in the refrigerator for up to 2 days. This helps maintain the creamy texture and refreshing flavor. If you notice any separation, simply give it a gentle stir before serving.

Can I freeze Mango Sago, and if so, how?
Absolutely! While it’s best fresh, you can freeze Mango Sago for up to 1 month. To freeze, pour the mixture into an airtight container or freezer bags, removing as much air as possible. When you’re ready to enjoy it, thaw it overnight in the fridge, then stir it well. For added creaminess, feel free to add a splash of coconut milk after thawing.

What should I do if my sago pearls become too sticky?
No worries! If your sago pearls are too sticky, you may have overcooked them or not rinsed them thoroughly. Cook them until they’re al dente, then be sure to rinse under cold water immediately after cooking. To salvage sticky pearls, try adding a bit more coconut milk and stirring gently to separate them.

Are there any dietary considerations I should keep in mind for Mango Sago?
Certainly! If you’re serving this dessert to guests, it’s essential to consider allergies, especially since it contains coconut and milk. For a dairy-free version, substitute sweetened condensed milk with coconut cream or a plant-based alternative. If serving to pets, remember that the sugar and ingredients should be avoided for their diets.

Can I customize the fruits in Mango Sago?
Very! The recipe is incredibly versatile! You can easily swap mangoes for other fruits like strawberries, bananas, or even some tropical favorites like passionfruit and pineapple. Just keep in mind that different fruits might change the overall flavor profile slightly, adding fun variations to your dessert!

Mango Sago

Mango Sago: A Refreshing Summer Dessert You’ll Love

Mango Sago is a refreshing summer dessert that combines creamy coconut, chewy sago pearls, and ripe mango for a delightful tropical experience.
Prep Time 15 minutes
Cook Time 20 minutes
Chilling Time 3 hours
Total Time 3 hours 35 minutes
Servings: 4 bowls
Course: Dessert
Cuisine: Asian
Calories: 250

Ingredients
  

Coconut Base
  • 1 can Coconut Milk Opt for unsweetened for a less sweet version.
  • 0.5 can Water
  • 1 cup Sweetened Condensed Milk Adjust to taste or swap with coconut cream for a dairy-free option.
Sago Mixture
  • 0.5 cup Sago Pearls Can be substituted with tapioca pearls.
  • 2 cups Ripe Mangoes Feel free to substitute with strawberries or bananas.
Jelly
  • 1 cup Coconut Jelly Fruit-flavored jelly can also be used.

Equipment

  • Medium saucepan
  • large pot
  • Spacious mixing bowl

Method
 

Preparation Steps
  1. In a medium saucepan, combine one can of coconut milk with half a can of water. Heat over medium flame until it reaches a gentle boil, stirring occasionally. Once boiling, mix in sweetened condensed milk to taste, ensuring the mixture is smooth. Remove from heat and allow to cool.
  2. In a large pot, bring about four cups of water to a rolling boil. Carefully add in the sago pearls and reduce heat to low, allowing them to simmer for 10 minutes. Remove from heat, cover, and let sit for an additional 10 minutes. The pearls should appear translucent and chewy; drain and rinse them under cold water.
  3. In a spacious mixing bowl, combine the cooled coconut milk mixture, diced ripe mangoes, cooked sago pearls, and coconut jelly cut into small pieces. Stir gently but thoroughly, letting the flavors meld.
  4. Transfer the Mango Sago mixture into individual serving bowls or a large dish, then cover with plastic wrap. Refrigerate for at least 3 hours before serving.

Nutrition

Serving: 1bowlCalories: 250kcalCarbohydrates: 35gProtein: 3gFat: 12gSaturated Fat: 10gMonounsaturated Fat: 1gSodium: 40mgPotassium: 150mgFiber: 1gSugar: 22gVitamin A: 1000IUVitamin C: 15mgCalcium: 20mgIron: 0.5mg

Notes

Store Mango Sago in an airtight container in the refrigerator for up to 2 days. Adjust sweetness and rinse sago pearls to prevent stickiness. Presentation can be enhanced with colorful fruits on top.

Tried this recipe?

Let us know how it was!

Creamy Custard Mochi Balls: Delightfully Chewy Japanese Treats

As I savored the last bite of my latest culinary creation, a thought struck me—what could possibly turn an ordinary gathering into a celebration? Enter the Creamy Custard Mochi Balls, a delightful treat that effortlessly marries the chewy goodness of mochi with the lusciousness of smooth custard. This gluten-free dessert isn’t just easy to make; it also allows you to play around with flavors, from fruity purees to rich chocolate, ensuring there’s something for everyone. Whether you’re prepping for a bustling weekend dessert bar or a cozy family night, these little bites of joy will surely impress your guests. Curious to try your hand at making this delightful Japanese dessert? Let’s dive in!

Why will you love these mochi balls?

Unique Experience: Creamy Custard Mochi Balls offer a delightful blend of textures, combining chewy mochi with a velvety custard center that surprises with every bite.

Versatile Flavors: Customize your custard fillings with fruit purees, chocolate, or even matcha for a personal twist that caters to all taste buds.

Gluten-Free Goodness: Made with glutinous rice flour, this treat is a hit not just for those gluten-free but for anyone who appreciates incredible flavors.

Quick Prep Time: With simple steps and a few ingredients, you can whip these up without taking too much time out of your day—perfect for unexpected guests!

Crowd-Pleasing Dessert: Whether for celebrations or family nights, these mochi balls are sure to become a favorite at any gathering, impressing everyone with their unique appeal! If you enjoy delightful homemade meals, you might also love trying out my Creamy Chicken Fettuccine Alfredo or Parmesan Crusted Chicken for a complete special dinner experience.

Creamy Custard Mochi Balls Ingredients

For the Custard

  • Egg Yolks – Provide richness and help thicken the custard.
  • Sugar – Adds sweetness to the custard.
  • Cornstarch – Helps to thicken the custard for a creamy texture.
  • Whole Milk (or Coconut Milk) – Forms the base of the custard; coconut milk enhances creaminess.
  • Unsalted Butter – Adds richness to the custard.
  • Vanilla Extract – Enhances the flavor of the custard.

For the Mochi

  • Glutinous Rice Flour – Essential for the chewy mochi texture; can be substituted with sweet rice flour.
  • Additional Sugar – Sweetens the mochi dough.
  • Cornstarch – Prevents sticking while handling the mochi dough.

For Coating

  • Crushed Vanilla Cookies – Provides a crunchy and delicious coating for the mochi balls.

These Creamy Custard Mochi Balls are not just treats; they’re an experience that will delight your taste buds!

Step‑by‑Step Instructions for Creamy Custard Mochi Balls

Step 1: Make the Custard Base
In a medium saucepan, whisk together egg yolks, sugar, and cornstarch until smooth. Gradually pour in your choice of whole milk or coconut milk while whisking to combine thoroughly. Place the saucepan over medium heat, stirring steadily until the mixture thickens and coats the back of a spoon, which should take about 5-7 minutes.

Step 2: Finish the Custard
Once thickened, remove the saucepan from the heat and stir in unsalted butter and vanilla extract until fully melted and incorporated. Pour the custard into a bowl, cover it with plastic wrap directly on the surface to prevent a film from forming, and let it cool at room temperature for about 30 minutes until it firms up.

Step 3: Freeze the Custard
After the custard has cooled, scoop it into small balls using a melon baller or teaspoon, and place them on a baking sheet lined with parchment paper. Transfer the baking sheet to the freezer and freeze the custard balls until solid, which should take about 2 hours. This will make wrapping the custard easier later.

Step 4: Prepare the Mochi Dough
In a heatproof bowl, combine glutinous rice flour and additional sugar. Gradually mix in milk, stirring until you have a smooth batter. Cover the bowl with plastic wrap and microwave the mixture in 1-minute intervals, stirring in between each, until thick and sticky, which typically takes about 3-4 minutes.

Step 5: Shape the Mochi
Once the mochi dough has thickened, allow it to cool slightly, then dust a clean surface and your hands with cornstarch to prevent sticking. Portion out the mochi dough and flatten each piece with your hands into a circle. The dough should be pliable but not too hot to handle.

Step 6: Encase the Custard Balls
Take a frozen custard ball and place it in the center of a mochi circle. Carefully wrap the mochi around the custard, pinching to seal the edges and forming it into a ball. Repeat this process with the remaining custard and mochi dough, ensuring each ball is well-sealed to prevent leaking.

Step 7: Coat and Chill the Mochi Balls
Once you’ve formed all your Creamy Custard Mochi Balls, roll them in crushed vanilla cookies for added crunch and flavor. Place the coated mochi balls on a plate and chill them in the refrigerator for 20-30 minutes before serving to firm up a bit more and develop their delightful textures.

Make Ahead Options

These Creamy Custard Mochi Balls are perfect for meal prep enthusiasts looking to save time during busy weeks! You can prepare the custard filling up to 24 hours in advance by cooling it, then scooping it into balls and freezing them until solid. The mochi dough can also be made up to 3 days ahead; simply store it in the refrigerator wrapped tightly to keep it fresh. When you’re ready to serve, just wrap the frozen custard balls in the chilled mochi dough, coat with crushed vanilla cookies, and let chill for 20-30 minutes. This way, you’ll have a joyful and delightful dessert ready to impress with just a bit of finishing touch!

Expert Tips for Creamy Custard Mochi Balls

  • Perfect Custard Texture: Always stir constantly while heating the custard to avoid burning and ensure a smooth, creamy texture in your Creamy Custard Mochi Balls.

  • Chill Time Matters: Don’t rush the chilling process for the custard. A well-firmed filling is crucial for easy wrapping in the mochi dough.

  • Avoid Stickiness: Use cornstarch generously on your hands and work surfaces when handling the mochi dough. This prevents it from sticking and making a mess.

  • Sealing Technique: Make sure to pinch the edges of the mochi securely around the custard. This seals in the flavor and prevents leakage during the coating stage.

  • Customize Flavors: Feel free to experiment with different custard fillings like chocolate or fruit purees. This versatility is part of the joy of making Creamy Custard Mochi Balls!

What to Serve with Creamy Custard Mochi Balls

Transform your culinary experience and delight your guests by pairing these delightful mochi balls with complementary dishes and drinks.

  • Fresh Fruit Salad: Bright, juicy fruits like strawberries and mangoes add a refreshing contrast to the creamy mochi. The vibrant colors also make for an inviting presentation!

  • Matcha Green Tea: This earthy, slightly bitter beverage balances the sweetness of the mochi while adding a unique flavor profile that enhances the Japanese dessert experience.

  • Coconut Milk Ice Cream: Serving a scoop of this creamy ice cream alongside the mochi provides an indulgent treat that echoes the coconut flavor, enhancing the overall taste.

  • Japanese Sweet Red Bean Soup: This warm dessert offers a cozy, comforting experience that contrasts beautifully with the cold, chewy balls. The bean flavor complements the custard filling perfectly.

  • Honeyed Almonds: Crunchy, honey-glazed almonds provide a textural contrast and add a touch of sweetness that matches the mochi without overwhelming it.

  • Lychee Lemonade: This light, fruity drink adds a refreshing twist that cuts through the richness of the mochi. The floral notes of lychee elevate the entire dessert experience.

  • Chocolate Dipped Strawberries: A plate of these luscious berries is not only beautiful but also adds an extra touch of indulgence that’s hard to resist. The combination of chocolate and fruit is a classic!

  • Sesame Cookies: The nutty flavor and crunchy texture of sesame cookies beautifully echo the mochi’s chewiness and custard’s richness, creating a harmonious dessert plate.

How to Store and Freeze Creamy Custard Mochi Balls

Fridge: Store leftover Creamy Custard Mochi Balls in an airtight container in the refrigerator for up to 3 days. Enjoy them cold or allow to come to room temperature before serving.

Freezer: For longer storage, place the mochi balls in a single layer on a baking sheet and freeze until solid, then transfer to a freezer-safe bag. They can be kept frozen for up to 3 weeks.

Reheating: When ready to enjoy, take them out of the freezer and let them sit at room temperature for about 10-15 minutes before serving. This softens the mochi just right without losing texture.

Assembling Ahead: You can prepare the custard and mochi dough ahead of time, assembling them just before guests arrive. This allows for fresh, delightful treats whenever needed!

Creamy Custard Mochi Balls Variations

Feel free to let your creativity shine by customizing these delightful mochi balls with various flavors and textures!

  • Fruity Twist: Incorporate pureed strawberries, mango, or blueberries into the custard for a burst of fruity freshness. The sweet fruit complements the creamy filling beautifully.

  • Chocolate Fix: Swap in cocoa powder or melted chocolate for the custard to satisfy your chocolate cravings. A rich, chocolaty center will bring a smile to any dessert lover’s face.

  • Matcha Magic: Add matcha powder to the custard for an earthy flavor and a vibrant green hue. This twist combines tradition with a modern green tea delight.

  • Nutty Adventure: Stir in chopped nuts like almonds or hazelnuts to the mochi dough for a crunchy texture. It’ll offer a delightful contrast to the chewy mochi.

  • Coconut Paradise: Use coconut cream in place of milk for an exotic coconut flavor. This addition amplifies the creamy texture while offering a taste of the tropics.

  • Savory Surprise: Experiment with a savory filling by mixing a little miso paste into the custard for a unique umami twist. It creates an exciting balance between sweet and savory.

  • Spicy Kick: For the adventurous, a pinch of chili powder in chocolate or sweet custards can create a captivating heat that surprises the taste buds.

  • Candied Zest: Add lemon or orange zest to the custard for a refreshing citrus note, brightening up the flavor profile beautifully.

These variations can help you create your perfect dessert. If you’re interested in exploring more delightful recipes, you’ll love my Summer Corn Chowder or the savory Seafood Bisque Soup. Happy cooking!

Creamy Custard Mochi Balls Recipe FAQs

How do I select ripe ingredients for my custard?
Absolutely! Choose fresh, high-quality eggs with undamaged shells, and look for milk that is within its expiration date. If using fruit purees for variations, select ripe fruits that are fragrant and slightly soft to the touch, as they will provide the best flavor for your custard filling.

What is the best way to store Creamy Custard Mochi Balls?
Store your mochi balls in an airtight container in the refrigerator for up to 3 days. If you want to keep them longer, they can be frozen. To do this, lay them out in a single layer on a baking sheet and freeze until solid, then transfer them to a freezer-safe bag. They’ll stay delicious for up to 3 weeks!

Can I freeze the Creamy Custard Mochi Balls?
Yes, indeed! After wrapping the custard in mochi dough, freeze the filled mochi balls until they are solid. This should take about 2 hours. To store, place the frozen mochi in a single layer in a freezer-safe bag. When you’re ready to enjoy them, let them thaw at room temperature for about 10-15 minutes to soften slightly.

What if my mochi dough is too sticky or hard?
Don’t worry! If your mochi dough is too sticky, use a generous amount of cornstarch on your hands and working surface to help manage the stickiness. If it turns out too hard, it may have been microwaved for too long. In that case, you can try adding a splash of warm water to soften it a bit, but only do this gradually to avoid making it overly wet.

Are there any dietary considerations I should keep in mind?
Great question! The recipe for Creamy Custard Mochi Balls is naturally gluten-free when using glutinous rice flour. However, check for allergies, especially if using flavored fillings, as certain fruits or chocolates may not be suitable for everyone. Additionally, ensure that all packaged ingredients, like vanilla extract or cookies, are certified gluten-free if that is a concern.

How can I ensure my custard is perfectly smooth?
To achieve a creamy texture, stir the custard continuously over medium heat until it thickens, which should take about 5-7 minutes. Make sure to remove it from the heat as soon as it coats the back of a spoon, as overheating can lead to curdling. After preparing, cover the custard with plastic wrap pressed directly onto its surface to prevent a film from forming while it cools.

Creamy Custard Mochi Balls

Creamy Custard Mochi Balls: Delightfully Chewy Japanese Treats

Creamy Custard Mochi Balls are a delightful, chewy dessert that combines mochi with a rich custard filling, perfect for any gathering.
Prep Time 30 minutes
Cook Time 10 minutes
Chilling Time 2 hours
Total Time 2 hours 40 minutes
Servings: 6 balls
Course: Dessert
Cuisine: Japanese
Calories: 150

Ingredients
  

For the Custard
  • 4 large Egg Yolks Provide richness and help thicken the custard.
  • 1/2 cup Sugar Adds sweetness to the custard.
  • 2 tablespoons Cornstarch Helps to thicken the custard for a creamy texture.
  • 2 cups Whole Milk or Coconut Milk Forms the base of the custard; coconut milk enhances creaminess.
  • 2 tablespoons Unsalted Butter Adds richness to the custard.
  • 1 teaspoon Vanilla Extract Enhances the flavor of the custard.
For the Mochi
  • 1 cup Glutinous Rice Flour Essential for the chewy mochi texture; can be substituted with sweet rice flour.
  • 2 tablespoons Additional Sugar Sweetens the mochi dough.
  • 1 tablespoon Cornstarch Prevents sticking while handling the mochi dough.
For Coating
  • 1 cup Crushed Vanilla Cookies Provides a crunchy and delicious coating for the mochi balls.

Equipment

  • Medium saucepan
  • Whisk
  • Baking Sheet
  • Melon baller
  • Microwave
  • Plastic Wrap

Method
 

Step-by-Step Instructions
  1. In a medium saucepan, whisk together egg yolks, sugar, and cornstarch until smooth. Gradually pour in your choice of whole milk or coconut milk while whisking to combine thoroughly. Place the saucepan over medium heat, stirring steadily until the mixture thickens and coats the back of a spoon, which should take about 5-7 minutes.
  2. Once thickened, remove the saucepan from the heat and stir in unsalted butter and vanilla extract until fully melted and incorporated. Pour the custard into a bowl, cover it with plastic wrap directly on the surface to prevent a film from forming, and let it cool at room temperature for about 30 minutes until it firms up.
  3. After the custard has cooled, scoop it into small balls using a melon baller or teaspoon, and place them on a baking sheet lined with parchment paper. Transfer the baking sheet to the freezer and freeze the custard balls until solid, which should take about 2 hours.
  4. In a heatproof bowl, combine glutinous rice flour and additional sugar. Gradually mix in milk, stirring until you have a smooth batter. Cover the bowl with plastic wrap and microwave the mixture in 1-minute intervals, stirring in between each, until thick and sticky, which typically takes about 3-4 minutes.
  5. Once the mochi dough has thickened, allow it to cool slightly, then dust a clean surface and your hands with cornstarch to prevent sticking. Portion out the mochi dough and flatten each piece with your hands into a circle.
  6. Take a frozen custard ball and place it in the center of a mochi circle. Carefully wrap the mochi around the custard, pinching to seal the edges and forming it into a ball. Repeat this process with the remaining custard and mochi dough.
  7. Once you’ve formed all your Creamy Custard Mochi Balls, roll them in crushed vanilla cookies for added crunch and flavor. Place the coated mochi balls on a plate and chill them in the refrigerator for 20-30 minutes before serving.

Nutrition

Serving: 1ballCalories: 150kcalCarbohydrates: 20gProtein: 2gFat: 6gSaturated Fat: 3gCholesterol: 35mgSodium: 50mgPotassium: 80mgSugar: 10gVitamin A: 250IUCalcium: 50mgIron: 0.5mg

Notes

These Creamy Custard Mochi Balls are not just treats; they’re an experience that will delight your taste buds! Customize flavors and enjoy them fresh.

Tried this recipe?

Let us know how it was!