Savory Artichoke and Graviera Filo Puffs for Your Next Feast

As I was rummaging through my pantry last week, I stumbled upon a forgotten package of filo pastry—its fluttering sheets instantly stirred excitement. It inspired me to whip up something delightful: Easy Artichoke and Graviera Filo Puffs! These dainty appetizers are not only bursting with the rich, creamy goodness of artisanal Graviera cheese and savory artichokes but also incredibly easy to prepare, making them a perfect canvas for any holiday gathering. Just imagine your guests savoring each crispy, flaky bite, while you relax knowing you’ve served a true crowd-pleaser, both vegetarian and loaded with flavor. Want to discover how to transform simple ingredients into a gourmet treat right in your kitchen? Let’s dive in!
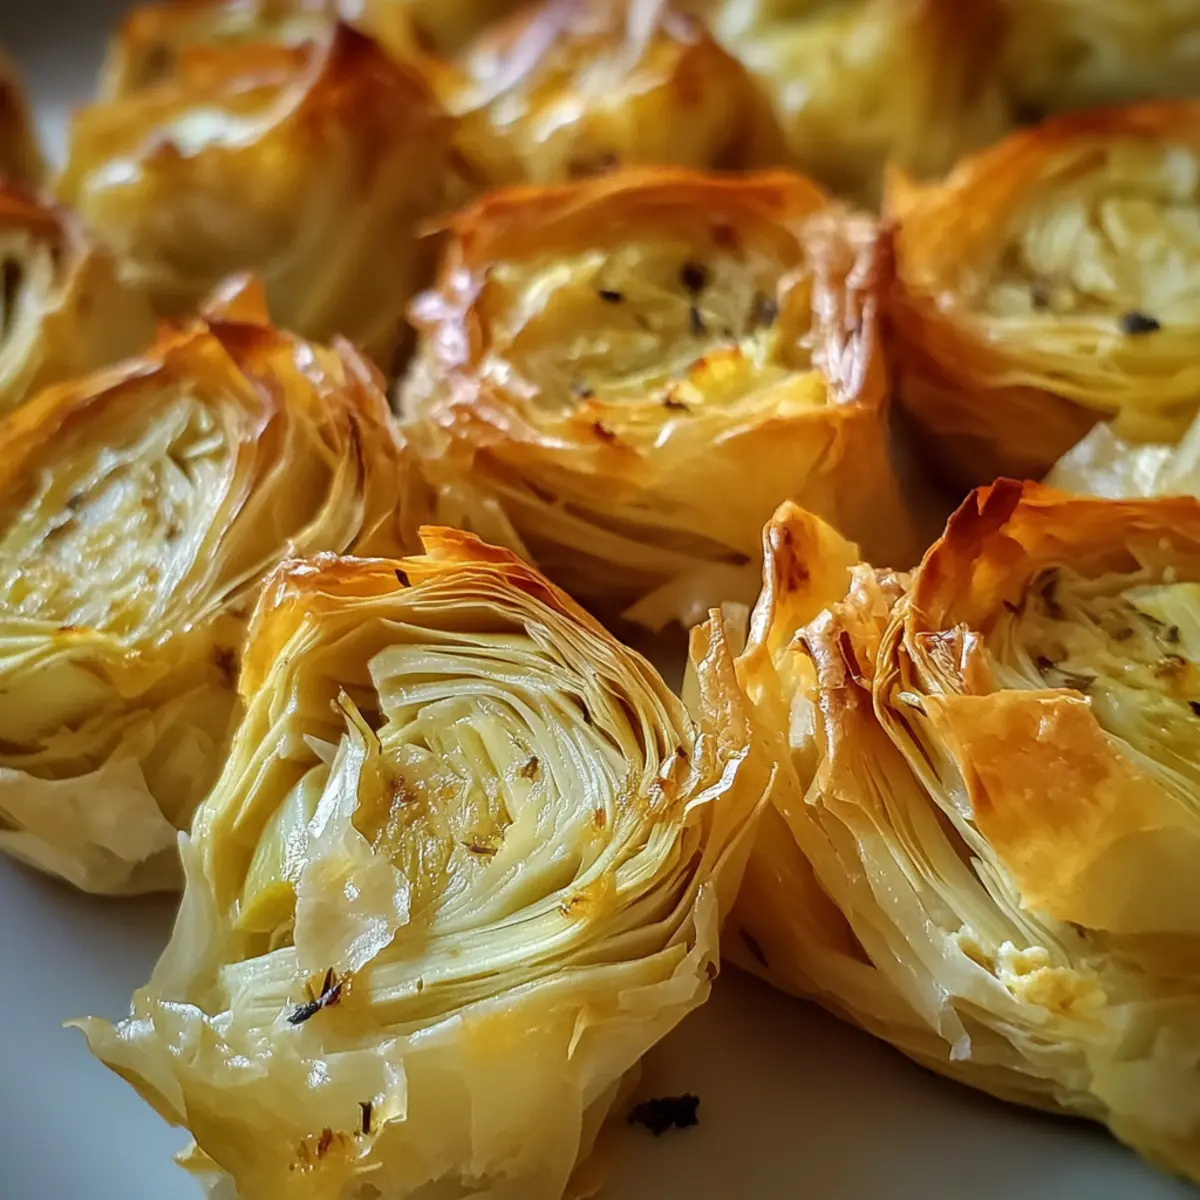
Why Are These Filo Puffs So Irresistible?

Simplicity is key: With minimal prep time, you can enjoy elegant gourmet appetizers without the stress. Rich, Creamy Flavor: The combination of artichokes and Graviera cheese creates a delectable filling that will have everyone asking for seconds. Versatile Options: Feel free to customize with different cheeses or add-ins like sautéed mushrooms or crispy bacon. Perfect for Any Occasion: Whether it’s a festive holiday party or a casual gathering, these Artichoke and Graviera Filo Puffs serve as the perfect crowd-pleaser. Need more inspiration? Check out my recipes for Smoky Cheddar Mac or Grilled Chicken Sandwich for more delicious ideas!

Artichoke and Graviera Filo Puffs Ingredients

• Discover the goodness of these delightful bites with the following ingredients!

For the Filling

  • Mini Filo Shells – Provides a flaky, crisp base for the filling; substitute with phyllo dough sheets if unavailable.
  • Extra Virgin Olive Oil – Adds richness and helps sauté vegetables; can replace with melted butter for a different flavor.
  • Green Onions/Shallots – Offers sweetness and depth to the filling; shallots can be swapped for an equally sweet option.
  • Garlic – Enhances savory flavor; use garlic powder if fresh is unavailable.
  • Sea Salt and Freshly Ground Pepper – Essential seasonings for overall flavor adjustment.
  • All-Purpose Flour – Thickens the filling mixture; cornstarch can be used as a gluten-free alternative.
  • Half and Half (or Heavy Cream) – Adds creaminess to the filling; for a lighter option, use milk or plant-based cream.
  • Artichoke Hearts – Key ingredient providing unique taste and texture; canned or frozen works best, ensuring they are drained well.
  • Greek Graviera Cheese (or Gruyère) – Provides a nutty and creamy taste; substitute with aged cheeses like Parmesan or aged Gouda.
  • Lemon Zest (optional) – Brightens the flavor; lime zest can be used as a substitute.
  • Fresh Basil or Chives (optional) – Adds freshness and herbal notes; substitute with any fresh herbs on hand, such as parsley.

Feel free to adjust these ingredients to suit your taste, and don’t forget, with these Artichoke and Graviera Filo Puffs, you’re on your way to creating a memorable appetizer experience!

Step‑by‑Step Instructions for Artichoke and Graviera Filo Puffs

Step 1: Preheat and Prepare
Begin by preheating your oven to 375°F (190°C). While the oven warms, take your mini filo shells out of the packaging and let them come to room temperature. This will ensure they are pliable and won’t tear when filled. Lay them out on a baking sheet lined with parchment paper for easy handling once the filling is ready.

Step 2: Sauté Aromatics
In a skillet, heat 2 tablespoons of extra virgin olive oil over medium heat. Once hot, add 1 cup of chopped green onions and 2 minced garlic cloves, sautéing for about 2-3 minutes until they soften and become fragrant. Season the mixture with a pinch of sea salt and freshly ground black pepper to enhance the flavors as you stir frequently to prevent any browning.

Step 3: Thicken the Filling
Sprinkle in 2 tablespoons of all-purpose flour to the sautéed onions and garlic, stirring constantly for about 2 minutes. This will create a roux that thickens your filling. Keep cooking until the flour is lightly golden and well incorporated, making sure it doesn’t burn, as a golden hue will add depth to your Artichoke and Graviera Filo Puffs.

Step 4: Create the Creamy Mixture
Slowly pour in 1 cup of half and half or heavy cream, stirring continuously until the mixture thickens slightly, which should take about 3-4 minutes. Once thickened, fold in 1 cup of drained and chopped artichoke hearts. This creamy base will be the heart of your savory filling, bringing lusciousness to each bite.

Step 5: Add the Cheese
Now, drop in ⅓ cup of grated Greek Graviera cheese, stirring until it melts completely and blends with the filling. Remove the skillet from heat and, if desired, fold in a teaspoon of lemon zest and some fresh herbs like basil or chives for added brightness. This step ensures your Artichoke and Graviera Filo Puffs have a deliciously cheesy and aromatic filling.

Step 6: Assemble the Filo Puffs
Carefully spoon the rich filling into each mini filo shell until filled generously. Place them back on the baking sheet, ensuring there’s some space between each one to allow for even baking. Top each filled shell with a sprinkle of the remaining Graviera cheese, creating a golden crust that will form during baking.

Step 7: Bake to Perfection
Transfer the baking sheet to your preheated oven and bake for 18-20 minutes. Keep an eye on them; they should become golden brown and bubbly as they cook. Once ready, allow the Artichoke and Graviera Filo Puffs to cool for about 5 minutes. This resting period helps the filling set and makes for easier handling when serving.
Expert Tips for Artichoke and Graviera Filo Puffs

Thaw Properly: Ensure your filo shells are completely thawed before using to avoid tearing and ensure easy assembly.

Watch the Bake: Keep a close eye on the baking process; ovens can vary in temperature and you want them golden brown, not burnt.

Flavor Options: Don’t hesitate to get creative! Adding different cheese types or sautéed mushrooms can elevate the flavor of your Artichoke and Graviera Filo Puffs.

Make Ahead: Prepare and assemble your filo puffs ahead of time, refrigerate them, and pop them in the oven just before serving for a fresh-out-of-the-oven experience.

Herb Boost: Fresh herbs can make a significant difference. Try different combinations to find your favorite flavor profile for these crispy delights.

Artichoke and Graviera Filo Puffs Variations

Feel free to get creative with these delightful puffs and adapt them to suit your taste!

  • Bacon Lovers: Add cooked, crumbled bacon for a delicious smoky flavor that complements the creamy filling perfectly. This twist elevates the richness, creating an indulgent treat for meat lovers.

  • Mushroom Medley: Incorporate sautéed mushrooms into the filling for added depth and texture. Button or shiitake mushrooms work beautifully, enhancing the umami and earthiness of each bite.

  • Cheese Swap: Experiment with different cheeses such as feta, mozzarella, or even pepper jack for a kick. Each cheese brings its unique character, so don’t hesitate to discover your favorite combination!

  • Spicy Kick: Add a dash of red pepper flakes or a sprinkle of cayenne pepper to heat things up. The warmth balances the rich flavors, making these puffs even more tantalizing.

  • Veggie Boost: Mix in some finely chopped spinach or kale to the filling for an extra nutritional punch. This not only adds beautiful color but also enhances the fiber content, making it a guilt-free indulgence.

  • Zesty Twist: Try replacing lemon zest with lime zest for a different citrusy note. This brightens the flavor and provides a refreshing edge, perfect for those who love a little tang.

  • Gluten-Free Option: Use gluten-free phyllo dough or skip the pastry altogether and serve the filling in small cups for a low-carb alternative. You still get to enjoy the delicious flavors without the extra carbs!

  • Herb Infusion: Experiment with various herbs like dill or thyme for a fresh, aromatic finish. These herbs will take your puffs from delightful to exceptional, offering a savory aroma that fills your kitchen.

These variations will ensure your Artichoke and Graviera Filo Puffs remain a crowd-pleaser at every gathering! For more delicious ideas, be sure to check out my recipe for Beef Cheese Roll or try the comforting flavors in Smoky Cheddar Mac.

What to Serve with Artichoke and Graviera Filo Puffs

These delightful bites deserve companions that enhance their savory goodness while offering a full, balanced meal experience.

  • Zesty Tzatziki: A refreshing yogurt-based dip bursting with cucumber and dill that cools and complements the rich flavors of the puffs. Just imagine dipping each crispy bite into its creamy goodness.

  • Mediterranean Chickpea Salad: A vibrant salad of chickpeas, tomatoes, red onion, and herbs delivers a crunchy texture and bright flavors, making it a perfect sidekick.

  • Garlic Parmesan Roasted Asparagus: Tender asparagus spears roasted with garlic and parmesan provide a crisp, buttery finish that matches beautifully with the flaky puffs.

  • Crispy Feta and Spinach Salad: Adding a warm, crispy feta to a fresh spinach salad gives a wonderful contrast in flavors and textures while staying true to the Mediterranean vibe.

  • Spanakopita: These traditional Greek spinach and feta pastries share similar flaky textures and comforting flavors, making them a delightful addition to your table.

  • Light White Wine: A chilled glass of Sauvignon Blanc enhances the creamy artichoke and cheese while balancing the richness of the puffs. For a non-alcoholic option, a sparkling water with a hint of lemon does wonders too!

  • Honey-Drizzled Baklava: Serve a sweet twist with this nutty dessert that celebrates Mediterranean cuisine, leaving your guests with a memorable finish after the savory bites.

Embrace the warmth of good food and the joy of gathering, and let these pairings elevate your next meal!

Make Ahead Options

These Artichoke and Graviera Filo Puffs are perfect for busy home cooks looking to save time! You can prepare the filling up to 24 hours in advance by sautéing the green onions and garlic, thickening it with flour, and then stirring in the artichokes and cheese. Simply refrigerate the filling in an airtight container to keep it fresh. When you’re ready to serve, spoon the filling into mini filo shells and bake them for about 18-20 minutes until golden brown. This way, you can enjoy deliciously crispy, gourmet appetizers without the last-minute rush! Your guests will be impressed, and you’ll be relaxed, knowing the bulk of the work is already done.

How to Store and Freeze Artichoke and Graviera Filo Puffs

Fridge: Store leftover Artichoke and Graviera Filo Puffs in an airtight container in the refrigerator for up to 3 days. Reheat in the oven to regain their crispiness.

Freezer: To freeze, place unbaked assembled filo puffs on a baking sheet and freeze until solid. Transfer to a zip-top bag and store for up to 2 months, baking from frozen on a lined tray without thawing.

Reheating: If refrigerated, bake reheated puffs at 350ºF (175ºC) for about 10 minutes to restore crispness. For frozen, add a few more minutes to the baking time.

Assembly Tip: You can assemble these Artichoke and Graviera Filo Puffs ahead of time. Simply keep them in the fridge until you’re ready to bake them fresh for your guests!
Artichoke and Graviera Filo Puffs Recipe FAQs

How do I choose ripe artichokes or artichoke hearts?
Absolutely! When selecting artichoke hearts, opt for canned or frozen options that are tender and free from dark spots. Always check the packaging for quality; if using fresh artichokes, look for ones that feel heavy and have tightly closed leaves.

How should I store leftover Artichoke and Graviera Filo Puffs?
Very! Store any leftovers in an airtight container in the refrigerator for up to 3 days. To keep them crispy, reheating them in a preheated oven at 350ºF (175ºC) for about 10 minutes is best.

Can I freeze Artichoke and Graviera Filo Puffs?
Certainly! To freeze, place the unbaked assembled filo puffs on a baking sheet lined with parchment paper. Freeze until solid, then transfer them to a zip-top bag. They can be stored for up to 2 months. Bake from frozen at 375°F (190°C) for about 20-25 minutes without thawing.

What should I do if my filling is too thick?
Not a problem! If your filling becomes too thick, simply add a little bit of milk, half and half, or cream gradually while stirring over low heat. This will help you reach that luscious, creamy consistency you want for your Artichoke and Graviera Filo Puffs.

Are there any dietary considerations for the ingredients?
Absolutely! For those with dairy allergies, consider substituting the Graviera cheese with a dairy-free cheese option and use plant-based cream. If your guests have gluten sensitivities, use gluten-free flour and stick to gluten-free phyllo dough or mini shells for an allergen-friendly recipe!

Can these Filo Puffs be made ahead of time?
Definitely! You can assemble the Artichoke and Graviera Filo Puffs up to a few hours in advance. Just keep them covered in the refrigerator until you’re ready to pop them in the oven for fresh, warm appetizers that your guests will love.

Artichoke and Graviera Filo Puffs

Savory Artichoke and Graviera Filo Puffs for Your Next Feast

Delight your guests with these Artichoke and Graviera Filo Puffs, a perfect appetizer for any gathering.
Prep Time 20 minutes
Cook Time 20 minutes
Cooling Time 5 minutes
Total Time 45 minutes
Servings: 12 puffs
Course: Appetizer
Cuisine: Mediterranean
Calories: 150

Ingredients
  

For the Filling
  • 1 package Mini Filo Shells or phyllo dough sheets
  • 2 tablespoons Extra Virgin Olive Oil or melted butter
  • 1 cup Green Onions/Shallots chopped
  • 2 cloves Garlic minced
  • to taste Sea Salt
  • to taste Freshly Ground Pepper
  • 2 tablespoons All-Purpose Flour or cornstarch for gluten-free
  • 1 cup Half and Half or Heavy Cream; substitute with milk
  • 1 cup Artichoke Hearts drained and chopped
  • cup Greek Graviera Cheese or Gruyère
  • 1 teaspoon Lemon Zest optional
  • to taste Fresh Basil or Chives optional

Equipment

  • Skillet
  • Baking Sheet
  • Parchment paper

Method
 

Step-by-Step Instructions
  1. Preheat your oven to 375°F (190°C) and let the mini filo shells come to room temperature on a baking sheet lined with parchment paper.
  2. Heat 2 tablespoons of olive oil in a skillet over medium heat, then add 1 cup of chopped green onions and sauté for 2-3 minutes.
  3. Sprinkle in 2 tablespoons of flour, stirring constantly for about 2 minutes until golden.
  4. Slowly pour in 1 cup of cream, stirring until it thickens, then fold in 1 cup of artichoke hearts.
  5. Add ⅓ cup of grated Graviera cheese and stir until melted; fold in optional lemon zest and herbs.
  6. Spoon the filling into each mini filo shell, sprinkle with remaining cheese, and bake for 18-20 minutes.
  7. Let the puffs cool for about 5 minutes before serving.
Nutrition

Serving: 1puffCalories: 150kcalCarbohydrates: 10gProtein: 4gFat: 10gSaturated Fat: 5gPolyunsaturated Fat: 1gMonounsaturated Fat: 3gCholesterol: 25mgSodium: 200mgPotassium: 50mgFiber: 1gVitamin A: 300IUVitamin C: 2mgCalcium: 100mgIron: 1mg

Notes

These puffs can be assembled ahead of time and refrigerated before baking.

Tried this recipe?

Let us know how it was!

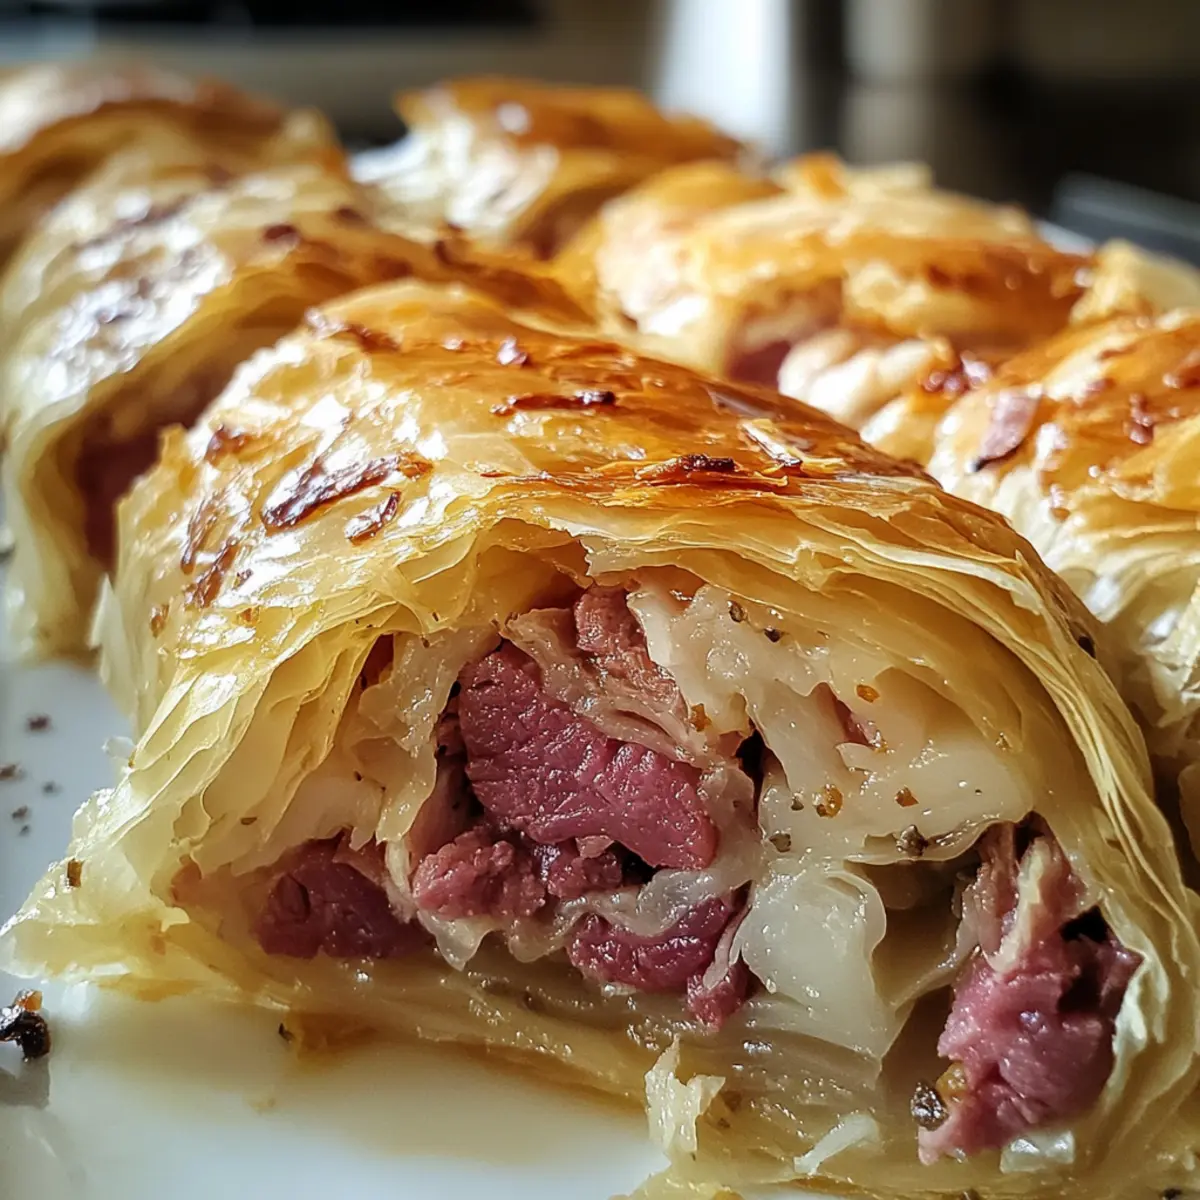
Crispy Corned Cabbage Parcels for a Flavorful Twist on Leftovers

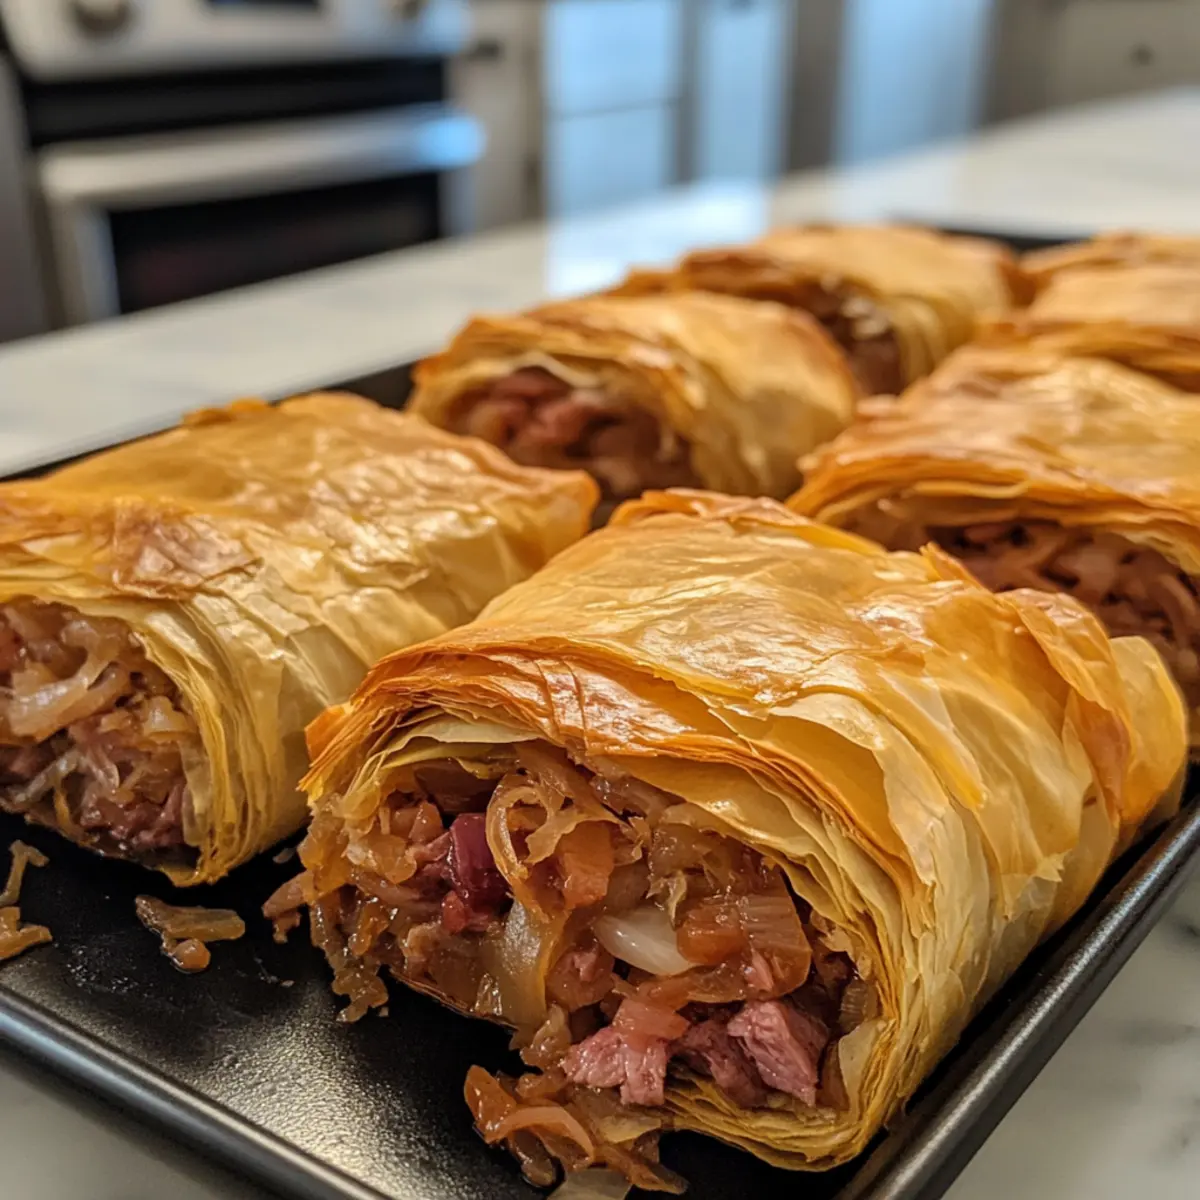
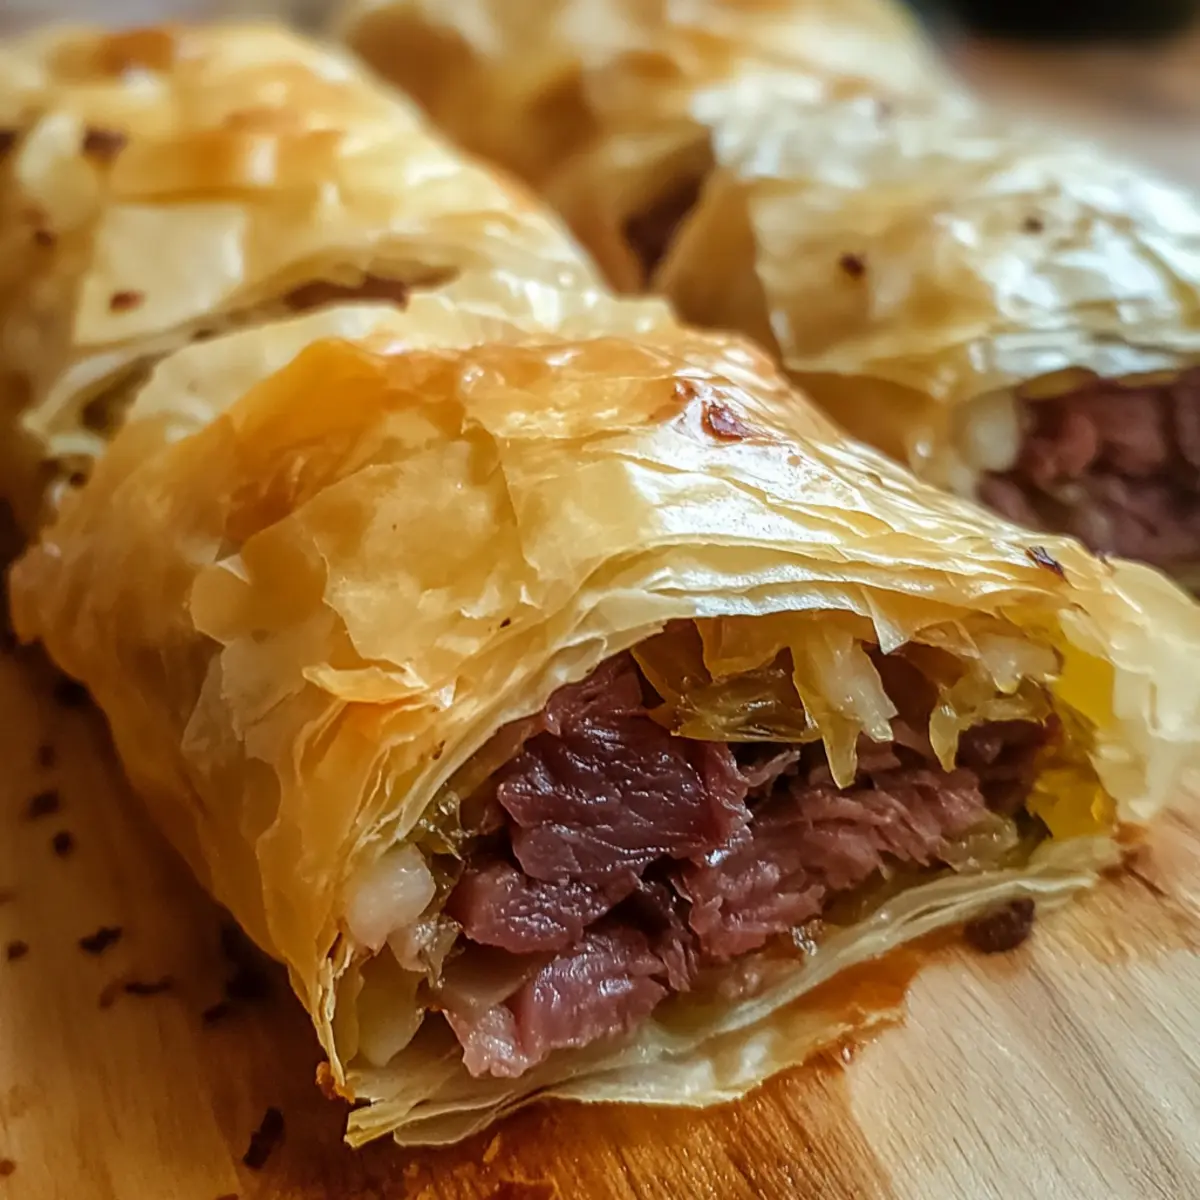
As I stood in my kitchen, breathing in the warm, savory aroma of sizzling vegetables, I felt a wave of inspiration wash over me. I had leftover corned beef from our St. Patrick’s Day feast, but rather than another predictable meal, I decided to elevate it into something extraordinary: Crispy Corned Cabbage Parcels. These bundles are not only a brilliant way to repurpose leftovers, but they also bring a delightful Mediterranean twist to a classic dish. The flaky filo pastry envelops a medley of caramelized cabbage and tender corned beef, creating a satisfying crunch that’s perfect for a light brunch or an impressive appetizer. Plus, they’re a fantastic way to keep your cooking routine fresh and exciting. Ready to turn your leftovers into a culinary masterpiece? Let’s dive in!

Why Choose Crispy Corned Cabbage Parcels?

Creativity at Its Best: Transforming your leftover corned beef into Crispy Corned Cabbage Parcels gives a new life to your meal without any hassle.

Flavor Fusion: The combination of sweet, caramelized cabbage and savory corned beef wrapped in flaky filo is a delightful twist that excites the palate.

Easy Preparation: With simple steps and minimal ingredients, making these bundles is a breeze, making them perfect for a quick weeknight dinner or brunch.

Crowd-Pleasing Appeal: These parcels are sure to impress guests, making them ideal for gatherings or family meals alongside Air Fryer Chicken Wings or a refreshing side salad.

Versatile Filling: Feel free to swap in whatever leftovers you have, be it chicken or seasonal veggies, allowing for endless variations that suit everyone’s taste.

Make-Ahead Convenience: Prepare the filling in advance, pop these in the oven just before serving, and enjoy the enticing aroma wafting through your kitchen!

Crispy Corned Cabbage Parcel Ingredients

For the Filling
Cooked Corned Beef – 6 oz, diced or sliced; this is the star ingredient that provides protein and flavor.
Caramelized Cabbage – About 1/4 of a small head cut into thin wedges; sweetness emerges when caramelized, enhancing the dish’s depth.
Leek – One small, thinly sliced; it adds a mild onion flavor; onion can be substituted if needed.
Russet Potato – One medium diced (about 6 oz); this provides substance; feel free to substitute with Yukon Gold for a different texture.
Carrots – Two small, chopped; they contribute sweetness and vibrant color to the filling.
Garlic – One clove minced; this adds aromatic depth and enhances the overall flavor profile.
Sea Salt & Freshly Ground Pepper – To taste; these elevate and balance the flavors.
Dried Mustard – Adds a subtle tang and depth; you can use mustard powder or omit if preferred.

For the Wrapping
Filo Pastry – Ensure it’s fully defrosted before use; it creates that light and crispy exterior you crave.
Extra Virgin Olive Oil – Used for brushing between pastry layers; it adds richness and helps achieve golden-brown bundles, but melted butter can be a flavorful alternative.

Enjoy diving into these Crispy Corned Cabbage Parcels as a delightful way to savor your leftovers in a fun, Mediterranean-style dish!

Step‑by‑Step Instructions for Crispy Corned Cabbage Parcels

Step 1: Prep Filo
Begin by ensuring your filo pastry is fully defrosted and at room temperature, which typically takes about 30 minutes. Preheat your oven to 375°F (190°C). Once ready, cover the sheets with a damp towel to prevent them from drying out as you work with the Crispy Corned Cabbage Parcels.

Step 2: Caramelize Cabbage
In a large skillet, heat 2 tablespoons of extra virgin olive oil over medium heat. Add the thin wedges of cabbage and sear for about 5 minutes on each side, until they turn a lovely golden brown. Once done, remove the cabbage from the pan, allow it to cool slightly, and slice it into ribbons.

Step 3: Sauté Vegetables
In the same skillet, add another tablespoon of olive oil, followed by the chopped leeks, diced potatoes, and carrots. Sauté these for around 5 minutes, stirring occasionally, until they’ve softened. Add the minced garlic and the sliced cabbage back into the skillet, mixing until everything is tender and aromatic—about 3 more minutes.

Step 4: Combine Filling
Transfer the sautéed vegetable mixture to a mixing bowl and add the diced corned beef. Sprinkle in sea salt, freshly ground pepper, and dried mustard, combining everything well to ensure the flavors of the filling for your Crispy Corned Cabbage Parcels meld perfectly.

Step 5: Prepare Muffin Tin
Take out a 24-cup muffin tin and brush each cup generously with olive oil to prevent sticking. This will help achieve a beautifully golden color on the outside of the parcels during baking.

Step 6: Assemble Bundles
On a clean surface, lay down one sheet of filo pastry and brush it lightly with olive oil. Stack a second sheet on top, then cut the stacked sheets into quarters. Now, take one quadrant, create a cross shape using two pieces, and fill the center with about 2 tablespoons of the vegetable and meat mixture. Scrunch the edges together to form a parcel, placing it into the muffin tin. Repeat until all filling is used.

Step 7: Bake
Once all the Crispy Corned Cabbage Parcels are assembled in the muffin tin, brush the tops lightly with olive oil for that extra crunch. Bake in the preheated oven for approximately 20 minutes, or until they turn a gorgeous golden brown and crispy.

Step 8: Serve
Allow the parcels to cool slightly on a wire rack before serving. These delightful Crispy Corned Cabbage Parcels can be enjoyed warm or at room temperature, perfect for any gathering alongside a tangy whole grain mustard or a zesty horseradish-mustard sauce.

Variations & Substitutions for Crispy Corned Cabbage Parcels

Get ready to let your creativity soar as you customize these delicious bites to suit your taste and pantry!

  • Shredded Chicken: Gently swap corned beef for moist shredded chicken for a lighter, equally tasty twist.

  • Seasonal Veggies: Use whatever seasonal vegetables catch your fancy, like roasted bell peppers or sautéed spinach for vibrant flavors.

  • Butter Swap: Brush filo layers with melted butter instead of olive oil for an indulgent, rich flavor and extra crispy texture.

  • Spicy Kick: Add a pinch of red pepper flakes or chopped jalapeños to the filling for an exciting heat that will warm your soul.

  • Herb Infusion: Toss in fresh herbs like dill or thyme into your filling to elevate the flavor and aroma, bringing a garden-fresh feel.

  • Cheesy Addition: For a delightful creaminess, mix in some shredded cheese like cheddar or Gruyère with the filling before wrapping.

  • Zesty Sauces: Try swapping out your dipping sauce for something bolder, like a tangy chili sauce or roasted garlic aioli, to intensify each bite.

  • Curried Flavor: For an intriguing fusion, add curry powder to your filling for a burst of exotic flavor, creating a unique taste experience.

These Crispy Corned Cabbage Parcels can be an endless canvas for your culinary creativity! Pair them with a refreshing side salad or serve alongside some flavor-packed chili beef to round out a delightful meal!

How to Store and Freeze Crispy Corned Cabbage Parcels

Fridge: Store any leftover parcels in an airtight container for up to 4 days. They will maintain their flavors and can be enjoyed throughout the week.

Freezer: For longer storage, freeze the assembled but uncooked parcels in a single layer on a baking sheet. Once frozen, transfer to a freezer bag for up to 2 months.

Reheating: To reheat, bake frozen parcels directly from the freezer at 375°F (190°C) for about 25-30 minutes until golden and crispy, ensuring the flavors of the crispy corned cabbage parcels shine through.

Make-Ahead Tips: Prepare the filling ahead of time and store it in the fridge. Assemble the parcels just before baking to enjoy fresh, crispy goodness!

Expert Tips for Crispy Corned Cabbage Parcels

  • Filo Handling: Keep filo sheets covered with a damp towel while working to prevent them from drying out and becoming brittle.
  • Gold Standard Oil: Use extra virgin olive oil between layers of pastry for a golden crispy texture; melted butter can also add a nice flavor twist.
  • Even Cooking: When caramelizing cabbage, avoid overcrowding the skillet, giving enough space for each piece to sear beautifully.
  • Flavor Boost: Don’t skip the dried mustard in the filling—its tangy depth is essential for enhancing the overall taste profile of your Crispy Corned Cabbage Parcels.
  • Versatile Fillings: Feel free to switch up the filling with other leftovers like chicken or seasonal vegetables, creating new flavor experiences each time!

What to Serve with Corned Beef and Caramelized Cabbage Filo Bundles?

Savoring these delightful bundles opens up a world of complementary flavors and textures that elevate your dining experience.

  • Simple Green Salad: The freshness of mixed greens brightens the meal while balancing the rich flavors of the parcels. Drizzle with a light vinaigrette for enhanced brightness.

  • Roasted Root Vegetables: Seasoned with herbs, these veggies add earthy sweetness and a hearty element to your table, complementing the savory filling beautifully.

  • Creamy Mashed Potatoes: A classic comfort food, they bring a smooth, buttery texture that pairs perfectly with the crispy exterior of the bundles, enhancing your meal’s cozy factor.

  • Apple Sauce: The sweetness of apple sauce cuts through the richness of the corned beef, providing a delightful contrast that elevates every bite.

  • Tangy Mustard Sauce: A zesty mustard sauce serves as an exciting dip, enhancing the flavor profile and adding a creamy texture that complements the crunchy bundles.

  • Herbed Yogurt Dip: A cool, herbed yogurt dip can act as a refreshing counterpoint to the warm, savory bundles, adding an extra layer of flavor that is irresistible.

These pairings not only create a harmonious meal experience but also present an opportunity to explore new flavors alongside your Crispy Corned Cabbage Parcels.

Make Ahead Options

These Crispy Corned Cabbage Parcels are perfect for meal prep aficionados! You can prepare the filling up to 3 days in advance by sautéing the vegetables and mixing in the diced corned beef; just refrigerate it in an airtight container to maintain its delicious quality. When you’re ready to serve, simply assemble the parcels using the prepped filling and filo pastry shortly before baking them. This way, you’ll have mouthwatering Crispy Corned Cabbage Parcels straight from the oven with minimal effort on busy evenings. Just remember to brush with olive oil before baking for that irresistible crispy texture. Enjoy the time-saving benefit of making your mealtime special without the last-minute rush!

Crispy Corned Cabbage Parcels Recipe FAQs

What type of cabbage is best for caramelization?
Absolutely! While you can use any cabbage, green or Savoy cabbage works beautifully for caramelizing due to their sweetness when cooked. Just make sure to slice it thinly to ensure even caramelization.

How long can I store leftover parcels?
Leftover Crispy Corned Cabbage Parcels can be stored in an airtight container in the refrigerator for up to 4 days. Just reheat them in a 300°F oven until they’re warm and crispy again—perfect for quick snacks or light meals!

Can I freeze the assembled parcels?
Yes! To freeze, lay the uncooked bundles on a baking sheet, and freeze them until solid. Then transfer them to a freezer bag for up to 2 months. When you’re ready to bake, you can cook them straight from the freezer, adding about 5-10 minutes to the cooking time.

What should I do if the filo pastry tears while working with it?
Very! If the filo tears, don’t worry. Simply layer another sheet over the torn area. The extra layers will actually add to the flakiness of your Crispy Corned Cabbage Parcels. Keeping the filo covered with a damp towel while you work can also help prevent tearing.

Are there any dietary considerations for these parcels?
The recipe can easily be modified to suit various dietary needs! If you need a gluten-free option, consider using gluten-free filo pastry. Additionally, feel free to swap out the corned beef with a plant-based protein for a vegetarian twist. Always check the labels for hidden allergens.

Can I prepare the filling in advance?
Absolutely! You can prepare the filling a day ahead and store it in the fridge. When you’re ready to enjoy your parcels, just assemble them with the filo pastry and bake. This makes weeknight meals or last-minute gatherings easy and stress-free!

Crispy Corned Cabbage Parcels Recipe FAQs

Crispy Corned Cabbage Parcels

Crispy Corned Cabbage Parcels for a Flavorful Twist on Leftovers

Transform your leftovers into Crispy Corned Cabbage Parcels, a delightful Mediterranean dish perfect for brunch or appetizers.
Prep Time 30 minutes
Cook Time 20 minutes
Total Time 50 minutes
Servings: 12 parcels
Course: Appetizer
Cuisine: Mediterranean
Calories: 150

Ingredients
  

For the Filling
  • 6 oz Cooked Corned Beef, diced or sliced This is the star ingredient that provides protein and flavor.
  • 1/4 head Caramelized Cabbage, cut into thin wedges Sweetness emerges when caramelized, enhancing the dish's depth.
  • 1 small Leek, thinly sliced It adds a mild onion flavor; onion can be substituted if needed.
  • 1 medium Russet Potato, diced This provides substance; feel free to substitute with Yukon Gold.
  • 2 small Carrots, chopped They contribute sweetness and vibrant color to the filling.
  • 1 clove Garlic, minced This adds aromatic depth and enhances the overall flavor profile.
  • Sea Salt & Freshly Ground Pepper To taste; these elevate and balance the flavors.
  • Dried Mustard Adds a subtle tang and depth; omit if preferred.
For the Wrapping
  • Filo Pastry Ensure it's fully defrosted before use.
  • Extra Virgin Olive Oil For brushing between pastry layers.

Equipment

  • large skillet
  • Mixing Bowl
  • 24-cup muffin tin
  • Baking Sheet

Method
 

Step-by-Step Instructions
  1. Ensure your filo pastry is fully defrosted and at room temperature. Preheat your oven to 375°F (190°C) and cover the sheets with a damp towel.
  2. In a large skillet, heat 2 tablespoons of olive oil over medium heat. Add the cabbage wedges and sear for about 5 minutes on each side until golden brown, then slice into ribbons.
  3. In the same skillet, add another tablespoon of olive oil, followed by leeks, potatoes, and carrots. Sauté for around 5 minutes until softened, then add garlic and cabbage, mixing until tender.
  4. Transfer the sautéed mixture to a mixing bowl and add diced corned beef, sea salt, pepper, and dried mustard, combining well.
  5. Brush a 24-cup muffin tin with olive oil to prevent sticking.
  6. Lay down one sheet of filo and brush lightly with olive oil. Stack a second sheet, cut into quarters, and create a cross shape with two pieces. Fill with about 2 tablespoons of the mixture, scrunch the edges to form a parcel, and place into the muffin tin.
  7. Brush the tops lightly with olive oil and bake for approximately 20 minutes until golden brown and crispy.
  8. Cool slightly on a wire rack before serving. Enjoy warm or at room temperature.

Nutrition

Serving: 1parcelCalories: 150kcalCarbohydrates: 10gProtein: 5gFat: 10gSaturated Fat: 1.5gPolyunsaturated Fat: 1gMonounsaturated Fat: 8gCholesterol: 20mgSodium: 300mgPotassium: 300mgFiber: 2gSugar: 2gVitamin A: 100IUVitamin C: 8mgCalcium: 30mgIron: 1mg

Notes

Store leftover parcels in an airtight container for up to 4 days. Freeze assembled but uncooked parcels for up to 2 months.

Tried this recipe?

Let us know how it was!

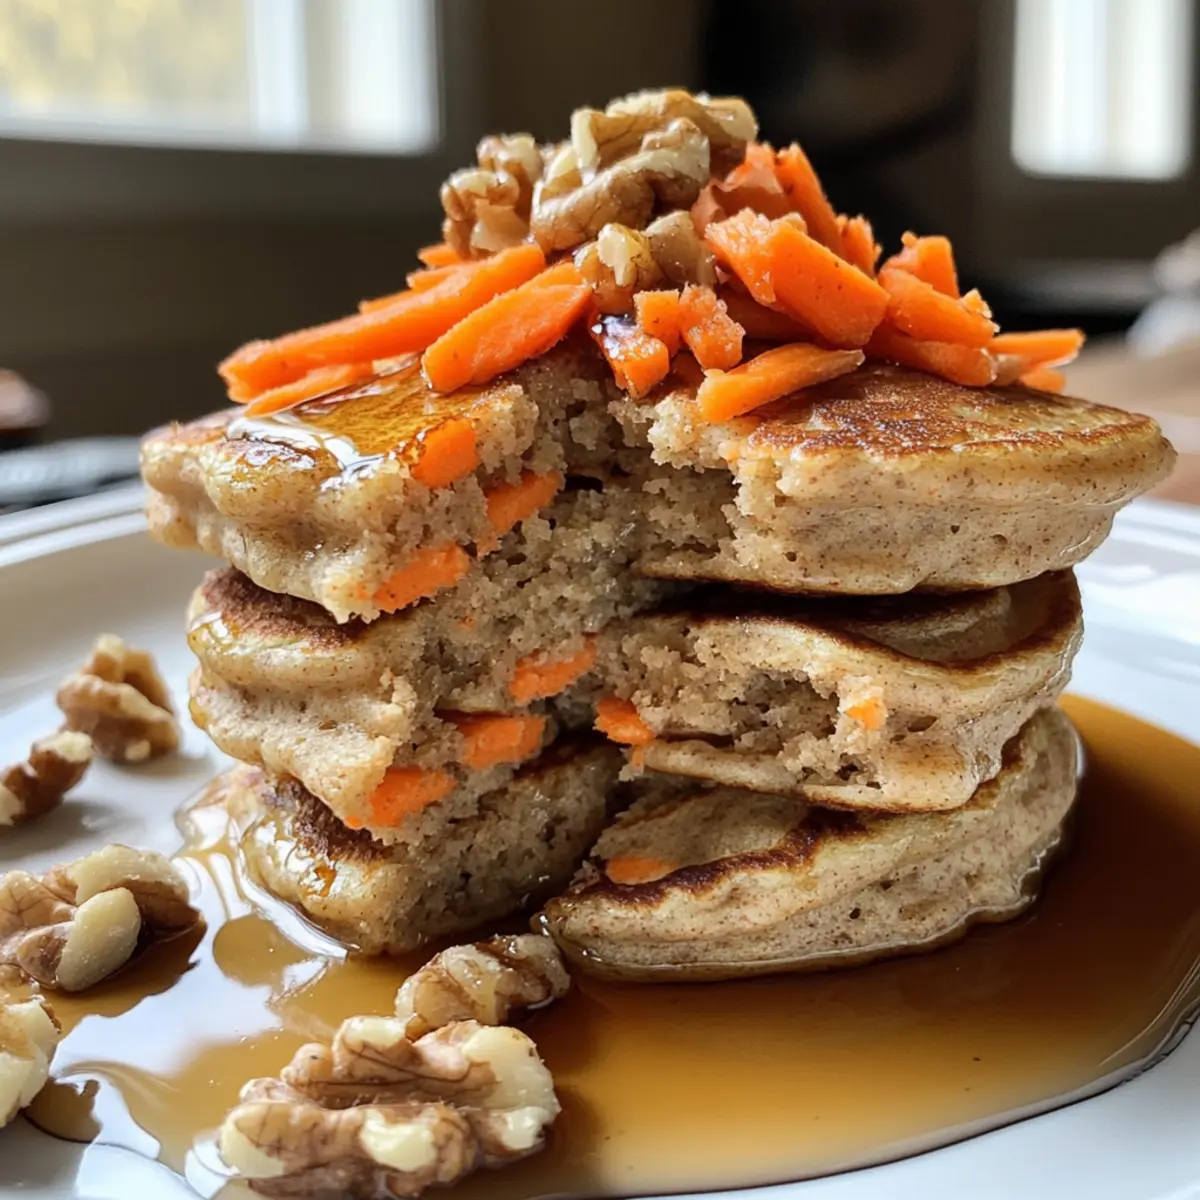
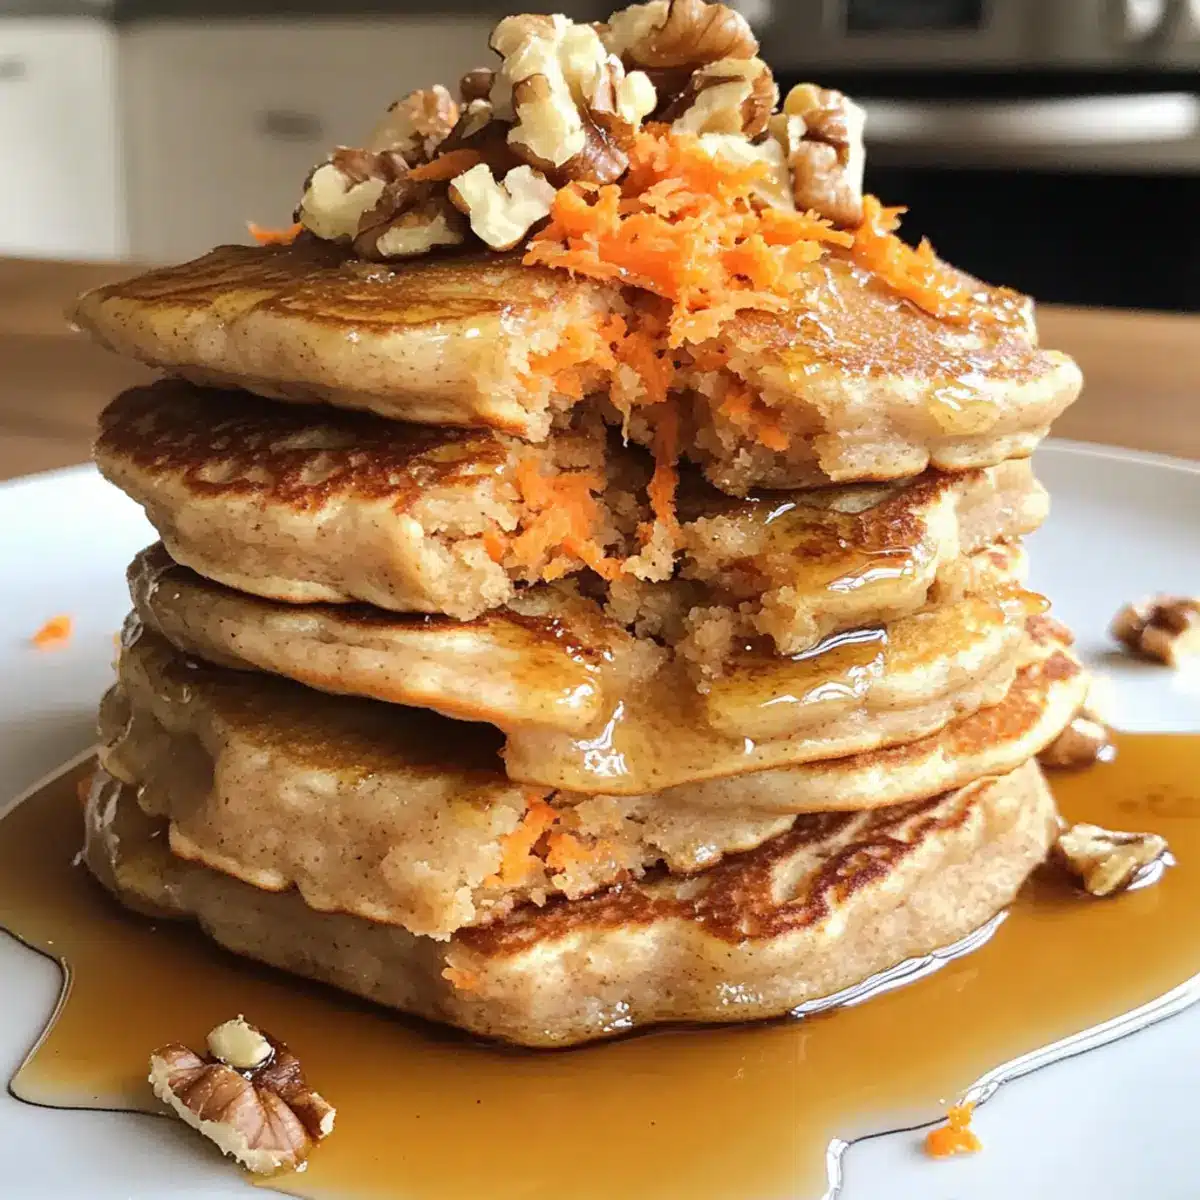
Fluffy Carrot Cake Pancakes for Cozy Mornings

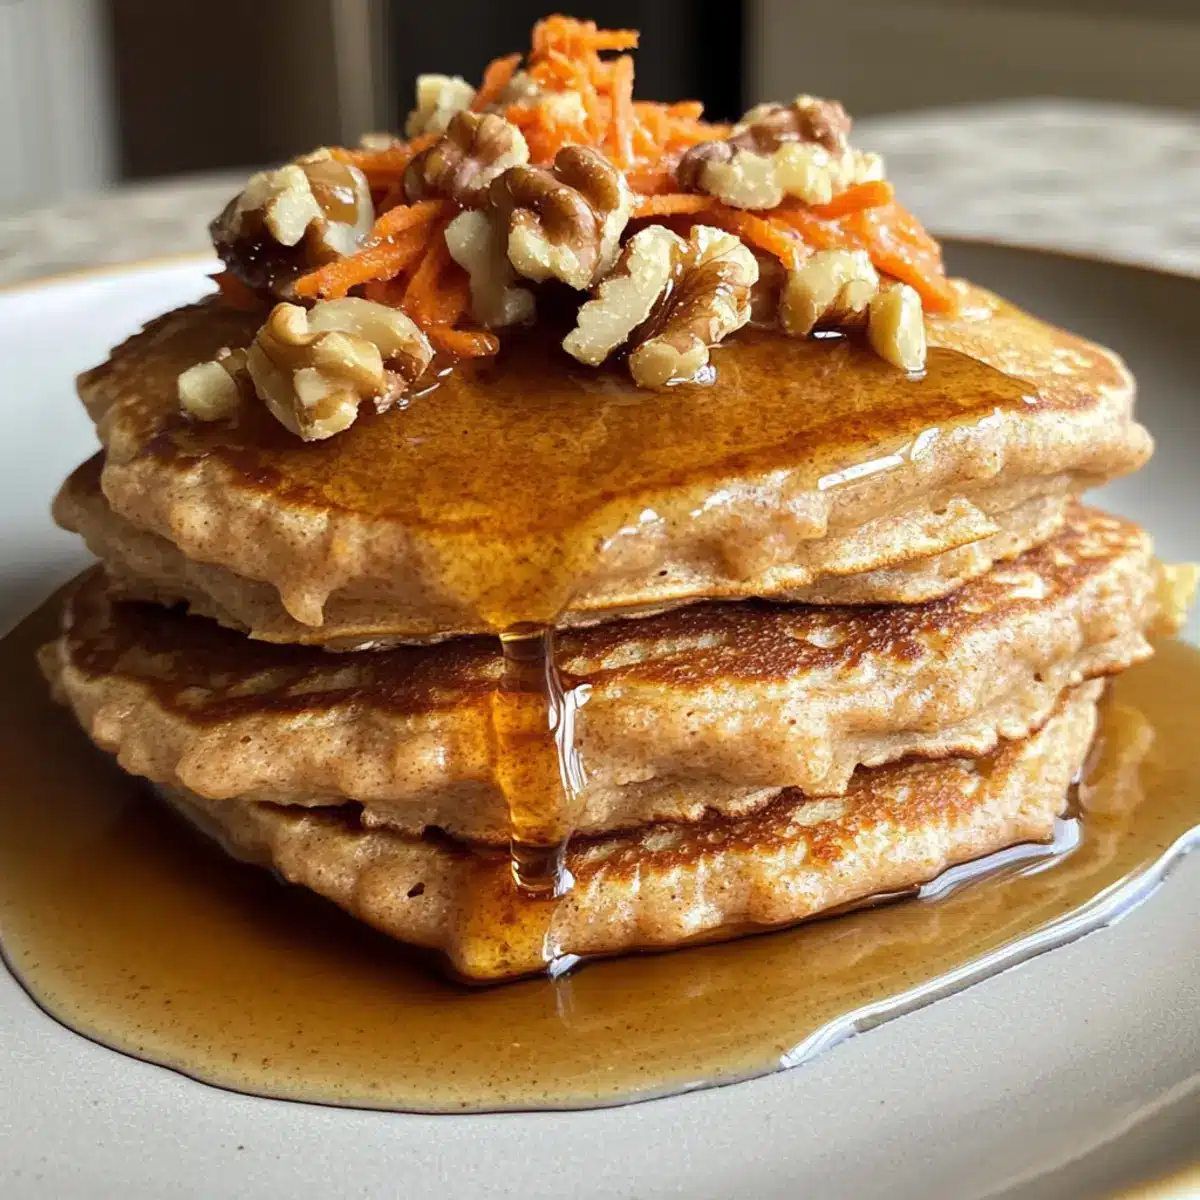
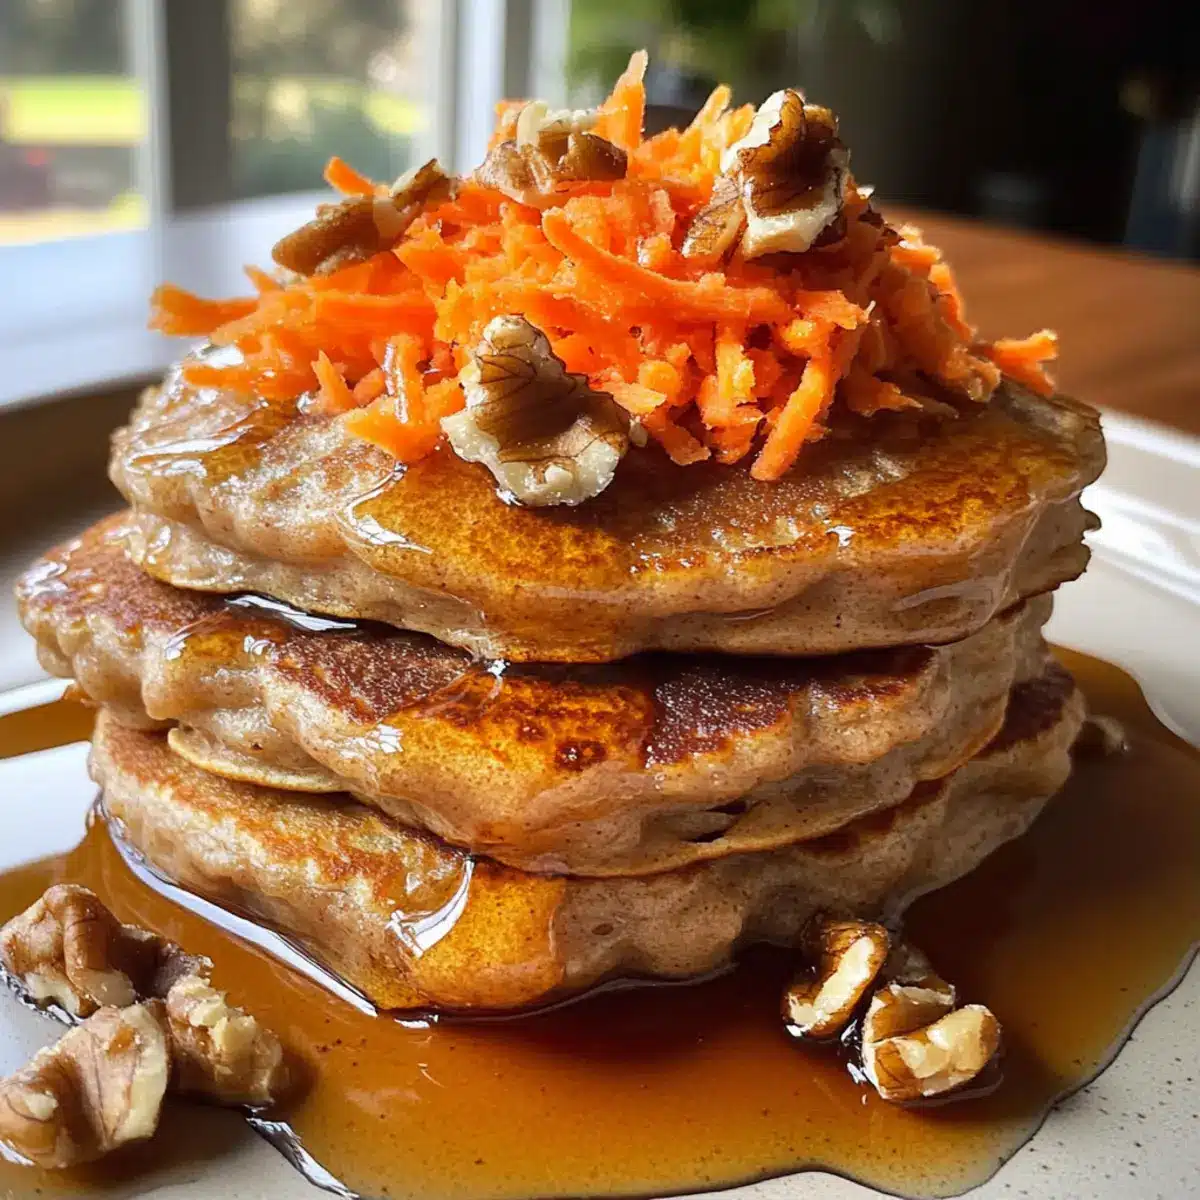
The aroma of spiced carrot cake wafted through my kitchen, and it suddenly hit me—what if I could bring that comfort to my breakfast plate? That’s when I crafted these Fluffy Dairy-Free Carrot Cake Pancakes. With soft and fluffy textures, they perfectly capture the essence of your favorite carrot cake while being a delightful breakfast dish. These pancakes are quick to whip up and ideal for Easter brunch or cozy Sunday morning family gatherings. Imagine piling them high and drizzling with real maple syrup, or pairing them with creamy Greek yogurt and crunchy walnuts for a breakfast that feels indulgent yet wholesome. Curious to see just how easy it is to make these delicious morning treats? Let’s dive in!

Why are carrot cake pancakes a must-try?

Unique Flavor: These pancakes bring the delightful taste of classic carrot cake right to your breakfast table.

Dairy-Free Delight: Made with dairy-free milk, they’re perfect for those with dietary restrictions without sacrificing flavor.

Quick and Easy: With just a few simple steps, you’ll be enjoying a warm stack of pancakes in no time.

Versatile Pairings: Serve them with a drizzle of maple syrup, fresh berries, and creamy Greek yogurt for a breakfast that feels truly special.

Crowd-Pleasing: Perfect for family gatherings or holiday brunches like Easter, these pancakes are sure to impress!

Once you try these fluffy beauties, you’ll want to explore other delicious breakfast options like Fluffy Buttermilk Pancakes Discover or even a twist on dessert with Strawberry Cheesecake Bars.

Carrot Cake Pancake Ingredients

For the Pancake Batter
Dairy-Free Milk – Provides moisture and blends well with vinegar to create a buttermilk substitute for these delightfully fluffy carrot cake pancakes.
White Vinegar – Reacts with dairy-free milk to mimic buttermilk, ensuring perfect pancake fluffiness.
Plain Flour/All-Purpose Flour – Acts as the structure of the pancakes, giving them a wonderful density.
Baking Powder – A leavening agent that helps pancakes rise perfectly and achieve that coveted fluff.
Bicarbonate of Soda – Reacts with vinegar to create lift and enhances the fluffiness of the pancakes.
Salt – Enhances overall flavor, making each bite a taste sensation.
Mixed Spice – A blend of warm spices that gives the characteristic flavor of carrot cake.
Cinnamon – Adds sweetness and warmth; feel free to adjust based on personal taste preferences.
Brown Sugar – Contributes moisture and a rich sweetness that complements the spices.
Egg – Provides structure and moisture. For a vegan option, use a flax egg instead.
Canola Oil – Adds fat for tenderness; you can replace it with melted coconut oil or another neutral oil.
Vanilla Extract – Enhances flavor—use a high-quality extract for the best results.
Grated Carrot – Adds moisture and texture, embodying the essence of carrot cake; about 2 medium carrots are needed.
Chopped Walnuts – Provides a crunchy texture; can be omitted for a nut-free version.

For Serving
Greek Yogurt – Adds creaminess and a tangy contrast to the sweetness of the pancakes.
Maple Syrup – A drizzle brings a delightful sweetness that pairs perfectly with the spiced flavors.
Fresh Berries – Brightens the plate and adds a burst of freshness; try strawberries or blueberries!
Dairy-Free Cream Cheese – A delicious alternative for adding an extra layer of creaminess.

Experience the joy of making these Carrot Cake Pancakes and savor the delightful twist on your classic breakfast treats!

Step‑by‑Step Instructions for Carrot Cake Pancakes

Step 1: Prepare the Buttermilk Substitute
In a small bowl, combine 1 cup of dairy-free milk with 1 tablespoon of white vinegar. Stir well and let it sit for about 5 minutes until it curdles slightly, resembling buttermilk. This step is crucial for achieving the perfect texture in your Carrot Cake Pancakes.

Step 2: Mix the Dry Ingredients
In another bowl, whisk together 1 cup of plain flour, 2 teaspoons of baking powder, 1 teaspoon of bicarbonate of soda, a pinch of salt, and your blend of mixed spices (including cinnamon). This will create a light and fluffy texture for your pancake batter, making sure to integrate all the dry ingredients evenly.

Step 3: Blend the Wet Ingredients
In a large mixing bowl, combine 1/4 cup of brown sugar, 1 egg (or flax egg for a vegan option), 2 tablespoons of canola oil, and 1 teaspoon of vanilla extract. Pour in your prepared dairy-free milk mixture and mix until smooth. This mixture will lend moistness and flavor to your delightful Carrot Cake Pancakes.

Step 4: Combine Wet and Dry Ingredients
Gently fold the dry ingredient mixture into the wet ingredients, stirring just until combined. Be careful not to overmix; some lumps are perfectly normal. This will create a thick pancake batter that retains all the wonderful flavors of your Carrot Cake Pancakes.

Step 5: Add the Carrots and Walnuts
Carefully fold in about 1 cup of grated carrots and 1/2 cup of chopped walnuts into the batter. This step adds texture and enhances the flavor profile of your pancakes, making them reminiscent of a slice of your favorite carrot cake.

Step 6: Rest the Batter
Allow the batter to rest for about 10 minutes. This crucial step helps the gluten to relax, resulting in light and fluffy Carrot Cake Pancakes. Use this time to prepare your griddle or skillet for cooking.

Step 7: Heat the Pan
Preheat a non-stick skillet over medium heat, lightly spraying it with oil. Aim for a temperature where water droplets sizzle and evaporate immediately upon contact. This ensures that the pancakes will cook evenly without sticking.

Step 8: Cook the Pancakes
Pour 1/4 cup of batter onto the heated skillet. Cook until bubbles start to form on the surface, about 2-3 minutes. When the edges appear set and lightly golden, flip the pancake and continue cooking for an additional 1-2 minutes until golden brown and cooked through.

Step 9: Repeat Cooking Process
Continue pouring batter in 1/4 cup increments, adjusting the pan heat as necessary to prevent burning. Keep cooking until all the batter is used up, monitoring the pancakes carefully to maintain an even cooking temperature.

Step 10: Serve and Enjoy
Serve your warm Carrot Cake Pancakes immediately with a dollop of Greek yogurt, a drizzle of maple syrup, and a sprinkle of fresh berries. These pancakes are perfect for brunch, and serve beautifully on any festive occasion!

What to Serve with Fluffy Dairy-Free Carrot Cake Pancakes

Imagine a heartwarming breakfast spread that not only matches the cozy flavors of your pancakes but elevates the experience to something truly special.

  • Greek Yogurt: Adds creaminess and a tangy contrast that complements the warm spices beautifully.
  • Drizzle of Maple Syrup: This sweet touch enhances the flavor profile, making every bite even more indulgent.
  • Fresh Berries: Bright and juicy, they add a refreshing burst that balances the richness of the pancakes.
  • Dairy-Free Cream Cheese: A luscious alternative that brings an extra layer of creaminess and pairs well with the spices.
  • Crunchy Walnuts: If you love texture, the contrast of these nuts gives a satisfying crunch to each fluffy pancake bite.
  • Light Fruit Salad: A mix of oranges, apples, and bananas adds a vibrant freshness, capturing the essence of springtime.
  • Cinnamon Coffee: A warm cup with a hint of spice mirrors the flavors in your pancakes, enhancing the comfort of your breakfast.
  • Sparkling Apple Cider: For a festive twist, this bubbly drink is refreshing and adds a delightful tartness that pairs wonderfully.
  • Carrot Cake Muffins: For the ultimate brunch experience, serve alongside these treats for those who can’t get enough of carrot cake!

Expert Tips for Carrot Cake Pancakes

  • Perfect Buttermilk Substitute: To achieve the ideal texture, allow the dairy-free milk and vinegar mixture to curdle for at least 5 minutes before use.

  • Don’t Overmix: Gently fold the dry ingredients into the wet ingredients; overmixing can lead to dense pancakes. Aim for a thick batter with some lumps for fluffy carrot cake pancakes.

  • Resting is Key: Allowing the batter to rest for 10 minutes is essential for gluten relaxation, resulting in lighter, fluffier pancakes.

  • Monitor Cooking Temperature: Start cooking on high heat, then reduce to medium to prevent burning while ensuring your pancakes are cooked through.

  • Customize Your Mix-ins: Feel free to swap walnuts for pecans or add raisins for extra sweetness—these variations can elevate the flavor of your carrot cake pancakes!

Carrot Cake Pancakes Variations

Feel free to get creative with your Carrot Cake Pancakes to make them uniquely yours!

  • Zucchini Switch: Substitute grated carrot with zucchini for a sneaky veggie twist that adds moisture and a subtle flavor.

  • Nutty Options: Pecans Swap: Use pecans instead of walnuts for a sweeter, softer crunch that pairs beautifully with the warming spices.

  • Fruit Surprise: Raisin Addition: Add a handful of raisins or dried cranberries to the batter for bursts of sweetness with every bite.

  • Cocoa Delight: For chocolate lovers, mix in some cocoa powder or chocolate chips to transform the flavor profile into a decadent treat!

  • Spice it Up: Heat Level: If you’re feeling adventurous, add a pinch of cayenne pepper or finely chopped jalapeño to the batter for a surprising kick.

  • Creamy Accents: Cream Cheese Swirl: Blend softened dairy-free cream cheese with a touch of powdered sugar and swirl it into the pancake batter for an added creamy layer.

  • Apple Overload: Swap out the carrot entirely with grated apple for a fresh, fruity twist reminiscent of apple spice pancakes.

  • Easy Mix: Feel free to combine any of these variations! Mixing in shredded zucchini while adding raisins or chopped pecans can create an incredibly delicious breakfast.

Don’t forget, after trying these delicious options, you might also fall in love with the delightful flavors of Fluffy Buttermilk Pancakes Discover or indulge in some sweet treats like Strawberry Cheesecake Bars. Enjoy exploring!

How to Store and Freeze Carrot Cake Pancakes

Fridge: Store leftover pancakes in an airtight container in the fridge for up to 3-4 days. Reheat in the microwave or on a skillet until warmed through.

Freezer: For longer storage, freeze pancakes in a single layer on a baking tray, then transfer to a freezer-safe bag once solid. They can be kept for up to 3 months.

Reheating: To reheat frozen pancakes, simply microwave them for 30-60 seconds or warm them in a skillet over low heat until heated through.

Layering: If stacking pancakes in the freezer, separate layers with parchment paper to prevent sticking, ensuring your delicious Carrot Cake Pancakes remain intact.

Make Ahead Options

These Fluffy Dairy-Free Carrot Cake Pancakes are perfect for busy home cooks looking to save time during hectic mornings! You can prepare the pancake batter up to 24 hours before cooking—simply mix all your ingredients as directed and store it in an airtight container in the refrigerator. For best results, give the batter a gentle stir before cooking to re-incorporate any settled ingredients. Additionally, you can grate the carrots and even chop the walnuts ahead of time, storing them in the fridge for up to 3 days. When you’re ready to serve, just heat your skillet and pour the batter directly onto the pan for a quick, delightful breakfast that feels homemade and special, without the rush!

Fluffy Dairy-Free Carrot Cake Pancakes Recipe FAQs

What type of dairy-free milk should I use?
Absolutely! You can use almond, oat, or soy milk as suitable alternatives. Each will provide moisture and help create a buttermilk substitute when combined with vinegar. Choose based on your taste preference or dietary needs!

How should I store leftover pancakes?
For optimal freshness, store your leftover pancakes in an airtight container in the fridge for up to 3-4 days. Reheat them in the microwave for about 30 seconds or on a skillet over low heat until warmed through. I often make a double batch so I can enjoy them throughout the week!

Can I freeze the carrot cake pancakes?
Yes, freezing is a great option! Once cooled, place the pancakes in a single layer on a baking tray to freeze them individually. After they are solid, transfer them to a freezer-safe bag. They can be kept for up to 3 months this way. Just remember to separate layers with parchment paper to prevent them from sticking together.

What if my pancake batter is too thick or too thin?
If your batter is too thick, you can add a little more dairy-free milk, one tablespoon at a time, until it reaches the desired consistency—smooth yet thick enough to hold shape on the pan. Conversely, if it’s too thin, just whisk in a touch more flour until you achieve a thicker batter. Don’t worry—pancakes are quite forgiving!

Are these pancakes suitable for people with nut allergies?
Definitely! If you’re preparing these pancakes for someone with nut allergies, simply omit the walnuts or substitute them with seeds like sunflower or pumpkin seeds for added crunch. You can also just enjoy them plain – they’ll still be delicious!

How can I ensure my pancakes are fluffy?
To get that fluffy texture, never skip the essential resting period of about 10 minutes after mixing the batter. This resting time allows the gluten to relax, leading to lighter pancakes. Also, be cautious not to overmix when combining your wet and dry ingredients—some lumps are perfectly fine!

Carrot Cake Pancakes

Fluffy Carrot Cake Pancakes for Cozy Mornings

Enjoy the delightful flavor of Carrot Cake Pancakes—a cozy breakfast twist on a classic favorite.
Prep Time 10 minutes
Cook Time 20 minutes
Resting Time 10 minutes
Total Time 40 minutes
Servings: 4 pancakes
Course: Breakfast
Cuisine: American
Calories: 180

Ingredients
  

For the Pancake Batter
  • 1 cup dairy-free milk for buttermilk substitute
  • 1 tablespoon white vinegar
  • 1 cup plain flour or all-purpose flour
  • 2 teaspoons baking powder
  • 1 teaspoon bicarbonate of soda
  • 1 pinch salt
  • 2 teaspoons mixed spice blend of warm spices
  • 1 teaspoon cinnamon adjust to taste
  • 1/4 cup brown sugar
  • 1 large egg or flax egg for vegan option
  • 2 tablespoons canola oil
  • 1 teaspoon vanilla extract high-quality preferred
  • 1 cup grated carrot about 2 medium carrots
  • 1/2 cup chopped walnuts optional
For Serving
  • 1 cup Greek yogurt for topping
  • 1/4 cup maple syrup for drizzling
  • 1 cup fresh berries strawberries or blueberries
  • 1/2 cup dairy-free cream cheese optional

Equipment

  • Mixing Bowl
  • Whisk
  • Non-stick skillet

Method
 

Preparation Steps
  1. Prepare the buttermilk substitute by combining dairy-free milk with white vinegar and letting it sit for about 5 minutes.
  2. Mix the dry ingredients: whisk together flour, baking powder, bicarbonate of soda, salt, mixed spices, and cinnamon.
  3. Blend the wet ingredients: mix brown sugar, egg (or flax egg), canola oil, vanilla extract, and the prepared milk mixture until smooth.
  4. Combine wet and dry ingredients gently, folding until just combined, being careful not to overmix.
  5. Add grated carrots and chopped walnuts to the batter and fold carefully.
  6. Rest the batter for about 10 minutes to allow gluten to relax.
  7. Heat a non-stick skillet over medium heat and lightly spray with oil.
  8. Cook pancakes: pour 1/4 cup of batter into the skillet, cooking until bubbles form, then flip and cook until golden brown.
  9. Repeat the cooking process with the remaining batter, adjusting heat as necessary.
  10. Serve warm topped with Greek yogurt, maple syrup, and fresh berries.

Nutrition

Serving: 1pancakeCalories: 180kcalCarbohydrates: 25gProtein: 3gFat: 7gSaturated Fat: 1gPolyunsaturated Fat: 3gMonounsaturated Fat: 3gCholesterol: 40mgSodium: 180mgPotassium: 150mgFiber: 1gSugar: 5gVitamin A: 500IUVitamin C: 2mgCalcium: 150mgIron: 1mg

Notes

Great for brunch or special occasions.

Tried this recipe?

Let us know how it was!

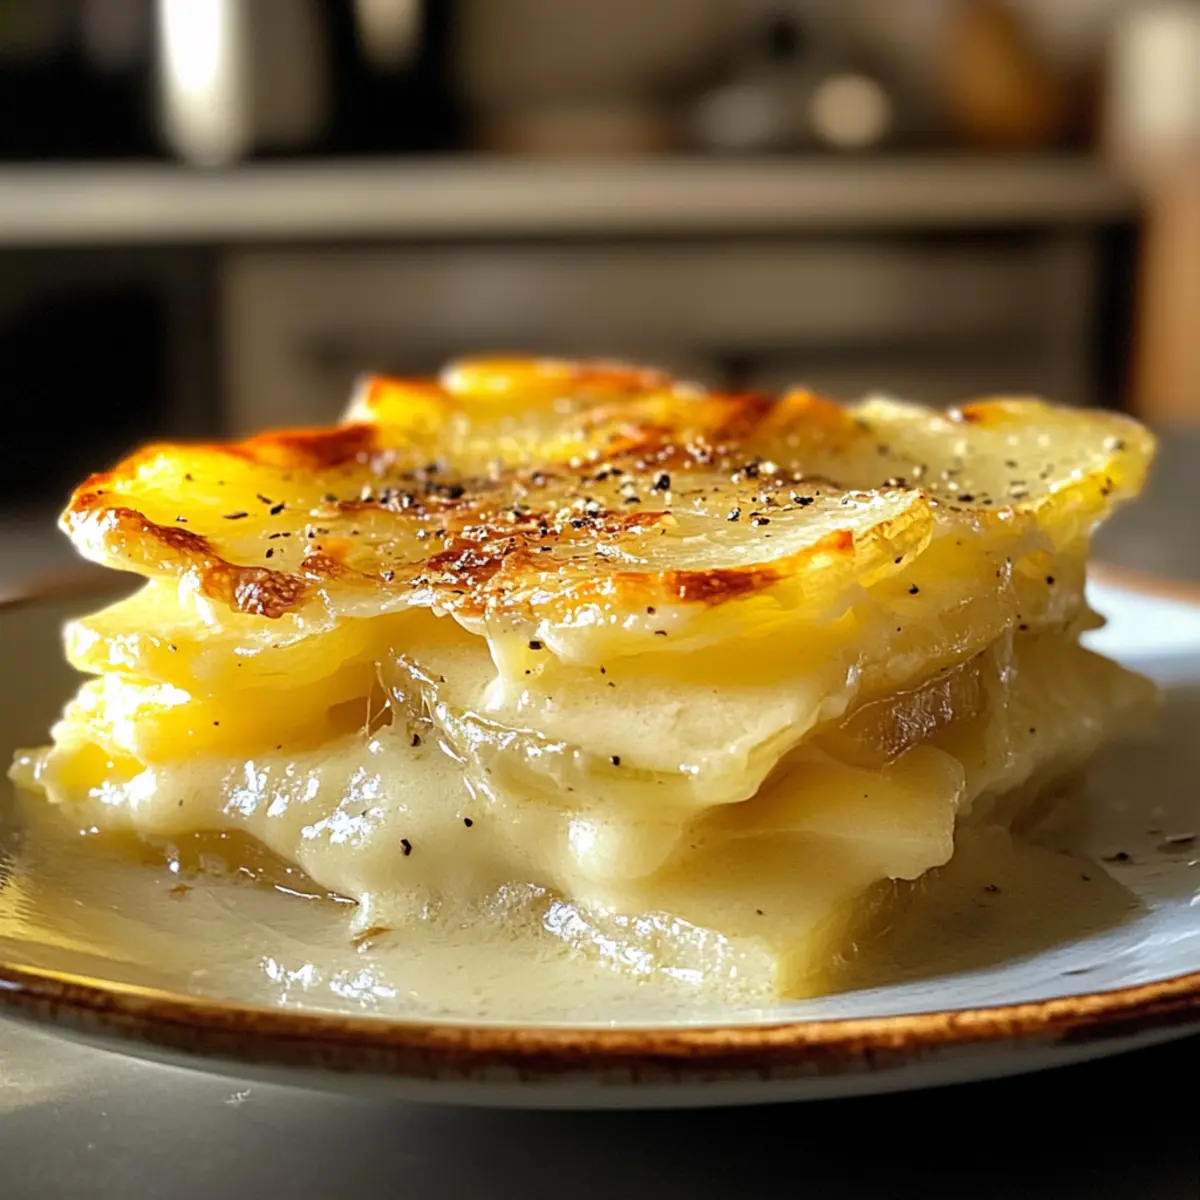
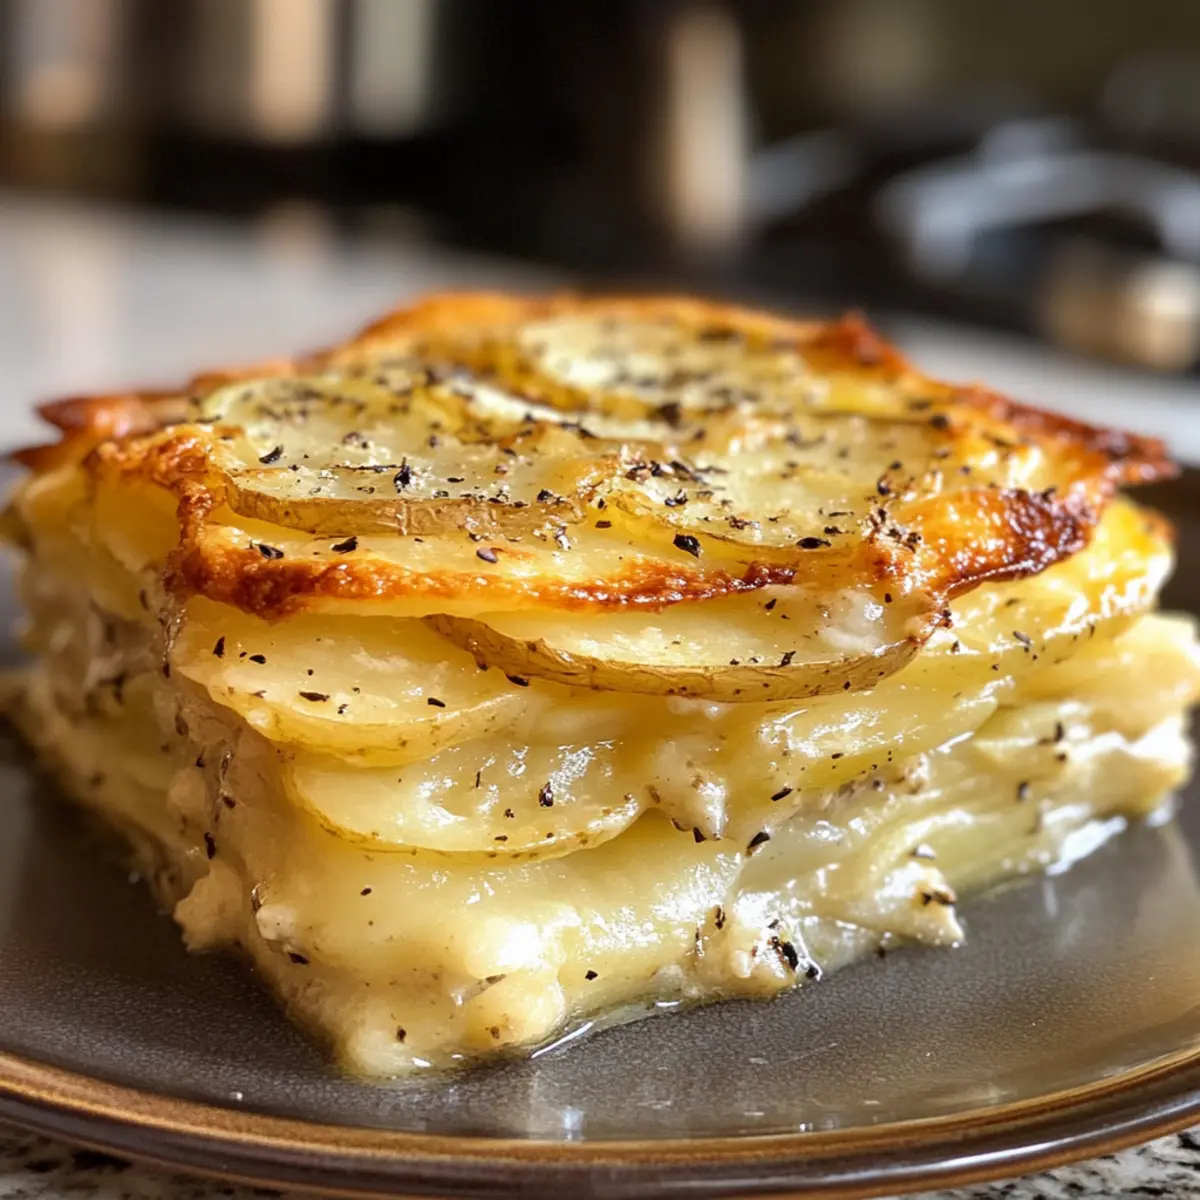
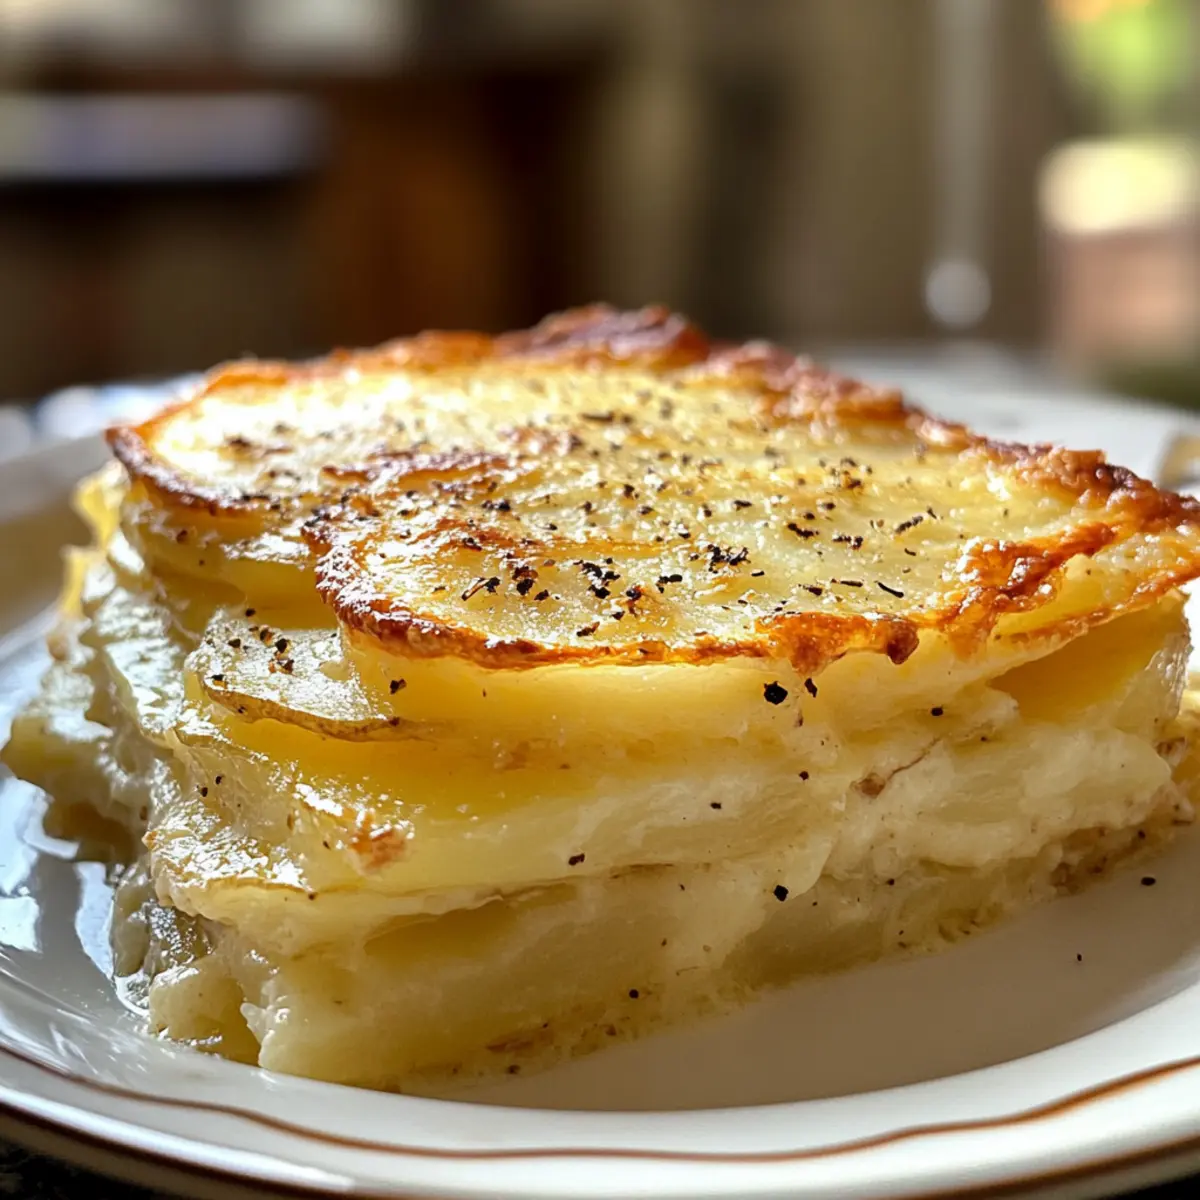
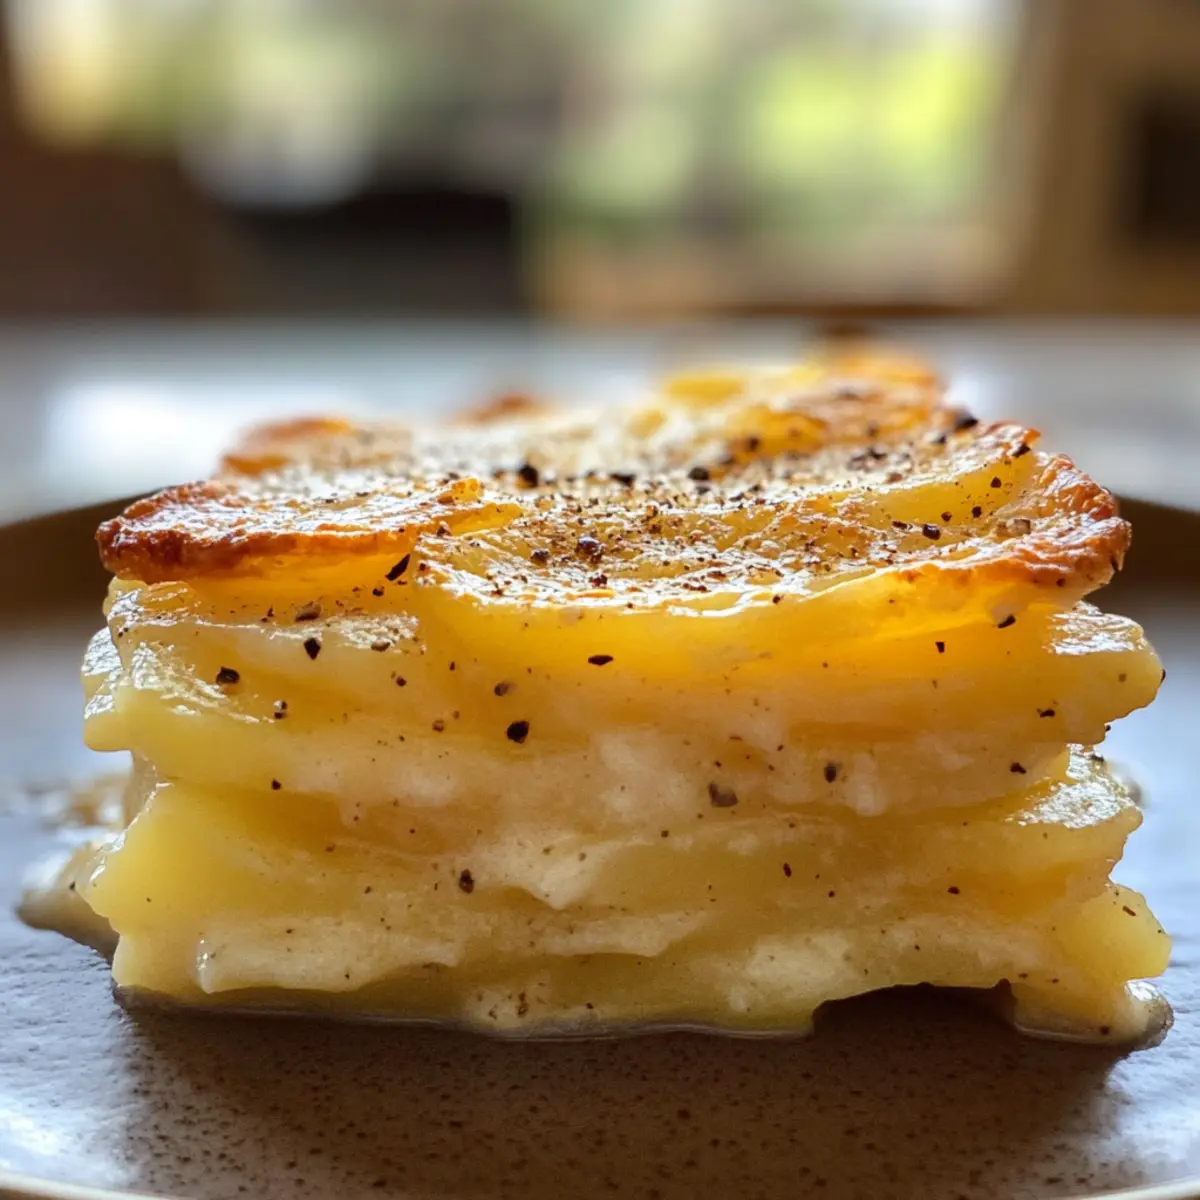
Creamy Nigella Potato Gratin Recipe for Cozy Comfort Nights

As I stood in my kitchen, the tantalizing aroma of sautéed onions and garlic wafted through the air, instantly transporting me to a cozy pub on a rainy evening. That’s the magic of Nigella Potato Gratin—this delightful recipe transforms humble ingredients into a luxurious comfort dish that’s perfect for any day of the week. What I love most about this creamy creation is its versatility; it can easily be made without cream for a lighter twist while still delivering that rich, heartwarming taste we crave. Plus, it’s vegetarian-friendly, making it a crowd-pleaser for gatherings! Are you ready to dive into this creamy, gooey goodness that could become your new family favorite?

Why is this Potato Gratin a Must-Try?

Indulgent texture: The creamy layers of sliced potatoes, combined with onions and garlic, create a dish that oozes comfort and warmth.

Customizable flavors: Whether you opt for a lighter version without cream or wish to add cheeses like Gruyère, this recipe allows for delightful variations.

Perfect for any occasion: Whether it’s a family dinner or a gathering with friends, this crowd-pleaser fits seamlessly into any meal.

Effortlessly simple: With minimal prep time and straightforward steps, you’ll have a delicious side dish ready that feels gourmet. Looking for more comforting potato inspiration? Check out our Ground Beef Potato Taco Bowl or savor the American Potato Salad for your next get-together!

Crisp, golden top: Achieve a perfectly bubbly crust that adds the ideal finishing touch, making every bite irresistible.

Nigella Potato Gratin Ingredients

For the Gratin
Potatoes – Use floury potatoes for the best texture and heartiness in your Nigella Potato Gratin.
Milk – Adds a creamy base; feel free to swap with plant-based milk for a lighter version.
Cream – Provides rich depth; you can opt for more milk if you’re making a lighter gratin.
Onion – Adds sweetness and enhances flavor; shallots can be used for a milder profile.
Garlic – Boosts the flavor; adjust the quantity according to your love for garlic.
Salt – Essential for flavor enhancement; season to your taste.
Butter – Used for greasing and richness; olive oil can be a great healthier alternative.

Feel free to experiment with the ingredients to make this dish your own while still indulging in the creamy comfort that makes it a true delight!

Step‑by‑Step Instructions for Nigella Potato Gratin​ Recipe

Step 1: Preheat the Oven
Begin by preheating your oven to 180°C (350°F). This ensures an even cooking temperature for your Nigella Potato Gratin once it’s placed inside. A well-heated oven will allow the gratin to develop that deliciously golden, bubbling top while the potatoes cook to tender perfection.

Step 2: Prepare the Potatoes
Slice your floury potatoes thinly, about 1/8 inch thick. As you slice, arrange the potato rounds neatly in a bowl to keep them organized and set aside. The uniform thickness is crucial, as it allows for even cooking and ensures that every layer contributes to the creamy texture of your gratin.

Step 3: Sauté Onions and Garlic
In a medium saucepan, melt a generous pat of butter over medium heat. Add the sliced onions and garlic, sautéing gently for about 5–7 minutes until they become translucent and fragrant, stirring often. This step infuses your gratin with rich, aromatic flavors that will elevate the dish to new heights.

Step 4: Layer the Potatoes
In a greased baking dish, begin layering your thinly sliced potatoes. Sprinkle a pinch of salt between each layer to enhance the flavor of the potatoes. Take your time to create even layers, and don’t be afraid to overlap the slices slightly—this will help create the enticing texture you’re aiming for in your Nigella Potato Gratin.

Step 5: Mix Milk and Cream
In another bowl, combine your milk and cream, stirring gently to blend. Pour this creamy mixture evenly over the layered potatoes, ensuring that it seeps into every nook. This will contribute to the luscious, creamy experience associated with a classic Nigella Potato Gratin, making each bite indulgent.

Step 6: Bake Covered
Cover the baking dish tightly with aluminum foil, locking in moisture as the potatoes cook. Place it in the preheated oven and bake for 30 minutes. During this time, the steam will help soften the potatoes, preparing them for their final transformation into a creamy delight.

Step 7: Uncover and Crisp
After 30 minutes, carefully remove the foil to reveal your bubbling gratin. Bake uncovered for an additional 15–20 minutes or until the top is golden brown and crispy. Keep an eye on it; the contrasting textures provide the perfect finish, inviting everyone to dig in.

Step 8: Rest Before Serving
Once baked to perfection, remove the gratin from the oven and let it rest for 10–20 minutes. This crucial step allows the layers to set, making serving easier and enhancing the deliciousness of your Nigella Potato Gratin. Savor the aroma as it cools, beckoning you to enjoy every creamy, warm bite.

What to Serve with Creamy Nigella Potato Gratin

The warmth of a freshly baked potato gratin deserves the perfect companions to elevate your meal experience.

  • Roasted Chicken: Juicy, herb-seasoned chicken pairs beautifully, complementing the creamy richness of the gratin without overpowering it.

  • Grilled Vegetable Medley: A mix of vibrant grilled veggies adds a fresh crunch that contrasts the creamy layers, balancing each bite delightfully.

  • Beef Wellington: For a special occasion, this savory centerpiece enhances the gratin’s luxurious profile, making for a truly elegant dining experience.

  • Mixed Green Salad: A light salad with a tangy vinaigrette brings a refreshing contrast to the richness of the gratin, enhancing its comforting nature.

  • Garlic Bread: Perfect for sopping up the creamy goodness, this toasty companion is a must for those who love a good carb indulgence.

  • Sparkling Wine: A glass of bubbly adds a festive touch, providing a refreshing lift that balances the gratin’s smooth, rich flavors.

Embrace these delightful pairings, and let your Nigella Potato Gratin shine as the heart of your meal!

Expert Tips for Nigella Potato Gratin

  • Layer Carefully: Ensure even potato layers for uniform cooking. Overlapping them slightly will help create that perfect creamy texture throughout your Nigella Potato Gratin.

  • Gentle Heat: Sauté onions and garlic over medium heat to avoid burning. This enhances flavor without overwhelming bitterness, contributing to a rich, comforting taste.

  • Resting Time: Always let the gratin rest 10-20 minutes after baking. This step is crucial for ensuring that the layers set properly and serve beautifully.

  • Choose Wisely: Select floury potatoes, like Russets, for the best texture. Avoid waxy potatoes, as they don’t provide the creamy consistency you’re aiming for in this dish.

  • Creamy Substitutes: If opting for a lighter version, use plant-based milk but still incorporate a bit of cream for that indulgent richness that makes the Nigella Potato Gratin special.

Make Ahead Options

These Nigella Potato Gratin are perfect for busy weeknight dinners and meal prep! You can slice the potatoes and sauté the onions and garlic up to 24 hours in advance; simply store them separately in the refrigerator to maintain freshness. If you’d like, you can even assemble the entire dish and cover it tightly before refrigerating for up to 3 days. Just remember to pour the milk and cream mixture over the layered potatoes right before baking to prevent the potatoes from browning. When ready to cook, simply bake as directed, adding an extra few minutes if taken straight from the fridge. Enjoy the luxury of a comforting, homemade side with minimal effort!

Nigella Potato Gratin Variations

Feel free to unleash your creativity and make this creamy dish uniquely yours!

  • Cheesy Upgrade:
    Add Gruyère or Cheddar cheese between layers for a richer, flavorful twist. Melty cheese elevates creaminess and indulgence!

  • Herb Fusion:
    Incorporate fresh rosemary or thyme for an aromatic lift. These herbs will infuse your gratin with delightful flavors that beautifully complement the creamy potatoes.

  • Garlic Kick:
    Increase the garlic for those who love a bold flavor. Adding roasted garlic can give a sweet, rich undertone that makes every bite more scrumptious.

  • Veggie Boost:
    Mix in sautéed spinach or caramelized mushrooms for added nutrition and texture. This creates a heartier dish you can feel great about serving!

  • Healthier Choice:
    Swap heavy cream for Greek yogurt or a mixture of half-and-half. This provides a creamy texture while reducing calories—perfect for lighter meals!

  • Spicy Zing:
    Add a pinch of red pepper flakes for a subtle heat that complements the creaminess. A little spice can transform your gratin into something truly unique.

  • Layered Dreams:
    Try using sweet potatoes or a mix of potatoes for a colorful and nutrient-packed variation. The sweetness adds depth, making every bite exciting.

Have fun exploring these variations and making this Nigella Potato Gratin your own! If you’re in the mood for more potato inspiration, consider our delicious Hearty Potato Kielbasa Soup or a refreshing Smoked Salmon Potato Salad.

How to Store and Freeze Nigella Potato Gratin

Fridge: Store leftovers in an airtight container in the refrigerator for up to 3 days to maintain freshness and flavor.

Freezer: For longer storage, you can freeze the potato gratin for up to 2 months. Make sure to wrap it tightly in plastic wrap and then foil to prevent freezer burn.

Reheating: When ready to enjoy, reheat in the oven at 180°C (350°F) until warm and the top is bubbly, about 25–30 minutes. This ensures the gratin maintains its creamy texture.

Room Temperature: Avoid leaving the gratin out at room temperature for more than 2 hours. To ensure food safety, return any uneaten portions to the fridge promptly.

Nigella Potato Gratin Recipe FAQs

What type of potatoes should I use for the Nigella Potato Gratin?
I recommend using floury potatoes, such as Russets, for the best texture and heartiness. They create a creamy base that is essential for achieving the indulgent richness of the gratin. Avoid waxy potatoes, as they do not provide the desired creamy consistency.

How should I store leftover Nigella Potato Gratin?
Store leftovers in an airtight container in the refrigerator for up to 3 days. This helps retain the flavors and ensures the dish stays fresh. When you’re ready to reheat, place it in the oven at 180°C (350°F) for about 25-30 minutes until it’s warm and bubbly again.

Can I freeze Nigella Potato Gratin?
Absolutely! You can freeze the potato gratin for up to 2 months. To do so, wrap it tightly in plastic wrap, and then in foil to protect against freezer burn. This extra layer is essential for preserving that creamy goodness while it’s stored.

What if my gratin is too watery after baking?
If you find your gratin is too watery, it may be due to not enough time in the oven or layering too much milk or cream. To fix this, you can pop it back in the oven uncovered for an additional 10-15 minutes. This will let excess moisture evaporate and help achieve that desired creamy texture.

Is Nigella Potato Gratin suitable for vegetarians?
Yes! This recipe is vegetarian-friendly, as it relies on plant-based ingredients like potatoes, milk, and cream. Feel free to substitute any dairy with non-dairy alternatives, making it suitable for various dietary preferences without sacrificing the creamy taste.

Can I make Nigella Potato Gratin without cream?
Definitely! For a lighter version, simply increase the amount of milk while reducing or omitting the cream. You can still achieve a deliciously creamy texture, especially if you add a sprinkle of cheese on top before baking for extra flavor.

Nigella Potato Gratin​ Recipe

Creamy Nigella Potato Gratin Recipe for Cozy Comfort Nights

Discover the cozy allure of the Nigella Potato Gratin, a creamy delight perfect for gatherings and comfort nights.
Prep Time 20 minutes
Cook Time 1 hour
Resting Time 15 minutes
Total Time 1 hour 35 minutes
Servings: 6 servings
Course: Dinner
Cuisine: Vegetarian
Calories: 350

Ingredients
  

For the Gratin
  • 1.5 kg Floury potatoes e.g., Russets
  • 500 ml Milk Use plant-based milk for lighter version
  • 250 ml Cream Optional for lighter version
  • 1 medium Onion Shallots can be used
  • 3 cloves Garlic Adjust quantity to taste
  • to taste Salt Essential for flavor enhancement
  • 50 g Butter For greasing, olive oil can be used

Equipment

  • Baking dish
  • Medium saucepan

Method
 

Step‑by‑Step Instructions
  1. Preheat your oven to 180°C (350°F).
  2. Slice your floury potatoes thinly, about 1/8 inch thick. Arrange them in a bowl.
  3. Melt butter in a medium saucepan over medium heat. Sauté onions and garlic for 5–7 minutes.
  4. In a greased baking dish, layer the sliced potatoes, sprinkling salt between layers.
  5. In another bowl, mix milk and cream, then pour it over the layered potatoes.
  6. Cover the dish tightly with aluminum foil and bake for 30 minutes.
  7. Remove the foil and bake uncovered for an additional 15–20 minutes until the top is golden.
  8. Let the gratin rest for 10–20 minutes before serving.

Nutrition

Serving: 1servingCalories: 350kcalCarbohydrates: 45gProtein: 6gFat: 15gSaturated Fat: 9gPolyunsaturated Fat: 1gMonounsaturated Fat: 3gCholesterol: 30mgSodium: 400mgPotassium: 900mgFiber: 4gSugar: 2gVitamin A: 500IUVitamin C: 15mgCalcium: 200mgIron: 2mg

Notes

Feel free to customize ingredients and layering for your perfect gratin. Make sure to let it rest for best results.

Tried this recipe?

Let us know how it was!

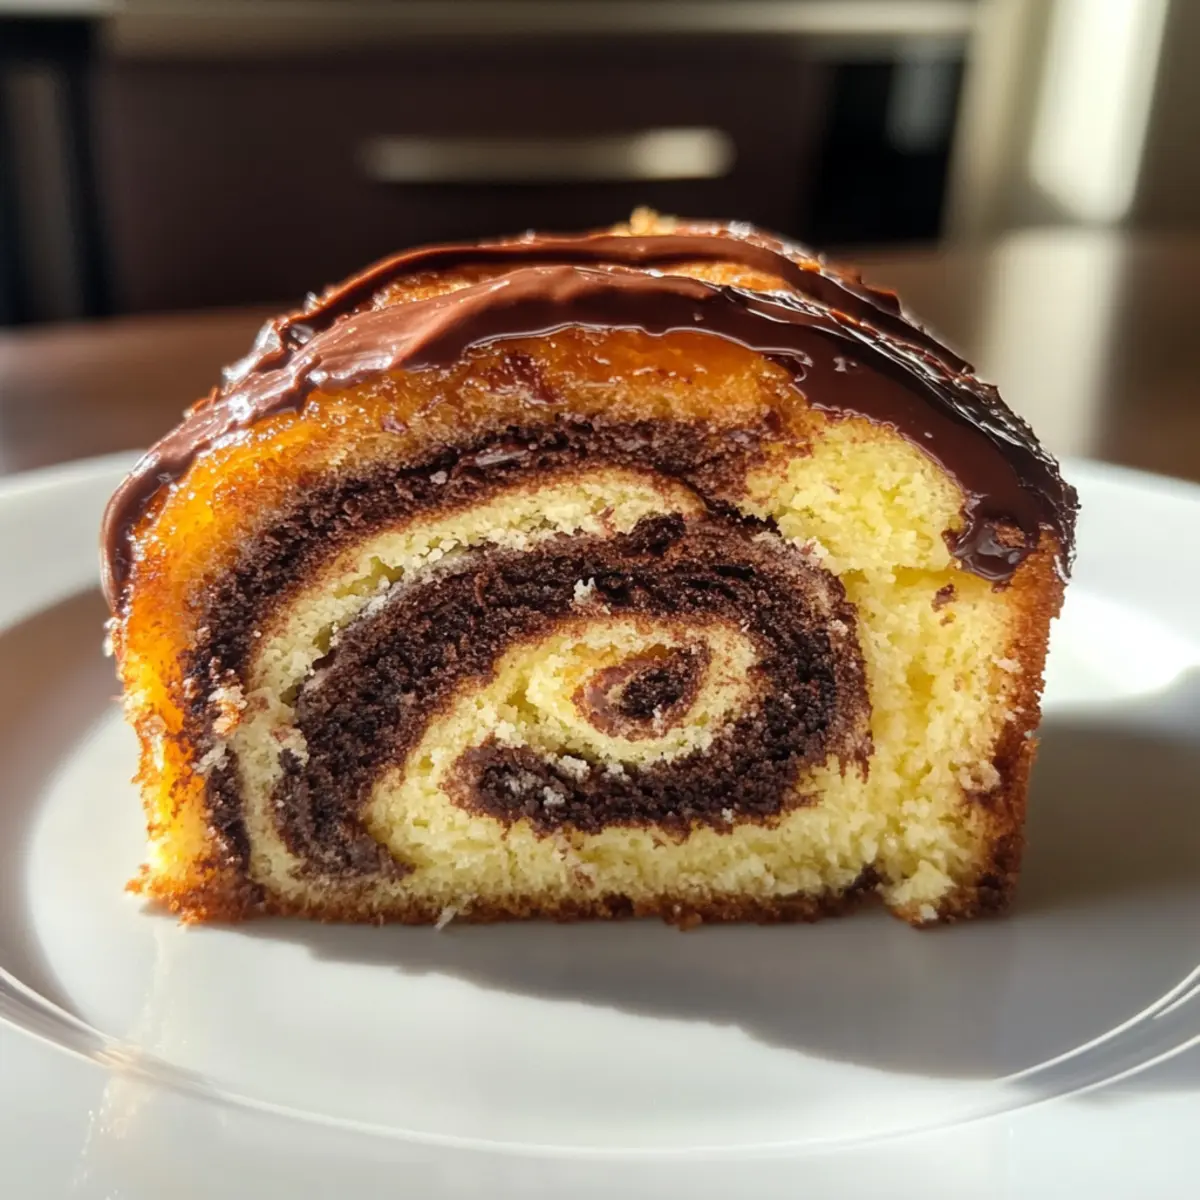
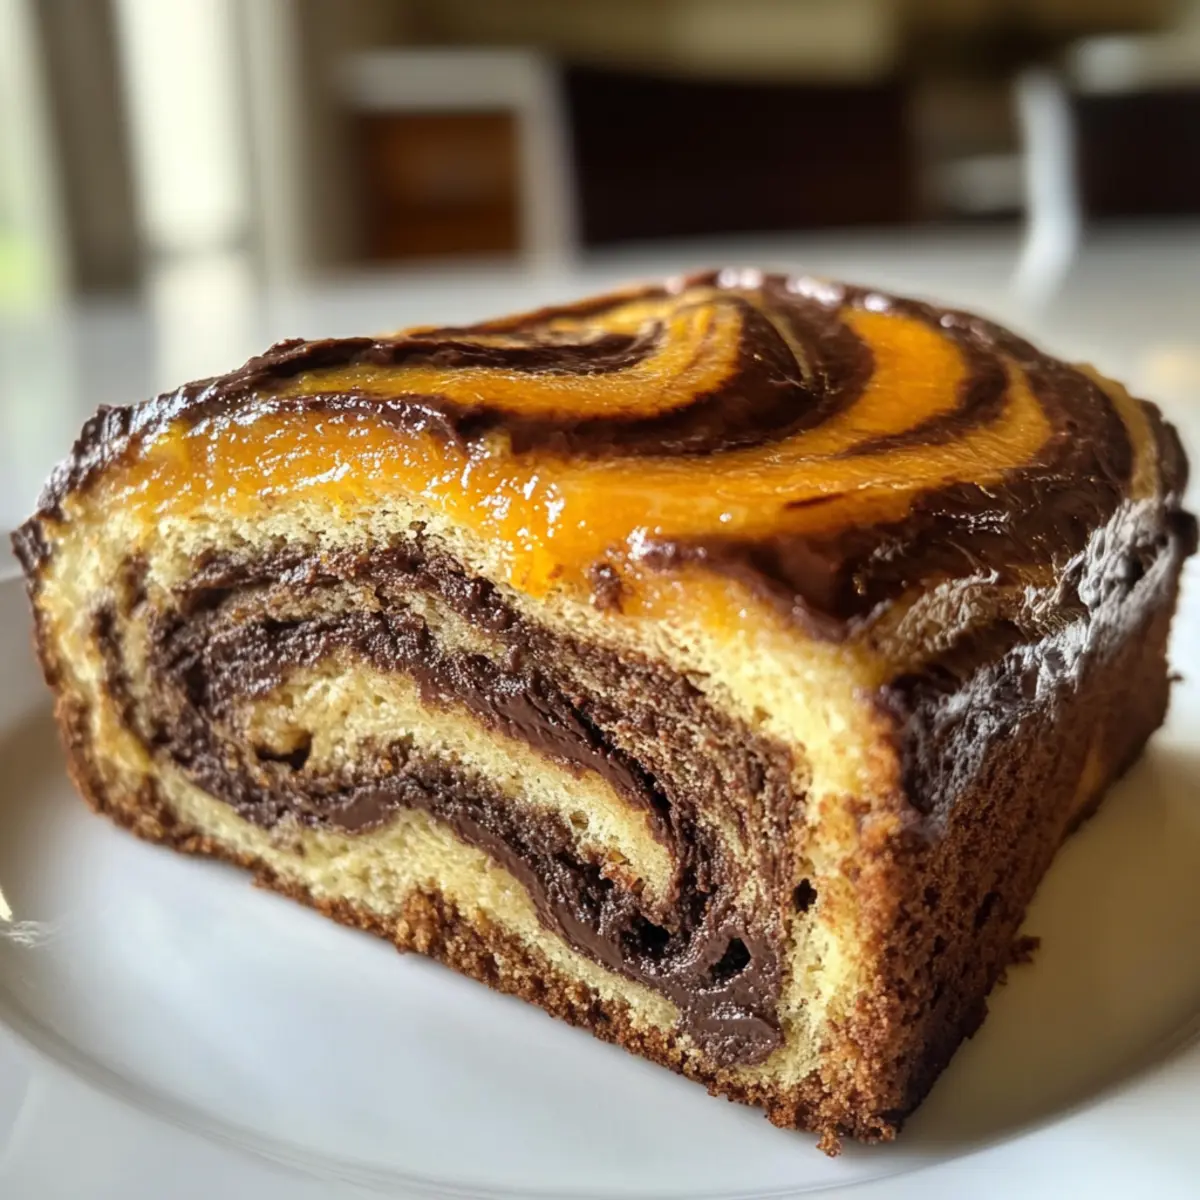
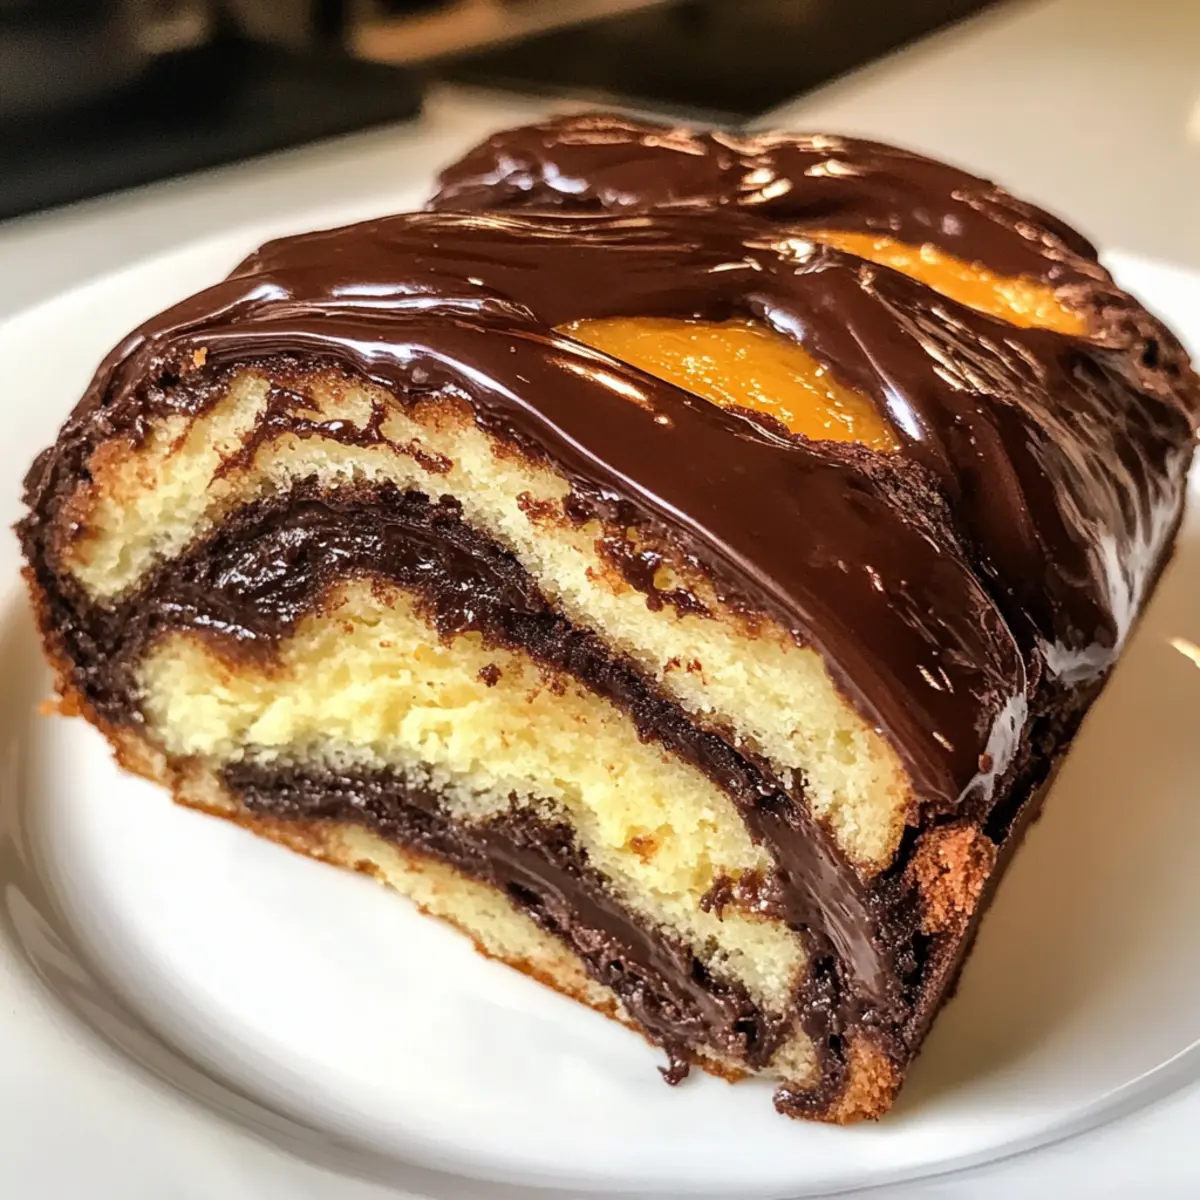
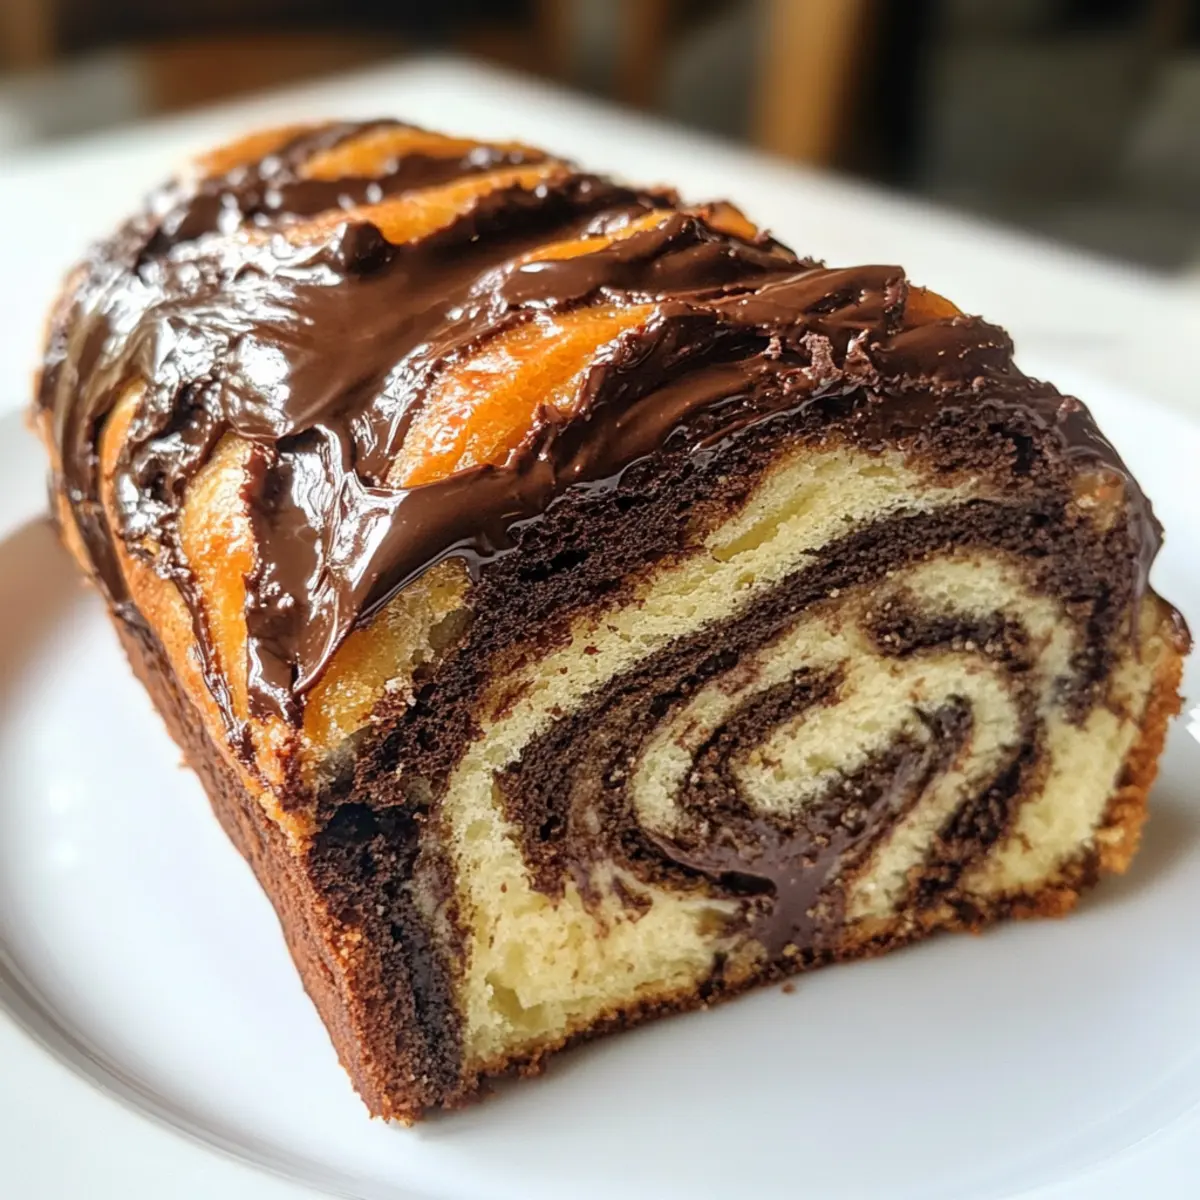
Irresistible Orange-Glazed Chocolate Babka for Sweet Memories

As I watched the vibrant orange glaze glisten over the warm chocolate babka, it whisked me back to festive gatherings filled with laughter and sweet aromas. This Orange-Glazed Chocolate Babka is not just a treat; it’s a celebration in every bite. With its luscious dark chocolate filling and the sunny zest of orange, this recipe effortlessly transforms breakfast or brunch into something extraordinary. Surprisingly simple to make, it’s perfect for those who crave homemade delights without the fuss, making it an ideal addition to your holiday baking, especially for Hanukkah. Imagine sharing slices of this moist, fluffy indulgence with loved ones while sipping a warm cup of coffee. Ready to create a showstopper that will have everyone asking for more? Let’s dive into this irresistibly delightful recipe!

Why is this babka so irresistible?

Decadent Delight: Every slice of this Orange-Glazed Chocolate Babka is a rich blend of flavors, where dark chocolate meets bright, zesty orange.

Effortless Preparation: You don’t need to be a baking expert! This recipe simplifies your holiday baking, making it surprisingly easy to whip up.

Crowd-Pleaser: Whether for brunch or a festive gathering, this stunning babka will have friends and family swooning—perfect for sharing during Hanukkah or any celebration.

Endless Variations: Feeling adventurous? Swap the chocolate for a cinnamon mixture or experiment with fillings like Nutella or sweet cheese, making this recipe versatile for any occasion.

Perfect Pairing: Serve warm with a cup of coffee or tea for a magical breakfast experience, reminiscent of cozy mornings and cherished memories, just like with our lovely Patriotic Chocolate Chip Cookies or White Chocolate Cranberry Cookies. This babka is bound to become a new favorite!

Orange-Glazed Chocolate Babka Ingredients

For the Dough
All-purpose flour (4¼ cups) – Provides structure; you can substitute with gluten-free flour for a gluten-free option.
Sugar (½ cup) – Adds sweetness to the dough and filling; coconut sugar can lend a deeper flavor.
Instant yeast (2 tsp) – Essential for leavening; feel free to use rapid-rise yeast if you prefer.
Orange zest (grated from 1 orange) – Imparts fresh citrus flavor; always use fresh zest for the best taste.
Eggs (3 large) – Adds richness and moisture; for an egg substitute, use flax eggs (1 egg = 1 tbsp ground flaxseed mixed with 2.5 tbsp water).
Lukewarm water (½ cup + up to 1-2 tbsp) – Helps activate the yeast; ensure it’s not too hot to avoid killing the yeast.
Fine sea salt (¾ tsp) – Enhances flavor; you can use table salt but reduce the amount slightly due to its saltiness.
Unsalted butter (⅔ cup, room temperature) – Adds richness and flavor; substitute with vegan butter for a dairy-free option.

For the Filling
Dark chocolate (4½ oz, chopped) – The main filling ingredient that provides rich flavor; semi-sweet chocolate works too.
Unsalted butter (½ cup, for filling) – Combines with chocolate for a smooth filling; use dairy-free alternatives if needed.
Powdered sugar (½ cup) – Sweetens the filling; opt for maple powdered sugar for a different flavor profile.
Cocoa powder (⅓ cup) – Deepens the chocolate flavor; using Dutch process cocoa gives a richer taste.
Espresso powder (¼ tsp, optional) – Enhances the chocolate flavor; feel free to omit if it’s not your preference.

For the Glaze
Water (for syrup, ⅓ cup) – Acts as a base for the syrup; simple yet effective.
Sugar (6 TBSP for syrup) – Adds sweetness to the glaze; consider brown sugar for a richer syrup flavor.
Orange zest (1 TBSP for syrup) – Adds citrus notes to the syrup; helps brighten the taste.
Orange juice (1 TBSP for syrup) – Complements the zest for a balanced syrup flavor; ensure it’s freshly squeezed for maximum freshness.

This orange-glazed chocolate babka is not just a delight to the palate, but also a feast for the senses, bursting with rich chocolate and zesty orange notes!

Step‑by‑Step Instructions for Orange-Glazed Chocolate Babka

Step 1: Prepare the Dough
In a stand mixer, combine 4¼ cups of all-purpose flour, ½ cup of sugar, 2 teaspoons of instant yeast, and the grated zest of 1 orange. Gradually mix in 3 large eggs and ½ cup of lukewarm water, ensuring everything is thoroughly combined. The mixture should begin to form a sticky dough that pulls away from the sides of the bowl.

Step 2: Add Fat and Knead
Next, sprinkle ¾ teaspoon of fine sea salt over the dough, followed by ⅔ cup of room-temperature unsalted butter. Mix on medium speed for about 10 minutes, allowing the dough to become smooth and elastic. It should be slightly tacky but not overly sticky—if needed, dust with flour until the perfect consistency is achieved.

Step 3: First Dough Rest
Transfer the dough into a greased bowl, turning it to coat fully in oil. Cover the bowl with plastic wrap or a damp cloth and refrigerate it for 2 to 3 hours, ideally overnight. This longer resting period enhances the flavor and texture of your orange-glazed chocolate babka, making it soft and fluffy.

Step 4: Make the Filling
While the dough is chilling, melt 4½ ounces of chopped dark chocolate and ½ cup of unsalted butter in a double boiler or microwave, stirring until smooth. Once melted, add ½ cup of powdered sugar, ⅓ cup of cocoa powder, and optional ¼ teaspoon of espresso powder, mixing until completely combined and silky. Allow this filling to cool slightly before using.

Step 5: Assemble Loaves
Grease two loaf pans with neutral oil and set aside. Roll out half of the chilled dough into a rectangle about 12×16 inches on a floured surface. Spread half of the chocolate filling evenly over the dough, ensuring even coverage. Roll the dough tightly, lengthwise, and cut the log in half lengthwise. Twist the halves together and place them in the prepared pans, cut side up.

Step 6: Second Dough Rest
Cover the shaped babka loosely with plastic wrap and let it rise at room temperature for 1 to 1½ hours. The dough should puff up and nearly double in size, showcasing its fluffy texture. Make sure it has room to expand for the best results.

Step 7: Bake
Preheat your oven to 375°F (190°C) while the dough rises. Once ready, bake the babka for about 30 minutes, or until golden brown and a skewer inserted into the center comes out clean. The aroma of the baking chocolate and orange will fill your kitchen, promising a delightful treat.

Step 8: Make Syrup
In a small saucepan, combine ⅓ cup of water and 6 tablespoons of sugar over medium heat. Stir until the sugar has completely dissolved. Then, mix in 1 tablespoon of orange zest and 1 tablespoon of orange juice, and continue to simmer for an additional 2 minutes. This syrup will add the finishing touch to your orange-glazed chocolate babka.

Step 9: Glaze and Cool
After removing the babka from the oven, immediately brush the warm orange syrup generously over the top, allowing it to soak in. Let the babka cool in the pans for about 10 minutes before transferring it to a wire rack to cool completely. This step ensures the center retains its moistness while the glaze adds a delightful shine.

Expert Tips for Orange-Glazed Chocolate Babka

  • Fresh Ingredients: Make sure your yeast is fresh; expired yeast may not properly leaven your dough, leading to a dense babka.
  • Kneading Technique: Knead until the dough is smooth and elastic to achieve that light, fluffy texture that makes this orange-glazed chocolate babka irresistible.
  • Stickiness Solution: Dough can get quite sticky—don’t be afraid to flour your surfaces generously to prevent sticking while rolling and shaping.
  • Cooling Time: For neat and tidy slices, allow the babka to cool completely before cutting; this helps maintain the beautiful swirls.
  • Taste Enhancer: Consider adding a dash of vanilla extract to your filling for an extra layer of flavor that complements the chocolate and orange.

Orange-Glazed Chocolate Babka Variations

Feel free to get creative with this Orange-Glazed Chocolate Babka and make it your own with these delightful suggestions!

  • Cinnamon Twist: Replace the chocolate filling with a mixture of cinnamon and sugar for a warm, spiced flavor. This version sings sweetly with hints of nostalgia, perfect for cozy gatherings.

  • Nutella Filling: Swap in Nutella for a creamy, hazelnut chocolate experience that’s simply irresistible. This indulgent twist will surely win the hearts of chocolate lovers and add an extra layer of richness.

  • Fruit Jam: Use your favorite fruit jam, like raspberry or apricot, in place of chocolate for a fruity burst. It brings a bright, fresh contrast to the rich dough and glaze!

  • Cheese Layer: Incorporate a sweetened cream cheese layer in addition to the chocolate filling for a decadent, cheesecake-inspired treat. The creamy texture pairs beautifully with the orange glaze, creating a delightful bite.

  • Vegan Option: Substitute the butter with coconut oil and use plant-based milk, along with a flax egg, for an entirely vegan version. You’ll still enjoy a rich, fluffy babka that’ll please everyone at the table.

  • Gluten-Free: Swap the all-purpose flour with a gluten-free flour blend for a gluten-free delight. Be sure to add a bit of xanthan gum if your blend doesn’t contain any for that perfect dough consistency.

  • Spiced Chocolate: Add a pinch of cayenne pepper or ground cardamom to the chocolate filling for an unexpected kick. This addition enhances the chocolate’s richness and adds lovely complexity.

As you explore these variations, remember that there’s no wrong way to enjoy your babka! You might even love a mix of flavors, like trying the creamy Nutella filling with a fruity jam swirled in! For more delicious recipes that perfect your holiday gatherings, don’t forget to check out our Patriotic Chocolate Chip Cookies or White Chocolate Cranberry Cookies. Happy baking!

How to Store and Freeze Orange-Glazed Chocolate Babka

Room Temperature: Keep slices of your orange-glazed chocolate babka wrapped in plastic wrap or stored in an airtight container for up to 3 days to maintain moisture and freshness.

Fridge: For longer-lasting preservation, store the babka in the fridge for up to a week. Just make sure it’s tightly sealed to avoid drying out!

Freezer: If you want to keep your delicious babka longer, you can freeze individual slices wrapped tightly in plastic wrap, then in foil, for up to 3 months.

Reheating: To enjoy your frozen babka, simply thaw in the fridge overnight and warm slices in a toaster oven or microwave for a few seconds before serving.

Make Ahead Options

These Orange-Glazed Chocolate Babka are perfect for busy home cooks looking to save time without sacrificing flavor! You can prepare the dough and filling up to 24 hours in advance by refrigerating the shaped babka after assembly. Just cover it tightly with plastic wrap to prevent drying out. When you’re ready to bake, simply let it rise at room temperature for about 1 to 1½ hours, then follow the baking instructions as usual. Additionally, you can make the syrup while the babka bakes, ensuring every slice gets that delightful glaze just before serving. With these make-ahead tips, you’ll enjoy all the rich, gooey goodness of freshly baked babka without the fuss!

What to Serve with Orange-Glazed Chocolate Babka

Elevate your breakfast or brunch experience by pairing delightful accompaniments with this enchanting treat.

  • Fresh Berries: Juicy strawberries or raspberries add a refreshing, tangy contrast to the sweet richness of the babka. Their vibrant colors and flavors are a feast for the eyes and palate.

  • Whipped Cream: Light and airy whipped cream creates a cloud-like topping, balancing the dense chocolate with a hint of sweetness. Just a dollop makes each slice feel like a luxurious dessert.

  • Coffee or Espresso: A bold cup of coffee or a shot of espresso enhances the rich chocolate notes in the babka. The caffeine pairs perfectly with the sweetness, enriching your morning ritual.

  • Citrus Salad: A bright citrus salad made with oranges, grapefruit, and a drizzle of honey brightens up the palate and complements the orange glaze beautifully. This citrusy side adds a refreshing balance to your meal.

  • Vanilla Ice Cream: Served warm, the babka pairs wonderfully with a scoop of vanilla ice cream. The creamy, cold texture contrasts delightfully with the warm layers of chocolate, creating a decadent dessert experience.

  • Greek Yogurt: A dollop of creamy Greek yogurt brings a delicious tang that cuts through the sweetness. Top it with a sprinkle of nuts for added crunch and flavor.

  • Herbal Tea: A fragrant herbal tea, such as chamomile or mint, offers a soothing sip that perfectly balances the chocolate’s richness, making for a comforting and cozy brunch experience.

Orange-Glazed Chocolate Babka Recipe FAQs

What type of flour is best for this babka?
For the best results, I recommend using all-purpose flour as it provides the right structure for the dough. If you’re looking for a gluten-free option, you can substitute with a gluten-free flour blend, but keep in mind that the texture may vary slightly.

How should I store leftover orange-glazed chocolate babka?
To keep your babka fresh, wrap it in plastic wrap or store it in an airtight container at room temperature for up to 3 days. If you want it to last longer, you can refrigerate it for up to a week, ensuring it remains tightly sealed to avoid drying out.

Can I freeze my chocolate babka?
Absolutely! To freeze, first let the babka cool completely. Then, slice it into individual pieces and wrap each slice tightly in plastic wrap, followed by aluminum foil. You can freeze it for up to 3 months. When you’re ready to enjoy it, simply thaw in the fridge overnight and warm in a toaster oven or microwave for a delightful treat.

What should I do if my babka dough is too sticky?
If your dough feels overly sticky, don’t worry! You can sprinkle a little extra flour on your work surface and on your hands while handling the dough. The key is to be gentle; add flour gradually until the dough is manageable but still soft. This ensures you maintain the light, fluffy texture that makes the orange-glazed chocolate babka irresistible.

Can I make this chocolate babka without eggs?
Definitely! If you need an egg substitute, you can use flax eggs. For one egg, mix 1 tablespoon of ground flaxseed with 2.5 tablespoons of water and let it sit for a few minutes until it becomes gelatinous. This will maintain the moisture and binding properties of the dough.

How do I know when my babka is properly baked?
You’ll know your orange-glazed chocolate babka is baked to perfection when it’s golden brown on top and a skewer inserted in the center comes out clean. Baking for about 30 minutes at 375°F usually does the trick, but keep an eye on it as ovens can vary. Enjoy the heavenly aroma while you wait!

Orange-Glazed, Chocolate Babka

Irresistible Orange-Glazed Chocolate Babka for Sweet Memories

This Orange-Glazed Chocolate Babka is a delightful treat combining rich chocolate and zesty orange flavors.
Prep Time 30 minutes
Cook Time 30 minutes
Dough Resting Time 3 hours
Total Time 4 hours
Servings: 12 slices
Course: Dessert
Cuisine: Baking
Calories: 350

Ingredients
  

For the Dough
  • 4.25 cups all-purpose flour Can substitute with gluten-free flour
  • 0.5 cups sugar Use coconut sugar for deeper flavor
  • 2 tsp instant yeast Can use rapid-rise yeast
  • 1 large orange zest Use fresh zest for best taste
  • 3 large eggs Can substitute with flax eggs
  • 0.5 cups lukewarm water Ensure it's not too hot
  • 0.75 tsp fine sea salt Reduce if using table salt
  • 0.67 cups unsalted butter Substitute with vegan butter for dairy-free
For the Filling
  • 4.5 oz dark chocolate Can use semi-sweet chocolate
  • 0.5 cups unsalted butter Use dairy-free alternatives if needed
  • 0.5 cups powdered sugar Maple powdered sugar can be used
  • 0.33 cups cocoa powder Dutch process cocoa gives richer taste
  • 0.25 tsp espresso powder Optional
For the Glaze
  • 0.33 cups water For syrup
  • 6 TBSP sugar Brown sugar can enrich the syrup
  • 1 TBSP orange zest For syrup
  • 1 TBSP orange juice Use freshly squeezed

Equipment

  • Stand Mixer
  • Loaf pans
  • Double boiler
  • Small saucepan

Method
 

Dough Preparation
  1. In a stand mixer, combine all-purpose flour, sugar, instant yeast, and orange zest. Gradually mix in eggs and lukewarm water until a sticky dough forms.
  2. Sprinkle fine sea salt over the dough and mix in unsalted butter. Knead for about 10 minutes until smooth and elastic.
  3. Transfer dough to a greased bowl, cover, and refrigerate for 2 to 3 hours.
Filling Preparation
  1. Melt dark chocolate and unsalted butter in a double boiler. Stir until smooth, then mix in powdered sugar, cocoa powder, and optional espresso powder.
Assembling Babka
  1. Grease two loaf pans and roll out half the dough. Spread half the filling, roll tightly, cut in half lengthwise, twist, and place in pans.
  2. Cover babka and let rise for 1 to 1.5 hours.
  3. Preheat oven to 375°F (190°C) while dough rises.
Baking and Glazing
  1. Bake babka for about 30 minutes or until golden brown.
  2. Prepare syrup by dissolving sugar in water, then add orange zest and juice. Simmer for 2 minutes.
  3. Brush warm syrup over babka after baking and cool slightly before transferring to a wire rack.

Nutrition

Serving: 1sliceCalories: 350kcalCarbohydrates: 45gProtein: 5gFat: 17gSaturated Fat: 10gPolyunsaturated Fat: 1gMonounsaturated Fat: 5gCholesterol: 90mgSodium: 200mgPotassium: 150mgFiber: 2gSugar: 18gVitamin A: 400IUVitamin C: 2mgCalcium: 30mgIron: 1.5mg

Notes

Make sure your yeast is fresh for the best rise. Consider adding vanilla extract to the filling for extra flavor.

Tried this recipe?

Let us know how it was!

Cheddar Bay Chicken Cobbler for Cozy Comfort Food Nights

As I stood in the kitchen, the aroma of garlic and melted cheese wafted through the air, instantly reminding me of cozy family dinners and laughter shared around the table. This Cheddar Bay Chicken Cobbler is my latest culinary delight, combining the classic richness of a creamy chicken casserole with the irresistible taste of buttery cheddar biscuits that I can whip up in no time. Perfect for busy weeknights, this dish not only saves you precious moments but also transforms simple ingredients into a comforting family-friendly meal that pleases everyone. With its enticing golden crust and hearty filling, it’s like a warm hug in a bowl. Ready to take your comfort food game to the next level? Let’s dive in and create some magic together!

Why is Cheddar Bay Chicken Cobbler a Must-Try?

Simplicity in preparation makes this dish a winner; you’ll be amazed at how quickly it comes together even on the busiest of nights. Hearty and satisfying, the creamy chicken filling paired with golden cheddar biscuits creates a flavor combination that feels indulgent yet comforting. Family-friendly and versatile, it’s perfect for picky eaters, easily allowing substitutions like rotisserie chicken for convenience or a variety of veggies to cater to different tastes. Best of all, it’s ideal for potlucks—your friends will surely be asking for the recipe! So, if you’re looking for a delightful new addition to your dinner rotation, this Cheddar Bay Chicken Cobbler could be your go-to, just like my Jerk Chicken Burritos or Grilled Chicken Sandwich.

Cheddar Bay Chicken Cobbler Ingredients

For the Filling
Cooked, Shredded Chicken – Provides protein and substance to the dish; for convenience, use rotisserie chicken.
Chicken Broth – Enhances the flavor of the filling; vegetable broth is a perfect substitute for a vegetarian version.
Frozen Mixed Vegetables – Adds nutrition and color; fresh or canned vegetables can be used, adjusting cooking times as needed.
Milk – Contributes creaminess to the filling; low-fat or plant-based milk can lighten it up.
Cream of Chicken Soup – Acts as the base thickener; consider a homemade white sauce for a healthier option.
Sour Cream – Brings creaminess and tang; Greek yogurt is a great substitute for health-conscious choices.
Garlic Powder – Deepens the flavor profile; fresh garlic can be used for a more aromatic result.
Black Pepper – Provides seasoning; adjust to taste based on your desired spice level.

For the Biscuits
Cheddar Bay Biscuit Mix – The key to achieving that iconic flavor and texture; feel free to swap with a homemade biscuit recipe if you prefer.
Shredded Cheddar Cheese – Enhances the biscuit topping’s flavor; mix different cheeses for extra variety.
Melted Butter – Ensures a golden crust on the biscuits; olive oil can be a lighter alternative.

For Garnish
Fresh Parsley (optional) – A lovely touch for garnish that adds freshness and vibrant color to your dish.

Step‑by‑Step Instructions for Cheddar Bay Chicken Cobbler

Step 1: Preheat and Prepare
Begin by preheating your oven to 375°F (190°C). While the oven heats, generously grease a 9×13-inch baking dish with your choice of cooking spray or butter. This ensures your Cheddar Bay Chicken Cobbler doesn’t stick during baking, making it easier to serve once it’s beautifully golden and bubbly.

Step 2: Mix the Filling
In a large mixing bowl, combine 1 cup of milk, 1 cup of sour cream, and 1 can of cream of chicken soup. Use a whisk to stir these ingredients until smooth and well-blended, creating a creamy base for your cobbler filling. The vibrant mixture should be free of lumps, inviting you to add in the flavors of the dish.

Step 3: Combine Ingredients
Next, fold in 1 teaspoon of garlic powder, 1/2 teaspoon of black pepper, 2 cups of frozen mixed vegetables, and 2 cups of cooked, shredded chicken. Stir everything together until each piece of chicken and vegetable is coated in the creamy mixture. Once combined, pour this flavorful filling into your prepared baking dish, spreading it evenly to ensure every bite gets that rich taste.

Step 4: Prepare the Biscuit Topping
For the topping, prepare the Cheddar Bay biscuit mix according to the package instructions, which typically involves adding water and mixing until just moistened. Fold in 1 cup of shredded cheddar cheese for that cheesy goodness that complements the cobbler seamlessly. This concoction will create a delightful flaky topping for your Cheddar Bay Chicken Cobbler.

Step 5: Assemble and Drizzle
Using a spoon, drop generous spoonfuls of the biscuit dough over the chicken mixture in the baking dish. Aim for an even distribution, allowing some of the filling to peek through for visual appeal. Once the dough is placed, drizzle the surface with 1/4 cup of melted butter, adding a rich, golden color as it bakes, and sprinkle with fresh parsley if desired.

Step 6: Bake to Perfection
Place the dish in the oven and bake for 40-45 minutes, or until the biscuit topping is beautifully golden brown and cooked through. You’ll know it’s done when the top is bubbly and has a lovely crust. As the Cheddar Bay Chicken Cobbler bakes, your kitchen will fill with delightful aromas that make waiting almost unbearable.

Step 7: Cool and Serve
Once baked, remove the dish from the oven and allow it to sit for about 5 minutes before serving. This resting time lets the filling set slightly, preventing it from being too runny when you dish it out. Serve this comforting meal warm, and enjoy a heartwarming dinner with family or friends!

Expert Tips for Cheddar Bay Chicken Cobbler

  • Shred Chicken Well: Make sure your chicken is finely shredded to ensure it mixes evenly with the creamy filling, preventing any large chunks that might disrupt the texture.

  • Let It Rest: Allowing the Cheddar Bay Chicken Cobbler to sit for about 5 minutes after baking helps thicken the filling, preventing it from being too watery when served.

  • Broil for Crispiness: If you desire a crispier biscuit topping, switch to broil during the last few minutes of baking—just watch closely to avoid burning.

  • Watch Seasoning Levels: Adjust black pepper and garlic powder according to your family’s taste preferences; a little goes a long way in enriching the overall flavor.

  • Mix Up Vegetables: Don’t hesitate to experiment with different frozen or fresh vegetables like broccoli or corn, adding variety while increasing the nutritional value of your dish.

How to Store and Freeze Cheddar Bay Chicken Cobbler

Fridge: Store any leftovers in an airtight container for up to 3 days. Make sure to allow the cobbler to cool completely before sealing to maintain freshness.

Freezer: If you’d like to make it ahead, assemble the Cheddar Bay Chicken Cobbler without baking, cover tightly, and freeze for up to 3 months. When ready to use, thaw in the refrigerator overnight before baking.

Reheating: To reheat, warm in the oven at 350°F (175°C) until heated through, about 20-25 minutes. This ensures the biscuit topping stays nice and flaky while the filling warms up beautifully.

Make-Ahead Tips: You can prepare the filling and toppings separately, storing them in the fridge for up to 2 days. Assemble just before baking for optimal freshness and flavor.

Cheddar Bay Chicken Cobbler Variations

Feel free to explore these delightful twists on the classic Cheddar Bay Chicken Cobbler, allowing your creativity to shine in the kitchen!

  • Turkey Swap: Substitute shredded chicken with cubed turkey for a delicious alternative that’s perfect for post-holiday meals.

  • Vegetarian Delight: Use chickpeas or lentils instead of chicken for a hearty vegetarian option without sacrificing flavor. This twist offers a protein-packed filling that’s both satisfying and nutritious.

  • Cheesy Twist: Experiment with different cheese blends like pepper jack or gouda in the biscuit topping for a unique flavor profile.

  • Veggie Boost: Incorporate fresh vegetables like broccoli, green beans, or corn to add color and nutrition. The vibrant veggies will not only enhance the taste but also provide a lovely crunch.

  • Spice It Up: Add diced jalapeños or red pepper flakes for a kick of heat. This variation is perfect for those who like a little extra spice in their meals.

  • Herb Infusion: Mix in fresh herbs, such as thyme or rosemary, into the filling or biscuit dough for an aromatic boost. These herbs will bring a delightful freshness to each bite.

  • Smart Swap: Use low-fat or plant-based milk and Greek yogurt instead of sour cream for a lighter option without compromising on creaminess. These substitutions make it easier to indulge without the guilt!

  • Serve with a Side: Pair the cobbler with a crisp side salad, roasted vegetables, or even some homemade cranberry sauce, like in my Mexican Barbecue Chicken for added flavor and a splash of color.

These variations not only keep things interesting but also cater to diverse taste preferences, making your cooking journey enjoyable and delightful!

Make Ahead Options

This Cheddar Bay Chicken Cobbler is a fantastic dish to prepare ahead of time, saving you precious minutes on busy weeknights! You can assemble the filling (including the cooked, shredded chicken, mixed vegetables, and creamy mixture) and store it in the refrigerator for up to 3 days. For the biscuit topping, prepare the dough and keep it covered in the fridge for up to 24 hours. When you’re ready to bake, simply drop the prepared biscuit topping over the chilled filling, drizzle with melted butter, and pop it in the oven. This method ensures that you still enjoy a delicious, hot meal while maintaining the comfort and quality of this savory dish.

What to Serve with Cheddar Bay Chicken Cobbler

Imagine a comforting spread that perfectly complements the creamy layers of your Cheddar Bay Chicken Cobbler—let’s explore some delicious pairings!

  • Garlic Roasted Green Beans: The crisp and slightly charred green beans add a fresh contrast to the creamy filling, enhancing the overall meal experience. Tossed with olive oil and garlic, they are simply irresistible.

  • Caesar Salad: This classic salad, with its crisp romaine lettuce and tangy dressing, offers a refreshing bite that balances the richness of the cobbler. Add croutons for extra crunch.

  • Honey-Glazed Carrots: Sweet and vibrant carrots bring a hint of sweetness that complements the savory flavors of the cobbler. Their caramelized exterior adds layers of taste and texture.

  • Creamy Coleslaw: The cool and crunchy coleslaw adds a delightful contrast to the warm cobbler. It’s a simple side that also brings a little tanginess to your dinner table.

  • Cornbread Muffins: Soft, sweet cornbread muffins make a heavenly addition to this dish. They soak up the creamy sauce and provide a comforting, buttery bite that feels like home.

  • Roasted Brussels Sprouts: These crispy sprouts, lightly seasoned, bring a hearty flavor and crunch to your meal. Their earthy taste pairs beautifully with the richness of your cobbler.

  • Sparkling Lemonade: The refreshing citrus notes of sparkling lemonade cleanse the palate between bites, making every mouthful of the comforting filling more enjoyable. A great sip to accompany your meal!

  • Apple Crisp: End your evening on a sweet note with a warm apple crisp. Its gooey, cinnamon-spiced filling and crumbly topping echo the comforting vibe of your main dish.

Cheddar Bay Chicken Cobbler Recipe FAQs

What is the best way to select ripe ingredients for this recipe?
Absolutely! For the frozen mixed vegetables, choose a colorful blend that looks vibrant and fresh. While using pre-packaged vegetables is convenient, if you opt for fresh, look for bright, firm produce without any dark spots or blemishes. For cheddar cheese, select a block rather than pre-shredded for better melting and flavor.

How should I store leftovers of Cheddar Bay Chicken Cobbler?
You can store any leftovers in an airtight container for up to 3 days in the refrigerator. Allow the cobbler to cool completely before sealing to keep it fresh and delicious. When ready to enjoy, simply reheat it in the oven for optimal texture.

Can I freeze Cheddar Bay Chicken Cobbler?
Yes! To freeze, assemble the cobbler without baking, cover tightly with plastic wrap, and then foil, and store it in the freezer for up to 3 months. When you’re ready to enjoy it, simply thaw in the refrigerator overnight before baking. This method ensures all the wonderful flavors are preserved.

What if my filling comes out too runny?
If you encounter a runny filling, it often helps to let the dish rest for about 5 minutes after baking. This allows the filling to thicken up. If you find it consistently too watery, try reducing the amount of cream of chicken soup or adding a touch more shredded chicken for added thickness next time.

Are there any dietary considerations I should be aware of?
Certainly! You can easily make this recipe gluten-free by using gluten-free biscuit mix. If you have lactose intolerance, substituting milk and sour cream for lactose-free alternatives works well. Remember to check that all packaged ingredients, like the cream of chicken soup, are compliant with any individual dietary needs.

How should I adjust the recipe if I want to use fresh instead of frozen vegetables?
Great question! If using fresh vegetables, you might want to sauté them briefly before mixing them into your filling. This pre-cooking caramelizes their natural sugars, enhancing the flavor. You’ll typically need about 3 cups of chopped fresh vegetables and you’ll want to cook them until just tender, roughly 5-7 minutes, before adding to your cobbler mix.

Cheddar Bay Chicken Cobbler

Cheddar Bay Chicken Cobbler for Cozy Comfort Food Nights

Cheddar Bay Chicken Cobbler is a comforting dish that combines creamy chicken filling with buttery cheddar biscuits.
Prep Time 15 minutes
Cook Time 45 minutes
Resting Time 5 minutes
Total Time 1 hour 5 minutes
Servings: 6 servings
Course: Dinner
Cuisine: American
Calories: 390

Ingredients
  

For the Filling
  • 2 cups Cooked, Shredded Chicken Use rotisserie chicken for convenience.
  • 1 cup Chicken Broth Vegetable broth can be a substitute.
  • 2 cups Frozen Mixed Vegetables Fresh or canned can be used.
  • 1 cup Milk Low-fat or plant-based milk can lighten it up.
  • 1 can Cream of Chicken Soup A homemade white sauce can be a healthier option.
  • 1 cup Sour Cream Greek yogurt is a great substitute.
  • 1 teaspoon Garlic Powder Fresh garlic can be used for a more aromatic result.
  • 1/2 teaspoon Black Pepper Adjust to taste.
For the Biscuits
  • 1 package Cheddar Bay Biscuit Mix Swap with a homemade biscuit recipe if desired.
  • 1 cup Shredded Cheddar Cheese Mix different cheeses for extra flavor.
  • 1/4 cup Melted Butter Olive oil can be a lighter alternative.
For Garnish
  • 1 tablespoon Fresh Parsley Optional, for garnish.

Equipment

  • 9x13-inch baking dish
  • Mixing Bowl
  • Whisk

Method
 

Step‑by‑Step Instructions
  1. Preheat your oven to 375°F (190°C) and grease a 9×13-inch baking dish.
  2. In a mixing bowl, combine 1 cup of milk, 1 cup of sour cream, and 1 can of cream of chicken soup. Whisk until smooth.
  3. Fold in 1 teaspoon of garlic powder, 1/2 teaspoon of black pepper, 2 cups of frozen mixed vegetables, and 2 cups of shredded chicken. Pour into the prepared baking dish.
  4. Prepare the Cheddar Bay biscuit mix according to package instructions and fold in 1 cup of shredded cheddar cheese.
  5. Drop spoonfuls of biscuit dough over the chicken mixture, drizzle with 1/4 cup of melted butter, and sprinkle with parsley if desired.
  6. Bake for 40-45 minutes, until the biscuit topping is golden brown and bubbly.
  7. Allow to cool for about 5 minutes before serving.
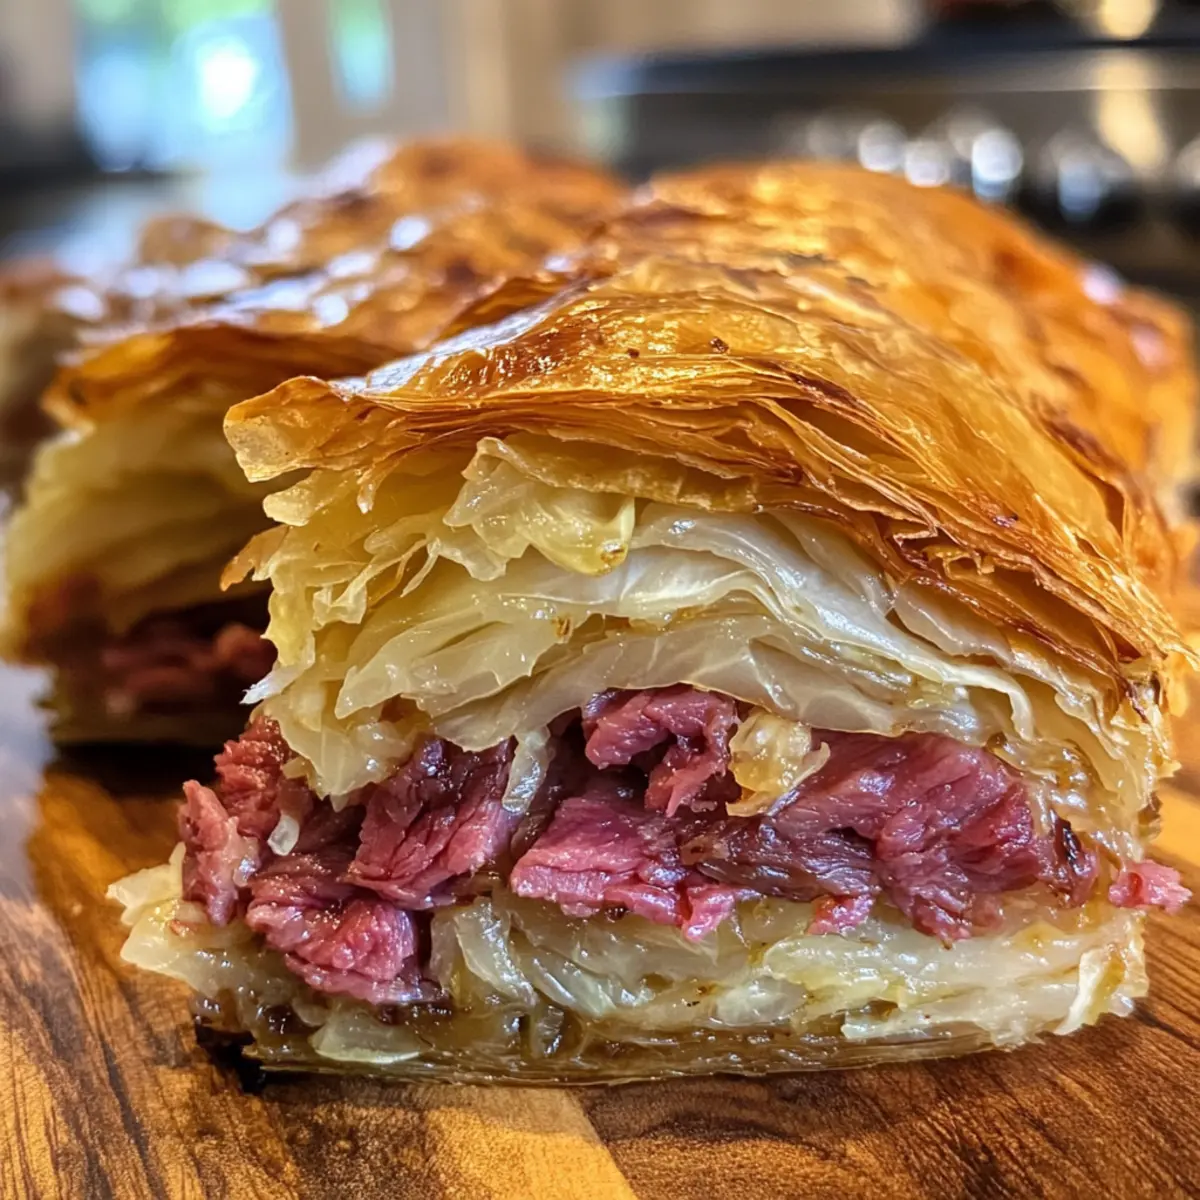
Nutrition

Serving: 1sliceCalories: 390kcalCarbohydrates: 32gProtein: 25gFat: 22gSaturated Fat: 12gPolyunsaturated Fat: 2gMonounsaturated Fat: 8gCholesterol: 90mgSodium: 750mgPotassium: 550mgFiber: 3gSugar: 4gVitamin A: 800IUVitamin C: 15mgCalcium: 200mgIron: 2mg

Notes

Shred chicken well for even mixing. Let it rest to thicken filling. Broil for crispiness as desired.

Tried this recipe?

Let us know how it was!

Decadent Pistachio Chocolate Lava Cakes for Every Occasion

I stumbled upon an exquisite gem of a dessert that transformed my concept of indulgence—a creation known as Pistachio Chocolate Lava Cakes. Imagine a rich, dark chocolate exterior giving way to a molten center filled with nutty pistachio goodness. This recipe is a true crowd-pleaser, perfect for impressing friends or simply treating yourself on a quiet evening at home. Not only are these cakes incredibly simple to throw together, but they also accommodate a variety of dietary preferences—gluten-free, vegan, and even keto options are all on the table. So, are you ready to impress your taste buds and elevate your dessert game? Let’s dive into this delightful chocolatey adventure!

Why are Pistachio Chocolate Lava Cakes a must-try?

Irresistible Flavors: The fusion of rich dark chocolate with creamy pistachio creates an exclusive combination that you simply can’t resist.

Versatile Options: Whether you’re gluten-free, vegan, or on a keto diet, this dessert adapts to your needs without sacrificing flavor—perfect for everyone at the table.

Quick & Easy: With minimal prep time and straightforward instructions, you can whip up these lava cakes even on a busy weeknight.

Showstopper Dessert: They’re as impressive as they are delicious; serve them warm, and watch the centers flow for that “wow” factor! Pair them with a scoop of Buttermilk Pancakes Discover for a complete indulgent breakfast experience.

Experience a dessert that stands out; your taste buds will thank you!

Pistachio Chocolate Lava Cakes Ingredients

For the Batter

  • Dark Chocolate – Use chocolate with at least 60% cocoa for the perfect balance of bitter and sweet flavors.
  • Butter – Adds a luscious richness and keeps the cake moist.
  • Eggs – Essential for structure; whisk them until thick and pale for the best result.
  • Confectioners’ Sugar – Sweetens the chocolate mixture and contributes to a silky texture.
  • Salt – A pinch elevates the nutty flavors of the pistachio in this decadent dessert.
  • Vanilla Extract – Infuses depth, amplifying the overall flavor profile of these Pistachio Chocolate Lava Cakes.

For the Pistachio Filling

  • Pistachio Paste – The star of the filling; opt for unsweetened or lightly sweetened varieties to control sweetness. If it’s thick, thin it with cream before freezing.

This delightful dessert showcases the rich and nutty experience that is sure to impress!

Step‑by‑Step Instructions for Pistachio Chocolate Lava Cakes

Step 1: Prepare Pistachio Filling
In a blender, combine the pistachio paste with cream if it needs thinning. Blend until smooth, then pour the mixture into small molds. Freeze for at least 1 hour until firm, ensuring your pistachio filling is ready to create that luscious molten center in your Pistachio Chocolate Lava Cakes.

Step 2: Melt Chocolate and Butter
Set up a double boiler by placing a heatproof bowl over simmering water. Add dark chocolate and butter to the bowl, stirring occasionally until completely melted and smooth, which should take about 5-7 minutes. This creates a rich base for your lava cakes, so be cautious and avoid microwaving to prevent burning.

Step 3: Mix Batter
In a large mixing bowl, whisk together the eggs and confectioners’ sugar until the mixture becomes thick and pale, about 3-4 minutes. Once achieved, gently fold in the melted chocolate and butter mixture, ensuring a smooth and cohesive batter without deflating the eggs. This step is crucial for creating the perfect texture of your Pistachio Chocolate Lava Cakes.

Step 4: Assemble Cakes
Preheat your oven to 425°F (220°C) and grease ramekins thoroughly with butter. Spoon a layer of the cake batter into each ramekin until the bottom is covered. Then, place a frozen pistachio disc in the center, topping it off with more batter until each ramekin is three-quarters full. This layering will bring the magic when baked!

Step 5: Bake
Place the filled ramekins on a baking tray and slide them into the preheated oven. Bake for 12-13 minutes, keeping a close eye until the edges are set, but the centers still wiggle slightly. This timing is crucial to ensure your Pistachio Chocolate Lava Cakes have that wonderful molten core that flows when cut.

Step 6: Serve Immediately
Once baked, allow the ramekins to cool for about 1 minute. Then, carefully invert each ramekin onto a plate, allowing the molten lava of pistachio goodness to flow out. Serve these delectable cakes warm and enjoy the delightful surprise at the center of your rich Pistachio Chocolate Lava Cakes.

What to Serve with Pistachio Chocolate Lava Cakes

Indulging in these decadent treats is just the beginning—let’s enhance your dessert experience with delightful accompaniments.

  • Vanilla Gelato: The creamy sweetness of vanilla gelato balances the rich chocolate and nutty filling, adding a delightful creaminess.

  • Fresh Berries: A mix of raspberries and strawberries provides a tart contrast to the sweetness, brightening every bite.

  • Chocolate Sauce: Drizzling a warm chocolate sauce over your lava cakes intensifies the heavenly chocolate experience while adding a luxurious touch.

  • Chopped Pistachios: Sprinkling chopped pistachios on top not only adds crunch but also elevates the nutty flavor for a gourmet finish.

  • Mint Leaves: A sprig of fresh mint on the side offers a refreshing note, refreshing your palate after each rich bite.

  • Espresso or Coffee: A cup of freshly brewed espresso complements the dessert beautifully, enhancing the chocolate flavors and providing a delightful pick-me-up.

By pairing these elements thoughtfully, each forkful of your Pistachio Chocolate Lava Cakes transforms into an extraordinary experience!

Expert Tips for Pistachio Chocolate Lava Cakes

  • Chill the Filling: Ensure the pistachio paste is frozen solid to create that coveted molten center. This step is key for achieving the perfect flood of flavor when you cut into your lava cakes.

  • Watch the Bake Time: For a softer, gooier center, reduce the baking time by one minute. Keep an eye on your cakes—the edges should be set while the center retains a slight jiggle.

  • Proper Serving: Serve immediately for the best molten experience; the cakes don’t hold well once cooled. To prepare ahead, bake, refrigerate, and gently reheat before serving for the same delightful results.

  • Use Quality Chocolate: Choose dark chocolate with at least 60% cocoa for a richer taste, enhancing the flavor profile of your Pistachio Chocolate Lava Cakes.

  • Ramekin Greasing: Don’t skip greasing the ramekins well! This ensures easy release and preserves the lovely shape of your cakes when plated.

How to Store and Freeze Pistachio Chocolate Lava Cakes

Fridge: Keep baked lava cakes in an airtight container for up to 6 hours. To enjoy the perfect molten center, gently reheat in the oven—not the microwave—until warmed through.

Freezer: If you want to prepare ahead, freeze unbaked, assembled cakes. Wrap each ramekin in plastic wrap and then aluminum foil; they can stay frozen for up to 1 month.

Reheating: For frozen, baked cakes, place them in the fridge overnight to thaw. Reheat in the oven at 350°F (175°C) for about 10-12 minutes until warmed through and gooey in the center.

Serving: Always serve immediately after reheating for the best molten experience of your Pistachio Chocolate Lava Cakes; enjoy the delightful surprise of the creamy pistachio filling!

Make Ahead Options

These Pistachio Chocolate Lava Cakes are perfect for meal prep enthusiasts! You can prepare the pistachio filling up to 24 hours in advance by blending the pistachio paste with cream (if needed) and freezing it in molds for a smooth consistency. The cake batter can also be made ahead; simply mix it and refrigerate for up to 3 days. When you’re ready to serve, pour the batter into greased ramekins, add the frozen filling, and bake directly from the fridge—no need to thaw! This way, you’ll enjoy restaurant-quality results with minimal effort, allowing for a stress-free dessert experience on any busy weeknight.

Pistachio Chocolate Lava Cakes Variations

Feel free to play with this recipe and make it your own; there’s so much deliciousness waiting to be discovered!

  • Nut-Free: Substitute pistachio paste with sunflower seed butter for a nut-free version that still delivers creaminess. The flavor will change, but it’s equally delightful!

  • Vegan: Swap eggs for aquafaba (the liquid from a can of chickpeas) to keep it plant-based. Just whisk it until frothy before adding to the batter for the best results.

  • Gluten-Free: Use a gluten-free flour blend in place of all-purpose to maintain the decadent texture. Your lava cakes will still rise beautifully and taste as luxurious!

  • Keto: Replace sugar with erythritol or another keto-friendly sweetener. Pair with a whipped coconut cream topping to provide a creamy offset to the rich chocolate.

  • Flavor Boost: Add a splash of espresso or coffee to the chocolate mixture. This secret ingredient will enhance the chocolate flavor, adding depth you won’t want to miss.

  • Spicy Chocolate: For a warming twist, incorporate a dash of cayenne pepper into the chocolate batter. This upgrade will surprise your palate with the perfect hint of heat!

  • Fruit-Infused: Toss a few raspberries or cherries in the batter before pouring it into ramekins. These add bursts of fruity sweetness that pair beautifully with the chocolate.

  • Pistachio Crunch: Top the finished cakes with crushed pistachios or chocolate curls for a delightful texture that complements the soft molten center. It’s a stunning way to finish your presentation.

For a delectable change of pace, try pairing these cakes with a scoop of White Chocolate Cranberry cookies for a festive touch. Happy baking!

Pistachio Chocolate Lava Cakes Recipe FAQs

What type of dark chocolate should I use?
Absolutely! For the richest flavor, I recommend using dark chocolate that is at least 60% cocoa. If you’re a fan of intense chocolate, go for 70%. This will balance beautifully with the creaminess of the pistachio filling.

How do I store the baked lava cakes?
Very simply! Store baked Pistachio Chocolate Lava Cakes in an airtight container in the refrigerator for up to 6 hours. To ensure the molten center remains delightful, gently reheat in the oven to warm them through—not the microwave, as that can ruin the gooey texture!

Can I freeze the cakes? If so, how?
Most definitely! To freeze unbaked lava cakes, assemble them in greased ramekins and wrap each one tightly with plastic wrap, followed by aluminum foil. This way, they can be stored in the freezer for up to 1 month. Simply thaw in the fridge overnight before baking to enjoy that molten goodness!

What if my cakes don’t have a molten center?
Don’t worry; it happens to the best of us! If the center isn’t molten, it usually just means they were baked a little too long. For the perfect gooey center, keep an eye on your cakes at the 12-minute mark and adjust baking time if needed. A minute can make all the difference!

Are there any dietary substitutions available?
Absolutely! For a gluten-free version, substitute regular flour with gluten-free flour, and for vegan options, replace the eggs with aquafaba or a suitable egg substitute. Feel free to experiment; it’s all about finding what works for you while still indulging in those heavenly flavors!

Can I make these ahead of time?
Yes, you can! You can prepare the cakes ahead of time by baking them, letting them cool, then storing in the fridge for up to 6 hours before serving. Just remember to reheat gently in the oven to keep that molten center intact—your guests will be delighted!
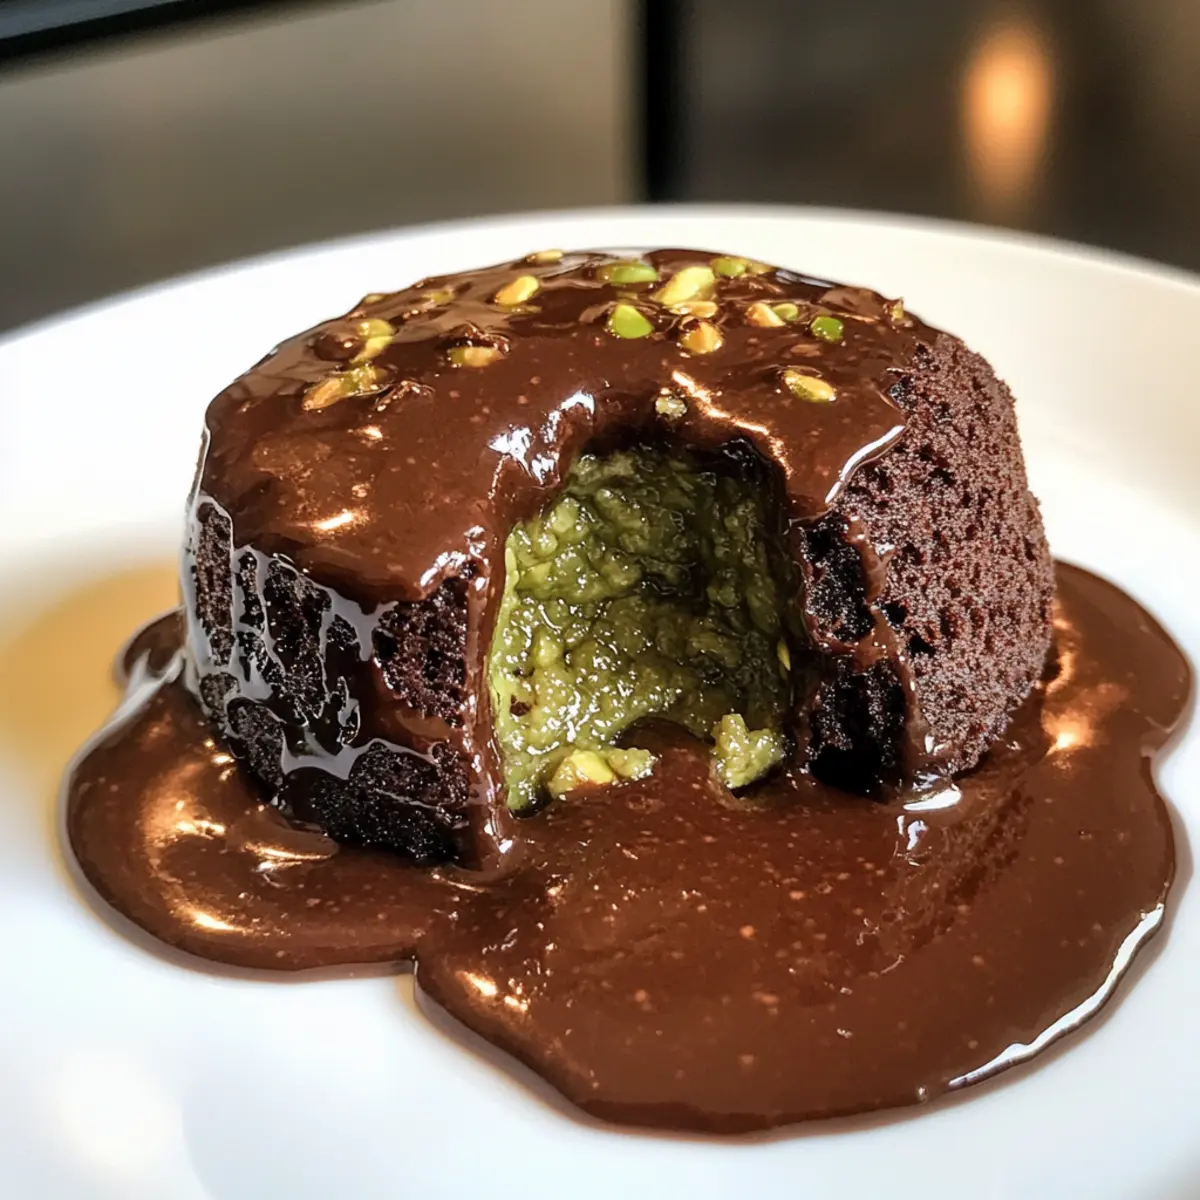
Pistachio Chocolate Lava Cakes

Decadent Pistachio Chocolate Lava Cakes for Every Occasion

Irresistible Pistachio Chocolate Lava Cakes with a molten center are perfect for impressing friends or treating yourself.
Prep Time 15 minutes
Cook Time 13 minutes
Freezing Time 1 hour
Total Time 1 hour 28 minutes
Servings: 4 cakes
Course: Dessert
Cuisine: American
Calories: 320

Ingredients
  

For the Batter
  • 4 oz Dark Chocolate Use chocolate with at least 60% cocoa
  • 1/2 cup Butter Adds richness and moisture
  • 2 large Eggs Whisk until thick and pale
  • 1/2 cup Confectioners' Sugar Sweetens the mixture
  • 1/4 tsp Salt Enhances nutty flavors
  • 1 tsp Vanilla Extract Infuses depth of flavor
For the Pistachio Filling
  • 1/2 cup Pistachio Paste Unsweetened or lightly sweetened

Equipment

  • blender
  • Double boiler
  • Mixing Bowl
  • ramekins
  • Baking tray

Method
 

Step-by-Step Instructions for Pistachio Chocolate Lava Cakes
  1. Prepare Pistachio Filling: In a blender, combine the pistachio paste with cream if needed. Blend until smooth, then pour into small molds and freeze for at least 1 hour.
  2. Melt Chocolate and Butter: Set up a double boiler, add dark chocolate and butter, stir until melted and smooth (about 5-7 minutes).
  3. Mix Batter: In a bowl, whisk eggs and confectioners' sugar until thick and pale (3-4 minutes). Fold in melted chocolate and butter mixture.
  4. Assemble Cakes: Preheat oven to 425°F (220°C). Grease ramekins with butter, add cake batter to cover bottom, place a frozen pistachio disc in the center and top with more batter.
  5. Bake: Place ramekins in preheated oven, bake for 12-13 minutes until edges set but centers jiggle slightly.
  6. Serve Immediately: Cool for 1 minute, invert onto plates, and serve warm for a molten center.

Nutrition

Serving: 1cakeCalories: 320kcalCarbohydrates: 28gProtein: 5gFat: 20gSaturated Fat: 12gPolyunsaturated Fat: 1gMonounsaturated Fat: 5gCholesterol: 120mgSodium: 150mgPotassium: 200mgFiber: 2gSugar: 15gVitamin A: 500IUCalcium: 30mgIron: 1mg

Notes

For the best molten experience, serve immediately after baking and enjoy the delightful pistachio filling.

Tried this recipe?

Let us know how it was!

Garlic Butter Steak: The Ultimate Comfort Food Delight

As I stood in my kitchen, the rich aroma of sizzling steaks began to fill the air—an instant reminder of the magical allure of cooking at home. Today, I’m excited to share my recipe for Garlic Butter Steak with Parmesan Cream Sauce, a dish that transforms any ordinary dinner into a celebration of flavors. This recipe is not only quick to prepare but also impressively luxurious, making it the perfect choice for everything from a cozy family meal to a sophisticated gathering with friends. Each succulent bite of ribeye steak, enhanced by the creamy, garlicky sauce, promises a moment of pure indulgence that will have everyone asking for seconds. Ready to elevate your dinner game? Let’s dive in and make this unforgettable dish together!

Why is Garlic Butter Steak a Must-Try?

Unforgettable Flavor: The rich garlic butter bath transforms every bite into a flavor explosion that leaves taste buds dancing.

Creamy Indulgence: With a Parmesan cream sauce that’s velvety smooth, each mouthful feels like a luxurious treat.

Quick to Prepare: Perfect for weeknight dinners, this recipe comes together in under 30 minutes, letting you enjoy gourmet tastes without the fuss.

Crowd-Pleasing Delight: Whether for a family dinner or a friendly gathering, this dish is sure to impress guests, drawing them to the table.

Versatile Ingredients: You can easily substitute the ribeye for your favorite cut, making it adaptable for any steak lover. Enhance your meal by pairing it with sides like Garlic Butter Shrimp or Grilled Garlic Rosemary Smashed Potatoes to elevate this dining experience even further!

Garlic Butter Steak Ingredients

For the Steak

  • Ribeye Steaks – Juiciness and flavor source; substitute with sirloin or filet mignon if desired.
  • Salt and Pepper – Essential seasonings that enhance the meat’s natural flavor; adjust to taste.
  • Butter – Provides richness and aids in searing; use unsalted for better control over seasoning.

For the Cream Sauce

  • Garlic (minced) – Adds depth and aromatic qualities; feel free to increase or decrease according to your garlic preference.
  • Heavy Cream – Forms the base of the creamy sauce, giving it a luxurious texture; can substitute with half and half for a lighter option.
  • Grated Parmesan Cheese – Infuses the sauce with umami; change it up with Asiago or Pecorino for different flavors.

For Garnishing

  • Chopped Fresh Parsley – Provides a fresh flavor contrast; sprinkle generously for a vibrant presentation.

Enjoy the delightful journey of flavors that this Garlic Butter Steak offers, making it an irresistible choice for any dinner occasion!

Step‑by‑Step Instructions for Garlic Butter Steak

Step 1: Prepare Steaks
Start by trimming any excess fat from your ribeye steaks, ensuring a clean cut for optimal searing. Pat the steaks dry with paper towels to enhance browning, then season both sides generously with salt and pepper. Allow the seasoned steaks to rest at room temperature for 30 minutes, which helps in achieving a perfectly cooked Garlic Butter Steak.

Step 2: Sear Steaks
Heat a large skillet over medium-high heat and add 2 tablespoons of butter, letting it melt until it starts to bubble. Carefully place the steaks in the hot skillet, ensuring they don’t overcrowd the pan. Sear each side for about 4-5 minutes until a deep golden-brown crust forms. Flip the steaks, add the remaining butter and minced garlic to the skillet, and continue to sear for another 4-5 minutes for medium-rare doneness.

Step 3: Rest Steaks
Once cooked to your desired doneness, remove the steaks from the skillet and transfer them to a plate. Loosely cover the steaks with aluminum foil and let them rest for 5 minutes. This resting period is crucial for a juicy Garlic Butter Steak as it allows the juices to redistribute throughout the meat, yielding tender slices.

Step 4: Make Sauce
Lower the heat to medium and pour in the heavy cream directly into the skillet, using a whisk to deglaze any tasty browned bits stuck on the bottom. Cook for about 3-4 minutes, stirring frequently, until the sauce is thick and creamy. Stir in the grated Parmesan cheese until melted and well combined, then season the sauce to taste with salt and pepper for an added flavor burst.

Step 5: Serve
Slice the rested Garlic Butter Steak against the grain for maximum tenderness and plate it elegantly. Generously drizzle the creamy Parmesan sauce over the steak slices, allowing the rich sauce to bathe each piece. Garnish with chopped fresh parsley for a vibrant touch, and your flavorful Garlic Butter Steak is ready to impress your guests!

Expert Tips for Garlic Butter Steak

  • Perfect Doneness: Use a meat thermometer to check your steak’s temperature; aim for 93°C for medium-rare for juicy results.

  • Resting Is Key: Always let your Garlic Butter Steak rest for 5 minutes under foil to keep it moist. This step allows juices to redistribute for tender slices.

  • Avoiding Sauce Separation: Keep the heat medium-low when making the Parmesan cream sauce. This prevents it from separating and helps achieve that velvety texture.

  • Customize Seasoning: Don’t hesitate to adjust salt and pepper to your taste. A little extra seasoning can elevate your Garlic Butter Steak into a flavor masterpiece.

  • Use Fresh Ingredients: Fresh parsley and quality parmesan make a significant difference in taste, enhancing your dish’s overall enjoyment.

What to Serve with Garlic Butter Steak with Parmesan Cream Sauce

Sink your teeth into the rich flavors of this steak, and envision the perfect side dish pairing to elevate your dining experience.

  • Garlic Mashed Potatoes: These creamy, buttery potatoes soak up the savory sauce beautifully, offering a comforting and hearty side.

  • Roasted Asparagus: Crisp-tender asparagus adds a fresh, green crunch that contrasts wonderfully with the richness of the steak, enhancing your meal’s balance.

  • Sautéed Mushrooms: Earthy sautéed mushrooms harmonize with the garlic and cream, providing a savory depth that complements the steak’s luxurious flavors seamlessly.

A simple blend of olive oil, garlic, and herbs can elevate their natural taste and make for an unforgettable pairing.

  • Caesar Salad: A crisp Caesar salad adds a refreshing bite to your meal, and its tangy dressing pairs perfectly with the steak’s rich creaminess.

  • Red Wine: A glass of full-bodied red wine, such as Cabernet Sauvignon, accentuates the steak’s flavors, making every bite feel like a gourmet experience.

  • Chocolate Mousse: For dessert, a light and airy chocolate mousse offers a decadent finish without overwhelming your palate after the rich steak. Its sweetness beautifully rounds off the meal.

How to Store and Freeze Garlic Butter Steak

Fridge: Store leftover Garlic Butter Steak in an airtight container for up to 3 days. Make sure it’s cooled for about 20 minutes before sealing to preserve quality.

Freezer: For longer storage, wrap the steak tightly in plastic wrap followed by aluminum foil. It can stay frozen for up to 3 months without loss of flavor.

Reheating: Gently warm the steak in the oven at 150°C until heated through. For the sauce, simmer on low heat while whisking to maintain its creamy consistency.

Storage Tips: Always store the Parmesan cream sauce separately to prevent sogginess. This way, you’ll enjoy the same delicious flavors when you reheat!

Garlic Butter Steak Variations

Feel free to get creative and make this recipe your own by trying out these delightful substitutions and twists!

  • Healthier Cuts: Substitute ribeye with sirloin or tenderloin for a leaner option, still packed with flavor.
  • Herb Infusion: Add fresh herbs like thyme or rosemary while basting the steaks for a fragrant touch, enhancing the aroma of your dish.
  • Wine Splash: Incorporate a splash of white wine into the sauce for brightness and complexity; just reduce the cream slightly to balance.
  • Cheese Swap: Replace Parmesan with Asiago or Pecorino for a distinctive flavor twist; each offers a unique taste profile to your sauce.
  • Creamy Alternatives: Use half and half in place of heavy cream if you’re seeking a lighter version, without losing that luxurious texture.
  • Spicy Kick: For some heat, stir in red pepper flakes or a dash of hot sauce into the creamy sauce; it’ll add a delightful zing to each bite.
  • Vegetable Lovers: Serve with roasted asparagus or broccoli to bring a fresh element to your meal; they pair wonderfully with the creamy sauce.
  • Sautéed Mushrooms: Toss in some sautéed mushrooms into your sauce for extra umami and earthiness; they will beautifully complement the steak.

If you’re feeling adventurous, why not try this alongside Honey Garlic Shrimp or some buttery Honey Butter Brioche for an extraordinary spin on your dinner experience? Unlock your culinary creativity with these variations and discover how an ordinary steak can turn into a gourmet masterpiece!

Make Ahead Options

These Garlic Butter Steaks are a fantastic option for meal prep devotees! You can season the ribeye steaks with salt and pepper and let them rest for up to 24 hours in the refrigerator, enhancing their flavor as they marinate. Additionally, you can prepare the Parmesan cream sauce up to 3 days in advance; simply refrigerate it after cooking. When ready to serve, reheat the sauce gently on the stove over low heat, whisking until smooth. For the steaks, sear them fresh for the best texture, then slice and drizzle the warmed sauce over the top. With these simple steps, you can enjoy a lovely homemade meal with minimal effort during busy weeknights!

Garlic Butter Steak with Parmesan Cream Sauce Recipe FAQs

What type of ribeye steaks should I choose for this dish?
Absolutely! Look for ribeye steaks that have good marbling, as this fat content will keep the steak juicy and flavorful. Ideally, you want steaks that are bright red with a bit of white fat running throughout. Avoid any that have dark spots, as these may indicate spoilage. If ribeye isn’t available, sirloin or filet mignon can work as delicious substitutes.

How should I store leftovers from the Garlic Butter Steak?
Very! Once your cloves of garlic may have laced deliciously through the cooked steak, let them cool for about 20 minutes. Then, transfer the leftover garlic butter steak into an airtight container. It should stay fresh in the fridge for up to 3 days! Always remember to store the Parmesan cream sauce separately to keep it from getting soggy, which helps maintain its creamy texture upon reheating.

Can I freeze the Garlic Butter Steak? If so, how?
Absolutely! To freeze your Garlic Butter Steak, allow it to cool completely, then securely wrap it in plastic wrap, followed by a layer of aluminum foil. This two-layer method will help prevent freezer burn. You can store it in the freezer for up to 3 months. When ready to enjoy again, simply thaw in the fridge overnight and gently reheat in the oven at 150°C.

What if my Parmesan cream sauce separates while cooking?
Fear not! If your sauce separates, it might be because the heat was too high. If this happens, simply lower the heat and continually whisk the sauce until it comes back together. Keeping the sauce on medium-low while cooking will help maintain its creamy and velvety consistency. If you notice any lumps, you can also blend the sauce using an immersion blender for a smoother texture.

Is this recipe suitable for those with dietary restrictions?
It’s essential to consider! While this Garlic Butter Steak is not inherently gluten-free or suitable for keto dieters due to the heavy cream and cheese, you can make it a bit more digestible by swapping heavy cream for a dairy-free alternative or using a non-dairy cheese. Always check the labels of any substitutes to ensure they fit any specific dietary needs, especially for allergies.

Can my pets have the leftover steak?
Definitely! Plain, cooked steak without any spices or garlic can be a treat for your furry friends. Just ensure they consume it in moderation, and avoid giving them the creamy Parmesan sauce, as dairy can upset many pets’ stomachs. Always double-check with your veterinarian for the safest options for your pets!

Garlic Butter Steak

Garlic Butter Steak: The Ultimate Comfort Food Delight

A sumptuous Garlic Butter Steak with Parmesan Cream Sauce that turns any dinner into a flavorful celebration.
Prep Time 10 minutes
Cook Time 20 minutes
Resting Time 5 minutes
Total Time 35 minutes
Servings: 4 servings
Course: Beef
Cuisine: American
Calories: 550

Ingredients
  

For the Steak
  • 2 pieces Ribeye Steaks Substitute with sirloin or filet mignon if desired.
  • to taste Salt Essential seasoning.
  • to taste Pepper Essential seasoning.
  • 4 tablespoons Butter Use unsalted for better control over seasoning.
For the Cream Sauce
  • 4 cloves Garlic (minced) Add according to your preference.
  • 1 cup Heavy Cream Can substitute with half and half for a lighter option.
  • 1/2 cup Grated Parmesan Cheese Can substitute with Asiago or Pecorino for different flavors.
For Garnishing
  • 1/4 cup Chopped Fresh Parsley Sprinkle generously for vibrant presentation.

Equipment

  • Skillet

Method
 

Step-by-Step Instructions
  1. Trim excess fat from the ribeye steaks and pat dry with paper towels. Season with salt and pepper and allow to rest for 30 minutes.
  2. Heat a skillet over medium-high heat and add 2 tablespoons of butter. Sear each side of the steaks for 4-5 minutes until golden-brown.
  3. Remove the steaks and let them rest under aluminum foil for 5 minutes.
  4. Pour heavy cream into the skillet, deglaze, and stir frequently for 3-4 minutes until thick. Add Parmesan cheese and season to taste.
  5. Slice the steak against the grain, drizzle with cream sauce, and garnish with parsley.

Nutrition

Serving: 1servingCalories: 550kcalCarbohydrates: 5gProtein: 40gFat: 45gSaturated Fat: 20gPolyunsaturated Fat: 2gMonounsaturated Fat: 18gCholesterol: 140mgSodium: 700mgPotassium: 800mgSugar: 1gVitamin A: 400IUVitamin C: 2mgCalcium: 150mgIron: 3mg

Notes

Utilize fresh ingredients like parsley and quality parmesan for best flavors. Adjust seasoning to your preference for optimal taste.

Tried this recipe?

Let us know how it was!

French Chocolate Flan: A Decadent Dessert Adventure

Can you recall the last time a dessert truly stole your breath away? Enter the French Chocolate Flan with Crispy Tart Base—a culinary marvel that transforms the classic flan into an unforgettable experience. This delightful recipe artfully combines a luscious chocolate custard with a buttery, crisp tart shell, ensuring every bite is a perfect harmony of textures. What’s more, it’s effortless to prepare and ideal for impressing your friends at gatherings or enjoying a cozy night in. Whether you’re a passionate home-chef or someone simply craving a comforting treat, this flan is your ticket to indulgence. Ready to elevate your dessert game? Let’s dive into this sweet adventure!

Why is French Chocolate Flan a Must-Try?

Indulgence Awaits: This French Chocolate Flan offers an elegant twist on a classic dessert, featuring a creamy chocolate custard paired with a crisp tart base. Effortlessly Impressive: Its stunning presentation makes it perfect for dinner parties or special occasions, ensuring you’ll delight your guests. Versatile Variations: Dress it up with fruit purees or rich chocolate shavings for a unique spin. Explore pairing ideas with Cheesy French Onion for a delightful meal combo. Make-Ahead Perfection: Prepare it a day in advance to really let those flavors shine, and enjoy the satisfaction of serving this delicious treat!

French Chocolate Flan Ingredients

  • For the Chocolate Custard

  • Egg Yolks (3) – Bring richness and a beautiful golden color; using whole eggs can provide a different texture.

  • Whole Eggs (2) – Essential for structure and stability; no substitutions needed here.

  • White Sugar (1 cup / 200g) – Adds sweetness; brown sugar offers a deeper flavor if you’re feeling adventurous.

  • Cornstarch (⅓ cup / 42g) – Acts as a thickening agent; arrowroot or tapioca starch are good substitutes.

  • Salt (½ teaspoon) – Enhances the sweetness; adjust according to your taste buds.

  • Whole Milk (2 ½ cups / 600ml) – Provides creaminess; you can replace with almond or oat milk for a dairy-free version.

  • Heavy Cream (1 ¾ cups / 400ml) – Ensures a rich texture; light cream may alter the outcome slightly.

  • Dark Chocolate (7 oz / 200g, chopped) – The star of the dish, adding a luscious chocolate flavor; unsweetened chocolate can be substituted for a less sweet option.

  • Jam (1 tablespoon) – Adds a lovely glaze to the finished flan; optional; melted chocolate or syrup can also be used.

  • For the Chocolate Tart Base

  • All-Purpose Flour (1 cup / 120g) – Creates structure for the base; feel free to opt for gluten-free flour blends if needed.

  • Icing Sugar (⅓ cup / 35g) – Provides sweetness and a fine texture; granulated sugar can work, too, though the texture will be different.

  • Cocoa Powder (¼ cup / 25g) – Infuses chocolate flavor and color; consider Dutch-process cocoa for a deeper taste.

  • Salt (¼ teaspoon) – Balances the sweetness of the tart; taste and adjust if necessary.

  • Butter (1 stick / 114g, melted) – Adds tenderness to the crust; margarine or coconut oil can be used if you prefer.

  • Vanilla Extract (½ teaspoon) – A lovely flavor enhancer; other extracts, like almond, can be fun substitutes.

Explore the art of creating your very own French chocolate flan with these delightful ingredients!

Step‑by‑Step Instructions for French Chocolate Flan

Step 1: Prepare the Tart Base
In a mixing bowl, combine 1 cup of all-purpose flour, ⅓ cup of icing sugar, ¼ cup of cocoa powder, and ¼ teaspoon of salt. Mix these dry ingredients until well blended. Then, add 1 stick of melted butter and ½ teaspoon of vanilla extract; use your hands to blend until the mixture becomes crumbly. Press this dough into a tart pan, ensuring an even layer, and pre-bake in a preheated oven at 350°F (175°C) for about 10 minutes, or until slightly firm.

Step 2: Make the Chocolate Custard
While the tart base is baking, whisk together 3 egg yolks and 2 whole eggs in a mixing bowl. Gradually add 1 cup of white sugar, ⅓ cup of cornstarch, and ½ teaspoon of salt, mixing until smooth. Slowly stir in 2 ½ cups of whole milk and 1 ¾ cups of heavy cream, ensuring everything is well combined. Afterwards, melt 7 ounces of dark chocolate, then gently fold it into the custard mixture until fully incorporated and silky.

Step 3: Bake the Flan
Once the tart base is ready, remove it from the oven and pour the chocolate custard mixture into it. Set the tart pan into a larger baking dish and fill the larger dish with hot water, creating a water bath. Bake the French chocolate flan at 325°F (163°C) for about 50-60 minutes, or until the custard is just set but still slightly jiggly in the center. Check for doneness by gently shaking the pan; the edges should be firm while the middle remains soft.

Step 4: Cool and Serve
After baking, carefully remove the tart pan from the water bath and let the flan cool at room temperature for about 30 minutes. Once cooled, refrigerate for at least 2 hours, allowing the flavors to meld and the texture to set. Before serving, give the top a glossy finish by brushing it with 1 tablespoon of jam, and enjoy a slice of your beautifully made French chocolate flan with friends and family!

How to Store and Freeze French Chocolate Flan

  • Fridge: Store the French chocolate flan in an airtight container or cover it with plastic wrap for up to 3 days. Keeping it covered helps maintain its moist texture and deepens the flavor.

  • Freezer: You can freeze individual slices of the flan for up to 2 months. Wrap each slice tightly in plastic wrap, followed by aluminum foil to prevent freezer burn. Thaw in the refrigerator before serving.
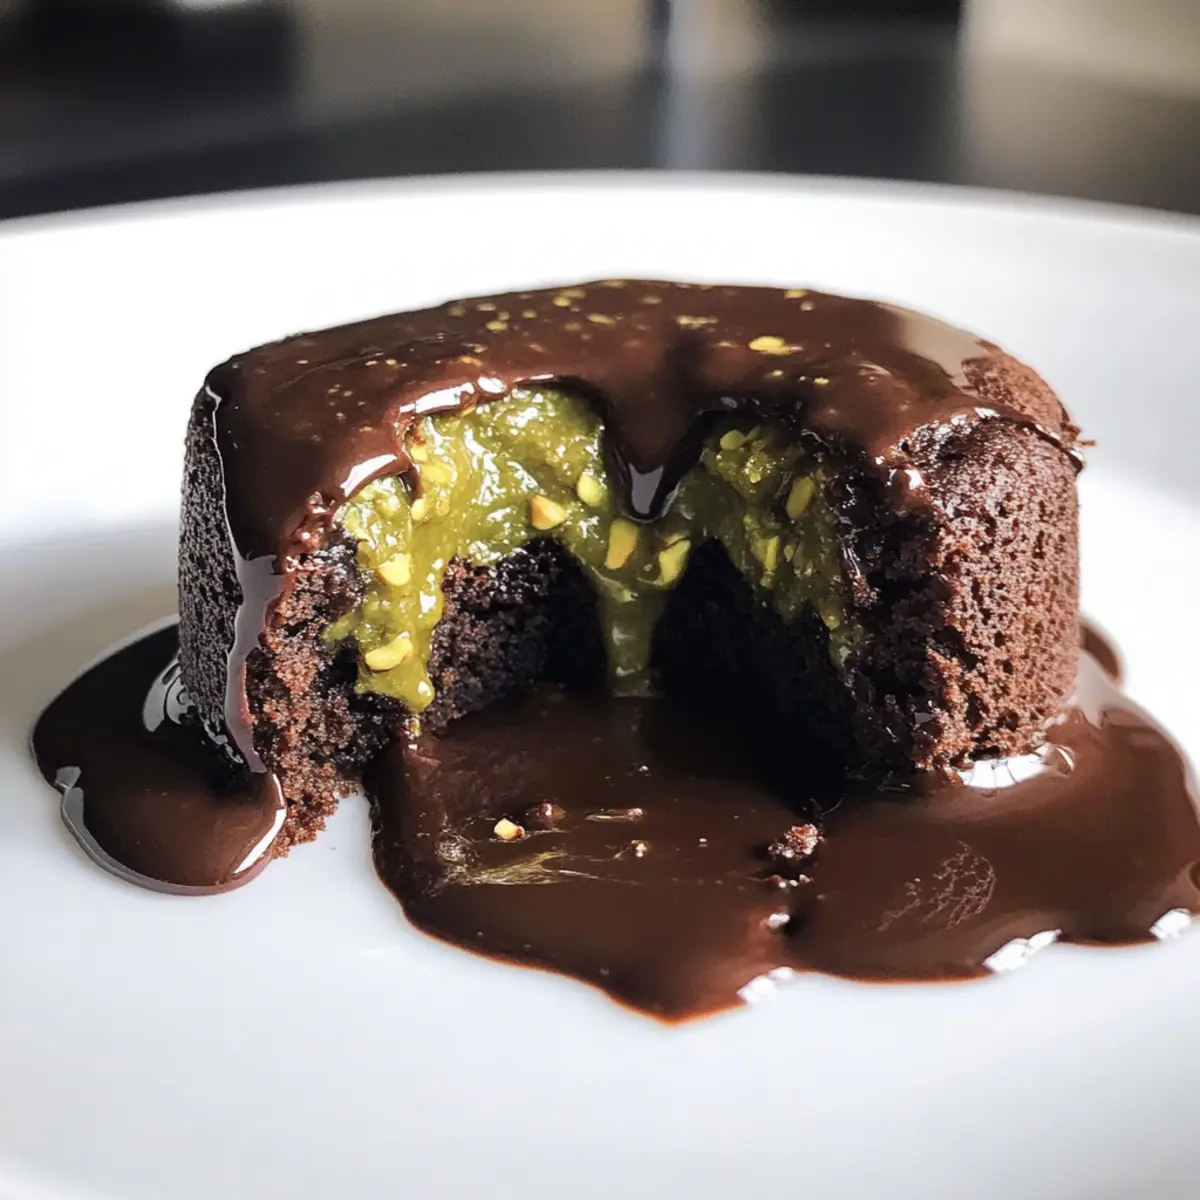
  • Reheating: Enjoy it chilled straight from the fridge for the best experience, or lightly warm it in the microwave for about 10-15 seconds for a comforting touch.

  • Make-Ahead Tip: Prepare your flan a day in advance for an exquisite treat; it allows the flavors to meld beautifully and makes for a stress-free serving experience!

French Chocolate Flan Variations & Substitutions

Customize your French Chocolate Flan experience with these flavorful suggestions that will tantalize your taste buds!

  • Fruit Layer: Add a layer of fruit puree like raspberry or strawberry between the custard and tart base for refreshing brightness. This fruity twist beautifully complements the rich chocolate.

  • White Chocolate Twist: Substitute white chocolate for some or all dark chocolate for a sweeter, creamier flavor that’s absolutely delightful. It brings a new dimension to your classic flan.

  • Spicy Kick: Enhance the custard with a pinch of cinnamon or a dash of espresso powder for an intriguing flavor profile. It adds warmth and a subtle complexity that chocolate lovers will adore.

  • Nutty Crust: Swap a portion of the all-purpose flour for ground nuts like almonds or hazelnuts in the crust for added texture and a nutty flavor. This delightful change creates a deliciously unique bite.

  • Dairy-Free Delight: Replace whole milk and heavy cream with coconut milk or almond milk for a dairy-free version that doesn’t skimp on creaminess. You’ll savor every luscious bite without the dairy!

  • Caramel Drizzle: For a decadent finish, drizzle homemade or store-bought caramel sauce over the top before serving to enrich the flavor and provide a luxurious touch.

  • Elegant Toppings: Top with whipped cream and chocolate shavings or fresh berries for an added flair. These finishing touches elevate the presentation and can make any meal special.

Integrate these variations into your recipe and enjoy discovering new flavors, perfect for sharing with family and friends. And if you’re seeking other exciting recipes, don’t miss out on my exquisite Patriotic Chocolate Chip or delightful White Chocolate Cranberry treats! Enjoy your culinary adventure!

What to Serve with French Chocolate Flan

Pairing a delightful side or a sweet treat can elevate your French Chocolate Flan experience to new heights. Imagine the harmonious blend of tastes and textures that will make your meal truly unforgettable!

  • Whipped Cream:
    A dollop of light, airy whipped cream adds a sweet touch and balance to the rich chocolate custard.

  • Fresh Berries:
    Raspberries or strawberries introduce a refreshing tartness that beautifully complements the velvety sweetness of the flan.

  • Chocolate Shavings:
    Dark chocolate shavings scattered on top enhance the indulgent chocolate flavor while adding a sophisticated touch.

  • Mint Leaves:
    A few fresh mint leaves not only brighten up the plate visually but also provide a fragrant contrast to the dessert’s richness.

  • Espresso:
    A shot of strong espresso or cappuccino pairs wonderfully, contrasting the sweetness and enriching the chocolate experience.

  • Vanilla Ice Cream:
    Serve a scoop on the side to create a melt-in-your-mouth moment of creamy goodness that contrasts with the flan’s texture.

  • Coconut Macarons:
    These chewy, slightly sweet cookies add a fun texture and flavor variation that makes for a delightful pairing.

  • Chocolate Sauce:
    A drizzle of rich, warm chocolate sauce can enhance the dessert experience and cater to the chocolate lover in your life.

  • Port Wine:
    A glass of rich, fruity Port wine can enrich your palate while reinforcing the depth of the chocolate flavors.

  • Caramel Sauce:
    A finishing touch of salted caramel sauce over the flan for added sweetness and a hint of salt can provide a delightful contrast to the dark chocolate.

Make Ahead Options

These French Chocolate Flans are perfect for busy home cooks looking to save time without compromising on flavor! You can prepare the chocolate tart base up to 24 hours in advance; simply keep it wrapped in plastic wrap at room temperature to maintain its crispness. The chocolate custard can be made and refrigerated for up to 3 days before pouring it into the tart shell. When you’re ready to serve, just bake the flan as instructed, allowing for a gorgeous, creamy dessert with minimal last-minute effort. Trust me, it’ll still be just as delicious and will wow your guests!

Expert Tips for French Chocolate Flan

  • Room Temperature Ingredients: Ensure all ingredients are at room temperature for a smoother and creamier chocolate custard mixture. This helps with even cooking.

  • Avoid Cracking: Bake the flan in a water bath to maintain moisture while cooking, preventing unsightly cracks on the surface.

  • Perfect Texture Check: When baking, the custard should appear slightly jiggly in the center but not liquid. This signals it’s perfectly set!

  • Chill Time Is Key: Allow the French chocolate flan to chill in the fridge for at least 2 hours for the best flavor and texture development before serving.
  • Storage Tips: Keep leftover flan in the refrigerator, covered, for up to three days. The flavor gets richer, making it even more delightful!

French Chocolate Flan Recipe FAQs

What type of chocolate should I use for the flan?
Absolutely! I recommend using high-quality dark chocolate (around 70% cocoa) for a rich flavor. If you prefer a less sweet option, you can opt for unsweetened chocolate. Its depth will truly elevate your flan!

How can I tell when the flan is done baking?
Very important! The flan should be slightly jiggly in the center when it’s done, but it shouldn’t look liquidy. A gentle shake of the pan should show firm edges while the middle retains a soft wobble. This is the hallmark of a perfectly cooked custard!

How should I store leftovers of the French chocolate flan?
To keep your delicious flan fresh, store it in the refrigerator, covered, for up to 3 days. This allows the flavors to deepen beautifully over time. Always make sure it’s airtight to prevent it from absorbing any unwanted odors from your fridge.

Can I freeze the French chocolate flan?
Absolutely! You can freeze individual slices of the flan for up to 2 months. Wrap each slice tightly in plastic wrap, followed by aluminum foil to protect it from freezer burn. When you’re ready to enjoy, simply thaw in the refrigerator for a few hours before serving.
What should I do if my custard breaks or curdles?
No worries! If your custard looks curdled, it might be a sign of overheating or using cold ingredients. To remedy this, ensure all ingredients are at room temperature before mixing. Also, try to bake in a water bath; this gentle cooking method helps prevent curdling. If you notice curdling, you can blend it briefly to smooth it out before pouring it into the tart shell, but be careful not to overdo it!

Is there a way to make this recipe dairy-free?
Yes, indeed! You can substitute the whole milk and heavy cream with plant-based alternatives like almond milk or coconut cream. Ensure that the dark chocolate you choose is dairy-free as well. This way, you can still enjoy a luscious flan without the dairy!

French Chocolate Flan

French Chocolate Flan: A Decadent Dessert Adventure

Experience the indulgent French Chocolate Flan, a delightful dessert with a creamy custard and crispy tart base.
Prep Time 30 minutes
Cook Time 1 hour
Chill Time 2 hours
Total Time 3 hours 30 minutes
Servings: 8 slices
Course: Dessert
Cuisine: French
Calories: 350

Ingredients
  

For the Chocolate Custard
  • 3 large Egg Yolks Bring richness and a beautiful golden color; using whole eggs can provide a different texture.
  • 2 large Whole Eggs Essential for structure and stability; no substitutions needed here.
  • 1 cup White Sugar Adds sweetness; brown sugar offers a deeper flavor if you're feeling adventurous.
  • cup Cornstarch Acts as a thickening agent; arrowroot or tapioca starch are good substitutes.
  • ½ teaspoon Salt Enhances the sweetness; adjust according to your taste buds.
  • 2 ½ cups Whole Milk Provides creaminess; you can replace with almond or oat milk for a dairy-free version.
  • 1 ¾ cups Heavy Cream Ensures a rich texture; light cream may alter the outcome slightly.
  • 7 oz Dark Chocolate, chopped The star of the dish, adding a luscious chocolate flavor; unsweetened chocolate can be substituted for a less sweet option.
  • 1 tablespoon Jam Adds a lovely glaze to the finished flan; optional; melted chocolate or syrup can also be used.
For the Chocolate Tart Base
  • 1 cup All-Purpose Flour Creates structure for the base; feel free to opt for gluten-free flour blends if needed.
  • cup Icing Sugar Provides sweetness and a fine texture; granulated sugar can work, too, though the texture will be different.
  • ¼ cup Cocoa Powder Infuses chocolate flavor and color; consider Dutch-process cocoa for a deeper taste.
  • ¼ teaspoon Salt Balances the sweetness of the tart; taste and adjust if necessary.
  • 1 stick Butter, melted Adds tenderness to the crust; margarine or coconut oil can be used if you prefer.
  • ½ teaspoon Vanilla Extract A lovely flavor enhancer; other extracts, like almond, can be fun substitutes.

Equipment

  • Mixing Bowl
  • Tart Pan
  • Oven
  • Baking dish

Method
 

Step-by-Step Instructions
  1. In a mixing bowl, combine 1 cup of all-purpose flour, ⅓ cup of icing sugar, ¼ cup of cocoa powder, and ¼ teaspoon of salt. Mix these dry ingredients until well blended. Then, add 1 stick of melted butter and ½ teaspoon of vanilla extract; use your hands to blend until the mixture becomes crumbly. Press this dough into a tart pan, ensuring an even layer, and pre-bake in a preheated oven at 350°F (175°C) for about 10 minutes, or until slightly firm.
  2. While the tart base is baking, whisk together 3 egg yolks and 2 whole eggs in a mixing bowl. Gradually add 1 cup of white sugar, ⅓ cup of cornstarch, and ½ teaspoon of salt, mixing until smooth. Slowly stir in 2 ½ cups of whole milk and 1 ¾ cups of heavy cream, ensuring everything is well combined. Afterwards, melt 7 ounces of dark chocolate, then gently fold it into the custard mixture until fully incorporated and silky.
  3. Once the tart base is ready, remove it from the oven and pour the chocolate custard mixture into it. Set the tart pan into a larger baking dish and fill the larger dish with hot water, creating a water bath. Bake the French chocolate flan at 325°F (163°C) for about 50-60 minutes, or until the custard is just set but still slightly jiggly in the center. Check for doneness by gently shaking the pan; the edges should be firm while the middle remains soft.
  4. After baking, carefully remove the tart pan from the water bath and let the flan cool at room temperature for about 30 minutes. Once cooled, refrigerate for at least 2 hours, allowing the flavors to meld and the texture to set. Before serving, give the top a glossy finish by brushing it with 1 tablespoon of jam, and enjoy a slice of your beautifully made French chocolate flan with friends and family!

Nutrition

Serving: 1sliceCalories: 350kcalCarbohydrates: 40gProtein: 7gFat: 20gSaturated Fat: 12gPolyunsaturated Fat: 0.5gMonounsaturated Fat: 6gCholesterol: 150mgSodium: 150mgPotassium: 200mgFiber: 2gSugar: 25gVitamin A: 500IUCalcium: 100mgIron: 2mg

Notes

Allow the French chocolate flan to chill in the fridge for at least 2 hours for the best flavor and texture development before serving. Store leftovers in the refrigerator, covered, for up to three days.
Tried this recipe?

Let us know how it was!

Smothered Chicken and Rice: Your Ultimate Comfort Food Fix

I never anticipated a simple dinner could become the highlight of my week, but that’s exactly what happened the first time I made Smothered Chicken and Rice. This recipe embodies Southern comfort food at its best, with succulent chicken enveloped in a creamy sauce, perfectly paired with fluffy rice. What I adore about this dish is how effortlessly it transforms a hectic weeknight into a cozy evening; it’s quick to prepare, yet feels incredibly indulgent. Plus, it’s a foolproof crowd-pleaser that even my picky eaters ask for time and time again! Ready to whip up a plate of savory goodness in your kitchen? Let’s dive into this creamy delight that will have everyone asking for seconds!

Why Is This Recipe a Must-Try?

Comforting Flavors: This dish is a warm hug in a bowl, laced with creamy goodness that wraps around juicy chicken.

Quick & Easy: Ideal for busy weeknights, you can have this on the table in under 30 minutes without compromising on taste!

Family Favorite: It’s perfect for all ages—kids love the rich sauce, and adults appreciate the heartiness.

Versatile Base: Pair it with sides like Country Ranch Green Beans and Potatoes or make it a full meal with a delightful dessert like Pumpkin Pie Crisp.

Flexible Ingredients: Easily swap chicken for veggies or adjust spices for a personalized touch, ensuring it caters to everyone’s palate.

Smothered Chicken and Rice Ingredients

• Here’s everything you need to create the perfect Smothered Chicken and Rice!

For the Chicken

  • Chicken Breasts – Use boneless, skinless chicken breasts for a tender, easy-to-cook protein.
  • Garlic Powder – Adds depth of flavor; fresh garlic can enhance the taste further.
  • Onion Powder – Provides a rich flavor base; fresh onion can replace it for extra texture.
  • Smoked Paprika – Adds a subtle smokiness; feel free to swap regular paprika if preferred.
  • Salt & Black Pepper – Essential for complementing all flavors in the dish.

For the Rice

  • Long-Grain White Rice – Offers a fluffy texture that pairs beautifully with the sauce; brown rice requires a longer cooking time.
  • Chicken Broth – Infuses flavor into the rice; vegetable broth can make it lighter if desired.

For the Creamy Sauce

  • Unsalted Butter – Creates a rich base for the sauce; margarine can serve as a non-dairy alternative.
  • All-Purpose Flour – Thickens the sauce, but gluten-free flour works for a gluten-free option.
  • Whole Milk – Provides the creamy consistency; almond or other plant-based milks can replace it in dairy-free versions.
  • Shredded Cheddar Cheese & Grated Parmesan Cheese – Adds creaminess and flavor; any melting cheese can be used, or nutritional yeast for a vegan touch.

For Finishing Touches

  • Fresh Parsley – A lovely garnish that adds color and freshness; consider other herbs for variation.

Step‑by‑Step Instructions for Smothered Chicken and Rice

Step 1: Prepare the Chicken
Start by seasoning the boneless, skinless chicken breasts with garlic powder, onion powder, smoked paprika, salt, and pepper. Heat olive oil in a large skillet over medium-high heat. Once the oil shimmers, sear the chicken for 4-5 minutes on each side until golden brown and cooked through. Remove the chicken from the skillet and set it aside, leaving the drippings in the pan for flavor.

Step 2: Cook the Rice
In a medium saucepan, bring 2 cups of chicken broth and a pinch of salt to a boil. Once boiling, add 1 cup of long-grain white rice, stir, and reduce heat to low. Cover the saucepan and let the rice simmer for 15-18 minutes until tender and all the liquid is absorbed. Once cooked, fluff the rice with a fork and set it aside, ready to soak up all the flavors of the Smothered Chicken and Rice.

Step 3: Make the Creamy Sauce
Using the same skillet, reduce the heat to medium and add 4 tablespoons of unsalted butter, allowing it to melt. Whisk in 1/4 cup of all-purpose flour until it turns a light golden color, about 1-2 minutes. Gradually pour in 1 cup of whole milk and 1/2 cup of chicken broth, continuously stirring for 3-4 minutes until the sauce thickens and becomes creamy.

Step 4: Add the Cheese
Remove the skillet from the heat and stir in 1 cup of shredded cheddar cheese and 1/4 cup of grated Parmesan cheese. Allow the cheese to melt completely into the sauce, creating a luscious, creamy texture. Taste the sauce and adjust seasoning with more salt or pepper if needed, ensuring it’s full of flavor for your Smothered Chicken and Rice.

Step 5: Combine Everything
Return the seared chicken breasts to the skillet, spooning the creamy sauce over the top. Cover the skillet and let it simmer on low heat for about 10 minutes, allowing the chicken to absorb the rich flavors of the sauce while ensuring it’s cooked through. This final step pulls the whole dish together beautifully.

Step 6: Serve the Dish
To serve, place a generous scoop of the fluffy rice on the plates and top it with the smothered chicken and creamy sauce. Garnish with freshly chopped parsley for an inviting touch of color. Enjoy this comforting and satisfying Smothered Chicken and Rice as a delightful weeknight meal that will please the entire family!

Smothered Chicken and Rice Variations

Feel free to take this dish to new heights with a sprinkle of creativity and a dash of customization!

  • Vegetarian Twist: Swap out chicken for hearty vegetables like mushrooms or cauliflower, making it suitable for plant-based eaters. This variation allows you to enjoy all the rich flavors without missing out.

  • Spicy Kick: Add cayenne pepper or red chili flakes to the creamy sauce for a zesty, spicy flavor that’ll warm up your soul. A little heat can elevate each bite!

  • Brown Rice Upgrade: For a healthier option, use brown rice instead of white. It brings a nuttier flavor and a bit more chewiness to your dish, making it more satisfying.

  • Dairy-Free Delight: Replace whole milk with almond milk or coconut milk and use a dairy-free cheese to make this dish vegan-friendly. You’ll still indulge in creamy goodness without the dairy!

  • Lemon Zest Finish: Stir in a splash of lemon juice and zest just before serving for a refreshing brightness that cuts through the rich sauce. It’s a delightful surprise that will elevate the dish!

  • Herb Infusion: Experiment with fresh herbs such as thyme or rosemary for more aromatic flavors. Toss a few sprigs into the sauce as it thickens for an added depth of flavor.

  • Creamy Mushroom Sauce: Sauté sliced mushrooms in the pan before making the sauce to infuse an earthy flavor. This addition brings an incredible richness that complements the chicken perfectly.

  • Southern Style: Add a hint of Creole seasoning for that extra Southern flair! This simple spice mix will transport your meal to comfort food heaven, reminiscent of a cozy diner!

Don’t forget to pair your Smothered Chicken and Rice with some delightful sides like Country Ranch Green Beans and Potatoes or enjoy it with a sweet finishing touch of Pumpkin Pie Crisp!

Make Ahead Options

Preparing Smothered Chicken and Rice in advance can save you valuable time during busy weeknights! You can season and sear the chicken up to 24 hours ahead, storing it in the refrigerator for maximum flavor retention. Additionally, the creamy sauce can be made and refrigerated for up to 3 days—just ensure it’s cooled before storing to maintain its creamy consistency. To finish, simply reheat the sauce gently on the stovetop, adding a splash of milk if it thickens too much. Combine the chicken and sauce and simmer them together before serving over freshly cooked rice for a delicious and comforting meal ready in no time!

How to Store and Freeze Smothered Chicken and Rice

Fridge: Store leftovers in an airtight container in the refrigerator for up to 3 days to maintain freshness and flavor.

Freezer: For longer storage, freeze Smothered Chicken and Rice in a freezer-safe container for up to 2 months. Ensure it’s wrapped tightly to avoid freezer burn.

Reheating: Reheat individual portions in the microwave or gently on the stovetop. If frozen, allow to thaw overnight in the fridge before reheating to ensure even warming and preserve the creamy texture.

Serving Tip: When ready to serve, consider adding a splash of extra milk or broth when reheating to restore the sauce’s luscious creaminess.

Expert Tips for Smothered Chicken and Rice

Rest the Chicken: Allow the chicken to rest after searing for juicier results. This helps retain the moisture within the meat.

Watch the Thickness: If the creamy sauce becomes too thick, simply add additional chicken broth or milk until you reach the desired consistency.

Avoid Overcrowding: When searing chicken, avoid overcrowding the skillet. Cook in batches if necessary to ensure that each piece gets perfectly golden.

Flavor Adjustments: Don’t hesitate to tweak the seasoning; taste the creamy sauce before adding the chicken to ensure it’s seasoned to your liking.

Perfect Rice: Fluff the rice with a fork after cooking to prevent it from becoming mushy and to allow it to absorb the creamy sauce better with your Smothered Chicken and Rice.

What to Serve with Creamy Smothered Chicken and Rice?

Indulge in a complete culinary experience that complements the rich, creamy flavors and tender chicken of this beloved comfort dish.

  • Country Ranch Green Beans: Fresh and crunchy, these beans bring a delightful contrast to the creamy chicken, enhancing the overall meal experience.

  • Buttery Garlic Bread: Crispy on the outside and soft within, this bread is perfect for soaking up extra sauce. It’s a comforting addition that no one can resist.

  • Crispy Roasted Potatoes: Seasoned to perfection, these golden potatoes offer a satisfying crunch, harmonizing beautifully with the tender, smothered chicken.

  • Creamy Coleslaw: A cool and tangy slaw adds a refreshing bite, balancing the richness of the dish and keeping the meal light yet filling.

  • Steamed Broccoli: Bright and vibrant, this steamed veggie not only provides a pop of color but also a healthy boost, making your plate visually appealing and nutritious.

  • Pumpkin Pie Crisp: Finish off on a sweet note! This dessert delivers the warm spices of autumn, wrapping up your meal with a cozy, comforting flavor that echoes the dish’s essence.

Smothered Chicken and Rice Recipe FAQs

How do I select ripe chicken for this recipe?
Absolutely! Always opt for fresh, boneless, skinless chicken breasts, looking for a pink hue without any dark spots. If purchasing frozen chicken, ensure it’s well-packaged with no signs of freezer burn. Fresh chicken should be stored in the fridge for up to 1-2 days or can be frozen for up to 9 months.

What is the best way to store leftovers?
Great question! Transfer your leftover Smothered Chicken and Rice into an airtight container as soon as possible. In the refrigerator, it will stay fresh for up to 3 days. Be sure to let it cool completely before sealing to prevent condensation, which can make the dish soggy.

Can I freeze Smothered Chicken and Rice?
Yes, indeed! To freeze this dish, allow it to cool completely and then portion it into freezer-safe containers. You can store it in the freezer for up to 2 months. When you’re ready to enjoy it again, just thaw it overnight in the fridge before reheating.

The sauce turned out too thick; what can I do?
Very common! If your sauce gets too thick, don’t worry! Simply return it to medium heat and whisk in a little bit of chicken broth or milk, 1-2 tablespoons at a time, until it reaches your desired consistency. Remember to taste as you go to balance the flavor.

Are there any dietary considerations I should remember?
Absolutely! If you have allergies, substitute the cheese with nutritional yeast for a vegan option, or use gluten-free flour in the sauce to cater to gluten sensitivities. If you’re cooking for pets, avoid giving them any food with onion or garlic, as these can be harmful to animals.

How long can I keep the dish in the fridge before it goes bad?
As a rule of thumb, enjoy your Smothered Chicken and Rice leftovers within 3 days when stored properly in the fridge. Just make sure to reheat it to at least 165°F (74°C) to ensure it’s safe to eat!

Smothered Chicken and Rice

Smothered Chicken and Rice: Your Ultimate Comfort Food Fix

Smothered Chicken and Rice is a comforting dish that blends tender chicken in a creamy sauce with fluffy rice, perfect for weeknight dinners.
Prep Time 10 minutes
Cook Time 20 minutes
Total Time 30 minutes
Servings: 4 servings
Course: Chicken
Cuisine: Southern
Calories: 450

Ingredients
  

For the Chicken
  • 4 pieces boneless, skinless chicken breasts for tender cooking
  • 1 teaspoon garlic powder adds depth of flavor
  • 1 teaspoon onion powder provides a rich flavor base
  • 1 teaspoon smoked paprika for subtle smokiness
  • to taste salt
  • to taste black pepper
For the Rice
  • 1 cup long-grain white rice fluffy texture
  • 2 cups chicken broth infuses flavor into rice
For the Creamy Sauce
  • 4 tablespoons unsalted butter rich base for sauce
  • 1/4 cup all-purpose flour thickens the sauce
  • 1 cup whole milk provides creamy consistency
  • 1/2 cup chicken broth for sauce flavor
  • 1 cup shredded cheddar cheese adds creaminess
  • 1/4 cup grated Parmesan cheese for extra flavor
For Finishing Touches
  • to taste fresh parsley for garnish

Equipment

  • large skillet
  • Medium saucepan

Method
 

Step-by-Step Instructions
  1. Season the chicken breasts with garlic powder, onion powder, smoked paprika, salt, and pepper. Heat olive oil in a large skillet over medium-high heat and sear the chicken for 4-5 minutes on each side until golden brown.
  2. In a medium saucepan, bring chicken broth and a pinch of salt to a boil. Add rice, stir, cover, and simmer for 15-18 minutes until tender. Fluff rice with a fork.
  3. In the same skillet, reduce heat to medium and melt butter. Whisk in flour until golden, then gradually add milk and chicken broth, stirring until sauce thickens.
  4. Remove skillet from heat and stir in cheddar cheese and Parmesan cheese until melted. Adjust seasoning as needed.
  5. Return chicken to the skillet and spoon sauce over it. Cover and simmer on low for 10 minutes.
  6. To serve, place fluffy rice on plates, top with smothered chicken and sauce, and garnish with chopped parsley.

Nutrition

Serving: 1servingCalories: 450kcalCarbohydrates: 35gProtein: 30gFat: 20gSaturated Fat: 10gPolyunsaturated Fat: 2gMonounsaturated Fat: 6gCholesterol: 80mgSodium: 800mgPotassium: 600mgFiber: 2gSugar: 2gVitamin A: 500IUVitamin C: 2mgCalcium: 200mgIron: 2mg

Notes

Allow the chicken to rest after searing for juicier results. Add milk or broth if the sauce is too thick. Fluff the rice with a fork after cooking.

Tried this recipe?

Let us know how it was!