Savory Chicken Kofta with Garlic Yogurt Sauce Recipe

As I prepped my ingredients one evening, the vibrant colors and aromatic spices whispered promises of a culinary adventure. This Chicken Kofta with Garlic Yogurt Sauce Recipe takes weeknight dinners to new heights with its delightful mix of ground chicken and fragrant herbs. Not only is it gluten-free, but it also comes together in just 30 minutes, making it a perfect option for those busy nights when you crave something homemade yet hassle-free. The tender kofta pairs beautifully with a creamy, zesty garlic yogurt sauce, creating a mouthwatering contrast that keeps everyone coming back for seconds. Curious about how to whip this up in your own kitchen? Let me guide you through this flavorful journey!

Why is Chicken Kofta a Must-Try?

Simplicity: With just a few ingredients and minimal prep, you’ll discover that dinner can be both quick and delicious.

Flavor Explosion: The blend of cumin, coriander, and fresh herbs brings a taste of the Middle East right to your table.

Versatile Dish: Customize your kofta with different proteins like turkey or beef, or spice it up with paprika for a thrilling twist.

Perfect Pairing: That creamy garlic yogurt sauce not only complements but enhances the kofta, creating a dip-worthy experience you won’t forget!

Crowd-Pleaser: Whether it’s a weeknight meal or a gathering with friends, this dish is sure to impress everyone at the table. For more flavorful chicken inspiration, check out my recipes for Grilled Boneless Chicken and Crispy Air Fryer Chicken, which also highlight the joy of homemade meals!

Chicken Kofta with Garlic Yogurt Sauce Ingredients

For the Chicken Kofta

  • Ground Chicken – The main protein source; feel free to substitute with ground turkey for a healthier option.
  • Onion – Adds sweetness and moisture; finely chop yellow or white onion for best results.
  • Garlic – Ratchets up the flavor profile; fresh is best to ensure an aromatic bite.
  • Fresh Parsley – Brings a bright, herbal note; swap with cilantro if you’re looking for a different twist.
  • Ground Cumin – Essential for that authentic Middle Eastern flavor; don’t skip this spice!
  • Ground Coriander – Complements cumin beautifully, creating a rich depth of taste.
  • Salt – Enhances flavor; adjust according to your taste.
  • Black Pepper – Adds a subtle kick; freshly cracked makes a difference.
  • Olive Oil – Helps to keep the kofta moist while grilling; a must for that perfect texture.

For the Garlic Yogurt Sauce

  • Plain Yogurt – Provides a creamy base; coconut yogurt is a great dairy-free substitute.
  • Lemon Juice – Brightens the sauce and adds a zesty flavor; vinegar is a quick alternative if necessary.
  • Salt – Just a pinch enhances the richness; feel free to adjust to preference.
  • Minced Garlic (optional) – For a stronger garlic flavor, add this to the yogurt mix!

This Chicken Kofta with Garlic Yogurt Sauce Recipe is easy to dive into—let’s get cooking!

Step‑by‑Step Instructions for Chicken Kofta with Garlic Yogurt Sauce Recipe

Step 1: Prep Ingredients
In a large mixing bowl, combine the ground chicken, finely chopped onion, minced garlic, and fresh parsley. Add ground cumin, coriander, salt, and black pepper. Mix well until all ingredients are thoroughly combined, ensuring a homogenous mixture with vibrant colors. This is the foundation for your Chicken Kofta that will provide bold flavors.

Step 2: Mix
Using your hands, gently knead the mixture just until everything is evenly distributed; be careful not to overmix, as this can make the kofta tough. The texture should be moist but firm. Set the mixture aside for about 10 minutes to allow the flavors to meld together, bringing out a richer taste for your Chicken Kofta.

Step 3: Shape Kofta
Wet your hands to prevent sticking, then take a small amount of the chicken mixture and shape it into elongated ovals, typically about 3 inches long. Aim to create around 10-12 kofta evenly to ensure uniform cooking. This shaping not only helps with the cooking process but also gives your Chicken Kofta an appealing look when served.

Step 4: Grill
Preheat your grill to medium-high heat (around 400°F). Lightly brush the grill grates with olive oil to prevent sticking. Place the shaped kofta on the grill and cook for 5-7 minutes on each side, or until they are golden brown and have an internal temperature of 165°F (75°C). A beautifully charred exterior will elevate the flavors of your Chicken Kofta.

Step 5: Prepare Yogurt Sauce
While the kofta is grilling, prepare the garlic yogurt sauce by mixing plain yogurt with lemon juice in a small bowl. Season with a pinch of salt to enhance the flavors. If you enjoy a stronger garlic taste, feel free to mix in some minced garlic. This creamy sauce will be the perfect complement to your Chicken Kofta, balancing the spices beautifully.

Step 6: Serve
Once the Chicken Kofta is cooked to perfection, remove them from the grill and let them rest for a couple of minutes. Serve the kofta on a platter alongside the garlic yogurt sauce. Garnish as desired with extra parsley or a sprinkle of paprika for a pop of color. Pair with pita, rice, or fresh salad to create a delightful homemade meal that everyone will enjoy!

How to Store and Freeze Chicken Kofta

Fridge: Store leftover chicken kofta in an airtight container for up to 3 days. This helps keep them moist and flavorful, perfect for a quick reheating.

Freezer: Place cooled kofta in a single layer on a baking sheet before transferring to a freezer bag. You can freeze for up to 3 months, ensuring freshness when you crave this dish.

Reheating: To reheat, thaw overnight in the refrigerator, then grill or pan-fry until heated through. Alternatively, microwave on medium power until warm, adding a touch of olive oil for moisture.

Yogurt Sauce Storage: Keep garlic yogurt sauce in a separate airtight container in the fridge for up to 3 days. Stir before serving to refresh its texture.

Make Ahead Options

These Chicken Kofta with Garlic Yogurt Sauce are perfect for busy weeknights when you want a homemade meal without the fuss! You can prepare the kofta mixture and shape the kofta up to 24 hours in advance. Simply store the shaped kofta in an airtight container in the refrigerator to maintain their moisture. The garlic yogurt sauce can also be made up to 3 days ahead; just mix all the ingredients and refrigerate it in a separate container. When you’re ready to serve, grill the kofta directly from the fridge for fresh, juicy results, and give the yogurt sauce a good stir before enjoying. This proactive meal prep not only saves time but ensures a delicious dinner is just minutes away!

What to Serve with Chicken Kofta with Garlic Yogurt Sauce

Elevate your weeknight dinner with delightful sides that beautifully complement the flavors of your tender kofta.

  • Fluffy Rice: The gentle warmth and subtle flavor of rice balance the kofta’s spices, making for a comforting pairing. Serve it simply seasoned or with a sprinkle of herbs for added freshness.

  • Pita Bread: Soft, pillowy pita is perfect for scooping up kofta and yogurt sauce. The chewy texture delivers a delightful contrast, enhancing each bite.

  • Crisp Salad: A fresh salad of cucumber, tomato, and feta provides a refreshing crunch that cuts through the richness of the kofta. Drizzle with a light vinaigrette for added zing.

  • Grilled Vegetables: Assorted vegetables like bell peppers and zucchini, lightly charred, add a smoky sweetness, enhancing the Middle Eastern flavors of your meal.

  • Roasted Potatoes: Crispy, seasoned potatoes deliver a satisfying crunch alongside the tender kofta. Their earthy flavors will keep your taste buds excited with every forkful!

  • Mint Lemonade: This refreshing drink offers a zesty brightness that complements the spices in your kofta, creating a perfect meal experience to tie everything together.

  • Baklava: For dessert, this sweet, flaky pastry drizzled with honey is a delightful way to end your meal, with its layered textures and nutty sweetness harmonizing beautifully with your savory feast.

Chicken Kofta with Garlic Yogurt Sauce Variations

Feel free to get creative and customize this recipe to your taste and dietary needs!

  • Dairy-Free: Swap plain yogurt with coconut yogurt for a creamy and tropical twist.
    Making the switch gives you a subtle sweetness that pairs surprisingly well with the spices.

  • Spicy Kick: Add cayenne pepper or paprika to the kofta mixture for an extra layer of heat.
    This fiery twist can awaken your taste buds and bring a whole new dimension to your meal!

  • Herb Swap: Swap fresh parsley for cilantro for a unique flavor profile.
    The bright notes of cilantro will reflect a more vibrant take on traditional kofta, enhancing the dish’s freshness.

  • Texture Twist: Mix in some finely grated zucchini or carrots to the chicken mixture for added moisture and health benefits.
    This little extra not only amplifies the juiciness but also infuses a hint of natural sweetness into every bite.

  • Ground Meat Alternatives: Use ground beef or lamb instead of chicken for a richer flavor.
    These meats bring a heartiness that complements the spices well, making for a deeply satisfying kofta.

  • Herbed Yogurt Sauce: Try adding fresh dill or mint to your garlic yogurt sauce for a refreshing change.
    These herbs lighten the sauce and bring a lovely aromatic quality, perfect for hot summer evenings.

  • Nutty Twist: Incorporate tahini into the garlic yogurt sauce for a nutty depth of flavor.
    It adds creaminess and takes the sauce to the next level, turning each bite into a creamy delight!

For more savory chicken inspiration, consider trying my delicious steak sandwich with garlic mayo or a flavorful grilled chicken sandwich. Happy cooking!

Expert Tips for Chicken Kofta

Finely Chopped Ingredients: Ensure that all ingredients, especially onion and parsley, are finely chopped for a uniform mix, enhancing flavor integration in your Chicken Kofta.

Avoid Overmixing: Mix just until combined; overmixing can lead to tough kofta. A gentle touch will keep them tender and juicy.

Grill Temperature Check: Preheat your grill properly. A hot grill (medium-high) is key to achieving that perfect char on your kofta for an authentic taste.

Resting Time Matters: Let the kofta rest for a minute after grilling. This allows the juices to redistribute, resulting in a more succulent Chicken Kofta.

Creative Variations: Feel free to experiment with different spices or herbs in the kofta mix or yogurt sauce for unique flavor twists that suit your palate!

Chicken Kofta with Garlic Yogurt Sauce Recipe FAQs

What kind of ground chicken should I use?
Absolutely, using lean ground chicken is ideal for this recipe, giving you juicy kofta without excess fat. However, if you’re looking for a healthier option, ground turkey works well too and offers a similar taste.

How do I store leftover Chicken Kofta?
Store any leftover chicken kofta in an airtight container in the refrigerator for up to 3 days. This keeps them moist and perfect for reheating! Just remember to separate any yogurt sauce to maintain its creaminess.

Can Chicken Kofta be frozen?
Very! To freeze, let the cooked kofta cool completely, then arrange them in a single layer on a baking sheet. Once frozen, transfer to a freezer bag, sealing tightly. They can be frozen for up to 3 months—when you’re ready to enjoy, just thaw overnight in the fridge and reheat!

What if my kofta fall apart on the grill?
If your kofta fall apart, it might be due to a few factors. Ensure your mixture is adequately combined without overmixing, as this can make it too soft. Adding a bit of grated onion can help bind the ingredients. Make sure to preheat your grill and use olive oil to keep them from sticking, too.

Is this recipe suitable for people with dietary restrictions?
Yes! This Chicken Kofta with Garlic Yogurt Sauce Recipe is naturally gluten-free. Just make sure to double-check any store-bought ingredients like your yogurt or sauces if you have strict dietary needs. Also, you can use coconut yogurt as a dairy-free substitute for the sauce!

How can I adjust the spice level?
Feel free to spice things up or tone them down! You can add spices like paprika or cayenne pepper to the chicken mix for a flavorful kick. For a milder version, just stick with the balance of cumin and coriander. Tasting the mix before cooking will allow you to adjust according to your preference!

Chicken Kofta with Garlic Yogurt Sauce Recipe

Savory Chicken Kofta with Garlic Yogurt Sauce Recipe

A delightful Chicken Kofta with Garlic Yogurt Sauce recipe that's gluten-free and takes just 30 minutes to prepare.
Prep Time 15 minutes
Cook Time 15 minutes
Resting Time 10 minutes
Total Time 30 minutes
Servings: 4 servings
Course: Dinner
Cuisine: Middle Eastern
Calories: 250

Ingredients
  

For the Chicken Kofta
  • 1 pound Ground Chicken Feel free to substitute with ground turkey for a healthier option.
  • 1 medium Onion Finely chopped yellow or white onion for best results.
  • 2 cloves Garlic Fresh is best to ensure an aromatic bite.
  • 1/4 cup Fresh Parsley Swap with cilantro if you're looking for a different twist.
  • 1 teaspoon Ground Cumin Essential for that authentic Middle Eastern flavor.
  • 1 teaspoon Ground Coriander Complements cumin beautifully.
  • 1 teaspoon Salt Enhances flavor; adjust according to your taste.
  • 1/2 teaspoon Black Pepper Freshly cracked makes a difference.
  • 2 tablespoons Olive Oil Helps to keep the kofta moist.
For the Garlic Yogurt Sauce
  • 1 cup Plain Yogurt Coconut yogurt is a great dairy-free substitute.
  • 1 tablespoon Lemon Juice Vinegar is a quick alternative if necessary.
  • 1 pinch Salt Feel free to adjust to preference.
  • 2 cloves Minced Garlic Optional for a stronger garlic flavor.

Equipment

  • Grill
  • Mixing Bowl
  • Measuring spoons
  • knife
  • cutting board

Method
 

Step-by-Step Instructions
  1. In a large mixing bowl, combine the ground chicken, finely chopped onion, minced garlic, and fresh parsley. Add ground cumin, coriander, salt, and black pepper. Mix well until all ingredients are thoroughly combined.
  2. Using your hands, gently knead the mixture just until everything is evenly distributed. Set the mixture aside for about 10 minutes to allow the flavors to meld together.
  3. Wet your hands to prevent sticking, then take a small amount of the chicken mixture and shape it into elongated ovals, typically about 3 inches long. Aim to create around 10-12 kofta.
  4. Preheat your grill to medium-high heat (around 400°F). Lightly brush the grill grates with olive oil. Place the shaped kofta on the grill and cook for 5-7 minutes on each side, or until they are golden brown.
  5. While the kofta is grilling, prepare the garlic yogurt sauce by mixing plain yogurt with lemon juice in a small bowl. Season with a pinch of salt. If desired, mix in some minced garlic.
  6. Once the Chicken Kofta is cooked to perfection, remove them from the grill and let them rest for a couple of minutes. Serve on a platter alongside the garlic yogurt sauce.

Nutrition

Serving: 1koftaCalories: 250kcalCarbohydrates: 7gProtein: 22gFat: 15gSaturated Fat: 3gPolyunsaturated Fat: 1gMonounsaturated Fat: 10gCholesterol: 85mgSodium: 400mgPotassium: 300mgFiber: 1gSugar: 1gVitamin A: 500IUVitamin C: 5mgCalcium: 150mgIron: 2mg

Notes

Ensure that all ingredients are finely chopped for a uniform mix. Preheat the grill properly for the best cooking results.

Tried this recipe?

Let us know how it was!

Crispy Garlic Parmesan Sweet Potato Wedges You’ll Love

The aroma of roasted garlic and melted Parmesan wafting through the kitchen is enough to make anyone’s mouth water. I have often found myself reaching for a quick snack from the freezer, but one bite of these Garlic Parmesan Sweet Potato Wedges transforms that routine. Not only are they irresistibly crispy and delightful, but they also offer a health-conscious twist on classic fries, making them a perfect guilt-free snack. With their natural sweetness and rich flavor, these wedges make for a nutritious accompaniment to any meal or an enjoyable solo treat. Trust me, you’ll want to keep this recipe close at hand. Ready to step up your snack game? Let’s dive into the world of crispy deliciousness!

Why Are These Wedges So Irresistible?

Crispy Texture: Each wedge is precisely roasted, resulting in an exterior that’s beautifully crispy while being tender on the inside.

Healthier Indulgence: Enjoy all the flavors of French fries without the guilt—these are a nutritious, gluten-free alternative packed with vitamins.

Flavor Explosion: With the perfect balance of garlic, onion, and savory Parmesan, they elevate your snacking game like no other.

Versatile Serving Options: Dip them in garlic aioli or chipotle ranch for an extra punch, or serve them alongside grilled meats for a hearty meal.

Quick & Easy: Whip these up in no time, making them ideal for busy weeknights or spontaneous gatherings. You’ll find yourself returning to this recipe again and again!

Garlic Parmesan Sweet Potato Wedges Ingredients

For the Wedges
Sweet Potatoes – Offers natural sweetness and essential nutrients; choose firm, smooth-skinned potatoes for best results.
Olive Oil – Provides crispiness and healthy fats; substitute with avocado oil for a different flavor profile.
Salt – Elevates the overall taste; use kosher salt for a coarser texture.
Black Pepper – Adds a hint of heat; fresh ground pepper enhances the flavor.

For the Seasoning
Garlic – Imparts robust flavor and boasts health benefits like immune support; fresh minced garlic works best.
Onion Powder – Enhances depth of flavor in the wedges; perfect for adding a savory note.
Smoked Paprika – Contributes a subtle smokiness; regular paprika can be used for a milder taste.
Red Pepper Flakes (Optional) – For those who enjoy heat; adjust the amount to your spice preference.

For the Garnish
Grated Parmesan Cheese – Adds a savory and cheesy flavor; nutritional yeast is a great dairy-free alternative.
Fresh Parsley – Used as a garnish for freshness and color; feel free to substitute with chives for a different flair.

Step‑by‑Step Instructions for Garlic Parmesan Sweet Potato Wedges

Step 1: Preheat Your Oven
Begin by preheating your oven to 425°F (220°C). This high temperature will ensure your Garlic Parmesan Sweet Potato Wedges become perfectly crispy on the outside. As the oven warms up, it’s the ideal time to gather your ingredients and equipment, including a baking sheet lined with parchment paper for easy cleanup.

Step 2: Prepare the Sweet Potatoes
While the oven is preheating, thoroughly wash and scrub the sweet potatoes under cool running water. Once clean, slice them into approximately 1-inch wedges, ensuring uniformity for even cooking. Set the cut wedges aside in a large mixing bowl, ready to be transformed with delicious flavors.

Step 3: Create the Seasoning Mixture
In a separate bowl, combine olive oil, minced garlic, smoked paprika, onion powder, salt, black pepper, and optional red pepper flakes. Mix well until you achieve a smooth and fragrant paste. This seasoning mixture will not only enhance the flavor of the wedges but also help them crisp up beautifully in the oven.

Step 4: Toss the Sweet Potato Wedges
Carefully pour the seasoning mixture over the sweet potato wedges in the mixing bowl. Toss them gently but thoroughly until each wedge is evenly coated with the savory blend. This step ensures that every bite of your Garlic Parmesan Sweet Potato Wedges is packed with flavor.

Step 5: Add Parmesan Cheese
Sprinkle half of the grated Parmesan cheese over the seasoned wedges and toss once more until they are mixed evenly. The cheese will melt and create a delightful crust as the wedges bake, adding a rich, savory flavor that perfectly complements the sweetness of the sweet potatoes.

Step 6: Arrange on Baking Sheet
Transfer the seasoned wedges to your lined baking sheet, arranging them in a single layer. Make sure to leave space between each wedge to avoid steaming. This layout allows them to crisp up nicely, offering the perfect texture for your Garlic Parmesan Sweet Potato Wedges.

Step 7: Bake the Wedges
Place the baking sheet in the preheated oven and bake for 25 to 30 minutes. Halfway through the baking time, carefully flip the wedges to ensure they cook evenly. You’ll know they’re ready when they turn golden brown and crispy, filling your kitchen with an irresistible aroma.

Step 8: Finish with Extra Parmesan
Once baked, remove the wedges from the oven and promptly sprinkle the remaining Parmesan cheese over the hot wedges. The residual heat will melt the cheese, creating a luscious topping that adds an extra layer of flavor to your Garlic Parmesan Sweet Potato Wedges.

Step 9: Garnish & Serve
Finally, transfer the golden-brown wedges to a serving platter. Garnish with freshly chopped parsley for a vibrant touch, and serve immediately. Whether you enjoy them solo or with delicious dipping sauces, these Garlic Parmesan Sweet Potato Wedges are sure to satisfy.

What to Serve with Garlic Parmesan Sweet Potato Wedges

These delightful wedges make the perfect centerpiece for a cozy family dinner or an enticing snack spread, inviting flavors that beckon for variety.

  • Creamy Garlic Aioli: A rich, garlicky dip that mirrors the flavor profile of the wedges, enhancing their deliciousness while providing a luscious texture that pairs beautifully.

  • Zesty Chipotle Ranch: The smoky heat from chipotle adds a spicy kick that complements the sweet and savory notes of the wedges, igniting your taste buds for each bite.

  • Fresh Green Salad: A crunchy mix of greens with a light vinaigrette brings balance to the meal, cutting through the richness while offering a refreshing crunch.

  • Grilled Chicken: Juicy grilled chicken provides protein and a smoky depth, creating a well-rounded plate that satisfies both cravings and nutritional needs.

  • Savory Veggie Skewers: Colorful vegetable skewers, drizzled with olive oil and herbs, offer a hearty, grilled flavor that contrasts well with the crispy texture of the sweet potato wedges.

  • Classic Cheeseburger: Pair with a succulent cheeseburger for an indulgent treat, as the sweet and crispy side accentuates the savory richness of the burger.

  • Ice-Cold Herbal Iced Tea: A refreshing, unsweetened herbal iced tea cools the palate, letting the flavors of the Garlic Parmesan Sweet Potato Wedges shine through alongside their delicious dips.

  • Chocolate Mousse: Cap off your meal with a silky chocolate mousse for a sweet ending, creating a delightful contrast to the savory wedges, leaving everyone satisfied and happy.

Storage Tips for Garlic Parmesan Sweet Potato Wedges

Room Temperature: Best enjoyed fresh, but if necessary, allow wedges to cool completely before storing in an airtight container at room temperature for up to 2 hours.

Fridge: Store leftover Garlic Parmesan Sweet Potato Wedges in an airtight container for up to 3 days. To keep them from getting soggy, avoid stacking them too closely.

Freezer: For longer storage, freeze the cooked wedges in a single layer on a baking sheet, then transfer to a freezer bag for up to 2 months. Reheat directly from frozen.

Reheating: To restore their crispiness, reheat in a preheated oven at 400°F (200°C) for about 10-15 minutes, making sure to flip halfway through for even warming.

Expert Tips for Garlic Parmesan Sweet Potato Wedges

Uniform Sizing: Make sure all wedges are cut to the same size for even cooking; this prevents some from burning while others are undercooked.

Don’t Overcrowd: Arrange the wedges in a single layer on the baking sheet; overcrowding can lead to steaming instead of that desired crispiness.

Watch the Time: Keep an eye on the wedges during the last few minutes of baking; they can quickly go from perfect to overdone.

Let Them Rest: After baking, allow the wedges to sit for a couple of minutes before serving; this helps them retain their crunch.

Customize Your Flavors: Feel free to mix in your favorite spices or herbs; adding rosemary or thyme can enhance the flavor of your Garlic Parmesan Sweet Potato Wedges.

Make Ahead Options

These Garlic Parmesan Sweet Potato Wedges are ideal for meal prep, allowing you to enjoy crispy, flavorful snacks even on your busiest days! You can wash and cut the sweet potatoes into wedges up to 24 hours in advance, storing them in a bowl of cold water in the refrigerator to prevent browning. Prepare the seasoning mixture and toss the wedges with it ahead of time, too—just be sure to refrigerate it as well. When you’re ready to serve, simply spread the seasoned wedges on a baking sheet and bake straight from the fridge for 25 to 30 minutes until golden and crispy. With these make-ahead tips, you’ll have delicious, guilt-free snacks ready to enjoy anytime!

Garlic Parmesan Sweet Potato Wedges Variations

Feel free to get creative and tailor these wedges to your taste! Each variation adds a new twist that elevates your snack experience.

  • Spicy Kick: Add cayenne pepper or chili powder to the seasoning mix for a delightful heat that complements the sweetness.

  • Herb-Infused: Mix dried thyme or rosemary into the seasoning blend for an aromatic lift that adds an earthy depth to every bite.

  • Vegan Delight: Swap grated Parmesan with nutritional yeast for a cheesy, yet dairy-free option that still oozes flavor and goodness.

  • Cheesy Options: Experiment with different cheeses like gouda or cheddar, and adjust the quantity for a richer flavor that changes the whole vibe.

  • Crispy Alternative: For extra crunch, try air frying the wedges instead; they’ll come out equally delicious and require less oil!

  • Garlic Lovers: Increase the amount of minced garlic or add garlic powder if you can’t get enough of that savory flavor profile.

  • Mixed Veggies: Toss in other root vegetables like carrots or parsnips for added texture and nutrition, while keeping the same delicious spices.

  • Sweet Twist: Drizzle a little maple syrup or honey before serving for a sweet-and-salty combo that takes the sweet potato flavor to new heights.

These variations will keep your Garlic Parmesan Sweet Potato Wedges fresh and exciting! Looking for more delicious ideas? You might also like serving these wedges with Honey Garlic Shrimp or pairing them with a hearty dish like Hearty Potato Kielbasa. Enjoy exploring your culinary creativity!

Garlic Parmesan Sweet Potato Wedges Recipe FAQs

What kind of sweet potatoes should I use?
For the best flavor and texture in your Garlic Parmesan Sweet Potato Wedges, look for firm, smooth-skinned sweet potatoes without any dark spots or blemishes. The sweeter, the better—if you can find them locally grown, they’re often more flavorful!

How should I store leftover sweet potato wedges?
Leftover Garlic Parmesan Sweet Potato Wedges can be stored in an airtight container in the refrigerator for up to 3 days. It’s best to avoid stacking them too closely to maintain their crispy texture. For longer storage, you can also freeze them, which I’ll explain next!

Can I freeze garlic Parmesan sweet potato wedges?
Absolutely! To freeze your Garlic Parmesan Sweet Potato Wedges, first, let them cool completely. Then, arrange them in a single layer on a baking sheet and place them in the freezer. Once frozen, transfer the wedges to a freezer bag, where they can last up to 3 months. When it’s time to enjoy them, reheat directly from frozen in a preheated oven at 400°F (200°C) for about 10-15 minutes, flipping halfway through to ensure they warm evenly.

What can I do if my wedges aren’t crispy?
If your sweet potato wedges aren’t achieving that desired crispiness, make sure to follow these steps: cut the wedges evenly to ensure even cooking, avoid overcrowding the baking sheet, and thoroughly coat them with olive oil. Additionally, a high baking temperature of 425°F (220°C) is crucial. If they seem to steam rather than roast, it may be a sign that they’re too close together on the tray.

Are Garlic Parmesan Sweet Potato Wedges suitable for those with gluten allergies?
Yes, indeed! These Garlic Parmesan Sweet Potato Wedges are naturally gluten-free, making them a perfect alternative for those avoiding gluten. Just ensure that the Parmesan cheese you use is made without any additives that might contain gluten. Enjoy your crunchy and delicious snack without worry!

Garlic Parmesan Sweet Potato Wedges

Crispy Garlic Parmesan Sweet Potato Wedges You'll Love

These Garlic Parmesan Sweet Potato Wedges are irresistibly crispy and offer a health-conscious twist on classic fries, perfect as a nutritious snack.
Prep Time 10 minutes
Cook Time 30 minutes
Total Time 40 minutes
Servings: 4 wedges
Course: Appetizer
Cuisine: American
Calories: 160

Ingredients
  

For the Wedges
  • 4 medium sweet potatoes Choose firm, smooth-skinned potatoes for best results.
  • 2 tablespoons olive oil Substitute with avocado oil for a different flavor profile.
  • 1 teaspoon salt Use kosher salt for a coarser texture.
  • 1/2 teaspoon black pepper Fresh ground pepper enhances the flavor.
For the Seasoning
  • 3 cloves garlic Fresh minced garlic works best.
  • 1 teaspoon onion powder Perfect for adding a savory note.
  • 1 teaspoon smoked paprika Regular paprika can be used for a milder taste.
  • 1/4 teaspoon red pepper flakes Adjust the amount to your spice preference.
For the Garnish
  • 1/2 cup grated Parmesan cheese Nutritional yeast is a great dairy-free alternative.
  • 2 tablespoons fresh parsley Feel free to substitute with chives.

Equipment

  • Oven
  • Baking Sheet
  • Mixing Bowl

Method
 

Step-by-Step Instructions
  1. Preheat your oven to 425°F (220°C).
  2. Wash and scrub the sweet potatoes, then slice into 1-inch wedges.
  3. Combine olive oil, minced garlic, smoked paprika, onion powder, salt, black pepper, and optional red pepper flakes in a bowl to create a seasoning mixture.
  4. Toss the sweet potato wedges with the seasoning mixture until evenly coated.
  5. Sprinkle half of the grated Parmesan cheese over the wedges and toss again.
  6. Arrange the seasoned wedges on a lined baking sheet in a single layer.
  7. Bake for 25 to 30 minutes, flipping halfway through for even cooking.
  8. Once baked, sprinkle the remaining Parmesan cheese over the hot wedges.
  9. Garnish with freshly chopped parsley and serve immediately.

Nutrition

Serving: 1wedgeCalories: 160kcalCarbohydrates: 30gProtein: 3gFat: 5gSaturated Fat: 1gMonounsaturated Fat: 4gSodium: 250mgPotassium: 500mgFiber: 4gSugar: 5gVitamin A: 21000IUVitamin C: 30mgCalcium: 70mgIron: 1mg

Notes

For best results, cut wedges uniformly and avoid overcrowding the baking sheet for crispiness.

Tried this recipe?

Let us know how it was!

Refreshing Japanese Kani Side Salad That’s Perfect for Any Meal

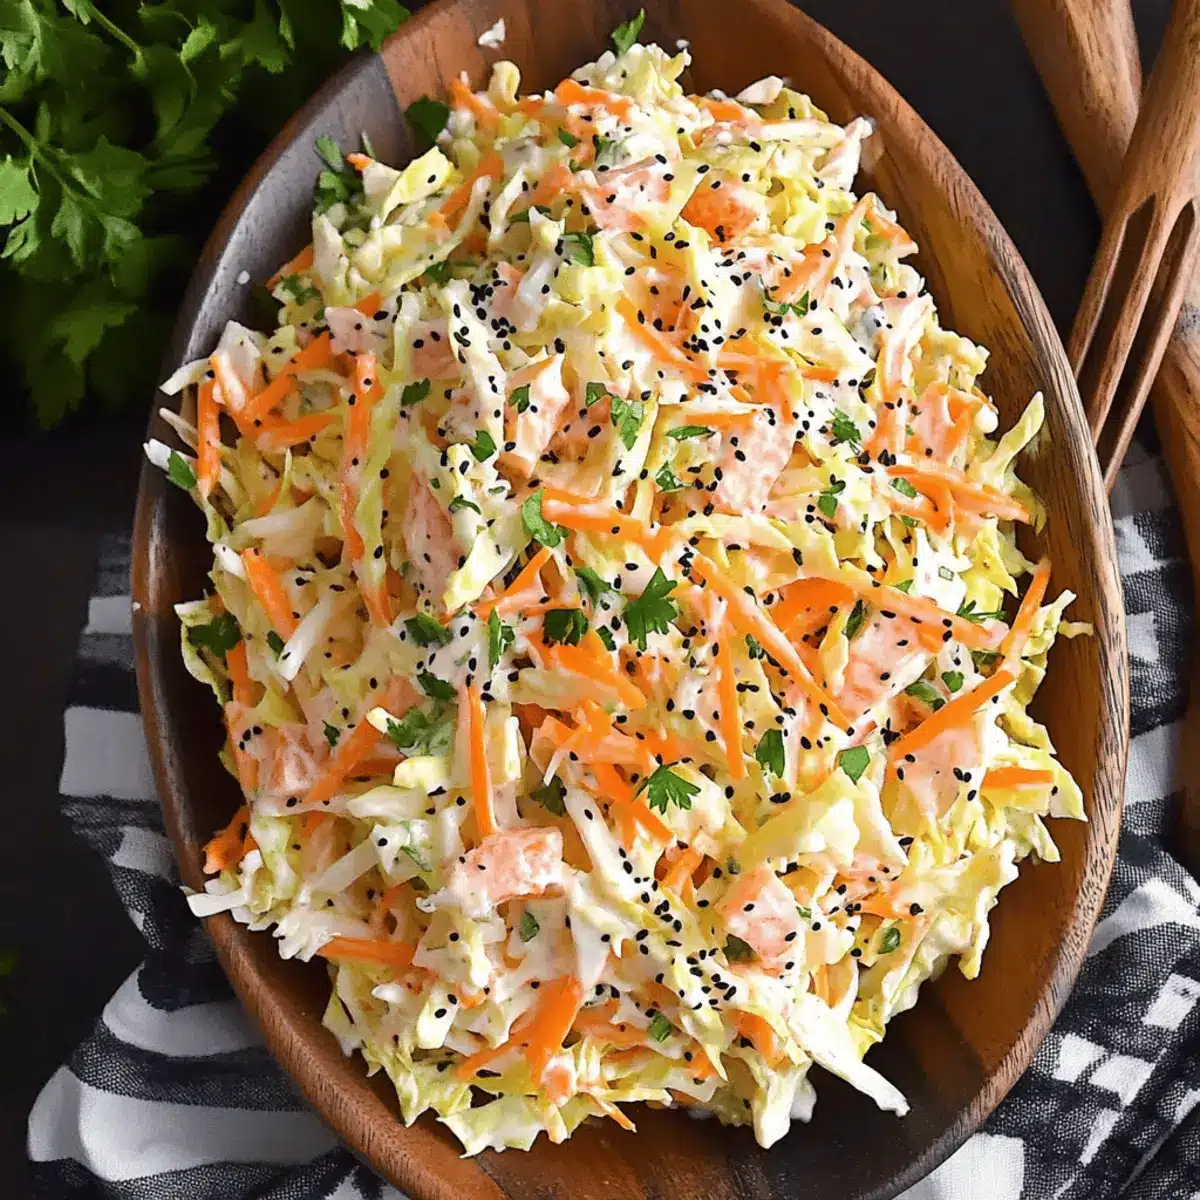
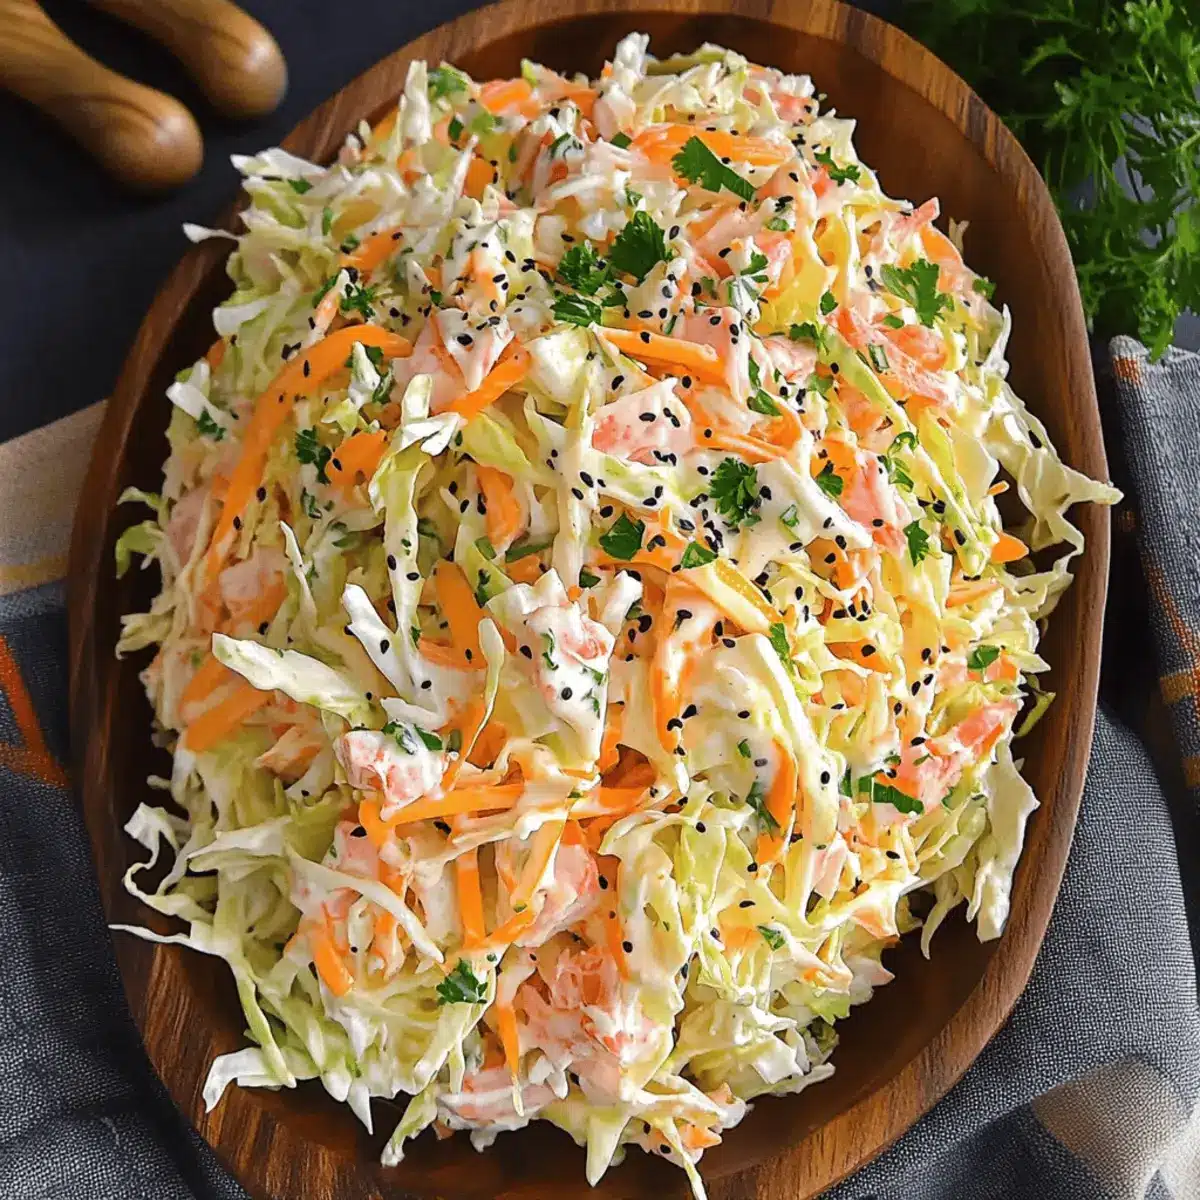
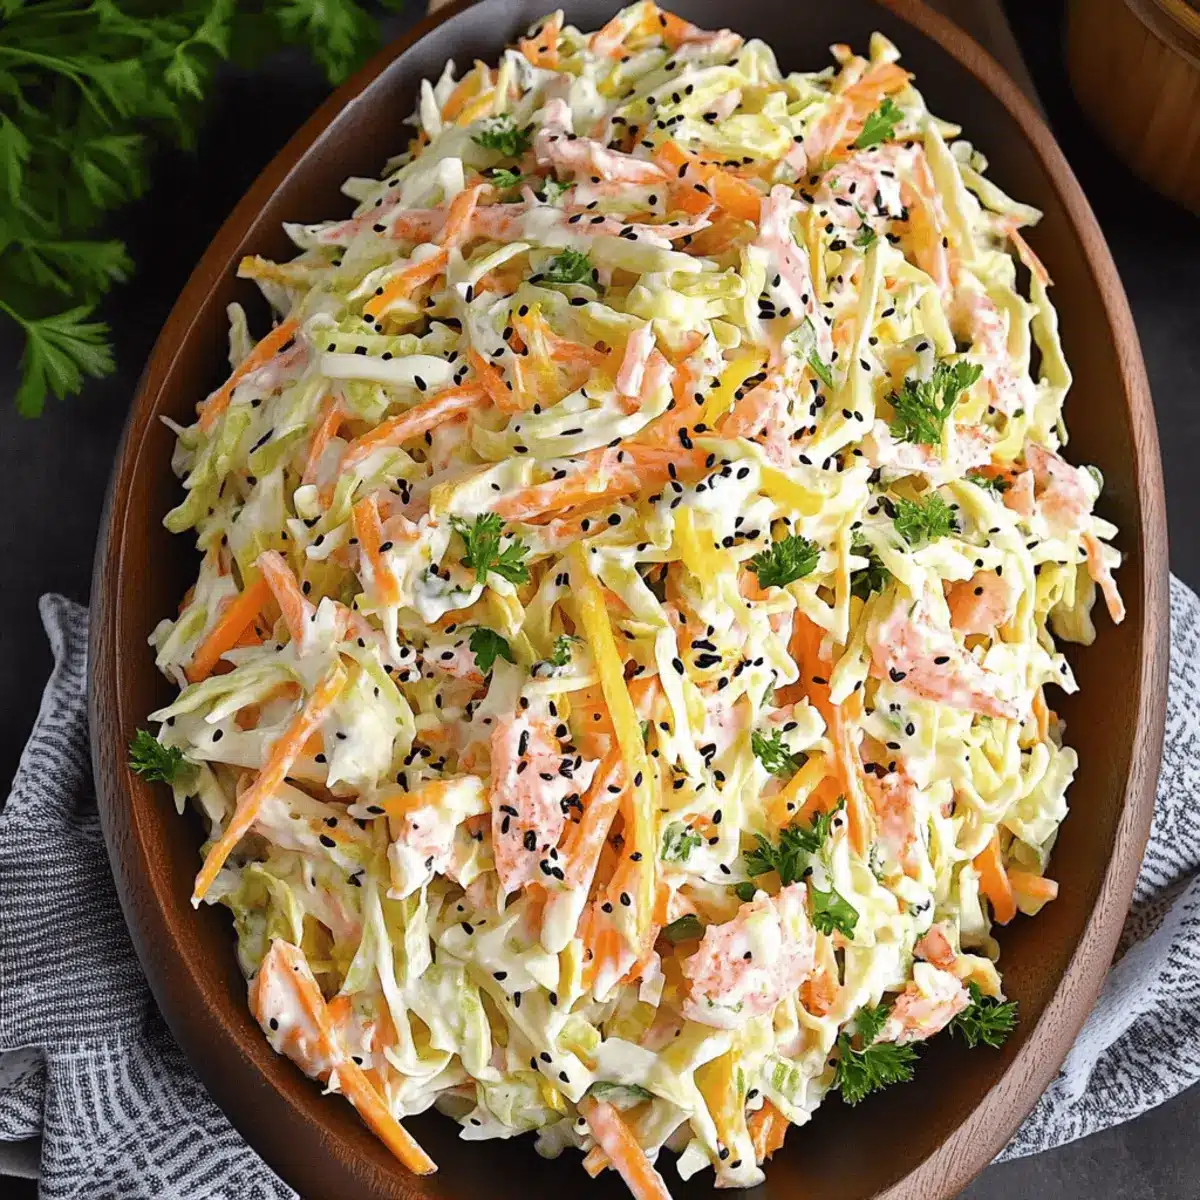
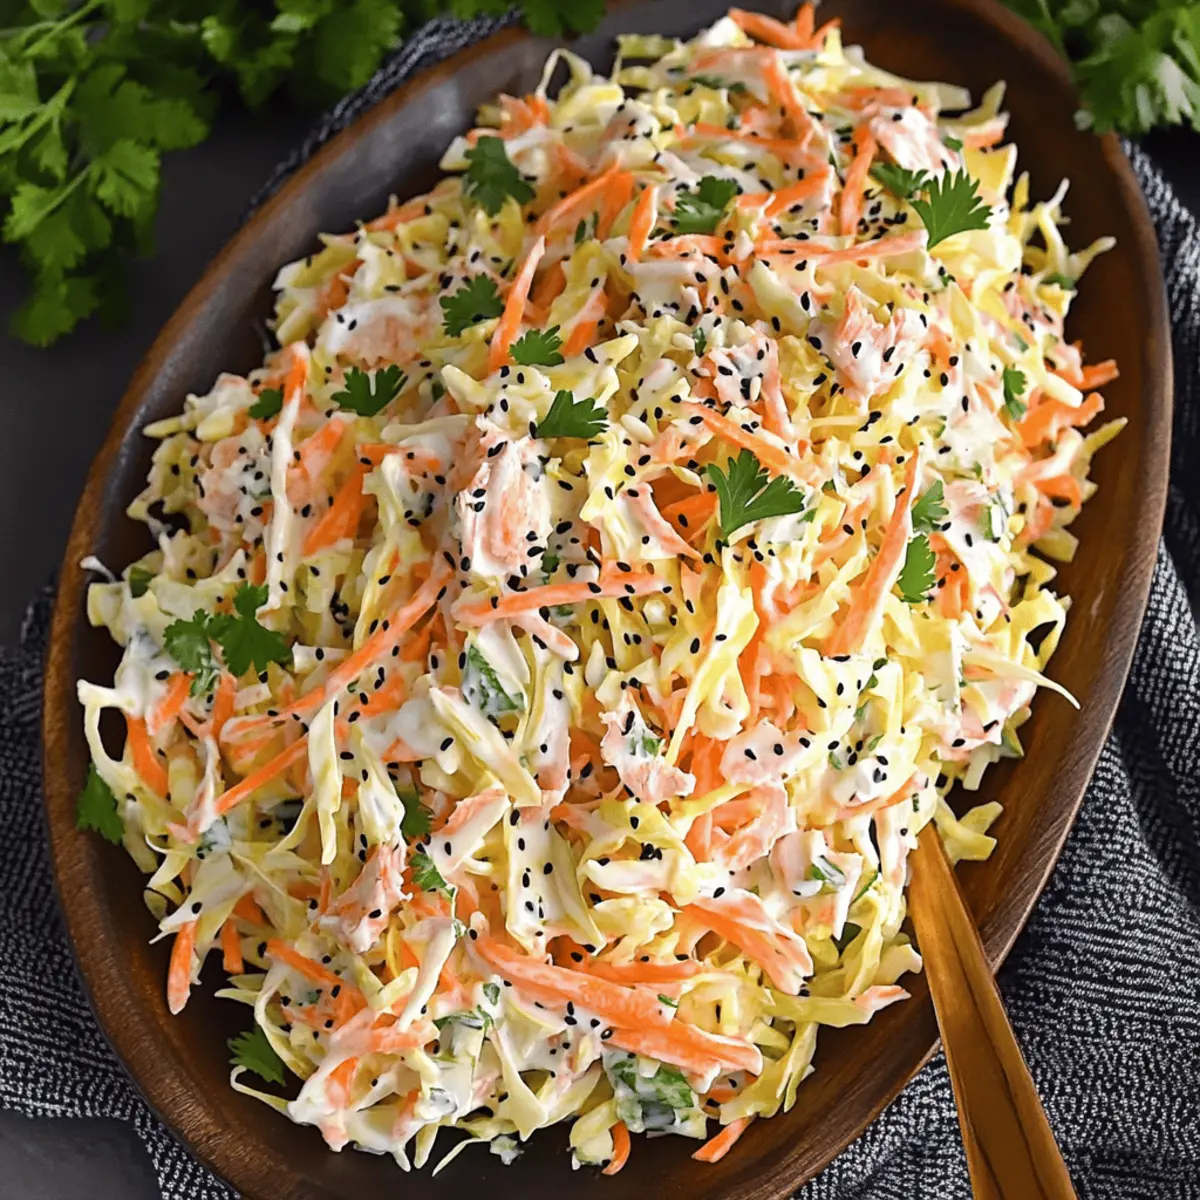
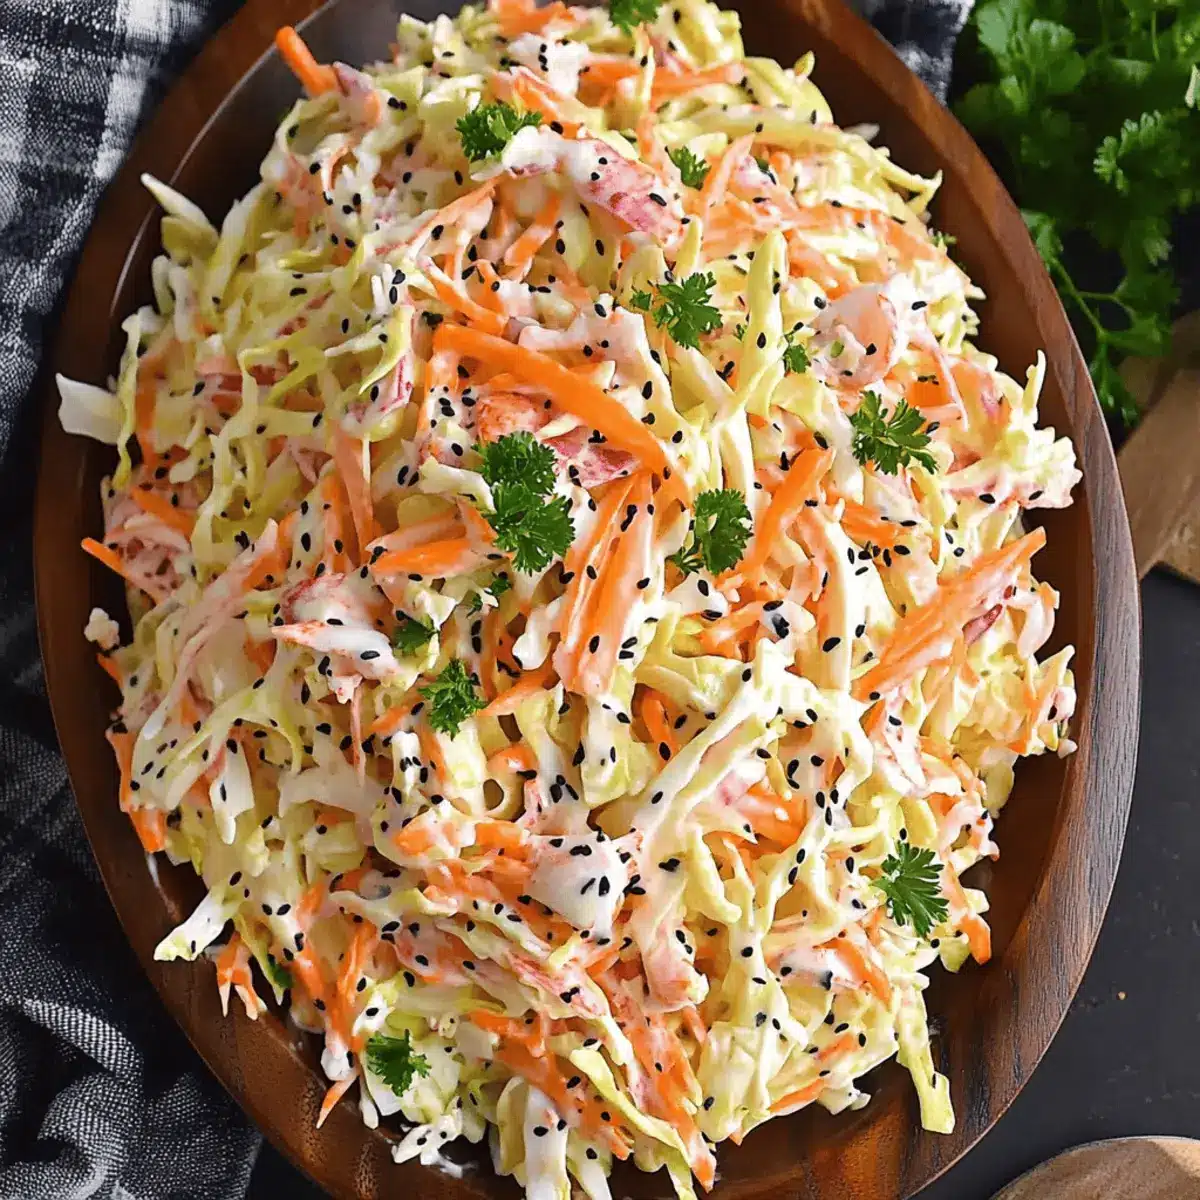
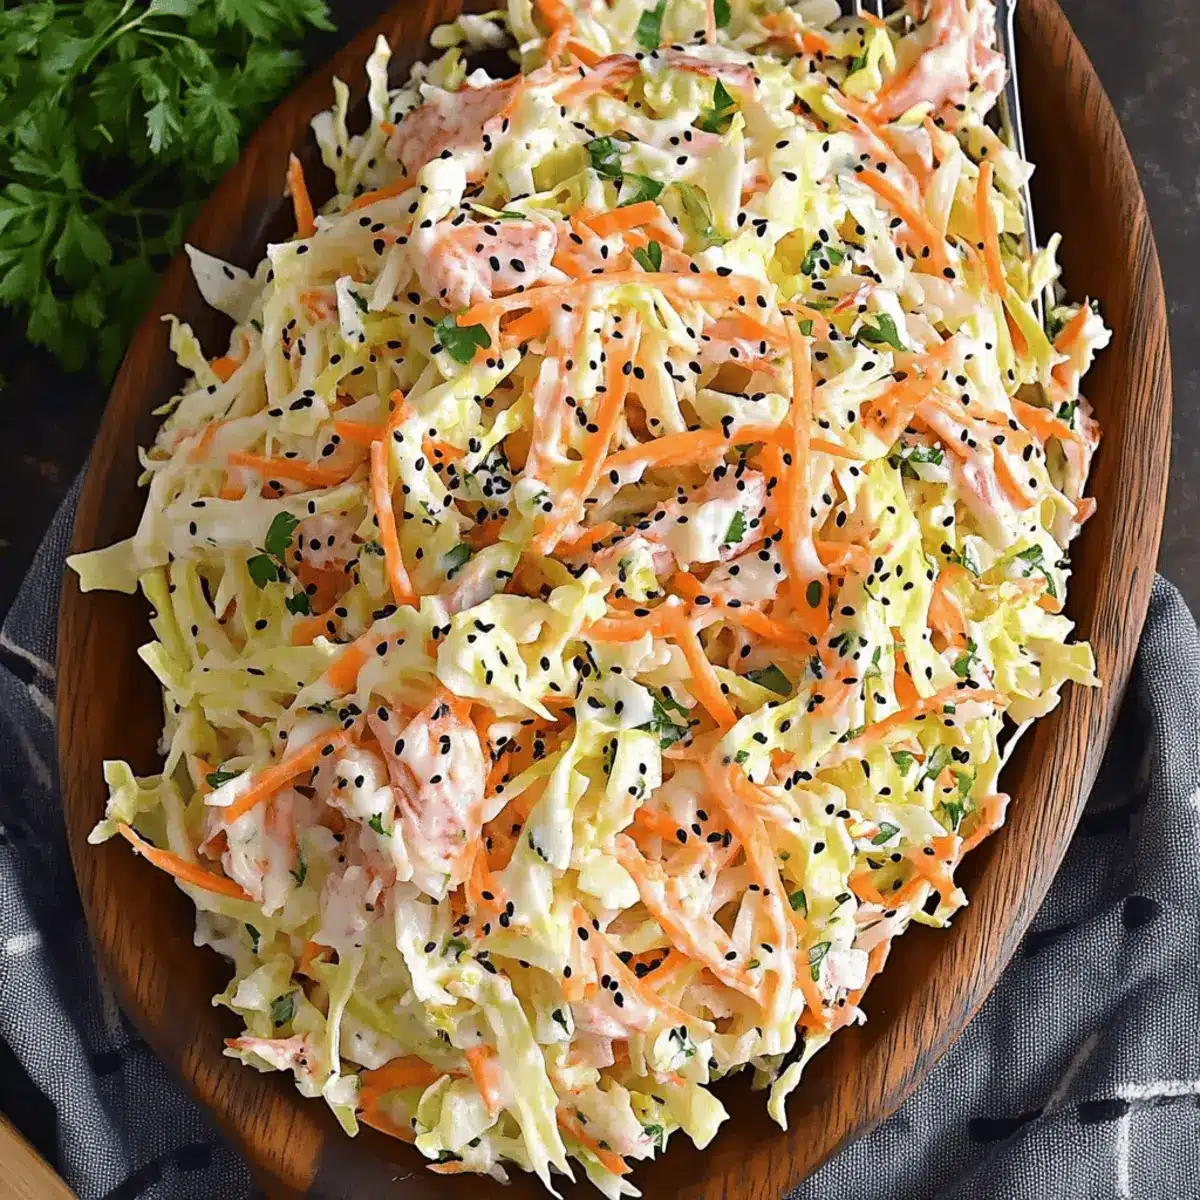
As the sun filters through the kitchen window on a warm afternoon, I find myself enamored by the vibrant colors in front of me. This Japanese Kani Side Salad is a celebration of freshness, boasting the perfect blend of crunchy cabbage, sweet carrots, and savory imitation crab. What I love most about this salad is its easy preparation and versatile nature—it’s a delightful companion to sushi or a stand-alone star that brings bright flavors to any meal. Best served chilled, this salad not only tantalizes the taste buds but also transports you to a refreshing oasis in your very own kitchen. Are you ready to dive into this delicious recipe?

Why is Kani Salad a Must-Try?

Vibrant, Refreshing Flavors: This Japanese Kani Side Salad isn’t just a feast for the eyes, but a refreshing treat that invigorates your palate. Easy Preparation: You only need a few minutes to whip up this dish, making it a perfect weeknight companion. Versatile Delight: Whether it’s served with sushi or as part of your summer picnic spread, its unique combination of textures complements a variety of entrees. Moreover, if you enjoy salads like Tuna Macaroni Salad or Steak Fajita Salad, you’ll appreciate the delicious freshness of this Kani salad. Chill for Flavor: Allowing it to refrigerate helps meld the ingredients, enhancing the overall taste. Truly, it’s a delightful way to say goodbye to boring fast food!

Japanese Kani Side Salad Ingredients

For the Salad
Imitation Crab Meat – Your main protein source, opt for flaked variety for best texture.
Carrots – Freshly julienned to add natural sweetness and crunch.
Cabbage – Shredded for volume and crispness; the star of the salad’s texture.
Canned Corn – Adds a pop of sweetness; make sure to drain well before use.
Fresh Parsley – For a touch of color and fresh flavor, can substitute with cilantro if desired.

For the Dressing
Mayonnaise – The creamy base, choose full-fat for richness or lighter versions for a healthier twist.
Fresh Lemon Juice – Adds acidity to brighten and balance the dressing’s flavors—an essential touch!
Garlic Powder – Enhances the salad’s flavor; fresh garlic can be used as a substitute for a more intense taste.
Onion Powder – Provides a savory depth, optional for those preferring milder flavors.
Ground Black Pepper – For a touch of heat, adjust according to your personal spice preference.
Salt – Use sparingly to enhance flavors, especially important if your imitation crab is already salty.
Toasted Sesame Seeds – Adds a nice nutty crunch; feel free to use non-toasted for a quicker option, but toasted is best for flavor.

This Japanese Kani Side Salad is all about ease and refreshment, making it a must-try for your next meal! Enjoy the delightful fusion of flavors that showcase the wonderful texture of imitation crab.

Step‑by‑Step Instructions for Japanese Kani Side Salad

Step 1: Combine the Salad Ingredients
In a large mixing bowl, combine 1 cup of shredded cabbage, 1 cup of julienned carrots, 1 cup of drained canned corn, and 1 cup of flaked imitation crab meat. Use a spatula to gently fold the ingredients together until they’re well mixed, allowing the crunchy cabbage and sweet carrots to intermingle with the savory crab. This should take about 2 minutes to ensure everything is evenly distributed.

Step 2: Prepare the Creamy Dressing
In a separate bowl, whisk together ½ cup of mayonnaise, 2 tablespoons of fresh lemon juice, ½ teaspoon of garlic powder, ¼ teaspoon of onion powder, ¼ teaspoon of salt, and ¼ teaspoon of ground black pepper. Aim for a smooth, creamy consistency, which should take about 2-3 minutes. The lemon juice will brighten up the flavors, setting the foundation for your Japanese Kani Side Salad.

Step 3: Combine Elements for Maximum Flavor
Pour your creamy dressing over the mixed salad ingredients. Carefully toss everything together using a pair of tongs, ensuring the dressing coats each piece evenly. This allows the flavors to meld, which should take about 1-2 minutes. The salad will look glossy and inviting, with the lovely colors of the ingredients shining through.

Step 4: Chill for Flavor Fusion
Cover the salad bowl with plastic wrap or a lid and refrigerate for at least 2 hours. This chilling step is crucial because it allows the flavors to develop and intensify. When you take it out, the salad should feel fresh and vibrant, with the ingredients nicely infused with the creamy dressing.

Step 5: Toss Again Before Serving
Once chilled, give your Japanese Kani Side Salad another gentle toss to redistribute the dressing. This will ensure every bite is as flavorful as the last. Serve immediately after this step, or return it to the refrigerator until you’re ready to serve. The final result should be a colorful, creamy salad bursting with refreshing flavors.

Make Ahead Options

These Japanese Kani Side Salad is perfect for meal prep enthusiasts! You can chop the vegetables (cabbage, carrots, corn, and parsley) up to 24 hours in advance and store them in an airtight container in the refrigerator to maintain their crispness. Additionally, prepare the creamy dressing using mayonnaise, lemon juice, and seasonings up to 3 days ahead. Just keep it covered in the fridge to prevent it from thickening too much or losing freshness. When you’re ready to serve your salad, combine the prepped ingredients and dressing in a bowl, toss gently, and enjoy a refreshing side dish with minimal effort!

What to Serve with Refreshing Japanese Kani Side Salad

Elevate your meal with delightful pairings that bring out the refreshing flavors of this beloved salad.

  • Sushi Rolls: These bite-sized delights complement the salad’s freshness, making the meal feel complete and satisfying. The fishy notes and delicate texture of sushi play perfectly with the creamy Kani salad.

  • Grilled Chicken: Seasoned grilled chicken provides a lovely contrast, enhancing the savory elements of the salad while adding a hearty component to your meal.

  • Rice Paper Rolls: Light and filled with fresh veggies, rice paper rolls offer an extra crunch and vibrant flavors that harmonize beautifully with the Kani salad.

  • Miso Soup: A warm, savory broth brightens up the meal, balancing the coolness of the salad with comforting umami flavors. The combination is a classic in Japanese cuisine that nourishes both body and soul.

  • Pickled Vegetables: The tanginess of pickles contrasts nicely with the creamy dressing, adding an exciting burst of flavor and texture to your plate.

  • Fruit Salad: Refreshing and light, a tropical fruit salad brings sweetness that rounds out the meal, offering a palate cleanser between bites of savory dishes.

  • Sparkling Green Tea: This refreshing beverage complements the meal perfectly. Its light, slightly sweet notes enhance the salad’s flavors without overpowering them.

  • Mochi Ice Cream: For dessert, the chewy texture and creamy fillings of mochi ice cream provide a delightful, sweet end to your meal that pairs wonderfully after enjoying the Kani salad.

Expert Tips for Japanese Kani Side Salad

  • Choose Wisely: Select high-quality imitation crab, preferably flaked, to enhance both texture and flavor in your Japanese Kani Side Salad.

  • Include Fresh Veggies: Opt for fresh ingredients like crunchy cabbage and sweet carrots to elevate your salad—frozen or canned won’t provide the same satisfying bite.

  • Perfect Your Dressing: Whisk the dressing ingredients until thoroughly combined for a smooth texture. A well-mixed dressing ensures every bite is flavorful.

  • Don’t Rush the Chill: Allow the salad to refrigerate for at least two hours. This step is essential for the flavors to meld together beautifully, so don’t skip it!

  • Adjust Seasoning: Taste the salad before serving. Feel free to adjust the salt and pepper according to your personal preference, as imitation crab can vary in saltiness.

  • Store Properly: Keep your salad covered in the fridge, enjoying it within three days for optimal freshness and flavor in your Japanese Kani Side Salad.

Storage Tips for Japanese Kani Side Salad

Fridge: Store the salad in an airtight container, covering it tightly. Consume within 3 days for the best flavor and freshness.

Freezer: Freezing is not recommended as the ingredients can lose their texture and flavor, particularly the cabbage and imitation crab.

Reheating: If desired, let the salad come to room temperature for a brief period before serving, but it’s best enjoyed chilled straight from the fridge for maximum crispness.

Covering: Always ensure the salad is well-covered in the refrigerator to avoid any absorption of odors from other foods, maintaining the delightful freshness of your Japanese Kani Side Salad.

Japanese Kani Side Salad Variations

Feel free to get creative with your Japanese Kani Side Salad, and let your taste buds guide you on this culinary adventure!

  • Protein Swap: Try shrimp instead of imitation crab for a delightful seafood twist. A touch of lime juice can brighten this combination even more.
  • Creamy Upgrade: Swap mayonnaise with Greek yogurt for a lighter dressing, infusing a tangy flavor without sacrificing creaminess. Yummy and refreshing!
  • Herb Exhilaration: Replace parsley with fresh cilantro for a zestier profile, or toss in some dill for a familiar brightness that complements seafood beautifully.
  • Crunch Factor: Add diced bell peppers for an extra crunch and color; they bring a sweet and juicy bite that’s irresistible!
  • Heat Enhancer: Incorporate a dash of sriracha or chili flakes into your dressing for a spicy kick—perfect for those who crave a little heat in their salad.
  • Avocado Magic: Throw in some diced avocado to amplify creaminess and healthy fats; it creates a rich texture that pairs beautifully with the other ingredients.
  • Nutty Delight: Toast some sesame seeds for added crunch or incorporate sliced almonds for a nutty flavor that enhances the salad’s complexity.
  • Vinaigrette Version: Switch the creamy dressing for a light vinaigrette made with rice vinegar and olive oil, perfect for a refreshing summer side!

If you love customizing your salads, you might also enjoy trying a Strawberry Spinach Salad or a vibrant Italian Chopped Salad for a delightful change in flavors!

Japanese Kani Side Salad Recipe FAQs

What type of imitation crab should I use for this salad?
I recommend using flaked imitation crab for the best texture and flavor. It tends to hold up better in salads than stick varieties. Check labels for quality, as some brands may have a fishy taste, while others provide a mild flavor that complements the salad beautifully.

How should I store the Japanese Kani Side Salad?
Store your salad in an airtight container in the refrigerator. Make sure to cover it tightly to keep the flavors fresh. Enjoy it within 3 days for the best taste and texture. If you notice any dark spots on the cabbage or a sour smell, it’s better to discard it.

Can I freeze the Japanese Kani Side Salad?
Freezing is not recommended for this salad because the ingredients—especially cabbage and imitation crab—tend to lose their crispness and texture once thawed. Enjoy it fresh and chilled for the best experience!

What if I can’t find fresh parsley? Can I use something else?
Absolutely! Fresh parsley adds a lovely touch, but you can substitute it with other fresh herbs like cilantro or chives. Each will bring a unique flavor profile. If you prefer a milder taste, try using diced green onions for that fresh kick.

Is there a way to adjust the salad for dietary restrictions or allergies?
Yes! For those with mayo allergies, you can substitute with plain Greek yogurt for a similar creamy texture, though the flavor will shift slightly. If you want to make it gluten-free, just ensure all your canned ingredients and spices are labeled gluten-free. Always check for specific allergy-related concerns, especially with imitation crab, which may contain fish products.

Why is it important to let the salad chill before serving?
Chilling the salad for at least 2 hours before serving is vital for flavor fusion. This time allows the ingredients to meld together, enhancing their individual flavors and creating a smooth, cohesive dressing. It’s a game-changer for the taste!

Japanese Kani Side Salad

Refreshing Japanese Kani Side Salad That's Perfect for Any Meal

This Japanese Kani Side Salad is a vibrant and refreshing dish that complements any meal.
Prep Time 10 minutes
Chill Time 2 hours
Total Time 2 hours 10 minutes
Servings: 4 servings
Course: Salad
Cuisine: Japanese
Calories: 150

Ingredients
  

For the Salad
  • 1 cup shredded cabbage the star of the salad's texture
  • 1 cup julienned carrots adds natural sweetness and crunch
  • 1 cup drained canned corn adds a pop of sweetness
  • 1 cup flaked imitation crab meat main protein source
  • 2 tablespoons fresh parsley can substitute with cilantro if desired
For the Dressing
  • ½ cup mayonnaise choose full-fat or lighter versions
  • 2 tablespoons fresh lemon juice essential for brightness
  • ½ teaspoon garlic powder or fresh garlic for a more intense taste
  • ¼ teaspoon onion powder optional for milder flavors
  • ¼ teaspoon ground black pepper adjust according to preference
  • ¼ teaspoon salt use sparingly if imitation crab is salty
  • 1 tablespoon toasted sesame seeds adds a nice nutty crunch

Equipment

  • Mixing Bowl
  • Whisk
  • Spatula
  • Tongs

Method
 

Step-by-Step Instructions for Japanese Kani Side Salad
  1. In a large mixing bowl, combine the shredded cabbage, julienned carrots, drained canned corn, and flaked imitation crab meat. Use a spatula to fold the ingredients together until well mixed, about 2 minutes.
  2. In a separate bowl, whisk together the mayonnaise, fresh lemon juice, garlic powder, onion powder, salt, and ground black pepper until smooth, about 2-3 minutes.
  3. Pour the creamy dressing over the mixed salad ingredients. Toss everything together with tongs, ensuring the dressing coats each piece evenly, about 1-2 minutes.
  4. Cover the bowl with plastic wrap and refrigerate for at least 2 hours to allow the flavors to meld.
  5. Once chilled, give the salad another gentle toss before serving. Serve immediately or keep it refrigerated until ready to serve.

Nutrition

Serving: 1servingCalories: 150kcalCarbohydrates: 12gProtein: 6gFat: 10gSaturated Fat: 1.5gPolyunsaturated Fat: 1gMonounsaturated Fat: 6gCholesterol: 5mgSodium: 300mgPotassium: 200mgFiber: 2gSugar: 3gVitamin A: 500IUVitamin C: 10mgCalcium: 30mgIron: 1mg

Notes

Enjoy this salad fresh for optimal taste. Adjust seasoning to your liking before serving.

Tried this recipe?

Let us know how it was!

Decadent Quick Ginger Bread Yule Log Cake for Holiday Cheer

“Baking brings people together,” I overheard a friend say at a holiday gathering, and I couldn’t agree more. This Quick Gingerbread Yule Log Cake is not just a dessert; it’s a celebration waiting to happen. With its spiced aroma filling your kitchen and uncomplicated steps guiding you through, this festive treat is impressively easy to create. Perfect for busy holiday gatherings, this cake’s delightful combination of soft gingerbread, creamy mascarpone filling, and airy meringue will surely wow your guests. Plus, with its potential for vegan substitutions, everyone can indulge. Are you ready to roll up some holiday magic?

Why Is This Yule Log Cake Special?

Simplicity is key: This recipe is easy to follow, making it perfect for bakers of all levels. Amazing Aroma: The warm spices of ginger and cinnamon will fill your kitchen with a cozy scent that delights everyone. Crowd-Pleasing: With its vibrant decoration of cranberries and rosemary, it’s not only delicious but a showstopper on any holiday table. Versatile options allow for vegan substitutions, ensuring everyone gets to enjoy a slice. Make-ahead Friendly: Prepare it in advance to save time and reduce stress during the holiday rush. Get ready to impress with this delightful Italian Chopped Salad as a side for a complete festive feast!

Quick Ginger Bread Yule Log Cake Ingredients

For the Cake

  • Eggs – Provides structure and moisture. Substitution: For egg replacement, use 1 tablespoon of ground flaxseed mixed with 3 tablespoons of water (equivalent to 1 egg).
  • Brown Sugar – Adds sweetness and depth of flavor. No alternative needed.
  • Granulated Sugar – Contributes sweetness and helps with texture. No alternative needed.
  • Vanilla Extract – Enhances flavor and aroma. No alternative needed.
  • All-Purpose Flour – Forms the cake structure. For a gluten-free version, use a 1:1 gluten-free flour blend.
  • Baking Powder – Provides leavening for the cake. No alternative needed.
  • Ground Ginger, Cinnamon, Nutmeg – Adds spice flavors that define gingerbread. No alternative needed.
  • Salt – Balances sweetness and enhances flavors. No alternative needed.

For the Filling

  • Plain Yogurt – Adds moisture and tang. Substitution: Use coconut yogurt or applesauce (reduce sugar slightly if using applesauce).
  • Molasses – Provides deep flavor and color to the cake. No alternative needed.
  • Mascarpone Cheese – Creamy filling component. Substitution: Use whipped coconut cream for a dairy-free option.

For the Decoration

  • Sugar (for sugared cranberries) – Sweetens and coats cranberries for decoration. No alternative needed.
  • Fresh Cranberries – Tart decoration. No alternative needed.
  • Fresh Rosemary – Optional garnish for aroma and visual appeal. No alternative needed.

Prepare to delight your guests with this festive and delectable Quick Gingerbread Yule Log Cake that captures the spirit of the season!

Step‑by‑Step Instructions for Quick Ginger Bread Yule Log Cake

Step 1: Preheat the Oven
Begin by preheating your oven to 350°F (175°C). Prepare a 10×15 jelly roll pan by lining it with parchment paper, making sure the paper hangs over the edges. This will make it easier to lift the cake out later. The preparation is essential for our Quick Gingerbread Yule Log Cake to bake evenly.

Step 2: Whip the Egg Whites
In a stand mixer, add the egg whites and beat them on medium speed until stiff peaks form, which will take about 4-5 minutes. Once this is achieved, set the whipped egg whites aside in a clean bowl. This step is crucial for providing the airy texture that complements the gingerbread in the Yule Log.

Step 3: Mix the Egg Yolks
Using the same mixer, combine the egg yolks, brown sugar, granulated sugar, and vanilla extract. Whisk on medium speed until the mixture reaches a creamy consistency, which should take about 2-3 minutes. This mixture creates a rich base that enhances the flavor profile of the Quick Gingerbread Yule Log Cake.

Step 4: Combine Dry Ingredients
In a separate bowl, sift together the all-purpose flour, baking powder, ground ginger, cinnamon, nutmeg, and salt. Gradually add these dry ingredients to the creamy egg yolk mixture, followed by the yogurt and molasses. Mix until everything is just combined and smooth, being careful not to overmix to maintain a tender cake.

Step 5: Fold in Egg Whites
Gently fold the whipped egg whites into the gingerbread batter using a spatula. Start with a small amount to lighten the mixture, then gradually fold in the rest until no streaks remain. This step ensures our Yule Log Cake has a light and fluffy texture, essential for rolling.

Step 6: Bake the Cake
Pour the batter into the prepared jelly roll pan, spreading it out evenly. Bake in the preheated oven for about 10 minutes or until the cake springs back when lightly touched. Keep an eye on it; you want it just set and golden to achieve that perfect gingerbread flavor.

Step 7: Roll the Cake
Once baked, remove the cake from the oven and immediately sprinkle a clean kitchen towel with powdered sugar. Carefully flip the warm cake onto the towel, peel off the parchment, and roll it up gently in the towel starting from the shorter side. Allow it to cool completely for 1-2 hours; this helps maintain its shape.

Step 8: Prepare Sugared Cranberries
While the cake cools, prepare the sugared cranberries. Dunk fresh cranberries in simple syrup, then roll them in sugar until they are well coated. Allow these to dry on a wire rack. These add a delightful touch to the decoration of your Quick Gingerbread Yule Log Cake.

Step 9: Spread the Filling
Unroll the cooled cake carefully, exposing the beautiful surface. Spread an even layer of mascarpone cheese filling over the surface of the cake, leaving a small border. Roll the cake back up using the towel as a guide, maintaining a tight roll. This filling is the creamy heart of your Yule Log.

Step 10: Chill the Cake
Wrap the rolled cake in plastic wrap and place it in the fridge for 30 minutes to 1 hour. This chilling step helps the filling to set, making it easier to cut and serve later. Your Quick Gingerbread Yule Log Cake will become an impressive holiday centerpiece after chilling.

Step 11: Make the Meringue Frosting
For the meringue frosting, combine egg whites and sugar in a bowl set over simmering water. Whisk continuously until warm, then remove from heat and whip until stiff peaks form. Spread the meringue generously over the chilled Yule log, creating a beautiful snowy finish to the cake.

Step 12: Decorate and Serve
Finish off your Yule Log by decorating it with sugared cranberries and fresh rosemary. If desired, briefly torch the edges of the meringue for a beautiful caramelized effect. Your Quick Gingerbread Yule Log Cake is now ready to serve, or you can refrigerate it until it’s time to impress your guests.

Quick Ginger Bread Yule Log Cake Variations

Feel free to get creative and personalize your cake with these delightful twists that will elevate your holiday celebration!

  • Vegan Delight: Replace eggs with flaxseed meal and use coconut yogurt for a completely dairy-free version. It’s just as delicious and inclusive!
  • Gluten-Free Goodness: Swap all-purpose flour for a 1:1 gluten-free blend, ensuring everyone can enjoy this festive treat.
  • Fruity Flavor: Substitute applesauce for yogurt to add a subtle fruity note, making the cake even sweeter and moist.
  • Spice Swap: Experiment with spices like cardamom or cloves for a unique flavor profile that still maintains the traditional gingerbread essence.
  • Chocolate Lovers: For a rich twist, add cocoa powder to the batter or fold in some mini chocolate chips, creating an indulgent variation of this classic dessert.
  • Nutty Crunch: Incorporate chopped nuts such as pecans or walnuts into the filling to give the Yule Log a satisfying crunch alongside the creamy texture.
  • Zesty Twist: Add a touch of orange zest into the batter or the mascarpone filling for a refreshing burst of citrus that complements the spices beautifully.

With these variations, you can customize your Quick Ginger Bread Yule Log Cake to suit any palate. Serve it alongside a beautiful Patriotic Poke Cake or a refreshing Honey Garlic Shrimp for a festive feast that your loved ones will remember!

Expert Tips for Quick Ginger Bread Yule Log Cake

  • Preheat Properly: Make sure to preheat your oven completely; this ensures even baking and prevents the cake from becoming dense.
  • Avoid Overmixing: When combining the moist and dry ingredients, mix just until combined to keep your gingerbread light and spongy.
  • Gentle Folding: Fold in the whipped egg whites carefully to maintain the airiness of the batter—this is key for the light texture of the Quick Ginger Bread Yule Log Cake.
  • Cooling Technique: When rolling the cake, use a towel dusted with powdered sugar to prevent sticking; this will help maintain the cake’s beautiful shape.
  • Crack Coverage: If your cake cracks while rolling, remember that the meringue frosting can hide those imperfections, adding charm to your presentation.
  • Make It Ahead: Consider making this cake a day in advance; it can taste even better after chilling, as the flavors meld beautifully!

Make Ahead Options

The Quick Gingerbread Yule Log Cake is a chef’s dream for effortless holiday preparations! You can bake the cake up to 24 hours in advance; simply cool it, roll it in a towel, and refrigerate. The creamy mascarpone filling can also be prepared ahead and stored separately, allowing you to avoid last-minute chaos. When ready to serve, just unroll the cake, spread the filling, and roll it back up. For the final touch, prepare the meringue frosting and decorate with cranberries and rosemary. This way, your Yule Log Cake maintains its delightful texture and flavor, making it just as delicious while saving you precious time during busy celebrations!

What to Serve with Quick Gingerbread Yule Log Cake

When it comes to elevating your festive dessert experience, pairing is everything! Having a few delightful sides can transform your dessert into an unforgettable meal celebration.

  • Whipped Cream: The lightness of freshly whipped cream adds a creamy contrast and can enhance the gingerbread flavors beautifully.
  • Spicy Chai Latte: A warm drink rich in spices, its cozy aroma complements the spiced nuances of the cake, creating a heartwarming holiday vibe.
  • Candied Pecans: These crunchy bites offer a delightful sweetness and texture contrast, enriching your dessert experience. Serve them alongside for an added crunch!
  • Vanilla Ice Cream: The creaminess of vanilla ice cream creates a luxurious mouthfeel when combined with the soft gingerbread, amplifying the sweetness.
  • Apple Cinnamon Compote: This warm, spiced compote brings a tangy touch that pairs beautifully with the richness of the Yule Log, making every bite exciting.
  • Eggnog: Rich and creamy, this traditional holiday drink is the perfect festive companion to the flavors of your gingerbread, perfect for toasting!
  • Chocolate Drizzle: A simple drizzle of melted dark chocolate over each slice adds an unexpected chocolatey twist that will satisfy any chocolate lover’s craving.
  • Sugared Cranberries: Placing some sugared cranberries on the side not only adds visual appeal but also a delightful tangy burst of flavor that complements the sweetness of the cake.
  • Festive Fruit Salad: A light and refreshing fruit salad can cleanse the palate and balance the rich flavors, bringing a bright element to your dessert spread.

Storage Tips for Quick Ginger Bread Yule Log Cake

Fridge: Store any leftover slices in an airtight container in the refrigerator for up to 2 days. This keeps the cake moist and the flavors intact.

Freezer: If you want to preserve your cake for longer, wrap it tightly in plastic wrap and then in aluminum foil, freezing for up to 3 months. Thaw overnight in the fridge before serving.

Reheating: To enjoy the cake warm, slice and microwave a piece for about 10-15 seconds. This adds a delightful touch to the cake’s creamy mascarpone filling.

Decoration Storage: For the best presentation, keep sugared cranberries and fresh rosemary separate in the fridge, and add them just before serving your Quick Ginger Bread Yule Log Cake.

Quick Ginger Bread Yule Log Cake Recipe FAQs

What type of eggs should I use for the cake?
Absolutely! Fresh, large eggs are ideal for this recipe as they contribute both moisture and structure to the Quick Ginger Bread Yule Log Cake. If you’re looking for a vegan alternative, mix 1 tablespoon of ground flaxseed with 3 tablespoons of water to replace each egg. This substitution works wonders, ensuring everyone can enjoy this festive treat!

How should I store leftover Yule Log cake?
For optimal freshness, store any leftover slices of the Quick Ginger Bread Yule Log Cake in an airtight container in the refrigerator, where it will keep for about 1-2 days. This helps maintain the cake’s moisture and flavor. If you want to keep it for a longer duration, feel free to wrap it tightly in plastic wrap and freeze it, ideally for no more than three months.

Can I freeze the Yule Log cake?
Absolutely! To freeze your Quick Ginger Bread Yule Log Cake, wrap it tightly in plastic wrap followed by aluminum foil to prevent freezer burn. Store it for up to 3 months. When you’re ready to enjoy, simply remove it from the freezer and allow it to thaw overnight in the refrigerator. It will be perfectly preserved and ready to wow your family again!

What if my cake cracks while rolling?
Very! If you notice any cracks forming as you roll the cake, don’t worry! This is quite common and can be easily disguised with the meringue frosting. When you apply the frosting generously, it will cover any imperfections, turning the cake’s appearance into a delightful wintry treat. Just fold the cake gently, and it should roll up nicely.

Are there any dietary considerations for this recipe?
Yes, indeed! This Quick Ginger Bread Yule Log Cake can easily be adapted for different dietary needs. For a gluten-free version, swap out the all-purpose flour for a 1:1 gluten-free flour blend. Also, use coconut yogurt and whipped coconut cream for a dairy-free option. This way, you can ensure that everyone at your holiday gathering can indulge in this delicious treat!

How long does the mascarpone filling last in the fridge?
Typically, the mascarpone filling can be stored in the fridge for up to 3 days if kept in an airtight container. However, for the best texture and flavor, I recommend preparing it fresh and enjoying it within a day of making your Quick Ginger Bread Yule Log Cake. This will ensure every slice is flavorful and creamy!

Quick Ginger Bread Yule Log Cake

Decadent Quick Ginger Bread Yule Log Cake for Holiday Cheer

This Quick Gingerbread Yule Log Cake is a festive dessert that combines spiced gingerbread with a creamy mascarpone filling, perfect for holiday gatherings.
Prep Time 30 minutes
Cook Time 10 minutes
Cooling Time 2 hours
Total Time 2 hours 40 minutes
Servings: 12 slices
Course: Dessert
Cuisine: Holiday
Calories: 250

Ingredients
  

For the Cake
  • 3 large Eggs Substitution: For egg replacement, use 1 tablespoon of ground flaxseed mixed with 3 tablespoons of water.
  • 1 cup Brown Sugar
  • 1 cup Granulated Sugar
  • 1 teaspoon Vanilla Extract
  • 1 cup All-Purpose Flour For a gluten-free version, use a 1:1 gluten-free flour blend.
  • 2 teaspoons Baking Powder
  • 1 teaspoon Ground Ginger
  • 1 teaspoon Cinnamon
  • 1/2 teaspoon Nutmeg
  • 1/2 teaspoon Salt
For the Filling
  • 1 cup Plain Yogurt Substitution: Use coconut yogurt or applesauce.

  • 1/2 cup Molasses
  • 1 cup Mascarpone Cheese Substitution: Use whipped coconut cream for a dairy-free option.
For the Decoration
  • 1 cup Sugar (for sugared cranberries)
  • 2 cups Fresh Cranberries
  • 1 sprig Fresh Rosemary Optional garnish.

Equipment

  • Stand Mixer
  • Oven
  • Jelly roll pan
  • Parchment paper
  • Wire Rack

Method
 

Step-by-Step Instructions
  1. Preheat your oven to 350°F (175°C) and prepare a 10x15 jelly roll pan by lining it with parchment paper.
  2. In a stand mixer, whip the egg whites on medium speed until stiff peaks form, about 4-5 minutes. Set aside.
  3. Mix together the egg yolks, brown sugar, granulated sugar, and vanilla extract until creamy, about 2-3 minutes.
  4. Sift together the all-purpose flour, baking powder, ground ginger, cinnamon, nutmeg, and salt in a separate bowl. Gradually mix into the egg yolk mixture, followed by yogurt and molasses.
  5. Gently fold in the whipped egg whites until no streaks remain.
  6. Pour the batter into the prepared jelly roll pan and bake for about 10 minutes.
  7. Once baked, sprinkle a clean kitchen towel with powdered sugar, flip the cake onto it, and roll it up gently. Let it cool completely for 1-2 hours.
  8. Prepare sugared cranberries by dunking fresh cranberries in simple syrup and rolling them in sugar.
  9. Unroll the cooled cake, spread an even layer of mascarpone filling, and roll it tightly back up.
  10. Wrap the rolled cake in plastic wrap and refrigerate for 30 minutes to 1 hour.
  11. For the meringue frosting, whisk egg whites and sugar over simmering water, then whip until stiff peaks form. Spread over the chilled Yule log.
  12. Decorate with sugared cranberries and fresh rosemary. Optionally torch the edges of the meringue for effect.

Nutrition

Serving: 1sliceCalories: 250kcalCarbohydrates: 30gProtein: 3gFat: 12gSaturated Fat: 7gPolyunsaturated Fat: 1gMonounsaturated Fat: 2gCholesterol: 45mgSodium: 150mgPotassium: 120mgFiber: 1gSugar: 18gVitamin A: 500IUVitamin C: 1mgCalcium: 50mgIron: 0.5mg

Notes

Ensure to preheat your oven properly and avoid overmixing for optimal texture. Consider making this cake a day in advance for enhanced flavor.

Tried this recipe?

Let us know how it was!

Melt-in-Your-Mouth Cake: The Ultimate Comfort Dessert

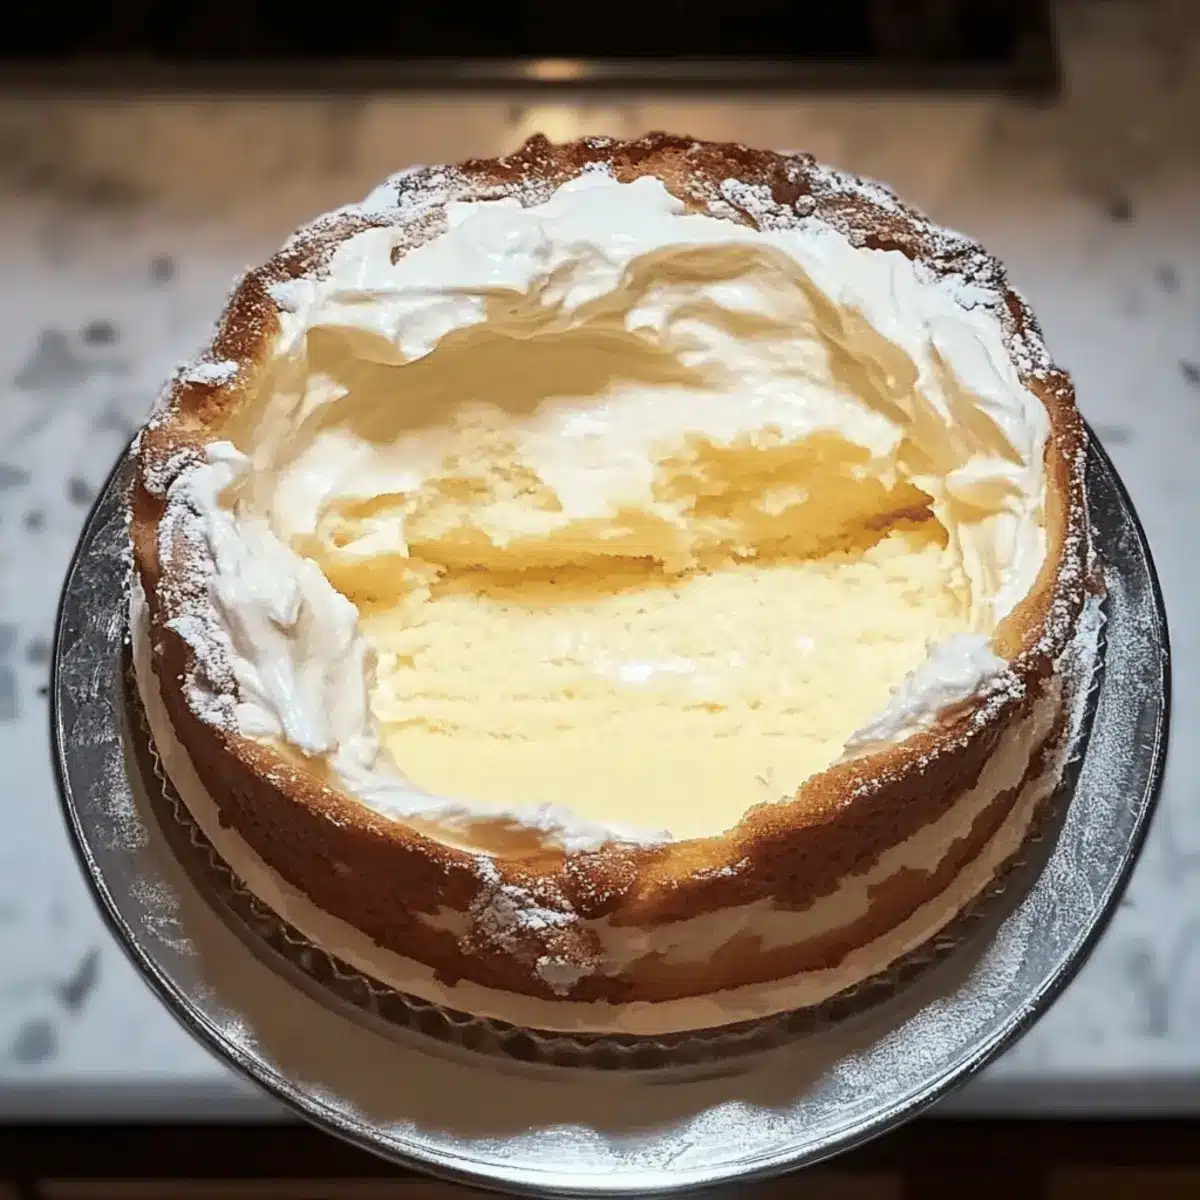
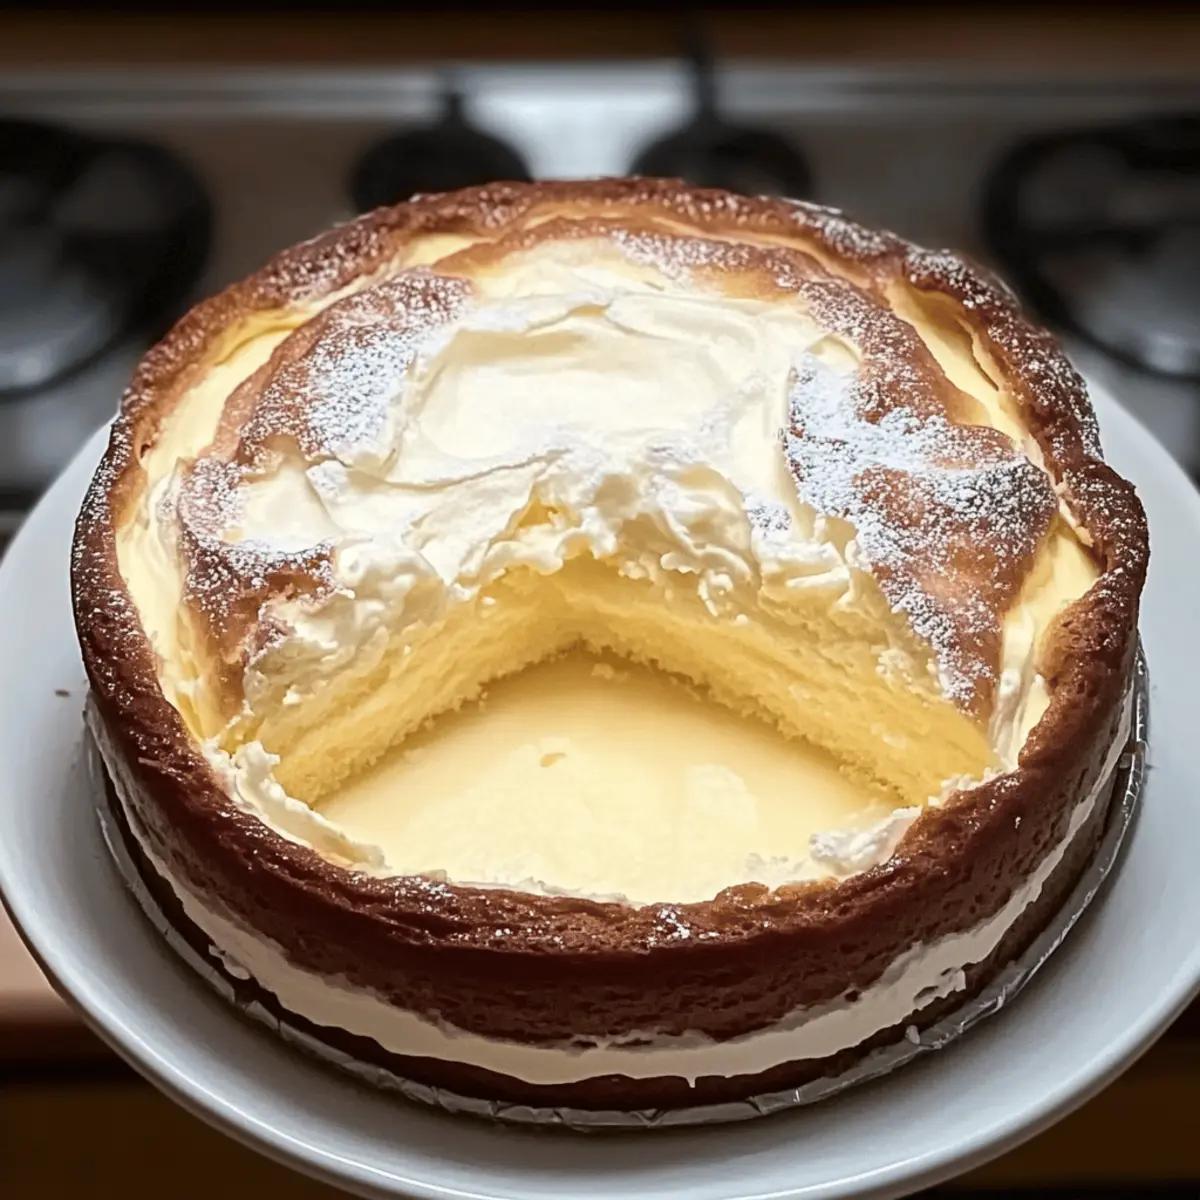
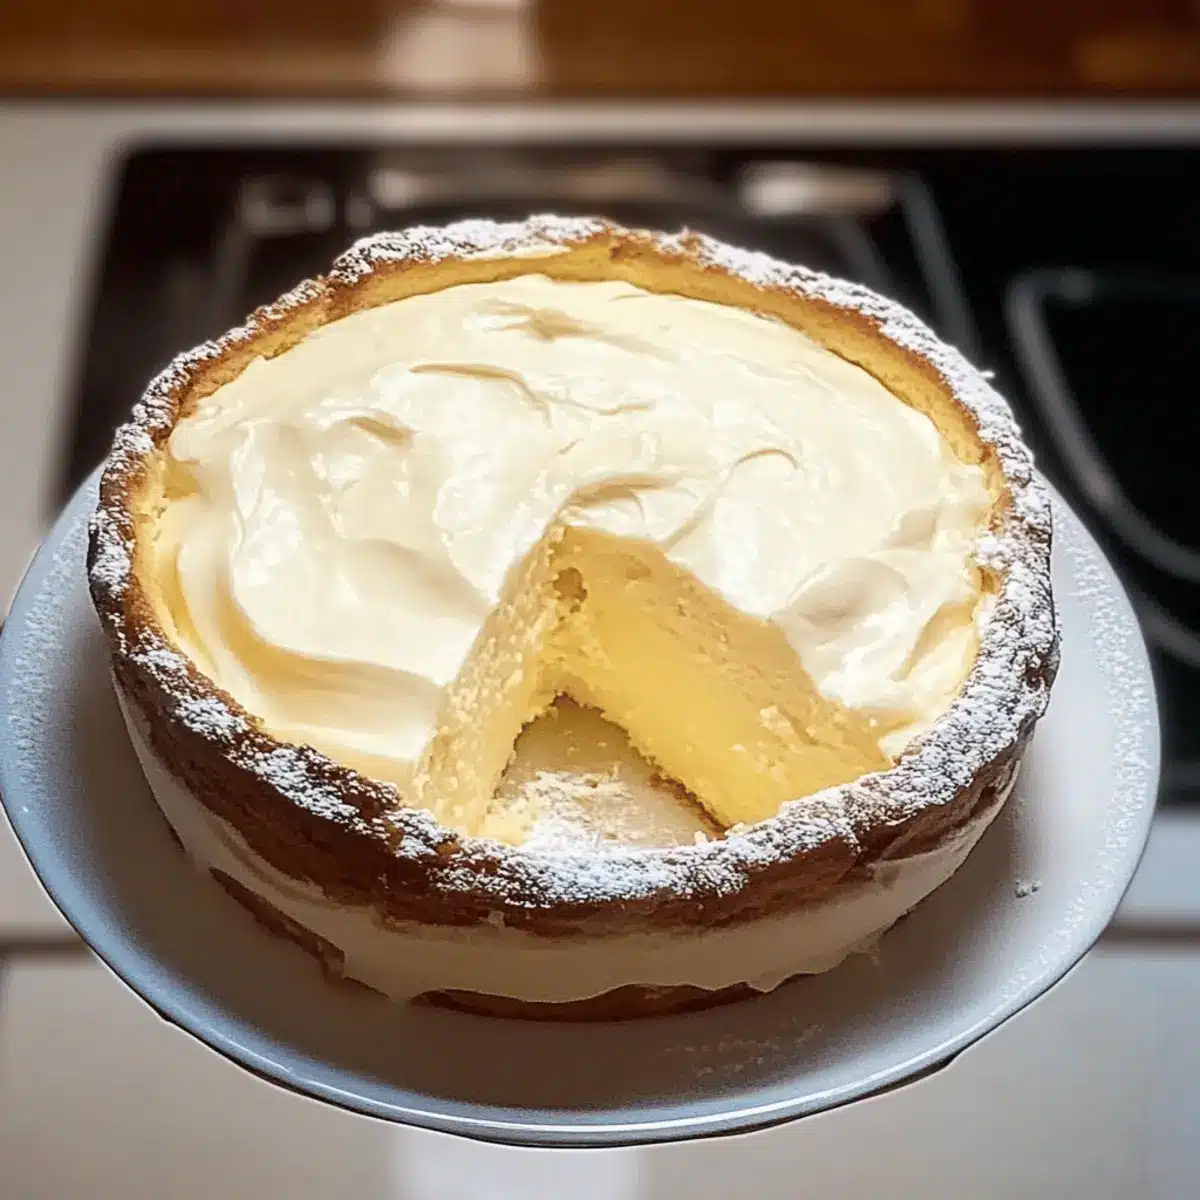
As I set out to create a dessert that truly captures the essence of celebration, I stumbled upon the delightful Melt-in-Your-Mouth Cake—a Polish gem that’s as comforting as it is exquisite. With its buttery layers and luxurious creamy filling, this cake is the perfect showcase of flavors that come together effortlessly. What excites me about this recipe is its uncomplicated approach—it’s easy to whip up and won’t break the bank, making it an ideal treat for festive gatherings or those simple evenings at home. Plus, the texture is a joyous dance between soft and creamy, satisfying everyone from kids to adults. Who wouldn’t want a slice of nostalgia on their plate? Curious to explore how to bring this indulgence to your kitchen? Let’s dive into the recipe!

Why is Melt-in-Your-Mouth Cake a Must-Try?

Ease of preparation is key! This recipe simplifies the baking process, making it approachable even for novice bakers. Rich, Creamy Layers deliver a dessert that feels indulgent without requiring hours in the kitchen. Versatile Variations allow you to customize flavors, from citrus zest to seasonal spices, ensuring you never get bored. Crowd-Pleasing Delight, perfect for gatherings, will impress guests of all ages—just like the Strawberry Cheesecake Bars and Cookies Cream Cheesecake you love. This Melt-in-Your-Mouth Cake truly embodies the spirit of sharing and celebration, making each slice a cherished memory.

Melt-in-Your-Mouth Cake Ingredients

For the Dough
Butter – 80 grams (⅓ cup); provides richness and moisture—substitute with margarine for a dairy-free version.
Milk – 100 ml; adds creaminess to the dough and filling—use almond milk or any non-dairy milk as a substitute.
Water – 100 ml; hydrates the dough—can be replaced with more milk for added flavor.
Salt – ½ teaspoon; balances sweetness; no common substitutions.
Flour – 500 grams (4 cups); the main structure—use all-purpose flour or gluten-free flour for a gluten-free variation.
Baking Powder – 1 teaspoon; provides leavening—ensure it’s fresh for the best results.
Eggs – 4; adds structure and richness—opt for flax eggs for a vegan version.
Sugar – 150 grams (¾ cup); sweetens the cream filling—alternative sweeteners can be used for lower sugar intake.

For the Cream Filling
Cream – 100 grams; adds richness—heavy cream preferred, but dairy-free cream can also work.

Optional Toppings
Icing Sugar – for garnish; adds a sweet finish.
Fresh Fruit or Chocolate Shavings – enhances presentation and flavor.

This Melt-in-Your-Mouth Cake is sure to become a favorite in your dessert repertoire, whether for special occasions or quiet afternoons at home!

Step‑by‑Step Instructions for Melt-in-Your-Mouth Cake

Step 1: Prepare Dough
Start by melting 80 grams of butter in a saucepan over low heat. Once melted, mix in 100 ml of milk, 100 ml of water, and ½ teaspoon of salt, stirring until fully combined. Bring the mixture to a gentle boil, then remove from heat.

Step 2: Mix Dry Ingredients
In a large mixing bowl, whisk together 500 grams of flour and 1 teaspoon of baking powder until well blended. This combination will create the structure for your Melt-in-Your-Mouth Cake.

Step 3: Combine Mixtures
Gradually add the flour mixture to the boiling liquid, stirring continuously until a smooth batter forms. Allow the batter to cool for about 10 minutes before incorporating 4 eggs, one at a time, mixing well after each addition to ensure a silky texture.

Step 4: Bake Layers
Preheat your oven to 400°F (200°C). Divide the dough evenly into prepared baking pans, spreading it out to create thin layers. Bake each layer for approximately 20 minutes, or until golden brown and a toothpick inserted in the center comes out clean. Once done, set aside to cool completely.

Step 5: Make Cream Filling
In a medium saucepan, beat 4 eggs with 150 grams of sugar until frothy. Slowly mix in the remaining flour and 100 ml of milk. Cook the mixture over low heat, stirring constantly, until it thickens. Once thickened, remove it from heat and let it cool before blending in 100 grams of cream, ensuring a creamy consistency.

Step 6: Assemble Cake
Once cooled, take one layer of the baked dough and spread a generous amount of the cream filling on top. Repeat the layering process with the remaining dough and cream until all layers are stacked. Refrigerate the assembled cake for at least two hours, allowing the flavors to meld and the layers to set properly.

Step 7: Garnish & Serve
After chilling, dust the top of your Melt-in-Your-Mouth Cake with icing sugar for a delightful finish. Feel free to garnish with fresh fruits or chocolate shavings. Slice and serve this beautiful dessert, enjoying the incredible flavors and textures with family and friends.

Make Ahead Options

Perfect for busy weeknights, the Melt-in-Your-Mouth Cake can be prepped ahead to save valuable time in the kitchen. You can prepare the dough and bake the layers up to 24 hours in advance; simply store them wrapped in plastic in the refrigerator to maintain their freshness. Additionally, the creamy filling can be made up to 3 days ahead and stored in an airtight container in the fridge. When you’re ready to assemble, layer the cream filling between the cooled cake layers, let it chill for at least 2 hours before serving, and garnish with icing sugar or your favorite toppings. This way, you’ll enjoy a delightful dessert that’s just as delicious with minimum last-minute effort!

Expert Tips for Melt-in-Your-Mouth Cake

  • Cool the Cream: Ensure the cream mixture is completely cool before combining it with butter to prevent unwanted melting and maintain a creamy texture.

  • Avoid Lumps: Stir continuously while cooking the cream filling to eliminate lumps and achieve a silky smooth consistency. This ensures your Melt-in-Your-Mouth Cake has a delightful filling.

  • Chill Time Matters: Allow the assembled cake to chill for a minimum of two hours. This step enhances the flavor and allows the layers to set, yielding the best results.

  • Layer Thickness: When baking, keep each dough layer thin and even to ensure consistent cooking and a more tender mouthfeel in the finished cake.

  • Flavor Variations: Don’t hesitate to personalize your cake by infusing the cream filling with extracts or fruit purees. Lemon zest or raspberry puree can elevate the flavor profile of your Melt-in-Your-Mouth Cake.

How to Store and Freeze Melt-in-Your-Mouth Cake

Fridge: Store the cake in an airtight container for up to 3 days to maintain its creamy filling and moist layers. This helps prevent drying out and keeps the flavors fresh.

Freezer: For longer storage, wrap slices tightly in plastic wrap, then place in an airtight container. The cake can be frozen for up to 2 months, preserving its deliciousness.

Thawing: When ready to enjoy, transfer the frozen slices to the fridge for several hours or overnight to thaw gradually. This ensures the Melt-in-Your-Mouth Cake retains its soft texture.

Reheating: If you prefer a warm slice, microwave for 10-15 seconds on low power, but be careful not to overheat, or the creamy filling may lose its lovely texture.

Melt-in-Your-Mouth Cake Variations

Feel free to customize your Melt-in-Your-Mouth Cake with these delightful twists for even more enjoyment!

  • Dairy-Free: Replace butter with margarine and cream with coconut cream to make this cake dairy-free without sacrificing flavor.

  • Gluten-Free: Substitute all-purpose flour with gluten-free flour blend to accommodate gluten sensitivities, ensuring everyone can enjoy this treat.

  • Citrus Zest: Add lemon or orange zest to both the dough and cream filling for a refreshing, zesty kick that brightens every bite.

  • Spiced Delight: Incorporate warming spices like cinnamon or nutmeg into the dough for a cozy, heartwarming flavor reminiscent of holiday baking.

  • Berry Burst: Include fruit purees, such as raspberry or strawberry, in the cream filling for a fruity twist that adds both color and flavor depth.

  • Nutty Texture: Fold in chopped nuts, like walnuts or almonds, into the cream filling for an added crunch that perfectly contrasts the soft cake layers.

  • Chocolate Drizzle: Drizzle melted chocolate over the assembled cake for a touch of indulgence that takes your dessert experience to the next level.

  • Seasonal Flavors: Experiment with seasonal flavors like pumpkin or peppermint in your cream filling to celebrate various occasions, just like with the delightful Pistachio Carrot Cake for fall festivities or wintertime treats.

These delightful variations not only allow you to personalize this recipe but also keep the excitement alive with every baking adventure!

What to Serve with Melt-in-Your-Mouth Cake?

Picture yourself surrounded by loved ones, savoring every bite of this indulgent dessert, perfectly paired with delightful accompaniments.

  • Whipped Cream: A light dollop adds an airy sweetness, enhancing the rich layers without overwhelming them.
  • Fresh Berries: Juicy strawberries or tart raspberries provide a refreshing contrast, balancing the cake’s creaminess with their vibrant flavors.
  • Chocolate Sauce: Drizzling warm chocolate sauce on top creates a luxurious experience; the bitterness beautifully interrupts the cake’s sweetness.
  • Coffee or Espresso: Robust coffee complements the cake’s richness, making for a comforting duo that awakens the senses.
  • Citrus Salad: A mix of oranges or grapefruits with mint brightens up the palate, offering a zesty contrast to the buttery layers.
  • Vanilla Ice Cream: Rich, creamy ice cream not only cools with every bite but also adds an exquisite touch when enjoyed alongside the cake.

Imagine indulging in this decadent cake with your chosen pairings, crafting a meal that warms the heart and invites joyful gatherings.

Melt-in-Your-Mouth Cake Recipe FAQs

How do I choose the best ingredients for my Melt-in-Your-Mouth Cake?
Absolutely! Selecting high-quality ingredients will significantly impact the flavor of your cake. For butter, look for a rich and creamy option, as it adds moisture and taste. When choosing milk, I recommend fresh whole milk for creaminess, but feel free to use almond or oat milk for a non-dairy alternative. Always ensure your eggs are fresh. If you spot any dark spots on the shells, opt for new ones. Using fresh baking powder will also be key for the cake to rise!

How should I store my Melt-in-Your-Mouth Cake?
Very important! Store your beautiful cake in an airtight container in the refrigerator for up to 3 days. This will help maintain the moistness of the layers and the creamy filling. If you notice it starting to dry out, consider placing a piece of wax paper between the cake and the lid to allow for some air circulation while keeping it protected.

Can I freeze my Melt-in-Your-Mouth Cake?
Absolutely! If you’ve got leftovers or want to save some for later, wrap slices tightly in plastic wrap and place them in an airtight container. This cake can be frozen for up to 2 months. For best results, thaw overnight in the fridge or at room temperature for a couple of hours before serving to maintain that delightful texture.

What should I do if my cake layers are too thick or not baking properly?
If your layers feel too thick, try dividing the batter into smaller portions next time—aim for around 1/2-inch thickness. This allows for even baking and helps avoid undercooked centers. If they’re not baking properly, check your oven temperature with an oven thermometer, as an inaccurate temperature can lead to uneven baking conditions. Adjusting baking time might also be necessary; sometimes, a few extra minutes can make all the difference!

Are there any dietary considerations I should keep in mind for this recipe?
Absolutely! For those with egg allergies, using flax eggs is a fantastic option. Simply combine 1 tablespoon of ground flaxseed with 2.5 tablespoons of water for each egg, letting it sit until it becomes gel-like. Additionally, if you need to make it gluten-free, substitute the all-purpose flour with a certified gluten-free blend. Always check labels for ingredients to ensure they meet your dietary needs.

How can I modify the flavors in my Melt-in-Your-Mouth Cake?
The more the merrier! You can personalize your cake by adding extracts like vanilla or almond to the cream filling. If you want a fruity twist, swirl in some lemon zest or raspberry puree for a refreshing flavor. Adding spices like cinnamon or nutmeg can provide a warm touch, especially during festive seasons. Enjoy experimenting with flavors that resonate with you!

Melt-in-Your-Mouth Cake

Melt-in-Your-Mouth Cake: The Ultimate Comfort Dessert

Experience the delight of Melt-in-Your-Mouth Cake, a Polish gem that blends rich, creamy layers for a comforting dessert.
Prep Time 30 minutes
Cook Time 40 minutes
Chill Time 2 hours
Total Time 3 hours 10 minutes
Servings: 8 slices
Course: Dessert
Cuisine: Polish
Calories: 300

Ingredients
  

For the Dough
  • 80 grams Butter Substitute with margarine for a dairy-free version.
  • 100 ml Milk Use almond milk or any non-dairy milk as a substitute.
  • 100 ml Water Can be replaced with more milk for added flavor.
  • 0.5 teaspoon Salt Balances sweetness; no common substitutions.
  • 500 grams Flour Use all-purpose flour or gluten-free flour for a gluten-free variation.
  • 1 teaspoon Baking Powder Ensure it's fresh for the best results.
  • 4 units Eggs Opt for flax eggs for a vegan version.
  • 150 grams Sugar Alternative sweeteners can be used for lower sugar intake.
For the Cream Filling
  • 100 grams Cream Heavy cream preferred, but dairy-free cream can also work.
Optional Toppings
  • Icing Sugar Adds a sweet finish.
  • Fresh Fruit or Chocolate Shavings Enhances presentation and flavor.

Equipment

  • Saucepan
  • Mixing Bowl
  • baking pans
  • Whisk

Method
 

Step-by-Step Instructions for Melt-in-Your-Mouth Cake
  1. Prepare Dough: Start by melting 80 grams of butter in a saucepan over low heat. Once melted, mix in 100 ml of milk, 100 ml of water, and ½ teaspoon of salt, stirring until fully combined. Bring the mixture to a gentle boil, then remove from heat.
  2. Mix Dry Ingredients: In a large mixing bowl, whisk together 500 grams of flour and 1 teaspoon of baking powder until well blended.
  3. Combine Mixtures: Gradually add the flour mixture to the boiling liquid, stirring continuously until a smooth batter forms. Allow the batter to cool for about 10 minutes before incorporating 4 eggs, one at a time.
  4. Bake Layers: Preheat your oven to 400°F (200°C). Divide the dough evenly into prepared baking pans, spreading it out to create thin layers. Bake each layer for approximately 20 minutes, or until golden brown.
  5. Make Cream Filling: Beat 4 eggs with 150 grams of sugar until frothy. Slowly mix in the remaining flour and 100 ml of milk. Cook over low heat, stirring constantly, until thickened. Mix in 100 grams of cream.
  6. Assemble Cake: Once cooled, layer the baked dough and cream filling. Refrigerate for at least two hours.
  7. Garnish & Serve: Dust with icing sugar and garnish with fruits or chocolate shavings. Slice and enjoy.

Nutrition

Serving: 1sliceCalories: 300kcalCarbohydrates: 40gProtein: 5gFat: 15gSaturated Fat: 9gPolyunsaturated Fat: 1gMonounsaturated Fat: 4gCholesterol: 80mgSodium: 150mgPotassium: 100mgFiber: 1gSugar: 20gVitamin A: 500IUCalcium: 50mgIron: 1mg

Notes

Ensure the cream mixture is completely cool before combining it with butter to maintain a creamy texture. Stir continuously while cooking the cream filling to eliminate lumps. Allow the assembled cake to chill for a minimum of two hours for best results.

Tried this recipe?

Let us know how it was!

Quick Ginger Bread Yule Log Cake for a Cozy Festive Treat

The aroma of gingerbread is an instant ticket to holiday cheer, and my Quick Gingerbread Yule Log Cake brings that magic right into your kitchen. This delightful treat combines the warmth of ginger and spices with the luxurious creaminess of mascarpone, creating an impressive centerpiece that’s surprisingly simple to prepare. Not only does it bring festive flair to gatherings, but it also offers the flexibility of vegan substitutions, making it accessible for everyone to enjoy. With its soft texture and elegant finish, this cake is bound to be a crowd-pleaser at your next holiday celebration. Are you ready to roll up your sleeves and dive into this festive baking adventure?

Why is this cake a holiday must?

Simplicity at Its Best: With straightforward steps, even novice bakers can create this impressive treat!

Festive Flavors: The aromatic blend of ginger, cinnamon, and nutmeg delivers a cozy holiday flavor that warms the soul.

Crowd-Pleasing Delight: Ideal for gatherings, this cake not only looks stunning but also tastes incredible, winning over every guest.

Versatile Options: Easily make it vegan by swapping in coconut yogurt and whipped coconut cream, so everyone can indulge.

Time-Saving Flavor: Ready in under an hour, this Yule Log Cake lets you enjoy the festive spirit without the fuss.

Unique Presentation: With its elegant roll and beautiful decorations, it’s sure to impress, just like a slice of Italian Chopped Salad beside it!

Quick Ginger Bread Yule Log Cake Ingredients

For the Cake
Eggs – Provides structure and moisture. Substitution: For egg replacement, use 1 tablespoon of ground flaxseed mixed with 3 tablespoons of water (equivalent to 1 egg).
Brown Sugar – Adds sweetness and depth of flavor. No alternative needed.
Granulated Sugar – Contributes sweetness and helps with texture. No alternative needed.
Vanilla Extract – Enhances flavor and aroma. No alternative needed.
All-Purpose Flour – Forms the cake structure. For a gluten-free version, use a 1:1 gluten-free flour blend.
Baking Powder – Provides leavening for the cake. No alternative needed.
Ground Ginger, Cinnamon, Nutmeg – Adds spice flavors that define gingerbread. No alternative needed.
Salt – Balances sweetness and enhances flavors. No alternative needed.
Plain Yogurt – Adds moisture and tang. Substitution: Use coconut yogurt or applesauce (reduce sugar slightly if using applesauce).
Molasses – Provides deep flavor and color to the cake. No alternative needed.

For the Filling
Mascarpone Cheese – Creamy filling component. Substitution: Use whipped coconut cream for a dairy-free option.

For the Sugared Cranberries
Sugar (for sugared cranberries) – Sweetens and coats cranberries for decoration. No alternative needed.
Fresh Cranberries – Tart decoration. No alternative needed.

For the Garnish
Fresh Rosemary – Optional garnish for aroma and visual appeal. No alternative needed.

This Quick Ginger Bread Yule Log Cake is sure to become a favorite in your festive baking repertoire!

Step‑by‑Step Instructions for Quick Ginger Bread Yule Log Cake

Step 1: Preheat the Oven
Begin by preheating your oven to 350°F (175°C). While it heats, take a 10×15 jelly roll pan and line it with parchment paper, ensuring it covers the bottom well to prevent sticking. This preparation is crucial for a smooth release once your gingerbread cake is baked.

Step 2: Whip Egg Whites
In the bowl of a stand mixer, whip the egg whites on medium speed until they reach stiff peaks, which should take about 3 to 5 minutes. The whites should be glossy and hold their shape well—this is key for a light and airy texture in your Quick Ginger Bread Yule Log Cake. Set the whipped whites aside for later.

Step 3: Mix Egg Yolks and Sugars
In the same mixer bowl (no need to wash it), whisk the egg yolks with brown sugar, granulated sugar, and vanilla extract on medium speed until the mixture is creamy and pale, roughly 2 to 3 minutes. This mixture will provide sweetness and flavor to your gingerbread cake, ensuring it’s deliciously moist.

Step 4: Combine Dry Ingredients
In a separate bowl, sift together all-purpose flour, baking powder, ground ginger, cinnamon, nutmeg, and salt. Gradually add this dry mixture to the wet egg yolk mixture while stirring gently. After the dry ingredients are fully combined, fold in the yogurt and molasses until the batter is smooth and well blended, creating a rich flavor characteristic of gingerbread.

Step 5: Fold in Egg Whites
Carefully fold the whipped egg whites into the cake batter using a spatula, making sure to maintain their airy texture. This gentle folding should take about 1-2 minutes. The goal is to incorporate the whites without deflating them, which is essential for the lightness of your Yule Log cake.

Step 6: Bake the Cake
Spread the batter evenly into the prepared jelly roll pan, using a spatula to make it smooth. Place the pan in the preheated oven and bake for approximately 10 minutes, or until the cake springs back when touched lightly in the center. It should have a lovely golden-brown color that signals it’s perfectly baked.

Step 7: Cool and Roll the Cake
Once baked, remove the cake from the oven and sprinkle a clean kitchen towel generously with powdered sugar. Carefully turn the baked cake onto the towel, remove the parchment paper, and roll the cake up gently with the towel inside. Let it cool for 1 to 2 hours—this will help it hold its shape later when you fill and roll it again.

Step 8: Prepare Sugared Cranberries
While the cake is cooling, prepare the sugared cranberries for decoration. In a small bowl, mix together sugar and a splash of water to create a simple syrup. Dip each cranberry in the syrup, then roll them in granulated sugar. Place them on a baking sheet to dry, which will give your Yule Log a beautiful festive touch.

Step 9: Fill the Cake
Once the cake is completely cool, gently unroll it while keeping the towel intact. Spread the mascarpone filling evenly over the cake, leaving a small border around the edges. Carefully roll the cake back up, this time without the towel, ensuring a neat log shape that will be easier to slice later.

Step 10: Chill to Set
Wrap the filled Yule Log in plastic wrap and chill it in the refrigerator for about 30 minutes to 1 hour. Chilling helps set the filling and keeps the cake firm, making it easier to frost and serve after it’s removed from the fridge.

Step 11: Make Meringue Frosting
To create the meringue frosting, whisk the egg whites and sugar together in a bowl set over a pot of simmering water. Heat until warm, stirring gently, then transfer to your stand mixer and beat on high until stiff peaks form, about 5 to 7 minutes. This airy frosting will beautifully envelop your Quick Ginger Bread Yule Log Cake.

Step 12: Decorate and Serve
After frosting, decorate your Yule Log with the sugared cranberries and a few sprigs of fresh rosemary for that festive look. If desired, use a kitchen torch to lightly brown the edges of the meringue for an eye-catching finish. Your impressive gingerbread Yule Log is now ready to be served or kept in the refrigerator until your holiday gathering!

Quick Ginger Bread Yule Log Cake Variations

Feel free to personalize your Yule Log Cake and make it truly your own with these delightful twists!

  • Vegan Option: Swap eggs for 1 tablespoon of ground flaxseed mixed with 3 tablespoons of water. This simple change keeps the cake moist yet entirely plant-based.

  • Gluten-Free: Use a 1:1 gluten-free flour blend in place of all-purpose flour. This swap ensures everyone can enjoy the cake without compromising on taste!

  • Tropical Twist: Substitute coconut yogurt for plain yogurt. The subtle coconut flavor adds a delightful island vibe to this holiday classic, making it truly unique.

  • Chocolate Lovers: Incorporate ¼ cup of cocoa powder into the batter for a rich chocolate gingerbread flavor. Pair it with a dark chocolate Ganache for an extra indulgent treat!

  • Spice It Up: Experiment with spices! Adding cardamom or cloves can deepen the flavor profile, giving your Yule Log a distinctive flair for the holidays.

  • Garnish Variations: Instead of sugared cranberries, try using pomegranate seeds or even sliced candied ginger for a touch of festivity and color that pops.

  • Nutty Crunch: Fold in ½ cup of chopped nuts, like pecans or walnuts, into the batter for an unexpected texture and nutty flavor that complements the spices beautifully.

  • Festive Fizz: Add a splash of rum or bourbon into the mascarpone filling for an adult twist that elevates the entire flavor experience. Your guests will be pleasantly surprised!

These festive adaptations will elevate your baking game, ensuring every bite of your Quick Ginger Bread Yule Log Cake is unforgettable. And if you’re looking for additional scrumptious ideas for celebration, don’t forget to check out this delightful Honey Garlic Shrimp that pairs wonderfully with your holiday spread!

Expert Tips for Quick Ginger Bread Yule Log Cake

  • Preheat Properly: Always preheat your oven fully to ensure even baking. This step is crucial for achieving that perfect light and fluffy texture in your Yule Log cake.

  • Gentle Folding: Be careful when folding in the whipped egg whites. Use a spatula and fold gently to maintain volume, preventing the cake from becoming dense.

  • Dust with Sugar: Before rolling your baked cake, sprinkle the kitchen towel generously with powdered sugar. This will help prevent sticking and make for a smoother rolling process.

  • Cool Completely: Allow the cake to cool completely before filling. A warm cake can melt the filling, making it difficult to roll and shape properly.

  • Decorative Touches: Use fresh rosemary and sugared cranberries not only for decoration but also to add flavors that enhance the overall appearance of your Quick Ginger Bread Yule Log Cake.

  • Chill Before Serving: After assembling, chill the Yule Log in the refrigerator. This helps to set the filling and makes slicing easier, ensuring a neat presentation for your guests.

What to Serve with Quick Ginger Bread Yule Log Cake

Elevating your festive dessert experience is easy with delightful pairings that charm the palate and enhance your celebration.

  • Cinnamon Spiced Apple Cider: The warm spices in apple cider echo the gingerbread, making a cozy and aromatic drink alongside the cake.

  • Vanilla Ice Cream: A scoop of creamy vanilla melts beautifully atop a slice, adding a delightful contrast to the spiced flavors of the cake.

  • Cardamom Hot Chocolate: Rich, creamy hot chocolate with a hint of cardamom warms the soul and is a perfect companion for dessert after a chilly winter day.

  • Ginger Snaps: These spicy cookies bring out the hints of ginger in the Yule Log while providing a delightful crunch that pairs well with the cake’s softness.

  • Roasted Pears with Honey: The caramelized sweetness of roasted pears enhances the cake’s rich flavors and adds a touch of elegance to your dessert table.

  • Sparkling Cranberry Mocktail: A fizzy, tart drink garnished with fresh cranberries not only complements the festive look but also refreshes the palate between sweet bites.

  • Fresh Mint Tea: The herbal brightness of mint tea contrasts beautifully with the rich spices of gingerbread, creating a refreshing finish to the meal.

  • Chocolate Covered Cherries: These decadent bites are a luxurious treat that pairs wonderfully with the cake’s creamy filling, offering a burst of flavor in every bite.

Make Ahead Options

These Quick Ginger Bread Yule Log Cakes are perfect for busy home cooks looking to save time during the festive season! You can prepare the gingerbread cake itself up to 24 hours in advance and store it tightly wrapped in plastic wrap at room temperature to maintain moisture. The mascarpone filling can also be mixed ahead of time and refrigerated for up to 2 days. When ready to assemble, simply spread the cold filling over the unrolled cake, roll it up, and chill for 30 minutes to 1 hour. Finish with the meringue frosting and decorations right before serving for a stunning presentation that still tastes just as delicious!

How to Store and Freeze Quick Ginger Bread Yule Log Cake

Fridge: Cover the Yule Log Cake tightly with plastic wrap or aluminum foil and store in the refrigerator for up to 3 days for optimal freshness and flavor.

Freezer: If you’d like to keep your Quick Ginger Bread Yule Log Cake longer, wrap it in plastic wrap and then in aluminum foil. It can be frozen for up to 2 months.

Thawing: When ready to enjoy, thaw the cake in the refrigerator overnight before serving. This ensures that the texture remains delightful.

Reheating: If you prefer your cake slightly warm, surface the cake with a damp paper towel and microwave it on low for about 10-15 seconds, keeping it moist and delicious.

Quick Ginger Bread Yule Log Cake Recipe FAQs

How do I choose the right eggs for this recipe?
Absolutely! Fresh eggs are key for this cake; look for eggs with uncracked shells and the furthest expiration date. If you’re using farm-fresh eggs, they should have a vibrant yellow yolk, indicating richness that adds to your cake’s flavor.

What’s the best way to store leftover Yule Log Cake?
To keep your Quick Ginger Bread Yule Log Cake fresh, cover it tightly with plastic wrap or foil. Store it in the refrigerator for up to 3 days. This prevents it from drying out and maintains its moist texture.

Can I freeze the Yule Log Cake for later?
Yes, definitely! To freeze, wrap the cooled cake tightly in plastic wrap, followed by aluminum foil to prevent freezer burn. It can be frozen for up to 2 months. When you’re ready to enjoy, place it in the refrigerator overnight to thaw before serving.

Why did my cake crack while rolling?
Very! It’s common for a rolled cake to crack. This can occur if the cake isn’t cooled completely before rolling, or if too much pressure is applied when rolling. If you encounter cracks, don’t worry—just cover them with the meringue frosting for a stunning presentation!

Are there any dietary considerations I should be aware of?
Great question! If making this cake for someone with dietary restrictions, you can easily substitute for vegan options, such as using coconut yogurt and whipped coconut cream instead of mascarpone. Additionally, ensure that all your ingredients, including baking powder, are gluten-free if catering to those with gluten sensitivity.

How long will the sugared cranberries last after preparation?
Sugared cranberries are best used fresh but can last in an airtight container at room temperature for about 2-3 days. Keep them away from moisture to maintain their sparkly appearance and crunch!

Quick Ginger Bread Yule Log Cake

Quick Ginger Bread Yule Log Cake for a Cozy Festive Treat

Quick Ginger Bread Yule Log Cake is a festive dessert that brings holiday cheer to your kitchen with its warm spices and luxurious filling.
Prep Time 30 minutes
Cook Time 10 minutes
Cooling Time 2 hours
Total Time 2 hours 40 minutes
Servings: 8 slices
Course: Dessert
Cuisine: Holiday
Calories: 250

Ingredients
  

For the Cake
  • 3 large Eggs For egg replacement, use 1 tablespoon of ground flaxseed mixed with 3 tablespoons of water (equivalent to 1 egg).
  • 1 cup Brown Sugar
  • 1 cup Granulated Sugar
  • 1 teaspoon Vanilla Extract
  • 1 cup All-Purpose Flour For a gluten-free version, use a 1:1 gluten-free flour blend.
  • 1 teaspoon Baking Powder
  • 1 teaspoon Ground Ginger
  • 1 teaspoon Cinnamon
  • 1 teaspoon Nutmeg
  • 1/2 teaspoon Salt
  • 1 cup Plain Yogurt Substitution: Use coconut yogurt or applesauce (reduce sugar slightly if using applesauce).
  • 1/2 cup Molasses
For the Filling
  • 1 cup Mascarpone Cheese Substitution: Use whipped coconut cream for a dairy-free option.
For the Sugared Cranberries
  • 1 cup Sugar for sugared cranberries
  • 2 cups Fresh Cranberries
For the Garnish
  • 1 stalk Fresh Rosemary Optional garnish for aroma and visual appeal.

Equipment

  • Stand Mixer
  • 10x15 Jelly Roll Pan
  • Parchment paper
  • Baking Sheet

Method
 

Step‑by‑Step Instructions
  1. Preheat your oven to 350°F (175°C) and prepare a 10x15 jelly roll pan with parchment paper.
  2. Whip the egg whites on medium speed until they reach stiff peaks.
  3. Mix egg yolks, brown sugar, granulated sugar, and vanilla until creamy.
  4. Sift together all-purpose flour, baking powder, ground ginger, cinnamon, nutmeg, and salt. Add to wet ingredients and mix.
  5. Gently fold in the yogurt and molasses, then fold in the whipped egg whites.
  6. Spread the batter into the prepared pan and bake for about 10 minutes.
  7. Cool the cake and roll it up in a powdered sugar-dusted towel.
  8. Prepare sugared cranberries by dipping them in syrup and rolling in sugar.
  9. Fill the cooled cake with mascarpone and roll it back up without the towel.
  10. Chill the filled Yule Log in plastic wrap for 30 minutes to an hour.
  11. Make meringue frosting by whisking egg whites and sugar over simmering water until warm, then beat until stiff peaks form.
  12. Decorate the Yule Log with sugared cranberries and rosemary before serving.

Nutrition

Serving: 1sliceCalories: 250kcalCarbohydrates: 35gProtein: 4gFat: 10gSaturated Fat: 5gPolyunsaturated Fat: 0.5gMonounsaturated Fat: 3gCholesterol: 30mgSodium: 150mgPotassium: 100mgFiber: 1gSugar: 20gVitamin A: 200IUVitamin C: 1mgCalcium: 50mgIron: 1mg

Notes

Allow the cake to cool completely before filling to avoid melting the filling. Use fresh rosemary and cranberries for decoration and flavor.

Tried this recipe?

Let us know how it was!

Deliciously Easy Japanese Kani Side Salad for Fresh Flavor

As I tossed together the vibrant colors of a Japanese Kani Side Salad, the refreshing crunch of cabbage, sweet julienned carrots, and savory imitation crab instantly transported me to a sunlit sushi bar. This easy preparation not only brings a burst of flavor to any meal but also serves as a delightful way to uplift your everyday dining experience. The creamy dressing, whispering hints of garlic and lemon, perfectly balances the fresh ingredients and makes this side dish a crowd-pleaser. Best served chilled, it pairs seamlessly with sushi or grilled chicken, yet it stands beautifully on its own, too. Curious about how to make this delightful dish and add a touch of Japan to your table? Let’s dive in!

Why is Kani Salad So Popular?

Unique Flavors: The combination of savory imitation crab and crunchy vegetables creates a salad that’s bursting with flavor.
Easy to Prepare: With minimal ingredients and straightforward steps, you’ll have a delicious dish in no time.
Versatile Side: Whether alongside sushi, grilled chicken, or enjoyed solo, this salad complements a variety of meals perfectly.
Refreshing Texture: Expect a satisfying crunch from cabbage and carrots, making it a perfect light side.
Healthier Choice: Packed with fresh ingredients, this salad is a nutritious alternative to heavy, calorie-laden options.
Crowd-Pleaser: Its deliciously creamy dressing appeals to all ages, making it a great addition to any gathering.
If you love refreshing sides, consider checking out my Strawberry Spinach Salad or the hearty flavors of Steak Fajita Salad as well!

Japanese Kani Side Salad Ingredients

For the Salad

  • Imitation Crab Meat – Use flaked imitation crab for the best taste; it’s the star protein of this refreshing dish.
  • Carrots – Fresh and julienned for sweetness and crunch; they brighten up the salad beautifully.
  • Cabbage – Shredded for optimal mixing; it adds volume and contributes to the satisfying texture.
  • Canned Corn – Ensure well-drained for added sweetness; it’s a delightful touch for balance.
  • Fresh Parsley – Adds color and freshness; feel free to use herbs like cilantro for a twist.

For the Dressing

  • Mayonnaise – A creamy base; full-fat versions offer richness, while lighter options work too.
  • Fresh Lemon Juice – Key for acidity; it brings brightness that balances the creamy flavors.
  • Garlic Powder – Enhances the overall flavor; fresh garlic can be a delicious substitute.
  • Onion Powder – Optional for those who prefer a milder taste; it adds savory depth.
  • Ground Black Pepper – Adjust according to your heat preference; it enhances all the flavors.
  • Salt – Use sparingly, especially with salty imitation crab; balance is crucial.
  • Toasted Sesame Seeds – Adds a nutty flavor and delightful crunch; they elevate the salad’s profile.

This Japanese Kani Side Salad is not just easy to prepare but also a delicious addition to any meal.

Step‑by‑Step Instructions for Japanese Kani Side Salad

Step 1: Prepare the Salad Ingredients
In a large mixing bowl, start by adding the main ingredients for your Japanese Kani Side Salad: flaked imitation crab meat, julienned carrots, shredded cabbage, and well-drained canned corn. Use a spatula to gently mix them together until evenly distributed. The vibrant colors should begin to blend beautifully, creating an inviting appearance that hints at the deliciousness to come.

Step 2: Make the Creamy Dressing
In a separate bowl, whisk together the mayonnaise, fresh lemon juice, garlic powder, onion powder, ground black pepper, and salt for the dressing. Aim for a smooth consistency, ensuring all ingredients are fully incorporated. As you whisk, the mixture should lighten slightly in color, indicating it’s well combined. This creamy dressing will tie all the flavors of your salad together perfectly.

Step 3: Combine the Salad and Dressing
Pour the creamy dressing over the mixed salad ingredients and use tongs to gently toss everything together. Ensure that each piece of cabbage, carrot, and crab is evenly coated with the dressing. As you toss, look for that satisfying glossy finish on each ingredient, which indicates that all the flavors are coming together in the Japanese Kani Side Salad.

Step 4: Chill for Flavor Development
For best results, cover the salad with plastic wrap or a lid and refrigerate for at least two hours. This chilling period is crucial as it allows the flavors to meld and deepen, heightening the overall taste of the salad. Your kitchen should begin to smell delightful, hinting at the refreshing treat awaiting you.

Step 5: Final Toss Before Serving
Before serving, give the salad one final toss to redistribute the dressing that may have settled. This step ensures that each bite remains flavorful and fresh. The Japanese Kani Side Salad is now ready to delight your guests or family, showcasing the vibrant colors and textures you’ve meticulously prepared.

Japanese Kani Side Salad Variations

Feel free to explore these delightful twists that add a personal touch to your Japanese Kani Side Salad!

  • Protein Boost: Substitute flaked imitation crab with shrimp for a fresh seafood twist. Shrimp adds a succulent flavor that compliments the salad beautifully.

  • Creamy Avocado: Add diced avocado for a rich and creamy texture. The creaminess of avocado amplifies the salad’s appeal, making every bite even more indulgent.

  • Crispy Additions: Toss in some crunchy chow mein noodles for texture. Just before serving, sprinkle them on top to maintain their crunch and add an exciting contrast.

  • Herb Variations: Swap fresh parsley for cilantro or chives to give a different aromatic profile. Each herb brings its own unique flavor, enhancing the salad in fresh ways.

  • Spicy Kick: Mix in a touch of sriracha with the dressing for some heat. This spicy twist adds a layer of complexity that could make it your new favorite.

  • Tangy Vinaigrette: Experiment with a rice vinegar and sesame oil dressing instead of mayonnaise for a lighter option. This change creates a refreshing zing that pairs delightfully with the salad’s ingredients.

  • Vegetable Medley: Include diced bell peppers or cucumbers for extra crunch and vivid color. Their crispness provides a refreshing pop, enhancing the overall experience.

Feel free to take inspiration from these variations for your delicious Japanese Kani Side Salad! If you enjoy this salad, why not try my Tuna Macaroni Salad or a refreshing Strawberry Spinach Salad next?

What to Serve with Japanese Kani Side Salad

A colorful Japanese Kani Side Salad deserves delightful companions to create a full meal experience.

  • Sushi Rolls: The fresh flavors of sushi harmonize beautifully with the creamy notes of the salad, creating a perfect pairing.
  • Grilled Chicken: Juicy, tender chicken adds a hearty element that balances the salad’s lightness and refreshing crunch.
  • Tempura Vegetables: Their crispy, warm texture contrasts wonderfully with the cool salad, offering a lovely variety of flavors and sensations.
  • Rice Paper Rolls: Light and fresh, these rolls filled with greens and shrimp echo the salad’s theme of light, vibrant bites.
  • Miso Soup: This warm, umami-rich broth complements the salad’s flavors perfectly, making for a comforting dining experience.
  • Chilled Sake: A glass of smooth, chilled sake enhances the meal, bringing an authentic Japanese touch to your dining table.
  • Fruit Sorbet: For dessert, a light and fruity sorbet cleanses the palate and provides a refreshing end to the meal.

These pairings create a delectable dining adventure, making every meal memorable and uplifting!

Expert Tips for Japanese Kani Side Salad

  • Select Quality Imitation Crab: Choose flaked imitation crab for a better taste; it has a softer texture that mixes well with the salad.
  • Fresh Ingredients Matter: Always opt for fresh carrots and cabbage to enhance the salad’s crunch and overall flavor; avoid pre-packaged options if possible.
  • Chill Properly: Don’t rush the chilling step; allowing the Japanese Kani Side Salad to rest for at least two hours will significantly improve flavor melding.
  • Mix Thoroughly: When combining the dressing and salad, use tongs to ensure an even coating; this helps prevent dry bites.
  • Adjust to Taste: Feel free to tweak seasonings like salt and pepper; it’s all about balancing the flavors to suit your palate.
  • Storage Precautions: Cover the salad tightly in the fridge to maintain freshness; it’s best enjoyed within three days.

Make Ahead Options

These Japanese Kani Side Salad preparations are perfect for busy cooks looking to save time during the week! You can prep all the salad ingredients—imitation crab, carrots, cabbage, and corn—up to 24 hours in advance. Simply combine them in a bowl, cover tightly, and refrigerate to maintain freshness. The creamy dressing can also be made ahead and stored separately for up to 3 days. On the day you plan to serve, just combine the salad and dressing, give it a final toss, and enjoy a delightful meal that’s just as delicious as when freshly made. This strategy not only saves time but also enhances the salad’s flavors!

How to Store and Freeze Japanese Kani Side Salad

Fridge: Keep your Japanese Kani Side Salad covered in an airtight container for up to 3 days. This helps maintain its freshness and flavor as well as the crispness of veggies.

Freezer: It’s not recommended to freeze this salad as the texture of the ingredients, especially the cabbage and creamy dressing, may become mushy upon thawing.

Reheating: This salad is best enjoyed chilled and doesn’t require reheating. Simply give it a gentle toss before serving to redistribute the dressing.

Leftovers: Enjoy any leftovers within 3 days for optimal taste and quality, keeping in mind to seal the container well to prevent drying out.

Japanese Kani Side Salad Recipe FAQs

How do I choose the right imitation crab meat?
Absolutely! When selecting imitation crab, look for flaked options as they provide the best taste and texture. Check the packaging for freshness and always avoid anything that looks overly processed or has dark spots. Freshness really matters for the overall flavor of your Japanese Kani Side Salad!

What is the best way to store leftover Kani salad?
You’ll want to store your Japanese Kani Side Salad in an airtight container in the fridge. It can stay fresh for up to 3 days. Make sure it’s well-covered to maintain its crispness and flavors. If you notice any moisture, consider layering a paper towel on top before sealing to absorb excess liquid.

Can I freeze Japanese Kani Side Salad?
I don’t recommend freezing this salad. The creamy dressing and crunchy vegetables like cabbage don’t hold up well in the freezer; they tend to become mushy once thawed. It’s best enjoyed fresh, so make only what you can eat within a few days!

Why did my Kani salad turn out soggy?
Very! If your salad is soggy, it could be due to excess moisture in the canned corn or not draining the ingredients well enough. Make sure to thoroughly drain your canned corn and use fresh veggies. When mixing the salad, try to avoid over-mixing, which can break down the ingredients and release extra moisture.

Is this salad safe for someone with seafood allergies?
Definitely! While imitation crab is made from fish, it contains less seafood than traditional crab, but it still may trigger allergies. If you’re making the Japanese Kani Side Salad for someone with seafood allergies, consider substituting the imitation crab with grilled chicken or a plant-based protein to keep it safe and just as delightful!

How long should I chill the salad before serving?
For the best flavor, chill your Japanese Kani Side Salad for at least 2 hours. This allows all the flavors to meld beautifully, resulting in a much tastier dish. If time permits, letting it sit longer, like overnight, can enhance the taste even more!

Japanese Kani Side Salad

Deliciously Easy Japanese Kani Side Salad for Fresh Flavor

Enjoy a refreshing Japanese Kani Side Salad with vibrant flavors and textures that elevate any meal.
Prep Time 15 minutes
Chilling Time 2 hours
Total Time 2 hours 15 minutes
Servings: 4 servings
Course: Salad
Cuisine: Japanese
Calories: 180

Ingredients
  

For the Salad
  • 8 ounces Imitation Crab Meat Flaked for best taste
  • 2 medium Carrots Fresh and julienned
  • 4 cups Cabbage Shredded
  • 1 cup Canned Corn Ensure well-drained
  • 1/4 cup Fresh Parsley Chopped
For the Dressing
  • 1 cup Mayonnaise Full-fat or lighter options
  • 2 tablespoons Fresh Lemon Juice For acidity
  • 1 teaspoon Garlic Powder Or use fresh garlic
  • 1 teaspoon Onion Powder Optional
  • 1/2 teaspoon Ground Black Pepper To taste
  • 1/2 teaspoon Salt Use sparingly
  • 1 tablespoon Toasted Sesame Seeds For added crunch

Equipment

  • Mixing Bowl
  • Spatula
  • Whisk
  • Tongs

Method
 

Preparation Steps
  1. In a large mixing bowl, add flaked imitation crab meat, julienned carrots, shredded cabbage, and well-drained canned corn. Mix gently until evenly distributed.
  2. In a separate bowl, whisk together mayonnaise, fresh lemon juice, garlic powder, onion powder, black pepper, and salt until smooth.
  3. Pour the creamy dressing over the mixed salad ingredients and toss using tongs until evenly coated.
  4. Cover the salad with plastic wrap and refrigerate for at least two hours to allow flavors to meld.
  5. Before serving, give the salad a final toss to redistribute the dressing.

Nutrition

Serving: 1servingCalories: 180kcalCarbohydrates: 14gProtein: 5gFat: 12gSaturated Fat: 2gPolyunsaturated Fat: 1gMonounsaturated Fat: 8gCholesterol: 15mgSodium: 300mgPotassium: 200mgFiber: 2gSugar: 3gVitamin A: 500IUVitamin C: 10mgCalcium: 40mgIron: 1mg

Notes

For best results, use fresh ingredients and allow the salad to chill for flavor development.

Tried this recipe?

Let us know how it was!

Melt-in-Your-Mouth Cake: A Dreamy Delight for Every Occasion

Can you feel the magic of a family gathering in the air? That’s exactly what the Melt-in-Your-Mouth Cake brings to the table—a soft, buttery delight that’s both comforting and indulgent. Known as the Wonderful Polish Cake, this recipe is a perfect embrace of nostalgia and flavor, making it just right for any occasion. Not only is it incredibly easy to whip up, but it’s also budget-friendly, making it a go-to choice for festive celebrations or casual get-togethers. Imagine layers of tender dough complemented by a rich, creamy filling that will have your guests asking for seconds! Are you ready to dig into the secrets behind this delightful cake?

Why is Melt-in-Your-Mouth Cake irresistible?

Irresistible, comforting layers: Each bite of this cake showcases soft, buttery layers, creating a dreamy, melt-in-your-mouth experience.

Budget-friendly delight: Packed with simple ingredients, it won’t break the bank, making it an accessible treat for everyone.

Versatile flavor options: Customize your creamy filling with fruit purees or flavored extracts to match any taste or occasion.

Perfect for gatherings: This cake’s crowd-pleasing nature makes it a must-have at holidays, parties, or even casual afternoons—just like my Pistachio Carrot Cake.

Easy to make: With straightforward steps, you’ll be enjoying this delightful treat without fuss. Your friends and family will adore it as much as they do my Cookies Cream Cheesecake!

Melt-in-Your-Mouth Cake Ingredients

For the Cake
Butter – Provides richness and moisture; substitute with margarine for a dairy-free version.
Milk – Adds creaminess to the dough and filling; use almond milk or any non-dairy milk as a substitute.
Water – Helps to hydrate the dough; can be replaced with more milk for added flavor.
Salt – Balances sweetness; no common substitutions.
Flour – Main structure; all-purpose flour is standard but can use gluten-free flour for a gluten-free variation.
Baking Powder – Provides leavening; ensure it’s fresh for best results.
Eggs – Adds structure and richness to both the dough and cream filling; for a vegan option, use flax eggs.
Sugar – Sweetens the cream filling; alternative sweeteners can be used for lower sugar intake.

For the Cream Filling
Cream – Adds richness to the filling; heavy cream preferred, but dairy-free cream can also work.

Optional Toppings
Icing Sugar – For dusting; adds sweetness and enhances presentation.
Fresh Fruit or Chocolate Shavings – Great for garnishing; can elevate visual appeal and flavor.

This Melt-in-Your-Mouth Cake is bound to become a cherished favorite, delighting friends and family alike!

Step‑by‑Step Instructions for Melt-in-Your-Mouth Cake

Step 1: Prepare Dough
Begin by melting 80 grams of butter in a medium saucepan over low heat. Once melted, whisk in 100 ml of milk, 100 ml of water, and ½ teaspoon of salt until well combined. Heat this mixture gently until it begins to simmer, which will help in hydrating the dough and create a smooth texture.

Step 2: Mix Dry Ingredients
In a separate large mixing bowl, sift together 500 grams of flour and 1 teaspoon of baking powder. This step ensures an even distribution of the baking powder and eliminates lumps, setting the foundation for the fluffy layers of your Melt-in-Your-Mouth Cake.

Step 3: Combine Mixtures
Once your liquid mixture is simmering, carefully pour the dry ingredients into the saucepan. Stir vigorously until the mixture forms a smooth dough. After mixing, remove from heat and allow it to cool slightly for about 5 minutes before adding eggs one at a time, ensuring each egg is fully incorporated before proceeding.

Step 4: Bake Layers
Preheat your oven to 400°F (200°C). Divide the dough into two equal portions and spread each one evenly into greased baking pans. Bake each layer in the preheated oven for about 20 minutes, or until they are lightly golden on top. Once baked, let the layers cool completely on a wire rack.

Step 5: Make Cream Filling
In a mixing bowl, beat together 4 eggs and 150 grams of sugar until frothy. Gradually add the remaining 100 ml of milk and a couple of tablespoons of flour, stirring well to avoid lumps. Pour this mixture into a saucepan and cook over medium heat, stirring constantly until it thickens, which should take about 5-7 minutes. Allow to cool before blending with 100 grams of whipped cream.

Step 6: Assemble Cake
Once both the cake layers and cream filling have cooled, it’s time to assemble your Melt-in-Your-Mouth Cake. On a serving plate, place one layer of cake, generously spread half of the cream filling on top, and then add the second layer of cake. Spread the remaining cream filling over the top layer for a luscious finish.

Step 7: Garnish & Serve
Refrigerate the assembled cake for at least two hours to allow the flavors to meld and the filling to set. Just before serving, dust the top with icing sugar or garnish with fresh fruits or chocolate shavings for an elegant touch. Slice into generous pieces and enjoy the delightful layers of this Melt-in-Your-Mouth Cake!

What to Serve with Melt-in-Your-Mouth Cake

This delightful cake is perfect for pairing, elevating your dining experience to new heights.

  • Whipped Cream: A dollop of freshly whipped cream adds a light and airy touch, complementing the cake’s rich cream filling.
  • Fresh Berries: Raspberries or strawberries provide a refreshing burst of flavor, enhancing the sweetness and offering a lovely contrast.
  • Vanilla Ice Cream: The creamy, cool taste of vanilla ice cream balances the warm, soft layers of the cake, making every bite heavenly.
  • Cheesy Ricotta Crostini: Lightly toasted crostini topped with creamy ricotta offer a satisfying crunch that beautifully contrasts the tender cake.
  • Herbal Tea: A warm cup of chamomile or mint tea gently complements the dessert, enhancing relaxation and comfort during dessert time.
  • Chocolate Shavings: Sprinkle dark chocolate shavings on top for a sophisticated touch that adds a bitter contrast to the sweet layers, delighting the palate.
  • Citrus Salad: A citrus salad brightens the meal with tangy flavors, providing a refreshing palate cleanser between bites of the cake.
  • Sparkling Cider: For a festive touch, serve with sparkling cider; its bubbles and sweetness create a delightful celebration for any gathering.

Melt-in-Your-Mouth Cake Customizations

Feel free to unleash your creativity and make this cake your own with these delightful variations!

  • Dairy-Free: Substitute butter with margarine and use your favorite non-dairy milk for a delicious treat that everyone can enjoy.

  • Gluten-Free: Swap out regular flour with a 1:1 gluten-free baking blend, so everyone can indulge in this cake without worry.

  • Fruity Twist: Add a splash of pureed berries or a hint of lemon zest to the cream filling for a refreshing pop of flavor. Think about how vibrant strawberries or zesty lemons can brighten your cake!

  • Nutty Delight: Stir in finely chopped nuts like almonds or hazelnuts to the dough for added texture and flavor; they add a delightful crunch that pairs beautifully with the creamy filling.

  • Spicy Kick: Enhance the spice with a dash of cinnamon or nutmeg in the cream filling or cake layers for a warm, inviting depth that makes each bite a comforting experience.

  • Decadent Chocolate: Fold cocoa powder into the cream mixture for a luscious, chocolaty filling or drizzle melted chocolate on top for a luxurious finish. Imagine the rich flavor embracing your taste buds!

  • Frosted Finish: Top the cake with a light layer of whipped cream or a chocolate ganache for an impressive presentation that will have guests swooning.

  • Layered Flavors: Create a stunning visual by layering with colorful fruit slices or even crumbled cookies between the cake layers, much like my Strawberry Cheesecake Bars.

With these delightful variations, your Melt-in-Your-Mouth Cake can transform into an extraordinary centerpiece for any occasion!

Storage Tips for Melt-in-Your-Mouth Cake

Fridge: Store in an airtight container for up to 3 days. This helps maintain the creamy filling and moist layers of your Melt-in-Your-Mouth Cake.

Freezer: If needed, freeze slices wrapped tightly in plastic wrap for up to 2 months. Thaw in the refrigerator overnight before serving.

Reheating: For best texture, serve chilled or at room temperature. Avoid microwaving as it may affect the creamy filling quality.

Covering: Always cover the cake with plastic wrap or foil to prevent it from drying out, ensuring every bite remains deliciously soft.

Expert Tips for Melt-in-Your-Mouth Cake

Cool the Mixture: Allow the cream mixture to cool before adding it to butter to avoid melting; this ensures a rich filling.

Prevent Lumps: Stir constantly while heating the filling to prevent lumps from forming and achieve a silky-smooth texture.

Chill for Flavor: Let the assembled cake chill for at least two hours, as this enhances the flavor and allows the layers to meld beautifully.

Fresh Baking Powder: Always use fresh baking powder; old leavening agents can result in a dense cake rather than the light, airy texture you desire.

Perfect Portions: When baking layers, make sure to spread the dough evenly; uneven layers can lead to a cake that doesn’t stack well.

Experimenting with Flavors: Feel free to swap in different flavored extracts or fruit purees for the cream filling, adding a personal touch to your Melt-in-Your-Mouth Cake.

Make Ahead Options

These Melt-in-Your-Mouth Cake layers are perfect for meal prep enthusiasts! You can prepare the dough up to 24 hours in advance by melting the butter and combining it with milk, water, and salt. Store the mixture in the refrigerator, ensuring it is tightly covered to maintain moisture. Additionally, the cream filling can be made up to 3 days ahead; just refrigerate it in an airtight container. When you’re ready to assemble, simply bake the dough layers and let them cool completely before spreading the cream filling and refrigerating the assembled cake for at least two hours before serving. This approach not only saves you time but also means your Melt-in-Your-Mouth Cake will be just as delicious and delightful when it’s finally time to savor!

Melt-in-Your-Mouth Cake Recipe FAQs

How do I choose ripe ingredients for my Melt-in-Your-Mouth Cake?
Absolutely! For the best flavor, ensure your butter is at room temperature before melting—it should be soft but not greasy. If using fruit as a garnish, go for ripe berries or citrus that are vibrant and smell fragrant, indicating freshness!

What are the best storage methods for the cake, and how long does it last?
This cake can be stored in an airtight container in the refrigerator for up to 3 days. This keeps the creamy filling fresh and moist. Just make sure to cover it well, as exposure to air can dry it out. If you plan to keep it longer, it’s best to freeze individual slices.

Can I freeze my Melt-in-Your-Mouth Cake? If so, how?
Absolutely! To freeze your cake, wrap slices tightly in plastic wrap and then place them in a resealable freezer bag. Label them with the date, and they can stay fresh for up to 2 months. When you’re ready to enjoy, simply thaw them overnight in the refrigerator.

What should I do if the cream filling gets lumpy?
Very frustrating! If you find lumps in your cream filling, don’t worry! Simply transfer it back to the saucepan, add a splash of milk, and whisk over medium heat until it becomes smooth. Continuous stirring is key; this helps break down lumps and achieve that silky texture you’re aiming for.

Are there any dietary considerations to keep in mind while making this cake?
Yes! If you’re baking for someone with dietary restrictions, you can easily adapt this recipe. Substitute eggs with flax eggs (1 tablespoon of ground flaxseed mixed with 2.5 tablespoons of water for each egg), and feel free to use non-dairy alternatives for milk and cream. Always check ingredient labels to avoid any allergens in pre-packaged items.

Can I use different flavors in my Melt-in-Your-Mouth Cake?
Very! You can customize the cream filling by incorporating flavored extracts like vanilla or almond, or using fruit purees such as raspberry or lemon. This gives the cake a delightful twist while keeping the original soft and creamy essence intact!

Melt-in-Your-Mouth Cake

Melt-in-Your-Mouth Cake: A Dreamy Delight for Every Occasion

Melt-in-Your-Mouth Cake is a dreamy, soft dessert that will enchant your guests with its comforting layers and creamy filling.
Prep Time 30 minutes
Cook Time 20 minutes
Chilling Time 2 hours
Total Time 2 hours 50 minutes
Servings: 8 slices
Course: Dessert
Cuisine: Polish
Calories: 350

Ingredients
  

For the Cake
  • 80 grams Butter Can substitute with margarine for a dairy-free version.
  • 100 ml Milk Almond milk or any non-dairy milk can be used.
  • 100 ml Water Can be replaced with more milk for added flavor.
  • 0.5 teaspoon Salt Balances sweetness.
  • 500 grams Flour All-purpose flour or gluten-free flour can be used.
  • 1 teaspoon Baking Powder Ensure it's fresh for best results.
  • 4 units Eggs Use flax eggs for a vegan option.
  • 150 grams Sugar Alternative sweeteners can be used.
For the Cream Filling
  • 100 grams Cream Heavy cream preferred, but dairy-free cream can work.
Optional Toppings
  • Icing Sugar For dusting; adds sweetness.
  • Fresh Fruit or Chocolate Shavings Great for garnishing.

Equipment

  • Medium saucepan
  • large mixing bowl
  • baking pans
  • Mixing Bowl
  • Whisk
  • Wire Rack

Method
 

Step-by-Step Instructions for Melt-in-Your-Mouth Cake
  1. Begin by melting 80 grams of butter in a medium saucepan over low heat. Whisk in 100 ml of milk, 100 ml of water, and ½ teaspoon of salt until well combined.
  2. In a separate large mixing bowl, sift together 500 grams of flour and 1 teaspoon of baking powder.
  3. Pour the dry ingredients into the saucepan and stir vigorously until a smooth dough forms. Allow to cool slightly for about 5 minutes before adding eggs one at a time.
  4. Preheat your oven to 400°F (200°C). Divide the dough into two portions and spread evenly into greased baking pans. Bake for about 20 minutes until lightly golden.
  5. In a mixing bowl, beat together 4 eggs and 150 grams of sugar until frothy. Gradually add 100 ml of milk and a couple of tablespoons of flour, stirring to avoid lumps. Cook over medium heat until thickened.
  6. Once both layers and cream filling have cooled, assemble the cake by placing one layer on a plate, spreading half of the cream filling, adding the second layer, and topping with the remaining filling.
  7. Refrigerate for at least two hours. Before serving, dust with icing sugar or garnish with fruits or chocolate shavings.

Nutrition

Serving: 1sliceCalories: 350kcalCarbohydrates: 45gProtein: 6gFat: 17gSaturated Fat: 10gPolyunsaturated Fat: 0.5gMonounsaturated Fat: 6gCholesterol: 150mgSodium: 200mgPotassium: 150mgFiber: 1gSugar: 20gVitamin A: 500IUCalcium: 100mgIron: 1mg

Notes

Allow the cream mixture to cool before adding to butter for a rich filling. Stir constantly while heating the filling to prevent lumps. Chill the assembled cake to enhance flavors.

Tried this recipe?

Let us know how it was!

Quick Ginger Bread Yule Log Cake that’s Festively Irresistible

As I pulled my gingerbread Yule log from the oven, the inviting aroma of warm spices filled my kitchen, transporting me straight to a festive wonderland. This Quick Gingerbread Yule Log Cake is a delightful project that radiates holiday cheer and offers a wonderful way to impress family and friends without spending hours in the kitchen. The joy of creating this treat lies in its comforting blend of flavors and textures, from the tender gingerbread to the creamy mascarpone filling, making it a true showstopper for any gathering. Plus, it’s versatile enough to cater to various dietary preferences with simple vegan substitutions. Are you ready to whip up a festive masterpiece that’ll steal the spotlight? Let’s dive into the recipe!

Why Is This Yule Log So Special?

Festively Irresistible: This Quick Gingerbread Yule Log Cake is the star of the holiday dessert table, bringing together warmth and cheer in every bite.
Quick to Make: With a simple preparation process, you can impress guests without spending all day in the kitchen—a perfect alternative to fast food!
Endless Customization: With options for vegan substitutions like coconut yogurt, you can cater to different dietary needs easily.
Beautiful Presentation: Each slice showcases stunning swirls and colors, making it not just delicious but also a true showstopper at any gathering.
Versatile Flavors: Spice it up by swapping traditional spices for cardamom or adding cocoa for a unique twist—there’s always a new way to enjoy it!

For an exciting change of pace, check out this delicious Italian Chopped Salad that pairs wonderfully with holiday meals.

Quick Gingerbread Yule Log Ingredients

For the Cake

  • Eggs – Provides structure and moisture. Substitution: For egg replacement, use 1 tablespoon of ground flaxseed mixed with 3 tablespoons of water (equivalent to 1 egg).
  • Brown Sugar – Adds sweetness and depth of flavor. No alternative needed.
  • Granulated Sugar – Contributes sweetness and helps with texture. No alternative needed.
  • Vanilla Extract – Enhances flavor and aroma. No alternative needed.
  • All-Purpose Flour – Forms the cake structure. For a gluten-free version, use a 1:1 gluten-free flour blend.
  • Baking Powder – Provides leavening for the cake. No alternative needed.
  • Ground Ginger, Cinnamon, Nutmeg – Adds spice flavors that define gingerbread. No alternative needed.
  • Salt – Balances sweetness and enhances flavors. No alternative needed.
  • Plain Yogurt – Adds moisture and tang. Substitution: Use coconut yogurt or applesauce (reduce sugar slightly if using applesauce).
  • Molasses – Provides deep flavor and color to the cake. No alternative needed.

For the Filling

  • Mascarpone Cheese – Creamy filling component. Substitution: Use whipped coconut cream for a dairy-free option.

For Decoration

  • Sugar (for sugared cranberries) – Sweetens and coats cranberries for decoration. No alternative needed.
  • Fresh Cranberries – Tart decoration. No alternative needed.
  • Fresh Rosemary – Optional garnish for aroma and visual appeal. No alternative needed.

Step‑by‑Step Instructions for Quick Ginger Bread Yule Log Cake

Step 1: Preheat and Prepare the Pan
Begin by preheating your oven to 350°F (175°C). While that warms up, take a 10×15 jelly roll pan and line it with parchment paper, ensuring it covers the bottom and sides. This will help the gingerbread yule log easily release after baking, making it perfect for rolling later on.

Step 2: Whip the Egg Whites
In a stand mixer, place your egg whites and whip them on high speed until stiff peaks form, which should take about 3–5 minutes. Once ready, set the whipped egg whites aside gently to preserve their volume, as you’ll be folding them into the batter for the Quick Ginger Bread Yule Log Cake later.

Step 3: Cream the Egg Yolks and Sugars
In the same mixer, mix the egg yolks with brown sugar, granulated sugar, and vanilla extract. Beat this mixture on medium speed until it becomes light and creamy, which should take about 2–3 minutes. The contrast between the creamy yolks and the airy egg whites will create a beautiful texture in your yule log.

Step 4: Mix Dry Ingredients with Wet Ingredients
In a separate bowl, combine the all-purpose flour, baking powder, ground ginger, cinnamon, nutmeg, and salt. Gradually add this dry mixture to the wet batter while incorporating yogurt and molasses, mixing until smooth and well-combined. This creates a fragrant batter that will be the base of your Quick Ginger Bread Yule Log Cake.

Step 5: Fold in the Egg Whites
Gently fold the whipped egg whites into the gingerbread batter using a spatula. Be careful to maintain airiness in the mixture—this will ensure your cake is light and fluffy. The batter should look smooth and well-blended but not over-mixed, preserving that airy texture crucial for a successful roll.

Step 6: Bake the Cake
Spread the prepared batter evenly into your lined jelly roll pan. Bake in the preheated oven for about 10 minutes, or until the cake springs back when lightly touched. It’s vital to watch closely; overbaking can lead to dryness, which you want to avoid in your gingerbread yule log.

Step 7: Roll the Cake
Once baked, sprinkle a clean kitchen towel with powdered sugar and carefully turn the hot cake onto it. Remove the parchment paper and gently roll the cake using the towel itself, starting from one short end. Let it cool rolled up for about 1–2 hours—this helps set its shape for the Quick Ginger Bread Yule Log Cake.

Step 8: Prepare Sugared Cranberries
While the cake cools, make the sugared cranberries by first dunking fresh cranberries in simple syrup, then rolling them in sugar. Allow them to dry on a wire rack for at least 30 minutes. These tart decorations will add a festive touch to your gingerbread yule log.

Step 9: Fill and Roll Back the Cake
Unroll the cooled cake carefully and spread the mascarpone filling evenly across the surface. Then, roll the cake back up without the towel, creating a tight log shape. Use a gentle hand to avoid cracking, ensuring a beautiful presentation for your Quick Ginger Bread Yule Log Cake.

Step 10: Chill the Cake
Wrap the rolled cake in plastic wrap and refrigerate for 30 minutes to 1 hour to allow the flavors to meld and the filling to set. This step not only enhances taste but also helps your creation hold its shape beautifully when it comes time to slice.

Step 11: Make the Meringue Frosting
To prepare the meringue frosting, whisk egg whites and sugar in a heatproof bowl over a double boiler until warm, stirring constantly, about 4 minutes. Remove from heat and whip until stiff peaks form. This fluffy frosting will cloak your Yule log cake in a light layer of sweetness.

Step 12: Decorate and Serve
Cover the chilled cake with meringue frosting, letting it look whimsical and airy. Garnish with sugared cranberries and fresh rosemary for an enchanting touch. Optionally, lightly torch the edges of the meringue for a charming finish. Slice and enjoy this stunning Quick Ginger Bread Yule Log Cake, ideal for holiday celebrations!

How to Store and Freeze Quick Ginger Bread Yule Log Cake

Fridge: Keep any leftover slices wrapped in plastic wrap or an airtight container for up to 1-2 days to maintain freshness.

Freezer: For longer storage, freeze slices in a single layer on a baking sheet, then transfer to an airtight container or freezer bag for up to 1 month.

Reheating: When ready to enjoy, thaw in the refrigerator overnight, then let it come to room temperature before serving to allow the flavors to come alive in this Quick Ginger Bread Yule Log Cake.

Creamy Filling: If you have any leftover mascarpone filling, store it separately in the fridge for up to 3 days, but use it soon for the best taste!

Tips for the Best Quick Ginger Bread Yule Log Cake

Preheat Properly: Ensure your oven is fully preheated for even baking. A cold oven can lead to uneven results.

Gentle Folding: When combining the whipped egg whites into the batter, fold gently to maintain the airy texture vital for the Quick Ginger Bread Yule Log Cake.

Powdered Sugar Towel: Use a generously powdered kitchen towel to prevent sticking when rolling the cake. This small step makes a big difference!

Check for Doneness: Avoid overbaking by checking the cake around the 10-minute mark. It should spring back when touched, ensuring a soft texture.

Smooth Filling: Spread mascarpone filling evenly across the cooled cake. This helps create beautiful swirls when rolled, enhancing the visual appeal.

Chill Before Serving: Let the rolled cake chill in the refrigerator for at least 30 minutes. This helps the flavors meld and keeps the cake firm for serving.

Quick Ginger Bread Yule Log Cake Variations

Feel free to get creative with this recipe and personalize it to your taste buds. These suggestions add delightful twists that will keep everyone coming back for more!

  • Gluten-Free: Substitute all-purpose flour with a 1:1 gluten-free flour blend for a cake everyone can enjoy.
  • Vegan: Replace eggs with 1 tablespoon of ground flaxseed mixed with 3 tablespoons of water and use coconut yogurt instead of regular yogurt.
  • Spiced Up: Swap in cardamom or allspice instead of traditional ginger for a new spin on flavors.
  • Chocolate Twist: Incorporate cocoa powder into the batter for a rich, chocolatey gingerbread delight.
  • Fruity Flavor: Use applesauce for yogurt in the batter to enhance moisture and add a natural sweetness.
  • Nutty Crunch: Fold in chopped walnuts or pecans for an extra layer of texture and a satisfying crunch.
  • Decorative Touch: Top with candied ginger or crushed peppermint for a festive and eye-catching garnish.
  • Citrus Zing: Add a touch of orange zest to the batter for a refreshing citrus contrast to the spiced cake.

For a fresh salad to pair with your festive meal, try the Italian Chopped Salad—it’s the perfect light counterpoint to this cake!

What to Serve with Quick Ginger Bread Yule Log Cake

The holiday spirit is in the air, and nothing elevates this festive Yule log more than perfect accompaniments that enhance its delightful flavors.

  • Spiced Apple Cider: This warm, aromatic drink complements the ginger notes in the cake beautifully, wrapping you in holiday warmth with each sip.

  • Creamy Mashed Potatoes: Their buttery texture contrasts nicely with the light meringue, making for a comforting meal experience—a lovely pairing for any festive gathering.

  • Sugared Cranberries: Not only a beautiful garnish for your Yule log, but they also provide a tart balance that cuts through the sweetness, enhancing your dessert’s flavor palette.

  • Chocolate Ganache: Drizzling this rich, velvety sauce over the cake adds a decadent touch that pairs remarkably well with the spiced gingerbread.

  • Roasted Brussels Sprouts: The slight bitterness of these greens contrasts with the sweetness of the cake and brings a savory element to the festive table.

  • Pumpkin Spice Latte: Offering warm notes of cinnamon and nutmeg, this seasonal favorite makes a fantastic cozy drink to enjoy alongside every festive bite.

Capture the essence of the season by enjoying these delightful pairings with your Quick Ginger Bread Yule Log Cake!

Make Ahead Options

This Quick Ginger Bread Yule Log Cake is a perfect candidate for meal prep, allowing busy cooks to savor the holidays without stress. You can bake the gingerbread cake up to 24 hours in advance; simply cool it as instructed and then wrap it tightly in plastic wrap to prevent drying out. The mascarpone filling can also be prepared 2-3 days ahead, just store it in an airtight container in the refrigerator to ensure it stays fresh and creamy. When you’re ready to assemble, simply unroll the cooled cake, spread the already-prepped filling, and roll it back up. After chilling for an hour, finish by covering it with meringue frosting for that impressive presentation, making your Quick Ginger Bread Yule Log Cake just as delightful as if made on the spot!

Quick Ginger Bread Yule Log Cake Recipe FAQs

How do I choose ripe ingredients for making the Quick Ginger Bread Yule Log Cake?
Absolutely! For the best flavor, select eggs that are large and fresh, preferably organic. Look for brown sugar that feels moist and has a rich molasses smell, which indicates freshness. Choose granulated sugar that is fine and free from lumps. When it comes to yogurt, ensure it’s creamy and smooth—plain or coconut yogurt works well. Fresh cranberries should be bright and firm, without any dark spots or blemishes, while molasses should be thick and dark, signifying quality.

What is the best way to store the Quick Ginger Bread Yule Log Cake?
I recommend wrapping leftover slices in plastic wrap or placing them in an airtight container to keep them fresh for up to 1-2 days in the refrigerator. Make sure to store the cake in the fridge if it’s filled with mascarpone to maintain its creamy texture. If you anticipate keeping it longer, freezing is an excellent option!

Can I freeze the Quick Ginger Bread Yule Log Cake?
Yes, you can! To freeze, slice the cake and place the slices in a single layer on a baking sheet. Freeze them for about 2 hours until solid. Then, transfer the slices to an airtight container or freezer bag, ensuring they are well-sealed. This way, they can be stored for up to 1 month. When you’re ready to enjoy, simply thaw in the refrigerator overnight, allowing those lovely festive flavors to come back to life.

What should I do if my Quick Ginger Bread Yule Log Cake cracks when rolling?
Very! If cracks appear while rolling, don’t worry too much—they can be easily disguised! You can gently seal the cracks with the meringue frosting once the cake is fully assembled. To avoid cracking in the first place, ensure that the cake is cooled properly for 1-2 hours and remember to roll it gently using a powdered sugar-dusted towel to prevent sticking.

Are there any dietary considerations for the Quick Ginger Bread Yule Log Cake?
Definitely! If you’re catering to specific dietary needs, substitutes like coconut yogurt or applesauce can easily replace dairy yogurt. To make it vegan, simply use the egg replacement with ground flaxseed and ensure that the sugar used is unrefined if needed. The mascarpone can be swapped with whipped coconut cream for a delightful, dairy-free option. Always check ingredients to avoid allergens like nuts or gluten if you’re hosting guests with dietary restrictions.

How should I prepare the Quick Ginger Bread Yule Log Cake for guests?
For an impressive presentation, chill the assembled cake for 30 minutes to 1 hour before serving. This allows the filling to set and keeps the cake’s shape intact. When ready to serve, decorate with your sugared cranberries and fresh rosemary for that festive flair! Serve slices on an elegant platter, and don’t forget to enjoy all the compliments that come your way for this beautiful dessert!

Quick Ginger Bread Yule Log Cake

Quick Ginger Bread Yule Log Cake that's Festively Irresistible

This Quick Ginger Bread Yule Log Cake is a must-try holiday dessert that impresses with its delightful flavors and presentation.
Prep Time 30 minutes
Cook Time 10 minutes
Cooling Time 2 hours
Total Time 2 hours 40 minutes
Servings: 10 slices
Course: Dessert
Cuisine: Holiday
Calories: 300

Ingredients
  

For the Cake
  • 3 large Eggs For egg replacement, use 1 tablespoon of ground flaxseed mixed with 3 tablespoons of water.
  • 1 cup Brown Sugar
  • 1 cup Granulated Sugar
  • 1 teaspoon Vanilla Extract
  • 1 cup All-Purpose Flour For gluten-free version, use a 1:1 gluten-free flour blend.
  • 1 teaspoon Baking Powder
  • 1 teaspoon Ground Ginger
  • 1 teaspoon Ground Cinnamon
  • 1/2 teaspoon Ground Nutmeg
  • 1/2 teaspoon Salt
  • 1 cup Plain Yogurt Use coconut yogurt or applesauce (reduce sugar slightly if using applesauce).
  • 1/2 cup Molasses
For the Filling
  • 1 cup Mascarpone Cheese Use whipped coconut cream for a dairy-free option.
For Decoration
  • 1 cup Sugar (for sugared cranberries)
  • 1 cup Fresh Cranberries
  • 2 sprigs Fresh Rosemary Optional garnish.

Equipment

  • Stand Mixer
  • 10x15 Jelly Roll Pan
  • Parchment paper
  • Wire Rack
  • Plastic Wrap
  • Double boiler

Method
 

Preparation Steps
  1. Preheat your oven to 350°F (175°C) and line a 10x15 jelly roll pan with parchment paper.
  2. Whip egg whites on high speed until stiff peaks form, about 3–5 minutes. Set aside.
  3. Cream egg yolks with brown sugar, granulated sugar, and vanilla extract until light and creamy, about 2–3 minutes.
  4. Combine flour, baking powder, spices, and salt in a bowl, then gradually add to wet mixture with yogurt and molasses until smooth.
  5. Fold the whipped egg whites into the batter carefully to maintain airiness.
  6. Spread the batter evenly in the prepared pan and bake for about 10 minutes, until the cake springs back when lightly touched.
  7. Sprinkle a clean kitchen towel with powdered sugar and carefully turn the hot cake onto it. Roll the cake while it's hot and let it cool for 1–2 hours.
  8. Prepare sugared cranberries by dunking fresh cranberries in simple syrup and then rolling them in sugar; let dry on a wire rack.
  9. Unroll the cooled cake and spread the mascarpone filling evenly across the surface. Roll back into a log shape.
  10. Wrap the cake in plastic wrap and refrigerate for 30 minutes to 1 hour to allow flavors to meld.
  11. Make meringue frosting by whisking egg whites and sugar over a double boiler until warm, then whip until stiff peaks form.
  12. Cover the chilled cake with meringue frosting and garnish with sugared cranberries and fresh rosemary.

Nutrition

Serving: 1sliceCalories: 300kcalCarbohydrates: 45gProtein: 4gFat: 12gSaturated Fat: 7gPolyunsaturated Fat: 1gMonounsaturated Fat: 3gCholesterol: 85mgSodium: 150mgPotassium: 150mgFiber: 2gSugar: 25gVitamin A: 300IUVitamin C: 1mgCalcium: 50mgIron: 1mg

Notes

Ensure the oven is fully preheated for even baking and gently fold the whipped egg whites to maintain the airy texture.

Tried this recipe?

Let us know how it was!

Melt-in-Your-Mouth Cake: Indulge in Pure Dessert Bliss

As the aroma of baking wafts through my kitchen, I can’t help but feel that joyous anticipation that only a special dessert can bring. Today, I’m excited to share my take on the timeless Melt-in-Your-Mouth Cake, a delightful Polish treat that captures the essence of homemade goodness. Not only is this cake surprisingly easy to make, but it’s also incredibly budget-friendly, making it the perfect choice for both festive gatherings and cozy weeknight indulgences. The combination of soft, buttery layers and a rich, creamy filling creates a dessert experience that feels utterly luxurious without the fuss. So, grab your apron and let’s embark on this baking adventure—what flavor twist will you add to your cake?

Why is this cake a must-try?

Indulgence and Tradition: This Melt-in-Your-Mouth Cake is rooted in Polish heritage, delivering authentic flavors with every bite.
Effortless Baking: With simple ingredients and straightforward steps, even novice bakers can achieve stunning results.
Versatile Flavors: Feel free to experiment—add fruit purees or spices to customize your filling and make it uniquely yours.
Crowd-Pleasing Delight: Whether at holiday gatherings or casual get-togethers, this cake is sure to impress family and friends, much like my delicious Strawberry Cheesecake Bars or Pistachio Carrot Cake.
Easy Storage: Enjoy it fresh or store in the fridge for up to three days; it only gets better with time!
Get ready to share a slice of happiness!

Melt-in-Your-Mouth Cake Ingredients

For the Cake Layers
Butter (80 grams / ⅓ cup) – Provides richness and moisture; substitute with margarine for a dairy-free version.
Milk (100 ml) – Adds creaminess to the dough and filling; use almond milk or any non-dairy milk as a substitute.
Water (100 ml) – Helps hydrate the dough; you can replace it with more milk for added flavor.
Salt (½ teaspoon) – Balances sweetness; no common substitutions recommended.
Flour (500 grams / 4 cups) – The main structure of the cake; all-purpose flour is standard, but gluten-free flour can be used for a gluten-free option.
Baking Powder (1 teaspoon) – Provides leavening; ensure it’s fresh for best results.
Eggs (4) – Adds structure and richness; for a vegan option, use flax eggs.

For the Cream Filling
Sugar (150 grams / ¾ cup) – Sweetens the cream filling; alternative sweeteners can be used for lower sugar intake.
Cream (100 grams) – Adds richness to the filling; heavy cream is preferred, but dairy-free cream can work too.

Optional Toppings
Icing Sugar – Perfect for dusting on top for a beautiful presentation; fresh fruit or chocolate shavings can enhance the look and flavor.

Now that you have your ingredients ready, let’s get baking this scrumptious Melt-in-Your-Mouth Cake!

Step‑by‑Step Instructions for Melt-in-Your-Mouth Cake

Step 1: Prepare Dough
In a medium saucepan, melt 80 grams of butter over low heat. Once melted, mix in 100 ml of milk, 100 ml of water, and ½ teaspoon of salt. Bring the mixture to a gentle boil, allowing it to bubble slightly, ensuring it is well combined before moving on.

Step 2: Mix Dry Ingredients
In a separate bowl, whisk together 500 grams of all-purpose flour and 1 teaspoon of baking powder until evenly blended. This step is crucial as it ensures the dry ingredients are well incorporated, providing a light and airy texture to your Melt-in-Your-Mouth Cake.

Step 3: Combine Mixtures
Once your liquids are boiling, gradually add the flour and baking powder mixture, stirring continuously until it forms a smooth, thick batter. Remove the saucepan from heat and let the dough cool for a few minutes before adding the 4 eggs, one at a time, mixing thoroughly after each addition.

Step 4: Bake Layers
Preheat your oven to 400°F (200°C). Divide the dough into two equal portions and spread each portion evenly in a greased baking pan. Bake each layer for approximately 20 minutes, or until golden brown and a toothpick inserted in the center comes out clean. Allow the layers to cool completely.

Step 5: Make Cream Filling
In a mixing bowl, beat together the 4 eggs and 150 grams of sugar until the mixture is frothy and light. Gradually incorporate 50 grams of flour and 100 ml of milk, stirring well. Transfer this mixture to a saucepan over medium heat, cooking until it thickens—this should take about 5 minutes while stirring constantly to prevent lumps.

Step 6: Cool and Blend
Once your cream filling has thickened, remove it from the heat and allow it to cool to room temperature. In a separate bowl, whip 100 grams of cream until it forms soft peaks. Gently fold the cooled cream mixture into the whipped cream until fully combined, creating a luxurious filling for your Melt-in-Your-Mouth Cake.

Step 7: Assemble Cake
To assemble, take one cake layer and spread a generous layer of the cream filling evenly over the top. Place the second layer on top, pressing down gently to adhere. Cover the entire cake with any remaining cream filling, smoothing it out for a beautiful presentation.

Step 8: Chill to Set
Refrigerate the assembled Melt-in-Your-Mouth Cake for at least two hours, or longer if possible, to let the flavors meld and the consistency firm up. This chilling step is essential for achieving the perfect texture and marrying the rich cream filling with the tender cake layers.

Step 9: Garnish & Serve
Before serving, dust the cooled cake with icing sugar for a sweet touch or garnish with fresh fruit or chocolate shavings to elevate its presentation. Cut into slices and enjoy this delightful Melt-in-Your-Mouth Cake with family and friends, celebrating the deliciousness of homemade desserts!

What to Serve with Melt-in-Your-Mouth Cake

To create the perfect dessert experience, complement your cake with delightful pairings that enhance its flavors and textures.

  • Whipped Cream: A dollop of freshly whipped cream adds a light, airy contrast to the rich cake, enhancing its decadent nature.
  • Berries Medley: Fresh strawberries, blueberries, and raspberries bring a burst of tartness, cutting through the sweetness and adding vibrant color.
  • Vanilla Ice Cream: Creamy ice cream, paired with the warm cake, creates a luscious melting moment that’s truly indulgent.
  • Chocolate Sauce: A drizzle of warm chocolate sauce offers an extra layer of richness, harmonizing beautifully with the creamy filling.
  • Hazelnut Coffee: Pairing this cake with a cup of nutty hazelnut coffee creates a cozy atmosphere, pleasing both the palate and the soul.
  • Citrus Sorbet: For a refreshing twist, serve a scoop of tangy citrus sorbet to cleanse the palate and brighten the overall eating experience.
  • Almond Biscotti: Crunchy almond biscotti provides a delightful texture contrast, making for a sophisticated bite alongside the cake.
  • Mint Tea: A soothing cup of mint tea complements the cake’s richness, offering a refreshing herbal note that balances the indulgence.

Expert Tips for Melt-in-Your-Mouth Cake

Cool Cream Mixture: Allow the cream mixture to cool completely before adding it to the butter to prevent unwanted melting.

Stir Constantly: For a lump-free cream filling, keep stirring constantly while heating. This ensures a smooth and luxurious texture.

Layer Evenly: Make sure to spread the cream filling evenly between the layers for consistent flavor and texture throughout your Melt-in-Your-Mouth Cake.

Chill Adequately: Refrigerate the cake for at least two hours to let the flavors blend and the texture set perfectly—your patience will be rewarded!

Experiment with Flavor: Don’t hesitate to add spices or extracts to either the dough or cream filling to create your unique twist on this classic dessert!

Make Ahead Options

These Melt-in-Your-Mouth Cake layers are perfect for meal prep enthusiasts! You can mix and bake the layers up to 24 hours in advance; just allow them to cool completely before wrapping them tightly in plastic wrap to prevent them from drying out. The cream filling can also be prepared ahead of time—just refrigerate it for up to 3 days until you’re ready to assemble. When you’re set to serve, layer the cake, refrigerate for at least 2 hours to let the flavors meld, and finish with a dusting of icing sugar. This way, you’ll savor the same deliciousness, with minimal effort on those busy weeknights!

How to Store and Freeze Melt-in-Your-Mouth Cake

Fridge: Store leftover cake in an airtight container in the fridge for up to 3 days to keep the layers moist and creamy.

Freezer: For longer storage, freeze individual slices wrapped tightly in plastic wrap and then in foil for up to 2 months. Thaw in the fridge before enjoying.

Reheating: If desired, gently reheat slices in the microwave for 10-15 seconds, or serve cold straight from the fridge for a refreshing treat.

Serving Fresh: This Melt-in-Your-Mouth Cake is best enjoyed within a few days, as the creamy filling stays rich and delightful.

Melt-in-Your-Mouth Cake Variations

Feel free to elevate and customize your Melt-in-Your-Mouth Cake with these delightful twists that will tickle your taste buds!

  • Vegan Delight: Substitute eggs with flax eggs and use dairy-free milk and cream for a vegan-friendly version. It’s amazing how versatile this cake can be!

  • Gluten-Free Option: Swap all-purpose flour with a gluten-free blend to cater to gluten sensitivities, allowing everyone to enjoy this indulgence.

  • Citrus Twist: Add lemon or orange zest to the cream filling for a refreshing and zesty flavor boost. The tartness will beautifully complement the cake’s sweetness!

  • Decadent Chocolate: Fold in cocoa powder into the cream filling for a rich chocolate version that will surely satisfy chocolate lovers. It’s like a dreamy chocolate cloud!

  • Spiced Variations: Sprinkle in cinnamon or nutmeg for a warm and cozy flavor profile, perfect for fall gatherings. The aroma alone will have everyone coming back for seconds!

  • Fruity Fusion: Incorporate pureed fruits like raspberry, strawberry, or mango into the cream filling, making every slice a fruity explosion of flavor.

  • Nutty Pleasure: Add chopped nuts, such as walnuts or hazelnuts, to the dough for a pleasant crunch that contrasts beautifully with the soft, creamy layers.

  • Festive Holiday: Enhance your cake with holiday spices such as ginger or cloves for that extra festive flair, reminiscent of cozy holiday gatherings.

Now that you have these delicious ideas in mind, let your creativity shine, just like in my Buttermilk Pancakes Discover or during festive celebrations while baking a stunning Patriotic Poke Cake. The possibilities are endless!

Melt-in-Your-Mouth Cake Recipe FAQs

How can I choose the best ingredients for this cake?
Absolutely! For the best result, select fresh eggs and ensure your butter is at room temperature before mixing. When selecting flour, opt for all-purpose flour that’s unbleached for an airy texture. If you’re using non-dairy alternatives, choose high-quality almond milk or unsweetened coconut cream for optimal flavor.

How should I store the Melt-in-Your-Mouth Cake?
The cake can be stored in an airtight container in the refrigerator for up to 3 days. This helps retain its creamy filling and keeps the layers moist. Just make sure to place a piece of parchment paper between the lid and cake to avoid sticking.

Can I freeze the Melt-in-Your-Mouth Cake?
Certainly! To freeze, slice the cake and wrap each piece tightly in plastic wrap, then in aluminum foil to prevent freezer burn. It can be stored for up to 2 months. To enjoy, simply thaw in the refrigerator overnight before serving. This way, it will regain its delicious texture without losing its flavor.

What can I do if my cream filling is lumpy?
Very! If you find your cream filling has lumps, don’t fret. Simply pour the mixture through a fine-mesh sieve to remove lumps after cooking. For next time, remember to stir it continuously over medium heat, ensuring a smooth and silky texture before folding in the whipped cream.

Is this cake suitable for people with allergies?
While the Melt-in-Your-Mouth Cake is vegetarian, it does contain eggs and dairy products, which may not be suitable for everyone. For a dairy-free version, you can use flax eggs and a non-dairy cream alternative. Always double-check ingredient labels for potential allergens, and feel free to modify ingredients as needed for dietary needs!

How do I make the cake even more flavorful?
The more the merrier! You can add flavored extracts, like vanilla or almond, to the cream filling or incorporate spices like cinnamon into the dough. For a fruity twist, consider adding lemon or raspberry puree to the cream for a refreshing surprise!

Melt-in-Your-Mouth Cake

Melt-in-Your-Mouth Cake: Indulge in Pure Dessert Bliss

Experience the joy of Melt-in-Your-Mouth Cake, a delightful Polish treat that combines rich flavors and effortless baking.
Prep Time 30 minutes
Cook Time 40 minutes
Chilling Time 2 hours
Total Time 3 hours 10 minutes
Servings: 8 slices
Course: Dessert
Cuisine: Polish
Calories: 300

Ingredients
  

For the Cake Layers
  • 80 grams Butter Provides richness and moisture; substitute with margarine for a dairy-free version.
  • 100 ml Milk Adds creaminess; use almond milk or any non-dairy milk as a substitute.
  • 100 ml Water Hydrates the dough; you can replace it with more milk for added flavor.
  • 0.5 teaspoon Salt Balances sweetness; no common substitutions recommended.
  • 500 grams Flour Main structure of the cake; gluten-free flour can be used.
  • 1 teaspoon Baking Powder Provides leavening; ensure it’s fresh for best results.
  • 4 pieces Eggs Adds structure and richness; for a vegan option, use flax eggs.
For the Cream Filling
  • 150 grams Sugar Sweetens the cream filling; alternative sweeteners can be used.
  • 100 grams Cream Adds richness; heavy cream is preferred, but dairy-free cream can work too.
Optional Toppings
  • Icing Sugar Perfect for dusting on top; fresh fruit or chocolate shavings can enhance the look.

Equipment

  • Medium saucepan
  • Baking pan
  • Mixing Bowl
  • Whisk

Method
 

Step‑by‑Step Instructions for Melt-in-Your-Mouth Cake
  1. In a medium saucepan, melt 80 grams of butter over low heat. Mix in 100 ml of milk, 100 ml of water, and ½ teaspoon of salt. Bring to a gentle boil.
  2. In a separate bowl, whisk together 500 grams of flour and 1 teaspoon of baking powder until evenly blended.
  3. Gradually add the flour mixture to the boiling liquids, stirring continuously until it forms a smooth, thick batter. Allow the dough to cool before adding the eggs.
  4. Preheat your oven to 400°F (200°C). Divide the dough into two equal portions and spread in a greased baking pan. Bake for approximately 20 minutes.
  5. In a mixing bowl, beat together the eggs and 150 grams of sugar until frothy. Gradually incorporate 50 grams of flour and 100 ml of milk, stirring well.
  6. Transfer the mixture to a saucepan over medium heat, cooking until it thickens—about 5 minutes while stirring constantly.
  7. Allow the cream filling to cool. In a separate bowl, whip 100 grams of cream until soft peaks form. Fold the cooled cream mixture into the whipped cream.
  8. To assemble, spread a layer of cream filling on one cake layer, place the second layer on top, and cover the entire cake with remaining cream.
  9. Refrigerate the assembled cake for at least two hours, allowing flavors to meld.
  10. Before serving, dust with icing sugar or garnish with fresh fruit or chocolate shavings.

Nutrition

Serving: 1slicesCalories: 300kcalCarbohydrates: 35gProtein: 4gFat: 15gSaturated Fat: 9gPolyunsaturated Fat: 1gMonounsaturated Fat: 3gCholesterol: 70mgSodium: 250mgPotassium: 150mgFiber: 1gSugar: 18gVitamin A: 500IUCalcium: 100mgIron: 1mg

Notes

Store leftover cake in an airtight container in the fridge for up to 3 days. For longer storage, freeze slices wrapped in plastic and foil for up to 2 months.

Tried this recipe?

Let us know how it was!