Old-Fashioned Vegetable Beef Soup: A Hearty Delight!

Introduction to Old-Fashioned Vegetable Beef Soup

There’s something magical about a steaming bowl of Old-Fashioned Vegetable Beef Soup, especially on a chilly evening. It’s like a warm hug from the inside out, perfect for those days when you need comfort food that doesn’t take all day to prepare. This recipe is not just about filling your belly; it’s about creating memories around the dinner table. Whether you’re feeding a hungry family or impressing friends, this hearty soup is a quick solution that brings everyone together. Trust me, once you try it, you’ll want to make it a regular in your kitchen rotation.

Why You’ll Love This Old-Fashioned Vegetable Beef Soup

This Old-Fashioned Vegetable Beef Soup is a game-changer for busy weeknights. It’s not just easy to make; it’s also packed with flavor and nutrition. The tender beef and vibrant vegetables create a symphony of taste that warms your soul. Plus, it’s a one-pot wonder, meaning less cleanup for you. With every spoonful, you’ll feel the love and care that goes into this comforting dish, making it a family favorite in no time.

Ingredients for Old-Fashioned Vegetable Beef Soup

Gathering the right ingredients is the first step to creating a delicious Old-Fashioned Vegetable Beef Soup. Here’s what you’ll need:

  • Beef stew meat: Tender cuts like chuck work best, providing rich flavor and texture.
  • Vegetable oil: This helps in browning the beef and sautéing the aromatics.
  • Onion: A staple in many dishes, it adds sweetness and depth to the soup.
  • Garlic: Freshly minced garlic brings a fragrant kick that elevates the overall taste.
  • Carrots: Their natural sweetness balances the savory elements and adds color.
  • Celery: This crunchy vegetable contributes a refreshing flavor and texture.
  • Green beans: Fresh or frozen, they add a nice crunch and vibrant color.
  • Corn: Whether fresh, frozen, or canned, corn adds a pop of sweetness.
  • Diced tomatoes: These provide acidity and a rich base for the soup.
  • Beef broth: The heart of the soup, it infuses everything with a savory depth.
  • Dried thyme and basil: These herbs enhance the flavor profile, making it aromatic.
  • Salt and pepper: Essential for seasoning, adjust to your taste preference.
  • Potatoes: Diced potatoes add heartiness and help thicken the soup.
  • Bay leaf: A single leaf adds a subtle depth of flavor during cooking.

For those looking to customize, consider adding a splash of Worcestershire sauce for extra umami or a dash of hot sauce for a kick. If you prefer a lighter version, ground turkey or chicken can be substituted for the beef. And if you like your soup thicker, a cornstarch slurry can work wonders. Exact measurements for these ingredients can be found at the bottom of the article, ready for printing!

How to Make Old-Fashioned Vegetable Beef Soup

Now that you have your ingredients ready, let’s dive into the heart of the matter: making this Old-Fashioned Vegetable Beef Soup. Follow these simple steps, and you’ll have a pot of comfort simmering on your stove in no time.

Step 1: Brown the Beef

Start by heating the vegetable oil in a large pot over medium-high heat. Once the oil is shimmering, add the beef stew meat. Brown the meat on all sides, which should take about 5 to 7 minutes. This step is crucial; it locks in the flavors. Once browned, remove the beef and set it aside. Don’t worry if some bits stick to the pot; they’ll add depth to your soup later.

Step 2: Sauté the Aromatics

In the same pot, toss in the chopped onion and minced garlic. Sauté them for 2 to 3 minutes until the onion turns translucent. The aroma will fill your kitchen, making it hard to resist. This step builds the flavor base for your soup, so don’t rush it!

Step 3: Combine Ingredients

Return the browned beef to the pot. Now, it’s time to add the rest of the ingredients: carrots, celery, green beans, corn, diced tomatoes, beef broth, thyme, basil, salt, pepper, diced potatoes, and the bay leaf. Stir everything together until well combined. The colors will be vibrant, and the anticipation will build!

Step 4: Simmer to Perfection

Bring the mixture to a boil, then reduce the heat to low. Cover the pot and let it simmer for 1.5 to 2 hours. This slow cooking allows the flavors to meld beautifully. Stir occasionally, and enjoy the delightful scents wafting through your home. You’ll know it’s ready when the beef is tender and the vegetables are cooked through.

Step 5: Final Touches

Before serving, remove the bay leaf. Give the soup a taste and adjust the seasoning if needed. If you want to elevate the flavor, consider adding a splash of Worcestershire sauce or a dash of hot sauce. Serve it hot, and watch as everyone gathers around the table, eager for a bowl of this hearty delight!

Tips for Success

  • Always brown the beef well; it enhances the flavor of the soup.
  • Use fresh vegetables for the best taste and texture.
  • Don’t skip the simmering time; it’s key for tender meat and rich flavors.
  • Adjust seasoning gradually; taste as you go for the perfect balance.
  • Store leftovers in an airtight container for up to three days.

Equipment Needed

  • Large pot: A Dutch oven works great, but any heavy-bottomed pot will do.
  • Wooden spoon: Perfect for stirring and scraping up those flavorful bits.
  • Cutting board: Essential for chopping your veggies and meat.
  • Sharp knife: A good knife makes prep work quick and easy.

Variations

  • Vegetarian Option: Swap the beef for hearty mushrooms or lentils for a plant-based twist.
  • Spicy Kick: Add diced jalapeños or a teaspoon of red pepper flakes for some heat.
  • Herb Infusion: Experiment with fresh herbs like parsley or cilantro for a fresh finish.
  • Seasonal Veggies: Use whatever vegetables are in season, like zucchini or squash, to keep it fresh.
  • Slow Cooker Version: Brown the beef and then transfer everything to a slow cooker for an easy, hands-off approach.

Serving Suggestions

  • Crusty Bread: Serve with a warm, crusty baguette or homemade cornbread for dipping.
  • Salad: A simple green salad with a tangy vinaigrette complements the soup perfectly.
  • Wine Pairing: A glass of red wine, like Merlot, enhances the hearty flavors.
  • Garnish: Top with fresh parsley or a sprinkle of grated Parmesan for an elegant touch.

FAQs about Old-Fashioned Vegetable Beef Soup

Can I make Old-Fashioned Vegetable Beef Soup in a slow cooker?

Absolutely! Brown the beef first, then transfer everything to a slow cooker. Cook on low for 6-8 hours or high for 3-4 hours. This method allows the flavors to develop beautifully.

What can I substitute for beef in this soup?

If you’re looking for a lighter option, ground turkey or chicken works well. For a vegetarian twist, try using hearty mushrooms or lentils instead of meat.

How do I store leftovers of Old-Fashioned Vegetable Beef Soup?

Store any leftovers in an airtight container in the fridge for up to three days. You can also freeze the soup for up to three months. Just make sure to leave some space in the container for expansion.

Can I add more vegetables to the soup?

Definitely! Feel free to toss in seasonal vegetables like zucchini, squash, or even spinach. Just remember to adjust the cooking time slightly for any new additions.

How can I thicken the soup if it’s too watery?

If your soup is too thin, mix 1 tablespoon of cornstarch with 2 tablespoons of cold water and stir it into the soup during the last 10 minutes of cooking. This will give it a nice, hearty texture.

Final Thoughts

Cooking this Old-Fashioned Vegetable Beef Soup is more than just preparing a meal; it’s about creating a warm, inviting atmosphere that brings people together. The rich flavors and hearty ingredients make every spoonful a comforting experience, perfect for chilly nights or family gatherings. As the aroma fills your kitchen, you’ll find yourself reminiscing about cozy dinners and shared laughter. This soup is a reminder that good food can nourish not just our bodies, but our souls too. So, gather your loved ones, serve up a bowl, and enjoy the simple joy that comes with every hearty bite.

Ranis

Old-Fashioned Vegetable Beef Soup: A Hearty Delight!

A hearty and comforting Old-Fashioned Vegetable Beef Soup, perfect for chilly days.
Prep Time 15 minutes
Total Time 2 hours 15 minutes
Servings: 6 servings
Course: Soup
Cuisine: American
Calories: 250

Ingredients
  

  • 1 pound beef stew meat cut into 1-inch cubes
  • 2 tablespoons vegetable oil
  • 1 medium onion chopped
  • 2 cloves garlic minced
  • 3 carrots sliced
  • 2 stalks celery sliced
  • 1 cup green beans cut into 1-inch pieces
  • 1 cup corn fresh, frozen, or canned
  • 1 can 14.5 ounces diced tomatoes, undrained
  • 6 cups beef broth
  • 1 teaspoon dried thyme
  • 1 teaspoon dried basil
  • Salt and pepper to taste
  • 2 cups potatoes diced (about 2 medium potatoes)
  • 1 bay leaf

Method
 

  1. In a large pot, heat the vegetable oil over medium-high heat. Add the beef stew meat and brown on all sides, about 5-7 minutes. Remove the beef and set aside.
  2. In the same pot, add the chopped onion and garlic. Sauté for 2-3 minutes until the onion is translucent.
  3. Return the browned beef to the pot. Add the carrots, celery, green beans, corn, diced tomatoes, beef broth, thyme, basil, salt, pepper, potatoes, and bay leaf. Stir to combine.
  4. Bring the mixture to a boil, then reduce the heat to low. Cover and simmer for 1.5 to 2 hours, or until the beef is tender and the vegetables are cooked through. Stir occasionally.
  5. Remove the bay leaf before serving. Taste and adjust seasoning if necessary.

Nutrition

Serving: 1cupCalories: 250kcalCarbohydrates: 15gProtein: 20gFat: 10gSaturated Fat: 3gPolyunsaturated Fat: 7gCholesterol: 50mgSodium: 600mgFiber: 3gSugar: 5g

Notes

  • For added flavor, consider adding a splash of Worcestershire sauce or a dash of hot sauce before serving.
  • You can substitute the beef with ground turkey or chicken for a lighter version.
  • If you prefer a thicker soup, mix 1 tablespoon of cornstarch with 2 tablespoons of cold water and stir it into the soup during the last 10 minutes of cooking.


Tried this recipe?

Let us know how it was!

Overnight Croissant Breakfast Casserole: A Must-Try Recipe!

Introduction to Overnight Croissant Breakfast Casserole

There’s something magical about waking up to the aroma of a warm, freshly baked dish. The Overnight Croissant Breakfast Casserole is just that—a delightful way to start your day without the morning rush. I remember weekends at my grandmother’s house, where breakfast was a feast, and everyone gathered around the table. This casserole captures that spirit perfectly. It’s a quick solution for busy mornings or a dish to impress your loved ones during brunch. With minimal prep and maximum flavor, this recipe is bound to become a favorite in your kitchen.

Why You’ll Love This Overnight Croissant Breakfast Casserole

This Overnight Croissant Breakfast Casserole is a game-changer for your mornings. It’s incredibly easy to prepare, allowing you to enjoy a delicious breakfast without the hassle. Just assemble it the night before, and let it work its magic while you sleep. The combination of flaky croissants, savory ham, and creamy cheese creates a taste sensation that will have everyone asking for seconds. Trust me, this dish is a crowd-pleaser!

Ingredients for Overnight Croissant Breakfast Casserole

Gathering the right ingredients is the first step to creating this delicious Overnight Croissant Breakfast Casserole. Here’s what you’ll need:

  • Croissants: The star of the show! Flaky and buttery, they provide a rich base for the casserole.
  • Eggs: These bind everything together, adding protein and a fluffy texture.
  • Whole Milk: Creamy and rich, it enhances the custard-like consistency of the dish.
  • Shredded Cheddar Cheese: Adds a sharp, savory flavor that melts beautifully.
  • Diced Cooked Ham: A classic addition for a hearty touch, but feel free to swap it out for cooked bacon or sausage.
  • Fresh Spinach: This brings a pop of color and a nutritious boost to the casserole.
  • Dijon Mustard: Just a teaspoon adds a subtle tang that elevates the flavor profile.
  • Garlic Powder: A sprinkle of this brings warmth and depth to the dish.
  • Salt and Black Pepper: Essential seasonings to enhance all the flavors.
  • Nutmeg: A pinch adds a hint of warmth and complexity, making it feel special.

For those looking to mix things up, consider omitting the ham for a vegetarian option. You can also experiment with different cheeses like feta or mozzarella for a unique twist. If you want to add more veggies, bell peppers or mushrooms work wonderfully!

Exact quantities for each ingredient are available at the bottom of the article for easy printing.

How to Make Overnight Croissant Breakfast Casserole

Step 1: Preheat and Prepare

Start by preheating your oven to 350°F (175°C). This ensures your casserole bakes evenly. While the oven warms up, grab a 9×13-inch baking dish and grease it with cooking spray or butter. This step is crucial; it prevents sticking and makes serving a breeze. Trust me, no one wants to wrestle with a stuck casserole! With the dish ready, you’re one step closer to breakfast bliss.

Step 2: Whisk the Egg Mixture

In a large mixing bowl, crack open those eight eggs. Add in the whole milk, Dijon mustard, garlic powder, salt, black pepper, and nutmeg. Whisk everything together until it’s well combined. You want a smooth, creamy mixture that will soak into the croissants. This egg mixture is the heart of your Overnight Croissant Breakfast Casserole, bringing all the flavors together. So, whisk with enthusiasm!

Step 3: Layer the Croissants

Now, it’s time to layer those flaky croissants. Tear them into bite-sized pieces and spread them evenly across the bottom of your greased baking dish. Make sure to cover the entire surface; this will create a delicious base for your casserole. The croissants will soak up all the egg mixture, turning into a delightful, custardy texture. It’s like a warm hug for your taste buds!

Step 4: Add Fillings

Next, sprinkle the diced cooked ham, chopped spinach, and shredded cheddar cheese over the croissant pieces. This is where the magic happens! The ham adds heartiness, the spinach brings freshness, and the cheese melts into gooey perfection. Feel free to get creative here—add more veggies or switch up the cheese for a unique flavor twist. Each layer adds depth to your Overnight Croissant Breakfast Casserole.

Step 5: Pour the Egg Mixture

Carefully pour the egg mixture over the layered croissants and fillings. Make sure to cover everything evenly, ensuring that each piece of croissant is soaked in that delicious custard. This soaking is key; it allows the flavors to meld together beautifully. If you notice any dry spots, gently press down on the croissants to help them absorb the mixture. You want every bite to be bursting with flavor!

Step 6: Refrigerate

Cover the dish with plastic wrap and pop it in the refrigerator. Let it chill for at least four hours, or ideally overnight. This resting period allows the croissants to soak up all that eggy goodness, resulting in a richer flavor and texture. It’s the perfect make-ahead option for busy mornings. Just think, you’ll wake up to a ready-to-bake casserole waiting for you!

Step 7: Bake

When you’re ready to bake, take the casserole out of the fridge and let it sit at room temperature for about 15 minutes. This helps it bake evenly. Then, place it in your preheated oven and bake for 35-40 minutes. You’re looking for a golden-brown top and a set center. The aroma will fill your kitchen, making it hard to resist. Once it’s done, let it cool for a few minutes before slicing and serving. Enjoy the deliciousness!

Tips for Success

  • Use day-old croissants for better absorption of the egg mixture.
  • Don’t skip the refrigeration step; it’s crucial for flavor development.
  • Experiment with different cheeses for a unique twist.
  • For a spicier kick, add diced jalapeños or red pepper flakes.
  • Let the casserole cool slightly before slicing for cleaner pieces.

Equipment Needed

  • Baking Dish: A 9×13-inch dish is ideal, but any similar-sized dish will work.
  • Mixing Bowl: A large bowl for whisking the egg mixture; a smaller bowl can suffice.
  • Whisk: Essential for blending ingredients; a fork can do the job in a pinch.
  • Plastic Wrap: To cover the dish while refrigerating; a clean kitchen towel can be an alternative.

Variations

  • Vegetarian Delight: Omit the ham and add more veggies like bell peppers, mushrooms, or zucchini for a colorful, nutritious twist.
  • Cheese Lovers: Swap out cheddar for feta, mozzarella, or pepper jack to create a different flavor profile.
  • Herb Infusion: Add fresh herbs like chives, parsley, or basil to elevate the flavor and add freshness.
  • Spicy Kick: Incorporate diced jalapeños or a sprinkle of red pepper flakes for those who enjoy a bit of heat.
  • Sweet Option: For a sweeter version, add diced apples or pears and a sprinkle of cinnamon for a delightful brunch treat.

Serving Suggestions

  • Fresh Fruit Salad: A light and refreshing side that complements the richness of the casserole.
  • Crispy Bacon or Sausage: For those who crave a savory addition, these pair perfectly.
  • Hot Coffee or Mimosas: A warm beverage or a bubbly drink elevates your brunch experience.
  • Garnish with Fresh Herbs: A sprinkle of parsley or chives adds a pop of color and freshness.

FAQs about Overnight Croissant Breakfast Casserole

Can I make this casserole ahead of time?

Absolutely! The Overnight Croissant Breakfast Casserole is designed for make-ahead convenience. Assemble it the night before and let it chill in the fridge. This allows the flavors to meld beautifully, making your morning stress-free.

Can I use different types of bread?

While croissants are the star of this dish, you can experiment with other types of bread. Brioche or even day-old bagels can work well. Just keep in mind that the texture and flavor will change slightly.

Is this casserole suitable for a crowd?

<pDefinitely! This recipe yields about eight servings, making it perfect for brunch gatherings or family breakfasts. You can easily double the recipe for larger groups, just use two baking dishes.

How do I store leftovers?

Store any leftovers in an airtight container in the refrigerator for up to three days. Reheat individual portions in the microwave or oven until warmed through. It’s just as delicious the next day!

Can I make it vegetarian?

<pYes! Simply omit the ham and add more vegetables like bell peppers, mushrooms, or zucchini. You can also switch up the cheese for a vegetarian-friendly option. This way, everyone can enjoy a slice of this delicious casserole!

Final Thoughts

Creating the Overnight Croissant Breakfast Casserole is more than just cooking; it’s about bringing people together. The joy of sharing a warm, comforting dish with family or friends is unmatched. Each bite is a reminder of cozy mornings and laughter around the table. This casserole is not only delicious but also incredibly versatile, allowing you to customize it to your taste. Whether it’s a special occasion or a simple weekend brunch, this recipe will surely impress. So, roll up your sleeves, embrace the process, and enjoy the delightful experience of making and sharing this wonderful dish!

Ranis

Overnight Croissant Breakfast Casserole: A Must-Try Recipe!

A delicious and easy-to-make Overnight Croissant Breakfast Casserole that is perfect for brunch or breakfast gatherings.
Prep Time 15 minutes
Cook Time 40 minutes
Total Time 4 hours 55 minutes
Servings: 8 servings
Course: Breakfast
Cuisine: American
Calories: 350

Ingredients
  

  • 8 large croissants torn into pieces
  • 8 large eggs
  • 2 cups whole milk
  • 1 cup shredded cheddar cheese
  • 1 cup diced cooked ham
  • 1 cup fresh spinach chopped
  • 1 teaspoon Dijon mustard
  • 1 teaspoon garlic powder
  • 1 teaspoon salt
  • ½ teaspoon black pepper
  • ¼ teaspoon nutmeg

Method
 

  1. Preheat your oven to 350°F (175°C). Grease a 9x13-inch baking dish with cooking spray or butter.
  2. In a large mixing bowl, whisk together the eggs, milk, Dijon mustard, garlic powder, salt, black pepper, and nutmeg until well combined.
  3. Layer the torn croissant pieces evenly in the prepared baking dish.
  4. Sprinkle the diced ham, chopped spinach, and shredded cheddar cheese over the croissant pieces.
  5. Pour the egg mixture evenly over the croissant and filling layers, ensuring everything is well soaked.
  6. Cover the dish with plastic wrap and refrigerate for at least 4 hours or overnight for best results.
  7. When ready to bake, remove the casserole from the refrigerator and let it sit at room temperature for about 15 minutes.
  8. Bake in the preheated oven for 35-40 minutes, or until the top is golden brown and the center is set.
  9. Allow to cool for a few minutes before slicing and serving.

Nutrition

Serving: 1sliceCalories: 350kcalCarbohydrates: 18gProtein: 18gFat: 24gSaturated Fat: 10gPolyunsaturated Fat: 14gCholesterol: 300mgSodium: 800mgFiber: 1gSugar: 2g

Notes

  • For a vegetarian option, omit the ham and add more vegetables like bell peppers or mushrooms.
  • Experiment with different cheeses such as feta or mozzarella for a unique flavor twist.

Tried this recipe?

Let us know how it was!

Red, White, and Blue Fruit Kabobs: A Fun Recipe to Try!

Introduction to Red, White, and Blue Fruit Kabobs

Summer gatherings are all about fun, flavor, and a splash of color, and that’s where these Red, White, and Blue Fruit Kabobs come in. They’re not just a treat for the taste buds; they’re a feast for the eyes too! Whether you’re hosting a backyard barbecue or looking for a quick dessert to impress your family, these kabobs are the perfect solution. They’re easy to make, healthy, and oh-so-fun to eat. Plus, who doesn’t love a little patriotic flair on their plate? Let’s dive into this delightful recipe that’s sure to brighten your day!

Why You’ll Love This Red, White, and Blue Fruit Kabobs

These Red, White, and Blue Fruit Kabobs are a game-changer for any summer event. They come together in just 15 minutes, making them a breeze for busy days. The vibrant colors and fresh flavors are sure to impress your guests, while the healthy ingredients keep everyone feeling good. Plus, they’re customizable! You can mix and match fruits to suit your taste, ensuring every bite is a delightful surprise.

Ingredients for Red, White, and Blue Fruit Kabobs

Gathering the right ingredients is half the fun! Here’s what you’ll need to create these vibrant Red, White, and Blue Fruit Kabobs:

  • Strawberries: Sweet and juicy, these red gems are the star of the show. Make sure to hull and halve them for easy threading.
  • Blueberries: These little blue beauties add a burst of flavor and a pop of color. Rinse them well before using.
  • Bananas: Creamy and soft, bananas provide a delightful contrast. Slice them into rounds for easy assembly.
  • Mini Marshmallows: These fluffy treats add a fun twist and a touch of sweetness. They’re perfect for filling in gaps on the skewers.
  • Whipped Cream (optional): For those who love a creamy dip, whipped cream is a delicious addition. It pairs beautifully with the fresh fruit.
  • Skewers: Use 6-inch or 8-inch skewers to hold everything together. Wooden or metal works great—just make sure they’re sturdy!

For those looking to mix things up, consider substituting bananas with pineapple or kiwi for a tropical flair. You can find all the exact measurements at the bottom of the article, ready for printing!

How to Make Red, White, and Blue Fruit Kabobs

Step 1: Prepare Your Fruit

Start by prepping your fruit. Hull the strawberries and slice them in half to reveal their juicy insides. Next, peel and slice the bananas into rounds. Finally, rinse the blueberries under cold water to remove any dirt. This simple prep work sets the stage for your delicious Red, White, and Blue Fruit Kabobs.

Step 2: Assemble the Kabobs

Grab a skewer and begin threading the fruit. Start with a strawberry half, followed by a blueberry, and then a slice of banana. Repeat this pattern until the skewer is filled, leaving a little space at the end for easy handling. It’s as simple as that!

Step 3: Create Colorful Patterns

For a visually stunning presentation, alternate the order of the fruit on each skewer. You might start with a blueberry, then a banana, and finish with a strawberry. This not only looks great but also adds a delightful mix of flavors in every bite of your fruit kabobs.

Step 4: Arrange and Serve

Once all your kabobs are assembled, arrange them on a serving platter. For an extra touch, serve with a side of whipped cream for dipping. This adds a creamy contrast to the fresh fruit, making your Red, White, and Blue Fruit Kabobs even more irresistible!

Tips for Success

  • Choose ripe, fresh fruit for the best flavor and texture.
  • Soak wooden skewers in water for 30 minutes to prevent burning if grilling.
  • Keep the kabobs refrigerated until serving to maintain freshness.
  • Get creative with fruit combinations—try adding grapes or melon!
  • Use a variety of skewer lengths for a fun presentation.

Equipment Needed

  • Skewers: Use 6-inch or 8-inch wooden or metal skewers. If you don’t have skewers, try using toothpicks for mini kabobs.
  • Cutting Board: A sturdy cutting board is essential for slicing your fruit safely.
  • Knife: A sharp knife will make quick work of hulling strawberries and slicing bananas.

Variations

  • Tropical Twist: Substitute bananas with pineapple or kiwi for a refreshing tropical flavor.
  • Berry Medley: Mix in raspberries or blackberries for an extra burst of color and taste.
  • Chocolate Drizzle: Drizzle melted dark chocolate over the assembled kabobs for a decadent treat.
  • Nutty Addition: Add a sprinkle of chopped nuts or granola for a crunchy texture.
  • Vegan Option: Use coconut whipped cream instead of regular whipped cream for a dairy-free delight.

Serving Suggestions

  • Pair your Red, White, and Blue Fruit Kabobs with a refreshing lemonade or iced tea for a perfect summer drink.
  • Serve alongside a light salad for a balanced meal that’s both colorful and nutritious.
  • For a festive touch, arrange kabobs on a patriotic-themed platter.

FAQs about Red, White, and Blue Fruit Kabobs

Can I make these kabobs ahead of time?

Absolutely! You can prepare the fruit and assemble the kabobs a few hours in advance. Just keep them refrigerated until you’re ready to serve. This makes them a great option for parties or picnics!

What fruits can I use instead of strawberries and bananas?

Feel free to get creative! You can substitute strawberries with raspberries or cherries, and bananas can be swapped for pineapple or kiwi. The key is to maintain the red, white, and blue theme while enjoying your favorite fruits.

Are Red, White, and Blue Fruit Kabobs healthy?

Yes! These kabobs are a healthy dessert option. They’re low in calories and packed with vitamins from the fresh fruit. Plus, they’re naturally sweet, making them a guilt-free treat for everyone!

Can I add a dip to these kabobs?

Definitely! Whipped cream is a popular choice, but you can also try yogurt or a fruit dip. A drizzle of honey or chocolate sauce can add a fun twist, too!

How do I store leftover kabobs?

If you have any leftovers, store them in an airtight container in the fridge. They’re best enjoyed within a day or two for optimal freshness. Just be aware that the fruit may soften over time.

Final Thoughts

Creating these Red, White, and Blue Fruit Kabobs is more than just a cooking task; it’s an experience filled with joy and creativity. Each colorful skewer brings a burst of summer vibes, perfect for gatherings or quiet family moments. The laughter shared while assembling them and the smiles they bring when served are priceless. Plus, they’re a guilt-free treat that everyone can enjoy. So, whether you’re celebrating a holiday or simply enjoying a sunny day, these kabobs are sure to add a splash of fun and flavor to your table!

Ranis

Red, White, and Blue Fruit Kabobs: A Fun Recipe to Try!

A fun and colorful recipe for Red, White, and Blue Fruit Kabobs, perfect for summer gatherings and celebrations.
Prep Time 15 minutes
Total Time 15 minutes
Course: Dessert
Cuisine: American
Calories: 120

Ingredients
  

  • 1 cup strawberries hulled and halved
  • 1 cup blueberries
  • 1 cup banana sliced
  • 1 cup mini marshmallows
  • 1 cup whipped cream optional, for serving
  • Skewers 6-inch or 8-inch

Method
 

  1. Begin by preparing your fruit: hull and halve the strawberries, slice the bananas, and rinse the blueberries.
  2. Take a skewer and start threading the fruit onto it. Begin with a strawberry half, followed by a blueberry, then a slice of banana, and repeat the pattern until the skewer is filled, leaving some space at the end for handling.
  3. Alternate the order of the fruit to create a colorful pattern: for example, you can start with a blueberry, then a banana, and then a strawberry.
  4. Once all the skewers are assembled, arrange them on a serving platter.
  5. If desired, serve with a side of whipped cream for dipping.

Nutrition

Serving: 2kabobsCalories: 120kcalCarbohydrates: 20gProtein: 1gFiber: 1gSugar: 10g

Notes

  • For added flavor, drizzle a little honey or agave syrup over the assembled kabobs before serving.
  • You can substitute the bananas with pineapple or kiwi for a tropical twist.

Tried this recipe?

Let us know how it was!

Grilled Cinnamon Apples: A Simple Sweet Treat Recipe

Introduction to Grilled Cinnamon Apples

There’s something magical about the aroma of grilled fruit wafting through the air, isn’t there? Grilled Cinnamon Apples are not just a dessert; they’re a warm hug on a plate. Whether you’re wrapping up a backyard barbecue or looking for a quick solution for a busy weeknight, this recipe is your go-to. With just a handful of ingredients, you can create a sweet treat that impresses your loved ones and satisfies your sweet tooth. Plus, who can resist the combination of tender apples, cinnamon, and a scoop of vanilla ice cream? Let’s dive into this delightful dish!

Why You’ll Love This Grilled Cinnamon Apples

Grilled Cinnamon Apples are the epitome of simplicity and flavor. They come together in just 18 minutes, making them perfect for those busy evenings when you crave something sweet but don’t have much time. The warm, comforting flavors of cinnamon and brown sugar elevate the natural sweetness of the apples, creating a dessert that feels indulgent yet effortless. Plus, they’re a hit with both kids and adults, ensuring everyone leaves the table happy!

Ingredients for Grilled Cinnamon Apples

Gathering the right ingredients is the first step to creating your Grilled Cinnamon Apples. Here’s what you’ll need:

  • Apples: Choose large apples like Honeycrisp or Granny Smith for their perfect balance of sweetness and tartness. They hold up well on the grill.
  • Brown Sugar: This adds a rich, caramel-like sweetness that complements the apples beautifully. You can also use coconut sugar for a healthier twist.
  • Ground Cinnamon: A warm spice that brings out the natural flavors of the apples. Feel free to experiment with other spices like nutmeg for a unique touch.
  • Lemon Juice: A splash of acidity brightens the dish and prevents the apples from browning too quickly.
  • Butter: Melted butter adds richness and helps the sugar and spices adhere to the apples.
  • Chopped Nuts (optional): Pecans or walnuts add a delightful crunch and nutty flavor. They’re optional but highly recommended!
  • Vanilla Ice Cream (optional): A scoop of creamy vanilla ice cream on top takes this dessert to the next level, making it a truly indulgent treat.

For exact quantities, check the bottom of the article where you can find everything listed for easy printing. Now, let’s get cooking!

How to Make Grilled Cinnamon Apples

Creating Grilled Cinnamon Apples is a breeze. Follow these simple steps, and you’ll have a delicious dessert ready in no time. Let’s get started!

Step 1: Preheat the Grill

First things first, fire up your grill! Preheat it to medium heat, around 350°F. This ensures that your apples cook evenly and develop those beautiful grill marks. A hot grill is key to achieving that perfect caramelization.

Step 2: Prepare the Apples

Next, grab your apples. Core them and slice them into 1/2-inch thick rings. If you prefer, you can cut them into wedges instead. Just remember, the thicker the slices, the longer they’ll take to grill. Aim for uniformity to ensure even cooking.

Step 3: Make the Cinnamon Mixture

In a large bowl, combine the brown sugar, ground cinnamon, lemon juice, and melted butter. Mix well until the sugar dissolves. This mixture is where the magic happens! The warm spices will infuse the apples with flavor as they grill.

Step 4: Coat the Apples

Now, it’s time to coat those apple slices. Add them to the bowl with the cinnamon mixture and toss gently until they’re evenly coated. If you’re using nuts, sprinkle them in now and give it another gentle mix. The nuts add a delightful crunch!

Step 5: Grill the Apples

Place the apple slices on the grill in a single layer. Grill them for about 3-4 minutes on each side. You’re looking for tender apples with those gorgeous grill marks. Keep an eye on them; you want them soft but not mushy!

Step 6: Serve and Enjoy

Once grilled to perfection, remove the apples from the grill. Serve them warm, and if you’re feeling indulgent, top them with a scoop of vanilla ice cream. The contrast of warm apples and cold ice cream is simply divine!

Tips for Success

  • Choose firm apples to prevent them from turning mushy on the grill.
  • Don’t skip the lemon juice; it enhances flavor and keeps apples fresh.
  • Experiment with spices like nutmeg or allspice for a unique twist.
  • Keep an eye on the grill; apples can go from perfect to overcooked quickly.
  • For extra flavor, try adding a splash of vanilla extract to the cinnamon mixture.

Equipment Needed

  • Grill: A gas or charcoal grill works perfectly. If you don’t have one, a grill pan on the stovetop will do.
  • Cutting Board: Essential for slicing your apples safely.
  • Mixing Bowl: A large bowl to combine your ingredients.
  • Tongs: Handy for flipping the apple slices on the grill.

Variations

  • Caramel Drizzle: For a decadent twist, drizzle warm caramel sauce over the grilled apples before serving.
  • Spiced Up: Add a pinch of nutmeg or allspice to the cinnamon mixture for an extra layer of flavor.
  • Maple Syrup: Substitute brown sugar with maple syrup for a unique sweetness that pairs beautifully with apples.
  • Vegan Option: Use coconut oil instead of butter and skip the ice cream or opt for a dairy-free version.
  • Fruit Medley: Mix in other fruits like peaches or pears for a delightful grilled fruit medley.

Serving Suggestions

  • Pair with Ice Cream: Serve your Grilled Cinnamon Apples with a scoop of vanilla ice cream for a delightful contrast.
  • Top with Whipped Cream: A dollop of whipped cream adds a light, airy touch.
  • Serve with Coffee: A warm cup of coffee or spiced chai complements the flavors beautifully.
  • Presentation: Arrange the apples on a rustic wooden board for a charming display.

FAQs about Grilled Cinnamon Apples

Got questions about Grilled Cinnamon Apples? You’re not alone! Here are some common queries that might pop up as you prepare this delightful dessert.

Can I use any type of apple for this recipe?

Absolutely! While Honeycrisp and Granny Smith are great choices, feel free to experiment with your favorites. Just ensure they’re firm enough to hold up on the grill.

How do I store leftover grilled apples?

Store any leftovers in an airtight container in the fridge for up to three days. Reheat them on the grill or in the microwave before serving again.

Can I make this recipe ahead of time?

While it’s best enjoyed fresh off the grill, you can prepare the cinnamon mixture and slice the apples ahead of time. Just toss them together right before grilling for the best flavor.

What can I substitute for brown sugar?

If you’re out of brown sugar, coconut sugar or even honey can work as alternatives. Just keep in mind that honey will add a different flavor profile.

Are Grilled Cinnamon Apples gluten-free?

Yes! This recipe is naturally gluten-free, making it a perfect dessert option for those with gluten sensitivities. Enjoy without worry!

Final Thoughts

Grilled Cinnamon Apples are more than just a dessert; they’re a celebration of simple pleasures. The joy of biting into warm, caramelized apples, infused with cinnamon, is a delightful experience that brings back memories of family gatherings and summer nights. This recipe is a reminder that cooking doesn’t have to be complicated to be delicious. Whether you’re impressing guests or treating yourself, these apples deliver comfort and satisfaction in every bite. So fire up that grill, gather your loved ones, and enjoy the sweet moments that come with sharing this delightful treat!

Ranis

Grilled Cinnamon Apples: A Simple Sweet Treat Recipe

Grilled Cinnamon Apples are a simple and delicious sweet treat that combines the natural sweetness of apples with the warm flavors of cinnamon and brown sugar, perfect for grilling.
Prep Time 10 minutes
Cook Time 8 minutes
Total Time 18 minutes
Servings: 4 servings
Course: Dessert
Cuisine: American
Calories: 150

Ingredients
  

  • 2 large apples such as Honeycrisp or Granny Smith
  • 2 tablespoons brown sugar
  • 1 teaspoon ground cinnamon
  • 1 tablespoon lemon juice
  • 1 tablespoon butter melted
  • 1/4 cup chopped pecans or walnuts optional
  • Vanilla ice cream for serving, optional

Method
 

  1. Preheat your grill to medium heat (about 350°F).
  2. Core the apples and slice them into 1/2-inch thick rings. If desired, you can also cut them into wedges.
  3. In a large bowl, combine the brown sugar, ground cinnamon, lemon juice, and melted butter. Mix well until the sugar is dissolved.
  4. Add the apple slices to the bowl and toss until they are evenly coated with the cinnamon mixture.
  5. If using, sprinkle the chopped nuts over the apples and gently mix to combine.
  6. Place the apple slices on the grill in a single layer. Grill for about 3-4 minutes on each side, or until they are tender and have nice grill marks.
  7. Remove the apples from the grill and serve warm, topped with a scoop of vanilla ice cream if desired.

Nutrition

Serving: 1servingCalories: 150kcalCarbohydrates: 22gProtein: 1gFat: 5gSaturated Fat: 2gPolyunsaturated Fat: 3gCholesterol: 5mgFiber: 2gSugar: 10g

Notes

  • For a caramel twist, drizzle caramel sauce over the grilled apples before serving.
  • Experiment with different spices like nutmeg or allspice for a unique flavor profile.

Tried this recipe?

Let us know how it was!

Smoky Cheddar Mac and Cheese: A Comforting Delight!

Introduction to Smoky Cheddar Mac and Cheese

There’s something undeniably comforting about a warm bowl of mac and cheese, isn’t there? When I think of my childhood, I remember those cozy evenings spent with family, sharing stories over creamy pasta. Now, as an adult, I’ve discovered a delightful twist on this classic dish: Smoky Cheddar Mac and Cheese. This recipe is perfect for busy weeknights or when you want to impress your friends at a gathering. With its rich flavors and creamy texture, it’s a dish that brings everyone together, making it a true comfort food for any occasion.

Why You’ll Love This Smoky Cheddar Mac and Cheese

This Smoky Cheddar Mac and Cheese is a game-changer in the kitchen. It’s incredibly easy to whip up, making it a perfect choice for those hectic weeknights. The combination of sharp cheddar and mozzarella creates a creamy, dreamy texture that’s hard to resist. Plus, the smoky flavor adds a unique twist that elevates this classic dish. Trust me, once you try it, you’ll be hooked!

Ingredients for Smoky Cheddar Mac and Cheese

Gathering the right ingredients is the first step to creating your Smoky Cheddar Mac and Cheese masterpiece. Here’s what you’ll need:

  • Elbow macaroni: The classic choice for mac and cheese, these little pasta shapes hold onto the creamy sauce beautifully.
  • Sharp cheddar cheese: This is the star of the show! Its bold flavor gives the dish that signature cheesy goodness.
  • Mozzarella cheese: Adds a stretchy, gooey texture that makes every bite irresistible.
  • Unsalted butter: Essential for creating a rich base for your cheese sauce.
  • All-purpose flour: This helps thicken the sauce, giving it that creamy consistency we all love.
  • Whole milk: The creaminess of whole milk enhances the sauce, making it velvety smooth.
  • Garlic powder: A sprinkle of this adds depth and flavor without overpowering the dish.
  • Onion powder: Complements the garlic and enhances the overall taste profile.
  • Smoked paprika: This is what gives your mac and cheese that delightful smoky flavor. It’s a game-changer!
  • Salt and black pepper: Essential seasonings that bring all the flavors together.
  • Panko breadcrumbs: For that crispy topping that contrasts beautifully with the creamy pasta.
  • Olive oil: Helps to crisp up the panko breadcrumbs when baked.
  • Grated Parmesan cheese: Adds an extra layer of flavor and richness to the topping.
  • Fresh parsley: A pop of color and freshness to garnish your dish before serving.

For those looking to spice things up, consider adding diced jalapeños or a few dashes of hot sauce to the cheese sauce. You can also experiment with different cheeses like gouda or pepper jack for a unique flavor profile. Exact quantities for each ingredient can be found at the bottom of the article, ready for printing!

How to Make Smoky Cheddar Mac and Cheese

Now that you have all your ingredients ready, let’s dive into the steps to create this mouthwatering Smoky Cheddar Mac and Cheese. Each step is simple, and I’ll share some tips along the way to ensure your dish turns out perfectly!

Step 1: Preheat Your Smoker or Oven

Preheating is crucial for achieving that perfect smoky flavor. If you’re using a smoker, set it to 225°F. This low and slow method infuses the dish with a rich smokiness. If you don’t have a smoker, no worries! Preheat your oven to 350°F and add a few drops of liquid smoke to the cheese sauce for that same delightful flavor.

Step 2: Cook the Elbow Macaroni

Bring a large pot of salted water to a boil. Add the elbow macaroni and cook according to the package instructions until al dente. This means the pasta should be firm to the bite, not mushy. Drain the pasta and set it aside. A little tip: rinse it briefly under cold water to stop the cooking process and prevent sticking.

Step 3: Make the Cheese Sauce

In a large saucepan over medium heat, melt the unsalted butter. Once it’s melted, whisk in the all-purpose flour. Cook this mixture for about a minute until it’s bubbly. Gradually whisk in the whole milk, stirring constantly. This is where the magic happens! Keep whisking until the sauce thickens and bubbles, about 5-7 minutes. Then, stir in the garlic powder, onion powder, smoked paprika, salt, and black pepper. Finally, remove it from heat and add the shredded cheddar and mozzarella cheeses, stirring until everything is melted and smooth.

Step 4: Combine Pasta and Cheese Sauce

Now it’s time to bring it all together! In a large bowl, combine the cooked macaroni with the creamy cheese sauce. Mix well to ensure every piece of pasta is coated in that luscious sauce. This is the moment when you can really appreciate the cheesy goodness!

Step 5: Prepare the Topping

For that irresistible crispy topping, mix the panko breadcrumbs with olive oil and grated Parmesan cheese in a small bowl. This combination will create a delightful crunch when baked. Sprinkle this mixture evenly over the mac and cheese, ensuring every bite has that satisfying texture.

Step 6: Bake or Smoke the Dish

Transfer your mac and cheese to a large cast-iron skillet or a baking dish. If you’re using the smoker, place it in and cook for 30-40 minutes until the top is golden and crispy. If you’re using the oven, bake for 20-25 minutes. Either way, you’ll be rewarded with a beautifully baked dish!

Step 7: Garnish and Serve

Once your Smoky Cheddar Mac and Cheese is out of the oven or smoker, let it cool for a few minutes. This helps the flavors settle. Before serving, garnish with freshly chopped parsley for a pop of color. Serve it hot, and watch everyone dig in with delight!

Tips for Success

  • Always salt your pasta water; it enhances the flavor of the macaroni.
  • Whisk continuously when making the cheese sauce to avoid lumps.
  • For extra creaminess, consider adding a splash of cream to the cheese sauce.
  • Let the mac and cheese sit for a few minutes after baking; it firms up nicely.
  • Feel free to customize with your favorite cheeses for a unique twist!

Equipment Needed

  • Large pot: For boiling the elbow macaroni. A deep saucepan works too.
  • Large saucepan: Essential for making the cheese sauce. A Dutch oven can be a great alternative.
  • Whisk: To ensure a smooth cheese sauce. A fork can work in a pinch.
  • Cast-iron skillet or baking dish: Perfect for baking. Any oven-safe dish will do.
  • Measuring cups and spoons: For accuracy in your ingredients. A kitchen scale is handy too.

Variations

  • Spicy Smoky Cheddar Mac: Add diced jalapeños or a few dashes of your favorite hot sauce for a fiery kick.
  • Different Cheeses: Experiment with gouda, pepper jack, or even blue cheese for a unique flavor profile.
  • Vegetable Add-Ins: Toss in some steamed broccoli, spinach, or roasted red peppers for added nutrition and color.
  • Gluten-Free Option: Substitute elbow macaroni with gluten-free pasta to accommodate dietary needs.
  • Vegan Version: Use plant-based cheeses and almond milk, and replace butter with coconut oil for a dairy-free delight.

Serving Suggestions

  • Fresh Salad: Pair your Smoky Cheddar Mac and Cheese with a crisp green salad for a refreshing contrast.
  • Garlic Bread: Serve with warm garlic bread to soak up any leftover cheese sauce.
  • Beer or Wine: A cold beer or a glass of white wine complements the smoky flavors beautifully.
  • Presentation: Serve in individual ramekins for a fun, personal touch at gatherings.

FAQs about Smoky Cheddar Mac and Cheese

Can I make Smoky Cheddar Mac and Cheese ahead of time?

Absolutely! You can prepare the dish up to the baking step, then cover and refrigerate it. When you’re ready to serve, just pop it in the oven or smoker. It’s a great way to save time on busy days!

What can I substitute for sharp cheddar cheese?

If sharp cheddar isn’t your thing, feel free to use medium cheddar or even a blend of cheeses. Gouda and pepper jack are fantastic alternatives that add their own unique flavors to the dish.

How do I store leftovers?

Store any leftovers in an airtight container in the fridge for up to three days. Reheat in the oven or microwave, adding a splash of milk to keep it creamy.

Can I freeze Smoky Cheddar Mac and Cheese?

Yes, you can freeze it! Just make sure it’s completely cooled before transferring it to a freezer-safe container. It can last up to three months. Thaw in the fridge before reheating.

What can I serve with Smoky Cheddar Mac and Cheese?

This dish pairs wonderfully with a fresh salad, garlic bread, or even some grilled vegetables. A cold beer or a crisp white wine can elevate the meal even further!

Final Thoughts

Creating Smoky Cheddar Mac and Cheese is more than just cooking; it’s about crafting a dish that warms the heart and brings people together. The rich, creamy texture combined with that delightful smoky flavor transforms a simple meal into a memorable experience. Whether you’re enjoying it on a cozy night in or serving it at a gathering, this dish is sure to impress. Plus, the joy of sharing a bowl of cheesy goodness with loved ones is truly unmatched. So, roll up your sleeves, embrace the process, and savor every delicious bite of this comforting delight!

Ranis

Smoky Cheddar Mac and Cheese: A Comforting Delight!

A comforting and smoky twist on classic mac and cheese, featuring sharp cheddar and mozzarella cheeses.
Prep Time 15 minutes
Cook Time 40 minutes
Total Time 55 minutes
Servings: 6 servings
Course: Main Dish
Cuisine: American
Calories: 450

Ingredients
  

  • 2 cups elbow macaroni
  • 4 cups shredded sharp cheddar cheese
  • 1 cup shredded mozzarella cheese
  • 4 tablespoons unsalted butter
  • 1/4 cup all-purpose flour
  • 4 cups whole milk
  • 1 teaspoon garlic powder
  • 1 teaspoon onion powder
  • 1 teaspoon smoked paprika
  • 1/2 teaspoon salt
  • 1/4 teaspoon black pepper
  • 1/2 cup panko breadcrumbs
  • 1 tablespoon olive oil
  • 1/4 cup grated Parmesan cheese
  • Fresh parsley chopped (for garnish)

Method
 

  1. Preheat your smoker to 225°F. If you don't have a smoker, you can use an oven set to 350°F and add a few drops of liquid smoke to the cheese sauce for a smoky flavor.
  2. Cook the elbow macaroni according to package instructions until al dente. Drain and set aside.
  3. In a large saucepan over medium heat, melt the butter. Once melted, whisk in the flour and cook for about 1 minute until bubbly.
  4. Gradually whisk in the milk, stirring constantly until the mixture thickens and bubbles, about 5-7 minutes.
  5. Stir in the garlic powder, onion powder, smoked paprika, salt, and black pepper. Remove from heat and add the shredded cheddar and mozzarella cheeses, stirring until melted and smooth.
  6. Combine the cooked macaroni with the cheese sauce, mixing well to coat all the pasta.
  7. Transfer the mac and cheese to a large cast-iron skillet or a baking dish.
  8. In a small bowl, mix the panko breadcrumbs with olive oil and Parmesan cheese. Sprinkle the mixture evenly over the mac and cheese.
  9. Place the skillet or baking dish in the smoker and cook for 30-40 minutes, or until the top is golden and crispy. If using the oven, bake for 20-25 minutes.
  10. Remove from the smoker or oven and let it cool for a few minutes. Garnish with chopped parsley before serving.

Nutrition

Serving: 1servingCalories: 450kcalCarbohydrates: 45gProtein: 20gFat: 22gSaturated Fat: 13gPolyunsaturated Fat: 9gCholesterol: 70mgSodium: 600mgFiber: 2gSugar: 5g

Notes

  • For a spicy kick, add diced jalapeños or a few dashes of hot sauce to the cheese sauce.
  • Experiment with different cheeses such as gouda or pepper jack for a unique flavor profile.

Tried this recipe?

Let us know how it was!

Patriotic Poke Cake: A Festive Summer Delight Recipe

Introduction to Patriotic Poke Cake

Summer celebrations are all about fun, family, and, of course, delicious desserts. That’s where my favorite, the Patriotic Poke Cake, comes into play. This vibrant cake is not just a feast for the eyes; it’s a quick and easy solution for those busy days when you want to impress your loved ones without spending hours in the kitchen. With its layers of strawberry and blue raspberry gelatin, it’s a delightful treat that captures the spirit of summer gatherings. Trust me, this cake will be the star of your next barbecue or picnic!

Why You’ll Love This Patriotic Poke Cake

This Patriotic Poke Cake is a game-changer for summer desserts. It’s incredibly easy to whip up, making it perfect for those last-minute gatherings. The vibrant colors and refreshing flavors will have everyone reaching for seconds. Plus, it’s a crowd-pleaser that appeals to both kids and adults alike. With minimal prep time and maximum flavor, you’ll find yourself making this cake for every occasion!

Ingredients for Patriotic Poke Cake

Gathering the right ingredients is the first step to creating this stunning Patriotic Poke Cake. Here’s what you’ll need:

  • White cake mix: The base of our cake, providing a light and fluffy texture.
  • Water: Essential for mixing with the cake mix to create the batter.
  • Vegetable oil: Adds moisture and richness to the cake.
  • Large eggs: These help bind the ingredients together and contribute to the cake’s structure.
  • Strawberry gelatin: This gives the cake its vibrant red color and fruity flavor.
  • Blue raspberry gelatin: Adds a pop of blue and a sweet-tart taste that complements the strawberries.
  • Boiling water: Used to dissolve the gelatin, ensuring it mixes well.
  • Cold water: Helps cool down the gelatin mixture before pouring it over the cake.
  • Whipped topping: A light and creamy layer that adds a delightful finish to the cake.
  • Fresh strawberries and blueberries: These not only enhance the cake’s patriotic theme but also add freshness and texture.

For those looking to switch things up, consider using different flavored gelatins to match your theme or occasion. You can also substitute the whipped topping with homemade whipped cream for a fresher taste. Exact quantities for each ingredient can be found at the bottom of the article, ready for printing!

How to Make Patriotic Poke Cake

Creating this Patriotic Poke Cake is a breeze! Follow these simple steps, and you’ll have a stunning dessert that’s sure to impress. Let’s dive in!

Step 1: Preheat and Prepare

Start by preheating your oven to 350°F (175°C). While it warms up, grab a 9×13-inch baking pan and grease it with butter or cooking spray. A light dusting of flour will help the cake release easily later. Trust me, you don’t want to lose any of this deliciousness!

Step 2: Mix the Batter

In a large mixing bowl, combine the white cake mix, water, vegetable oil, and eggs. Use an electric mixer on medium speed for about 2 minutes. You want a smooth, well-blended batter. The aroma of the cake mix will start to fill your kitchen, and it’s just the beginning of the magic!

Step 3: Bake the Cake

Pour the batter into your prepared pan, spreading it evenly. Bake for 25-30 minutes. To check if it’s done, insert a toothpick into the center. If it comes out clean, you’re golden! Let the cake cool in the pan for about 10 minutes. The anticipation is half the fun!

Step 4: Poke Holes

Once the cake has cooled slightly, take the handle of a wooden spoon or a fork and poke holes all over the top. Space them about 1 inch apart. This is where the gelatin will soak in, creating those delightful layers of flavor. Don’t be shy—more holes mean more flavor!

Step 5: Prepare Gelatin Mixtures

In a separate bowl, dissolve the strawberry gelatin in 1 cup of boiling water. Stir until it’s completely dissolved, then add 1 cup of cold water. Repeat this process with the blue raspberry gelatin. The vibrant colors will make you feel like a kid again, and the sweet smell will have your mouth watering!

Step 6: Soak the Cake

Now, pour half of the strawberry gelatin mixture evenly over the cake, allowing it to seep into the holes. Follow this with the blue raspberry gelatin, using the remaining half. Watch as the colors blend and create a beautiful, festive look. It’s like a summer celebration in a pan!

Step 7: Chill and Top

Refrigerate the cake for at least 2 hours. This allows the gelatin to set perfectly. Once chilled, spread the whipped topping over the cake. Finally, decorate with fresh strawberries and blueberries. Your Patriotic Poke Cake is now ready to shine at your next gathering!

Tips for Success

  • Make sure your eggs are at room temperature for a smoother batter.
  • Don’t skip the chilling time; it’s crucial for the gelatin to set properly.
  • Use a toothpick to check for doneness; it should come out clean.
  • For a fun twist, try adding sprinkles to the whipped topping.
  • Keep leftovers covered in the fridge for up to three days.

Equipment Needed

  • 9×13-inch baking pan: A standard size for this cake; a glass or metal pan works well.
  • Mixing bowl: Use a large bowl for mixing the batter; a stand mixer can save time.
  • Electric mixer: Handy for achieving a smooth batter; a whisk can work in a pinch.
  • Wooden spoon or fork: Essential for poking holes in the cake.
  • Measuring cups: For accurate ingredient measurements; a kitchen scale is a great alternative.

Variations

  • Flavored Gelatins: Experiment with different flavors like lime or orange for a unique twist.
  • Gluten-Free Option: Use a gluten-free cake mix to make this dessert suitable for those with dietary restrictions.
  • Fruit Additions: Incorporate other fruits like raspberries or blackberries for added flavor and color.
  • Vegan Version: Substitute eggs with applesauce or flaxseed meal and use a plant-based whipped topping.
  • Chocolate Drizzle: Add a drizzle of chocolate sauce over the whipped topping for a decadent touch.

Serving Suggestions

  • Pair with a scoop of vanilla ice cream for a delightful contrast.
  • Serve alongside fresh fruit salad for a refreshing side.
  • Complement with lemonade or iced tea for a perfect summer drink.
  • Garnish with mint leaves for an elegant touch.
  • Present on a festive platter to enhance the patriotic theme.

FAQs about Patriotic Poke Cake

Can I make this cake ahead of time?

Absolutely! The Patriotic Poke Cake can be made a day in advance. Just be sure to keep it covered in the refrigerator. This allows the flavors to meld beautifully, making it even more delicious!

What if I can’t find blue raspberry gelatin?

No worries! You can substitute it with any blue gelatin flavor, like blue jello or even grape. The key is to maintain that vibrant color and fruity taste that makes this cake so festive.

How do I store leftovers?

Store any leftover cake in an airtight container in the fridge. It should stay fresh for up to three days. Just be prepared for the flavors to intensify as it sits!

Can I use fresh fruit instead of gelatin?

While gelatin gives that signature poke cake texture, you can layer fresh fruit on top for a lighter version. Just keep in mind that it won’t have the same vibrant color or flavor infusion.

Is this cake suitable for kids?

Definitely! The Patriotic Poke Cake is a hit with kids. Its colorful layers and sweet flavors make it a fun dessert for any summer celebration. Just watch out for the sugar rush!

Final Thoughts

Creating a Patriotic Poke Cake is more than just baking; it’s about bringing people together. The vibrant colors and refreshing flavors evoke the joy of summer gatherings, sparking laughter and memories. Each slice is a celebration, a reminder of sunny days spent with family and friends. Whether it’s a backyard barbecue or a festive picnic, this cake is sure to be the highlight of the table. So, roll up your sleeves, embrace the fun, and let this delightful dessert be your go-to for any occasion. Trust me, you’ll be making it again and again!

Ranis

Patriotic Poke Cake: A Festive Summer Delight Recipe

A festive and colorful cake perfect for summer celebrations, featuring layers of strawberry and blue raspberry gelatin.
Prep Time 20 minutes
Cook Time 30 minutes
Total Time 2 hours 50 minutes
Servings: 12 servings
Course: Dessert
Cuisine: American
Calories: 210

Ingredients
  

  • 1 box 15.25 oz white cake mix
  • 1 cup water
  • 1/3 cup vegetable oil
  • 3 large eggs
  • 1 3 oz box strawberry gelatin
  • 1 3 oz box blue raspberry gelatin
  • 1 cup boiling water
  • 1 cup cold water
  • 1 cup whipped topping like Cool Whip
  • 1/2 cup fresh strawberries sliced
  • 1/2 cup fresh blueberries

Method
 

  1. Preheat the oven to 350°F (175°C). Grease and flour a 9x13-inch baking pan.
  2. In a large mixing bowl, combine the cake mix, water, vegetable oil, and eggs. Beat on medium speed for 2 minutes until well combined.
  3. Pour the batter into the prepared pan and bake for 25-30 minutes, or until a toothpick inserted in the center comes out clean.
  4. Once the cake is done, remove it from the oven and let it cool in the pan for 10 minutes.
  5. Using the handle of a wooden spoon or a fork, poke holes all over the top of the cake, about 1 inch apart.
  6. In a separate bowl, dissolve the strawberry gelatin in 1 cup of boiling water, then stir in 1 cup of cold water.
  7. Pour half of the strawberry gelatin mixture evenly over the cake, allowing it to soak into the holes.
  8. Repeat this process with the blue raspberry gelatin, using the remaining half of the mixture.
  9. Refrigerate the cake for at least 2 hours to allow the gelatin to set.
  10. Once chilled, spread the whipped topping over the cake and decorate with sliced strawberries and blueberries.

Nutrition

Serving: 1sliceCalories: 210kcalCarbohydrates: 30gProtein: 2gFat: 8gSaturated Fat: 1gPolyunsaturated Fat: 7gCholesterol: 30mgSodium: 200mgSugar: 15g

Notes

  • For added flavor, consider drizzling a bit of chocolate sauce over the whipped topping before serving.
  • You can substitute the whipped topping with homemade whipped cream for a fresher taste.
  • Try using different flavored gelatins to match your theme or occasion.

Tried this recipe?

Let us know how it was!

Creamy Rotisserie Chicken and Mushroom Soup: Enjoy in Minutes!

Introduction to Creamy Rotisserie Chicken and Mushroom Soup

When the chill of evening sets in, nothing warms the soul quite like a bowl of creamy soup. This Creamy Rotisserie Chicken and Mushroom Soup is my go-to for those busy nights when I crave comfort without the fuss.

With just a handful of ingredients and minimal prep, you can whip up a delicious meal that feels like a warm hug.

Whether you’re looking to impress your family or simply treat yourself after a long day, this soup is the perfect solution. Trust me, it’s a dish that brings everyone together around the table.

Why You’ll Love This Creamy Rotisserie Chicken and Mushroom Soup

This Creamy Rotisserie Chicken and Mushroom Soup is a lifesaver for busy weeknights.

It’s quick to prepare, taking just 35 minutes from start to finish.

The rich, savory flavors will have your taste buds dancing, while the creamy texture offers a comforting embrace.

Plus, using rotisserie chicken means you can skip the lengthy cooking process.

It’s a delicious way to enjoy a homemade meal without the hassle!

Ingredients for Creamy Rotisserie Chicken and Mushroom Soup

Creating this Creamy Rotisserie Chicken and Mushroom Soup is a breeze, thanks to its simple yet flavorful ingredients. Here’s what you’ll need:

  • Olive oil: A staple in my kitchen, it adds richness and helps sauté the aromatics.
  • Onion: Diced onion brings a sweet, savory base to the soup, enhancing its overall flavor.
  • Garlic: Minced garlic adds a punch of flavor that elevates the dish to new heights.
  • Mushrooms: I prefer button or cremini mushrooms for their earthy taste and meaty texture.
  • Chicken broth: This is the heart of the soup, providing depth and warmth. Homemade is great, but store-bought works just fine!
  • Rotisserie chicken: The star of the show! It saves time and adds a delicious, smoky flavor.
  • Heavy cream: For that luxurious, creamy texture that makes every spoonful feel indulgent.
  • Dried thyme: A sprinkle of thyme brings a hint of herbal freshness that complements the chicken beautifully.
  • Salt and black pepper: Essential for seasoning, these enhance all the flavors in the soup.
  • Fresh parsley: Chopped parsley is perfect for garnishing, adding a pop of color and freshness.

Feel free to get creative! You can substitute half-and-half for a lighter version or toss in some frozen peas or spinach for added nutrition.

For exact measurements, check the bottom of the article where you can find everything available for printing.

How to Make Creamy Rotisserie Chicken and Mushroom Soup

Making this Creamy Rotisserie Chicken and Mushroom Soup is as easy as pie.

With just a few steps, you’ll have a comforting bowl of goodness ready to enjoy.

Let’s dive into the process!

Step 1: Sauté the Aromatics

Start by heating the olive oil in a large pot over medium heat.

Once it’s shimmering, toss in the diced onion.

Sauté for about 5 minutes until the onion turns translucent and fragrant.

This step lays the foundation for a flavorful soup.

Step 2: Add the Mushrooms

Next, stir in the minced garlic and sliced mushrooms.

Cook them together for 5 to 7 minutes.

You want the mushrooms to soften and release their moisture.

Their earthy aroma will fill your kitchen, making it hard to resist!

Step 3: Pour in the Chicken Broth

Now, it’s time to pour in the chicken broth.

Bring the mixture to a gentle boil.

This is where the magic begins, as all those flavors start to meld together.

Don’t rush this step; let it bubble for a minute or two.

Step 4: Combine the Chicken and Cream

Reduce the heat to low and add the shredded rotisserie chicken.

Then, pour in the heavy cream, dried thyme, salt, and black pepper.

Stir everything together until well combined.

The soup will start to take on that creamy, dreamy texture we all love.

Step 5: Simmer and Season

Let the soup simmer for 10 to 15 minutes.

This allows the flavors to deepen and develop.

Don’t forget to taste and adjust the seasoning if needed.

When it’s ready, serve hot, garnished with fresh parsley for that extra touch of color and flavor.

Tips for Success

  • Always taste as you go! Adjust seasoning to your preference for the best flavor.
  • For a thicker soup, let it simmer a bit longer to reduce the liquid.
  • Use a good quality chicken broth for richer taste; homemade is ideal if you have it!
  • Don’t skip the fresh parsley; it brightens the dish and adds a fresh finish.
  • Store leftovers in an airtight container for up to three days—just reheat gently!

Equipment Needed

  • Large pot: A sturdy pot is essential for simmering the soup. A Dutch oven works great too!
  • Wooden spoon: Perfect for stirring and combining ingredients without scratching your pot.
  • Measuring cups: Handy for measuring out your ingredients accurately.
  • Cutting board and knife: Essential for chopping onions, garlic, and mushrooms.

Variations

  • Herb Infusion: Experiment with fresh herbs like rosemary or basil for a different flavor profile.
  • Spicy Kick: Add a pinch of red pepper flakes or a dash of hot sauce for some heat.
  • Vegetarian Option: Swap the rotisserie chicken for chickpeas or lentils and use vegetable broth.
  • Cheesy Delight: Stir in some grated Parmesan or cheddar cheese for an extra creamy and cheesy soup.
  • Low-Carb Version: Replace the heavy cream with coconut milk and use cauliflower instead of mushrooms for a lighter take.

Serving Suggestions

  • Crusty Bread: Serve with a warm, crusty baguette or sourdough for dipping.
  • Salad Pairing: A light green salad with a tangy vinaigrette complements the richness of the soup.
  • Wine Selection: A chilled white wine, like Chardonnay, enhances the flavors beautifully.
  • Garnish: Top each bowl with a sprinkle of extra parsley or a drizzle of olive oil for presentation.

FAQs about Creamy Rotisserie Chicken and Mushroom Soup

Can I use leftover chicken instead of rotisserie chicken?

Absolutely! Leftover chicken works perfectly in this creamy soup. Just shred it and add it in the same way as the rotisserie chicken. It’s a great way to use up what you have!

How can I make this soup dairy-free?

To make a dairy-free version, substitute the heavy cream with coconut milk or a dairy-free cream alternative. Just be sure to adjust the seasoning to balance the flavors!

Can I freeze Creamy Rotisserie Chicken and Mushroom Soup?

Yes, you can freeze this soup! Just let it cool completely, then transfer it to an airtight container. It will keep well in the freezer for up to three months. Reheat gently on the stove when you’re ready to enjoy it again.

What can I serve with this soup?

This soup pairs wonderfully with crusty bread, a fresh salad, or even a side of roasted vegetables. It’s a complete meal that’s sure to satisfy!

How can I make this soup spicier?

If you like a bit of heat, add red pepper flakes or a dash of hot sauce while simmering. You can also toss in some diced jalapeños for an extra kick!

Final Thoughts

There’s something truly special about a bowl of Creamy Rotisserie Chicken and Mushroom Soup.

It’s not just a meal; it’s a moment of comfort, a chance to unwind after a hectic day.

The rich flavors and creamy texture wrap around you like a warm blanket, inviting you to savor each spoonful.

Whether you’re sharing it with family or enjoying a quiet night in, this soup brings joy to the table.

So, grab your ingredients and let the aroma fill your kitchen.

You’re not just cooking; you’re creating memories that will linger long after the last bite.

Ranis

Creamy Rotisserie Chicken and Mushroom Soup: Enjoy in Minutes!

A quick and delicious creamy soup made with rotisserie chicken and mushrooms, perfect for a comforting meal.
Prep Time 10 minutes
Cook Time 25 minutes
Total Time 35 minutes
Servings: 6 servings
Course: Soup
Cuisine: American
Calories: 320

Ingredients
  

  • 2 tablespoons olive oil
  • 1 medium onion diced
  • 2 cloves garlic minced
  • 8 ounces mushrooms sliced (button or cremini)
  • 4 cups chicken broth
  • 2 cups rotisserie chicken shredded
  • 1 cup heavy cream
  • 1 teaspoon dried thyme
  • 1 teaspoon salt
  • ½ teaspoon black pepper
  • 2 tablespoons fresh parsley chopped (for garnish)

Method
 

  1. In a large pot, heat the olive oil over medium heat. Add the diced onion and sauté for about 5 minutes, or until translucent.
  2. Stir in the minced garlic and sliced mushrooms. Cook for an additional 5-7 minutes, until the mushrooms are tender and have released their moisture.
  3. Pour in the chicken broth and bring the mixture to a boil.
  4. Reduce the heat to low and add the shredded rotisserie chicken, heavy cream, dried thyme, salt, and black pepper. Stir well to combine.
  5. Simmer the soup for 10-15 minutes, allowing the flavors to meld together.
  6. Taste and adjust seasoning if necessary. Serve hot, garnished with fresh parsley.

Nutrition

Serving: 1cupCalories: 320kcalCarbohydrates: 6gProtein: 22gFat: 22gSaturated Fat: 11gPolyunsaturated Fat: 8gCholesterol: 80mgSodium: 800mgFiber: 1gSugar: 2g

Notes

  • For a lighter version, substitute half-and-half for the heavy cream.
  • Add a cup of frozen peas or spinach in the last few minutes of cooking for added nutrition and color.

Tried this recipe?

Let us know how it was!

Greek-Style Loaded Hummus: Discover the Ultimate Dip!

Introduction to Greek-Style Loaded Hummus

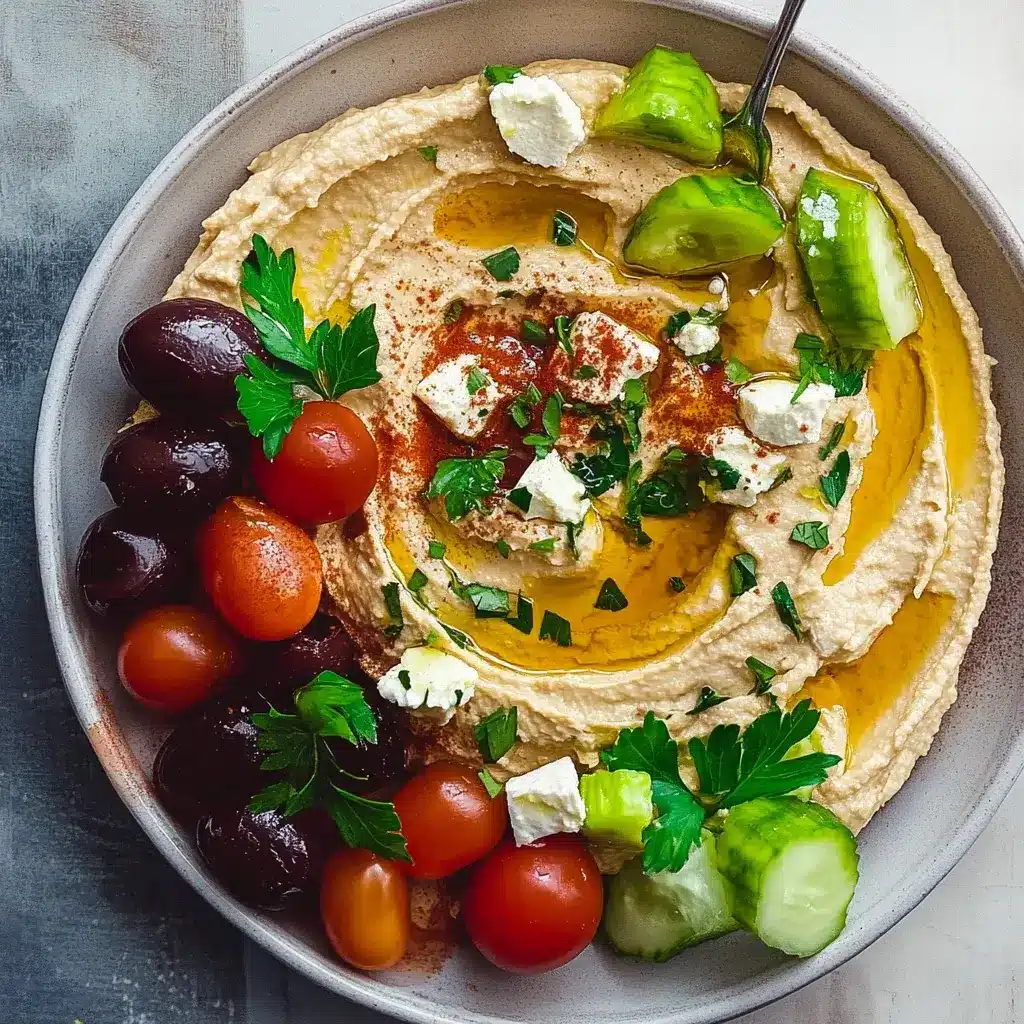
There’s something magical about a dip that brings people together. Greek-Style Loaded Hummus is that dip. It’s creamy, flavorful, and packed with fresh ingredients that make it a hit at any gathering. Whether you’re hosting friends for game night or just need a quick snack after a long day, this recipe is your go-to solution. It’s not just about satisfying hunger; it’s about creating moments. With its vibrant colors and delicious toppings, this hummus is sure to impress your loved ones and elevate your appetizer game. Let’s dive into this culinary delight!

Why You’ll Love This Greek-Style Loaded Hummus

This Greek-Style Loaded Hummus is a game-changer in the kitchen. It’s incredibly easy to whip up, taking just 15 minutes from start to finish. The flavors are vibrant and fresh, making it a crowd-pleaser for any occasion. Plus, it’s a healthy snack option that doesn’t skimp on taste. Whether you’re dipping pita chips or fresh veggies, this hummus is sure to satisfy your cravings and impress your guests.

Ingredients for Greek-Style Loaded Hummus

Gathering the right ingredients is the first step to creating your Greek-Style Loaded Hummus. Each component plays a vital role in building flavor and texture. Here’s what you’ll need:

  • Canned chickpeas: The base of your hummus, providing creaminess and protein. Rinse them well to remove excess sodium.
  • Tahini: This sesame seed paste adds a nutty flavor and smooth texture. It’s a staple in many Mediterranean dishes.
  • Fresh lemon juice: Brightens up the dip with acidity. Use fresh lemons for the best flavor.
  • Olive oil: Adds richness and helps blend the ingredients smoothly. A good quality extra virgin olive oil is ideal.
  • Garlic: Minced garlic infuses the hummus with a robust flavor. Adjust the amount based on your preference.
  • Ground cumin: This spice brings warmth and depth to the dish. It’s a classic flavor in Mediterranean cuisine.
  • Salt and pepper: Essential for seasoning. Adjust to taste for the perfect balance.
  • Greek yogurt: Adds creaminess and a tangy flavor. For a dairy-free option, substitute with a plant-based yogurt.
  • Diced cucumber: Provides a refreshing crunch and complements the creamy hummus.
  • Diced tomatoes: Adds juiciness and a pop of color. Choose ripe tomatoes for the best taste.
  • Kalamata olives: These briny olives enhance the Mediterranean flavor profile. Chop them for easy mixing.
  • Crumbled feta cheese: A classic topping that adds a salty, creamy element. You can skip this for a vegan version.
  • Chopped fresh parsley: For garnish, it adds a burst of color and freshness.
  • Pita chips or fresh veggies: Perfect for dipping! Choose your favorites for a delightful crunch.

For exact measurements, check the bottom of the article where you can find everything listed for easy printing. Enjoy the process of gathering these ingredients, as each one contributes to the deliciousness of your Greek-Style Loaded Hummus!

How to Make Greek-Style Loaded Hummus

Creating your Greek-Style Loaded Hummus is a breeze! Follow these simple steps, and you’ll have a delicious dip ready in no time. Let’s get started!

Step 1: Blend the Base

First, grab your food processor. Combine the canned chickpeas, tahini, fresh lemon juice, olive oil, minced garlic, ground cumin, salt, and pepper. Blend everything until it’s smooth and creamy. If the mixture is too thick, don’t hesitate to add a splash of water. This will help you achieve that perfect consistency!

Step 2: Prepare the Serving Dish

Once your hummus is blended to perfection, it’s time to transfer it to a serving dish. Spread it out evenly with a spatula. This not only makes it look appealing but also creates a nice surface for the toppings. A beautiful presentation is half the battle!

Step 3: Add the Greek Yogurt

In a small bowl, mix the Greek yogurt with a pinch of salt. This adds a delightful creaminess to your dip. Spread the yogurt over the hummus, creating a luscious layer that complements the flavors beautifully.

Step 4: Top with Fresh Ingredients

Now comes the fun part! Sprinkle the diced cucumber, juicy tomatoes, chopped Kalamata olives, and crumbled feta cheese on top of the hummus. Each ingredient adds a burst of flavor and texture, making your Greek-Style Loaded Hummus truly irresistible.

Step 5: Garnish and Serve

Finally, finish off your masterpiece by sprinkling chopped fresh parsley over the top. This adds a pop of color and freshness. Serve your hummus with pita chips or fresh veggies for dipping. Enjoy every bite of this delightful appetizer!

Tips for Success

  • Always rinse your chickpeas well to reduce sodium and enhance flavor.
  • For a creamier texture, blend longer and add water gradually.
  • Use fresh ingredients for the best taste, especially the lemon juice.
  • Experiment with spices; a pinch of cayenne can add a nice kick.
  • Let the hummus sit for a bit before serving to allow flavors to meld.

Equipment Needed

  • Food processor: Essential for blending the hummus smoothly. A high-speed blender works too.
  • Spatula: Perfect for spreading the hummus evenly in the serving dish.
  • Measuring cups: Useful for accurate ingredient portions, though you can eyeball it if you’re confident.
  • Small bowl: Handy for mixing the Greek yogurt with salt.

Variations of Greek-Style Loaded Hummus

  • Spicy Hummus: Add a pinch of cayenne pepper or diced jalapeños to the base for a fiery kick.
  • Roasted Red Pepper Hummus: Blend in some roasted red peppers for a smoky flavor that elevates the dip.
  • Herbed Hummus: Mix in fresh herbs like dill or mint for a refreshing twist on the classic recipe.
  • Avocado Hummus: Incorporate ripe avocado for a creamy texture and a boost of healthy fats.
  • Vegan Option: Substitute Greek yogurt with a dairy-free yogurt and skip the feta for a completely plant-based dip.

Serving Suggestions for Greek-Style Loaded Hummus

  • Pair with warm pita bread for a classic Mediterranean experience.
  • Serve alongside a colorful veggie platter for a healthy crunch.
  • Complement with a refreshing cucumber salad for a light meal.
  • Enjoy with a chilled glass of white wine or sparkling water.
  • Present in a beautiful bowl, garnished with extra parsley for visual appeal.

FAQs about Greek-Style Loaded Hummus

Can I make Greek-Style Loaded Hummus ahead of time?

Absolutely! This dip can be made a day in advance. Just store it in an airtight container in the fridge. The flavors will meld beautifully, making it even tastier!

What can I use instead of tahini?

If you don’t have tahini on hand, you can substitute it with sunflower seed butter or even peanut butter. While the flavor will change slightly, it will still create a creamy texture.

Is Greek-Style Loaded Hummus suitable for a vegan diet?

Yes! To make it vegan, simply swap the Greek yogurt for a dairy-free yogurt and omit the feta cheese. You’ll still enjoy a delicious and creamy dip!

How long does Greek-Style Loaded Hummus last in the fridge?

When stored properly, this hummus can last up to a week in the fridge. Just give it a good stir before serving again!

What are some creative ways to serve Greek-Style Loaded Hummus?

Besides the classic pita chips and veggies, try using it as a spread on sandwiches or wraps. It also makes a fantastic topping for grilled meats or roasted vegetables!

Final Thoughts

Creating Greek-Style Loaded Hummus is more than just making a dip; it’s about crafting a delightful experience. Each bite transports you to sun-soaked Mediterranean shores, where fresh ingredients reign supreme. The joy of sharing this creamy, vibrant dish with friends and family is unmatched. Whether it’s a casual gathering or a festive celebration, this hummus brings people together. Plus, it’s a healthy option that doesn’t compromise on flavor. So, roll up your sleeves, gather your ingredients, and let the magic of this recipe unfold. You’ll be savoring every moment and every bite!

Ranis

Greek-Style Loaded Hummus: Discover the Ultimate Dip!

A delicious and creamy Greek-Style Loaded Hummus topped with fresh vegetables and feta cheese, perfect for dipping.
Prep Time 15 minutes
Total Time 15 minutes
Servings: 6 servings
Course: Appetizer
Cuisine: Greek
Calories: 180

Ingredients
  

  • 2 cups canned chickpeas drained and rinsed
  • 1/4 cup tahini
  • 1/4 cup fresh lemon juice about 2 lemons
  • 2 tablespoons olive oil
  • 2 cloves garlic minced
  • 1/2 teaspoon ground cumin
  • Salt and pepper to taste
  • 1/4 cup Greek yogurt
  • 1/2 cup diced cucumber
  • 1/2 cup diced tomatoes
  • 1/4 cup Kalamata olives pitted and chopped
  • 1/4 cup crumbled feta cheese
  • 2 tablespoons chopped fresh parsley
  • Pita chips or fresh veggies for serving

Method
 

  1. In a food processor, combine the chickpeas, tahini, lemon juice, olive oil, garlic, cumin, salt, and pepper. Blend until smooth, adding a little water if necessary to reach your desired consistency.
  2. Transfer the hummus to a serving dish and spread it out evenly.
  3. In a small bowl, mix the Greek yogurt with a pinch of salt and spread it over the hummus.
  4. Top the hummus with diced cucumber, diced tomatoes, chopped olives, and crumbled feta cheese.
  5. Sprinkle the chopped parsley over the top for garnish.
  6. Serve with pita chips or fresh veggies for dipping.

Nutrition

Serving: 1servingCalories: 180kcalCarbohydrates: 15gProtein: 6gFat: 10gSaturated Fat: 1.5gPolyunsaturated Fat: 8.5gCholesterol: 5mgSodium: 200mgFiber: 4gSugar: 2g

Notes

  • For a spicier version, add a pinch of cayenne pepper or some diced jalapeños to the hummus mixture.
  • Substitute the Greek yogurt with a dairy-free yogurt for a vegan option, and try adding roasted red peppers for an extra flavor boost.

Tried this recipe?

Let us know how it was!

Creamy Mushroom Pasta: A Delightful Recipe You’ll Love!

Introduction to Creamy Mushroom Pasta

There’s something magical about a bowl of creamy mushroom pasta that instantly warms the soul. Maybe it’s the rich, velvety sauce or the earthy mushrooms that remind me of cozy family dinners. This dish is not just a meal; it’s a comforting hug on a plate. Perfect for those busy weeknights or when you want to impress someone special, creamy mushroom pasta is a quick solution that doesn’t skimp on flavor. With just a handful of ingredients, you can whip up a delightful dinner that feels indulgent yet simple. Let’s dive into this culinary adventure!

Why You’ll Love This Creamy Mushroom Pasta

This creamy mushroom pasta is a game-changer for any home cook. It’s incredibly easy to make, taking just 30 minutes from start to finish. The combination of savory mushrooms and rich cream creates a flavor explosion that will have your taste buds dancing. Plus, it’s versatile enough to please everyone at the table, whether you’re cooking for picky eaters or gourmet enthusiasts. Trust me, this dish will quickly become a favorite!

Ingredients for Creamy Mushroom Pasta

Gathering the right ingredients is the first step to creating a delicious creamy mushroom pasta. Here’s what you’ll need:

  • Pasta: Fettuccine or spaghetti works beautifully, but feel free to use your favorite type.
  • Olive Oil: A staple in Italian cooking, it adds richness and depth to the dish.
  • Onion: Finely chopped, it brings sweetness and flavor to the base of the sauce.
  • Garlic: Minced garlic adds a fragrant kick that elevates the entire dish.
  • Mushrooms: Sliced cremini or button mushrooms are perfect for their earthy taste and texture.
  • Dried Thyme: This herb complements the mushrooms beautifully, adding a hint of warmth.
  • Salt and Black Pepper: Essential for seasoning, they enhance all the flavors in the dish.
  • Heavy Cream: The star of the show, it creates that luscious, creamy sauce we all crave.
  • Parmesan Cheese: Grated, it adds a salty, nutty flavor that ties everything together.
  • Fresh Parsley: Chopped, it’s a lovely garnish that adds a pop of color and freshness.

For those looking to mix things up, consider adding cooked chicken or shrimp for extra protein. If you want a lighter version, half-and-half can replace the heavy cream, or you can opt for a dairy-free cream alternative. The exact quantities for each ingredient are available at the bottom of the article for easy printing!

How to Make Creamy Mushroom Pasta

Now that you have your ingredients ready, let’s get cooking! This creamy mushroom pasta comes together in just a few simple steps. Follow along, and you’ll have a delicious meal on the table in no time.

Step 1: Cook the Pasta

Start by boiling a large pot of salted water. Once it’s bubbling, add your fettuccine or spaghetti. Cook according to the package instructions until it’s al dente. This usually takes about 8-10 minutes. Remember to reserve half a cup of that pasta water before draining. It’s liquid gold for your sauce!

Step 2: Sauté the Onions

In a large skillet, heat the olive oil over medium heat. Add the finely chopped onion and sauté for about 3-4 minutes. You want them soft and translucent, not browned. This step builds a flavorful base for your creamy mushroom pasta.

Step 3: Add Garlic and Mushrooms

Next, toss in the minced garlic and sliced mushrooms. Cook for another 5-7 minutes, stirring occasionally. You’ll know they’re ready when the mushrooms are browned and have released their moisture. The aroma will be heavenly, trust me!

Step 4: Season the Mixture

Now it’s time to add some flavor! Stir in the dried thyme, salt, and black pepper. Cook for an additional minute to let those spices mingle. This is where your creamy mushroom pasta starts to come alive!

Step 5: Create the Creamy Sauce

Pour in the heavy cream and bring the mixture to a gentle simmer. Let it cook for 2-3 minutes until it thickens slightly. Keep stirring to ensure everything is well combined. The sauce should be rich and inviting, ready to coat your pasta.

Step 6: Combine Pasta and Sauce

Now, add the drained pasta to the skillet. Toss everything together, ensuring the pasta is well coated in that luscious creamy sauce. If it feels too thick, don’t hesitate to add a splash of the reserved pasta water. It’ll help achieve that perfect consistency.

Step 7: Finish with Parmesan

Finally, stir in the grated Parmesan cheese until it melts and blends into the sauce. Taste and adjust the seasoning if needed. Serve your creamy mushroom pasta immediately, garnished with fresh parsley for a pop of color. Enjoy every bite!

Tips for Success

  • Always salt your pasta water; it enhances the flavor of the noodles.
  • Don’t rush the sautéing process; letting the onions and mushrooms caramelize adds depth.
  • Reserve pasta water before draining; it’s perfect for adjusting sauce consistency.
  • For a richer flavor, use freshly grated Parmesan instead of pre-packaged.
  • Experiment with herbs like basil or oregano for a unique twist!

Equipment Needed

  • Large Pot: Essential for boiling pasta; a deep saucepan works too.
  • Skillet: A non-stick skillet is ideal for sautéing; cast iron adds flavor.
  • Colander: For draining pasta; a slotted spoon can work in a pinch.
  • Wooden Spoon: Perfect for stirring; a silicone spatula is a great alternative.

Variations

  • Protein Boost: Add cooked chicken, shrimp, or even crispy bacon for a heartier meal.
  • Vegetable Medley: Toss in spinach, peas, or sun-dried tomatoes for extra color and nutrition.
  • Vegan Option: Substitute heavy cream with coconut cream and use nutritional yeast instead of Parmesan.
  • Gluten-Free: Use gluten-free pasta to make this dish suitable for those with dietary restrictions.
  • Spicy Kick: Add red pepper flakes or a dash of hot sauce for a bit of heat.

Serving Suggestions

  • Side Salad: A crisp Caesar or mixed greens salad pairs perfectly with the creamy pasta.
  • Bread: Serve with warm garlic bread or a crusty baguette to soak up the sauce.
  • Wine: A glass of Chardonnay or Pinot Grigio complements the dish beautifully.
  • Presentation: Garnish with extra parsley and a sprinkle of Parmesan for a restaurant-style finish.

FAQs about Creamy Mushroom Pasta

As you embark on your creamy mushroom pasta journey, you might have a few questions. Here are some common queries that can help you along the way:

Can I use different types of mushrooms?

Absolutely! While cremini and button mushrooms are fantastic, feel free to experiment with shiitake, portobello, or even a mix of wild mushrooms. Each variety brings its own unique flavor to the dish.

How can I make this dish lighter?

If you’re looking for a lighter version of creamy mushroom pasta, consider substituting half-and-half for the heavy cream. You can also use a dairy-free cream alternative to keep it vegan-friendly.

What can I serve with creamy mushroom pasta?

This dish pairs wonderfully with a crisp side salad or some warm garlic bread. A glass of white wine, like Chardonnay, can elevate your meal even further!

Can I make this pasta ahead of time?

While creamy mushroom pasta is best enjoyed fresh, you can prepare the sauce in advance. Just reheat it gently and toss it with freshly cooked pasta when you’re ready to serve.

How do I store leftovers?

Store any leftover creamy mushroom pasta in an airtight container in the fridge for up to three days. Reheat gently on the stovetop, adding a splash of water or cream to loosen the sauce.

Final Thoughts

Cooking creamy mushroom pasta is more than just preparing a meal; it’s about creating a moment of joy. The rich flavors and comforting textures invite you to slow down and savor each bite. Whether you’re sharing it with family or enjoying a quiet dinner alone, this dish brings warmth and satisfaction. It’s a reminder that good food doesn’t have to be complicated. With just a few ingredients and a little love, you can transform an ordinary evening into something special. So grab your apron, and let’s make some delicious memories together!

Ranis

Creamy Mushroom Pasta: A Delightful Recipe You’ll Love!

A creamy and delicious pasta dish made with mushrooms, perfect for a comforting meal.
Prep Time 10 minutes
Cook Time 20 minutes
Total Time 30 minutes
Servings: 4 servings
Course: Main Course
Cuisine: Italian
Calories: 450

Ingredients
  

  • 8 ounces fettuccine or spaghetti
  • 2 tablespoons olive oil
  • 1 medium onion finely chopped
  • 3 cloves garlic minced
  • 8 ounces mushrooms sliced (such as cremini or button)
  • 1 teaspoon dried thyme
  • 1/2 teaspoon salt
  • 1/4 teaspoon black pepper
  • 1 cup heavy cream
  • 1/2 cup grated Parmesan cheese
  • 2 tablespoons fresh parsley chopped (for garnish)

Method
 

  1. Cook the pasta according to package instructions in a large pot of salted boiling water until al dente. Drain and set aside, reserving 1/2 cup of pasta water.
  2. In a large skillet, heat the olive oil over medium heat. Add the chopped onion and sauté for about 3-4 minutes until softened.
  3. Add the minced garlic and sliced mushrooms to the skillet. Cook for another 5-7 minutes, stirring occasionally, until the mushrooms are browned and have released their moisture.
  4. Stir in the dried thyme, salt, and black pepper. Cook for an additional minute to combine the flavors.
  5. Pour in the heavy cream and bring the mixture to a gentle simmer. Let it cook for 2-3 minutes until slightly thickened.
  6. Add the cooked pasta to the skillet, tossing to coat in the creamy mushroom sauce. If the sauce is too thick, add a little reserved pasta water to reach your desired consistency.
  7. Stir in the grated Parmesan cheese until melted and well combined. Adjust seasoning if necessary.
  8. Serve immediately, garnished with fresh parsley.

Nutrition

Serving: 1servingCalories: 450kcalCarbohydrates: 40gProtein: 12gFat: 25gSaturated Fat: 15gPolyunsaturated Fat: 10gCholesterol: 70mgSodium: 500mgFiber: 2gSugar: 2g

Notes

  • For added protein, consider adding cooked chicken or shrimp to the pasta before serving.
  • Substitute half-and-half for the heavy cream for a lighter version, or use a dairy-free cream alternative for a vegan option.

Tried this recipe?

Let us know how it was!

Classic American Potato Salad: A Must-Try Recipe Today!

Introduction to Classic American Potato Salad

Growing up, summer meant backyard barbecues and family gatherings, where the star of the show was always the classic American potato salad. This dish is more than just a side; it’s a celebration of flavors and memories. Creamy, tangy, and oh-so-satisfying, it’s the perfect companion for grilled meats or a picnic spread. Whether you’re looking for a quick solution for a busy day or a dish to impress your loved ones, this potato salad is a must-try. Let’s dive into this timeless recipe that brings everyone together around the table.

Why You’ll Love This Classic American Potato Salad

This classic American potato salad is a game-changer for any meal. It’s incredibly easy to whip up, making it perfect for busy weeknights or last-minute gatherings. The creamy texture and tangy flavor will have everyone coming back for seconds. Plus, it’s versatile enough to pair with just about anything, from burgers to grilled veggies. Trust me, this dish will quickly become a staple in your kitchen!

Ingredients for Classic American Potato Salad

Gathering the right ingredients is key to making a delicious classic American potato salad. Here’s what you’ll need:

  • Yukon Gold potatoes: These creamy potatoes hold their shape well and add a buttery flavor.
  • Mayonnaise: The base of the dressing, providing that rich creaminess we all love.
  • Dijon mustard: Adds a tangy kick that balances the richness of the mayo.
  • Apple cider vinegar: A splash of acidity that brightens the flavors.
  • Garlic powder: For a subtle depth of flavor without the bite of fresh garlic.
  • Onion powder: Enhances the overall taste with a hint of sweetness.
  • Salt and black pepper: Essential for seasoning and bringing all the flavors together.
  • Celery: Adds a satisfying crunch and freshness to the salad.
  • Red onion: Provides a pop of color and a mild onion flavor.
  • Hard-boiled eggs: These add protein and a creamy texture, making the salad more filling.
  • Fresh parsley: A sprinkle of green for garnish and a fresh taste.

For those looking to mix things up, consider adding diced pickles or relish for an extra tangy flavor. If you want a lighter version, swap out half of the mayonnaise for Greek yogurt. You can find the exact quantities for each ingredient at the bottom of the article, ready for printing!

How to Make Classic American Potato Salad

Creating the perfect classic American potato salad is a straightforward process that anyone can master. Follow these simple steps, and you’ll have a dish that’s sure to impress. Let’s get started!

Step 1: Prepare the Potatoes

Begin by placing your cubed Yukon Gold potatoes in a large pot. Cover them with cold water and add a pinch of salt. Bring the water to a boil over medium-high heat. Cook the potatoes until they’re fork-tender, which usually takes about 10 to 15 minutes. Once they’re done, drain the potatoes and let them cool completely. Cooling is crucial; it prevents the dressing from becoming runny and helps the flavors meld better.

Step 2: Make the Dressing

While the potatoes are cooling, it’s time to whip up the dressing. In a large mixing bowl, combine the mayonnaise, Dijon mustard, apple cider vinegar, garlic powder, onion powder, salt, and black pepper. Mix everything until it’s smooth and creamy. Achieving that perfect consistency is key; it ensures every bite of potato is coated in deliciousness.

Step 3: Combine Ingredients

Once the potatoes have cooled, gently fold them into the bowl with the dressing. Add in the finely chopped celery, red onion, hard-boiled eggs, and parsley. Be careful not to mash the potatoes; you want them to stay intact for that delightful texture. Even mixing is essential here, as it allows all the flavors to come together beautifully.

Step 4: Chill and Serve

After combining everything, taste the salad and adjust the seasoning if needed. Cover the bowl and refrigerate for at least one hour. Chilling is vital; it allows the flavors to meld and develop. When you’re ready to serve, you can enjoy it chilled or at room temperature. Pair it with grilled meats or serve it at your next picnic for a guaranteed crowd-pleaser!

Tips for Success

  • Choose Yukon Gold potatoes for the best flavor and texture.
  • Let the potatoes cool completely to avoid a watery salad.
  • Adjust the seasoning to your taste; don’t be afraid to experiment!
  • For added crunch, consider including diced pickles or bell peppers.
  • Make it a day ahead; the flavors improve as it sits in the fridge.

Equipment Needed

  • Large pot: Essential for boiling the potatoes. A Dutch oven works great too.
  • Mixing bowl: Use a large bowl for combining ingredients. A glass or stainless steel bowl is ideal.
  • Colander: Perfect for draining the potatoes after cooking.
  • Spatula: A rubber spatula helps gently fold ingredients without mashing.

Variations of Classic American Potato Salad

  • Herbed Potato Salad: Add fresh dill or chives for a burst of herbal flavor that brightens the dish.
  • Spicy Potato Salad: Mix in diced jalapeños or a dash of hot sauce for a kick that will wake up your taste buds.
  • Vegan Potato Salad: Substitute mayonnaise with a vegan mayo or a blend of avocado for a creamy, plant-based option.
  • Loaded Potato Salad: Incorporate crumbled bacon, shredded cheese, and green onions for a heartier, indulgent twist.
  • Southwestern Potato Salad: Add black beans, corn, and a sprinkle of cumin for a zesty, southwestern flair.

Serving Suggestions for Classic American Potato Salad

  • Pair it with grilled burgers or hot dogs for a classic summer meal.
  • Serve alongside barbecued chicken or ribs for a hearty feast.
  • Complement with a refreshing iced tea or lemonade.
  • Garnish with extra parsley for a pop of color.
  • Use a colorful serving bowl to make it visually appealing.

FAQs about Classic American Potato Salad

Can I make classic American potato salad ahead of time?

Absolutely! In fact, making it a day ahead allows the flavors to meld beautifully. Just store it in the fridge, and it’ll be ready to serve when you are.

What type of potatoes are best for potato salad?

Yukon Gold potatoes are my go-to for classic American potato salad. They’re creamy and hold their shape well, making for a perfect texture.

How long can I store leftover potato salad?

Leftover potato salad can be stored in an airtight container in the fridge for up to 3-5 days. Just give it a good stir before serving again!

Can I customize the ingredients in this potato salad?

Definitely! Feel free to add your favorite ingredients, like diced pickles, bell peppers, or even bacon for a twist on the classic American potato salad.

Is classic American potato salad gluten-free?

Yes, this classic American potato salad is naturally gluten-free, making it a great option for those with gluten sensitivities. Just double-check your mayonnaise brand to be sure!

Final Thoughts

There’s something truly special about a classic American potato salad. It’s not just a dish; it’s a vessel for memories, laughter, and good times shared with family and friends. Each creamy bite transports me back to sun-soaked afternoons, where the only worry was whether to have seconds. This recipe is a reminder that cooking can be simple yet rewarding. Whether you’re hosting a barbecue or enjoying a quiet dinner, this potato salad will elevate your meal. So grab your ingredients, roll up your sleeves, and let the joy of cooking bring everyone together around the table!

Ranis

Classic American Potato Salad: A Must-Try Recipe Today!

A classic American potato salad recipe that is creamy, tangy, and perfect for picnics and barbecues.
Prep Time 20 minutes
Cook Time 15 minutes
Total Time 1 hour 35 minutes
Servings: 6 servings
Course: Salad
Cuisine: American
Calories: 320

Ingredients
  

  • 2 pounds Yukon Gold potatoes peeled and cut into 1-inch cubes
  • 1 cup mayonnaise
  • 2 tablespoons Dijon mustard
  • 1 tablespoon apple cider vinegar
  • 1 teaspoon garlic powder
  • 1 teaspoon onion powder
  • 1 teaspoon salt
  • 1/2 teaspoon black pepper
  • 1 cup celery finely chopped
  • 1/2 cup red onion finely chopped
  • 4 hard-boiled eggs chopped
  • 1/4 cup fresh parsley chopped

Method
 

  1. Place the cubed potatoes in a large pot and cover with cold water. Add a pinch of salt and bring to a boil over medium-high heat. Cook until the potatoes are fork-tender, about 10-15 minutes. Drain and let cool completely.
  2. In a large mixing bowl, combine the mayonnaise, Dijon mustard, apple cider vinegar, garlic powder, onion powder, salt, and black pepper. Mix until smooth.
  3. Once the potatoes have cooled, add them to the bowl with the dressing. Gently fold in the celery, red onion, hard-boiled eggs, and parsley until everything is well combined.
  4. Taste and adjust seasoning if necessary. Cover the salad and refrigerate for at least 1 hour to allow the flavors to meld.
  5. Serve chilled or at room temperature.

Nutrition

Serving: 1servingCalories: 320kcalCarbohydrates: 25gProtein: 6gFat: 22gSaturated Fat: 3gPolyunsaturated Fat: 19gCholesterol: 100mgSodium: 500mgFiber: 3gSugar: 2g

Notes

  • For a lighter version, substitute Greek yogurt for half of the mayonnaise.
  • Add diced pickles or relish for an extra tangy flavor.

Tried this recipe?

Let us know how it was!