Cool and Creamy Mango Cucumber Smoothie for Summer Bliss

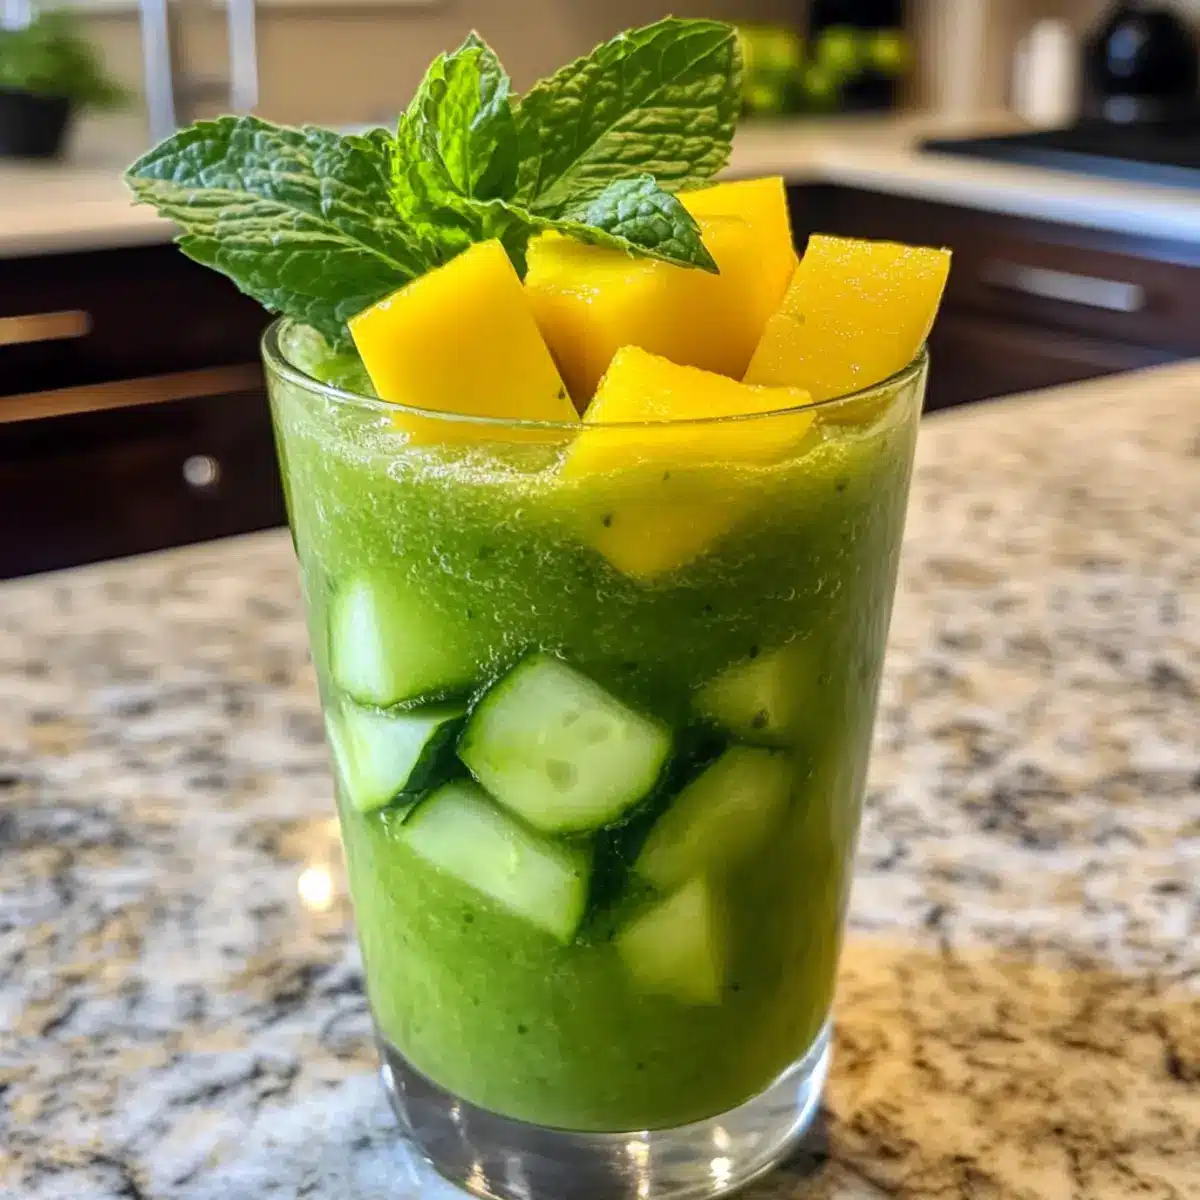
As the sun blazes high in the sky, nothing beats the heat quite like a fresh drink. Today, I’m excited to share my go-to ultra-refreshing Mango Cucumber Smoothie—a vibrant blend that instantly transports me to summer. This smoothie not only boasts the delightful sweetness of ripe mango but also the crispness of cool cucumber, making it both hydrating and delicious. It’s quick to whip up in just three minutes, perfect for busy days or impromptu gatherings. Plus, this vegan treat is bursting with nutrients, ensuring you feel refreshed and energized. Ready to dive into a drink that’s as good for you as it is for your taste buds? Let’s blend our way to a cooler, happier summer!
Why is this Mango Cucumber Smoothie a Must-Try?

Refreshing and Hydrating: This smoothie is a summer thirst-quencher that combines velvety mango with crunchy cucumber, creating a drink that’s as delightful as it is nourishing.

Vegan Goodness: Packed with plant-based ingredients, it’s perfect for anyone looking for a healthy vegan option that doesn’t compromise on taste.

Quick Prep: Need a fast refreshment? This recipe takes just 3 minutes to blend together, making it an easy choice for busy days.

Versatile Flavor: Feel free to swap the herbs or liquids to match your taste—try substituting coconut water with almond milk or oat milk for a different twist!

Crowd-Pleasing Drink: Perfect for summer parties or post-workout refreshments, this smoothie is sure to impress your guests while keeping them cool.

Nutritional Powerhouse: With vitamins C and K, plus essential electrolytes, this smoothie is not just delicious; it’s a health-boosting choice you’ll want to enjoy again and again!

Mango Cucumber Smoothie Ingredients

• Get ready for a refreshing treat!

For the Smoothie

  • Frozen Mango Chunks – Provides natural sweetness and creamy texture; using fresh mangoes in season will elevate the flavor!
  • Lebanese Cucumber – Adds hydrating crunch; Persian cucumbers are a sweeter alternative if you prefer.
  • Mint or Basil – Gives a fresh aroma; feel free to use any herb you love to customize your drink.
  • Juice of ½ Lime – Offers a tangy kick that balances the sweetness; always go for fresh lime juice for the brightest taste.
  • Zest of ½ Lime – Enhances lime flavor with aromatic oils; this adds an extra layer of deliciousness.
  • Coconut Water – Serves as a silky base for blending and provides electrolytes; substituting with almond or oat milk lends creaminess while still being vegan.

Embrace the refreshing essence of this Mango Cucumber Smoothie and let it brighten up your summer days!

Step‑by‑Step Instructions for Mango Cucumber Smoothie

Step 1: Gather Ingredients
Start by collecting all your ingredients for the Mango Cucumber Smoothie. You’ll need frozen mango chunks, a Lebanese cucumber, fresh mint or basil, lime juice and zest, and coconut water. Ensure everything is ready at hand to streamline the blending process, as you’ll be putting everything together in just a moment.

Step 2: Prepare the Blender
Place your high-speed blender on a stable surface and ensure it’s set to the “blend” function. Add the frozen mango chunks first for smooth mixing, followed by the chopped cucumber. The frozen mango will create a creamy texture, while the cucumber adds hydration and a fresh crunch.

Step 3: Add Fresh Ingredients
Next, incorporate the fresh herbs—mint or basil—along with the juice and zest of half a lime. These ingredients infuse the Mango Cucumber Smoothie with refreshing aromas and a zesty kick. Make sure to squeeze out all the juice from the lime for optimal flavor.

Step 4: Pour in Liquid
Now, slowly pour in the coconut water, which acts as the liquid base for your smoothie. If you prefer a creamier texture, feel free to substitute with almond milk or oat milk. The coconut water not only helps in blending but also enhances the hydration factor of this refreshing drink.

Step 5: Blend Until Smooth
Secure the blender lid tightly and blend the mixture on high for about 30 seconds to 1 minute. You’re looking for a vibrant, creamy consistency without any lumps. Keep an eye on the texture—as soon as it’s smooth and well combined, you’re ready for the next step!

Step 6: Adjust Consistency
After blending, take a moment to check the consistency of your Mango Cucumber Smoothie. If it’s thicker than you’d like, add a bit more coconut water, then blend again for about 15 seconds. This step ensures you get the perfect sip every time, adjusting to your preference.

Step 7: Serve and Enjoy
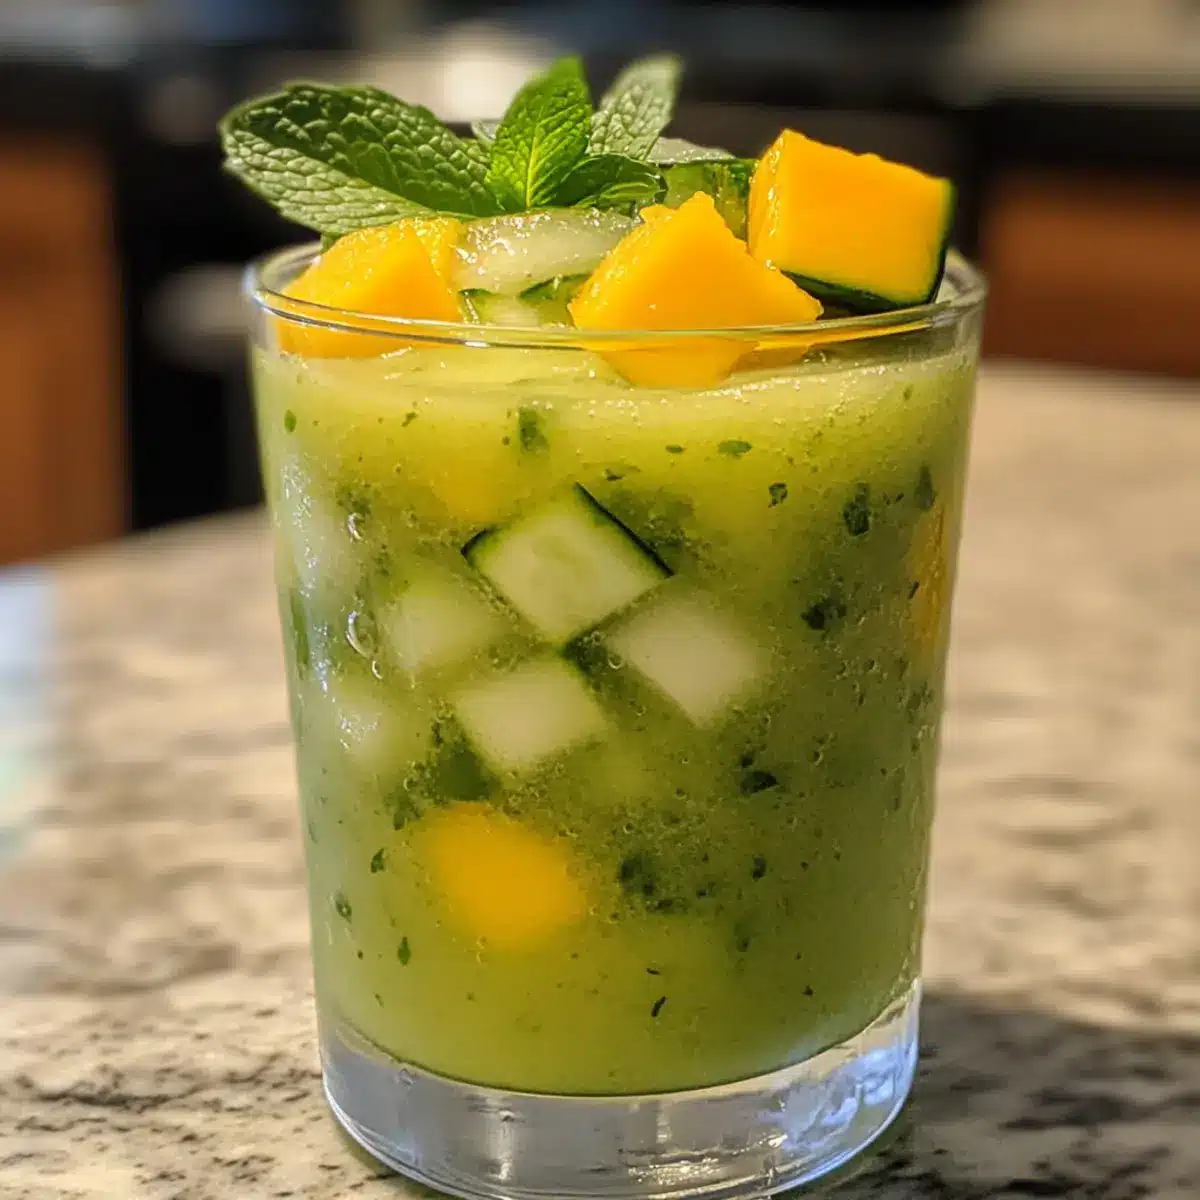
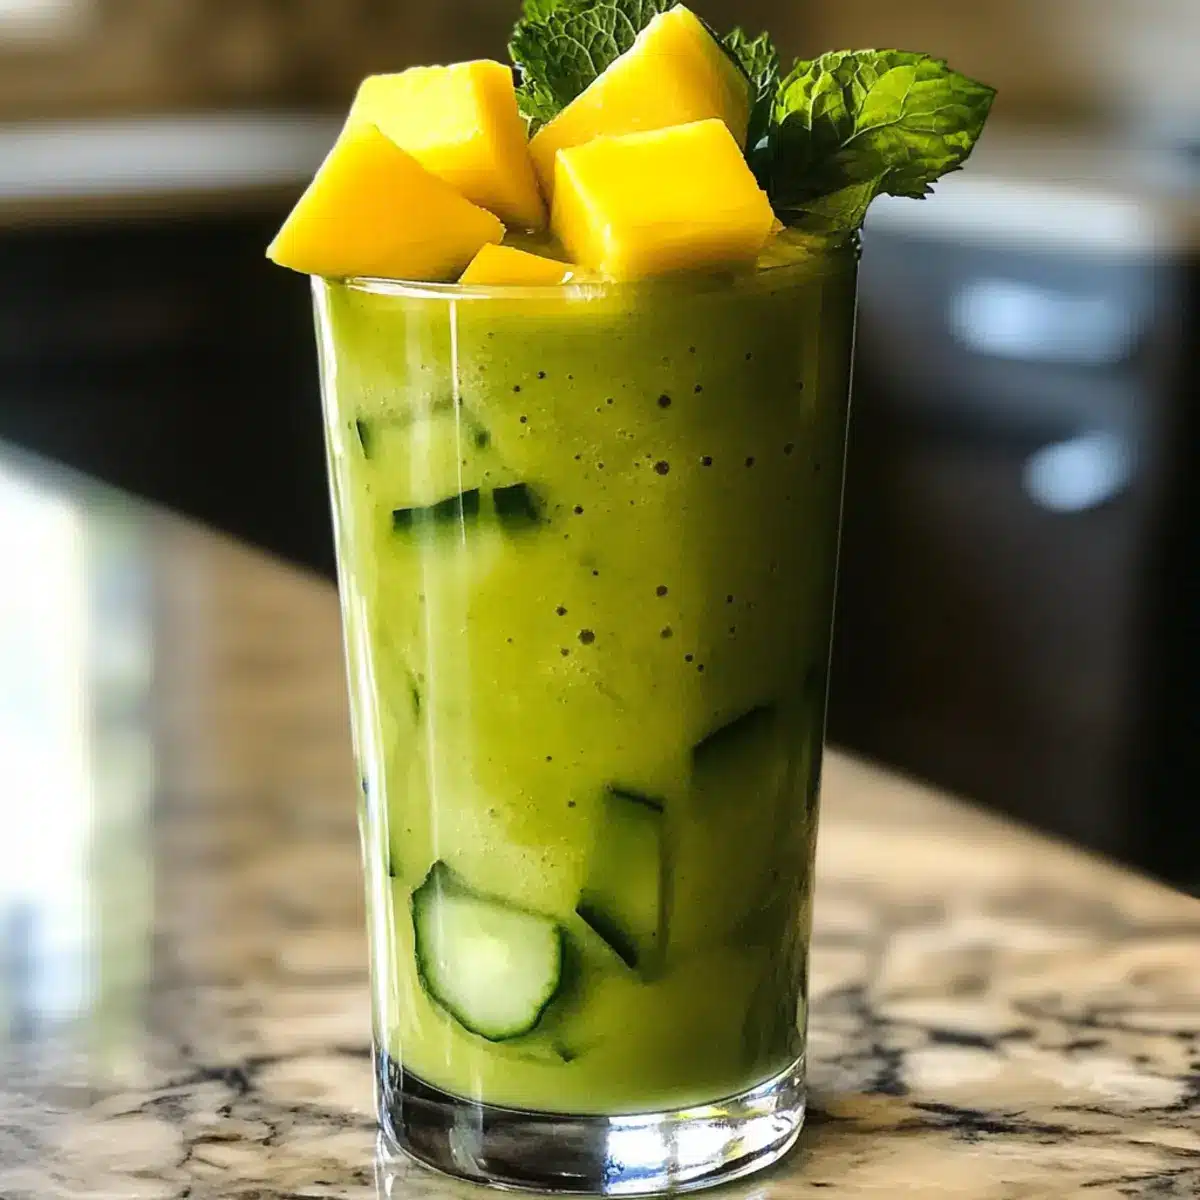
Finally, pour the creamy Mango Cucumber Smoothie into a glass jar. For an extra refreshing treat, serve it chilled with a few ice cubes for that frosty goodness. Take a moment to admire the bright green color before enjoying this delicious and nutritious summer drink right away!
How to Store and Freeze Mango Cucumber Smoothie

Fridge: Store any leftovers in an airtight container for up to 24 hours. Be sure to stir well before serving, as the smoothie may separate.

Freezer: If you want to keep your Mango Cucumber Smoothie for longer, freeze it in ice cube trays for easy blending later. Thaw before enjoying!

Room Temperature: This smoothie is best enjoyed fresh, so try to consume it immediately after making. Avoid storing at room temperature to maintain freshness.

Reheating: This refreshing drink is best served cold; avoid reheating as the quality and texture will be affected—enjoy it as a delightful frozen treat!

Expert Tips for Mango Cucumber Smoothie

  • Choose Ripe Mangoes: Ensure your mangoes are fully ripe for optimal sweetness and flavor; under-ripe fruit can result in a less flavorful smoothie.

  • Ice for Extra Chill: Add a handful of ice cubes to the blender for an extra frosty refreshment, especially during those hot summer days!

  • Cucumber Skin Matters: Peel the cucumber if the skin is tough or bitter; this will enhance the creamy texture and maintain the smoothie’s vibrant color.

  • Customize the Herbs: Experiment with herbs like cilantro or parsley for a unique flavor twist in your Mango Cucumber Smoothie—don’t be afraid to try new combinations!

  • Stay Hydrated: Use coconut water for electrolytes, but feel free to substitute with coconut milk for creaminess or almond milk for a nutty flavor.

  • Serve Fresh: For the best taste and texture, enjoy your smoothie immediately; if leftovers are stored, give them a good stir before serving.

What to Serve with Mango Cucumber Smoothie

Elevate your summer sipping experience with delicious accompaniments that complement the refreshing charm of your smoothie.

  • Crispy Kale Chips: A satisfying crunch that perfectly balances the smoothie’s creamy texture, making for a delightful snack.
  • Quinoa Salad: This protein-packed dish adds texture and a burst of flavors, enriched with veggies and a zesty dressing.
  • Fresh Fruit Platter: Juicy fruits like berries or watermelon harmonize beautifully with the smoothie’s tropical notes, creating a refreshing spread.
  • Spicy Veggie Wraps: Fill whole-grain wraps with crisp veggies and hummus for a light yet flavorful meal that echoes the smoothie’s freshness.
  • Chilled Herbal Tea: A refreshing drink to pair alongside your smoothie, opt for mint or lemongrass for a complementary flavor.
  • Coconut Macaroons: These sweet bites offer a delightful contrast to the juicy ingredients of the smoothie, perfect for satisfying a sweet tooth.
  • Almond Butter Toast: Toast topped with a layer of creamy almond butter and sliced bananas provides a nourishing and flavorful side.
  • Mango Sorbet: This frozen treat echoes the mango flavor in the smoothie, creating an indulgent yet fruity pairing.

Make Ahead Options

Planning ahead makes enjoying this vibrant Mango Cucumber Smoothie even easier! You can prepare the ingredients up to 24 hours in advance by chopping the cucumber and measuring out the frozen mango chunks, mint, and lime juice. Store them in an airtight container in the refrigerator to retain freshness. When you’re ready to enjoy, simply blend the prepped ingredients with the coconut water right before serving to keep that delicious, creamy texture. This method saves you precious time on busy mornings while ensuring your smoothie remains just as refreshing and flavorful as if you made it on the spot!

Mango Cucumber Smoothie Variations

Feel free to get creative with this Mango Cucumber Smoothie and personalize it to your heart’s content!

  • Dairy-Free: Substitute coconut water with almond milk or oat milk for a creamy alternative. This swap keeps it vegan while adding a nutty flavor.

  • Herb Twist: Experiment with cilantro or parsley instead of mint or basil for a surprising flavor twist that brightens the blend. Try this for a unique summer vibe!

  • Protein Boost: Add a scoop of your favorite protein powder to make this smoothie more filling. It’s great for a pre- or post-workout treat!

  • Citrus Zing: Incorporate orange juice along with lime for an extra citrusy kick. This twist ramps up the freshness and adds layers of flavor!

  • Chill with Ice: For a frosty delight, throw in a handful of ice cubes when blending. It’s a wonderful way to enhance that refreshing summer feel!

  • Additional Fruits: Toss in a handful of spinach or kale for an extra nutrient boost without significantly changing the flavor. It’s a delicious way to amp up the health benefits!

  • Sweeten Naturally: If you like it sweeter, add a splash of agave syrup or honey (if not strict vegan) to satisfy those sweet cravings without overdoing it.

Consider these variations the cherry on top of your delightful mango cucumber creation! If you’re looking for more refreshing ideas, try this with a side of Mango Dragonfruit Refresher or enjoy as a dessert with a scoop of Mango Coconut Pudding. Cheers to endless summer sips!
Mango Cucumber Smoothie Recipe FAQs

How do I choose ripe mangoes for the Mango Cucumber Smoothie?
Absolutely! When selecting ripe mangoes, look for those that yield slightly to pressure when squeezed, indicating softness. The skin should be vibrant in color and may have a few dark spots, which can signal ripeness. Avoid green or overly hard mangoes for the best flavor in your smoothie.

How should I store leftover Mango Cucumber Smoothie?
The best way to store any leftover smoothie is in an airtight container in the fridge for up to 24 hours. Since smoothies can separate, give it a good stir before enjoying it again. If you find the texture has changed, try adding a splash of coconut water or milk to revive it!

Can I freeze the Mango Cucumber Smoothie?
Yes, freezing is a fantastic way to preserve your smoothie! Pour the smoothie into ice cube trays and freeze. Once solid, transfer the cubes to a freezer-safe bag or container for up to 3 months. When ready to enjoy, blend the frozen cubes with a bit of coconut water for a quick, refreshing drink.

What if my smoothie turns out too thick?
If your Mango Cucumber Smoothie is thicker than you’d like, no worries! Simply add a little more coconut water (or your preferred liquid) and blend again until you achieve your desired consistency. Keep adjusting until it’s just right for your taste!

Is this smoothie suitable for anyone with allergies?
Yes, this smoothie is vegan and free from common allergens like dairy and gluten. However, if you have specific allergies, be sure to check the ingredients like the coconut water or any substitutes you use, such as almond milk, which contains nuts. Always consult with health professionals regarding allergies.

Can I use different herbs in the Mango Cucumber Smoothie?
Very! Feel free to experiment with various herbs based on your preference. Swap mint with basil, cilantro, or even a hint of dill for an unexpected twist. Just keep in mind that stronger herbs could alter the overall flavor of the smoothie, so start with small amounts!
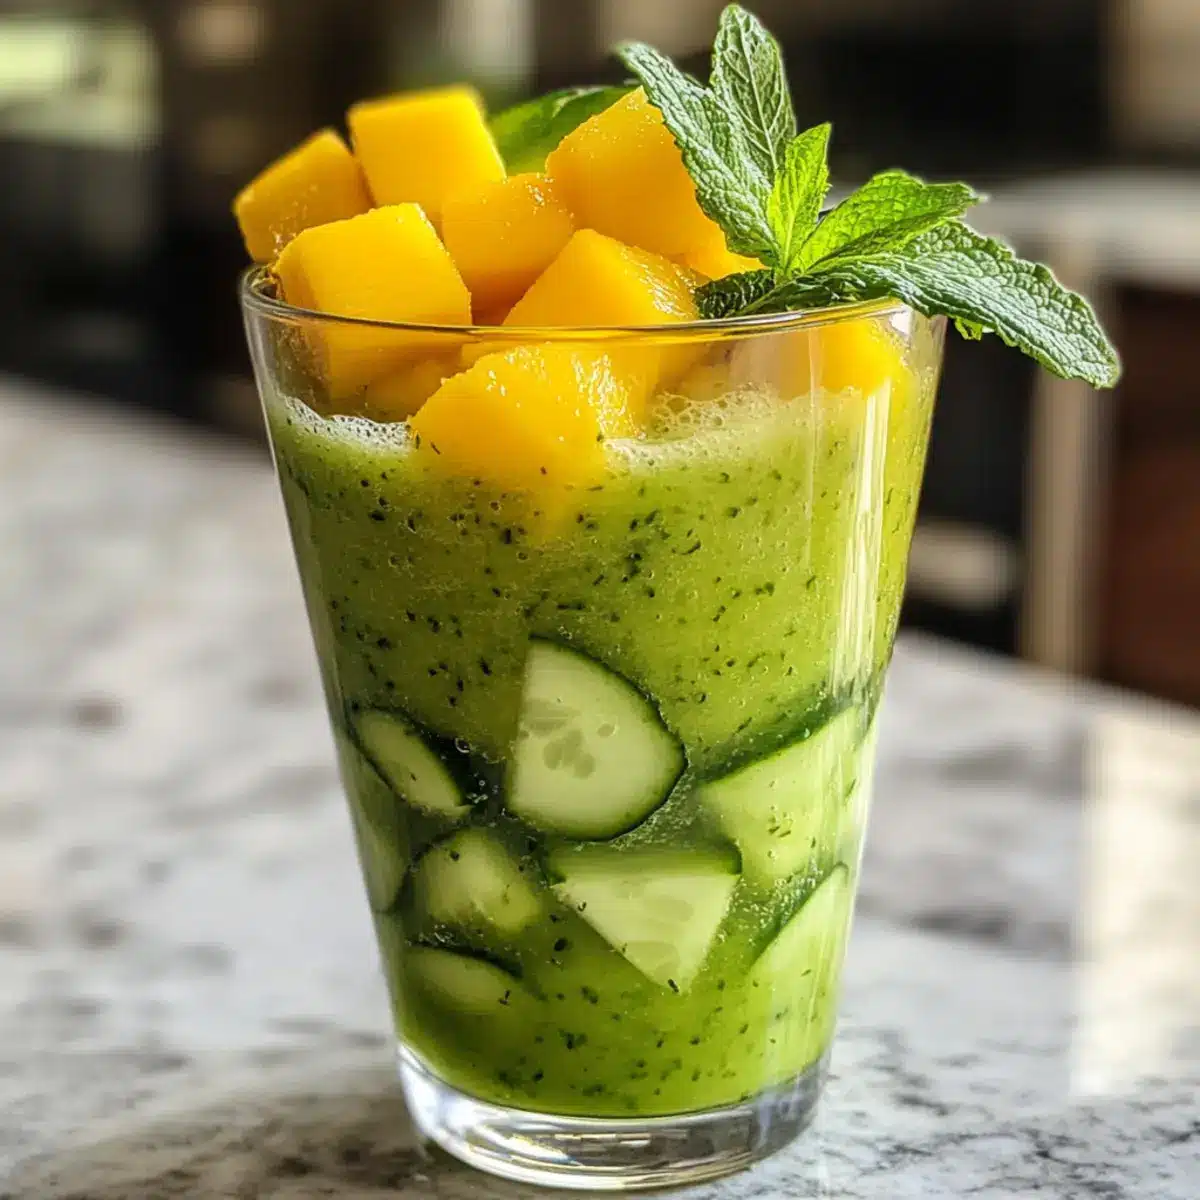
Mango Cucumber Smoothie

Cool and Creamy Mango Cucumber Smoothie for Summer Bliss

Enjoy this refreshing Mango Cucumber Smoothie, a hydrating summer delight that combines the sweetness of mango with the crunch of cucumber.
Prep Time 3 minutes
Total Time 3 minutes
Servings: 2 glasses
Course: Drinks
Cuisine: Vegan
Calories: 150

Ingredients
  

For the Smoothie
  • 2 cups Frozen Mango Chunks Using fresh mangoes in season will elevate the flavor!
  • 1 medium Lebanese Cucumber Persian cucumbers are a sweeter alternative if you prefer.
  • 1/4 cup Fresh Mint or Basil Feel free to use any herb you love.
  • 1 medium Juice of ½ Lime Always go for fresh lime juice for the brightest taste.
  • 1 teaspoon Zest of ½ Lime Enhances lime flavor with aromatic oils.
  • 1 cup Coconut Water Substituting with almond or oat milk lends creaminess.

Equipment

  • High-Speed Blender

Method
 

Step-by-Step Instructions
  1. Gather Ingredients: Collect all your ingredients for the Mango Cucumber Smoothie.
  2. Prepare the Blender: Place your high-speed blender on a stable surface and add the frozen mango chunks followed by the chopped cucumber.
  3. Add Fresh Ingredients: Incorporate the fresh herbs along with the juice and zest of half a lime.
  4. Pour in Liquid: Slowly pour in the coconut water for blending.
  5. Blend Until Smooth: Secure the blender lid and blend on high for about 30 seconds to 1 minute.
  6. Adjust Consistency: If it's thicker than desired, add more coconut water and blend again.
  7. Serve and Enjoy: Pour the smoothie into a glass jar and serve chilled.
Nutrition

Serving: 1glassCalories: 150kcalCarbohydrates: 30gProtein: 2gFat: 1gSodium: 50mgPotassium: 300mgFiber: 4gSugar: 20gVitamin A: 100IUVitamin C: 60mgCalcium: 20mgIron: 0.5mg

Notes

This smoothie is best enjoyed fresh; avoid storing at room temperature to maintain freshness.

Tried this recipe?

Let us know how it was!

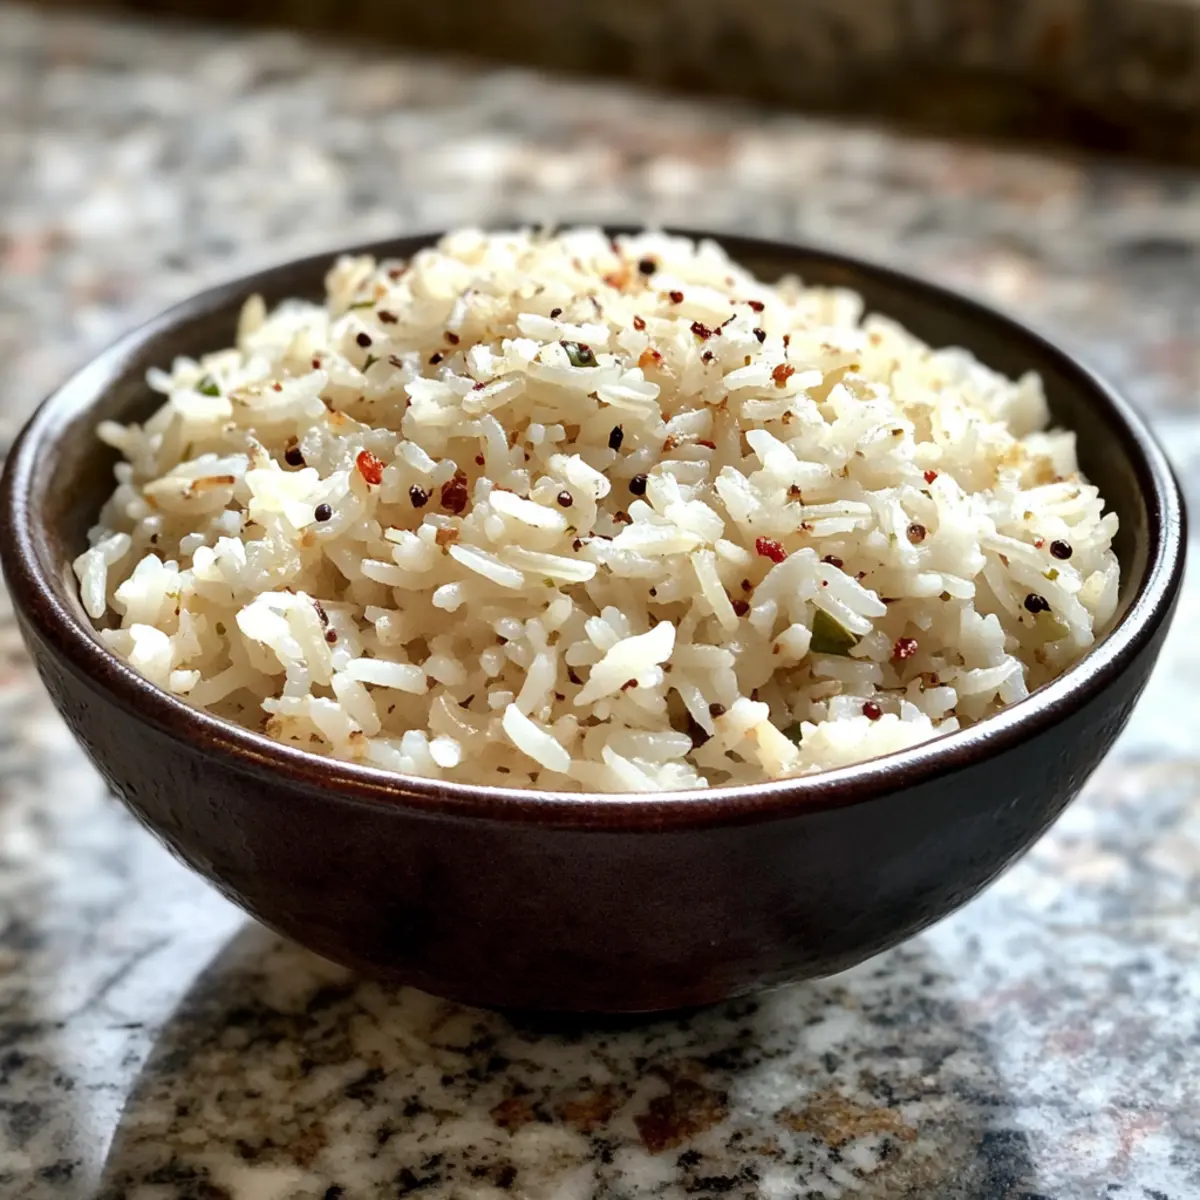
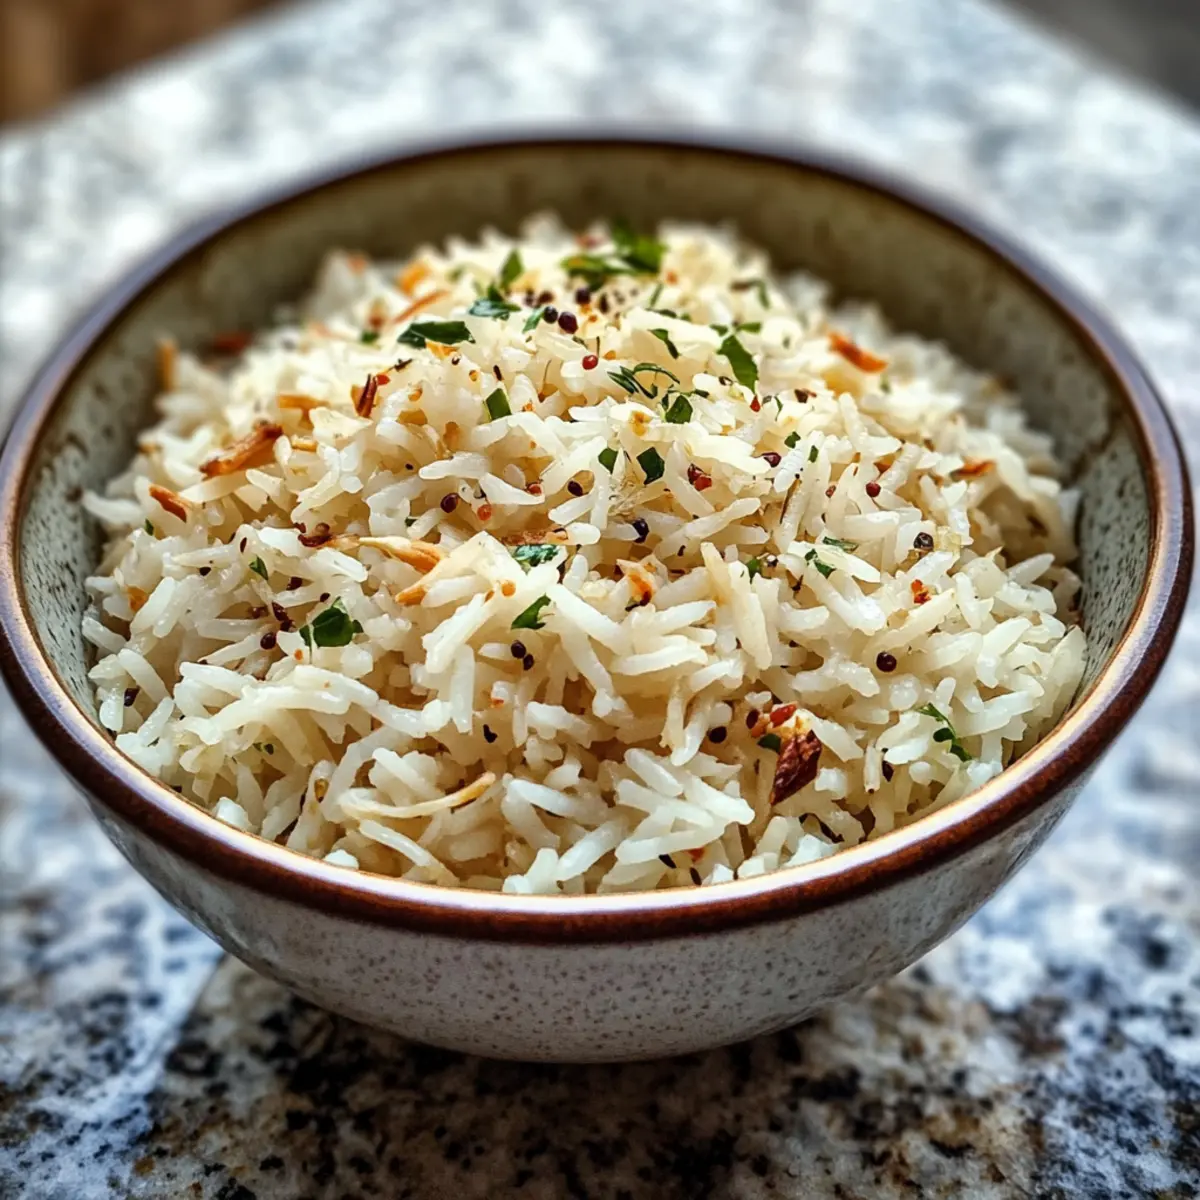
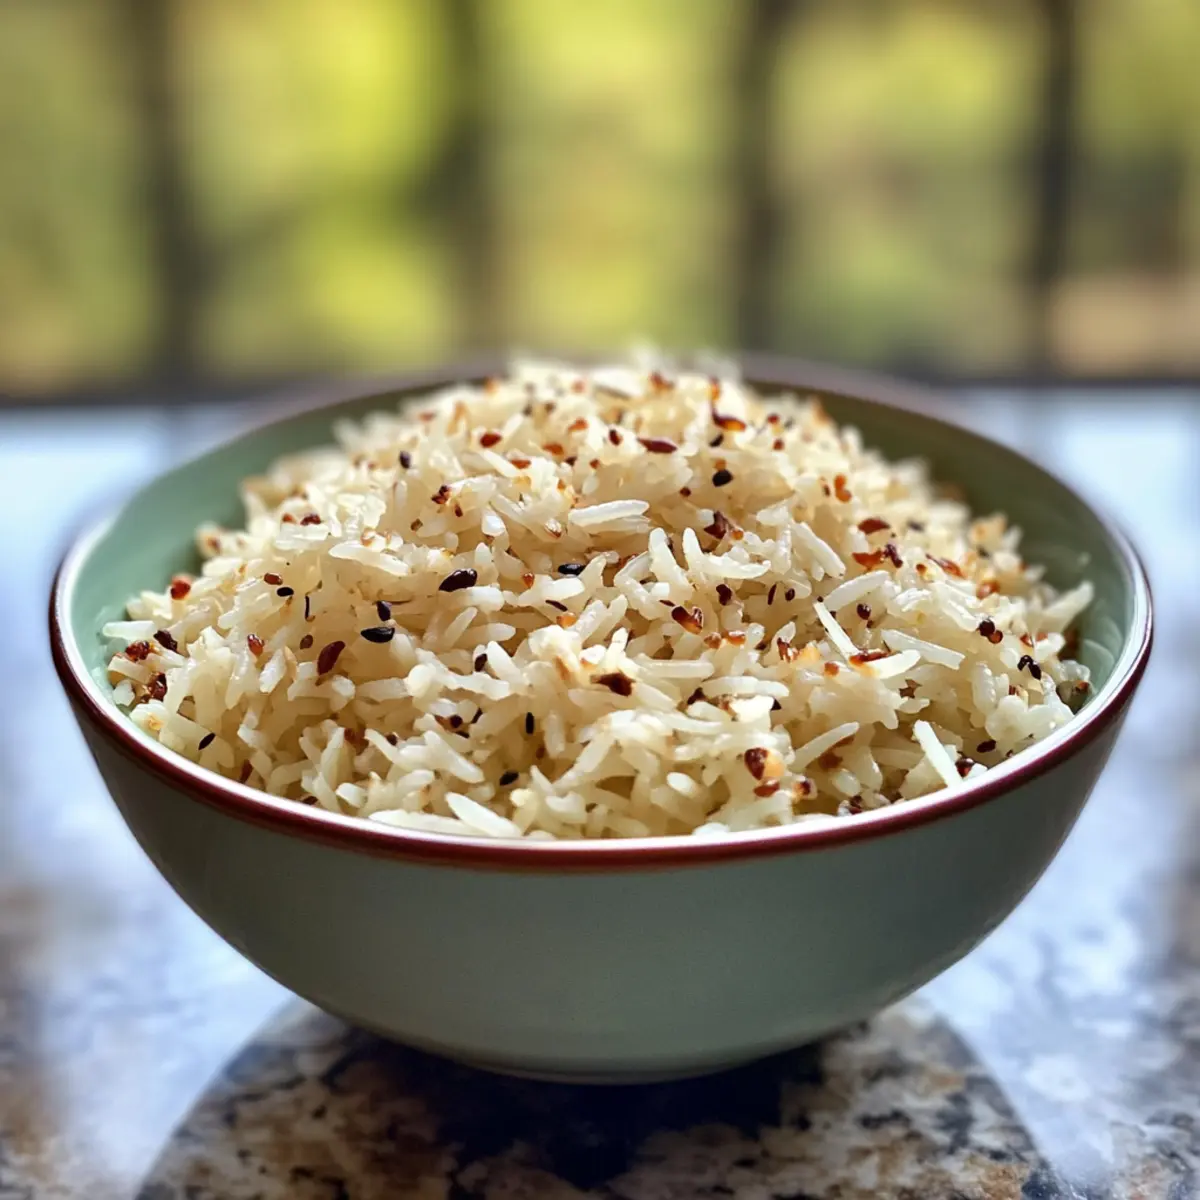
Ghee Rice with Coconut Milk: A Creamy Flavor Explosion

The sweet, tropical aroma of coconut wafts through my kitchen, reminding me of sun-soaked afternoons spent exploring vibrant street markets. Today, I’m delighted to share my take on Ghee Rice with Coconut Milk—a luscious twist on traditional ghee rice that elevates this humble grain into a sumptuous side dish. This recipe is not only a breeze to whip up in one pot, making cleanup effortless, but it also captivates with its rich, nutty flavors, perfect for family gatherings or a simple weeknight dinner. Trust me, whether you’re a kitchen veteran or a novice cook, this dish turns the ordinary into an extraordinary experience. Are you ready to transform your table with this deliciously fragrant creation?

Why is Ghee Rice with Coconut Milk special?

Unforgettable Flavors: The fusion of buttery ghee and creamy coconut milk creates a taste explosion that’s hard to resist.

Quick and Easy: With minimal preparation and just one pot, you can create an impressive dish that saves time on cleanup.

Versatile Pairing: This rice is the perfect sidekick to your favorite curries or grilled proteins, enhancing every meal’s flavor profile.

Family-Friendly: Both kids and adults will delight in this comforting dish, making mealtime a joyous occasion for everyone at the table.

Nutritional Boost: Each serving is a wholesome option packed with flavor, catering to those seeking hearty vegetarian dishes.

Transform your dining experience with this delightful Ghee Rice with Coconut Milk, and for more vibrant flavors, try pairing it with a refreshing Pineapple Coconut Mojito or a warm bowl of Coconut Curry Soup.

Ghee Rice with Coconut Milk Ingredients

• Discover the key ingredients for a delicious Ghee Rice with Coconut Milk!

For Cooking

  • Ghee – Adds a rich, buttery flavor; can substitute with unsalted butter for a different taste.
  • Cinnamon Stick – Provides warm, aromatic notes; use ground cinnamon if unavailable, but adjust the quantity.
  • Bay Leaf – Enhances flavor with herbal undertones; can omit if not available.
  • Green Cardamom Pods – Imparts a unique floral aroma; use ground cardamom as a last resort, but adjust accordingly.
  • Cloves – Adds a warm and slightly spicy flavor; limit substitution, as they’re strong in flavor, or omit if undesired.
  • Cumin Seeds – Offers an earthy warmth; replace with caraway seeds for a different profile.
  • Chili (optional) – Adds heat and depth; adjust type and quantity based on your heat preference.

For the Rice

  • Basmati Rice – Known for its long grains and fragrant aroma; substitute with jasmine rice, adjusting liquid ratios accordingly.
  • Coconut Milk – Provides creaminess and rich flavor; use full-fat for best results, as light coconut milk won’t achieve the same texture.
  • Water – Necessary for cooking the rice.
  • Salt – Enhances flavor; adjust to taste.

Embrace the essence of Indian cuisine with this exceptional dish!

Step‑by‑Step Instructions for Ghee Rice with Coconut Milk

Step 1: Rinse and Soak the Rice
Begin by placing 1 cup of basmati rice in a fine-mesh strainer. Rinse it under cold running water until the water runs clear, removing excess starch. Then, soak the rice in water for at least 20 minutes to ensure fluffy grains after cooking. This step is essential for achieving the perfect texture in your Ghee Rice with Coconut Milk.

Step 2: Sauté the Aromatics
In a medium pot, heat 2 tablespoons of ghee over low to medium heat. Add a cinnamon stick, bay leaf, 2-3 crushed green cardamom pods, and 2-3 cloves, sautéing for about 2-3 minutes. This will release the warm, aromatic notes crucial for flavor infusion. Stir frequently, watching for the spices to become fragrant but not burn.

Step 3: Add Cumin and Chili
Next, sprinkle in 1 teaspoon of cumin seeds and, if desired, a whole chili for a touch of heat. Sauté these aromatics for an additional 2-3 minutes until they become golden and aromatic. This step enhances the depth of flavor in your Ghee Rice with Coconut Milk, making it irresistible and inviting.

Step 4: Incorporate the Soaked Rice
Carefully add the soaked and drained basmati rice to the pot. Stir gently to coat the grains with the fragrant ghee and spices, frying for about 3-4 minutes. As the rice cooks, it will begin to lightly toast, achieving a delicate nuttiness that is essential for this dish. Keep stirring to prevent sticking.

Step 5: Combine Coconut Milk and Water
Pour in ¼ cup of rich coconut milk, followed by 1 ¼ cups of water and ¾ teaspoon of salt. Stir well to combine all ingredients, ensuring that the rice is evenly distributed. The mixture should look creamy and inviting, with the coconut milk mingling beautifully with the spices and rice.

Step 6: Bring to a Boil and Simmer
Increase the heat to bring the mixture to a gentle boil. Once it starts bubbling, reduce the heat to low and cover the pot with a tight-fitting lid. Allow it to simmer for 25 minutes without lifting the lid. This steaming process is vital to fully cook the rice, allowing it to absorb all the wonderful flavors of the Ghee Rice with Coconut Milk.

Step 7: Let the Rice Rest
After 25 minutes of simmering, turn off the heat but keep the pot covered. Let the rice rest for an additional 10 minutes to allow the steam to continue cooking the grains gently. This resting phase is crucial for achieving that fluffy, perfectly cooked texture in your final dish.

Step 8: Fluff and Serve
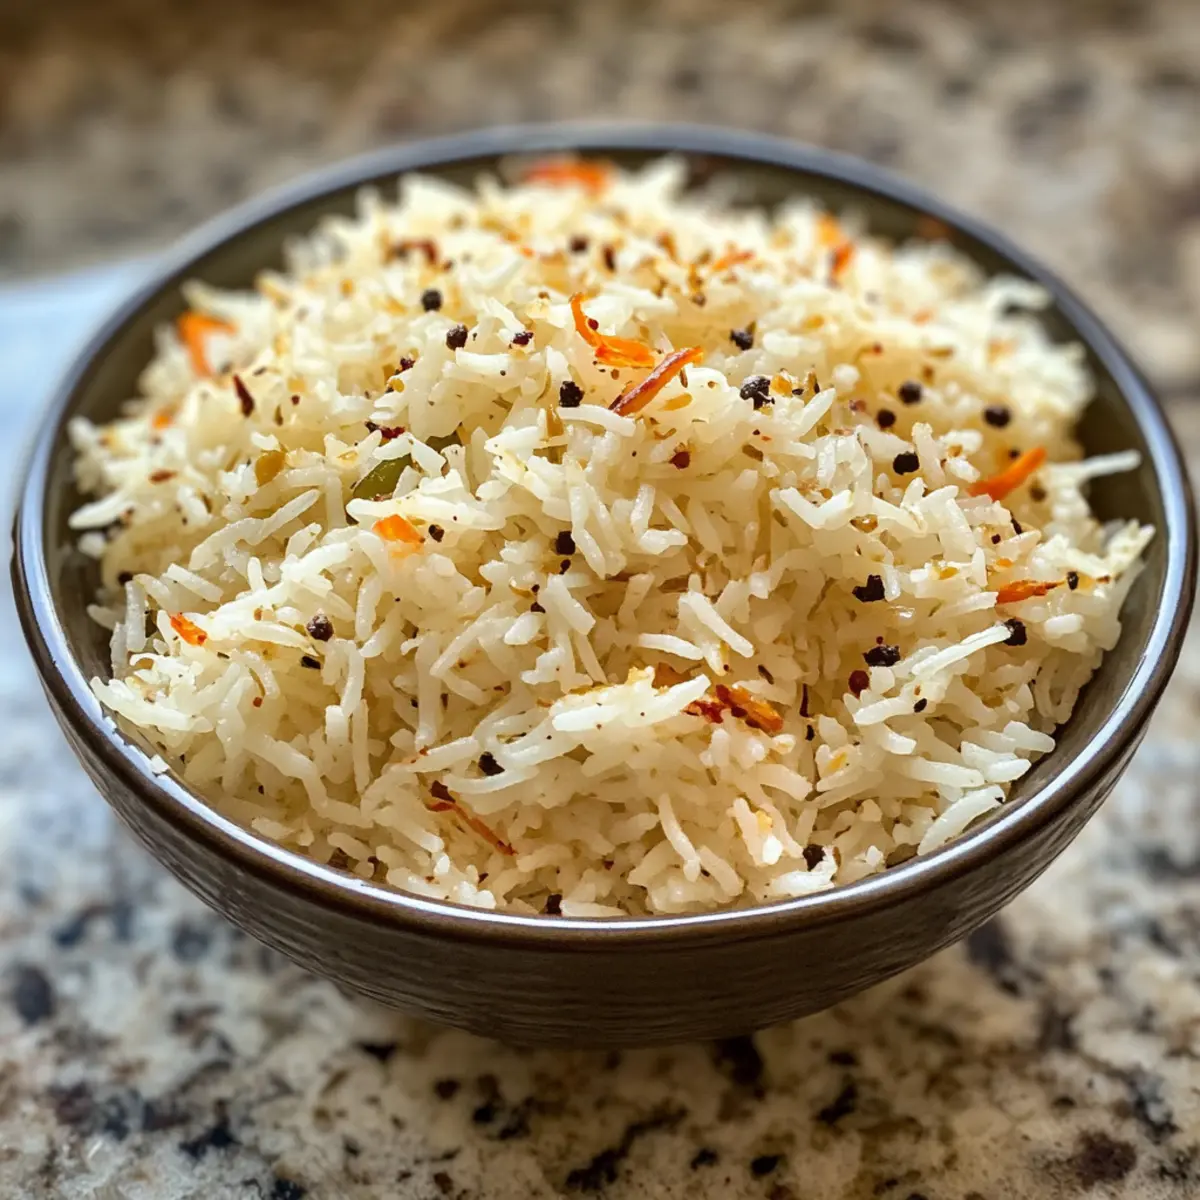
Using a fork, fluff the rice gently to separate the grains. Be sure to remove any whole spices, like the cinnamon stick and bay leaf, before serving. Your Ghee Rice with Coconut Milk is now ready to be enjoyed, beautifully fragrant and deliciously rich. Garnish with chopped nuts or fresh herbs for an extra touch if desired.

Expert Tips for Ghee Rice with Coconut Milk

  • Soak for Success: Ensure you soak the basmati rice for at least 20 minutes prior to cooking; this is key to achieving fluffy grains in your Ghee Rice with Coconut Milk.

  • Mind the Heat: When sautéing spices, keep the heat low to medium to prevent burning. This ensures you extract the best aromas, enhancing the final flavor of your dish.

  • Don’t Skip the Rest: Allow the rice to rest covered after cooking to let the steam do its magic; this step is crucial for that perfect texture.

  • Coconut Milk Caution: Avoid overheating the coconut milk during cooking to prevent curdling. Bring it to a boil briefly before simmering.

  • Adjust to Taste: Feel free to tweak the salt and spice levels to suit your family’s preferences, especially if kids are involved; a little less heat can make it more kid-friendly!

Ghee Rice with Coconut Milk Variations

Customize your Ghee Rice with Coconut Milk and let your creativity shine through each delightful twist!

  • Veggie-Loaded: Add seasonal vegetables like peas, carrots, or bell peppers for extra nutrition and color. Sauté them along with the spices for a delightful crunch!

  • Nutty Surprise: Toss in some toasted cashews or almonds to introduce a creamy texture and crunchy bite. The nuts pair beautifully with the rice’s rich flavors!

  • Herb Infusion: Brighten things up with fresh herbs like cilantro or mint. Stir in chopped herbs just before serving for a vibrant, aromatic finish.

  • Fruity Delight: Incorporate dried fruits such as sultanas or raisins for a sweet contrast to the savory flavors. They’ll add a lovely pop of sweetness in every bite!

  • Spice Symphony: Experiment with spices like saffron or nutmeg to elevate the dish further. Saffron adds luxury, while nutmeg brings warmth and depth, perfect for festive occasions.

  • Smoky Flavor: For a hint of smokiness, replace part of the ghee with smoked oil or add smoked paprika. It transforms the dish into a stunning flavor experience.

  • Protein Boost: Mix in cooked lentils or chickpeas for a hearty, protein-rich side. This elevates the dish, making it a complete meal on its own!

  • Coconut Creaminess: Use coconut cream instead of coconut milk for an ultra-luscious texture. A bit richer, this twist will make your dish decadently creamy.

Embrace the world of flavors with Ghee Rice with Coconut Milk, and while you’re at it, why not try it alongside a warm bowl of Coconut Curry Soup or serve it with a refreshing Pineapple Coconut Mojito to truly tantalize your taste buds?

Storage Tips for Ghee Rice with Coconut Milk

Fridge: Store Ghee Rice with Coconut Milk in an airtight container for up to 2-3 days. Ensure it’s completely cooled before sealing to preserve freshness.

Freezer: Freeze the rice for up to 1 month. Portion it into freezer-safe containers and allow to cool completely before freezing to avoid freezer burn.

Reheating: When ready to enjoy your leftover rice, reheat it in the microwave or on the stove. Add a splash of coconut milk or water to restore moisture and avoid dryness.

Room Temperature: Avoid leaving Ghee Rice with Coconut Milk at room temperature for more than 2 hours to ensure food safety.

What to Serve with Ghee Rice with Coconut Milk

There’s nothing quite like a rich, aromatic rice dish that elevates your main course to an unforgettable dining experience.

  • Spicy Chickpea Curry: The hearty flavors of chickpeas simmered in a spiced tomato sauce provide a delightful contrast to the creamy rice.

  • Tandoori Chicken: The smoky, charred notes of this classic Indian grilled chicken pair beautifully with the delicate coconut rice, balancing richness with zest.

  • Vegetarian Lentil Dal: This comforting lentil dish brings warmth and earthiness to the table, enhancing the ghee rice’s luxurious texture.

  • Cucumber Raita: A cooling side made with yogurt, cucumber, and spices, balancing the warmth of the other dishes while adding a refreshing crunch.

  • Mango Chutney: This sweet and slightly tangy condiment complements the nutty elements of the ghee rice and adds a burst of flavor.

  • Naan Bread: Soft, pillowy naan serves as an excellent vessel for scooping up the rice and curry, creating a satisfying meal experience.

  • Garlic Butter Shrimp: The savory, succulent shrimp tossed in garlic butter creates an elegant pairing, introducing a juicy, tender element that enhances the rice’s richness.

  • Sweet Coconut Ladoo: For dessert, these small, sweet treats made from coconut and condensed milk offer a delectable finish that echoes the ingredients of the main dish.

Make Ahead Options

Ghee Rice with Coconut Milk is an excellent choice for meal prep, saving you invaluable time on busy weeknights! You can prepare the rice by rinsing and soaking it for up to 24 hours in advance, then follow through to the sautéing stage, keeping the aromatics intact. Store the mixture in an airtight container in the refrigerator, ensuring it remains flavorful and moist. When you’re ready to serve, simply add the coconut milk and water, bring it to a gentle boil, then cover and simmer as usual. For best results, allow the rice to rest before fluffing, ensuring it stays just as delicious as when freshly made. With these steps, you’ll enjoy the warm, comforting flavors of ghee rice with minimal effort!

Ghee Rice with Coconut Milk Recipe FAQs

What type of rice is best for Ghee Rice with Coconut Milk?
I highly recommend using basmati rice for its fragrant aroma and long grains. However, if you don’t have basmati on hand, you can substitute it with jasmine rice. Just be sure to adjust the liquid ratios slightly, as jasmine may require a little less water.

How should I store leftover Ghee Rice with Coconut Milk?
Store any leftover Ghee Rice with Coconut Milk in an airtight container in the refrigerator for up to 2-3 days. Allow the rice to cool completely before sealing it to preserve freshness and flavor.

Can I freeze Ghee Rice with Coconut Milk?
Absolutely! You can freeze Ghee Rice with Coconut Milk for up to 1 month. Portion it into freezer-safe containers, ensuring it’s completely cooled before freezing to avoid freezer burn. When ready to enjoy, simply reheating in the microwave or on the stovetop works beautifully; just add a little coconut milk or water to restore moisture.

What if my Ghee Rice with Coconut Milk turns out too wet?
If your rice is too wet, don’t worry! Simply remove the lid and simmer the rice uncovered on low heat for a few minutes. Stir it occasionally to help the excess moisture evaporate. It’s all about patience to achieve that fluffy finish!

Are there any dietary considerations for Ghee Rice with Coconut Milk?
Yes! This recipe is vegetarian and can easily accommodate vegan diets if made with plant-based ghee or oil instead of dairy ghee. Be sure to check if anyone has nut allergies if you choose to garnish with nuts. Always adjust spices based on your family’s preferences and sensitivities.

How can I enhance the flavors of Ghee Rice with Coconut Milk?
To amp up your dish, consider adding a splash of lime or lemon juice for a hint of acidity, or garnish with fresh herbs like cilantro or mint. For a touch of sweetness and texture, dried fruits like sultanas or nuts such as cashews are fantastic options. Enjoy experimenting!

Ghee Rice with Coconut Milk

Ghee Rice with Coconut Milk: A Creamy Flavor Explosion

Ghee Rice with Coconut Milk offers a savory, fragrant dish that's both easy to prepare and perfect for any meal.
Prep Time 20 minutes
Cook Time 25 minutes
Resting Time 10 minutes
Total Time 55 minutes
Servings: 4 servings
Course: Dinner
Cuisine: Indian
Calories: 300

Ingredients
  

For Cooking
  • 2 tablespoons Ghee Can substitute with unsalted butter.
  • 1 stick Cinnamon Use ground cinnamon if unavailable.
  • 1 Bay Leaf Can omit if not available.
  • 2-3 pods Green Cardamom Can use ground cardamom as a last resort.
  • 2-3 Cloves Limit substitution; they have a strong flavor.
  • 1 teaspoon Cumin Seeds Replace with caraway seeds for a different profile.
  • 1 chili Chili (optional) Adjust type and quantity based on heat preference.
For the Rice
  • 1 cup Basmati Rice Substitute with jasmine rice, adjusting liquid accordingly.
  • ¼ cup Coconut Milk Use full-fat for best results.
  • 1 ¼ cups Water
  • ¾ teaspoon Salt Adjust to taste.

Equipment

  • Medium pot
  • Fine mesh strainer
  • wooden spoon

Method
 

Step-by-Step Instructions
  1. Rinse 1 cup of basmati rice until the water runs clear, then soak for at least 20 minutes.
  2. In a pot, heat 2 tablespoons of ghee and sauté a cinnamon stick, bay leaf, green cardamom pods, and cloves for 2-3 minutes.
  3. Add 1 teaspoon of cumin seeds and a whole chili; sauté for another 2-3 minutes until aromatic.
  4. Add the soaked and drained basmati rice; stir to coat with ghee and spices, frying for 3-4 minutes.
  5. Pour in ¼ cup of coconut milk, 1 ¼ cups of water, and ¾ teaspoon of salt; stir to combine.
  6. Bring the mixture to a boil, then reduce heat, cover, and simmer for 25 minutes.
  7. Let the rice rest covered for 10 minutes after cooking.
  8. Fluff the rice with a fork, remove whole spices, and serve.

Nutrition

Serving: 1cupCalories: 300kcalCarbohydrates: 45gProtein: 6gFat: 10gSaturated Fat: 6gPolyunsaturated Fat: 1gMonounsaturated Fat: 3gSodium: 200mgPotassium: 300mgFiber: 2gSugar: 1gCalcium: 2mgIron: 10mg

Notes

Soak the basmati rice for at least 20 minutes to achieve fluffy grains. Adjust spice levels to suit preference, especially for kids.

Tried this recipe?

Let us know how it was!

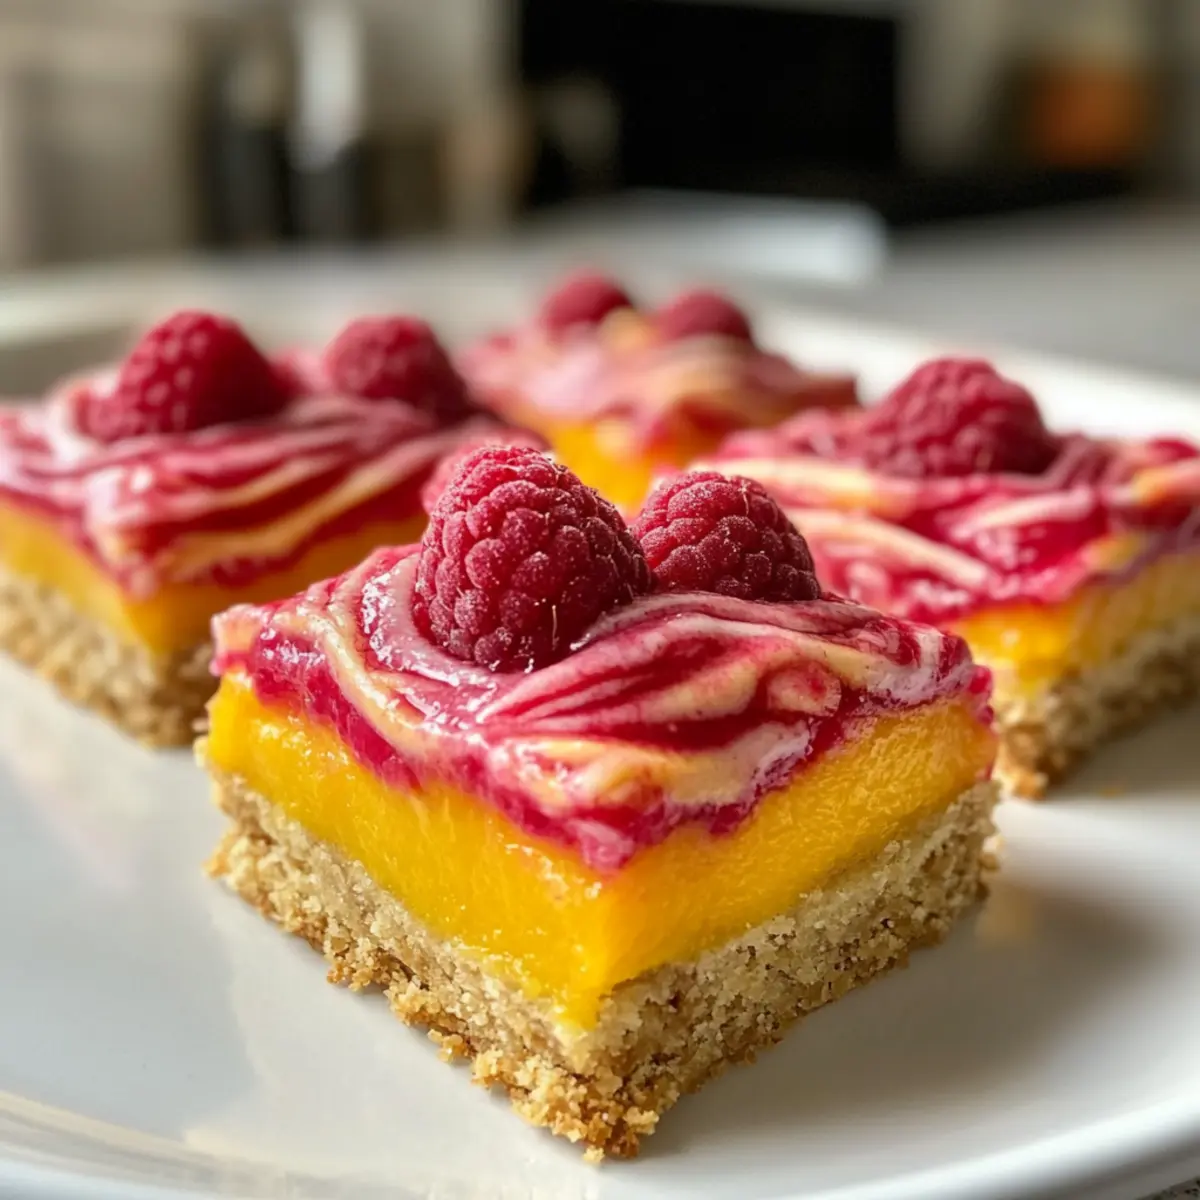
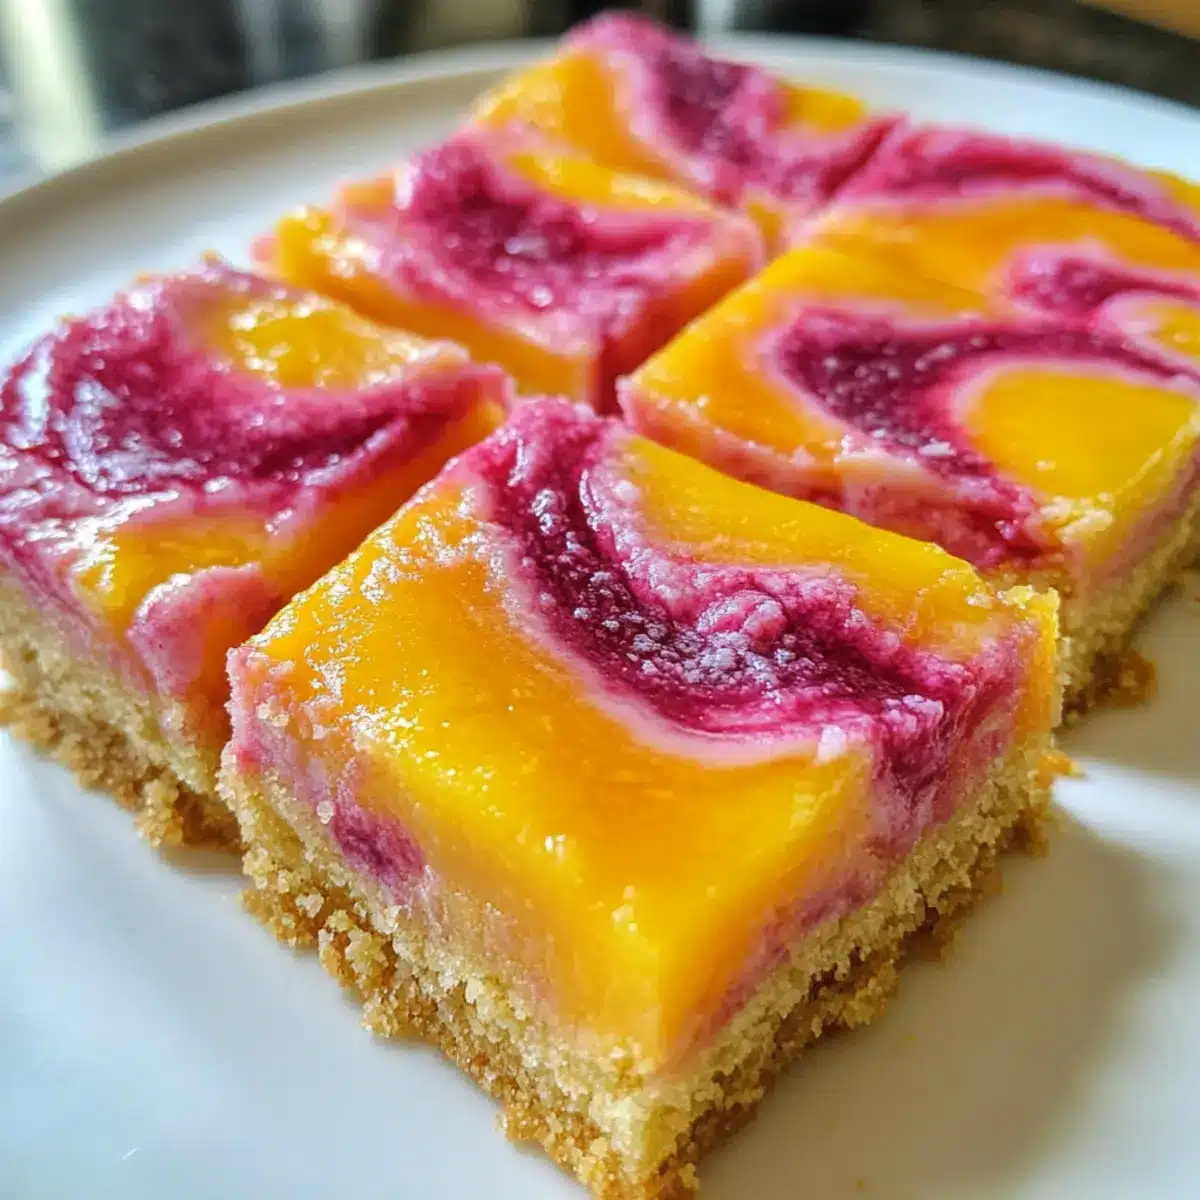
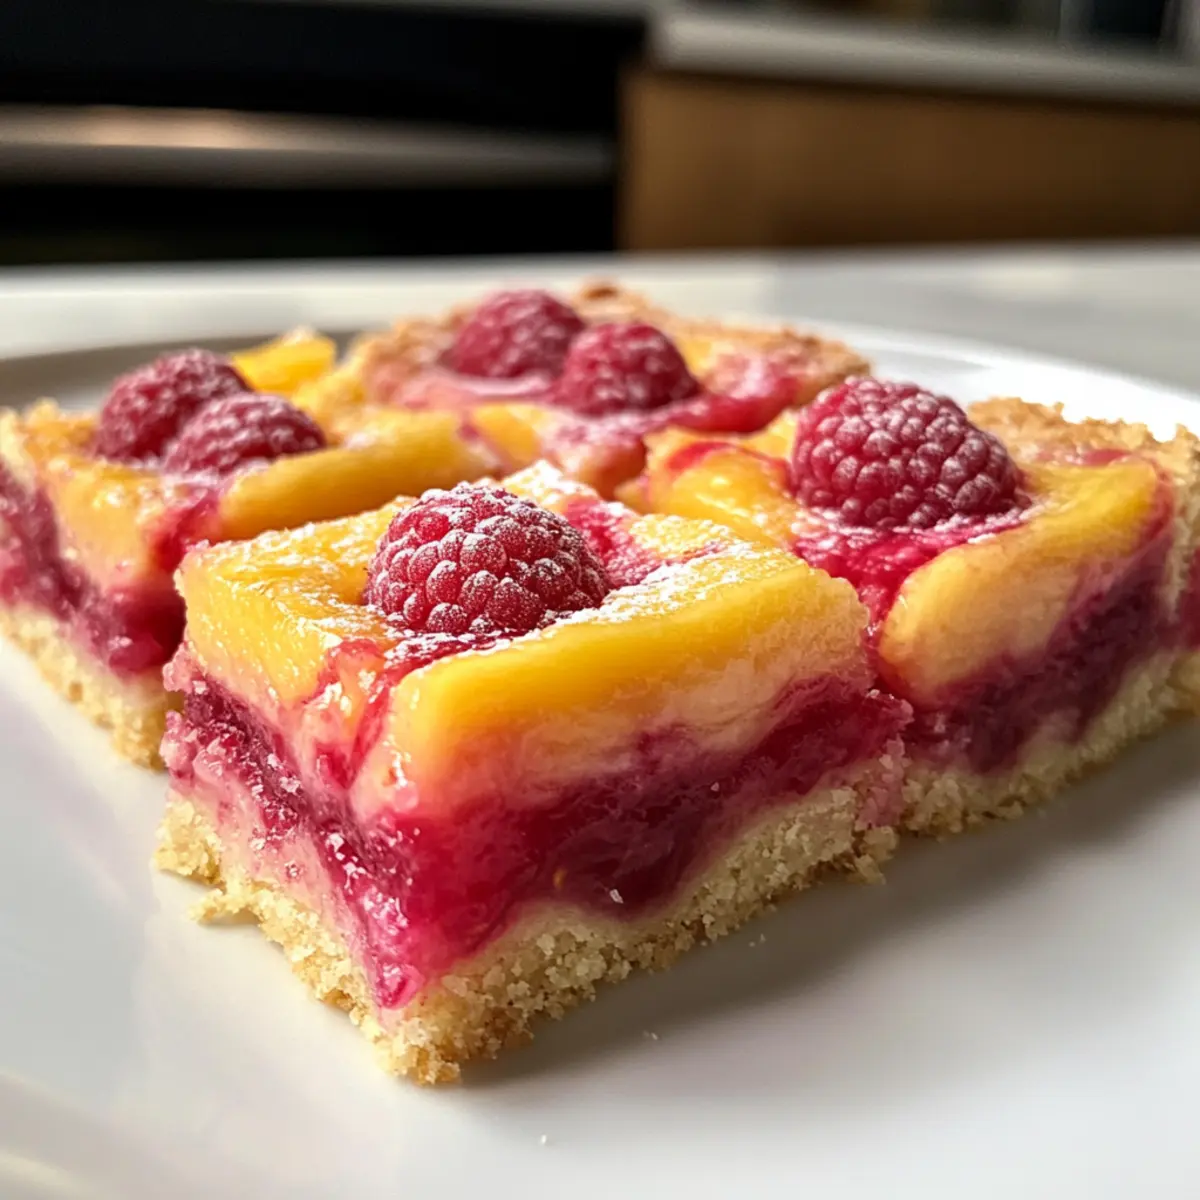
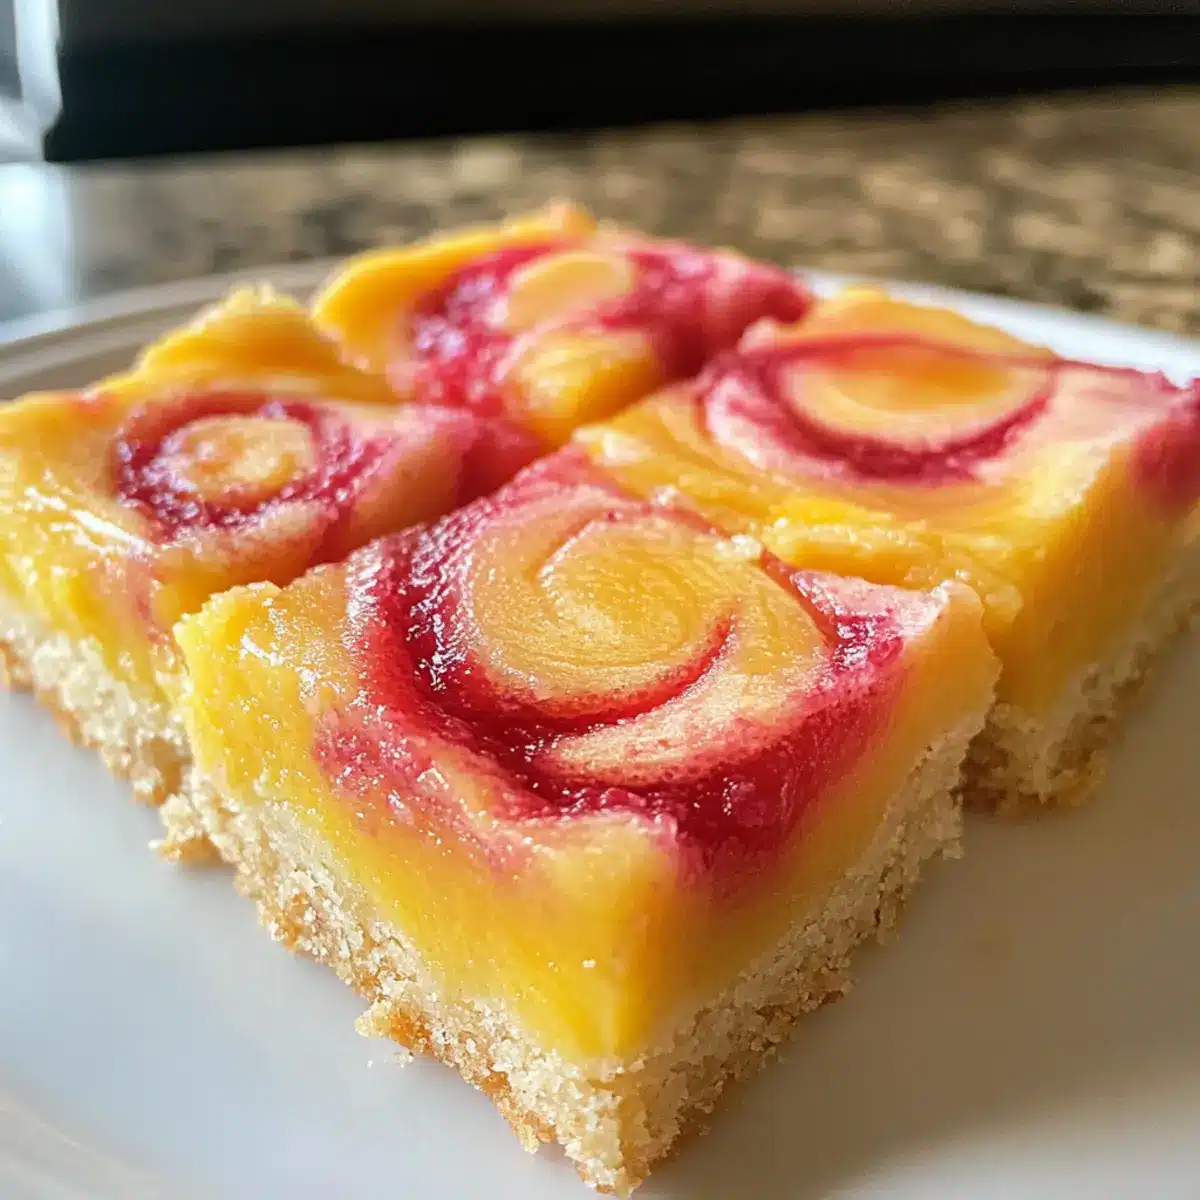
Raspberry Mango Bars with a Buttery Dreamy Twist

As I stood in my kitchen, the sun streaming through the window, I couldn’t help but smile at the vibrant colors surrounding me. Today, it’s all about making these irresistible Raspberry Mango Bars, a treat that captures the essence of summer in every bite. With a buttery shortbread crust and silky mango curd, they’re not just easy to make, but they also deliver an impressive presentation without all the fuss—perfect for gatherings or an afternoon indulgence. Plus, with the option to freeze, you can whip up a batch ahead of time and have a delightful dessert ready whenever the mood strikes. So, are you ready to embark on this tropical flavor journey with me?

Why Are Raspberry Mango Bars So Incredible?

Vibrant Flavors: These Raspberry Mango Bars bring summer to your plate with a delightful mix of tropical mango and tart raspberry.

No Bake Option: Love ease? You can freeze these bars for a delicious make-ahead dessert, making them perfect for busy days.

Beautiful Presentation: The stunning swirls of raspberry jam create a visual feast that will impress friends and family at any gathering.

Versatile Variations: Try them as Passion Fruit Mango Bars for an exotic twist or add a fluffy meringue topping for a delightful finish—endless possibilities await!

Perfect for Any Occasion: Whether it’s a summer picnic or a cozy afternoon snack, these bars are sure to be a hit, reminding you to savor every juicy bite. For more tropical treats, check out my Mango Coconut Pudding or Fish Tacos Mango for that same sunny vibe!

Raspberry Mango Bars Ingredients

For the Buttery Shortbread Crust
All-Purpose Flour – Provides structure; consider a gluten-free blend for a gluten-free option.
Powdered Sugar – Adds sweetness for a delicate crust; no substitutions recommended for best texture.
Salt – Enhances flavors; essential for balance in both crust and filling.
Butter (Cold) – Key to a rich and crumbly texture—ensure it’s cold for perfect results.
Egg Yolk – Adds richness and binds the crust; save the egg whites for a meringue if you try the variation.
Heavy Cream – Provides moisture and tenderness; milk can be a substitute if needed.
Vanilla Extract – Depth of flavor; no substitutions suggested for a true taste.

For the Mango Curd
Unflavored Gelatin Powder – Helps set the curd; do not replace with agar for optimal results.
Cold Water – Activates the gelatin; crucial for the setting process.
Butter (Softened) – Essential for a creamy curd; do not use margarine here.
Granulated Sugar – Sweetens the curd; light brown sugar can deepen the flavor profile.
Egg Yolks (Total 10) – Creates a rich, custard-like filling; vital for texture and taste.
Mango Puree – The primary flavor component; use ripe mangoes for the best results, either store-bought or homemade.
Lemon Juice – Brightens and balances the curd; lime juice can offer a unique twist.

For the Assembly
Raspberry Jam – Adds a tart swirl; you can swap for similar jam if desired, but raspberry is highly recommended for the best Raspberry Mango Bars experience.

Step‑by‑Step Instructions for Raspberry Mango Bars

Step 1: Prepare the Crust
Preheat your oven to 350°F (175°C) and line an 8×8-inch baking dish with parchment paper. In a food processor, combine all-purpose flour, powdered sugar, and salt until well mixed. Add cold butter and pulse until the mixture resembles fine sand. In a separate bowl, whisk together the egg yolk, heavy cream, and vanilla, then gradually mix into the flour mixture until crumbly. Press the mixture into the lined pan, prick with a fork, freeze for 30 minutes, and then bake for 35 minutes or until slightly golden.

Step 2: Make the Mango Curd
While the crust is cooling, bloom the unflavored gelatin in cold water as per package instructions. In a double boiler over simmering water, combine softened butter and granulated sugar, whisking until melted and blended. Then, add the egg yolks and mango puree, stirring constantly for about 15-25 minutes until the mixture thickens and coats the back of a spoon. Once thickened, melt the gelatin in a microwave for just a few seconds until liquid, mix it into the curd, and strain through a fine mesh sieve for a smooth texture.

Step 3: Assemble the Bars
Pour the silky mango curd over your cooled buttery shortbread crust, ensuring it’s evenly spread. Warm the raspberry jam slightly in the microwave until pourable, then drizzle it across the mango filling. Use a skewer or knife to gently swirl the jam into the curd, creating a beautiful marbled effect. Refrigerate the assembled Raspberry Mango Bars for at least 4-6 hours or overnight, until the curd is fully set and firm.

Step 4: Serve
To slice your Raspberry Mango Bars, run a warm knife around the edges of the dish to loosen any sticking. Cut into squares or rectangles for serving, ensuring clean edges. These bars are a visual delight and a scrumptious treat, perfect for summer gatherings or a sweet afternoon snack ready whenever you crave a tropical escape.

What to Serve with Raspberry Mango Bars?

These delicious, tropical bars evoke a lively summer day, making them the perfect centerpiece for your next dessert spread.

  • Coconut Whipped Cream: Adds a light, creamy counterpart that enhances the tropical flavors without overwhelming the dish. Perfect for dolloping on top of each bar!
  • Fresh Fruit Salad: A medley of juicy fruits—like kiwi, pineapple, and berries—introduces a refreshing pop of color and acidity to balance the sweetness of the bars.
  • Iced Green Tea: This subtly flavored drink complements the bars beautifully, providing a refreshing note that cools down your palate between bites.
  • Flaky Almond Biscotti: These crunchy treats offer a delightful textural contrast, with nuttiness and a touch of sweetness, perfect for a complementary dunking partner.
  • Lemon Sorbet: Refreshing and tart, the sorbet serves as a palate cleanser and cools off the sweetness of the bars—a delightful way to round off any meal.
  • Chocolate Drizzle: A rich, dark chocolate drizzle adds a decadent touch, creating a beautiful contrast against the vibrant mango and raspberry layers.
  • Summery Lemonade: A refreshing glass of lemonade will pair splendidly, balancing sweetness and providing a zesty lift to every mouthful of the Raspberry Mango Bars.

Expert Tips for Raspberry Mango Bars

  • Chill Ingredients: Ensure your butter and heavy cream are cold when making the crust. This will yield a beautifully flaky texture and prevent the crust from becoming too dense.

  • Gelatin Handling: When blooming the unflavored gelatin, use just enough cold water to activate it. Overheating in the microwave can compromise its thickening ability, so warm it briefly.

  • Neat Slicing: To achieve clean cuts on your Raspberry Mango Bars, run a warm knife around the edges prior to slicing. This simple step prevents sticking and preserves the beautiful layers.

  • Parchment Layering: Store the bars in an airtight container with parchment paper between layers. This prevents them from sticking together and maintains their freshness.

  • Watch the Time: Refrigerate the assembled bars for at least 4-6 hours—or overnight—to ensure the mango curd sets properly. Rushing this step can lead to a runny filling.

Make Ahead Options

These Raspberry Mango Bars are perfect for meal prep enthusiasts! You can prepare the buttery shortbread crust up to 24 hours in advance—just cool it completely, cover tightly with plastic wrap, and refrigerate. The mango curd can also be made up to 3 days ahead of time; simply store it in an airtight container in the fridge, ensuring it’s properly cooled before sealing to maintain freshness. When you’re ready to assemble, pour the mango curd over the crust and swirl in the raspberry jam, then refrigerate for 4-6 hours or overnight until set. Following these tips guarantees you’ll enjoy the same delicious flavor and texture as if they were made fresh!

Raspberry Mango Bars Variations

Feel free to let your creativity flow and customize these Raspberry Mango Bars to suit your taste buds!

  • Passion Fruit Mango Bars: Swap raspberry jam for bright and tangy passion fruit curd, then top with a sprinkle of toasted coconut for extra texture and flavor. This tropical twist will take you on a delightful flavor journey.

  • Raspberry Mango Meringue Bars: Top your mango curd with a fluffy meringue layer, lightly toasted for a gorgeous finish. This adds a sweet, airy contrast to the rich filling, making every bite a cloud of joy!

  • Vegan Option: Substitute dairy ingredients with coconut oil, coconut cream, and flax eggs. You’ll enjoy a creamy mango filling while keeping it plant-based and delicious!

  • Gluten-Free Variation: Use a gluten-free all-purpose flour blend instead of regular flour for the crust without compromising the wonderful flavor and texture of these bars.

  • Nutty Crust Addition: Incorporate finely ground almonds or pecans into the shortbread crust for added crunch and a nutty aroma. This will bring a delightful surprise to the buttery base.

  • Coconut Cream Swirl: Mix in coconut cream with the mango curd for a tropical coconut flavor that pairs beautifully with the raspberry swirl. This lends a decadent richness to your bars.

  • Heat Level: For a touch of spice, add a small amount of finely chopped jalapeño or a dash of chili powder to the raspberry jam before swirling. This unexpected heat can elevate your dessert to an entirely new level.

  • Fruity Add-ins: Fold in some diced fresh strawberries or kiwi to the mango curd before pouring it over the crust for a colorful, fruity variation that enhances the overall aesthetic and flavor.

These variations will keep things exciting, allowing you to enjoy your Raspberry Mango Bars in numerous delightful ways. And if you love tropical flavors, don’t forget to check out my Mango Coconut Pudding for a creamy treat or spice it up with the Fish Tacos Mango for a zesty meal!

How to Store and Freeze Raspberry Mango Bars

Fridge: Store your Raspberry Mango Bars in an airtight container, separating layers with parchment paper, for up to 5 days to maintain freshness.

Freezer: For longer storage, freeze individual bars wrapped in parchment and then placed in a freezer-safe container for up to 3 months.

Thawing: Thaw frozen bars overnight in the fridge for the best texture, ensuring they’re ready to enjoy without compromising flavor.

Reheating: If desired, serve chilled or at room temperature for a refreshing treat, as these bars are best enjoyed as they are after thawing.

Raspberry Mango Bars Recipe FAQs

How do I choose ripe mangoes for the mango curd?
Absolutely! When selecting mangoes, look for ones that give slightly to gentle pressure, indicating ripeness. The skin may have a slight blush or deep yellow hue, and there should be no dark spots all over. Ripe mangoes have a sweet aroma near the stem end. If they’re not quite ripe, place them at room temperature for a few days until they soften.

How should I store leftover Raspberry Mango Bars?
To maintain their delightful freshness, store your Raspberry Mango Bars in an airtight container, with parchment paper layered between each bar to prevent sticking, in the fridge for up to 5 days. This way, each slice will remain just as fabulous as the first!

Can I freeze Raspberry Mango Bars for later enjoyment?
Yes, you can! For longer storage, wrap individual bars in parchment paper and then place them in a freezer-safe container or zip-top bag. They will keep well in the freezer for up to 3 months. Just remember to thaw them in the fridge overnight for the best texture before enjoying.

What should I do if the mango curd doesn’t set properly?
If you find that your mango curd is runny, don’t worry! Ensure the gelatin is properly bloomed and added to the curd mixture. If it still doesn’t set after refrigerating, try re-heating the curd gently on the stove until it thickens, then re-cool it in the fridge. It’s crucial to follow the chilling time as well, giving it at least 4-6 hours or overnight to set firmly.

Are these Raspberry Mango Bars suitable for dietary restrictions?
Very! This recipe can be made gluten-free by substituting the all-purpose flour with a gluten-free blend. Additionally, if you’re interested in reducing sugar, you could use a sugar alternative suitable for baking. Just be sure to check that any substitutes still work well in the curd for the best results. As for allergies, keep in mind the use of eggs and dairy; consider alternatives like aquafaba for binding and coconut cream for richness.

Can I use a different fruit for the curd or swirl?
Absolutely, the more the merrier! You could experiment with other tropical fruits like passion fruit or guava for the curd, or use strawberry or blueberry jam instead of raspberry for a different yet delicious twist. Just keep the flavors balanced to create a delightful tropical experience!

Raspberry Mango Bars

Raspberry Mango Bars with a Buttery Dreamy Twist

Delicious Raspberry Mango Bars feature a buttery shortbread crust and silky mango curd. Perfect for gatherings or an afternoon treat.
Prep Time 30 minutes
Cook Time 35 minutes
Chilling Time 4 hours
Total Time 5 hours 5 minutes
Servings: 16 bars
Course: Dessert
Cuisine: Tropical
Calories: 180

Ingredients
  

For the Buttery Shortbread Crust
  • 1 cup All-Purpose Flour Consider a gluten-free blend for gluten-free option.
  • 1/4 cup Powdered Sugar No substitutions recommended for best texture.
  • 1/4 teaspoon Salt Essential for balance in both crust and filling.
  • 1/2 cup Butter (Cold) Ensure it's cold for perfect results.
  • 1 large Egg Yolk Save the egg whites for meringue if you try the variation.
  • 2 tablespoons Heavy Cream Milk can be a substitute if needed.
  • 1 teaspoon Vanilla Extract No substitutions suggested for true taste.
For the Mango Curd
  • 2 teaspoons Unflavored Gelatin Powder Do not replace with agar for optimal results.
  • 1/4 cup Cold Water Crucial for the setting process.
  • 1/2 cup Butter (Softened) Do not use margarine here.
  • 3/4 cup Granulated Sugar Light brown sugar can deepen flavor.
  • 10 large Egg Yolks (Total) Vital for texture and taste.
  • 1 cup Mango Puree Use ripe mangoes for the best results.
  • 2 tablespoons Lemon Juice Lime juice can offer a unique twist.
For the Assembly
  • 1/2 cup Raspberry Jam Raspberry is highly recommended for best experience.

Equipment

  • Oven
  • Food processor
  • Double boiler
  • 8x8-inch Baking Dish

Method
 

Step‑by‑Step Instructions for Raspberry Mango Bars
  1. Preheat your oven to 350°F (175°C) and line an 8x8-inch baking dish with parchment paper. In a food processor, combine all-purpose flour, powdered sugar, and salt until well mixed. Add cold butter and pulse until the mixture resembles fine sand. In a separate bowl, whisk together the egg yolk, heavy cream, and vanilla, then gradually mix into the flour mixture until crumbly. Press the mixture into the lined pan, prick with a fork, freeze for 30 minutes, and then bake for 35 minutes or until slightly golden.
  2. While the crust is cooling, bloom the unflavored gelatin in cold water as per package instructions. In a double boiler over simmering water, combine softened butter and granulated sugar, whisking until melted and blended. Then, add the egg yolks and mango puree, stirring constantly for about 15-25 minutes until the mixture thickens and coats the back of a spoon. Once thickened, melt the gelatin in a microwave for just a few seconds until liquid, mix it into the curd, and strain through a fine mesh sieve for a smooth texture.
  3. Pour the silky mango curd over your cooled buttery shortbread crust, ensuring it's evenly spread. Warm the raspberry jam slightly in the microwave until pourable, then drizzle it across the mango filling. Use a skewer or knife to gently swirl the jam into the curd, creating a beautiful marbled effect. Refrigerate the assembled Raspberry Mango Bars for at least 4-6 hours or overnight, until the curd is fully set and firm.
  4. To slice your Raspberry Mango Bars, run a warm knife around the edges of the dish to loosen any sticking. Cut into squares or rectangles for serving, ensuring clean edges.

Nutrition

Serving: 1barCalories: 180kcalCarbohydrates: 25gProtein: 2gFat: 8gSaturated Fat: 5gMonounsaturated Fat: 2gCholesterol: 50mgSodium: 60mgPotassium: 70mgSugar: 18gVitamin A: 300IUVitamin C: 10mgCalcium: 20mgIron: 0.5mg

Notes

Ensure your butter and heavy cream are cold for the crust and run a warm knife around the edges prior to slicing for clean cuts.

Tried this recipe?

Let us know how it was!

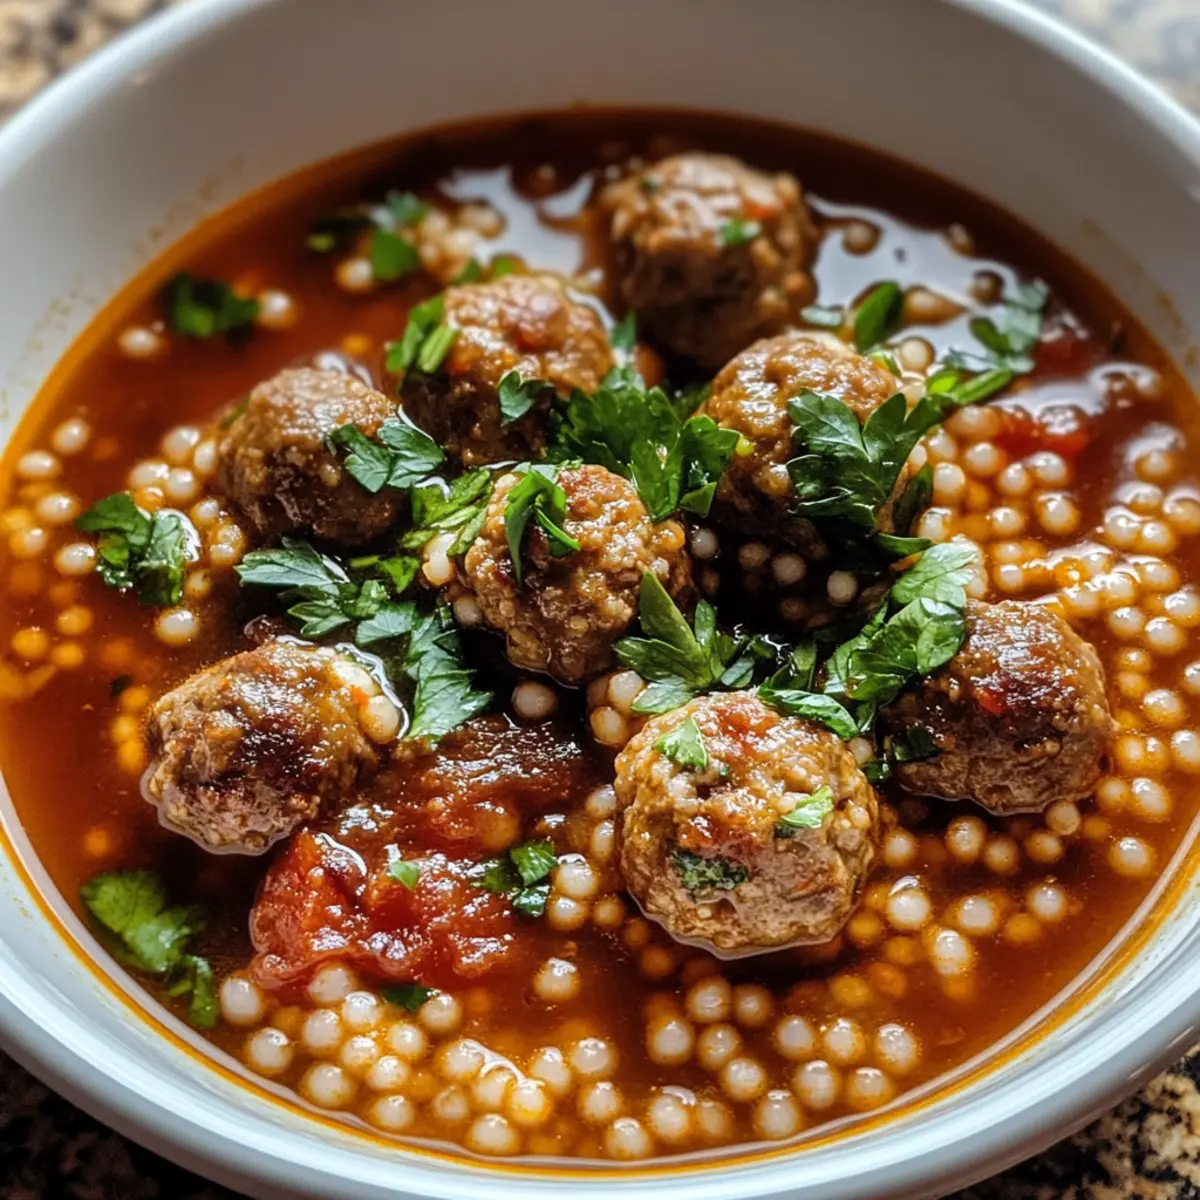
Mini Moroccan Meatball Couscous Soup: A Cozy Hug in a Bowl

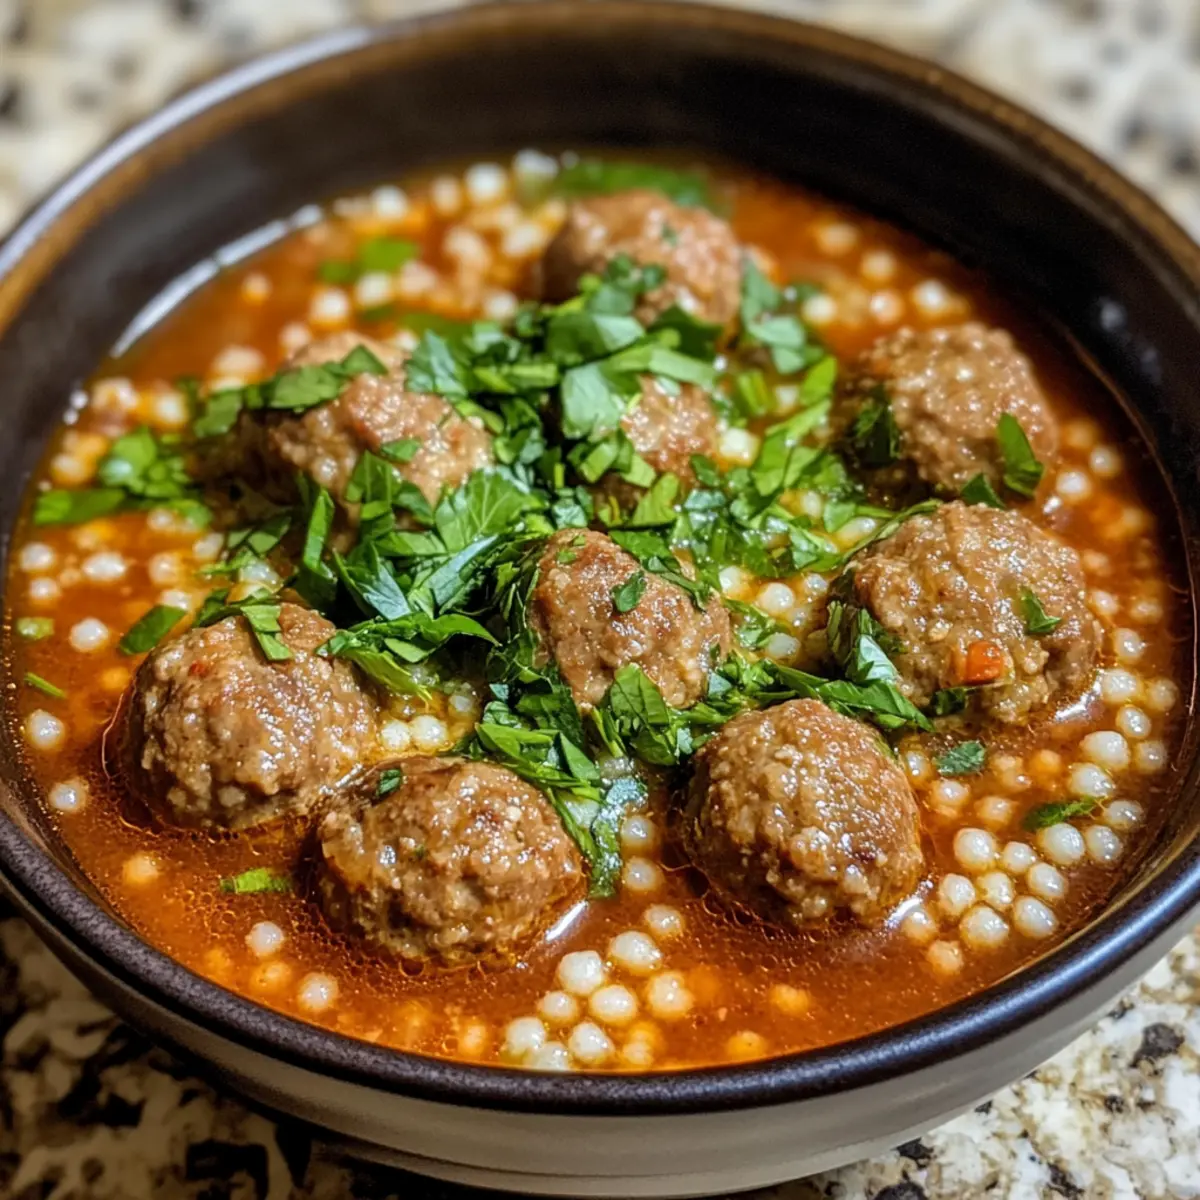
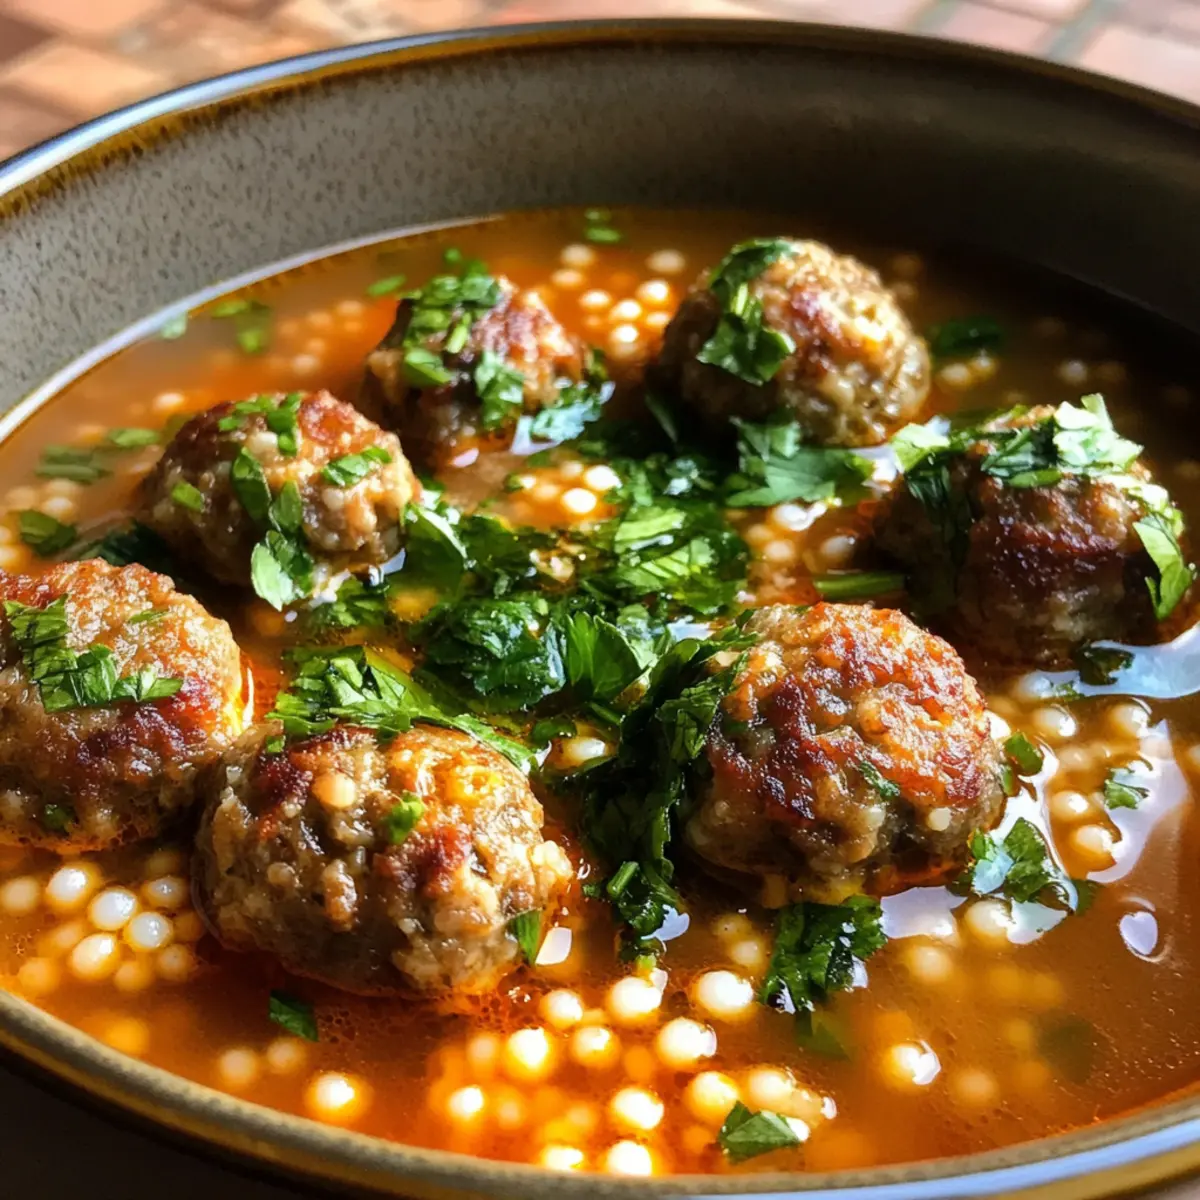
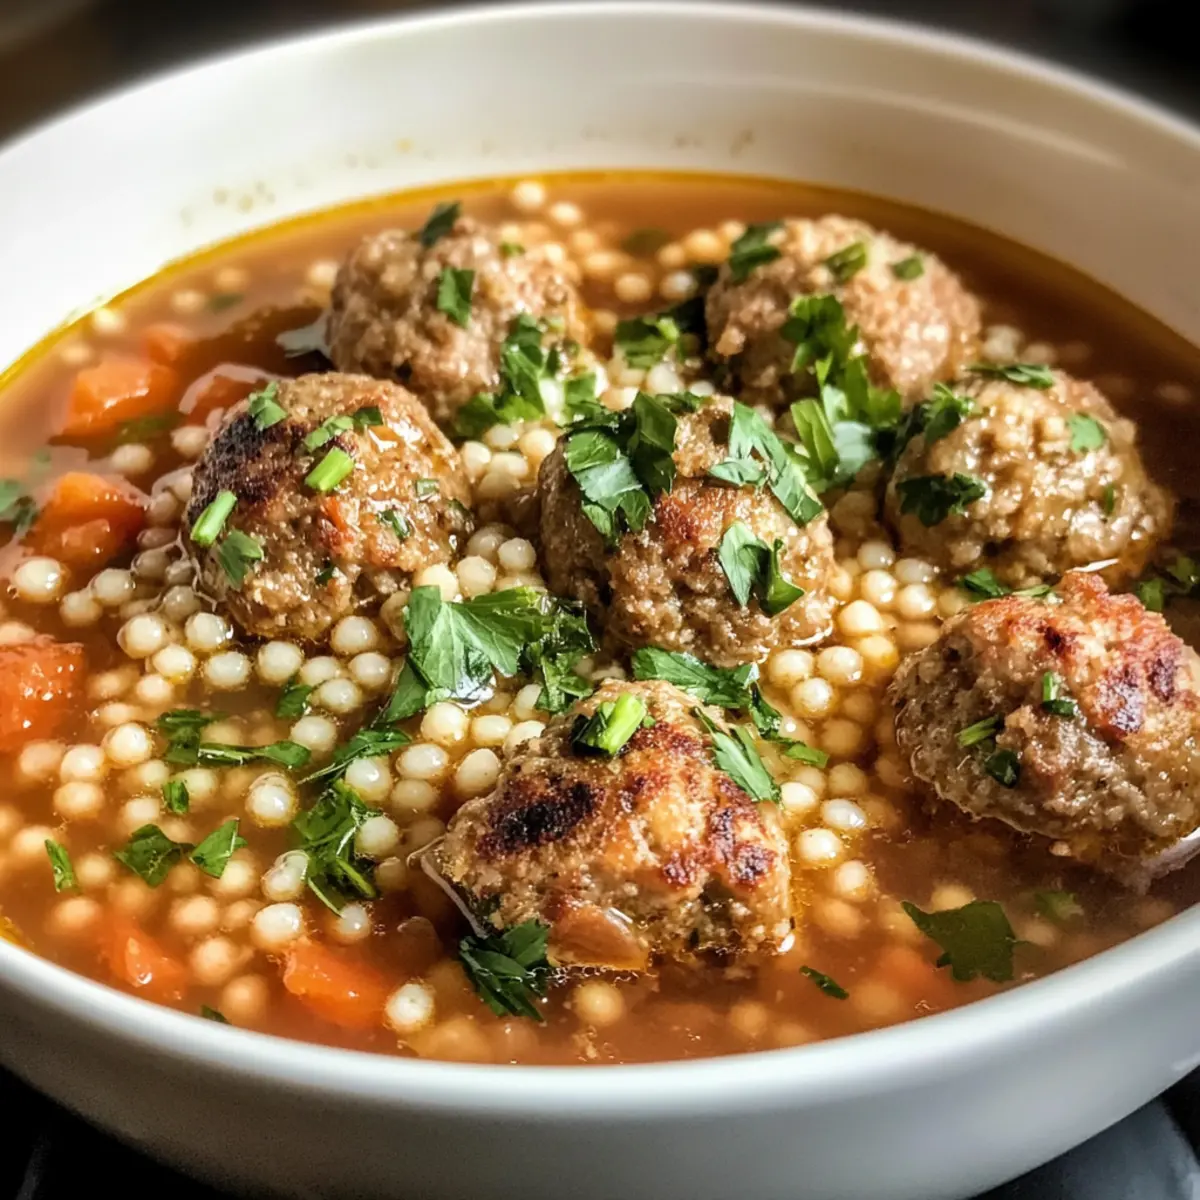
As I stirred the pot, the air filled with a vibrant mix of spices that transported me straight to a bustling Moroccan marketplace. This Mini Moroccan Meatball Couscous Soup is not just a recipe; it’s a cozy hug in a bowl, infused with rich flavors and homemade goodness. Using either ground lamb or beef, these spiced meatballs simmer alongside comforting pearl couscous in a nourishing broth, making it a satisfying meal on any chilly evening. With a quick prep time of just 55 minutes, this hearty dish is perfect for those craving a warm, high-protein option that doesn’t skimp on flavor. Plus, it’s just as delightful for dinner as it is for leftovers the next day. Ready to delight your taste buds? Let’s dive into this delicious journey!

Why is this soup a must-make?

Comforting warmth: The Mini Moroccan Meatball Couscous Soup cradles your taste buds in a symphony of spices, creating a cozy atmosphere that’s perfect for chilly nights.

Hearty ingredients: Packed with protein from flavorful meatballs and pearl couscous, this dish ensures you’re fueled and satisfied.

Quick preparation: With just 55 minutes from prep to bowl, you can whip up this delightful recipe without spending hours in the kitchen.

Versatile options: Whether using ground lamb or beef or opting for a vegetarian twist with chickpeas, the possibilities keep every meal fresh and exciting.

Nourishing texture: The combination of tender meatballs and chewy couscous makes every spoonful feel like a warm hug, reminiscent of classic soups yet creatively elevated.

Add a side of homemade crusty bread for a complete meal that delights your family and friends, or serve it alongside a bowl of creamy Seafood Bisque Soup for a luxurious touch!

Mini Moroccan Meatball Couscous Soup Ingredients

For the Meatballs

  • Ground Lamb or Beef – Acts as the main protein; for a leaner option, use ground turkey.
  • Tomato Paste – Provides a rich base flavor for the meatballs; essential for moisture and depth.
  • Ground Coriander – Offers a warm, earthy flavor that complements the spices.
  • Ground Cumin – Adds a nutty, spicy note to the meatballs; enhances the overall taste.
  • Dried Thyme – Provides herbal notes that elevate the dish’s flavor.
  • Chili Powder – Adds heat and depth; adjust according to your spice preference.
  • Ground Turmeric – Brings a golden color and earthy taste; a hallmark of Moroccan cuisine.
  • Ground Cinnamon – Introduces a subtle sweetness; balances the flavors beautifully.
  • Kosher Salt + Black Pepper – Essential for seasoning; adjust to taste.

For the Soup Base

  • Olive Oil – For sautéing and adding richness; drizzle a bit extra before serving.
  • Shallots – Adds mild sweetness and depth to the soup base; enhances overall flavor.
  • Garlic – Offers strong aromatic notes; crucial for seasoning and warmth.
  • Chicken Broth – Forms the soup base; substitute with vegetable broth for a vegetarian version.
  • Water – Used to balance the consistency of the soup; adjust as needed.

For the Couscous

  • Pearl Couscous – Provides texture and heartiness; substitute with gluten-free couscous or quinoa for a gluten-free option.

For Garnish

  • Chopped Mint or Parsley – Fresh herbs that brighten the dish and add a pop of color.

This delicious Mini Moroccan Meatball Couscous Soup is not only comforting but a culinary adventure with each ingredient playing a key role in the delightful symphony of flavors.

Step‑by‑Step Instructions for Mini Moroccan Meatball Couscous Soup

Step 1: Prepare the Meatballs
Preheat your oven to 375°F (190°C). In a mixing bowl, combine the ground lamb or beef, tomato paste, and all the spices including coriander, cumin, and chili powder. Use your hands to gently mix the ingredients until just combined—be careful not to overmix. Roll the mixture into small balls, about 1 inch in diameter, and arrange them on a parchment-lined baking sheet. Bake for 10-12 minutes, or until they are browned and cooked through.

Step 2: Toast the Couscous
In a medium saucepan, heat a tablespoon of olive oil over medium heat. Add the pearl couscous, stirring frequently, and toast it for 1-2 minutes until it becomes lightly golden and fragrant. Pour in 1¾ cups of water and a pinch of salt. Bring this mixture to a boil, then reduce the heat, cover, and simmer for about 8-10 minutes, or until the water is absorbed and the couscous is fluffy.

Step 3: Create the Soup Base
In a large Dutch oven, warm a tablespoon of olive oil over medium heat. Add the chopped shallots and sauté for about 2 minutes until they are translucent. Stir in the minced garlic, allowing it to cook for another minute until fragrant. Next, pour in 4 cups of chicken broth and an additional cup of water, bringing the mixture to a gentle boil. This will form the flavorful base of your Mini Moroccan Meatball Couscous Soup.

Step 4: Combine and Simmer
Once the broth is boiling, carefully add the baked meatballs and cooked couscous into the pot. Reduce the heat and let the soup simmer for about 10 minutes to allow the flavors to meld together. Stir occasionally and taste the broth, adjusting seasoning with kosher salt and black pepper as desired, ensuring the soup is deliciously balanced.

Step 5: Garnish and Serve
After simmering, ladle the soup into bowls, and top each serving with freshly chopped mint or parsley for a pop of color and flavor. Drizzle a little extra olive oil over the top for added richness. Your Mini Moroccan Meatball Couscous Soup is now ready to be enjoyed—serve it warm alongside homemade crusty bread for a complete meal that brings warmth and comfort.

Mini Moroccan Meatball Couscous Soup Variations

Customize your soup with these delightful twists that bring new flavors and textures!

  • Vegetarian: Replace meat with plant-based ground meat or mashed chickpeas to create a hearty, protein-packed soup.

  • Extra Veggies: Add chopped spinach, zucchini, or carrots for a nutritious boost and vibrant color in your bowl. These additions will not only enhance the dish’s flavor but also make it visually appealing.

  • Spicy Kick: Stir in a spoonful of harissa or sriracha for an exciting heat level that will wake up your taste buds.

  • Couscous Options: Swap pearl couscous with quinoa or gluten-free couscous to accommodate dietary preferences while keeping the texture satisfying. Both alternatives work wonderfully and add a unique twist to the soup!

  • Creamy Broth: Mix in a splash of coconut milk at the end for a creamy and subtly sweet flavor that complements the spices beautifully.

  • Regional Flair: Experiment with Moroccan spice blends like ras el hanout to deepen the complexity of the soup, or try adding preserved lemons for a zesty twist.

  • Serving Style: Serve in individual bread bowls for a fun and interactive dining experience. The bread soaks up the flavors and offers a delightful crunch!

  • Herb Variations: Explore other herbs like cilantro or dill instead of mint or parsley for a different aromatic experience that can change the dish’s character entirely.

As you explore these variations, the delightful world of flavors will keep your meals exciting and inspire you to create other comforting dishes, like Coconut Curry Soup or a classic bowl of Old Fashioned Vegetable Beef Soup!

Expert Tips for Mini Moroccan Meatball Couscous Soup

  • Don’t Overmix: Gently combine the meatball ingredients to keep them tender. Overmixing can lead to tough meatballs.

  • Flavor Boost: If using frozen meatballs, sauté the spice mix in the broth before adding them. This enhances the overall flavor of your soup.

  • Season Wisely: Taste the broth after adding the meatballs, as they will release their juices. Adjust the seasoning accordingly for a perfectly balanced soup.

  • Custom Couscous: For a gluten-free option, swap pearl couscous with gluten-free couscous or quinoa. Both will still provide that comforting texture.

  • Fresh Herbs: Garnish your soup with chopped mint or parsley to brighten the dish and elevate the flavors of the Mini Moroccan Meatball Couscous Soup.

  • Make Ahead: This soup stores well in the fridge for up to three days. Reheat gently to prevent overcooking the meatballs and enjoy the delightful flavors all over again!

Storage Tips for Mini Moroccan Meatball Couscous Soup

  • Fridge: Store leftover soup in an airtight container for up to 3 days. Ensure it’s cooled completely before sealing to maintain freshness and prevent condensation.

  • Freezer: Freeze the soup in portions for up to 2 months. Use freezer-safe containers or resealable bags, and label them for easy identification later.

  • Reheating: When ready to enjoy, thaw in the fridge overnight, then reheat on the stove over medium heat, stirring gently to avoid breaking the meatballs. Add a splash of broth or water to thin if needed.

  • Quality Check: The flavors of the Mini Moroccan Meatball Couscous Soup improve after a day, making it a great option for meal prep and easy lunches throughout the week!

Make Ahead Options

These Mini Moroccan Meatball Couscous Soup components are perfect for busy weeknights! You can prepare the meatballs and store them in an airtight container for up to 24 hours in the refrigerator. To maintain their quality and prevent them from drying out, cover the meatballs with plastic wrap. The pearl couscous can also be cooked in advance and kept in the fridge for up to 3 days. When you’re ready to enjoy your soup, just reheat the broth and add the chilled meatballs and couscous, simmering gently until warmed through. This way, you’ll have a delicious, hearty meal ready in no time with minimal effort!

What to Serve with Mini Moroccan Meatball Couscous Soup

Savoring this delightful soup is just the beginning; let’s complete your meal with perfect pairings that enhance its vibrant flavors.

  • Homemade Crusty Bread: The warm, crunchy exterior and soft interior of a freshly baked loaf are ideal for soaking up the hearty broth. It adds a comforting touch that complements every spoonful.

  • Simple Green Salad: A light, crisp salad with mixed greens, cherry tomatoes, and a zesty lemon vinaigrette provides a refreshing contrast, balancing the richness of the soup beautifully.

  • Roasted Vegetables: A medley of seasonal veggies, roasted until caramelized, brings sweetness and depth to your meal, adding enticing textures and flavors that harmonize with the meatballs.

  • Herbed Yogurt Sauce: Drizzled over the soup or served on the side, this creamy, tangy sauce enhances the dish’s Moroccan spices while offering a cool, refreshing element to each bite.

  • Spiced Couscous: For those craving more couscous, a side of herbed or spiced couscous will echo the flavors in your soup and create an exciting, cohesive meal experience.

  • Minted Iced Tea: A cool, refreshing drink with hints of mint perfectly contrasts the warm spices in the soup. It’s a delightful way to cleanse your palate between bites.

  • Baklava: To finish on a sweet note, serve this rich, nutty dessert. Its honey sweetness beautifully complements the savory flavors of your Mini Moroccan Meatball Couscous Soup and leaves everyone wanting more.

Mini Moroccan Meatball Couscous Soup Recipe FAQs

What ingredients should I look for to ensure freshness?
Absolutely! When selecting your ground meat, choose vibrant red lamb or beef without any dark spots or off-odors. Fresh shallots should be firm and dry, while garlic should be plump without any green sprouts, ensuring robust flavor. For herbs, look for bright green mint or parsley, as they add a lovely freshness to the dish.

How long can I store leftover soup in the fridge?
You can store your Mini Moroccan Meatball Couscous Soup in an airtight container in the fridge for up to 3 days. Make sure to let it cool completely before sealing it, allowing the flavors to meld while keeping it fresh.

Can I freeze this soup, and if so, how?
Yes! To freeze the soup, let it cool completely, then portion it into freezer-safe containers or resealable bags. Label them with the date for easy tracking. It can be kept in the freezer for up to 2 months. To reheat, first thaw it in the refrigerator overnight, then warm it gently on the stove over medium heat, adding a splash of broth or water to adjust the consistency if needed.

What should I do if the meatballs are dry or tough?
Very! A common mistake is overmixing the meatball mixture. Make sure to mix until just combined to maintain tenderness. If you’ve already baked them and they’re dry, try adding them back into the soup to soak up more liquid, or serve with a drizzle of olive oil to enhance moisture and flavor.

Are there any dietary considerations I should keep in mind?
For those with gluten sensitivities, using gluten-free couscous or quinoa as a substitute will ensure everyone can enjoy the dish. If you’re making this soup for pets, avoid giving them any meat that has been seasoned or cooked with garlic or onion, as these can be harmful to them.

How can I enhance the flavor of the broth?
If you want to boost the broth’s flavor, consider sautéing the shallots and garlic first in olive oil, then adding a splash of lemon juice or a few crushed tomatoes for acidity. This depth of flavor complements the spices beautifully, making your Mini Moroccan Meatball Couscous Soup even more delicious!

Mini Moroccan Meatball Couscous Soup

Mini Moroccan Meatball Couscous Soup: A Cozy Hug in a Bowl

This Mini Moroccan Meatball Couscous Soup is a comforting dish rich in flavor, perfect for chilly evenings.
Prep Time 25 minutes
Cook Time 30 minutes
Total Time 55 minutes
Servings: 4 servings
Course: Dinner
Cuisine: Moroccan
Calories: 450

Ingredients
  

For the Meatballs
  • 1 pound Ground Lamb or Beef or ground turkey for a leaner option
  • 2 tablespoons Tomato Paste provides moisture and depth
  • 1 teaspoon Ground Coriander earthy flavor
  • 1 teaspoon Ground Cumin nutty, spicy
  • 1 teaspoon Dried Thyme herbal notes
  • 1 teaspoon Chili Powder adjust for spice preference
  • 1 teaspoon Ground Turmeric golden color
  • 1 teaspoon Ground Cinnamon subtle sweetness
  • 1 teaspoon Kosher Salt adjust to taste
  • 1/2 teaspoon Black Pepper adjust to taste
For the Soup Base
  • 2 tablespoons Olive Oil plus extra for drizzling
  • 1 cup Shallots chopped
  • 2 cloves Garlic minced
  • 4 cups Chicken Broth or vegetable broth for vegetarian version
  • 1 cup Water to balance consistency
For the Couscous
  • 1 cup Pearl Couscous or gluten-free alternative
For Garnish
  • 1/4 cup Chopped Mint or Parsley for freshness

Equipment

  • Baking Sheet
  • Mixing Bowl
  • Medium saucepan
  • large Dutch oven

Method
 

Step‑by‑Step Instructions
  1. Preheat your oven to 375°F (190°C). In a mixing bowl, combine the ground lamb or beef, tomato paste, and all the spices including coriander, cumin, and chili powder. Use your hands to gently mix the ingredients until just combined. Roll the mixture into small balls, about 1 inch in diameter, and arrange them on a parchment-lined baking sheet. Bake for 10-12 minutes, or until they are browned and cooked through.
  2. In a medium saucepan, heat a tablespoon of olive oil over medium heat. Add the pearl couscous, stirring frequently, and toast it for 1-2 minutes until it becomes lightly golden and fragrant. Pour in 1¾ cups of water and a pinch of salt. Bring this mixture to a boil, then reduce the heat, cover, and simmer for about 8-10 minutes, or until the water is absorbed and the couscous is fluffy.
  3. In a large Dutch oven, warm a tablespoon of olive oil over medium heat. Add the chopped shallots and sauté for about 2 minutes until they are translucent. Stir in the minced garlic, allowing it to cook for another minute until fragrant. Next, pour in 4 cups of chicken broth and an additional cup of water, bringing the mixture to a gentle boil.
  4. Once the broth is boiling, carefully add the baked meatballs and cooked couscous into the pot. Reduce the heat and let the soup simmer for about 10 minutes to allow the flavors to meld together. Stir occasionally and taste the broth, adjusting seasoning with kosher salt and black pepper as desired.
  5. After simmering, ladle the soup into bowls, and top each serving with freshly chopped mint or parsley for a pop of color and flavor. Drizzle a little extra olive oil over the top for added richness.

Nutrition

Serving: 1bowlCalories: 450kcalCarbohydrates: 45gProtein: 30gFat: 15gSaturated Fat: 4gPolyunsaturated Fat: 2gMonounsaturated Fat: 8gCholesterol: 75mgSodium: 900mgPotassium: 800mgFiber: 3gSugar: 3gVitamin A: 500IUVitamin C: 5mgCalcium: 30mgIron: 3mg

Notes

This soup stores well in the fridge for up to three days. Reheat gently to prevent overcooking the meatballs.

Tried this recipe?

Let us know how it was!

Flaky Jamaican Curry Chicken Patties for a Flavorful Feast

As a delightful bite-sized snack, Flaky Jamaican Curry Chicken Patties evoke memories of vibrant street markets filled with irresistible aromas. There’s something truly magical about the combination of a buttery, curry-infused crust enclosing tender, succulent chicken and aromatic spices. Not only are these patties easy to whip up, but they also offer a dairy-free option, making them suitable for a variety of dietary needs. Perfect for meal prep or served as a party appetizer, they promise to please palates young and old alike. Whether you crave a mild flavor or a spicy kick, this recipe allows you to customize the heat level to suit your tastes. So, are you ready to embark on this flavorful journey? Let’s get cooking!

Why are these patties a must-try?

Flavor Explosion: These Flaky Jamaican Curry Chicken Patties deliver a burst of flavor that transports you straight to the Caribbean. The aromatic spices harmonize perfectly with tender chicken, creating an irresistible filling.

Customizable Spice Level: Control the heat to suit your preferences! Enjoy mild flavors or ramp up the spice for a bold kick.

Meal Prep Friendly: Ready to make ahead? These patties can be frozen and baked when hunger strikes, making meal times a breeze!

Versatile Dish: Ideal as a party appetizer or quick snack, these patties are sure to impress guests or satisfy family cravings. Pair them with a refreshing yogurt dip or a side of chutney for an unforgettable experience.

Dairy-Free Delight: You can relish in guilt-free indulgence thanks to the dairy-free options, making them perfect for various dietary needs. Discover more delicious ideas like [Thai Chicken Meatballs] or [crispy air fryer chicken].

Flaky Jamaican Curry Chicken Patties Ingredients

  • For the Crust

  • Organic All-Purpose Flour – Provides structure for the crust.
    Note: Can substitute with gluten-free all-purpose flour.

  • Baking Powder – Helps the crust rise, making it light and flaky.

  • Curry Powder – Adds authentic Jamaican flavor to the dough.
    Substitution Note: Jamaican curry for best flavor, or burn standard curry powder for enhanced taste.

  • Turmeric Powder – Enhances color and offers health benefits.

  • Dried Parsley & Thyme – Adds herbal flavor to the crust.

  • Salted Butter (cubed & cold) – Creates flakiness by incorporating fat into the dough.
    Note: Unsalted butter can be used; add salt to dry ingredients if substituted.

  • Salted Butter (frozen & grated) – Provides additional layers of flakiness.

  • Unsweetened Almond Milk (very cold) – Moistens the dough without adding sweetness.
    Substitution: Whole milk or any favored non-dairy milk can be used.

  • For the Filling

  • Cooked Shredded Chicken – The main protein component.
    Note: Can use cooked turkey as an alternative.

  • Extra Virgin Olive Oil – Used to sauté the vegetables and enhance flavor.

  • Onion (chopped) – Adds sweetness and depth to the filling.

  • Garlic (minced) – Provides aromatic flavor.

  • Fresh Ginger (minced) – Adds a warm, spicy note.

  • Scotch Bonnet Pepper (minced) – Provides heat; can be adjusted for spice preference.
    Note: Use milder peppers for a less spicy version.

  • Sea Salt & Allspice – Season the filling for a balanced flavor.

  • Full-Fat Coconut Milk (canned) – Gives a creamy texture and rich flavor to the filling.

  • Organic Chicken Stock – Adds moisture and intensifies the filling’s flavor.

  • Other

  • Egg Wash – Mixture of egg and milk for glazing the patties before baking.

These Flaky Jamaican Curry Chicken Patties promise to enhance your cooking repertoire while offering a delicious and gratifying experience!

Step‑by‑Step Instructions for Flaky Jamaican Curry Chicken Patties

Step 1: Prepare the Crust
In a large mixing bowl, combine organic all-purpose flour, baking powder, curry powder, turmeric, dried parsley, and thyme. Cut in cubed and grated cold butter until the mixture resembles coarse crumbs. Gradually stir in very cold almond milk until a dough forms. Shape the dough into a ball, wrap it in plastic wrap, and chill in the refrigerator for at least 1 hour, allowing the flavors to meld.

Step 2: Make the Filling
Heat a skillet over medium heat and add extra virgin olive oil. Once hot, burn the curry powder for about 1 minute until fragrant, then add chopped onion, minced garlic, and minced ginger. Sauté these aromatics for 3-4 minutes until softened. Next, incorporate shredded chicken, additional curry powder, sea salt, allspice, and minced scotch bonnet peppers, stirring well to combine, then cook for another few minutes.

Step 3: Simmer the Filling
Pour in the full-fat coconut milk and organic chicken stock, stirring to blend. Bring the mixture to a gentle simmer over low heat, allowing it to thicken for about 5-7 minutes. Stir occasionally, ensuring that the filling doesn’t stick to the bottom of the pan. The consistency should be creamy and rich, perfect for the flaky Jamaican curry chicken patties.

Step 4: Assemble the Patties
Preheat your oven to 375°F (190°C). On a floured surface, roll out the chilled dough to about 1/8-inch thickness. Sprinkle the surface with grated frozen butter, fold the dough over, and roll it out again. Using a round cutter, cut circles from the dough, brush the edges with egg wash, and place a spoonful of the chicken filling in the center. Fold the dough over and crimp the edges to seal, ensuring a secure filling.

Step 5: Bake
Line a baking sheet with parchment paper and arrange the assembled flaky Jamaican curry chicken patties on it. Brush the tops with egg wash for a golden finish. Bake in the preheated oven for 20-25 minutes, or until the patties are beautifully golden brown and flaky. Keep an eye on them as they bake to avoid over-browning, and enjoy the irresistible aroma that fills your kitchen!

Storage Tips for Flaky Jamaican Curry Chicken Patties

  • Room Temperature: Allow leftover patties to cool completely before storing them. They can sit at room temperature for up to 2 hours, but be sure to refrigerate if longer.

  • Fridge: Store leftover Flaky Jamaican Curry Chicken Patties in an airtight container for up to 3 days. Reheat in the oven at 350°F (175°C) until heated through.

  • Freezer: For longer storage, freeze unbaked patties individually wrapped in plastic wrap, then transfer to a freezer-safe bag. They can last up to 3 months. Bake directly from frozen, adding an extra 5-10 minutes to the baking time.

  • Reheating: To reheat patties, preheat your oven to 350°F (175°C), place them on a baking sheet, and heat for about 15-20 minutes until warm and crispy. Enjoy the delightful flavor again!

Flaky Jamaican Curry Chicken Patties Variations

Feel free to explore these delightful variations that can elevate your Flaky Jamaican Curry Chicken Patties even further!

  • Vegetarian Twist: Substitute chicken with your favorite cooked vegetables like bell peppers and zucchini for a hearty vegetarian option. This vibrant mix will keep your taste buds dancing!

  • Dairy-Free Swap: Use any non-dairy milk instead of almond milk for the crust, ensuring everyone can enjoy these patties without a worry. Coconut or oat milk works great, keeping flavors rich and delightful!

  • Texture Boost: Add some crushed crackers or breadcrumbs to the chicken filling for a fun and crunchy texture. A little extra crunch can make each bite truly memorable!

  • Herbal Infusion: Replace dried parsley and thyme with fresh herbs for a fragrant, vibrant filling. Fresh cilantro or basil can add a unique twist, inspiring the taste of the tropics.

  • Spice Level: Want to spice things up? Toss in additional chillies or use extra scotch bonnet peppers for that fiery kick. Adventure awaits in every bite!

  • Fusion Flavors: Experiment with different spices like cumin or coriander in your filling for a fun fusion twist. It’s a journey of flavors that will surprise and delight your palate.

  • Savory Add-Ins: Consider incorporating some feta or goat cheese into the chicken filling for a creamy aspect that complements the curry beautifully. The tang adds depth to the savory bites!

  • Sweet Notes: Add diced mango or pineapple to the filling for a sweet contrast to the spicy chicken. This balance will transport you straight to the islands!

Looking for something else? Pair your patties with a refreshing yogurt dip or a bowl of spicy mango chutney to round out the experience. And if you’re intrigued by more chicken dishes, try these scrumptious Jerk Chicken Burritos or a tasty Grilled Chicken Sandwich. Your culinary adventure begins here!

Expert Tips for Flaky Jamaican Curry Chicken Patties

  • Chill Your Dough: Make sure to chill the dough for at least an hour. This helps create that perfectly flaky texture you desire in your patties.

  • Balance the Spices: Start with a smaller amount of scotch bonnet pepper, especially if you prefer mild flavors. You can always add more for a spicier kick!

  • Thoroughly Simmer: Allow the filling to simmer until it’s thick and creamy. This prevents a soggy bottom in your patties, ensuring each Flaky Jamaican Curry Chicken Patty holds its shape beautifully.

  • Precise Rolling: Roll the dough evenly to about 1/8-inch thickness to ensure all patties bake consistently. Thicker dough can lead to uneven cooking.

  • Watch the Bake: Keep an eye on your patties as they bake. Every oven is different, so check for a golden brown color at around the 20-minute mark to prevent burning.

  • Custom Fillings: Feel free to experiment with the filling! Substitute chicken for cooked veggies or try different spices to customize your Flaky Jamaican Curry Chicken Patties to your taste preferences.

Make Ahead Options

These Flaky Jamaican Curry Chicken Patties are ideal for meal prep enthusiasts! You can prepare the dough up to 24 hours in advance by mixing the crust ingredients and chilling it in the refrigerator, maintaining its flakiness. The chicken filling can also be made ahead and stored in an airtight container in the fridge for up to 3 days. When you’re ready to enjoy, simply roll out the chilled dough, fill it with your prepared mixture, seal the edges, and bake until golden. This way, you’ll have delicious, homemade patties ready in no time, ensuring busy weeknights are stress-free yet flavorful!

What to Serve with Flaky Jamaican Curry Chicken Patties?

Warm, flaky, and bursting with flavor, pair your Jamaican curry chicken patties with these delicious accompaniments for a feast that tantalizes the senses.

  • Cilantro Lime Rice: A refreshing, zesty side dish that complements the rich curry flavor while adding a pleasant brightness to your meal.

  • Spicy Mango Chutney: This sweet and spicy condiment enhances the flavor profile, providing a delightful contrast to the savory patties.

  • Caribbean Coleslaw: Crunchy and colorful, this side adds a crisp texture and cooling effect that balances the warmth of the patties.

  • Avocado Salsa: Creamy avocado mixed with tomatoes and onions offers a refreshing bite, perfect for dipping or topping your patties.

  • Cool Yogurt Dip: A tangy yogurt dip can serve as a delicious cooling agent, tempering the spice while also enhancing the overall taste experience.

  • Pineapple or Coconut Juice: Sweet and tangy drinks like these will hydrate and cleanse the palate, making your meal even more enjoyable.

  • Chilled Coconut Soup: For a unique starter, a light coconut soup brings a delicious, creamy embrace that complements the vibrant spices of the patties.

  • Plantain Chips: Crispy plantain chips add a crunchy, slightly sweet element that pairs wonderfully with the soft, flaky texture of the patties.

  • Fruit Salad with Lime Dressing: A vibrant mixture of tropical fruits drizzled with lime juice brings freshness and sweetness, rounding out the meal beautifully.

Flaky Jamaican Curry Chicken Patties Recipe FAQs

What is the best way to select ripe ingredients for these patties?
Absolutely! When selecting ingredients, look for ripe and fragrant produce. For instance, choose fresh garlic that is firm with no sprouts, and ensure that your scotch bonnet peppers are smooth and bright in color. For the chicken, opt for shredded meat that is tender and cooked properly for the best flavor infusion.

How should I store leftover patties, and for how long will they last?
To keep your Flaky Jamaican Curry Chicken Patties at their best, allow them to cool completely, then place them in an airtight container. In the fridge, they’ll last up to 3 days. If you’re meal prepping or want to store them longer, the freezer is an excellent option – just wrap each individually and they can last up to 3 months!

Can I freeze unbaked patties, and how do I bake them from frozen?
Yes, you can freeze unbaked patties! First, wrap each one tightly in plastic wrap and then place them in a freezer-safe bag. They will stay fresh for up to 3 months. When you’re ready to enjoy them, preheat your oven to 375°F (190°C) and bake them directly from frozen, adding an extra 5-10 minutes to the baking time to ensure they are fully cooked and golden.

What should I do if the filling is too runny?
Very good question! If you find that your filling for the patties is too runny, simply return it to the stove over low heat. Allow it to simmer for an additional 5-10 minutes while stirring occasionally. This will help the excess liquid evaporate, resulting in a thicker filling that holds its shape beautifully inside the patties.

Are these patties suitable for people with dietary restrictions, such as allergies?
Definitely! These Flaky Jamaican Curry Chicken Patties can be easily adapted for various diets. They are dairy-free, thanks to the almond milk, but you can also use other non-dairy alternatives. If managing nut allergies, process the recipe with whole milk instead. Always double-check ingredient labels to ensure there are no allergens specific to your dietary needs.

Flaky Jamaican Curry Chicken Patties

Flaky Jamaican Curry Chicken Patties for a Flavorful Feast

These Flaky Jamaican Curry Chicken Patties are a delightful snack, featuring a buttery crust and savory chicken filling, perfect for any gathering.
Prep Time 1 hour
Cook Time 25 minutes
Chilling Time 1 hour
Total Time 2 hours 25 minutes
Servings: 12 patties
Course: Chicken
Cuisine: Caribbean
Calories: 350

Ingredients
  

For the Crust
  • 2 cups Organic All-Purpose Flour Can substitute with gluten-free all-purpose flour.
  • 1 tbsp Baking Powder
  • 1 tbsp Curry Powder Use Jamaican curry for best flavor, or burn standard curry powder for enhanced taste.
  • 1 tsp Turmeric Powder
  • 1 tsp Dried Parsley
  • 1 tsp Dried Thyme
  • 1/2 cup Salted Butter (cubed & cold) Unsalted butter can be used; add salt to dry ingredients if substituted.
  • 1/2 cup Salted Butter (frozen & grated)
  • 1 cup Unsweetened Almond Milk (very cold) Whole milk or any favored non-dairy milk can be used.
For the Filling
  • 2 cups Cooked Shredded Chicken Can use cooked turkey as an alternative.
  • 2 tbsp Extra Virgin Olive Oil
  • 1 medium Onion (chopped)
  • 3 cloves Garlic (minced)
  • 1 inch Fresh Ginger (minced)
  • 1 medium Scotch Bonnet Pepper (minced) Use milder peppers for a less spicy version.
  • 1 tsp Sea Salt
  • 1 tsp Allspice
  • 1 cup Full-Fat Coconut Milk (canned)
  • 1/2 cup Organic Chicken Stock
Other
  • 1 each Egg Wash Mixture of egg and milk for glazing the patties before baking.

Equipment

  • Mixing Bowl
  • Skillet
  • Baking Sheet
  • Plastic Wrap
  • Rolling Pin
  • Round cutter

Method
 

Prepare the Crust
  1. In a large mixing bowl, combine organic all-purpose flour, baking powder, curry powder, turmeric, dried parsley, and thyme. Cut in cubed and grated cold butter until the mixture resembles coarse crumbs. Gradually stir in very cold almond milk until a dough forms. Shape the dough into a ball, wrap it in plastic wrap, and chill in the refrigerator for at least 1 hour.
Make the Filling
  1. Heat a skillet over medium heat and add extra virgin olive oil. Once hot, burn the curry powder for about 1 minute until fragrant, then add chopped onion, minced garlic, and minced ginger. Sauté these aromatics for 3-4 minutes until softened.
  2. Next, incorporate shredded chicken, additional curry powder, sea salt, allspice, and minced scotch bonnet peppers, stirring well to combine, then cook for another few minutes.
Simmer the Filling
  1. Pour in the full-fat coconut milk and organic chicken stock, stirring to blend. Bring the mixture to a gentle simmer over low heat, allowing it to thicken for about 5-7 minutes.
  2. Stir occasionally, ensuring that the filling doesn’t stick to the bottom of the pan. The consistency should be creamy and rich.
Assemble the Patties
  1. Preheat your oven to 375°F (190°C). On a floured surface, roll out the chilled dough to about 1/8-inch thickness. Sprinkle the surface with grated frozen butter, fold the dough over, and roll it out again.
  2. Using a round cutter, cut circles from the dough, brush the edges with egg wash, and place a spoonful of the chicken filling in the center. Fold the dough over and crimp the edges to seal, ensuring a secure filling.
Bake
  1. Line a baking sheet with parchment paper and arrange the assembled flaky Jamaican curry chicken patties on it. Brush the tops with egg wash for a golden finish. Bake in the preheated oven for 20-25 minutes, or until the patties are beautifully golden brown and flaky.

Nutrition

Serving: 1pattieCalories: 350kcalCarbohydrates: 30gProtein: 20gFat: 15gSaturated Fat: 6gPolyunsaturated Fat: 5gMonounsaturated Fat: 4gCholesterol: 50mgSodium: 400mgPotassium: 300mgFiber: 2gSugar: 1gVitamin A: 500IUVitamin C: 3mgCalcium: 20mgIron: 1.5mg

Notes

Allow leftover patties to cool completely before storing. They can be refrigerated for up to 3 days or frozen for up to 3 months.

Tried this recipe?

Let us know how it was!

Creamsicle Hamentaschen: A Nostalgic Fruity Delight

As I sifted through my pantry on a sun-soaked afternoon, a burst of nostalgia struck me—those delightful Creamsicles from childhood! That’s when I knew I had to recreate their magic in a new form: Creamsicle Hamentaschen. These gorgeous little pastries blend fruity sorbet with creamy dairy-free ice cream, all tucked within light gluten-free sponge cake. Not only do they deliver a delightful twist on traditional Hamentaschen, but they’re also an excellent treat for anyone mindful of dietary restrictions. Plus, their stunning presentation makes them a showstopper for gatherings or a sweet surprise for loved ones. Intrigued? Let’s dive into how to bring this fun recipe to life, shall we?

Why are Creamsicle Hamentaschen a must-try?

Nostalgic Delight: These Creamsicle Hamentaschen take you back to childhood with their fruity and creamy flavor profile.

Unique Twist: Innovatively blending traditional Hamentaschen with creamy ice cream and fruity sorbet, this dessert stands out at any gathering.

Dietary-Friendly: Perfectly crafted to be gluten-free and dairy-free, making them suitable for various dietary needs.

Easy to Make: With simple steps and readily available ingredients, you’ll find this recipe refreshingly straightforward, perfect for both beginners and seasoned bakers.

Crowd-Pleasing Appeal: Serve these delightful pastries at parties or family gatherings, and watch them disappear in a flash! They’re bound to impress everyone with their stunning appearance and vibrant flavors.

Creamsicle Hamentaschen Ingredients

For the Sponge Cake
Granulated Sugar – Sweetness to balance the flavors; swap with coconut sugar for a healthier twist.
Gluten-Free Flour (1:1 with Xanthan Gum) – Provides structure for the sponge cake; consider almond flour for a nutty taste, but adjust moisture.

For the Filling
Dairy-Free Vanilla Ice Cream – A creamy layer that enhances the dessert; ensure it’s entirely free of dairy.
Fruit-Flavored Sorbet (e.g., apricot, strawberry) – Adds fruity bursts and color; feel free to get creative with seasonal flavors!
Fruit-Flavored Jelly Filling – Offers a decorative touch and an additional layer of flavor; substitute any similar fruit preserve as desired.

For the Topping
Powdered Sugar – A sweet finish and aesthetic dusting; opt for cornstarch-based powdered sugar for a gluten-free choice.

This delightful Creamsicle Hamentaschen recipe is sure to become a family favorite!

Step‑by‑Step Instructions for Creamsicle Hamentaschen

Step 1: Prep the Sponge Cake
Begin by preheating your oven to 350°F (175°C). In a large mixing bowl, whisk together gluten-free flour and granulated sugar until well combined. Grease a square baking pan and pour the batter into it, leveling the top. Bake for 25-30 minutes, or until a toothpick inserted comes out clean. Allow it to cool completely in the pan before lifting it out to cut.

Step 2: Cut the Cake Layers
Once the gluten-free sponge cake has cooled, carefully remove it from the pan and place it on a cutting board. Using a sharp knife, slice the cake into triangles about 2 inches wide for the filling. These will form the base and top of your Creamsicle Hamentaschen. Set these cake triangles aside, ensuring they stay intact.

Step 3: Prepare the Filling
While the cake cools, take the dairy-free vanilla ice cream out of the freezer and let it soften for about 10 minutes. In a mixing bowl, combine the softened ice cream with your chosen fruity sorbet. Gently fold the sorbet into the ice cream until thoroughly mixed, creating a vibrant and creamy filling that captures the essence of Creamsicle Hamentaschen.

Step 4: Layer the Cake
Return to your square baking pan and place one cake triangle at the bottom. Spoon a layer of the ice cream and sorbet mixture on top, spreading it evenly with a spatula. Follow this with another triangle, pressing it down gently. Repeat the layering process, alternating between cake and the creamy filling until all ingredients are used, finishing with a cake layer on top.

Step 5: Finish & Freeze
Cover the pan tightly with plastic wrap or foil, ensuring no air can escape. Place the layered creation in the freezer and allow it to set for at least 6 hours, or overnight if possible. This time allows the layers to firm up beautifully and the flavors to meld together for the perfect Creamsicle Hamentaschen experience.

Step 6: Serve the Hamentaschen
Once frozen solid, remove the pan from the freezer and let it sit for a few minutes to soften slightly. Carefully lift the entire creation out and place it on a cutting board. Use a sharp knife to cut into triangular pieces, mimicking the traditional shape. Dust with powdered sugar and add a dollop of fruit-flavored jelly in the cutouts, if desired, before serving.

Storage Tips for Creamsicle Hamentaschen

Fridge: Keep any leftover Creamsicle Hamentaschen in an airtight container for up to 3 days. This ensures they stay fresh and ready to enjoy!

Freezer: You can freeze the Hamentaschen tightly wrapped in plastic wrap for up to 1 week. For best results, double wrap them to avoid freezer burn.

Reheating: To enjoy a slightly softened version, let them sit at room temperature for about 10 minutes before serving. This will revive their delightful texture!

Serving Suggestions: When ready to serve, dust with powdered sugar and add a dollop of fruit-flavored jelly in the cutouts for an extra touch of sweetness.

Expert Tips for Creamsicle Hamentaschen

  • Perfect Ice Cream Softness: Ensure your dairy-free vanilla ice cream is just soft enough for easy spreading; this helps avoid melting into a messy mix.
  • Sharp Knife Use: When cutting the cake triangles, use a sharp knife for clean edges; this ensures your Creamsicle Hamentaschen look as good as they taste.
  • Avoid Overmixing: When combining the sorbet and ice cream, be gentle to maintain the creaminess; overmixing can lead to a soupy filling.
  • Chill Properly: Plan to freeze these delectable treats for at least 6 hours; this allows the layers to hold together beautifully when served.
  • Experiment with Flavors: Don’t hesitate to swap out the sorbet for seasonal fruits; this adds a fun twist to your Creamsicle Hamentaschen and keeps things exciting!

Make Ahead Options

These Creamsicle Hamentaschen are perfect for busy home cooks wanting to save time during the week! You can prepare the gluten-free sponge cake up to 24 hours in advance. Simply bake it, let it cool, and store it tightly wrapped in plastic wrap at room temperature. Next, you can mix your dairy-free ice cream and fruity sorbet filling and refrigerate it for up to 3 days. Assemble the layers when you’re ready to serve: place the cake layers in a pan, add the filling, cover tightly, and freeze for at least 6 hours or overnight. This way, every bite remains just as delightful—ensuring your Creamsicle Hamentaschen are a hit without the last-minute rush!

What to Serve with Creamsicle Hamentaschen?

Elevate your sweet treat experience with delightful pairings that complement the bright, creamy flavors of these pastries.

  • Fresh Berries: Juicy strawberries and raspberries add a burst of freshness that balances the dessert’s sweetness and enhances presentation.

  • Coconut Whipped Cream: Light and airy, this coconut variation adds a creamy texture, perfectly marrying with the flavors of the Creamsicle Hamentaschen.

  • Mint Tea: This soothing drink offers a refreshing contrast to the sweet pastries while cleansing the palate between bites.

  • Lemon Sorbet: A tangy counterpoint to the sweet and creamy fillings, lemon sorbet enhances the fruity notes and brightens your dessert table.

  • Chocolate Drizzle: A simple drizzle of melted dairy-free chocolate introduces a rich, bittersweet flavor that can elevate each bite of the Creamsicle Hamentaschen.

  • Vanilla Almond Milk: A smooth, nutty beverage that complements the creaminess of the dessert while offering a refreshing drink option.

  • Fruit Salad: A rainbow of seasonal fruits can add texture and freshness to the table, serving as a light, vibrant side that pairs beautifully with the Hamentaschen flavors.

Explore these delightful combinations for a truly enchanting dessert spread!

Variations & Substitutions for Creamsicle Hamentaschen

Feel free to get creative and customize these delightful pastries to suit your taste and dietary preferences!

  • Dairy-Free Ice Cream: Use coconut or almond milk ice cream for a nutty flavor while keeping it dairy-free.

  • Fruit Sorbet: Experiment with tropical flavors like mango or pineapple for a refreshing twist on the classic. The sweet tang of tropical fruits will dance on your palate!

  • Nutty Flour: Switch out gluten-free flour for almond flour to introduce a richer, nutty taste. Remember to adjust moisture levels for best results.

  • Flavored Fillings: Try raspberry or blueberry jam in place of fruit-flavored jelly for a vibrant color contrast and extra fruity burst!

  • Chocolate Variation: Swap vanilla ice cream for chocolate to create a rich, decadent version. What a delightful surprise it would be to encounter creamy chocolate hiding within!

  • Fresh Fruits: Add fresh berries or sliced peaches between layers for added texture and vibrant flavors. The freshness elevates the overall experience!

  • Spicy Twist: Add a pinch of cayenne pepper to the sorbet for a subtle heat that complements the sweetness beautifully. It’s a surprise that will intrigue your taste buds!

  • Single Layer: For a simpler take, layer the ice cream and sorbet mixture in a bowl and serve with cake crumbles on top. It’ll be a delightful, deconstructed treat!

If you’re looking for ideas on how to make this recipe even better, check out my expert tips for perfecting your pastries as well as suggestions for serving suggestions for an inviting presentation!

Creamsicle Hamentaschen Recipe FAQs

What is the best way to choose ripe ingredients for Creamsicle Hamentaschen?
Absolutely! For the best results, select fruit-flavored sorbets that are vibrant in color and free of ice crystals, indicating freshness. Look for dairy-free vanilla ice cream that’s smooth and creamy; if possible, check the ingredients for natural flavorings rather than artificial ones. When it comes to jelly fillings, opt for brands that list fruit as their primary ingredient for the best taste.

How should I store leftover Creamsicle Hamentaschen?
Very simple! Place any leftover Creamsicle Hamentaschen in an airtight container and store them in the refrigerator for up to 3 days. If you want to keep them longer, wrap each piece tightly in plastic wrap and freeze for up to 1 week. Be sure to double wrap them to prevent freezer burn.

Can I freeze Creamsicle Hamentaschen for later?
Yes, you can! For freezing, follow these steps: After preparing the Hamentaschen, wrap them tightly in plastic wrap and place them in a freezer-safe container. They can be stored in the freezer for up to 1 week. When you’re ready to enjoy them, let them sit at room temperature for about 10 minutes to soften slightly before serving. Refrain from placing them directly in the microwave, as the texture of the ice cream may be compromised!

What should I do if my ice cream is too soft to spread?
No worries! If your dairy-free vanilla ice cream is too soft, simply place it back into the freezer for about 5–10 minutes to firm up a little. Alternatively, you can also spoon it into a mixing bowl and gently fold in some chilled fruit sorbet to create a thicker consistency before layering it in your Hamentaschen.

Are there any dietary considerations for making Creamsicle Hamentaschen?
Definitely! This recipe is both gluten-free and dairy-free, making it a wonderful option for those with dietary restrictions. Be sure to choose certified gluten-free flour for the sponge cake and check labels on your ice cream and sorbet to ensure they are completely dairy-free. Always consider any potential allergies, especially with fruit fillings, if serving to a larger crowd.

How long should I freeze the Hamentaschen before serving?
To achieve the perfect texture for your Creamsicle Hamentaschen, I recommend freezing them for at least 6 hours. However, for best results, freezing overnight allows the flavors to meld beautifully and the textures to set just right. This waiting period helps ensure each bite is as delightful as possible!

Creamsicle Hamentaschen

Creamsicle Hamentaschen: A Nostalgic Fruity Delight

Experience a nostalgic twist with these Creamsicle Hamentaschen, combining fruity sorbet and creamy dairy-free ice cream in a gluten-free sponge cake.
Prep Time 30 minutes
Cook Time 30 minutes
Freezing Time 6 hours
Total Time 12 hours
Servings: 12 pieces
Course: Dessert
Cuisine: American
Calories: 150

Ingredients
  

For the Sponge Cake
  • 1 cup Granulated Sugar Swap with coconut sugar for a healthier twist.
  • 1 cup Gluten-Free Flour (1:1 with Xanthan Gum) Consider almond flour for a nutty taste.
For the Filling
  • 2 cups Dairy-Free Vanilla Ice Cream Ensure it's entirely free of dairy.
  • 1 cup Fruit-Flavored Sorbet e.g., apricot or strawberry.
  • 1 cup Fruit-Flavored Jelly Filling Substitute any similar fruit preserve.
For the Topping
  • 1 cup Powdered Sugar Opt for cornstarch-based powdered sugar for a gluten-free choice.

Equipment

  • Mixing Bowl
  • Baking pan
  • sharp knife
  • Spatula

Method
 

Step‑by‑Step Instructions
  1. Preheat your oven to 350°F (175°C). In a large mixing bowl, whisk together gluten-free flour and granulated sugar until well combined. Grease a square baking pan and pour the batter into it. Bake for 25-30 minutes.
  2. Once cooled, slice the cake into triangles about 2 inches wide.
  3. Soften the dairy-free vanilla ice cream for 10 minutes. Fold in the fruity sorbet until thoroughly mixed.
  4. Layer one cake triangle at the bottom, then spoon a layer of the ice cream mixture on top. Repeat the layering process, finishing with a cake layer on top.
  5. Cover tightly with plastic wrap and freeze for at least 6 hours or overnight.
  6. Cut into triangular pieces and dust with powdered sugar. Add jelly in the cutouts if desired.

Nutrition

Serving: 1pieceCalories: 150kcalCarbohydrates: 25gProtein: 2gFat: 5gSaturated Fat: 2gPolyunsaturated Fat: 0.5gMonounsaturated Fat: 2gSodium: 70mgPotassium: 100mgFiber: 1gSugar: 12gVitamin A: 10IUVitamin C: 2mgCalcium: 1mgIron: 1mg

Notes

Ensure the ice cream is just soft enough for easy spreading. Use a sharp knife for clean edges when cutting the cake triangles. Plan to freeze for at least 6 hours for best results.

Tried this recipe?

Let us know how it was!

Strawberry Glazed French Crullers for a Sweet Morning Delight

As I stood in my kitchen this morning, the scent of warm oil and sweet strawberries filled the air, transporting me to a sunny afternoon at a French bakery. Strawberry Glazed French Crullers are my go-to treat when I crave something light and airy, yet indulgent. With a delightfully crispy exterior and a tender interior, they are perfectly complemented by a homemade strawberry glaze that captures the essence of summer. What I love most about this recipe is its simplicity, making it a delightful project for bakers of all skill levels. Plus, they’re an instant crowd-pleaser, perfect for gatherings or an afternoon pick-me-up. Are you ready to create your own batch and impress your loved ones? Let’s dive into this sweet adventure together!

Why Are Strawberry Glazed French Crullers Irresistible?

Simplicity at Its Finest: With straightforward steps and basic ingredients, anyone can whip up these delightful treats.
Light and Fluffy: The airy texture complements the crispiness, making each bite a heavenly experience.
Sweet Summer Flavor: The homemade strawberry glaze adds a burst of freshness that captures seasonal happiness, perfect for any occasion.
Crowd-Pleasing Treat: Serve them at brunch, and watch everyone indulge – they’re sure to disappear fast! Pair them with a cup of coffee or tea for the ultimate experience, just like my Roasted Strawberry Whipped toast!
Endless Customization: Whether you use fresh strawberries or freeze-dried ones for a twist, these crullers offer fun variations to keep your baking exciting!

Strawberry Glazed French Crullers Ingredients

For the Choux Pastry

  • Water – Provides moisture to create the perfect choux pastry.
  • Whole Milk – Adds richness and enhances the flavor of your crullers.
  • Unsalted Butter – Offers a buttery taste that significantly impacts texture.
  • Granulated Sugar – Sweetens the crullers, balancing all the flavors.
  • Salt – Helps balance the sweetness, enhancing the overall flavor profile.
  • Bread Flour – Creates structure; its higher protein content is crucial for the desired airy texture.
  • Large Eggs – Essential for leavening and structure; they contribute to the lightness!
  • Vegetable or Canola Oil – Ideal for frying; feel free to substitute with your favorite neutral oil.

For the Strawberry Glaze

  • Powdered Sugar – Serves as the base for the delicious strawberry glaze.
  • Fresh Strawberries – Provides fresh flavor; can also be pureed or mashed for different textures.
  • Whole Milk (for glaze) – Adjusts the glaze’s consistency to perfection.

For the Strawberry Sugar

  • Freeze Dried Strawberries – Offers intense strawberry flavor without extra moisture, perfect for a sweet sprinkle.
  • Granulated Sugar (for strawberry sugar) – Sweetens and enhances that delightful strawberry flavor in your garnish.

Get ready to treat your taste buds with these Strawberry Glazed French Crullers that blend sweetness with airy goodness!

Step‑by‑Step Instructions for Strawberry Glazed French Crullers

Step 1: Prepare Parchment Squares
Begin by cutting eighteen 4” x 4” squares of parchment paper. If desired, use a pen to lightly trace circles on each square to guide your piping. This will help you create uniform crullers, ensuring they fry evenly and look delightful.

Step 2: Cook Choux Pastry
In a medium saucepan, combine 1 cup of water, 1 cup of whole milk, ½ cup of unsalted butter, 2 tablespoons of granulated sugar, and a pinch of salt. Heat over medium-high, bringing the mixture to a rolling boil. Immediately add 1 ¼ cups of bread flour, stirring vigorously with a wooden spoon until it forms a thick paste that pulls away from the sides of the pan.

Step 3: Steam Out Moisture
Transfer the thick paste to a stand mixer fitted with a paddle attachment. Mix on medium speed for about 3-5 minutes, allowing the steam to escape and the temperature to decrease slightly. This step is crucial for achieving the desired airy texture of your Strawberry Glazed French Crullers, so make sure the mixture is cool to the touch before proceeding.

Step 4: Incorporate Eggs
Once the choux pastry has cooled, add four large eggs, one at a time, mixing well after each addition. Continue beating until the batter becomes smooth and glossy, about 2-3 minutes. The texture should be thick yet pipeable, ready for shaping.

Step 5: Pipe Dough
Spoon the batter into a large piping bag fitted with a star nozzle. Pipe the dough onto the prepared parchment squares, creating circular rings approximately 3 inches in diameter. Ensure the rings are even and well-defined, as this will help them maintain their shape during frying.

Step 6: Fry Crullers
In a deep fryer or large pot, heat vegetable or canola oil to 370°F (188°C). Carefully lower the cruller rings into the hot oil, starting with just a few at a time. Fry each cruller for 2-3 minutes per side, using tongs to remove the parchment paper after about 45 seconds. The crullers should be golden brown and puffed, giving a perfect crispy exterior.

Step 7: Cool and Glaze
Once fried, transfer the crullers to a wire rack to drain excess oil for 5 minutes. Meanwhile, prepare the strawberry glaze by whisking powdered sugar, fresh strawberries, and a splash of whole milk until smooth. Dip the cooled crullers into the glaze, allowing the excess to drip off. For a delightful finish, sprinkle with strawberry sugar while the glaze is still wet.

Strawberry Glazed French Crullers Variations

Feel free to unleash your creativity and enhance these delightful crullers with personal touches!

  • Dairy-Free: Substitute whole milk with almond milk or oat milk for a lighter glaze that still tastes divine.
  • Chocolate Lovers: Drizzle melted dark chocolate over the crullers instead of glaze for a rich twist that’s utterly indulgent.
  • Citrus Zest: Add lemon or orange zest to the glaze for a refreshing citrus flavor that brightens each bite.
  • Spiced Sugar: Dust the crullers with cinnamon sugar instead of strawberry sugar for a warm, cozy touch on chilly mornings.
  • Nutty Crunch: Incorporate finely chopped nuts, like almonds or pistachios, into the glaze for added texture and flavor. Their crunch adds an exciting contrast to the soft pastry!
  • Seasonal Variations: Swap fresh strawberries for other berries, like blueberries or raspberries, to celebrate different seasons beautifully.
  • Savory Spin: Infuse the choux pastry with herbs like rosemary or thyme for a unique savory version, perfect for pairing with cheeses at brunch.
  • Fruity Glaze: Use pureed peaches or mangos in place of strawberries for a tropical spin that transports you to a sun-soaked getaway.

If you’re looking for more fruity inspiration, don’t miss my delightful Strawberry Spinach Salad or the indulgent Strawberry Cheesecake Bars. Let’s make those crullers special together!

Storage Tips for Strawberry Glazed French Crullers

Room Temperature: Enjoy these crullers fresh for the best taste and texture, ideally within a few hours of making them.

Fridge: If you have leftovers, store them in an airtight container in the refrigerator for up to 1 day to maintain their softness.

Freezer: For longer storage, freeze unglazed crullers in a single layer on a baking sheet, then transfer to an airtight container for up to 1 month.

Reheating: To enjoy your crullers later, reheat in a 350°F oven for about 5 minutes until warm and crispy. Best to glaze just before serving to preserve the fresh flavor of strawberry!

Expert Tips for Strawberry Glazed French Crullers

  • Organize Your Workspace: Keep all ingredients and tools within arm’s reach to streamline your cooking process and avoid any last-minute scrambles.

  • Perfect Piping Technique: Ensure your dough rings are evenly piped for uniform cooking. Practice makes perfect, so don’t hesitate to try a few test rounds!

  • Monitor Oil Temperature: Use a thermometer to keep the frying oil at 370°F. Too cold will make oily crullers, while too hot can lead to burnt exteriors.

  • Cool Before Glazing: Allow your crullers to cool slightly on a wire rack before dipping them in glaze to prevent melting and ensure a beautiful finish.

  • Experiment with Flavors: Feel free to add a touch of vanilla or almond extract to the glaze for an extra layer of flavor, focusing on complementing the strawberries in your Strawberry Glazed French Crullers.

Make Ahead Options

These Strawberry Glazed French Crullers are perfect for meal prep enthusiasts looking to save time without sacrificing quality! You can prepare the choux pastry up to 24 hours in advance and store it in an airtight container in the refrigerator. To maintain that light, airy texture, simply scoop the pastry into your piping bag and pipe the rings on parchment squares before frying. You can also make the strawberry glaze ahead and store it in the fridge for up to 3 days; just give it a good stir before using. When you’re ready to serve, fry the crullers and glaze them for a fresh, delightful treat that tastes just as delicious as if they were made fresh that day!

What to Serve with Strawberry Glazed French Crullers

Let your creativity soar as you design the perfect spread to accompany these delightful, airy treats.

  • Rich Coffee: A bold coffee enhances the sweet flavors and provides a comforting contrast to the light crullers.
  • Fresh Berries: Juicy mixed berries add a refreshing burst, enhancing the fruity notes of the strawberry glaze.
  • Light Whipped Cream: Smooth and airy, it offers an indulgent touch that pairs beautifully with the crullers’ texture.
  • Vanilla Yogurt: Creamy and slightly tangy, it balances sweetness while adding a nutritious element to your afternoon snack.

Imagine serving the crullers with a side of fresh berries, allowing your guests to create their own delicious combinations. Each bite becomes a delightful exploration of flavors that play off the cruller’s sweetness!

  • Sparkling Lemonade: Light and fizzy, this drink brings a zesty brightness that elevates the entire tasting experience.
  • Homemade Lemon Curd: A tangy twist that complements the sweetness of the crullers while offering an elegant touch to your dessert spread.
  • Chocolate Drizzle: A quick drizzle of melted chocolate can add a luxurious element, turning your crullers into a decadent indulgence.
  • Fruit Salad: A vibrant medley of seasonal fruits enhances the fresh strawberry notes and adds a healthy crunch to the experience.

Strawberry Glazed French Crullers Recipe FAQs

How do I select ripe strawberries for the glaze?
Absolutely! Look for strawberries that are vibrant red, firm to the touch, and free of dark spots. Ideally, they should have a sweet fragrance, indicating ripeness. If you can find organic strawberries, they tend to pack more flavor, making your glaze even more delightful.

What’s the best way to store leftover crullers?
Very! Store your unglazed crullers in an airtight container at room temperature for the best texture, but they should be enjoyed fresh within a few hours. If you have leftovers, refrigerate them in the same container for up to 1 day. This method helps retain their airy texture while keeping them safe from moisture.

Can I freeze Strawberry Glazed French Crullers?
Yes! To freeze the crullers, first cool them completely, and then place them in a single layer on a baking sheet. Once they are frozen solid (about 1-2 hours), transfer them to an airtight container or freezer bag. They can be stored this way for up to 3 months. When ready to enjoy, reheat them in a 350°F oven for about 5 minutes before glazing, which helps to restore their original texture.

What should I do if my dough is too runny?
Don’t worry if this happens! If your batter seems too runny after adding the eggs, it might need more flour. Start by adding an additional tablespoon of bread flour, mixing well. If it still doesn’t hold its shape, give it a few more minutes in the mixer; the batter should achieve a thick, pipeable consistency. It’s essential for the crullers to have structure while frying, so patience is key here.

Are Strawberry Glazed French Crullers safe for pets?
No, it’s best to keep these delectable treats away from pets. The sugar and butter can be harmful, and many pets are sensitive to the ingredients used in baked goods. If you’re looking to share some love with your furry friends, consider making them a pet-friendly treat instead!

Can I substitute ingredients if I have allergies?
Certainly! If you’re avoiding eggs, you can try using flax eggs as a substitute (1 tablespoon of ground flaxseed mixed with 2.5 tablespoons of water per egg). Additionally, vegetable oil can be replaced with coconut oil for frying. Always be sure to check for any other allergies with your additional ingredients like sugar or flavorings, and feel free to experiment with different fruits in the glaze too!

Strawberry Glazed French Crullers

Strawberry Glazed French Crullers for a Sweet Morning Delight

Strawberry Glazed French Crullers are light, airy, and indulgent treats with a delightful strawberry glaze.
Prep Time 30 minutes
Cook Time 20 minutes
Cooling Time 5 minutes
Total Time 55 minutes
Servings: 18 crullers
Course: Dessert
Cuisine: French
Calories: 180

Ingredients
  

For the Choux Pastry
  • 1 cup water
  • 1 cup whole milk
  • ½ cup unsalted butter
  • 2 tablespoons granulated sugar
  • 1 pinch salt
  • 1 ¼ cups bread flour
  • 4 large eggs
  • Vegetable or Canola Oil for frying
For the Strawberry Glaze
  • 1 cup powdered sugar
  • 1 cup fresh strawberries
  • 2 tablespoons whole milk for glaze
For the Strawberry Sugar
  • ½ cup freeze dried strawberries
  • ¼ cup granulated sugar for strawberry sugar

Equipment

  • Medium saucepan
  • Stand Mixer
  • piping bag
  • Star nozzle
  • Deep fryer or large pot

Method
 

Step-by-Step Instructions
  1. Prepare Parchment Squares: Cut eighteen 4” x 4” squares of parchment paper. Optionally trace circles for piping.
  2. Cook Choux Pastry: Combine water, whole milk, unsalted butter, granulated sugar, and salt in a saucepan. Boil, then add bread flour, stirring until a thick paste forms.
  3. Steam Out Moisture: Transfer the mixture to a stand mixer and mix for 3-5 minutes until cool.
  4. Incorporate Eggs: Add eggs one at a time, mixing until smooth and glossy, about 2-3 minutes.
  5. Pipe Dough: Spoon the batter into a piping bag and pipe circular rings on parchment squares.
  6. Fry Crullers: Heat oil to 370°F (188°C) and fry cruller rings until golden brown, about 2-3 minutes per side.
  7. Cool and Glaze: Drain fried crullers, prepare glaze, dip crullers in glaze, and sprinkle with strawberry sugar.

Nutrition

Serving: 1crullerCalories: 180kcalCarbohydrates: 23gProtein: 2gFat: 9gSaturated Fat: 5gPolyunsaturated Fat: 1gMonounsaturated Fat: 3gCholesterol: 50mgSodium: 90mgPotassium: 70mgSugar: 6gVitamin A: 300IUVitamin C: 5mgCalcium: 30mgIron: 0.5mg

Notes

For an extra layer of flavor, consider adding vanilla or almond extract to the glaze.

Tried this recipe?

Let us know how it was!

Creamy Honey Mustard Chicken Salad for Quick, Tasty Meals

A satisfying crunch followed by a zesty tang; there’s just something magical about a well-made salad. When life gets busy, I often find myself dreaming of quick, nutritious meals that don’t skimp on flavor—like my Creamy Honey Mustard Chicken Salad. This dish is a game-changer, blending tender rotisserie chicken with a creamy yogurt-mayo dressing. Not only does it provide an impressive 40 grams of protein per serving, but it also comes together in just 10 minutes! Perfect for a bustling lunch break or as a delightful snack, this salad is versatile and gluten-free, making it a great choice for everyone. So, are you ready to whip up something delicious and energizing? Let’s dive into this easy recipe together!

Why is this chicken salad irresistible?

Simplicity, with just a few ingredients, this creamy honey mustard chicken salad comes together in a mere 10 minutes, perfect for those busy weekdays. High-protein goodness means each serving packs 40 grams, keeping you energized. Versatile and delicious, enjoy it on toast, in wraps, or even as a dip on crackers. Whether you’re preparing a light dinner or a meal prep for the week, this recipe fits the bill. For a delightful twist, consider adding some diced celery or apples for that extra crunch and flavor!

Creamy Honey Mustard Chicken Salad Ingredients

• Get everything you need for this flavorful dish!

For the Salad

  • Rotisserie Chicken Breast – Provides a convenient and hearty protein source that saves prep time.
  • Plain Greek Yogurt – Adds rich creaminess while boosting the protein content; sour cream can be used as a substitute for a different taste.
  • Mayonnaise – Contributes to the salad’s delightful creaminess; opt for a dairy-free version if necessary.
  • Dijon Mustard – Brings a bold, sharp flavor; make sure to choose a high-quality brand for the best taste.
  • Grainy Mustard – Offers texture and depth of flavor; whole-grain or old-style varieties work wonderfully.
  • Honey – Sweetens the dressing and balances out the tang; maple syrup serves as an excellent alternative.
  • Lemon Juice – Brightens up the flavors and adds a refreshing acidity, easily substitutable with apple cider vinegar.
  • Salt – Elevates the overall flavor; adjust based on your taste preferences if you’re using brined chicken.

This delightful combination results in a creamy honey mustard chicken salad that’s bursting with flavor and protein!

Step‑by‑Step Instructions for Creamy Honey Mustard Chicken Salad

Step 1: Shred the Chicken
Start by taking 3 cups of rotisserie chicken breast and roughly chop it into bite-sized pieces. Use two forks for a quick and easy shredding method, ensuring tender shreds without overworking the chicken. Aim for a fluffy texture that will nicely absorb the dressing. Set your shredded chicken aside in a large mixing bowl while you prepare the creamy dressing.

Step 2: Prepare the Dressing
In a separate bowl, combine ½ cup of plain Greek yogurt, 2 tablespoons of mayonnaise, 2 tablespoons each of Dijon and grainy mustard, along with 2 tablespoons of honey and 1 tablespoon of lemon juice. Season with ½ teaspoon of salt. Whisk together until the mixture is smooth, creamy, and well-blended, showcasing a beautiful, tangy hue. This dressing is the heart of your Creamy Honey Mustard Chicken Salad.

Step 3: Combine the Ingredients
Pour the freshly whisked dressing over the shredded chicken in the mixing bowl. Use a spatula to gently fold the dressing into the chicken, ensuring every morsel is coated evenly. The ideal consistency should be creamy and cohesive for optimal flavor. Take your time with this step to achieve a delightful balance between chicken and sauce.

Step 4: Chill for Flavor
Cover the bowl with plastic wrap or a lid and place it in the refrigerator for at least 30 minutes. This chilling time allows the flavors to meld beautifully, creating a more cohesive taste in your Creamy Honey Mustard Chicken Salad. While waiting, you might prepare your serving options, such as toasting some sourdough or prepping wraps.

Step 5: Serve and Enjoy
Once chilled, give the salad a quick stir before serving. You can scoop generous portions onto toasted sourdough, roll it in wraps, or serve it alongside crackers for a delightful crunch. The creamy texture, balanced honey sweetness, and tangy mustard flavor will bring joy to every bite. Enjoy your delicious homemade chicken salad!

Creamy Honey Mustard Chicken Salad Variations

Feel free to put your personal spin on this delicious salad with these exciting variations!

  • Dairy-Free: Substitute Greek yogurt and mayonnaise with avocado or coconut yogurt for creamy vegan goodness. Embrace a tasty twist that retains richness without dairy.

  • Crunchy Delight: Add diced celery and chopped apples for extra crunch and a hint of sweetness. This creates a refreshing contrast to the creamy dressing!

  • Nutty Flavor: Toss in some toasted walnuts or pecans to add a delightful nutty flavor and rich texture. They pair wonderfully with the honey mustard tang.

  • Spicy Kick: Mix in a teaspoon of sriracha or a few dashes of hot sauce for a flavor boost with heat. This adds an exciting dimension to your salad!

  • Herbaceous Touch: Stir in fresh herbs like dill or parsley to brighten the salad and enhance the overall taste. Freshness can take your dish to new heights!

  • Fruit Fusion: Incorporate dried cranberries or raisins for a sweet pop that balances the tanginess beautifully. This adds a delightful dimension to each bite!

  • Hearty Grains: Serve over a bed of quinoa or brown rice to transform your salad into a wholesome meal. This elevates its protein content while adding texture.

  • Mediterranean Twist: Add kalamata olives and feta cheese for a Mediterranean-inspired version. This pair provides a salty contrast that perks up the entire salad!

For more delicious chicken ideas, check out my recipes for Grilled Honey BBQ Bacon Chicken Kabobs or Parmesan Crusted Chicken with Creamy Garlic Sauce. Each variation gives you a chance to explore new flavors while enjoying a beloved classic. Happy cooking!

Make Ahead Options

These Creamy Honey Mustard Chicken Salad preparations are perfect for busy home cooks looking to save time! You can shred the rotisserie chicken and prepare the dressing (combining the Greek yogurt, mayonnaise, mustards, honey, lemon juice, and salt) up to 24 hours in advance. Store the chicken and dressing separately in airtight containers in the refrigerator to maintain quality. This ensures your salad stays fresh without becoming soggy. When it’s time to serve, simply mix the chicken with the dressing, and let it chill for at least 30 minutes for the best flavor. Enjoy a quick, nutritious meal that’s just as delicious as if you made it from scratch!

How to Store and Freeze Creamy Honey Mustard Chicken Salad

Fridge: Keep your creamy honey mustard chicken salad in an airtight container for up to 4 days. Stir before serving to ensure a creamy texture.

Freezer: For longer storage, freeze the salad without the dressing in a freezer-safe container for up to 3 months. Thaw overnight in the fridge before adding the dressing.

Reheating: This salad is best enjoyed cold, but if served warm, heat gently on the stovetop, avoiding high temperatures to prevent the dressing from separating.

Leftovers: Enjoy leftover salad on toast, in wraps, or with crackers for a delicious and convenient snack throughout the week.

What to Serve with Creamy Honey Mustard Chicken Salad

Elevate your meal experience with these delightful pairings, perfect for complementing the flavors of your chicken salad.

  • Creamy Mashed Potatoes: Their buttery, velvety texture contrasts beautifully with the zesty salad, making for a heartwarming combination.
  • Crispy Green Salad: A fresh, crisp salad with mixed greens and a light vinaigrette adds crunch and brightness to your plate. Toss in some sliced cucumbers for a refreshing twist.
  • Toasted Sourdough Bread: The warm, crunchy texture offers a delightful vehicle for the creamy chicken salad, turning every bite into a comfort food experience.
  • Dill Pickles: Their tangy crunch serves as a perfect palate cleanser, enhancing the savory notes of the chicken salad while adding a satisfying zing.
  • Fruit Salad: A mix of seasonal fruits brings sweet, juicy notes that perfectly balance the savory flavor of the dish—think apples, berries, and mandarin oranges!
  • Chilled White Wine: A crisp Sauvignon Blanc or Pinot Grigio pairs nicely, complementing the honey and mustard flavors without overwhelming them.
  • Sweet Potato Fries: Their natural sweetness and crispy exterior make a delightful contrast to the creamy texture of the chicken salad, creating a fulfilling meal.
  • Yogurt Parfait: For a light dessert, layer Greek yogurt with honey and granola; it’s a sweet ending that echoes the salad’s honey notes.
  • Sparkling Water with Lemon: Refreshing and light, this drink cleanses the palate and complements the tangy elements of your chicken salad beautifully.

Expert Tips for Creamy Honey Mustard Chicken Salad

  • Quality Ingredients: Choose high-quality Dijon mustard and mayonnaise to elevate the flavor of your Creamy Honey Mustard Chicken Salad. Fresh, quality ingredients make a significant difference!
  • Avoid Sogginess: Drain any excess liquid from the rotisserie chicken before mixing to prevent a watery salad. This will keep the creamy texture intact.
  • Chill Time Matters: Allowing your salad to chill for at least 30 minutes deepens the flavors, offering a richer taste experience. Don’t skip this step!
  • Mix-In Ideas: Experiment with add-ins like diced apples, celery, or even chopped nuts to enhance taste and texture, giving your chicken salad a personal touch.
  • Storage Tips: Keep leftovers in an airtight container in the fridge for up to 4 days. The flavors continue to develop, but stir before serving to maintain consistency.

Creamy Honey Mustard Chicken Salad Recipe FAQs

How do I choose the best rotisserie chicken for this recipe?
Absolutely! When selecting a rotisserie chicken, look for one that has golden-brown skin, indicating it’s cooked to perfection. Make sure the meat is juicy, without any dark spots all over, as this may indicate it’s past its prime. If you can, opt for organic or free-range chicken for better flavor and quality!

What is the best way to store leftover chicken salad?
Simply store leftover creamy honey mustard chicken salad in an airtight container in the fridge for up to 4 days. Before serving again, give it a good stir to restore its creamy texture. If it seems too thick, add a splash of yogurt or a little lemon juice to loosen it up, and refresh those flavors.

Can I freeze my chicken salad for later use?
Very much so! To freeze your creamy honey mustard chicken salad, I recommend separating the dressing from the chicken first. Keep the shredded chicken in a freezer-safe container for up to 3 months. When you’re ready to enjoy it, simply thaw the chicken in the fridge overnight, then mix in your dressing fresh to ensure the best taste and texture!

What if I have a dairy allergy?
No worries at all! For a dairy-free version of this recipe, simply substitute the plain Greek yogurt with a dairy-free yogurt alternative, such as coconut or almond yogurt. You can also use a vegan mayonnaise option to keep the creamy texture without any dairy, while still enjoying a delicious creamy honey mustard chicken salad.

Why is my salad turning out watery?
Great question! If your salad is watery, it’s likely due to excess liquid in the rotisserie chicken. To prevent this, make sure to drain any juices from the chicken before shredding. Also, avoid over-mixing the dressing and chicken; gently fold them together to maintain a thicker texture. If it still gets watery, a little extra yogurt will help restore creaminess!

Can I add more ingredients to this salad?
The more the merrier! Feel free to mix in some diced celery, apples, or even dried cranberries to give your creamy honey mustard chicken salad an extra lift. For those with specific dietary preferences, you could also throw in some nuts or seeds for a delightful crunch!

Creamy Honey Mustard Chicken Salad

Creamy Honey Mustard Chicken Salad for Quick, Tasty Meals

A quick and delicious Creamy Honey Mustard Chicken Salad, combining tender chicken with a creamy dressing for a nutritious meal.
Prep Time 10 minutes
Chill Time 30 minutes
Total Time 40 minutes
Servings: 4 cups
Course: Salad
Cuisine: American
Calories: 350

Ingredients
  

For the Salad
  • 3 cups Rotisserie Chicken Breast shredded
  • ½ cup Plain Greek Yogurt or sour cream as a substitute
  • 2 tablespoons Mayonnaise dairy-free option available
  • 2 tablespoons Dijon Mustard high-quality recommended
  • 2 tablespoons Grainy Mustard whole-grain or old-style varieties
  • 2 tablespoons Honey maple syrup is an alternative
  • 1 tablespoon Lemon Juice apple cider vinegar can be used instead
  • ½ teaspoon Salt adjust to taste

Equipment

  • Mixing Bowl
  • Whisk
  • Spatula
  • Plastic Wrap

Method
 

Step-by-Step Instructions
  1. Start by taking 3 cups of rotisserie chicken breast and roughly chop it into bite-sized pieces. Use two forks for a quick and easy shredding method. Set aside in a large mixing bowl.
  2. In a separate bowl, combine ½ cup of plain Greek yogurt, 2 tablespoons of mayonnaise, 2 tablespoons each of Dijon and grainy mustard, along with 2 tablespoons of honey and 1 tablespoon of lemon juice. Season with ½ teaspoon of salt. Whisk together until smooth and creamy.
  3. Pour the dressing over the shredded chicken and gently fold until coated evenly. Aim for a creamy consistency.
  4. Cover the bowl and refrigerate for at least 30 minutes to allow the flavors to meld.
  5. Once chilled, stir the salad and serve on toasted sourdough, in wraps, or alongside crackers.

Nutrition

Serving: 1cupCalories: 350kcalCarbohydrates: 15gProtein: 40gFat: 15gSaturated Fat: 3gPolyunsaturated Fat: 1gMonounsaturated Fat: 10gCholesterol: 85mgSodium: 600mgPotassium: 600mgFiber: 1gSugar: 5gVitamin A: 500IUVitamin C: 5mgCalcium: 50mgIron: 1mg

Notes

For a delightful twist, consider adding diced celery or apples for extra crunch and flavor. Store leftovers in an airtight container for up to 4 days.

Tried this recipe?

Let us know how it was!

Air Fried Pearl Onions – Crispy, Sweet Bites Everyone Craves

As I rummaged through my freezer the other day, I stumbled upon a bag of frozen pearl onions, and suddenly, inspiration struck! With just a little creativity, I’m turning those humble ingredients into crispy Air Fried Mini Blooming Onions, a low-effort appetizer that’s perfect for impressing your friends at game day gatherings. Not only are these golden bites a healthier alternative to their deep-fried counterparts, but they also come together in no time, making them a stress-free crowd-pleaser. Picture that satisfying crunch followed by the sweet, tender inside that makes every bite a delight. So, are you ready to elevate your snack game with this easy recipe? Let’s dive in!

Why are these Air Fried Pearl Onions irresistible?

Crispy Perfection: Each onion is coated to achieve a satisfying crunch that you won’t be able to resist.

Low-Maintenance Delight: Minimal prep work means you can whip these up in no time, making them perfect for unexpected guests or game day.

Sweet & Savory Harmony: The natural sweetness of pearl onions pairs wonderfully with a hint of spice, creating a flavor explosion that keeps everyone coming back for more.

Versatile Serving Options: Pair with a variety of dipping sauces like Boom Boom Sauce or ranch dressing, allowing everyone to customize their experience.

Healthy Yet Indulgent: These air-fried goodies give you the satisfying experience of a classic appetizer without the guilt, offering a lower-calorie alternative to traditional deep-fried options.

Crowd-Pleasing Appeal: Whether it’s a family gathering or a night with friends, these mini blooming onions are sure to be the star of the show!

Air Fried Pearl Onions Ingredients

• Here’s what you’ll need to create these crispy, sweet bites!

For the Coating

  • Frozen Pearl Onions – The star ingredient that brings sweetness and texture; fresh pearl onions can be used but may require extra prep time.
  • Flour – Acts as the coating base, providing structure to that delightful crispy exterior.
  • Paprika – Adds not just color, but also a mild flavor to enhance the overall taste.
  • Salt – Enhances the flavors, making each bite more delicious.
  • Black Pepper – Contributes a subtle warmth and depth to the dish.
  • Cayenne Pepper – For a touch of heat; adjust based on your spice preference.
  • Garlic Powder – Elevates the dish with its aromatic notes, perfectly complementing the onions.
  • Egg – Binds the coating together, ensuring every bite is packed with flavor.
  • Oil (in a spray bottle) – An essential for achieving that crispy texture in the air fryer; avoid commercial sprays that could damage your fryer basket.

Dive into this recipe and get ready to serve up some mouthwatering Air Fried Pearl Onions that everyone will crave!

Step‑by‑Step Instructions for Air Fried Pearl Onions

Step 1: Prep the Onions
Start by microwaving the frozen pearl onions for about 2 minutes on high, just enough to soften them slightly but not fully cook. Once done, remove them from the microwave and let them cool briefly. This quick pre-cooking step helps in achieving that perfectly crispy texture when air frying your Air Fried Pearl Onions later on.

Step 2: Prepare the Coating
In a medium-sized bowl, crack and beat one egg until it’s well mixed. In another bowl, whisk together 1 cup of flour, 1 teaspoon of paprika, 1 teaspoon of salt, ½ teaspoon of black pepper, ½ teaspoon of cayenne pepper, and 1 teaspoon of garlic powder. This flavorful coating will envelop the pearl onions, creating a deliciously crispy layer when they are air-fried.

Step 3: Coat the Onions
Drain the microwaved pearl onions and pat them dry to remove excess moisture, which is crucial for the coating to stick properly. Begin dipping each onion into the flour mixture first, then into the beaten egg, and back again into the flour mixture for a thorough coating. Make sure every onion is evenly covered to ensure that lovely crunch throughout your Air Fried Pearl Onions.

Step 4: Chill the Coated Onions
Once all the pearl onions are coated, arrange them on a tray in a single layer. Refrigerate the coated onions for about 10 minutes. This chilling step allows the coating to set, helping it adhere better during the air frying process and ensuring a crispier texture when they come out of the air fryer.

Step 5: Air Fry the Onions
Preheat your air fryer to 380°F. Once preheated, arrange the coated pearl onions in the basket in a single layer to ensure even cooking. Lightly spray them with oil from a refillable spray bottle to assist in achieving that golden-brown coloration. Air fry the onions for 3 minutes, then shake the basket gently and spray them lightly once more before continuing to air fry for another 3 minutes, or until they are golden and crispy.

Step 6: Serve and Enjoy
Once your Air Fried Pearl Onions are crispy and golden, carefully remove them from the air fryer and let them cool for a minute. Serve immediately with your favorite dipping sauces like Boom Boom Sauce or ranch dressing. The delightful crunch paired with the sweet softness inside will make these mini blooming onions a hit at any gathering!

Expert Tips for Air Fried Pearl Onions

  • Dry the Onions Well: Ensure the pearl onions are thoroughly dried after microwaving; excess moisture can prevent the coating from adhering properly.

  • Use Refillable Oil Spray: Avoid commercial cooking sprays that can damage your air fryer. Use a refillable spray bottle with your choice of oil to achieve a crispy texture.

  • Chill for Crispiness: Don’t skip the chilling step! It helps the coating set firmly on the onions, resulting in a crunchier finish post-air frying.

  • Monitor Cooking Time: Keep an eye on your onions while air frying; every fryer is different. Adjust the cooking time as needed for perfectly golden brown Air Fried Pearl Onions.

  • Mix It Up: Feel free to customize the spices in the coating! Experiment with flavors like Italian seasoning or even a barbecue rub for a unique twist.

Storage Tips for Air Fried Pearl Onions

Fridge: Store any leftover Air Fried Pearl Onions in an airtight container for up to 4 days. This helps retain their flavor and avoids sogginess.

Freezer: For longer storage, place cooled onion leftovers in a single layer on a baking sheet, freeze until solid, then transfer to a freezer bag for up to 2 months.

Reheating: To enjoy them again, air fry frozen onions at 350°F for 3-5 minutes until crispy and warmed through. Keep the texture just right for that satisfying crunch!

Air Fried Pearl Onions Variations

Feel free to get creative and personalize these crispy delights with these fun variations!

  • Spicy Twist: Add extra cayenne or a dash of hot sauce to the egg mixture for a fiery kick that spice lovers will adore.

  • Herb-Infused: Mix dried herbs like oregano or thyme into the flour coating for a fragrant, savory experience. This aromatic twist can elevate the flavor profile elegantly.

  • Gluten-Free: Substitute regular flour with almond flour or a gluten-free blend to make these delicious treats accessible for gluten-sensitive friends.

  • Cheesy Goodness: Incorporate grated parmesan cheese into the flour mixture for a savory, cheesy crust that takes these air-fried gems to the next level.

  • Roasted Garlic Flavor: Use roasted garlic powder instead of the standard garlic powder for a sweeter, richer flavor that enhances the overall taste.

  • Baked Alternative: If you prefer the oven method, place the coated onions on a lined baking tray and bake at 400°F for 15-20 minutes for equally crispy results! Check out my Crispy Air Fryer Baked Potatoes for another simple recipe to try in the oven.

  • Sweet Potato Swap: Try using sweet potato chunks instead of pearl onions; they provide a sweeter taste and a healthier take on this appetizer.

  • Asian-inspired: Swap the flour for cornstarch and add soy sauce to the egg mixture for a delightful, Asian-style twist perfect for dipping in sweet chili sauce.

Whatever variation you choose, these Air Fried Pearl Onions will surely become a centerpiece at your next gathering!

Make Ahead Options

These Air Fried Pearl Onions are a fantastic option for meal prep! You can coat the pearl onions up to 24 hours in advance by following the initial steps of microwaving them, preparing the coating, and chilling them as directed. Once coated, simply store them in an airtight container in the refrigerator to maintain their crispiness. When you’re ready to enjoy these delightful bites, air fry them for the final cooking step—just preheat your air fryer, spray with oil, and fry until golden and crispy, which takes about 6 minutes. This way, you can have a delicious appetizer with minimal effort, perfect for those busy weeknights or game days!

What to Serve with Air Fried Pearl Onions?

Pairing these crispy bites with complementary flavors will elevate your gathering to the next level of deliciousness!

  • Boom Boom Sauce: This zesty, creamy dipping sauce adds a perfect kick, balancing the sweetness of the onions beautifully.
  • Ranch Dressing: A classic favorite, ranch dressing brings a cooling contrast to the crispy texture, making each bite delightful.
  • Garlic Aioli: Rich and creamy, garlic aioli enhances the flavor with a touch of garlic that harmonizes with the onions’ sweetness.
  • Spicy Ketchup: Add a fun twist to your snack with spicy ketchup; it creates a lively contrast, enhancing the flavor experience.
  • Coleslaw: Serve alongside a tangy coleslaw for a crunchy, fresh element that brightens up the richness of the onions.
  • Mixed Green Salad: A light and refreshing salad with a citrus vinaigrette provides a refreshing contrast to the fried goodness.
  • Beer or Cider: Pair these bites with a cold, crisp beer or a refreshing cider for a wonderful complement to your flavors.
  • Chocolate Mousse: For dessert, indulge in rich chocolate mousse, offering a sweet finish to a savory experience.

Air Fried Pearl Onions Recipe FAQs

How do I choose the best frozen pearl onions?
When selecting frozen pearl onions, look for bags that contain onions without any large ice crystals, as this indicates they have been stored properly. They should be a uniform size and not have any dark spots or abnormalities, which can signal aging. If using fresh pearl onions, select ones that are firm and have a smooth skin, avoiding any with soft spots or blemishes.

How should I store leftover Air Fried Pearl Onions?
Absolutely! Store any leftover Air Fried Pearl Onions in an airtight container in the fridge for up to 4 days. This will help maintain their flavor and prevent them from becoming soggy. If you’re looking to enjoy them later, place the onions on a paper towel to absorb any excess moisture before sealing.

Can I freeze Air Fried Pearl Onions?
Yes, you can! To freeze, allow the Air Fried Pearl Onions to cool completely first. Then, place them in a single layer on a baking sheet and freeze until solid, about 1-2 hours. Once frozen, transfer them to a freezer-safe bag or container, where they can be stored for up to 2 months. For reheating, simply air fry the frozen onions at 350°F for 3-5 minutes until they’re crispy and warmed through.

What should I do if the coating doesn’t stick to the onions?
If you find that the coating isn’t sticking, make sure to dry the pearl onions thoroughly after microwaving, as excess moisture can prevent adhesion. Additionally, ensure you’re using enough flour in your initial coating and pressing it firmly onto the onions. Chilling the coated onions before frying is also crucial—don’t skip that step, as it helps set the batter, leading to better adherence during cooking.

Can I make Air Fried Pearl Onions gluten-free?
Of course! To make this recipe gluten-free, simply substitute regular flour with a 1:1 gluten-free flour blend. You can also consider using cornstarch or almond flour for a different texture and flavor. This is a great way to ensure that everyone can enjoy these delicious air-fried treats while adhering to dietary restrictions.

Air Fried Pearl Onions

Air Fried Pearl Onions – Crispy, Sweet Bites Everyone Craves

Air Fried Pearl Onions are a healthier, crispy alternative to deep-fried snacks, perfect for gatherings.
Prep Time 10 minutes
Cook Time 6 minutes
Chilling Time 10 minutes
Total Time 26 minutes
Servings: 4 bites
Course: Appetizer
Cuisine: American
Calories: 120

Ingredients
  

Coating Ingredients
  • 1 bag Frozen Pearl Onions Fresh can be used but may require extra prep
  • 1 cup Flour For coating
  • 1 teaspoon Paprika Adds flavor and color
  • 1 teaspoon Salt Enhances flavor
  • 0.5 teaspoon Black Pepper Adds warmth
  • 0.5 teaspoon Cayenne Pepper For heat, adjust to taste
  • 1 teaspoon Garlic Powder Adds aromatic flavor
  • 1 large Egg Binds coating together
  • to taste Oil In a spray bottle for crispiness

Equipment

  • Air fryer
  • Microwave
  • Mixing bowls
  • tray

Method
 

Preparation Steps
  1. Microwave the frozen pearl onions for about 2 minutes on high to soften slightly.
  2. In a bowl, crack and beat the egg until well mixed.
  3. In another bowl, whisk together flour, paprika, salt, black pepper, cayenne pepper, and garlic powder.
  4. Drain the microwaved onions and dry them well.
  5. Dip each onion in the flour mixture, then into the beaten egg, and back into the flour for coating.
  6. Refrigerate coated onions for about 10 minutes to allow the coating to set.
  7. Preheat air fryer to 380°F, arrange onions in a single layer, spray lightly with oil, and air fry for 6 minutes, shaking halfway.
  8. Let cool for a minute before serving with dipping sauces.

Nutrition

Serving: 4bitesCalories: 120kcalCarbohydrates: 20gProtein: 3gFat: 4gSaturated Fat: 1gPolyunsaturated Fat: 1gMonounsaturated Fat: 2gCholesterol: 40mgSodium: 300mgPotassium: 200mgFiber: 1gSugar: 2gVitamin A: 200IUVitamin C: 5mgCalcium: 20mgIron: 1mg

Notes

Ensure the onions are dry after microwaving for the coating to stick. Use a refillable oil spray to avoid damaging the air fryer. Chill for best results.

Tried this recipe?

Let us know how it was!

Power Up with Delicious Coffee Ginger Energy Bars

The scent of freshly brewed coffee mingles with the bright zing of ginger, and suddenly, my kitchen feels alive. I’ve crafted these Coffee Ginger Energy Bars not just for their delicious blend of flavors but also for the quick energy boost they provide—a perfect remedy for those long afternoons or early morning buzzes. They’re vegan, gluten-free, and ready in no time, making them a go-to option for anyone tired of fast food. Whether you’re a dedicated athlete or simply someone who loves a hearty homemade snack, these chewy bars pack a punch of wholesome ingredients. Curious about how this delightful power snack comes together? Let’s dive into the recipe that will energize your day!

Why are Coffee Ginger Energy Bars a must-try?

Deliciously Unique: The blend of rich coffee and zesty ginger creates an energizing flavor profile that tantalizes your taste buds.

Quick and Simple: With minimal prep, you’ll be enjoying these bars in no time—perfect for busy days!

Healthy Snacking: Made with natural and wholesome ingredients, these vegan, gluten-free bars give you a nutritious boost without the guilt.

Versatile Enjoyment: Pair them with your morning coffee or enjoy them as a post-workout refuel; their versatility makes them appealing to everyone.

Crowd-Pleasing: Whether for a snack at home or a treat for friends, these bars cater to all dietary needs. You might also enjoy some spicy warmth from Pumpkin Cream Coffee alongside!

Energy Boost: Thanks to the caffeine from the coffee and the nutrition in oats, these bars are perfect for powering through your day.

Coffee Ginger Energy Bars Ingredients

• Fuel your cravings with these wholesome ingredients!

For the Base

  • Oats – A gluten-free powerhouse that provides structure to the bars.
  • Pitted Dates – These naturally sweet gems bind the ingredients together; feel free to substitute with dried figs for a unique twist.

For the Flavor

  • Ground Coffee – Delivers a robust coffee flavor and an energizing boost; decaf is a great option if you prefer less caffeine.
  • Ground Ginger – Infuses warmth and spice into every bite; swap it out for ground cinnamon if desired for a sweeter profile.

For the Creaminess

  • Almond Butter – Adds healthy fats and a creamy texture—try peanut or sunflower seed butter as tasty alternatives.
  • Coconut Oil – Provides richness and moisture; any neutral oil can be used in its place.

For Sweetness

  • Maple Syrup – This natural sweetener enhances the flavor; you can use honey as a non-vegan substitute.
  • Vanilla Extract – Elevates the overall flavor profile beautifully.

For the Final Touch

  • Sea Salt – Balances out the sweetness and enhances all flavors; you can omit this if you’re watching your sodium.
  • Water (if needed) – Adjusts the mixture’s consistency for easy blending.

Step‑by‑Step Instructions for Coffee Ginger Energy Bars

Step 1: Combine the Base Ingredients
Start by adding the oats, pitted dates, ground coffee, ground ginger, and sea salt into a food processor. Blend these ingredients until they reach a coarse texture, which should take about 30 seconds. You want to see small bits of dates and oats still present, as this adds great texture to your Coffee Ginger Energy Bars.

Step 2: Mix in the Creamy Elements
Next, incorporate the almond butter, maple syrup, and coconut oil into the oat mixture. Pulse the food processor for another 30 seconds or until the ingredients combine into a smooth, cohesive mixture. You should see a thick dough-like consistency forming that holds together when pressed; this is crucial for the bars’ structure.

Step 3: Adjust the Consistency
If your mixture feels too dry, gradually add water, one tablespoon at a time, while blending. Continue processing until you achieve a sticky yet firm consistency that easily holds together. Aim for a balance where the Coffee Ginger Energy Bars are moldable but not overly wet; this step is key for a perfect chewy texture.

Step 4: Transfer to the Pan
Line an 8×8 inch baking pan with parchment paper for easy removal. Pour the blended mixture into the pan, and using a spatula, spread it evenly across the bottom. Press down firmly to create a smooth, compact layer; this ensures that your Coffee Ginger Energy Bars won’t crumble when sliced.

Step 5: Chill to Set
Place the pan in the refrigerator and allow the mixture to chill for 20-30 minutes. This helps the bars firm up, making them easier to slice later. You’ll know they’re ready when they feel slightly firm to the touch; patience pays off for a delightful chewy texture!

Step 6: Slice and Serve
Once set, remove the pan from the refrigerator and carefully lift the bars out using the parchment paper. Place them on a cutting board and slice into bars of your desired size. Enjoy your Coffee Ginger Energy Bars immediately or store them in an airtight container for a quick, energizing snack later!

Expert Tips for Coffee Ginger Energy Bars

  • Measure Ingredients Carefully: Accurate measurements ensure the right texture. Too many oats can make the bars crumbly, while too few can cause them to fall apart.

  • Food Processor Magic: Don’t over-blend! Aim for a coarse mixture before adding the creamy ingredients, allowing for a delightful chew in the Coffee Ginger Energy Bars.

  • Customize Wisely: Feel free to swap almond butter for other nut or seed butters, but keep in mind that flavors will vary, impacting the overall taste profile!

  • Chill Time is Key: Allow enough time for the bars to firm up in the refrigerator—this step is crucial for achieving a perfect slice without crumbling.

  • Storage Savvy: To keep the bars fresh longer, store them in an airtight container in the fridge for up to 5 days or freeze for extended enjoyment!

Make Ahead Options

These Coffee Ginger Energy Bars are perfect for busy home cooks looking to save time! You can prepare the mixture up to 3 days in advance and store it in the fridge before pressing it into the baking pan. Just follow the first three steps, blending the base ingredients until smooth, then refrigerate the mixture in an airtight container. When you’re ready to finish your bars, simply transfer the mixture into the prepared pan, chill for another 20-30 minutes, slice, and enjoy! To maintain quality, make sure to store the finished bars in the fridge, where they’ll stay fresh for up to 5 days—or freeze them for a longer shelf life, ensuring a nutritious snack is always within reach!

Coffee Ginger Energy Bars Variations

Feel free to explore these creative twists that can enhance your Coffee Ginger Energy Bars and suit your taste buds perfectly!

  • Spiced Coffee: Add a dash of cinnamon and nutmeg for a warm, spicy flavor that perfectly complements the ginger.

  • Nutty Texture: Swap almond butter with crunchy peanut butter or cashew butter for added texture and a rich, nutty taste.

  • Decadent Chocolate: Incorporate dark chocolate chips or cacao nibs for a sweet, indulgent touch that pairs beautifully with the coffee flavor.

  • Dried Fruits: Mix in chopped dried apricots, cranberries, or raisins for a fruity burst of flavor and extra chewiness. These additions create delightful pockets of sweetness throughout each bar.

  • Heat Level: For those who like a kick, sprinkle in some cayenne pepper to bring spice to the forefront of your bars, waking up your palate!

  • Nut-Free Option: Replace nut butter with sunbutter or tahini to cater to nut-free diets without sacrificing flavor or texture.

  • Protein Boost: Add a scoop of your favorite protein powder to enhance these bars into a more filling snack, perfect for post-workout recovery.

For a sweet finish, why not pair your energy bars with a cup of Pumpkin Cream Coffee for a delightful morning treat? And if you’re craving something creamy, you might enjoy these delicious Strawberry Cheesecake Bars for dessert!

Storage Tips for Coffee Ginger Energy Bars

Fridge: Store the Coffee Ginger Energy Bars in an airtight container for up to 5 days, ensuring they remain fresh and chewy.

Freezer: For longer storage, wrap the bars individually in plastic wrap and place them in a freezer-safe bag. They can last for up to 3 months without losing their delicious flavor.

Reheating: If you prefer a soft texture, microwave the bars for about 10-15 seconds before enjoying. This will bring back their delightful chewy consistency.

Make-Ahead: These bars can be made in advance, making them a convenient and healthy snack option ready whenever you need a quick energy boost.

What to Serve with Coffee Ginger Energy Bars

Imagine a cozy afternoon, where the aroma of coffee wafts through the air, and you have the perfect energy snack right at your fingertips.

  • Fresh Fruit Salad: A vibrant mix of seasonal fruits adds a refreshing sweetness that balances the spiciness of the bars. The juicy bursts of each fruit will elevate your snacking experience and add a touch of freshness.

  • Homemade Almond Milk: Creamy and slightly sweet, almond milk pairs perfectly with these bars, enhancing the nutty flavors while keeping it light. This soothing drink allows the taste of coffee and ginger to shine through blissfully.

  • Yogurt Parfait: Layered with your favorite yogurt, granola, and fresh berries, a parfait provides a nutritious balance, perfect for breakfast or a snack. The tanginess of yogurt complements the bars beautifully while adding probiotic goodness.

  • Herbal Tea: A warm cup of chamomile or peppermint tea provides a soothing counterpoint to the energizing bars. The floral or minty notes make for a delightful pairing, ideal for winding down after an active day.

  • Dark Chocolate Chips: For an indulgent treat, sprinkle some dark chocolate chips on top—each bite of rich chocolate enhances the comforting flavors of the bars, making for a rich and satisfying dessert option.

  • Nutty Trail Mix: A handful of mixed nuts and seeds offers an extra crunch and protein boost, making your snack even more substantial. This blend complements the energy bars nicely, keeping you fueled and energized throughout the day.

Coffee Ginger Energy Bars Recipe FAQs

How do I choose the best pitted dates for my bars?
Absolutely! Look for dates that are plump and moist, without dark spots or a dry exterior. Medjool dates are my favorite for their sweetness and texture, but you can also use Deglet Noor dates if they are more readily available.

What is the best way to store Coffee Ginger Energy Bars?
These bars can be stored in an airtight container in the fridge for up to 5 days. For longer-term storage, simply wrap each bar individually in plastic wrap and place them in a sealed freezer-safe bag. They will remain delicious for up to 3 months in the freezer!

Can I freeze Coffee Ginger Energy Bars?
Yes, indeed! To freeze, wrap each bar tightly in plastic wrap, and place them in a freezer-safe bag or container. They can last up to 3 months. When you’re ready to enjoy one, just let it thaw in the fridge overnight or microwave it for about 10–15 seconds for a warm, chewy treat.

What can I do if my mixture is too dry when blending?
If your mixture seems too dry, no worries! Gradually add water, one tablespoon at a time, while blending until you reach the desired sticky yet firm consistency. Aim for a dough-like texture that holds together when pressed. This adjustment is key for the perfect chewy bars!

Is there any way to customize these bars for different dietary needs?
Absolutely! If you’re allergic to nuts, you can substitute almond butter with sunflower seed butter. For those who are not vegan, feel free to switch maple syrup with honey. Additionally, if you’re sensitive to caffeine, using decaf ground coffee is a great option—just remember to adjust for flavor!

Can I add other ingredients to the Coffee Ginger Energy Bars?
Very much! You can mix in dried fruits, seeds, or even nuts for added texture and flavor. Consider adding cacao nibs for a chocolatey bite or a pinch of cayenne pepper for some heat. The more the merrier when it comes to customizing your bars!

Coffee Ginger Energy Bars

Power Up with Delicious Coffee Ginger Energy Bars

Enjoy these Coffee Ginger Energy Bars for a quick, energizing snack that combines the flavors of coffee and ginger.
Prep Time 10 minutes
Chill Time 30 minutes
Total Time 40 minutes
Servings: 12 bars
Course: Breakfast
Cuisine: Vegan
Calories: 150

Ingredients
  

For the Base
  • 2 cups Oats Gluten-free
  • 1 cup Pitted Dates Can substitute with dried figs
For the Flavor
  • 1 cup Ground Coffee Decaf option available
  • 2 teaspoons Ground Ginger Can substitute with ground cinnamon
For the Creaminess
  • 1/2 cup Almond Butter Can substitute with peanut or sunflower seed butter
  • 1/4 cup Coconut Oil Any neutral oil can be used
For Sweetness
  • 1/4 cup Maple Syrup Honey can be used as a non-vegan substitute
  • 1 teaspoon Vanilla Extract
For the Final Touch
  • 1/2 teaspoon Sea Salt Can omit if watching sodium
  • Water Add if needed for consistency

Equipment

  • Food processor
  • Baking pan
  • Spatula
  • Parchment paper

Method
 

Step-by-Step Instructions
  1. Combine oats, pitted dates, ground coffee, ground ginger, and sea salt in a food processor. Blend until coarse, about 30 seconds.
  2. Mix in almond butter, maple syrup, and coconut oil. Pulse for another 30 seconds until smooth and cohesive.
  3. If the mixture is too dry, gradually add water until it holds together but is not overly wet.
  4. Line an 8x8 inch baking pan with parchment paper. Pour the mixture into the pan and press down firmly.
  5. Chill in the refrigerator for 20-30 minutes until firm.
  6. Remove from refrigerator, lift bars out using parchment paper, slice into desired sizes, and enjoy!

Nutrition

Serving: 1barCalories: 150kcalCarbohydrates: 25gProtein: 3gFat: 6gSaturated Fat: 1gPolyunsaturated Fat: 0.5gMonounsaturated Fat: 4.5gSodium: 50mgPotassium: 150mgFiber: 3gSugar: 10gCalcium: 2mgIron: 4mg

Notes

Store in an airtight container in the fridge for up to 5 days or freeze for up to 3 months. Microwave for 10-15 seconds to soften before eating.

Tried this recipe?

Let us know how it was!