Refreshing Watermelon Pizza with Fruit Toppings for Summer Fun

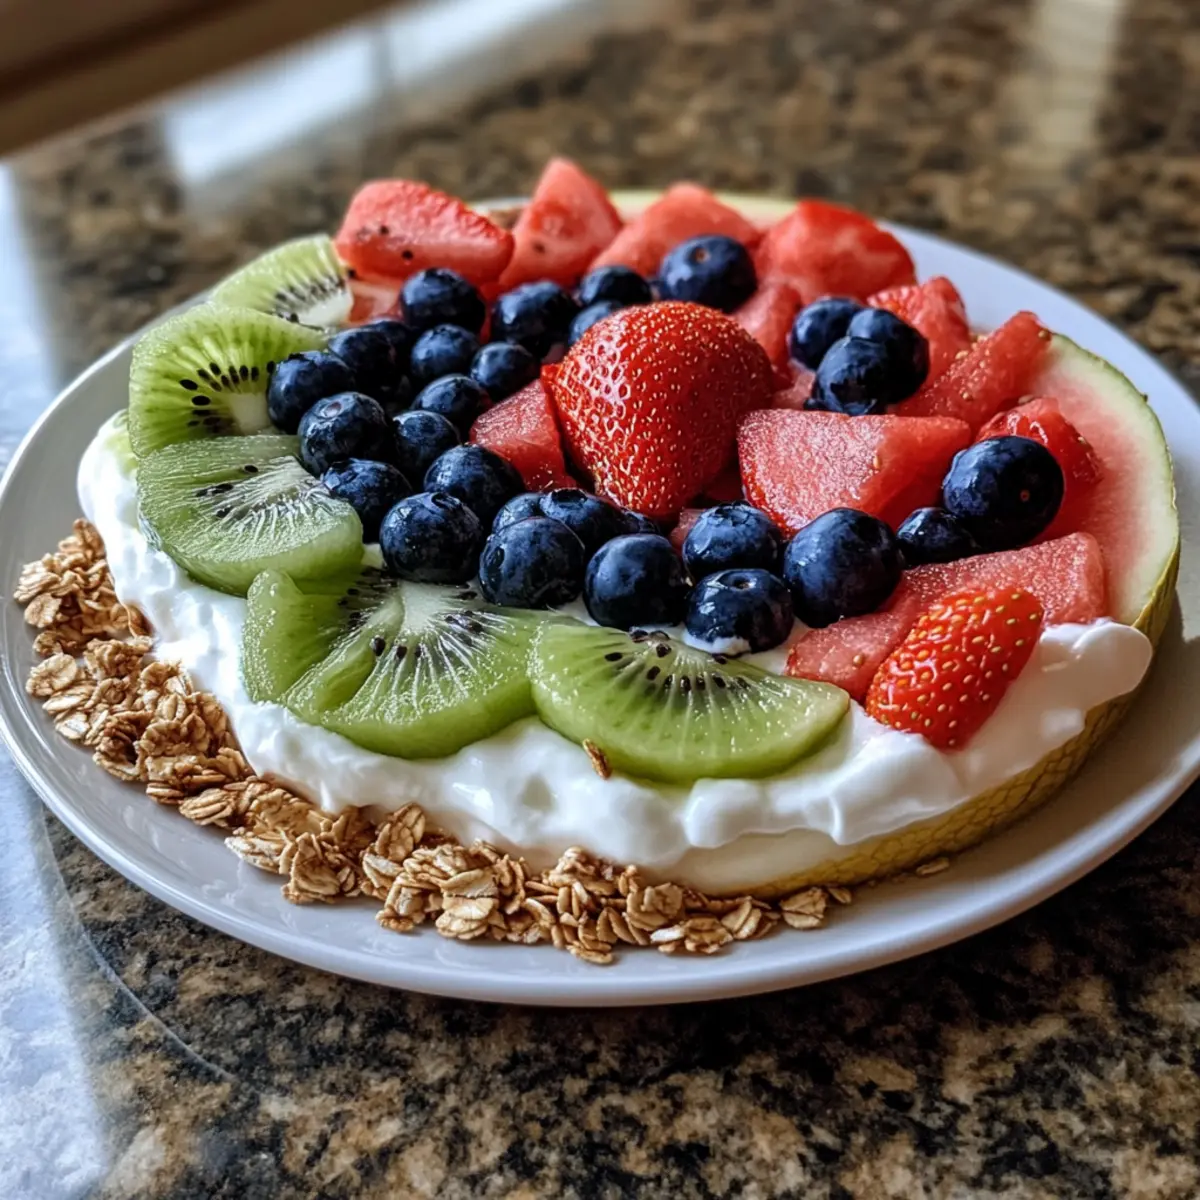
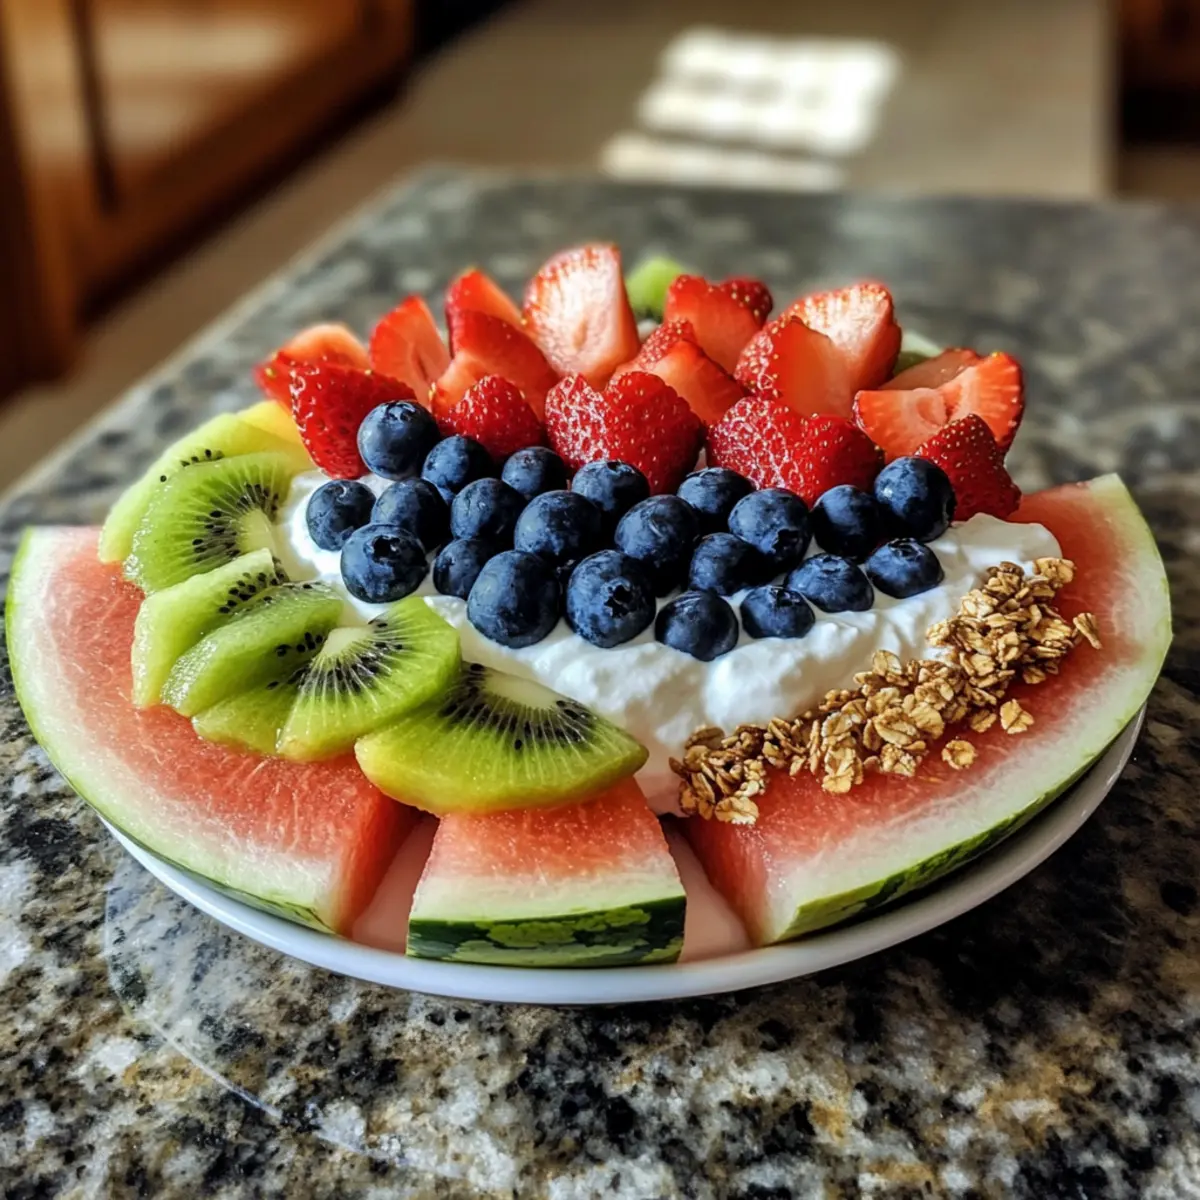
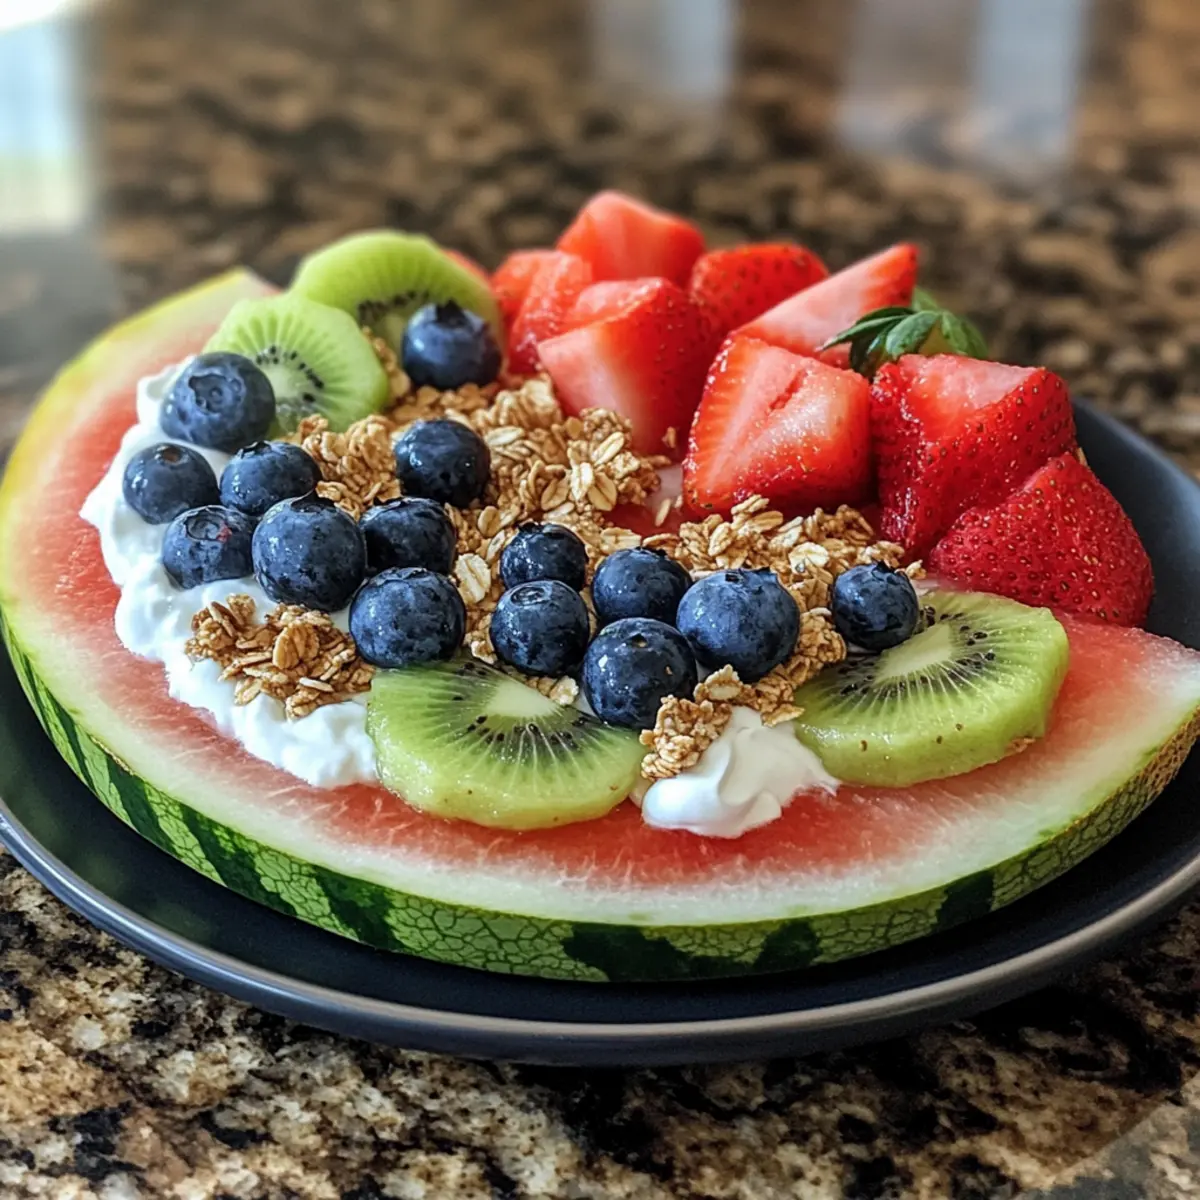
As summer’s golden rays dance across our backyards, I find myself dreaming of vibrant flavors, and what could be more refreshing than a slice of Watermelon Pizza? Picture this: a juicy watermelon base adorned with creamy yogurt and a rainbow of colorful fruits. This no-bake delight is not just a feast for the eyes; it’s also budget-friendly and unbelievably easy to whip up, making it an ideal treat for everything from backyard barbecues to a quick afternoon snack. Plus, it’s fully customizable, inviting everyone—kids included—to join in on the fun. Ready to transform a simple fruit into a playful masterpiece that will have your taste buds singing? Let’s dive into the delightful world of Watermelon Pizza!
Why is Watermelon Pizza a must-try?

Refreshing and Fun: This no-bake treat is a delightful way to elevate your summer gatherings, turning a simple watermelon into an edible centerpiece!
Customizable for all tastes: You can mix and match toppings, from fruits to crunchy seeds, so everyone at the table can find their perfect slice.
Budget-friendly ingredients: Using seasonal fruits reduces costs while maximizing flavor – you’ll impress guests without breaking the bank!
Kid-friendly and interactive: Get children involved by letting them create their own slices, making snack time fun and engaging.
Light and Healthy: Packed with vitamins and minerals, this dessert is a guilt-free way to satisfy your sweet tooth while staying cool.
Consider pairing it with a side of our popular Pizza Burgers Flavor for a meal that hits all the right notes this summer!

Watermelon Pizza Ingredients

• A delicious array of components awaits your creativity!

  • For the Base

  • Watermelon – Choose a fresh, ripe watermelon for the juiciest and most flavorful crust possible.

  • For the Creamy Layer

  • Yogurt (Greek or dairy-free) – This creamy sauce adds richness; swap with cream cheese or nut butter for a different twist.

  • For the Colorful Toppings

  • Fresh Fruits (berries, kiwi, bananas, etc.) – Opt for seasonal fruits to enhance flavor and save money while decorating your Watermelon Pizza.

  • For Crunchy Additions

  • Crunchy Toppings (nuts, seeds, granola) – Add these for texture and flavor contrast, making each bite satisfying.

  • For Extra Sweetness

  • Honey or Agave syrup – A light drizzle of this optional sweetener can elevate the flavors of your Watermelon Pizza!

Step‑by‑Step Instructions for Watermelon Pizza

Step 1: Prep the Watermelon
Begin by selecting a fresh, ripe watermelon. Slice it into 1-inch thick rounds, creating a sturdy base for your Watermelon Pizza. Look for vibrant color and a firm texture to ensure the best flavor. Place the watermelon slices on a large platter lined with parchment paper so they’re easy to move and present beautifully.

Step 2: Spread the Creamy Layer
Take your yogurt (Greek or dairy-free) and generously spread a layer over the top of each watermelon slice. Use a spatula for an even distribution, covering the surface from edge to edge. If you prefer, chill the watermelon slices in the refrigerator for about 15 minutes beforehand to help the yogurt stick better and enhance the refreshing taste.

Step 3: Add Colorful Toppings
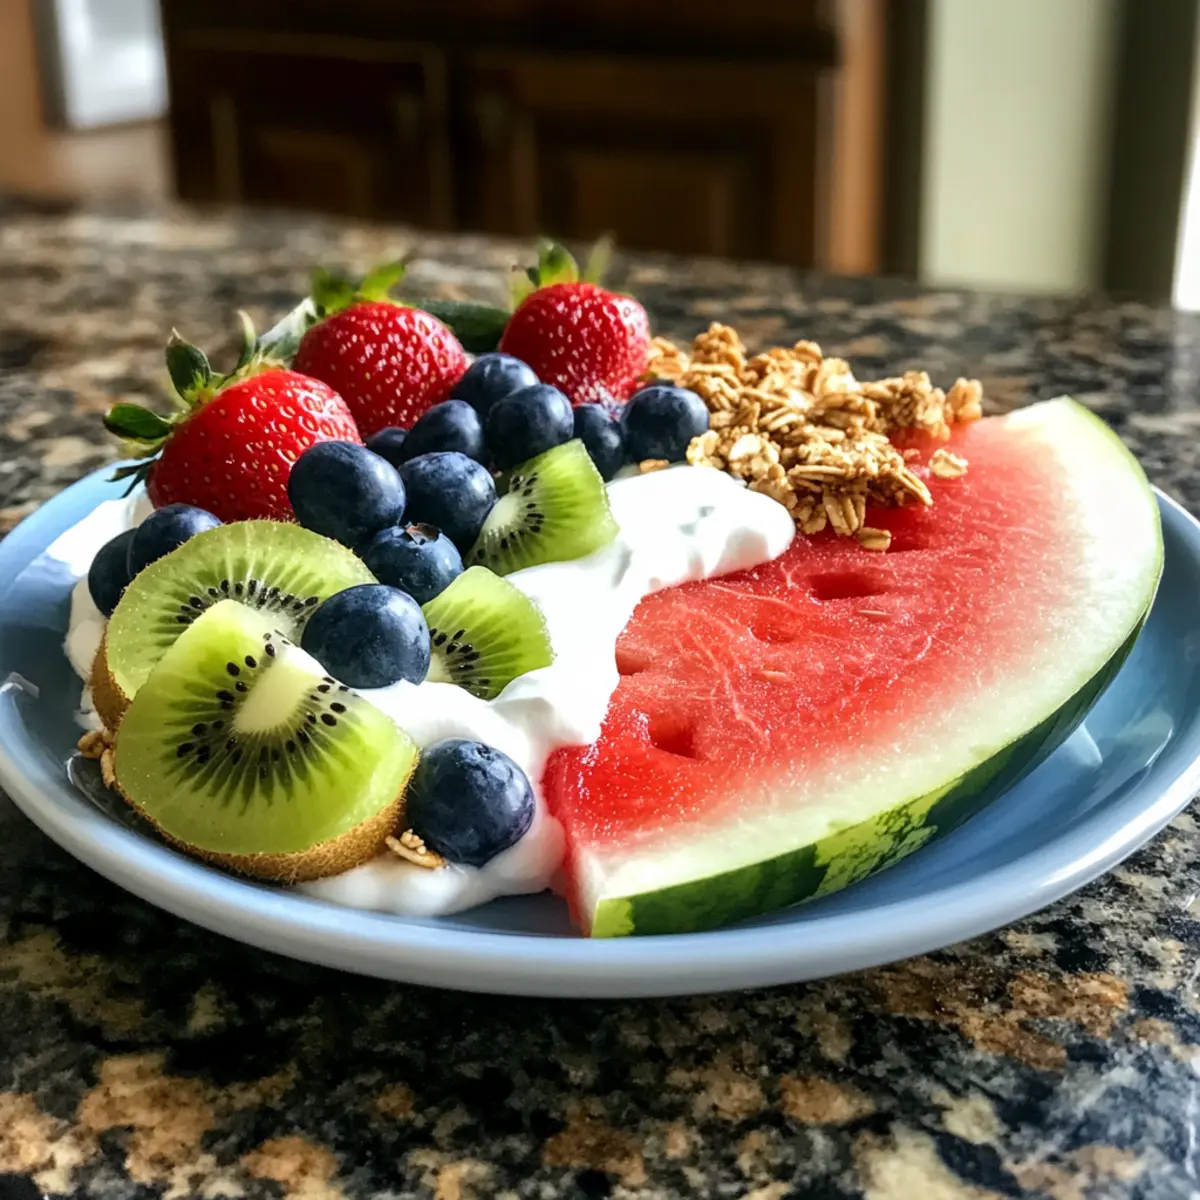
Now comes the fun part! Decorate each yogurt-covered slice with an assortment of fresh fruits like berries, kiwi, and bananas. Be sure to arrange the fruits in a colorful, playful manner for visual appeal. Aim for a mix of textures and flavors to make each Watermelon Pizza slice look appetizing and delightful.

Step 4: Sprinkle Crunchy Additions
For an extra crunch, top your Watermelon Pizza with a sprinkle of nuts, seeds, or granola. These add-ons provide a satisfying contrast to the juicy watermelon and creamy yogurt. Keep the toppings light to ensure they complement rather than overshadow the beautifully vibrant fruits painted across your watermelon slices.

Step 5: Drizzle with Sweetness
If you crave a touch of sweetness, drizzle some honey or agave syrup over the finished Watermelon Pizza. This step is optional but adds a lovely glaze that enhances the fresh ingredients. To prevent the syrup from running off, do this just before serving so it clings perfectly to the fruits and yogurt.

Step 6: Slice and Serve
With your Watermelon Pizza fully adorned, it’s time to serve! Use a sharp knife to slice the watermelon rounds into wedges, making it easier for everyone to enjoy. For gatherings, consider slicing ahead of time for convenience. Serve immediately to savor the refreshing flavors while they’re at their best!
Watermelon Pizza Variations & Substitutions

Customize your Watermelon Pizza to delight your taste buds with some inviting twists!

  • Tropical Vibes: Swap yogurt with coconut yogurt and top with fresh pineapple and coconut flakes for a sunny twist. It’s like a mini vacation on a plate!

  • Dessert-Style: Use chocolate spread or Nutella instead of yogurt, then layer on sliced strawberries and fluffy marshmallows for a decadent dessert. The combination creates a creamy, sweet indulgence your family will love.

  • PB&J Style: Spread peanut butter for a nutty base, then add your favorite jelly and banana slices on top. This playful take is perfect for kiddos craving a nostalgic flavor!

  • Savory Delight: Mix cream cheese with herbs and spread it over the watermelon. Garnish with cucumber slices and cherry tomatoes for a savory pizza that balances sweetness and saltiness beautifully.

  • Berry Burst: Try a medley of mixed berries like blueberries, raspberries, and strawberries for a berry bonanza! This not only enhances flavor but also elevates the vibrant colors of your pizza.

  • Chili Lime Kick: Drizzle with lime juice and sprinkle a touch of chili powder over the top. The zing from lime and heat from chili create an exciting contrast that dance on your palate.

  • Nutty Crunch: Add a mix of nuts like pistachios and almonds for an extra crunchy texture that complements the juicy watermelon perfectly. It adds both nutrition and depth to every bite!

  • Granola Goodness: Sprinkle your favorite granola for a wholesome touch. The combination of crunchy oats and fresh fruits delivers a satisfying crunch that’s exciting in every mouthful.

Feeling inspired? You might also enjoy pairing this delightful dish with our refreshing Chicken Naan Pizza for a vibrant summer feast! Explore the endless customization possibilities and let your creativity flow.

Expert Tips for Watermelon Pizza

  • Choose Wisely: Select a fresh, ripe watermelon with a uniform shape and deep color, ensuring a sweet and juicy base for your Watermelon Pizza.

  • Cooling is Key: Chill the watermelon slices for about 15 minutes before spreading yogurt. This helps the yogurt adhere better and enhances refreshing flavor.

  • Mix Textures: Combine soft fruits like bananas or berries with crunchy toppings such as nuts or granola to elevate the enjoyment of each bite and create a delightful contrast.

  • Less is More: Don’t overcrowd your toppings. A few carefully chosen ingredients will make your Watermelon Pizza visually appealing and allow each flavor to shine!

  • Prep Ahead: Prepare all toppings in advance and store them in separate containers to save time and keep everything fresh for assembling your Watermelon Pizza at the last minute.

Make Ahead Options

These refreshing Watermelon Pizza slices are perfect for meal prep and can save you valuable time on those busy days! You can cut the watermelon into 1-inch thick rounds and store them in the refrigerator for up to 24 hours before assembling. For the toppings, prep your fresh fruits and crunchy additions, placing them in separate containers to maintain their texture and freshness, which can last for up to 3 days in the fridge. When you’re ready to serve, simply spread the yogurt over the watermelon base, top with the fruits and crunchy elements, drizzle with honey or agave syrup, and enjoy a delightful treat that is just as delicious as when you first made it!

How to Store and Freeze Watermelon Pizza

Fridge: Store assembled Watermelon Pizza in the refrigerator for up to 30 minutes to maintain freshness; thereafter, the watermelon may start to become soggy.

Toppings: Keep fresh fruit toppings in an airtight container in the fridge for up to 2 days to ensure they stay crisp and flavorful.

Prepping Ahead: For best results, prepare toppings a day in advance and assemble just before serving to enjoy the best texture and taste.

Freezing: It’s not recommended to freeze Watermelon Pizza as the watermelon can lose its texture and become mushy once thawed; enjoy fresh!

What to Serve with Watermelon Pizza

Elevate your summer gatherings with delightful accompaniments that perfectly balance the refreshing sweetness of your Watermelon Pizza.

  • Creamy Greek Yogurt Dip: A smooth, tangy dip that pairs beautifully with the fruity flavors, adding an extra layer of creaminess.
  • Crispy Veggie Platter: Fresh, crunchy veggies like cucumbers and bell peppers complement the sweetness, offering a refreshing contrast.
  • Honey-Drizzled Ricotta: The creaminess of ricotta mixed with honey mirrors the sweetness of the watermelon, creating a luxurious texture.
  • Sparkling Lemonade: Add a spritz of citrus fizz to invigorate your palate alongside the vibrant Watermelon Pizza.
  • Grilled Shrimp Skewers: Savory shrimp with a hint of smokiness contrasts delightfully, making for a well-rounded meal.
  • Mint Water: Infuse water with fresh mint leaves for a cooling beverage that enhances the overall refreshing vibe of your spread.

For an extra touch, consider serving your Watermelon Pizza at a picnic alongside a colorful arrangement of fresh fruits and refreshing beverages. It transforms your meal into a joyful celebration!
Watermelon Pizza Recipe FAQs

How do I choose the right watermelon?
Absolutely! When selecting a watermelon, look for a firm and symmetrical shape with a deep green color. Check for a yellow spot on its underside, indicating ripeness. Avoid any with dark spots all over, as this can signal overripeness.

What is the best way to store leftover Watermelon Pizza?
To keep your Watermelon Pizza fresh, store it in the refrigerator for up to 30 minutes after assembly. Beyond that, the watermelon can become soggy. For toppings, keep fresh fruits in an airtight container in the fridge for up to 2 days.

Can I prepare the toppings in advance?
Very much so! I recommend prepping your toppings a day before. Store them in separate airtight containers in the fridge; this way, they retain their freshness and crunch for when you’re ready to assemble your Watermelon Pizza.

Can I freeze Watermelon Pizza?
I advise against freezing Watermelon Pizza. While some ingredients may freeze well, watermelon tends to lose its texture and becomes mushy once thawed, which detracts from your delicious treat.

Is this recipe suitable for kids with dietary restrictions?
Yes! You can easily customize the Watermelon Pizza to cater to different dietary needs. For a dairy-free version, simply use dairy-free yogurt or nut butter and ensure the toppings are nut-free if allergies are a concern. Always check labels to be sure!

What should I do if my watermelon slices are too soft?
If your watermelon slices turn out soft, you can enjoy them as a refreshing fruit salad instead! Alternatively, try chilling them for 15 minutes before spreading the yogurt; this may help firm them up a bit.
Watermelon Pizza

Refreshing Watermelon Pizza with Fruit Toppings for Summer Fun

Enjoy a refreshing slice of Watermelon Pizza topped with creamy yogurt and colorful fruits, perfect for summer gatherings.
Prep Time 15 minutes
Chilling Time 15 minutes
Total Time 30 minutes
Servings: 8 slices
Course: Dessert
Cuisine: American
Calories: 100

Ingredients
  

For the Base
  • 1 medium Watermelon Fresh and ripe
For the Creamy Layer
  • 1 cup Yogurt (Greek or dairy-free) Can substitute with cream cheese or nut butter
For the Colorful Toppings
  • 2 cups Fresh Fruits (berries, kiwi, bananas, etc.) Use seasonal fruits for best flavor
For Crunchy Additions
  • 1 cup Crunchy Toppings (nuts, seeds, granola)
For Extra Sweetness
  • 2 tablespoons Honey or Agave syrup Optional for drizzling

Equipment

  • sharp knife
  • Large Platter
  • Spatula
  • Parchment paper

Method
 

Prep and Assemble
  1. Begin by selecting a fresh, ripe watermelon. Slice it into 1-inch thick rounds, placing them on a large platter lined with parchment paper.
  2. Spread yogurt generously over the top of each watermelon slice using a spatula.
  3. Decorate each slice with fresh fruits, arranging them colorfully for visual appeal.
  4. Sprinkle with crunchy toppings for added texture.
  5. Drizzle with honey or agave syrup just before serving.
  6. Slice watermelon rounds into wedges and serve immediately.
Nutrition

Serving: 1sliceCalories: 100kcalCarbohydrates: 25gProtein: 3gFat: 2gSodium: 20mgPotassium: 150mgFiber: 2gSugar: 18gVitamin A: 500IUVitamin C: 15mgCalcium: 50mgIron: 0.5mg

Notes

Chill watermelon slices for better yogurt adherence. Prepare toppings in advance for efficiency.

Tried this recipe?

Let us know how it was!

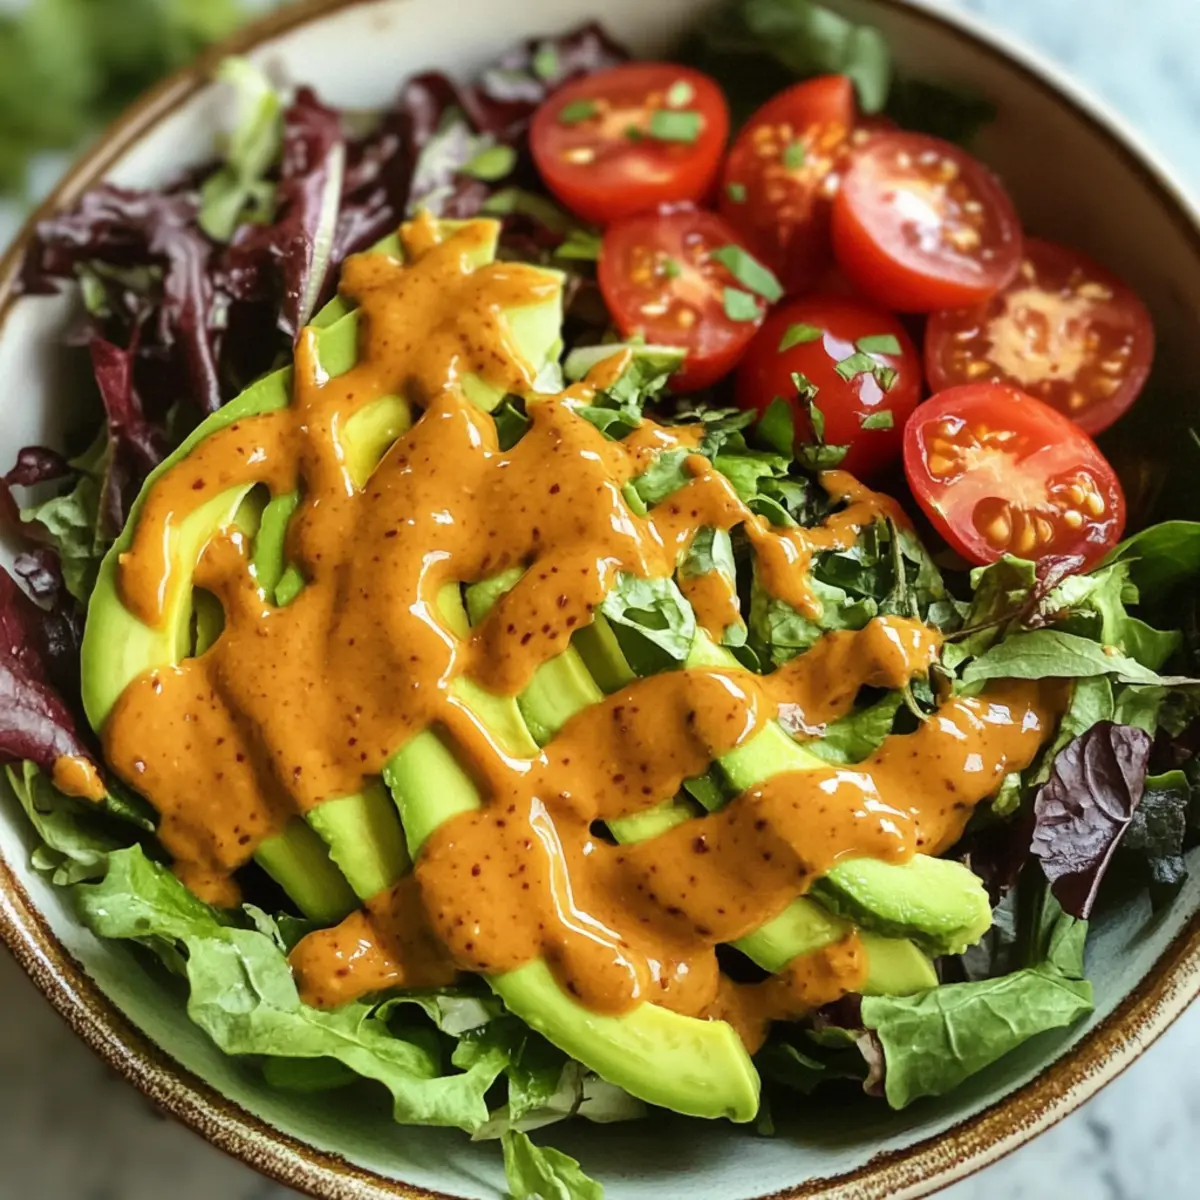
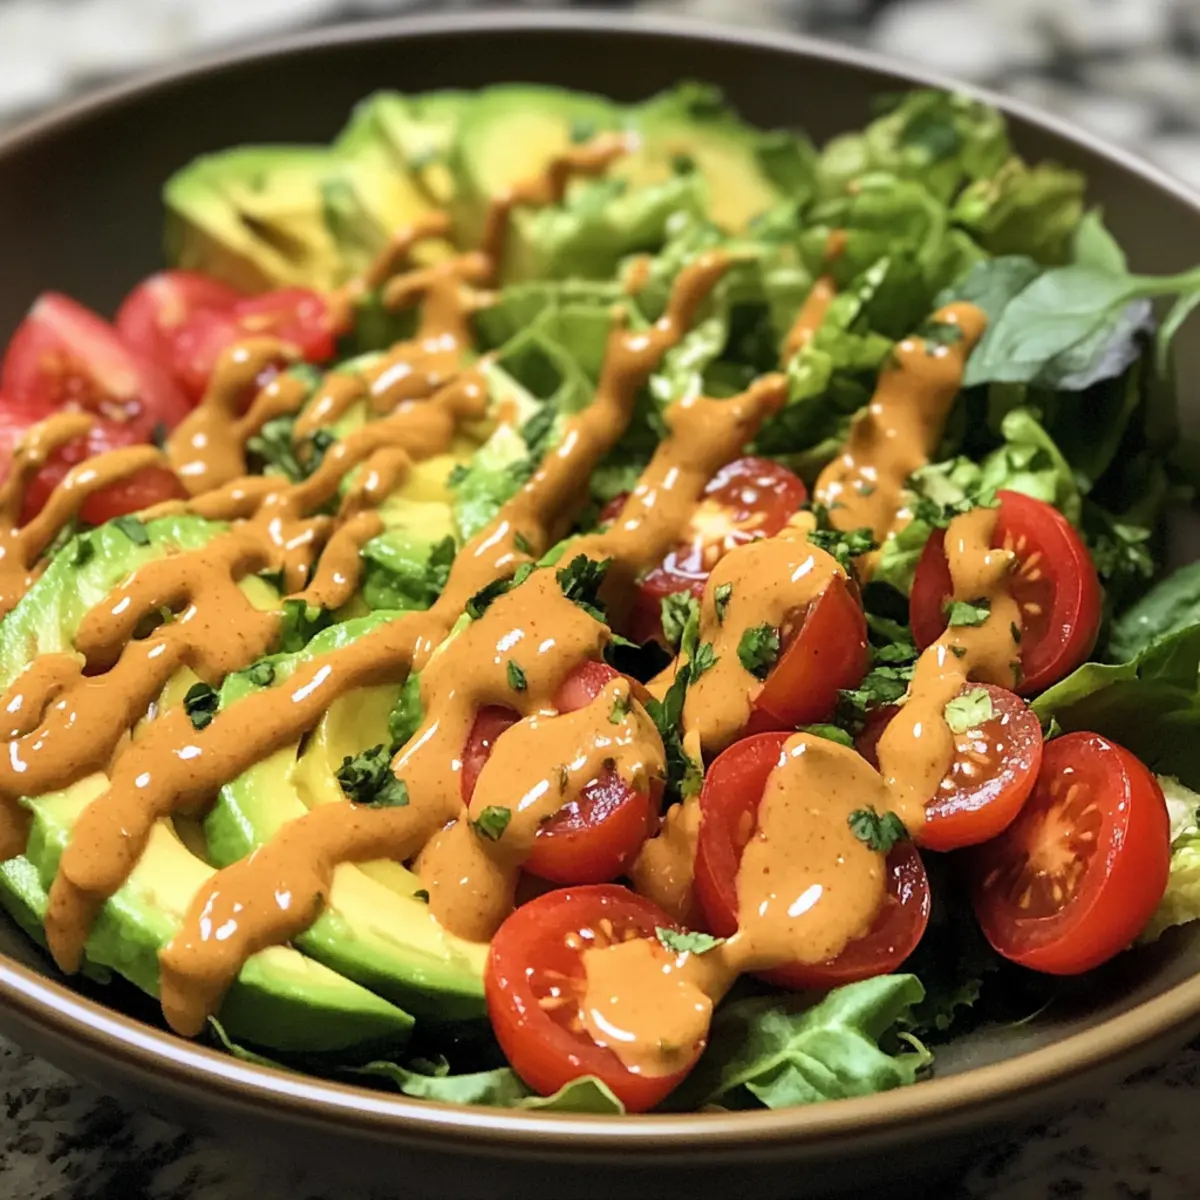
Creamy Japanese Roasted Sesame Dressing You’ll Love

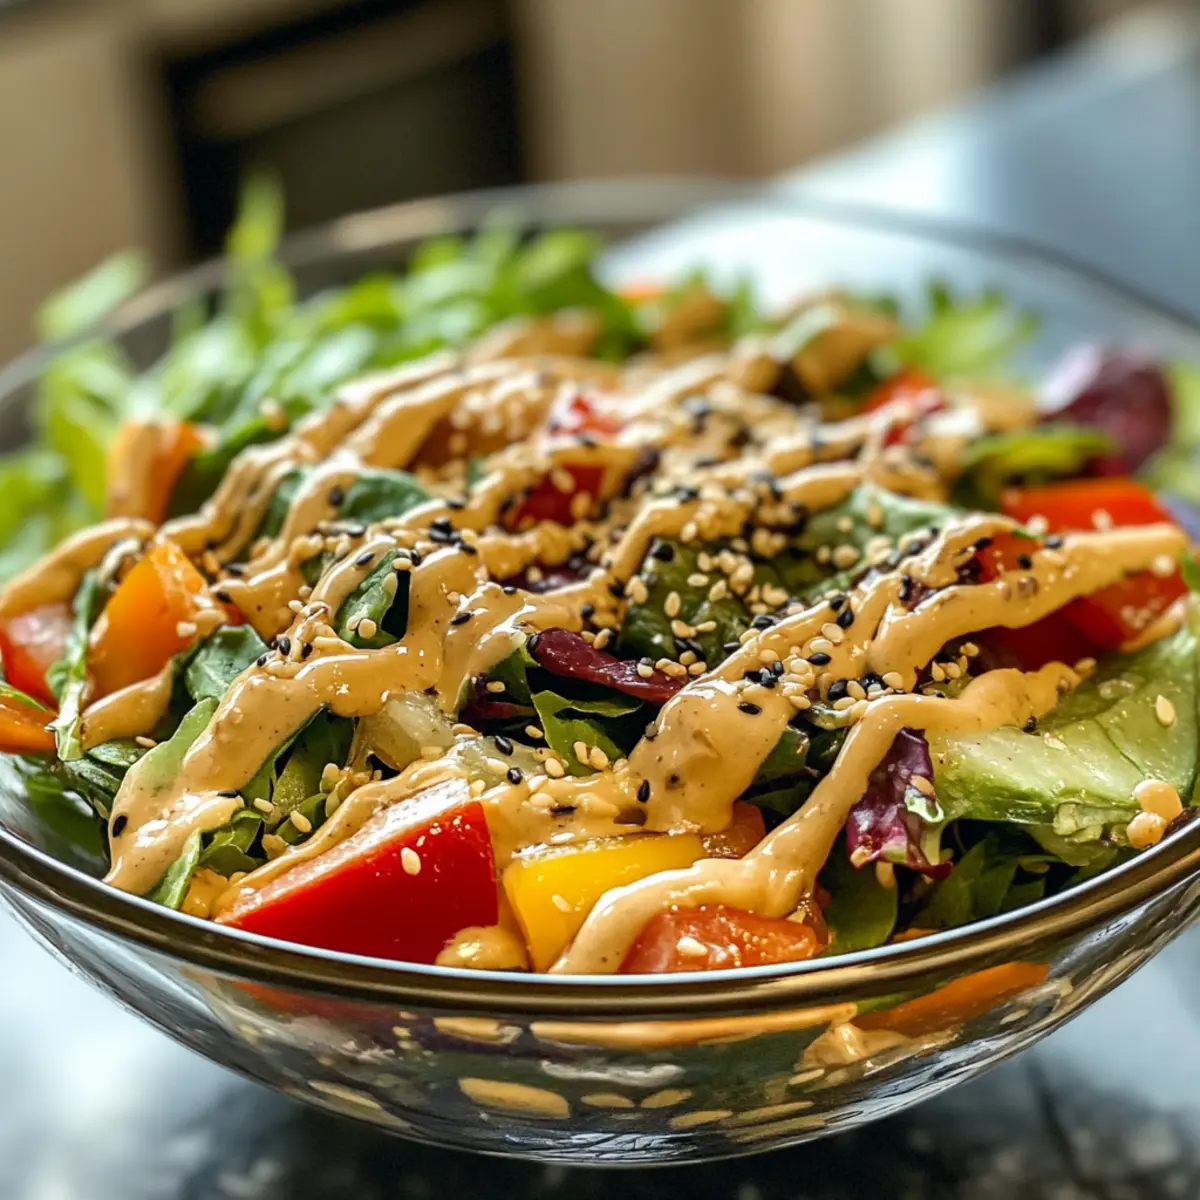
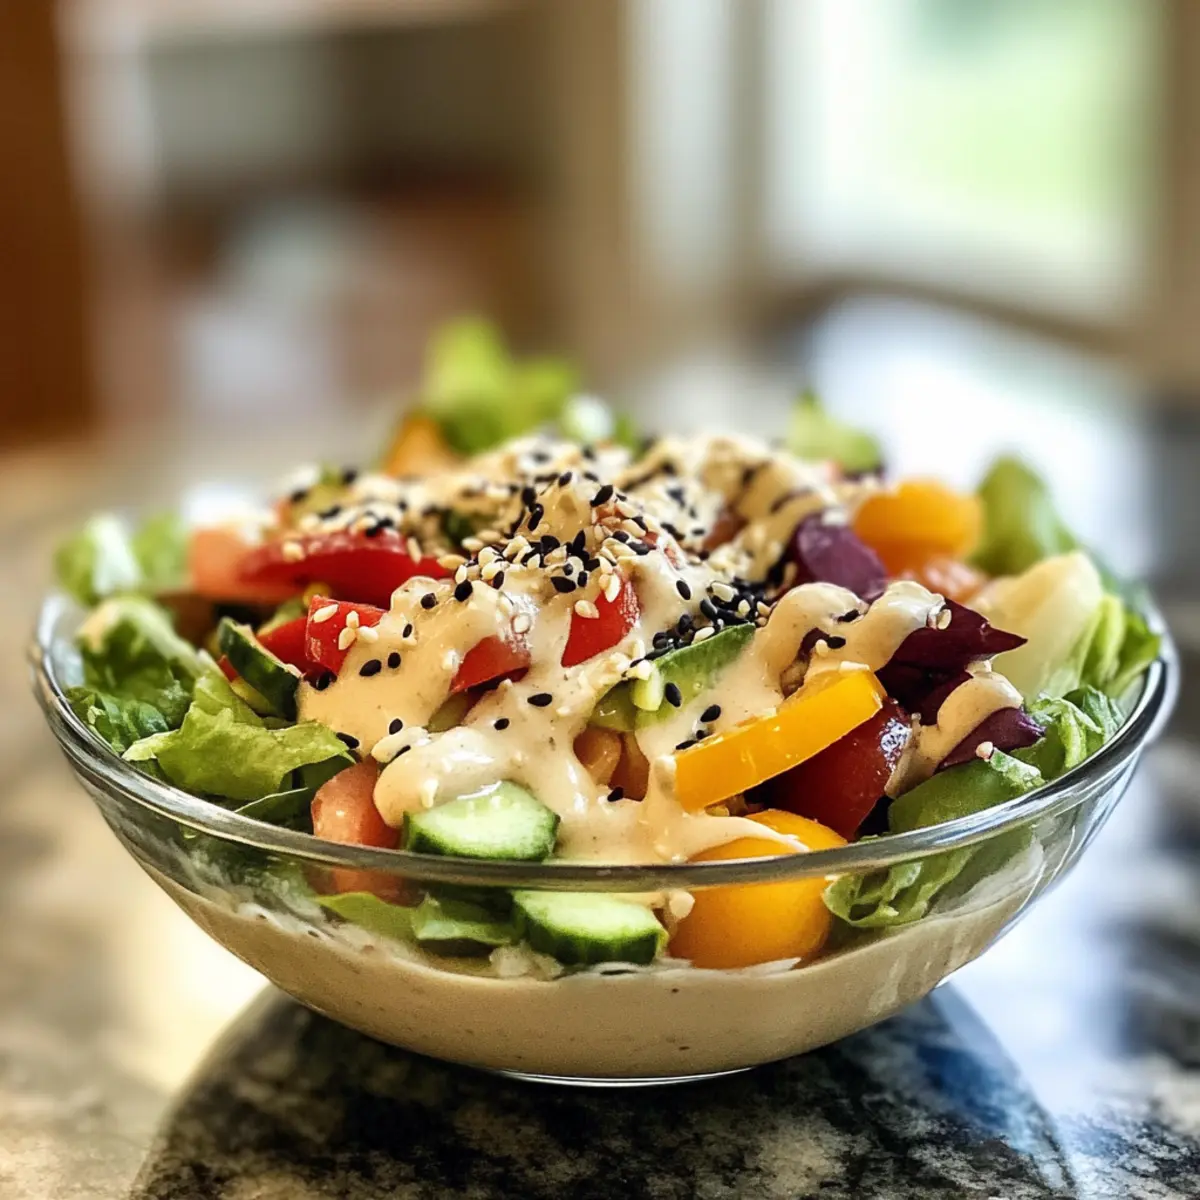
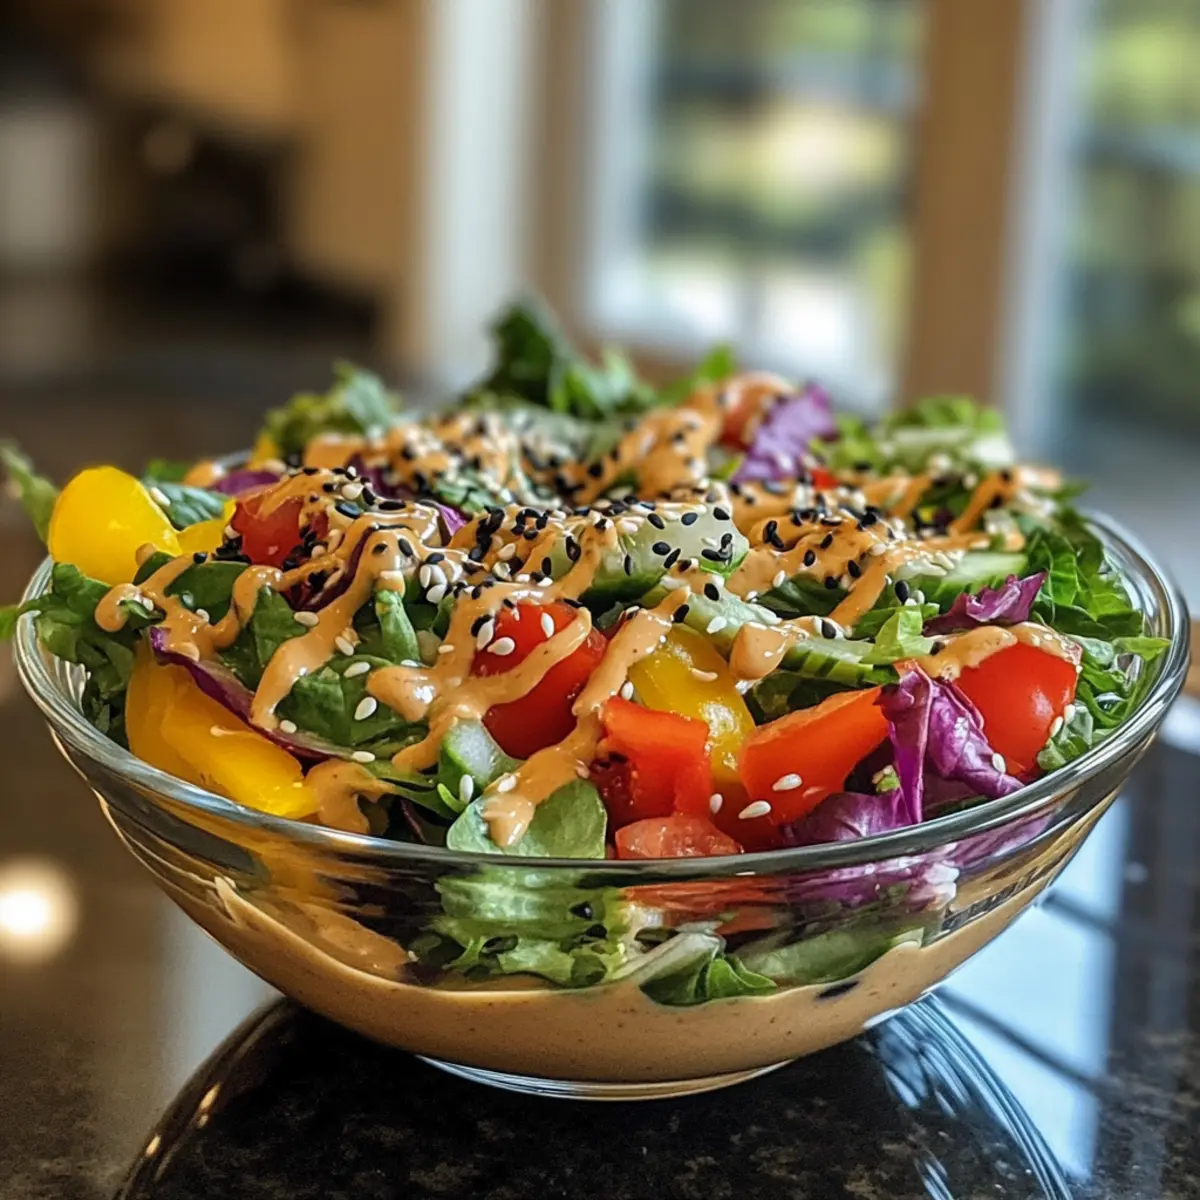
As I stood in my kitchen, the warm aroma of toasted sesame seeds wafted through the air, instantly transporting me to my favorite Japanese restaurant. That’s when it hit me—why not recreate that delightful flavor at home? This Japanese Roasted Sesame Dressing, a Kewpie Copycat, is both creamy and nutty, perfect for elevating your salads, grain bowls, or serving as a captivating dipping sauce. What’s even better? It comes together in just 5 minutes with simple, pantry-friendly ingredients. Say goodbye to tedious prep work and hello to a quick kitchen triumph that your taste buds will love! Are you ready to whisk up this flavorful homage to Kewpie?

Why is this dressing a must-try?

Creamy, this Japanese Roasted Sesame Dressing is the ultimate pantry staple that brings restaurant-quality flavors to your home cooking. Quick and simple, you can whip it up in just 5 minutes, making it ideal for busy weeknights. Versatile, it pairs beautifully with everything from salads to grilled meats or roasted veggies. Nutty richness from toasted sesame seeds brings a depth of flavor that transforms any dish. If you’re exploring other delectable dressings, don’t miss out on this delicious Strawberry Spinach Dressing, or try our Roasted Carrot Lentil Dressing for a heartier option!

Japanese Roasted Sesame Dressing Ingredients

Get ready for quick flavor!

For the Dressing

  • Kewpie Mayonnaise – This creamy base gives your dressing that signature umami flavor; if unavailable, plain mayonnaise works but lacks some depth.
  • Toasted Sesame Seeds – Adds a delightful crunch and rich sesame taste; toasting them enhances their flavor beautifully.
  • Soy Sauce – A must for saltiness and depth; for gluten-free needs, tamari is a perfect substitute.
  • Maple Syrup – Balances the savory and salty notes with sweetness; honey or sugar can work in its place.
  • Apple Cider Vinegar – Provides a refreshing acidity; if you’re out, rice vinegar or white vinegar will do the trick.
  • Sesame Oil – Infuses an intense sesame flavor; you can omit it, but it may lack a bit of that nutty essence.
  • Tahini (optional) – Elevates the sesame goodness with its creamy texture; while highly recommended, it can be skipped if needed.

This Japanese Roasted Sesame Dressing is the key to transforming your meals into something extraordinary!

Step‑by‑Step Instructions for Japanese Roasted Sesame Dressing

Step 1: Combine the Ingredients
In a medium mixing bowl, add ½ cup of Kewpie mayonnaise, ¼ cup of toasted sesame seeds, 2 tablespoons of soy sauce, 1 tablespoon of maple syrup, 1 tablespoon of apple cider vinegar, 1 teaspoon of sesame oil, and 1 tablespoon of tahini if desired. Ensure all ingredients are ready and reach for your whisk; this creamy mixture will soon transform into your delightful Japanese Roasted Sesame Dressing.

Step 2: Whisk to Perfection
Using your whisk, vigorously mix the ingredients for about 30 seconds until everything is smoothly combined and well incorporated. You’ll want to achieve a velvety consistency without any lumps. The toasted sesame seeds should be evenly distributed, adding depth and texture. As you stir, watch for the rich, creamy color that signals your dressing is coming together beautifully.

Step 3: Transfer the Dressing
Once your mixture reaches a silky texture, carefully pour it into a serving bowl or an airtight jar. If you’re using a jar, a funnel can help avoid spills. This step is essential to ensure easy pouring later, whether you’re drizzling it over salads or using it as a dipping sauce. Admire the luscious, creamy appearance of your homemade Japanese Roasted Sesame Dressing!

Step 4: Serve with Your Favorite Dishes
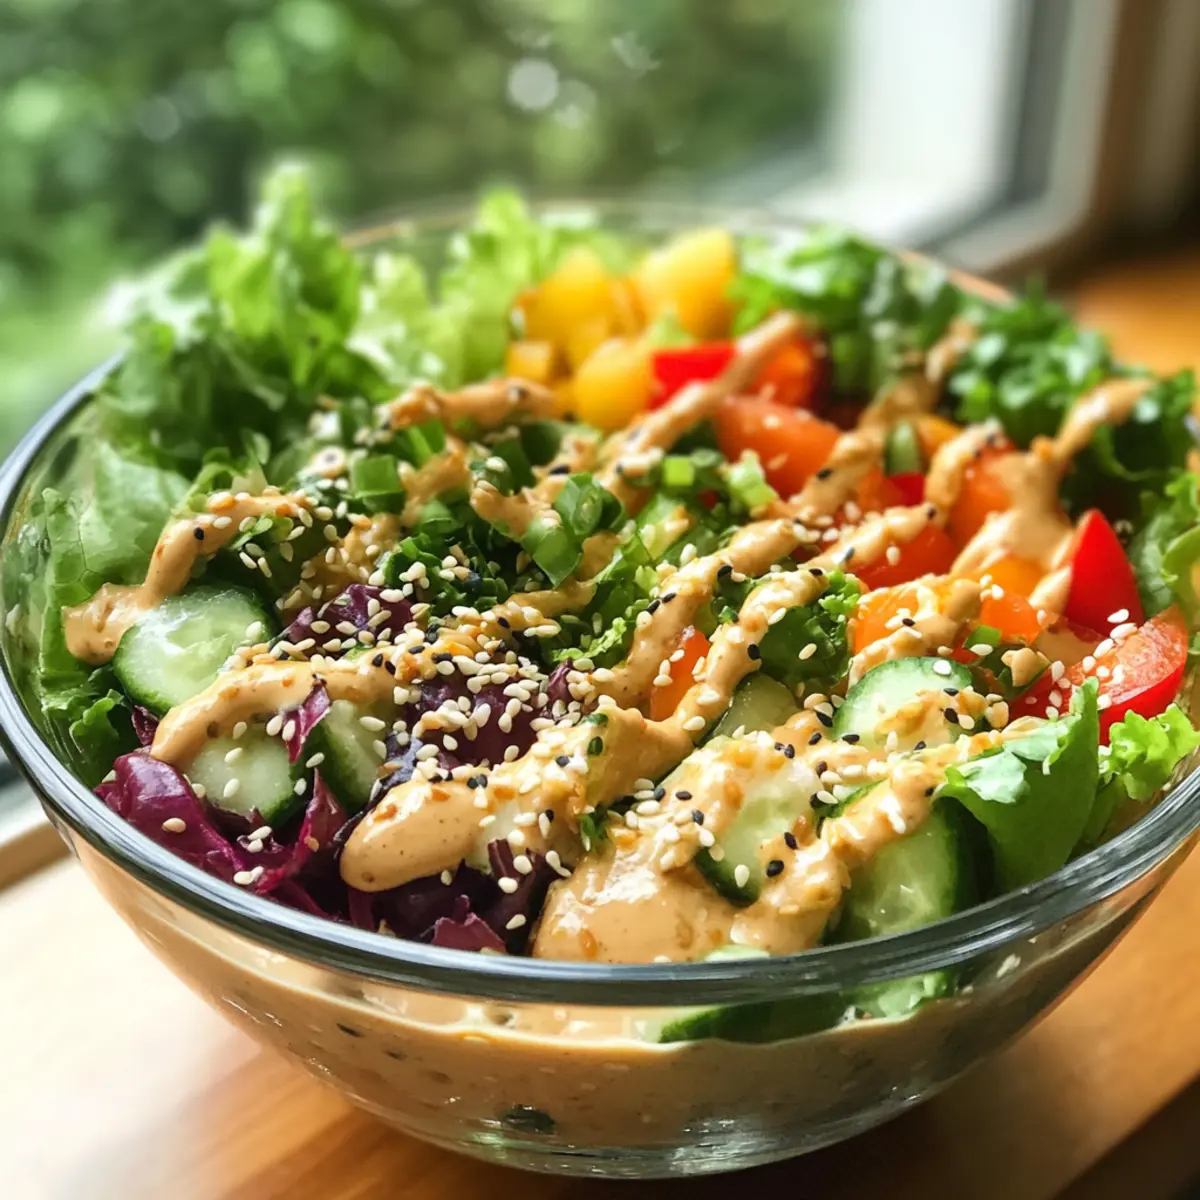
This versatile dressing is perfect for enhancing a variety of dishes. Drizzle it over fresh salads, grain bowls, or roasted vegetables for a delightful finish. You can also serve it as a zesty dipping sauce for crispy snacks or grilled meats. The rich, nutty flavor elevates any meal, making it an instant favorite.

Step 5: Store for Later Use
To keep your Japanese Roasted Sesame Dressing fresh, transfer any leftovers to an airtight container and refrigerate. It will maintain its delicious flavor for up to one week. Before using, give it a gentle shake or stir to recombine any separated ingredients. This simple storage tip ensures you’ll always have this creamy dressing on hand whenever a flavor boost is needed!

Make Ahead Options

These Japanese Roasted Sesame Dressing preparations are perfect for busy home cooks looking to save time during their week! You can whisk together the dressing up to 3 days in advance, storing it in an airtight container in the refrigerator. To maintain its fabulous flavor and texture, just make sure to refrigerate the dressing immediately after preparation. Before serving, give it a good shake or stir to recombine any ingredients that may have settled. This way, you’ll have a creamy, nutty dressing ready to elevate your salads or grain bowls, bringing restaurant-quality flavors to your table effortlessly!

Japanese Roasted Sesame Dressing Variations

Feel free to explore these delightful twists on your Japanese Roasted Sesame Dressing! Each variation will enhance its flavor profile, making it even more enjoyable in your meals.

  • Greek Yogurt Swap: Use Greek yogurt instead of Kewpie mayonnaise for a lighter, tangy alternative. This swap brings a fresh creaminess that pairs beautifully with salads.

  • Miso Infusion: Stir in a tablespoon of miso paste to enrich the dressing’s umami flavor. This addition elevates the dressing further, making the taste experience truly unforgettable.

  • Agave Nectar: Substitute maple syrup with agave nectar for a vegan-friendly sweetener. Its mild sweetness complements the other ingredients without overpowering them.

  • Coconut Sugar: Experiment with using coconut sugar for a caramel-like sweetness. This twist adds a unique flavor while still maintaining the dressing’s balance of tastes.

  • Rice Vinegar Twist: Swap apple cider vinegar with rice vinegar for a milder acidity. This change will impart a more authentic Japanese flavor, perfect for drizzles over sushi rolls.

  • Add Fresh Herbs: Toss in a handful of finely chopped cilantro or basil for an aromatic lift. Fresh herbs can bring an extra layer of vibrancy, transforming the dressing into a flavorful masterpiece.

  • Spicy Kick: Add a teaspoon of sriracha or chili oil to introduce some heat. The spicy element creates an exciting flavor explosion, perfect for those who enjoy a little kick in their dishes.

If you love fresh flavors, don’t miss our inviting Roasted Strawberry Whipped ricotta toast or the savory Steak Fajita Dressing—each offering its unique delightful touch to your meal prep!

Expert Tips for Japanese Roasted Sesame Dressing

  • Toasting Technique: Avoid over-toasting sesame seeds to prevent bitterness; aim for a golden-brown color for optimal flavor.

  • Smooth Consistency: For a velvety texture, blend the ingredients in a high-powered blender. This ensures the sesame seeds are thoroughly incorporated.

  • Flavor Enhancements: Consider adding roasted garlic or a spoonful of miso to elevate the umami richness in your Japanese Roasted Sesame Dressing.

  • Storage Reminder: Store the dressing in an airtight container in the fridge. Remember to shake well before each use to recombine the ingredients.

  • Versatile Uses: Experiment with this dressing as a marinade for grilled meats or a dip for fresh vegetables; its nutty flavors make it truly versatile!

How to Store and Freeze Japanese Roasted Sesame Dressing

Fridge: Store your Japanese Roasted Sesame Dressing in an airtight container in the refrigerator for up to 1 week, ensuring it retains its creamy texture and rich flavors.

Freezer: While freezing isn’t recommended for this dressing due to potential texture changes, if necessary, place it in a freezer-safe container and use within 1 month.

Reheating: For best results, enjoy the dressing cold or at room temperature. If you choose to thaw a frozen batch, let it defrost in the fridge overnight and stir well before use.

What to Serve with Japanese Roasted Sesame Dressing

Elevate your dining experience by pairing this luscious dressing with various dishes that highlight its nutty and creamy flavor.

  • Crispy Green Salad: A fresh mix of crunchy lettuce, vibrant vegetables, and herbs brings a delightful crispness that complements the dressing’s creaminess.
  • Grilled Chicken Skewers: Juicy chicken marinated and grilled to perfection, serves as a savory backdrop that balances the rich, nutty dressing beautifully.
  • Quinoa Bowl: Fluffy quinoa topped with roasted vegetables creates a wholesome, satisfying meal where each bite is enhanced by the flavorful dressing.
  • Roasted Brussels Sprouts: The slight bitterness of Brussels sprouts is transformed into a sweet delight when drizzled with this dressing, offering a wonderful contrast.
  • Sushi Rolls: Light and delicate sushi rolls filled with fresh ingredients are brought to life when paired with this tangy dressing for dipping.
  • Rice Paper Rolls: Fresh, light, and filled with crunchy veggies or shrimp, these rolls paired with the dressing create a delightful flavorful experience.
  • Chilled Noodle Salad: Tossed with sesame dressing, chilled noodles become the perfect canvas for a medley of fresh tastes and textures.
  • Sesame-Crusted Tofu: Crispy tofu with a fragrant sesame seed crust pairs seamlessly with the dressing, making it a fantastic plant-based option.

Japanese Roasted Sesame Dressing Recipe FAQs

How do I select the best sesame seeds for this dressing?
Absolutely! When selecting sesame seeds, look for seeds that are plump and have a bright, even color. Toasted seeds should have a golden hue without any dark spots, which can indicate over-toasting. If you find un-toasted sesame seeds, you can easily toast them at home. Simply place them in a dry skillet over medium heat, stirring frequently for about 3 to 5 minutes until they’re fragrant and lightly golden.

How should I store the dressing for maximum freshness?
Very good question! Transfer your Japanese Roasted Sesame Dressing to an airtight container and store it in the refrigerator. It will stay fresh and flavorful for up to 1 week. I always recommend giving it a good shake or stir before each use to ensure the ingredients are well combined.

Can I freeze Japanese Roasted Sesame Dressing?
The more the merrier! While freezing isn’t usually recommended for this dressing due to the change in texture, if you feel it’s necessary, use a freezer-safe container and store it for up to 1 month. When you’re ready to use it, let it thaw overnight in the fridge and give it a thorough mix before serving to restore some of its creaminess.

What should I do if my dressing is too thick?
No worries at all! If you find your dressing thicker than desired, simply whisk in a small amount of water, one teaspoon at a time, until it reaches your desired consistency. Alternatively, a splash of extra apple cider vinegar or a dash of more Kewpie mayonnaise can help adjust the texture while enhancing the flavor.

Are there any dietary considerations for this dressing?
Certainly! This Japanese Roasted Sesame Dressing contains Kewpie mayonnaise, which has eggs; an allergy alert for those with egg allergies. For gluten-free needs, use tamari instead of soy sauce. If you’re looking to make it vegan, consider substituting Kewpie with a vegan mayo alternative and omitting the tahini if avoiding sesame products.

How can I enhance the flavor of my dressing?
Great question! For an extra flavor boost, you might want to try adding a little roasted garlic or a spoonful of miso to the dressing. This will deepen the umami profile and provide a thrilling taste experience. Blend all ingredients thoroughly for the smoothest results, and enjoy experimenting!

Japanese Roasted Sesame Dressing

Creamy Japanese Roasted Sesame Dressing You’ll Love

This Japanese Roasted Sesame Dressing is creamy and nutty, perfect for elevating your salads and meals.
Prep Time 5 minutes
Total Time 5 minutes
Servings: 4 servings
Course: Salad
Cuisine: Japanese
Calories: 80

Ingredients
  

For the Dressing
  • 0.5 cup Kewpie mayonnaise or plain mayonnaise if Kewpie is unavailable
  • 0.25 cup toasted sesame seeds toasted enhances flavor
  • 2 tablespoons soy sauce tamari for gluten-free
  • 1 tablespoon maple syrup or honey/sugar
  • 1 tablespoon apple cider vinegar or rice/white vinegar
  • 1 teaspoon sesame oil omit if desired
  • 1 tablespoon tahini optional but recommended

Equipment

  • Mixing Bowl
  • Whisk
  • serving bowl or airtight jar

Method
 

Step-by-Step Instructions
  1. In a medium mixing bowl, add Kewpie mayonnaise, toasted sesame seeds, soy sauce, maple syrup, apple cider vinegar, sesame oil, and tahini if desired. Mix until combined.
  2. Using your whisk, mix the ingredients for about 30 seconds until smoothly combined and well incorporated.
  3. Carefully pour the mixture into a serving bowl or an airtight jar.
  4. Drizzle it over fresh salads, grain bowls, or roasted vegetables.
  5. Transfer any leftovers to an airtight container and refrigerate for up to one week.

Nutrition

Serving: 1tablespoonCalories: 80kcalCarbohydrates: 3gProtein: 1gFat: 7gSaturated Fat: 1gPolyunsaturated Fat: 4gMonounsaturated Fat: 2gCholesterol: 5mgSodium: 200mgPotassium: 50mgSugar: 1gVitamin A: 100IUCalcium: 20mgIron: 0.4mg

Notes

For enhanced flavor, consider adding roasted garlic or a spoonful of miso.

Tried this recipe?

Let us know how it was!

Indulge in Orange Almond Chocolate Chunk Cookies Bliss

As the aroma of freshly baked cookies wafts through the house, it feels like a delightful escape to a cozy café, and that’s exactly how I felt while whipping up these Orange Almond Chocolate Chunk Cookies with Sea Salt. With their unique blend of zesty orange and nutty almond flavors, these cookies are a sophisticated twist on the classic treat we all love. Not only are they wonderfully chewy and soft, but they’re also super easy to prepare, making them an ideal choice for any home chef looking to impress or simply indulge. The sprinkle of sea salt is the secret touch that takes these cookies from ordinary to extraordinary. Curious about how to bring a touch of magic to your next baking session? Let’s dive into this mouth-watering recipe together!

Why are these cookies so special?

Irresistible Flavor Fusion: These cookies blend zesty orange and crunchy almonds, creating a unique flavor profile that delights the palate.
Easy to Make: With simple steps and common ingredients, you’ll whip these up in no time, making them perfect for any home chef!
Perfectly Balanced Textures: Your bite will reveal a soft, chewy center alongside rich chocolate chunks, complemented by a delightful crunch of almonds.
Crowd-Pleasing Treat: Great for sharing at gatherings or indulging at home, they’re sure to impress any cookie lover!
And if you’re looking for other delicious ideas, don’t miss our delightful Chocolate Cranberry Cookies and the decadent Bake Cookies Cream!

Orange Almond Chocolate Chunk Cookie Ingredients

For the Cookie Base
All-purpose flour – Structure; can substitute with gluten-free flour blend for a gluten-free option.
Baking powder – Leavening agent; ensure it’s fresh for the best results.
Baking soda – Leavening agent; helps cookies spread and rise.
Kosher salt – Enhances flavor; can use table salt but reduce quantity.

For the Sweetness
Unsalted butter, room temperature – Provides richness and moisture; cream it well with sugars for best texture.
Light-brown sugar – Adds sweetness and moisture; enhances chewiness and can be substituted with coconut sugar for a lighter flavor.
Granulated sugar – Contributes sweetness; white sugar helps achieve crispness and aids in spreading.

For Flavoring
Orange zest – Adds citrus flavor and fragrance; fresh zest is recommended for the best taste.
Large eggs – Binding agent; room temperature eggs mix better into the batter.
Vanilla extract – Flavor booster; pure vanilla is preferred for richer depth.

For the Indulgent Finish
Chocolate almond bars, chopped – Provides sweetness and texture; can substitute with dark chocolate bars or other nut chocolates.
Flaky sea salt – Finishing touch that enhances the overall sweetness; while regular salt works, flaky salt adds a delightful texture.

Step‑by‑Step Instructions for Orange Almond Chocolate Chunk Cookies

Step 1: Prepare Dry Ingredients
In a mixing bowl, whisk together 2 cups of all-purpose flour, 1 teaspoon baking powder, ½ teaspoon baking soda, and ½ teaspoon kosher salt for about 30 seconds. This step ensures that your dry ingredients are evenly distributed and ready to create the perfect structure for your Orange Almond Chocolate Chunk Cookies.

Step 2: Creaming
In a separate large bowl, use a hand mixer to beat together ¾ cup of room-temperature unsalted butter, ½ cup of light-brown sugar, and ½ cup of granulated sugar until the mixture becomes creamy and fluffy. This process usually takes about 2-3 minutes; add in 1 tablespoon of fresh orange zest, allowing that delightful aroma to elevate your cookie batter.

Step 3: Add Eggs and Vanilla
To your creamed butter and sugars, add in 2 large eggs, one at a time, mixing well after each addition to ensure they are fully incorporated. Next, pour in 1 teaspoon of pure vanilla extract, which enhances the flavor of your Orange Almond Chocolate Chunk Cookies, and mix until everything is well blended and smooth.

Step 4: Combine Mixtures
Gradually add the dry ingredient mixture to the wet ingredients while mixing on low speed until just combined. Be gentle; overmixing can toughen your cookies. The dough should be soft but not too sticky, indicating it’s ready for the final ingredients.

Step 5: Incorporate Chocolate
Fold in 1 cup of chopped chocolate almond bars until they are evenly distributed throughout the cookie dough. This step ensures that every bite of your Orange Almond Chocolate Chunk Cookies is packed with a rich chocolatey texture, creating a delightful contrast with the citrus notes.

Step 6: Chill Dough
Shape the dough into 3-ounce balls and place them onto plates. Cover tightly with plastic wrap and refrigerate for at least 1 hour. Chilling the dough helps the flavors to meld and encourages a thicker, more chewy cookie once baked.

Step 7: Preheat Oven
While the dough chills, preheat your oven to 350°F (180°C). This ensures the oven reaches the right temperature for baking, allowing your Orange Almond Chocolate Chunk Cookies to puff up perfectly.

Step 8: Baking
Once chilled, place the dough balls on a parchment-lined baking sheet, spacing them about 2 inches apart. Press them down slightly, sprinkle with flaky sea salt, and bake in the preheated oven for 11 minutes. The cookies should have a golden edge while the centers remain slightly soft.

Step 9: Cooling
Allow the cookies to cool on the baking sheet for about 5 minutes before transferring them to a wire rack to cool completely. This helps them set properly and prevents any crumbling, ensuring your Orange Almond Chocolate Chunk Cookies stay delightfully chewy and intact!

Expert Tips for Orange Almond Chocolate Chunk Cookies

  • Room Temperature Ingredients: Ensure all ingredients, especially butter and eggs, are at room temperature. This helps create a smoother batter, essential for your Orange Almond Chocolate Chunk Cookies.
  • Avoid Overmixing: Once you add the dry ingredients to the wet, mix gently until just combined. Overmixing can lead to tough cookies rather than the tender texture you desire.
  • Chill the Dough: Don’t skip chilling! Allowing the dough to rest in the fridge for an hour helps to develop flavors and prevents spreading, resulting in perfectly chewy cookies.
  • Check Baking Time: Keep an eye on the cookies as they bake; ovens vary. They should be lightly golden around the edges but soft in the center when you take them out—this will keep them chewy!
  • Flaky Sea Salt: A sprinkle of flaky sea salt right before baking enhances sweetness and adds a lovely textural contrast; don’t overlook this finishing touch for your Orange Almond Chocolate Chunk Cookies!

Orange Almond Chocolate Chunk Cookies Variations

Feel free to personalize your Orange Almond Chocolate Chunk Cookies with these exciting twists that will delight your taste buds!

  • Nut-Free: Omit the almonds and substitute with sunflower seeds for a crunchy texture without the nuts. These cookies will still shine with their chocolaty goodness.
  • Double Chocolate: Swap half of the all-purpose flour for unsweetened cocoa powder for decadent, chocolatey cookies. The added richness makes it an indulgent treat!
  • Fruit-Infused: Add dried cranberries or cherries for a fruity twist. Their tartness complements the sweet chocolate and zesty orange beautifully.
  • Spice It Up: Sprinkle in a teaspoon of cinnamon or cardamom for a warm, fragrant kick. This cozy addition transforms the cookie into a comforting dessert.
  • Dairy-Free: Replace the butter with coconut oil and use dairy-free chocolate to enjoy these cookies without dairy. The coconut adds a lovely tropical undertone.
  • Whole Grain: Substitute half of the all-purpose flour for whole wheat flour for a heartier version. Your cookies will still be deliciously chewy yet packed with extra nutrition!
  • Chewy & Crispy: For a chewier texture, add a tad more brown sugar. This will enhance the moisture, giving you that bakery-style experience.
  • Spicy Twist: Add finely chopped candied ginger for a surprising spice that plays wonderfully with the orange and chocolate flavors. It’s a unique addition that will excite your taste buds!

If you’re looking for even more delightful cookie recipes, try our Patriotic Chocolate Chip or these amazing Bake Cookies Cream. Happy baking!

How to Store and Freeze Orange Almond Chocolate Chunk Cookies

Room Temperature: Store cookies in an airtight container at room temperature for up to 1 week. This keeps them soft and chewy, ready for a daily treat!

Fridge: For extra freshness, you can store the cookies in the fridge for up to 2 weeks. Just let them come to room temperature before enjoying!

Freezer: Freeze cookies in an airtight container or freezer bag for up to 3 months. When ready to enjoy, thaw at room temperature or warm them in the oven for a few minutes.

Reheating: To revive these delicious Orange Almond Chocolate Chunk Cookies, reheat in a 350°F (175°C) oven for 5-7 minutes. Enjoy that fresh-baked warmth!

What to Serve with Orange Almond Chocolate Chunk Cookies?

These delightful cookies are perfect for crafting a cozy, inviting meal that wraps you in warmth and sweetness.

  • Rich Coffee: A bold cup of coffee balances the cookies’ sweetness, making each bite feel like a comforting hug.

  • Vanilla Ice Cream: Creamy vanilla ice cream adds a cool contrast and enhances the cookies’ flavors, creating a delightful dessert experience.

  • Fresh Fruit Salad: A refreshing fruit salad brings brightness and acidity to the meal, providing a perfect counterbalance to the rich cookie texture.

  • Sparkling Water: The light effervescence of sparkling water refreshes the palate, making it a delightful complement during a cookie break.

  • Hot Tea: A cup of herbal tea, especially chamomile or ginger, offers a soothing backdrop to the bold flavors of the cookies.

  • Chocolate Mousse: For an indulgent dessert spread, serve with chocolate mousse; the smooth richness pairs beautifully with the cookie’s texture.

  • Decadent Brownies: Pair these cookies with fudgy brownies for a dessert platter that’s guaranteed to impress and satisfy all sweet tooth cravings.

Embrace the inviting aromas and flavors, enjoying the special moments these pairings create.

Make Ahead Options

These Orange Almond Chocolate Chunk Cookies are perfect for meal prep enthusiasts looking to save time on busy days! You can prepare the cookie dough up to 24 hours in advance by shaping it into balls, placing them on a plate, covering tightly with plastic wrap, and refrigerating. This not only allows the flavors to meld but also keeps the dough fresh. If you want to take it a step further, you can freeze the dough balls for up to 3 months; just freeze them on a baking sheet, then transfer to a zip-top bag. When you’re ready to bake, simply add a few extra minutes to the baking time, and enjoy cookies that are just as delicious as if they were freshly made!

Orange Almond Chocolate Chunk Cookies with Sea Salt Recipe FAQs

What is the best way to choose ripe ingredients for this recipe?
Absolutely! When selecting oranges for zest, look for firm, vibrant oranges with smooth skin. The best zest comes from fresh oranges since bottled varieties lack the fragrant oils. For almonds, opt for unsalted, raw almonds for a crunch that complements the cookies beautifully.

How should I store my Orange Almond Chocolate Chunk Cookies?
To keep your cookies fresh, store them in an airtight container at room temperature for up to 1 week. If you want to preserve their texture, place a slice of bread in the container to help retain moisture. This little trick will keep your cookies soft and delicious!

Can I freeze these cookies for later enjoyment?
Absolutely! You can freeze your Orange Almond Chocolate Chunk Cookies for up to 3 months. To do this, let the cookies cool completely, then place them in an airtight container or freezer bag. When you’re ready to indulge, thaw them at room temperature or pop them in a preheated oven at 350°F (175°C) for 5-7 minutes to revive that fresh-baked goodness.

What if my cookies spread too much while baking?
Very good question! If your cookies spread excessively, it could be due to a few factors: Ensure you’re using chilled dough, as it prevents spreading. Also, check that your butter isn’t too soft when mixing, as overly warm butter can cause cookies to flatten. If you face this issue regularly, refrigerating the dough longer may help!

Are there any dietary considerations for these cookies regarding allergies?
Great inquiry! This recipe contains common allergens like wheat, eggs, and dairy. For a gluten-free option, you can substitute all-purpose flour with a gluten-free blend. If you or someone you are serving has nut allergies, you could replace almonds with sunflower seeds or simply omit them, allowing for a delightful, nut-free treat.

Orange Almond Chocolate Chunk Cookies

Indulge in Orange Almond Chocolate Chunk Cookies Bliss

Delight in these Orange Almond Chocolate Chunk Cookies, featuring a unique flavor fusion with zesty orange and crunchy almonds.
Prep Time 30 minutes
Cook Time 11 minutes
Chilling Time 1 hour
Total Time 1 hour 41 minutes
Servings: 12 cookies
Course: Dessert
Cuisine: American
Calories: 150

Ingredients
  

For the Cookie Base
  • 2 cups all-purpose flour Can substitute with gluten-free flour blend.
  • 1 teaspoon baking powder Ensure it’s fresh.
  • 0.5 teaspoon baking soda Helps cookies spread and rise.
  • 0.5 teaspoon kosher salt Use table salt but reduce quantity.
For the Sweetness
  • 0.75 cups unsalted butter, room temperature Cream it well with sugars.
  • 0.5 cups light-brown sugar Can be substituted with coconut sugar.
  • 0.5 cups granulated sugar Helps achieve crispness.
For Flavoring
  • 1 tablespoon orange zest Fresh zest recommended.
  • 2 large eggs Room temperature mixes better.
  • 1 teaspoon vanilla extract Pure vanilla preferred.
For the Indulgent Finish
  • 1 cup chocolate almond bars, chopped Can substitute with dark chocolate bars.
  • to taste flaky sea salt Enhances sweetness.

Equipment

  • Mixing Bowl
  • Hand mixer
  • Baking Sheet
  • Parchment paper

Method
 

Step-by-Step Instructions
  1. Whisk together flour, baking powder, baking soda, and salt in a mixing bowl for 30 seconds.
  2. Cream butter, light-brown sugar, and granulated sugar until fluffy, then add orange zest.
  3. Add eggs, one at a time, mixing well; then mix in vanilla extract.
  4. Gradually mix dry ingredients into wet until just combined.
  5. Fold in chopped chocolate almond bars until evenly distributed.
  6. Shape dough into 3-ounce balls, refrigerate for at least 1 hour.
  7. Preheat your oven to 350°F (180°C) as dough chills.
  8. Place dough balls on a baking sheet, press down slightly, sprinkle with flaky sea salt, and bake for 11 minutes.
  9. Cool on the baking sheet for 5 minutes, then transfer to a wire rack.

Nutrition

Serving: 1cookieCalories: 150kcalCarbohydrates: 22gProtein: 2gFat: 7gSaturated Fat: 4gMonounsaturated Fat: 2gCholesterol: 25mgSodium: 100mgPotassium: 50mgFiber: 1gSugar: 10gVitamin A: 200IUVitamin C: 1mgCalcium: 20mgIron: 0.5mg

Notes

Ensure all ingredients are at room temperature. Chill the dough for the best texture.

Tried this recipe?

Let us know how it was!

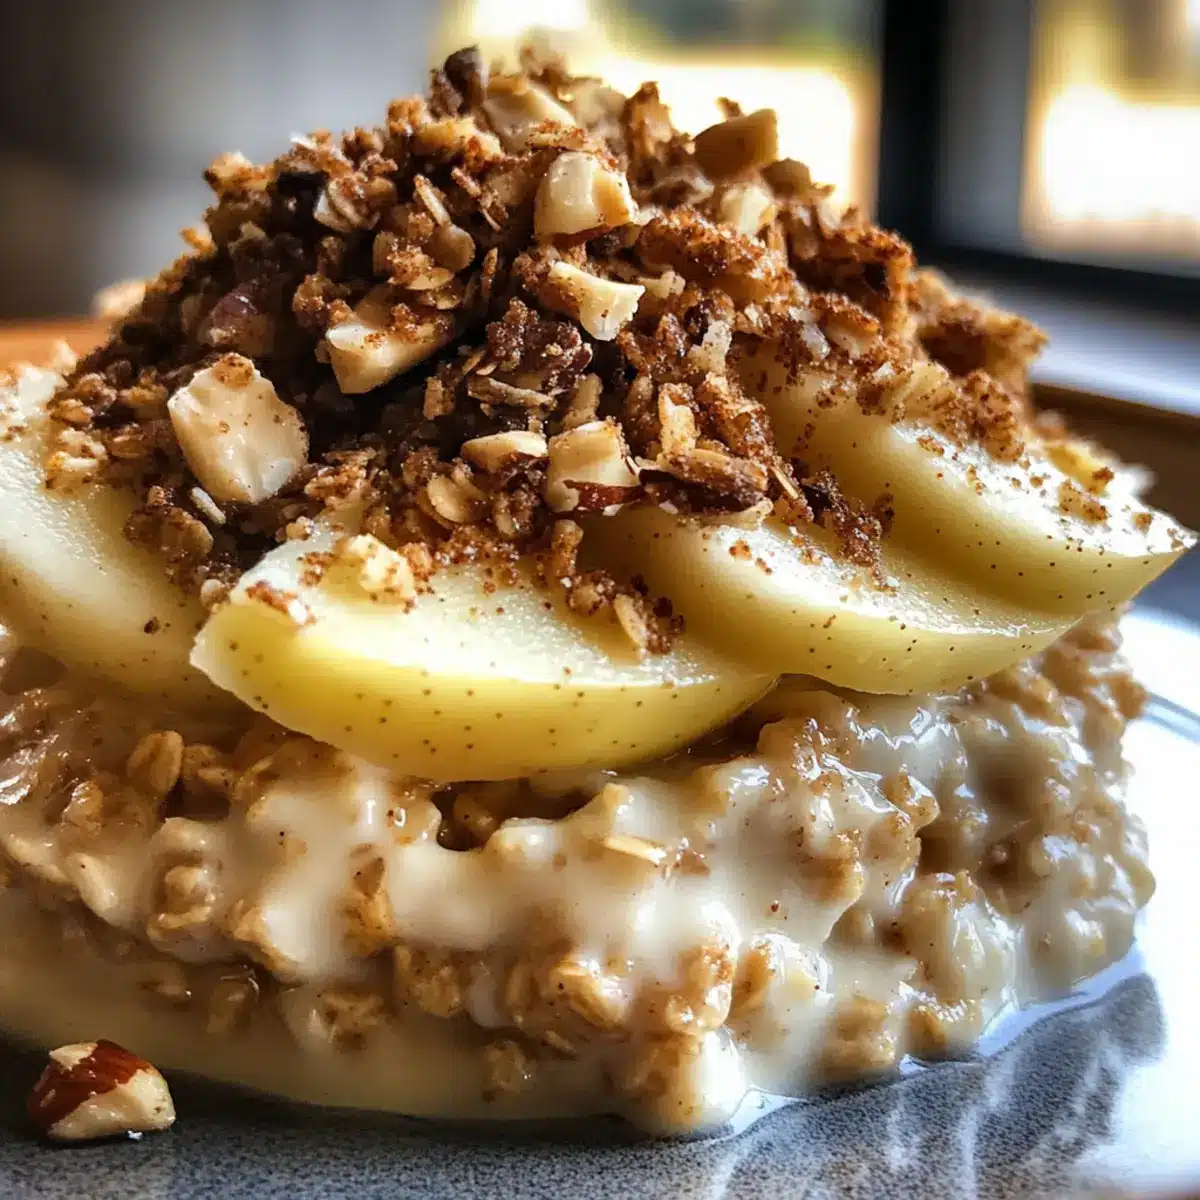
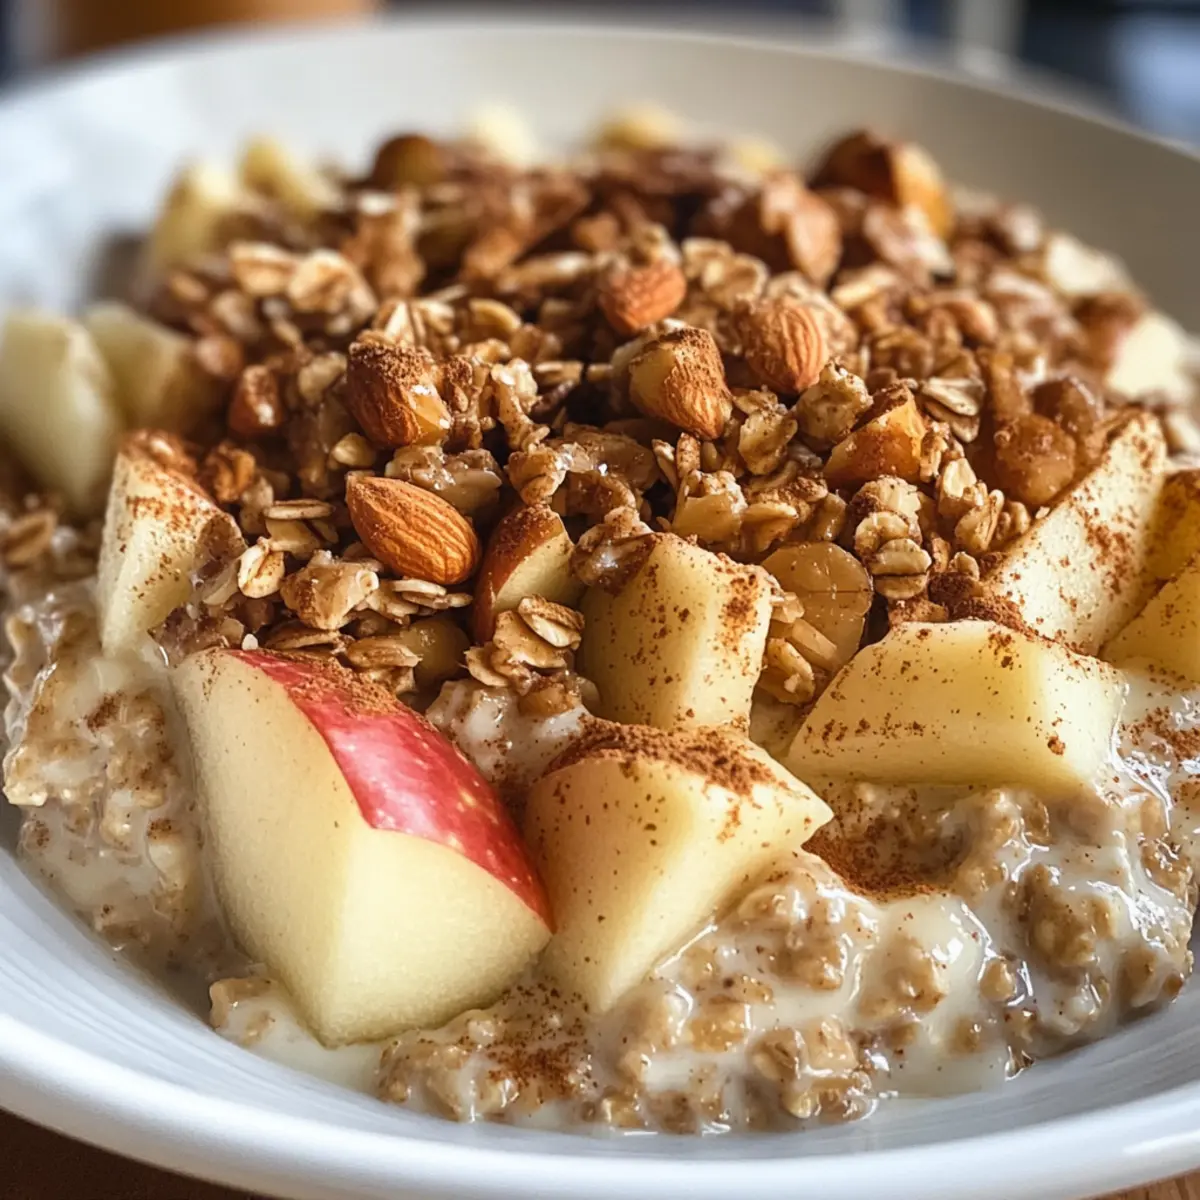
Apple Crumble Overnight Oats for a Cozy Breakfast Boost

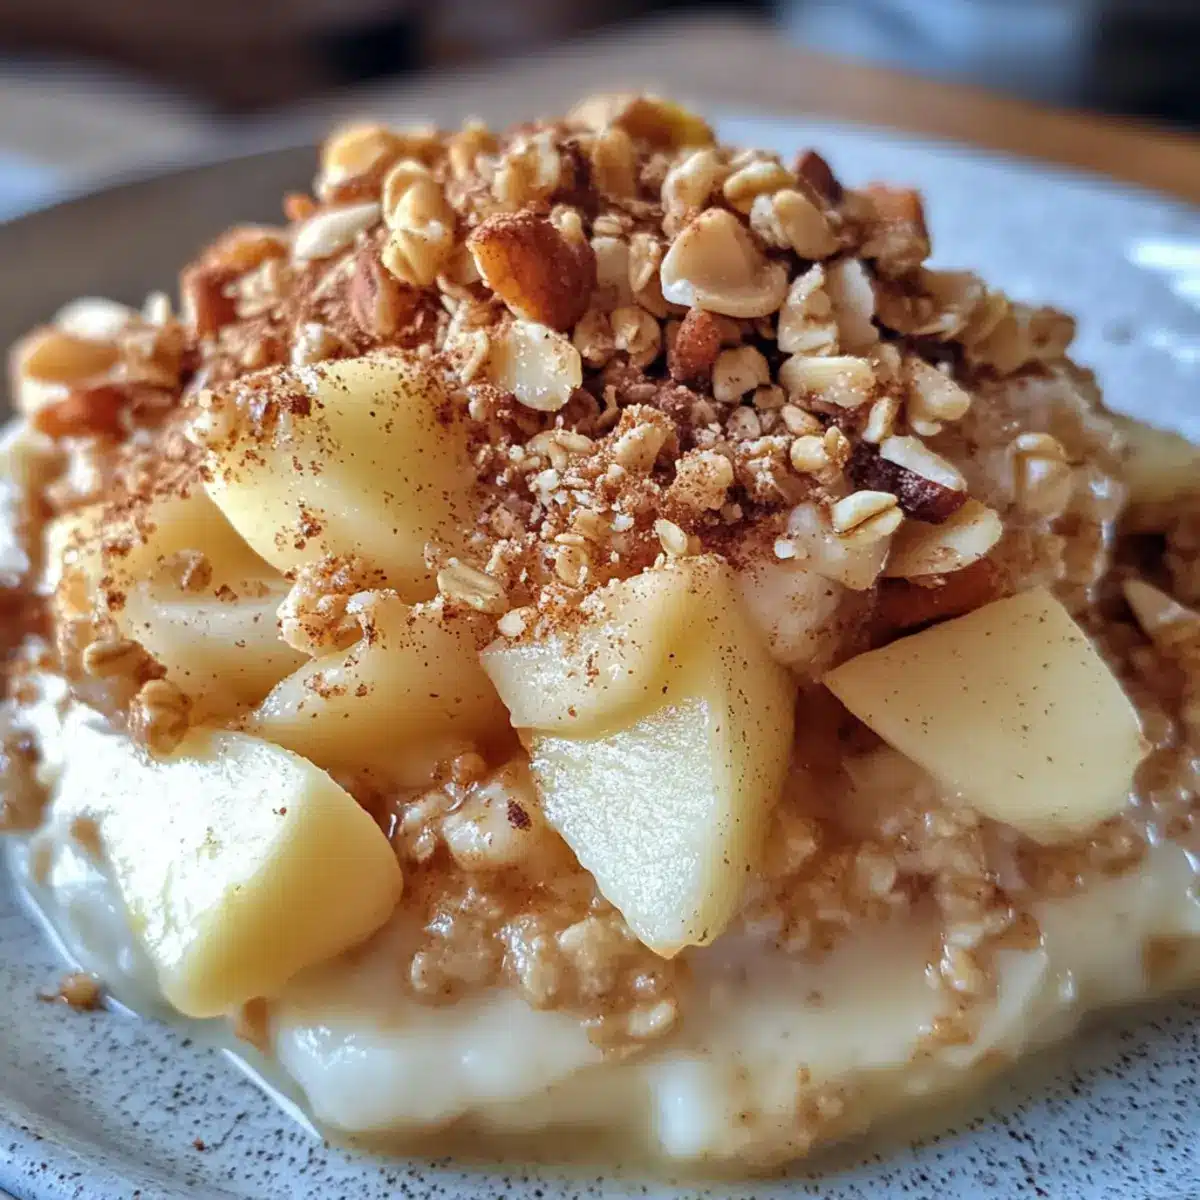
As I opened the fridge early one morning, my heart sank at the thought of another mundane breakfast. But then I spotted my perfectly ripe apples, and inspiration struck! These Apple Crumble Overnight Oats quickly turned my morning blues into anticipation for a cozy, satisfying start to the day. This recipe is a delightful fusion of luscious cinnamon apples and a golden crunch, transforming nourishing ingredients into a breakfast that feels like a warm hug. Whether you’re juggling a busy schedule or looking for a healthy meal prep option, these oats are both quick to assemble and packed with fiber. Ready to elevate your breakfast routine with a treat that’s as hearty as it is wholesome? Let’s dive in!

Why are Apple Crumble Overnight Oats a Must-Try?

Comforting and satisfying, these oats blend the nostalgic flavors of apple crumble with a nutritious twist. Time-saving and easy to prepare, you can whip up a batch in minutes and enjoy them all week. Versatile in toppings, choose from your favorite fruits, nuts, or even a scoop of nut butter for that extra protein kick! This recipe is perfect for those tired of fast food breakfasts. Plus, they’re not just delicious; they’re also high in fiber, making them great for digestive health. Ready to upgrade your morning meal?

Apple Crumble Overnight Oats Ingredients

For the Oats
Old-fashioned rolled oats – They provide the perfect base for texture and are packed with fiber.
Chia seeds – These help thicken the mixture and add an extra fiber boost; you can use flaxseeds as a substitute.

For the Liquid
Almond milk – This adds moisture and creaminess; feel free to swap it for coconut or soy milk.

For the Apples
Chopped apples – Fresh or even baked apples will add delightful sweetness; honeycrisp or granny smith varieties are excellent choices.

For Sweetness
Maple syrup – A natural sweetener that enhances flavor; substitute with agave syrup or omit for less sweetness.

For Flavor
Cinnamon – It brings warmth and a cozy essence to your oats; a pinch of nutmeg can deepen the flavor.

For Topping
Nuts or granola – These add a wonderful crunch; opt for your favorite nuts or a gluten-free granola to keep it nut-free.

With these wholesome ingredients, you’re all set to create a delightful batch of apple crumble overnight oats, a breakfast that feels indulgent yet is nourishing!

Step‑by‑Step Instructions for Apple Crumble Overnight Oats

Step 1: Combine Dry Ingredients
In a mixing bowl, combine 1 cup of old-fashioned rolled oats, 2 tablespoons of chia seeds, and 1 teaspoon of cinnamon. Stir these dry ingredients together until they’re evenly mixed, allowing the warm notes of cinnamon to make an inviting aroma. This blend serves as the hearty base for your Apple Crumble Overnight Oats.

Step 2: Add Liquid and Sweetener
Next, pour in 2 cups of almond milk and add 2 tablespoons of maple syrup. Mix thoroughly until well incorporated, ensuring no dry spots remain. The almond milk adds a creamy texture, while the maple syrup introduces a touch of sweetness that perfectly complements the oats. This mixture is the heart of your overnight oats.

Step 3: Incorporate the Apples
Fold in 1 to 1.5 cups of chopped apples gently into the mixture. You can use fresh or baked apples, making sure they’re evenly distributed. The chunks will soften overnight, infusing each bite of your Apple Crumble Overnight Oats with delightful fruitiness and natural sweetness, setting the stage for a delicious breakfast.

Step 4: Portion and Refrigerate
Using a ladle, portion the mixture into individual jars or airtight containers. This recipe typically makes about 4 servings. Cover them securely and place in the refrigerator for a minimum of 4 hours or overnight. Allowing the oats to soak overnight ensures a creamy, delicious texture, making your breakfast ready for the morning rush.

Step 5: Top and Serve
In the morning, take the jars out of the fridge and give them a good stir. Top each serving with additional chopped apples and a sprinkle of nuts or gluten-free granola for a satisfying crunch. Enjoy your Apple Crumble Overnight Oats cold, or if preferred, warm gently in the microwave for about 30 seconds to bring that cozy comfort to your breakfast experience.

Apple Crumble Overnight Oats Variations

Feel free to get creative with these deliciously adaptable Apple Crumble Overnight Oats!

  • Fruit Swap: Replace apples with pears or peaches for a delightful seasonal twist that brightens up your breakfast.
    Think about the juicy sweetness of ripe peaches; they’ll add a whole new layer of flavor to this cozy dish.

  • Protein Boost: Stir in a scoop of your favorite protein powder or nut butter for an energizing breakfast that’s great after a workout.
    Adding nut butter not only enhances the taste but also gives your oats a creamy texture that feels indulgent.

  • Coconut Flavor: Mix in some shredded coconut for a tropical vibe. This will add sweetness and a chewy texture to your oats.
    Coconut pairs beautifully with cinnamon, taking your flavors to a whole new level—just imagine that sunny burst of flavor!

  • Sweetness Variations: Opt for agave syrup as a substitute for maple syrup to reduce sugar or omit completely for a cardio-friendly treat.
    You can also try incorporating mashed bananas to naturally sweeten your oats while adding creaminess.

  • Nutty Crunch: If you’re not nut-free, add walnuts or pecans for a crunchy topping that’s sure to elevate each bite.
    Toasting the nuts beforehand enhances their flavor, giving you that dreamy, comforting crunch that’ll remind you of a classic crumble.

  • Extra Spice: Sprinkle in some cardamom or ginger along with the cinnamon to add depth and warmth to your breakfast.
    The hint of spice brings an exciting twist that harmonizes beautifully with the sweetness of the apples.

  • Chocolatey Delight: Stir in a tablespoon of cacao powder or mini chocolate chips for a decadent touch that feels like dessert.
    Imagine indulging in chocolatey goodness while still enjoying a nutritious start to your day!

  • Zesty Twist: Add a dash of lemon or orange zest to brighten up the flavors and offer a fresh citrus contrast.
    This tiny adjustment can make the apples really pop and add an unexpected zing that dances on your palate.

Feel inspired yet? Let your imagination run wild as you concoct your own variations of these Apple Crumble Overnight Oats! And for more breakfast inspiration, check out my recipe for Overnight Croissant Breakfast, or try whipping up a refreshing Pineapple Coconut Mojito to complement your meal prep!

How to Store and Freeze Apple Crumble Overnight Oats

Fridge: Store your prepared apple crumble overnight oats in airtight containers for up to 4 days. This keeps them fresh and ready for a quick breakfast option.

Freezer: If you need to extend their life, you can freeze the oats for up to 3 months. Portion them in freezer-safe containers, and thaw overnight in the fridge before enjoying.

Reheating: To enjoy your oats warm, microwave them for about 30 seconds. Stir well and add a splash of almond milk if needed to loosen the consistency.

Customization: Remember to add your favorite toppings like nuts or granola just before serving for the best texture and flavor!

Tips for the Best Apple Crumble Overnight Oats

  • Soak Time: Allow oats to soak for at least 4 hours or overnight for a creamy texture; this is crucial for the best apple crumble overnight oats experience.

  • Sweetness Customization: Adjust the sweetness according to your taste. Remember, toppings like nuts or granola can contribute extra sweetness, so taste as you go!

  • Liquid Ratio: Be careful with your liquid-to-oats ratio; a 2:1 ratio of almond milk to oats ensures a perfectly thick and not runny mixture.

  • Chop with Care: Cut your apples into evenly sized pieces to ensure even distribution and consistent texture throughout your oats.

  • Storage Savvy: These packs can last in the fridge for up to 4 days, making them ideal for meal prep. Just remember to add toppings right before serving for freshness!

What to Serve with Apple Crumble Overnight Oats?

Imagine a cozy brunch table where the warm scents of cinnamon and apples dance in the air, creating a delightful atmosphere for your loved ones to enjoy.

  • Fresh Fruit Salad: A vibrant mix of seasonal fruits like blueberries, strawberries, and oranges adds brightness and enhances the flavors of the oats.
  • Vegan Yogurt Parfait: Layered with dairy-free yogurt, this creamy side complements the texture of your oats, adding a touch of tanginess.
  • Almond Butter Toast: Spread creamy almond butter on whole-grain toast for a crunchy, nutty addition that pairs beautifully with the sweet oats.
  • Savory Avocado Toast: A unique twist on breakfast, creamy avocado on toast provides a satisfying savory contrast to the sweet apple oats.
  • Chai Latte: The warm spices of a homemade chai latte echo the cinnamon in your oats, offering a comforting drink that warms the soul.
  • Nutty Granola Bars: These homemade bars are perfect for a quick on-the-go snack, providing a crunchy texture to balance the creaminess of your oats.
  • Chia Seed Pudding: An additional light and refreshing option, chia pudding offers a simple way to incorporate more fiber and omega-3s.
  • Maple-Infused Iced Coffee: For an added kick, serve a chilled, sweetened iced coffee; it pairs wonderfully with the wholesome breakfast experience of the oats.
  • Dark Chocolate Shavings: A dusting of dark chocolate adds a touch of indulgence, elevating the morning feast to a truly luxurious experience.
  • Coconut Whipped Cream: Light and fluffy coconut cream on top enhances the dessert-like quality of your oats, taking the flavor up a notch.

Make Ahead Options

These Apple Crumble Overnight Oats are perfect for meal prep enthusiasts! You can prepare the entire mixture up to 24 hours in advance, allowing the oats to soak and infuse with flavor overnight. Simply combine the oats, chia seeds, cinnamon, almond milk, maple syrup, and chopped apples, then portion them into jars or airtight containers before refrigerating. To maintain quality, keep toppings like nuts or granola separate until you’re ready to serve; sprinkle them on just before enjoying your breakfast. This way, your oats will remain just as deliciously creamy and satisfying, making busy mornings a breeze!

Apple Crumble Overnight Oats Recipe FAQs

How do I choose the best apples for my overnight oats?
Absolutely! For the best results, look for firm, sweet varieties like Honeycrisp or Granny Smith. These apples hold their shape well and add a wonderful natural sweetness to your Apple Crumble Overnight Oats. Avoid apples with dark spots or overly soft textures, as they may not provide the desired crunch and freshness.

How long can I store Apple Crumble Overnight Oats in the fridge?
You can keep your prepared Apple Crumble Overnight Oats in airtight containers for up to 4 days in the fridge. This makes them a fantastic meal prep option for busy mornings! Just remember to add your toppings like nuts or granola right before serving to keep them crisp and fresh.

Can I freeze Apple Crumble Overnight Oats?
Yes, you can absolutely freeze these oats! Portion your Apple Crumble Overnight Oats into freezer-safe containers to save them for later. They can be stored in the freezer for up to 3 months. When you’re ready to enjoy, just thaw them in the refrigerator overnight, and they’ll be ready for a quick breakfast!

What should I do if my oats are too runny?
If your oats turn out too runny, the good news is you can easily fix this! Start by adding a bit more chia seeds or oats to the mixture, letting it sit for an additional hour to thicken. Always maintain that 2:1 liquid-to-oats ratio for perfect consistency. If you find it too thick after soaking, stir in a splash of almond milk to loosen it right before eating.

Are these overnight oats suitable for people with nut allergies?
Very! To make your Apple Crumble Overnight Oats nut-free, simply swap almond milk for an alternative like oat or soy milk. Additionally, choose toppings like pumpkin seeds or sunflower seeds instead of nuts to keep it delicious and allergy-friendly.

Can I customize the sweetness level in my Apple Crumble Overnight Oats?
Definitely! You can adjust the sweetness to your liking by varying the amount of maple syrup you use. If you prefer a lower sweetness level, feel free to reduce it or omit it altogether, as the natural sweetness from the apples will still shine through. Plus, remember that toppings can also contribute to the overall flavor, so make it your own!

Apple crumble overnight oats

Apple Crumble Overnight Oats for a Cozy Breakfast Boost

Apple crumble overnight oats offer a cozy, nutritious breakfast packed with fiber and flavor, perfect for busy mornings.
Prep Time 15 minutes
Refrigeration Time 4 hours
Total Time 4 hours 15 minutes
Servings: 4 servings
Course: Breakfast
Cuisine: American
Calories: 250

Ingredients
  

For the Oats
  • 1 cup old-fashioned rolled oats Packed with fiber for texture
  • 2 tablespoons chia seeds Helps thicken the mixture
For the Liquid
  • 2 cups almond milk Adds moisture and creaminess
For the Apples
  • 1 to 1.5 chopped apples Use honeycrisp or granny smith varieties
For Sweetness
  • 2 tablespoons maple syrup Natural sweetener
For Flavor
  • 1 teaspoon cinnamon Brings warmth to the oats
For Topping
  • 1 nuts or granola Add for crunch

Equipment

  • Mixing Bowl
  • Airtight containers or jars

Method
 

Step-by-Step Instructions
  1. Combine dry ingredients: In a mixing bowl, combine 1 cup of old-fashioned rolled oats, 2 tablespoons of chia seeds, and 1 teaspoon of cinnamon.
  2. Add liquid and sweetener: Pour in 2 cups of almond milk and add 2 tablespoons of maple syrup, mixing thoroughly.
  3. Incorporate the apples: Fold in 1 to 1.5 cups of chopped apples gently into the mixture.
  4. Portion and refrigerate: Use a ladle to portion the mixture into jars or airtight containers and refrigerate for at least 4 hours or overnight.
  5. Top and serve: In the morning, stir well and top with chopped apples and a sprinkle of nuts or granola.

Nutrition

Serving: 1servingCalories: 250kcalCarbohydrates: 40gProtein: 7gFat: 8gSaturated Fat: 0.5gPolyunsaturated Fat: 2gMonounsaturated Fat: 4gSodium: 150mgPotassium: 300mgFiber: 8gSugar: 10gVitamin A: 10IUVitamin C: 15mgCalcium: 20mgIron: 10mg

Notes

These oats can last in the fridge for up to 4 days. Add toppings right before serving for freshness.

Tried this recipe?

Let us know how it was!

Cheesy Braided Pesto Bread: Your New Comfort Food Delight

As I stood by my kitchen window, the scent of fresh basil wafted through the air, reminding me of sun-drenched afternoons spent in summer gardens. That’s when the idea for Cheesy Braided Pesto Bread came to life! This homemade delight not only elevates your bread game but also allows you to impress guests with minimal effort. The beauty of this recipe lies in its versatility; it’s a vegetarian treat that welcomes various twists, from sun-dried tomato pesto to a medley of cheeses. Plus, the soft, chewy texture is perfect for slathering with butter or enjoying on its own. Ready to dive into making a savory babka that will have everyone coming back for seconds? Let’s get started!

Why is This Bread So Irresistible?

Comforting Taste: The Cheesy Braided Pesto Bread combines fresh basil pesto and melted cheese for an unforgettable flavor experience. Each slice offers a delightful taste sensation that brings warmth to any meal.

Easy to Make: With the stand mixer doing the heavy lifting, this recipe is surprisingly simple for a homemade bread. The hands-on time is minimal, allowing you to relax while the dough rises.

Adaptable Base: Whether you stick to classic basil pesto or try a sun-dried tomato variation, the possibilities are endless. Customize it to fit your taste or seasonal ingredients!

Perfect for Sharing: Impress guests at dinner parties or family gatherings with this eye-catching loaf. It’s ideal for serving alongside your favorite soups or salads, making it a versatile addition to any table.

Crowd-Pleasing Appeal: Whether you’re a seasoned chef or a novice in the kitchen, this savory babka is sure to delight anyone who takes a bite; it’s comforting, delicious, and homemade!

Cheesy Braided Pesto Bread Ingredients

For the Dough
All-Purpose Flour – Provides structure; consider substituting with bread flour for a chewier texture.
Instant Yeast – Acts as a leavening agent for rising; can be replaced with active dry yeast (proof in warm milk first).
Whole Milk – Adds richness and moisture; substitute with 2% or dairy-free milk for a lighter version.
Eggs – Contributes to moisture and dough structure; for an egg-free option, use ¼ cup vegetable oil or a flax egg.
Neutral Oil (canola, grapeseed, avocado) – Adds fat and moisture; any light oil works well as a substitute.
Kosher Salt – Enhances flavor and strengthens gluten; use sea salt if preferred.
Granulated Sugar – Feeds the yeast and balances flavors; can be omitted for a less sweet bread.

For the Pesto
Basil (packed) – The star flavor of the pesto; substitute with spinach or arugula for a different taste.
Garlic – Infuses the pesto with aromatic flavor; can be substituted with garlic powder or omitted for a milder touch.
Pine Nuts (toasted) – Adds richness and nuttiness; walnuts or sunflower seeds are great substitutes.
Extra Virgin Olive Oil – Binds the pesto ingredients together; regular olive oil can work as a substitute.
Parmesan (grated) – Delivers umami flavor to the pesto; nutritional yeast serves as a dairy-free option if needed.

Optional Ingredient
Shredded Mozzarella – Enhances cheesiness if added to the bread; Gruyère or smoked Gouda can create a unique flavor profile.

Step‑by‑Step Instructions for Cheesy Braided Pesto Bread

Step 1: Make Dough
In your stand mixer, combine all-purpose flour and instant yeast. Gradually pour in whole milk along with one egg, neutral oil, kosher salt, and granulated sugar. Using a dough hook, mix on low speed for about 30 minutes until the dough becomes smooth and elastic, pulling away from the sides of the bowl.

Step 2: Prepare Pesto
While the dough rises, grab your food processor. Add garlic and toasted pine nuts and blend until finely chopped. Gradually add the fresh basil and olive oil, processing until you achieve a smooth consistency. Stir in freshly grated Parmesan cheese, ensuring a well-blended, creamy pesto perfect for spreading on your Cheesy Braided Pesto Bread.

Step 3: Kneading Dough
Transfer the dough onto a lightly floured surface, taking care to fold gently to release any air bubbles trapped inside. Allow the dough to rest for 20 minutes, covering it with a clean kitchen towel. This resting period helps relax the gluten, resulting in a softer texture once baked.

Step 4: Roll & Spread
After resting, roll the dough into a 16″x10″ rectangle on your floured surface. Carefully spread the pesto evenly over the surface, leaving about half an inch from the edges. If using, sprinkle shredded mozzarella cheese across the pesto before continuing to the next step for that extra cheesiness in your delectable bread.

Step 5: Shape Bread
Starting from the top edge of the rectangle, tightly roll the dough down to create a log shape. Once rolled, use a sharp knife to cut the log in half lengthwise. Twist each half together to form a braid, creating a beautiful shape that shows off the vibrant pesto within your Cheesy Braided Pesto Bread.

Step 6: Proof
Place the braided bread in a parchment-lined loaf pan and cover it with a kitchen towel. Allow it to rise for 2 to 2.5 hours in a warm environment until the dough has doubled in size. This step is crucial for achieving a light and airy texture in your finished bread.

Step 7: Bake
Preheat your oven to 375°F (190°C). Once hot, brush the top of the braided bread with an egg wash to give it a lovely golden finish. Bake for 45 to 50 minutes, or until the bread is golden brown and sounds hollow when tapped on the bottom. Allow it to cool for an hour before slicing and serving.

Make Ahead Options

These Cheesy Braided Pesto Bread are perfect for busy weeknights! You can prepare the dough up to 24 hours in advance; simply mix and knead, then wrap it tightly in plastic wrap and refrigerate. Additionally, you can make the pesto ahead of time and store it in an airtight container in the fridge for up to 3 days. When you’re ready to bake, allow the dough to come to room temperature before rolling and shaping it, then proceed with proofing and baking as directed. This way, you’ll have fresh, homemade bread with minimal effort, just as delightful as if you made it all in one go!

What to Serve with Cheesy Braided Pesto Bread

Enhance your mealtime experience with delightful accompaniments that beautifully complement this homemade bread.

  • Creamy Tomato Soup: This classic pairing brings a warm, comforting touch, while the acidity balances the rich pesto flavors in the bread.

  • Simple Green Salad: A refreshing mix of crisp greens and a light vinaigrette provides a bright contrast to the bread’s hearty texture, making this a healthful addition.

  • Garlic Butter Shrimp: Tender, succulent shrimp sautéed in garlic butter elevate the meal, as each bite dives into an ocean of savory delight alongside your bread.

  • Mediterranean Dips Platter: Offer hummus, tzatziki, and baba ganoush as delightful spreadable options, perfectly suited for tearing off pieces of your cheesy bread and dipping.

  • Roasted Vegetables: Vibrantly colored seasonal vegetables roasted to perfection add a warm, earthy quality to the meal, enhancing the fresh flavors in the bread.

  • Sparkling White Wine: Pair your bread with a crisp, bubbly white that cuts through the richness, making each bite of cheesy braided pesto a sheer delight.

Savor your Cheesy Braided Pesto Bread with these incredible pairings, ensuring a satisfying meal that inspires warm gatherings and joyful conversations.

Storage Tips for Cheesy Braided Pesto Bread

Room Temperature: Store cooled Cheesy Braided Pesto Bread wrapped in plastic or in an airtight container for up to 3 days to maintain its freshness and softness.

Fridge: If your kitchen is warm, refrigerate the bread for about 5 days. Wrap it tightly to prevent it from drying out, ensuring you’ll enjoy each slice.

Freezer: For longer storage, freeze your braided bread for up to 3 months. Slice it before freezing for easier thawing, and wrap each piece tightly in plastic wrap.

Reheating: To enjoy leftover bread, let it thaw at room temperature before reheating in the oven at 350°F (175°C) for about 10 minutes to restore its heavenly crust and warmth.

Expert Tips for Cheesy Braided Pesto Bread

  • Kneading Technique: Mix on low for 30 minutes. This helps develop gluten for a tender crumb, essential in your Cheesy Braided Pesto Bread.

  • Resting Time: Don’t rush the resting phase. Allow the dough to rest for 20 minutes to relax gluten and ensure a softer bread.

  • Flavor Variations: Experiment with different pestos, like sun-dried tomato or arugula, adjusting texture as needed for your intended taste in the bread.

  • Baking Temperature: Ensure your oven is fully preheated to 375°F (190°C) for consistent baking; this helps achieve that perfect golden crust.

  • Check for Doneness: Tap the bottom of the loaf after baking; it should sound hollow when fully cooked, indicating your Cheesy Braided Pesto Bread is ready to shine!

Cheesy Braided Pesto Bread Variations

Feel free to let your imagination run wild and customize this bread to suit your taste!

  • Sun-Dried Tomato Pesto: Swap out the traditional pesto for sun-dried tomato pesto to add a rich, savory twist. The depth of flavor will transform your bread into a delightful and unexpected treat.

  • Herb Mix: Add fresh herbs like thyme or oregano to the dough for an aromatic touch. This simple addition will elevate your bread’s flavor profile, making every bite an herbaceous delight.

  • Cheese Medley: Try replacing mozzarella with a blend of cheeses such as Gruyère, provolone, or smoked Gouda. Each option provides a unique flavor that complements the pesto beautifully. You could even consider adding in some feta for a tangy surprise.

  • Add Some Heat: Spice things up by mixing in red pepper flakes or chopped jalapeños into the pesto. The added heat will provide a delightful contrast to the creamy richness of the cheese.

  • Nutty Alternative: Instead of pine nuts, use toasted walnuts or pumpkin seeds to create a nutty flavor that pairs well with the fresh pesto. It’s a fantastic way to add texture and a different taste dimension.

  • Sweet Twist: For a subtly sweet version, include a drizzle of honey in the dough. It balances beautifully with the savory elements while providing a unique sweetness that contrasts nicely with the cheese.

  • Easier Assembly: For a quick twist, layer the pesto and cheese directly in the loaf pan, skip the braiding for a rustic look. This will save time while still delivering delicious flavors!

  • Cheesy French Onion: If you’re feeling adventurous, try scattering some caramelized onions and a bit of thyme with your cheese for a delightful surprise inside!

Cheesy Braided Pesto Bread Recipe FAQs

How do I select the right pesto?
Absolutely! The key to a delicious Cheesy Braided Pesto Bread is using fresh, high-quality pesto. Look for vibrant green color and a fresh aroma. If you’re making your own, opt for basil that’s dark green and fragrant, avoiding any leaves with yellowing or dark spots. For alternative options, sun-dried tomato pesto can also provide a unique flavor twist.

How should I store leftovers?
You can store your cooled bread wrapped in plastic or in an airtight container at room temperature for up to 3 days. If your kitchen is warm, feel free to refrigerate it for up to 5 days, making sure to wrap it tightly to prevent drying out.

Can I freeze Cheesy Braided Pesto Bread?
Very! To freeze, slice the bread before wrapping each piece tightly in plastic wrap. Store the wrapped slices in a freezer-safe bag or container and enjoy them for up to 3 months. When you’re ready to savor it again, simply thaw at room temperature and reheat in a 350°F (175°C) oven for about 10 minutes.

What if my dough is too sticky?
No worries! If your dough feels sticky while kneading, sprinkle in a little more flour, but be cautious not to overdo it as that can lead to a dry loaf. Sometimes, allowing it to rest for a brief period can also help the gluten relax, making it easier to handle.

Is this recipe suitable for those with dietary restrictions?
Of course! This Cheesy Braided Pesto Bread is vegetarian. For those mindful of gluten, consider using a gluten-free flour blend that includes xanthan gum. If you’re accommodating dairy-free diets, substitute cheese with nutritional yeast and use dairy-free milk for a delightful alternative!

Cheesy Braided Pesto Bread

Cheesy Braided Pesto Bread: Your New Comfort Food Delight

Cheesy Braided Pesto Bread is a delightful vegetarian treat combining fresh basil pesto and melted cheese for unforgettable flavor.
Prep Time 20 minutes
Cook Time 50 minutes
Resting Time 20 minutes
Total Time 1 hour 30 minutes
Servings: 12 slices
Course: Appetizer
Cuisine: Italian
Calories: 250

Ingredients
  

For the Dough
  • 4 cups All-Purpose Flour Consider substituting with bread flour for a chewier texture.
  • 2 teaspoons Instant Yeast Can be replaced with active dry yeast (proof in warm milk first).
  • 1 cup Whole Milk Substitute with 2% or dairy-free milk for a lighter version.
  • 1 large Eggs For an egg-free option, use ¼ cup vegetable oil or a flax egg.
  • 2 tablespoons Neutral Oil Canola, grapeseed, or avocado oil recommended.
  • 1 teaspoon Kosher Salt Use sea salt if preferred.
  • 1 tablespoon Granulated Sugar Can be omitted for a less sweet bread.
For the Pesto
  • 2 cups Basil Packed.
  • 2 cloves Garlic Can be substituted with garlic powder or omitted.
  • ¼ cup Pine Nuts Toasted.
  • ½ cup Extra Virgin Olive Oil Regular olive oil can work as a substitute.
  • ½ cup Parmesan Grated. Nutritional yeast serves as a dairy-free option.
Optional Ingredient
  • 1 cup Shredded Mozzarella Enhances cheesiness if added.

Equipment

  • Stand Mixer
  • Food processor
  • Loaf Pan

Method
 

Instructions
  1. In your stand mixer, combine all-purpose flour and instant yeast. Gradually pour in whole milk along with one egg, neutral oil, kosher salt, and granulated sugar. Using a dough hook, mix on low speed for about 30 minutes until the dough becomes smooth and elastic, pulling away from the sides of the bowl.
  2. While the dough rises, grab your food processor. Add garlic and toasted pine nuts and blend until finely chopped. Gradually add the fresh basil and olive oil, processing until you achieve a smooth consistency. Stir in freshly grated Parmesan cheese.
  3. Transfer the dough onto a lightly floured surface, folding gently to release any air bubbles. Allow the dough to rest for 20 minutes, covering it with a kitchen towel.
  4. After resting, roll the dough into a 16"x10" rectangle on your floured surface. Carefully spread the pesto evenly over the surface.
  5. Starting from the top edge of the rectangle, tightly roll the dough down to create a log shape. Cut the log in half lengthwise and twist each half together to form a braid.
  6. Place the braided bread in a parchment-lined loaf pan and cover with a kitchen towel. Allow it to rise for 2 to 2.5 hours until the dough has doubled in size.
  7. Preheat your oven to 375°F (190°C). Brush the top of the braided bread with an egg wash and bake for 45 to 50 minutes, or until golden brown and sounds hollow when tapped.

Nutrition

Serving: 1sliceCalories: 250kcalCarbohydrates: 32gProtein: 8gFat: 10gSaturated Fat: 3gPolyunsaturated Fat: 1gMonounsaturated Fat: 5gCholesterol: 35mgSodium: 300mgPotassium: 150mgFiber: 2gSugar: 1gVitamin A: 400IUVitamin C: 5mgCalcium: 100mgIron: 1.5mg

Notes

Store cooled bread wrapped in plastic or airtight container for up to 3 days. Refrigerate for about 5 days in warm kitchens. Freeze for up to 3 months, slice before freezing for easier thawing.

Tried this recipe?

Let us know how it was!

Irresistibly Creamy Mini No-Bake Orange Cheesecakes

As the summer sun lingers longer in the sky, I find myself drawn to lighter, refreshing desserts that evoke the feeling of a tropical escape. Enter my No-Bake Mini Orange Cheesecakes, a delightful treat that’s not only vegan and egg-free but also demands minimal time in the kitchen. The base is a buttery coconut biscuit crust that provides a satisfying crunch, while the creamy orange filling adds a vibrant zest to every bite. These desserts are a fantastic crowd-pleaser, perfect for entertaining or simply indulging in a quiet afternoon at home. Plus, they’re incredibly easy to whip up, leaving you more time to enjoy the sunshine. Ready to bring a taste of summer into your kitchen? Let’s dive into this refreshing recipe!

Why Are These Cheesecakes So Irresistible?

Creamy Delight: Each bite of these mini no-bake orange cheesecakes offers a smooth, creamy texture that melts in your mouth, perfectly complementing the crunchy coconut biscuit base.

Vibrant Flavor: The fresh orange filling bursts with zesty citrus notes, making each serving a refreshing escape, reminiscent of tropical paradise!

Convenient and Quick: With minimal prep time and no baking required, you’ll have a scrumptious dessert ready in no time, ideal for those fun summer get-togethers.

Crowd-Pleasing Appeal: These cheesecakes are not only vegan and egg-free, but they also satisfy anyone craving dessert, making them suitable for gatherings or family nights—everyone loves them!

Versatile Options: Feel free to customize your cheesecakes; try using lemon or lime juice for a new twist, or explore our recipes for delightful alternatives like Bake Cookies Cream to enhance your dessert repertoire!

Mini No-Bake Orange Cheesecakes Ingredients

  • For the Crust
    Dairy-Free Butter (40g) – Provides fat and richness for the crust; substitute with any vegan butter.
    Plain Biscuits (100g) – Acts as the base for the cheesecake; can use vegan digestives.
    Desiccated Coconut (20g) – Adds texture and nutty flavor to the crust; optional for those avoiding coconut.

  • For the Orange Curd
    Corn Flour (3 tablespoons) – Thickens the orange curd; no substitution; essential for texture.
    Dairy-Free Butter (100g) – Used for the curd to provide creaminess; substitute with margarine if needed.
    Caster Sugar (100g) – Sweetens and balances the tartness of the orange; can use coconut sugar for a different flavor profile.
    Orange Juice (170ml) – Base flavor for curd, contributing citrus notes; freshly squeezed is recommended.
    Zest of 2 Large Oranges – Enhances the orange flavor; no substitutions.
    Vegan Condensed Milk (100g) – Adds creaminess and sweetness; can substitute with coconut cream and extra sugar.
    Orange Food Gel (drop) – Optional coloring to enhance appearance; omit if desired.

These Mini No-Bake Orange Cheesecakes are not just delicious; they’re also a fun and vibrant way to brighten up your dessert table!

Step‑by‑Step Instructions for Mini No-Bake Orange Cheesecakes

Step 1: Prepare the Base
Begin by melting 40g of dairy-free butter in a small saucepan over low heat. In a mixing bowl, combine the melted butter with 100g of crushed plain biscuits and 20g of desiccated coconut, stirring until thoroughly mixed. Firmly press this blend into the bottoms of your serving cups, creating an even layer. Place the cups in the fridge to chill for at least 30 minutes, allowing the base to set.

Step 2: Make the Orange Curd
In a small bowl, mix 3 tablespoons of corn flour with a few tablespoons of water until smooth, forming a paste. Next, in a saucepan over medium heat, melt 100g of dairy-free butter. Stir in 100g of caster sugar, 170ml of orange juice, and the zest of two large oranges, mixing until fully combined. Gradually add the corn flour paste, continuously stirring until the mixture thickens into a curd consistency, which should take about 5-7 minutes. Transfer the curd to a bowl and let it cool completely.

Step 3: Prepare Cheesecake Filling
While the orange curd cools, soak 100g of cashews in water for at least 4 hours or overnight for the best blending results. Once ready, drain and rinse the cashews, then blend them together with 100g of coconut cream in a food processor until completely smooth. After achieving a creamy texture, mix in the cooled orange curd and adjust sweetness if desired, ensuring the cheesecake filling is well-combined and fluffy.

Step 4: Assemble the Cheesecakes
Retrieve the chilled cups from the fridge and carefully spoon the creamy cheesecake filling over the firm biscuit base in each cup, filling them generously but leaving a little space for toppings. Next, layer additional orange curd on top for extra flavor and vibrant color. You can also add any decorations, such as orange slices or zest, to enhance the presentation before proceeding.

Step 5: Chill
Once assembled, place the mini no-bake orange cheesecakes back in the refrigerator. Allow them to chill for at least 4 hours, or overnight, so they can firm up and the flavors meld beautifully. When ready to serve, take them out of the fridge and let them sit for a few minutes at room temperature for easier serving. Enjoy the refreshing taste of your delightful homemade treats!

Mini No-Bake Orange Cheesecakes Variations

Feel free to get creative with these cheesecakes and indulge in some delightful twists!

  • Citrus Swap: Substitute lemon or lime juice for an exciting change in flavor. The bright acidity adds a refreshing zing that perfectly complements the creamy filling.

  • Gluten-Free Crust: Swap out the plain biscuits for almond flour to create a gluten-free base. This will give your mini cheesecakes a nutty flavor and a delightfully different texture.

  • Nutty Base: Replace desiccated coconut with crushed nuts for a crunchy alternative. Walnuts or almonds give an irresistible toasty flavor that pairs beautifully with the citrus.

  • Berry Bliss: Top the cheesecakes with a layer of berry compote instead of orange curd. Strawberries or blueberries will create a luscious, sweet-tart topping—perfect for summer!

  • Chocolate Indulgence: Drizzle melted dark vegan chocolate over the tops before serving. This indulgent twist adds richness and a touch of sophistication to your cheesecakes.

  • Chili Heat: Mix a pinch of cayenne pepper or chili powder into the filling for a surprising kick! The heat will contrast wonderfully with the sweetness and creaminess of the cheesecakes.

  • Crunchy Granola Topping: Add a sprinkle of granola on top for an extra crunch. This fun texture contrast will elevate every bite—just like in your favorite no-bake desserts, such as Strawberry Icebox Pie.

  • Vegan Cream Cheese: For an even creamier filling, replace the coconut cream with vegan cream cheese. It lends a rich texture that deepens the flavor experience!

With these variations, you’ll have endless ways to enjoy your mini no-bake orange cheesecakes. Happy customizing!

Expert Tips for Mini No-Bake Orange Cheesecakes

  • Soak Cashews: Soak the cashew nuts overnight for the best texture. This step ensures a creamy filling that blends smoothly with the other ingredients.

  • Chill Well: Allow the cheesecakes to chill for at least 4 hours, or overnight, to ensure they set properly. This helps achieve the ideal firm texture for the mini no-bake orange cheesecakes.

  • Fresh Ingredients: Use freshly squeezed orange juice and zest for the most vibrant flavor. This ensures that the citrus notes shine through in your dessert.

  • Butter Alternatives: If you can’t find dairy-free butter, margarine is a suitable substitute for both the crust and curd. Just ensure it’s vegan-friendly!

  • Don’t Rush Assembly: Take your time when layering the filling and curd—this will ensure attractive and flavorful mini cheesecakes, enhancing their visual appeal when served.

Storage Tips for Mini No-Bake Orange Cheesecakes

Fridge: Keep mini no-bake orange cheesecakes in an airtight container in the fridge for up to 3-5 days. This will preserve their creamy texture and vibrant flavor.

Freezer: If you want to store them longer, you can freeze the cheesecakes for up to 2 months. Wrap each one tightly in plastic wrap and place in a freezer-safe container.

Thawing: To enjoy frozen mini cheesecakes, transfer them to the fridge to thaw overnight. This slow method helps maintain their smooth consistency.

Reheating: There’s no need to reheat these cheesecakes, as they are best served chilled. Allow them to reach room temperature for a few minutes before serving for optimal flavor!

What to Serve with No-Bake Mini Orange Cheesecakes

Elevate your dessert experience with delightful pairings that enhance the refreshing flavors of these creamy treats.

  • Fresh Berries: Juicy strawberries or blueberries provide a sweet and tart contrast that complements the citrusy cheesecakes beautifully.
  • Coconut Whipped Cream: Light and airy, this dairy-free cream adds a luscious touch, perfect for dolloping on top of your cheesecakes.
  • Mint Leaves: A sprinkle of fresh mint adds a burst of color and a cool flavor that brightens each bite.
  • Pineapple Sorbet: This tropical treat adds a refreshing twist, making for a delightful palate cleanser between spoonfuls.
  • Sparkling Water with Lime: The fizz and citrus notes in this drink enhance the tropical feel while keeping things light and refreshing.
  • Dark Chocolate Drizzle: A drizzle of melted dark chocolate offers a creamy contrast to the bright orange flavor, adding a hint of indulgence.
  • Citrus Salad: A mix of oranges, grapefruits, and pomegranate provides a colorful, juicy side that mirrors the flavors in the cheesecakes.
  • Almond Biscotti: Crunchy and nutty, these cookies provide a delightful texture that pairs well with the creamy consistency of the cheesecakes.
  • Iced Tea with Mint: A refreshing, lightly sweetened iced tea elevates the dessert experience and complements its bright flavor profile.

Make Ahead Options

These Mini No-Bake Orange Cheesecakes are perfect for busy home cooks looking to save time while still enjoying a refreshing treat! You can prepare the crust and orange curd up to 24 hours in advance. Simply follow the first two steps of the recipe, then refrigerate them separately in airtight containers to maintain their freshness. The cheesecake filling can also be made and stored in the fridge for up to 3 days. When you’re ready to serve, fill each cup with the cheesecake mixture, add any desired toppings, and chill for a few hours to achieve that perfect texture. These make-ahead options ensure that you’ll have delicious, hassle-free desserts ready to impress at a moment’s notice!

Mini No-Bake Orange Cheesecakes Recipe FAQs

How do I choose the best oranges for the orange curd?
Absolutely! When selecting oranges, look for ones that are firm and heavy for their size, with a bright, vibrant color. Avoid any fruits with dark spots or blemishes, as they can indicate overripeness. If you can, opt for organic oranges since they’ll yield a better flavor for your curd.

What’s the best way to store mini no-bake orange cheesecakes?
I recommend keeping your mini no-bake orange cheesecakes in an airtight container in the fridge to maintain their creamy texture. They will be best enjoyed within 3-5 days. If you’re making them in advance, they also freeze well!

Can I freeze these cheesecakes for longer storage?
Yes, you can freeze your mini no-bake orange cheesecakes for up to 2 months! Simply wrap each cheesecake tightly in plastic wrap and place them in a freezer-safe container. To thaw, transfer them to the fridge overnight—this slow thawing helps maintain their texture.

What should I do if my orange curd is too runny?
If your orange curd is runny, don’t worry! You can thicken it by cooking it a bit longer on low heat while stirring continuously. If it still doesn’t set, mix a little more corn flour with some cold water to create a slurry, then add it to the curd and cook until thickened. This should help achieve the perfect consistency.

Are these cheesecakes suitable for people with allergies?
Yes! These mini no-bake orange cheesecakes are vegan and free of dairy and eggs, making them suitable for many dietary restrictions. However, always check for specific allergies with any ingredients used, especially when substituting items like vegan butter or condensed milk, which can contain various additives.

Mini No-Bake Orange Cheesecakes

Irresistibly Creamy Mini No-Bake Orange Cheesecakes

These Mini No-Bake Orange Cheesecakes are a refreshing dessert that combines creamy orange filling with a crunchy coconut biscuit base.
Prep Time 15 minutes
Chilling Time 4 hours
Total Time 4 hours 15 minutes
Servings: 6 cheesecakes
Course: Dessert
Cuisine: Vegan
Calories: 250

Ingredients
  

Crust
  • 40 g Dairy-Free Butter Provides fat and richness; substitute with any vegan butter.
  • 100 g Plain Biscuits Can use vegan digestives.
  • 20 g Desiccated Coconut Optional for those avoiding coconut.
Orange Curd
  • 3 tablespoons Corn Flour Thickens the orange curd; no substitution.
  • 100 g Dairy-Free Butter Substitute with margarine if needed.
  • 100 g Caster Sugar Can use coconut sugar for a different flavor profile.
  • 170 ml Orange Juice Freshly squeezed is recommended.
  • 2 large Oranges Zest enhances the flavor; no substitutions.
  • 100 g Vegan Condensed Milk Can substitute with coconut cream and extra sugar.
  • drop Orange Food Gel Optional coloring; omit if desired.

Equipment

  • Mixing Bowl
  • Saucepan
  • Food processor
  • Serving Cups

Method
 

Preparation
  1. Melt 40g of dairy-free butter in a saucepan. Combine with 100g crushed plain biscuits and 20g desiccated coconut. Press into serving cups and chill for 30 minutes.
  2. Mix 3 tablespoons of corn flour with water to form a paste. In a saucepan, melt 100g dairy-free butter. Stir in 100g caster sugar, 170ml orange juice, and zest. Add the corn flour paste gradually, stirring until thickened.
  3. Soak 100g cashews in water for at least 4 hours. Blend with 100g coconut cream until smooth. Mix in cooled orange curd until well combined.
  4. Spoon cheesecake filling over the biscuit base in chilled cups. Layer additional orange curd on top, and add decorations like orange slices before serving.
  5. Chill assembled cheesecakes in the refrigerator for at least 4 hours before serving.

Nutrition

Serving: 1cheesecakeCalories: 250kcalCarbohydrates: 30gProtein: 3gFat: 14gSaturated Fat: 8gPolyunsaturated Fat: 1gMonounsaturated Fat: 4gSodium: 200mgPotassium: 100mgFiber: 2gSugar: 15gVitamin A: 500IUVitamin C: 30mgCalcium: 20mgIron: 1mg

Notes

Use fresh ingredients for the best flavor. Make sure to soak cashews overnight and chill cheesecakes properly to achieve ideal texture.

Tried this recipe?

Let us know how it was!

Cheesy Kielbasa Skillet: Comforting Flavor in Every Bite

“Wait, what’s for dinner?” A common question that spurs a bit of panic in many households. Luckily, I have just the answer that will make weeknight meals a breeze: Cheesy Kielbasa Skillet. This dish brilliantly marries smoky kielbasa, creamy cheese, and gluten-free pasta, creating a cozy bowl of goodness that’s sure to please the entire family. One of the best parts? It comes together in no time, making it the perfect antidote to the fast food dilemma. Plus, with vibrant green peas and red pepper pieces, this meal sneaks in some veggies without the fuss of traditional cooking. Curious to know how to make this quick and hearty dinner that fits your busy lifestyle? Let’s get cooking!

Why is this Cheesy Kielbasa Skillet special?

Quick and Easy: This recipe is designed for busy weeknights, allowing you to prepare a hearty, flavorful meal in under 30 minutes.

Creamy Comfort: The combination of melted cheese and silky cream cheese creates a rich, creamy sauce that coats every bite.

Kid-Friendly: Even picky eaters will rejoice at the sight of this dish, thanks to the delicious flavors of kielbasa and colorful veggies. Consider pairing it with a side of Hearty Potato Kielbasa for a complete meal!

Gluten-Free Goodness: Using gluten-free spiral pasta means everyone can enjoy this comforting dish without worry.

Versatile Vegetable Additions: Whether you’re looking to sneak in more greens or switch things up, adding sautéed spinach or broccoli is a breeze!

Make this Cheesy Kielbasa Skillet for a crowd-pleasing dinner that the whole family will love!

Cheesy Kielbasa Skillet Ingredients

• Gather these simple ingredients for a delightful, easy weeknight dinner!

For the Pasta

  • Gluten-Free Spiral Pasta – Serves as the hearty base of the dish; feel free to substitute with any gluten-free pasta you prefer.

For the Kielbasa

  • Kielbasa (1 lb., uncooked) – Adds savory protein that enhances the meal’s flavors; if using pre-cooked kielbasa, brown it for an extra flavor boost.

For the Veggies

  • Green Peas (½ cup, frozen) – Offers sweetness and color; no need for substitutions, but fresh peas can work too!
  • Red Pepper Strips (¼ cup) – Enhances both flavor and texture; substitute with any mild bell pepper for a similar taste.

For the Cheese Sauce

  • Butter (¼ cup) – Adds richness and depth to the sauce.
  • Cream Cheese (¼ lb.) – Forms the creamy base; can be swapped with neufchâtel cheese for a lighter option.
  • Parmesan Cheese (¼ cup) – Introduces savory depth; can replace with Pecorino Romano for a distinct flavor.
  • Milk (½-1 cup) – Thins out the cheese sauce for the desired consistency; any type of milk (dairy or plant-based) works well.
  • Shredded Cheddar & Monterey Jack Cheese (2 cups) – Key to achieving that cheesy goodness; use a mix of your favorite cheeses for variation.

For Seasoning

  • Salt & Pepper – Essential for enhancing flavor to taste.

Whip up this Cheesy Kielbasa Skillet for a delicious and comforting dinner your family will love!

Step‑by‑Step Instructions for Cheesy Kielbasa Skillet

Step 1: Cook Pasta
Begin by bringing a large pot of salted water to a rolling boil over high heat. Once boiling, add 8 ounces of gluten-free spiral pasta and cook for 8–10 minutes until al dente. In the final minute of cooking, toss in ½ cup of frozen green peas to cook through. Drain the pasta and peas together in a colander, shaking off any excess water.

Step 2: Cook Kielbasa
While the pasta cooks, heat a large skillet over medium heat. Add 1 pound of uncooked kielbasa, cut into slices, to the skillet. Sauté for about 5–7 minutes, stirring occasionally until the kielbasa is nicely browned and fully cooked through. Once done, remove the kielbasa from the skillet and keep it warm on a plate.

Step 3: Sauté Peppers
In the same skillet, keep the flavorful drippings, and turn the heat to medium-low. Add ¼ cup of red pepper strips and sauté for about 3–4 minutes, stirring often until they are tender but still vibrant. Remove them from the skillet and place them on the plate with the kielbasa to keep warm.

Step 4: Make Cheese Sauce
In a medium saucepan, melt ¼ cup of butter over low heat. Stir in ¼ pound of cream cheese and ¼ cup of parmesan cheese until the mixture is smooth and creamy, about 2–3 minutes. Gradually stir in 2 cups of shredded cheddar and Monterey Jack cheese, adding ½ to 1 cup of milk to reach your desired sauce consistency, mixing until everything is melted and combined.

Step 5: Combine Ingredients
Return the cooked pasta and peas to the skillet, then add the warm kielbasa and sautéed red peppers. Pour the creamy cheese sauce over the mixture, stirring gently to coat everything evenly and ensuring every bite is luscious with flavor. Cook over low heat for an additional minute to warm through, then serve immediately for the best cheesy experience.

Expert Tips for Cheesy Kielbasa Skillet

  • Pasta Perfection: Always cook your gluten-free pasta just until al dente; it will continue to soften in the sauce, ensuring a perfect texture.

  • Kielbasa Choice: Opt for high-quality kielbasa for the best flavor, and don’t be afraid to experiment with different varieties like turkey or chicken for a lighter version.

  • Creamy Consistency: If your cheese sauce seems too thick, add milk gradually while stirring on low heat until you reach your desired creamy consistency.

  • Vegetable Variations: Feel free to incorporate additional veggies like steamed broccoli or fresh spinach, but remember to sauté them briefly before mixing to retain their vibrant color and crunch.

  • Storage Smart: Store any leftovers in an airtight container in the refrigerator for up to 3 days; reheat gently with a splash of milk for moisture.

  • Cheese Joy: Get creative with cheese! Mixing different kinds can elevate your Cheesy Kielbasa Skillet, providing unique flavors that excite the taste buds.

Cheesy Kielbasa Skillet Variations

Feel free to let your creativity shine by customizing this dish to suit your taste buds!

  • Sausage Swap: Try chicken or turkey sausage for a lighter, healthier alternative, while still keeping that savory essence.
    By mixing it up, you not only lighten the dish but also bring new flavors into the mix that your family will love.

  • Veggie Boost: Add broccoli or spinach for enhanced nutrition and vibrant color that makes the dish even more appealing.
    Incorporating more veggies not only adds to the health factor but also provides that irresistible crunch in every bite!

  • Spicy Kick: For a heat boost, toss in diced jalapeños or a sprinkle of crushed red pepper flakes to the cheese sauce.
    Turning up the heat will certainly excite those adventurous eaters looking for a little thrilling flavor!

  • Cheese Variation: Use different cheese combinations like gouda or Swiss to create unique flavors that can transform the whole experience.
    Experimenting with cheese not only enhances taste but also alters the texture, making each version feel fresh and new.

  • Herb Infusion: Stir in fresh chopped herbs like parsley or basil for a hint of freshness that brightens every spoonful.
    Herbs not only amplify the flavor but also add a splash of color, making your dish more visually appealing!

  • Creamy Alternatives: Swap in ricotta or a vegan cream cheese to maintain that creamy texture while catering to dietary preferences.
    These swaps ensure everyone at the table can indulge in the comforting creaminess of your dish!

  • Pasta Twist: Use a different type of gluten-free pasta, such as penne or fusilli, to change up the texture and bite.
    Selecting a unique pasta can elevate the overall dining experience while providing that hearty base everyone loves.

  • Extra Protein: Consider adding chickpeas or cannellini beans for extra protein and fiber that boosts the dish’s nutritional value.
    These additions create a delightful heartiness that keeps everyone satisfied and nourished.

Feel free to pair your Cheesy Kielbasa Skillet with a side of Cheesy French Onion or a light Zucchini Sweet Skillet to round out a delightful meal!

How to Store and Freeze Cheesy Kielbasa Skillet

Fridge: Store leftovers in an airtight container in the refrigerator for up to 3 days. Reheat gently on the stove or in the microwave, adding a splash of milk to keep it creamy.

Freezer: Freeze Cheesy Kielbasa Skillet in an airtight container for up to 3 months. Ensure it cools completely before sealing to prevent ice crystals from forming.

Reheating: Thaw in the refrigerator overnight before reheating. Heat over low on a stovetop, stirring occasionally, and add milk as needed to restore creaminess.

Portioning: For easy meals, consider portioning leftovers into individual containers before freezing, making meal prep a breeze!

Make Ahead Options

These Cheesy Kielbasa Skillet ingredients lend themselves perfectly to meal prep! You can cook the gluten-free spiral pasta and add the frozen peas up to 24 hours in advance. Just store them together in an airtight container in the refrigerator. The kielbasa can also be browned ahead of time; simply reheat it in the skillet when you’re ready to combine everything. To maintain the creamy texture of the cheese sauce, prepare it up to 3 days before serving and refrigerate it separately. When you’re ready to enjoy your meal, just reheat the pasta, kielbasa, and veggies in a skillet, add the cheese sauce, and gently warm through for that delicious comfort dish without fuss!

What to Serve with Cheesy Kielbasa Skillet

Elevate your meal experience by discovering delightful pairings that complement this creamy, savory dish.

  • Garlic Bread: A crispy, buttery delight that soaks up the cheesy sauce while adding a satisfying crunch. Perfect for those who love a bit of indulgence with their meal.

  • Simple Green Salad: A refreshing mix of greens and a light vinaigrette balances the richness of the skillet, offering a zest that brightens every bite. Add cherry tomatoes and cucumber for extra flavor and texture.

  • Roasted Vegetables: Caramelized carrots and Brussels sprouts add a wonderful sweetness and earthy flavor that contrasts beautifully with the dish’s creaminess. Toss them with olive oil and seasoning for a perfect side.

  • Coleslaw: The crunchy, tangy nature of coleslaw provides a textural contrast that refreshes the palate amidst the richness of cheese and sausage. Try a vinegar-based slaw for a lighter touch.

  • Sweet Cornbread: Soft and slightly sweet, this cornbread is a delightful way to soak up any leftover cheese sauce. The sweet notes pair beautifully with the savory kielbasa.

  • Fruit Salad: A colorful medley of seasonal fruits adds a sweet and refreshing ending to your meal. It’s a bright way to cleanse the palate after that hearty Cheesy Kielbasa Skillet.

  • Crisp White Wine: A chilled glass of Sauvignon Blanc or Pinot Grigio impeccably complements the dish with its acidity, enhancing the flavors without overpowering them. Cheers to a delightful dining experience!

Cheesy Kielbasa Skillet Recipe FAQs

How do I select the best kielbasa?
Absolutely! When choosing kielbasa, look for a product that is fresh, ideally with a nice, plump appearance. Opt for full-flavored varieties that contain no fillers or preservatives for the best taste. If you’re trying to watch your sodium intake, consider turkey or chicken kielbasa options.

What’s the best way to store leftover Cheesy Kielbasa Skillet?
Very! To keep leftovers fresh, store them in an airtight container in the refrigerator for up to 3 days. When reheating, add a splash of milk to the skillet or microwave to restore that creamy texture and prevent it from drying out during the heating process.

Can I freeze Cheesy Kielbasa Skillet?
Absolutely! You can freeze the Cheesy Kielbasa Skillet for up to 3 months. Just ensure it has completely cooled before transferring it to an airtight container or freezer bag. For best results, portion out individual servings, making it convenient to grab a meal on busy nights.

What if my cheese sauce is too thick?
No worries! If your cheese sauce becomes too thick, simply add milk gradually while stirring over low heat until you reach your desired creamy consistency. This will help loosen the sauce and maintain that delightful texture, making it perfect for coating the pasta and veggies.

Are there any dietary considerations I should keep in mind?
Certainly! This recipe is gluten-free, making it suitable for those with gluten sensitivities or celiac disease. However, you should always check the labels on your pasta and sausages to ensure they are gluten-free. Additionally, feel free to substitute or skip the dairy items like cream cheese or milk with plant-based alternatives if you’re lactose intolerant.

Can I add more vegetables to this dish?
Very much so! Adding more vegetables like broccoli, spinach, or even zucchini can not only boost nutritional value but also enhance flavor. Just sauté the additional veggies for a few minutes until tender before adding them to the mixture to maintain their bright colors and crunchiness.

Cheesy Kielbasa Skillet

Cheesy Kielbasa Skillet: Comforting Flavor in Every Bite

Cheesy Kielbasa Skillet is a quick and creamy dish featuring smoky kielbasa, gluten-free pasta, and vibrant veggies, ready in under 30 minutes.
Prep Time 10 minutes
Cook Time 20 minutes
Total Time 30 minutes
Servings: 4 servings
Course: Dinner
Cuisine: American
Calories: 500

Ingredients
  

For the Pasta
  • 8 ounces Gluten-Free Spiral Pasta
For the Kielbasa
  • 1 lb Kielbasa, uncooked Add savory protein
For the Veggies
  • 0.5 cup Green Peas, frozen Fresh peas can work too
  • 0.25 cup Red Pepper Strips Substitute with any mild bell pepper
For the Cheese Sauce
  • 0.25 cup Butter Adds richness
  • 0.25 lb Cream Cheese Can be swapped with neufchâtel cheese
  • 0.25 cup Parmesan Cheese Can replace with Pecorino Romano
  • 0.5-1 cup Milk Any type of milk works well
  • 2 cups Shredded Cheddar & Monterey Jack Cheese Use a mix of your favorite cheeses
For Seasoning
  • Salt To taste
  • Pepper To taste

Equipment

  • large pot
  • large skillet
  • Medium saucepan

Method
 

Cooking Steps
  1. Bring a large pot of salted water to a rolling boil. Add pasta and cook for 8–10 minutes. In the final minute, add frozen peas. Drain pasta and peas together.
  2. In a skillet over medium heat, add sliced kielbasa. Sauté for 5–7 minutes until browned. Remove kielbasa and keep warm.
  3. In the same skillet, add red pepper strips and sauté for 3–4 minutes until tender. Remove and keep warm with kielbasa.
  4. Melt butter in a saucepan over low heat. Stir in cream cheese and parmesan until smooth. Gradually add cheddar and Monterey Jack cheese, stirring in milk for desired consistency.
  5. Return pasta and peas to the skillet, add kielbasa and red peppers. Pour cheese sauce over the mixture, stirring to coat evenly. Warm through and serve immediately.

Nutrition

Serving: 1servingCalories: 500kcalCarbohydrates: 40gProtein: 25gFat: 30gSaturated Fat: 15gPolyunsaturated Fat: 2gMonounsaturated Fat: 8gCholesterol: 80mgSodium: 900mgPotassium: 300mgFiber: 3gSugar: 2gVitamin A: 15IUVitamin C: 20mgCalcium: 20mgIron: 10mg

Notes

Store leftovers in an airtight container in the fridge for up to 3 days. Reheat gently, adding a splash of milk if needed.

Tried this recipe?

Let us know how it was!

Zesty Chili Lime Tahini Sauce for Quick Vegan Delights

In just five minutes, you can whip up a zesty explosion of flavor that will elevate any dish to new heights. This 5-Minute Chili Lime Tahini Sauce is my secret weapon for turning everyday meals into memorable culinary experiences, and it’s a breeze to make! With its creamy texture and a perfect balance of tangy lime and spicy heat, this vegan delight is not only a crowd-pleaser but also gluten-free and dairy-free, making it suitable for everyone. Plus, it requires only six simple ingredients, which means less time shopping and more time savoring those delicious flavors. Whether you’re drizzling it over tacos, dipping crunchy veggies, or adding a kick to your salads, this sauce is bound to become a staple in your kitchen. Ready to get started and discover how easy it is to impress your friends and family?

Why is this sauce a kitchen essential?

Simplicity: With just six ingredients and a quick five-minute prep time, this sauce is incredibly easy to make, making it perfect for busy weeknight dinners.

Versatile: Use this Chili Lime Tahini Sauce as a dressing for salads, a dip for fresh veggies, or a zesty drizzle over tacos – the options are endless!

Flavorful: The combination of creamy tahini, zesty lime, and spicy chili makes for a mouthwatering explosion of flavors that will impress even the pickiest eaters.

Health-conscious: Being gluten-free and vegan, this sauce caters to various dietary preferences, ensuring everyone can enjoy it guilt-free.

Make-ahead: Whip up a batch ahead of time, store it in the fridge, and have a delicious condiment ready when you need it, just like the Chili Beef Flavor.

Cultural flair: Rooted in Mediterranean and Middle Eastern cuisine, it adds a unique twist to your meals and a touch of exotic flavor that everyone will love!

Chili Lime Tahini Sauce Ingredients

• Discover the magic behind this vibrant sauce!

For the Sauce

  • Tahini – Adds creaminess and a nutty flavor; can be swapped with sunflower seed butter for a nut-free alternative.
  • Juice of 2 Limes – Provides acidity and freshness; lemon juice works as a flavorful substitute if desired.
  • Chili Powder – Introduces spice; adjust according to heat preference or opt for smoked chili powder for a deeper flavor profile.
  • Smoked Paprika – Adds a smoky hint; regular paprika or cayenne pepper can easily replace it if needed.
  • Garlic Powder – Enhances savory notes; fresh minced garlic can be used but will change the sauce’s texture.
  • Salt – Balances the flavors; sea salt or kosher salt are best for optimal results.
  • Water – Adjusts thickness to your liking; essential for achieving the perfect pourable consistency for your Chili Lime Tahini Sauce.

Step‑by‑Step Instructions for Chili Lime Tahini Sauce

Step 1: Combine Ingredients
In a medium mixing bowl, add 1/2 cup of tahini, the juice of 2 limes, 1 teaspoon of chili powder, 1 teaspoon of smoked paprika, 1 teaspoon of garlic powder, and a generous pinch of salt. Use a whisk or a fork to blend these six ingredients together until they form a thick, creamy mixture that’s well integrated and free of lumps.

Step 2: Adjust Thickness
Next, gradually incorporate water into your mixture to reach your desired sauce consistency. Start by adding 1 tablespoon of water at a time, whisking briskly after each addition. You’re aiming for a pourable consistency akin to thick salad dressing; this should take about 2-3 tablespoons of water, depending on your preference for thickness.

Step 3: Taste and Adjust
After achieving the perfect consistency for your Chili Lime Tahini Sauce, take a moment to taste it. If you desire additional tang, squeeze in a little more lime juice, or if you prefer more heat, sprinkle in a bit more chili powder. Remember to whisk it again to blend any adjustments you make seamlessly into the sauce.

Step 4: Serve or Store
Once your sauce is perfectly balanced, it’s ready to shine! Drizzle it over tacos, use it as a dressing on vibrant salads, or serve it as a delicious dip for fresh veggies. If you’re not using it right away, transfer it to an airtight container and refrigerate; it will keep well for up to five days.

Expert Tips for Chili Lime Tahini Sauce

  • Storage Solution: Keep your Chili Lime Tahini Sauce in an airtight container in the fridge for up to five days. If it thickens, simply whisk in a little water to restore its creamy texture.

  • Whisk Over Blender: Using a whisk instead of a blender will give the sauce a delightful rustic texture that adds character. Plus, it’s quicker and easier to clean up!

  • Flavor Fusion: For the best flavor, let the sauce sit for 10-30 minutes before serving. This resting time allows the ingredients to meld and enhance the overall taste profile.

  • Substitutions: Feel free to experiment with the ingredients! For a nuttier flavor, try sunflower seed butter instead of tahini, or add fresh herbs for a bright twist.

  • Heat Control: Adjust the chili powder to suit your spice preference. Start with less if you’re unsure, and gradually add more to avoid overwhelming the dish with heat.

What to Serve with 5-Minute Chili Lime Tahini Sauce

Elevate your next meal with the zesty explosion of flavors that this creamy sauce brings.

  • Crispy Tacos: These crunchy delights pair perfectly with the tangy sauce, bringing texture and a bold flavor boost to each bite.
  • Grilled Vegetables: Add freshness and smokiness to your plate; this sauce complements the charred, earthy flavors beautifully.
  • Chilled Quinoa Salad: The creamy tahini dressing adds richness to this light dish, while the lime brightens each bite, creating harmony.
  • Roasted Chickpeas: The nutty taste of tahini balances the spices on these crunchy bites, giving you a delightful finger food option.
  • Fresh Veggie Platter: Carrots, celery, and bell peppers make delicious dippers for this sauce—healthy and colorful, perfect for gatherings!
  • Savory Grain Bowls: Drizzling the sauce over a hearty grain bowl transforms your meal into a vibrant, flavorful experience.
  • Margaritas: For a fun pairing, sip on a refreshing margarita to complement the zesty lime notes in the sauce.
  • Chocolate Avocado Mousse: For dessert, indulge in a whipped chocolate avocado mousse; its richness contrasts beautifully with the tangy sauce.

Storage Tips for Chili Lime Tahini Sauce

Fridge: Store your Chili Lime Tahini Sauce in an airtight container in the refrigerator for up to five days. If it thickens, simply whisk in a little water to bring it back to the desired consistency.

Make-Ahead: This sauce can be made ahead of time, which makes it perfect for meal prep! Just whip up a batch and have it ready to elevate your meals all week long.

Freezer: For longer storage, freeze the sauce in small portions using ice cube trays. It can remain fresh for up to three months; just thaw it in the fridge overnight before using.

Reheating: If the sauce thickens after freezing, reheat gently on the stove or in the microwave, adding water as needed to regain its creamy texture before serving.

Make Ahead Options

Preparing your Chili Lime Tahini Sauce ahead of time is a fantastic way to save precious minutes on busy weeknights! You can mix the sauce and refrigerate it for up to 5 days in an airtight container, so it’s ready whenever you need that creamy, zesty lift for your meals. Just make sure to whisk in a little extra water before serving if it thickens in the fridge, keeping its mouthwatering consistency intact. For the freshest flavor, consider letting the sauce sit in the fridge for an hour or more before using it, allowing those delightful flavors to meld beautifully. By having this Chili Lime Tahini Sauce ready to go, you’ll make every mealtime a quick and delicious affair!

Chili Lime Tahini Sauce Variations

Feel free to personalize your Chili Lime Tahini Sauce with these delightful twists that make every bite an adventure!

  • Nut-Free: Substitute tahini with sunflower seed butter for a creamy and nut-free alternative that’s just as delicious.

  • Citrus Medley: For a refreshing twist, mix in the zest of your limes. It will brighten up the sauce and enhance the lime flavor.

  • Herb-Infused: Add a few tablespoons of chopped fresh herbs, like cilantro or parsley, for an aromatic uplift that pairs beautifully with any dish.

  • Sweet & Spicy: For a balanced flavor, stir in a teaspoon of maple syrup or honey alongside additional chili powder to create a sweet-spicy fusion.

  • Smoky Delight: Swap in smoked paprika for regular or try chipotle powder for an extra kick of smoky heat that adds depth to the sauce.

  • Creamy & Garlicy: If you’re a garlic lover, use fresh minced garlic in place of garlic powder for a bolder, more fragrant sauce. Just be mindful of the texture!

  • Add-Heat: Increase the chili powder amount or introduce a dash of cayenne for those who crave a fiery kick. Start small to find your perfect heat level.

  • Quick Creamy Dip: Mix in some vegan yogurt or coconut cream for an even creamier texture, which makes it an ideal dip for crackers or fresh veggies.

Enhance your culinary creations with this flexible sauce. Whether you’re serving up tacos, grilled veggies, or drizzling over salads, there’s a variation for everyone! Pair with a side of Chili Beef Flavor for an unforgettable meal, or use it atop your favorite dishes alongside our Parmesan Crusted Sauce. Enjoy the journey of flavor!

Chili Lime Tahini Sauce Recipe FAQs

Can I use different citrus instead of lime juice?
Absolutely! While lime juice brings a wonderful zesty flavor to your Chili Lime Tahini Sauce, you can certainly swap it out for lemon juice or even orange juice. Each citrus will give a unique twist to the sauce, so feel free to experiment based on your taste preferences or what’s available in your kitchen!

How should I store the sauce?
Store your Chili Lime Tahini Sauce in an airtight container in the refrigerator for up to five days. If you notice it thickening, simply whisk in a tablespoon of water to restore its creamy consistency. For best results, keep it covered to maintain freshness.

Can I freeze the sauce?
Yes, you can freeze your Chili Lime Tahini Sauce! Pour it into an ice cube tray or small freezer-safe containers and freeze for up to three months. To use, thaw it overnight in the fridge, and if it thickens, gently reheat it on the stove or microwave, adding a little water to achieve the desired texture.

What should I do if the sauce is too thick or too runny?
If your sauce is too thick, you can gradually add water, one tablespoon at a time, whisking well after each addition until you reach your desired consistency. Conversely, if the sauce is too runny, you can add an extra spoonful of tahini or some more spices to thicken it. Adjusting the lime juice can also help balance the flavors if it’s too intense.

Is this sauce suitable for people with allergies?
The Chili Lime Tahini Sauce is gluten-free, vegan, and dairy-free, making it suitable for many dietary preferences. However, if you’re serving guests, be mindful of potential nut allergies since tahini is made from sesame seeds. You could offer a nut-free alternative like sunflower seed butter if needed.

How can I enhance the flavor of the sauce?
For an even richer taste experience, let your Chili Lime Tahini Sauce sit for 10-30 minutes before serving. This allows the flavors to meld together beautifully. You can also mix in fresh herbs like cilantro or parsley for added freshness, or a sprinkle of cumin for a smoky warmth.

Chili Lime Tahini Sauce

Zesty Chili Lime Tahini Sauce for Quick Vegan Delights

This Chili Lime Tahini Sauce is a creamy, zesty delight that elevates any dish, vegan and gluten-free.
Prep Time 5 minutes
Total Time 5 minutes
Servings: 4 people
Course: Appetizer
Cuisine: Mediterranean, Middle Eastern
Calories: 70

Ingredients
  

For the Sauce
  • 1/2 cup tahini Can be swapped with sunflower seed butter for nut-free
  • 2 limes Juice Provides acidity; lemon juice can be used as a substitute
  • 1 teaspoon chili powder Adjust according to heat preference
  • 1 teaspoon smoked paprika Regular paprika or cayenne can replace it
  • 1 teaspoon garlic powder Fresh minced garlic can be used instead
  • a pinch salt Sea salt or kosher salt are best
  • 2-3 tablespoons water Adjust thickness to desired consistency

Equipment

  • Mixing Bowl
  • Whisk

Method
 

Step-by-Step Instructions
  1. In a medium mixing bowl, add tahini, lime juice, chili powder, smoked paprika, garlic powder, and salt. Whisk to blend until creamy and free of lumps.
  2. Gradually incorporate water to reach your desired sauce consistency, adding 1 tablespoon at a time.
  3. Taste the sauce; adjust with more lime juice for tang or chili powder for heat, whisking to blend.
  4. Serve over tacos, as a salad dressing, or dip for veggies. Store in an airtight container in the fridge.

Nutrition

Serving: 1tablespoonCalories: 70kcalCarbohydrates: 6gProtein: 2gFat: 5gSaturated Fat: 0.5gPolyunsaturated Fat: 2gMonounsaturated Fat: 2gSodium: 150mgPotassium: 100mgFiber: 1gSugar: 1gVitamin C: 2mgCalcium: 30mgIron: 1mg

Notes

For a nuttier flavor, try sunflower seed butter instead of tahini. Adjust chili powder to suit spice preference.

Tried this recipe?

Let us know how it was!

Delightful Vegan Lemon Sandwich Cookies for Sweet Summer Treats

On a sun-kissed afternoon, I found myself craving something light, zesty, and utterly delightful. Enter these Vegan Lemon Sandwich Cookies, a bright culinary treasure perfect for summer gatherings—or any time the mood strikes! These soft, buttery cookies boast a luscious cream-filled center that truly elevates your cookie game. As a bonus, they’re not just vegan; they’re also dairy-free and egg-free, making them a fantastic dessert option for everyone at the table. Whip them up in no time to impress friends and family with your baking prowess, or simply treat yourself to a sweet escape. Are you ready to brighten your day with a bite?

Why are Vegan Lemon Sandwich Cookies a Must-Try?

Irresistibly Zesty: Each bite bursts with refreshing lemon flavor, perfect for summer days or anytime you need a citrus lift.
Soft and Tender: These cookies have a delightful melt-in-your-mouth quality, making them a pleasure to savor.
Quick to Make: Spend less time in the kitchen and more enjoying life—these cookies come together in just a few simple steps!
Versatile Delight: Perfect as a light dessert after dinner or a sweet snack with your afternoon tea, especially alongside a cup of herbal tea.
Crowd-Pleasing Treat: Whether at a picnic or family gathering, these cookies will surely be a hit with vegan and non-vegan friends alike!
Plus, if you’re looking for more delicious treats, check out my recipe for Bake Cookies Cream or indulge in a refreshing Tuna Salad Sandwich that’s easy to whip up.

Vegan Lemon Sandwich Cookies Ingredients

For the Cookies

  • Caster Sugar – A sweetener for the cookies and cream filling; substitute with coconut sugar for a healthier option.
  • Lemon Zest (2 medium lemons) – Provides a bright lemon flavor; use organic lemons for the best zest.
  • Dairy-Free Block Butter (200g) – Acts as the fat for tenderness and richness; can be replaced with vegan margarine.
  • All-Purpose Flour (300g) – The main structure for the cookies; substitute with gluten-free flour for a gluten-free version.
  • Yellow Food Gel – Enhances cookie color; omit if a natural look is preferred.

For the Cream Filling

  • Dairy-Free Butter (150g) – Used for the creamy filling; can substitute with vegan shortening for a firmer cream.
  • Dairy-Free Cream Cheese (20g) – Adds tanginess and creaminess; replace with coconut cream for a different flavor profile.
  • Icing Sugar (200g) – Sweetens and thickens the cream filling; dust with coconut sugar for added flavor.
  • Lemon Extract (1 teaspoon) – Amplifies the lemon flavor; fresh lemon juice may be substituted for a different tartness.
  • Lemon Zest (1 lemon) – Adds extra zing for the filling.
  • Fresh Mint Leaves – Used for garnish, providing a fresh contrast to the lemon.

Step‑by‑Step Instructions for Vegan Lemon Sandwich Cookies

Step 1: Prepare Lemon Sugar
Combine caster sugar and the zest of two medium lemons in a bowl. Use your fingers to rub the zest into the sugar until fragrant and the mixture appears moist. This step takes about 5 minutes and releases the natural oils from the zest, infusing the sugar with a bright, citrusy aroma that will enhance your Vegan Lemon Sandwich Cookies.

Step 2: Cream Ingredients
In a mixing bowl, add the lemon sugar and 200g of dairy-free block butter at room temperature. Beat together using a hand mixer on medium speed for approximately 3-4 minutes, or until the mixture is pale and fluffy. If desired, add a few drops of yellow food gel to achieve a more vibrant color. This creamy base is essential for a delightful texture in your cookies.

Step 3: Form Dough
Sift in 300g of all-purpose flour to the butter mixture, and mix until a thick dough forms. You may want to use a spatula to combine the flour thoroughly before switching to your hands. Once combined, wrap the dough in plastic film and chill in the refrigerator for 40 minutes to an hour. Chilling helps to firm up the dough, making it easier to work with when shaping the cookies.

Step 4: Shape Cookies
After chilling, preheat your oven to 180°C (fan). On a lightly floured surface, roll out the dough to about ½ inch thickness. Use cookie cutters to cut out your desired shapes, and place them on a lined baking tray, ensuring they are spaced apart. The dough should be slightly thick to maintain a soft structure when baked as Vegan Lemon Sandwich Cookies.

Step 5: Bake
Put the baking tray in the preheated oven and bake for 10-12 minutes. Keep an eye on the cookies; they are ready when the edges begin to turn golden brown. Once baked, remove them from the oven and let them cool on the tray for about 5 minutes before transferring them to a wire rack. This helps maintain their softness while cooling.

Step 6: Make Filling
In a bowl, whip together 150g of dairy-free butter and 20g of dairy-free cream cheese until well combined and creamy. Gradually add 200g of icing sugar, 1 teaspoon of lemon extract, and the zest of one lemon. Mix until the filling is fluffy and well-blended. This creamy mixture will add a delicious zing to your Vegan Lemon Sandwich Cookies.

Step 7: Assemble Cookies
Once the cookies are completely cooled, dip the tops of half of them in caster sugar for a touch of sweetness and sparkle. Pipe or spread the creamy filling onto the bottoms of the remaining cookies and gently sandwich them together, pressing slightly. Be careful not to overfill to maintain balance in your Vegan Lemon Sandwich Cookies.

Step 8: Garnish & Serve
Finish by placing a fresh mint leaf atop each sandwich for a pop of color and a refreshing touch. Arrange your Vegan Lemon Sandwich Cookies on a serving platter, ready for enjoyment. These delightful treats are perfect for any occasion, especially alongside a cup of herbal tea on a sunny day!

Expert Tips for Vegan Lemon Sandwich Cookies

  • Chill the Dough: Ensure the dough is well-chilled to prevent spreading during baking; this keeps your cookies beautifully shaped.
  • Use Fresh Lemons: Always opt for fresh, organic lemons to enhance the zesty flavor of your Vegan Lemon Sandwich Cookies—dried or bottled zest won’t compare!
  • Control the Filling: Adjust the thickness of the cream filling by adding icing sugar gradually; this helps you achieve the perfect consistency for spreading.
  • Cool Completely: Wait until the cookies are completely cool before adding filling; this prevents melting and ensures a delightful sandwich texture.
  • Mind the Oven: Keep an eye on your cookies while baking to avoid overbaking; they should be soft and slightly golden around the edges.

Vegan Lemon Sandwich Cookies Variations

Feel free to get creative and customize your Vegan Lemon Sandwich Cookies to suit your taste and dietary preferences!

  • Orange Twist: Replace lemon zest with orange zest for a sweeter citrus flavor. The result? A refreshing twist that’s just as bright and flavorful!

  • Chocolate Chips: Add ½ cup of vegan chocolate chips to the cookie dough for a delightful contrast of sweet chocolate and tangy lemon. Your cookie lovers will be in heaven!

  • Nutty Texture: Fold in ¼ cup of finely chopped nuts like almonds or walnuts into the dough for an extra crunch. This adds depth and texture, elevating your cookies to the next level.

  • Ball Cookie Style: Instead of sandwiching, roll the dough into balls and bake for classic lemon cookies. They’re equally delightful and perfect for a more casual treat.

  • Extra Citrus: Mix in some lime zest along with the lemon for a zesty blend that tingles the taste buds. The combination is a refreshing surprise!

  • Coconut Flavors: Substitute coconut cream for the dairy-free cream cheese for a tropical twist. This version brings a lush and creamy texture paired beautifully with the lemon.

  • Lower Sugar: Use a sugar alternative like monk fruit sweetener to keep the cookies low in sugar while still maintaining that sweet treat vibe. Who says you have to compromise on flavor?

  • Chili Heat: For those who love a kick, incorporate a pinch of cayenne pepper into the filling for a surprising heat that beautifully contrasts the sweetness. It’s a great conversation starter at your next gathering!

And if you’re in the mood for more delightful ideas, check out my scrumptious recipes for Grilled Lemon Herb or satisfy sweet cravings with Chocolate Cranberry Cookies. Embrace these variations—your taste buds are in for a treat!

Make Ahead Options

These Vegan Lemon Sandwich Cookies are fantastic for meal prep, allowing you to enjoy delicious treats without the last-minute rush! You can prepare the cookie dough and chill it in the refrigerator for up to 24 hours. Simply roll the dough into balls before chilling, then bake and cool as usual. For the cream filling, mix it in advance and store in an airtight container in the refrigerator for up to 3 days. To assemble, just take out the cookies and filling, pipe them together, and serve for fresh, delightful results! Enjoy your time-saving advantages while impressing friends and family with these tasty Vegan Lemon Sandwich Cookies anytime!

What to Serve with Vegan Lemon Sandwich Cookies

Looking to create a delightful meal experience to accompany these soft and zesty treats?

  • Refreshing Herbal Tea: Perfect for a light afternoon gathering, herbal tea enhances the lemon’s brightness while providing a soothing contrast. Try chamomile or mint varieties.

  • Crisp Green Salad: A simple salad with mixed greens, cucumber, and a light vinaigrette introduces a vibrant, fresh element that complements the cookie’s sweetness. The crunchy textures will balance the softness.

  • Coconut Vanilla Ice Cream: Serve a scoop of dairy-free coconut vanilla ice cream alongside, offering a creamy contrast that lovingly melts into the cookie’s lemony filling.

  • Fruity Lemonade: Pair with a glass of homemade lemonade infused with fresh fruits; it echoes the lemon flavor and adds a refreshing, thirst-quenching element perfect for warm days.

  • Mixed Berry Parfait: Layers of yogurt and mixed berries will enhance the dessert experience while adding a tart touch. The combination of flavors will keep your taste buds dancing with joy!

  • Chocolate Covered Strawberries: For a sweet pairing, these berries introduce a luscious richness, perfectly offsetting the citrusy zing of the cookies. Their juiciness offers a fabulous flavor contrast.

How to Store and Freeze Vegan Lemon Sandwich Cookies

Fridge: Store cookies in an airtight container for up to 3-4 days. They’re best enjoyed chilled, bringing out their refreshing lemon flavor.

Freezer: For longer storage, freeze unfilled cookies in a single layer on a baking sheet for 1 hour, then transfer to an airtight container for up to 1 month.

Reheating: If you prefer warm cookies, briefly heat the chilled cookies in the oven at 175°C (350°F) for about 5 minutes to regain their softness before adding the filling.

Make-Ahead Tip: Prepare the cookie dough and freeze it for up to a month. Thaw in the refrigerator before shaping and baking your Vegan Lemon Sandwich Cookies.

Vegan Lemon Sandwich Cookies Recipe FAQs

What kind of lemons should I use for this recipe?
I recommend using organic lemons for the best zest and flavor. Look for lemons that feel firm and heavy for their size, and avoid any with dark spots or blemishes for a refreshing taste in your Vegan Lemon Sandwich Cookies.

How should I store these cookies?
Store your cookies in an airtight container in the refrigerator for up to 3-4 days. They’re particularly delightful when enjoyed chilled, allowing those vibrant lemon flavors to really shine through!

Can I freeze Vegan Lemon Sandwich Cookies?
Absolutely! To freeze the cookies, first chill the unfilled cookies for an hour on a baking sheet. Then, transfer them to an airtight container and store them in the freezer for up to 1 month. When you’re ready to enjoy, just thaw them in the refrigerator or at room temperature.

How can I make the cream filling thicker?
For a thicker cream filling, add icing sugar gradually while mixing until you reach your desired consistency. Be patient with this step; achieving a fluffy texture is key for your Vegan Lemon Sandwich Cookies. If you need it even firmer, consider some extra refrigeration or adding a bit more vegan cream cheese.

Can I make these cookies gluten-free?
Certainly! Simply substitute the all-purpose flour with a gluten-free flour blend. Make sure it has a binding ingredient, like xanthan gum, to maintain the soft texture and keep your Vegan Lemon Sandwich Cookies delightful and intact.

Are these cookies safe for pets?
While these cookies are a tasty treat for humans, keep them away from your furry friends! The sugar and dairy-free cream may not be suitable for pets, so always opt for pet-specific treats if you want to give them something special.

Vegan Lemon Sandwich Cookies

Delightful Vegan Lemon Sandwich Cookies for Sweet Summer Treats

Delightful Vegan Lemon Sandwich Cookies are zesty, soft, and perfect for summer gatherings.
Prep Time 15 minutes
Cook Time 12 minutes
Chilling Time 1 hour
Total Time 1 hour 27 minutes
Servings: 12 cookies
Course: Dessert
Cuisine: Vegan
Calories: 150

Ingredients
  

For the Cookies
  • 200 g Dairy-Free Block Butter Acts as the fat for tenderness and richness; replace with vegan margarine.
  • 300 g All-Purpose Flour Main structure; substitute with gluten-free flour for a gluten-free version.
  • 150 g Caster Sugar Sweetener for cookies and filling; substitute with coconut sugar for healthier option.
  • 2 medium lemons Lemon Zest Provides a bright lemon flavor; use organic lemons for best zest.
  • Yellow Food Gel Enhances cookie color; omit if a natural look preferred.
For the Cream Filling
  • 150 g Dairy-Free Butter Used for creamy filling; substitute with vegan shortening for firmer cream.
  • 20 g Dairy-Free Cream Cheese Adds tanginess and creaminess; replace with coconut cream for different flavor.
  • 200 g Icing Sugar Sweetens and thickens filling; dust with coconut sugar for added flavor.
  • 1 teaspoon Lemon Extract Amplifies lemon flavor; fresh lemon juice may be substituted.
  • 1 lemon Lemon Zest Adds extra zing for the filling.
  • Fresh Mint Leaves Used for garnish, providing fresh contrast.

Equipment

  • Mixing Bowl
  • Hand mixer
  • sifter
  • Rolling Pin
  • cookie cutters
  • Baking tray
  • Plastic Wrap
  • Wire Rack

Method
 

Step-by-Step Instructions
  1. Combine caster sugar and the zest of two medium lemons in a bowl. Rub the zest into the sugar until fragrant.
  2. Add the lemon sugar and dairy-free block butter at room temperature in a mixing bowl. Beat on medium speed until pale and fluffy.
  3. Sift in all-purpose flour and mix until a thick dough forms. Wrap in plastic film and chill in the refrigerator for 40 minutes to an hour.
  4. Roll out the dough to about ½ inch thickness. Cut out desired shapes with cookie cutters and place on a lined baking tray.
  5. Bake in a preheated oven at 180°C for 10-12 minutes until edges are golden brown. Let cool on the tray for 5 minutes before transferring to a wire rack.
  6. Whip together dairy-free butter and dairy-free cream cheese. Gradually add icing sugar, lemon extract, and lemon zest until fluffy.
  7. Dip the tops of half the cookies in caster sugar. Pipe or spread creamy filling onto the bottoms of the remaining cookies and sandwich them together.
  8. Garnish each sandwich with a fresh mint leaf. Serve arranged on a platter.

Nutrition

Serving: 1cookieCalories: 150kcalCarbohydrates: 22gProtein: 2gFat: 7gSaturated Fat: 2gPolyunsaturated Fat: 0.5gMonounsaturated Fat: 1.5gSodium: 120mgPotassium: 50mgFiber: 0.5gSugar: 10gVitamin C: 5mgCalcium: 1mgIron: 2mg

Notes

Chill the dough well to prevent spreading during baking. Use fresh lemons for the best flavor.

Tried this recipe?

Let us know how it was!

Vegan Lemon Sandwich Cookies That Brighten Your Day

The aroma of fresh lemons wafts through my kitchen, instantly transporting me back to sun-soaked summer afternoons. Today, I’m excited to share my Zesty Vegan Lemon Sandwich Cookies—an indulgent treat that’s as vibrant as the season itself. These soft, melt-in-your-mouth cookies are not just vegan; they’re a delightful way to elevate your dessert game while keeping things simple and crowd-pleasing. Filled with a creamy, zesty lemon filling, they marry the perfect balance of sweetness and tanginess, making them an irresistible summertime snack. Plus, with a quick prep time and dairy-free ingredients, they’re a guilt-free indulgence that anyone can enjoy. Are you ready to bring a burst of sunshine to your dessert table? Let’s dive into this deliciously fun recipe!

Why Are Vegan Lemon Sandwich Cookies Perfect?

Delightful Flavor: These cookies burst with zesty lemon flavor, embodying the essence of summer in every bite.

Easy to Make: With minimal ingredients and straightforward steps, you can whip these up even on a busy day.

Crowd-Pleaser: They cater to various dietary preferences, making them a hit at parties, picnics, or anytime you need a sweet treat.

Versatile Options: Feel free to experiment—try replacing lemon with other citrus fruits or adding poppy seeds for an exciting twist!

Fresh and Light: Thanks to creamy dairy-free ingredients, these cookies are indulgent yet guilt-free, perfect for satisfying your sweet tooth without the heaviness.

If you’re looking for more summer-inspired recipes, check out my delicious Grilled Lemon Herb Salmon and feel refreshed!

Vegan Lemon Sandwich Cookies Ingredients

For the Cookies
Caster Sugar – Provides sweetness and texture; you can use granulated sugar as a substitute if needed.
Lemon Zest (2 medium lemons) – Adds vibrant lemon flavor; make sure to finely grate the zest without including the bitter white pith.
Dairy-Free Block Butter (200g) – Acts as the base fat for the cookies, offering a rich flavor; substitute with coconut oil for a different taste.
All-Purpose Flour (300g) – Provides structure and body; gluten-free flour blends can be used as a substitute.
Yellow Food Gel – Used for coloring the dough to achieve a lemon-like appearance; feel free to omit if you prefer a natural look.

For the Filling
Dairy-Free Butter (150g) – Serves as the creamy base for the lemon cream, ensuring a delightful texture.
Dairy-Free Cream Cheese (20g) – Adds creaminess and tang to the filling, enhancing the overall flavor.
Icing Sugar (200g) – Sweetens and thickens the whipped cream filling and creates a perfect balance with the zesty flavors.
Lemon Extract (1 teaspoon) – Intensifies the lemon flavor, making these vegan lemon sandwich cookies truly irresistible.
Lemon Zest (1 lemon, for filling) – Enhances the fresh taste in the cream, giving it that extra zing.

For Decoration
Fresh Mint Leaves – Adds a touch of color and fresh aroma; they make your cookies look even more appealing!

Step‑by‑Step Instructions for Vegan Lemon Sandwich Cookies

Step 1: Prepare Dough
In a mixing bowl, combine caster sugar and lemon zest, then cream together with dairy-free butter and yellow food gel until the mixture becomes pale and fluffy, approximately 3-5 minutes. Gradually sift in all-purpose flour, stirring until a thick dough forms. Wrap the dough in plastic wrap and chill it in the refrigerator for 40-60 minutes, which helps prevent spreading when baking.

Step 2: Preheat Oven
While the dough chills, preheat your oven to 180°C (fan). Line a baking tray with greaseproof paper, making it ready for the cookies. This step is essential to ensure a non-stick surface, allowing for easy removal after baking.

Step 3: Shape Cookies
After the chilling period, lightly flour your work surface and roll out the chilled dough to a thickness of about ½ inch. Use your preferred cookie cutter to cut out shapes, transferring them carefully onto the prepared baking tray. Make sure to leave enough space between each cookie, as they will spread slightly during baking.

Step 4: Bake
Place the baking tray in the preheated oven and bake the cookies for 10-12 minutes, or until the edges turn golden brown. Keep an eye on them during the last few minutes for perfect doneness. Once baked, allow the cookies to cool briefly on the tray before transferring them to a wire rack to cool completely.

Step 5: Make Filling
In a clean mixing bowl, whip together dairy-free butter and cream cheese until the mixture is creamy and smooth. Gradually add icing sugar, lemon extract, and fresh lemon zest, mixing until everything is combined and fluffy, about 3-5 minutes. If the filling appears too thick, a splash of dairy-free milk can be added to reach the desired consistency.

Step 6: Assemble Cookies
Take half of the cooled cookies and dip the tops in caster sugar, giving them a sweet sparkle. On the remaining cookies, use a piping bag to pipe the zesty cream filling onto the center, then gently place the sugary cookie halves on top, creating delightful sandwich cookies. For an extra touch of freshness, garnish with mint leaves before serving.

How to Store and Freeze Vegan Lemon Sandwich Cookies

Fridge: Store the cookies in an airtight container; they’ll stay fresh for up to 3-4 days, preserving their delightful flavor and texture.

Freezer: Wrap individual cookies tightly in plastic wrap, then place them in a freezer bag. These can be frozen for up to 3 months—simply thaw before enjoying!

Reheating: If frozen, let them thaw in the fridge overnight. For a warm treat, pop them in the microwave for 10-15 seconds, being careful not to overheat.

Airtight Storage: Always ensure you seal the container well to prevent any moisture or odors from affecting your delicious vegan lemon sandwich cookies.

What to Serve with Vegan Lemon Sandwich Cookies

Elevate your dessert experience by pairing these delightful cookies with a few complementary treats that enhance their zesty charm.

  • Herbal Tea: A warm cup of chamomile or mint tea brings a soothing contrast to the refreshing cookies, heightening their flavor.

  • Lemonade: The bright, citrusy notes of freshly squeezed lemonade beautifully echo the cookies’ lemon filling, making for a perfectly refreshing duo.

  • Fruit Salad: Fresh berries and sliced citrus not only add a pop of color but also bring a refreshing sweetness that complements the cookies’ tartness.

  • Coconut Whipped Cream: Light and airy, this dairy-free accompaniment enhances the creamy filling, adding an extra layer of indulgence to your dessert spread.

  • Poppy Seed Muffins: For a delightful brunch spread, pair these cookies with poppy seed muffins. Their nutty flavor harmonizes splendidly with the lemony sweetness.

  • Sparkling Water: Lightly flavored sparkling water with a hint of lime or lemon serves as a refreshing palate cleanser that pairs well with the cookies’ richness.

  • Vanilla Ice Cream: A scoop of dairy-free vanilla ice cream adds a luscious and creamy contrast that makes each bite of the sandwich cookies taste even better.

  • Dark Chocolate: For an unexpected twist, serve a small dish of high-quality dark chocolate as a dipping option. The bittersweet notes create a delicious balance with the sweet, citrusy cookies.

Make Ahead Options

These Vegan Lemon Sandwich Cookies are perfect for meal prep enthusiasts! You can prepare the cookie dough and chill it in the refrigerator for up to 24 hours before baking, which allows the flavors to meld beautifully while saving you time on busy days. Additionally, the cream filling can be made up to 3 days in advance; simply store it in an airtight container in the fridge to maintain its creamy texture. When you’re ready to serve, bake the cookies and allow them to cool before assembling with the filling. This way, you’ll enjoy these delicious cookies just as fresh and delightful as if they were made the same day!

Vegan Lemon Sandwich Cookies Adaptations

Feel free to get creative with these refreshing cookies by exploring various twists and substitutions that still keep their zesty charm!

  • Citrus Swap: Replace lemon zest with lime or orange zest for a unique flavor profile that brightens up your dessert table.
  • Nutty Addition: Fold in a handful of finely chopped almonds or walnuts to the dough for delightful crunch and flavor contrast.
  • Flavored Fillings: Experiment with different extracts, like almond or coconut, in the cream filling for exciting flavor variations. Who says lemon has to be the only star?
  • Gluten-Free: Substitute all-purpose flour with a gluten-free flour blend to ensure everyone can indulge without concern. Adjust your flour amount, as different blends can absorb differently!
  • Creamy Avocado: For a healthier filling, try incorporating ripe avocado pureé into your cream for a richer texture and a fun twist!
  • Chocolate Dip: After assembling the cookies, dip them in melted dairy-free chocolate for an indulgently decadent treat that enhances the flavors wonderfully.
  • Poppy Seed Surprise: Add poppy seeds to the dough for an enticing texture and a classic lemony touch. Imagine the delightful crunch in every bite!
  • Mint Infusion: Incorporate fresh mint leaves into the filling for a refreshing touch that adds summer vibes to your treat.

While you’re embracing creativity in the kitchen, take a moment to check out my delectable Grilled Chicken Sandwich or the luscious Chocolate Cranberry Cookies! Each recipe offers its own blend of flavors that are sure to stimulate your palate!

Expert Tips for Vegan Lemon Sandwich Cookies

  • Chill Dough Properly: Ensure your dough is chilled adequately; this will help prevent it from spreading too much while baking, resulting in perfectly shaped cookies.

  • Avoid Over-Mixing: When making the filling, don’t over-mix; aim for a light and fluffy texture. This is key for achieving the creamy filling without it becoming dense.

  • Piping Perfection: Use a piping bag for the filling to keep it neat and evenly distributed between the cookies. If the filling is too thick, add a splash of dairy-free milk to adjust the consistency.

  • Decorative Touch: When dipping cookies in caster sugar, do so gently for a light coating. It adds a lovely sweetness without overpowering the lemon flavor.

  • Storage Tips: Store the vegan lemon sandwich cookies in an airtight container in the fridge to keep them fresh. Enjoy within 3-4 days for the best taste!

Vegan Lemon Sandwich Cookies Recipe FAQs

What type of lemons should I use for the best flavor?
I recommend using fresh, ripe lemons for the best flavor. Look for lemons that are bright yellow and firm, avoiding those with dark spots or a dull color. The zest and juice will have more brightness and fragrance when using high-quality lemons.

How should I store Vegan Lemon Sandwich Cookies?
Store your cookies in an airtight container in the fridge for up to 3-4 days. This helps them maintain their soft texture and delicious flavor. Make sure the container is sealed tightly to keep moisture at bay!

Can I freeze the Vegan Lemon Sandwich Cookies?
Absolutely! Wrap each cookie tightly in plastic wrap, then place them in a freezer bag to avoid freezer burn. They can be frozen for up to 3 months. To enjoy, simply thaw them in the fridge overnight before serving, or pop them in the microwave for 10-15 seconds for a quick treat.

What if my filling is too thick?
If your cream filling seems too thick, simply add a splash of dairy-free milk—about a tablespoon at a time—mixing well until you reach your desired consistency. The filling should be light and fluffy, perfect for piping between the cookie halves.

Are these cookies safe for people with allergies?
These Vegan Lemon Sandwich Cookies are dairy-free and egg-free, making them suitable for those with lactose intolerance or egg allergies. However, always check ingredient labels as some dairy-free products may contain allergens like soy or nuts. If you’re baking for someone with specific dietary restrictions, you might want to inform them about any substitutes used.

Can I substitute any ingredients in this recipe?
Certainly! You can swap granulated sugar for coconut sugar if you’re looking for a less refined option. For a gluten-free version, use a gluten-free all-purpose flour blend. You can also replace lemon zest with zest from limes or oranges for a fun twist on the flavors!

Vegan Lemon Sandwich Cookies

Vegan Lemon Sandwich Cookies That Brighten Your Day

Enjoy these Vegan Lemon Sandwich Cookies, a delightful treat that balances sweetness and tanginess with a creamy lemon filling.
Prep Time 20 minutes
Cook Time 12 minutes
Chilling Time 1 hour
Total Time 1 hour 32 minutes
Servings: 12 cookies
Course: Dessert
Cuisine: Vegan
Calories: 150

Ingredients
  

For the Cookies
  • 200 grams Dairy-Free Block Butter Substitute with coconut oil if needed.
  • 300 grams All-Purpose Flour Gluten-free flour blends can be used as a substitute.
  • 2 medium lemons Lemon Zest Finely grate the zest.
  • 1 teaspoon Yellow Food Gel Feel free to omit for a natural look.
  • 150 grams Caster Sugar Can be replaced with granulated sugar.
For the Filling
  • 150 grams Dairy-Free Butter Base for the lemon cream.
  • 20 grams Dairy-Free Cream Cheese Adds tanginess.
  • 200 grams Icing Sugar Sweetens the filling.
  • 1 teaspoon Lemon Extract Intensifies lemon flavor.
  • 1 lemon Lemon Zest For enhancing filling flavor.
For Decoration
  • Fresh Mint Leaves Adds color and freshness.

Equipment

  • Mixing Bowl
  • Baking tray
  • piping bag
  • Cookie cutter

Method
 

Step-by-Step Instructions
  1. In a mixing bowl, combine caster sugar and lemon zest. Cream together with dairy-free butter and yellow food gel until pale and fluffy, about 3-5 minutes. Gradually sift in all-purpose flour until a thick dough forms. Chill for 40-60 minutes.
  2. Preheat your oven to 180°C (fan) and line a baking tray with greaseproof paper.
  3. Roll out the chilled dough to about ½ inch thickness. Use a cookie cutter to cut out shapes and transfer to the baking tray, leaving space in between.
  4. Bake for 10-12 minutes, until the edges are golden brown. Allow to cool briefly before transferring to a wire rack.
  5. In a clean bowl, whip together dairy-free butter and cream cheese until smooth. Gradually add icing sugar, lemon extract, and fresh lemon zest until fluffy.
  6. Dip half of the cooled cookies in caster sugar. Use a piping bag to pipe the filling on the remaining cookies and sandwich them together, garnishing with mint leaves before serving.

Nutrition

Serving: 1cookieCalories: 150kcalCarbohydrates: 22gProtein: 2gFat: 7gSaturated Fat: 3gPolyunsaturated Fat: 1gMonounsaturated Fat: 2gSodium: 130mgPotassium: 50mgFiber: 1gSugar: 8gVitamin C: 2mgCalcium: 2mgIron: 4mg

Notes

Store in an airtight container in the fridge for up to 3-4 days. Freezing is possible for up to 3 months.

Tried this recipe?

Let us know how it was!