As the aroma of fresh bread fills my kitchen, I can’t help but feel transported back to family gatherings where comfort food reigned supreme. Today, I’m excited to share a recipe that effortlessly captures that nostalgic essence: Garbage Bread. This delightful dish seamlessly blends convenience and mouthwatering flavors, perfect for busy weeknights or impromptu get-togethers. With its warm, fluffy dough wrapped around a scrumptious filling that can be tailored to everyone’s tastes, it’s a sure crowd-pleaser. Plus, it’s budget-friendly and quick to whip up, making it an easy go-to for any home chef looking to swap takeout for something homemade. Are you ready to roll up your sleeves and dive into this versatile recipe that promises joyful moments around the dinner table? Let’s get started!
Why is Garbage Bread a Must-Try?
Unmatched versatility: This recipe is a blank canvas for your creativity! Fill it with your favorite meats, veggies, or cheeses, allowing for endless flavor combinations that will please the whole family.
Quick and Easy: With minimal prep time and simple ingredients, you can have a delicious homemade meal ready in under 30 minutes. Ideal for busy weeknights or last-minute gatherings!
Budget-Friendly: Using common pantry staples, this dish is kind to your wallet while still delivering a satisfying, hearty meal.
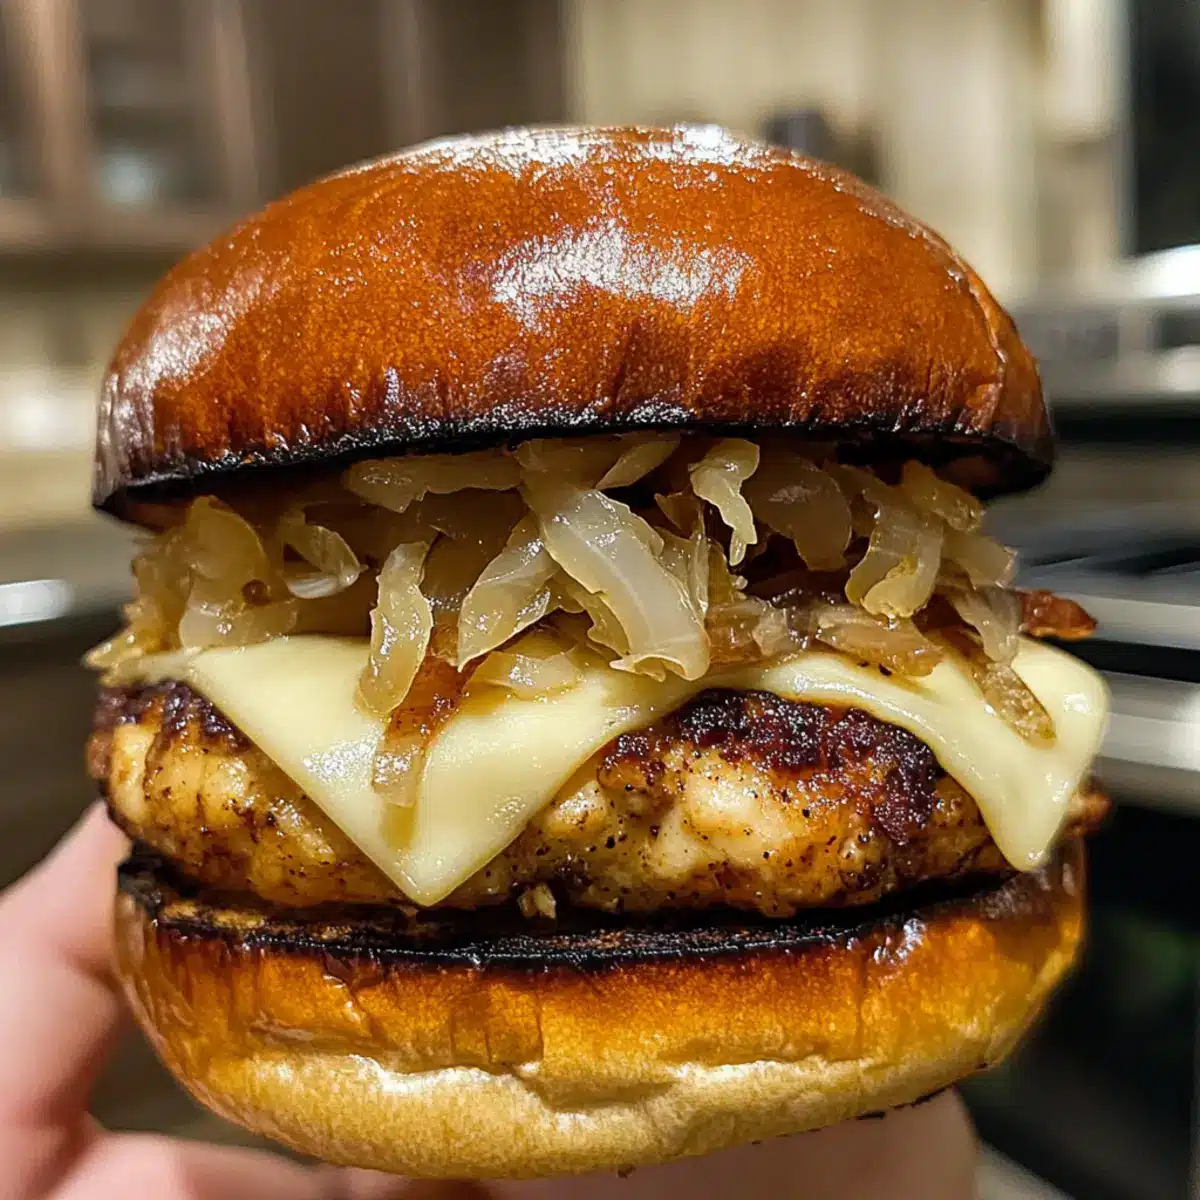
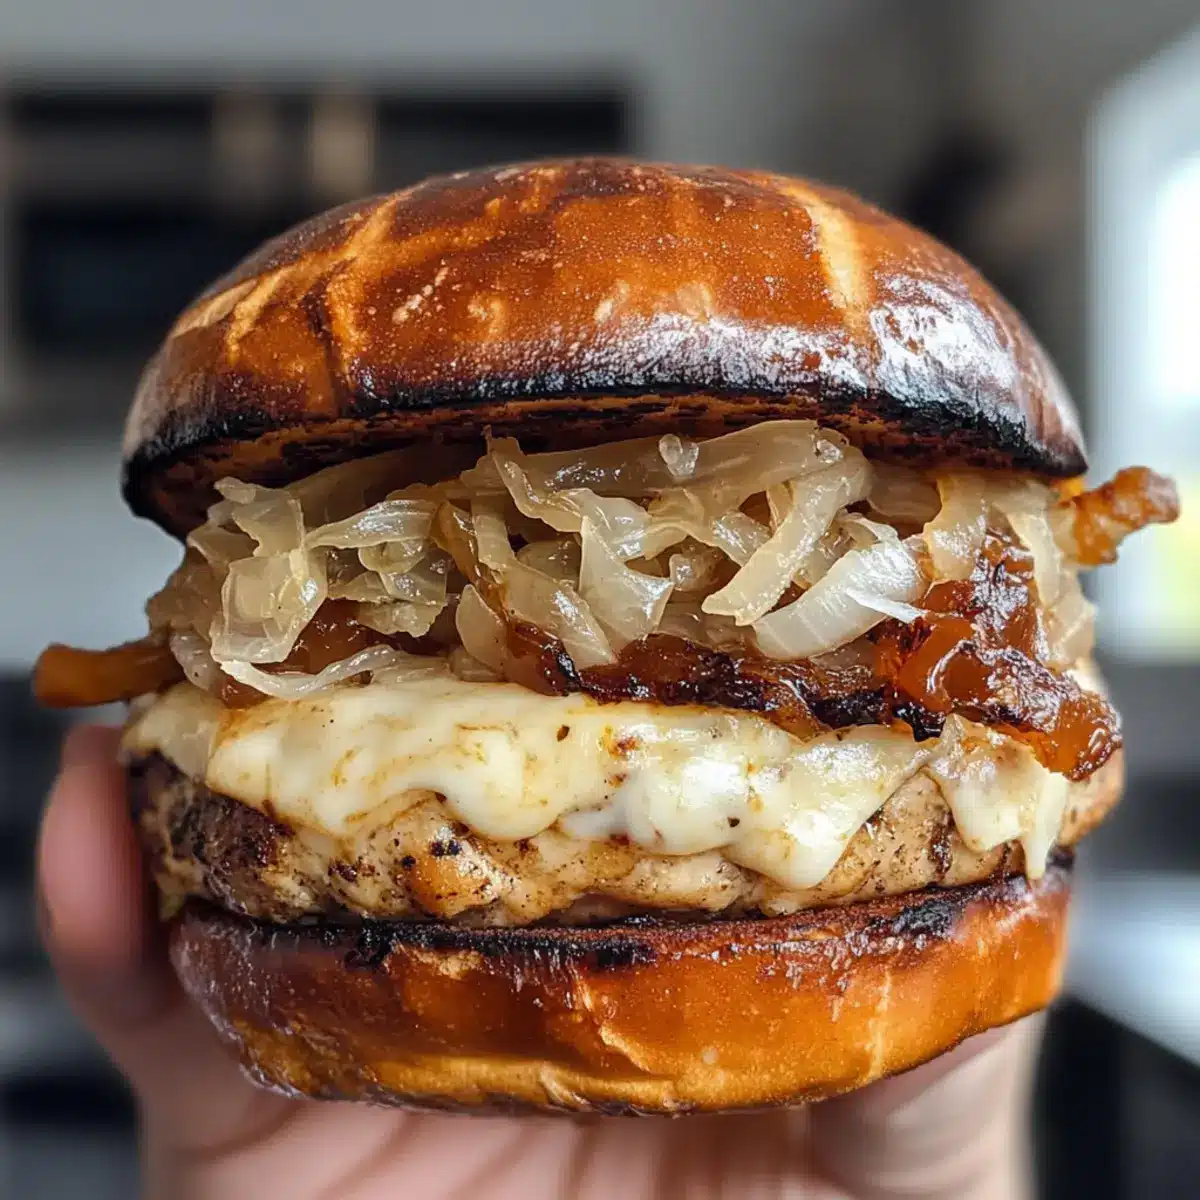
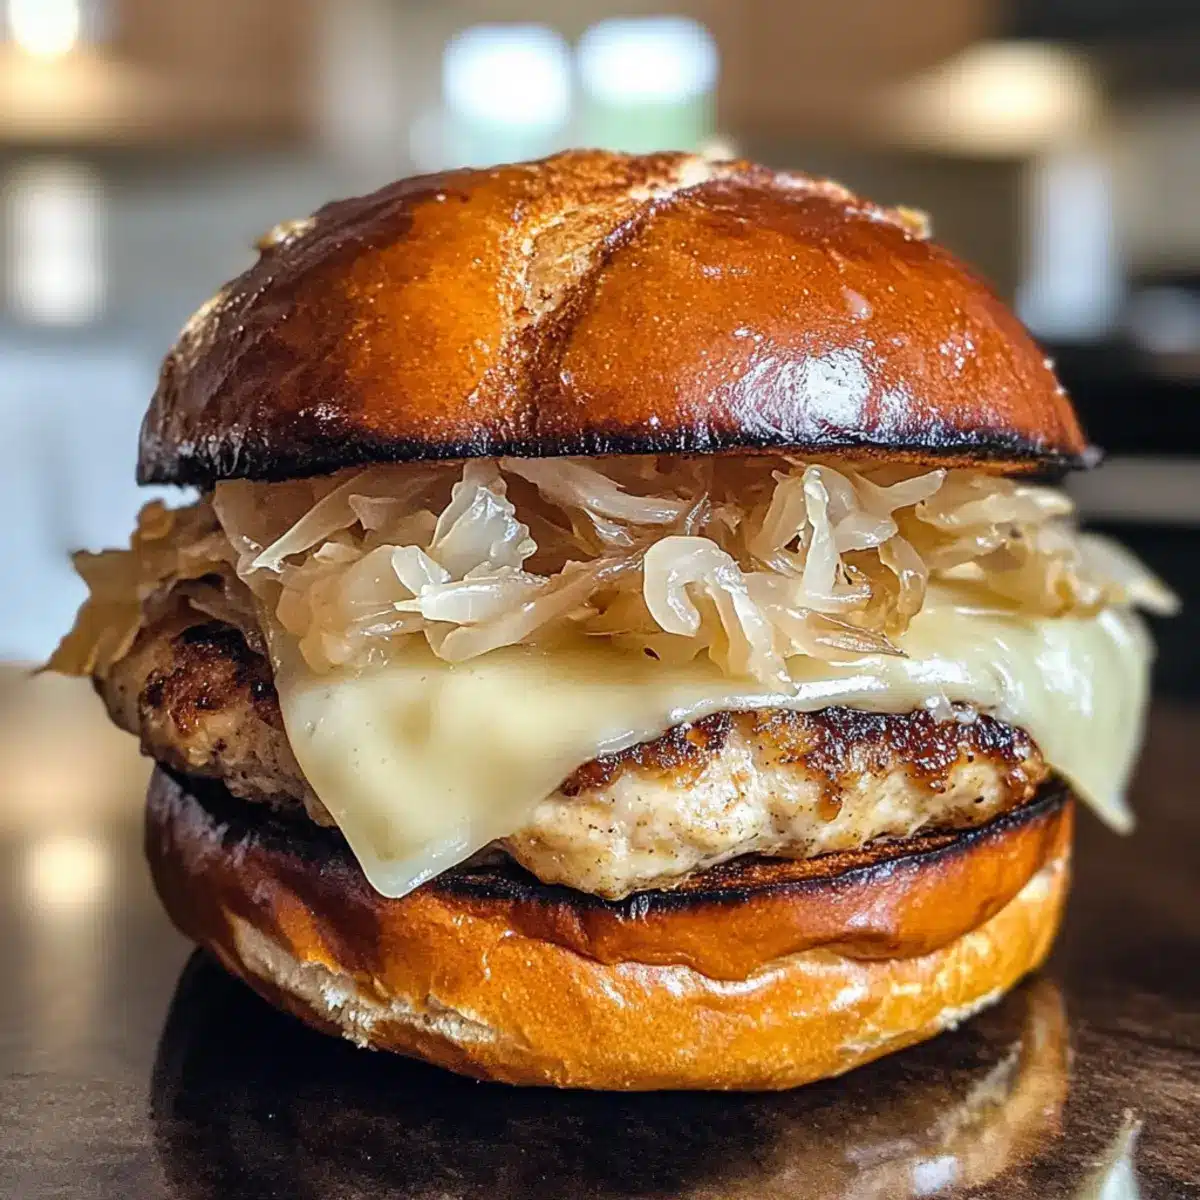
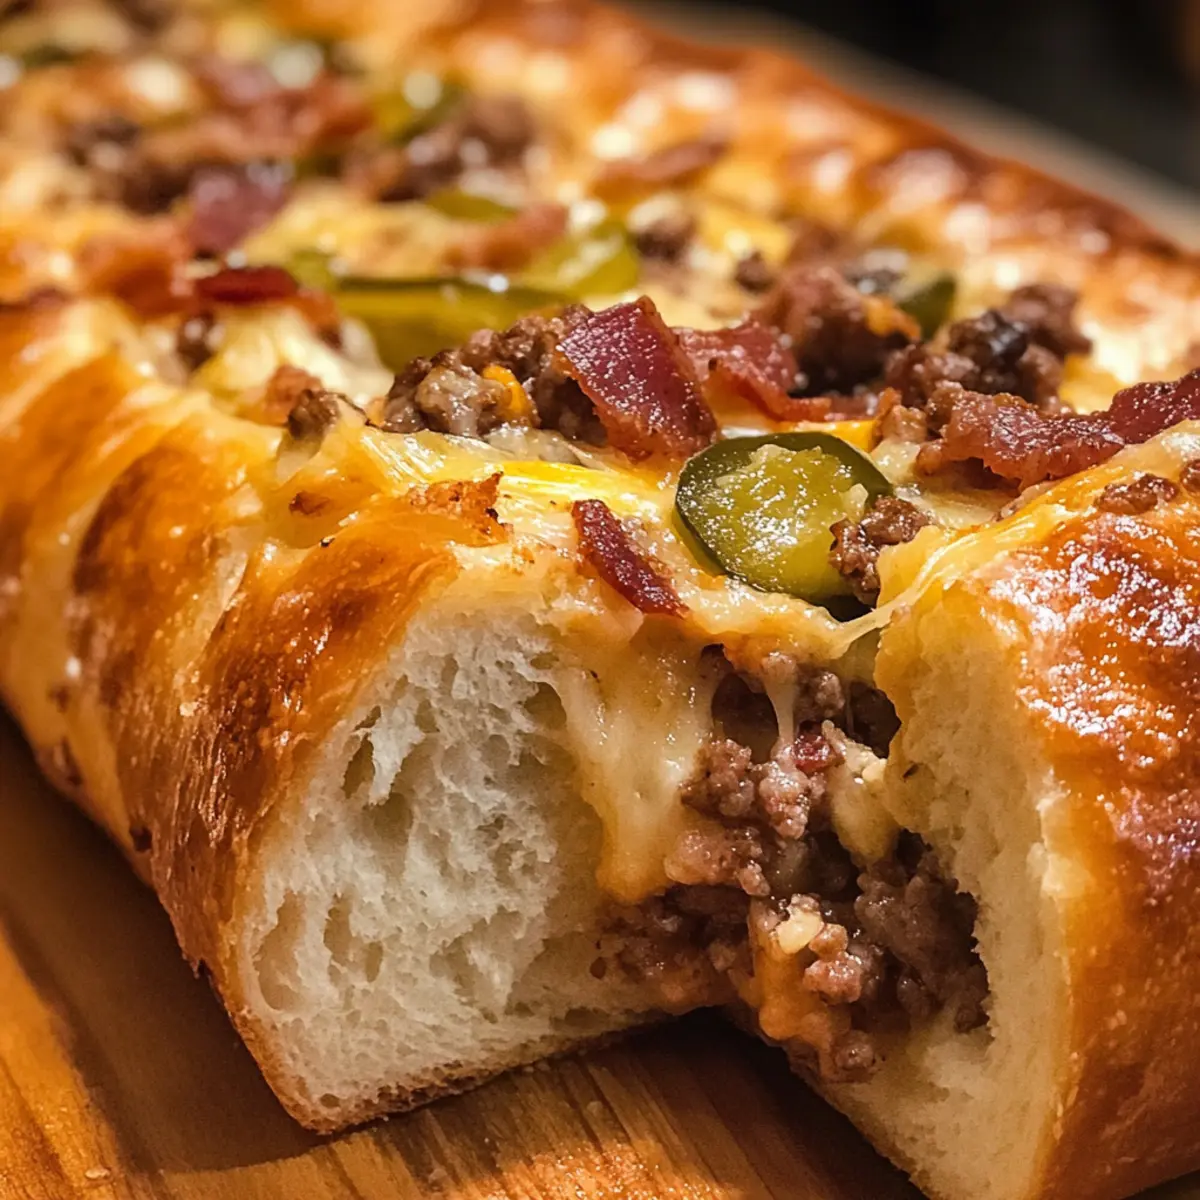
Crowd-Pleaser: The warm, cheesy, and savory filling wrapped in golden-brown bread makes this dish a guaranteed hit at parties or family dinners. It’s a perfect alternative to fast food!
Transform your mealtimes with this delightful recipe and remember to substitute ingredients as per your preference for a truly personalized dish. For more meal ideas, check out our collection of budget-friendly dinner recipes.
Garbage Bread Ingredients
For the Filling
• Ground Beef – Provides protein and flavor; opt for lean beef to reduce fat content.
• Diced Onion – Adds sweetness and depth; substitute with shallots or omit for a simpler flavor.
• Bacon – Adds crunch and savory depth; try turkey bacon for a lower-fat option.
• Chopped Pickles – Introduces acidity and crunch; replace with diced jalapeños for a spicy kick.
• American Cheese Slices – Provides creaminess; use cheddar or mozzarella for different flavors.
For the Dough
• Refrigerated French Bread Dough – Serves as the base and structure for the dish; homemade dough can enhance flavor.
Condiments
• Ketchup – Adds sweetness and tanginess; substitute with barbecue sauce for a smoky taste.
• Mustard – Offers a zesty kick; yellow or Dijon can be substituted based on your preference.
• Beaten Egg – Used to brush the dough for a glossy finish; milk can give a lighter sheen.
• Sesame Seeds – Sprinkled on top for added flavor and texture; you can omit for a simpler presentation.
Now that you have everything you need, let’s get ready to make some mouthwatering Garbage Bread that the whole family will love!
Step‑by‑Step Instructions for Garbage Bread
Step 1: Preheat the Oven
Begin by preheating your oven to 350°F (175°C). While the oven warms up, line a large baking sheet with parchment paper to prevent the Garbage Bread from sticking. This step ensures you have a clean surface ready for baking while preparing your ingredients.
Step 2: Cook the Filling
In a skillet over medium heat, add the ground beef and diced onion, cooking them until the beef is browned and the onion is tender, about 8-10 minutes. Stir occasionally, breaking up the meat and ensuring it’s evenly cooked. Season with salt and pepper to taste, then drain any excess fat to keep your filling nice and lean.
Step 3: Roll Out the Dough
On a lightly floured surface, roll out the refrigerated French bread dough into a rectangular shape measuring approximately 12×18 inches. This thin layer will create a delightful crust for your Garbage Bread. Use a rolling pin for even thickness, ensuring it’s large enough to hold all your tasty filling without tearing.
Step 4: Spread the Condiments
Next, spread a layer of ketchup and mustard over the dough, leaving a ½-inch border around the edges. This flavorful base helps blend the savory filling with a hint of sweetness and tanginess. Be generous but don’t overdo it, as you want to prevent any mess while rolling.
Step 5: Add the Filling
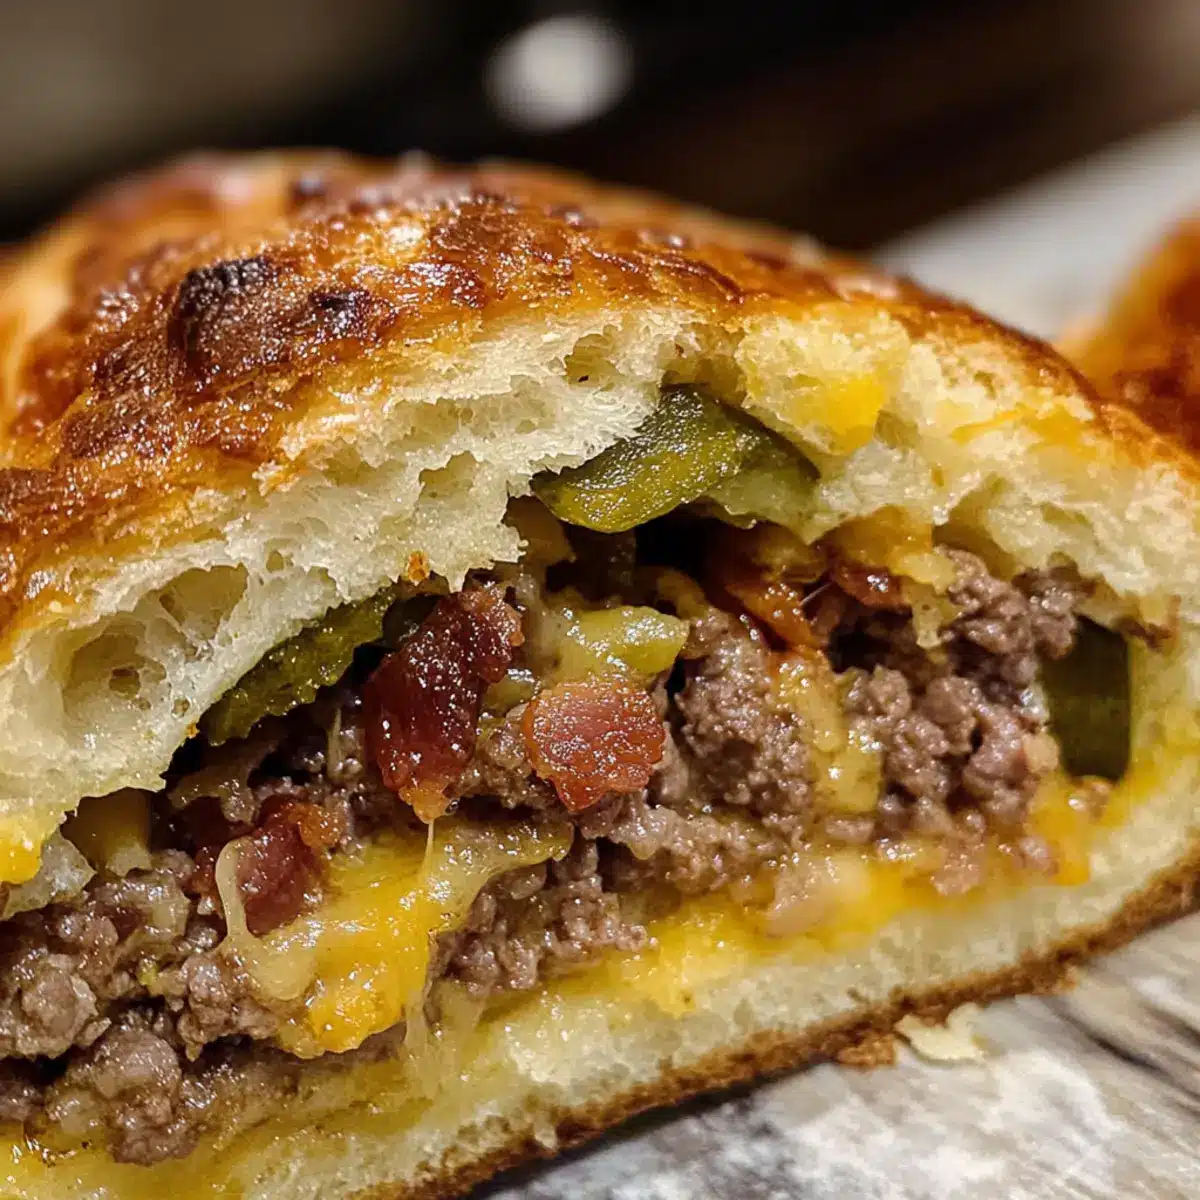
Carefully layer the cooked ground beef mixture, crispy bacon pieces, chopped pickles, and cheese slices over the condiment base. Distribute the ingredients evenly, allowing for a delightful bite in every slice of your Garbage Bread. The combination of flavors will make this dish a crowd favorite!
Step 6: Roll it Up
Starting from one long side, gently roll the dough tightly into a log shape, sealing the edges as you go to keep the filling secure. Take your time to ensure it’s rolled evenly without gaps. Once rolled, pinch the seam to secure it, preparing the Garbage Bread for baking.
Step 7: Prepare for Baking
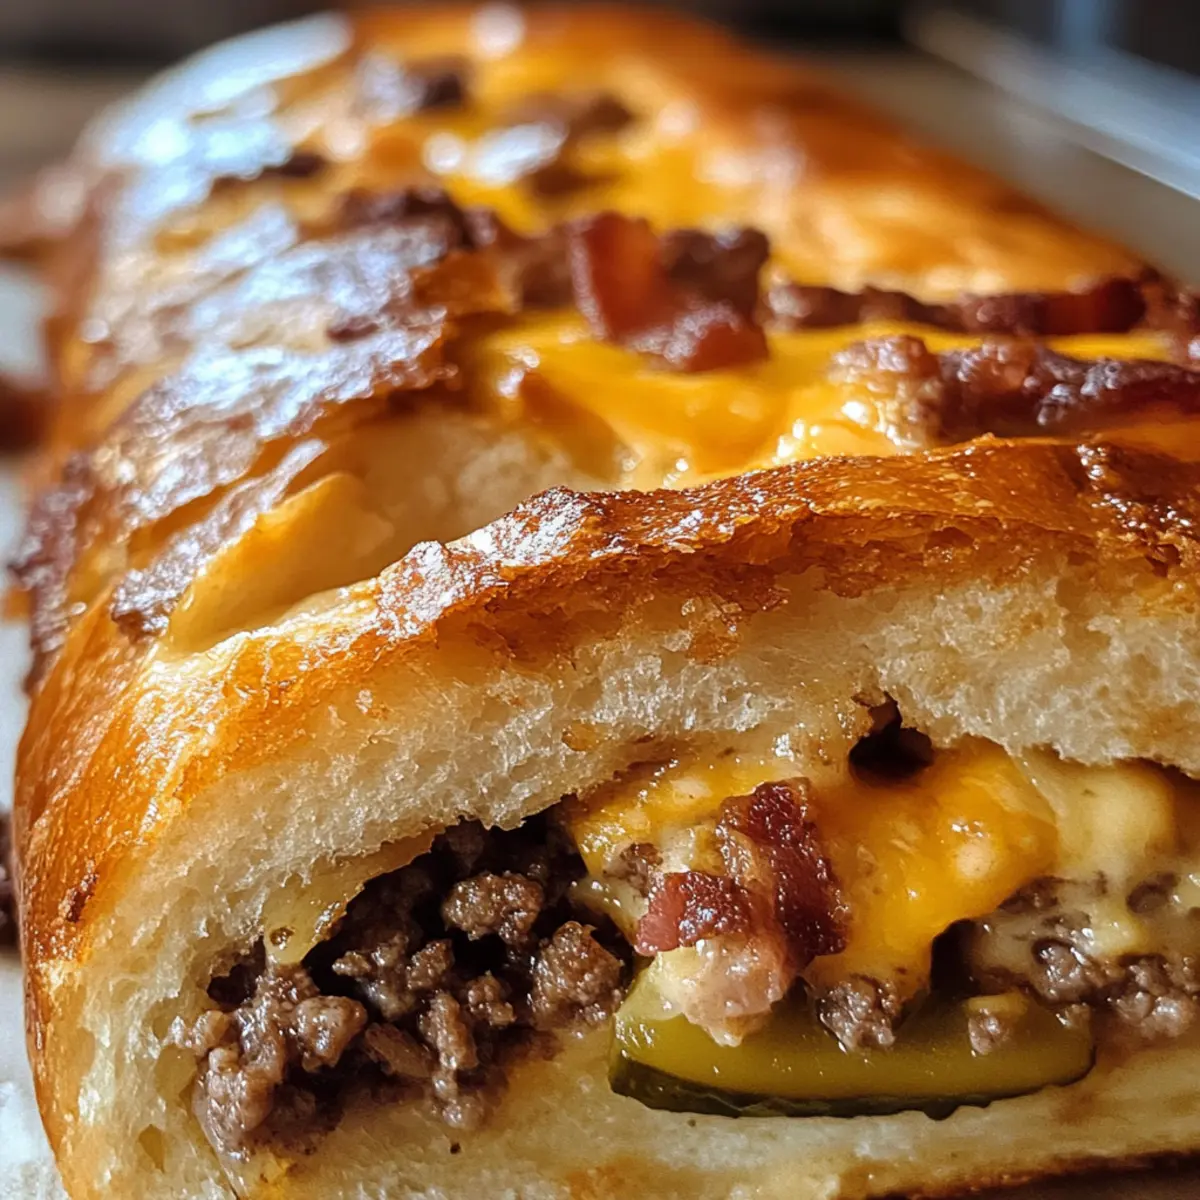
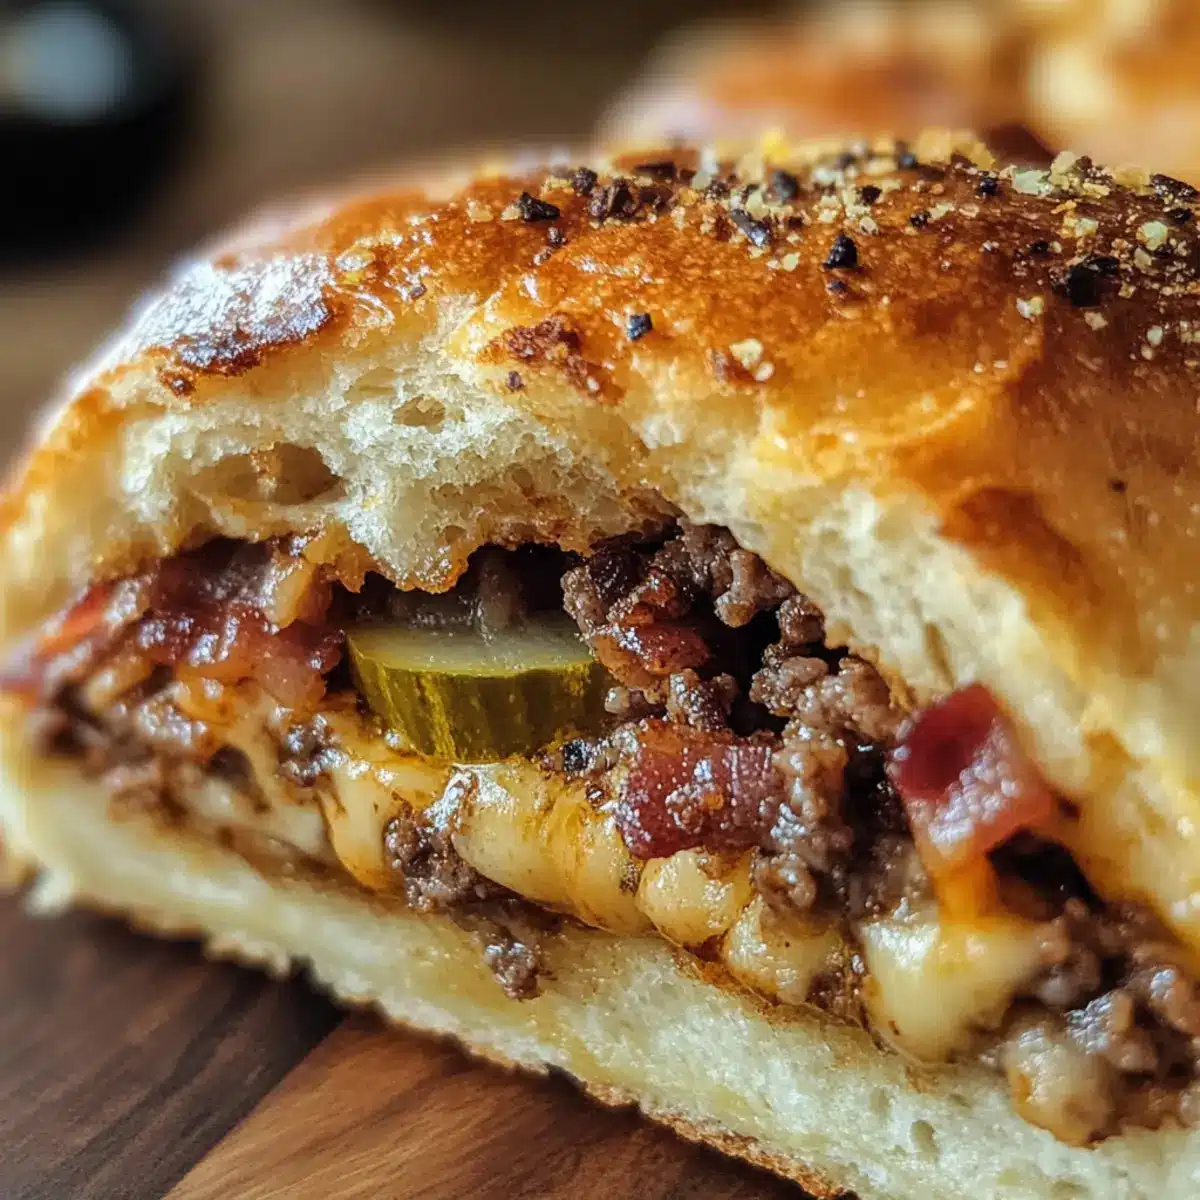
Place the rolled Garbage Bread seam-side down on the prepared baking sheet. To achieve a golden-brown finish, brush the top with a beaten egg. For an additional touch of texture, sprinkle sesame seeds over the egg wash, creating a beautiful crust that enhances both appearance and flavor.
Step 8: Bake the Bread
Slide the baking sheet into your preheated oven and bake for 20-25 minutes, or until the Garbage Bread turns golden brown and puffs up. Keep an eye on the bread, as ovens can vary; you want it to be perfectly crispy on the outside while remaining soft on the inside.
Step 9: Cool and Serve
Once baked to perfection, remove the Garbage Bread from the oven and let it cool for about 5 minutes before slicing. This short cooling period helps the filling settle, making for cleaner cuts. Serve warm alongside Thousand Island dressing for dipping, and watch it quickly disappear from the table!
Make Ahead Options
Garbage Bread is a fantastic option for meal prep enthusiasts! You can prepare the filling by cooking the ground beef, diced onions, and crispy bacon up to 3 days in advance; just store it in an airtight container in the refrigerator to maintain freshness. The assembled bread can be rolled and wrapped tightly, then refrigerated for up to 24 hours before baking. To finish, simply brush with the beaten egg and sprinkle sesame seeds on top, then bake as directed when you’re ready to serve. This prep method ensures you have a scrumptious, warm dish ready with minimal effort on busy weeknights! With these tips, your Garbage Bread will be just as delicious as when freshly made.
Expert Tips for Garbage Bread
-
Seal the Edges: Ensure you tightly seal the edges when rolling to prevent any delicious filling from leaking out during baking.
-
Watch the Meat: Avoid overcooking the ground beef; this keeps the flavor fresh and prevents a dry filling.
-
Customize Fillings: Feel free to experiment with different fillings such as veggies or varied cheeses to elevate your Garbage Bread experience.
-
Perfectly Roll Dough: Take your time rolling the dough evenly, which is essential for a well-structured Garbage Bread that bakes uniformly.
-
Golden Finish: Brush with egg wash for that beautiful golden-brown color, and sprinkle with sesame seeds for an added crunch!
How to Store and Freeze Garbage Bread
Fridge: Store leftover Garbage Bread in an airtight container for up to 3-4 days. This helps retain moisture and flavor, ensuring a satisfying meal whenever you’re hungry.
Freezer: You can freeze unbaked Garbage Bread for up to 2 months. Wrap it tightly in plastic wrap and then aluminum foil to prevent freezer burn.
Reheating: To enjoy your Garbage Bread, bake from frozen at 350°F (175°C) for 15-20 minutes or until heated through. Alternatively, you can microwave slices for a quick warm-up, but baking will give you the best texture.
Make-Ahead: Prepare the filling in advance and assemble the Garbage Bread when you’re ready to bake. This can save you time on busy weekdays and make mealtime a breeze!
Garbage Bread: Delicious Customization Options
Feel free to let your creativity shine as you adapt the recipe to your liking with these simple swaps and additions.
- Dairy-Free: Substitute the cheese with vegan cheese or nutritional yeast for a similar flavor without dairy.
- Vegetarian: Use a mixture of sautéed mushrooms, bell peppers, and spinach in place of ground beef for a savory veggie-packed filling.
- Spicy Kick: Add diced jalapeños or crushed red pepper flakes to intensify the heat and make your Garbage Bread unforgettable.
- Herb Infusion: Mix in fresh herbs like parsley or basil with your filling to elevate the flavor profile and add freshness.
- Gluten-Free: Use gluten-free bread dough or wraps as the base to cater to gluten sensitivities while enjoying the same delicious experience.
- Breakfast Twist: Fill the dough with scrambled eggs, cheese, and breakfast sausage for a hearty breakfast option that’s perfect for brunch!
- Sweet Version: For a fun dessert, swap out savory fillings for sweet options like cinnamon, apples, and cream cheese, baking to a golden finish.
- Extra Crunch: Toss in a handful of crushed tortilla chips or fried onions into the filling to add a delightful crunch to every bite.
With these variations, you can create your perfect version of Garbage Bread! If you’re looking for more ideas, check out our collection of family-friendly recipes to inspire your culinary adventures.
What to Serve with Garbage Bread
Pairing your Garbage Bread with the right sides can elevate your meal to new heights.
-
Simple Side Salad: A crisp salad of mixed greens brightens the meal, adding freshness to the hearty flavors of the bread.
-
Steamed Vegetables: Opt for a colorful medley of steamed veggies. Their crunch and natural sweetness beautifully contrast the savory filling.
-
Potato Wedges: Crispy potato wedges seasoned with herbs offer a satisfying texture, making for a classic comfort food combination that’s irresistible.
-
Thousand Island Dressing: Serve as a dipping sauce for a tangy kick that complements the savory aspects of the Garbage Bread perfectly.
-
Garlic Butter Breadsticks: If you can’t resist carbs, these buttery delight offer a rich flavor that pairs wonderfully with the cheesy filling.
-
Coleslaw: A creamy coleslaw adds a crunchy, tangy component that enhances your meal’s overall flavor profile, making every bite delightful.
-
Homemade Marinara Sauce: Consider serving a warm marinara sauce for dipping, provides a rich and savory counterpart that every bite will love.
-
Iced Tea or Lemonade: Balance everything with a refreshing drink that can cleanse your palate and complement the richness of the Garbage Bread beautifully.
-
Chocolate Chip Cookies: End the meal on a sweet note with soft, gooey chocolate chip cookies for an ultimate comfort food finale!
Garbage Bread Recipe FAQs
What kind of ground beef should I use for Garbage Bread?
I recommend using lean ground beef, as it provides great flavor while keeping the dish less greasy. If you prefer, ground turkey or chicken can be equally delicious alternatives for a lighter option.
How do I properly store leftovers of Garbage Bread?
Store any leftovers in an airtight container in the refrigerator for up to 3-4 days. This helps keep the bread moist and flavorful. If you’ve had a big gathering and have quite a bit left, don’t worry!
Can I freeze Garbage Bread? What’s the best method?
Absolutely! You can freeze unbaked Garbage Bread for up to 2 months. Start by wrapping the assembled bread tightly in plastic wrap, then cover it with aluminum foil to prevent freezer burn. When you’re ready to enjoy it, just bake straight from the freezer at 350°F (175°C) for about 15-20 minutes or until heated through.
What should I do if the filling leaks out while baking?
To prevent leakage, make sure the edges of your Garbage Bread are sealed tightly when rolling it up. If you notice a leak happening during baking, it’s usually due to an uneven roll or not sealing properly. Don’t worry too much; it’ll still taste delicious! Make adjustments in your next attempt to keep it secure.
Can I modify the ingredients for dietary restrictions?
Definitely! For a vegetarian option, swap out the meat for a medley of your favorite veggies and cheeses. Be mindful of any allergies; for example, you can replace cheese with dairy-free alternatives or skip the pickles for acidity if there’s a vinegar intolerance. The customizable nature of Garbage Bread makes it a fantastic option for various diets!
What’s the best way to reheat leftover Garbage Bread?
For the best texture, I recommend reheating leftover Garbage Bread in the oven. Preheat it to 350°F (175°C) and bake for about 10 minutes, or until it’s warmed through and the crust is crispy again. If you’re in a hurry, you can use the microwave, but the bread will be softer. Enjoy your delicious treat!
Garbage Bread: Mouthwatering Flavor in Every Bite
Ingredients
Equipment
Method
- Preheat your oven to 350°F (175°C) and line a large baking sheet with parchment paper.
- Cook ground beef and diced onion in a skillet over medium heat until browned, about 8-10 minutes. Season and drain excess fat.
- Roll out the refrigerated French bread dough on a floured surface to a rectangular shape of about 12x18 inches.
- Spread ketchup and mustard over the dough, leaving a ½-inch border around the edges.
- Layer cooked ground beef mixture, bacon, chopped pickles, and cheese slices evenly over the condiments.
- Roll the dough tightly from one long side, sealing the edges and pinching the seam.
- Place the rolled bread seam-side down on the baking sheet. Brush with a beaten egg and sprinkle with sesame seeds.
- Bake for 20-25 minutes until golden brown and puffy. Monitor closely for desired doneness.
- Cool for 5 minutes before slicing. Serve warm with Thousand Island dressing for dipping.