Crispy Air Fryer Apple Fritters: Sweet Comfort in Every Bite

With a whiff of cinnamon swirling in the air, there’s something undeniably comforting about a freshly made treat. As I reached for my air fryer, the thought of Air Fryer Apple Fritters danced in my mind—crispy on the outside, fluffy on the inside, and filled with sweet, tender apple chunks. This easy recipe transforms everyday ingredients into a delightful dessert, making it perfect for cozy family dinners or friendly gatherings. Not only does it offer a healthier twist on the classic fritter, but it also provides a quick cooking method that doesn’t compromise on taste. Can you imagine serving these warm, dusted with powdered sugar, alongside your favorite ice cream? I can’t wait for you to try these delicious fritters—what will you pair them with?

Why are Air Fryer Apple Fritters irresistible?

Crispy exterior, fluffy interior—these fritters are like a warm hug for your taste buds. Quick and easy, this recipe saves you time without sacrificing flavor, making them perfect for last-minute desserts. Versatile variations abound; swap apples for pears or bananas for a fun twist! Crowd-pleasing treat, everyone will be asking for seconds—especially when paired with a scoop of vanilla ice cream. Why not elevate your next gathering with these delightful Air Fryer Apple Fritters?

Air Fryer Apple Fritter Ingredients

For the Batter

  • All-Purpose Flour – Provides structure and a fluffy texture; substitute with gluten-free flour for a gluten-free option.
  • Granulated Sugar – Adds sweetness to balance flavors; consider using coconut sugar for a lower glycemic index.
  • Baking Powder – Acts as a leavening agent to ensure the fritters rise properly.
  • Ground Cinnamon – Enhances flavor; substitute with pumpkin pie spice for a seasonal twist.
  • Ground Nutmeg – Adds warmth to the spice mix; optional and can be omitted if desired.
  • Eggs – Acts as a binder and adds moisture; flaxseed meal can be used for a vegan version.
  • Milk – Provides moisture; use almond or oat milk for a lactose-free alternative.
  • Vanilla Extract – Adds aromatic sweetness; can be replaced with almond extract for a different flavor.
  • Apples (e.g., Fuji or Honeycrisp) – Provides natural sweetness and texture; pears or bananas can be used instead for different variations.

For the Glaze

  • Powdered Sugar – For dusting; optional depending on desired sweetness, try it for that classic Air Fryer Apple Fritters finish.

Step‑by‑Step Instructions for Air Fryer Apple Fritters

Step 1: Prepare Apples
Start by peeling, coring, and dicing your apples into ½ inch pieces. Aim for uniform sizes to ensure even cooking. Set the prepared apple pieces aside as you move on to the batter—these fruity morsels will add sweetness and texture to your Air Fryer Apple Fritters!

Step 2: Make Batter
In a large mixing bowl, whisk together your dry ingredients—flour, sugar, baking powder, cinnamon, and nutmeg. In a separate bowl, combine the wet ingredients: eggs, milk, and vanilla extract, whisking until smooth. Gradually fold the wet mixture into the dry, then carefully mix in the diced apples, ensuring a gentle touch to maintain a fluffy texture.

Step 3: Preheat Air Fryer
Preheat your air fryer to 350°F (175°C) for about 5 minutes. This step is crucial for achieving that golden-brown exterior on your Air Fryer Apple Fritters. While it’s heating up, prepare your air fryer basket by lightly spraying it with cooking oil to prevent sticking.

Step 4: Shape Fritters
Using a spoon or a cookie scoop, drop generous portions of the batter into the preheated air fryer basket, ensuring there’s enough space between each fritter for proper airflow. You want them to puff up beautifully, so avoid overloading the fryer basket for best results!

Step 5: Cook Fritters
Air fry the fritters for approximately 10-12 minutes, flipping them halfway through the cooking time. Keep an eye on them; they should turn a lovely golden brown on the outside. This is when the magic happens, turning your batter into beautifully cooked Air Fryer Apple Fritters!

Step 6: Prepare Glaze
Once cooked, remove the fritters from the air fryer and let them cool for a few minutes. Dust them lightly with powdered sugar while they’re warm for a touch of sweetness. Serve your delightful Air Fryer Apple Fritters warm, and savor the festive aroma and taste they bring to your table!

Air Fryer Apple Fritters Variations & Substitutions

Feel free to get creative with these delightful fritters—your taste buds will thank you!

  • Gluten-Free: Use a gluten-free flour blend for a delicious option that everyone can enjoy.
  • Vegan: Replace eggs with flaxseed meal or applesauce. Just mix 1 tablespoon of ground flaxseed with 3 tablespoons of water—let it sit for a few minutes until thickened.
  • Dairy-Free: Swap milk with almond milk or coconut milk for a creamy, rich flavor without the dairy. This keeps the batter light and fluffy!
  • Sweet Spice: Consider using pumpkin pie spice instead of cinnamon for a warm, seasonal twist. Just think of those autumn vibes!
  • Fruit Variations: Substitute apples with pears or even mashed bananas for a completely different fruity flavor while keeping it delicious and comforting.
  • Nutty Addition: Fold in walnuts or pecans for an added crunch, giving your fritters a delightful texture and heartiness.
  • Extra Decadence: Mix in chocolate chips for a sweet surprise! Warm, melty chocolate is the perfect complement to the apple flavor.
  • Zesty Flavor: Add a teaspoon of lemon zest to the batter for a bright, refreshing contrast to the sweetness of the apples.

Looking to spice things up? Try pairing your Air Fryer Apple Fritters with a refreshing drink like a Pineapple Coconut Mojito for a delightful finish! And if you’re aiming for something savory, why not serve them alongside some Air Fryer Chicken for a perfect brunch combination? Enjoy customizing your fritters!

Expert Tips for Air Fryer Apple Fritters

  • Don’t Overmix: Mixing the batter too much can lead to dense fritters. Just stir until combined for a lighter texture!
  • Preheat Properly: Ensure your air fryer is fully preheated; this helps achieve that desired golden-brown crust on your Air Fryer Apple Fritters.
  • Check for Doneness: Avoid the mistake of undercooking. Fritters should be well-browned and fluffy inside; give them an extra minute if unsure.
  • Use Uniform Size: A cookie scoop helps create evenly sized fritters that cook at the same rate, ensuring each bite is just as delicious as the last.
  • Experiment with Spices: Personalize your fritters by trying different spices like nutmeg or pumpkin pie spice for a unique twist each time!

What to Serve with Air Fryer Apple Fritters?

With each bite of warm, cinnamon-scented goodness, you’ll want to create a complete meal that embraces comfort and sweetness.

  • Vanilla Ice Cream: The creamy sweetness contrasts beautifully with the warm fritters, creating a delightful dessert experience.
  • Caramel Sauce: Drizzle over the fritters for an indulgent touch that heightens their decadent apple flavor.
  • Coffee: A cup of rich, brewed coffee complements the fritters’ sweetness, making for a perfect afternoon treat or breakfast pairing.
  • Fresh Fruit Salad: A refreshing mix of berries and citrus balances the richness of the fritters with bright, refreshing flavors.
  • Whipped Cream: Light and fluffy, it adds a touch of elegance and extra sweetness to your warm fritters.
  • Chocolate Sauce: For those with a sweet tooth, chocolate sauce provides a deliciously decadent dip that transforms the fritters into a dessert delight.
  • Nutty Granola: A crunchy, nutty granola sprinkled on top offers a delightful contrast in texture and a burst of flavor.
  • Chai Tea: The warm spices in chai pair wonderfully with cinnamon fritters, creating a cozy, comforting beverage to enjoy on a chilly day.
  • Maple Syrup: A drizzle of maple syrup lends natural sweetness and enhances the flavors of your delightful Air Fryer Apple Fritters.

Storage Tips for Air Fryer Apple Fritters

Room Temperature: Store leftover Air Fryer Apple Fritters in an airtight container at room temperature for up to 2 days to maintain their delightful freshness.

Fridge: If you prefer to keep them longer, refrigerate the fritters in an airtight container for up to 5 days. Reheat them in the air fryer to restore their crispness.

Freezer: For longer storage, freeze the fritters in a single layer on a baking sheet before transferring to an airtight container or freezer bag. They can be frozen for up to 3 months.

Reheating: When ready to enjoy, simply reheat the fritters in your air fryer at 350°F (175°C) for 3-5 minutes until warmed through and crispy again.

Make Ahead Options

These Air Fryer Apple Fritters are perfect for busy home cooks looking to save time without sacrificing flavor! You can prepare the batter and refrigerate it for up to 24 hours in advance; just keep the diced apples separate and fold them in right before cooking to maintain their freshness. Additionally, you can dice your apples and refrigerate them in an airtight container for up to 3 days to prevent browning. When you’re ready to enjoy, simply combine the batter with the apples, preheat your air fryer, and cook as directed for warm, delicious fritters—just like they were made fresh that day!

Air Fryer Apple Fritters Recipe FAQs

How do I select the best apples for my fritters?
Absolutely! I recommend using Fuji or Honeycrisp apples as they provide the ideal sweetness and texture. Look for firm apples without bruises or dark spots. If you want to try something different, pears or even mashed bananas can be delightful substitutes!

How should I store leftover Air Fryer Apple Fritters?
Very! To keep your fritters fresh, store them in an airtight container at room temperature for about 2 days. If you prefer a longer shelf life, refrigerate them for up to 5 days. Don’t forget to reheat in the air fryer for 3-5 minutes before serving to restore their crispiness!

Can I freeze Air Fryer Apple Fritters?
Of course! To freeze, first arrange the fritters in a single layer on a baking sheet and freeze until solid. Once frozen, transfer them to an airtight container or freezer bag. They can be stored in the freezer for up to 3 months. When you’re ready to enjoy, simply reheat in your air fryer at 350°F (175°C) for 3-5 minutes.

What should I do if my fritters are not cooking evenly?
No worries! Ensure you’re not overcrowding the air fryer basket, as this can hinder air circulation and lead to uneven cooking. It’s best to air fry them in batches if necessary. If they are still undercooked after the suggested cooking time, allow them an extra minute or two until they’re golden brown and cooked through.

Are Air Fryer Apple Fritters suitable for dietary restrictions?
Absolutely! This recipe can easily cater to various dietary needs. For a gluten-free option, substitute all-purpose flour with gluten-free flour. If you want a vegan version, simply swap the eggs for flaxseed meal and use almond or oat milk as alternatives. Just be cautious of any allergies related to apples or nuts if adding.

How long does it take to prepare the batter for the fritters?
Preparing the batter takes about 15-20 minutes. You’ll spend some time peeling and dicing the apples, mixing the dry and wet ingredients, and combining everything together. Remember, the more careful you are with your mixing, the fluffier your fritters will be!

Air Fryer Apple Fritters

Crispy Air Fryer Apple Fritters: Sweet Comfort in Every Bite

These Air Fryer Apple Fritters are crispy on the outside, fluffy on the inside, and filled with sweet apple chunks, making them perfect for a cozy dessert.
Prep Time 15 minutes
Cook Time 12 minutes
Cooling Time 5 minutes
Total Time 32 minutes
Servings: 4 fritters
Course: Dessert
Cuisine: American
Calories: 210

Ingredients
  

For the Batter
  • 1 cup All-Purpose Flour or gluten-free flour
  • 1 cup Granulated Sugar or coconut sugar
  • 2 teaspoons Baking Powder
  • 1 teaspoon Ground Cinnamon or pumpkin pie spice
  • 1/4 teaspoon Ground Nutmeg optional
  • 1 large Eggs or flaxseed meal for vegan
  • 1/2 cup Milk or almond/oat milk
  • 1 teaspoon Vanilla Extract or almond extract
  • 2 cups Apples (e.g., Fuji or Honeycrisp) or pears/bananas
For the Glaze
  • 1 cup Powdered Sugar optional, for dusting

Equipment

  • Air fryer

Method
 

Preparation Steps
  1. Prepare Apples: Peel, core, and dice apples into ½ inch pieces and set aside.
  2. Make Batter: Whisk together dry ingredients and then combine with wet ingredients, fold in apples.
  3. Preheat Air Fryer: Preheat to 350°F (175°C) for about 5 minutes and prepare the basket with cooking oil.
  4. Shape Fritters: Drop portions of batter into the air fryer basket, ensuring space between each fritter.
  5. Cook Fritters: Air fry for 10-12 minutes, flipping halfway through until golden brown.
  6. Prepare Glaze: Dust cooked fritters with powdered sugar while warm and serve.

Nutrition

Serving: 1fritterCalories: 210kcalCarbohydrates: 30gProtein: 2gFat: 9gSaturated Fat: 1gPolyunsaturated Fat: 0.5gMonounsaturated Fat: 4gCholesterol: 30mgSodium: 150mgPotassium: 150mgFiber: 1gSugar: 10gVitamin A: 200IUVitamin C: 2mgCalcium: 25mgIron: 1mg

Notes

For best results, do not overmix the batter and ensure the air fryer is preheated properly for a crispy finish.

Tried this recipe?

Let us know how it was!

Sausage and Egg Pies: The Ultimate Breakfast Comfort Food

As I hovered over the brunch spread, a delightful aroma wafted through the air, pulling me closer to the unmistakable combo of sausage and eggs. That’s when this idea sparked: Savory Sausage and Egg Pies. This comforting recipe promises to elevate your breakfast game while being effortlessly adaptable to whatever ingredients you have on hand. Whether you’re hosting weekend guests or just treating yourself, these golden, flaky pastries filled with juicy sausage and fluffy eggs are a surefire hit. They’re not only easy to whip up, but they also make a fantastic make-ahead option for busy mornings. Curious about how to bring your breakfast table to life with this mouthwatering delight? Let’s dive into the deliciousness!

Why Are Sausage and Egg Pies Irresistible?

Comforting and Satisfying: A warm bite of these pies takes you to breakfast bliss with every mouthful of savory sausage and creamy cheese.
Versatile Option: Feel free to customize with your favorite veggies or swap out ingredients based on your cravings, just like with my Baked Vegetable Egg recipe!
Perfect for Any Meal: Whether it’s breakfast, brunch, or even a hearty snack, these pies fit perfectly into any meal plan.
Make-Ahead Convenience: Prep them in advance for quick breakfasts during busy weeks; they can be stored easily and still taste fantastic reheated.
Crowd-Pleasing Delight: These mini savory pastries are great for gatherings—your friends and family will be reaching for seconds!

Sausage and Egg Pies Ingredients

• Get ready to bring comfort to your table with these Sausage and Egg Pies!

For the Filling

  • Sausage Meat – Choose high-quality sausage with robust flavors; it serves as the heart of your pies.
  • Eggs – Fresh eggs lend moisture and protein to the filling; save some for egg washing!
  • Cheddar Cheese – This ingredient adds creamy richness; feel free to swap with your favorite cheese variety.
  • Salt and Pepper – Essential for enhancing flavor; adjust according to your personal taste.

For the Crust

  • Puff Pastry – The key to a flaky and tender crust; using pre-made saves time, just keep it chilled before rolling out.

Step‑by‑Step Instructions for Sausage and Egg Pies

Step 1: Preheat the Oven
Begin by preheating your oven to 375°F (190°C). This ensures the perfect baking environment for your Sausage and Egg Pies. While the oven heats up, gather your ingredients and equipment, including a muffin tin and a rolling pin, to streamline the process ahead.

Step 2: Prepare the Puff Pastry
Unroll the chilled puff pastry on a lightly floured surface. Use a rolling pin to flatten it slightly, then cut out circles that are slightly larger than the cups of your muffin tin. Each circle should be about 4 inches in diameter to comfortably fit into the tin, ensuring a generous crust around your filling.

Step 3: Line the Muffin Tin
Carefully place each puff pastry circle into the muffin tin, pressing down gently to secure it in place. Make sure each cup is lined evenly to create a sturdy base for your Sausage and Egg Pies. The pastry edges should slightly overhang for a beautiful presentation when baked.

Step 4: Prepare the Filling
In a mixing bowl, combine the sausage meat, 3 beaten eggs, and shredded cheddar cheese. Season with salt and pepper to taste, ensuring everything is well incorporated. This savory mixture is the heart of your pies, so mix until the sausage is evenly distributed throughout for maximum flavor.

Step 5: Fill the Pastry Cups
Spoon the sausage mixture into each lined pastry cup, filling them to just below the rim. Take care not to overfill, as the egg will puff during baking. Each cup should look beautifully packed, ready to transform into a delicious Sausage and Egg Pie in the oven.

Step 6: Egg Wash the Pastry Edges
Reserve a small amount of the beaten egg and use it to brush along the edges of each pastry. This step adds a lovely golden brown color and shiny finish to your Sausage and Egg Pies. The egg wash also helps seal the edges, ensuring that none of your savory filling escapes during baking.

Step 7: Bake to Perfection
Place the muffin tin in the preheated oven and bake for 25-30 minutes. Keep an eye on the pies as they bake; the crust should turn a gorgeous golden brown, and the filling should be firm to the touch. The enticing aroma will fill your kitchen, heralding a delicious result.

Step 8: Cool and Serve
Once baked, carefully remove the muffin tin from the oven and allow your Sausage and Egg Pies to cool slightly for about 5-10 minutes. This cooling step makes them easier to handle. Serve your delightful creations warm, perfect for a hearty breakfast or brunch treat.

How to Store and Freeze Sausage and Egg Pies

Fridge: Store your Sausage and Egg Pies in an airtight container for up to 3 days. They’ll retain their flavor and texture, making them perfect for quick breakfasts.

Freezer: You can freeze these pies for up to 2 months. Make sure they are fully cooled, then wrap them tightly in plastic wrap followed by aluminum foil to prevent freezer burn.

Reheating: To enjoy, reheat from frozen in a preheated oven at 350°F (175°C) for about 20-25 minutes, or until heated through. This helps maintain the crispy crust.

Make-Ahead: Preparing Sausage and Egg Pies in advance is a great way to save time on busy mornings; just follow the storage tips to keep them fresh!

Make Ahead Options

These Sausage and Egg Pies are perfect for meal prep enthusiasts! You can prepare the filling (sausage mixture and cheese combined) up to 24 hours in advance—just store it in an airtight container in the refrigerator to keep it fresh. The pastry can also be rolled out and lined in the muffin tin, then covered and refrigerated for up to 3 days. When you’re ready to serve, fill the pastry cups with the chilled sausage mixture, brush with the reserved egg wash, and bake as directed. This way, you’ll have delicious breakfast pies ready with minimal effort, just as tasty as if made fresh!

What to Serve with Sausage and Egg Pies

Make your breakfast feast even more delightful by pairing these irresistible pies with complementary dishes that enhance the experience.

  • Fresh Fruit Salad: Light and refreshing, a mix of seasonal fruits adds a burst of color and natural sweetness to your meal.

  • Crispy Hash Browns: The crunchy texture of golden hash browns contrasts wonderfully with the tender filling of the pies, creating a satisfying bite.

  • Garlic Sautéed Spinach: This nutritious green element brings a slight bitterness that balances the savory flavors of the sausage and eggs.

Pair your Sausage and Egg Pies with a hint of brightness from a side of seasoned avocado slices. The creaminess enhances the overall flavor profile, making each bite a joy.

  • Classic Coffee: The rich warmth of freshly brewed coffee complements the hearty pastry, making your brunch complete and energizing.

  • Herbed Yogurt Dip: A cool, creamy dip adds a tangy note that can be drizzled over the pies for a delightful twist, contrasting the golden pastry.

  • Mini Cinnamon Rolls: Indulge in something sweet to round out the meal; their soft texture and sweet spice provide a lovely contrast to the savory pies.

  • Sparkling Water with Lemon: For a refreshing drink option, citrus-infused sparkling water cleanses the palate beautifully between bites of your savory treat.

Sausage and Egg Pies Variations

Feel free to let your culinary creativity shine with these delightful twists on the classic Sausage and Egg Pies!

  • Bacon Boost: Swap the sausage for crispy bacon for a smoky flavor explosion that will make breakfast even more decadent.
    The combination of the salty bacon and creamy eggs creates a heavenly mix that will satisfy any breakfast craving.

  • Vegetable Medley: Add sautéed spinach, bell peppers, or mushrooms to the filling for a nutritious twist.
    This not only elevates the flavor profile but also adds a pop of color to your pies, making them visually appealing as well.

  • Cheese Swap: Try using feta or mozzarella instead of cheddar cheese for a different taste experience.
    The tanginess of feta or the melt-in-your-mouth goodness of mozzarella will take your pies to a new level.

  • Spice It Up: Sprinkle in some red pepper flakes or diced jalapeños for an added kick of heat.
    This is perfect for those who enjoy a bit of spice with their breakfast, adding an unexpected element of surprise.

  • Savory Herbs: Infuse your filling with fresh herbs like chives, parsley, or thyme for a fragrant twist.
    The vibrant flavors will bring your Sausage and Egg Pies to life, making them feel like they came straight from a gourmet kitchen.

  • Meat-Free Delight: Substitute the sausage with a plant-based alternative for a delicious vegan option.
    Even if you’re not plant-based, this variation can introduce a whole new texture and flavor profile that might surprise you.

  • Flavorful Sauces: Consider adding a dollop of salsa or hot sauce on top before serving for an extra burst of flavor.
    This simple addition can transform the entire experience, turning your humble pies into an exciting dish that packs a punch.

  • Mini Versions: Create bite-sized versions using mini muffin tins for a fun appetizer or party snack.
    These little treasures are perfect for gatherings and are incredibly cute, making them irresistible to your guests!

Whether you’re in the mood for something classic or adventurous, these variations ensure there’s a Sausage and Egg Pie to please every palate. If you’re looking for additional inspiration for delicious breakfast options, check out my Grilled Chicken Sandwich or Cheese Roll Ups for even more family-friendly favorites!

Expert Tips for Sausage and Egg Pies

  • Quality Sausage: Choose high-quality sausage with robust flavors; this will enhance the overall taste of your Sausage and Egg Pies.
  • Chill the Pastry: Always use chilled puff pastry to ensure it puffs beautifully when baked—warm pastry can lead to a soggy crust.
  • Don’t Overfill: Fill the pastry cups just below the rim to allow space for the egg to puff up during baking, preventing messy overflow.
  • Customize Vegetables: Feel free to add veggies like spinach or bell peppers for extra nutrition; just remember to sauté them first to avoid excess moisture.
  • Baking Time Watch: Keep a close eye on the baking time; your pies are perfect once the crust is golden brown and the filling is set.

Sausage and Egg Pies Recipe FAQs

How do I select the best sausage meat?
Absolutely! When choosing sausage meat, look for high-quality options that contain herbs or spices for added flavor. Freshness is key—check the expiration date and avoid any with dark spots or an off smell. For a unique twist, consider exploring local artisan butchers for their homemade blends!

How can I store leftover Sausage and Egg Pies?
Certainly! After preparation, store any leftover Sausage and Egg Pies in an airtight container in the fridge for up to 3 days. This keeps them fresh and ready for quick breakfasts—just reheat in the oven for the best texture!

Can I freeze Sausage and Egg Pies?
Very much so! To freeze, first ensure the pies are completely cooled. Wrap each pie individually in plastic wrap and then in aluminum foil to prevent freezer burn. You can freeze them for up to 2 months. When you’re ready to enjoy, reheat from frozen at 350°F (175°C) for about 20-25 minutes until warmed through.

What should I do if the pastry is soggy?
Not a worry! If your Sausage and Egg Pies turn out soggy, ensure the pastry is chilled before baking and that you don’t overload the filling. Baking them until the crust is golden brown also helps eliminate excess moisture. You can also pre-bake the pastry shells for a few minutes before adding the filling to set them and avoid sogginess.

Are these Sausage and Egg Pies suitable for dietary restrictions?
Definitely! If you’re accommodating specific dietary needs, you can customize these pies. Use gluten-free puff pastry for a gluten-free version or choose low-fat sausage and cheese to reduce calories. Always be mindful of allergies, especially if using alternative ingredients. If you have pets, avoid feeding them foods with onions or garlic included in your recipe.

How can I customize these Sausage and Egg Pies further?
The more the merrier! To tailor your pies, consider adding sautéed vegetables like spinach, bell peppers, or mushrooms for added nutrition. You can also try swapping the sausage with breakfast bacon or pancetta for a different flavor profile. Remember, the filling is versatile, so you can mix and match based on what you have in your pantry!

Sausage and Egg Pies

Sausage and Egg Pies: The Ultimate Breakfast Comfort Food

Sausage and Egg Pies are the perfect breakfast comfort food, combining flaky pastry with juicy sausage and fluffy eggs.
Prep Time 20 minutes
Cook Time 30 minutes
Cooling Time 10 minutes
Total Time 1 hour
Servings: 12 pies
Course: Breakfast
Cuisine: Comfort Food
Calories: 250

Ingredients
  

For the Filling
  • 1 pound Sausage Meat Choose high-quality sausage with robust flavors.
  • 3 Eggs Fresh eggs lend moisture and protein to the filling; save some for egg washing!
  • 1 cup Cheddar Cheese Feel free to swap with your favorite cheese variety.
  • to taste Salt Essential for enhancing flavor.
  • to taste Pepper Essential for enhancing flavor.
For the Crust
  • 1 sheet Puff Pastry Using pre-made saves time; keep it chilled before rolling out.

Equipment

  • Muffin Tin
  • Rolling Pin

Method
 

Step-by-Step Instructions for Sausage and Egg Pies
  1. Preheat the oven to 375°F (190°C).
  2. Unroll the chilled puff pastry on a lightly floured surface and cut out circles about 4 inches in diameter.
  3. Line each muffin tin cup with the puff pastry circles, pressing down gently.
  4. In a mixing bowl, combine the sausage meat, 3 beaten eggs, and cheddar cheese. Season with salt and pepper.
  5. Spoon the sausage mixture into each lined pastry cup, filling just below the rim.
  6. Brush the edges of each pastry with reserved beaten egg for a golden finish.
  7. Bake for 25-30 minutes, until the crust is golden brown and the filling is firm.
  8. Cool for 5-10 minutes before serving warm.

Nutrition

Serving: 1pieCalories: 250kcalCarbohydrates: 15gProtein: 12gFat: 15gSaturated Fat: 5gPolyunsaturated Fat: 2gMonounsaturated Fat: 8gCholesterol: 180mgSodium: 400mgPotassium: 180mgFiber: 1gSugar: 1gVitamin A: 500IUVitamin C: 1mgCalcium: 150mgIron: 2mg

Notes

These Sausage and Egg Pies can be customized with your favorite veggies or different types of cheese, and they make a great make-ahead option.

Tried this recipe?

Let us know how it was!

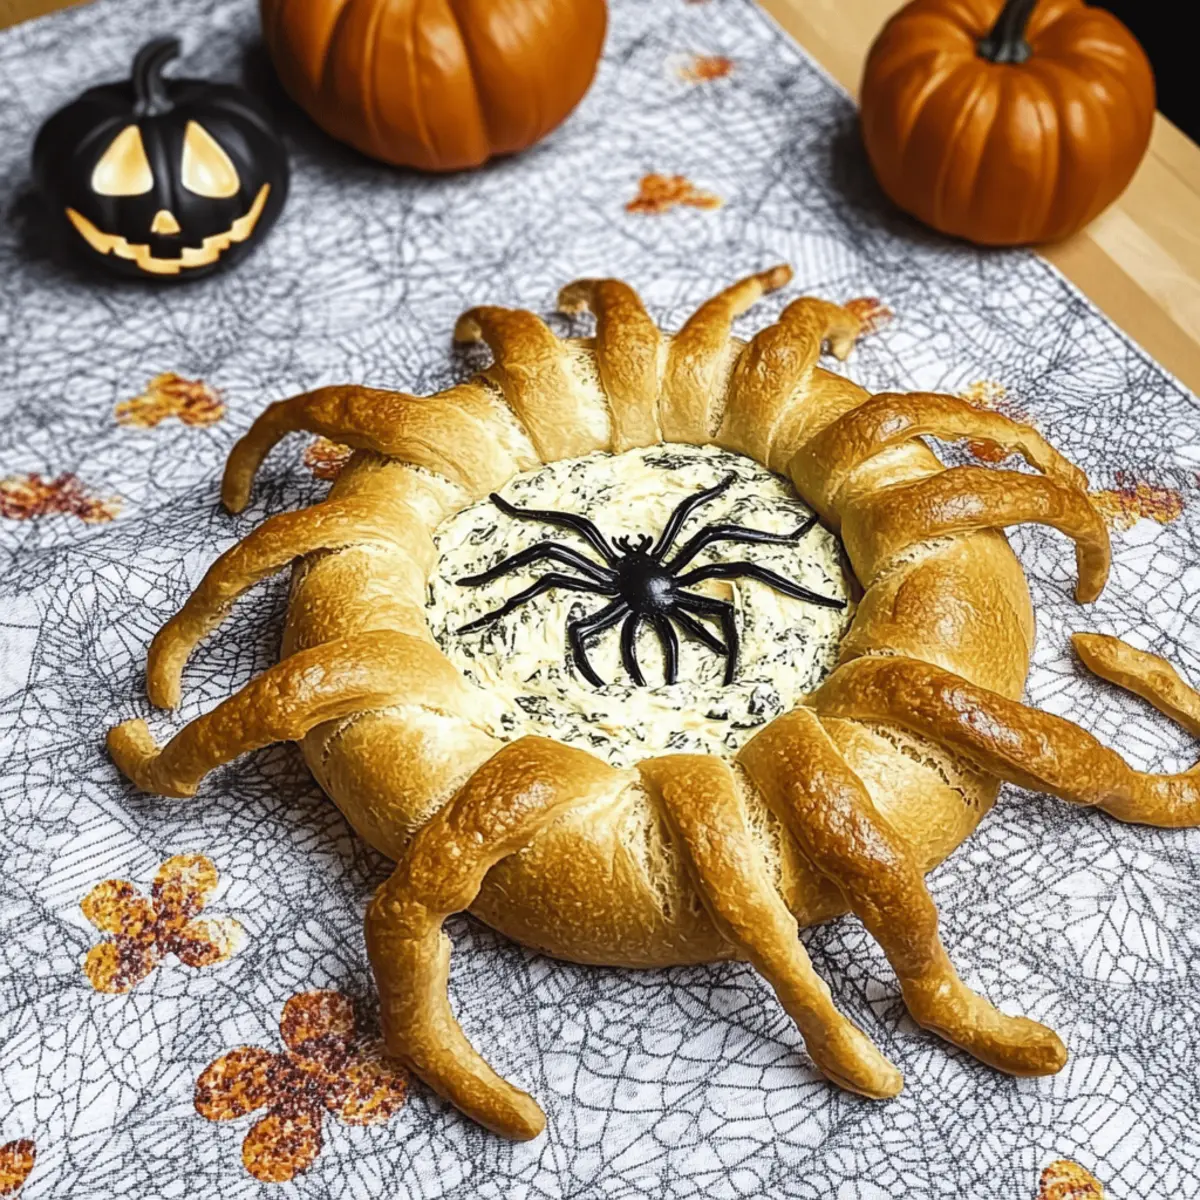
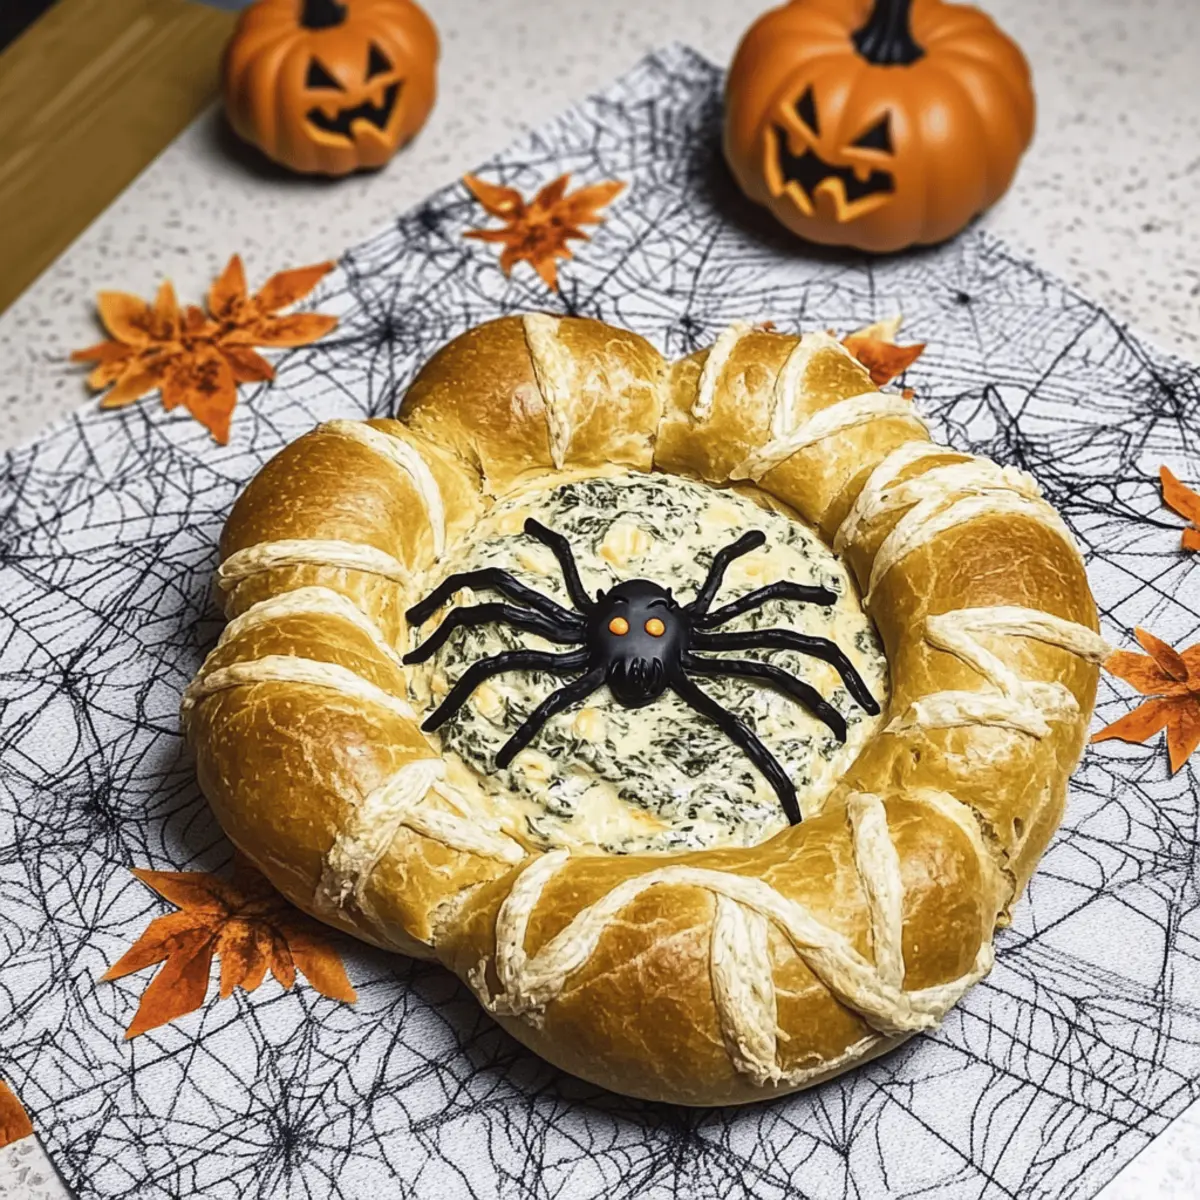
Delicious Halloween Spider Bread That Dips Delightfully

As the cool autumn breeze sweeps in, it’s time to shake up your Halloween festivities with a delightfully spooky twist. Meet the Halloween Spider Bread Bowl—a recipe that not only serves as an enchanting centerpiece but also doubles as a yummy dip container. With its charming spider shape, it’s bound to spark conversations and bring a smile to both kids and adults alike. Best of all, crafting this culinary creation is a breeze, making it the perfect addition to your Halloween party menu. Whether you’re hosting a ghoulish gathering or a cozy family night, this easy party food guarantees a fun and interactive experience. What kind of dips will you fill your spooky spider with?

Why is Halloween Spider Bread a Must-Make?

Easy to Prepare: You don’t need to be a master chef to whip up this charming dish—it’s simple enough for anyone to try!

Adorable & Fun: This cute spider shape will be the star of your Halloween spread, delighting both kids and adults.

Deliciously Versatile: Fill your spider bread bowl with a variety of dips like spinach artichoke or a classic cheesy blend to cater to everyone’s taste.

Crowd-Pleasing Appeal: Perfect for parties, this recipe brings a fun, interactive twist to any gathering, inviting guests to dive right in!

Make Ahead Friendly: You can prep the bread a day in advance and simply reheat before serving, saving you precious time for fun festivities!

Get creative with your fillings and serve with an array of dippable snacks for an unforgettable Halloween celebration!

Halloween Spider Bread Ingredients

• Get ready to bake your Halloween Spider Bread with these essential ingredients!

For the Dough

  • Flour – The backbone of your bread, providing structure; whole wheat or gluten-free flour make great substitutions.
  • Water – Helps hydrate and activate the yeast; warm water speeds up the yeast magic!
  • Yeast – The leavening hero that gives your bread its rise; instant yeast can cut your prep time in half.
  • Sugar – Adds a hint of sweetness while aiding in browning; honey or agave syrup can also be used.
  • Salt – Elevates the overall flavor; never skip this crucial ingredient for that delicious taste!
  • Egg – Adds richness and a lovely golden color to your bread; consider a flax egg for a vegan twist.

For the Spider Features

  • Coffee Beans/Peppercorns – These will create the spider’s creepy eyes; raisins or chocolate chips make a sweeter option!

For Baking

  • Cooking Spray – Keeps your bread from sticking; any neutral oil will do the trick!

Step‑by‑Step Instructions for Halloween Spider Bread

Step 1: Make the Dough
In a large mixing bowl, combine 3 cups of flour, 1 cup of warm water, 2 teaspoons of instant yeast, 1 tablespoon of sugar, 1 teaspoon of salt, and 1 beaten egg. Mix with a wooden spoon until a shaggy dough forms. Gradually knead the dough on a floured surface for about 8-10 minutes until it becomes smooth and elastic, indicating that your Halloween Spider Bread will rise beautifully.

Step 2: Shape the Spiders
Once the dough is ready, divide it into three pieces: one for the main body and two smaller ones for the head and legs. Shape the larger piece into an oval for the body, then take small pieces from the remaining dough to roll out 8 thin ropes as legs. Attach them by pinching to the body and head; this will create a fun and quirky spider shape on a parchment-lined cookie sheet.

Step 3: Rise
Lightly spray the shaped spider dough with cooking spray to keep it moist and cover it gently with plastic wrap. Let it rise in a warm area for 30-45 minutes, or until it has visibly doubled in size. This crucial step ensures your Halloween Spider Bread will be fluffy and airy when baked.

Step 4: Preheat Oven
While the dough is rising, preheat your oven to 400°F (200°C). Getting your oven hot means your Halloween Spider Bread will have that beautiful golden crust when baked. This warming will ensure even cooking and perfect results—your kitchen will soon smell delightful!

Step 5: Add Eyes
After the dough has risen, it’s time to add some character to your creepy crawlers! Use coffee beans to create eyes for the large spider and peppercorns for the smaller ones. Gently press them into place; this small touch will enhance the spooky appearance of your Halloween Spider Bread.

Step 6: Egg Wash
To achieve a glossy finish on your Spider Bread, brush the surface of the dough with an egg wash—this can be a simple mixture of beaten egg with a splash of water. This step not only adds a beautiful sheen but also aids in browning during baking, crusting up your Halloween treat to a perfect golden hue.

Step 7: Bake
Carefully place your shaped spider bread in the preheated oven. Bake the large spider for 20-25 minutes or until it reaches an internal temperature of 200°F (93°C) when checked with an instant-read thermometer. The smaller spiders can bake for 15-20 minutes; keep an eye out for that enticing golden brown color.

Step 8: Cool
Once baked, transfer your Halloween Spider Bread to a cooling rack. Let it cool for about 20 minutes to ensure the interior sets properly before cutting. This cooling period also helps prevent tearing when you’re ready to hollow it out, making it perfect for serving dips.

Step 9: Hollow Out
Finally, to create an enticing dip container, carefully cut the top off the large spider and hollow out the inside with a knife or spoon. Be gentle so that the bread maintains its spider shape. Now, your delightful Halloween Spider Bread is ready to be filled with your favorite dips, serving as both a delicious treat and a spooky centerpiece!

What to Serve with Halloween Spider Bread

As you prepare to celebrate Halloween, consider an array of delicious accompaniments that will truly make your spider bread shine.

  • Crispy Veggie Sticks:
    Fresh carrots, celery, and bell peppers offer a crunchy contrast, perfect for dipping and adding a vibrant touch to your spooky spread.

  • Savory Spinach Artichoke Dip:
    This classic dip’s creamy texture pairs nicely with the soft bread, creating a delightful harmony of flavors your guests will adore.

  • Cheesy Buffalo Chicken Dip:
    With a zesty kick, this dip adds an exciting flavor twist that will have everyone diving into your Halloween Spider Bread!

  • Garlic Herb Butter Breadsticks:
    Serve warm, these buttery delight-filled breadsticks complement the spider’s whimsical shape while providing a perfect edible pairing.

  • Sliced Cheese Platter:
    A selection of cheeses brings elegance and great taste, balancing out the fun of your spider bread and inviting guests to indulge.

  • Sweet Mini Desserts:
    Delight your guests with an assortment of mini treats like chocolate-covered pretzels or cookie bites, offering a playful end to the meal after all the savory fun!

Storage Tips for Halloween Spider Bread

Room Temperature: Store your Halloween Spider Bread covered with a clean kitchen towel for up to 3 days, ensuring it maintains its freshness without drying out.

Fridge: For longer storage, wrap the bread tightly in plastic wrap or aluminum foil and place it in the fridge. It can last for up to a week; just remember to reheat before serving.

Freezer: If you want to keep your spider bread for an extended period, freeze it wrapped in plastic and then in an airtight container for up to 2 months. Thaw overnight in the fridge before reheating.

Reheating: To freshen your Halloween Spider Bread, reheat in a preheated oven at 350°F (175°C) for about 10-15 minutes until warmed through, perfect for enjoying with your favorite dips!

Make Ahead Options

These Halloween Spider Bread creations are perfect for busy cooks looking to save time without sacrificing fun! You can prepare the dough up to 24 hours in advance; simply follow the recipe up to the rising step, then cover and refrigerate the shaped spiders. This keeps the dough fresh and ready for baking when you’re ready to entertain. On the day you plan to serve, bring the dough to room temperature for about 30 minutes before proceeding to add the eyes, egg wash, and bake them. This way, your Halloween Spider Bread will be just as delicious and spooky, allowing you to enjoy stress-free preparations for your Halloween gathering!

Expert Tips for Halloween Spider Bread

  • Measure Accurately: Use a kitchen scale for precise measurements to ensure the perfect dough consistency for your Halloween Spider Bread.

  • Avoid Sticky Dough: If your dough becomes sticky while kneading, lightly flour your hands and working surface to make it manageable.

  • Cool Before Cutting: Allow your spider bread to cool completely before hollowing it out. This prevents tearing and keeps the spooky shape intact.

  • Enhance Flavor: Consider adding herbs like rosemary or thyme into the dough for extra flavor in your Halloween Spider Bread.

  • Creative Fillings: Don’t hesitate to get imaginative with dip fillings, using various options like a spicy buffalo dip or a classic spinach-artichoke mixture to cater to different tastes!

Variations & Substitutions for Halloween Spider Bread

Feel free to play around with the recipe and make it uniquely yours with these tempting twists!

  • Herb-Infused Dough: Add fresh or dried herbs like rosemary or thyme to the dough for a fragrant flavor boost. The aroma of herbs will fill your kitchen as it bakes!

  • Dairy-Free Option: Replace the egg with a flax egg made from ground flaxseed and water for a vegan-friendly version. Your guests won’t even notice the difference!

  • Spicy Kick: Mix in some crushed red pepper flakes or jalapeño bits to the dough for a thrilling heat that livens up your Halloween spread! It’s a fun surprise for those who love a bit of spice.

  • Sweet Spider Eyes: Swap out coffee beans and peppercorns for chocolate chips or raisins to create a sweeter, kid-friendly version. The cute chocolate eyes will surely bring squeals of delight!

  • Alternative Dips: Experiment with fillings by choosing from hot cheeses like queso, or try a tangy salsa; a layered dip can add a punch of flavors that everyone will adore. Explore your favorite recipes and enjoy the surprises!

  • Gluten-Free Flour: If needed, substitute the all-purpose flour with a gluten-free blend to cater to gluten-sensitive friends while maintaining great flavor and texture.

  • Cheesy Goodness: Incorporate shredded cheese into the dough for a savory twist that adds richness and melty goodness; think gooey cheddar or a blend of your favorites!

  • Seasonal Spices: Feel free to sprinkle in some pumpkin pie spice or cinnamon to embrace that cozy fall flavor. Your Halloween Spider Bread will not only look adorable but taste delightful too!

By making these variations, your Halloween feast will be bursting with flavors and surprises that everyone will savor. Looking for more fun ideas? Check out this spinach artichoke dip recipe to see how it pairs beautifully with your spider bread!

Halloween Spider Bread Recipe FAQs

How do I know if my ingredients are fresh enough?
Absolutely! For a successful Halloween Spider Bread, use fresh flour and yeast—look for yeast that is still active and bubbly when mixed with warm water and sugar. Check the flour for any off smells or visible signs of spoilage; fresh flour will smell slightly sweet and nutty. If any ingredients like your flour or yeast are close to their expiration dates, I’d recommend replacing them for the best results!

How should I store leftover Halloween Spider Bread?
Very! To keep your Halloween Spider Bread fresh, cover it with a clean kitchen towel at room temperature for up to 3 days. If you want to prolong its life, wrap it tightly in plastic wrap or aluminum foil and place it in the refrigerator for up to a week. Just remember to reheat it slightly before serving, to regain that lovely texture!

Can I freeze Halloween Spider Bread?
Absolutely! Freezing is a great option if you want to save some for later. To do this, wrap your cooled bread tightly in plastic wrap, then place it in an airtight container or freezer bag. This will keep it fresh for up to 2 months. When you’re ready to enjoy it again, simply thaw it overnight in the refrigerator. Reheat in the oven at 350°F (175°C) for about 10-15 minutes to bring it back to life!

What should I do if my dough is too sticky?
No worries! If your dough becomes too sticky while kneading, don’t panic. Lightly flour your hands and working surface, gradually adding flour little by little until the dough is manageable. Remember, it’s perfectly OK to adjust the flour amount slightly; the dough should be pliable but not overly sticky, creating a lovely structure for your Halloween Spider Bread!

Are there any dietary considerations I should keep in mind?
Very! This Halloween Spider Bread can easily be tailored for different dietary needs. For a vegan version, you can swap the egg for a flax egg made by mixing 1 tablespoon of ground flaxseed with 3 tablespoons of water. Also, selecting gluten-free flour ensures those with gluten sensitivities can enjoy this festive treat. Always check with guests beforehand if you’re serving this at a gathering, just to be safe!

Halloween Spider Bread

Delicious Halloween Spider Bread That Dips Delightfully

This Halloween Spider Bread is a spooky centerpiece perfect for parties, serving as a dip container that delights both kids and adults alike.
Prep Time 30 minutes
Cook Time 25 minutes
Rising Time 45 minutes
Total Time 1 hour 40 minutes
Servings: 8 pieces
Course: Appetizer
Cuisine: American
Calories: 200

Ingredients
  

For the Dough
  • 3 cups flour whole wheat or gluten-free options available
  • 1 cup warm water helps activate yeast
  • 2 teaspoons instant yeast cuts prep time
  • 1 tablespoon sugar can substitute honey or agave syrup
  • 1 teaspoon salt essential for flavor
  • 1 large egg for richness; can use flax egg for vegan option
For the Spider Features
  • 8 pieces coffee beans/peppercorns for eyes; raisins or chocolate chips can be an alternative
For Baking
  • as needed cooking spray neutral oil can work too

Equipment

  • Mixing Bowl
  • cookie sheet
  • Oven
  • Spatula
  • knife
  • Measuring cups
  • Measuring spoons
  • Plastic Wrap
  • cooling rack

Method
 

Instructions
  1. In a large mixing bowl, combine flour, warm water, instant yeast, sugar, salt, and a beaten egg. Mix until a shaggy dough forms. Knead on a floured surface for 8-10 minutes until smooth and elastic.
  2. Divide the dough into three pieces for the main body and legs. Shape the large piece into an oval for the body and roll 8 thin ropes for the legs, attaching them to create the spider shape.
  3. Lightly spray the shaped dough with cooking spray, cover with plastic wrap, and let it rise in a warm area for 30-45 minutes, until doubled in size.
  4. Preheat your oven to 400°F (200°C) while the dough rises.
  5. After rising, use coffee beans to create eyes on the large spider and peppercorns for the smaller ones.
  6. Brush the surface of the dough with an egg wash (beaten egg with water) for a glossy finish.
  7. Bake the large spider for 20-25 minutes and the smaller spiders for 15-20 minutes, until golden brown and internal temperature reaches 200°F (93°C).
  8. Transfer to a cooling rack and cool for 20 minutes before cutting.
  9. Carefully cut the top off the large spider and hollow out the inside to create a dip container.

Nutrition

Serving: 1pieceCalories: 200kcalCarbohydrates: 35gProtein: 6gFat: 4gSaturated Fat: 1gPolyunsaturated Fat: 1gMonounsaturated Fat: 2gCholesterol: 50mgSodium: 350mgPotassium: 150mgFiber: 2gSugar: 1gVitamin A: 1IUCalcium: 2mgIron: 8mg

Notes

Store covered at room temperature for up to 3 days, or refrigerate for up to a week. Freeze for longer storage up to 2 months. Reheat before serving.

Tried this recipe?

Let us know how it was!

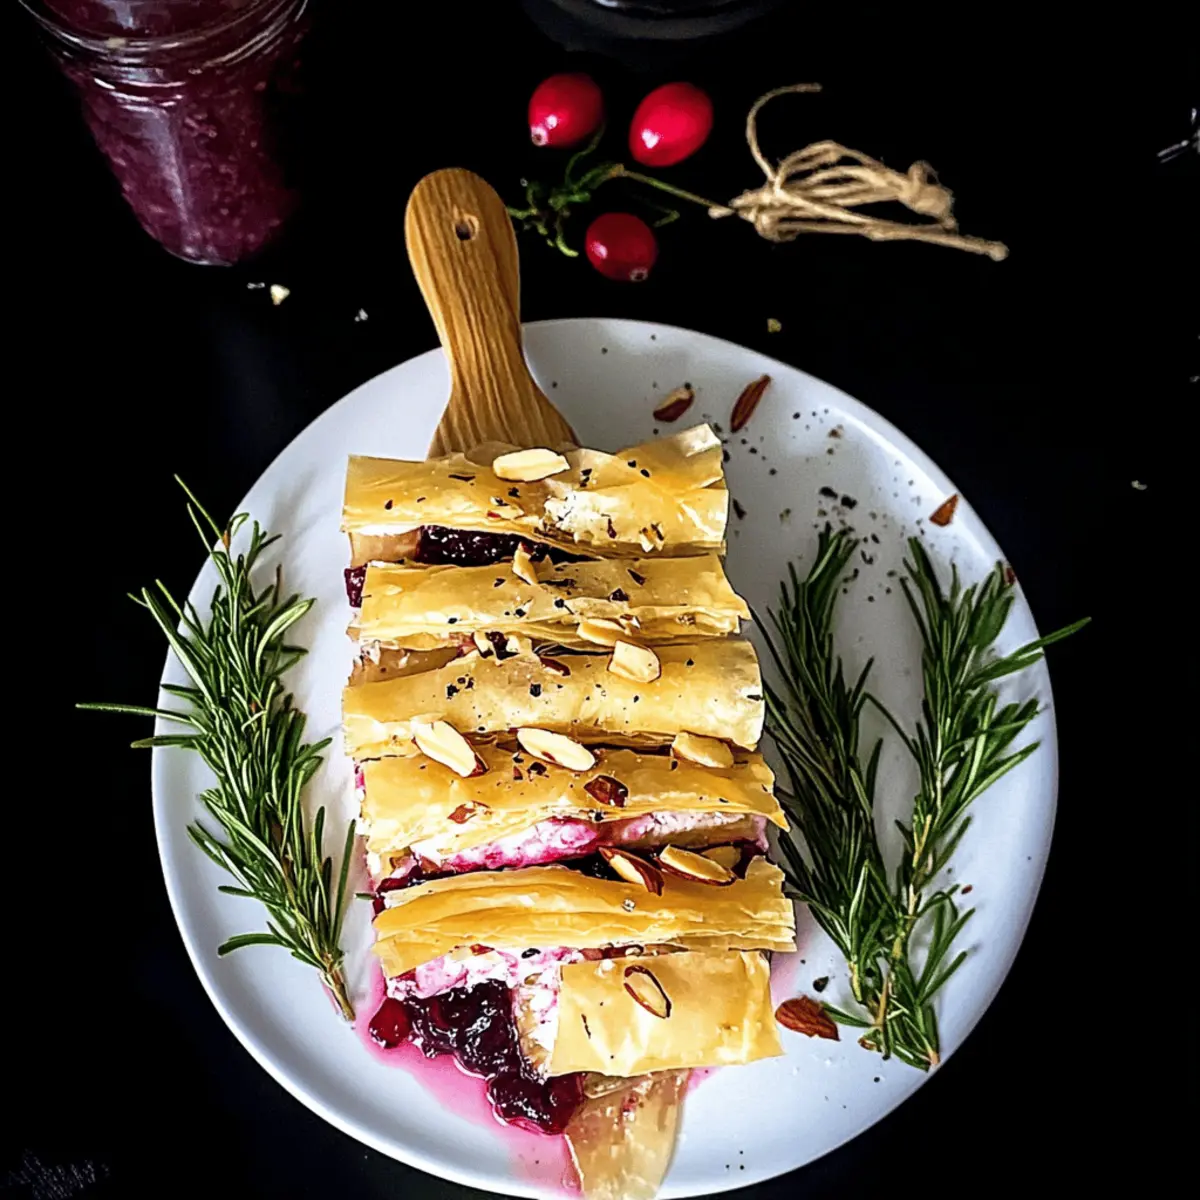
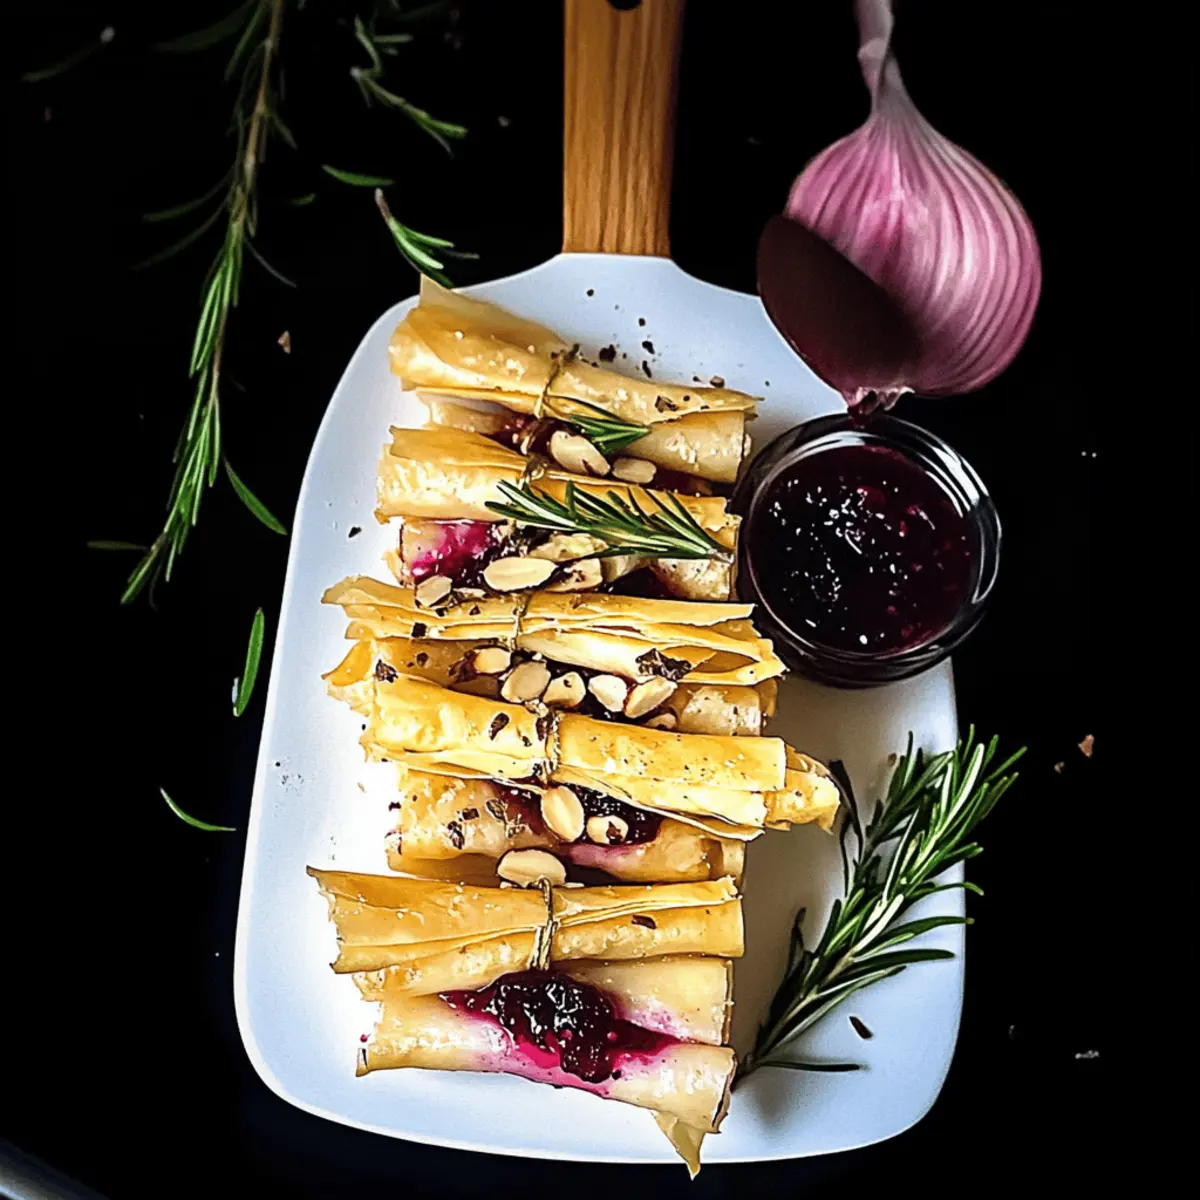
Savor the Magic of Brie Filo Crackers for Festive Cheering

As I gingerly unfolded the delicate layers of filo pastry, the kitchen filled with a melodic crunching sound that promised something spectacular. These Elegant Cranberry and Brie Filo Crackers, perfect as a festive holiday appetizer, weave together the sweetness of cranberries, the creaminess of brie, and the satisfying crunch of almonds. Not only are they a feast for the eyes, but they’re also a breeze to whip up, allowing you to impress guests without spending hours in the kitchen. Plus, they’re gluten-free when using the right filo pastry, catering to diverse dietary needs while elevating your entertaining game. Are you ready to bring a touch of elegance to your next gathering?

Why are Brie Filo Crackers a must-try?

Irresistible Flavor: The combination of creamy brie and sweet cranberries creates a delightful taste explosion, making each bite unforgettable.
Quick & Easy: With just a handful of ingredients, you’ll have these festive delights ready in no time, perfect for any last-minute gathering!
Versatile Snack: Enjoy them as a standalone appetizer or pair them with your favorite wine or cheese board. They never disappoint!
Gluten-Free Option: By choosing gluten-free filo pastry, you can cater to everyone’s dietary needs and still keep the flavors high.
Eye-Catching Presentation: These elegant crackers are not only delicious but are also a stunning addition to any holiday table, sure to impress your guests.

Brie Filo Crackers Ingredients

For the Crackers
Filo Pastry – Light and flaky, making them perfect for encasing all the delicious flavors. Tip: Handle carefully to avoid tearing.
Butter – Adds richness and aids in achieving a golden color. Substitution: Use olive oil for a dairy-free version.

For the Filling
Brie Cheese – This creamy delight provides a smooth texture and rich flavor. Tip: You can substitute with Camembert if desired.
Cranberry Sauce – Offers a sweet and tangy kick, enhancing the overall taste. Note: Both homemade and store-bought options are great.
Almond Flakes – Adds a crunchy texture and nutty flavor to each bite. Substitution: Try walnuts or pecans for a different twist.

For the Garnish
Black Sesame Seeds – Provides a decorative finish and a hint of flavor. Optional: White sesame seeds can replace them for variety.

Step‑by‑Step Instructions for Brie Filo Crackers

Step 1: Preheat and Prepare
Start by preheating your oven to 180°C (350°F). While the oven warms up, line two baking trays with parchment paper to prevent sticking and facilitate easy cleanup. This preparation will set the stage for your Brie Filo Crackers, ensuring they bake evenly and achieve that delightful golden color.

Step 2: Prepare the Filo Pastry
Unroll the thawed filo pastry sheets on a clean, flat surface. Carefully cut the sheets into 36 squares, each about 10cm (4 inches) wide. Be gentle as you handle the thin pastry to prevent tearing. Once cut, stack the squares neatly, ready to be brushed with melted butter and filled with delicious ingredients.

Step 3: Brush with Butter
Melt some butter in a small saucepan or microwave, and use a pastry brush to generously coat each filo square with melted butter. This will not only enhance the flavor of your Brie Filo Crackers but also create that appealing, crispy texture as they bake. Make sure all edges are covered for an even bake.

Step 4: Add the Filling
At one end of each buttered filo square, place a slice of creamy brie cheese, followed by a heaping teaspoon of vibrant cranberry sauce, and a sprinkle of almond flakes. The combination of these flavors is what makes your Brie Filo Crackers irresistible. Be sure not to overfill, allowing for easy rolling and sealing of the pastry.

Step 5: Roll and Seal
Gently roll each filo square over the filling, tucking in the sides as you go to keep the delicious contents secure. Pinch the ends tightly to ensure the filling doesn’t escape during baking. This rolling technique will create those crispy, flaky layers that are the hallmark of a perfect cracker.

Step 6: Arrange for Baking
Once rolled, carefully transfer your secured Brie Filo Crackers onto the prepared baking trays, leaving a little space between each one. Brush the tops with any remaining melted butter, then sprinkle a few black sesame seeds over them for a decorative touch and added flavor. They’re now ready to go into the oven.

Step 7: Bake to Perfection
Place the baking trays in the preheated oven and bake the crackers for 15-20 minutes, or until they are puffed and beautifully golden brown. Keep an eye on them to prevent any from browning too quickly—your kitchen will be filled with a mouthwatering aroma as they bake.

Step 8: Garnish and Serve
Once baked, remove the trays from the oven and let the Brie Filo Crackers cool slightly. For an extra festive presentation, garnish with fresh rosemary sprigs or tie with chives. These colorful garnishes not only enhance the visual appeal but also add a hint of fresh flavor to complement the rich filling.

Expert Tips for Brie Filo Crackers

  • Handle with Care: Delicately manage the filo pastry to avoid tearing. When in doubt, stack two squares for sturdiness without compromising flavor.
  • Butter vs. Oil: For a rich golden color, brush with melted butter. If you’re looking for a dairy-free option, olive oil works beautifully too.
  • Filling Balance: Avoid overstuffing to ensure the crackers roll properly and seal tight; this prevents leaks in the oven.
  • Freezer Friendly: Make these elegant crackers ahead of time! Freeze them unbaked, then pop them straight into the oven from the freezer for fresh, warm treats.
  • Perfect Baking Time: Keep an eye on the baking process; each oven is different. You’ll want the crackers to be golden brown and puffed for the best texture and taste.

Make Ahead Options

These Elegant Cranberry and Brie Filo Crackers are perfect for meal prep, saving you time during busy holiday gatherings! You can assemble the crackers up to 24 hours in advance; simply prepare them through the rolling and sealing stage, then store them in an airtight container in the refrigerator. To maintain their crispness, place parchment paper between layers of crackers. When you’re ready to serve, brush with melted butter, sprinkle with sesame seeds, and bake directly from the fridge for 15-20 minutes until golden. This way, you will enjoy fresh, restaurant-quality Brie Filo Crackers with minimal effort on the day of your event!

Variations & Substitutions for Brie Filo Crackers

Feel free to personalize your Brie Filo Crackers with these creative twists that will tantalize your taste buds!

  • Dairy-Free: Substitute brie with vegan cheese for a plant-based alternative that maintains creaminess.

  • Spicy Kick: Add a bit of jalapeño or a sprinkle of red pepper flakes to the filling for a flavorful heat that surprises.

  • Fruit Swap: Replace cranberry sauce with apple chutney for a delightful twist of sweetness and depth in flavor.

  • Nutty Alternatives: Use hazelnuts or pistachios instead of almond flakes to explore different textures and flavors that add character.

  • Herb Infusion: Incorporate fresh thyme or rosemary into the filling to enhance the aroma and flavor profile, making every bite feel festive.

  • Gluten-Free Check: Ensure your filo is gluten-free to cater to sensitive guests, allowing everyone to indulge without worries.

  • Different Cheeses: Experiment with goat cheese for a tangy delight or a mix of cheeses for a more intricate flavor combination—in cheesemaking, variety is king!

  • Sweet Touch: Drizzle honey or maple syrup over the crackers before serving for an added touch of sweetness that complements the brie beautifully.

Embrace these variations to elevate your festive gatherings, and don’t hesitate to mix and match ideas! If you’re looking for serving inspiration, consider pairing your crackers with various dips or tasting them alongside a beautiful cheese board—explore cheese pairing ideas that will elevate your entertaining game!

Storage Tips for Brie Filo Crackers

Room Temperature: Once baked, allow the Brie Filo Crackers to cool completely before storing them in an airtight container. They can be kept at room temperature for up to 2 days.

Fridge: If you have leftovers, place them in the fridge in an airtight container. They should stay fresh for up to 3 days. To enjoy their crispiness, reheat them in the oven for a few minutes before serving.

Freezer: These delicious crackers can be frozen unbaked for up to 2 months. Simply assemble them, place on a baking tray, and freeze until solid. Then transfer to a freezer bag. Bake straight from frozen when ready to serve.

Reheating: For best results, reheat leftover Brie Filo Crackers in a preheated oven at 180°C (350°F) for about 5-10 minutes until warm and crisp.

What to Serve with Elegant Cranberry and Brie Filo Crackers

Indulge in a delectable culinary experience designed to enhance your festive gatherings with delightful pairings.

  • Creamy Mashed Potatoes: Their velvety texture and buttery flavor provide a comforting contrast to the crispy crackers, creating a satisfying balance.

  • Garlic Herb Roasted Vegetables: These vibrant veggies offer earthy flavors and a colorful presentation, brightening up your holiday table alongside the elegant crackers.

  • Savory Spinach and Feta Dip: Rich and tangy, this dip pairs beautifully with the sweet and creamy elements of the crackers, making for a delightful flavor combination.

  • Classic Charcuterie Board: Include a variety of cheeses, cured meats, and seasonal fruits to create a feast that complements the elegance of your holiday spread.

  • Sparkling Wine or Champagne: The effervescence of bubbly drinks elevates your meal, making each bite of cracker feel even more festive.

  • Chocolate-Dipped Fruit: For dessert, consider introducing a sweet element such as strawberries or orange slices dipped in chocolate, providing a stunning finish to your meal.

  • Fresh Cranberry Sauce: Adding a spoonful of cranberry sauce on the side not only enhances the flavors but also ties the dish together in a festive harmony.

Cranberry and Brie Filo Crackers Recipe FAQs

How do I choose the best cranberries for the filling?
Absolutely! Look for cranberries that are plump and vibrant in color. Avoid any that are shriveled, soft, or have dark spots. Fresh cranberries will give your crackers a lively tartness and beautiful color, enhancing both presentation and flavor. If you’re using homemade cranberry sauce, ensure it’s a smooth consistency for easy spreading.

What’s the best way to store leftover Brie Filo Crackers?
Very! Let the crackers cool completely and store them in an airtight container. At room temperature, they will stay fresh for about 2 days, but if you want to keep them for longer, you can refrigerate them. Just remember to reheat in the oven for a few minutes to regain their crispy texture.

Can I freeze the Brie Filo Crackers?
Of course! Assemble the unbaked crackers and place them on a baking tray. Freeze them until solid, then transfer them to a freezer-safe bag. They can be stored this way for up to 2 months. When you’re ready to bake, you can pop them straight from the freezer into the oven—no thawing needed! Just add a couple of extra minutes to the baking time.

What should I do if the filo pastry tears during assembly?
Don’t worry—this can happen! Just layer two pieces of filo pastry together and brush them with melted butter before filling. This not only adds sturdiness but also creates even more delightful flakiness in the finished crackers. If you’re gentle during assembly, you’ll find that the layers cooperate beautifully.

Are there any allergens I should be aware of in this recipe?
Yes! The recipe contains dairy from the brie cheese and butter, as well as nuts from the almond flakes. For a gluten-free version, ensure you use gluten-free filo pastry. If you’re cooking for someone with nut allergies, simply replace almonds with seeds or leave them out altogether. Feel free to customize the recipe to accommodate dietary restrictions!

Can I prepare these crackers ahead of time for a party?
Absolutely! You can make the crackers in advance and freeze them unbaked, allowing you to bake fresh crackers while your guests are arriving. This not only saves time but also ensures they’re warm and crispy, maximizing enjoyment. Just remember to follow the freezing instructions mentioned above!

Brie Filo Crackers

Savor the Magic of Brie Filo Crackers for Festive Cheering

Delight in these Brie Filo Crackers, a festive appetizer that combines creamy brie, sweet cranberries, and flaky pastry.
Prep Time 30 minutes
Cook Time 20 minutes
Cooling Time 5 minutes
Total Time 55 minutes
Servings: 12 crackers
Course: Appetizer
Cuisine: Holiday
Calories: 120

Ingredients
  

For the Crackers
  • 1 package Filo Pastry Tip: Handle carefully to avoid tearing.
  • 4 tablespoons Butter Substitution: Use olive oil for a dairy-free version.
For the Filling
  • 200 grams Brie Cheese Tip: You can substitute with Camembert if desired.
  • 1 cup Cranberry Sauce Note: Both homemade and store-bought options are great.
  • 50 grams Almond Flakes Substitution: Try walnuts or pecans for a different twist.
For the Garnish
  • 2 tablespoons Black Sesame Seeds Optional: White sesame seeds can replace them for variety.

Equipment

  • Oven
  • Baking trays
  • Parchment paper
  • Pastry Brush
  • Small saucepan

Method
 

Step-by-Step Instructions for Brie Filo Crackers
  1. Preheat your oven to 180°C (350°F) and line two baking trays with parchment paper.
  2. Unroll the thawed filo pastry sheets and cut them into 36 squares, each about 10cm (4 inches) wide.
  3. Melt some butter and use a brush to coat each filo square generously.
  4. At one end of each buttered filo square, place a slice of brie, cranberry sauce, and almond flakes.
  5. Gently roll each filo square over the filling, tucking in the sides to seal it.
  6. Transfer the rolled crackers onto the baking trays, brush with remaining melted butter, and sprinkle sesame seeds.
  7. Bake for 15-20 minutes until puffed and golden brown.
  8. Let the crackers cool slightly and garnish with fresh rosemary or chives.

Nutrition

Serving: 1crackerCalories: 120kcalCarbohydrates: 10gProtein: 2gFat: 8gSaturated Fat: 4gPolyunsaturated Fat: 1gMonounsaturated Fat: 3gCholesterol: 15mgSodium: 200mgPotassium: 50mgFiber: 1gSugar: 2gVitamin A: 5IUCalcium: 50mgIron: 1mg

Notes

These crackers are quick to prepare and can be made ahead of time, ensuring you have an elegant appetizer ready for your guests.

Tried this recipe?

Let us know how it was!

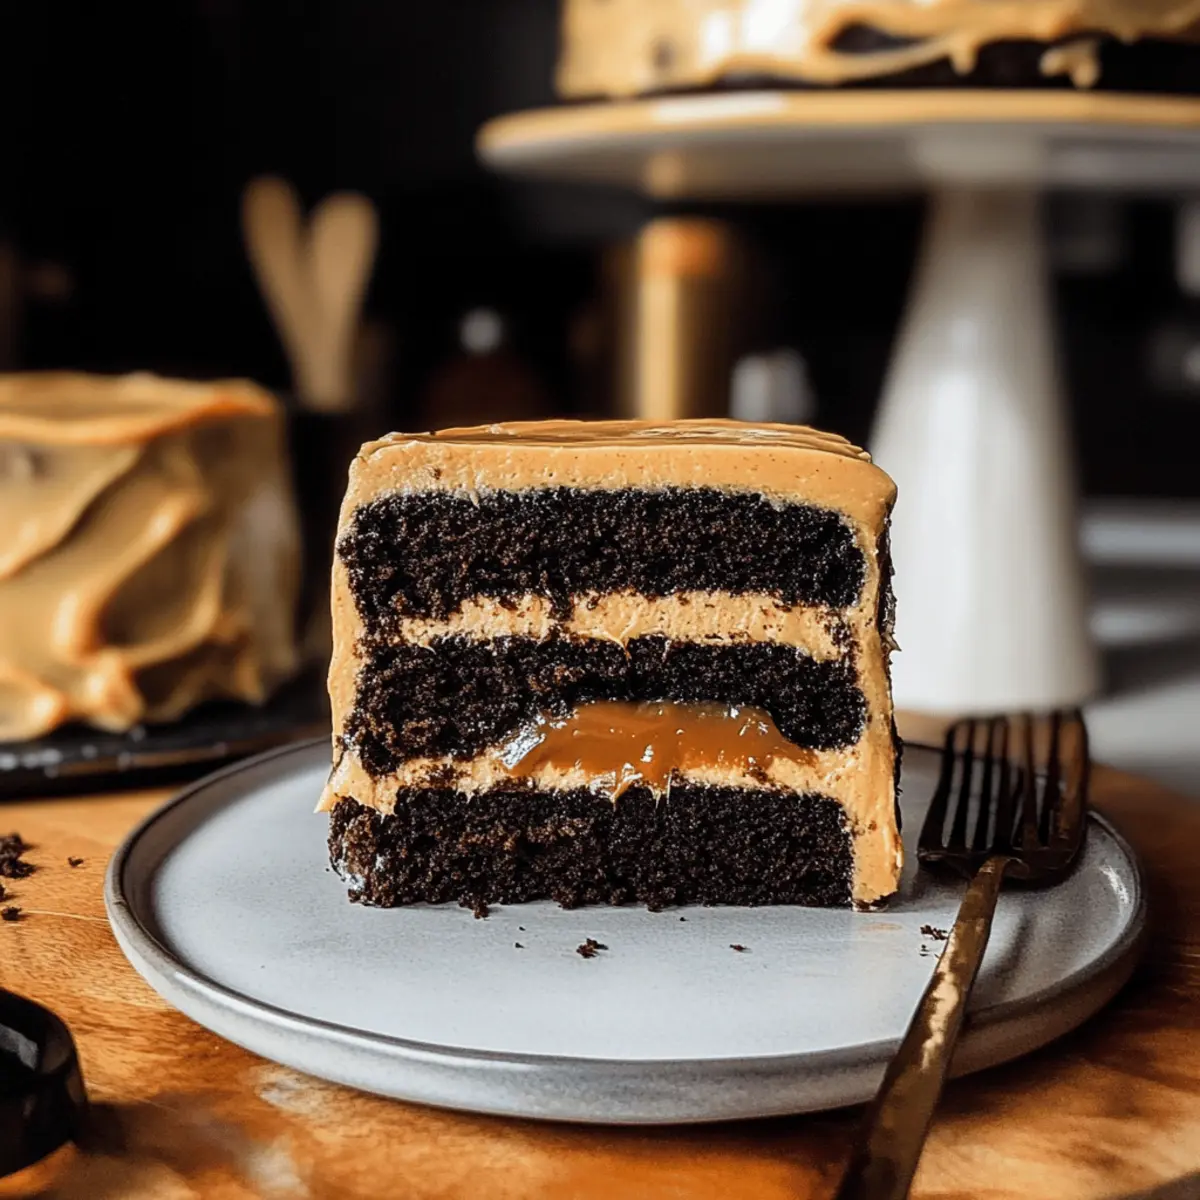
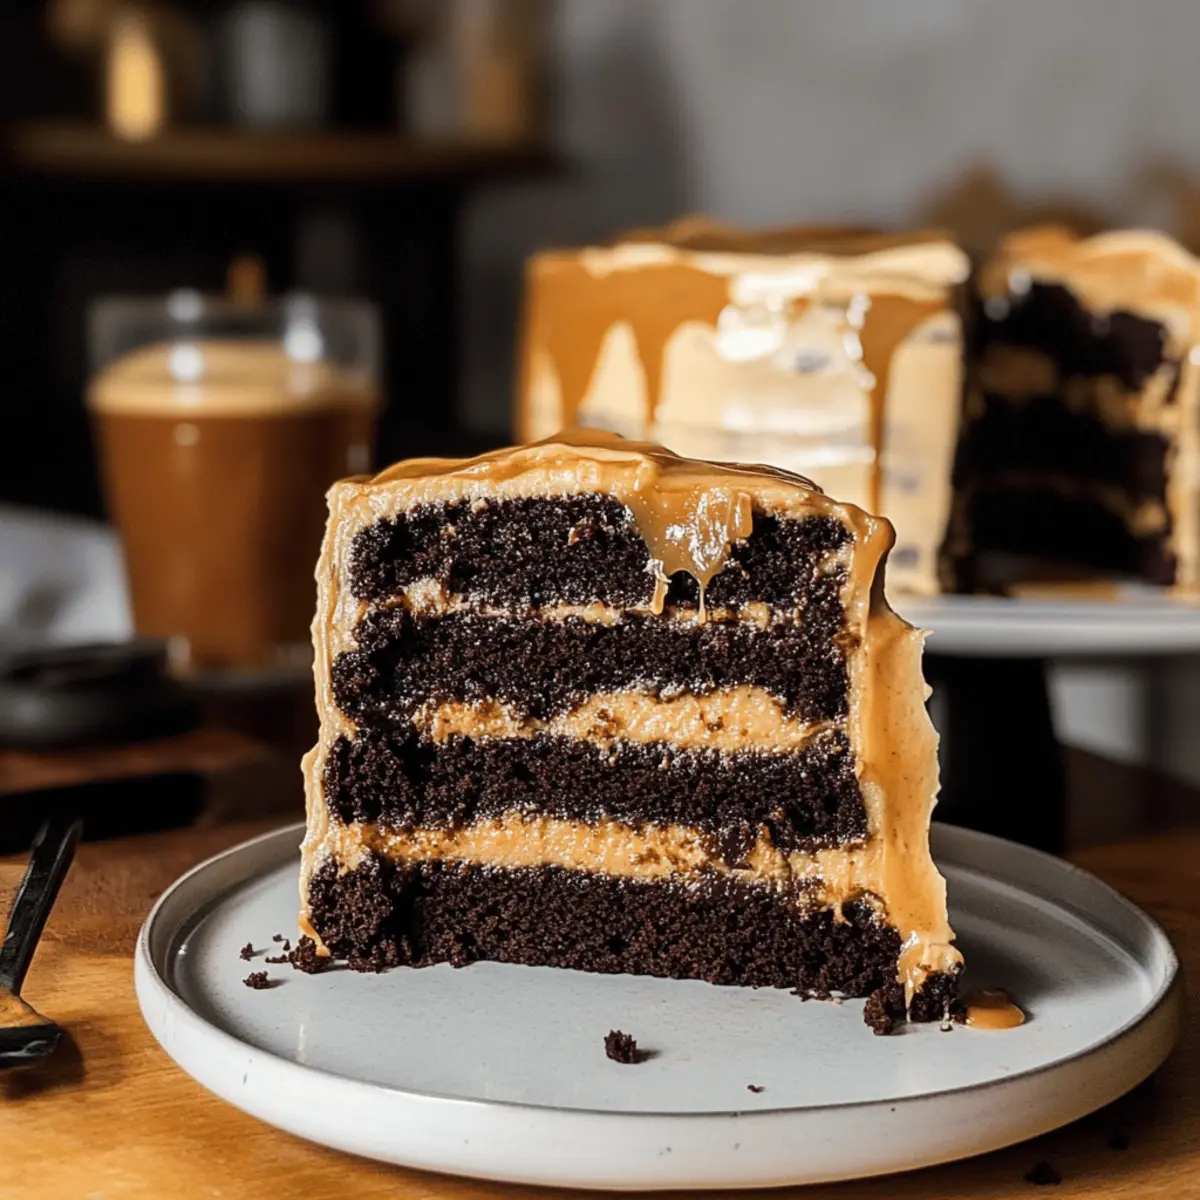
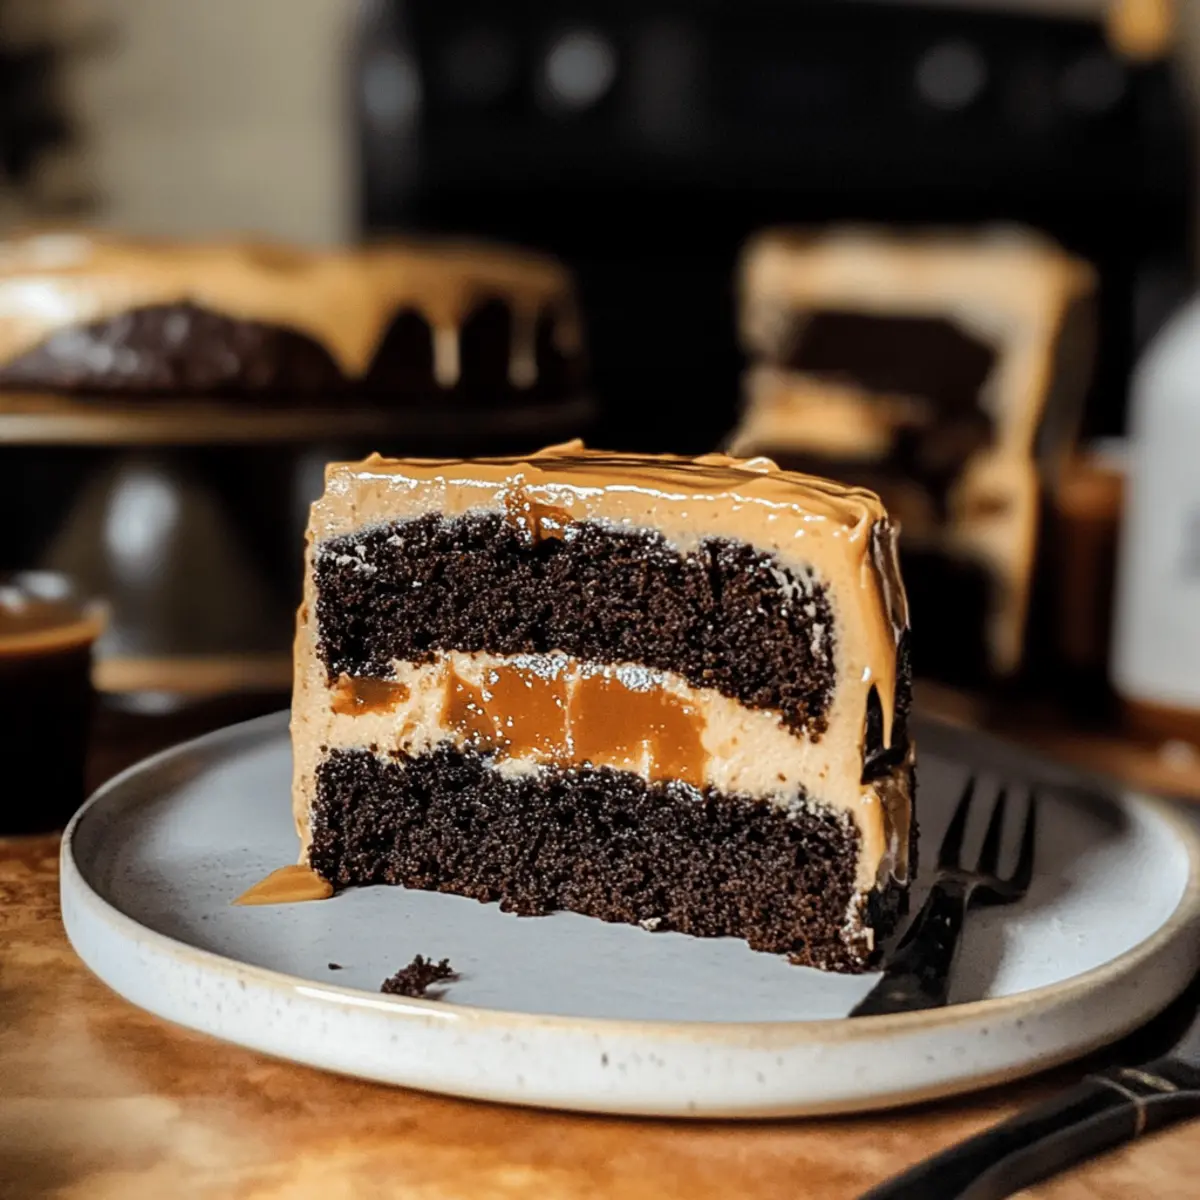
Decadent Chocolate Butterbeer Cake That’s Totally Vegan

A hint of magic wafts through the air as I pull a slice of this Rich & Moist Vegan Chocolate Butterbeer Cake from the oven, and I can’t help but feel transported to the bustling halls of Hogwarts. This delightful creation merges the rich allure of chocolate with the whimsical charm of butterbeer, making it a perfect dessert for both Harry Potter fans and anyone seeking a sweet indulgence. Besides being incredibly simple to whip up, this cake is also a crowd-pleaser—vegan and dairy-free, it caters to a variety of dietary needs while ensuring no one misses out on dessert. Whether you’re planning a themed gathering or just want to treat yourself, this cake is bound to delight. Curious about how this enchanting treat is crafted? Let’s dive into the recipe!

Why is this cake a magical delight?

Enchantment in Every Bite: This Rich & Moist Vegan Chocolate Butterbeer Cake offers an unmatched allure that whisk you away to the Wizarding World.
Vegan and Delicious: Ideal for everyone, this cake is completely free of animal products, ensuring no one is left out of the fun!
Rich, Decadent Flavor: A luscious blend of chocolate and butterscotch transforms each slice into a dreamy dessert.
Easy to Make: With straightforward steps, even new bakers can create this masterpiece.
Perfect for Any Occasion: Whether it’s a Harry Potter party or an ordinary day, this cake will surely impress your guests. Pair it with Buttermilk Pancakes Discover for a complete treat!

Chocolate Butterbeer Cake Ingredients

Get ready to create a truly enchanting dessert with these key ingredients!

For the Cake

  • Vegan Chocolate Cake Mix – Opt for a high-quality mix to ensure rich flavor and texture.
  • Butterbeer Reduction – This unique addition elevates the dessert; make it by simmering butterbeer until thickened.
  • Vegan Cream Cheese – Perfect for the frosting, it gives a creamy consistency while keeping it dairy-free.
  • Non-Dairy Milk – Almond, soy, or oat milk adds moisture; choose your favorite!
  • Apple Cider Vinegar – This helps activate the baking soda for a fluffy cake.
  • Baking Soda – Essential for leavening, ensuring your cake rises beautifully.
  • All-Purpose Flour – The base ingredient for structure; sift for a lighter texture.
  • Cocoa Powder – Use high-quality cocoa for a deeper chocolate flavor.
  • Powdered Sugar – Sweetens and helps achieve the ideal consistency for frosting.

For the Butterscotch Sauce

  • Homemade or Store-Bought Butterscotch Sauce – Homemade is recommended for a fresher flavor; the sweetness enhances the cake deliciously.

With these ingredients, you’re all set to create a magical Chocolate Butterbeer Cake that promises rich flavors and joyful memories!

Step‑by‑Step Instructions for Chocolate Butterbeer Cake

Step 1: Prepare the Butterbeer Reduction
To begin your Chocolate Butterbeer Cake, pour butterbeer into a saucepan and simmer over medium heat. Allow it to reduce for approximately 15-20 minutes until thickened and syrupy. Stir gently to prevent burning, then remove it from the heat and set aside to cool while you gather and prepare the other ingredients.

Step 2: Mix Dry Ingredients
In a large mixing bowl, whisk together the all-purpose flour, cocoa powder, baking powder, baking soda, and salt until evenly combined. This step is essential for ensuring your cake has a uniform texture. The rich cocoa will deepen the flavor profile of your Chocolate Butterbeer Cake, so be sure to combine thoroughly.

Step 3: Combine Wet Ingredients
In a separate medium bowl, mix the non-dairy milk, apple cider vinegar, and your cooled butterbeer reduction until they are well blended. The vinegar will react with the baking soda during baking, giving your cake a lovely rise. Ensure everything is combined smoothly before moving on to incorporate the dry ingredients.

Step 4: Combine Mixtures
Gradually pour the wet mixture into the dry ingredients, mixing gently with a spatula or whisk until just combined. Avoid overmixing; a few lumps are perfectly fine. The batter should be smooth and rich, indicating you’re on the right track to making a fabulous Chocolate Butterbeer Cake.

Step 5: Bake
Preheat your oven to 350°F (175°C) while you prepare your cake pans by greasing them lightly. Pour the batter evenly into the prepared pans and bake for 30-35 minutes. The cakes are done when a toothpick inserted into the center comes out clean, creating a moist yet airy texture for the Chocolate Butterbeer Cake.

Step 6: Cool
Once baked, allow the cakes to cool in the pans for about 10 minutes. Carefully remove them and transfer to wire racks for complete cooling. It’s important not to frost the cakes until they have completely cooled, as this prevents melting and sliding of the frosting, ensuring a beautifully presented Chocolate Butterbeer Cake.

Step 7: Make Frosting
While the cakes cool, prepare the frosting. In a mixing bowl, blend the vegan cream cheese, powdered sugar, and butterscotch sauce until creamy and smooth. Adjust the sweetness to taste if needed. This luscious frosting will add a delightful layer of flavor to your Chocolate Butterbeer Cake, so make sure it’s not too runny.

Step 8: Assemble Cake
To assemble, place one cooled cake layer on a serving plate. Spread a generous layer of butterscotch filling in the center, then top with the second layer. Frost the top and sides generously with your butterscotch cream cheese frosting. For a magical finish, consider drizzling some additional butterscotch sauce over the top for an irresistible Chocolate Butterbeer Cake!

Chocolate Butterbeer Cake Variations

Feel free to bring your own magic to this delightful cake with these tempting twists!

  • Vanilla Bliss: Swap the chocolate cake for a vanilla cake mix for a lighter flavor. Imagine a fluffy vanilla sponge paired with butterscotch—pure delight!

  • Spicy Chocolate: Add a pinch of cinnamon or nutmeg to the dry ingredients for a warm spice kick. This subtle addition will create a cozy cake perfect for fall gatherings.

  • Nutty Crunch: Fold in chopped walnuts or pecans into the batter for extra texture. The nutty flavor complements the chocolate and butterscotch beautifully, adding a lovely crunch.

  • Fruit Fusion: Incorporate mashed bananas or applesauce into the batter for added moisture and a touch of fruitiness. This variation will keep your cake moist while adding a natural sweetness.

  • Gluten-Free Option: Substitute the all-purpose flour with a gluten-free blend. Be sure to add a bit of xanthan gum to maintain the cake’s structure.

  • Salted Caramel Drizzle: Finish your creation with a drizzle of salted caramel sauce for a gourmet touch. The salty-sweet contrast enhances the flavors and presentation—everyone will be raving about it!

If you want to explore more delicious options, check out these White Chocolate Cranberry treats that also showcase fantastic flavors or try the enchanting Patriotic Chocolate Chip dessert for another crowd-pleaser. Enjoy your baking adventure!

Make Ahead Options

Preparing this Rich & Moist Vegan Chocolate Butterbeer Cake in advance can save you time and make your baking experience much easier! You can prepare the cake layers up to 2 days in advance; simply bake and allow them to cool completely before wrapping each layer in plastic wrap and storing them in the refrigerator. The butterscotch filling can also be made up to 3 days ahead. Just store it in an airtight container to maintain its creamy texture. When you’re ready to finish the cake, frost the layers and serve, allowing the cake to come to room temperature for just as delicious a treat as if made fresh!

Tips for the Best Chocolate Butterbeer Cake

Quality Ingredients: Always choose high-quality cocoa powder and vegan cream cheese for the best flavor and texture in your Chocolate Butterbeer Cake.

Cool Layers Completely: Ensure your cake layers are completely cool before frosting. This prevents the icing from melting and keeps your cake looking pristine.

Avoid Overmixing: When combining wet and dry ingredients, mix until just combined. Overmixing can lead to a dense texture instead of a light and fluffy cake.

Experiment with Sweetness: Taste your butterscotch frosting before adding it to the cake; adjust sweetness by adding more powdered sugar or butterscotch sauce to suit your taste.

Crumb Coat for Neat Frosting: If you’re new to layer cakes, apply a crumb coat first to catch any stray crumbs. It helps create a smooth finish when you add the final frosting layer.

Storage Tips: Keep leftover cake in an airtight container in the fridge for up to a week. This ensures the remaining slices of your Chocolate Butterbeer Cake stay fresh and moist!

What to Serve with Rich & Moist Vegan Chocolate Butterbeer Cake

Indulging in a slice of this magical cake is a delight, but pairing it with the right accompaniments transforms your experience into an unforgettable feast!

  • Coconut Whipped Cream: A light, fluffy topping adds creaminess and contrasts beautifully with the rich chocolate flavors.

  • Fresh Berries: Tart strawberries or sweet raspberries provide a refreshing burst to balance the cake’s decadent sweetness. Their vibrant colors will also brighten up your dessert table.

  • Non-Dairy Ice Cream: A scoop of creamy vanilla or caramel-flavored vegan ice cream melts delightfully against each slice of the Chocolate Butterbeer Cake, enhancing its luxurious texture.

  • Butterscotch Drizzle: A little extra homemade or store-bought butterscotch sauce drizzled on top takes the cake to another level—richly sweet and utterly indulgent.

  • Coffee or Tea: A hot cup of brewed coffee or a cozy herbal tea complements the cake’s flavors and provides a comforting element to your dessert experience.

  • Nutty Cookies: Pairing with a few crunchy almond or pecan shortbread cookies introduces a delightful texture contrast and adds a satisfying element to your treat.

Imagine unwinding with these perfect companions after savoring a slice of Chocolate Butterbeer Cake, creating a magical moment at your dining table!

Storage Tips for Chocolate Butterbeer Cake

Fridge: Store leftover Chocolate Butterbeer Cake in an airtight container in the fridge for up to 7 days, preserving its moist texture and delightful flavor.

Freezer: For longer storage, wrap slices of the cake tightly in plastic wrap and then in foil before placing them in the freezer. They can be kept for up to 3 months and will retain their delicious taste.

Reheating: When ready to enjoy, thaw in the refrigerator overnight, then pop a slice in the microwave for about 10-15 seconds to enjoy a warm, cozy treat!

Wrap Carefully: Always ensure that you seal your cake well. Proper wrapping prevents freezer burn and keeps the cake fresh for your next magical moment!

Rich & Moist Vegan Chocolate Butterbeer Cake Recipe FAQs

How do I choose ripe ingredients for this cake?
Absolutely! When selecting your non-dairy milk, consider options like almond or oat milk for the best moisture. For cocoa powder, check for freshness; it should smell rich and chocolatey. If you’re using store-bought butterscotch sauce, ensure it has no artificial flavors or colors for a more authentic taste.

How should I store leftover Chocolate Butterbeer Cake?
For optimal freshness, store any leftover cake in an airtight container in the fridge for up to 7 days. It’s important to keep it well-sealed to prevent it from drying out. You can also place parchment paper between layers to maintain moisture.

Can I freeze Chocolate Butterbeer Cake?
Very much so! Wrap individual slices of the cake tightly in plastic wrap and then in foil. This method prevents freezer burn and retains flavor. They can be kept in the freezer for up to 3 months; just be sure to thaw them in the refrigerator overnight before enjoying. When reheating, microwave for 10-15 seconds for a cozy treat!

What should I do if my cake turns out too dense?
The more the merrier when it comes to fluffiness! If your cake ends up dense, it could be due to overmixing the batter. Mix your wet and dry ingredients just until combined, as too much mixing develops the gluten in the flour and leads to a heavier texture. Also, double-check that your baking soda is fresh; expired leavening agents won’t create the necessary rise.

Is this cake safe for those with allergies?
Absolutely! This Vegan Chocolate Butterbeer Cake is dairy-free, making it a great option for those with lactose intolerance or dairy allergies. However, if you’re serving guests with gluten sensitivities, you can swap out all-purpose flour for a gluten-free blend. Always check the labels of your ingredients to ensure they meet your dietary needs!

Can I use a different type of flour for this recipe?
Yes! If you prefer to explore alternatives, consider using whole wheat flour for added nutrition. However, keep in mind that it may change the texture slightly. For best results, use a gluten-free all-purpose flour blend that already includes xanthan gum to help mimic the structure of traditional flour.

Chocolate Butterbeer Cake

Decadent Chocolate Butterbeer Cake That's Totally Vegan

Experience the magical allure of a Vegan Chocolate Butterbeer Cake that's rich, moist, and utterly delightful!
Prep Time 20 minutes
Cook Time 35 minutes
Cooling Time 10 minutes
Total Time 1 hour 5 minutes
Servings: 8 slices
Course: Dessert
Cuisine: Vegan
Calories: 350

Ingredients
  

For the Cake
  • 1 box Vegan Chocolate Cake Mix Opt for a high-quality mix.
  • 1 cup Butterbeer Reduction Simmer butterbeer until thickened.
  • 8 oz Vegan Cream Cheese For frosting.
  • 1 cup Non-Dairy Milk Almond, soy, or oat milk.
  • 1 tbsp Apple Cider Vinegar Activates baking soda.
  • 1 tsp Baking Soda For leavening.
  • 2 cups All-Purpose Flour Sift for lighter texture.
  • 3/4 cup Cocoa Powder Use high-quality cocoa.
  • 1 cup Powdered Sugar For frosting consistency.
For the Butterscotch Sauce
  • 1 cup Homemade or Store-Bought Butterscotch Sauce Homemade recommended.

Equipment

  • Mixing bowls
  • Saucepan
  • Spatula
  • Whisk
  • Oven
  • Cake Pans
  • Cooling racks

Method
 

Step-by-Step Instructions for Chocolate Butterbeer Cake
  1. Prepare the Butterbeer Reduction by simmering butterbeer in a saucepan over medium heat for 15-20 minutes until thickened.
  2. Mix Dry Ingredients by whisking together flour, cocoa powder, baking powder, baking soda, and salt in a large mixing bowl.
  3. Combine Wet Ingredients by mixing non-dairy milk, apple cider vinegar, and cooled butterbeer reduction in a medium bowl.
  4. Combine Mixtures by gradually pouring the wet mixture into the dry ingredients, stirring gently until just combined.
  5. Bake by preheating oven to 350°F (175°C), pouring batter into prepared pans, and baking for 30-35 minutes until a toothpick comes out clean.
  6. Cool cakes in pans for 10 minutes before transferring to wire racks to cool completely.
  7. Make Frosting by blending vegan cream cheese, powdered sugar, and butterscotch sauce until smooth.
  8. Assemble the cake by layering cooled cake layers with butterscotch filling and frosting the top and sides.

Nutrition

Serving: 1sliceCalories: 350kcalCarbohydrates: 60gProtein: 4gFat: 14gSaturated Fat: 2gPolyunsaturated Fat: 1gMonounsaturated Fat: 1gSodium: 200mgPotassium: 250mgFiber: 3gSugar: 25gCalcium: 4mgIron: 10mg

Notes

Ensure cake layers are cool before frosting to prevent melting. Store leftovers in an airtight container for up to 7 days.

Tried this recipe?

Let us know how it was!

Swicy Mango Crispy Rice Sushi: A Flavorful Vegan Delight

The satisfying crunch of air-fried sushi rice, paired with the tropical sweetness of ripe mango, transports me to sun-soaked shores every time I take a bite. Introducing my Swicy Mango Crispy Rice Sushi, a delightful vegetarian-friendly fusion dish that melds vibrant flavors and textures into a crowd-pleasing appetizer. With its quick prep and playful presentation, this recipe is perfect for elevating any gathering, sparking curiosity, and inviting friends to dive into a world of culinary creativity. Whether you’re a seasoned home chef or just looking to break free from takeout, these delicious bites offer a healthier alternative without sacrificing taste. Ready to impress everyone at your next dinner party? Let’s dive into the magic of these zesty flavor-packed bites!

Why is Swicy Mango Sushi a Must-Try?

Bursting with flavor, this dish combines sweet mango and spicy gochujang mayo in every bite, making it a delightful fusion experience. Air-fried perfection ensures each sushi piece is crispy outside and soft inside—definitely an appealing upgrade from ordinary takeout! Versatile options allow you to swap mango for avocado or pineapple, tailoring it to your palate. Elevate gatherings with this colorful presentation that will impress friends and family alike. And as a time-saving gem, it’s ready in under an hour, meaning more time spent enjoying and less time chopping!

Swicy Mango Crispy Rice Sushi Ingredients

• Get ready to create a colorful blast of flavor with these tasty ingredients!

For the Sushi Base

  • Sushi Rice – Provides the ideal structure for our crispy sushi bites.
  • Water – Essential for cooking the sushi rice to perfection.
  • Rice Vinegar – Adds a tangy touch that enhances the flavor profile.
  • Sugar – Balances the acidity of the vinegar for a harmonious taste.
  • Salt – Elevates the overall flavor, making each bite delicious.
  • Neutral Oil Spray – Ensures a golden, crispy texture during air-frying.

For the Filling

  • Large Ripe Mango – The star ingredient, offering natural sweetness; substitute with ripe avocado or pineapple for a different twist.
  • Cucumber – Adds a refreshing crunch; consider using seedless varieties for the best results.
  • Red Onion – Introduces a sharp, mild flavor that beautifully contrasts with the fruit.
  • Lime Juice – Brightens the dish and adds zing.
  • Soy Sauce – Infuses umami richness; for a gluten-free option, use tamari.
  • Toasted Sesame Oil – Provides a lovely nutty aroma and depth of flavor.
  • Black or White Sesame Seeds – A delightful garnish that adds crunch.

For the Spicy Mayo

  • Mayonnaise – Creations a creamy binding; can be replaced with vegan mayo for a dairy-free option.
  • Gochujang – Delivers a spicy kick—adjust according to your heat preference.
  • Honey or Maple Syrup – Balances any heat from the gochujang; optional for dietary concerns.

For Garnish

  • Nori – Adds an authentic sushi flavor and visual appeal.
  • Extra Sesame Seeds & Sliced Scallions – Enhancements that elevate both texture and taste.

You’ll be amazed at how this Swicy Mango Crispy Rice Sushi brings out the joy of home-cooked meals, transforming simple ingredients into something spectacular!

Step‑by‑Step Instructions for Swicy Mango Crispy Rice Sushi

Step 1: Prepare the Sushi Rice
Begin by rinsing the sushi rice in cold water until the water runs clear, which helps remove excess starch. In a medium saucepan, combine the rinsed rice with water and bring it to a boil over medium-high heat. Once boiling, lower the heat, cover, and simmer for 15 minutes. Afterward, remove from heat and let it sit, covered, for an additional 10 minutes to steam.

Step 2: Season the Rice
In a small bowl, whisk together rice vinegar, sugar, and salt until dissolved. Once the rice has rested, transfer it to a large bowl and gently fold in the vinegar mixture. Use a wooden spatula to avoid crushing the rice. Allow the seasoned rice to cool to room temperature while you prepare the other elements of your Swicy Mango Crispy Rice Sushi.

Step 3: Form the Rice Blocks
Once the rice is cooled, firmly press it into an 8×8-inch baking dish, spreading it evenly. Make sure the rice is compact to maintain its shape during cooking. Cover the dish with plastic wrap and refrigerate for at least 30 minutes. This chilling step is crucial in helping the rice firm up, ensuring perfectly defined shapes when cut.

Step 4: Cut and Air Fry the Rice
After the rice has chilled, carefully lift it from the baking dish and slice it into 12 rectangular pieces. Lightly spray both sides of each rice rectangle with a neutral oil spray to promote a golden crisp. Preheat your air fryer to 400°F (200°C), then place the rice pieces in the basket. Air fry for 12–15 minutes, flipping halfway, until they are golden brown and crispy.

Step 5: Make the Mango Tartare
While the rice is frying, dice the large ripe mango, cucumber, and red onion into small pieces. In a medium bowl, combine the diced ingredients with lime juice, soy sauce, toasted sesame oil, sesame seeds, and optional chili flakes for a little heat. Stir gently to mix, and let the flavors meld together as you prepare the mayo.

Step 6: Prepare the Gochujang Mayo
In a small bowl, whisk together mayonnaise, gochujang, lime juice, and honey or maple syrup until smooth and creamy. Adjust the level of gochujang according to your spice preference, ensuring it remains a delightful complement to the Swicy Mango Crispy Rice Sushi. This creamy sauce will enhance the dish’s flavor profile when drizzled on top.

Step 7: Assemble and Serve Your Sushi
Once the crispy rice has finished air frying, carefully place each piece on a serving platter. Generously top each crispy rice rectangle with the mango tartare mixture, allowing the vibrant colors to shine through. Drizzle the gochujang mayo over each bite and garnish with nori strips, extra sesame seeds, and sliced scallions for added texture and flavor. Serve immediately to enjoy the delightful contrast of flavors and textures!

What to Serve with Swicy Mango Crispy Rice Sushi

Transform your gathering into a culinary adventure by pairing these delightful bites with complementary dishes that enhance their vibrant flavors.

  • Asian-style Slaw: The crunch of cabbage and carrots with a tangy dressing brightens each bite, providing a refreshing contrast.
  • Seaweed Salad: Its umami flavors and sea-salt notes harmonize beautifully, creating a delightful oceanic pairing.
  • Coconut Rice: Creamy and subtly sweet, it adds a luscious texture and tropical essence that mirrors the mango in the sushi.
  • Cucumber Salad: Crisp cucumbers dressed in rice vinegar and sesame provide a light, refreshing contrast that complements the sushi’s flavors.
  • Chilled Sake: The clean, smooth taste of cold sake pairs perfectly with the sushi, elevating the overall dining experience.
  • Sparkling Water: Infused with lime, the bubbles cleanse the palate and refresh between bites of sushi, enhancing their tropical flavors.
  • Mango Sorbet: For dessert, this refreshing treat echoes the sweetness of the sushi, creating a delightful finish to your meal.
  • Matcha Green Tea: Served hot or iced, its subtle earthiness balances the sushi’s sweetness, providing a soothing conclusion to the meal.
  • Miso Soup: The warm, savory broth enhances the umami flavors throughout the meal, making it a comforting addition alongside the sushi bites.

How to Store and Freeze Swicy Mango Crispy Rice Sushi

Fridge: Store any leftover crispy rice squares in an airtight container in the refrigerator for up to 2 days. Keep the mango tartare and gochujang mayo separately to maintain freshness.

Freezer: For longer storage, freeze the air-fried rice squares on a parchment-lined baking sheet until solid. Transfer to a freezer-safe bag or container for up to 1 month.

Reheating: To revive frozen crisped rice, preheat your air fryer to 350°F (175°C) and air fry for about 5–7 minutes until crispy again.

Preparation Tips: If making ahead, prepare the mango tartare and mayo in advance, but don’t assemble until you’re ready to serve the Swicy Mango Crispy Rice Sushi to keep that delightful crunch!

Expert Tips for Swicy Mango Crispy Rice Sushi

  • Rice Rinsing: Thoroughly rinse the sushi rice until the water runs clear to remove excess starch; this helps achieve the perfect texture.

  • Chill Time: Don’t skip the chilling step! Refrigerating the pressed rice for at least 30 minutes is essential to maintain its shape during air-frying.

  • Even Crispiness: Flip the rice pieces halfway through air-frying to ensure they cook evenly and achieve every bit of delicious crispness.

  • Fresh Assembly: Assemble the sushi bites just before serving to keep the crispy rice crunchy—store toppings separately until then.

  • Spice Level: Adjust the amount of gochujang in the mayo to suit your taste; start with a small amount for a milder kick in your Swicy Mango Crispy Rice Sushi.

Swicy Mango Crispy Rice Sushi Variations

Feel free to unleash your creativity and customize this recipe to suit your taste buds!

  • Avocado Swap: Replace mango with ripe avocado for a creamy texture that’s just as delightful.

  • Tropical Twist: Diced pineapple adds a deliciously tangy note—perfect for those sunny days!

  • Gluten-Free Option: Use tamari instead of soy sauce, making this dish accessible for anyone avoiding gluten.

  • Extra Crunch: Toss in some diced bell peppers or carrots with the mango tartare for added color and texture.

  • Heat Levels: Adjust the chili flakes to spice things up or dial it down based on your preference; it’s all about your comfort zone!

  • Asian Flair: Incorporate a splash of rice wine vinegar for an added tang in the mango tartare.

  • Creamy Coconut: Substitute half of the mayo with coconut cream for a tropical flair that enhances the overall richness.

  • Cilantro Boost: Add fresh chopped cilantro to the mango tartare for a refreshing herbaceous note that complements the sweetness perfectly.

If you’re looking for more tropical inspiration, why not explore my delicious Mango Dragonfruit Refresher or treat yourself to a delightful Mango Coconut Pudding? With these variations, you’re set to create a truly unique dining experience!

Make Ahead Options

These Swicy Mango Crispy Rice Sushi bites are ideal for meal prep, allowing you to enjoy a burst of flavor without the last-minute rush! You can prepare the sushi rice and form it into blocks up to 24 hours in advance; simply refrigerate the pressed rice to maintain its shape. For added convenience, make the mango tartare and gochujang mayo up to 3 days ahead—just keep them in airtight containers in the fridge to preserve freshness. When you’re ready to serve, air fry the chilled rice pieces until golden and crispy, then assemble with the tartare and drizzle with mayo for delightful, restaurant-quality results. Enjoy the time-saving benefits of this prep-ahead strategy during busy weeknights!

Swicy Mango Crispy Rice Sushi Recipe FAQs

What kind of rice should I use for sushi?
Absolutely, sushi rice is key for the right texture! Look for short-grain Japanese rice, often labeled as “sushi rice,” because it becomes sticky when cooked, helping to hold the sushi together. Rinsing the rice is vital to remove excess starch, which can make it gummy.

How long can I store leftover sushi bites?
If you have any leftover crispy rice squares, you can store them in an airtight container at room temperature for up to 2 days. Just remember to keep the mango tartare and gochujang mayo in separate containers to maintain their freshness until you’re ready to enjoy your delicious bites again!

Can I freeze the crispy rice sushi?
Absolutely! To freeze your air-fried rice squares, first lay them on a parchment-lined baking sheet in a single layer and place them in the freezer until solid. Once frozen, transfer them to a freezer-safe bag or container, where they can stay good for up to 1 month. When you’re ready to eat them, simply reheat in the air fryer at 350°F (175°C) for about 5–7 minutes until they’re nice and crispy again.

What can I use instead of mango?
I often suggest ripe avocado or diced pineapple as delightful substitutes for mango if you’re looking for variation or want to cater to different tastes. Both options bring their unique flavors and textures—avocado for creaminess and pineapple for a tangy sweetness!

Can I make this recipe gluten-free?
Very much so! To make your Swicy Mango Crispy Rice Sushi gluten-free, simply swap out regular soy sauce for tamari, which is made from gluten-free ingredients. Most other ingredients in the recipe are naturally gluten-free, making it an easy and tasty option for those with dietary restrictions.

How do I prevent the crispy rice from getting soggy?
To keep the crispy rice from becoming soggy, avoid assembling the sushi bites too early. Store the crispy rice and toppings separately, and assemble them just before serving. This way, you get that satisfying crunch with every bite of your Swicy Mango Crispy Rice Sushi!

Swicy Mango Crispy Rice Sushi

Swicy Mango Crispy Rice Sushi

Swicy Mango Crispy Rice Sushi is a flavorful vegan delight that combines the crunch of air-fried sushi rice with the sweet tropical flavor of mango.
Prep Time 30 minutes
Cook Time 15 minutes
Chilling Time 30 minutes
Total Time 1 hour 15 minutes
Servings: 12 pieces
Course: Appetizer
Cuisine: Fusion
Calories: 150

Ingredients
  

Sushi Base
  • 1 cup Sushi Rice
  • 1 cup Water
  • 2 tablespoons Rice Vinegar
  • 1 tablespoon Sugar
  • 1 teaspoon Salt
  • Spray Neutral Oil Spray
Filling
  • 1 large Ripe Mango Can substitute with ripe avocado or pineapple
  • 1 medium Cucumber Seedless varieties recommended
  • 1/4 medium Red Onion
  • 1 tablespoon Lime Juice
  • 2 tablespoons Soy Sauce Use tamari for gluten-free
  • 1 teaspoon Toasted Sesame Oil
  • 1 tablespoon Black or White Sesame Seeds
Spicy Mayo
  • 1/2 cup Mayonnaise Can replace with vegan mayo
  • 2 tablespoons Gochujang Adjust according to spice preference
  • 1 tablespoon Honey or Maple Syrup Optional
Garnish
  • 2 sheets Nori
  • 1 tablespoon Extra Sesame Seeds
  • 2 tablespoons Sliced Scallions

Equipment

  • Air fryer
  • Medium saucepan
  • large bowl
  • 8x8-inch Baking Dish
  • small bowl

Method
 

Preparation Steps
  1. Rinse the sushi rice in cold water until clear, then cook with water in a saucepan over medium-high heat until boiling.
  2. Lower heat, cover, and simmer for 15 minutes, then let sit off heat for 10 minutes.
  3. Whisk rice vinegar, sugar, and salt until dissolved, then fold into cooled rice.
  4. Press rice into an 8x8 dish and refrigerate for at least 30 minutes.
  5. Slice chilled rice into 12 pieces, spray with oil, and air fry at 400°F for 12–15 minutes, flipping halfway.
  6. Dice mango, cucumber, and onion, mix with lime juice, soy sauce, sesame oil, and sesame seeds.
  7. Whisk together mayo, gochujang, lime juice, and honey until smooth.
  8. Assemble sushi with tartare on top of each rice piece, drizzle with mayo, and garnish with nori and scallions.

Nutrition

Serving: 1pieceCalories: 150kcalCarbohydrates: 20gProtein: 2gFat: 7gSaturated Fat: 1gPolyunsaturated Fat: 0.5gMonounsaturated Fat: 5gSodium: 300mgPotassium: 150mgFiber: 1gSugar: 3gVitamin A: 500IUVitamin C: 20mgCalcium: 15mgIron: 1mg

Notes

Serve immediately for best texture; keep toppings separate until serving.

Tried this recipe?

Let us know how it was!

Starbucks Egg White Bites: Creamy, High-Protein Goodness

While sipping on my morning coffee, I found myself missing those delightful Starbucks Egg White Bites that always felt like a hug in a bite. These scrumptious, high-protein morsels have a light and airy texture that makes them a perfect option for anyone craving a wholesome breakfast without the fuss. In less than 40 minutes, you can whip up a batch of these delicious bites packed with flavors from cheese and fresh veggies! Not only are they a fantastic meal prep solution, but they’re also gluten-free and low-carb, making them an ideal choice for many dietary preferences. Whether you’re busy on the go or simply want to indulge in something delicious at home, these egg white bites are a delightful twist on healthy eating. Ready to make your mornings feel special with a homemade touch? Let’s dive in!

Why are Starbucks Egg White Bites Special?

Healthful Delight: These egg white bites are packed with protein, making them a smart choice for your morning routine.
Quick & Easy: You’ll have a delicious breakfast ready in under 40 minutes, perfect for busy days.
Versatile Variations: Feel free to customize with your favorite cheeses and veggies for a twist on flavor! You can also try them with a side of Baked Vegetable Egg Casserole for more healthy ideas.
Crowd-Pleaser: They’re not just for you—your family and friends will love these savory bites, making them an ideal addition to brunch or meal prep.
Perfectly Fluffy Texture: Enjoy the light, airy consistency that mimics a gourmet café experience right in your own kitchen!

Starbucks Egg White Bites Ingredients

• Get ready to whip up these delightful bites with ease!

For the Bites

  • Egg Whites – The star of the show, offering that high-protein, low-fat goodness; purchase pre-packaged for convenience.
  • Cottage Cheese – Adds moisture and contributes to the fluffy texture; good quality matters, so opt for Good Culture 2% low fat.
  • Mozzarella Cheese – Infuses creaminess and delightful flavor; feel free to substitute with Monterey Jack or Gruyere for a different twist.
  • Red Bell Pepper – Sweet and colorful, it livens up the bites; you can swap it for diced roasted red peppers if desired.
  • Spinach – Packed with nutrients and color; finely chop before adding to ensure even distribution.
  • Salt & Pepper – Elevates the flavors; adjust to taste for a perfect balance.
  • Non-Stick Cooking Spray – Essential for easy mold release; be generous with silicon liners for best results.
  • Boiling Water – Creates a steam bath for even cooking and a sous vide-like texture for your Starbucks Egg White Bites.

Step‑by‑Step Instructions for Starbucks Egg White Bites

Step 1: Preheat and Prepare
Start by preheating your oven to 350°F (175°C). While the oven warms up, generously coat your silicon cupcake mold with non-stick cooking spray to ensure the Starbucks Egg White Bites release smoothly after baking. Make sure every cavity is well-sprayed as this will help maintain their fluffy texture.

Step 2: Chop Vegetables
Next, finely chop the red bell pepper and spinach to bring vibrant flavor and nutrition to your egg bites. Once chopped, set the vegetables aside, ready to mix. This guarantees that each bite will be infused with the delicious flavors you’ve chosen, contributing to your overall experience.

Step 3: Blend the Base
In your blender, add the egg whites, cottage cheese, and mozzarella cheese. Blend the mixture for about 60 seconds until it’s smooth and airy, creating bubbles that will enhance the fluffiness of your bites. This combines all your ingredients and gives a light texture as you prepare the egg white mixture for the molds.

Step 4: Assemble the Bites
Arrange your prepared silicon mold on a baking sheet for stability. Begin by adding a spoonful of the chopped vegetables into each cavity, followed by pouring in the blended egg white mixture until each is about 3/4 full. Sprinkle salt and pepper on top, ensuring each Starbucks Egg White Bite is well-seasoned to enhance the flavors.

Step 5: Create the Steam Bath
Now, carefully fill the baking sheet with boiling water until it reaches halfway up the sides of the molds. This steam bath method helps cook the egg white bites evenly and gives them that luxurious texture. Place the setup in the preheated oven and let the bites bake for 30-35 minutes, or until the tops are firm to the touch.

Step 6: Cool and Serve
Once baked, remove the baking sheet from the oven and let the Starbucks Egg White Bites cool for about 5 minutes. Gently pull them away from the edges of the mold to release, then carefully pop them out. Enjoy these warm bites, either as a cozy breakfast or a healthy snack throughout your day!

What to Serve with Starbucks Egg White Bites

Looking to create a delightful breakfast spread that complements your fluffy egg white bites and brightens your morning?

  • Crispy Bacon: The savory crunch of bacon balances the light texture of the bites, adding a satisfying contrast.

  • Fresh Fruit Salad: A refreshing medley of seasonal fruits provides a sweet and juicy contrast, brightening up your plate.

  • Avocado Toast: Creamy avocado spread on whole grain bread offers healthy fats and a delightful richness to your meal.

  • Herbed Quinoa: Nutty quinoa seasoned with fresh herbs complements the bites incredibly well, adding an earthy flavor.

  • Hot Sauce or Salsa: A kick of spice elevates the flavor profile of the Starbucks Egg White Bites, perfect for those who crave zest.

  • Green Smoothie: A blend of greens and fruits adds a nutrient boost and balances the savory bites with freshness.

  • Greek Yogurt Parfait: Layered with granola and berries, it’s a creamy, sweet addition that enhances your morning experience beautifully.

  • Brewed Herbal Tea: Enjoy a warm cup alongside your meal, providing a calm and cozy vibe while you relish each bite.

Add any of these wonderful sides for a breakfast experience that’s not just filling but also full of joyful flavors!

How to Store and Freeze Starbucks Egg White Bites

  • Fridge: Store your Starbucks Egg White Bites in an airtight container for up to 3 days to maintain freshness. For best results, layer parchment paper between bites to prevent sticking.
  • Freezer: You can freeze these bites for up to 2-3 months. Place them in a single layer on a baking sheet until frozen, then transfer to a freezer-safe bag, removing excess air.
  • Reheating: To enjoy your bites again, simply microwave them for 15-30 seconds, covered, until warmed through. They will be just as delicious as when they were fresh!
  • Serving Tip: For added flavor, consider reheating with a sprinkle of cheese or a drizzle of your favorite hot sauce after removing them from the fridge or freezer.

Make Ahead Options

These Starbucks Egg White Bites are perfect for busy home cooks looking to save time during hectic mornings! You can prepare the egg white mixture and chop the vegetables up to 24 hours in advance. Simply blend the egg whites, cottage cheese, and mozzarella, and store the mix in an airtight container in the fridge. Chop your red bell pepper and spinach, and keep them in separate containers to maintain freshness and prevent browning. When you’re ready to bake, just pour the mixture into the molds, add the prepped veggies, sprinkle with salt and pepper, and follow the same baking instructions. This way, you’ll enjoy delicious, high-protein bites that are just as flavorful and fluffy as if they were freshly made!

Expert Tips for Starbucks Egg White Bites

  • Silicon Molds Matter: Always use silicon molds for easy removal; metal pans can lead to sticking and a broken texture.
  • Vegetable Prep: Make sure to finely chop vegetables to ensure even flavor distribution; larger pieces might disrupt the light, fluffy consistency.
  • Baking Time: Keep an eye on your bites; baking time can vary based on your oven. Check for doneness once the tops feel firm to the touch.
  • Steam Bath Success: The boiling water is key to achieving that perfect sous vide-like texture in your Starbucks Egg White Bites; don’t skip this step!
  • Storage Tips: Store leftovers in an airtight container in the fridge for up to 3 days, or freeze for up to 2-3 months for quick breakfasts.

Starbucks Egg White Bites Variations & Substitutions

Feel free to put your personal spin on these delightful Starbucks Egg White Bites and create a breakfast that’s uniquely yours!

  • Cheese Swaps: Try using cheddar or feta instead of mozzarella for a sharper taste. Each option brings a different flavor profile and excitement to your bites.
  • Meat Lovers: Add diced ham or cooked sausage for a heartier version that satisfies more substantial cravings. This twist makes for a filling breakfast that the family will love!
  • Veggie Boost: Experiment with mushrooms or green onions to add a different depth of flavor. The earthiness of mushrooms pairs beautifully with the fluffiness of the bites, creating a comforting classic.
  • Herb Infusion: Mix in fresh herbs like chives or basil to brighten up the flavor. A sprinkle of fresh herbs elevates the dish, making it feel gourmet.
  • Spice It Up: For those who love a kick, add some jalapeños or red pepper flakes for a spicy twist. These bites become a zesty treat that awakens your tastebuds.
  • Creamy Additions: Incorporate a dollop of cream cheese into the filling for a rich texture. This little touch adds a whole new level of creaminess that will keep you coming back for more.
  • Savory Snack: Turn these bites into a delightful mini quiche by adding a layer of flaky crust at the bottom. Working with a crust can enhance the bite and make it feel extra indulgent.
  • Colorful Mix: Use a range of colorful peppers like yellow or orange bell peppers for a vibrant plate. Visually enticing dishes not only look good but can brighten your mood and appetite, especially when served alongside Red White Blue Fruit Kabobs for a festive flair!

No matter which variations you choose, these egg white bites will surely become a cherished part of your breakfast routine.

Starbucks Egg White Bites Recipe FAQs

What type of egg whites should I use?
Absolutely! You can use either fresh egg whites or pre-packaged egg whites for convenience. If using fresh, make sure to separate the yolks completely, as even a bit of yolk can affect the fluffiness of your Starbucks Egg White Bites.

How should I store leftover egg white bites?
Store your Starbucks Egg White Bites in an airtight container in the fridge for up to 3 days. I recommend layering parchment paper between them to prevent sticking and keep them fresh. Just make sure they cool completely before sealing!

Can I freeze Starbucks Egg White Bites?
Yes, you can freeze these bites for up to 2-3 months! To ensure they freeze well, place them in a single layer on a baking sheet until solid. Then, transfer them to a freezer-safe bag, making sure to remove as much air as possible before sealing. When you’re ready to enjoy them, just microwave for 15-30 seconds until warmed through.

What should I do if my egg white bites aren’t puffing up?
If your Starbucks Egg White Bites aren’t puffy, it may be due to overmixing. Make sure to blend the ingredients only until smooth and airy, about 60 seconds, to incorporate air without deflating the mixture. Additionally, ensure your baking time is adequate; if they aren’t firm to the touch, give them a few more minutes in the oven.

Can I add ingredients to accommodate dietary restrictions?
Very! This recipe is quite flexible. If you or someone you know has dietary restrictions, feel free to use lactose-free cheese, or swap in your favorite vegetables. Just be mindful of the moisture content in any additions, as too much liquid can affect the final texture.

Are Starbucks Egg White Bites suitable for kids or pets?
Absolutely! These bites are a healthy option for kids, thanks to their protein content and nutritious ingredients. However, make sure there are no ingredients that are harmful to pets, like certain cheeses or seasonings. It’s always wise to check if you’re sharing with your furry friends!

Starbucks Egg White Bites

Starbucks Egg White Bites: Creamy, High-Protein Goodness

Delight in Starbucks Egg White Bites, creamy, high-protein morsels perfect for a quick breakfast.
Prep Time 10 minutes
Cook Time 35 minutes
Cooling Time 5 minutes
Total Time 50 minutes
Servings: 6 bites
Course: Breakfast
Cuisine: American
Calories: 90

Ingredients
  

For the Bites
  • 1 cup egg whites pre-packaged for convenience
  • 1/2 cup cottage cheese Good Culture 2% low fat
  • 1/2 cup mozzarella cheese substitute with Monterey Jack or Gruyere if desired
  • 1 medium red bell pepper finely chopped
  • 1 cup spinach finely chopped
  • to taste pinch salt
  • to taste pinch pepper
  • disconnect spray non-stick cooking spray be generous with silicon liners
  • 2 cups boiling water for steam bath

Equipment

  • blender
  • silicon cupcake mold
  • Baking Sheet

Method
 

Step-by-Step Instructions for Starbucks Egg White Bites
  1. Preheat your oven to 350°F (175°C) and coat the silicon cupcake mold with non-stick cooking spray.
  2. Finely chop the red bell pepper and spinach, then set aside.
  3. Blend the egg whites, cottage cheese, and mozzarella cheese for about 60 seconds until smooth and airy.
  4. Place the silicon mold on a baking sheet. Add chopped vegetables to each cavity, then pour in the egg mixture until 3/4 full. Season with salt and pepper.
  5. Fill the baking sheet with boiling water halfway up the sides of the molds. Bake for 30-35 minutes until firm to the touch.
  6. Allow to cool for 5 minutes, then release from the molds and serve warm.

Nutrition

Serving: 1bitesCalories: 90kcalCarbohydrates: 3gProtein: 10gFat: 4gSaturated Fat: 2gMonounsaturated Fat: 1gCholesterol: 5mgSodium: 150mgPotassium: 200mgFiber: 1gSugar: 1gVitamin A: 500IUVitamin C: 30mgCalcium: 150mgIron: 1mg

Notes

Store leftovers in an airtight container for up to 3 days or freeze for 2-3 months. Reheat in the microwave for 15-30 seconds.

Tried this recipe?

Let us know how it was!

Spicy Indian Cherry Chutney: Sweet Heat for Every Dish

You won’t believe how a simple jar of Spicy Indian Cherry Chutney can transform your meals! This vibrant condiment marries the sweetness of ripe cherries with a kick of heat, making it an irresistible addition to anything from grilled meats to afternoon snacking. The best part? It’s quick to whip up and completely customizable, so you can adjust the spice level to suit your tastes. Imagine serving this luscious chutney at your next gathering or enjoying it cozy on a quiet night in—either way, it’s designed to impress. Ready to learn how to create this sweet and tangy delight? Let’s dive into the recipe!

Why is Spicy Indian Cherry Chutney so loved?

Versatile Creation: This chutney is a culinary chameleon, effortlessly enhancing everything from grilled meats to sandwiches and cheese boards. Customizable Spice Level: You control the heat! Adjust the chili powder to make it just how you like it, whether you prefer mild or fiery. Quick Preparation: Ready in under 30 minutes, it’s perfect for those busy weeknights. Rich Flavor Profile: With a delightful blend of sweet cherries, savory onions, and aromatic spices, every spoonful bursts with flavor. Crowd Pleaser: Bring this chutney to your next gathering, and watch it disappear—everyone will be asking for the recipe! Pair it with dishes like Spicy Korean Gochujang or Spicy Thai Basil for even more delicious options.

Spicy Indian Cherry Chutney Ingredients

• Get ready to savor every bite with these ingredients that make the perfect jar of Spicy Indian Cherry Chutney!

For the Chutney

  • Cherries – Provides sweetness and vibrant color; use fresh cherries when in season for optimal flavor.
  • Sugar – Balances the tartness of cherries; brown or coconut sugar can add a unique twist.
  • Apple Cider Vinegar – Adds tanginess and aids in preservation; substitute with white wine vinegar for a milder taste.
  • Onions – Introduces savory depth; red onions are preferable for a sweeter flavor profile.
  • Ginger – Contributes warmth and a hint of spice; fresh ginger is recommended for best results.
  • Cumin – Adds earthiness and aroma; toasted cumin seeds can enhance the nuttiness.
  • Chili Powder – Introduces heat to the chutney; adjust to your desired spice level for customizable enjoyment.

Step‑by‑Step Instructions for Spicy Indian Cherry Chutney

Step 1: Prepare Cherries
Begin by washing 2 cups of fresh cherries, then pit and halve them, ensuring you have all the vibrant, juicy cherries ready to go. Place the prepared cherries in a mixing bowl and set them aside for a moment while you gather the other ingredients. Their sweet aroma will already start to fill your kitchen!

Step 2: Combine Ingredients
In a medium saucepan, combine the halved cherries with 1 cup of sugar and ½ cup of apple cider vinegar. Allow this mixture to rest for about 10 minutes. This resting time will allow the cherries to release their juices, enhancing the final flavor of your Spicy Indian Cherry Chutney—look for this mixture to become beautifully glossy.

Step 3: Add Aromatics
Next, stir in 1 finely chopped red onion, 1 tablespoon of freshly grated ginger, 1 teaspoon of cumin, and 1 teaspoon of chili powder into the mixture. Mix everything well, allowing the aromatics to infuse your chutney. The colors will become even more vibrant, hinting at the delicious flavor that’s about to develop.

Step 4: Cook Mixture
Place the saucepan over medium heat and cook the mixture, stirring occasionally, until it starts to bubble. Let it simmer for about 20-30 minutes, during which the chutney will thicken and become aromatic. Keep an eye on the consistency; it should be thick and bubbling gently while the flavors meld beautifully together.

Step 5: Cool and Store
Once your Spicy Indian Cherry Chutney has reached the perfect thickness, remove it from heat, and let it cool for about 15 minutes. After cooling, carefully transfer the chutney to a clean, sterilized jar. This sweet and spicy condiment will develop even richer flavors as it sits, so refrigerate it and savor the taste over the coming weeks!

What to Serve with Spicy Indian Cherry Chutney

Indulge in a culinary adventure by exploring delightful pairings that will elevate your meal experience and tantalize your taste buds.

  • Grilled Chicken: The smoky flavors of grilled chicken marry beautifully with the sweet and spicy notes of the chutney, creating a vibrant dish.

  • Soft Cheese: Creamy brie or tangy goat cheese spreads harmoniously with the chutney, offering a decadent contrast to every bite. The unexpected pairing turns a simple cheese platter into a sophisticated treat.

  • Savory Flatbreads: Serve warm naan or pita bread with cherry chutney as a dip; the bread’s pillowy texture complements the chutney’s chunky consistency.

  • Spicy Tacos: Add a spoonful of chutney to your tacos for a burst of flavor—its sweetness and heat create a fantastic balance with spicy fillings.

  • Roasted Vegetables: Toss roasted sweet potatoes or carrots in the chutney for an unexpected twist; the chutney enhances the natural sweetness of the vegetables.

  • Cold Cuts Platter: Pair your chutney with prosciutto or salami; the contrast of salty, savory meats against the sweet heat of the chutney brings a delightful complexity to your snack spread.

  • Craft Beer: A refreshing, hoppy IPA will cut through the richness of the chutney and complement its spice, making for a perfect pairing while enjoying your meal.

  • Chocolate Desserts: Drizzle over dark chocolate mousse or brownie bites. The spicy cherry notes elevate dessert with an intriguing but delicious twist, surprising your guests in the sweetest way!

Spicy Indian Cherry Chutney Variations

Feel free to get creative and tailor this Spicy Indian Cherry Chutney recipe to your taste buds!

  • Fruit Swap: Substitute cherries with apricots or peaches for a different fruity dimension. Each brings its own sweetness and flavor, delightfully refreshing your chutney experience. Try it with grilled chicken for a tasty twist!

  • Warm Spices: Add a dash of cinnamon or allspice for a beautiful depth of flavor. This addition evokes warmth and makes the chutney perfect for fall dishes or cozy family dinners.

  • Dried Fruits: Toss in some raisins or currants to introduce chewy sweetness and texture. The bite-sized morsels offer a lovely counterpoint to the tangy chutney, making it even more irresistible.

  • Nutty Crunch: Stir in chopped walnuts or almonds to introduce a delightful crunch to the chutney. Nuts not only add texture but also enhance the nutty flavors, making it a superb accompaniment to cheese plates.

  • Smoky Touch: Mix in a bit of smoked paprika or chipotle powder to give your chutney a smoky flair. It’s an exciting way to elevate the flavor, especially when paired with grilled meats or BBQ.

  • Herbal Notes: Fresh cilantro or mint can be added for a refreshing herbal twist. These herbs will brighten the chutney and introduce a pleasant balance to the sweet and spicy notes.

  • Heat Level: Adjust the chili powder to match your spice preference. For a milder version, reduce the amount, or amp it up with crushed red pepper flakes for a fiery kick!

  • Citrus Zest: Consider adding the zest of a lime or lemon for a tangy brightness. It adds a whole new layer of freshness, making the chutney perfect for summer gatherings or picnics.

Let your imagination roam, and enjoy experimenting with these variations! Pair your creations with a delicious dish like Spicy Korean Gochujang or Spicy Thai Basil for even more reason to savor this delightful condiment!

Expert Tips for Spicy Indian Cherry Chutney

  • Cherry Quality: Use ripe, fresh cherries for the best sweetness and flavor; avoid overripe or bruised fruit to maintain a balanced taste.

  • Sugar Substitution: Experiment with brown or coconut sugar for nuanced flavors; just be mindful of how each sugar’s unique sweetness interacts with the tartness of cherries.

  • Vinegar Choice: While apple cider vinegar is excellent, you can try balsamic vinegar for a different depth of flavor; just remember it may slightly alter the color.

  • Consistent Heat: If you’re unsure about spice levels, start with less chili powder and gradually increase it to find your ideal balance, ensuring your Spicy Indian Cherry Chutney matches your taste.

  • Storage Tips: Always store your chutney in sterilized jars to prolong freshness; consume within 2-3 weeks for a delightful experience!

Make Ahead Options

These Spicy Indian Cherry Chutney options are perfect for meal prep enthusiasts looking to save time during busy weeknights! You can prep the chutney up to 24 hours in advance by making the entire recipe and storing it in a clean, sterilized jar in the refrigerator. This allows the flavors to deepen, making it just as delicious when served the next day! Make sure to let the chutney cool completely before sealing it to maintain its quality and freshness. When you’re ready to serve, simply give it a good stir and pair it with your favorite grilled meats or cheeses—you’ll have a vibrant, flavorful condiment ready to impress without the last-minute rush!

How to Store and Freeze Spicy Indian Cherry Chutney

Fridge: Keep your Spicy Indian Cherry Chutney in an airtight jar in the refrigerator. It will stay fresh for up to 2-3 weeks, allowing flavors to develop.

Freezer: For longer storage, freeze chutney in ice cube trays or airtight containers. It can be stored for up to 3 months, making it easy to pull out as needed.

Thawing: To enjoy frozen chutney, simply thaw in the refrigerator overnight or warm gently on the stovetop, stirring until fully heated through.

Sterilization Advice: Always ensure jars are properly sterilized before filling to maintain freshness and prevent spoilage.

Spicy Indian Cherry Chutney Recipe FAQs

How do I choose ripe cherries for my chutney?
Absolutely! When selecting cherries, look for plump, firm fruits with a deep red color. Avoid cherries with dark spots or blemishes, as these may indicate overripeness or spoilage. Fresh, seasonal cherries will give your chutney the best sweetness and vibrant flavor.

What’s the best way to store my Spicy Indian Cherry Chutney?
Very well! Store your chutney in an airtight jar in the refrigerator for up to 2-3 weeks. This allows the flavors to meld beautifully over time. If you notice the chutney darkening slightly, don’t worry—it just means it’s developing even richer flavors!

Can I freeze Spicy Indian Cherry Chutney?
Absolutely! To freeze, pour the chutney into ice cube trays or an airtight container. It can last up to 3 months in the freezer. When ready to enjoy, simply thaw it overnight in the refrigerator or warm it gently on the stovetop while stirring until heated through.

What should I do if my chutney is too thick?
No worries! If you find your chutney has turned out thicker than desired, add a tablespoon of warm water, vinegar, or even a splash of fruit juice. Stir gently over low heat until you reach the desired consistency. Taste to ensure the balance of flavors remains.

Can I make this chutney without sugar?
While sugar helps balance the tartness of the cherries, you have options! You can substitute with honey or maple syrup for a more natural sweetness. Just keep in mind that the flavor profile may change slightly, so adjust to your taste preferences!

Is this chutney safe for pets?
While the ingredients in Spicy Indian Cherry Chutney are generally safe for humans, it’s always wise to keep it away from your pets! Ingredients like sugar can be harmful in large quantities, and the spices may upset their stomach. Always ensure your furry friends stick to their pet-friendly foods!

Spicy Indian Cherry Chutney

Spicy Indian Cherry Chutney: Sweet Heat for Every Dish

Experience the vibrant blend of sweet cherries and spice with this Spicy Indian Cherry Chutney, perfect for enhancing any dish.
Prep Time 10 minutes
Cook Time 30 minutes
Cooling Time 15 minutes
Total Time 55 minutes
Servings: 8 servings
Course: Appetizer
Cuisine: Indian
Calories: 30

Ingredients
  

For the Chutney
  • 2 cups cherries fresh, pitted and halved
  • 1 cup sugar brown or coconut sugar can add a unique twist
  • ½ cup apple cider vinegar substitute with white wine vinegar for a milder taste
  • 1 medium red onion finely chopped
  • 1 tablespoon ginger freshly grated
  • 1 teaspoon cumin toasted cumin seeds can enhance the nuttiness
  • 1 teaspoon chili powder adjust to your desired spice level

Equipment

  • Medium saucepan
  • Mixing Bowl
  • sterilized jar

Method
 

Step-by-Step Instructions
  1. Begin by washing 2 cups of fresh cherries, then pit and halve them. Place the prepared cherries in a mixing bowl and set aside.
  2. In a medium saucepan, combine the halved cherries with 1 cup of sugar and ½ cup of apple cider vinegar. Allow this mixture to rest for about 10 minutes.
  3. Stir in 1 finely chopped red onion, 1 tablespoon of freshly grated ginger, 1 teaspoon of cumin, and 1 teaspoon of chili powder into the mixture.
  4. Place the saucepan over medium heat and cook the mixture, stirring occasionally until it starts to bubble. Let it simmer for about 20-30 minutes.
  5. Once thickened, remove it from heat, and let it cool for about 15 minutes before transferring to a clean, sterilized jar.

Nutrition

Serving: 1tablespoonCalories: 30kcalCarbohydrates: 8gPotassium: 30mgSugar: 7gVitamin C: 1mg

Notes

Use ripe, fresh cherries for the best flavor. Experiment with sugar types and vinegar for a unique taste.

Tried this recipe?

Let us know how it was!

Creamy German Goulash: Ultimate Comfort in Every Bite

As autumn leaves start to fall and the air turns crisp, I find myself longing for the comforting embrace of a hearty meal. That’s where my Creamy German Goulash comes in, a delightful fusion of tender beef, vibrant spices, and a creamy sauce that warms both body and soul. Not only is this dish an easy one-pot wonder perfect for busy weeknights, but it also adapts beautifully to your pantry’s offerings; swap out ingredients and make it your own! Imagine gathering around the table, savoring each spoonful as laughter fills the air—a true celebration of home-cooked goodness. Ready to step into a world of comforting flavors? Let’s get started on this delightful culinary adventure!

Why is German Goulash so comforting?

Hearty, indulgent flavors: The Creamy German Goulash combines rich beef and creamy sauce with spices that hit all the right notes for comfort.

Versatile and customizable: Swap out beef for pork or even veggies to accommodate your dietary needs or preferences, perfect for those who crave personal touches in their dishes.

One-pot convenience: This recipe streamlines your cooking process—less time washing dishes and more time enjoying with family!

Perfect for gatherings: Serve it up at your next family dinner, and watch as everyone reaches for seconds.

A cozy classic: In just a few hours, you’ll end up with aromatic goodness simmering that makes your home feel welcoming, much like a warm hug.

Pair this with some noodles or a fresh salad for a complete meal, and don’t forget to check out my Creamy Chicken Fettuccine Alfredo for another comforting dish!

Creamy German Goulash Ingredients

• Here’s everything you need to whip up this comforting dish!

For the Goulash
Beef chuck – Provides the main protein; substitute with veal or pork for variation.
Onions – Adds sweetness and depth; shallots can be used for a milder flavor.
Olive oil – Used for browning beef; can be swapped with vegetable oil.
Sweet paprika – The key spice giving the dish its signature flavor; smoked paprika adds a deeper taste.
Smoked paprika – Enhances smokiness; omit if unavailable.
Caraway seeds – Adds warm aroma; optional if not preferred.
Marjoram – Brings an earthy note; can substitute with oregano.
Cayenne pepper (optional) – Adds heat; adjust to your liking.
Garlic – Enhances overall flavor; garlic powder will do in a pinch.
Tomato paste – Richens the sauce; can swap with crushed tomatoes.
Beef broth – Forms the sauce base; vegetable broth is a lighter option.
Dry red wine (optional) – Adds complexity; can increase beef broth if skipping.
Diced tomatoes – Provides acidity and moisture; fresh tomatoes work too.
Bell peppers – For sweetness; mix colors or use one variety.
Potatoes – Makes the dish heartier; sweet potatoes add a different taste.
Sour cream – Adds luscious creaminess; crème fraîche or Greek yogurt are great alternatives.
All-purpose flour – Thickens the sauce; cornstarch can be used for a gluten-free option.
Salt and pepper – Essential for seasoning; adjust to taste.
Fresh parsley – For garnish; chives offer a different flavor profile.
Noodles or Spätzle (optional) – Serve for added heartiness; rice or polenta work well too.

Now that you have all the ingredients lined up, let’s get ready to make your Creamy German Goulash a delicious reality!

Step‑by‑Step Instructions for Creamy German Goulash

Step 1: Prepare the Beef
Start by patting your beef chuck dry with a paper towel and seasoning generously with salt and pepper. This step helps to enhance the flavors and allows for a better sear. Preheat your large pot or Dutch oven over medium-high heat and add a splash of olive oil, allowing it to heat until shimmering—about 2 minutes.

Step 2: Brown the Beef
In batches, carefully add the seasoned beef to the hot pot, making sure not to overcrowd. Sear for 4-5 minutes per side until each piece is deeply browned; this creates rich flavor. Once browned, transfer the beef to a plate and set aside while you prepare the next ingredients.

Step 3: Sauté the Onions
In the same pot, add the chopped onions and another drizzle of olive oil if needed. Sauté over medium heat for about 5-7 minutes until the onions turn translucent and slightly caramelized, stirring occasionally. This develops sweetness and depth, setting a flavorful base for your Creamy German Goulash.

Step 4: Add Garlic and Spices
Stir in minced garlic, sweet and smoked paprika, caraway seeds, marjoram, and optional cayenne pepper. Cook for an additional 1 minute, stirring constantly to toast the spices and release their aromatic qualities. The rich scents will envelop your kitchen and signal that your goulash is on its way to perfection.

Step 5: Incorporate Tomato Paste
Next, add the tomato paste to the pot and cook for another minute, stirring well to combine. This step adds depth and complexity to your sauce while infusing it with acidity. Make sure to let the tomato paste caramelize slightly, which enhances the overall flavor profile of the goulash.

Step 6: Deglaze the Pot
Pour in beef broth and the optional dry red wine, using a wooden spoon to scrape any browned bits from the bottom of the pot. Bring the mixture to a gentle simmer once everything is combined. Return the browned beef to the pot, stirring to ensure everything is well coated in the savory liquid.

Step 7: Add Tomatoes and Peppers
Include the diced tomatoes and chopped bell peppers to the pot, stirring to combine. Bring the mixture back to a simmer and reduce the heat to low. Cover the pot and let your Creamy German Goulash simmer for 2-3 hours, allowing the flavors to meld beautifully while the beef becomes tender.

Step 8: Stir in Potatoes
After the initial simmering time, add cubed potatoes to the pot. Stir well and cover again, cooking for an additional 30-45 minutes, or until the potatoes are fork-tender. Ensure to check the liquid levels throughout; add more broth if necessary to prevent the dish from drying out.

Step 9: Whisk in Sour Cream
In a bowl, whisk together sour cream and flour until smooth. Temper this mixture by adding a few spoonfuls of the hot goulash liquid, then stir it all back into the pot. This step will create a luscious, creamy sauce, so stir gently and let it heat through for a few minutes without boiling.

Step 10: Final Seasoning and Serve
Taste your Creamy German Goulash and adjust the seasoning with additional salt and pepper if needed. Allow it to simmer for a few more minutes until slightly thickened, then remove from heat. Serve hot, garnished with fresh parsley, alongside noodles or Spätzle for a complete meal that’s sure to delight everyone.

Make Ahead Options

These Creamy German Goulash preparations are perfect for busy home cooks eager to simplify meal planning! You can dice the vegetables and brown the beef up to 24 hours in advance; simply refrigerate them in airtight containers to keep everything fresh. If time allows, prepare the entire goulash a day ahead; let it cool completely before refrigerating. When ready to serve, gently reheat the goulash on the stovetop, adding a splash of beef broth to maintain its creamy texture. The flavors will deepen overnight, resulting in an even more delicious dish that requires minimal effort on busy weeknights!

What to Serve with Creamy German Goulash

Imagine cozying up with a warm bowl of goulash surrounded by dishes that perfectly complement its rich flavors.

  • Butter Noodles: Soft and silky, butter noodles soak up the sauce beautifully, creating a delightful harmony with each bite.
  • Crusty Bread: A rustic loaf serves as an excellent vehicle for sopping up the creamy sauce, adding a satisfying crunch to every spoonful.
  • Crisp Garden Salad: The fresh crunch of greens provides a refreshing contrast to the rich goulash, brightening up the entire meal.
  • Spätzle: These tender German dumplings add an extra layer of comfort while enhancing the hearty nature of your goulash.
  • Roasted Vegetables: Roasting brings out the natural sweetness of vegetables; carrots, zucchini, or bell peppers can nicely balance the dish’s flavors.
  • Pickled Cucumbers: Their tangy bite cuts through the richness of the goulash, offering an exciting flavor contrast that awakens the palate.
  • Pilsner Beer: A light, crisp beer pairs well with the flavors of goulash, enhancing the dining experience with a refreshing finish.
  • Red Wine: A glass of dry red wine adds depth to the meal, emphasizing the hearty flavors present in the goulash.
  • Apple Strudel: End your lovely meal with a sweet contrast; this classic dessert adds warmth with its spiced apple filling and flaky crust.
  • Chocolate Mousse: For a light and airy finish, the smoothness of chocolate mousse would be a wonderful treat to round out your hearty meal.

Expert Tips for Creamy German Goulash

Perfect Browning: Ensure beef is browned well to build depth of flavor; this avoids steaming and promotes caramelization.

Liquid Levels: Check broth levels periodically during simmering to prevent drying out; add more liquid as needed for a perfect creamy consistency.

Sour Cream Technique: Avoid boiling after stirring in sour cream; this helps maintain that rich and creamy texture you love in your Creamy German Goulash.

Season Wisely: Taste and adjust seasoning at the end of cooking for the best balance of flavors; a little extra salt can go a long way!

Resting Time: Allow the goulash to sit for a few minutes before serving; this enhances the flavors and thickens the sauce slightly.

Customizable Flair: Get creative! Add in your favorite veggies or spices to make the goulash uniquely yours while keeping the heartwarming essence intact.

Creamy German Goulash Variations

Feel free to let your culinary creativity shine with these delightful twists on the classic goulash! Each suggestion brings a new dimension of flavor or texture, inviting you to tailor your meal to suit your tastes.

  • Gluten-Free: Swap all-purpose flour with cornstarch to create a gluten-free thickener, ensuring everyone can enjoy this comforting dish.

  • Vegetarian: Replace beef with hearty mushrooms and lentils for a satisfying, plant-based take that doesn’t skimp on flavor.

  • Spicy Kick: Add more cayenne pepper or a dash of your favorite hot sauce to turn up the heat, creating a warming sensation that soothes on chilly nights.

  • Extra Veggies: Stir in diced carrots or bell peppers for additional sweetness and vibrant color, making your goulash even more nourishing and appealing.

  • Creamy Twist: Increase the amount of sour cream or mix in half-and-half for a richer sauce that envelops the meat and potatoes in a luscious hug.

  • Wine Infusion: Splash a bit of red wine into the pot for an extra depth of flavor, or go for a robust stout beer to bring complex notes.

  • Flavorful Broth: For a more robust base, use homemade beef broth or stock, enhancing the overall taste and authenticity of your creamy goulash.

Pair your goulash with a side of crusty bread or noodles and savor the warmth of family gatherings. If you’re looking for more comfort food ideas, be sure to explore my delicious Creamy Seafood Bisque Soup or the heartwarming Mushroom Pasta Delightful that are equally satisfying!

How to Store and Freeze Creamy German Goulash

Fridge: Store leftovers in an airtight container for up to 3 days. Allow the goulash to cool slightly before covering to maintain the creamy texture.

Freezer: For longer storage, freeze in airtight containers for up to 3 months. Thaw in the fridge overnight before reheating to keep flavors intact.

Reheating: Reheat gently on the stovetop over low heat, adding a splash of beef broth or water if necessary to restore the creamy consistency.

Serving Suggestions: Enhance your experience by serving with freshly cooked noodles or crusty bread, perfect for soaking up every last drop of this delicious goulash.

Creamy German Goulash Recipe FAQs

How do I select ripe ingredients for the goulash?
When selecting ingredients for your Creamy German Goulash, look for beef that’s bright red and marbled for optimal tenderness. Choose onions that are firm with a smooth skin, avoiding any with soft spots or sprouting. Opt for bell peppers that are vibrant and crisp, and when it comes to tomatoes, seek out those that are slightly fragrant and feel heavy for their size.

What is the best way to store leftovers?
Store your leftover Creamy German Goulash in an airtight container in the refrigerator for up to 3 days. Allow the dish to cool down before sealing it to maintain its creamy texture. If the goulash thickens while stored, feel free to add a splash of beef broth or water when reheating to bring back its original consistency.

Can I freeze Creamy German Goulash?
Absolutely! To freeze your goulash, let it cool completely, and then portion it into airtight containers or freezer bags. It can be stored in the freezer for up to 3 months. For best results, thaw the goulash in the refrigerator overnight before reheating; this will keep the flavors intact. When reheating, use low heat on the stovetop, adding a little broth or water if needed.

What can I do if my goulash is too thin?
If you find your Creamy German Goulash is thinner than you’d like, don’t worry! You can thicken it easily. Mix 1-2 tablespoons of cornstarch with a splash of cold water to create a slurry, then stir it gradually into the goulash while simmering. Let it cook for a few more minutes until it thickens to your desired consistency. If you prefer a more rustic method, simply mash a few of the potatoes already in the goulash to thicken the sauce naturally.

Are there any dietary considerations for pets or allergies?
When preparing Creamy German Goulash, be mindful of allergens such as gluten, especially if you’re serving it with noodles. For those with gluten sensitivities, opt for gluten-free noodles or serve it over rice instead. Also, be cautious with garlic and onions; while they’re safe for most humans, these ingredients can be toxic to pets. If sharing with furry friends, it’s best to set aside a portion before adding these ingredients.

Can I make this dish vegetarian or vegan-friendly?
Definitely! To make a vegetarian or vegan version of Creamy German Goulash, simply substitute beef with hearty vegetables like mushrooms, lentils, or a meat alternative like tempeh or tofu. Replace beef broth with vegetable broth and skip the sour cream for a dairy-free yogurt alternative. The spices and flavors will still shine through, delivering that comforting essence you love!

Creamy German Goulash

Creamy German Goulash: Ultimate Comfort in Every Bite

Creamy German Goulash combines tender beef, vibrant spices, and a creamy sauce for ultimate comfort.
Prep Time 15 minutes
Cook Time 3 hours
Total Time 3 hours 15 minutes
Servings: 6 servings
Course: Beef
Cuisine: German
Calories: 500

Ingredients
  

For the Goulash
  • 2 pounds beef chuck can substitute with veal or pork
  • 2 medium onions can use shallots for a milder flavor
  • 2 tablespoons olive oil or vegetable oil
  • 2 tablespoons sweet paprika key spice for flavor
  • 1 tablespoon smoked paprika omit if unavailable
  • 1 teaspoon caraway seeds optional
  • 2 teaspoons marjoram can substitute with oregano
  • 1/4 teaspoon cayenne pepper optional, adjust to taste
  • 4 cloves garlic or garlic powder in a pinch
  • 2 tablespoons tomato paste or crushed tomatoes
  • 4 cups beef broth or vegetable broth for a lighter option
  • 1 cup dry red wine optional, can increase beef broth if skipping
  • 1 can diced tomatoes can use fresh tomatoes
  • 2 cups bell peppers mix colors or use one variety
  • 2 cups potatoes sweet potatoes add a different taste
  • 1 cup sour cream or crème fraîche/Greek yogurt
  • 2 tablespoons all-purpose flour or cornstarch for gluten-free
  • 1 teaspoon salt adjust to taste
  • 1 teaspoon pepper adjust to taste
  • 1/4 cup fresh parsley or chives for garnish
  • 4 cups noodles or Spätzle optional for serving

Equipment

  • Dutch oven

Method
 

Step‑by‑Step Instructions
  1. Pat beef chuck dry, season with salt and pepper, and heat olive oil in a pot over medium-high heat.
  2. Brown beef in batches for 4-5 minutes per side, then transfer to a plate.
  3. Sauté chopped onions for 5-7 minutes until translucent and slightly caramelized.
  4. Add minced garlic, sweet and smoked paprika, caraway seeds, marjoram, and cayenne pepper; cook for 1 minute.
  5. Incorporate tomato paste and cook for 1 minute, allowing it to caramelize.
  6. Deglaze the pot with beef broth and optional red wine, scraping browned bits; return beef.
  7. Add diced tomatoes and bell peppers, bring to a simmer, cover, and cook for 2-3 hours.
  8. Add cubed potatoes and cook for an additional 30-45 minutes until fork-tender.
  9. Whisk together sour cream and flour, temper with hot goulash liquid, then stir into pot.
  10. Adjust seasoning with salt and pepper, let simmer, then serve hot garnished with parsley.

Nutrition

Serving: 1cupCalories: 500kcalCarbohydrates: 45gProtein: 30gFat: 25gSaturated Fat: 10gPolyunsaturated Fat: 2gMonounsaturated Fat: 8gCholesterol: 90mgSodium: 800mgPotassium: 950mgFiber: 5gSugar: 6gVitamin A: 10IUVitamin C: 15mgCalcium: 5mgIron: 20mg

Notes

Allow the goulash to rest for a few minutes before serving to enhance flavors.

Tried this recipe?

Let us know how it was!

Hearty French Lentil Soup That’s Cozy and Delicious

As the cool breeze of autumn settles in, I find myself reaching for comforting meals that not only warm the body but soothe the soul. One of my favorites is this Hearty Vegan French Lentil Soup, a delightful concoction that brings together earthy lentils, vibrant vegetables, and aromatic spices. Not only is this recipe incredibly nutritious, but it also offers a cozy embrace in every spoonful, making it perfect for chilly evenings or hearty lunches. With quick prep time and easy ingredients, this vegan soup is a wonderful way to transition from fast food to homemade delights. Curious how you can whip up this comforting dish that’s sure to impress even the pickiest eaters? Let’s dive in!

Why Choose This French Lentil Soup?

Nutritious and Hearty: This vegan soup is not only packed with protein from the lentils but also loaded with vibrant veggies, making it a wholesome meal option.

Quick Prep Time: You can have this comforting dish on the table in under an hour, making it perfect for a busy weeknight dinner.

Versatile Flavors: Feel free to customize the recipe! Add your favorite veggies or herbs to make it your own, just like my Roasted Carrot Lentil dish.

Crowd-Pleasing Appeal: Whether you’re serving it to family or guests, this soup is a sure hit that satisfies even the pickiest eaters.

Easy Storage: Leftovers can be kept for up to five days or even frozen, so it’s perfect for meal prepping. Try pairing it with a slice of warm bread for an unbeatable experience!

French Lentil Soup Ingredients

For the Creaminess
Raw Cashews (or Sunflower Seeds) – Adds creaminess to the soup; substitute sunflower seeds for nut-free options.
Water – Used to blend the cashews into a cream, essential for the soup’s consistency.

For the Soup Base
Extra-Virgin Olive Oil – Adds richness; can be replaced with vegetable broth for an oil-free version.
Yellow or Sweet Onion (or Leeks) – Provides a flavorful base; sweetness enhances the overall taste.
Garlic – Adds depth and aroma; use fresh minced for best flavor.
Fine Sea Salt – Enhances flavors; adjust based on taste preference.

For Added Flavor and Nutrition
Carrots – Contributes sweetness and texture; can be diced or chopped.
Celery – Adds crunch and flavor; helps build a savory and aromatic base.
Ground Cumin – Provides warmth and earthiness; essential for robust flavor.
Dried Thyme – Infuses the soup with herbal notes; enhances overall taste.
Ground Turmeric – For color and anti-inflammatory properties; helps enhance the soup’s health benefits.

For the Main Ingredients
Canned Diced Tomatoes – Adds acidity and natural sweetness; use with juices for extra flavor.
French Green Lentils – Main protein source; holds shape well and can be swapped for green or brown lentils, but note texture will change.
Veggie Broth (low sodium) – Base liquid for the soup; provides savory depth.
Swiss Chard or Kale – Adds nutrition and vibrant color; can be substituted with any leafy greens.
Freshly Ground Black Pepper – For seasoning; adjust to taste.
White Wine Vinegar – Adds brightness; use sparingly to enhance flavors without overwhelming.

Step‑by‑Step Instructions for Hearty Vegan French Lentil Soup

Step 1: Soak and Blend Cashews
Begin by soaking ½ cup of raw cashews (or sunflower seeds) in water for 1-2 hours. Once they are softened, drain the water and blend the cashews with ½ cup of fresh water until smooth and creamy. This cashew cream adds a luscious texture to your Hearty Vegan French Lentil Soup, so set it aside until needed.

Step 2: Sauté Aromatics
In a large Dutch oven, heat 2 tablespoons of extra-virgin olive oil (or vegetable broth for an oil-free variation) over medium heat. Once hot, add one diced yellow onion and 2 cloves of minced garlic with a pinch of fine sea salt. Sauté for 4-6 minutes, stirring occasionally, until the onion becomes translucent and fragrant.

Step 3: Add Vegetables
Next, stir in 2 diced carrots and 2 stalks of chopped celery, cooking for another 3-4 minutes. This will enhance the soup’s flavor and builds a savory base. The vegetables should be slightly softened, making the kitchen smell delightful as you prepare your Hearty Vegan French Lentil Soup.

Step 4: Incorporate Spices
Sprinkle in 1 teaspoon each of ground cumin, dried thyme, and ground turmeric. Stir the mixture well for about 1 minute until the spices release their fragrances. This step is crucial for building layers of flavor in your Hearty Vegan French Lentil Soup, resulting in a warm, aromatic base.

Step 5: Combine Main Ingredients
Add one 14-ounce can of diced tomatoes (including juices), 1 cup of French green lentils, and 4 cups of low-sodium veggie broth to your aromatic mix. Stir everything together, making sure the lentils are well coated. Bring the soup to a boil over high heat, then reduce to a gentle simmer. Cover for 30-35 minutes, stirring occasionally, until the lentils are tender.

Step 6: Finish with Cream and Greens
Once the lentils are cooked through, stir in the prepared cashew cream and 2 cups of chopped Swiss chard or kale. Season your Hearty Vegan French Lentil Soup with freshly ground black pepper and a splash of white wine vinegar for brightness. Cook for an additional 3-5 minutes, just until the greens have wilted and flavors meld beautifully.

Step 7: Serve Warm
Ladle the soup into bowls and serve warm, optionally accompanied by crusty whole-grain bread for a satisfying meal. Your Hearty Vegan French Lentil Soup is now ready, providing a cozy and wholesome experience that everyone will love!

What to Serve with Hearty Vegan French Lentil Soup

Cozying up with a warm bowl of soup is delightful, but a full meal can elevate your dining experience to a whole new level.

  • Crusty Whole-Grain Bread: Perfect for dipping, this bread adds a satisfying texture that complements the soup’s velvety richness. It’s a classic pairing, bringing warmth and a homemade touch to your meal.

  • Fresh Green Salad: A light, crisp salad with mixed greens, cucumbers, and a lemon vinaigrette complements the soup wonderfully. The freshness balances the hearty flavors of the lentil soup and leaves you feeling revitalized.

  • Roasted Vegetables: Roasting seasonal vegetables such as carrots, Brussels sprouts, or sweet potatoes brings out their natural sweetness. This side contrasts beautifully with the earthy notes of the lentil soup.

  • Garlic Breadsticks: Soft and flavorful, garlic breadsticks offer a crunchy element and aroma that enhances the overall enjoyment of your meal. Dipping them into the soup creates a delicious fusion of flavors.

  • Couscous or Quinoa: A light serving of fluffy couscous or nutty quinoa can round out your meal. These grains provide additional protein and a delightful texture contrast, making each bite a wholesome experience.

  • Savory Applesauce: A bowl of warm, spiced applesauce offers a surprising sweetness that complements the savory depth of the soup. This unique pairing adds a comforting, nostalgic element to your meal.

  • Homemade Lemonade or Iced Tea: For a refreshing drink, a glass of homemade lemonade or iced tea balances the hearty flavors with a touch of brightness. The acidity cleanses the palate, making every bite of soup even more enjoyable.

  • Vegan Chocolate Cake: If you’re craving something sweet, a slice of vegan chocolate cake can beautifully round off the meal. Its rich chocolate flavor is a perfect contrast to the savory soup, creating a delightful finish.

How to Store and Freeze French Lentil Soup

Fridge: Store your French lentil soup in an airtight container for up to 5 days. Reheat on the stovetop or in the microwave, adding a splash of broth if it thickens.

Freezer: For long-term storage, freeze the soup in airtight containers or freezer bags for 1–2 months. Thaw overnight in the fridge before reheating for a cozy meal.

Reheating: When reheating frozen soup, add a bit of broth to adjust the consistency, as it may thicken during freezing. Warm gently on the stovetop for the best flavor and texture.

Make-Ahead: This hearty soup is perfect for meal prep! Make a big batch to enjoy during the week, and you’ll always have a nutritious option ready in the fridge or freezer.

French Lentil Soup Variations

Feel free to get creative and personalize this delightful soup to make it your own!

  • Nut-Free: Substitute cashews with sunflower seeds for a creamy texture without nuts.

  • Add Veggies: Toss in bell peppers or mushrooms for extra flavor and nutrition; they’ll provide lovely texture and earthy notes.

  • Herby Twist: Experiment with various herbs like rosemary or smoked paprika to elevate the soup’s flavor profile; each will bring a unique aromatic experience.

  • Spicy Kick: Add a pinch of cayenne pepper or red pepper flakes for a delightful heat that complements the earthy lentils beautifully; adjust according to your spice tolerance.

  • Creamy Alternatives: Replace cashew cream with coconut cream for a tropical twist; this will give a creamy consistency while adding a subtle sweetness that pairs well with spices.

  • Different Lentils: Swap French green lentils for regular green or brown lentils; they’ll change the texture but still create a hearty soup that warms the soul, similar to my Chicken Mushroom Soup.

  • For Extra Zing: Use lemon juice or zest in place of white wine vinegar for a bright and zesty finish that enhances the overall taste of the soup.

  • Sweet Addition: Add a tablespoon of maple syrup or agave for a hint of natural sweetness, balancing out the savory elements beautifully; this subtle change can make your soup feel even more comforting.

Explore these variations to create a delightful bowl of Hearty Vegan French Lentil Soup that suits your taste perfectly! Don’t forget to try it alongside some homemade crusty bread for a complete meal.

Expert Tips for French Lentil Soup

  • Avoid Overcooking: Monitor lentils closely to prevent mushiness; check for doneness frequently during the simmering process.

  • Fresh Ingredients Matter: Opt for fresh, seasonal vegetables to elevate the flavor profile; they make this vegan dish truly shine.

  • Lentil Substitutions: If swapping French lentils for green or brown, remember they tend to break down more, thickening the soup significantly.

  • Oil-Free Option: For a healthier twist, sauté the aromatics in vegetable broth instead of olive oil to reduce fat while retaining flavor.

  • Cashew Cream Tip: Remember to soak cashews long enough to achieve a creamy consistency; this step is essential for a luscious soup texture.

Make Ahead Options

These Hearty Vegan French Lentil Soup is perfect for meal prep enthusiasts! You can chop the vegetables and soak the cashews up to 24 hours in advance, storing them in the refrigerator to keep them fresh. You can also prepare the lentil base (steps 1-5) and refrigerate it for up to 3 days; just remember to store the cashew cream separately to maintain its texture. When you’re ready to enjoy the soup, simply reheat the lentil mixture over medium heat, stir in the cashew cream and greens, and cook until heated through for a comforting meal that tastes just as delicious as when freshly made.

Hearty Vegan French Lentil Soup Recipe FAQs

How do I choose ripe ingredients for this soup?
Absolutely! When selecting your vegetables, look for fresh produce that feels firm to the touch. Carrots should be bright orange without blemishes, and celery should be crisp with no dark spots. For the leafy greens like Swiss chard or kale, choose vibrant leaves without wilting. If using cashews, opt for raw, unsalted varieties stored in a cool, dry place.

What are the best storage methods for the soup, and how long does it last?
You can keep your French lentil soup in an airtight container in the fridge for up to 5 days. To maintain its delicious flavor, allow it to cool completely before storing. For longer storage, freeze it in individual portions in freezer-safe bags or containers for up to 1-2 months. Just label them with the date, and you’ll be ready to enjoy a cozy meal on a chilly night!

How can I freeze this French lentil soup properly?
Very! Start by letting the soup cool after cooking. Then, portion it into freezer-safe containers or zip-top bags, leaving some space at the top for expansion as it freezes. Seal tightly and freeze flat if using bags, which makes storage easier. When ready to enjoy, simply thaw overnight in the fridge, then reheat gently on the stove, adding a splash of broth if it thickens.

What can I do if my lentils become mushy during cooking?
If you notice your lentils are becoming mushy, it may be due to cooking them for too long or not rinsing them properly before adding to the soup. For the future, monitor them closely and test for doneness around the 30-minute mark. You can also stir gently during cooking, ensuring even heat. If already mushy, consider blending the soup for a creamy texture or adding some fresh cooked lentils to retain a bit of chew.

Are there any dietary considerations I should keep in mind for this recipe?
Absolutely! This recipe is vegan and gluten-free, making it suitable for various dietary needs. If allergies are a concern, substitute the cashews with sunflower seeds to make it nut-free. Always double-check your canned diced tomatoes for any added ingredients. If serving to pets, be cautious with garlic, as it’s toxic to dogs; keep them away from leftovers.

French Lentil Soup

Hearty French Lentil Soup That's Cozy and Delicious

Enjoy this nourishing French Lentil Soup, a comforting vegan dish packed with flavors and nutrients, perfect for chilly evenings.
Prep Time 15 minutes
Cook Time 35 minutes
Total Time 50 minutes
Servings: 6 servings
Course: Dinner
Cuisine: French
Calories: 250

Ingredients
  

For the Creaminess
  • 1/2 cup raw cashews or sunflower seeds
  • 1/2 cup water to blend the cashews
For the Soup Base
  • 2 tablespoons extra-virgin olive oil or vegetable broth for oil-free
  • 1 large yellow or sweet onion or leeks
  • 2 cloves garlic minced
  • 1 teaspoon fine sea salt to taste
For Added Flavor and Nutrition
  • 2 medium carrots diced
  • 2 stalks celery chopped
  • 1 teaspoon ground cumin
  • 1 teaspoon dried thyme
  • 1 teaspoon ground turmeric
For the Main Ingredients
  • 1 14-ounce can canned diced tomatoes with juices
  • 1 cup French green lentils
  • 4 cups low sodium veggie broth
  • 2 cups Swiss chard or kale chopped
  • to taste freshly ground black pepper
  • 1 tablespoon white wine vinegar

Equipment

  • Dutch oven

Method
 

Step-by-Step Instructions
  1. Soak the cashews in water for 1-2 hours. Drain and blend with 1/2 cup water until smooth.
  2. In a Dutch oven, heat olive oil over medium heat. Add onion and garlic; sauté for 4-6 minutes.
  3. Stir in carrots and celery; cook for another 3-4 minutes until slightly softened.
  4. Add ground cumin, thyme, and turmeric; stir for 1 minute until fragrant.
  5. Combine diced tomatoes, lentils, and veggie broth; bring to a boil, then reduce to a simmer and cover for 30-35 minutes.
  6. Stir in the cashew cream and Swiss chard; season with black pepper and vinegar. Cook for additional 3-5 minutes.
  7. Ladle soup into bowls and serve warm, optionally with crusty bread.

Nutrition

Serving: 1bowlCalories: 250kcalCarbohydrates: 40gProtein: 10gFat: 8gSaturated Fat: 1gPolyunsaturated Fat: 3gMonounsaturated Fat: 3gSodium: 400mgPotassium: 700mgFiber: 12gSugar: 4gVitamin A: 6000IUVitamin C: 20mgCalcium: 80mgIron: 3mg

Notes

Store in an airtight container for up to 5 days or freeze for 1-2 months. Reheat on the stovetop, adding broth if thickened.

Tried this recipe?

Let us know how it was!