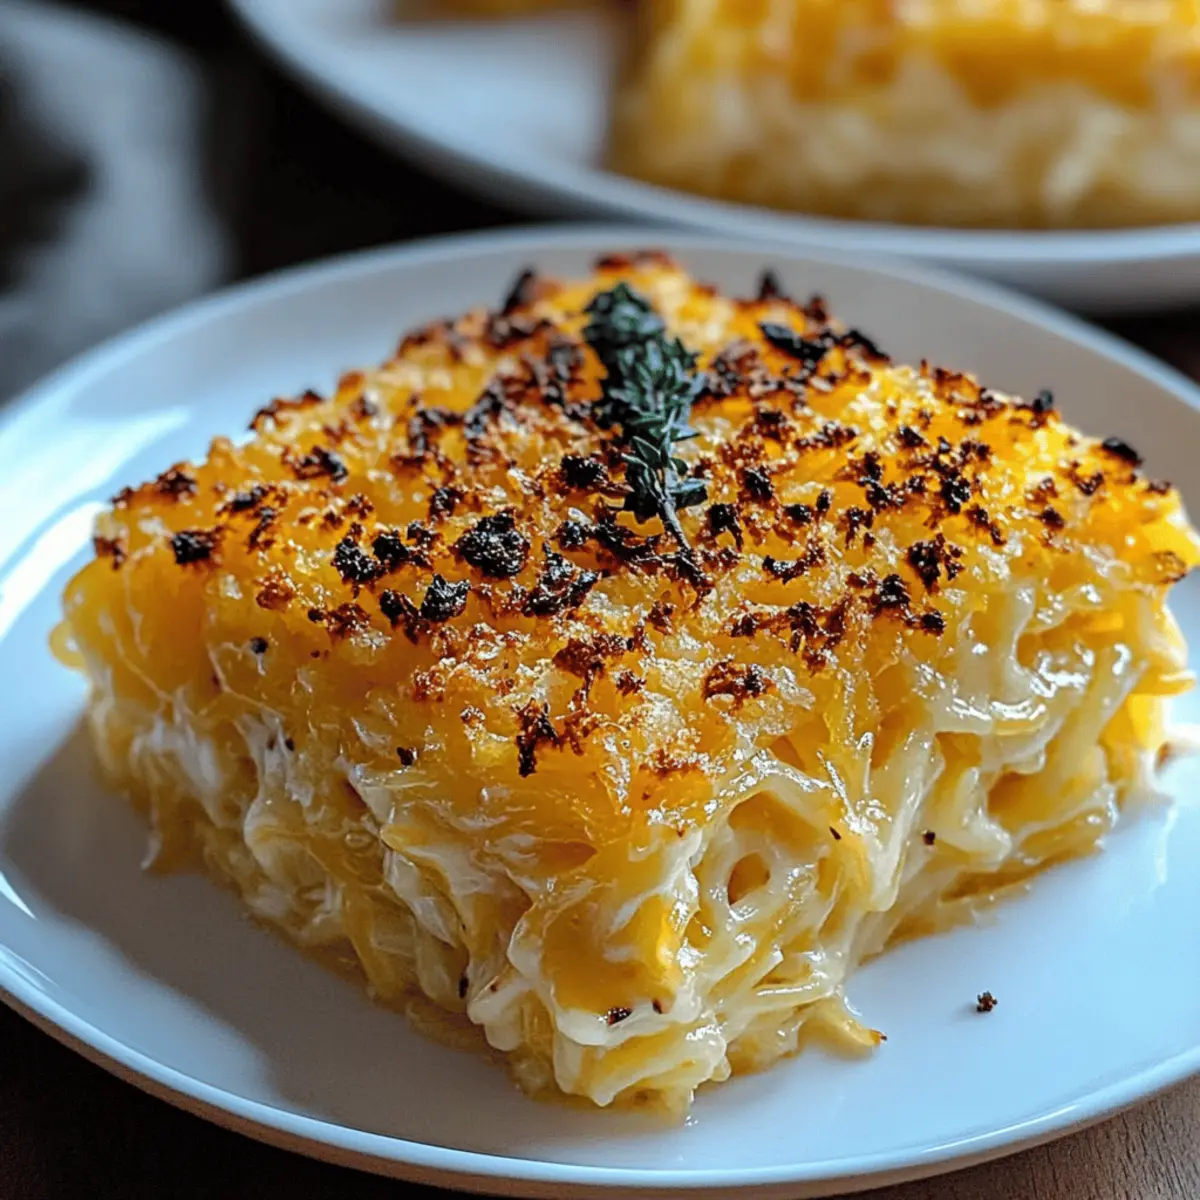
Creamy Spaghetti Squash Au Gratin for Guilt-Free Comfort

As I stood in my kitchen, the scent of roasted garlic enveloped me like a warm embrace, transporting me to cozy family dinners. Today, I’m excited to share my creamy Spaghetti Squash Au Gratin—a delightful comfort food twist that will please both health-conscious eaters and those craving a rich, cheesy indulgence. This dish combines the naturally sweet root veggie with a luscious cheese sauce, making it a satisfying choice that’s gluten-free and packed with vitamins and fiber. Plus, it’s quick to prepare and perfect for weeknight meals or special occasions alike! Are you ready to elevate your dinner game with a dish that’s both comforting and nourishing?
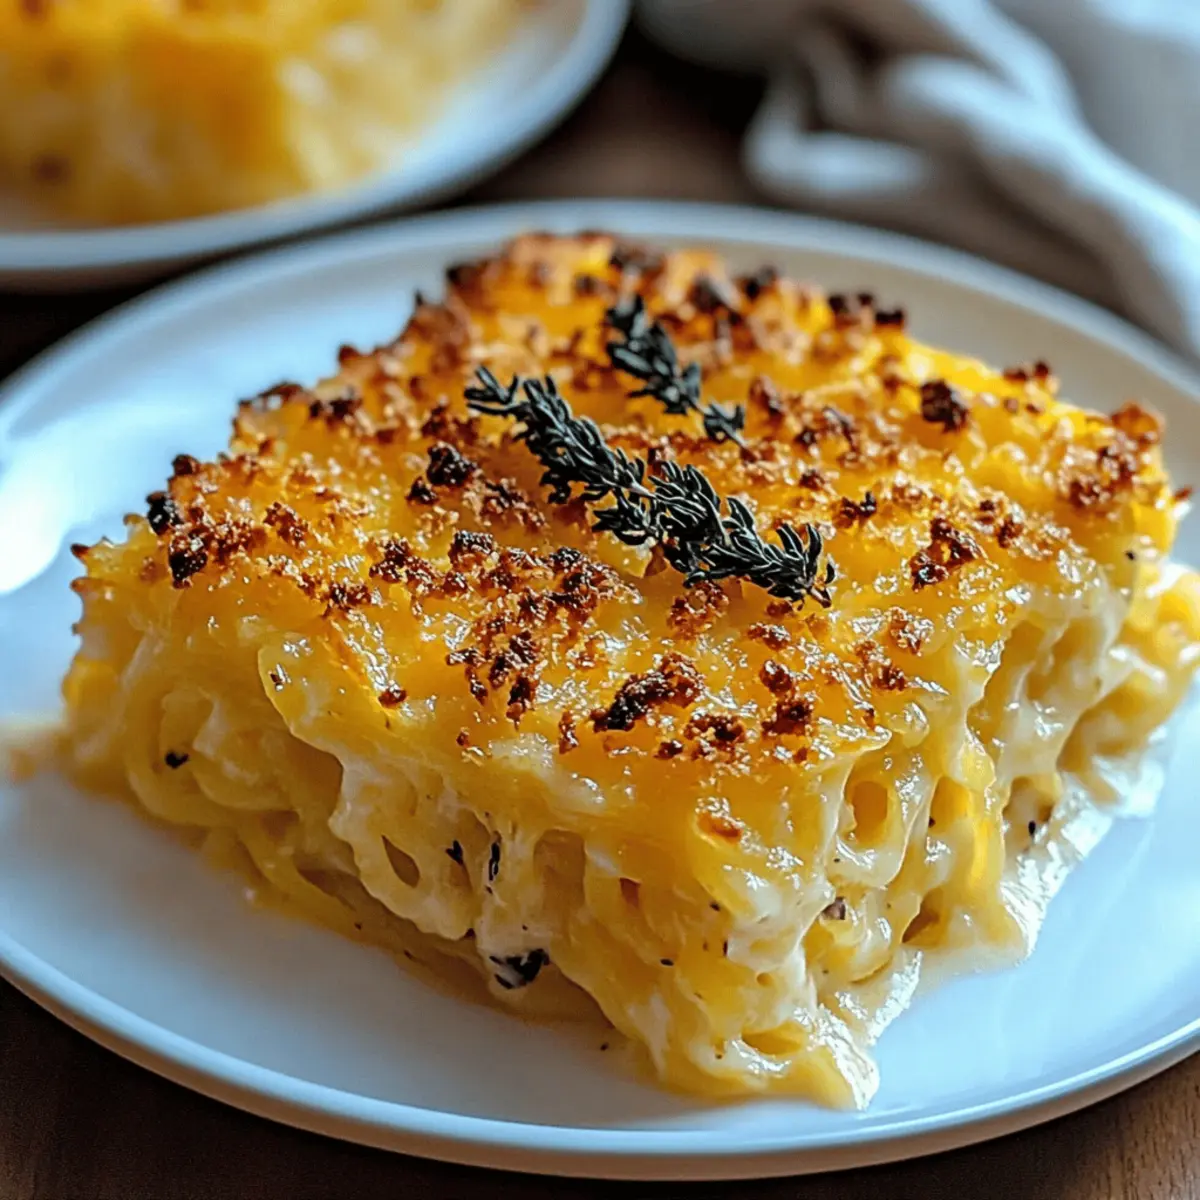
Why is Spaghetti Squash Au Gratin a must-try?

Comforting Flavor: This creamy dish captures the essence of traditional au gratin while being gluten-free and nutritious. Easy Preparation: With straightforward steps, you can whip this up in no time—perfect for busy weeknights! Versatile Options: Customize it by adding proteins like chicken or bacon, making it ideal for any palate. Healthy Twist: Packed with vitamins and fiber, it’s a feel-good alternative to classic pasta dishes. For more delightful meals like this, don’t miss my Garlic Shrimp Spaghetti or explore other comforting vegetarian options that are sure to impress!

Spaghetti Squash Au Gratin Ingredients

For the Base
Spaghetti Squash – Provides a tender and slightly sweet foundation; substitute with zucchini for a lower-carb variation.
Unsalted Butter – Adds richness and depth to the cheese sauce; consider olive oil for a dairy-free alternative.

For the Cheese Sauce
Yellow Onion – Imparts sweetness and depth of flavor; shallots can be used for a milder result.
Garlic – Enhances the aroma and flavor profile; garlic powder works in a pinch.
All-Purpose Flour – Thickens the sauce; gluten-free flour is perfect for those with dietary restrictions.
Whole Milk – Creates a creamy consistency; almond or oat milk can be used for a dairy-free version.
Salt & Pepper – Essential for seasoning; adjust according to your taste.
Nutmeg – Adds warmth and a hint of spice; cinnamon or allspice can provide an interesting twist.

For the Cheesy Topping
Gruyere Cheese – Brings a nutty flavor to the dish; Swiss cheese can be substituted.
Sharp Cheddar Cheese – Adds a delightful tang; any aged cheese can serve as an alternative.
Parmesan Cheese – Contributes a salty flavor; Pecorino Romano is a good substitute.
Panko Breadcrumbs – Creates a crunchy topping; regular breadcrumbs can be crushed for a similar texture.
Fresh Parsley – An optional garnish for a pop of color; chives or basil work beautifully, too.

Step‑by‑Step Instructions for Spaghetti Squash Au Gratin

Step 1: Preheat the Oven
Begin by preheating your oven to 400°F (200°C). This prepares it for roasting the spaghetti squash, ensuring it cooks evenly and achieves that perfect tenderness. While it warms up, you’ll have time to prep the squash and gather your ingredients for a seamless cooking experience.

Step 2: Prepare the Spaghetti Squash
Carefully slice the spaghetti squash in half lengthwise, then scoop out the seeds using a spoon. Take a butter knife or your fingers to sprinkle some unsalted butter, along with a pinch of salt and pepper, into the hollow part of each half. This seasoning will enhance the natural sweetness as it roasts.

Step 3: Roast the Squash
Place the squash halves cut-side down on a baking sheet lined with parchment paper. Roast in the preheated oven for about 45-60 minutes, or until the skin is tender and a fork easily pierces the flesh. This step is crucial for achieving that spaghetti-like texture that makes the Spaghetti Squash Au Gratin so delightful.

Step 4: Shred the Squash
Once cooked, allow the squash to cool for a few minutes so you can handle it safely. Using a fork, gently scrape the flesh to create long strands resembling spaghetti. This step is both satisfying and essential, as the shredded squash will serve as the base of your creamy au gratin.

Step 5: Sauté the Aromatics
In a medium saucepan, melt 4 tablespoons of unsalted butter over medium heat. Add the chopped yellow onion and sauté for about 4-5 minutes, or until it becomes translucent. Stir in minced garlic and continue cooking for 1-2 minutes until fragrant. This mixture will lay the flavorful foundation for your cheese sauce.

Step 6: Create the Roux
Sprinkle all-purpose flour over the sautéed onion and garlic, stirring continuously for 1-2 minutes to form a roux. Be sure to cook it just enough to eliminate raw flour taste, ensuring your cheese sauce is smooth and rich without any gritty texture.

Step 7: Whisk in the Milk
Gradually pour in 2 cups of whole milk while whisking constantly to prevent lumps. Keep simmering the mixture over medium heat until it thickens, about 5-7 minutes. The goal is a creamy consistency that will beautifully envelop the shredded spaghetti squash.

Step 8: Stir in the Cheese
Once the sauce has thickened, season it with salt, pepper, and a dash of nutmeg to enhance the flavors. Remove the pot from heat and stir in the melted gruyere, sharp cheddar, and parmesan cheeses until fully combined and you achieve a luscious, cheesy sauce that will coat the squash perfectly.

Step 9: Combine and Transfer
In a large mixing bowl, combine the shredded spaghetti squash with the cheese sauce, mixing until each strand is well coated. Transfer this delectable mixture into a greased 9×13-inch baking dish, spreading it evenly for uniform cooking and crisping on top.

Step 10: Prepare the Topping
In a small bowl, mix together the remaining cheeses with panko breadcrumbs for that irresistible crunch. Sprinkle this topping evenly over the spaghetti squash mixture in the baking dish, ensuring every bite will have that delightful golden crust.

Step 11: Bake to Perfection
Place the baking dish in the oven and bake for 20-25 minutes, or until the topping is golden brown and bubbly. Keep an eye on it as it approaches the end of the baking time, as the visual cue of bubbling edges means your Spaghetti Squash Au Gratin is almost ready.

Step 12: Let it Rest and Serve
Once done baking, remove the dish from the oven and let it rest for about 5-10 minutes. This resting period allows the flavors to meld beautifully. Garnish with fresh parsley before serving, and prepare to indulge in a comforting and healthy twist on classic au gratin!
How to Store and Freeze Spaghetti Squash Au Gratin

Fridge: Store leftovers in an airtight container for up to 3-4 days. This keeps them fresh while preserving the creamy texture of the cheese sauce.

Freezer: For longer storage, freeze in a rigid, airtight container for up to 2 months. Ensure the dish is completely cooled before freezing to prevent ice crystals.

Reheating: Reheat in the oven at 350°F (175°C) for about 20-25 minutes until heated through, or microwave in 1-minute intervals until warm. Always cover with foil to keep the top from over-browning.

Make-Ahead Tip: This Spaghetti Squash Au Gratin can be assembled a day in advance and refrigerated. Just bake it fresh when you’re ready to serve!

Spaghetti Squash Au Gratin Variations

Feel free to get creative with this dish; the possibilities are endless, making it a fantastic way to cater to your taste buds.

  • Add Protein: Stir in cooked chicken, crispy bacon, or crumbled sausage for a heartier meal that the whole family will love. Protein-packed, it transforms your dish into a full-bodied feast!
  • Veggie Mix-Ins: Incorporate sautéed mushrooms, spinach, or even roasted bell peppers for a colorful and nutritious twist. The added veggies not only enhance the flavor but also boost the dish’s fiber content.
  • Spice it Up: Incorporate hot sauce or sprinkle in red pepper flakes into the cheese mixture for a delightful kick. The spice will elevate the dish, making it even more enjoyable for heat lovers!
  • Cheese Blends: Experiment with Fontina, Gouda, or a hint of creamy blue cheese for a more luxurious flavor profile. The rich variety will keep your taste buds intrigued and satisfied!
  • Dairy-Free Delight: Use nut milk and dairy-free cheese alternatives to make this a vegan-friendly option. Enjoy the comforting flavors without the dairy guilt!
  • Gluten-Free Flour: Swap the all-purpose flour for a gluten-free alternative to maintain that creamy texture while keeping it gluten-free. This option ensures everyone can enjoy this heavenly dish!
  • Fresh Herbs: Try adding fresh herbs like thyme or rosemary for a fragrant twist that lights up the flavor profile. These fresh herbs take the dish from good to utterly phenomenal!
  • Crispy Topping: For an extra crunch, mix in seeds such as pumpkin or sunflower with your panko breadcrumbs. This will give a delightful crunch that contrasts beautifully with the creamy cheese beneath.

For more comforting dishes, don’t miss my Garlic Shrimp Spaghetti next, or consider adding some roasted veggies to your plate for a wholesome meal.

Expert Tips for Spaghetti Squash Au Gratin

  • Watch the Squash: Keep an eye on the spaghetti squash while roasting; it should be tender but not mushy for the perfect texture.
  • Quality Cheese Matters: Use high-quality cheese for a rich flavor that elevates the entire dish—your taste buds will thank you!
  • Prepare Ahead: If you’re short on time, assemble the Spaghetti Squash Au Gratin in advance and refrigerate it; just pop it in the oven when you’re ready.
  • Customize Your Toppings: Feel free to switch up the cheese blend or add spices to the topping for additional flavor and texture that suits your family’s taste.
  • Don’t Skip the Nutmeg: A pinch of nutmeg is key in the cheese sauce—it adds a warm depth and can really make the flavors pop!

What to Serve with Spaghetti Squash Au Gratin

Pair your Spaghetti Squash Au Gratin with delightful sides that elevate the meal into a dining experience you won’t forget.

  • Garlic Bread: Warm, crusty garlic bread provides a satisfying crunch, perfect for scooping up that creamy au gratin. The buttery flavor complements the dish flawlessly.
  • Mixed Greens Salad: A fresh tossed salad with light vinaigrette adds a crispy contrast and a burst of color, balancing the richness of the gratin. Tossing in some nuts can provide an extra crunch, enhancing your meal’s textures.
  • Roasted Asparagus: Tender roasted asparagus drizzled with lemon juice adds brightness, while its earthy flavor pairs wonderfully with the cheesy notes of the gratin. This combination feels elegant yet accessible.
  • Herbed Quinoa: Light and fluffy quinoa seasoned with fresh herbs brings a nutty flavor and additional nutrients, pairing beautifully with the savory elements of the gratin. It’s a filling side that won’t weigh you down.
  • Grilled Chicken: A simple grilled chicken breast adds hearty protein to your plate, making it a satisfying main for meat lovers. Season with herbs to elevate the flavor profile.
  • Sparkling Lemonade: As a refreshing drink, sparkling lemonade cuts through the richness of the gratin, bringing a zesty contrast that will keep your palate excited.
  • Chocolate Mousse: For dessert, serve delicious chocolate mousse to wrap up your meal on a sweet note. Its velvety texture and rich flavor make it a delightful indulgence after a savory feast.
  • Roasted Vegetables: A medley of roasted seasonal vegetables complements the flavors of the gratin while offering a healthy, colorful addition to your meal.

Make Ahead Options

These Spaghetti Squash Au Gratin can be a lifesaver for busy weeknights! You can roast and shred the spaghetti squash up to 24 hours in advance; simply refrigerate the shredded squash in an airtight container to maintain its quality. Additionally, the cheese sauce can be prepared up to 3 days ahead—store it separately in the fridge. When you’re ready to enjoy this comforting dish, combine the shredded squash with the cheese sauce, transfer it to a baking dish, and top with cheese and breadcrumbs. Bake according to the original recipe, and you’ll have a delicious meal with minimal last-minute effort!

Spaghetti Squash Au Gratin Recipe FAQs

What is the best way to choose a ripe spaghetti squash?
Absolutely! When selecting a spaghetti squash, look for one that feels heavy for its size and has a smooth, firm skin. Avoid any with dark spots or soft spots, as these may indicate overripeness or spoilage. A vibrant golden-yellow hue is your best indicator of freshness.

How should I store leftover Spaghetti Squash Au Gratin?
Totally! Store your leftovers in an airtight container in the refrigerator for up to 3-4 days. Make sure it’s completely cooled before sealing to keep the moisture at bay and preserve that creamy texture of the cheese sauce. I often love to enjoy it again later in the week!

Can I freeze Spaghetti Squash Au Gratin?
Definitely! For freezing, allow your dish to cool fully before transferring it into a rigid, airtight container. It will keep well for up to 2 months in the freezer. Just be sure to label it with the date. When you’re ready to enjoy it again, let it thaw in the fridge overnight before reheating.

What if the cheese sauce turns out lumpy?
No worries! If your cheese sauce becomes lumpy, it might mean it was heated too quickly or not whisked enough during the milk incorporation. To fix it, try blending the sauce in a blender until smooth. Remember, patience is key during the cooking process—whisk slowly and allow it to thicken gradually for the creamiest results.

Are there any dietary considerations for Spaghetti Squash Au Gratin?
Yes, certainly! This dish is naturally vegetarian and gluten-free, but if you’re preparing it for someone with allergens, watch out for ingredients like dairy in the cheese and butter. You can make this dish dairy-free by using nut-based milk and dairy-free cheese substitutes. Always check ingredient labels to keep everyone safe.

Can I prepare Spaghetti Squash Au Gratin in advance?
Definitely! You can assemble the entire dish a day ahead of time. Simply prepare it, cover it tightly, and refrigerate. When you’re ready to serve it, pop it straight into the oven; you might need to adjust the cooking time—just keep an eye on that golden topping!

Spaghetti Squash Au Gratin

Creamy Spaghetti Squash Au Gratin for Guilt-Free Comfort

Delight in this creamy Spaghetti Squash Au Gratin, a healthy and gluten-free twist on a classic comfort food.
Prep Time 15 minutes
Cook Time 1 hour
Resting Time 10 minutes
Total Time 1 hour 25 minutes
Servings: 6 servings
Course: Dinner
Cuisine: American
Calories: 320

Ingredients
  

For the Base
  • 1 medium Spaghetti Squash Substitute with zucchini for lower-carb variation.
  • 4 tablespoons Unsalted Butter Consider olive oil for dairy-free alternative.
For the Cheese Sauce
  • 1 medium Yellow Onion Shallots can be used for a milder result.
  • 2 cloves Garlic Garlic powder works in a pinch.
  • 1/4 cup All-Purpose Flour Gluten-free flour is perfect for dietary restrictions.
  • 2 cups Whole Milk Almond or oat milk can be used for dairy-free version.
  • 1 teaspoon Salt Adjust according to your taste.
  • 1 teaspoon Pepper Adjust according to your taste.
  • 1/4 teaspoon Nutmeg Cinnamon or allspice can provide an interesting twist.
For the Cheesy Topping
  • 1 cup Gruyere Cheese Swiss cheese can be substituted.
  • 1 cup Sharp Cheddar Cheese Any aged cheese can serve as an alternative.
  • 1/2 cup Parmesan Cheese Pecorino Romano is a good substitute.
  • 1 cup Panko Breadcrumbs Regular breadcrumbs can be crushed for similar texture.
  • 2 tablespoons Fresh Parsley Chives or basil work beautifully too.

Equipment

  • Oven
  • Baking Sheet
  • Medium saucepan
  • Mixing Bowl

Method
 

Preparation Steps
  1. Preheat your oven to 400°F (200°C).
  2. Carefully slice the spaghetti squash in half lengthwise and scoop out the seeds.
  3. Sprinkle the insides of each half with butter, salt, and pepper.
  4. Place the squash halves cut-side down on a baking sheet and roast for 45-60 minutes.
  5. Allow the squash to cool, then shred the flesh into spaghetti-like strands.
  6. Melt butter in a saucepan, add onion and sauté until translucent.
  7. Add minced garlic and cook until fragrant.
  8. Sprinkle flour over the mixture and cook for 1-2 minutes to form a roux.
  9. Gradually whisk in milk and simmer until thickened.
  10. Stir in nutmeg, salt, pepper, and the cheeses until melted.
  11. Combine shredded squash with cheese sauce and transfer to a greased baking dish.
  12. Mix remaining cheeses with panko breadcrumbs and sprinkle over the top.
  13. Bake for 20-25 minutes until golden brown and bubbly.
  14. Let it rest for 5-10 minutes before serving and garnish with parsley.
Nutrition

Serving: 1servingCalories: 320kcalCarbohydrates: 30gProtein: 15gFat: 18gSaturated Fat: 10gPolyunsaturated Fat: 2gMonounsaturated Fat: 4gCholesterol: 50mgSodium: 800mgPotassium: 600mgFiber: 4gSugar: 3gVitamin A: 500IUVitamin C: 17mgCalcium: 450mgIron: 1.5mg

Notes

This dish is a great option for meal prep or can be assembled in advance and baked when ready.

Tried this recipe?

Let us know how it was!

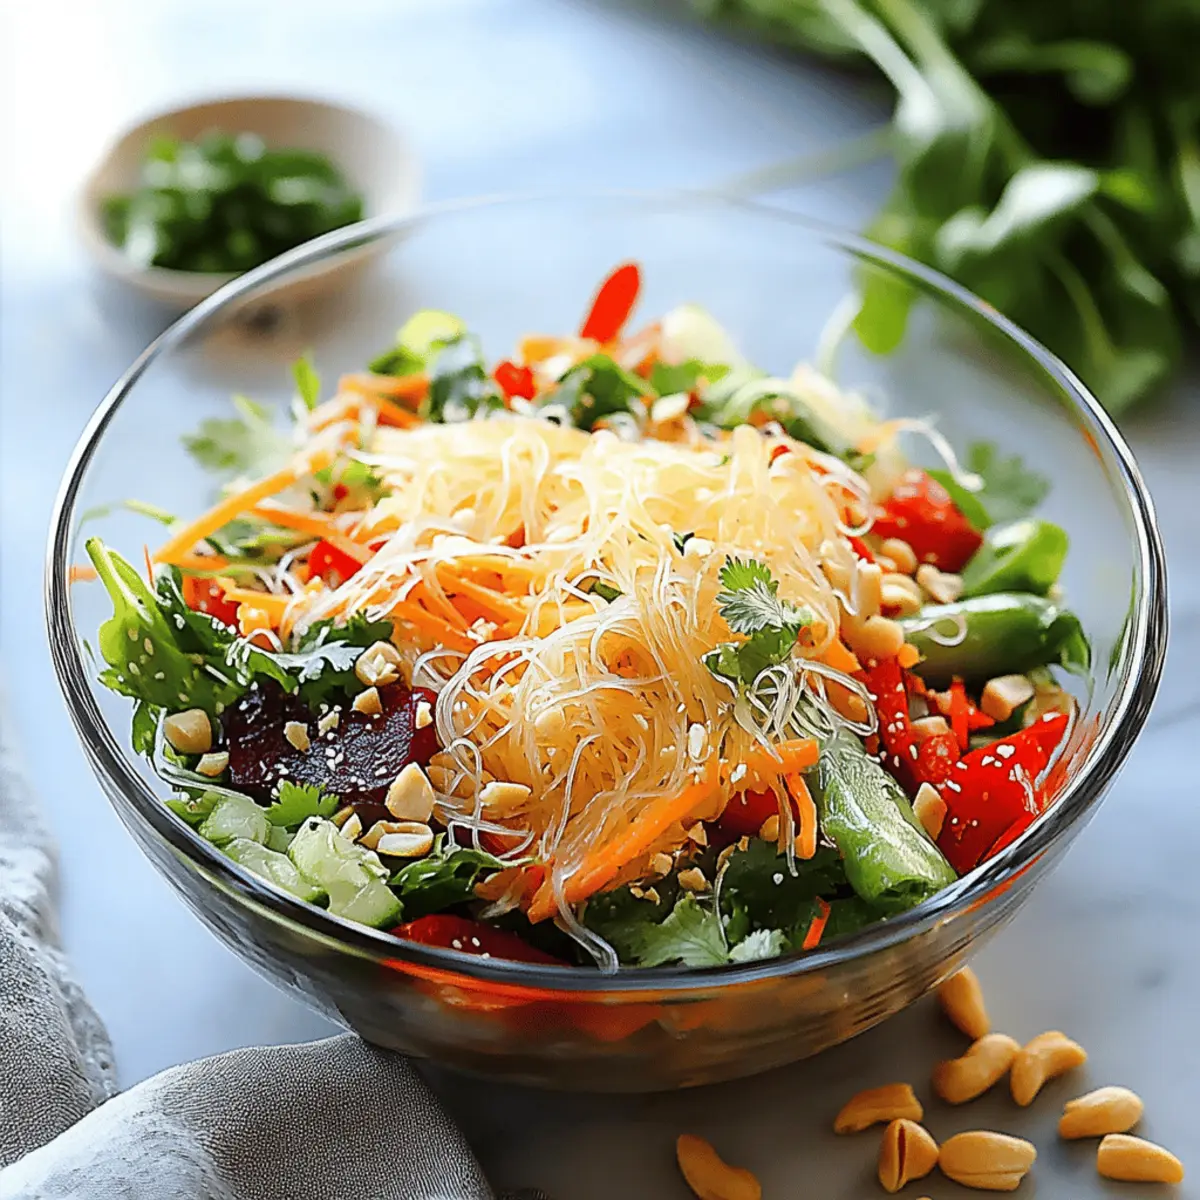
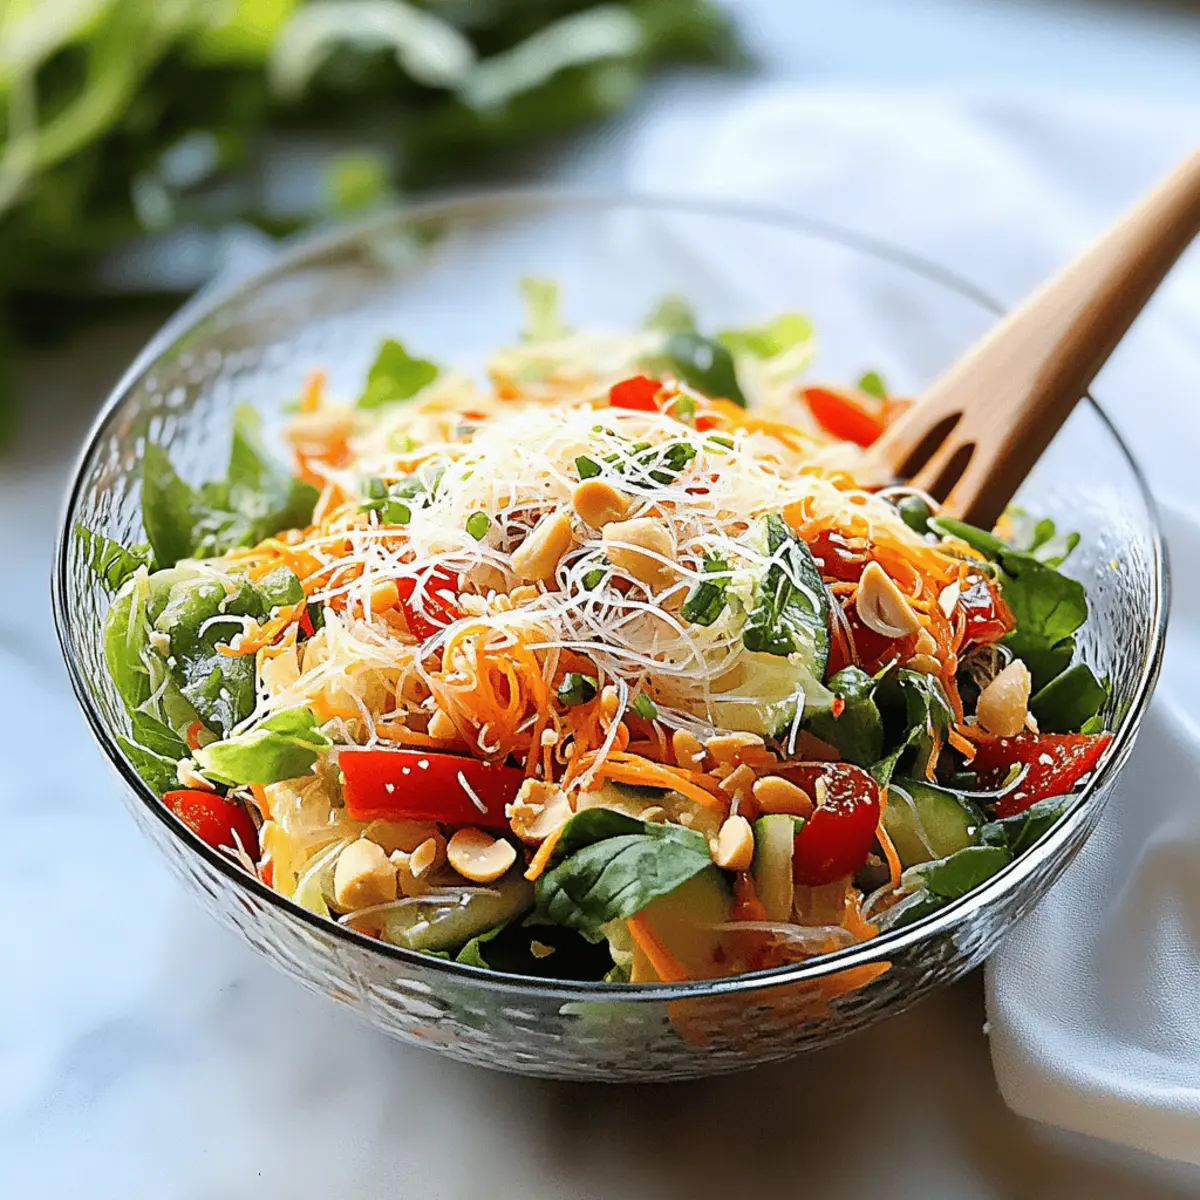
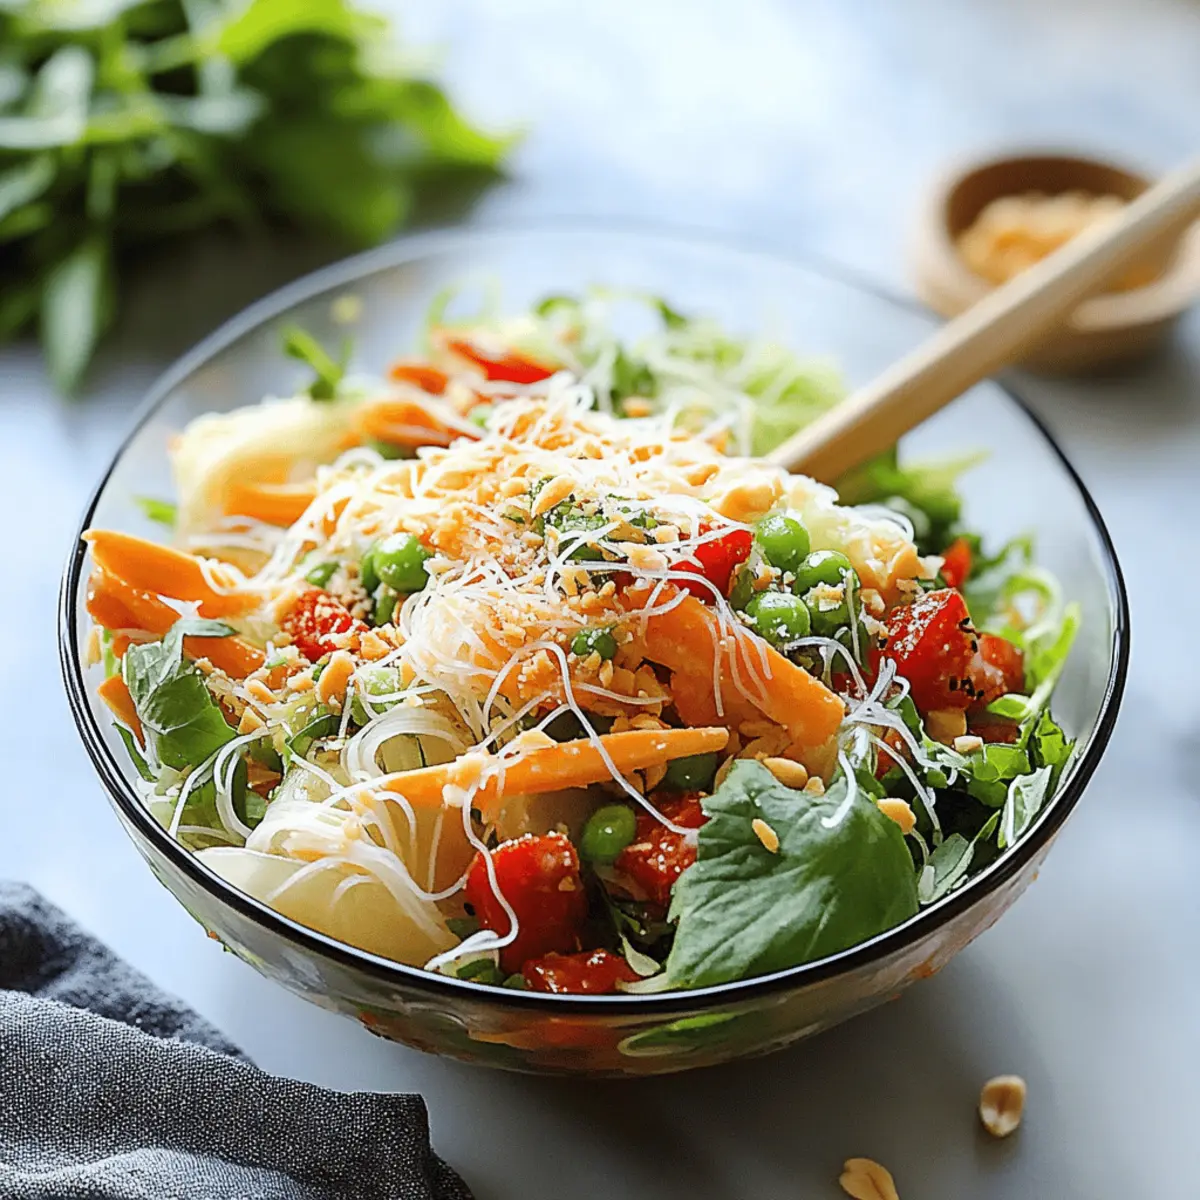
Fresh and Crunchy Spring Roll Salad You’ll Love

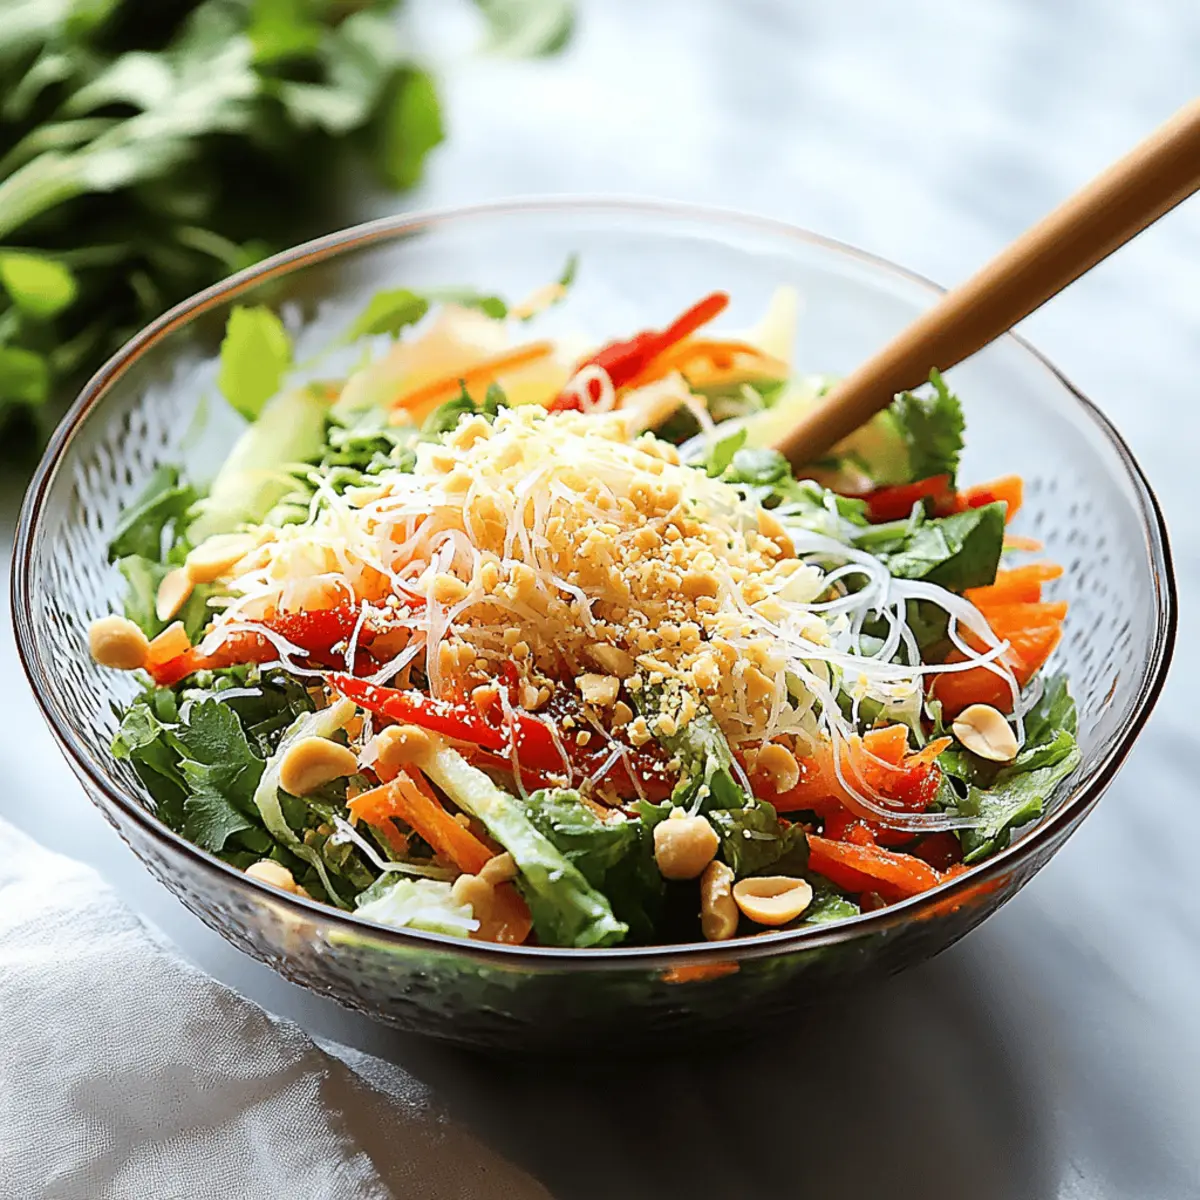
As the bright colors of spring burst into bloom, I can’t help but crave something fresh and invigorating. Enter the Spring Roll Salad with Spicy Ginger Dressing, a delightful blend of crunchy veggies, soft rice vermicelli noodles, and a zesty dressing that’s sure to awaken your taste buds. This salad is not only a feast for the eyes, but it also whips up in no time—a perfect solution for hectic weeknights or a vibrant addition to any gathering. It’s versatile enough to cater to various diets, whether you’re vegan, gluten-free, or simply looking to lighten up your meal. So, why not dive into this healthy bowl of goodness? What fun ingredients will you customize your salad with today?

Why is This Salad So Irresistible?

Vibrant Colors: The variety of fresh veggies creates a stunning visual feast, making every bowl a work of art.

Quick Preparation: Ready in under 30 minutes, this salad is your go-to for busy evenings or last-minute gatherings.

Customizable Delight: Whether you prefer it vegan or gluten-free, you can easily adjust the ingredients to suit your lifestyle.

Flavor Explosion: The harmony of crispy vegetables, chewy noodles, and tangy spicy ginger dressing bursts with flavor, keeping your palate intrigued.

Perfect for Any Occasion: A crowd-pleaser at potlucks or a refreshing side dish to grilled proteins, this salad fits seamlessly into any meal plan.

If you love vibrant and exciting dishes like this Spring Roll Salad, you might also enjoy our refreshing Strawberry Spinach Salad or the hearty Italian Chopped Salad.

Spring Roll Salad Ingredients

For the Salad
Rice Vermicelli Noodles – A soft base for your salad; you can substitute with zucchini noodles for a low-carb option.
Shredded Carrots – Adds a sweet crunch; radishes can be used as a tasty alternative.
Bell Peppers (red and yellow) – Contributes vibrant color and sweetness; feel free to swap with other bell pepper colors or similar vegetables.
Cucumber – Offers refreshing crispness; try zucchini for a different texture.
Bean Sprouts – Adds a delightful crunch and nutty flavor; if you prefer, shredded cabbage or snap peas work great too!
Fresh Cilantro – Provides a burst of freshness; switch with parsley or basil for a unique herb twist.
Fresh Mint Leaves – Imparts a cool and aromatic flavor; basil can also replace mint for a fresh alternative.
Green Onions – Adds a mild onion flavor; chives or shallots can work as milder substitutes.
Crushed Peanuts – Offers a nutty texture; for a nut-free option, consider sunflower seeds.

For the Spicy Ginger Dressing
Fresh Ginger (grated) – Delivers spice and warmth; adjust according to your heat preference.
Soy Sauce – Brings saltiness and umami flavor; gluten-free soy sauce or tamari is great for gluten-sensitive diets.
Rice Vinegar – Adds essential acidity; you can substitute with apple cider vinegar or white vinegar.
Honey or Agave Syrup – Offers sweetness to balance the dressing’s flavors; maple syrup is an excellent vegan alternative.
Sesame Oil – Adds richness and a nutty depth; substituting with another oil will affect the overall flavor.
Chili Sauce – Provides heat; adjust the amount based on your personal spice tolerance.

Get ready to create a vibrant Spring Roll Salad that not only tantalizes your taste buds but celebrates freshness and versatility!

Step‑by‑Step Instructions for Spring Roll Salad

Step 1: Cook Noodles
Bring a pot of water to a rolling boil. Once boiling, add the rice vermicelli noodles and cook according to the package instructions, typically about 3-5 minutes. Stir occasionally to prevent sticking, then drain and rinse the noodles under cold water to stop the cooking process. Set aside to cool completely.

Step 2: Prepare Vegetables
While the noodles are cooking, take your time to thinly slice the carrots, bell peppers, cucumber, and green onions. Aim for uniform cuts to ensure even distribution of flavors in your Spring Roll Salad. As you slice, enjoy the vibrant colors and fresh aromas that fill your kitchen, creating anticipation for this delightful dish.

Step 3: Combine Greens
In a large mixing bowl, combine all your prepared vegetables, including shredded carrots, sliced bell peppers, cucumber, and vibrant bean sprouts. Add freshly chopped cilantro and mint leaves for an aromatic touch. Toss the mixture gently with clean hands or salad tongs to ensure all ingredients blend beautifully, creating a colorful base for the salad.

Step 4: Mix Noodles
Add the cooled rice vermicelli noodles to the vegetable mixture in the bowl. Using your hands or tongs, gently toss everything together until the noodles are distributed evenly amongst the crunchy veggies. This step ensures that each bite of your Spring Roll Salad is packed with a delightful mix of textures and flavors.

Step 5: Prepare Dressing
In a small bowl, whisk together the grated fresh ginger, soy sauce, rice vinegar, honey (or agave), sesame oil, and chili sauce. Blend these ingredients until well combined, adjusting the seasoning to your taste. The dressing should be zesty and balanced, complementing the freshness of the salad perfectly.

Step 6: Dress the Salad
Drizzle the spicy ginger dressing over the assembled Spring Roll Salad, and toss gently to ensure that every ingredient is evenly coated in the flavorful dressing. The colors and aromas will come alive as the dressing seeps into the crunchy veggies and soft noodles, creating an irresistible dish.

Step 7: Serve
Transfer your beautifully dressed Spring Roll Salad to a serving platter. If desired, sprinkle with crushed peanuts for added texture and nutty flavor. Serve chilled or at room temperature, allowing the freshness of the ingredients to shine. Perfect for warm days or light meals, enjoy this delicious salad as a main or side dish!

How to Store and Freeze Spring Roll Salad

Fridge: Store leftover Spring Roll Salad in an airtight container in the refrigerator for up to 2-3 days. Keep the dressing separate to maintain the freshness of the vegetables.

Freezer: While freezing is not optimal for this salad, you can freeze the cooked lettuce and rice vermicelli noodles separately. They can last up to 1 month, but fresh vegetables and dressing should not be frozen.

Reheating: If you prefer warm salads, gently reheat the noodles in the microwave for about 30 seconds, then mix them with fresh veggies and dressing right before serving.

Preparation Ahead: For meal prep, chop your veggies and prepare the dressing in advance, storing them separately. This allows you to toss everything together at mealtime while keeping it deliciously fresh.

Expert Tips for Spring Roll Salad

Keep Noodles Cool: Ensure your rice vermicelli noodles are cooled properly before mixing, preventing the vegetables from wilting and maintaining their crunch.

Taste the Dressing: Always taste your spicy ginger dressing before adding it to the salad; you can adjust the sweetness or heat to perfectly suit your palate.

Dress Just Before Serving: To retain maximum freshness, keep the dressing separate until you’re ready to serve the Spring Roll Salad; this will keep everything vibrant and crisp.

Mix Colors and Textures: Feel free to mix and match veggies—opt for colorful bell peppers and varied greens—adding visual appeal and enhancing flavor contrasts in your salad.

Customize Smartly: Remember, this salad is versatile! Substitute ingredients based on your dietary needs; think about adding grilled chicken for protein or swap peanuts for sunflower seeds to make it nut-free.

Spring Roll Salad Variations & Substitutions

Feel free to let your creativity shine as you customize this vibrant salad to your heart’s content!

  • Vegan Twist: Substitute honey with maple syrup in the dressing to keep it 100% vegan. This small change doesn’t compromise taste but enhances it—making the salad even sweeter!

  • Gluten-Free Delight: Opt for gluten-free soy sauce or tamari to cater to those sensitive to gluten. Enjoy the same umami richness without any worries!

  • Protein Boost: Toss in some grilled chicken, shrimp, or crispy tofu. This adds heartiness and turns your salad into a fulfilling main course.

  • Crunchy Alternatives: Swap crushed peanuts for sunflower seeds or pumpkin seeds to accommodate nut allergies while still packing a satisfying crunch.

  • Herb Variations: If you don’t have cilantro, parsley or fresh basil can be delightful substitutes, adding their distinct flavors while keeping things fresh.

  • Spicy Kick: Add sliced jalapeños or a drizzle of Sriracha for an extra kick! Elevating your salad’s heat makes it exciting and layers on new flavors.

  • Fruity Addition: Incorporate diced mango or fresh strawberries for a sweet contrast that complements the heat of the dressing beautifully.

As you find new favorite combinations, you may also want to explore dishes like a hearty Tuna Salad Sandwich for quick lunches or a delightful Italian Chopped Salad to accompany your meals. Enjoy personalizing your Spring Roll Salad!

Make Ahead Options

These Spring Roll Salad components are perfect for meal prep enthusiasts! You can chop and refrigerate the vegetables (like carrots, bell peppers, and cucumbers) up to 3 days in advance to save time during busy weeknights. To maintain freshness and prevent wilting, store the prepared veggies in an airtight container with a paper towel to absorb excess moisture. For the dressing, whisk together the spicy ginger ingredients up to 24 hours ahead and refrigerate in a separate container. When you’re ready to serve, simply toss the chilled vegetables and noodles together, drizzle the dressing over the top, and enjoy a delightful, fresh meal without any stress!

What to Serve with Spring Roll Salad with Spicy Ginger Dressing

This colorful salad of fresh vegetables and delightful noodles is your ticket to a full meal experience!

  • Grilled Chicken: The smoky flavor and juicy texture enhance the freshness of the salad, making every bite satisfying. Perfectly seasoned, grilled chicken adds protein that balances well with the light and spicy dressing.

  • Crispy Tofu: A vegetarian twist that complements the salad’s crunch while absorbing the zesty dressing. This adds an extra layer of flavor and a chewy texture, enriching the overall dining experience.

  • Mango Slices: The sweetness of fresh mango contrasts beautifully with the spiciness of the ginger dressing. Its vibrant color also adds an appealing visual element—truly a feast for the eyes!

  • Fresh Spring Rolls: Elevate your meal by serving traditional spring rolls on the side. The harmonious flavors will echo each other, and the combination is sure to delight your taste buds.

  • Chili Lime Quinoa: A refreshing and nutritious grain dish that mirrors the vibrant flavors of the salad. Its zesty notes will perfectly complement the spring roll salad without overwhelming its subtlety.

  • Asian Cucumber Salad: This light and crunchy salad brings a refreshing tanginess that pairs wonderfully with the creamy dressing of the spring roll salad. It’s a delightful way to add more texture and flavors.

  • Coconut Rice: The creamy, slightly sweet flavor of coconut rice creates a delicious contrast to the spicy ginger dressing. This comforting side will invite warmth and richness into your meal.

  • Mint Lemonade: A light, refreshing drink that complements the vibrant flavors of the salad. The minty notes enhance the freshness, while the lemon impart a wonderful zing to quench your thirst.

  • Lychee Sorbet: Conclude your meal on a sweet note with this light and refreshing dessert. Its fruity flavors are perfectly balanced against the savory elements of the salad, making it a delightful way to end your dinner.

Spring Roll Salad with Spicy Ginger Dressing Recipe FAQs

What should I look for when selecting fresh vegetables for the Spring Roll Salad?
Absolutely! When choosing fresh vegetables, aim for vibrant colors and a firm texture. For instance, shredded carrots should be bright orange and crisp, while cucumbers should be firm with smooth skin. Avoid any with dark spots or soft areas, indicating they may be past their prime.

How can I store leftover Spring Roll Salad, and how long does it last?
Very! Store your leftover Spring Roll Salad in an airtight container placed in the refrigerator for up to 2-3 days. It’s best to keep the dressing separate until you’re ready to serve to maintain the freshness of your vegetables.

Can I freeze Spring Roll Salad?
While it’s not ideal to freeze the entire salad due to the fresh vegetables, you can freeze cooked rice vermicelli noodles for up to 1 month. Just make sure they are well-cooked, cooled completely, and then placed in an airtight container or freezer bag. Thaw them in the refrigerator before serving. Remember, fresh veggies and dressing do not freeze well!

What if I don’t like spicy food? Can I adjust the level of heat in the dressing?
Of course! You have complete control over the spice level in your dressing. Start by adding a small amount of chili sauce, then taste and adjust according to your preference. You can even leave it out altogether or substitute it with a milder sauce if you prefer.

Is this Spring Roll Salad suitable for someone with nut allergies?
Yes, it can be! If you’re preparing the salad for someone with nut allergies, simply omit the crushed peanuts and replace them with sunflower seeds for a delightful crunch without the risk. Always double-check with your guests about their allergies to ensure complete safety.

Can pets share this salad with me?
While it’s a healthy option for humans, it’s best to keep the Spring Roll Salad away from pets. Ingredients like onion and garlic in the dressing can be harmful to dogs and cats. If you want to share the love, consider giving them plain, steamed veggies as a treat instead!

Spring Roll Salad

Fresh and Crunchy Spring Roll Salad You’ll Love

Enjoy a fresh and invigorating Spring Roll Salad rich in colorful veggies and zesty flavors.
Prep Time 15 minutes
Cook Time 5 minutes
Total Time 20 minutes
Servings: 4 servings
Course: Salad
Cuisine: Asian
Calories: 250

Ingredients
  

For the Salad
  • 4 oz Rice Vermicelli Noodles Substitute with zucchini noodles for a low-carb option.
  • 1 cup Shredded Carrots Radishes can be used as an alternative.
  • 1 cup Bell Peppers (red and yellow) Swap with other bell pepper colors or similar vegetables.
  • 1 cup Cucumber Try zucchini for a different texture.
  • 1 cup Bean Sprouts Shredded cabbage or snap peas can also be used.
  • 1/2 cup Fresh Cilantro Substitute with parsley or basil.
  • 1/4 cup Fresh Mint Leaves Basil can also replace mint.
  • 2 stalks Green Onions Chives or shallots can be substitutes.
  • 1/4 cup Crushed Peanuts Sunflower seeds can be used for a nut-free option.
For the Spicy Ginger Dressing
  • 1 tbsp Fresh Ginger (grated) Adjust according to heat preference.
  • 3 tbsp Soy Sauce Use gluten-free soy sauce or tamari for gluten sensitivity.
  • 2 tbsp Rice Vinegar Apple cider vinegar or white vinegar can be used.
  • 1 tbsp Honey or Agave Syrup Maple syrup is a vegan alternative.
  • 1 tbsp Sesame Oil Substituting with other oils may alter flavor.
  • 1 tbsp Chili Sauce Adjust amount based on spice tolerance.

Equipment

  • pot
  • Mixing Bowl
  • Whisk
  • knife
  • cutting board
  • salad tongs

Method
 

Step-by-Step Instructions for Spring Roll Salad
  1. Bring a pot of water to a rolling boil. Add the rice vermicelli noodles and cook according to package instructions, about 3-5 minutes. Drain and rinse under cold water to stop the cooking process. Set aside to cool.
  2. Thinly slice the carrots, bell peppers, cucumber, and green onions while the noodles cook. Aim for uniform cuts for even flavor distribution.
  3. In a large mixing bowl, combine all prepared vegetables, including shredded carrots, sliced bell peppers, cucumber, and bean sprouts. Add chopped cilantro and mint leaves, then toss gently to blend.
  4. Add the cooled rice vermicelli noodles to the vegetable mixture and gently toss until evenly distributed among the veggies.
  5. In a small bowl, whisk together grated ginger, soy sauce, rice vinegar, honey (or agave), sesame oil, and chili sauce. Adjust seasoning to taste.
  6. Drizzle the spicy ginger dressing over the salad and toss gently to ensure all ingredients are coated.
  7. Transfer the salad to a serving platter and sprinkle with crushed peanuts if desired. Serve chilled or at room temperature.

Nutrition

Serving: 1servingCalories: 250kcalCarbohydrates: 30gProtein: 6gFat: 12gSaturated Fat: 2gPolyunsaturated Fat: 6gMonounsaturated Fat: 3gSodium: 500mgPotassium: 300mgFiber: 4gSugar: 5gVitamin A: 100IUVitamin C: 50mgCalcium: 4mgIron: 6mg

Notes

Keep noodle and dressing preparation separate until serving to maintain freshness. Customize adding grilled chicken or adjusting ingredients based on dietary needs.

Tried this recipe?

Let us know how it was!

Dirty Martini Deviled Eggs: A Bold Twist on Classic Flavor

As I stood in my kitchen, the tantalizing aroma of freshly boiled eggs filled the air, pulling me into the culinary adventure that is Dirty Martini Deviled Eggs. This delightful twist on the classic deviled egg brings together the sophistication of a well-crafted cocktail with the comforting familiarity of a beloved appetizer. With a creamy, luscious yolk filling enhanced by briny olives, and a hint of gin or vodka, these deviled eggs are not just a snack; they’re a party on a plate! The beauty of this recipe lies in its quick prep time—ready in less than 30 minutes—making them perfect for spontaneous gatherings or weekend brunches. These cocktail-inspired bites are sure to impress your guests and elevate any occasion. Ready to serve up some fun flavors and sophisticated twists? Let’s dive into this delectable recipe!

Why Are Dirty Martini Deviled Eggs Amazing?

Unique Flavor Fusion: These deviled eggs combine the classic comfort of a beloved appetizer with the sophisticated zest of a dirty martini.

Quick & Easy: In under 30 minutes, you can whip up a crowd-pleaser that brings both elegance and ease to your table, making them ideal for spontaneous gatherings.

Versatile Ingredients: Feel free to customize the recipe by using different spirits or garnishes, like smoked paprika or fresh herbs, to match your flavor preferences.

Bold Presentation: Serve them up chilled with a sprinkle of paprika or chili flakes for a pop of color, turning heads at any event.

Perfect for Any Occasion: Whether it’s a casual cocktail hour or a festive brunch, these bites are guaranteed to impress your guests and elevate your menu, much like our spiced nuts or crostini options.

Dirty Martini Deviled Eggs Ingredients

For the Filling

  • Large Eggs – The foundation of the dish; choose the freshest for the best texture.
  • Mayonnaise – Adds luxurious creaminess; swap with Greek yogurt for a lighter option.
  • Gin (or Vodka) – Provides a distinctive kick; opt for vodka for a cleaner taste.
  • Dry Vermouth – Elevates flavor with botanical notes; essential for that cocktail twist.
  • Olive Brine – Infuses a salty umami flavor, giving the deviled eggs their “dirty” character—add more for a stronger taste.
  • Garlic Powder – Delivers a subtle kick; fresh garlic can enhance the flavor even further.
  • Kosher Salt – Balances all the flavors; adjust to your personal taste.
  • Freshly Ground Black Pepper – Adds spice; freshly ground offers the best flavor.

For the Garnish

  • Chopped Green Olives – Adds brininess and texture, reinforcing the dirty martini profile; try capers for a different twist.
  • Chopped Parsley – Brings a fresh touch and color; chives can be a lovely alternative.
  • Paprika or Chili Flakes – Optional for garnish; add color and a hint of heat to elevate presentation.

Step‑by‑Step Instructions for Dirty Martini Deviled Eggs

Step 1: Boil the Eggs
Begin by placing your large eggs in a pot and covering them with cold water by at least an inch. Bring the water to a boil over medium-high heat. Once boiling, turn off the heat, cover the pot, and let the eggs sit for 10 minutes. This method ensures perfectly cooked yolks for your Dirty Martini Deviled Eggs.

Step 2: Cool the Eggs
After the resting time, carefully transfer the eggs to an ice bath filled with cold water to stop the cooking process. Let them cool for about 5 minutes until they’re easy to handle. Cooling the eggs completely will make them much easier to peel, resulting in smooth egg whites for your deviled eggs.

Step 3: Prepare the Egg Yolks
Once the eggs are cool, gently tap them on a hard surface to crack the shells and peel them under running water for better ease. Cut each egg in half lengthwise and carefully scoop the yolks into a mixing bowl. Set the whites aside on a serving platter, ready to be filled with the creamy dirt martini-inspired mixture.

Step 4: Make the Filling
Mash the egg yolks with a fork until they are crumbly. To this bowl, add mayonnaise, gin (or vodka), dry vermouth, olive brine, garlic powder, kosher salt, and freshly ground black pepper. Mix everything until smooth and creamy, making sure to taste as you go to achieve the perfect balance of flavors for your Dirty Martini Deviled Eggs.

Step 5: Fold in Add-Ins
Once your yolk mixture is creamy and well-combined, fold in the chopped green olives and parsley. This mixture will add delightful texture and a burst of flavor to your filling. Adjust seasoning if necessary by tasting again; this step is crucial to ensure your deviled eggs are as addictive as they should be.
Step 6: Fill the Egg Whites
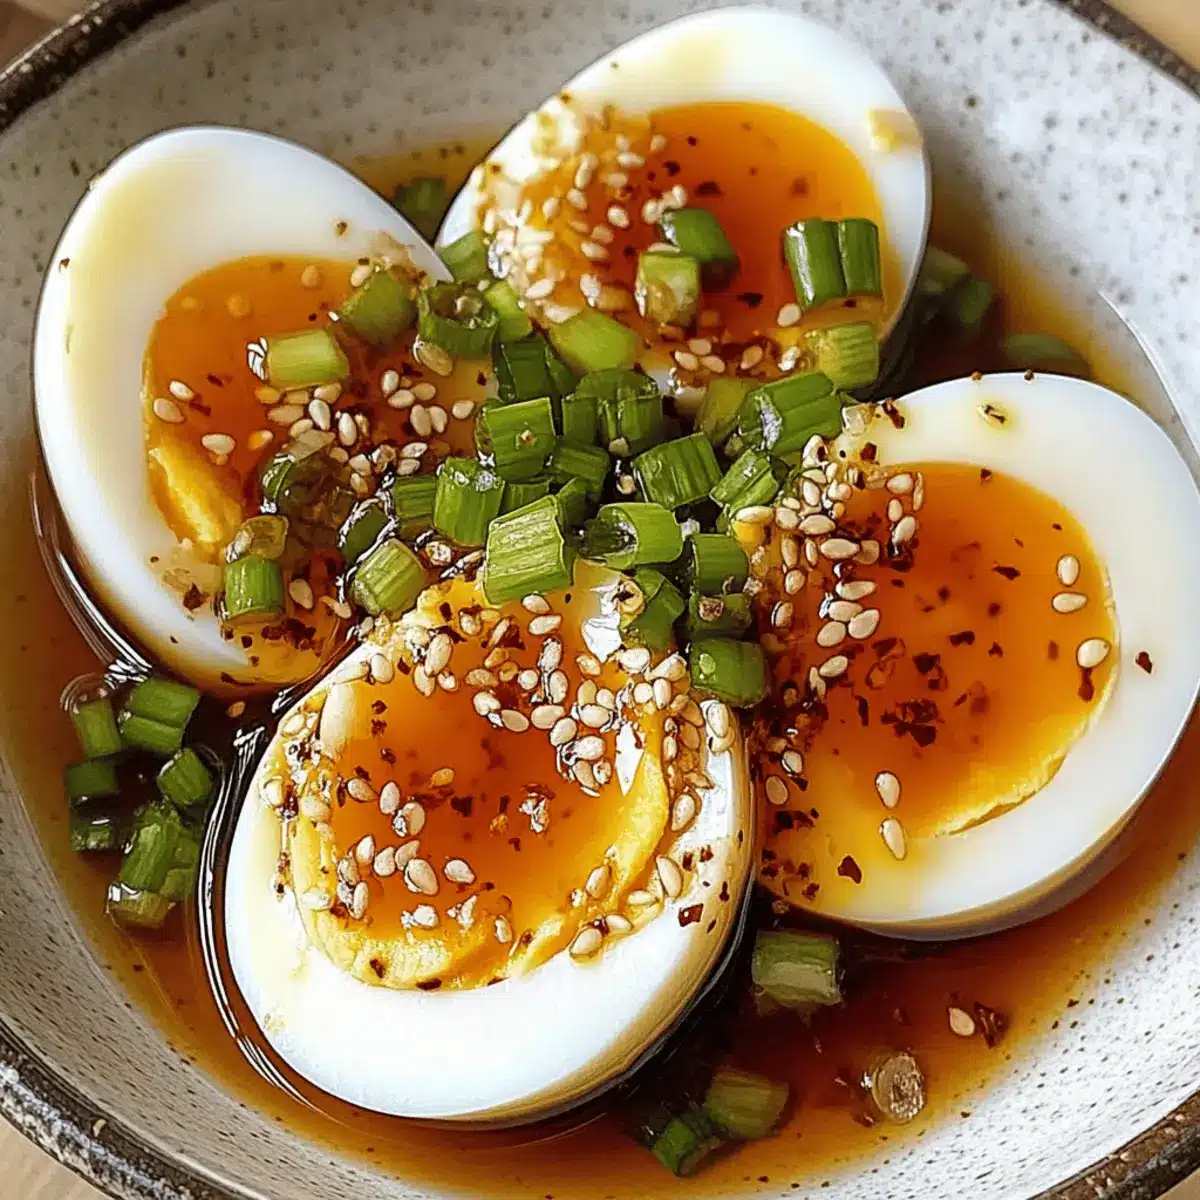
Spoon or pipe the flavorful yolk mixture back into the hollowed-out egg whites, filling them generously. If you like a neater presentation, using a piping bag will yield beautiful peaks. The delightful color and inviting aroma of your Dirty Martini Deviled Eggs will surely catch everyone’s attention at your gathering.

Step 7: Garnish and Serve
To finish off your Dirty Martini Deviled Eggs, sprinkle a touch of paprika or chili flakes on top for color and a hint of heat. Consider adding an additional chopped olive on each egg for an eye-catching garnish. Serve them chilled alongside spiced nuts or crostini, and prepare for compliments as your guests enjoy these sophisticated bites!

Dirty Martini Deviled Eggs Variations

Feel free to reimagine these delicious Dirty Martini Deviled Eggs, turning a classic favorite into a unique creation that suits your personal taste!

  • Dairy-Free: Replace mayonnaise with avocado or tahini for an equally creamy and delicious filling. The subtle flavor of avocado complements the brininess perfectly.
  • Spicy Kick: Add diced jalapeños or a few dashes of hot sauce to your yolk mixture for a fiery twist that brings an exciting heat to every bite!
  • Savory Herb Mix: Incorporate fresh herbs like dill or tarragon instead of parsley for a flavor profile that pops with herbal freshness. It’s a delightful way to switch things up!
  • Smoked Flavor: Mix in some smoked paprika or a few drops of liquid smoke to lend your deviled eggs a smoky depth that pairs beautifully with the other flavors.
  • Olive Lovers: Use a mix of different olives, such as kalamata or even stuffed olives, to create a more complex and flavorful filling. Each bite will offer a different twist!
  • Vegan Version: Swap the eggs entirely with a chickpea mixture using mashed chickpeas, vegan mayo, and your favorite seasonings. It’s a wholesome twist that keeps the essence alive!
  • Nutty Crunch: For added texture, fold in some toasted pine nuts or chopped nuts to the yolk mixture; this will give your deviled eggs an irresistible crunch that contrasts beautifully with the creaminess.
  • Lemon Zest: Add a sprinkle of fresh lemon zest to the filling for a refreshing pop that cuts through the richness, enhancing the overall flavor profile beautifully.

These variations will elevate your Dirty Martini Deviled Eggs while still keeping their charm intact, just like our crostini or spiced nuts would do for your appetizer table! Enjoy exploring new tastes and find your favorite versions!

Expert Tips for Dirty Martini Deviled Eggs

Egg Cooling: Ensure eggs are cooled completely before peeling for smooth whites and easy handling—this prevents frustrating cracks.

Season to Taste: Always taste your yolk mixture before filling to ensure the perfect level of seasoning. Adjust salt and olive brine according to your preference.

Make Ahead: For freshness, prepare the filling a day in advance but hold off on assembling the eggs until just before serving, keeping your Dirty Martini Deviled Eggs at their best!

Experiment with Spirits: Don’t hesitate to try flavored spirits like herb-infused vodka for a unique twist; it can elevate the dish even further!

Garnishing: Use finely chopped herbs or a sprinkle of smoked paprika for a beautiful presentation, enhancing both flavor and visual appeal.

How to Store and Freeze Dirty Martini Deviled Eggs

Fridge: Store assembled Dirty Martini Deviled Eggs in an airtight container for up to 3 days. This keeps them fresh and ready for snacking!

Make-Ahead: You can prepare the yolk filling a day in advance and refrigerate it. Just fill the egg whites shortly before serving for the best texture.

Freezer: For freezing, it’s best to freeze the plain egg whites only. Store in an airtight container for up to 1 month; the filling does not freeze well.

Reheating: If you have frozen egg whites, let them defrost in the fridge overnight before filling and serving, ensuring you maintain the deviled eggs’ lovely texture.

What to Serve with Dirty Martini Deviled Eggs

These deliciously sophisticated bites are sure to shine on your appetizer spread. Enhance your meal with these perfect pairings!

  • Crispy Crostini: Crunchy crostini provide a delightful contrast, perfect for scooping and enjoying the creamy filling.
  • Spiced Nuts: These savory bites add a delightful crunch and complement the brined flavor of the deviled eggs beautifully.
  • Light Green Salad: A refreshing salad with mixed greens and a tangy vinaigrette cleanses the palate and balances the richness of the eggs.
  • Roasted Asparagus: Tender, roasted asparagus brings a hint of earthiness, making it an elegant side that pairs perfectly with cocktails.
  • Sparkling Wine: A glass of bubbly elevates the experience, enhancing the sophisticated vibes of your cocktail-inspired dish.
  • Zesty Shrimp Cocktail: Chilled shrimp with a lively cocktail sauce adds a classic touch and harmonizes beautifully with the flavors of the deviled eggs.
  • Fruit Platter: A colorful assortment of seasonal fruits adds a refreshing sweetness, balancing the savory notes of the dish delightfully.
  • Chocolate Mousse Cups: End on a sweet note with velvety chocolate mousse, providing a rich counterpoint and complete dining experience.

Make Ahead Options

These Dirty Martini Deviled Eggs are a fantastic choice for meal prep, allowing you to enjoy sophisticated flavors without the last-minute rush! You can boil and peel the eggs up to 48 hours in advance and store them in an airtight container to keep them fresh. The yolk filling can also be prepared up to 24 hours ahead; simply refrigerate it in a sealed container. To maintain quality, avoid assembling the deviled eggs until just before serving, as this keeps the egg whites from becoming soggy. When ready to enjoy, fill the whites with the prepped filling, garnish, and present them for a delightful treat that impresses with minimal effort!

Dirty Martini Deviled Eggs Recipe FAQs

How do I select the best eggs for my Dirty Martini Deviled Eggs?
Absolutely! When choosing eggs, look for those that are fresh and free from cracks. The best eggs will have a clean, unblemished shell and feel slightly heavy for their size, indicating that they are still full of moisture. If you can, opt for organic or farm-fresh eggs for the best taste and quality.

How should I store my Dirty Martini Deviled Eggs?
You can store assembled Dirty Martini Deviled Eggs in an airtight container in the fridge for up to 3 days. Just ensure they’re covered well to maintain freshness. If you want to prepare them ahead of time, consider making the yolk filling a day prior and then filling the egg whites just before serving for optimal texture and flavor.

Can I freeze Dirty Martini Deviled Eggs?
While it’s not recommended to freeze the assembled deviled eggs due to the creamy filling, you can freeze the plain egg whites. To do this, place the egg whites in an airtight container and store them in the freezer for up to 1 month. When you’re ready to use them, let the whites thaw in the refrigerator overnight before you fill them with the creamy yolk mixture.

What should I do if my yolk mixture is too runny?
If you find that your yolk mixture is too runny, don’t worry! Start by refrigerating it for about 30 minutes to allow it to thicken. If it’s still not the right consistency, you can add a touch more mayonnaise or a small amount of mashed avocado to help bind it together. Just keep tasting as you adjust to maintain that delightful flavor profile.

Are there any dietary considerations for my guests with allergies?
Certainly! Always check with your guests to see if they have any allergies. These Dirty Martini Deviled Eggs contain common allergens like eggs and mayonnaise. If any guests are gluten or dairy intolerant, you could substitute the mayonnaise with a vegan alternative or Greek yogurt. For those avoiding alcohol, you can simply omit the gin or vodka and still enjoy the delicious flavors!

Dirty Martini Deviled Eggs

Dirty Martini Deviled Eggs: A Bold Twist on Classic Flavor

Dirty Martini Deviled Eggs combine the classic comfort of deviled eggs with the sophisticated flavor of a dirty martini.
Prep Time 10 minutes
Cook Time 20 minutes
Cooling Time 5 minutes
Total Time 30 minutes
Servings: 12 pieces
Course: Appetizer
Cuisine: American
Calories: 100

Ingredients
  

For the Filling
  • 6 large Large Eggs The foundation of the dish; choose the freshest for the best texture.
  • 1/3 cup Mayonnaise Adds luxurious creaminess.
  • 2 tablespoons Gin or Vodka Provides a distinctive kick.
  • 1 tablespoon Dry Vermouth Elevates flavor with botanical notes.
  • 1 tablespoon Olive Brine Infuses a salty umami flavor.
  • 1/4 teaspoon Garlic Powder Delivers a subtle kick.
  • 1/2 teaspoon Kosher Salt Balances all the flavors.
  • 1/4 teaspoon Freshly Ground Black Pepper Adds spice.
For the Garnish
  • 1/4 cup Chopped Green Olives Adds brininess and texture.
  • 2 tablespoons Chopped Parsley Brings a fresh touch and color.
  • 1 teaspoon Paprika or Chili Flakes Optional for garnish.

Equipment

  • pot
  • Mixing Bowl
  • piping bag
  • Ice bath

Method
 

Step-by-Step Instructions
  1. Begin by placing your large eggs in a pot and covering them with cold water by at least an inch. Bring the water to a boil over medium-high heat. Once boiling, turn off the heat, cover the pot, and let the eggs sit for 10 minutes.
  2. Carefully transfer the eggs to an ice bath filled with cold water to stop the cooking process. Let them cool for about 5 minutes.
  3. Once the eggs are cool, gently tap them on a hard surface to crack the shells and peel them under running water for better ease. Cut each egg in half lengthwise and carefully scoop the yolks into a mixing bowl.
  4. Mash the egg yolks with a fork until they are crumbly. Add mayonnaise, gin (or vodka), dry vermouth, olive brine, garlic powder, kosher salt, and freshly ground black pepper. Mix everything until smooth and creamy.
  5. Fold in the chopped green olives and parsley. Adjust seasoning if necessary by tasting again.
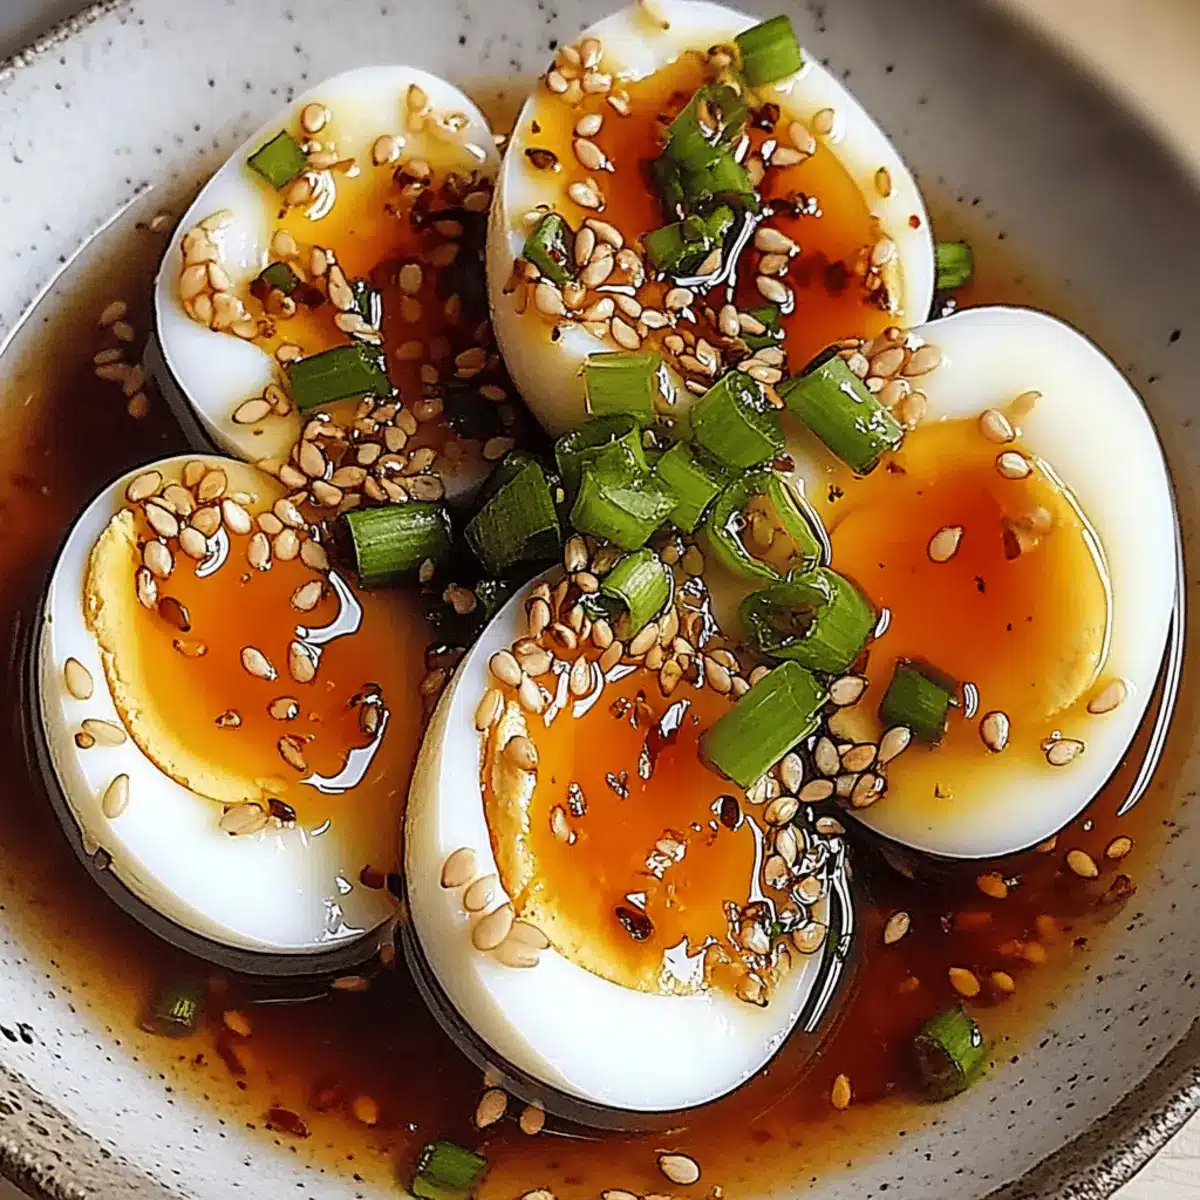
  6. Spoon or pipe the flavorful yolk mixture back into the hollowed-out egg whites, filling them generously.
  7. Sprinkle a touch of paprika or chili flakes on top for color and a hint of heat. Serve them chilled.

Nutrition

Serving: 1pieceCalories: 100kcalCarbohydrates: 1gProtein: 6gFat: 8gSaturated Fat: 2gMonounsaturated Fat: 5gCholesterol: 186mgSodium: 248mgPotassium: 63mgVitamin A: 500IUCalcium: 30mgIron: 1mg

Notes

You can prepare the yolk filling a day in advance but hold off on assembling the eggs until just before serving for the best texture.

Tried this recipe?

Let us know how it was!

Delicious French Salted Bitter Cookies for a Sweet Surprise

As I crunched into my first bite of French Salted Bitter Cookies, I was transported to a quaint patisserie nestled on a cobblestone street in Paris. The wonderful blend of rich French butter and a hint of sea salt creates a delightful balance that dances on your palate, making these cookies irresistible. They are perfect for a cozy coffee break or elegant gifting, offering a wonderful respite from the mundane. What I love most is that these cookies are not only a quick baking project but also a crowd-pleaser that brings smiles to everyone who tries them. If you’re ready to elevate your baking game with a dash of French elegance, let’s dive into how to make these exquisite French Salted Bitter Cookies together! What flavor pairings do you think would take these cookies to the next level?

What flavor pairings will enhance these cookies?

Unexpected Versatility: These French Salted Bitter Cookies shine with their ability to complement a variety of flavors. Perfect Pairings: Enjoy them with a fresh cup of French press coffee or a glass of dry white wine for an elevated experience. Easy to Make: The recipe is straightforward—ideal for both novice and seasoned bakers. Impressive Presentation: Their elegant look makes them a lovely gift or a charming addition to an afternoon tea. Gluten-Free Option: With a simple flour substitution, even gluten-sensitive friends can enjoy these delights! Elevate your dessert table by pairing them with a scoop of crème fraîche or fresh summer berries for a delightful twist.

French Salted Bitter Cookies Ingredients

For the Cookie Dough
French Butter – Use unsalted for better control over sweetness and salt.
Granulated Sugar – This adds a delightful sweetness and helps achieve a crispy edge.
Egg – Binds ingredients and adds moisture, resulting in a rich texture.
Vanilla Extract – Enhances flavor with sweet aromatic notes, elevating your cookies.
All-Purpose Flour – Provides structure; for a gluten-free option, substitute with a blend containing xanthan gum.
Baking Powder – Ensures cookies have a light and airy texture; mix thoroughly with flour.
Sea Salt – A pinch of flaky sea salt amplifies the flavors; sprinkle on top for the perfect finish.

For the Finishing Touch
Flaky Sea Salt – Used to finish the cookies while warm, adding a delightful crunch and salty kick.

These French salted bitter cookies are a delightful indulgence that balance sweet and salty flavors, perfect for sharing or savoring alone!

Step‑by‑Step Instructions for FRENCH SALTED BITTER COOKIES

Step 1: Cream Butter and Sugar
In a large mixing bowl, use an electric mixer to beat 1 cup of softened French butter with 3/4 cup of granulated sugar until the mixture becomes pale and fluffy, about 4-5 minutes. This step is crucial for creating a light texture in your French Salted Bitter Cookies, so ensure it’s well combined before moving on.

Step 2: Add Wet Ingredients
Next, crack in one whole egg and add 1 teaspoon of vanilla extract to the creamed mixture. Mix on low speed until the ingredients blend smoothly without any lumps, taking about 1-2 minutes. This blend adds moisture and aromatic flavor, making your cookies delightful and rich.

Step 3: Combine Dry Ingredients
In a separate bowl, whisk together 2 cups of all-purpose flour, 1 teaspoon of baking powder, and 1/4 teaspoon of sea salt until evenly combined. This step helps to distribute the baking powder throughout, ensuring your cookies rise perfectly. Set this mixture aside until you’re ready to incorporate it.

Step 4: Mix Dough
Gradually add the dry mixture to your buttery creamed mixture, stirring gently with a spatula or wooden spoon. Aim for a soft, cohesive dough, about 2 minutes of mixing. Be careful not to overmix; you want the texture to remain tender for your French Salted Bitter Cookies.

Step 5: Chill the Dough
Once the dough is mixed, wrap it in plastic wrap and refrigerate for at least 1 hour. This chilling process is essential to prevent spreading, enhancing the texture of your cookies as they bake. Use this time to clean up your workspace or sip on a cup of tea.

Step 6: Shape Cookies
After chilling, roll the dough out on a lightly floured surface to about 1/2-inch thickness. Use a fluted round cutter to cut out your cookies and transfer them to a parchment-lined baking tray. This will ensure they bake evenly while maintaining their lovely shapes.

Step 7: Prepare for Baking
Brush the tops of each cookie with a beaten egg yolk for a glossy finish and then score them gently with a fork for a decorative touch. This adds a nice visual appeal to your French Salted Bitter Cookies and helps them to crisp up beautifully in the oven.

Step 8: Bake
Preheat your oven to 350°F (175°C) and bake the cookies for 15-18 minutes. Watch closely for the cookies to turn golden brown around the edges—this gives them a delightful crispness while keeping the centers tender.

Step 9: Finish with Sea Salt
As soon as the cookies come out of the oven, sprinkle them with flaky sea salt while they are still warm. This finishing touch enhances their flavor, creating the perfect balance of sweet and salty that defines these French Salted Bitter Cookies.

How to Store and Freeze French Salted Bitter Cookies

Room Temperature: Store your French Salted Bitter Cookies in an airtight container at room temperature for up to 5 days to maintain their delightful crispness.

Fridge: If you live in a very warm environment, you can keep them in the refrigerator for up to 7 days, ensuring they are wrapped or in a container to prevent drying out.

Freezer: Unbaked dough can be frozen for up to 3 months. Wrap it tightly in plastic wrap, then place it in a freezer bag. Bake directly from frozen, adding an extra few minutes to the baking time.

Reheating: To enjoy leftover cookies warm, briefly reheat them in a 300°F (150°C) oven for about 5-10 minutes, allowing the butter to soften and restore their delightful texture.

Make Ahead Options

These French Salted Bitter Cookies are perfect for meal prep enthusiasts looking to save time on busy weeknights! You can prepare the cookie dough up to 24 hours in advance by following the mixing and chilling steps, simply wrap it tightly in plastic wrap and refrigerate. For longer storage, the unbaked dough can be frozen for up to 3 months; just thaw it overnight in the fridge before rolling and shaping. Once you’re ready to bake, slice the chilled dough into cookies, brush with egg yolk, and score them before popping them into the oven. With these make-ahead options, you’ll enjoy fresh, delectable cookies with minimal effort!

Expert Tips for French Salted Bitter Cookies

  • Softened Butter: Ensure your French butter is fully softened. This step aids in achieving the fluffy texture needed for your cookies’ success.

  • Chill Indeed: Don’t skip the chilling time! It relaxes the gluten in the dough, preventing excess spreading when baked and ensuring tender cookies.

  • Measure Accurately: Use a kitchen scale for precision when measuring your flour and sugar. Incorrect measurements can lead to dense cookies instead of the desired lightness.

  • Flaky Salt Finish: For the best salty punch, sprinkle flaky sea salt on warm cookies just after baking. It enhances the balance of flavors in your French salted bitter cookies.

  • Don’t Overmix: When combining wet and dry ingredients, mix until just combined. Overmixing can result in tougher cookies. Treat them gently for the best texture!

French Salted Bitter Cookies Variations

Feel free to explore these delightful twists on the classic French Salted Bitter Cookies to make them truly yours!

  • Gluten-Free: Swap all-purpose flour with a gluten-free blend. Don’t forget to add xanthan gum for the perfect texture.
    Gluten-free doesn’t have to mean sacrificing flavor or texture. This twist lets everyone enjoy these French gems!

  • Citrus Zing: Add the zest of one lemon or orange to the dough for a refreshing citrus kick that brightens every bite.
    The vibrant citrus notes balance the sweet and salty profile, making them even more delightful.

  • Nutty Delight: Fold in 1/2 cup of chopped nuts like almonds or hazelnuts for a satisfying crunch that complements the tenderness of the cookie.
    Nuts bring not just flavor but a lovely texture contrast to each cookie, enhancing the overall experience.

  • Chocolate Overload: Stir in 1/2 cup of mini chocolate chips or chunks for a rich, decadent addition that pairs beautifully with the salty notes.
    Chocolate and salt create a delicious harmony—perfect for those needing a little extra indulgence.

  • Spicy Kick: Add 1/4 teaspoon of cayenne pepper or espresso powder to the dry ingredients for a surprising kick that elevates the flavor profile.
    These unexpected ingredients will intrigue your taste buds, handing you a delightful surprise with each crunch.

  • Herbal Infusion: Mix in 2 teaspoons of finely chopped fresh rosemary or thyme for an aromatic touch that adds complexity.
    Herbs provide an enchanting twist, turning these cookies into a sophisticated treat that will impress guests at any gathering.

  • Double Dip: After baking, dip half of each cookie in melted dark chocolate and sprinkle with sea salt for an eye-catching finish.
    This extra step not only enhances the appearance but also offers an indulgent chocolate layer that pairs wonderfully with the salty flavor.

  • Caramel Drizzle: Drizzle warm caramel sauce over the cooled cookies for a luscious and decadent treat that’s hard to resist.
    A sweet, gooey caramel contrast takes these cookies to a whole new level, perfect for special occasions!

These tempting variations will keep your baking routine exciting, transforming the French Salted Bitter Cookies into a versatile delight perfect for any occasion. If you’re feeling inspired, check out Bake Cookies Cream for another cookie adventure!

What to Serve with French Salted Bitter Cookies?

Indulging in French Salted Bitter Cookies opens the door to delightful pairing possibilities that will enhance your culinary experience.

  • Rich Dark Coffee: The bold flavors in a strong cup beautifully contrast the sweet and salty notes, creating a perfect balance to your palate.

  • Black Tea with Lemon: The zesty brightness of lemony black tea uplifts the cookie’s flavor, making each bite feel like a refreshing little escape.

  • Crème Fraîche: A dollop of creamy crème fraîche beside your cookies elevates them to new heights, adding a luxurious touch to each bite.

  • Fresh Berries: Juicy summer berries offer a refreshing burst of sweetness and tartness, brightening the cookie’s naturally rich flavors.

  • Chocolate Ganache: Drizzling warm chocolate ganache adds an indulgent layer, embracing the bittersweet elements and creating an irresistible treat.

  • Dry White Wine: A crisp glass of dry white wine complements the buttery richness of the cookies, providing a sophisticated touch to your afternoon.

  • Candied Citrus Zest: Sprinkling candied citrus over your cookies provides a delightful crunch with a sweet-tart zing that works wonders against the cookie’s flavors.

  • Vanilla Ice Cream: Pairing the cookies with a scoop of velvety vanilla ice cream brings together crisp and creamy textures for a comforting dessert experience.

  • Toasted Nuts: A handful of roasted almonds or hazelnuts can add a wonderful crunch and earthiness, enhancing the cookie’s flavor profile in a simple yet sophisticated way.

These thoughtful pairings ensure that your French Salted Bitter Cookies shine even brighter, making every moment shared around the table truly special.

French Salted Bitter Cookies Recipe FAQs

How do I choose the right French butter for this recipe?
Absolutely! When selecting your French butter, opt for unsalted butter for better control over the sweetness and salt level of your cookies. If you can’t find it, salted butter works in a pinch; just remember to reduce the added sea salt in the recipe by a pinch to balance the flavors.

What is the best way to store leftover French Salted Bitter Cookies?
I recommend storing your French Salted Bitter Cookies in an airtight container at room temperature for up to 5 days. This keeps them crisp while retaining their tender centers. If you live in a warm climate, it’s best to keep them in the refrigerator for up to 7 days, ensuring they’re wrapped or sealed to prevent drying out.

Can I freeze the dough for later use?
Absolutely! To freeze unbaked dough, wrap it tightly in plastic wrap and place it in a freezer bag. Your cookies will keep well for up to 3 months. When you’re ready to bake, simply preheat your oven, then bake directly from frozen—just add an extra few minutes to the original baking time.

What should I do if my cookies spread too much while baking?
If your cookies spread too much, make sure to chill your dough for at least an hour before baking, as this prevents excessive spreading. Additionally, ensure your butter is softened, not melted, when creaming it with sugar. Lastly, check that you’re using enough flour; if you’re measuring by volume, spoon the flour into the measuring cup and level off rather than scooping directly from the bag.

Are there any dietary considerations for these cookies?
Yes! The French Salted Bitter Cookies are vegetarian, and with a simple flour swap, they can also be made gluten-free. Use a gluten-free flour blend that includes xanthan gum to ensure the right texture. Additionally, if you’re baking for someone with allergies, always double-check the ingredient labels for potential allergens in butter and baking powder.

How can I enhance the flavor of my cookies?
Great question! Consider adding citrus zest, like lemon or orange, to the dough for a fresh twist. You can also incorporate chopped nuts for added texture or use a drizzle of melted dark chocolate over the baked cookies for an indulgent finishing touch. The more the merrier!

FRENCH SALTED BITTER COOKIES

Delicious French Salted Bitter Cookies for a Sweet Surprise

These French Salted Bitter Cookies offer a delightful balance of sweet and salty flavors, perfect for sharing or savoring alone.
Prep Time 1 hour 15 minutes
Cook Time 18 minutes
Chilling Time 1 hour
Total Time 2 hours 33 minutes
Servings: 24 cookies
Course: Dessert
Cuisine: French
Calories: 120

Ingredients
  

For the Cookie Dough
  • 1 cup French Butter unsalted
  • 3/4 cup Granulated Sugar
  • 1 large Egg
  • 1 teaspoon Vanilla Extract
  • 2 cups All-Purpose Flour or gluten-free blend
  • 1 teaspoon Baking Powder
  • 1/4 teaspoon Sea Salt
For the Finishing Touch
  • to taste Flaky Sea Salt for sprinkling

Equipment

  • Electric Mixer
  • Mixing Bowl
  • Whisk
  • Parchment paper
  • Rolling Pin
  • Fluted Round Cutter

Method
 

Step‑by‑Step Instructions
  1. In a large mixing bowl, use an electric mixer to beat the French butter with granulated sugar until pale and fluffy, about 4-5 minutes.
  2. Add the egg and vanilla extract to the creamed mixture, mixing on low speed until smooth, about 1-2 minutes.
  3. In a separate bowl, whisk together the all-purpose flour, baking powder, and sea salt until combined.
  4. Gradually add the dry mixture to the wet mixture, stirring gently until a soft dough forms.
  5. Wrap the dough in plastic wrap and refrigerate for at least 1 hour.
  6. Roll the chilled dough out to about 1/2-inch thickness and cut out cookies with a fluted cutter.
  7. Brush the tops with beaten egg yolk and score with a fork for decoration.
  8. Preheat the oven to 350°F (175°C) and bake for 15-18 minutes until golden brown.
  9. Sprinkle with flaky sea salt immediately after removing from the oven.

Nutrition

Serving: 1cookieCalories: 120kcalCarbohydrates: 16gProtein: 2gFat: 6gSaturated Fat: 4gMonounsaturated Fat: 2gCholesterol: 20mgSodium: 80mgPotassium: 35mgSugar: 5gVitamin A: 250IUCalcium: 10mgIron: 0.5mg

Notes

Ensure butter is softened for the best texture. Chill the dough to prevent spreading while baking. Use precise measurements for the best results.

Tried this recipe?

Let us know how it was!

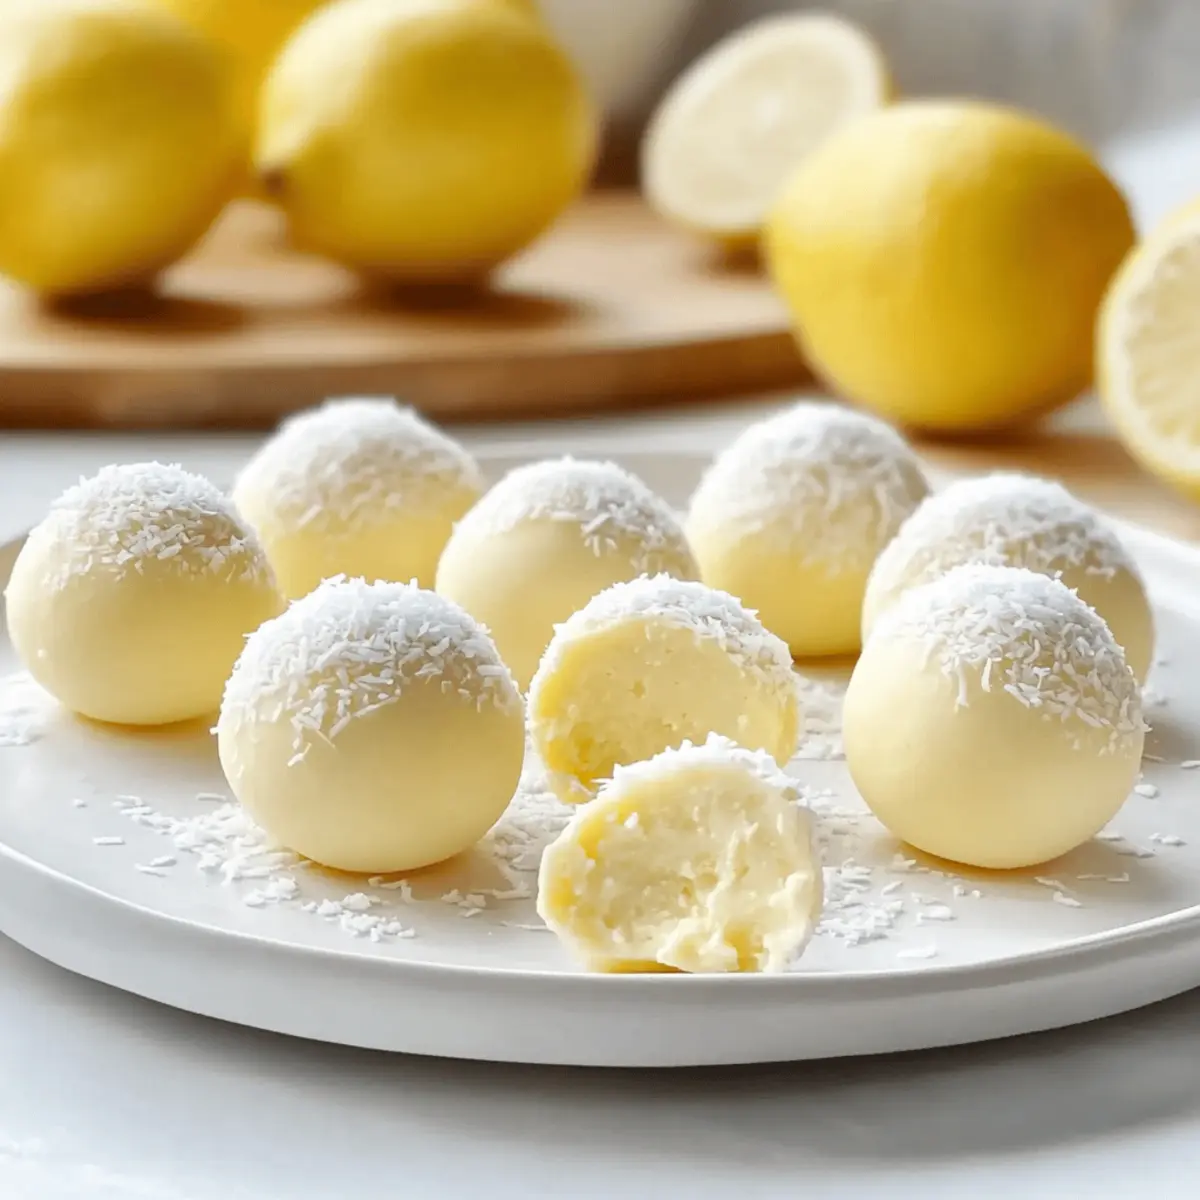
Creamy Lemon Truffles: A Zesty No-Bake Delight

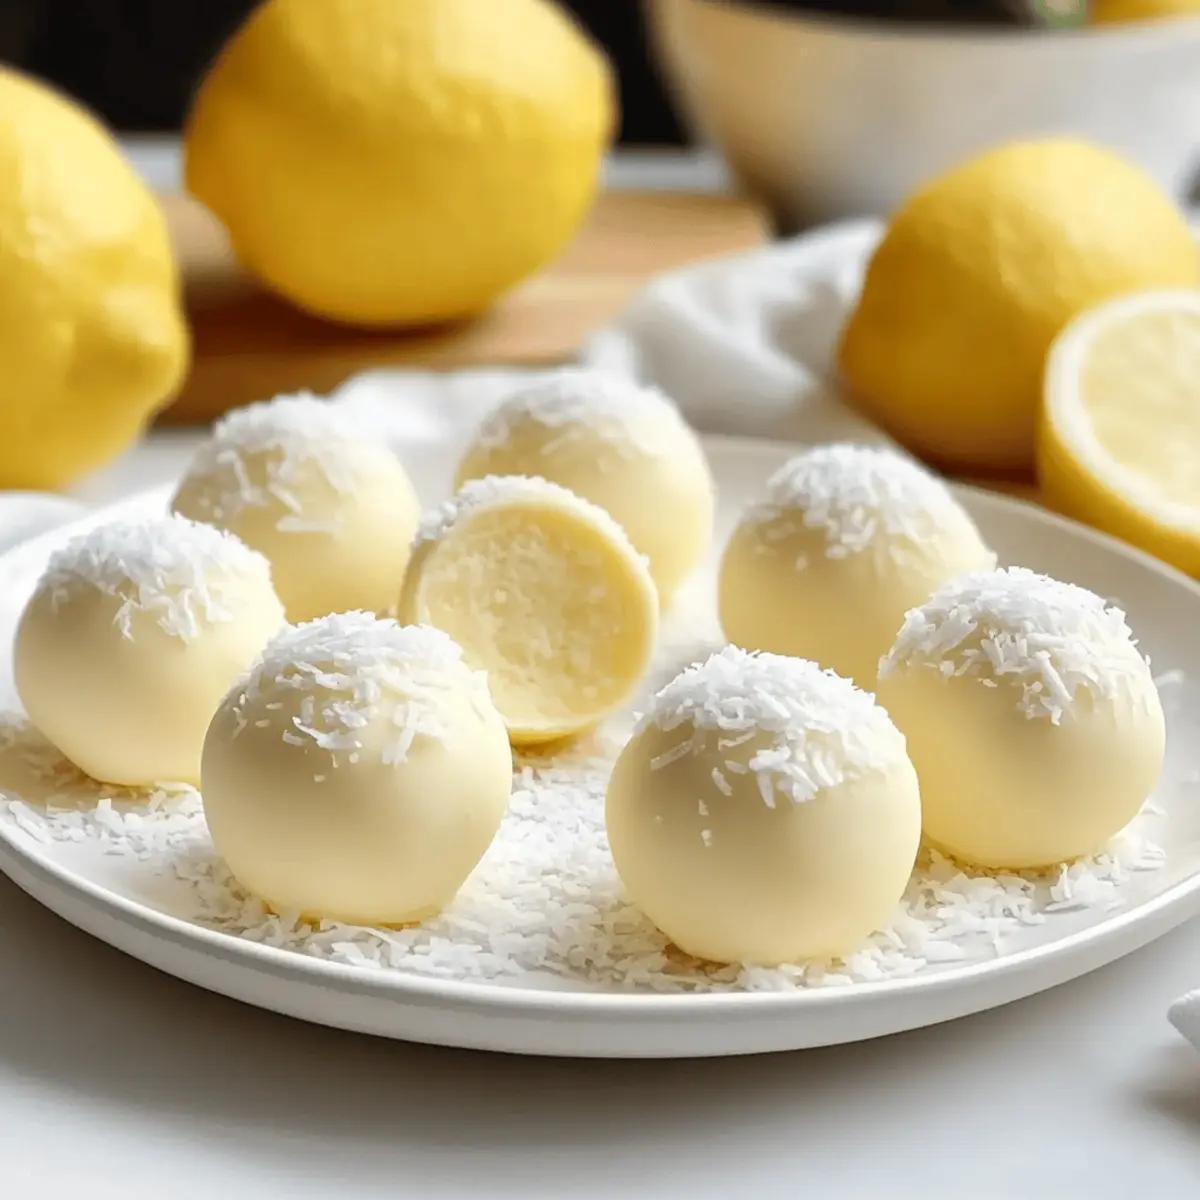
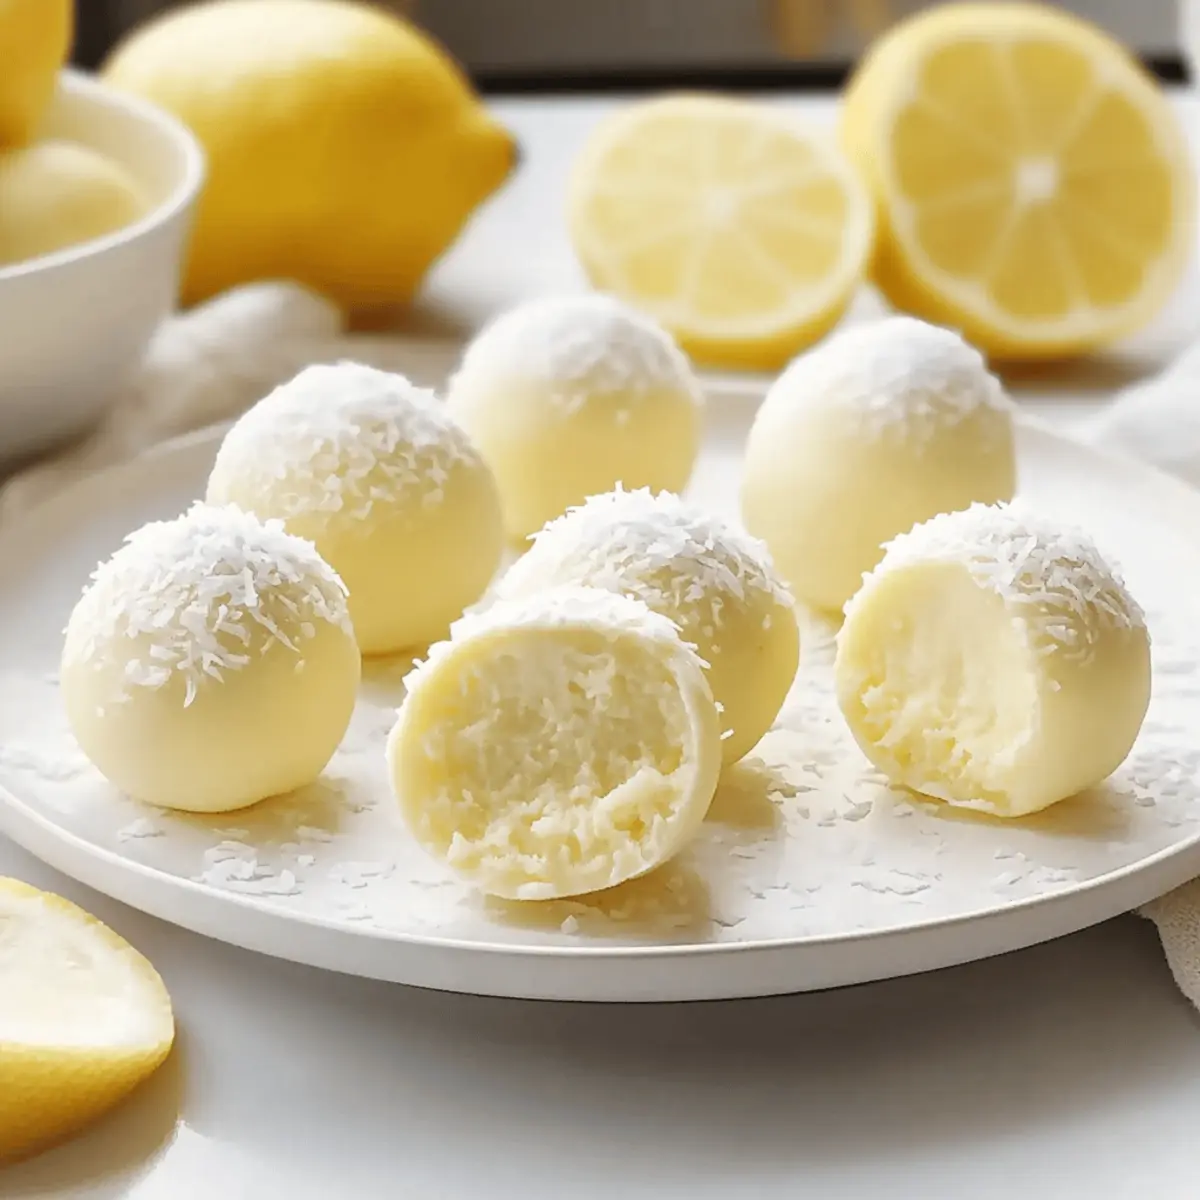
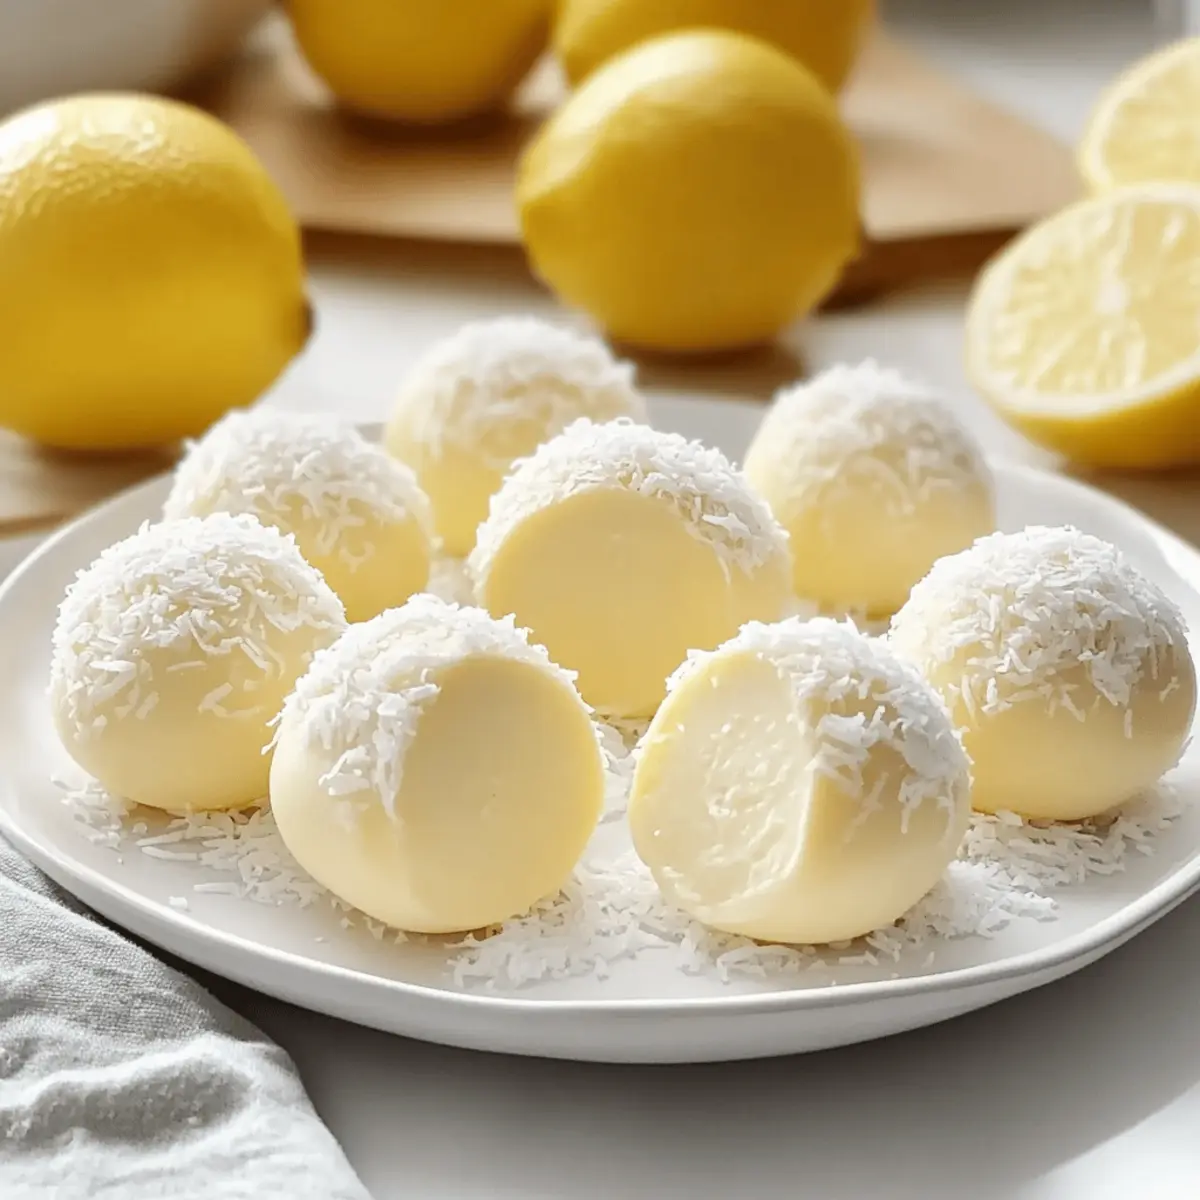
As I unwrapped the zesty sun-kissed lemon, an idea danced through my mind—a no-bake treat that would be both effortless and exquisite. Enter my Creamy Lemon Truffles! These delightful bites craft a perfect harmony of tangy lemon and creamy goodness, making them a delightful treat for any occasion. Whether you’re celebrating a milestone, searching for a homemade gift, or simply aiming for an indulgent moment at home, these truffles deliver. Not only do they come together in just 10 minutes, but they’re also gluten-free and keto-friendly, appealing to a range of dietary needs. The best part? You can customize them to reflect your taste preferences! So, what’s your favorite citrus twist? Let’s dive into this easy recipe and discover how to whip up a batch that’s sure to impress!

Why Are Creamy Lemon Truffles Irresistible?

Decadent Flavor: Each truffle bursts with a zesty lemon essence, perfectly balanced by creamy richness.
Effortless Preparation: No baking is required, making this recipe a breeze for even the busiest home cooks.
Diet-Friendly Delight: Gluten-free, keto-friendly, and customizable, these truffles cater to various dietary preferences.
Quick Satisfaction: With just 10 minutes of prep time, you’ll have a delightful treat in no time!
Perfect for Any Occasion: Whether it’s a dinner party or a sweet gift, these treats are sure to impress your guests! For more citrus-inspired delights, check out my Lemon Garlic Shrimp.

Creamy Lemon Truffles Ingredients

• Indulge in these luscious truffles with colorful, zesty flavor!

For the Truffle Mixture

  • Cream Cheese – Provides a creamy base and richness; for a dairy-free option, use dairy-free cream cheese.
  • Butter – Adds moisture and richness; substitute with coconut oil for a dairy-free alternative.
  • White Chocolate – Offers sweetness and structure; if avoiding chocolate, roll the truffles in cocoa powder or shredded coconut instead.
  • Lemon Juice – Imparts tangy flavor and brightens the taste; always opt for fresh lemon juice for the best flavor.
  • Powdered Sugar – Sweetens the mixture, balancing the tartness of lemon; you can reduce the amount for a less sweet flavor.

Optional Coating

  • Shredded Coconut – For a tropical twist and texture; this adds a fun contrast to the creamy truffles.
  • Crushed Nuts – Provides a crunchy exterior; consider using almonds or pistachios for extra flavor.

With these key ingredients, you’re moments away from enjoying your very own Creamy Lemon Truffles! Happy crafting!

Step‑by‑Step Instructions for Creamy Lemon Truffles

Step 1: Melt the Chocolate
Begin by placing white chocolate in a microwave-safe bowl. Microwave on medium power for 30 seconds, then stir well. Repeat this process until the chocolate is completely melted and smooth, usually about 1 to 2 minutes total. Be mindful to avoid burning the chocolate, as it can clump. Set it aside to cool slightly while preparing the next step.

Step 2: Mix Cream Cheese and Butter
In a mixing bowl, combine softened cream cheese and butter, using a hand mixer or a whisk. Beat the mixture until it becomes creamy and well-blended, taking about 2-3 minutes. This base will provide the luscious texture for your Creamy Lemon Truffles. Make sure there are no lumps before moving on to the next step.

Step 3: Combine Ingredients
Next, pour in the slightly cooled melted white chocolate, fresh lemon juice, and powdered sugar into the cream cheese mixture. Gently fold all ingredients together using a spatula or spoon until fully incorporated. The mixture should be smooth and creamy, with the vibrant lemon aroma wafting through your kitchen—about 2 minutes will do the trick.

Step 4: Chill the Mixture
Once mixed, cover the bowl with plastic wrap and chill the truffle mixture in the refrigerator for 10 to 15 minutes. This step allows the mixture to firm up, making it easier to roll into balls. After chilling, it should be thick enough to hold its shape without being too hard.

Step 5: Form the Truffles
Using a spoon or a small cookie scoop, scoop out chilled portions of the mixture and roll them into small balls with your hands. Aim for about 1-inch diameter for each truffle. If the mixture is too soft, return it to the refrigerator for a few more minutes to firm up. This step makes your Creamy Lemon Truffles ready for their final touch.

Step 6: Coat the Truffles
Roll each truffle in shredded coconut or crushed nuts, if desired, to add some delightful texture and flavor. Ensure they are evenly coated, enhancing their visual appeal and taste. This step is easily adjustable based on your preference, allowing you to customize your Creamy Lemon Truffles.

Step 7: Set the Truffles
Arrange the coated truffles on a sheet of parchment paper. Refrigerate them for about 30 minutes, allowing them to set and firm completely. This final chill helps the truffles retain their shape and ensures every bite delivers a creamy, zesty burst of flavor. After chilling, they are ready to serve!

Expert Tips for Creamy Lemon Truffles

  • Slowly Melt Chocolate: Avoid clumping by melting white chocolate slowly—microwave in short intervals, stirring frequently. A drop of oil helps maintain smoothness.
  • Chill Before Rolling: If your truffle mixture feels too soft, chill it longer. This makes shaping easier and results in perfectly formed Creamy Lemon Truffles.
  • Fresh Lemon Juice: Always use fresh lemon juice for the brightest flavor; bottled lemon juice lacks the zestiness that elevates your truffles.
  • Coating Options: Get creative! Roll your truffles in crushed nuts, shredded coconut, or even a dusting of cocoa powder to add unique flavors and textures.
  • Airtight Storage: Store truffles in an airtight container in the refrigerator for up to a week or freeze them for longer enjoyment.

What to Serve with Creamy Lemon Truffles

Elevate your dessert experience with delightful accompaniments that enhance the zesty goodness of these treats.

  • Fresh Berries: The natural sweetness of strawberries or raspberries provides a lovely contrast to the tangy truffles. Their vibrant colors also make for an eye-catching presentation!
  • Mint Leaves: A sprinkle of fresh mint not only adds a pop of color but also a refreshing note that complements the creamy lemon flavor beautifully.
  • Dark Chocolate Drizzle: A rich dark chocolate drizzle creates an indulgent combination, balancing the sweetness and acidity of the truffles for a sophisticated touch.
  • Coconut Whipped Cream: This light and fluffy topping enhances the tropical vibe, offering a creamy and airy complement to the dense truffles.
  • Iced Tea: A refreshing brew—perhaps citrus herbal or mint green tea—cleanses the palate, making each truffle taste all the more delightful.
  • Almond Biscotti: Crunchy almond biscotti serves as a delightful crunch, and their nutty flavor pairs wonderfully with the creamy texture of the truffles.
  • Lemon Sorbet: For a zesty sherbet experience, serve a scoop of lemon sorbet alongside the truffles to brighten the flavors even more.
  • Sparkling Wine: A glass of bubbly adds a celebratory flair, its effervescence lifts the palate, creating a memorable dessert experience.
  • Chocolate-Covered Pretzels: Combining sweet and salty, these pretzels offer a delightful bite that nicely contrasts with the truffles’ smoothness.

Make Ahead Options

These Creamy Lemon Truffles are perfect for busy home cooks looking to save time! You can prepare the truffle mixture up to 24 hours in advance and simply refrigerate it until you’re ready to roll. To do this, follow the initial steps (melt the chocolate and mix the ingredients), and then chill the mixture until firm. Just before serving, roll the chilled mixture into balls, and coat them with shredded coconut or crushed nuts as desired. This method not only saves you time but ensures the truffles remain just as delicious and fresh. Alternatively, you can also store the finished truffles in an airtight container in the fridge for up to 1 week, allowing for delightful snacking anytime!

Creamy Lemon Truffles Variations & Substitutions

Feel free to let your creativity shine as you customize these delightful truffles!

  • Coconut Twist: Substitute coconut butter for cream cheese to enhance that tropical flavor profile.

  • Nutty Coating: Roll the truffles in crushed almonds or walnuts for a crunchy exterior that adds texture. It’s a delightful contrast to the creamy center!

  • Cocoa Coating: If you want a richer chocolate experience, use cocoa powder instead of coconut or nuts. The deep flavor will complement the lemon perfectly.

  • Fruit Infusion: Add a tablespoon of finely grated lemon zest or switch it up by incorporating orange zest for a citrusy surprise. The truffles will explode with vibrant flavors!

  • Sugar-Free: Use a sugar substitute for powdered sugar to make a keto-friendly version that satisfies your sweet tooth without the extra carbs.

  • Spicy Kick: For those who love a bit of heat, sprinkle cayenne pepper or chili powder in the coating. This unique blend of flavors will tantalize your taste buds!

  • Berry Goodness: Roll the truffles in crushed freeze-dried berries, like strawberries or raspberries, for a burst of fruity flavor and a pop of color.

  • Decadent Variation: Swap in dark chocolate for at least 70% cocoa for a richer taste experience—this twist will elevate your truffles to gourmet status.

Stay inspired by the versatility of these truffles, and for more delicious ideas, check out my Creamy Chicken Fettuccine Alfredo or refreshing Summer Corn Chowder. Happy cooking!

How to Store and Freeze Creamy Lemon Truffles

Fridge: Store your truffles in an airtight container in the refrigerator for up to 1 week to keep them fresh and creamy.

Freezer: If you’d like to keep them longer, place truffles in a freezer-safe container, separating layers with parchment paper. They can be frozen for up to 3 months.

Thawing: When ready to enjoy, move the truffles from the freezer to the fridge to thaw overnight. This ensures they maintain their delectable creamy texture.

Reheating: There’s no need to reheat; simply enjoy them chilled for a refreshing treat any time!

Creamy Lemon Truffles Recipe FAQs

What type of lemons should I use for the best flavor?
Absolutely! For the brightest and most vibrant flavor, always opt for fresh lemons. Look for ones that are firm and have a bright yellow color, avoiding any with dark spots or wrinkles. The fresh juice will elevate your Creamy Lemon Truffles and give them that irresistible tang.

How long can I store my truffles, and what’s the best way?
You’ll want to keep your truffles stored in an airtight container in the refrigerator, where they’ll stay fresh for up to 1 week. For longer storage, freeze them in a freezer-safe container, layering with parchment paper to prevent sticking. They can last up to 3 months in the freezer.

Can I freeze Creamy Lemon Truffles, and what’s the best method?
Yes, you can! To freeze your truffles, place them in a single layer on a baking sheet and freeze for about 1-2 hours until solid. Then transfer them to a freezer-safe container, separating layers with parchment paper. This method helps retain their shape and texture, and they’ll be good for up to 3 months.

What if my truffle mixture is too soft to roll?
Very! If the mixture feels too soft and doesn’t hold its shape, simply pop it back in the refrigerator for an additional 10-15 minutes. This will firm it up, making it easier to roll into those lovely little balls. If it’s still too soft after chilling, you might need to add a touch more powdered sugar to thicken it.

Are Creamy Lemon Truffles suitable for those with allergies?
The truffles can be adapted for various dietary needs. For a dairy-free version, substitute cream cheese with dairy-free cream cheese and butter with coconut oil. Be mindful of other allergies as well, like nuts, if you plan to roll the truffles in crushed nuts or coconut. Always check the labels of your ingredients to ensure they fit your dietary requirements.

Creamy Lemon Truffles

Creamy Lemon Truffles: A Zesty No-Bake Delight

Delight in these Creamy Lemon Truffles, a zesty no-bake treat perfect for any occasion.
Prep Time 10 minutes
Chilling Time 15 minutes
Total Time 25 minutes
Servings: 12 truffles
Course: Dessert
Cuisine: American
Calories: 90

Ingredients
  

For the Truffle Mixture
  • 8 oz Cream Cheese softened
  • 4 tbsp Butter softened
  • 8 oz White Chocolate melted
  • 1/4 cup Lemon Juice fresh
  • 1/2 cup Powdered Sugar adjust for sweetness
Optional Coating
  • 1 cup Shredded Coconut
  • 1/2 cup Crushed Nuts e.g., almonds or pistachios

Equipment

  • Microwave-safe bowl
  • Mixing Bowl
  • hand mixer or whisk
  • Spatula
  • Cookie Scoop

Method
 

Preparation Steps
  1. Begin by placing white chocolate in a microwave-safe bowl. Microwave on medium power for 30 seconds, then stir well. Repeat this process until the chocolate is completely melted and smooth, about 1 to 2 minutes total.
  2. In a mixing bowl, combine softened cream cheese and butter. Beat until creamy and well-blended, about 2-3 minutes.
  3. Pour the slightly cooled melted white chocolate, fresh lemon juice, and powdered sugar into the cream cheese mixture. Fold all ingredients together until fully incorporated.
  4. Cover the bowl with plastic wrap and chill the truffle mixture in the refrigerator for 10 to 15 minutes.
  5. Using a spoon or small cookie scoop, scoop out chilled portions of the mixture and roll them into small balls.
  6. Roll each truffle in shredded coconut or crushed nuts to coat.
  7. Arrange the coated truffles on parchment paper and refrigerate for about 30 minutes to set.

Nutrition

Serving: 1truffleCalories: 90kcalCarbohydrates: 7gProtein: 1gFat: 7gSaturated Fat: 4gPolyunsaturated Fat: 0.5gMonounsaturated Fat: 2.5gCholesterol: 25mgSodium: 30mgPotassium: 30mgSugar: 6gVitamin A: 200IUVitamin C: 2mgCalcium: 20mg

Notes

Store the truffles in an airtight container in the refrigerator for up to a week or freeze for longer storage.

Tried this recipe?

Let us know how it was!

Irresistible Dubai Chocolate Cups You Can Make in Minutes

Standing in my kitchen, I can’t help but smile as the enchanting aroma of warm chocolate fills the air. Today, I’m thrilled to share my recipe for Easy Dubai Chocolate Cups—these delightful treats combine creamy, nutty pistachio butter with a satisfying crunch that’s perfect for satisfying sweet cravings. With just four simple, no-bake ingredients, they’re not only quick to whip up but also gluten-free and dairy-free, making them ideal for nearly any dietary need. Picture these charming chocolate cups at your next gathering, bringing a touch of Middle Eastern magic to the table. Intrigued by how such simplicity can lead to such bliss? Let’s dive into this delightful dessert together!

Why Are These Dubai Chocolate Cups Irresistible?

Simplicity at its Core: With just four ingredients, these cups make indulgence effortless.

No Baking Required: Skip the oven and enjoy a quick, hassle-free dessert!

Healthy Twist: Gluten-free and dairy-free, they cater to various dietary preferences while still satisfying your sweet tooth.

Customizable Delight: Add different nut butters or fresh fruits like strawberries for a personal touch that impresses.

Perfect for Any Occasion: Whether it’s a casual get-together or a fancy party, these Dubai Chocolate Cups are bound to wow your guests. Get ready to share the love and discover more delights like White Chocolate Cranberry or try making no-bake cookies and cream cheesecake cups for a fun twist!

Dubai Chocolate Cups Ingredients

• A sweet delight with minimal effort!

For the Base

  • Pistachio Butter – Adds a nutty flavor and creamy texture; swap it for almond or cashew butter if desired.
  • Kataifi – Contributes a delightful crunch; shredded phyllo or rice krispies work as excellent substitutes.

For the Coating

  • Semi-Sweet Chocolate – Provides a rich, sweet coating; use dark chocolate for a bolder taste or sugar-free chocolate for a healthier option.
  • Butter – Used to toast the kataifi, enhancing its flavor; choose vegan butter for a dairy-free alternative.

These easy Dubai Chocolate Cups are sure to satisfy your sweet cravings while aligning perfectly with your dietary needs!

Step‑by‑Step Instructions for Easy Dubai Chocolate Cups

Step 1: Prep Components
Begin by gathering all your ingredients for the Easy Dubai Chocolate Cups. Make sure you have pistachio butter, kataifi, butter, and semi-sweet chocolate ready. This will streamline your process and make it more enjoyable. Also, grab a non-stick pan for toasting the kataifi and a silicone mold for shaping your cups.

Step 2: Toast Kataifi
Melt 2 tablespoons of butter in a non-stick pan over medium heat. Once melted, add the kataifi and stir continuously for about 5–7 minutes, until it becomes golden and aromatic. As it cooks, keep an eye on it to prevent burning, ensuring a delightful crunchy texture for your Dubai Chocolate Cups. Once done, transfer the kataifi to a plate to cool.

Step 3: Melt Chocolate
In a microwave-safe bowl, add the semi-sweet chocolate and heat in 30-second intervals. Stir well between intervals until the chocolate is completely melted and smooth, which should take about 1–2 minutes in total. This melted chocolate will be the luscious coating that binds all the ingredients of your Dubai Chocolate Cups together.

Step 4: Layer Cups
Spoon a layer of melted chocolate into each silicone cup, filling just enough to coat the bottom. Next, add a layer of the cooled toasted kataifi over the chocolate, pressing it gently to form a solid layer. Top off each cup with another layer of melted chocolate, ensuring all the kataifi is well covered to create that divine outer shell.

Step 5: Chill
Place your filled silicone cups in the refrigerator and allow them to chill for about 1 hour. This will help the chocolate set and firm up, resulting in perfectly molded Dubai Chocolate Cups. Keep an eye on them, and try not to disturb the cups while they chill for the best results.

Step 6: Serve
Once the chocolate has fully set, gently remove the cups from the silicone mold. You should see beautifully formed cups, ready to delight! Arrange them on a serving plate and let everyone enjoy these scrumptious Easy Dubai Chocolate Cups, perfect for sharing or indulging on your own.

Storage Tips for Dubai Chocolate Cups

  • Fridge: Store leftovers in an airtight container in the fridge for up to 2 weeks, ensuring they stay fresh and ready to satisfy sweet cravings whenever they arise.
  • Freezer: Freeze your Dubai Chocolate Cups for up to 1 month. Make sure to wrap them individually in plastic wrap to prevent freezer burn, preserving their delightful flavor and texture.
  • Thawing: When ready to enjoy the frozen cups, let them thaw naturally at room temperature for about 20–30 minutes before indulging for the best texture and taste.
  • Reheating: If you have leftover melted chocolate, you can reheat it gently in the microwave or a double boiler to use for topping, ensuring your treats stay beautifully coated.

What to Serve with Easy Dubai Chocolate Cups

Indulge in a rich dessert experience while pairing these delightful chocolate cups with complementary bites that elevate their charm.

  • Crispy Vanilla Biscotti: These sweet, crunchy delights offer a perfect contrast to the creamy texture of the Dubai Chocolate Cups. Dipping them into coffee can amplify the flavors beautifully.

  • Minty Fruit Salad: A refreshing mix of seasonal fruits with a hint of mint adds brightness, balancing the richness of the chocolate cups. The vibrant colors also create a stunning visual appeal at gatherings.

  • Creamy Coconut Ice Cream: This dairy-free treat melds perfectly with the nutty flavors, enhancing the overall indulgence. The cold creaminess provides a lovely temperature contrast with the rich chocolate.

  • Steamy Herbal Tea: Choose a light, floral herbal tea to cleanse the palate. Options like jasmine or chamomile can enhance the dessert without overpowering its flavors.

  • Dark Chocolate Dipped Strawberries: Add a touch of romance to your spread with these luscious strawberries. Their natural sweetness and slight acidity complement the nutty notes of the Dubai Chocolate Cups beautifully.

  • Chic Coffee Blend: A robust coffee, like an espresso or a rich latte, brings out the depth of the chocolate and creates a cozy atmosphere perfect for sharing with loved ones.

Dubai Chocolate Cups Variations

Feel free to explore and customize these delightful cups to suit your taste buds!

  • Fruit-Filled: Add sliced strawberries or bananas inside the cups for a fruity surprise. The freshness complements the rich chocolate perfectly.

  • Nutty Topping: Top your cups with chopped pistachios or almonds for an extra crunch. It adds a lovely touch of flavor and decorates the dessert beautifully.

  • Spicy Kick: Mix in a pinch of cayenne pepper or chili powder with the chocolate for a surprising heat. This twist creates an exciting flavor contrast that indulges the adventurous palate.

  • Alternative Nut Butters: Swap pistachio butter for almond or sunflower seed butter to change up the flavor profile. Each nut brings its unique essence to the dessert.

  • Decadent Drizzle: Drizzle melted white chocolate over the chilled cups for an elegant finish. This not only enhances the flavor but also makes the presentation irresistible.

  • Healthy Substitution: For a lower-calorie option, use sugar-free or dark chocolate instead of semi-sweet. This variation caters to those mindful of their sugar intake while still satisfying cravings.

  • Crunchy Base Swap: If you can’t find kataifi, shredded phyllo or rice krispies are excellent alternatives that maintain that delightful crunch. They offer a creative way to achieve the right texture.

  • Flavor Improv: Infuse your melted chocolate with a splash of vanilla or almond extract. This newfound depth of flavor will elevate your Dubai Chocolate Cups to the next level.

Embrace the joy of creating — these delightful treats are versatile and can be modified to fit any occasion. Consider pairing them with some Patriotic Chocolate Chip cookies for extra indulgence or a refreshing touch of White Blue Dirt dessert cups for that festive flair!

Expert Tips for Dubai Chocolate Cups

  • Toast Carefully: Stir the kataifi frequently while toasting to prevent burning; burnt kataifi can spoil the delicate flavor of your Dubai Chocolate Cups.

  • Melting Method: For a smoother result, consider using a double boiler to melt the chocolate, ensuring even heating and preventing seizing.

  • Avoid Frozen Mistakes: Never microwave the cups directly from the freezer; let them thaw naturally at room temperature to retain their delightful texture.

  • Customize Flavors: Feel free to experiment with different nut butters like almond or sunflower seed for a unique twist on this Dubai Chocolate Cups recipe.

  • Serve Styled: Enhance presentation by topping your cups with chopped pistachios or a drizzle of white chocolate before serving; it adds a touch of elegance!

Make Ahead Options

These Easy Dubai Chocolate Cups are perfect for busy home cooks looking to save time while still indulging in a delicious dessert! You can prepare the toasted kataifi and melt the chocolate up to 24 hours in advance. Simply store the toasted kataifi in an airtight container at room temperature to maintain its crunchiness, while the melted chocolate can be refrigerated. When you’re ready to assemble the Dubai Chocolate Cups, layer the chocolate and kataifi in the silicone molds, then finish by pouring melted chocolate over the top before chilling them in the fridge for about an hour. This way, you’ll have delightful treats ready to impress your guests with minimal effort!

Easy Dubai Chocolate Cups Recipe FAQs

How do I choose ripe ingredients for my Dubai Chocolate Cups?
Absolutely! For the pistachio butter, look for a fresh jar with no added sugars or preservatives for the best flavor. If you’re opting for Kataifi, make sure it’s not dry and brittle; instead, it should be soft and pliable. For chocolate, a high-quality semi-sweet or dark chocolate is key—check the ingredients for no artificial flavors.

What’s the best way to store leftover Dubai Chocolate Cups?
Very simple! Store your Dubai Chocolate Cups in an airtight container in the fridge for up to 2 weeks. This will keep them fresh and delightful! If you want to keep them longer, you can freeze them for up to 1 month. Just wrap each cup in plastic wrap to prevent freezer burn.

How can I freeze my Dubai Chocolate Cups properly?
To freeze your cups, wrap each one individually in plastic wrap, then store them in an airtight freezer-safe container or zip-top bag. This ensures they stay protected against freezer odors. When you’re ready to indulge, take them out and let them thaw naturally at room temperature for about 20–30 minutes before serving.

What if my kataifi burns while toasting?
Don’t worry too much! If your kataifi gets too brown, it can taste bitter. Make sure to stir it continuously while toasting over medium heat, and if it burns, simply discard it and start with a new batch. Toast for a shorter time next time—about 5-7 minutes should suffice for a lovely golden color!

Are these Dubai Chocolate Cups safe for those with allergies?
Great question! This recipe is gluten-free and dairy-free when using vegan butter and checking the chocolate’s label for allergens. However, always read the labels of the ingredients you buy to ensure they are free from any allergens relevant to you or your guests. If anyone is allergic to nuts, you can substitute the pistachio butter with seed butters like sunflower or pumpkin seed for a nut-free option.

Can I customize the flavors of my Dubai Chocolate Cups?
Absolutely! These cups are very versatile. Feel free to mix different nut butters like almond or cashew for unique taste experiences. You can even add fresh fruits like bananas or strawberries inside the cups before layering the kataifi, enhancing the flavor and making them visually appealing!

Dubai Chocolate Cups

Irresistible Dubai Chocolate Cups You Can Make in Minutes

Delightful Dubai Chocolate Cups that combine creamy pistachio butter with a satisfying crunch, perfect for any gathering. Gluten-free and dairy-free!
Prep Time 15 minutes
Cook Time 7 minutes
Chilling Time 1 hour
Total Time 1 hour 22 minutes
Servings: 12 cups
Course: Dessert
Cuisine: Middle Eastern
Calories: 150

Ingredients
  

For the Base
  • 1 cup Pistachio Butter Swap it for almond or cashew butter if desired.
  • 2 cups Kataifi Shredded phyllo or rice krispies work as substitutes.
For the Coating
  • 1 cup Semi-Sweet Chocolate Use dark or sugar-free chocolate for alternatives.
  • 2 tablespoons Butter Choose vegan butter for a dairy-free option.

Equipment

  • non-stick pan
  • silicone mold
  • Microwave-safe bowl

Method
 

Step-by-Step Instructions
  1. Gather all ingredients for the Easy Dubai Chocolate Cups: pistachio butter, kataifi, butter, and semi-sweet chocolate.
  2. Melt 2 tablespoons of butter in a non-stick pan over medium heat. Add the kataifi and stir continuously for about 5-7 minutes until golden.
  3. In a microwave-safe bowl, heat the semi-sweet chocolate in 30-second intervals until completely melted and smooth.
  4. Spoon a layer of melted chocolate into each silicone cup, then add a layer of toasted kataifi and press gently.
  5. Top each cup with another layer of melted chocolate, ensuring all kataifi is covered.
  6. Refrigerate the filled cups for about 1 hour to allow the chocolate to set.
  7. Once set, carefully remove the cups from the silicone mold and serve.

Nutrition

Serving: 1cupCalories: 150kcalCarbohydrates: 10gProtein: 3gFat: 11gSaturated Fat: 3gPolyunsaturated Fat: 2gMonounsaturated Fat: 5gCholesterol: 5mgSodium: 50mgPotassium: 100mgFiber: 1gSugar: 5gCalcium: 2mgIron: 4mg

Notes

Consider customizations with different nut butters and toppings. Store in an airtight container for up to 2 weeks in the fridge or freeze for up to 1 month.

Tried this recipe?

Let us know how it was!

Savory Japanese Cabbage Pancake: Quick, Healthy Delight

As I flipped my first okonomiyaki, the aroma of sautéed cabbage wafted through my kitchen, instantly transporting me to the bustling streets of Japan. These Japanese cabbage pancakes are not only a fantastic way to use up whatever veggies you have lying around, but they also deliver a satisfying meal in just 20 minutes—perfect for anyone craving a quick yet wholesome dish. Packed with nutrients and customizable to suit any palate, these delightful pancakes are ideal for breakfast, lunch, or dinner. Whether you’re a seasoned chef or a busy home cook, this recipe will have you flicking flour around in joyful abandon. Ready to learn how to make your own deliciously fluffy okonomiyaki? Let’s dive in!

Why are Japanese Cabbage Pancakes so enticing?

Crispiness Meets Fluffiness: Each bite of these Japanese cabbage pancakes offers a delightful contrast; crispy on the outside yet fluffy within.

Quick to Prepare: In just 20 minutes, you can whip up a meal that’s both delicious and healthy, making it perfect for busy weeknights.

Endless Customization: Add your favorite veggies—carrots, leeks, or even spicy peppers—for a personalized flavor profile that suits everyone at the table.

Healthy and Wholesome: Packed with nutrients and low in calories, these pancakes can easily fit into your diet while satisfying those comfort food cravings.

Family-Friendly Fun: Kids will love helping combine the ingredients, transforming dinner into a fun family activity! For more ideas, check out my delightful Fluffy Buttermilk Pancakes that are equally shareable.

Versatile Serving Options: Enjoy them hot or at room temperature, paired with a side of miso soup or a light salad for a complete meal.

Japanese Cabbage Pancake Ingredients

Unleash the flavor with these essential ingredients!

For the Batter

  • Cabbage – Provides structure and the main flavor; can substitute with kale or bok choy for a different taste.
  • Carrot – Adds sweetness and color; grated zucchini can be used for a lighter texture.
  • Onion – Offers aroma and depth; green onions or shallots serve as good alternatives.
  • Salt – Draws moisture from vegetables to improve texture.
  • Eggs – Binds the mixture for stability; for a vegan option, substitute with flax eggs.
  • Soy Sauce – Adds umami flavor; tamari can be used for gluten-free needs.
  • Toasted Sesame Oil – Enhances flavor; olive oil may substitute, but it will alter the taste.
  • All-Purpose Flour – Provides structure; gluten-free all-purpose flour works too.
  • Oil for Frying – Prevents sticking; use neutral oil like canola or grapeseed.

For Toppings

  • Japanese Mayonnaise – Adds a creamy element to each bite for an authentic touch.
  • Toasted Sesame Seeds – Enhance flavor and add a delightful crunch.
  • Pickled Ginger – Offers a tangy contrast that brightens the dish.
  • Sliced Scallions – Bring freshness and color to the presentation.
  • Cilantro – Adds a burst of flavor that complements the savory pancakes beautifully.

Now you’re well-equipped to create your very own Japanese cabbage pancake masterpiece! Enjoy crafting and indulging in this delightful dish.

Step‑by‑Step Instructions for Japanese Cabbage Pancake

Step 1: Prep Vegetables
Begin by shredding the cabbage, carrot, and onion; place them in a colander. Sprinkle salt over the veggies and let them sit for about 10 minutes to draw out excess moisture, which helps improve the texture of your Japanese cabbage pancake. You’ll know they’re ready when they start to soften.

Step 2: Prepare Batter
In a large mixing bowl, whisk together the eggs, soy sauce, and toasted sesame oil until well combined. Gradually add in the all-purpose flour, mixing until you achieve a smooth batter. This mixture will serve as the foundation for your Japanese cabbage pancake, creating a binding element that holds all the flavors together.

Step 3: Mix Vegetables and Batter
After draining the moisture from the vegetables, gently fold them into the batter until everything is evenly coated. The vibrant colors from the cabbage, carrot, and onion will brighten the batter. This is the magic moment where your Japanese cabbage pancake begins to take shape, bursting with wholesome goodness!

Step 4: Heat Skillet
Place a non-stick skillet or well-seasoned cast iron skillet over medium-high heat and add a drizzle of cooking oil. Allow the pan to heat for about 1-2 minutes; you’ll know it’s ready when a drop of water sizzles upon contact. This is crucial for achieving that perfect crispy outer layer on your Japanese cabbage pancake.

Step 5: Cook Pancakes
Pour the battered mixture into the skillet to form your pancake. For a larger pancake, use all the batter, or for individual servings, scoop out half or a quarter cup at a time. Cook for approximately 5 minutes, until the bottom turns golden brown. Carefully flip and let the other side cook for another 3-4 minutes until it matches in color and becomes crispy.

Step 6: Rest and Serve
Once cooked, remove the pancake from the skillet and let it rest for a minute to set. This helps the flavors meld together beautifully. Serve your Japanese cabbage pancake warm, topped with your favorite accompaniments like Japanese mayonnaise, sesame seeds, or pickled ginger for that extra flair!

What to Serve with Japanese Cabbage Pancakes

Looking to create the perfect meal that complements your delicious okonomiyaki? Let’s explore some delightful options!

  • Miso Soup: A warm bowl of miso soup brings comforting flavors that enhance the savory pancakes, making for a wholesome pairing.

  • Sesame Cucumber Salad: Crisp and refreshing, this salad adds a crunchy contrast and balances the richness of the pancakes.

  • Edamame: Lightly salted edamame pods make a great finger food. Their earthy flavor complements okonomiyaki beautifully, adding a fun, interactive element to your meal.

  • Sweet Chili Sauce: Drizzling sweet chili sauce over the pancakes offers a delightful kick and tangy sweetness that tantalizes the taste buds and takes each bite to another level.

  • Steamed Rice: A small bowl of steamed jasmine or brown rice provides a neutral backdrop for the vibrant flavors of the pancakes, making it a satisfying side.

  • Sake: Enjoying chilled or warm sake brings an authentic Japanese dining experience, enhancing the overall meal vibe with each sip.

  • Matcha Green Tea: A soothing cup of matcha green tea pairs wonderfully, cleansing the palate while adding a unique, earthy depth to your dining experience.

How to Store and Freeze Japanese Cabbage Pancakes

Fridge: Store leftover pancakes in an airtight container in the refrigerator for up to 3 days. Reheat gently on a skillet or in the microwave for a quick meal.

Freezer: For longer storage, place cooled pancakes in a single layer on a baking sheet, then freeze until solid. Transfer to a freezer bag for up to 1 month.

Thawing: When ready to enjoy again, thaw the frozen pancakes in the refrigerator overnight.

Reheating: To reheat, warm them in a skillet over medium heat until heated through, or microwave for about 30-60 seconds. Enjoy the deliciousness of your Japanese cabbage pancakes!

Make Ahead Options

These Japanese cabbage pancakes are perfect for meal prep enthusiasts! You can shred and salt the cabbage, carrot, and onion up to 24 hours in advance, allowing the veggies to draw moisture overnight for optimal texture. Once ready to cook, simply mix the drained vegetables into the batter you’ve prepared and keep it refrigerated for up to 3 days. For the best results, remember to gently fold the ingredients right before cooking to ensure the pancakes retain their fluffy texture. When you’re ready to serve, just heat your skillet and cook the pancakes until they’re golden brown—resulting in delicious, homemade okonomiyaki with minimal effort on busier nights!

Expert Tips for Japanese Cabbage Pancakes

Perfecting the Batter: Beat the eggs thoroughly before adding to achieve a light, fluffy texture in your pancakes.

Moisture Management: Don’t skip salting the vegetables; it’s essential to extract moisture for a better texture in your Japanese cabbage pancake.

Skillet Choice: Use a non-stick or well-seasoned cast iron skillet to prevent sticking and ensure easy flipping.

Heat Control: Maintain medium heat while cooking; too high a temperature can burn the outside while leaving the inside raw.

Experiment with Fillings: Feel free to add or substitute other vegetables, such as grated zucchini or bell peppers, to customize your Japanese cabbage pancake to suit your taste.

Japanese Cabbage Pancake Variations

Feel free to let your creativity shine and customize these delicious pancakes to suit your taste buds!

  • Dairy-Free: Use coconut milk instead of eggs for a rich and creamy texture. This will introduce a subtle sweetness, perfect for those avoiding dairy.

  • Gluten-Free: Swap out all-purpose flour for gluten-free flour blend. This ensures everyone at your table can enjoy these tasty pancakes without any worries.

  • Spicy Kick: Incorporate finely chopped jalapeños or spicy miso into the batter. This adds a delightful heat that pairs beautifully with the savory flavors.

  • Seaweed Flavor: Mix in crumbled nori or wakame for an authentic taste. This twist not only enhances flavor but gives a lovely oceanic aroma.

  • Extra Veggies: Add grated zucchini or squash for an added layer of nutrition and a unique flavor twist. It’s a great way to pack more veggies into these pancakes.

  • Herb Infusion: Fresh herbs like cilantro or basil can be mixed into the batter for a refreshing kick. This not only brightens the flavor but adds a gorgeous touch of color.

  • Sautéed Fillings: Before mixing, sauté leeks or mushrooms, and fold them into the batter for a delicious depth of flavor. This can elevate your Japanese cabbage pancakes even further.

  • Asian Slaw Topping: Top the pancakes with an Asian slaw made of shredded carrots, cabbage, and a sesame dressing for added crunch and freshness.

By exploring these twists, you can create a personalized meal everyone will love. For additional pancake inspiration, try my scrumptious Fluffy Buttermilk Pancakes that are perfect for breakfast or brunch!

Japanese Cabbage Pancake Recipe FAQs

How do I choose the right cabbage for my Japanese cabbage pancakes?
Absolutely! When selecting cabbage, look for heads that are firm and heavy for their size, with crisp leaves and no dark spots all over. If you want to try something different, bok choy or kale can also make a delightful substitution!

What’s the best way to store leftover Japanese cabbage pancakes?
You can store any leftovers in an airtight container in the fridge for up to 3 days. When you’re ready to savor them again, simply reheat them gently on a skillet to bring back that wonderful texture.

Can I freeze Japanese cabbage pancakes, and how?
Very much so! To freeze, let your pancakes cool completely. Then, place them in a single layer on a baking sheet and freeze until solid. Afterward, transfer them to a freezer bag and they will keep well for up to 1 month. When you crave them again, thaw in the refrigerator overnight and reheat before serving.

What should I do if my pancake mixture is too runny?
If you find your batter is too runny, don’t panic! You can simply add a little more all-purpose flour—start with a tablespoon at a time—until you achieve a thicker consistency. This will ensure your pancakes hold together perfectly while cooking.

Are there any dietary considerations for pets regarding Japanese cabbage pancakes?
While the main ingredients in Japanese cabbage pancakes are safe for dogs and cats in small amounts, it’s best to avoid sharing them. Ingredients like soy sauce can be high in sodium. Always check with your veterinarian before introducing new foods to your pet’s diet.

What if my pancakes are burning on the outside but raw inside?
To avoid this common mistake, ensure you’re cooking on medium heat. If the temperature is too high, consider lowering it. Additionally, make sure to allow a sufficient time for cooking each side so they become perfectly golden brown inside and out. Enjoy the cooking journey!

Japanese Cabbage Pancake

Savory Japanese Cabbage Pancake: Quick, Healthy Delight

Delight in the flavors of Japanese cabbage pancakes, a quick meal delivering nutrition and customization in every bite.
Prep Time 10 minutes
Cook Time 10 minutes
Total Time 20 minutes
Servings: 4 pancakes
Course: Breakfast
Cuisine: Japanese
Calories: 200

Ingredients
  

For the Batter
  • 2 cups Cabbage can substitute with kale or bok choy
  • 1 medium Carrot grated zucchini can be used
  • 1 medium Onion green onions or shallots serve as alternatives
  • 1 teaspoon Salt draws moisture from vegetables
  • 2 large Eggs for vegan option, substitute with flax eggs
  • 2 tablespoons Soy Sauce tamari can be used for gluten-free needs
  • 1 tablespoon Toasted Sesame Oil olive oil may be substituted
  • 1 cup All-Purpose Flour gluten-free flour works too
  • 2 tablespoons Oil for Frying use neutral oil like canola
For Toppings
  • 1/4 cup Japanese Mayonnaise
  • 2 tablespoons Toasted Sesame Seeds
  • 1 tablespoon Pickled Ginger
  • 2 tablespoons Sliced Scallions
  • 1/4 cup Cilantro

Equipment

  • Non-stick skillet
  • Mixing Bowl
  • colander

Method
 

Step-by-Step Instructions
  1. Begin by shredding the cabbage, carrot, and onion; place them in a colander. Sprinkle salt over the veggies and let them sit for about 10 minutes to draw out excess moisture.
  2. In a large mixing bowl, whisk together the eggs, soy sauce, and toasted sesame oil until well combined. Gradually add in the all-purpose flour to achieve a smooth batter.
  3. After draining the moisture from the vegetables, gently fold them into the batter until everything is evenly coated.
  4. Place a non-stick skillet over medium-high heat and add a drizzle of cooking oil. Allow the pan to heat for 1-2 minutes until a drop of water sizzles.
  5. Pour the batter into the skillet, cooking for approximately 5 minutes until the bottom is golden brown. Carefully flip and cook for another 3-4 minutes.
  6. Once cooked, remove the pancake from the skillet and let it rest for a minute. Serve warm topped with Japanese mayonnaise, sesame seeds, or pickled ginger.

Nutrition

Serving: 1pancakeCalories: 200kcalCarbohydrates: 30gProtein: 6gFat: 8gSaturated Fat: 1gPolyunsaturated Fat: 3gMonounsaturated Fat: 2gCholesterol: 100mgSodium: 500mgPotassium: 300mgFiber: 2gSugar: 2gVitamin A: 1500IUVitamin C: 30mgCalcium: 50mgIron: 1mg

Notes

Feel free to customize with additional vegetables or toppings to suit your taste.

Tried this recipe?

Let us know how it was!

Butterbeer Cookies Conjure Sweet Magic in Every Bite

Take a deep breath, and let the aroma of freshly baked cookies transport you to your favorite magical realm. These Butterbeer Cookies Conjure up delightful memories from the Wizarding World with every soft, chewy bite. Infused with brown sugar and topped with a luscious butterscotch frosting, they’re not just a treat; they’re a sweet escape that’s perfect for any Harry Potter fan or dessert lover. The exciting part? This recipe is family-friendly and quick to whip up, making it an easy go-to for gatherings or cozy evenings at home. Why not bring a splash of magic to your kitchen today? Are you ready to start baking these enchanting delights?

What Makes These Cookies So Magical?

Irresistible Flavor: The rich combination of brown sugar and butterscotch frosting creates a nostalgic taste experience that feels like a sweet hug.
Family-Friendly Fun: Perfect for bakers of all ages, this recipe invites kids and adults alike to join in on the magical baking adventure.
Quick & Easy: With just a few simple ingredients and minimal prep time, you can conjure up these treats in no time!
Eye-Catching Decor: Adorned with colorful Harry Potter-inspired sprinkles, these cookies are a feast for the eyes as much as for the taste buds.
Perfect for Sharing: Whether at a themed gathering or a cozy family night, these cookies are sure to be the crowd favorite, just like the beloved Chocolate Cranberry Cookies from the feast at Hogwarts!

Butterbeer Cookies Ingredients

• To create these enchanting Butterbeer Cookies, gather a few simple ingredients that will conjure sweet magic in every bite!

For the Cookie Base

  • Butter – Provides richness and moisture; use softened butter for easy creaming.
  • Granulated Sugar – Adds sweetness and structure; you can swap it with coconut sugar for a deeper flavor.
  • Brown Sugar – Enhances moisture and gives a chewy texture; light or dark brown sugar are interchangeable.
  • Egg – Binds the ingredients together; ensure it’s at room temperature for optimal mixing.
  • Vanilla Extract – Adds depth of flavor; pure vanilla extract is preferred for authenticity.
  • All-Purpose Flour – Provides structure; substitute with a 1:1 gluten-free flour blend for a gluten-free version.
  • Salt – Enhances the overall flavor of the cookies.
  • Baking Powder – Acts as a leavening agent, ensuring the cookies rise.

For the Butterscotch Frosting

  • Powdered Sugar – Used in frosting for sweetness and a smooth texture.
  • Butterscotch Syrup – Imparts a rich flavor to the frosting; can be substituted with caramel syrup if necessary.
  • Heavy Cream – Adjusts the consistency of the frosting; milk can be used as a lighter alternative.

For Decoration

  • Harry Potter-inspired Sprinkles – A whimsical touch for a festive look; feel free to use any colorful sprinkles as an alternative.

Now, you’re all set to begin your magical baking journey with these delightful Butterbeer Cookies!

Step‑by‑Step Instructions for Butterbeer Cookies Conjure

Step 1: Preheat and Prepare
Start by preheating your oven to 350°F (175°C) to ensure the perfect baking temperature for your Butterbeer Cookies. While the oven warms up, line a baking sheet with parchment paper to prevent sticking and to make cleanup a breeze. This initial setup will help streamline your baking process, getting you ready for the cookie magic to unfold!

Step 2: Cream the Sugars and Butter
In a large mixing bowl, cream together ½ cup of softened butter, ½ cup of granulated sugar, and ¾ cup of brown sugar using a hand mixer or stand mixer. Beat until the mixture is light and fluffy, about 3-4 minutes. You’ll know it’s ready when it transitions to a pale hue with a smooth consistency, creating a delightful base for your Butterbeer Cookies.

Step 3: Add Egg and Vanilla
Next, add in one room-temperature egg and 1 teaspoon of vanilla extract, mixing well until fully incorporated. This should take about 1-2 minutes; the batter will become shiny and smooth. Combining these elements early enriches the flavor profile of your Butterbeer Cookies, bringing that touch of nostalgia to every bite.

Step 4: Mix Dry Ingredients
In a separate bowl, whisk together 2 cups of all-purpose flour, 1 teaspoon of baking powder, and ¼ teaspoon of salt. This step is important for even distribution of the leavening and seasoning. Once mixed, gradually incorporate the dry ingredients into your wet mixture, stirring at low speed or by hand until just combined, ensuring the dough remains soft and pliable.

Step 5: Scoop and Shape the Dough
Using a cookie scoop or tablespoon, portion out 7-8 equal mounds of dough onto your prepared baking sheet. Space them out at least 2 inches apart, as they will spread while baking. Flatten each mound slightly with your palm to promote even baking and achieve a lovely soft texture in your final Butterbeer Cookies.

Step 6: Bake to Perfection
Pop the baking sheet into your preheated oven and bake for 12-13 minutes. Keep an eye on them towards the end; they should be set around the edges while the centers appear slightly soft. This is crucial—remember, they will firm up as they cool. Once baked, let them rest on the baking sheet for about 10 minutes to firm up before transferring to a cooling rack.

Step 7: Whip Up the Butterscotch Frosting
While your Butterbeer Cookies cool, prepare the frosting. In a mixing bowl, beat ½ cup of softened butter until creamy. Gradually add 2 cups of powdered sugar, ¼ cup of butterscotch syrup, 1 teaspoon of vanilla extract, and 2 tablespoons of heavy cream. Continue mixing until the frosting is fluffy and smooth, about 3-4 minutes.

Step 8: Frost and Decorate
Once your cookies have cooled completely, it’s time to frost! Pipe or spread a generous layer of butterscotch frosting on each cookie, creating a luscious topping. For that extra touch of magic, sprinkle colorful Harry Potter-inspired sprinkles on top, making your Butterbeer Cookies Conjure a festive treat that’s as delightful to the eyes as it is to the taste buds.

Expert Tips for Butterbeer Cookies

Watch the Bake Time: Keep a close eye on your cookies during baking. They may seem undercooked, but they will firm up as they cool.

Room Temperature Ingredients: Make sure your butter and egg are at room temperature for easy mixing. This will help achieve a smoother cookie dough.

Proper Dough Measurement: Use a cookie scoop for even portions to ensure consistent baking and perfect cookie size; spacing is key to prevent them from merging.

Mind the Frosting: If your butterscotch frosting is too thick, add an extra splash of heavy cream until you achieve a smooth consistency.

Creative Decorations: Feel free to customize your sprinkles! While Harry Potter-themed sprinkles add flair, any colorful sprinkles will make these Butterbeer Cookies festive.

What to Serve with Magical Butterbeer Cookies

Indulge in sweet treats that elevate your butterbeer cookies into a fantastical feast.

  • Hot Cocoa: A warm cup of rich hot cocoa enhances the sweetness of the cookies and adds a touch of cozy comfort.

  • Caramel Drizzle: Drizzle homemade caramel sauce over the cookies for an extra layer of sweetness that pairs beautifully with butterscotch frosting.

  • Vanilla Ice Cream: Keep it classic! A scoop of creamy vanilla ice cream creates an irresistible contrast to the warm, soft cookies.

  • Pumpkin Spice Latte: The warm spices in this beloved fall drink resonate with the flavors of the cookies, offering a match made in heaven.

  • Harry Potter-themed Milkshake: Blend milk, vanilla ice cream, and a dash of butterscotch syrup for a whimsical drink that echoes the magical experience.

  • Spiced Apple Cider: Serve with a steaming cup of spiced apple cider to create an enchanting flavor duo, perfect for chilly evenings.

  • Chocolate Dipped Pretzels: The salty crunch of chocolate-dipped pretzels adds a delightful texture and pairs well with the sweet cookies.

  • Room Temperature Chai Tea: With its aromatic spices, chai tea complements the sweet butterscotch frosting, transporting you to a cozy tea party.

  • Nutty Trail Mix: A crunchy trail mix bursting with nuts and chocolate offers a satisfying contrast to the soft, chewy cookies.

  • White Chocolate Raspberry Cheesecake Bars: For those longing for an indulgent dessert option, these rich bars will steal the spotlight and round out your magical spread.

Butterbeer Cookies Conjure Sweet Magic

Take a deep breath, and let the aroma of freshly baked cookies transport you to your favorite magical realm. These Butterbeer Cookies Conjure up delightful memories from the Wizarding World with every soft, chewy bite. Infused with brown sugar and topped with a luscious butterscotch frosting, they’re not just a treat; they’re a sweet escape that’s perfect for any Harry Potter fan or dessert lover. The exciting part? This recipe is family-friendly and quick to whip up, making it an easy go-to for gatherings or cozy evenings at home. Why not bring a splash of magic to your kitchen today? Are you ready to start baking these enchanting delights?

  • Spiced Up: Add 1 teaspoon of cinnamon or nutmeg to the dry ingredients for a warm, cozy flavor that evokes the autumn season.

  • Choco-Butterscotch Bliss: Mix in ½ cup of chocolate or butterscotch chips to the dough for an extra layer of delightful sweetness, making each bite even more magical.

  • Nutty Surprise: Fold in ½ cup of chopped pecans or walnuts for a crunchy texture that contrasts beautifully with the softness of the cookie.

  • Salted Caramel Variation: Drizzle warm salted caramel sauce over the frosted cookies to elevate the flavors and add a touch of decadence.

  • Gluten-Free Option: Swap regular flour for a 1:1 gluten-free flour blend to ensure everyone can enjoy these delicious cookies without worry.

  • Fancier Frosting: For a more luxurious frosting, incorporate 2 tablespoons of cream cheese into the butterscotch frosting for an added tanginess that beautifully balances the sweetness.

  • Colorful Sprinkles: Use themed sprinkles in shades of gold and green for a fun twist, echoing the spirit of the Wizarding World. Speaking of fun treats, don’t forget to explore the delightful Chocolate Cranberry Cookies that will complement this magical experience!

  • Antioxidant Boost: Substituting one cup of flour with a cup of ground oats can add texture and a nutritional boost, making these cookies not only magical but also a smidge healthier.

Your baking journey just became even more enchanting! Remember, these Butterbeer Cookies are not just about the ingredients – they’re about the memories you create along the way. Happy baking!

How to Store and Freeze Butterbeer Cookies

  • Room Temperature: Store cookies in an airtight container for up to 3 days to maintain their soft and chewy texture. Ensure the lid is tightly sealed to keep out moisture.

  • Fridge: For longer freshness, you can place the cookies in the refrigerator for up to a week. Just be mindful that the cold may slightly alter their texture.

  • Freezer: Freeze unbaked dough balls for up to 2 months. Simply scoop the dough onto a parchment-lined baking sheet, freeze until solid, then transfer to a freezer-safe bag. Bake from frozen, adding an extra minute or two to the baking time.

  • Reheating: To revive leftover cookies, pop them in the microwave for about 10-15 seconds. This will warm them up and bring back that freshly baked feel.

Make Ahead Options

These Butterbeer Cookies are perfect for busy home cooks looking to save time without sacrificing flavor! You can prepare the dough up to 24 hours in advance; simply cover it tightly with plastic wrap and refrigerate. For an even longer option, scoop the dough into balls and freeze them for up to 2 months. When you’re ready to bake, just place the frozen dough balls on the baking sheet and add a couple of extra minutes to the baking time. The butterscotch frosting can also be made in advance and stored in an airtight container in the fridge for up to 3 days. Just allow the frosting to come to room temperature before spreading it on your cookies for that fresh, delightful taste!

Butterbeer Cookies Recipe FAQs

What type of butter should I use for these cookies?
Absolutely! Use softened unsalted butter for the best results. It provides the perfect richness and moisture, making your Butterbeer Cookies soft and chewy. If you’re in a pinch, you could use margarine, but I always recommend butter for that authentic flavor.

How should I store leftover cookies?
To keep your cookies fresh and delicious, store them in an airtight container at room temperature for up to 3 days. If you prefer longer storage, refrigerate them for up to a week, but be aware this may slightly change their texture. For optimal softness, I often suggest rewarming them in the microwave just before serving.

Can I freeze the dough for these cookies?
Yes, indeed! You can freeze unbaked dough balls for up to 2 months. To do so, scoop the dough onto a parchment-lined baking sheet and freeze until solid. Once frozen, transfer the dough balls into a freezer-safe bag. When you’re ready to bake, simply take them from the freezer and bake straight away, adding an extra minute or two to the baking time.

What if my cookies turn out flat?
Very! If your cookies come out more flat than you’d like, it could be due to a few reasons. First, make sure your butter is softened but not melted; melted butter can cause cookies to spread too much. Also, ensure you’re using fresh baking powder and that the flour is properly measured. Avoid packing the flour; instead, spoon it into the measuring cup and level it off.

Are these Butterbeer Cookies safe for people with allergies?
It’s important to note that these cookies contain common allergens such as gluten (from flour), eggs, and dairy (from butter and cream). For those with gluten sensitivities, be sure to substitute a 1:1 gluten-free flour blend. If allergies are a concern, consider using egg replacers and dairy-free alternatives for the butter and cream. Always read labels on every ingredient to ensure it fits dietary needs!

What visual cues should I look for to know when the cookies are done?
When baking, keep an eye on your cookies during the last couple of minutes. They should be set around the edges but still look slightly undercooked in the center—a good sign they’re ready! Once out of the oven, allow them to cool on the sheet for about 10 minutes to firm up. That’s when the magic happens!

Butterbeer Cookies Conjure

Butterbeer Cookies Conjure Sweet Magic in Every Bite

These Butterbeer Cookies Conjure delightful memories with every soft, chewy bite, making them a magical treat for dessert lovers.
Prep Time 15 minutes
Cook Time 13 minutes
Cooling Time 10 minutes
Total Time 38 minutes
Servings: 12 cookies
Course: Dessert
Cuisine: British
Calories: 150

Ingredients
  

For the Cookie Base
  • ½ cup butter softened
  • ½ cup granulated sugar or coconut sugar
  • ¾ cup brown sugar light or dark
  • 1 large egg room temperature
  • 1 teaspoon vanilla extract pure preferred
  • 2 cups all-purpose flour or gluten-free blend
  • ¼ teaspoon salt
  • 1 teaspoon baking powder
For the Butterscotch Frosting
  • ½ cup powdered sugar
  • ¼ cup butterscotch syrup or caramel syrup
  • 2 tablespoons heavy cream or milk
For Decoration
  • Harry Potter-inspired sprinkles or any colorful sprinkles

Equipment

  • Mixing Bowl
  • Hand mixer
  • Cookie Scoop
  • Baking Sheet
  • Parchment paper

Method
 

Step-by-Step Instructions
  1. Preheat your oven to 350°F (175°C) and line a baking sheet with parchment paper.
  2. Cream together the butter, granulated sugar, and brown sugar until light and fluffy, about 3-4 minutes.
  3. Add the egg and vanilla extract, mixing until incorporated for about 1-2 minutes.
  4. Whisk together the flour, baking powder, and salt in a separate bowl, then gradually mix into the wet ingredients.
  5. Scoop out 7-8 equal mounds of dough on the baking sheet, spacing them at least 2 inches apart.
  6. Bake for 12-13 minutes until set around the edges, then cool for 10 minutes on the baking sheet.
  7. Prepare the frosting by beating the butter, adding powdered sugar, butterscotch syrup, vanilla, and heavy cream until fluffy.
  8. Once cooled, frost the cookies and top them with colorful sprinkles.

Nutrition

Serving: 1cookieCalories: 150kcalCarbohydrates: 22gProtein: 1gFat: 7gSaturated Fat: 4gPolyunsaturated Fat: 0.5gMonounsaturated Fat: 1.5gCholesterol: 20mgSodium: 60mgPotassium: 50mgSugar: 10gVitamin A: 5IUCalcium: 2mgIron: 4mg

Notes

Make sure to use room temperature ingredients for a smoother dough and keep a close eye on the baking time.

Tried this recipe?

Let us know how it was!

Irresistible Korean Soy Marinated Eggs for Your Snack Cravings

As I stood by the stove, entranced by the bubbling pot of boiling water, I couldn’t help but smile at the simplicity and elegance of cooking Korean Soy Marinated Eggs (Mayak Gyeran). These delightful little gems are not only a gorgeous palette of flavors, but they’re also high in protein and remarkably versatile. Whether you’re topping off a bed of steaming rice, nestling them alongside your favorite noodles, or enjoying them as a quick snack, these marinated eggs have an uncanny ability to elevate any dish. The best part? They are incredibly easy to prepare, making them a perfect choice for busy weeknights. Curious about how these addictive gems come together and the secrets behind their rich, savory goodness? Let’s dive in!

Why Are Korean Soy Marinated Eggs a Must-Try?

Addictive Flavor: The savory-sweet marinade infuses each egg with robust flavor, turning a simple ingredient into a culinary masterpiece.
Quick Prep: With just a few ingredients and 10 minutes of active cooking time, you’ll have a delightful dish ready to marinate!
Versatile Ingredient: Perfect as a topping for rice or noodles, these eggs also shine as a healthy midday snack. Enjoy them with a side of kimchi or in your bento box!
Nutrient-Packed: High in protein and gluten-friendly, they fit seamlessly into any dietary regimen. Plus, the flavor develops beautifully over time, making them even better the next day!
Impressive Presentation: Their beautiful golden yolks and rich marinade make these eggs not just tasty but visually appealing too—ideal for impressing guests at gatherings or meal prep. Check out how to incorporate them into your meals alongside a delicious Korean Steak Sandwich for a complete feast!

Korean Soy Marinated Eggs Ingredients

For the Marinade

  • Soy Sauce – The foundation of umami flavor; opt for low-sodium soy sauce for a healthier twist.
  • Sugar – Enhances sweetness and balances the saltiness; raw or brown sugar adds depth.
  • Water – Dilutes soy sauce to create the perfect marinade consistency.
  • Rice Vinegar – Brings acidity and brightness; can be swapped with apple cider vinegar if needed.
  • Sesame Oil – Adds richness with its nutty flavor; toasted sesame oil is preferred for extra depth.
  • Garlic – Infuses aromatic depth; use freshly minced garlic for the best taste.
  • Chili Pepper (optional) – Adds a gentle heat to the mix; substitute with gochugaru for more spice.

For the Eggs

  • Fresh Eggs – Ensure you’re using the freshest eggs for optimal flavor and a luscious texture.

For Garnish

  • Green Onions – Provides freshness and crunch; both white and green parts enhance the dish.
  • Toasted Sesame Seeds – Adds a delightful texture and visual appeal—sprinkle on top before serving.

Enjoy creating these Korean Soy Marinated Eggs that are sure to elevate your meals and satisfy your snack cravings!

Step‑by‑Step Instructions for Korean Soy Marinated Eggs

Step 1: Boil the Eggs
Fill a medium pot with water and bring it to a rolling boil over high heat. Gently add fresh eggs to the boiling water and cook them for 6–7 minutes for soft-boiled yolks. As they cook, the whites will become opaque, and you’ll notice a slight bubbling.

Step 2: Ice Bath Rescue
Once the eggs are perfectly boiled, promptly transfer them to a large bowl filled with ice water. Let them sit for about 5 minutes to cool down quickly, which will stop the cooking process and help create a tender, jammy yolk.

Step 3: Peel the Eggs
Carefully tap the cooled eggs on a hard surface to crack the shells, then peel them under running water for easier removal. Be gentle to avoid breaking the whites. You’ll see the beautiful golden yolks emerge, ready for marinating in the Korean Soy Marinated Eggs recipe.

Step 4: Prepare the Marinade
In a mixing bowl, whisk together soy sauce, water, sugar, rice vinegar, sesame oil, minced garlic, sliced green onions, and chopped chili pepper if desired. Stir the mixture for a few moments until the sugar dissolves completely, creating a fragrant and savory dressing for your marinated eggs.

Step 5: Submerge the Eggs
Place the peeled eggs into a clean jar or container, ensuring they fit snugly. Pour the marinade over the eggs, fully submerging them in the flavorful liquid. As you do this, notice how the rich soy sauce begins to coat each egg, promising an addictive taste.

Step 6: Refrigerate for Flavor
Seal the jar or container tightly and refrigerate for at least 6 hours, though overnight is best. This allows the Korean Soy Marinated Eggs to soak up the marinade, transforming them into a beautifully flavored snack or topping.

Step 7: Serve and Enjoy
When ready to serve, remove the eggs from the marinade and slice them in half. Garnish with sliced green onions and toasted sesame seeds for an appealing presentation. Enjoy these delectable Korean Soy Marinated Eggs on rice, noodles, or as a nutritious stand-alone snack!

Variations & Substitutions for Korean Soy Marinated Eggs

Explore the delightful ways to personalize your Korean Soy Marinated Eggs and discover flavors that dance on your palate!

  • Spicy Kick: Add extra chili flakes or gochujang for a fiery version that’ll awaken your taste buds.
  • Sweet Twist: Swap out regular sugar for honey or maple syrup to infuse a warm, natural sweetness.
  • Citrusy Zest: Incorporate fresh citrus juice like lime or lemon for a bright, refreshing element to the marinade.
  • Herbaceous Infusion: Toss in fresh herbs such as cilantro or basil for a fragrant twist that elevates your dish.
  • Umami Boost: Use mushroom soy sauce or tamari to deepen the umami flavor, perfect for plant-based enthusiasts.
  • Ginger Glow: Add finely grated ginger to the marinade for a zesty, warm flavor that complements the other ingredients beautifully.
  • Texture Change: For a unique crunch, try adding chopped toasted nuts like peanuts or cashews as a garnish.
  • Alternative Vinegar: If rice vinegar isn’t available, apple cider or white wine vinegar works beautifully as a substitute, providing similar acidity.

Feel free to experiment with these variations and discover your favorite twist! And if you’re eager to explore more Korean-inspired recipes, check out my delicious Spicy Korean Gochujang Beef Noodles for a hearty meal that pairs perfectly with these marinated eggs!

Make Ahead Options

These addictive Korean Soy Marinated Eggs (Mayak Gyeran) are perfect for meal prep! You can cook and marinate the eggs up to 24 hours in advance, allowing the flavors to develop beautifully. To do this, follow the initial steps to boil, cool, and peel the eggs, then prepare the marinade. Once the marinade is ready, submerge the eggs in it and seal the container. Refrigerate them for at least 6 hours (or overnight for the best flavor). For optimal quality, ensure the eggs are fully covered with the marinade to prevent any exposure to air. When it’s time to serve, simply remove the eggs, slice them in half, and garnish with green onions and sesame seeds for a restaurant-quality touch—all with minimal effort on your busy weeknight!

Expert Tips for Korean Soy Marinated Eggs

  • Timing is Key: Don’t over-boil the eggs! Stick to 6–7 minutes for perfectly soft yolks and tender whites.
  • Cooling Technique: Use an ice bath immediately after cooking to halt the cooking process and preserve that creamy, jammy yolk.
  • Marination Time Matters: Allow at least 6 hours in the marinade, but overnight is best for maximum flavor infusion in your Korean Soy Marinated Eggs.
  • Avoid Cracking: Peel the eggs gently under running water to prevent breaking the whites and to reveal the beautiful yolks intact.
  • Customize Your Flavor: Feel free to experiment with extra spices like ginger or varying types of soy sauce for unique twists to your marinade.

What to Serve with Korean Soy Marinated Eggs

Delight in creating a harmonious dining experience that takes your meal to new heights with these mesmerizing flavors.

  • Steamed Rice: The fluffy texture of rice absorbs the rich marinade, creating a delightful contrast to the soft-boiled eggs. It’s a comforting companion that balances the dish perfectly.

  • Spicy Kimchi: This crunchy, fermented side adds heat and tang, cutting through the richness of the eggs. The zesty flavor of kimchi elevates the meal, making each bite an adventure.

  • Noodle Salad: Tossed with vibrant veggies and a light dressing, a classic noodle salad adds freshness and texture. It complements the savory eggs beautifully, providing a satisfying crunch.

  • Pickled Vegetables: Bright and tangy pickled veggies add an explosion of flavor, enhancing the umami of the eggs while contributing a refreshing zing to the palate.

  • Hong Kong Style Congee: Enjoy the soft-boiled eggs atop this silky rice porridge, where its warm, creamy consistency beautifully offsets the salty notes of the marinade.

  • Cucumber Salad: Crisp and refreshing, a simple cucumber salad with sesame dressing offers a light counterpart to the concentration of flavors in the eggs. It adds a delightful crunch, ensuring each bite is balanced.

  • Cold Tofu: Soft, chilled tofu drizzled with soy sauce and sesame oil serves as a lovely, light side dish that complements the richness of the marinated eggs.

  • Sake or Soju: Pair your meal with a glass of chilled sake or soju to enjoy a traditional touch, enhancing the overall flavor experience with their smooth, subtle profiles.

These pairings not only enhance the experience of Korean Soy Marinated Eggs but also spread joy and love to your mealtime gatherings!

How to Store and Freeze Korean Soy Marinated Eggs

Fridge: Keep your Korean Soy Marinated Eggs in an airtight container in the refrigerator for up to 4 days. The flavor continues to develop and deepen as they sit.

Freezer: For longer storage, freeze the peeled eggs in an airtight container for up to 3 months. However, the texture of the egg whites may change once thawed.

Reheating: When ready to enjoy, thaw the eggs in the fridge overnight and serve chilled or at room temperature. For added flavor, briefly immerse them in the marinade again.

Flavor Note: The marinated eggs will maintain their flavor profile while stored, making them a delicious convenience for quick meals or snacks!

Korean Soy Marinated Eggs Recipe FAQs

How do I select the best eggs for marinating?
Absolutely! Choosing fresh eggs is crucial for achieving optimal flavor and texture. Look for eggs with no visible cracks and a clean shell. If you can, buy organic or farm-fresh eggs, as their quality often leads to richer-tasting yolks.

How should I store my marinated eggs?
You can keep your Korean Soy Marinated Eggs in an airtight container in the refrigerator for up to 4 days. The flavors will continue to develop the longer they sit, enhancing the dish’s overall taste. Just ensure they are fully submerged in the marinade to keep them fresh!

Can I freeze Korean Soy Marinated Eggs?
Definitely! To freeze, place the peeled eggs in an airtight container, separating them with parchment paper if you prefer. They can be stored in the freezer for up to 3 months. Keep in mind that the texture of the egg whites may change slightly once thawed, but they’re still tasty when used in cooking.

What if I overcook the eggs?
No need to fret! If you find your eggs are overcooked, resulting in a rubbery texture, they can still be salvaged. Try making them into a salad or mixing them into a rice dish where a little extra texture won’t deter from the overall flavor. Remember, timing is key, so stick to the 6–7 minute mark for soft-boiled yolks!

Are these marinated eggs safe for my pets?
While eggs can be a protein-rich treat for dogs, avoid sharing marinated eggs with your pets due to the soy sauce and other seasonings that could be harmful. If you’re looking to give your furry friend a special treat, consider offering plain boiled eggs instead!

Is there a gluten-free option for the soy sauce?
Absolutely! If you’re looking for a gluten-free alternative, opt for tamari sauce, which is made without wheat. It provides a similar flavor profile that complements the Korean Soy Marinated Eggs while aligning with your dietary needs!

Korean Soy Marinated Eggs

Irresistible Korean Soy Marinated Eggs for Your Snack Cravings

Discover the delightfully addictive Korean Soy Marinated Eggs, perfect for snacking or as a versatile dish to elevate your meals.
Prep Time 10 minutes
Cook Time 7 minutes
Marination Time 6 hours
Total Time 6 hours 17 minutes
Servings: 4 eggs
Course: Appetizer
Cuisine: Korean
Calories: 68

Ingredients
  

For the Marinade
  • 1/2 cup Soy Sauce Low-sodium preferred
  • 2 tablespoons Sugar Raw or brown sugar
  • 1/4 cup Water
  • 2 tablespoons Rice Vinegar Can substitute with apple cider vinegar
  • 1 teaspoon Sesame Oil Toasted preferred
  • 1 clove Garlic Minced
  • 1 pinch Chili Pepper Optional, use gochugaru for more spice
For the Eggs
  • 4 large Fresh Eggs Use freshest eggs
For Garnish
  • 2 tablespoons Green Onions Sliced
  • 1 tablespoon Toasted Sesame Seeds For sprinkling on top

Equipment

  • Medium pot
  • Mixing Bowl
  • Jar or container
  • Ice bath

Method
 

Step-by-Step Instructions
  1. Fill a medium pot with water and bring it to a rolling boil. Gently add fresh eggs and cook for 6–7 minutes for soft-boiled yolks.
  2. Transfer eggs to a bowl filled with ice water and let them sit for about 5 minutes to cool.
  3. Carefully tap eggs to crack the shells and peel them under running water.
  4. In a mixing bowl, whisk together soy sauce, water, sugar, rice vinegar, sesame oil, minced garlic, sliced green onions, and chopped chili pepper if desired.
  5. Place peeled eggs in a clean jar, pour the marinade over the eggs, ensuring they are fully submerged.
  6. Seal the container and refrigerate for at least 6 hours, preferably overnight.
  7. Remove eggs from the marinade, slice in half, garnish with green onions and sesame seeds, and serve.

Nutrition

Serving: 1eggCalories: 68kcalCarbohydrates: 1gProtein: 6gFat: 5gSaturated Fat: 1gCholesterol: 186mgSodium: 235mgPotassium: 63mgSugar: 1gVitamin A: 270IUCalcium: 50mgIron: 0.9mg

Notes

Storing marinated eggs for optimal flavor development can enhance your meals significantly.

Tried this recipe?

Let us know how it was!

Savory Japanese Cabbage Pancake for a Quick, Healthy Meal

As I flipped through my favorite Japanese cookbook, a sudden craving for comfort food struck me—one that would transport my taste buds straight to the streets of Osaka. Enter Japanese Cabbage Pancakes, or okonomiyaki, a delightful medley of veggies and savory goodness that’s both quick to prepare and incredibly versatile. Packed with nutrition and customizable to your heart’s desire, these pancakes can transform any fridge leftovers into a satisfying meal in just 20 minutes. Whether you’re looking for a light breakfast or a filling dinner option, this recipe is your go-to for a healthy, vegetarian dish that doesn’t skimp on flavor. Are you ready to whip up some magic in your kitchen? Let’s dive in!

Why are Japanese Cabbage Pancakes amazing?

Quick, Flavor-Packed Delight: In just 20 minutes, you can whip up a meal that’s not only delicious but also healthy!

Customizable Goodness: Use whatever veggies you have on hand for a unique twist each time; think grated zucchini or spicy leeks!

Crowd-Pleaser: Perfect for family dinners or brunch gatherings, everyone will love the crispy outside and fluffy inside.

Nutrient-Rich Comfort: Each serving is loaded with vitamins, making it a guilt-free indulgence.

Easy Clean-Up: With minimal prep, your kitchen stays tidy, so you can enjoy your meal without the hassle.

For an even more delightful duo, serve with a side of Buttermilk Pancakes Discover for a sweet finish!

Japanese Cabbage Pancake Ingredients

For the Batter

  • Cabbage – Provides the foundation and main flavor; feel free to swap it out for kale or bok choy for a unique taste.
  • Eggs – Binds the ingredients for stability; consider using flax eggs for a vegan alternative.
  • All-Purpose Flour – Gives structure to the pancake; gluten-free flour can work just as well.
  • Soy Sauce – Adds savory depth; tamari serves as a great gluten-free substitute.
  • Toasted Sesame Oil – Infuses a rich flavor; olive oil can be used, but may alter the overall taste.
  • Salt – Enhances flavor and draws out moisture from the veggies.

For the Vegetables

  • Onion – Contributes aroma and a savory note; try green onions or shallots for a different twist.
  • Carrot – Adds sweetness and vibrant color; shredded zucchini offers a lighter, refreshing alternative.

For Cooking

  • Oil for Frying – Prevents sticking and ensures a golden exterior; neutral oils like canola or grapeseed are best.

For Toppings

  • Japanese Mayonnaise – Elevates flavor; drizzle it on top for that authentic touch.
  • Toasted Sesame Seeds – Adds a nutty crunch; perfect for garnishing.
  • Pickled Ginger – Offers a tangy contrast to the pancakes.
  • Sliced Scallions – Provides freshness and color; a must-have topping!
  • Cilantro – Enhances flavor and presentation; feel free to omit if you’re not a fan.

With these ingredients, you’ll be well on your way to crafting your very own savory Japanese cabbage pancakes that perfectly align with your culinary ambitions!

Step‑by‑Step Instructions for Japanese Cabbage Pancake

Step 1: Prep Vegetables
Begin by shredding the cabbage, carrot, and onion, then combine them in a colander. Sprinkle with salt and toss gently; let the mixture sit for about 10 minutes to draw out moisture. This step is essential for achieving crispy Japanese cabbage pancakes, as it enhances the texture and flavor of the vegetables.

Step 2: Prepare Batter
In a large bowl, whisk together the eggs, soy sauce, toasted sesame oil, and all-purpose flour. Mix until the batter is smooth and well combined, which should take about 2 minutes. This batter will act as the glue for your flavorful vegetables, ensuring that your Japanese cabbage pancakes hold together beautifully.

Step 3: Mix Vegetables and Batter
Once the vegetables have released some moisture, rinse and drain them thoroughly. Fold the drained veggies into the prepared batter until everything is evenly coated. Take care not to overmix, as you want to maintain the texture and integrity of the vegetables, making your Japanese cabbage pancake both hearty and delicious.

Step 4: Heat Skillet
Place a non-stick skillet or well-seasoned cast iron skillet over medium-high heat. After about 2 minutes, add a tablespoon of oil, swirling it around to coat the bottom. A properly heated skillet is crucial for achieving that golden brown exterior on your Japanese cabbage pancakes, so make sure the oil is shimmering before proceeding.

Step 5: Cook Pancakes
Pour all of the batter into the skillet for one large pancake, or use half or a quarter cup of batter for medium or mini pancakes. Cook for about 5 minutes until the bottom is golden and crispy. With a spatula, carefully flip the pancake and cook for an additional 4-5 minutes, until the other side is also golden and cooked through.

Step 6: Rest and Serve
Once cooked, transfer the Japanese cabbage pancakes to a plate and let them rest for about 1 minute. This brief resting period allows the steam to escape, keeping the pancakes fluffy. Serve warm, garnished with your choice of toppings, such as Japanese mayonnaise, toasted sesame seeds, or sliced scallions for added flavor and texture.

What to Serve with Quick & Healthy Okonomiyaki

Enhance your dining experience by pairing your savory cabbage pancakes with delightful sides that complement their flavor and texture.

  • Miso Soup: A warm bowl of miso soup adds comforting umami, creating a traditional Japanese meal experience that balances the pancakes perfectly.

  • Crispy Tempura Vegetables: Lightly battered and fried vegetables offer a crunchy contrast to the soft pancakes. Try sweet potatoes or zucchini for a colorful addition.

  • Asian Slaw: A fresh, tangy slaw with a mix of cabbage, carrots, and a sesame dressing provides a crunchy, refreshing counterpoint to the richness of okonomiyaki.

  • Steamed Edamame: These protein-packed pods are not only nutritious but also provide a fun finger food element. Lightly salted, they complement the flavors of your pancakes beautifully.

  • Pickled Vegetables: Add a tangy bite with a variety of pickled veggies. The acidity cuts through the richness of the batter, enhancing every bite of your okonomiyaki.

  • Japanese Green Tea: A cup of fragrant green tea is a lovely drink to serve, offering a light and refreshing sip that cleanses the palate between bites.

  • Sesame-Citrus Dressing Salad: A simple salad drizzled with a tangy sesame dressing will add brightness and a fresh crunch, balancing the savory pancakes’ flavors.

  • Fruity Mochi: For dessert, consider offering a sweet mochi filled with fruit or red bean paste. These chewy delights provide a satisfying end to your meal without overwhelming the palate.

Expert Tips for Japanese Cabbage Pancakes

  • Don’t Rush the Vegetables: Allow the shredded vegetables to sit with salt for at least 10 minutes. This will help draw out moisture, crucial for crispy Japanese cabbage pancakes.

  • Mix Gently: When combining the veggies and batter, fold gently to maintain texture. Overmixing can lead to a dense pancake that loses its fluffy charm.

  • Watch the Heat: Cook on medium to medium-high heat. High heat may burn the outside while leaving the inside undercooked, ruining your delicious creation.

  • Use Non-Stick Cookware: A non-stick or well-seasoned cast iron skillet is essential. It ensures easy flipping and helps you achieve that perfect golden brown crust.

  • Customize Wisely: Feel free to experiment with different vegetables but keep the ratios similar to maintain the structural integrity of your Japanese cabbage pancakes.

How to Store and Freeze Japanese Cabbage Pancakes

Fridge: Store leftover Japanese cabbage pancakes in an airtight container for up to 3 days. Simply reheat in a skillet or microwave before serving to enjoy their crispy goodness.

Freezer: For longer storage, freeze pancakes individually separated by parchment paper for up to 1 month. Thaw in the refrigerator overnight before reheating for the best texture.

Reheating: Reheat gently in a non-stick skillet over medium heat to restore crispiness, or use the microwave for a quicker option, keeping it covered to maintain moisture.

Japanese Cabbage Pancake Variations

Feel free to let your creativity shine as you make this delightful dish just the way you love it!

  • Greens Boost: Add spinach or kale for an extra nutritional punch. These leafy greens add vibrant color and mild flavor that complements the pancakes wonderfully.

  • Spicy Twist: Mix in chopped jalapeños or your favorite hot sauce for a kick. The heat will elevate the flavor profile and make every bite a thrilling adventure!

  • Seafood Infusion: Fold in cooked shrimp or crab for a rich, savory addition. This variation creates the satisfaction of both the sea and the garden in each delicious mouthful.

  • Herbaceous Delight: Include fresh cilantro or basil in the batter for a fresh taste. This addition brightens the dish and adds an aromatic layer to each bite.

  • Nutty Flavor: Sprinkle in chopped walnuts or toasted sesame seeds for added crunch. They enhance not only the texture but also create a nutty richness that complements the pancakes beautifully.

  • Cheesy Goodness: Incorporate shredded cheese like cheddar or mozzarella into the mix. For an extra melty treat, place cheese on top before flipping for gooey goodness in every bite.

  • Japanese Tradition: Top your pancakes with okonomiyaki sauce or kewpie mayo for authenticity. A drizzle of these sauces brings that beloved street food vibe right to your table!

Explore these tantalizing variations while enjoying your savory Japanese cabbage pancakes, and if you’re in the mood for something sweet afterward, don’t miss out on the delightfully fluffy Buttermilk Pancakes Discover for a perfect contrast!

Make Ahead Options

These Japanese Cabbage Pancakes are perfect for busy home cooks looking to save time during the week! You can prepare the vegetable mixture (shredded cabbage, carrot, and onion) and let it sit with salt in the fridge for up to 24 hours. Once ready to cook, simply rinse, drain, and fold into your batter. To maintain quality, ensure you store the mixed vegetables in an airtight container to prevent them from browning. If you’d like, you can cook the pancakes in advance and refrigerate them for up to 3 days; just reheat in a skillet or microwave before serving. In either case, you’ll have delicious, quick meals ready to enjoy with minimal effort!

Japanese Cabbage Pancake Recipe FAQs

What type of cabbage should I use?
Absolutely! For the best flavor and texture in your Japanese cabbage pancakes, I recommend using green cabbage. However, you can substitute it with kale or bok choy for a unique twist or if you happen to have them on hand.

How should I store leftover okonomiyaki?
You can store your Japanese cabbage pancakes in an airtight container in the refrigerator for up to 3 days. Just layer them between parchment paper to keep them from sticking together, and reheat them in a skillet or microwave before enjoying.

Can I freeze okonomiyaki?
Yes! You can freeze your pancakes for up to 1 month. To do this, place each pancake on a parchment-lined baking sheet and freeze them individually before transferring to a freezer bag. Don’t forget to thaw them in the refrigerator overnight before reheating, which helps maintain their texture.

What if my pancakes are too soggy?
If your Japanese cabbage pancakes come out too soggy, it’s usually due to excess moisture in the vegetables. Next time, let your shredded veggies sit with salt for about 10 minutes, rinse them, and thoroughly pat them dry before mixing with the batter. This simple step will help achieve that delightful crispiness!

Are there any dietary considerations I should be aware of?
Certainly! This recipe is very customizable—if you need a gluten-free option, simply use gluten-free all-purpose flour instead of standard flour. For a vegan twist, you can substitute the eggs with flax eggs by mixing 1 tablespoon of ground flaxseed with 2.5 tablespoons of water and letting it sit for about 5 minutes until it thickens. Always check for any specific allergies to the ingredients you choose!

Japanese Cabbage Pancake

Savory Japanese Cabbage Pancake for a Quick, Healthy Meal

Japanese Cabbage Pancakes are a quick and customizable comfort food packed with flavor and nutrition.
Prep Time 10 minutes
Cook Time 10 minutes
Resting Time 1 minute
Total Time 20 minutes
Servings: 4 pancakes
Course: Breakfast
Cuisine: Japanese
Calories: 180

Ingredients
  

For the Batter
  • 2 cups Cabbage Or substitute with kale or bok choy
  • 2 large Eggs Flax eggs for a vegan option
  • 1 cup All-Purpose Flour Gluten-free flour can be used
  • 2 tablespoons Soy Sauce Tamari for gluten-free
  • 1 tablespoon Toasted Sesame Oil Olive oil is an alternative
  • 1 teaspoon Salt
For the Vegetables
  • 1 medium Onion Or use green onions or shallots
  • 1 large Carrot Shredded zucchini can be used
For Cooking
  • 2 tablespoons Oil for Frying Neutral oils like canola or grapeseed are best
For Toppings
  • 2 tablespoons Japanese Mayonnaise For drizzling on top
  • 1 tablespoon Toasted Sesame Seeds For garnishing
  • 2 tablespoons Pickled Ginger
  • 2 tablespoons Sliced Scallions For freshness
  • 2 tablespoons Cilantro Optional

Equipment

  • Non-stick skillet
  • colander
  • Mixing Bowl

Method
 

Step-by-Step Instructions
  1. Begin by shredding the cabbage, carrot, and onion, then combine them in a colander. Sprinkle with salt and toss gently; let sit for about 10 minutes to draw out moisture.
  2. In a large bowl, whisk together the eggs, soy sauce, toasted sesame oil, and all-purpose flour until smooth, about 2 minutes.
  3. Rinse and drain the vegetables thoroughly and fold them into the batter until evenly coated.
  4. Heat a skillet over medium-high heat, add a tablespoon of oil once hot.
  5. Pour the batter into the skillet for one large pancake, or use smaller amounts for medium or mini pancakes. Cook for about 5 minutes until golden, then flip and cook for another 4-5 minutes.
  6. Transfer the pancakes to a plate and let rest for about 1 minute before serving warm with desired toppings.

Nutrition

Serving: 1pancakeCalories: 180kcalCarbohydrates: 20gProtein: 6gFat: 8gSaturated Fat: 1gPolyunsaturated Fat: 3gMonounsaturated Fat: 4gCholesterol: 70mgSodium: 300mgPotassium: 250mgFiber: 2gSugar: 1gVitamin A: 200IUVitamin C: 15mgCalcium: 20mgIron: 1mg

Notes

Customize the vegetables as you like but keep ratios similar for best results. Allow vegetables to sit with salt for crispy pancakes.

Tried this recipe?

Let us know how it was!