Creamy Italian-Style Pistachio Cream You’ll Love to Spread

As I stood in my kitchen, the scent of toasting pistachios filled the air, whisking me away to the sun-drenched streets of Italy. This Homemade Italian-Style Pistachio Cream is not just a dessert—it’s an experience to savor. The rich, velvety spread is perfect for elevating toast, drizzling over ice cream, or creating delightful fillings for pastries. Making this indulgent treat at home ensures you can enjoy every spoonful guilt-free, with no artificial ingredients or preservatives muddying its natural goodness. Plus, customizing the recipe allows you to play with flavors and adjust sweetness just to your liking. Curious about how to bring a touch of Italy into your own kitchen? Let’s dive in!
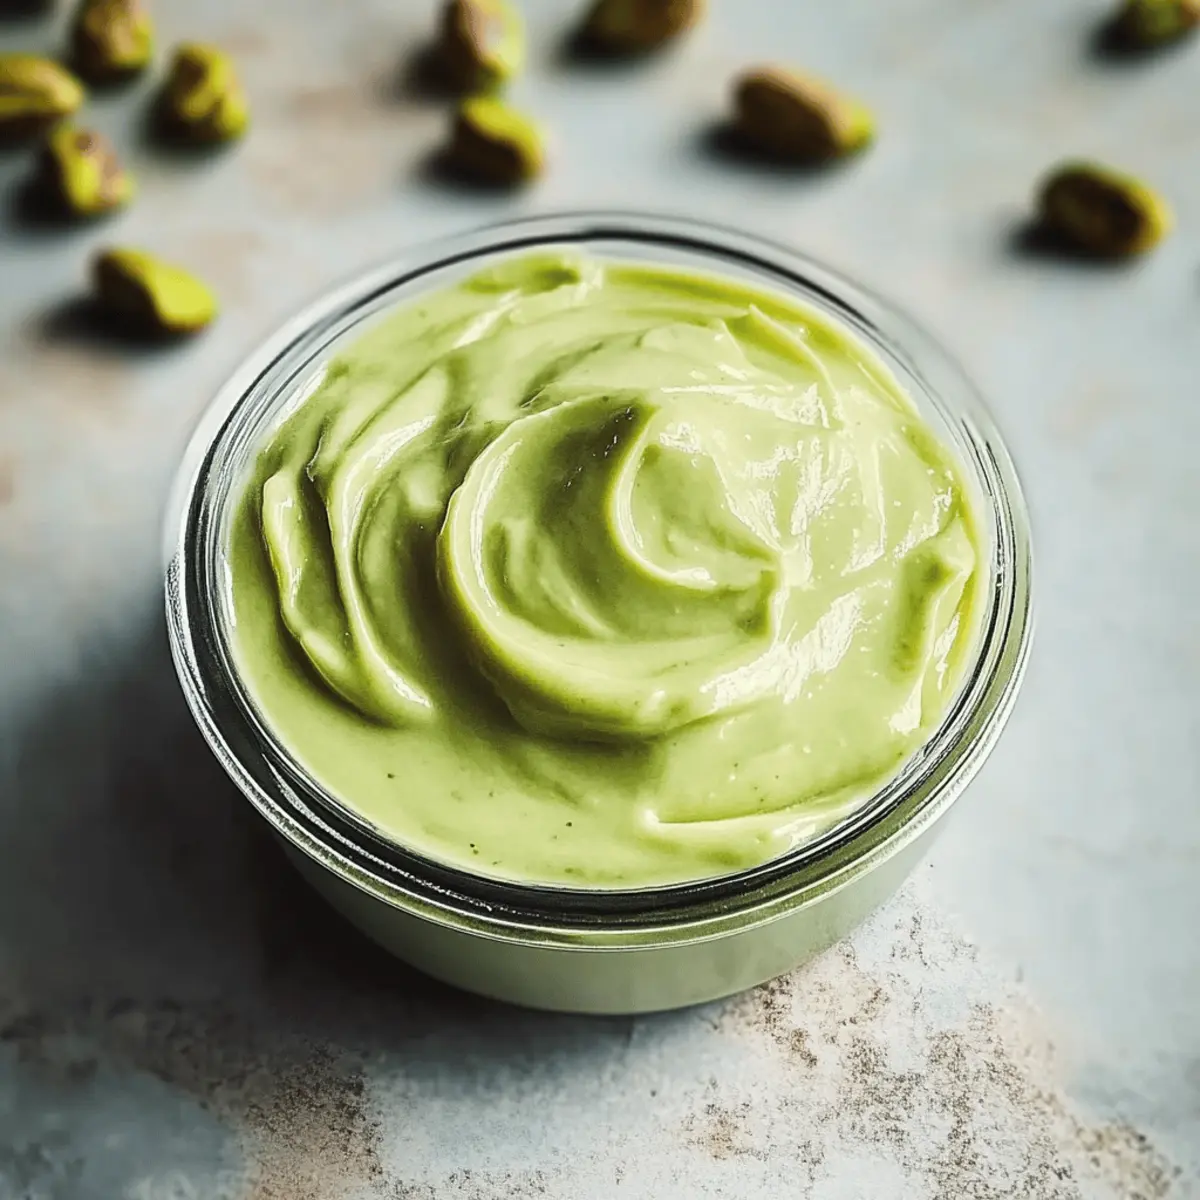
Why is Italian-Style Pistachio Cream Irresistible?

Velvety Texture: The smooth, creamy consistency of this pistachio cream makes each bite a delight.

Rich Flavor: Crafted from real pistachios and white chocolate, it delivers an authentic taste that transports you straight to Italy.

Endless Versatility: Use it as a spread, a dessert topping, or even a filling for your favorite pastries—this cream elevates any dish to gourmet status.

Easy to Make: With simple ingredients and minimal steps, you’ll have a homemade treat ready in no time!

Natural Ingredients: Say goodbye to artificial additives. This recipe focuses on fresh, high-quality components for a guilt-free indulgence.

Whether you’re enjoying it on [toast] or drizzling it over ice cream, you’ll fall in love with this luscious cream and want to whip up a batch over and over.

Italian-Style Pistachio Cream Ingredients

• To create this delightful Italian-Style Pistachio Cream, you’ll want to gather these essential ingredients for the best results.

For the Base

  • Raw, Unsalted Pistachios – Choose fresh, vibrant nuts for a rich and authentic flavor.
  • Unsalted Butter – Adds creaminess; can be substituted with coconut oil for a dairy-free option.
  • Whole Milk or Cream – Provides a smooth texture; almond milk works well as a non-dairy alternative.

For Sweetness

  • White Chocolate – Offers sweetness and depth; opt for high-quality chocolate to enhance flavor.
  • Confectioner’s Sugar – Sweetens the cream; adjust depending on your taste preferences, or use maple syrup as a substitute.

For Balance

  • Kosher Salt – Enhances overall flavors and balances the sweetness.

With these ingredients in hand, you’re just a few steps away from creating a luxurious homemade treat. Enjoy the process of whipping up your own Italian-Style Pistachio Cream!

Step‑by‑Step Instructions for Italian-Style Pistachio Cream

Step 1: Prepare the Pistachios
Start by boiling shelled raw pistachios in a pot of water for about 3 minutes. This quick blanching helps in removing the skins easily. Once done, drain the pistachios and let them cool slightly. Using a kitchen towel, rub the pistachios gently to peel off the skins, revealing their vibrant color which is essential for your Italian-Style Pistachio Cream.

Step 2: Melt Butter and Chocolate
In a heat-proof bowl, combine unsalted butter and 1/4 cup of whole milk. Place the bowl over a pot of simmering water (a double boiler) and stir gently until the butter has melted completely. Once this mixture is smooth, add finely chopped white chocolate. Continue to stir until the chocolate is fully melted and the mixture is homogenous, creating a rich base for your cream.

Step 3: Blend Ingredients
Transfer the peeled pistachios to your blender along with the remaining milk, confectioner’s sugar, and a pinch of kosher salt. Pour in the melted butter and white chocolate mix. Blend on high speed until the mixture becomes smooth and creamy, stopping occasionally to scrape down the sides. This step is crucial for achieving the velvety texture characteristic of Italian-Style Pistachio Cream.

Step 4: Store the Cream
Once the mixture is blended to perfection, carefully transfer the luscious pistachio cream into an airtight container. Make sure to smooth the top with a spatula for even storage. Seal the container tightly and refrigerate for up to 2 weeks. The chill will help the flavors meld beautifully, enhancing your homemade Italian-Style Pistachio Cream!
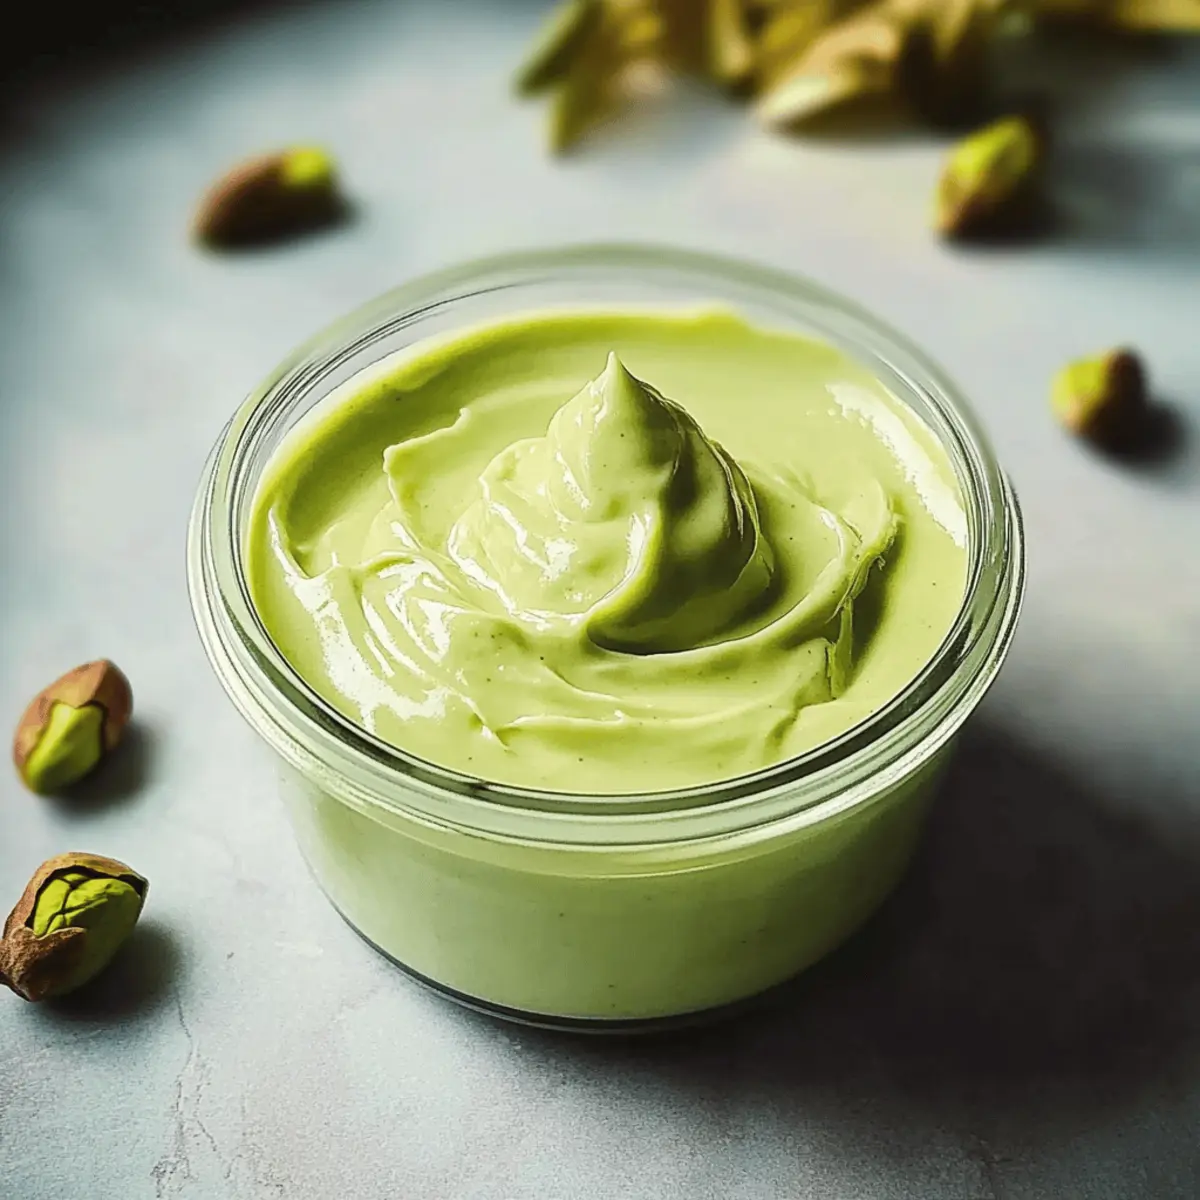
What to Serve with Homemade Italian-Style Pistachio Cream

Imagine a stunning spread that can elevate breakfast or dessert, adding layers of joy to every bite.

  • Toasted Brioche: The buttery richness of warm brioche pairs wonderfully with the nutty sweetness of pistachio cream, creating a luxurious breakfast treat.
  • Fresh Berries: Strawberries and raspberries offer a tart contrast to the creamy sweetness, bringing a pop of color and freshness to your plated dessert.
  • Chocolate Fondue: Dip strawberries, bananas, or marshmallows into pistachio cream for a delightful twist on traditional fondue, merging flavors for a heavenly experience.
  • Pistachio Cookies: Delight your senses with a cookie that complements its filling; the nutty bite perfectly matches the creamy spread, creating a wonderful texture unity.

Serve these treats alongside your Homemade Italian-Style Pistachio Cream for an unforgettable culinary adventure!

How to Store and Freeze Italian-Style Pistachio Cream

Refrigeration: Store the Italian-Style Pistachio Cream in an airtight container in the fridge for up to 2 weeks, ensuring it stays fresh and delicious.

Freezer: For longer storage, freeze the cream in an airtight container for up to 3 months. Thaw in the fridge overnight before using.

Serving: After thawing, give the cream a good stir to restore its smooth texture. If it’s too thick, gradually add a splash of milk to reach your desired consistency.

Room Temperature: Avoid leaving the pistachio cream at room temperature for extended periods to maintain its quality and freshness.

Make Ahead Options

These Homemade Italian-Style Pistachio Cream is perfect for busy home cooks looking to save time during the week! You can prepare the pistachios by blanching and peeling them up to 24 hours in advance, allowing you to jump right into blending quickly when you’re ready to make the cream. Additionally, the melted butter and white chocolate mixture can be made a few days ahead and refrigerated in an airtight container. When you’re ready to finish, simply blend the prepped ingredients together, and you’ll have luscious, restaurant-quality pistachio cream with minimal effort. Storing it properly will maintain its creamy texture, ensuring every spoonful is as delicious as the day you made it!

Italian-Style Pistachio Cream Variations

Feel free to let your culinary creativity shine as you customize this delightful pistachio cream!

  • Dairy-Free: Substitute unsalted butter with coconut oil and whole milk with almond milk for a creamy, plant-based delight.
    Coconut oil adds a subtle tropical flair, while almond milk keeps the texture smooth and luscious.

  • Dark Chocolate Twist: Swap white chocolate for dark chocolate to enhance richness and add a deliciously deep flavor.
    This simple change will elevate your cream, making it perfect for chocolate lovers seeking a gourmet experience.

  • Sweet Spice: Add a pinch of cinnamon or nutmeg for a warm, cozy flavor that pairs beautifully with the nutty cream.
    These spices bring a hint of nostalgia and comfort to each spoonful, transforming your pistachio cream into a seasonal treat.

  • Flavor Infusion: Incorporate a teaspoon of vanilla or almond extract for an extra layer of flavor depth.
    This subtle enhancement can make your cream stand out, perfect for slathering on holiday pastries or drizzling over desserts.

  • Nutty Crunch: Stir in some crushed pistachios or other nuts to provide a delightful texture contrast.
    This variation adds an element of crunch that makes each bite more exciting and satisfying.

  • Herbaceous Touch: Blend in fresh herbs like basil or mint for an unexpected twist that’s refreshing and fragrant.
    This adventurous blend can be a delightful surprise when paired with sweet desserts or breakfast items.

  • Heat It Up: Add a dash of cayenne pepper or red pepper flakes for a spiced-up version that tingles the taste buds.
    A little kick can turn this sweet treat into a fun and zesty companion for savory dishes or charcuterie boards.

As you explore these variations, let your taste buds guide you. Experiment with each option to find the perfect mix for your palate, just like when perfecting that iconic pasta dish or a succulent chicken fettuccine alfredo! Enjoy every rich, creamy moment of creating your ideal Italian-Style Pistachio Cream.

Expert Tips for Italian-Style Pistachio Cream

  • Fresh Ingredients: Use high-quality, raw pistachios and fresh dairy components to ensure the best flavor and texture for your Italian-Style Pistachio Cream.

  • Skin Removal: Boil the pistachios briefly for easier skin removal; this enhances the cream’s vibrant green color and helps achieve the perfect consistency.

  • Consistency Control: If the cream turns out too thick, gradually add warm milk until you reach your desired smoothness without compromising flavor.

  • Blending Technique: Blend thoroughly and pause occasionally to scrape down the sides, ensuring you avoid any graininess and achieve that luxurious creamy feel.

  • Custom Sweetness: Adjust confectioner’s sugar based on your preference—you can also substitute with maple syrup for a unique twist in your Italian-Style Pistachio Cream.
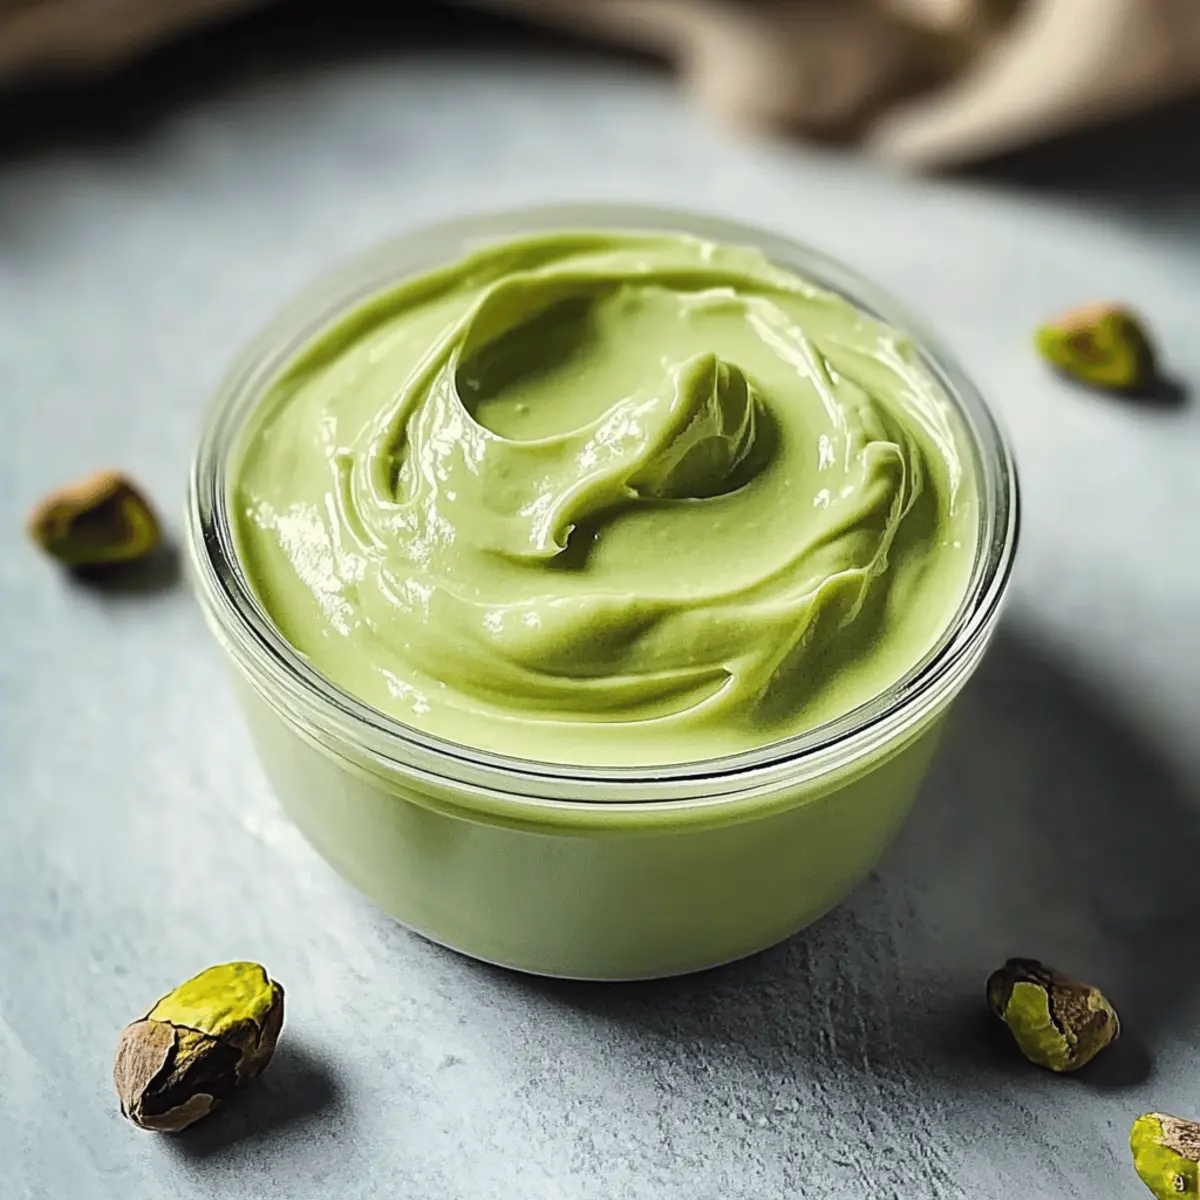
Italian-Style Pistachio Cream Recipe FAQs

What type of pistachios should I use?
Absolutely! For the best flavor and texture in your Italian-Style Pistachio Cream, opt for raw, unsalted pistachios. Look for bright green, fresh nuts, as darker, duller ones may indicate age. If possible, buy them from a bulk section where you can ensure their freshness.

How do I store the pistachio cream?
To keep your Italian-Style Pistachio Cream fresh, store it in an airtight container in the refrigerator. It will last up to 2 weeks. Just be sure to check for any changes in texture or smell before using, and give it a good stir if separation occurs.

Can I freeze Italian-Style Pistachio Cream?
Very! You can freeze your pistachio cream for up to 3 months. To do this, transfer it into an airtight container or freezer bag, pushing out any excess air. When you’re ready to enjoy it, thaw the cream in the fridge overnight, and if it’s too thick, add a little warm milk to adjust the consistency.

What should I do if my pistachio cream is too thick?
If your cream ends up a bit thicker than expected, don’t fret! Simply add warm milk a tablespoon at a time while stirring to reach your desired consistency. Blend again briefly if needed. This will help you achieve that lovely, smooth texture.

Is this recipe suitable for people with nut allergies?
Definitely not! Since the main ingredient is pistachios, those with nut allergies should steer clear of this delicious treat. If you want to create a nut-free spread, consider using seeds like sunflower or pumpkin seeds as the base, but note that the flavor will differ.

Can I use different types of chocolate?
Of course! While the recipe calls for white chocolate for sweetness and creaminess, you can easily substitute it with dark chocolate for a richer taste. Just make sure you adjust the sweetness accordingly, as dark chocolate tends to be less sweet than white.
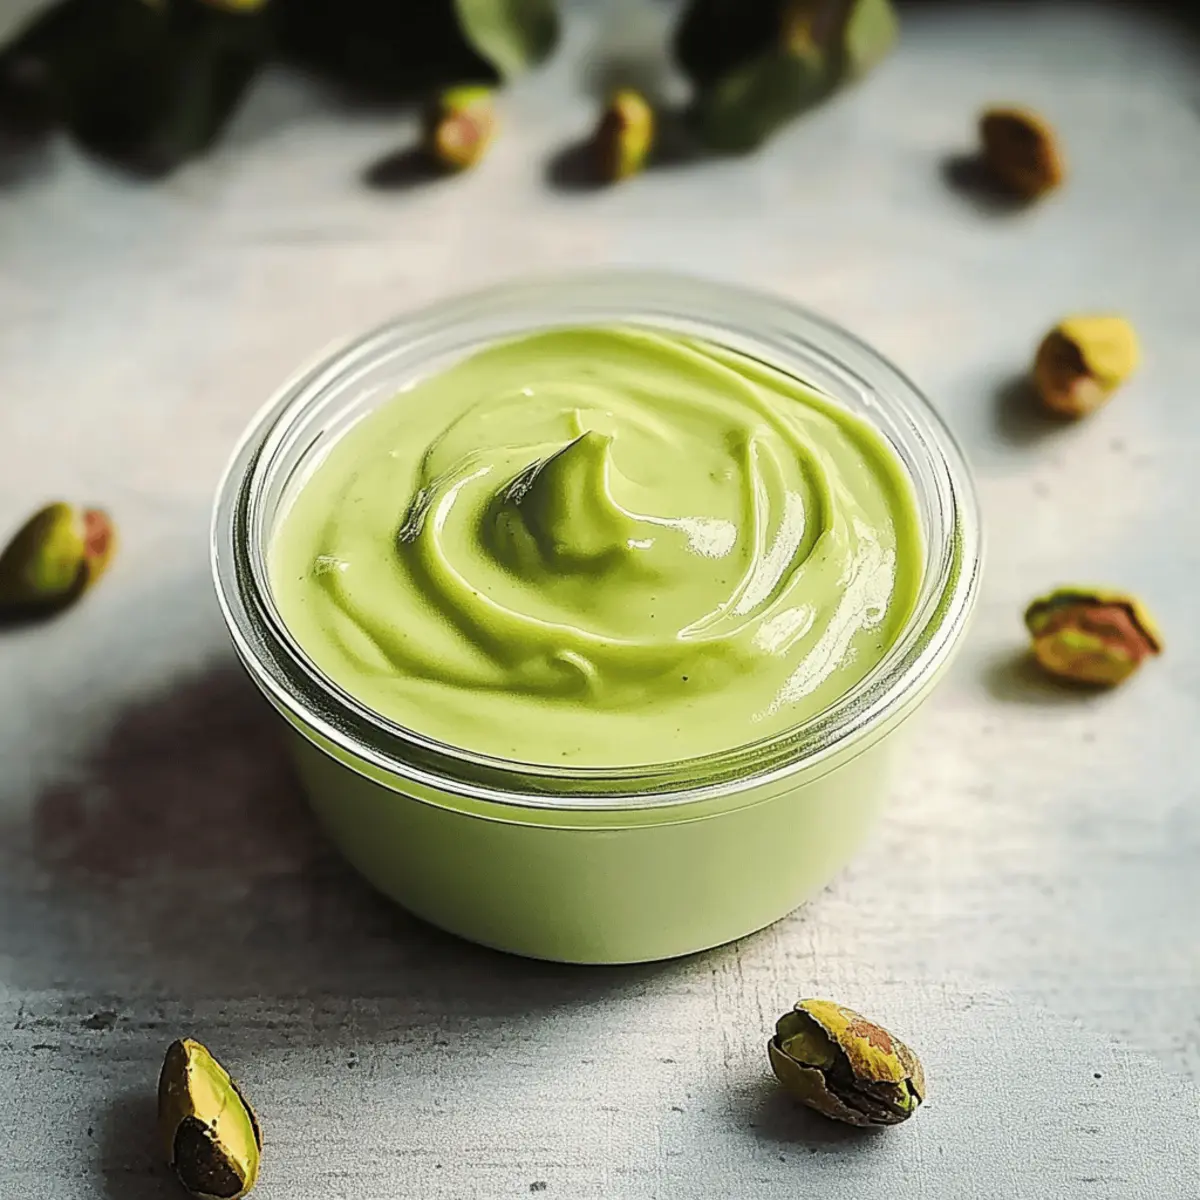
Italian-Style Pistachio Cream

Creamy Italian-Style Pistachio Cream You’ll Love to Spread

Indulge in this homemade Italian-Style Pistachio Cream, a velvety spread perfect for desserts or as a toast topping.
Prep Time 20 minutes
Cook Time 10 minutes
Chilling Time 2 hours
Total Time 2 hours 30 minutes
Servings: 8 servings
Course: Dessert
Cuisine: Italian
Calories: 120

Ingredients
  

For the Base
  • 1 cup Raw, Unsalted Pistachios
  • 1/4 cup Unsalted Butter Can substitute with coconut oil for dairy-free
  • 1/4 cup Whole Milk Almond milk works as non-dairy alternative
For Sweetness
  • 1/2 cup White Chocolate High-quality chocolate enhances flavor
  • 1/4 cup Confectioner's Sugar Adjust for sweetness; maple syrup is a substitute
For Balance
  • 1/2 teaspoon Kosher Salt Enhances flavors

Equipment

  • blender
  • Double boiler
  • airtight container

Method
 

Preparation
  1. Boil shelled raw pistachios in water for about 3 minutes. Drain and cool, then rub off skins.
  2. Melt unsalted butter and 1/4 cup whole milk over a double boiler. Stir until smooth, then add chopped white chocolate.
  3. Blend peeled pistachios with remaining milk, confectioner's sugar, and salt. Add melted butter and chocolate mix, blend until smooth.
  4. Transfer cream to an airtight container, smooth the top, and refrigerate for up to 2 weeks.
Nutrition

Serving: 1tablespoonCalories: 120kcalCarbohydrates: 8gProtein: 2gFat: 10gSaturated Fat: 4gPolyunsaturated Fat: 1gMonounsaturated Fat: 5gCholesterol: 15mgSodium: 30mgPotassium: 150mgFiber: 1gSugar: 5gVitamin A: 200IUCalcium: 30mgIron: 0.5mg

Notes

Use high-quality raw pistachios and fresh dairy components for the best flavor. Adjust sweetness based on your preference.

Tried this recipe?

Let us know how it was!

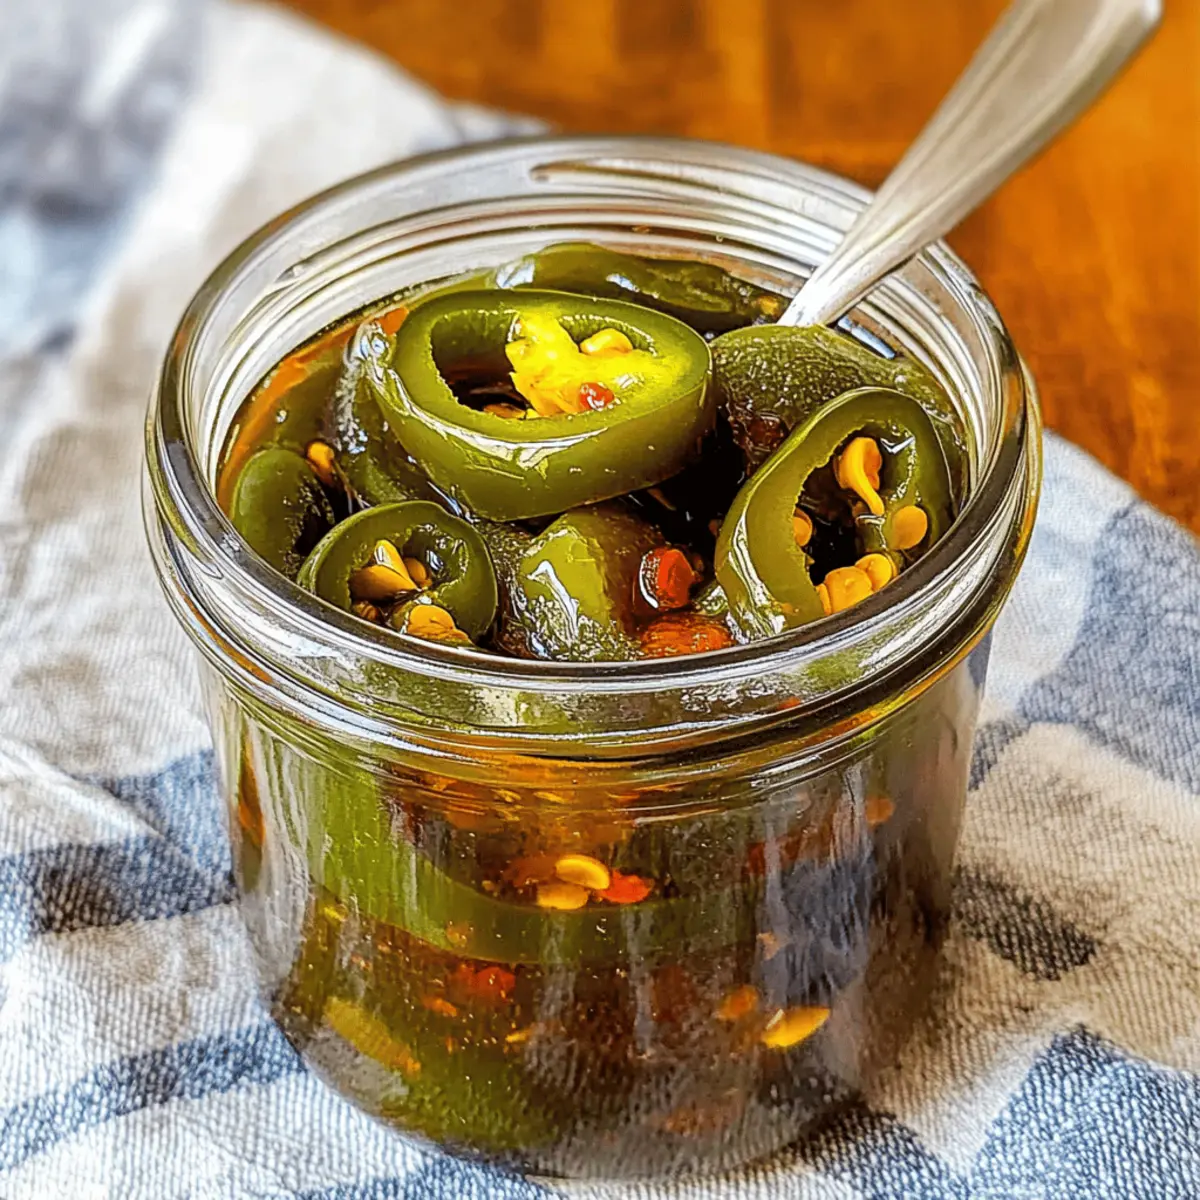
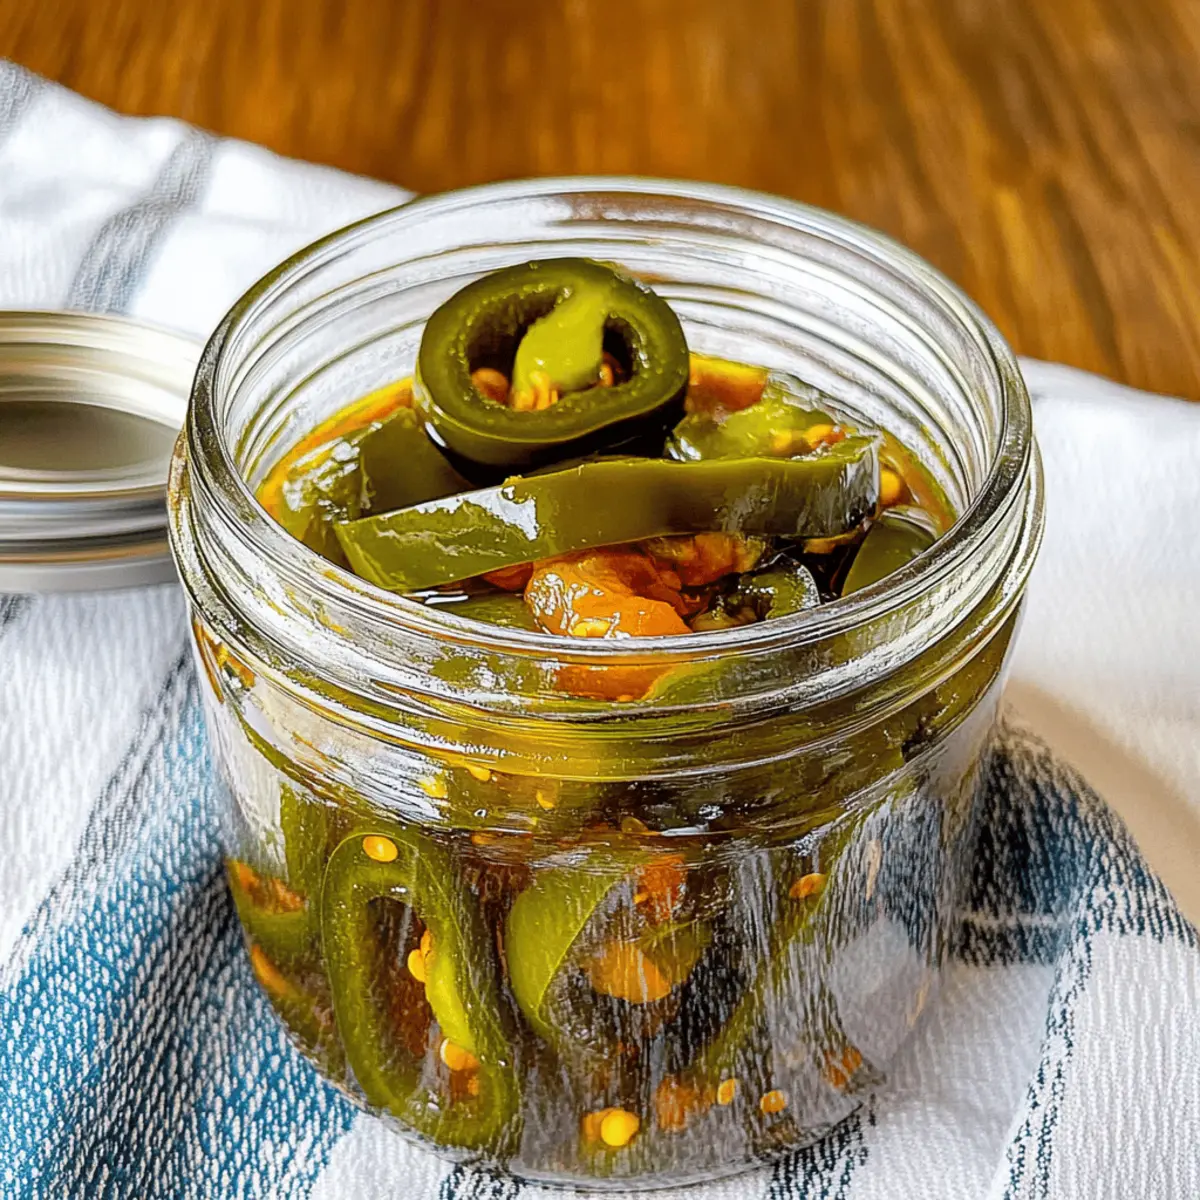
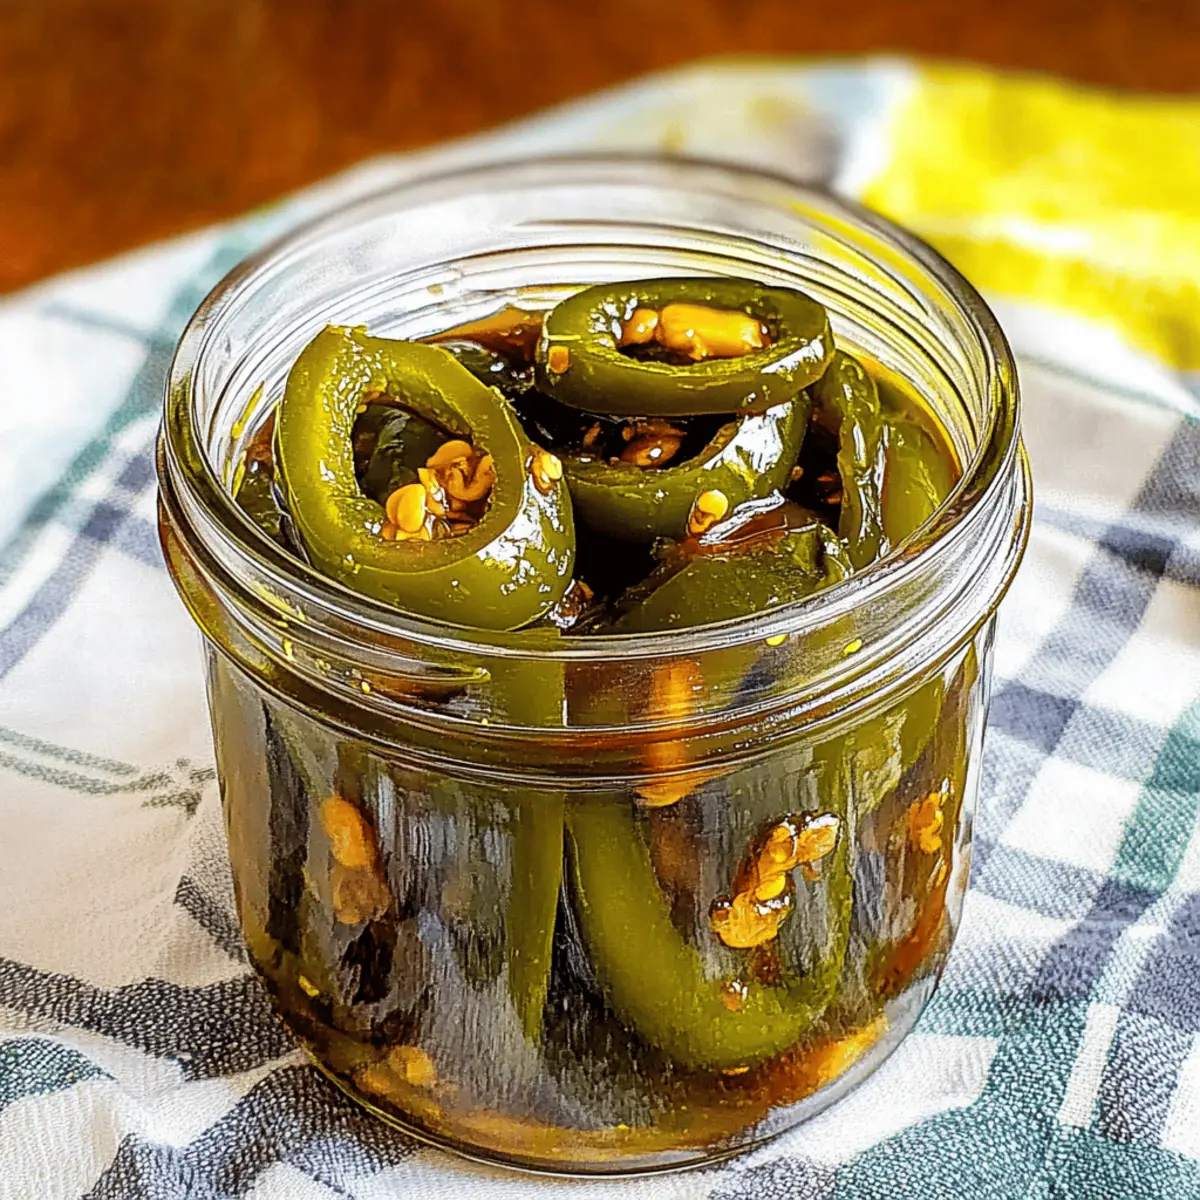
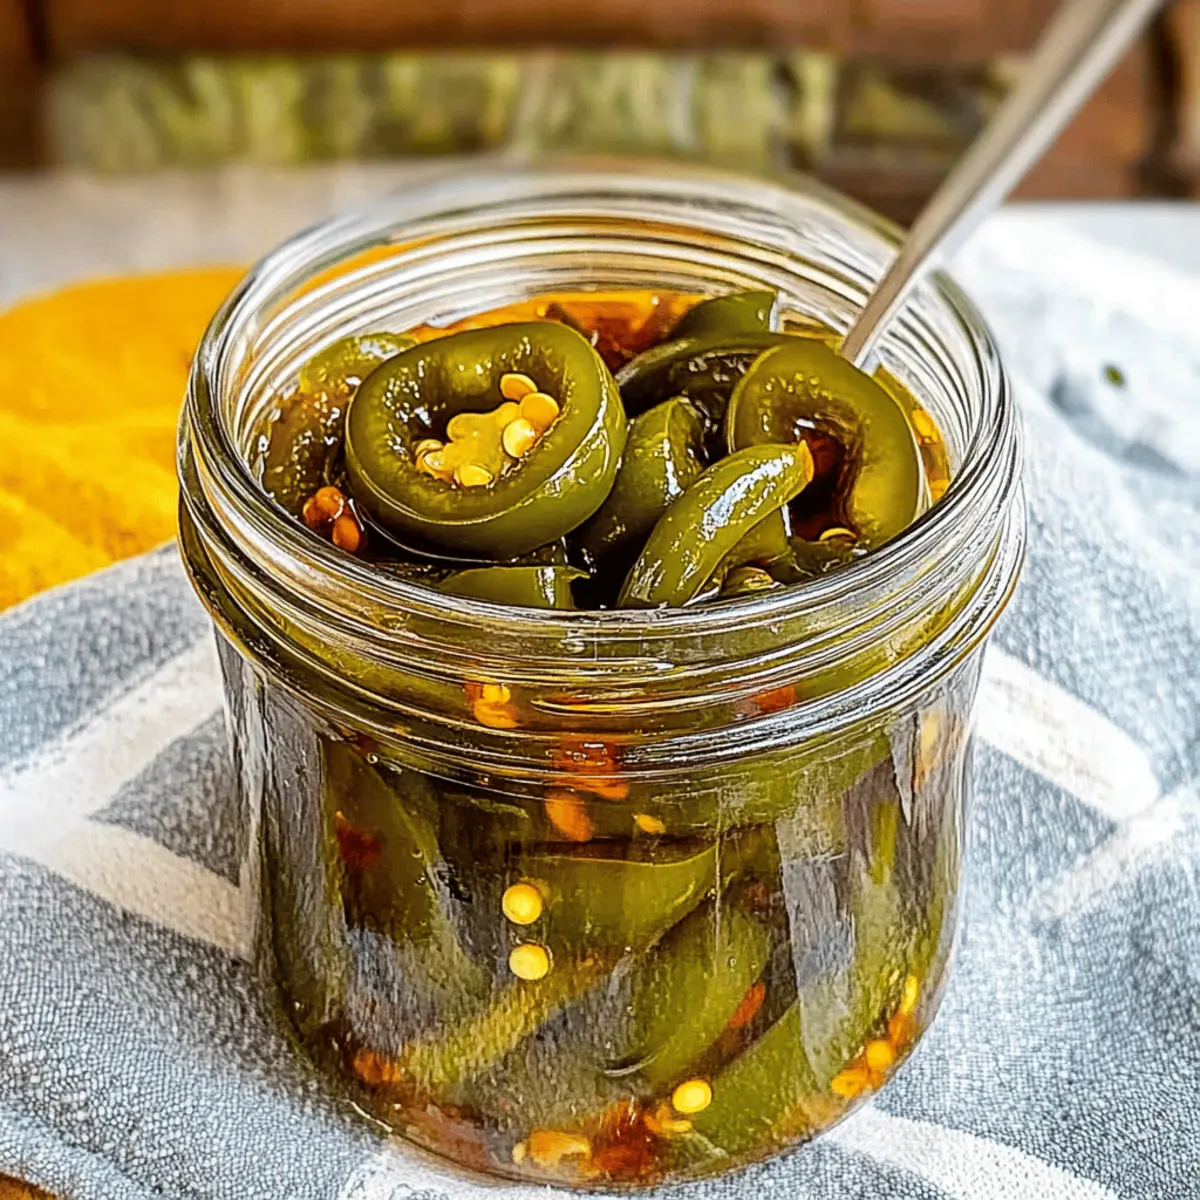
Sweet and Spicy Candied Jalapenos That Elevate Every Bite

As I stood in my kitchen, the aroma of cooking sugar and spices filled the air, instantly transporting me to a bustling farm stand in the heart of summer harvest. This is the magic of making homemade candied jalapenos, affectionately known as cowboy candy. With just a handful of ingredients, these sweet and spicy preserved peppers are quick to prepare and offer a delightful way to elevate your meals or snacks. Imagine adding bold, zesty hints to your favorite cornbread or impressing guests with a unique garnish for cocktails. Not only will this recipe transform your jalapeno surplus into something extraordinary, but it also packs a punch of flavor that’s sure to surprise. Curious about how to create this delightful treat? Let’s dive into the delicious world of cowboy candy!

Why Are Candied Jalapenos a Must-Try?

Simplicity at Its Best: Crafting these candied jalapenos is a breeze, requiring minimal prep and just a few pantry staples.

Flavor Explosion: The perfect balance of sweetness and heat provides a taste sensation that enhances everything from burgers to ice cream.

Versatile Treat: Use them in a variety of dishes, whether as a topping, snack, or cocktail garnish, making them a true crowd-pleaser.

Quick Prep Time: Ready in under an hour, this recipe is a fantastic way to utilize those fresh peppers from your garden or farmer’s market.

Sweet & Spicy Balance: The unique mix of spices allows you to customize your heat level, ensuring everyone can enjoy your cowboy candy.

Dive into the deliciousness of candied jalapenos!

Candied Jalapenos Ingredients

For the Peppers
Jalapeno Peppers – About 10-12 average-sized peppers provide that perfect heat to balance out the sweetness.

For the Syrup
Sugar – The primary sweetener that contrasts the heat; feel free to substitute with honey for a different flavor profile.
Apple Cider Vinegar – Offers essential acidity to enhance the flavor and preserve the peppers; white vinegar works just as well if needed.
Chili Powder (optional) – Adds an extra kick of spice and depth; omit if you want a milder, sweeter version.
Turmeric Powder – Provides a beautiful color and subtle earthiness; consider using paprika for a similar effect without changing the taste.
Ground Ginger – Imparts a warm spice that rounds out the syrup; using fresh ginger can elevate the flavor even further.

Enjoy making these delightful candied jalapenos!

Step‑by‑Step Instructions for Sweet and Spicy Candied Jalapenos

Step 1: Slice the Jalapenos
Begin by washing about 10-12 average-sized jalapenos, then slice them into ¼-inch round pieces using a sharp knife. If you prefer a milder flavor, carefully remove the seeds with a spoon or knife. The vibrant green color of the pepper slices should stand out beautifully, signaling they are ready for the next step in making your candied jalapenos.

Step 2: Prepare the Syrup
In a medium-sized pot, combine 2 cups of sugar with 1 cup of apple cider vinegar and your chosen spices, such as chili powder and turmeric. Heat the mixture over medium-high stir until it comes to a rolling boil. After around 5 minutes, reduce the heat to low, allowing the syrup to simmer until the sugar fully dissolves, resulting in a glossy texture that clings to the spoon.

Step 3: Add the Jalapenos
Once the syrup has reached the perfect consistency, add the sliced jalapenos to the pot, stirring gently to ensure they are thoroughly coated in the bubbling syrup. Allow the jalapenos to simmer in the syrup for about 4 minutes, watching as they darken and become more tender, absorbing all that sweet and spicy goodness.

Step 4: Transfer to Jars
Using a slotted spoon, carefully transfer the candied jalapenos into sterilized glass jars, leaving a bit of space at the top. Pour the remaining syrup over the jalapenos until they are completely submerged, ensuring all flavors meld together. The jars should be filled to about ¼ inch from the top, setting you up for successful preservation of your delicious candied jalapenos.

Step 5: Seal and Store
Tightly seal the jars with lids, ensuring they are secure but not overly tightened. Place the jars in the refrigerator for immediate consumption, where the flavor will intensify over the next week. Alternatively, if you want to store them for longer, proceed to process the jars in a boiling water bath for 10 minutes, making sure the water covers the jars adequately for safe storage.

Make Ahead Options

These candied jalapenos are perfect for meal prep enthusiasts! You can slice the jalapenos and prepare the syrup up to 24 hours in advance to save time on busy days when you need a quick flavor boost. Simply follow the initial steps, then refrigerate the sliced jalapenos and syrup separately until you’re ready to finish the recipe. When you’re set to serve, just combine the jalapenos with the syrup and simmer for about 4 minutes before transferring them to jars. This way, you’ll maintain their vibrant color and delicious flavor, ensuring your cowboy candy is just as delightful as if freshly made.

Candied Jalapenos Variations & Substitutions

Feel free to get creative and adapt these candied jalapenos to your taste, adding an exciting twist to this delightful treat.

  • Heat Boost: Add Habaneros instead of jalapenos for a fiery kick that will tantalize spice lovers. Just handle with care, as habaneros pack a punch!

  • Sweet Alternative: Use Honey in place of sugar for a natural sweetness that offers a distinct flavor profile while still balancing the heat perfectly.

  • Vinegar Swap: Replace Apple Cider Vinegar with White Vinegar for a more neutral tang, ideal if you prefer a less pronounced vinegar taste in your syrup.

  • Spice It Up: Incorporate Chili Flakes for an extra layer of heat and a delightful crunchy texture that contrasts beautifully with the tender jalapenos.

  • Seasonal Twist: Add a touch of Cinnamon or Nutmeg to the syrup for a seasonal twist that enhances the sweetness while introducing warm, cozy flavors.

  • Garlic Infusion: Toss in some Minced Garlic to the syrup for a sweet and spicy kick, creating a unique flavor combination that’s bold and irresistible.

  • Citrus Zing: A splash of Lemon Juice brightens the sweetness, enhancing the overall flavor with a refreshing zing that’s perfect for summer dishes.

  • Smoky Flavor: Experiment with Smoked Paprika to bring a delightful smokiness that adds depth and complexity, making these jalapenos a hit at any gathering.

These variations are just the beginning—every twist opens a new door to flavor potential! Explore the possibilities and serve your candied jalapenos with anything from burgers to cheese platters for an unforgettable snack or topping. Enjoy your flavor journey!

How to Store and Freeze Candied Jalapenos

Refrigerator: Store your candied jalapenos in sealed jars in the fridge for up to 3 months, ensuring they are completely submerged in syrup to maintain freshness.

Freezer: For extended storage, place the cooled candied jalapenos in airtight freezer bags or containers; they can be frozen for up to 1 year without losing their delightful flavor.

Thawing: When ready to enjoy, thaw the jalapenos in the refrigerator overnight, and they will retain their sweet and spicy goodness.

Reheating: Serve candied jalapenos cold or gently warm them in a microwave or stovetop, restoring their luscious texture while elevating any dish they adorn.

What to Serve with Sweet and Spicy Candied Jalapenos?

Imagine the burst of flavor that your meals will experience when paired with these vibrant, sweet-and-spicy treats.

  • Creamy Coleslaw: The cool, creamy texture of a coleslaw provides a perfect contrast to the heat of the jalapenos, making each bite a delightful balance.
  • Savory Cornbread: The subtle sweetness in cornbread pairs effortlessly with the candied jalapenos, enhancing both the flavors and the textures on your plate.
  • Grilled Burgers: Topping a juicy burger with these candied jalapenos introduces a zing that elevates the classic grill experience, delighting your taste buds.
  • Cheese Platter: Serve alongside a variety of cheeses, where the sweet-and-spicy kick complements rich creamy brie or sharp cheddar beautifully.
  • Tortilla Chips and Guacamole: Enjoy them as a unique twist to standard accompaniments; the jalapenos add excitement to each crunchy bite, enhancing the guacamole’s creaminess.
  • Cream Cheese Dip: The sweet and spicy jalapenos can create a sensational contrast when mixed into a creamy dip, perfect for entertaining!
  • Spicy Salsa: Dice some jalapenos and add them to your favorite salsa recipe to crank up the heat, bringing a vibrant taste to tacos or tortilla chips.
  • Grilled Chicken Tacos: Enhance your tacos with candied jalapenos, which add layers of flavor to the smoky grilled chicken, making each bite unforgettable.
  • Margaritas: For a festive drink pairing, the jalapenos can serve as a spicy garnish, adding a fun twist to traditional cocktails and making your gatherings lively.

Expert Tips for Candied Jalapenos

  • Wear Gloves: Always wear gloves when handling jalapenos to protect your skin from the spicy oils that can cause irritation.

  • Customize Heat Levels: If you prefer a milder flavor, be sure to remove the seeds and membranes from the jalapenos before slicing.

  • Let Them Rest: For the best flavor, allow the candied jalapenos to sit in the refrigerator for at least one week before enjoying. This wait time enhances the sweetness and heat.

  • Sterilization Matters: Ensure your jars are properly sterilized before canning to prevent contamination—this is key for preserving your candied jalapenos safely.

  • Experiment with Flavors: Don’t hesitate to get creative with spices! Adding cinnamon or cloves can give your cowboy candy a delightful twist.

Sweet and Spicy Candied Jalapenos (Cowboy Candy) Recipe FAQs

What’s the best way to select ripe jalapenos?
Absolutely! Look for jalapeno peppers that are firm and glossy. The skins should be smooth, with a vibrant green color. Avoid any that have dark spots or wrinkles, as they might be overripe. Fresh jalapenos will have a slight sheen, indicating their juiciness and flavor.

How long can I store candied jalapenos in the refrigerator?
You can store your candied jalapenos in the refrigerator for up to 3 months. Just ensure they are kept in sealed jars and submerged in syrup. This helps maintain their crispness and the flavors blend together beautifully as they sit!

Can I freeze my candied jalapenos? How?
Very! To freeze your candied jalapeños, first allow them to cool completely. Then, pack them into airtight freezer bags or containers, ensuring to cover them with syrup for optimal flavor preservation. They can be stored in the freezer for up to 1 year. When ready to enjoy, simply thaw them in the refrigerator overnight.

What should I do if my candied jalapenos are too spicy?
If you find your candied jalapenos too spicy, consider using fewer seeds, or choose a mild pepper like banana peppers next time. To tone down the heat of your current batch, mix them with a bit more sugar in the syrup, or serve them alongside cream cheese or sour cream to balance the spice in future recipes.

Are candied jalapenos safe for pets?
No, candied jalapenos are not safe for pets, especially dogs. The sugars and spices can upset their stomachs. It’s best to enjoy these delightful treats yourself and keep them out of reach from your furry friends.

How should I prepare jars for canning candied jalapenos?
To ensure proper canning, start by sterilizing your jars in boiling water for about 10 minutes. After that, let them air dry completely before filling with the jalapenos and syrup. While filling the jars, leave about ¼ inch headspace at the top. Finally, seal them tightly and process in a boiling water bath for 10 minutes for safe, long-term storage.

Candied Jalapenos

Sweet and Spicy Candied Jalapenos That Elevate Every Bite

These candied jalapenos offer a delightful sweet and spicy punch, perfect for enhancing your meals and snacks.
Prep Time 15 minutes
Cook Time 30 minutes
Resting Time 7 minutes
Total Time 1 hour
Servings: 12 jalapenos
Course: Appetizer
Cuisine: American
Calories: 30

Ingredients
  

For the Peppers
  • 10-12 pieces Jalapeno Peppers average-sized
For the Syrup
  • 2 cups Sugar can substitute with honey
  • 1 cup Apple Cider Vinegar white vinegar can be used
  • 1 teaspoon Chili Powder optional for extra spice
  • 1 teaspoon Turmeric Powder or use paprika
  • 1 teaspoon Ground Ginger fresh ginger can be used for added flavor

Equipment

  • sharp knife
  • medium-sized pot
  • slotted spoon
  • sterilized glass jars

Method
 

Preparation Steps
  1. Begin by washing about 10-12 average-sized jalapenos, then slice them into ¼-inch round pieces.
  2. In a medium-sized pot, combine 2 cups of sugar with 1 cup of apple cider vinegar and your chosen spices. Heat over medium-high until it boils, then reduce to low and simmer until sugar dissolves.
  3. Add the sliced jalapenos to the pot, stirring gently until they are coated in the syrup. Simmer for about 4 minutes until tender.
  4. Transfer the jalapenos into sterilized jars, pouring the syrup over to submerge them. Fill to about ¼ inch from the top.
  5. Seal the jars securely and refrigerate for immediate consumption or process in a boiling water bath for longer storage.

Nutrition

Serving: 1jalapenoCalories: 30kcalCarbohydrates: 8gSodium: 5mgPotassium: 50mgSugar: 7gVitamin A: 2IUVitamin C: 10mgIron: 1mg

Notes

Always wear gloves when handling jalapenos. Let them sit in the refrigerator for at least a week to enhance flavors.

Tried this recipe?

Let us know how it was!

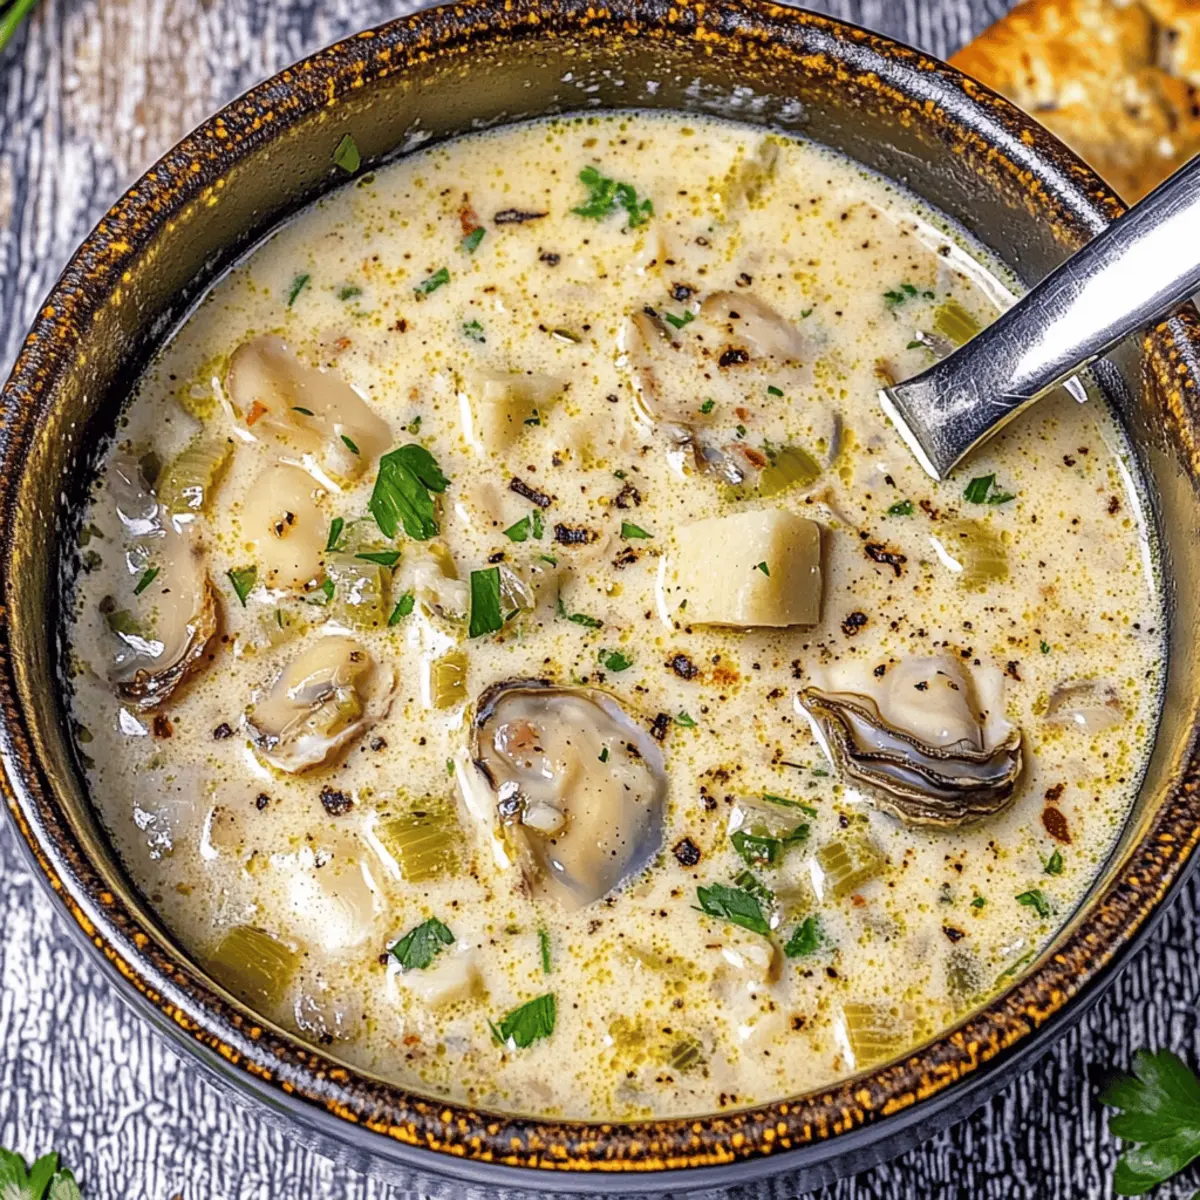
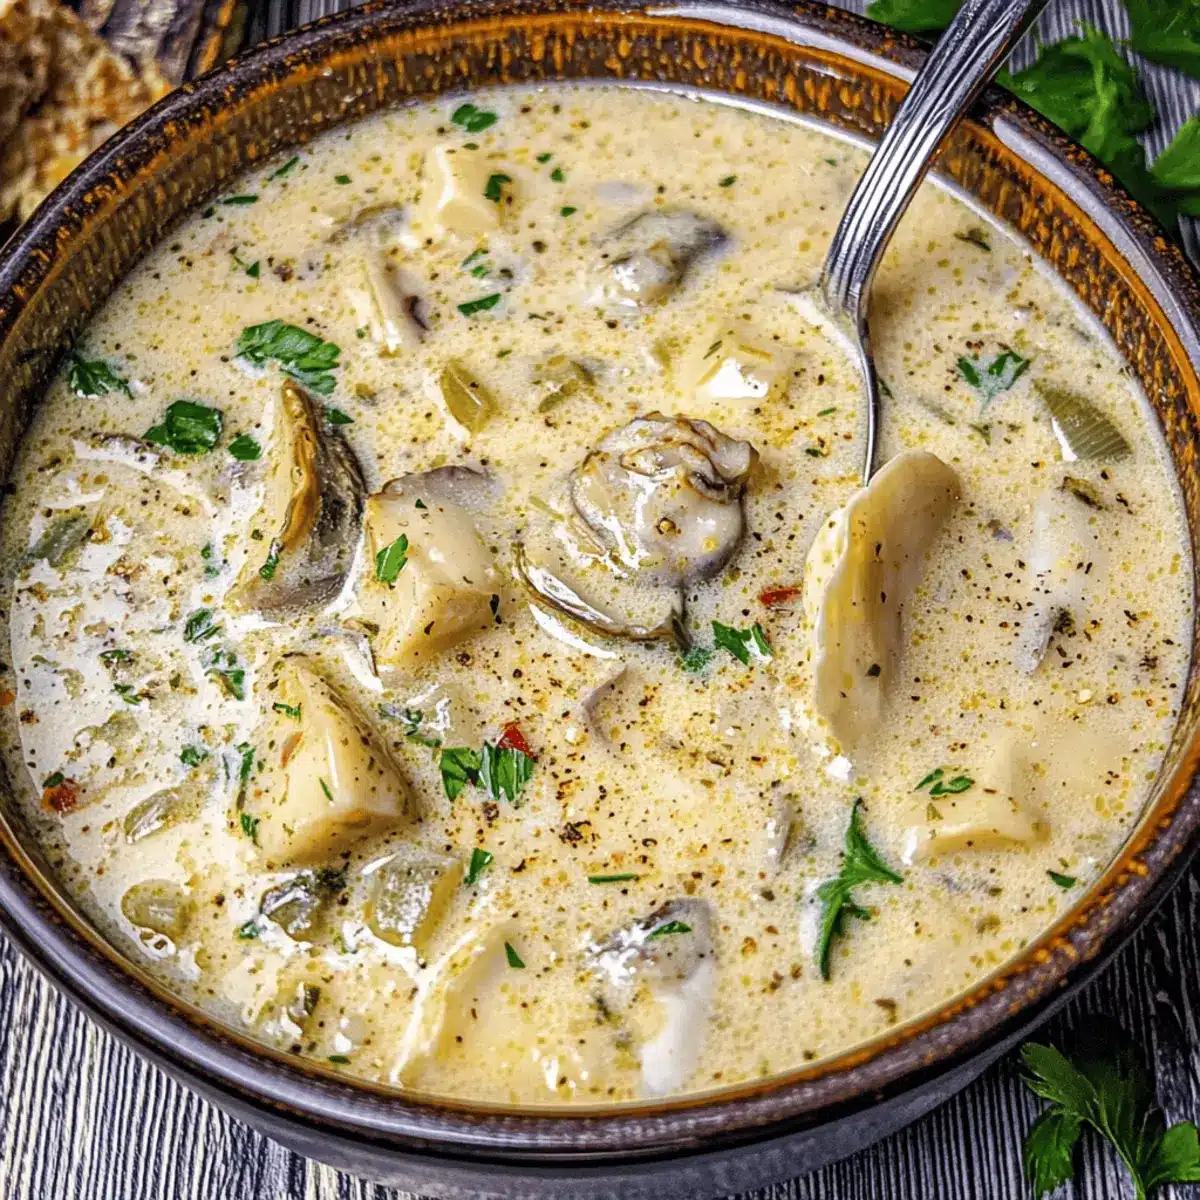
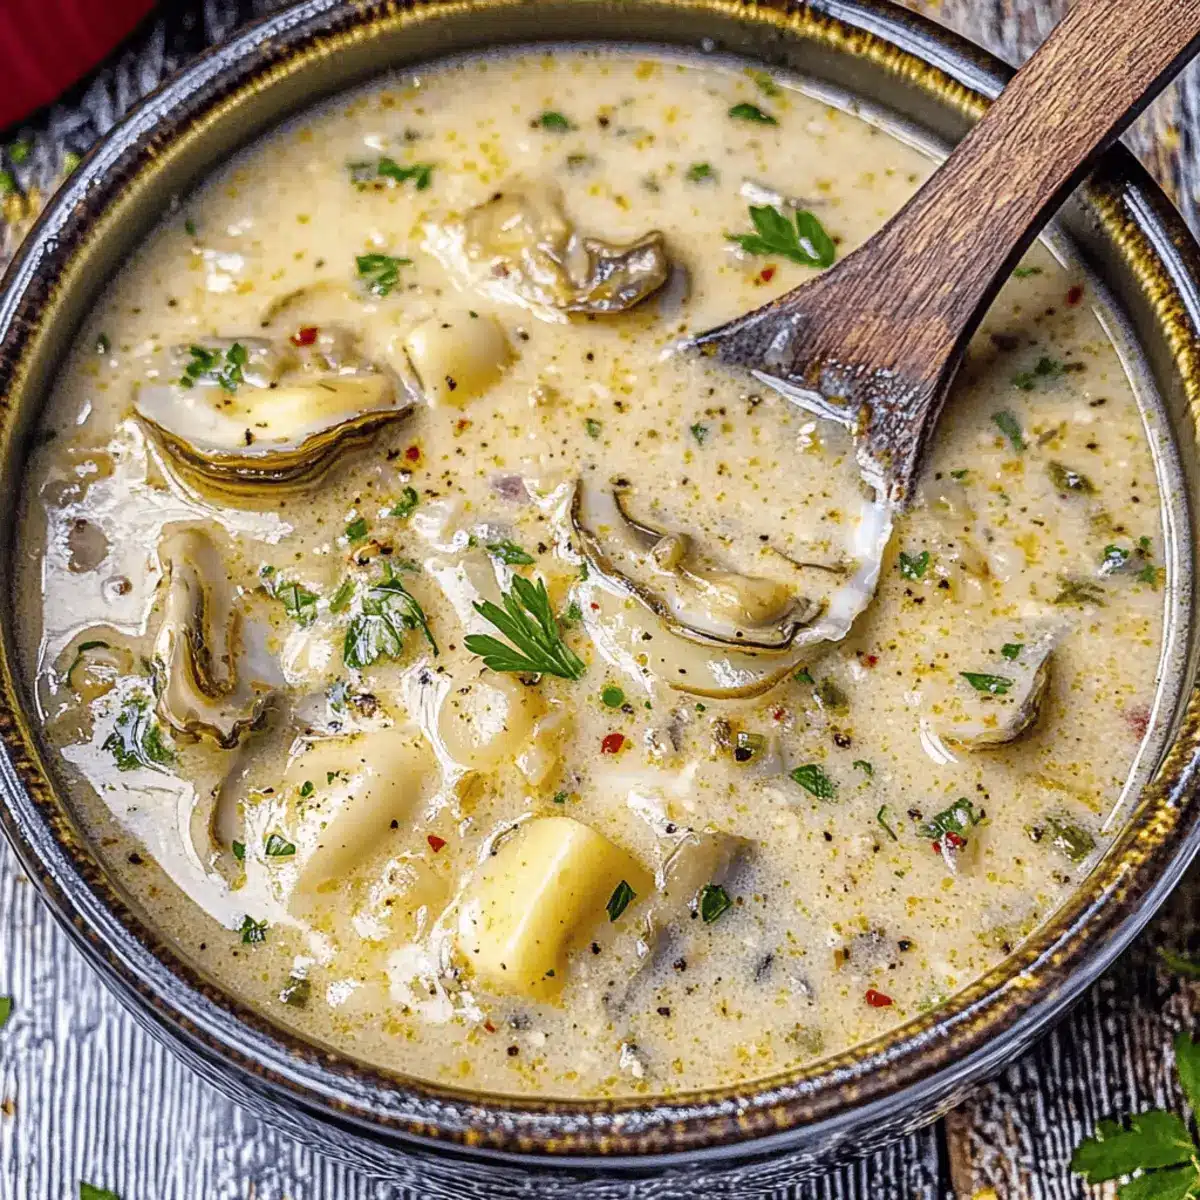
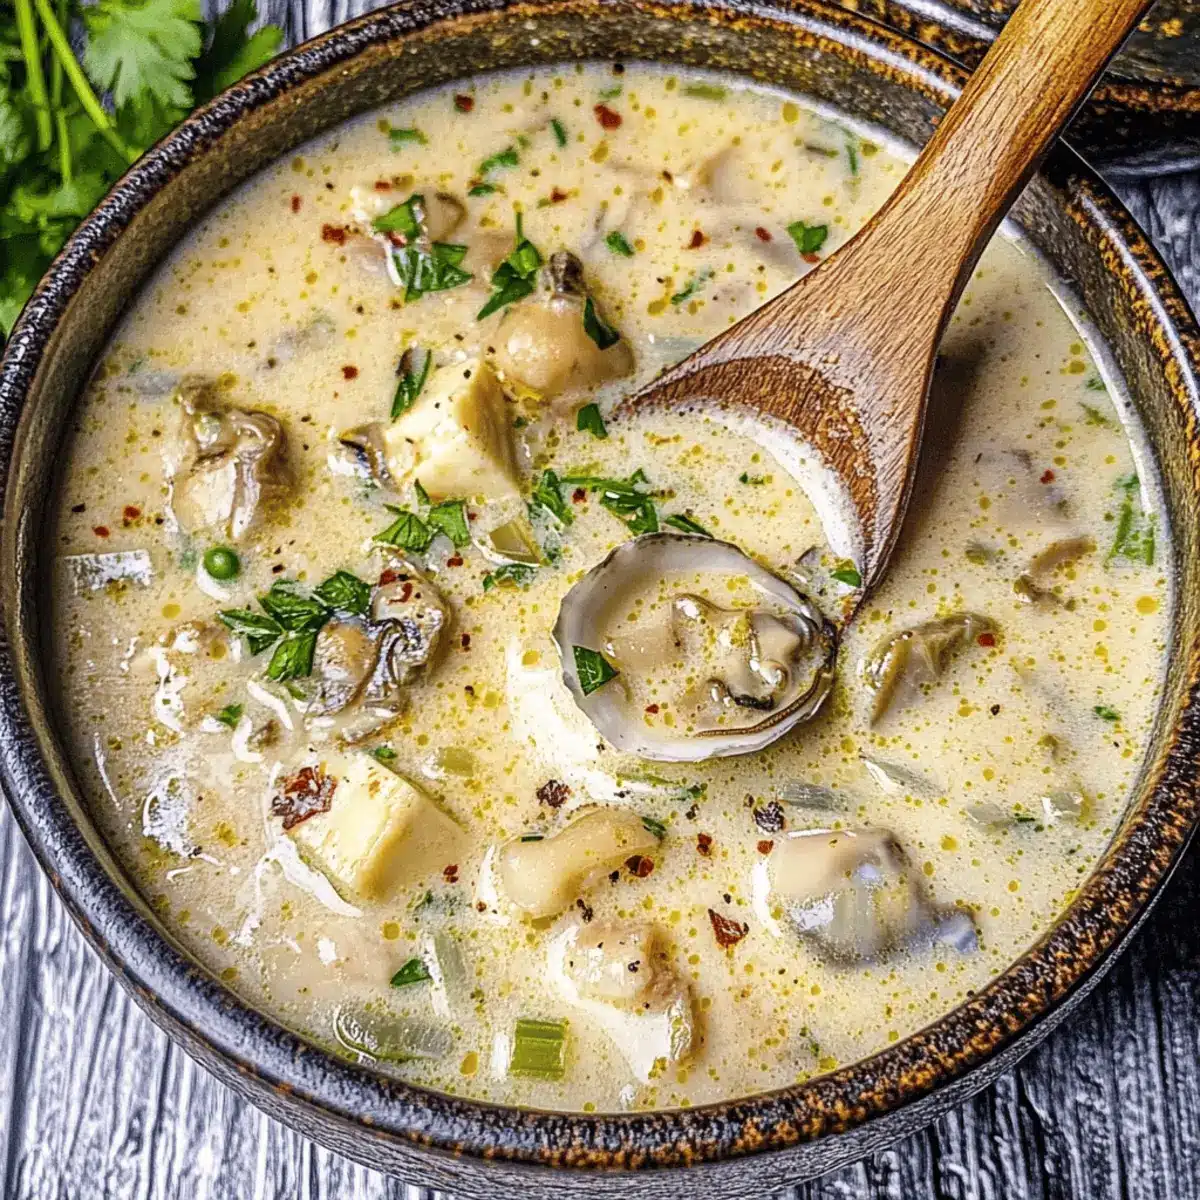
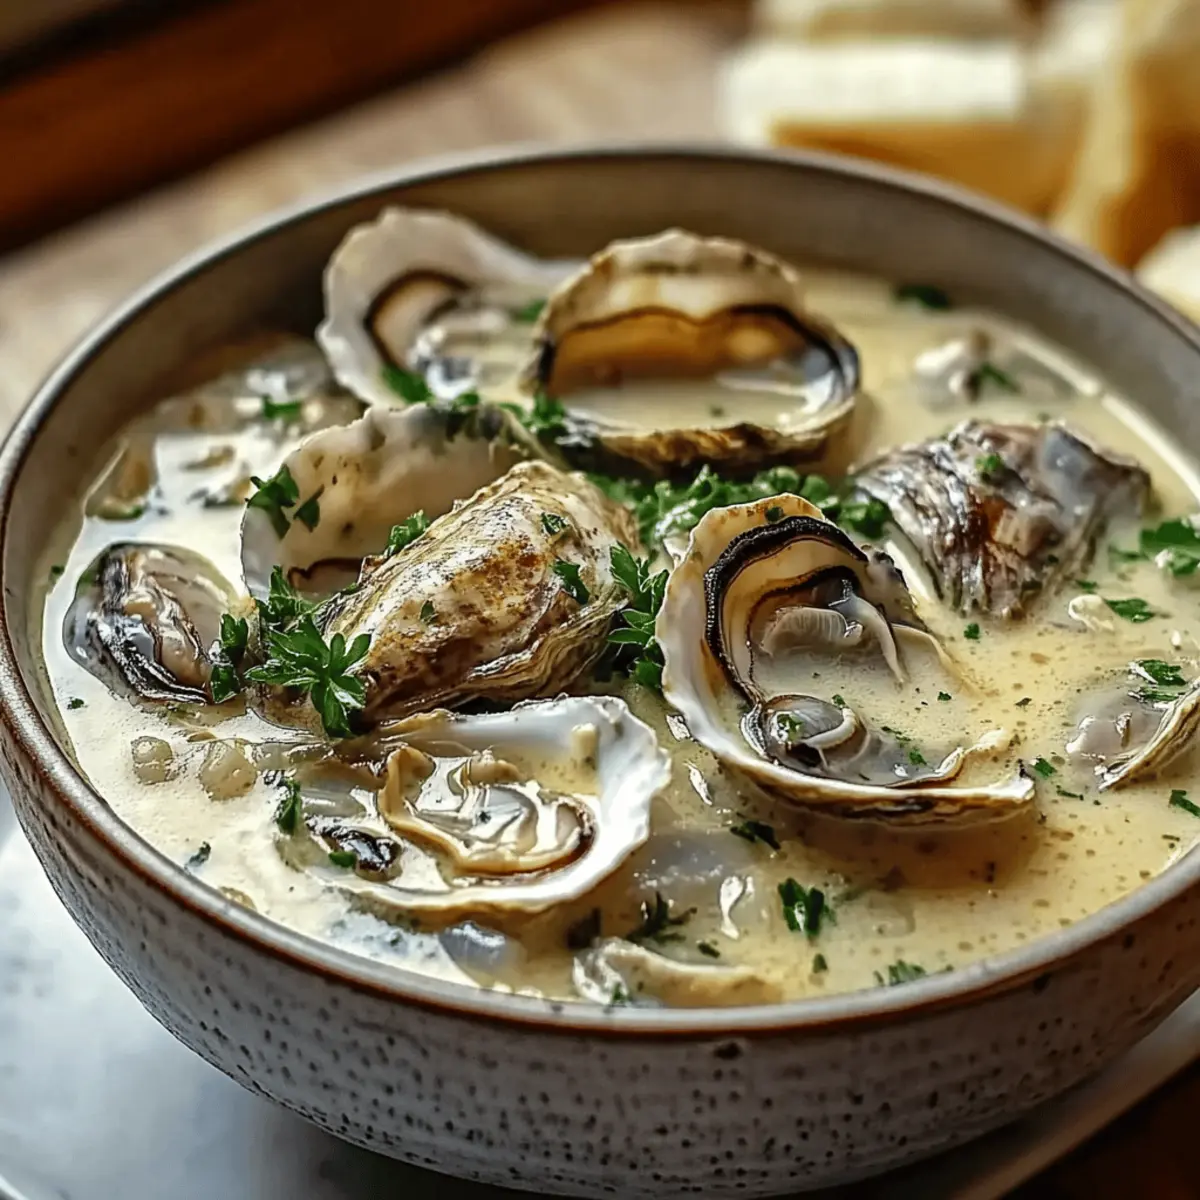
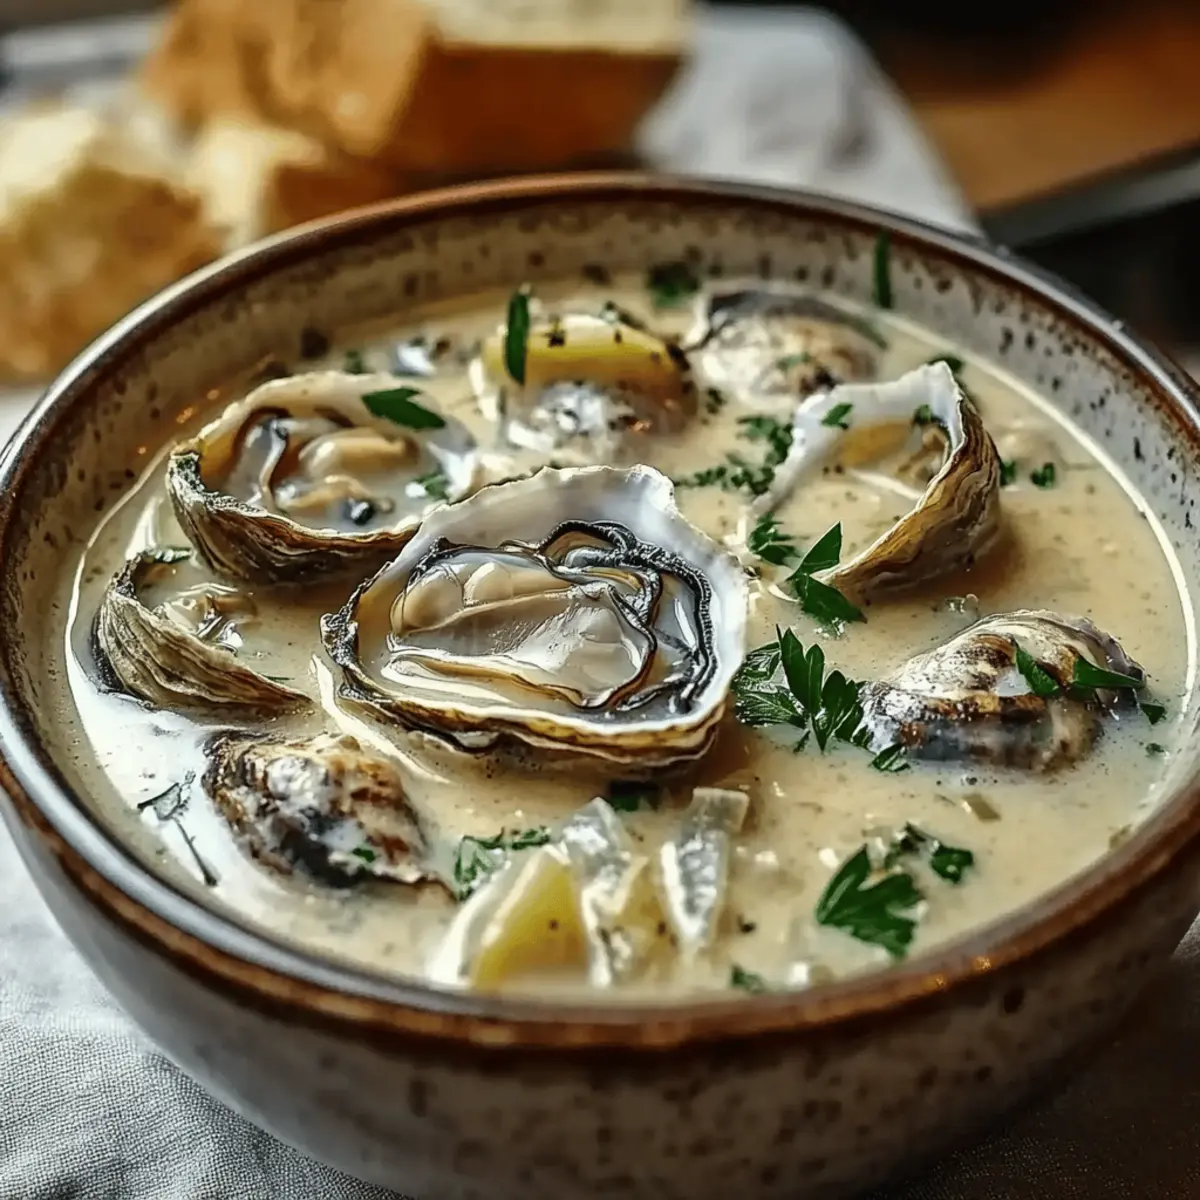
Hearty Oyster Stew Recipe with a Spicy Cajun Twist

The moment I first tasted a bowl of New Orleans-style oyster stew, I was instantly transported to a cozy café, where the scent of Cajun spices filled the air, and laughter mingled with the soft hum of jazz. This Rustic New Orleans Oyster Stew Recipe is more than just a dish; it’s a warm embrace in a bowl, brimming with plump oysters swimming in a rich, creamy roux. Not only is this stew a crowd-pleaser for chilly evenings, but it also brings a comforting familiarity that makes it perfect for festive gatherings. With a few simple ingredients and a dash of spice, you can whip up a luscious stew that showcases the best of Cajun flavors. Are you ready to dive into the heart of this Southern tradition with me?

What makes this oyster stew so special?

Rich, Spicy Comfort: Experience the delightful warmth of spices that envelops each spoonful, thanks to the unique Cajun seasonings used in this stew.

Simple Yet Flavorful: With just a handful of ingredients like butter, roux, and fresh oysters, you can create a dish that feels like a culinary masterpiece.

Crowd-Pleasing Delight: Perfect for gatherings, this stew is a guaranteed hit with friends and family, providing comfort and satisfaction on chilly nights.

Versatile Options: Not in the mood for oysters? Try swapping in smoked oysters or even add potatoes for a chowder twist!

Get ready to explore the comforting flavors of Savory Turkey Patties with Herbs or enjoy it alongside some Mango Coconut Pudding for dessert. This oyster stew is bound to add warmth and excitement to your meals!

Oyster Stew Recipe Ingredients

For the Roux
Butter – Adds richness and forms the roux; plant-based butter can be used for a vegan option.
Flour – Provides thickening as part of the roux.

For the Stew
Onion – Adds sweetness and depth to the flavor profile.
Bell Pepper – Introduces freshness; jalapeño peppers can be used for extra spice.
Celery – Contributes crunchy texture and subtle earthy flavor.
Cajun Seasonings – Adds a spicy kick to the stew; adjust according to your taste for this oyster stew recipe.
Milk – Creates a creamy base; substitute with oat or almond milk for a dairy-free option.
Oyster Liquor – Enhances the seafood flavor; use the liquid from shucked oysters.
Salt and Pepper – Basic seasoning; adjust to your liking.
Parsley – Freshness and color to garnish the dish.
Green Onions – Mild onion flavor; can be swapped with chives if desired.
Garlic – Adds aromatic depth for a richer flavor.
Hot Sauce – Introduces heat; adjust according to your spice preference.
Oysters – The star ingredient; fresh shucked oysters are ideal, but canned can also be used.

Serving Suggestions
Optional Toppings – Garnish with extra parsley, butter, chili flakes, and serve with soda crackers or oyster crackers for added crunch.

Step‑by‑Step Instructions for Hearty Oyster Stew Recipe with a Spicy Cajun Twist

Step 1: Make the Roux
In a large pot, melt 4 tablespoons of butter over medium to medium-high heat until it foams. Gradually stir in 4 tablespoons of flour, whisking constantly for about 5 minutes until a blonde roux develops, which should appear smooth and slightly golden in color. This roux is the foundation of your oyster stew recipe, adding both flavor and thickness.

Step 2: Cook Vegetables
Add 1 cup of chopped onion, 1 cup of diced bell pepper (or jalapeño for more heat), and 1 cup of diced celery to the roux. Sauté the vegetables for 2 minutes, stirring frequently until they soften and become fragrant. This step enhances the aromatic base of the stew, bringing a tasty complexity to the dish.

Step 3: Add Dairy & Seasonings
Pour in 2 cups of milk and 1 cup of reserved oyster liquor, stirring well to combine. Then, add 1-2 tablespoons of Cajun seasonings, along with salt and pepper to taste. Cook the mixture for 3-4 minutes over medium heat, allowing it to thicken slightly and become creamy. This forms the delicious backdrop of your oyster stew recipe.

Step 4: Cook Oysters
Incorporate 2 cups of fresh shucked oysters into the pot, along with ¼ cup of chopped parsley, ¼ cup of sliced green onions, 2 minced garlic cloves, and 1-2 teaspoons of hot sauce. Bring the mixture to a gentle boil and cook for 3-4 minutes, watching for the edges of the oysters to curl, which signals they are perfectly cooked and tender.

Step 5: Serve
Remove the pot from heat and taste, adjusting seasoning as needed. Ladle the hearty oyster stew into bowls and garninsh with additional parsley and green onions if desired. Serve hot with soda crackers or oyster crackers on the side, allowing everyone to enjoy the warmth and comforting flavors of this delicious recipe.

Storage Tips for Oyster Stew Recipe

Fridge: Store any leftover oyster stew in an airtight container for up to 3 days to maintain freshness.

Reheating: Gently reheat the stew on the stovetop over low heat, stirring occasionally to keep the oysters tender and the creaminess intact.

Freezer: Avoid freezing this oyster stew recipe due to its dairy content, as it can change the texture upon thawing.

Serving Tips: If you’re planning to serve the stew again, consider adding fresh herbs or a splash of cream when reheating to revive its rich flavors.

Oyster Stew Recipe Variations

Feel free to explore and customize the oyster stew to your heart’s content, infusing it with flavors and textures that excite your taste buds!

  • Dairy-Free: Swap the milk for oat or almond milk to create a creamy, dairy-free version of this comforting dish.

  • Smoked Oysters: Substitute fresh oysters with canned smoked oysters for a wonderful depth of flavor that beautifully complements the Cajun spices.

  • Spicy Kick: If you love heat, add sliced jalapeños or extra hot sauce to the stew for a lively and vibrant kick that warms the soul.

  • Chowder Twist: Mix in diced potatoes or corn to give your stew a hearty, chowder-like texture that’s sure to please.

  • Herb Blend: For a fragrant twist, try adding fresh thyme, dill, or even tarragon. These herbs will elevate the dish and add a refreshing taste.

  • Vegetarian Option: Create a vegetarian stew by omitting oysters entirely and incorporating extra vegetables like mushrooms for umami, or chickpeas for protein.

  • Flavor Boost: Drizzle a bit of lemon juice or sprinkle citrus zest over the finished stew for bright, zesty notes that enliven every bite.

  • Serving Choice: Instead of traditional oyster crackers, try serving with crusty baguette slices or garlic bread for a deliciously different experience.

Pair the stew with refreshing Mango Coconut Pudding for a sweet finish, or complement it with hearty Hobo Casserole for a memorable meal!

Make Ahead Options

These flavorful Oyster Stew Recipe components are perfect for meal prep, saving you valuable time on busy weeknights! You can make the roux (butter and flour mixture) up to 24 hours in advance and store it in an airtight container in the refrigerator. Additionally, the vegetables (onion, bell pepper, and celery) can be chopped ahead of time and refrigerated for up to 3 days. When you’re ready to enjoy the stew, simply reheat the roux and sauté the prepped vegetables before adding the milk and oyster liquor. Be sure to stir gently to maintain the creamy texture of your stew. Just like freshly made, this make-ahead oyster stew will still be just as delicious, filling your home with the incredible aromas of Cajun spices!

Expert Tips for the Best Oyster Stew

  • Perfect Roux: Stir constantly: A well-made roux is essential; stirring constantly prevents it from burning and ensures a smooth base for your oyster stew recipe.

  • Customize Spice: Adjust TJaziness: Personalize the heat by varying the Cajun seasonings and hot sauce; start with a little and add more until it’s just right for your palate.

  • Gentle Cooking: Don’t overcook oysters: Adding them at the right time ensures tenderness. Cook just until the edges curl—overcooking makes them tough.

  • Use Fresh Ingredients: Quality matters: Fresh shucked oysters shine in this oyster stew recipe. If using canned, opt for smoked for an extra flavor boost.

  • Go Creamy or Dairy-Free: Milk alternatives are great: If dairy isn’t your preference, oat or almond milk can create a deliciously creamy stew without sacrificing flavor.

  • Add Finishing Touches: Garnish for texture: Enhance your stew with extra parsley or chili flakes for visual appeal and added flavor—don’t skip that crunchy cracker for dipping!

What to Serve with Rustic New Orleans Oyster Stew

The comforting bowl of oyster stew is just the beginning of your culinary adventure; let’s elevate your meal with delicious pairings that enhance every bite.

  • Crusty French Bread: Perfect for dipping, this bread’s crispy crust and soft interior soak up the flavorful broth beautifully.
  • Creamy Coleslaw: The cool crunch of coleslaw balances the richness of the stew, adding a refreshing element to your meal. A hint of tang from the dressing will harmonize perfectly with the spice of the stew.
  • Spicy Cornbread Muffins: These sweet and spicy muffins are the ideal accompaniment, providing sweetness that complements the stew’s warmth while also adding texture.
  • Garlic Butter Roasted Vegetables: Roasted seasonal vegetables drizzled with garlic butter bring a delicious, caramelized flavor that pairs wonderfully with the creamy broth.
  • Crispy Potato Chips: Serve these on the side for a salty crunch that contrasts with the soft texture of the stew and brings out the seafood flavor beautifully.
  • Chilled White Wine: A glass of chilled Sauvignon Blanc or a lightly oaked Chardonnay can accentuate the briny flavors of the oysters while balancing the richness of the dish.
  • Lemon Sorbet: For dessert, consider a refreshing lemon sorbet that cleanses the palate after the richness of the stew, leaving your guests with a sweet and zesty finish.
  • Herb-Infused Rice: Lightly seasoned rice with herbs can be a wonderful base to soak up the stew, offering a heartier addition to your meal that enhances the dish’s overall flair.
  • Classic Caesar Salad: Crisp romaine tossed with creamy dressing and crunchy croutons adds a delightful crunch and tang to your dining experience.

Let these delightful suggestions inspire you to create a harmonious meal that celebrates the heartwarming essence of your oyster stew recipe!

Oyster Stew Recipe FAQs

How do I choose the best oysters for this recipe?
Absolutely! When selecting oysters, look for fresh ones that smell like the sea— that’s a good sign! Avoid oysters with dark spots or a strong, unpleasant odor. Fresh shucked oysters are ideal, but canned oysters can be used for convenience. Just remember, using quality ingredients enhances your oyster stew recipe tremendously!

How should I store leftover oyster stew?
Very good question! Store any leftover oyster stew in an airtight container in the refrigerator for up to 3 days. Be sure to gently reheat it on the stovetop over low heat to maintain the stew’s velvety texture. Avoid high heat to prevent the oysters from becoming tough.

Can I freeze oyster stew?
Generally, it’s best to avoid freezing this oyster stew recipe. The dairy content can alter the texture when thawed, leading to a grainy consistency. If you have to freeze it, consider omitting the milk, and you can add it back in after reheating.

What if my roux doesn’t turn out right?
No worries! If your roux becomes too dark or burns, you can start over. Just melt fresh butter in a new pot, slowly add flour while whisking constantly, and cook until it reaches that beautiful blonde color—this will ensure a smooth base for your stew. Remember, patience is key; take your time!

Can I adjust the spiciness of my oyster stew?
Absolutely! You can customize the heat by adjusting the amount of Cajun seasoning and hot sauce to fit your taste. Start with a small quantity of seasoning, and gradually increase it until you reach your desired spice level. The more the merrier when it comes to flavor!

Is there a dairy-free option for this oyster stew?
Definitely! For a dairy-free version, use oat or almond milk instead of regular milk in your oyster stew recipe. The plant-based alternatives still provide a creamy texture while catering to dietary preferences. Enjoy the same comforting flavors without compromising on taste!

Oyster Stew Recipe

Hearty Oyster Stew Recipe with a Spicy Cajun Twist

Enjoy this comforting Oyster Stew Recipe infused with rich Cajun flavors, perfect for cozy gatherings or chilly evenings.
Prep Time 15 minutes
Cook Time 30 minutes
Total Time 45 minutes
Servings: 4 bowls
Course: Dinner
Cuisine: Cajun, Southern
Calories: 350

Ingredients
  

For the Roux
  • 4 tablespoons Butter Can use plant-based butter for a vegan option.
  • 4 tablespoons Flour
For the Stew
  • 1 cup Onion Chopped.
  • 1 cup Bell Pepper Diced; jalapeño can be used for extra spice.
  • 1 cup Celery Diced.
  • 1-2 tablespoons Cajun Seasonings Adjust according to taste.
  • 2 cups Milk Oat or almond milk can be substituted.
  • 1 cup Oyster Liquor Liquid from shucked oysters.
  • to taste Salt
  • to taste Pepper
  • ¼ cup Parsley Chopped; for garnish.
  • ¼ cup Green Onions Sliced; can swap with chives.
  • 2 cloves Garlic Minced.
  • 1-2 teaspoons Hot Sauce Adjust according to spice preference.
  • 2 cups Oysters Fresh shucked oysters preferred.
Optional Toppings
  • Extra parsley For garnish.
  • Butter For additional richness.
  • Chili flakes For added heat.
  • Soda crackers or oyster crackers For added crunch.

Equipment

  • large pot

Method
 

Step-by-Step Instructions
  1. In a large pot, melt 4 tablespoons of butter over medium to medium-high heat until it foams. Gradually stir in 4 tablespoons of flour, whisking constantly for about 5 minutes until a blonde roux develops, smooth and slightly golden in color.
  2. Add 1 cup of chopped onion, 1 cup of diced bell pepper, and 1 cup of diced celery to the roux. Sauté for 2 minutes until softened and fragrant.
  3. Pour in 2 cups of milk and 1 cup of reserved oyster liquor, stirring well. Add 1-2 tablespoons of Cajun seasonings, plus salt and pepper to taste. Cook for 3-4 minutes, allowing the mixture to thicken slightly.
  4. Incorporate 2 cups of fresh shucked oysters, ¼ cup of chopped parsley, ¼ cup of sliced green onions, 2 minced garlic cloves, and 1-2 teaspoons of hot sauce. Bring to a gentle boil and cook for 3-4 minutes until oysters are tender.
  5. Remove from heat, adjust seasoning as needed. Ladle into bowls and garnish with parsley and green onions. Serve hot with soda crackers or oyster crackers.

Nutrition

Serving: 1bowlCalories: 350kcalCarbohydrates: 30gProtein: 15gFat: 20gSaturated Fat: 10gPolyunsaturated Fat: 3gMonounsaturated Fat: 5gCholesterol: 40mgSodium: 800mgPotassium: 600mgFiber: 2gSugar: 2gVitamin A: 1000IUVitamin C: 8mgCalcium: 150mgIron: 3mg

Notes

Stir constantly while making the roux to prevent burning. Adjust spices to personal preference, and use fresh ingredients for the best flavor.

Tried this recipe?

Let us know how it was!

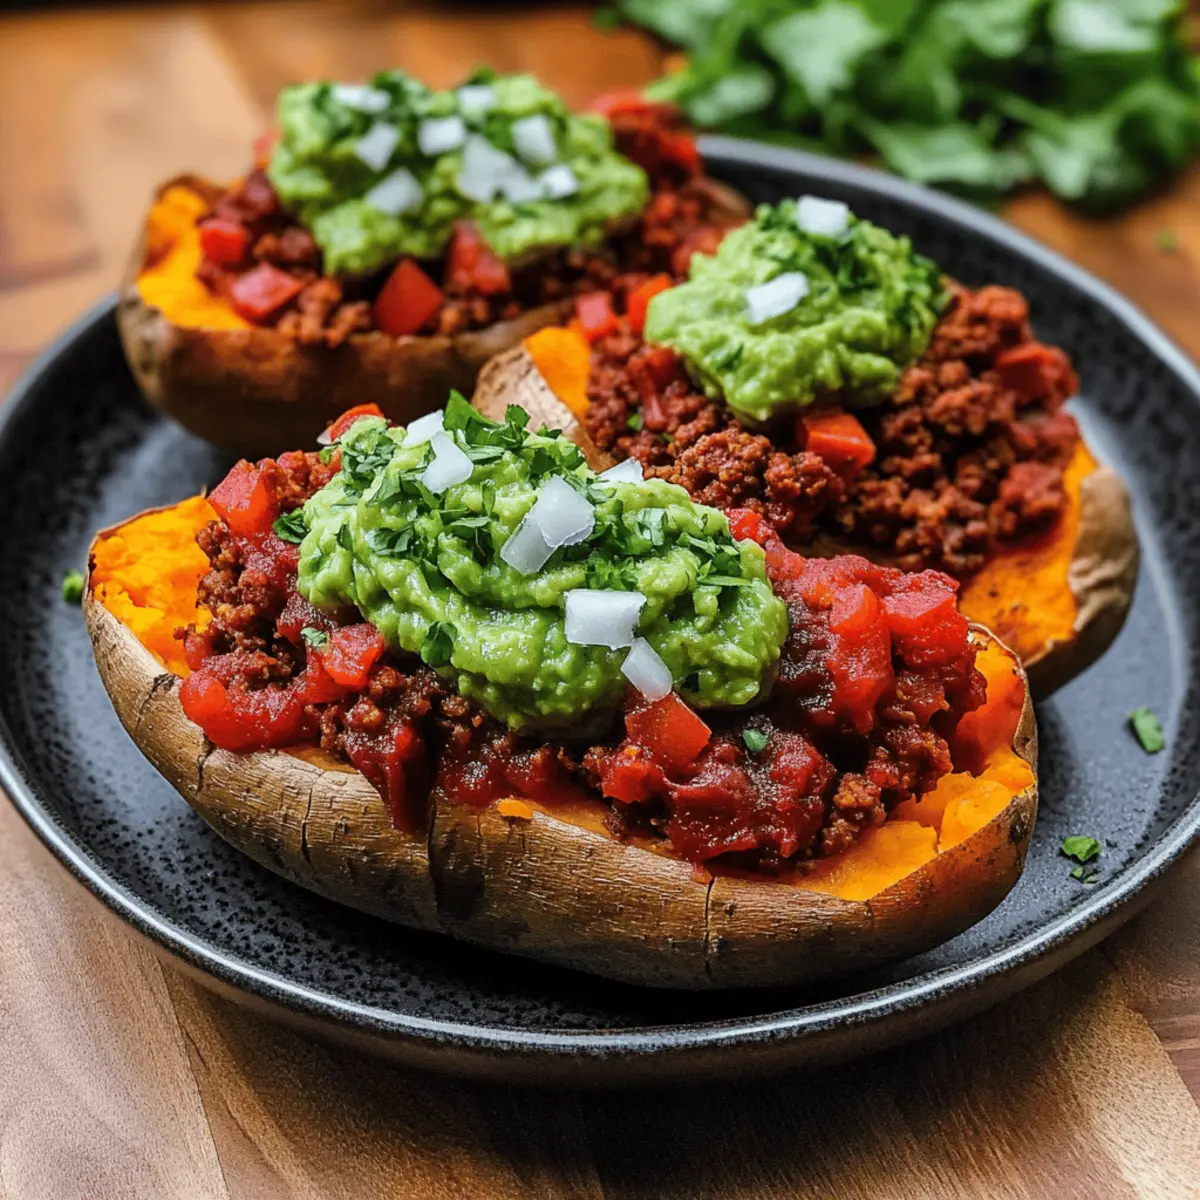
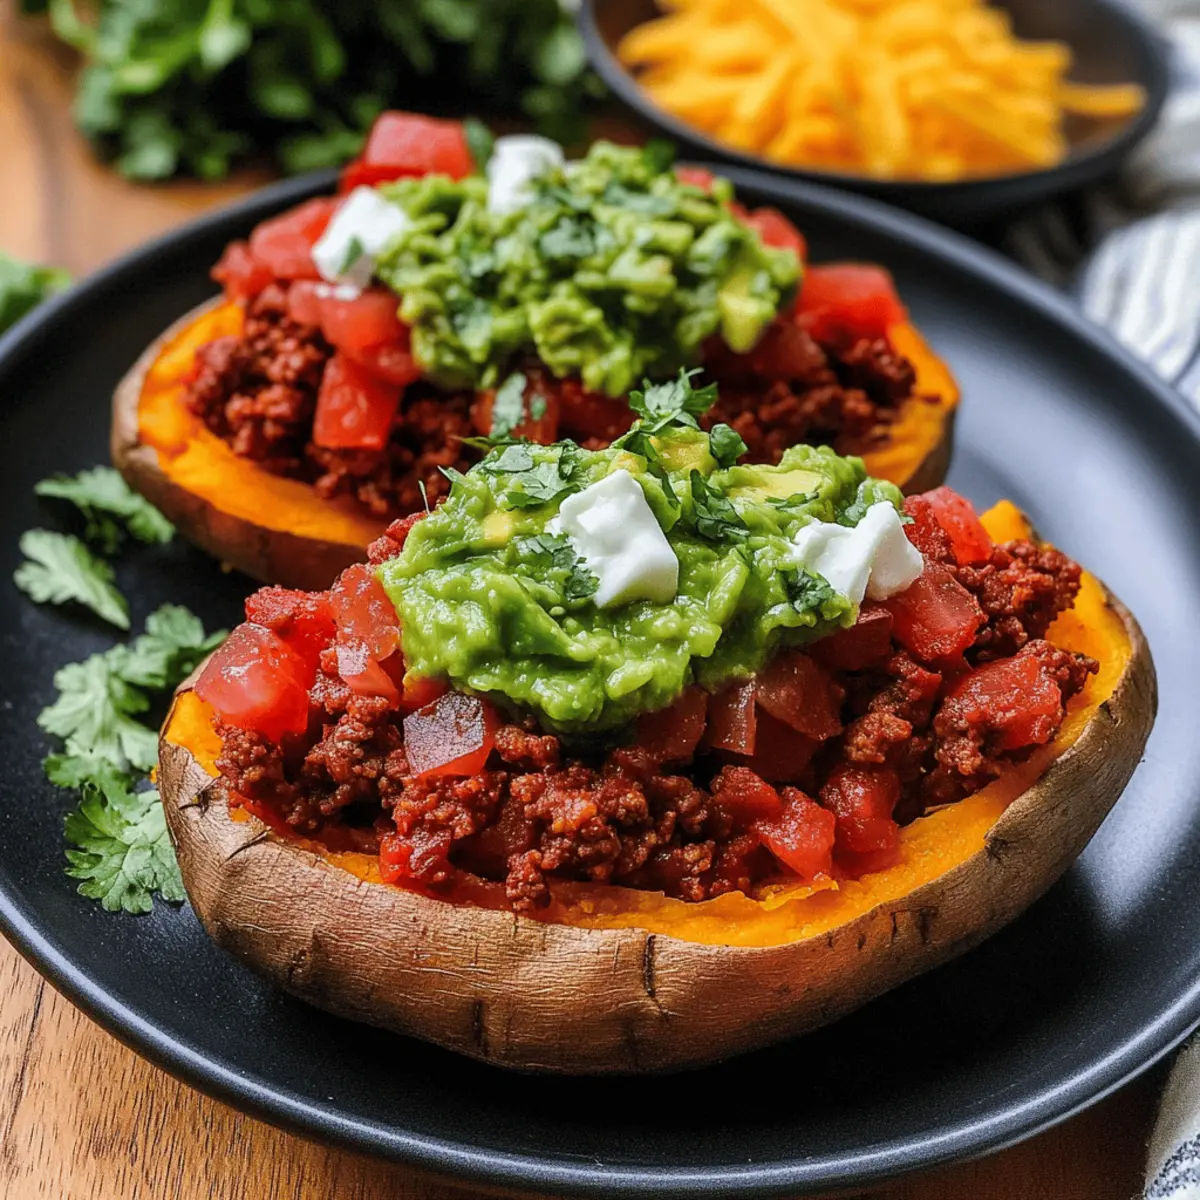
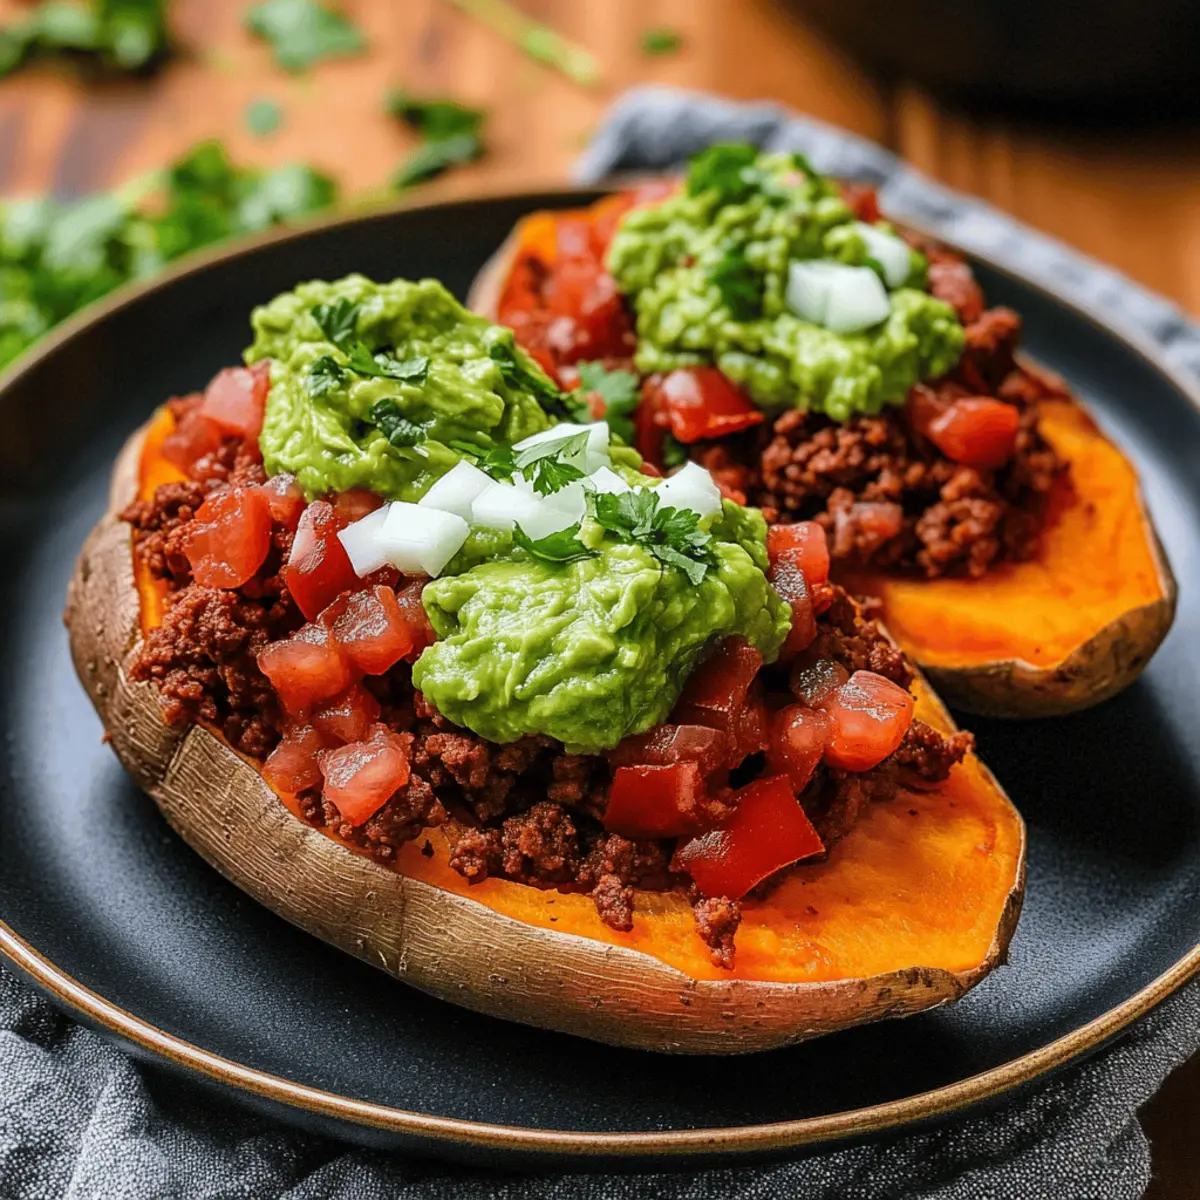
Taco Stuffed Sweet Potatoes for a Healthy Dinner Delight

As I lifted my fork to dive into dinner, a tantalizing aroma filled the kitchen, instantly transporting me to my favorite taco joint. But tonight, instead of a greasy meal, I was indulging in Taco Stuffed Sweet Potatoes, a vibrant and healthy twist on taco night. The combination of warm, roasted sweet potatoes cradling a savory beef filling is not only satisfying but also proves that nutritious meals can be delicious and fun. Perfect for whipping up on busy weeknights, this dish allows for endless customization with your choice of toppings—from zesty guacamole to creamy sour cream. It’s a guilt-free dinner that the whole family will love. Are you ready to fill your plate with goodness and flavor? Let’s get cooking!

Why Are Taco Stuffed Sweet Potatoes Amazing?

Healthful Twist: These Taco Stuffed Sweet Potatoes transform a classic dish into a nutritious powerhouse, featuring natural sweetness and ample vitamins.
Time-Saving Perfection: Ideal for busy weeknights, this recipe comes together quickly, allowing you to enjoy a homemade meal without hassle.
Flavor Explosion: With a delightful blend of spices, the savory filling complements the sweet potatoes beautifully for an unforgettable taste experience.
Customizable Delight: Top your stuffed potatoes with your favorite fixings—think guacamole, pico de gallo, or even jalapeños for an extra kick!
Family Favorite: This dish appeals to eaters of all ages, ensuring that everyone at the table will be asking for more, just like how they’d love the vibrant flavors in Buffalo Chicken Stuffed peppers!

Taco Stuffed Sweet Potatoes Ingredients

• Get ready to create this healthy and delicious dish!

For the Filling

  • Ground Beef – Provides rich protein to make the taco filling hearty and satisfying; feel free to substitute with ground turkey for a leaner option.
  • Onion – Adds depth and flavor to the filling; either white or red onions work wonderfully here.
  • Garlic – Freshly minced garlic boosts the aroma; for a quick option, garlic powder can be used.
  • Canned Fire Roasted Diced Tomatoes – Adds moisture and a smoky hint to the taco mixture; if you prefer a smoother texture, blend them up!
  • Chili Powder – Offers a warm kick that’s essential to taco flavor; adjust according to your spice preference.
  • Cumin – Deepens the flavor profile, bringing an earthy essence to the filling.
  • Paprika – Provides a mild sweetness and vibrant color; for extra heat, try smoked paprika!
  • Garlic Powder, Onion Powder, Salt, & Black Pepper – This blend of spices accentuates the savory filling perfectly.

For the Sweet Potatoes

  • Sweet Potatoes – The star of the dish, offering natural sweetness and fiber; use potatoes of similar size for even baking.
  • Olive Oil – Essential for roasting the sweet potatoes to a perfect golden brown; you can use avocado oil as a substitute for a different flavor.

Toppings

  • Guacamole – Adds creaminess and richness; homemade or store-bought works great!
  • Cheddar Cheese – Sprinkle some melted cheese on top for extra indulgence; opt for dairy-free cheese for a lighter version.
  • Pico de Gallo – A fresh and zesty topping that brightens the dish; feel free to make it from scratch!
  • Sour Cream – Complements the flavors beautifully; Greek yogurt is a great healthier substitute.

Now that you have all the ingredients for your Taco Stuffed Sweet Potatoes, let’s move on to crafting this delicious meal!

Step‑by‑Step Instructions for Taco Stuffed Sweet Potatoes

Step 1: Prep the Potatoes
Begin by washing and scrubbing the sweet potatoes thoroughly. Use a fork to poke holes all over each potato, which allows steam to escape during cooking. Next, rub them with olive oil and season generously with salt and pepper. This simple prep will ensure your Taco Stuffed Sweet Potatoes have a flavorful, crispy skin.

Step 2: Bake the Potatoes
Arrange the seasoned sweet potatoes on a parchment-lined baking pan. Preheat your oven to 425°F and bake the potatoes for 40-45 minutes. They are ready when they yield easily to a fork or knife, indicating that they are soft and tender. This step creates a deliciously sweet, fluffy base for your stuffing.

Step 3: Prepare the Filling
While the sweet potatoes bake, heat 1 tablespoon of olive oil in a skillet over medium heat. Sauté the minced garlic and diced onion until softened and fragrant, about 3-4 minutes. Then, add the ground beef to the skillet, cooking until it’s browned and crumbly. Stir in your spices and cook for an additional minute, allowing the flavors to develop.

Step 4: Add Tomatoes and Simmer
Once the beef is cooked, stir in the canned fire-roasted diced tomatoes and bring the mixture to a gentle simmer. Allow it to cook for 5-7 minutes, stirring occasionally, until most of the liquid is absorbed. This will create a seasoned taco filling that perfectly complements the sweet potatoes, making your Taco Stuffed Sweet Potatoes irresistible.

Step 5: Stuff the Potatoes
When the sweet potatoes are finished baking, remove them from the oven and let them cool slightly. Carefully cut each potato lengthwise, fluffing the insides gently with a fork. Using a spoon, fill each sweet potato generously with the savory taco mixture. This step not only makes them hearty but also showcases the delicious blend of flavors.

Step 6: Serve with Toppings
Finally, serve your Taco Stuffed Sweet Potatoes warm, topped with your favorite ingredients like guacamole, shredded cheddar cheese, pico de gallo, and a dollop of sour cream. Each vibrant topping enhances the dish’s flavor and appeal, making it a fun and customizable meal. Now, gather your loved ones and enjoy this healthy dinner!

Storage Tips for Taco Stuffed Sweet Potatoes

  • Room Temperature: Allow Taco Stuffed Sweet Potatoes to cool completely before storing at room temperature for no more than 2 hours to prevent bacteria growth.
  • Fridge: Store leftover stuffed sweet potatoes in an airtight container in the refrigerator for up to 3-4 days. Reheat thoroughly in the microwave or oven before enjoying again.
  • Freezer: For longer storage, wrap the unfilled sweet potatoes tightly in plastic wrap and aluminum foil and freeze for up to 1 month. The taco filling can be frozen separately for the same duration.
  • Reheating: Reheat refrigerated or frozen Taco Stuffed Sweet Potatoes in a preheated oven at 350°F until warmed through, approximately 15-20 minutes from the fridge and 30-40 minutes if frozen.

Make Ahead Options

Meal prep is a breeze with these Taco Stuffed Sweet Potatoes! You can prepare the taco filling up to 3 days in advance, storing it in an airtight container in the refrigerator to maintain its freshness. Additionally, you can bake the sweet potatoes ahead of time and keep them in the fridge for up to 24 hours; just make sure they are wrapped to prevent them from drying out. When you’re ready to serve, simply warm the sweet potatoes and taco filling together in the oven for about 10 minutes at 350°F, or microwave them separately, and then stuff the potatoes. This way, you’ll enjoy a delicious homemade meal with minimal effort after a long day!

Taco Stuffed Sweet Potatoes Add-Ons

Feel free to let your creativity shine as you customize this delightful dish to your taste and dietary needs!

  • Ground Turkey: Replace ground beef with turkey for a leaner, protein-packed alternative that’s equally delicious.
  • Plant-Based Meat: For a vegetarian option, swap the beef for your favorite plant-based ground meat, perfect for satisfying meat lovers and vegans alike. There are fantastic alternatives available that mimic traditional flavors well!
  • Sweet Potato Variations: Try different varieties of sweet potatoes, like purple or Japanese sweet potatoes, for a unique flavor and color profile that’s eye-catching and tasty.
  • Spicy Kick: Add diced jalapeños or your favorite hot sauce to the filling for an extra heat level that warms the palate just right.
  • Cheese Swap: Use cotija or vegan cheese to stay true to taco flavors while keeping it dairy-free.
  • Topping Twist: Try adding roasted corn or black beans on top for added texture and flavor. Incorporating these can create exciting new flavors with every bite!
  • Herb Infusion: Fresh cilantro or parsley can provide a burst of freshness to your toppings—especially when combined with zesty lime juice.
  • Flavor Boosters: Incorporate custom spices like smoked paprika or taco seasoning for more intense taco flavor that will keep your taste buds dancing!

If you’re craving more vibrant flavors, make sure to check out my easy and delicious Taco Lasagna Discover for an exciting twist on taco night!

Expert Tips for Taco Stuffed Sweet Potatoes

  • Uniform Size: Ensure your sweet potatoes are similar in size for even cooking. This prevents some being undercooked while others become overdone.
  • Check for Doneness: Pierce the baked sweet potatoes with a knife; they should be incredibly tender. If they’re still firm, give them a few more minutes in the oven.
  • Flavor Enhancement: Don’t skip the seasoning of the sweet potatoes with olive oil, salt, and pepper. This step elevates the overall taste of your Taco Stuffed Sweet Potatoes.
  • Customize the Filling: Feel free to mix in black beans or corn for added texture and flavor. This can create a heartier filling that everyone will love.
  • Storage & Prep: Leftover taco filling freezes beautifully for future meals. Just be sure to cool it completely before storing in airtight containers.
  • Topping Choices: Experiment with different toppings like jalapeños or fresh cilantro to make your Taco Stuffed Sweet Potatoes even more exciting!

What to Serve with Taco Stuffed Sweet Potatoes

As you savor each bite of your Taco Stuffed Sweet Potatoes, consider these delightful pairings to create a full, satisfying meal that complements the dish beautifully.

  • Crispy Side Salad: A fresh mix of lettuce, tomatoes, and cucumbers provides a crunchy contrast, balancing the softness of the sweet potatoes. Drizzle with zesty vinaigrette for extra flavor.

  • Chips and Salsa: The classic crunch of tortilla chips paired with vibrant salsa offers a playful snack before diving into your stuffed potatoes. The bright flavors awaken the taste buds.

  • Roasted Corn: Sweet and slightly charred corn brings a delightful sweetness and hearty texture, enhancing the taco theme while providing a colorful addition to your plate.

  • Guacamole: A smooth and creamy topping adds richness to your meal, echoing the flavors of the stuffed sweet potatoes while allowing for a comforting dip.

  • Mexican Rice: Fluffy, cilantro-laced Mexican rice adds a hearty base that complements the tender sweet potatoes while absorbing all the flavorful juices from the taco filling.

  • Black Bean Salad: A refreshing black bean salad with bell peppers and lime juice offers a protein-packed side dish that brightens up the meal, matching the flavors of the taco filling.

  • Spicy Pineapple Salsa: The heat and sweetness of pineapple salsa create an exciting juxtaposition, which can awaken the senses and liven up the overall dining experience.

  • Watermelon Spritzer: Refreshing and light, this drink’s sweetness provides a delightful counterpoint to the savory tacos. It’s perfect for cleansing the palate between bites.

  • Chocolate Avocado Mousse: Finish your meal with a rich yet healthy dessert, offering creamy chocolate flavors that harmonize wonderfully with the earlier tastes of your meal, bringing a lovely conclusion.

Taco Stuffed Sweet Potatoes Recipe FAQs

How do I choose ripe sweet potatoes?
Absolutely! When selecting sweet potatoes, look for those that are firm with a smooth skin. Avoid any with dark spots, green edges, or wrinkled skin. They should feel heavy for their size.

How should I store leftover Taco Stuffed Sweet Potatoes?
Leftover Taco Stuffed Sweet Potatoes can be stored in an airtight container in the refrigerator for up to 3-4 days. Be sure to let them cool completely before storing to prevent condensation and sogginess.

Can I freeze Taco Stuffed Sweet Potatoes?
Very! To freeze, wrap unfilled sweet potatoes tightly in plastic wrap and then in aluminum foil, which will help prevent freezer burn. You can freeze taco filling separately too—just ensure it’s fully cooled first. Both can be stored for up to 3 months. When ready to eat, thaw in the refrigerator overnight and reheat in a 350°F oven for about 20-30 minutes.

What should I do if my sweet potatoes are undercooked after baking?
If your sweet potatoes seem firm after the initial baking time, simply pop them back in the oven for an additional 5-10 minutes. Check their doneness by piercing them with a fork; they should yield easily when fully cooked.

Are Taco Stuffed Sweet Potatoes suitable for a gluten-free diet?
Absolutely! Taco Stuffed Sweet Potatoes are inherently gluten-free, making them a great choice for those with gluten sensitivities. Just ensure that any additional toppings, such as sauces or cheese, you use are also gluten-free.

Can I make the taco filling ahead of time?
Of course! You can prepare your taco filling 1-2 days in advance. Simply cook it as per the instructions, let it cool, and store it in an airtight container in the refrigerator. When ready to serve, just warm it up before stuffing your baked sweet potatoes. This makes for a quick assembly on busy nights!

Taco Stuffed Sweet Potatoes

Taco Stuffed Sweet Potatoes for a Healthy Dinner Delight

Enjoy a healthy twist on taco night with Taco Stuffed Sweet Potatoes filled with savory beef.
Prep Time 15 minutes
Cook Time 45 minutes
Total Time 1 hour
Servings: 4 servings
Course: Dinner
Cuisine: Mexican
Calories: 350

Ingredients
  

For the Filling
  • 1 lb Ground Beef or ground turkey for a leaner option
  • 1 medium Onion either white or red
  • 2 cloves Garlic freshly minced
  • 1 can Canned Fire Roasted Diced Tomatoes blend for a smoother texture if desired
  • 1 tbsp Chili Powder adjust according to spice preference
  • 1 tsp Cumin
  • 1 tsp Paprika smoked paprika for extra heat
  • 1 tsp Garlic Powder
  • 1 tsp Onion Powder
  • 1 tsp Salt
  • 1 tsp Black Pepper
For the Sweet Potatoes
  • 4 medium Sweet Potatoes
  • 2 tbsp Olive Oil or avocado oil as substitute
Toppings
  • 1 cup Guacamole homemade or store-bought
  • 1 cup Cheddar Cheese melted, can use dairy-free
  • 1 cup Pico de Gallo fresh or homemade
  • 1 cup Sour Cream or Greek yogurt as a healthier substitute

Equipment

  • Skillet
  • Oven
  • Baking pan
  • Parchment paper
  • Fork

Method
 

Step-by-Step Instructions
  1. Wash and scrub the sweet potatoes. Poke holes with a fork, rub with olive oil, and season with salt and pepper.
  2. Preheat oven to 425°F and bake sweet potatoes for 40-45 minutes until soft.
  3. In a skillet, heat olive oil and sauté garlic and onion for 3-4 minutes until soft. Add ground beef and cook until browned.
  4. Stir in fire-roasted diced tomatoes and simmer for 5-7 minutes until liquid is absorbed.
  5. Cut baked sweet potatoes lengthwise and fluff insides with a fork. Fill with the taco mixture.
  6. Serve warm topped with guacamole, cheddar cheese, pico de gallo, and sour cream.

Nutrition

Serving: 1stuffed potatoCalories: 350kcalCarbohydrates: 40gProtein: 25gFat: 15gSaturated Fat: 5gCholesterol: 80mgSodium: 600mgPotassium: 800mgFiber: 6gSugar: 7gVitamin A: 15000IUVitamin C: 30mgCalcium: 200mgIron: 4mg

Notes

Customize filling with black beans or corn for added texture. Store leftovers in airtight containers.

Tried this recipe?

Let us know how it was!

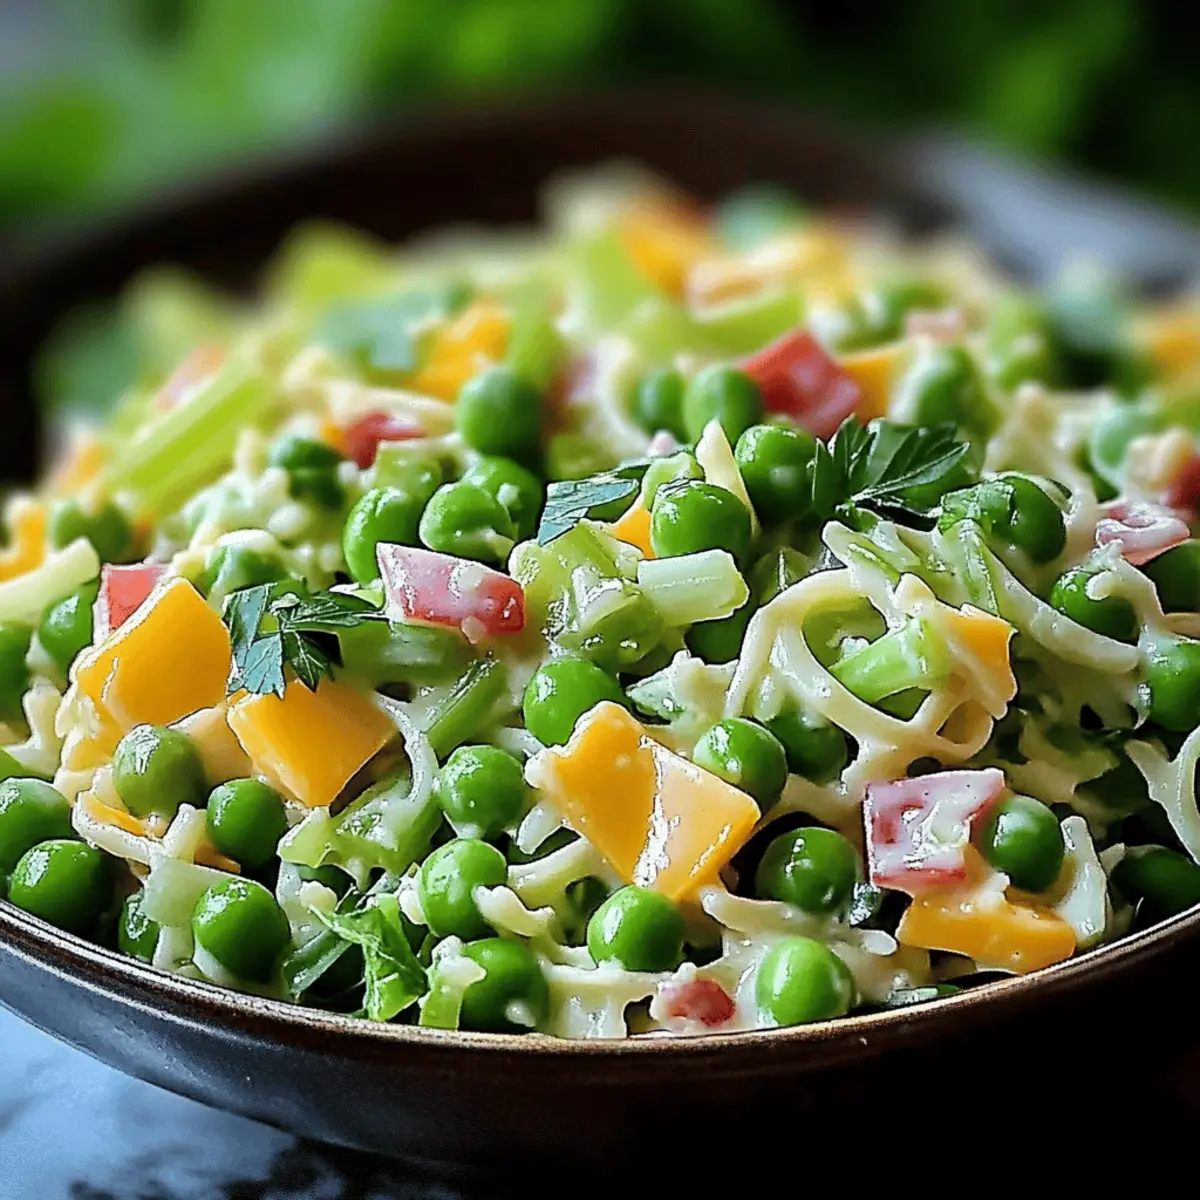
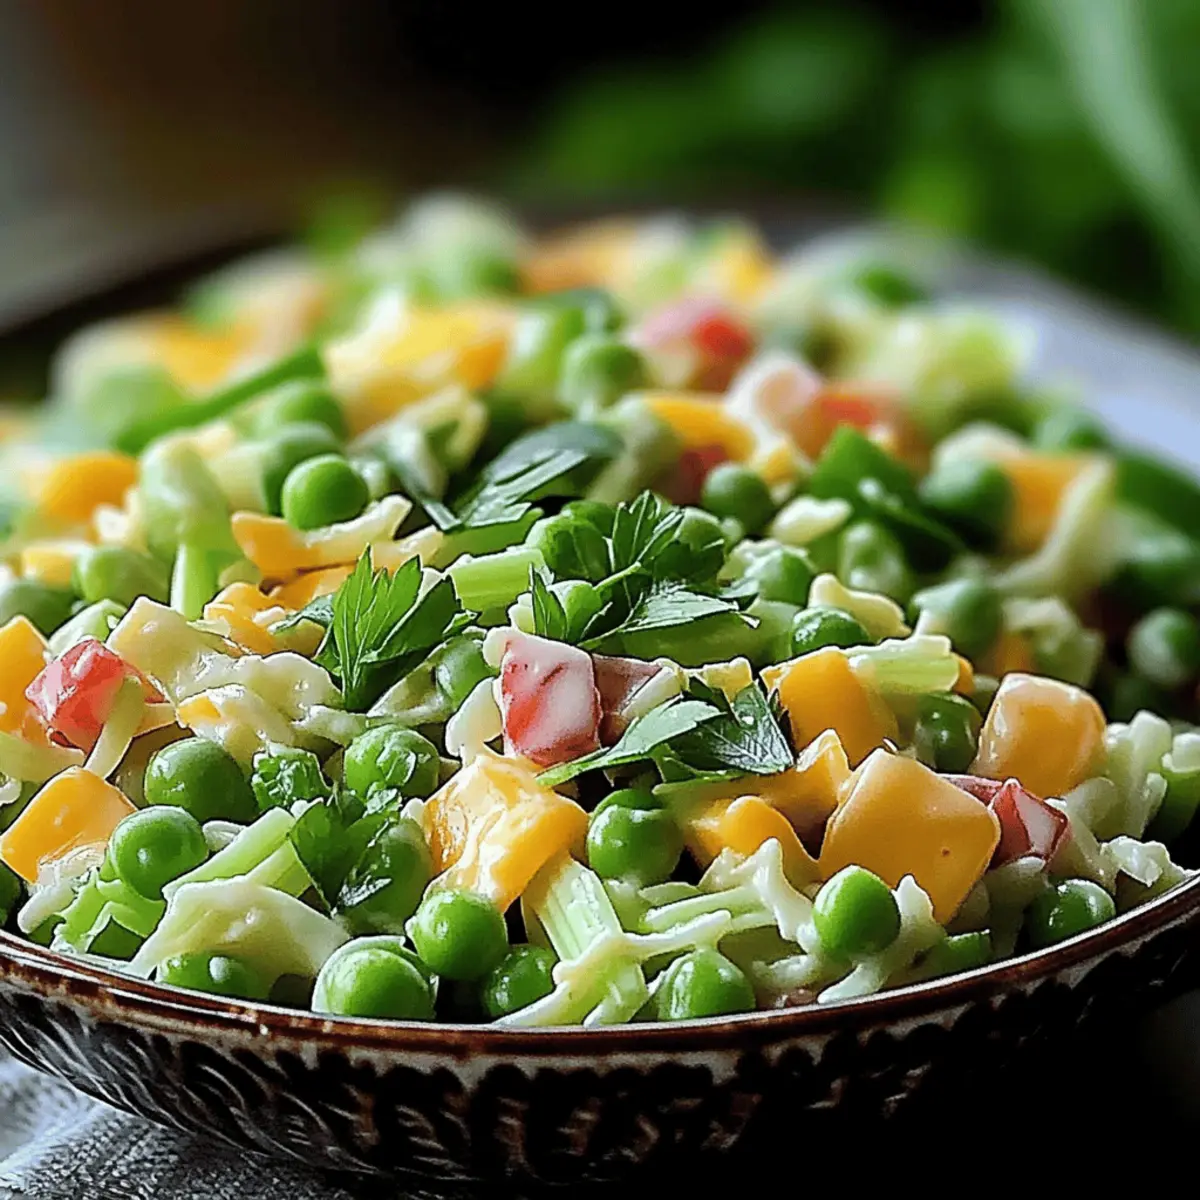
Deliciously Creamy Irish Pea Salad for Your Next Gathering

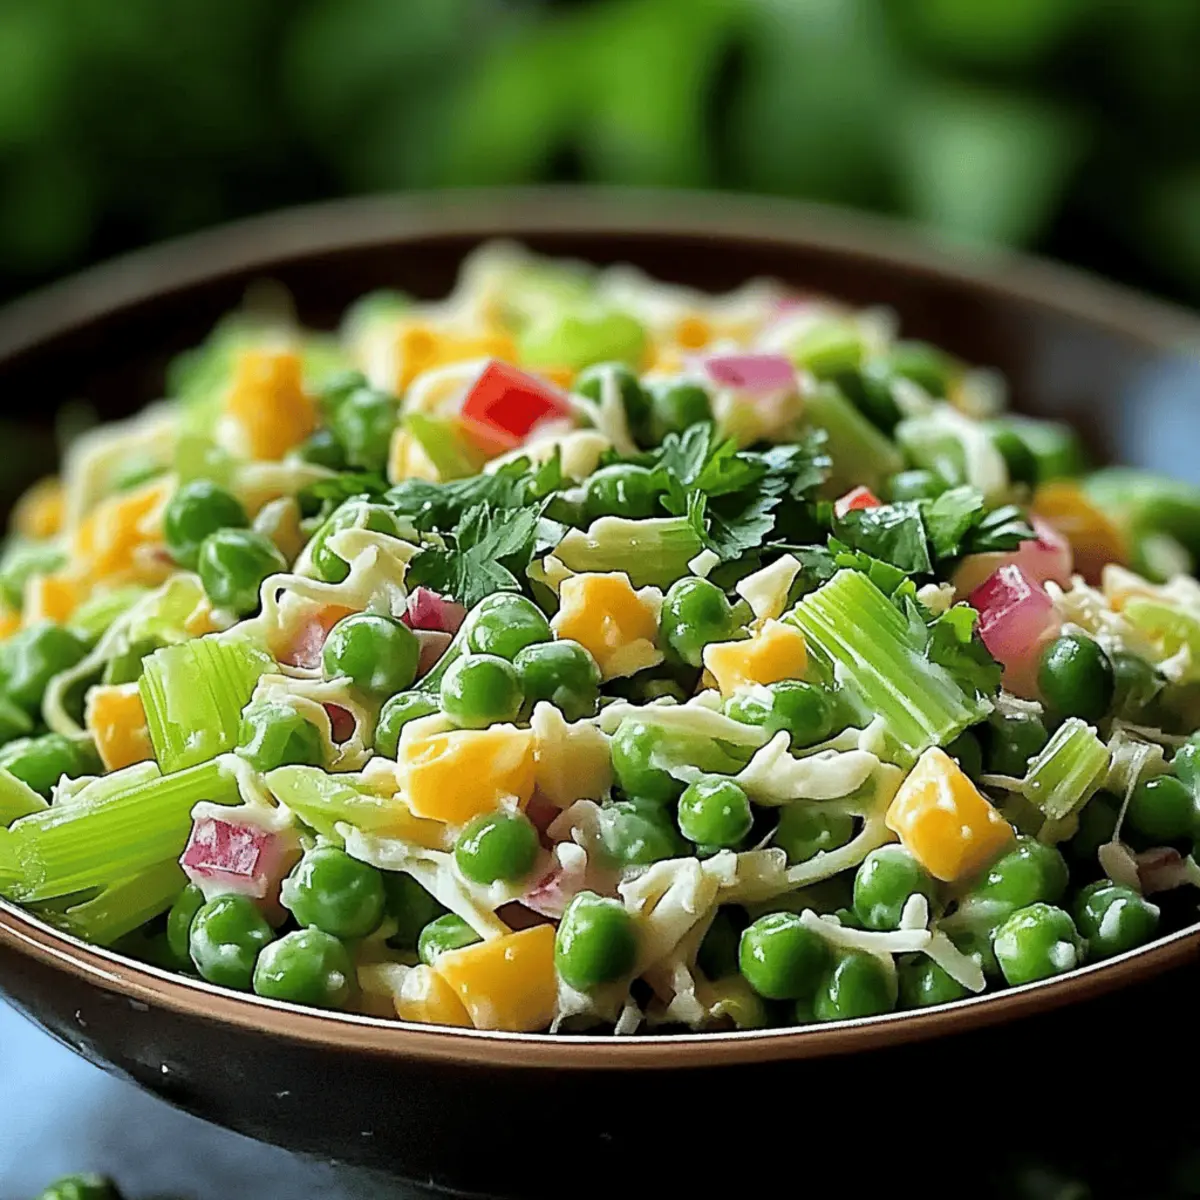
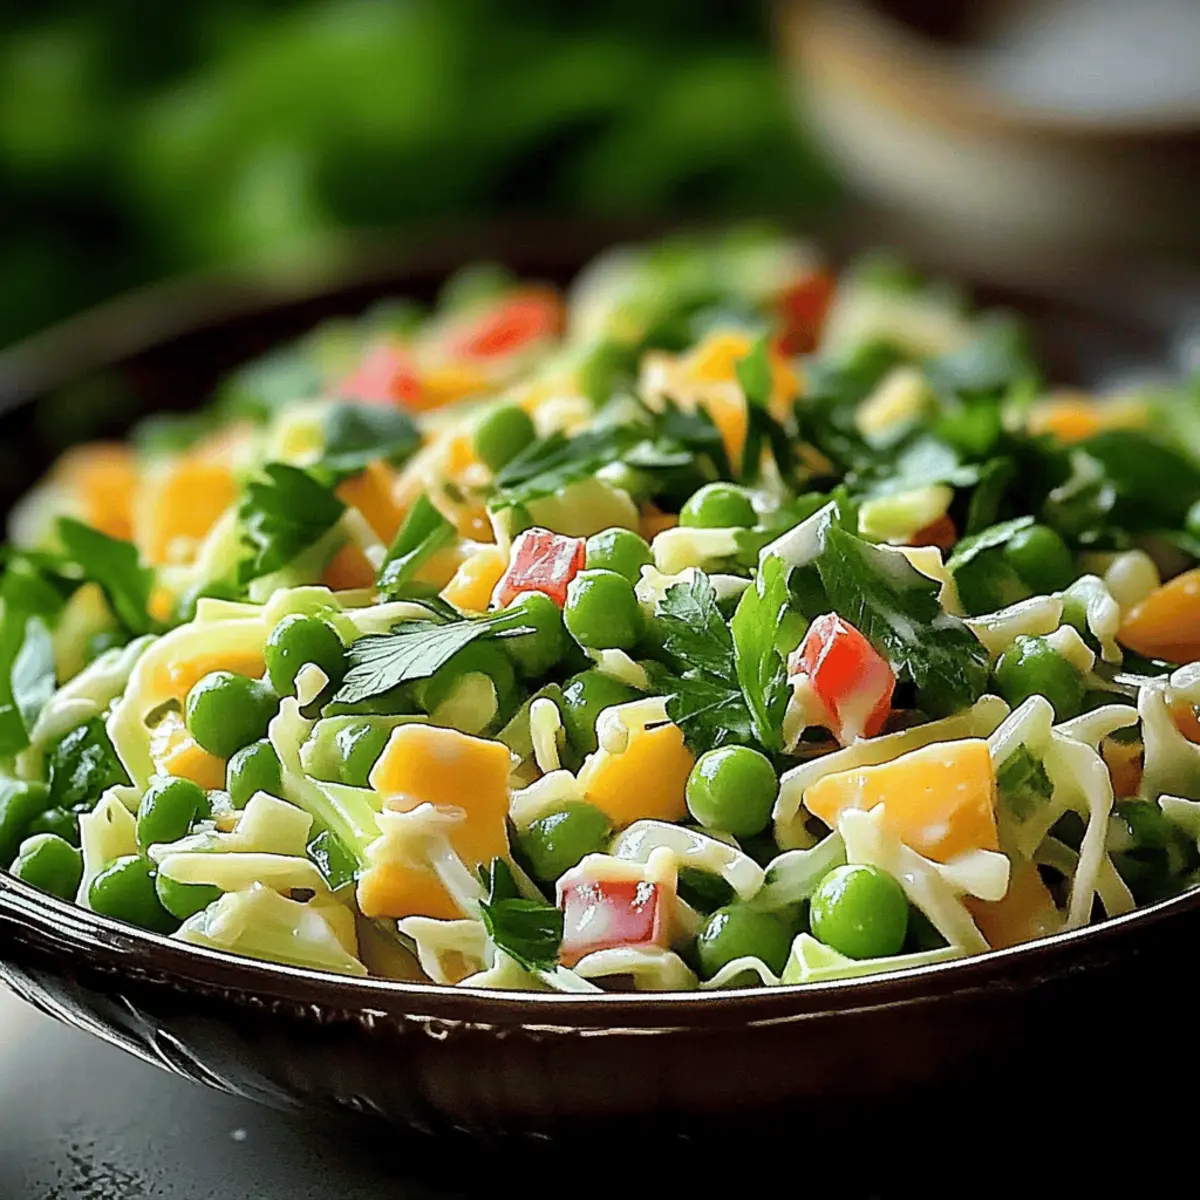
The sun is setting, casting a golden hue over a bustling kitchen filled with laughter and sizzling pans; I can almost taste the vibrant flavors about to come alive in a classic Irish Pea Salad. This dish, with its tender peas and sharp cheddar, is a delightful crunch you can rely on for any occasion. Perfectly suitable for vegetarians and gluten-free, this creamy creation not only caters to dietary needs but also serves as a refreshing side at potlucks or gatherings. Plus, the quick prep time means you can squeeze in this crowd-pleaser even on the busiest of nights. What’s your favorite twist to make this salad your own?

What makes this Irish Pea Salad irresistible?

Versatile Delight: This Irish Pea Salad is not only delicious but also adaptable, allowing you to incorporate proteins like crispy bacon or ham for added heartiness. Creamy Bliss: The rich dressing, made with mayo and sour cream, creates a luscious mouthfeel that pairs beautifully with the crunch of fresh vegetables. Quick Preparation: With just 15 minutes of prep, you can whip up this crowd-pleaser perfect for gatherings or family dinners. Healthier Options: Go for Greek yogurt instead of sour cream, providing a lighter yet satisfying alternative without sacrificing flavor. Eye-Catching Colors: Its vibrant hues from peas and bell peppers make it a feast for the eyes, ensuring it stands out on any table. Enjoy alongside dishes like my Strawberry Spinach Salad for a full spread!

Irish Pea Salad Ingredients

• Here’s everything you need to create this delightful dish!

For the Salad

  • Frozen peas (thawed) – Provides the main texture and sweetness; feel free to substitute with fresh peas if you prefer a more vibrant taste.
  • Diced cheddar cheese – Adds richness and sharp flavor; try using mozzarella or Jack cheese for a creamier experience.
  • Chopped celery – Contributes a satisfying crunch and freshness to the salad.
  • Chopped red bell pepper – Offers sweetness and vibrant color, enhancing the salad’s visual appeal.
  • Finely chopped red onion – Adds depth of flavor with a hint of sharpness.

For the Dressing

  • Mayonnaise – Forms the creamy base of the dressing; use a light version for fewer calories.
  • Sour cream – Provides tanginess and creaminess; Greek yogurt is an excellent substitute for a healthier twist in this Irish Pea Salad.
  • Apple cider vinegar – Introduces acidity that balances the richness beautifully.
  • Sugar – A touch of sweetness to harmonize the flavors.
  • Salt and black pepper – Essential seasonings that enhance the overall taste.

Step‑by‑Step Instructions for Irish Pea Salad

Step 1: Prepare the Salad Ingredients
In a large mixing bowl, combine 2 cups of thawed frozen peas, 1 cup of diced cheddar cheese, 1 cup of chopped celery, 1 cup of chopped red bell pepper, and ½ cup of finely chopped red onion. Use a wooden spoon to gently mix all the ingredients together until evenly distributed, making sure to get a colorful assortment! This vibrant base sets the stage for your creamy Irish Pea Salad.

Step 2: Make the Creamy Dressing
In a separate medium bowl, whisk together ¾ cup of mayonnaise, ½ cup of sour cream (or Greek yogurt for a lighter option), 2 tablespoons of apple cider vinegar, 1 tablespoon of sugar, and salt and black pepper to taste. Continue whisking until the dressing is smooth and creamy—this luscious mixture will coat your salad beautifully.

Step 3: Combine Salad and Dressing
Pour the creamy dressing over your mixed salad ingredients. Using a spatula or a large spoon, gently toss everything together, ensuring that every pea and vegetable is beautifully coated in that rich dressing. Be careful to avoid mashing the peas—your Irish Pea Salad should have a delightful texture!

Step 4: Chill to Enhance Flavors
Cover the bowl with plastic wrap or transfer the salad to a sealed container. Refrigerate for at least one hour before serving, allowing the flavors to meld and intensify. This step is key to achieving the best results, giving the salad a refreshing coolness that enhances each bite.

Step 5: Serve and Enjoy
When you’re ready to serve, give the salad a gentle stir to reincorporate any dressing that may have settled. Present your beautiful Irish Pea Salad in a serving bowl or offer it as a side on individual plates. This dish not only tastes great but also makes a delightful presentation at any gathering!

Irish Pea Salad: Exciting Variations

Feel free to let your creativity flourish by customizing this Irish Pea Salad to suit your taste and dietary preferences!

  • Protein-Packed: Add crispy bacon or diced ham to elevate the flavor and make the salad heartier. It brings a savory crunch that contrasts beautifully with the creaminess.
  • Vegetarian Delight: For a meatless version, throw in some hard-boiled eggs, offering a satisfying protein boost while complementing the creamy texture perfectly.
  • Creamier Option: Swap out the sour cream for Greek yogurt to lighten the dish. This change not only lowers the calories but also adds a delightful tang of flavor.
  • Herb Infusion: Sprinkle in fresh herbs like dill, mint, or parsley for a vibrant flavor pop. These herbs enhance the freshness and add wonderful aromas!
  • Cheese Change: If you’re feeling adventurous, swap the cheddar for crumbled feta or a sharp blue cheese. These options will add a unique flavor twist to the traditional recipe.
  • Nutty Crunch: Toss in some toasted walnuts or pecans to give the salad a delightful crunch. Their nutty flavor pairs well with the peas and dressing!
  • Sweet & Spicy: For those who enjoy a bit of heat, add diced jalapeños or crushed red pepper flakes to introduce a spicy kick. A balancing sweetness from the salad will make for a fantastic juxtaposition.
  • Fruit Fusion: Experiment with adding diced apples or grapes for a touch of sweetness and juicy texture, imparting an entirely refreshing vibe to the dish.

Looking for more refreshing ideas? Try serving this alongside my Italian Chopped Salad or combine its flavorful elements with a lovely Strawberry Spinach Salad for a beautiful spread!

Make Ahead Options

This Creamy Irish Pea Salad is a wonderful choice for meal prep! You can prepare the salad ingredients, such as the thawed peas, diced cheddar, chopped celery, chopped red bell pepper, and finely chopped red onion, up to 24 hours ahead of time. Simply mix them together and store them in an airtight container in the refrigerator. For optimal flavor, make the dressing (mayonnaise and sour cream or Greek yogurt, apple cider vinegar, sugar, salt, and pepper) separately and refrigerate it as well. When ready to serve, combine the salad and dressing right before enjoying—this ensures the peas remain crisp and fresh. With these make-ahead tips, your Irish Pea Salad will be just as delightful with minimal effort on the day of serving!

Storage Tips for Irish Pea Salad

Fridge: Store leftovers in an airtight container in the refrigerator for up to 3 days. The flavors will meld beautifully, making every bite more enjoyable!

Reheating: This salad is best enjoyed cold, so simply give it a gentle stir before serving—no reheating necessary.

Avoid Freezing: Do not freeze the Irish Pea Salad as the creamy dressing and vegetables can change texture, leading to an unappetizing result.

Freshness Check: Always check for freshness before consuming leftovers; signs like discoloration or off-odors indicate that it’s time to say goodbye!

What to Serve with Creamy Irish Pea Salad?

The vibrant colors and creamy texture of this salad invite a delicious companion to the table, enhancing every gathering.

  • Corned Beef: The savory notes of corned beef perfectly contrast the creaminess of the salad, making for a classic Irish pairing.

  • Shepherd’s Pie: Rich, hearty, and comforting, Shepherd’s Pie offers a perfect balance to the refreshing taste of Irish Pea Salad.

  • Grilled Chicken: Juicy, seasoned grilled chicken adds protein alongside the salad’s crunchy freshness, making for a well-rounded meal.

  • Soda Bread: Soft and fluffy soda bread pairs beautifully, perfect for scooping up every bit of salad left on your plate.

  • Crispy Bacon: Elevate your salad experience by adding crispy bacon bits for a delightful crunch and smoky flavor contrast.

  • Mint-Infused Lemonade: This refreshing drink complements the salad’s richness while offering a zesty burst of flavor.

  • Fruit Tart: A light, sweet dessert like a fruit tart serves as a joyful finale, balancing the savory elements of the meal.

  • Roasted Vegetables: Seasonal roasted veggies add another layer of flavor and texture, pairing beautifully with the creaminess of the salad.

Consider any of these delightful options to elevate your meal experience and truly impress your guests at your next gathering!

Expert Tips for Irish Pea Salad

  • Chill Time Is Key: Allow the salad to sit in the refrigerator for at least one hour before serving; this melds the flavors beautifully, making each bite even more delicious.

  • Cheese Add-In: For a fresher taste, consider adding the diced cheddar cheese just before serving. This keeps the cheese from getting too soft and maintains a pleasant texture.

  • Storage Wisdom: The salad keeps well in the fridge for up to three days, but avoid freezing. Freezing can change the texture due to the mayonnaise and vegetables.

  • Mix Fresh Herbs: Incorporate fresh herbs like dill or parsley for an added burst of flavor that pairs wonderfully with the creamy dressing in your Irish Pea Salad.

  • Mind Your Mixing: When combining the ingredients, gently toss them without mashing the peas; you want that delightful crunch to shine in every bite!

Irish Pea Salad Recipe FAQs

How do I choose the right frozen peas for my Irish Pea Salad?
Absolutely! When selecting frozen peas, look for bags that are bright green and free from ice crystals. This indicates freshness and quality. If you can find fresh peas, blanch them briefly in boiling water until bright green (about 2-3 minutes) for an even better texture!

What’s the best way to store leftovers of this Irish Pea Salad?
Very simply! Store any leftovers in an airtight container in the refrigerator for up to 3 days. The flavors will actually improve as they meld together, so don’t hesitate to dig in! Just give it a gentle stir before serving to blend the ingredients again.

Can I freeze the Irish Pea Salad?
No, I wouldn’t recommend freezing this salad. Freezing can negatively affect the texture due to the mayonnaise and moisture from the vegetables. If you have leftovers, enjoy them over the next few days for the best taste and texture!

What should I do if my salad dressing is too thick?
If your dressing seems a bit thick for your liking, don’t fret! You can easily thin it by adding a teaspoon of milk or a splash of apple cider vinegar until it reaches your desired consistency. Just whisk it in gradually for the best results.

Is this Irish Pea Salad suitable for my gluten-free diet?
Absolutely! This salad is naturally gluten-free, especially when using gluten-free mayonnaise. Just check the labels on your ingredients to ensure they’re gluten-free. It’s a yummy, worry-free option for anyone avoiding gluten!

Can I modify this recipe for dietary restrictions, such as dairy allergies?
Of course! For a dairy-free version of the Irish Pea Salad, simply use vegan mayonnaise and omit the cheese, or replace it with a plant-based cheese alternative. You can still enjoy all the flavorful crunch without any dairy!

Irish Pea Salad

Deliciously Creamy Irish Pea Salad for Your Next Gathering

This creamy Irish Pea Salad is a delightful gluten-free and vegetarian side, perfect for gatherings.
Prep Time 15 minutes
Chill Time 1 hour
Total Time 1 hour 15 minutes
Servings: 6 servings
Course: Salad
Cuisine: Irish
Calories: 250

Ingredients
  

For the Salad
  • 2 cups frozen peas thawed
  • 1 cup diced cheddar cheese
  • 1 cup chopped celery
  • 1 cup chopped red bell pepper
  • 0.5 cup finely chopped red onion
For the Dressing
  • 0.75 cup mayonnaise light version optional
  • 0.5 cup sour cream or Greek yogurt
  • 2 tablespoons apple cider vinegar
  • 1 tablespoon sugar
  • to taste salt
  • to taste black pepper

Equipment

  • Mixing Bowl
  • Whisk
  • Spatula

Method
 

Step‑by‑Step Instructions
  1. In a large mixing bowl, combine 2 cups of thawed frozen peas, 1 cup of diced cheddar cheese, 1 cup of chopped celery, 1 cup of chopped red bell pepper, and ½ cup of finely chopped red onion. Mix gently until evenly distributed.
  2. In a separate medium bowl, whisk together ¾ cup of mayonnaise, ½ cup of sour cream, 2 tablespoons of apple cider vinegar, 1 tablespoon of sugar, and salt and black pepper to taste. Whisk until smooth.
  3. Pour the creamy dressing over the salad ingredients and gently toss to combine without mashing the peas.
  4. Cover with plastic wrap or transfer to a sealed container and refrigerate for at least one hour to allow flavors to meld.
  5. Before serving, stir the salad gently and present it in a serving bowl or on individual plates.

Nutrition

Serving: 1cupCalories: 250kcalCarbohydrates: 20gProtein: 6gFat: 18gSaturated Fat: 3gPolyunsaturated Fat: 0.5gMonounsaturated Fat: 1gCholesterol: 15mgSodium: 400mgPotassium: 250mgFiber: 5gSugar: 3gVitamin A: 10IUVitamin C: 30mgCalcium: 150mgIron: 1mg

Notes

Allow the salad to chill for at least one hour before serving to enhance the flavors. The salad keeps well in the fridge for up to three days. Avoid freezing the salad.

Tried this recipe?

Let us know how it was!

Creamy Butter Garlic Crab: A Luxurious Seafood Delight

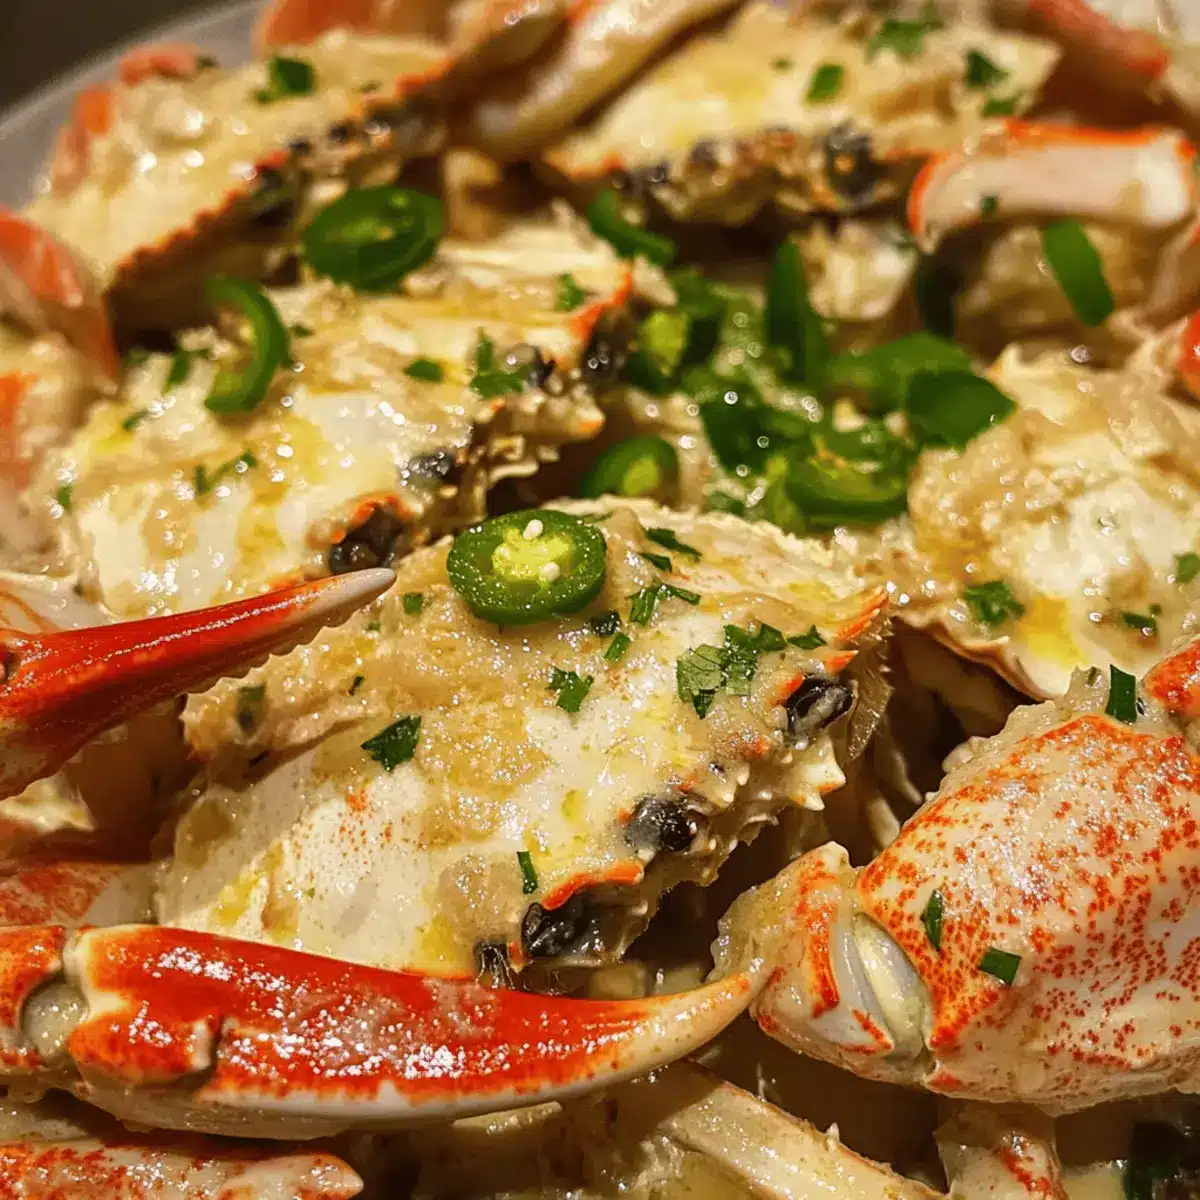
As I gently lifted the lid off the pot, a cloud of savory aromas wafted through the kitchen, enveloping me in pure culinary bliss. This Creamy Butter Garlic Crab is more than just a dish; it’s a vibrant celebration of Indo-Chinese flavors that brings joy to any table. Quick to prepare, this recipe quickly turns an ordinary evening into something special, perfect for impressing friends or indulging yourself after a hectic day. With its rich, velvety sauce and succulent crab meat, it’s bound to become a household favorite. Plus, it invites creativity in the kitchen; you can easily swap in your choice of seafood or adjust the spices to complement your unique taste. Are you ready to dive into a whirlpool of deliciousness? Let’s get cooking!

Why is this crab dish irresistible?

Decadent Flavor: The bold combination of creamy butter and aromatic garlic creates a luxurious sauce that perfectly enhances the tender crab meat.

Quick and Easy: With straightforward instructions, you don’t need to be a culinary expert to impress your guests.

Versatile Seafood: Feel free to substitute crab with shrimp or lobster for a delightful twist – just imagine a Honey Garlic Shrimp taking center stage!

Perfect for Gatherings: Serve with warm garlic bread or flavored rice to cater to all tastes during family dinners or celebrations.

Unique Indo-Chinese Fusion: This dish embodies a seamless blend of Indian and Chinese culinary traditions, making it a standout option for adventurous food lovers!

Creamy Butter Garlic Crab Ingredients

For the Crab

  • Fresh Crab – The star of the dish, providing a sweet, succulent flavor; use fleshy crabs like mud or sea crab for best results.
  • Green Chillies (5) – Adds heat with a vibrant kick; substitute with paprika for a milder version if you prefer.

For the Sauce

  • Butter (4 Tbsp) – Adds richness and depth to the gravy; margarine can be a great non-dairy substitute.
  • Garlic Paste (1 Tbsp) & Garlic Pods (10) – Provides an intense garlic flavor; feel free to adjust according to your taste.
  • Fresh Cream (200 ml) – Creates the creamy base of the gravy; for a dairy-free alternative, consider using soy or almond milk.
  • Chicken Stock (2 cups) – Brings depth of flavor to the sauce; vegetable stock or even water can work as a substitute.

For the Seasoning

  • Black Pepper Powder (2 tsp) – Adds warmth and a pleasant mild kick; adjust according to personal spice preferences.
  • Salt (1.5 tsp or to taste) – Essential for enhancing overall flavor; always tweak it to your liking.
  • Turmeric Powder (1 tsp) – Enhances color and flavor; it’s optional but recommended for its anti-allergic properties.
  • Garlic Powder (1 tsp) & Dried Parsley (2 tsp) – Enhances the overall flavor profile; both are optional but highly recommended for extra zest.

Whip up this Creamy Butter Garlic Crab and savor every bite of this delectable seafood delight!

Step‑by‑Step Instructions for Creamy Butter Garlic Crab

Step 1: Clean the Crab
Start by thoroughly cleaning the fresh crab under cold running water. Remove any debris or sand, then bring a large pot of water to a rolling boil. Add turmeric and salt. Once boiling, carefully immerse the crabs and boil for 3–4 minutes until the shells turn bright red. Remove the crabs and let them cool slightly before handling.

Step 2: Prepare Garlic
While the crab is cooling, chop half of the garlic pods and set them aside. Take the remaining garlic and blend it into a paste using a mortar and pestle or a small food processor. This will intensify the garlic flavor in your Creamy Butter Garlic Crab sauce, giving it that delicious depth you’re looking for.

Step 3: Sauté Garlic
In a large skillet or wok, melt the butter over medium heat until it starts to foam. Add the chopped garlic and garlic paste, stirring constantly for about 2 minutes. The aroma of garlic will start to fill your kitchen, and the garlic should be lightly golden but not burnt. This step is vital for infusing the butter with rich flavors before proceeding.

Step 4: Add Seasonings
Next, stir in the black pepper, salt, dried parsley, and garlic powder. Allow these seasonings to cook together for an additional minute, stirring frequently to combine. This creates a fragrant base for your Creamy Butter Garlic Crab, ensuring that every component marries beautifully.

Step 5: Incorporate the Crab
Now it’s time to add the crab to the skillet. Place the boiled crab pieces and green chilies into the pan, gently tossing them in the mixture using tongs. Shallow fry for about 1 minute, making sure the crabs are well-coated in the buttery sauce and the chilies infuse their heat.

Step 6: Mix in Cream and Stock
Pour in the fresh cream and chicken stock, stirring to combine all the ingredients. Cover the skillet with a lid and reduce the heat to low. Allow it to simmer for around 15 minutes, every now and then checking to ensure nothing sticks to the bottom. This slow cooking lets the flavors meld together wonderfully.

Step 7: Final Adjustments
After 15 minutes, uncover the skillet and taste the sauce. Adjust the seasoning by adding more salt or pepper as needed, and sprinkle additional dried parsley for flavor. The sauce should be rich and creamy, clinging to the crab meat, which should be hot and tender.

Step 8: Serve and Enjoy
Serve your Creamy Butter Garlic Crab immediately, garnished with fresh parsley if desired. Pair it with warm garlic bread or garlic rice for a complete meal that embodies comfort and indulgence. Each bite will be a celebration of flavors, perfect for impressing your guests or enjoying a special night in!

How to Store and Freeze Creamy Butter Garlic Crab

Fridge: Store leftover Creamy Butter Garlic Crab in an airtight container for up to 3 days. This helps maintain its rich flavors and creamy texture.

Freezer: For longer storage, you can freeze the dish for up to 2 months. Ensure it’s in a freezer-safe container, leaving space for expansion.

Reheating: Thaw in the fridge overnight before reheating. Gently reheat on the stovetop over low heat, adding a splash of cream or stock if needed.

Serving: Enjoy with freshly baked bread or rice to bring back that delightful taste and texture!

Expert Tips for Creamy Butter Garlic Crab

  • Quality Crabs Matter: Always choose fresh, high-quality crab for the best flavor in your Creamy Butter Garlic Crab dish. Frozen or low-quality options can alter the taste.

  • Adjust Spiciness: If you’re unsure about your tolerance for heat, start with fewer green chilies. You can always add more during cooking to suit your taste.

  • Low and Slow: Cooking on low heat allows flavors to blend beautifully. Avoid high heat, which can cause the garlic to burn and ruin the sauce.

  • Cream Alternatives: For a lighter version, consider using a mix of non-dairy cream alternatives like coconut milk or almond milk, particularly if you’re lactose intolerant.

  • Perfect Seasoning: Taste your sauce before serving to ensure the seasoning is spot on. Don’t hesitate to add more salt or black pepper to elevate the flavor of your Creamy Butter Garlic Crab!

Creamy Butter Garlic Crab Variations

Feel free to get creative and make this Creamy Butter Garlic Crab your own with these delicious twists!

  • Shrimp Substitute: Swap crab for shrimp to enjoy a different seafood experience that’s just as tasty.

  • Lobster Upgrade: Use lobster instead of crab for an indulgent take that elevates your dish to a new level of luxury.

  • Spice it Up: Add finely chopped jalapeños for a fiery infusion of heat, perfect for those who love a little kick.

  • Coconut Twist: For a Penang-style variation, replace the fresh cream with coconut milk to create a delightful tropical flavor.

  • Garlic Lovers: Increase the garlic paste to two tablespoons for an even bolder flavor that garlic aficionados will adore.

  • Dairy-Free Option: Substitute fresh cream with almond milk to cater to lactose intolerance while still enjoying that creamy texture.

  • Herb Infusion: Add fresh basil or cilantro at the end of cooking for a burst of freshness and color.

  • Quick and Easy: For a simplified version, use store-bought garlic butter and skip the sautéing step; it’s a great time-saver!

If you’re looking to pair this scrumptious dish with something equally delightful, I highly recommend serving it alongside freshly baked garlic bread. You might also enjoy a side of savory garlic rice as seen in the recipes for Honey Butter Brioche and Lemon Garlic Shrimp. Happy cooking!

Make Ahead Options

These Creamy Butter Garlic Crab dishes are perfect for busy home cooks looking to save time! You can clean and boil the crab (up to 24 hours in advance) and store it in the refrigerator, keeping it fresh for your meal prep. Additionally, you can prepare the garlic paste and sauté the chopped garlic, then refrigerate these components in airtight containers for up to 3 days. When you’re ready to serve, simply heat the butter, add the prepped ingredients, toss in the crab, and finish with cream and stock. This way, you’ll enjoy a restaurant-quality dish that feels as good as freshly made, without spending hours in the kitchen!

What to Serve with Creamy Butter Garlic Crab?

Indulging in this culinary delight opens the door to a symphony of flavors, begging for delightful companions on your dinner table.

  • Garlic Bread: The crispy, buttery goodness of garlic bread complements the creamy sauce, perfect for dipping and soaking up those savory juices.

  • Garlic Rice: Fluffy rice infused with garlic provides a lovely base, balancing the richness of the crab while adding a familiar comfort to the meal.

  • Steamed Broccoli: A bright green contrast, the tender crunch of steamed broccoli brings freshness to the palate and enhances the dish visually.

  • Mango Salad: Refreshing slices of mango tossed with a hint of lime and mint brighten up the plate, adding a sweet-tart element that cuts through the richness.

  • White Wine: A chilled glass of Sauvignon Blanc creates a delightful pairing that complements the flavors of the crab, enhancing the overall dining experience.

  • Coconut Curry Soup: For those seeking warmth, a bowl of coconut curry soup brings a fragrant touch of spice, harmonizing beautifully with the crab dish’s Indo-Chinese roots.

Creamy Butter Garlic Crab Recipe FAQs

What type of crab is best for this recipe?
Absolutely! Fresh crab is the key player here, and I recommend using fleshy crabs such as mud crab or sea crab for that sweet, succulent flavor. Look for crabs with hard shells and no dark spots – that’s your sign of freshness!

How should I store leftover Creamy Butter Garlic Crab?
Very good question! Store any leftovers in an airtight container in the fridge for up to 3 days. This method helps maintain the rich flavors and creamy texture of the dish. Just reheat gently on the stovetop when you’re ready to enjoy the leftovers!

Can I freeze Creamy Butter Garlic Crab?
Certainly! To freeze, place the dish in a freezer-safe container, leaving some space for expansion. It can be frozen for up to 2 months. When you’re ready to enjoy it again, thaw in the fridge overnight and reheat on low heat to keep the sauce creamy.

What if I want to adjust the spice level?
Great thinking! If you’re sensitive to spice, I recommend starting with fewer green chilies. You can always add more during cooking based on your heat preference. Remember, the flavors can build over time!

Are there any dietary considerations to keep in mind?
Yes, indeed! This dish contains crab, butter, and cream, which can be allergenic for some individuals. For those who are lactose intolerant, consider using soy milk or almond milk in place of cream. Always double-check for any seafood allergies before serving to friends or family!

What if my sauce is too thick after cooking?
No worries at all! If you find the sauce too thick, simply add a splash of chicken stock or cream to loosen it up while reheating. Stir well to bring it back to that luscious, creamy consistency we all love in this Creamy Butter Garlic Crab dish!

Creamy Butter Garlic Crab

Creamy Butter Garlic Crab: A Luxurious Seafood Delight

This Creamy Butter Garlic Crab is a decadent dish showcasing rich flavors, perfect for impressing guests or a special night in.
Prep Time 10 minutes
Cook Time 30 minutes
Total Time 40 minutes
Servings: 4 servings
Course: Dinner
Cuisine: Indo-Chinese
Calories: 550

Ingredients
  

For the Crab
  • 1 kg Fresh Crab Use fleshy crabs like mud or sea crab.
  • 5 pieces Green Chillies Add heat; substitute with paprika for milder version.
For the Sauce
  • 4 Tbsp Butter Margarine can be a non-dairy substitute.
  • 1 Tbsp Garlic Paste Feel free to adjust according to taste.
  • 10 pieces Garlic Pods Chopped and blended.
  • 200 ml Fresh Cream Non-dairy alternatives may be used.
  • 2 cups Chicken Stock Vegetable stock or water can be substitutes.
For the Seasoning
  • 2 tsp Black Pepper Powder Adjust to personal spice preference.
  • 1.5 tsp Salt Adjust according to taste.
  • 1 tsp Turmeric Powder Optional but recommended.
  • 1 tsp Garlic Powder Optional for flavor enhancement.
  • 2 tsp Dried Parsley Optional but enhances flavor.

Equipment

  • large pot
  • skillet or wok
  • mortar and pestle or food processor

Method
 

Step-by-Step Instructions
  1. Clean the crab under cold running water. Remove debris, bring a large pot of water to boil, add turmeric and salt, then boil crabs for 3-4 minutes. Remove and let cool.
  2. Chop half of the garlic pods and blend the remaining into a paste.
  3. Melt the butter in a skillet over medium heat, add chopped garlic and garlic paste, stirring for about 2 minutes until golden.
  4. Stir in black pepper, salt, dried parsley, and garlic powder, cooking for an additional minute.
  5. Add the boiled crab pieces and green chilies to the skillet, gently tossing to coat in the mixture.
  6. Pour in the fresh cream and chicken stock, cover, reduce heat to low, and simmer for about 15 minutes.
  7. After 15 minutes, uncover and taste the sauce. Adjust seasoning if needed, and sprinkle with parsley.
  8. Serve immediately, garnished with fresh parsley, alongside garlic bread or rice.

Nutrition

Serving: 1servingCalories: 550kcalCarbohydrates: 15gProtein: 45gFat: 35gSaturated Fat: 20gPolyunsaturated Fat: 2gMonounsaturated Fat: 5gCholesterol: 150mgSodium: 800mgPotassium: 600mgFiber: 1gSugar: 3gVitamin A: 500IUVitamin C: 5mgCalcium: 30mgIron: 2mg

Notes

For best flavor, use high-quality crab and adjust spiciness and salt to taste. Cream alternatives can lighten the dish.

Tried this recipe?

Let us know how it was!

Delicious Mexican Beef Chile Verde for Cozy Family Nights

As I walked through the bustling streets of Mexico City, the tantalizing aroma of slow-cooked meats and fresh herbs wafted through the air, beckoning me to discover their secrets. That day, I found myself enamored with the Mexican Beef Chile Verde, a dish that presents the perfect harmony of spice and savory comfort. This hearty recipe not only allows for a variety of proteins—beef, pork, chicken, or even a vegetarian twist—but also keeps dinner preparation simple enough for any home chef. With its rich, vibrant green sauce made from tomatillos and jalapeños, this dish is a family-friendly favorite that promises to warm your heart and satisfy even the pickiest eaters. Are you ready to elevate your mealtime with flavor and flair? Let’s dive into this delicious adventure together!

Why Is Mexican Beef Chile Verde a Must-Try?

Simplicity at its Finest: This recipe takes only a few steps to create a hearty, flavorful dish.

Customizable Options: Enjoy the flexibility to switch in pork, chicken, or even a vegetarian alternative while still capturing that signature taste.

Wholesome Comfort: With ingredients like tomatillos and garlic, you’re left with a comforting stew that’s both satisfying and nutritious.

Family Favorite: It appeals to all ages, making mealtime an exciting event your family will look forward to.

Perfect for Meal Prep: Leftovers save beautifully, so you can enjoy the savory goodness for days! Serve with warm tortillas or a fresh salad for an extraordinary crowd-pleaser.

Mexican Beef Chile Verde Ingredients

• Discover the flavorful components that make this dish shine!

For the Beef

  • Beef Stew Meat (Chuck Roast) – Main protein source, providing richness and texture; feel free to substitute with pork shoulder or chicken for a delicious twist.

For the Sauce

  • Tomatillos – Essential for the green sauce, they offer acidity and vibrant color; fresh tomatillos are best, but canned can work in a pinch.
  • Green Chilies (Anaheim, Hatch, or Poblano) – Adds body and sweetness to the sauce; choose varieties based on your preferred heat level.
  • Jalapeños – Provides the desired heat; remove seeds for a milder flavor, or go for serrano chilies if you’re seeking more spice.
  • Garlic – Adds aromatic depth and enhances flavor; freshly minced garlic packs the most punch!
  • Onion – A base flavor booster that caramelizes beautifully; yellow or white onions are great choices.

For the Spices

  • Ground Cumin – An essential spice for authentic flavor; if you’re out, coriander can be a suitable alternative.
  • Dried Oregano (preferably Mexican) – Elevates the herbal notes in the dish; substitute with regular oregano or thyme if needed.
  • Ground Coriander – Provides citrusy notes to enhance the overall flavor profile.
  • Ground Black Pepper & Salt – Basic seasonings that you can adjust to taste, ensuring the dish hits just the right notes.

For Cooking

  • Olive Oil – Necessary for searing the beef, adding richness; swap out with vegetable oil if that’s what you have on hand.
  • Beef Broth – Moisten and enrich the stew; low-sodium options add health benefits, or switch to chicken broth as a substitute.
  • Fresh Lime Juice – Brightens the entire dish, cutting through the richness; adjust as per your taste preference to keep things zesty!

Step‑by‑Step Instructions for Mexican Beef Chile Verde

Step 1: Sear the Beef
Begin by patting the beef stew meat dry with paper towels, which will help it brown beautifully. Heat 2 tablespoons of olive oil in a large Dutch oven over medium-high heat. Carefully add the beef cubes, allowing enough space between them. Sear for about 5-7 minutes, turning occasionally until browned on all sides. Once browned, remove the beef from the pot and set aside.

Step 2: Sauté the Aromatics
In the same Dutch oven, add the chopped onion and sauté over medium heat for 3-4 minutes until it becomes translucent and fragrant. Next, stir in the minced garlic, cooking for an additional minute until it’s aromatic. This base will infuse your Mexican Beef Chile Verde with depth and flavor.

Step 3: Cook the Vegetables
Add the chopped tomatillos, green chilies, and jalapeños to the pot, stirring to combine. Cook them for about 5-7 minutes, or until they soften and start to release their juices. You’ll know they’re done when the colors brighten and the vegetables become slightly tender, creating a delicious foundation for the sauce.

Step 4: Incorporate the Spices
Sprinkle in the ground cumin, dried oregano, ground coriander, black pepper, and salt. Stir these spices into the vegetable mixture and toast for a minute, allowing their flavors to bloom. This step is crucial as it enhances the overall taste profile of your Mexican Beef Chile Verde, bringing warmth and complexity.

Step 5: Return the Beef and Add Broth
Carefully return the seared beef to the pot, mixing it into the aromatic vegetable and spice blend. Pour in 4 cups of beef broth, scrapping the bottom of the pot to deglaze any flavorful bits. Turn up the heat until the mixture reaches a gentle boil, then reduce the heat to low. Cover the pot with a lid and simmer for 1.5 to 2 hours, allowing the beef to become incredibly tender.

Step 6: Finish with Lime Juice
After the simmering time, check the beef for tenderness; it should fall apart easily with a fork. Stir in the fresh lime juice, adjusting to your taste preferences for brightness. Taste and adjust the seasoning if necessary, ensuring your Mexican Beef Chile Verde has the perfect balance of flavors before serving.

Step 7: Serve and Enjoy
Ladle the rich, green stew into bowls, garnishing with fresh cilantro if desired. Pair your Mexican Beef Chile Verde with warm tortillas, cilantro-lime rice, or your favorite side for a delightful meal. Take a moment to savor the mouthwatering aroma and vibrant colors of this hearty dish!

Storage Tips for Mexican Beef Chile Verde

Fridge: Store leftovers in an airtight container for up to 3 days. This keeps the flavors fresh while enjoying the hearty stew on busy nights.

Freezer: Freeze your Mexican Beef Chile Verde in a freezer-safe container for up to 3 months. Be sure to leave some space at the top for expansion during freezing.

Reheating: To reheat, thaw overnight in the fridge for best results. Warm in a pot over medium heat, stirring occasionally until heated through, about 15 minutes.

Airtight Guidance: Always ensure the container is sealed tightly to avoid freezer burn, preserving the savory taste of this comforting dish.

Expert Tips for Mexican Beef Chile Verde

Quality Ingredients: Using high-quality beef will significantly enhance the flavor and tenderness of your Mexican Beef Chile Verde.

Browning Matters: Don’t rush the browning process! A proper sear adds depth and richness, ensuring a deliciously flavorful stew.

Customize Spice Levels: Adjust the heat by modifying the number of jalapeños or experimenting with different chilies based on your family’s heat preference.

Simmer Time: Allow for a longer simmer to develop a deeper flavor profile; check for liquid levels to prevent burning.

Taste as You Go: Don’t hesitate to taste and adjust seasoning throughout the cooking process, ensuring your final dish is perfectly balanced.

Storage Savvy: Leftovers maintain their flavor well; store them in airtight containers to enjoy this delicious Mexican Beef Chile Verde for days!

Mexican Beef Chile Verde Variations

Embrace the opportunity to customize your Mexican Beef Chile Verde with these delightful tweaks and substitutions!

  • Pork Alternative: Substitute pork shoulder for a richer flavor; it’s juicy and will pull apart nicely just like beef.

  • Chicken Twist: Use chicken thighs for a succulent option; they stay moist and absorb all the delicious flavors.

  • Vegetarian Delight: Replace meat with a robust mix of zucchini, bell peppers, and tofu. You’ll create a hearty, vibrant dish that everyone will love!

  • Spice It Up: Adjust the number of jalapeños to control the heat; add more for a fiery kick or seal in those flavors with milder bell peppers.

  • Cilantro Kick: Sprinkle in fresh cilantro for a burst of freshness right before serving; it elevates the dish beautifully.

  • Creamy Addition: Stir in a splash of cream or coconut milk at the end for a luxurious, creamy twist that enriches the sauce.

  • Beans Galore: Mix in black beans or pinto beans to add texture and protein, making the dish even more filling and nourishing.

  • Hearty Stew: For a thicker consistency, incorporate a tablespoon of cornstarch mixed with water; it will create a fabulous sauce that clings to every morsel.

As you explore these creative variations, consider pairing your Mexican Beef Chile Verde with warm tortillas or a fresh salad to round out a delicious meal. If you’re in the mood for more Mexican-inspired dishes, check out my Mexican Barbecue Chicken or dive into a comforting Mexican Lasagna Discover for satisfying dinners that will become family favorites!

What to Serve with Authentic Mexican Beef Chile Verde

Indulge your senses and create a complete dinner experience by pairing this flavorful stew with delightful sides.

  • Warm Tortillas: Perfect for scooping up the tender beef and green sauce, they add a comforting, hearty touch to every bite.

  • Cilantro-Lime Rice: The bright, zesty flavor complements the rich stew beautifully, providing a refreshing contrast that balances the meal.

  • Fresh Green Salad: Crisp greens with a light vinaigrette offer a refreshing crunch, cleansing the palate and making each bite feel light and bright.

  • Refried Beans: Creamy and savory, they enhance the protein content while offering a smooth contrast to the stew’s texture and flavor intensity.

  • Guacamole: This creamy dip is a delightful addition, providing richness and a splash of color that elevates your whole dining experience. The coolness of the avocado pairs perfectly with the spices in the Chile Verde.

  • Mexican Street Corn: Grilled corn drizzled with lime and topped with cotija cheese adds a sweet and tangy flavor, offering a fun and festive element to your meal.

  • Margaritas: A classic drink to accompany this dish, their sweetness and tartness will amplify the flavors of the stew while enhancing your dining moment.

  • Churros: End your meal on a sweet note with these crispy treats; their sugary coating and soft interior provide a delightful contrast to the savory main course.

Make Ahead Options

These Authentic Mexican Beef Chile Verde dishes are perfect for busy home cooks looking to save time during the week! You can prep the sauce components—like sautéing the onions, garlic, and tomatillos—up to 24 hours in advance, then refrigerate them overnight. The beef itself can be marinated in the spices and broth for even deeper flavor up to 3 days prior to cooking. When you’re ready to serve, simply reheat the prepped ingredients, add the beef, and cook as instructed until tender. This allows you to enjoy a delicious homemade meal with minimal effort on your busy nights while ensuring that each bite is just as delectable!

Mexican Beef Chile Verde Recipe FAQs

What type of tomatillos should I use for my Chile Verde?
Absolutely! Fresh tomatillos are the best choice for a vibrant green sauce with a fresh flavor. When selecting tomatillos, look for those that are firm and have bright skin, avoiding ones with dark spots or a mushy texture. If fresh tomatillos aren’t available, canned tomatillos can be a good substitute, though they may be slightly less fresh in flavor.

How should I store leftover Mexican Beef Chile Verde?
After your cozy family night, store any leftovers in an airtight container in the fridge for up to 3 days. This ensures the flavors remain intact while you enjoy your spicy stew again. If you want to keep it longer, you can freeze the stew; just make sure to use a freezer-safe container for storage.

Can I freeze Mexican Beef Chile Verde?
Very! To freeze your Mexican Beef Chile Verde, allow it to cool completely before transferring it to a freezer-safe container. Leave some space at the top for the stew to expand as it freezes. It can be stored for up to 3 months. When you’re ready to enjoy it again, thaw it overnight in the fridge and reheat it gently on the stove for the best texture.

How do I adjust the heat level in my Chile Verde?
If you’re looking to customize the spice level, start by adjusting the number of jalapeños you use; removing the seeds will also reduce the heat. For those who like it spicier, consider adding a serrano chili or a pinch of cayenne pepper to the mix. Taste as you go and remember, you can always add more spice but it’s tough to take it out once it’s in!

Is this recipe suitable for those with dietary restrictions?
The Mexican Beef Chile Verde is naturally gluten-free, making it a great option for those with gluten sensitivities! For those with meat allergies, feel free to use alternative proteins like tofu or skip meat altogether for a delightful vegetarian version. Just ensure you’re using low-sodium broth if sodium intake is a concern.

What can I serve alongside my Mexican Beef Chile Verde?
There’s nothing like complementing your savory stew with warm corn or flour tortillas for some added flavor and texture. Cilantro-lime rice is also a wonderful pairing that enhances the dish, while a fresh green salad can provide a refreshing crunch. Beans are an excellent option too, adding protein and fiber to round out your meal!

Mexican Beef Chile Verde

Delicious Mexican Beef Chile Verde for Cozy Family Nights

A hearty Mexican Beef Chile Verde that combines spice and savory comfort, perfect for family meals.
Prep Time 15 minutes
Cook Time 2 hours
Total Time 2 hours 15 minutes
Servings: 6 servings
Course: Beef
Cuisine: Mexican
Calories: 350

Ingredients
  

For the Beef
  • 2 pounds Beef Stew Meat (Chuck Roast) Main protein source; can substitute with pork or chicken.
For the Sauce
  • 1 pound Tomatillos Fresh tomatillos are best.
  • 2 cups Green Chilies (Anaheim, Hatch, or Poblano) Choose varieties based on preferred heat.
  • 2 pieces Jalapeños Remove seeds for milder flavor.
  • 3 cloves Garlic Freshly minced has the most flavor.
  • 1 medium Onion Yellow or white onions work well.
For the Spices
  • 2 teaspoons Ground Cumin An essential spice for authentic flavor.
  • 1 teaspoon Dried Oregano (preferably Mexican) Substitute with regular oregano if needed.
  • 1 teaspoon Ground Coriander Adds citrusy notes.
  • 1 teaspoon Ground Black Pepper
  • 1 teaspoon Salt Adjust to taste.
For Cooking
  • 2 tablespoons Olive Oil Necessary for searing beef.
  • 4 cups Beef Broth Low-sodium options add health benefits.
  • 2 tablespoons Fresh Lime Juice Adjust to taste.

Equipment

  • Dutch oven

Method
 

Step-by-Step Instructions
  1. Sear the Beef: Pat the beef stew meat dry and heat olive oil in a Dutch oven. Add beef cubes and sear until browned on all sides. Remove and set aside.
  2. Sauté the Aromatics: In the same pot, add onion and sauté until translucent. Add garlic and cook until aromatic.
  3. Cook the Vegetables: Add tomatillos, green chilies, and jalapeños. Cook until softened and colors brighten.
  4. Incorporate the Spices: Add ground cumin, dried oregano, ground coriander, black pepper, and salt. Stir and toast for a minute.
  5. Return the Beef and Add Broth: Mix seared beef with vegetables and spices. Pour in beef broth, deglazing the pot. Simmer covered for 1.5 to 2 hours.
  6. Finish with Lime Juice: Check tenderness and stir in lime juice. Adjust seasonings to taste.
  7. Serve and Enjoy: Ladle into bowls and garnish with cilantro. Serve with warm tortillas.

Nutrition

Serving: 1bowlCalories: 350kcalCarbohydrates: 20gProtein: 30gFat: 15gSaturated Fat: 5gPolyunsaturated Fat: 1gMonounsaturated Fat: 10gCholesterol: 80mgSodium: 800mgPotassium: 800mgFiber: 4gSugar: 3gVitamin A: 500IUVitamin C: 20mgCalcium: 70mgIron: 3mg

Notes

Quality ingredients and proper browning enhance flavor. Adjust spice levels per preference, and store leftovers properly.

Tried this recipe?

Let us know how it was!

Brisket & Beer Cheese Pretzel Bombs: Game Day Perfection

The kitchen was filled with the warm, inviting scent of smoked meat and freshly baked bread as I crafted a snack that would steal the show at any gathering. These Smoked Brisket & Beer Cheese Pretzel Bombs are not just another appetizer; they offer an incredible fusion of smoky brisket and creamy, beer-infused cheese, all wrapped in a chewy pretzel shell. Perfect for game days, parties, or simply impressing your family around the dinner table, this recipe brings comfort food to a whole new level. Plus, with options for gluten-free and vegan adaptations, everyone can join in on the fun! Are you ready to elevate your snack game and learn how to make these mouth-watering treats?

Why Choose Pretzel Bombs for Your Next Party?

Mouthwatering Flavor: The rich combination of smoky brisket and creamy beer cheese inside a warm pretzel shell creates an irresistible taste that will have your guests raving.

Versatile Options: Enjoy these pretzel bombs as they are, or explore gluten-free and vegan versions that cater to everyone’s dietary needs.

Perfect for Any Occasion: Whether it’s game day or a casual family gathering, these bombs are the ultimate crowd-pleaser that appeals to all ages.

Satisfying Texture: Each bite reveals a chewy exterior followed by a deliciously warm filling—truly a textural delight!

Time-Saving Treat: Prep the brisket and filling ahead of time, then simply assemble and bake for a quick, show-stopping snack. Don’t forget to check out my mouthwatering Cheddar Mac Cheese for a perfect side!

Brisket & Beer Cheese Pretzel Ingredients

Get ready to create the ultimate appetizer with these excitefully delicious ingredients!

For the Brisket

  • 3 lb Beef Brisket – This is the star of the show, providing that essential smokiness and tenderness.
  • 1 tbsp Olive Oil – Helps to season the brisket perfectly.
  • 1 tbsp Smoked Paprika – Enhances the depth and smokiness of the dish.
  • 1 tbsp Garlic Powder – Gives a robust flavor that enhances the brisket.
  • 1 tbsp Onion Powder – Adds a touch of sweetness and complexity.
  • 1 tsp Salt – Crucial for bringing out all the flavors.
  • 1 tsp Black Pepper – Introduces a mild heat that complements the brisket.
  • 1 cup Beef Broth – Keeps the brisket juicy while it smokes.

For the Beer Cheese Filling

  • 1 cup Shredded Cheddar Cheese – The main cheese that gives the filling its satisfying richness.
  • 1/2 cup Shredded Monterey Jack Cheese – Adds creaminess and extra flavor to the mix.
  • 1/2 cup Beer (IPA or Stout) – Provides richness to the cheese; feel free to use any beer you enjoy!
  • 1/4 cup Sour Cream – Introduces creaminess to the filling, balancing the flavors.
  • 1 tbsp Dijon Mustard – Brings a tangy kick to the cheese mixture.
  • 1 tsp Worcestershire Sauce – Adds a savory depth that enhances the overall flavor.

For the Pretzel Dough

  • 1 lb Refrigerated Pizza Dough – The foundation of our pretzel bombs; use gluten-free pizza dough for a gluten-free version!
  • 1 Egg (beaten) – An egg wash creates that beautiful golden crust.
  • Coarse Salt – Just a sprinkle on top for that authentic pretzel taste.

Gather these ingredients, and you’ll be on your way to making unforgettable Brisket & Beer Cheese Pretzel Bombs that are sure to impress!

Step‑by‑Step Instructions for Brisket & Beer Cheese Pretzel Bombs

Step 1: Prepare the Smoked Brisket
Preheat your smoker to 225°F. Rub the 3 lb beef brisket generously with olive oil, smoked paprika, garlic powder, onion powder, salt, and black pepper, creating a flavorful crust. Place the brisket in the smoker and cook for 6-8 hours, until it reaches fork-tender perfection. Once done, let it rest for at least 30 minutes, then shred it into bite-sized pieces.

Step 2: Make Beer Cheese Filling
In a medium saucepan over low heat, combine 1 cup shredded cheddar cheese, 1/2 cup shredded Monterey Jack cheese, 1/2 cup of beer, 1/4 cup sour cream, 1 tablespoon Dijon mustard, and 1 teaspoon Worcestershire sauce. Stir constantly until the cheeses melt and the mixture is smooth and creamy, about 5-10 minutes. Allow the cheese mixture to cool slightly before using to avoid sogginess in the pretzel bomb dough.

Step 3: Assemble Pretzel Bombs
Roll out the 1 lb refrigerated pizza dough on a lightly floured surface and cut it into circles, about 4 inches in diameter. Place a spoonful of the beer cheese filling and a generous portion of the shredded brisket in the center of each circle. Fold the dough over the filling and pinch the edges tightly to seal them well. This will ensure that all that deliciousness stays inside while baking.

Step 4: Bake Pretzel Bombs
Preheat your oven to 375°F. Line a baking sheet with parchment paper and place the sealed pretzel bombs on it, leaving space between them for expansion. Brush each bomb with beaten egg for a rich golden crust and sprinkle with coarse salt. Bake for 15-20 minutes, or until they are puffed and golden brown. Keep an eye on them for that perfect color.

Step 5: Serve Warm
Once baked, remove the pretzel bombs from the oven and let them cool for a few minutes. They’re best enjoyed warm, so serve them right away! Pair these flavorful Brisket & Beer Cheese Pretzel Bombs with your favorite dipping sauces, like Dijon mustard, for a delightful snack experience that everyone will love.

Expert Tips for Brisket & Beer Cheese Pretzel Bombs

  • Prep in Advance: Start smoking the brisket the day before; it takes time to reach that dreamy fork-tender goodness.

  • Cooling is Key: Allow the beer cheese filling to cool slightly before assembling; this prevents sogginess in the pretzel dough.

  • Avoid Overcrowding: When baking, give each pretzel bomb enough space on the sheet to ensure even baking and a nice golden crust.

  • Sealing Tight: Make sure to pinch the dough tightly to seal the bombs properly; this keeps that rich brisket & beer cheese filling from leaking out.

  • Experiment with Beer: Try different beer varieties to discover new flavor profiles in your beer cheese; even a light lager can create a refreshing twist!

  • Freezing Tips: For future convenience, freeze unbaked pretzel bombs tightly wrapped. When ready to bake, adjust the baking time to ensure they are cooked through.

Storage Tips for Brisket & Beer Cheese Pretzel Bombs

Room Temperature: Let the pretzel bombs cool completely before storing and keep them at room temperature for up to 2 days in an airtight container to maintain freshness.

Fridge: Store leftovers in the fridge for up to 3 days. Place them in an airtight container to avoid drying out. Reheat in the oven at 350°F until warmed through for a delicious snack.

Freezer: For longer storage, freeze unbaked brisket & beer cheese pretzel bombs tightly wrapped in plastic wrap and then in aluminum foil for up to 2 months. Bake directly from frozen, adding a few extra minutes to the baking time.

Reheating: If you have baked leftovers, reheat in the oven at 350°F for about 10-15 minutes until heated through. This ensures they remain crispy on the outside and warm on the inside.

What to Serve with Smoked Brisket & Beer Cheese Pretzel Bombs

Picture your gathering where guests savor every bite of warm, cheesy treats that pair perfectly with delightful sides and drinks.

  • Creamy Coleslaw: This tangy, crunchy delight provides a refreshing contrast to the rich, smoky flavors of the pretzel bombs.

  • Spicy Mustard Dipping Sauce: Elevate the snack with a zesty kick that complements the savory depth of the brisket & beer cheese.

  • Roasted Garlic Mashed Potatoes: The creamy texture and buttery flavor create a comforting side that perfectly balances the bold taste of the pretzel bombs.

  • Pickles and Olives: Their briny crunch not only cleanses the palate but also adds a delightful contrast to the warmth and richness of each bomb.

  • Craft Beer Selection: Pair your pretzel bombs with an hoppy IPA or a rich stout for a harmonious flavor experience that echoes the beer cheese filling.

  • Mixed Vegetable Platter: Fresh, crisp veggies and a tangy dip provide a light, crunchy element that complements the hearty nature of the bite-sized bombs.

  • Chocolate Stout Brownies: For dessert, indulge in rich and fudgy brownies, adding a chocolatey finish to your wholesome feast that echoes the use of stout in the recipe.

Make Ahead Options

These Smoked Brisket & Beer Cheese Pretzel Bombs are a fantastic solution for busy home cooks looking to save time! You can prepare the smoked brisket and beer cheese filling up to 3 days in advance. Simply smoke the brisket, let it cool, shred it, and store it in an airtight container in the refrigerator. For the cheese filling, melt the cheeses and combine with the other ingredients, then refrigerate until you’re ready to assemble. When it’s time to serve, roll out the refrigerated pizza dough, fill it with the prepared brisket and cheese, and bake immediately for restaurant-quality results with minimal effort. Just remember, to keep the pretzel bombs from becoming soggy, avoid adding the filling until you’re ready to assemble and bake!

Brisket & Beer Cheese Pretzel Ideas

Unlock your creativity and personalize each bite of these pretzel bombs with these delightful variations!

  • Gluten-Free: Use gluten-free pizza dough to cater to those avoiding gluten while still ensuring a tasty treat.

  • Vegan: Swap out the brisket for jackfruit or lentils, and embrace plant-based cheese and milk for a delicious vegan version.

  • Spicy Twist: Add a pinch of cayenne pepper or diced jalapeños to the cheese filling for a zesty kick that’ll have your taste buds dancing.

  • Cheesy Overload: Experiment by mixing in a variety of cheeses like pepper jack or gouda for unexpected flavor combinations.

  • Savor the Sweet: Include caramelized onions in the filling to add a hint of sweetness that beautifully offsets the smokiness of the brisket.

  • Beer Variations: Try using different types of beer like a dark stout or a fruity ale to enhance the beer cheese flavors and keep things interesting.

  • Mini Bombs: For a fun twist, roll smaller pretzel balls for bite-sized appetizers, perfect for parties and casual gatherings.

These variations offer something for everyone and make each batch a unique experience. Don’t forget to enjoy them with your favorite dipping sauce. And if you’re looking for more inspirations, check out my Strawberry Cheesecake Bars for a sweet finish to your savory feast!

Brisket & Beer Cheese Pretzel Bombs Recipe FAQs

How do I choose the right brisket?
Absolutely! When selecting your brisket, look for one with good marbling—this fat helps keep the meat juicy and tender during smoking. Ideally, choose a flat cut with a bright red color and minimal dark spots. Prioritize cuts weighing around 3 pounds for this recipe to achieve that perfect smoky flavor and tenderness.

How do I store leftovers?
Very! After enjoying your Brisket & Beer Cheese Pretzel Bombs, let them cool completely before storing. You can keep them at room temperature in an airtight container for up to 2 days. If you have leftovers, pop them in the fridge, where they’ll stay fresh for up to 3 days. Just remember, reheating them in the oven at 350°F restores that crispy exterior and warms the cheesy filling perfectly.

Can I freeze these pretzel bombs?
Absolutely! To freeze unbaked brisket & beer cheese pretzel bombs, wrap each one tightly in plastic wrap and then in aluminum foil for extra protection. You can pop them in the freezer for up to 2 months. When you’re ready to bake, remove them from the freezer and bake directly from frozen, adding an extra 5-10 minutes to the cooking time. This way, you’ll have deliciously fresh pretzel bombs whenever you need a snack!

What if the dough is too wet or sticky?
No worries! If your pretzel dough feels too wet or sticky, dust your workspace with a little flour as you roll it out, allowing you to handle it more easily. If the dough is excessively sticky and does not hold together, you can incorporate a small amount of flour (about 1 tablespoon at a time) until you reach the desired consistency. Just be cautious – too much can alter the texture.

Can these pretzel bombs be made vegan?
Very! For a vegan version of these Brisket & Beer Cheese Pretzel Bombs, substitute the brisket with jackfruit or another plant-based protein, and use plant-based cheese and a vegan sour cream alternative. This way, everyone can enjoy the delicious experience without compromising on flavor!

Is there a way to make these gluten-free?
Absolutely! To make gluten-free brisket & beer cheese pretzel bombs, simply switch out the refrigerated pizza dough for a gluten-free version, which is widely available in stores. You can also make your own gluten-free dough if you’re feeling adventurous! Just ensure that all other ingredients, especially sauces and seasonings, are gluten-free as well.

Brisket & Beer Cheese Pretzel

Brisket & Beer Cheese Pretzel Bombs: Game Day Perfection

Make these Brisket & Beer Cheese Pretzel Bombs for a crowd-pleasing appetizer at any gathering.
Prep Time 30 minutes
Cook Time 8 hours
Resting Time 30 minutes
Total Time 9 hours
Servings: 12 bombs
Course: Appetizer
Cuisine: American
Calories: 300

Ingredients
  

Brisket
  • 3 lb Beef Brisket Provides smokiness and tenderness
  • 1 tbsp Olive Oil For seasoning
  • 1 tbsp Smoked Paprika Enhances smokiness
  • 1 tbsp Garlic Powder Adds robust flavor
  • 1 tbsp Onion Powder Provides sweetness
  • 1 tsp Salt Bring out flavors
  • 1 tsp Black Pepper Mild heat
  • 1 cup Beef Broth Keeps brisket juicy
Beer Cheese Filling
  • 1 cup Shredded Cheddar Cheese Main cheese for richness
  • 1/2 cup Shredded Monterey Jack Cheese Adds creaminess
  • 1/2 cup Beer IPA or Stout, for richness
  • 1/4 cup Sour Cream Balances flavors
  • 1 tbsp Dijon Mustard For tangy flavor
  • 1 tsp Worcestershire Sauce Enhances flavor
Pretzel Dough
  • 1 lb Refrigerated Pizza Dough Use gluten-free for gluten-free version
  • Coarse Salt For sprinkling on top

Equipment

  • Smoker
  • Medium Saucepans
  • Baking Sheet

Method
 

Step-by-Step Instructions
  1. Preheat your smoker to 225°F. Rub the brisket with olive oil, smoked paprika, garlic powder, onion powder, salt, and black pepper. Cook for 6-8 hours until tender.
  2. In a medium saucepan over low heat, combine cheddar cheese, Monterey Jack cheese, beer, sour cream, Dijon mustard, and Worcestershire sauce. Stir until smooth, about 5-10 minutes. Cool before using.
  3. Roll out the pizza dough and cut into 4-inch circles. Place beer cheese filling and brisket in the center, fold and pinch edges tightly.
  4. Preheat oven to 375°F. Place pretzel bombs on a lined baking sheet. Brush with egg and sprinkle with coarse salt. Bake for 15-20 minutes until golden brown.
  5. Remove from oven, let cool briefly, and serve warm with your favorite dipping sauces.

Nutrition

Serving: 1bombCalories: 300kcalCarbohydrates: 30gProtein: 18gFat: 15gSaturated Fat: 7gPolyunsaturated Fat: 1gMonounsaturated Fat: 4gCholesterol: 70mgSodium: 800mgPotassium: 200mgFiber: 2gSugar: 1gVitamin A: 200IUCalcium: 200mgIron: 2mg

Notes

Prep in advance by smoking the brisket the day before. Allow the cheese filling to cool to prevent sogginess in the dough.

Tried this recipe?

Let us know how it was!

Flourless Chocolate Truffle Cake: Decadence Without Guilt

As I whisked the eggs into a froth, a wave of nostalgia washed over me, reminding me of the joyous gatherings filled with laughter and indulgence. This Flourless Chocolate Truffle Cake is not just a dessert; it’s a decadent gluten-free delight that transforms any ordinary moment into a celebration. With a truffle-like texture that melts in your mouth, you’ll find this cake is both impressively luxurious and blissfully easy to whip up. It’s perfect for satisfying chocolate cravings after a long day or serving at special occasions, ensuring you’ll never have to reach for outdated fast-food desserts again. Plus, the best part? You can make it ahead of time, freeing you up to savor every smile at your table. Ready to tempt your taste buds with this rich creation? Let’s dive in!

Why is this cake a must-try?

Irresistible Indulgence: This Flourless Chocolate Truffle Cake offers a rich, decadent experience that chocolate lovers crave.
Gluten-Free Delight: Perfect for those avoiding gluten, yet satisfying enough for everyone to enjoy!
Effortless Preparation: With just a few easy steps, you can create a show-stopping dessert without the hassle.
Make-Ahead Convenience: Prepare it in advance, making entertaining stress-free and enjoyable.
Versatile Flavor Options: From a hint of coffee to a dash of citrus zest, customizing this cake to suit your taste is effortless. Dive into more delightful creations like White Chocolate Cranberry and Pistachio Carrot Cake for your next culinary adventure!

Flourless Chocolate Truffle Cake Ingredients

For the Batter
Eggs – Provide structure and lightness to the cake; be sure they are cold for optimal volume when beaten.
Bittersweet/Semidark Chocolate (1 lb) – The main flavor base offering deep chocolate richness; aim for 60-80% cacao for the best balance.
Unsalted Butter (16 tbsp) – Adds creaminess and moisture; can be substituted with dairy-free butter for a vegan option.
Strong Black Coffee or Liqueur (1/4 cup, optional) – Boosts the chocolate flavor depth; omit if preferred for a purer chocolate taste.

For Dusting
Confectioners’ Sugar or Unsweetened Cocoa – Optional for dusting the top, adding visual appeal to your Flourless Chocolate Truffle Cake.

Step‑by‑Step Instructions for Flourless Chocolate Truffle Cake

Step 1: Prep Baking Dish
Preheat your oven to 325°F (163°C). Prepare an 8-inch springform pan by lining the bottom with parchment paper and greasing the sides generously. To create a water bath, wrap the outside of the pan in aluminum foil and place it in a larger roasting pan. Set aside as you move on to the chocolate mixture.

Step 2: Melt Chocolate and Butter
In a heatproof bowl, combine 1 pound of bittersweet or semidark chocolate and 16 tablespoons of unsalted butter, along with ¼ cup of strong black coffee or liqueur, if using. Set the bowl over a pot of simmering water, ensuring it doesn’t touch the water, and stir until everything is melted and smooth, about 5-7 minutes. Remove it from heat and let it cool slightly.

Step 3: Whip Eggs
In a stand mixer, beat 4 cold eggs on high speed for about 5 minutes until they double in volume and become pale and frothy. The eggs are ready when they form soft peaks and hold a ribbon-like structure. This fluffy texture is key for the lightness of your Flourless Chocolate Truffle Cake.

Step 4: Combine Mixtures
Gently fold the whipped eggs into the cooled chocolate mixture in thirds. Use a spatula to carefully incorporate the eggs without deflating them, ensuring no visible egg foam remains. The aim is to maintain that airy texture that will result in a decadent cake.

Step 5: Bake
Pour the combined batter into your prepared springform pan, smoothing the top with a spatula. Place the pan into the larger roasting pan and surround it with boiling water until it reaches halfway up the sides of the cake pan. Bake for about 22-25 minutes, or until the cake slightly rises and a thin crust forms on top.

Step 6: Cool
Once baked, carefully remove the cake from the oven and the water bath. Allow it to cool to room temperature in the pan, and then cover it with plastic wrap or foil. Refrigerate for at least 6 hours or overnight to enhance the texture and flavor of your Flourless Chocolate Truffle Cake.

Step 7: Serve
Before serving your glorious cake, dust the top with confectioners’ sugar or unsweetened cocoa for an elegant finish. Use a warm knife to slice through the rich cake for clean cuts. Enjoy this delightful treat with a touch of whipped cream or fresh berries for an extra touch!

What to Serve with Flourless Chocolate Truffle Cake?

Indulging in the luxurious flavors of this cake is a delightful experience, especially when paired with the right accompaniments.

  • Whipped Cream: A dollop of lightly sweetened whipped cream adds a fluffy contrast that enhances the cake’s richness.

  • Fresh Berries: Raspberries or strawberries provide a burst of tartness, balancing the cake’s deep chocolate taste beautifully.

  • Vanilla Ice Cream: The creaminess of vanilla ice cream serves as a perfect counterpoint to the cake’s dense, fudgy texture.

  • Espresso or Coffee: A strong cup of espresso elevates chocolate flavors and adds sophistication to the dessert experience.

  • Chocolate Sauce: Drizzling warm chocolate sauce on top creates a decadent indulgence that chocolate lovers will relish.

  • Citrus Zest: A sprinkle of orange or lemon zest freshens up the dish, adding a bright contrast to the cake’s richness.

  • Mint Leaves: Fresh mint not only garnishes beautifully but also provides a refreshing note that enhances each bite.

  • Port Wine or Dessert Wine: A glass of sweet dessert wine or port complements the chocolate, making for a delightful pairing experience. Enjoy these pairings with your Flourless Chocolate Truffle Cake for a truly memorable dessert finale!

Expert Tips for Flourless Chocolate Truffle Cake

  • Egg Preparation: Use cold eggs as they whip better, leading to a fluffier cake. Warm eggs will not achieve the same volume, impacting the texture.

  • Chocolate Melting: Melt chocolate and butter gently; overheating can cause the mixture to seize. Keep the heat low and stir frequently for smooth results.

  • Folding Technique: Be gentle when folding in the eggs. Overmixing can deflate the whipped eggs, resulting in a denser cake rather than the expected lightness.

  • Baking Monitoring: Check the cake around the 22-minute mark; it should appear slightly risen and set but still soft in the middle. Overbaking will lead to dryness.

  • Chilling Time: Allow the cake to chill in the refrigerator for at least 6 hours. This ensures it sets properly, enhancing the truffle-like texture you want in this Flourless Chocolate Truffle Cake.

Make Ahead Options

These Flourless Chocolate Truffle Cakes are perfect for busy home cooks looking to save time without compromising on flavor! You can prepare the cake batter up to 24 hours in advance and refrigerate it before baking. Simply mix as directed, then cover the bowl and store it in the fridge. When you’re ready to bake, pour the batter into the prepared pan and follow the baking instructions. If you need even more flexibility, the baked cake can be stored in the refrigerator for up to 3 days, allowing the flavors to deepen. Just remember to dust with confectioners’ sugar or cocoa just before serving for that final touch of elegance! This way, you’ll have a stunning dessert ready with minimal effort during your busy weeknights.

How to Store and Freeze Flourless Chocolate Truffle Cake

Fridge: Store the cake in an airtight container for up to 3 days. This helps maintain its rich, moist texture and flavors.

Freezer: For longer preservation, wrap slices tightly in plastic wrap and place them in a freezer-safe bag or container. The cake can be frozen for up to 2 months.

Reheating: To enjoy, thaw slices in the fridge overnight or at room temperature for a few hours. Gently reheat in the microwave for a few seconds to bring back its melt-in-your-mouth experience.

Make-Ahead Tip: The Flourless Chocolate Truffle Cake can be made 1-2 days in advance and stored in the fridge, perfect for stress-free entertaining.

Flourless Chocolate Truffle Cake Variations

Feel free to explore these tempting twists to make your Flourless Chocolate Truffle Cake uniquely yours!

  • Vanilla Infusion: Replace coffee or liqueur with vanilla extract for a delightful aroma. This subtle change brightens the chocolate flavor, creating a lovely balance.

  • Dairy-Free Delight: Substitute unsalted butter with coconut oil or dairy-free butter for a vegan-friendly alternative. The flavor remains rich while accommodating those avoiding dairy.

  • Citrus Zest: Add a teaspoon of orange or lemon zest into the batter for a refreshing burst. This citrus addition elevates the cake, making it perfect for springtime gatherings.

  • Salty-Sweet Contrast: Finish your cake with a sprinkle of sea salt on top before serving. This enhances the chocolate flavor and adds that touch of gourmet flair.

  • Nuts About Texture: Fold in finely chopped nuts, like walnuts or hazelnuts, into the batter for an extra crunch. Not only does this add dimension, but it also complements chocolate beautifully.

  • Berry Bliss: Top your cake with a mix of fresh berries before serving. Strawberries, raspberries, or blueberries not only provide a pop of color but also a refreshing contrast to the rich cake.

  • Boozy Boost: For an added kick, incorporate a splash of your favorite liqueur, like Grand Marnier or Frangelico, directly into the batter. This surprise element will delight your guests!

For more enjoyable variations, consider whipping up a batch of my delightful Strawberry Cheesecake Bars or treating yourself to the luscious flavors of my charming Patriotic Poke Cake. The possibilities are endless—get creative!

Flourless Chocolate Truffle Cake Recipe FAQs

What type of chocolate should I use for the cake?
Opt for bittersweet or semidark chocolate with a cacao content of 60-80%. This range provides a deep, rich flavor that balances the sweetness and ensures a luxurious taste that truly shines in your Flourless Chocolate Truffle Cake.

How do I store the Flourless Chocolate Truffle Cake?
Store the cake in an airtight container in the refrigerator for up to 3 days. This helps retain its delightful texture and flavors, keeping it moist and ready to impress every time you serve it!

Can I freeze Flourless Chocolate Truffle Cake?
Absolutely! For freezing, wrap individual slices tightly in plastic wrap and place them in a freezer-safe bag or container. It can be frozen for up to 2 months. When you’re ready to enjoy it, simply thaw in the refrigerator overnight or at room temperature for a few hours, then consider a gentle reheat in the microwave for that just-baked experience.

What should I do if the cake seems to be too dense?
If your cake turns out denser than expected, it’s likely due to under-beaten eggs or overmixing when folding. For a fluffy texture, ensure that your eggs are well-whipped until doubled in volume, forming soft peaks. When combining the mixtures, be gentle to avoid deflating the eggs.

Does this cake contain allergens?
Yes, the Flourless Chocolate Truffle Cake contains eggs and butter, making it unsuitable for those with egg or dairy allergies. However, you can substitute dairy-free butter for a vegan version, ensuring that all your guests can enjoy this exquisite treat!

Flourless Chocolate Truffle Cake

Flourless Chocolate Truffle Cake: Decadence Without Guilt

Experience the rich and decadent Flourless Chocolate Truffle Cake, a gluten-free delight perfect for any occasion.
Prep Time 15 minutes
Cook Time 25 minutes
Cooling Time 6 hours
Total Time 6 hours 40 minutes
Servings: 8 slices
Course: Dessert
Cuisine: American
Calories: 350

Ingredients
  

For the Batter
  • 4 large Eggs cold for optimal volume
  • 16 tbsp Unsalted Butter can be substituted with dairy-free butter
  • 1 lb Bittersweet/Semidark Chocolate aim for 60-80% cacao
  • 1/4 cup Strong Black Coffee or Liqueur optional
For Dusting
  • Confectioners' Sugar or Unsweetened Cocoa optional

Equipment

  • 8-inch springform pan
  • Mixing Bowl
  • Stand Mixer
  • Pot for water bath
  • Spatula
  • Aluminum Foil
  • Parchment paper

Method
 

Step-by-Step Instructions
  1. Preheat your oven to 325°F (163°C). Prepare an 8-inch springform pan by lining the bottom with parchment paper and greasing the sides generously.
  2. In a heatproof bowl, combine 1 pound of bittersweet or semidark chocolate and 16 tablespoons of unsalted butter, along with ¼ cup of strong black coffee or liqueur, if using. Set the bowl over a pot of simmering water and stir until everything is melted and smooth, about 5-7 minutes.
  3. In a stand mixer, beat 4 cold eggs on high speed for about 5 minutes until they double in volume and become pale and frothy.
  4. Gently fold the whipped eggs into the cooled chocolate mixture in thirds without deflating them.
  5. Pour the combined batter into your prepared springform pan and bake for about 22-25 minutes, or until the cake slightly rises and a thin crust forms on top.
  6. Once baked, allow it to cool to room temperature and then refrigerate for at least 6 hours or overnight.
  7. Before serving, dust the top with confectioners' sugar or unsweetened cocoa and slice with a warm knife.

Nutrition

Serving: 1sliceCalories: 350kcalCarbohydrates: 25gProtein: 4gFat: 25gSaturated Fat: 15gPolyunsaturated Fat: 2gMonounsaturated Fat: 6gCholesterol: 150mgSodium: 50mgPotassium: 200mgFiber: 2gSugar: 15gVitamin A: 10IUCalcium: 2mgIron: 10mg

Notes

Store in an airtight container for up to 3 days. Can be frozen for up to 2 months. Allow to chill for at least 6 hours for best texture.

Tried this recipe?

Let us know how it was!

Creamy Oyster Stew Recipe for Ocean-Fresh Comfort

As I stood in my kitchen, the aroma of sautéed leeks and creamy broth wafted through the air, transporting me to the coastal shores where fresh oysters are a prized catch. This luxurious creamy oyster stew recipe captures that essence, blending the briny goodness of oysters with a velvety base that warms the heart. Not only is it ready in under 30 minutes, making it perfect for a cozy weeknight comfort meal, but it’s also adaptable to various dietary preferences, with vegetarian and gluten-free options available. So whether you’re a seasoned seafood lover or just looking to shake up your usual routine, this stew promises to impress. Curious about how to make this delightful dish your own? Let’s dive into it!

Why Is This Oyster Stew Recipe Irresistible?

Indulgent, Creamy Bliss: This oyster stew wraps your taste buds in a cozy, velvety embrace with each spoonful.

Quick Preparation: Ready in under 30 minutes, it’s perfect for busy weeknights when comfort is the goal.

Customizable Options: Whether you’re gluten-free or prefer a vegetarian twist, it’s easily adaptable to fit your dietary needs without sacrificing flavor.

Fresh Ocean Flavor: Experience the delightful brininess of fresh oysters that truly transport you to the sea.

Crowd-Pleasing Delight: Perfect for gatherings, this stew is sure to impress friends and family alike. Pair it with some garlic bread for the ultimate experience!

Oyster Stew Recipe Ingredients

• Dive into the essential components for a delightful oyster stew that will warm your heart!

  • Fresh Oysters – A key ingredient, offering that unique briny flavor that makes this oyster stew recipe unforgettable. Substitute with canned oysters if needed but expect a different texture.
  • Unsalted Butter – Adds a rich depth to the broth; for a dairy-free option, try olive oil instead.
  • Leek or Onion – Provides sweetness and savory aroma; shallots can be a milder alternative.
  • Celery – Introduces a delightful crunch; feel free to omit for a simpler flavor profile.
  • Whole Milk – Creates the creamy foundation of the stew; swap with half-and-half or non-dairy milk for a lighter version.
  • Heavy Cream – Boosts the richness of your stew; consider using more milk or a plant-based cream if you’re looking for a lighter option.
  • Worcestershire Sauce – Adds umami depth; soy sauce can work as a gluten-free substitute.
  • Tabasco Sauce – Brings a kick of heat; adjust to meet your spice preference!
  • Smoked Paprika – Contributes a lovely smoky flavor; regular paprika can be used if necessary.
  • Salt and White Pepper – The essential finishing touches for perfect seasoning; adjust based on your taste.
  • Fresh Parsley – A garnish that adds a pop of freshness; chives can be a lovely substitute.
  • Oyster Crackers – Serve alongside for a delightful crunch; gluten-free crackers ensure everyone can enjoy!

Step‑by‑Step Instructions for Oyster Stew Recipe

Step 1: Prepare the Ingredients
Begin by shucking fresh oysters and reserving their liquor in a bowl to use later. Finely dice the leek or onion and chop the celery into small pieces, aiming for uniform sizes to ensure even cooking. Have all your ingredients ready to streamline the cooking process and gather all your cooking equipment, including a large pot and a wooden spoon.

Step 2: Sauté Aromatics
In a large pot, melt 3 tablespoons of unsalted butter over medium heat. Once the butter is bubbly and fragrant, add the diced leek or onion along with the chopped celery. Sauté these aromatics for about 3-4 minutes until they become translucent, releasing a lovely aroma that sets the stage for your luxurious creamy oyster stew.

Step 3: Combine Broth Ingredients
Next, add the reserved oyster liquor, whole milk, and heavy cream to the pot, stirring gently to combine all the ingredients. Increase the heat slightly to bring the mixture to a low simmer, but avoid boiling to maintain the cream’s delicate texture. Let it simmer gently for about 2-3 minutes, allowing the flavors to meld beautifully together.

Step 4: Add Oysters
Now it’s time to introduce the star of the show! Carefully fold in the fresh oysters, followed by a splash of Worcestershire sauce and a few dashes of Tabasco for a touch of heat. Season the oyster stew with salt and white pepper, stirring gently as you cook for an additional 5-7 minutes. The oysters should plump up and become tender, inviting that delicious briny goodness into every bite.

Step 5: Serve
Once your oysters are cooked through and the stew has thickened slightly, remove it from the heat. Serve the creamy oyster stew hot in bowls, garnished with a sprinkle of fresh parsley for a pop of color. Pair it with oyster crackers on the side for added texture, and revel in the comforting, ocean-fresh experience that defines this exquisite oyster stew recipe.

Make Ahead Options

These Creamy Oyster Stew recipes are perfect for busy home cooks looking to save time during the week! You can shuck the oysters and prepare the aromatic base (butter, leek, and celery) up to 24 hours in advance. Just store them in airtight containers in the fridge to maintain freshness. When it’s time to enjoy your stew, simply sauté the prepped ingredients, add the reserved oyster liquor, whole milk, and heavy cream, then fold in the oysters and seasonings. This way, you’ll experience a warm, ocean-fresh meal with minimal effort, just like it was freshly made! Remember, this dish is best when served immediately after cooking for the creamiest texture.

How to Store and Freeze Oyster Stew

  • Fridge: Keep leftover oyster stew in an airtight container in the fridge for up to 3 days. Make sure to let it cool completely before sealing to preserve its creamy texture.

  • Freezer: Freeze oyster stew in a freezer-safe container for up to 2 months. Note that the texture may change slightly upon thawing, so be prepared for a different mouthfeel when reheating.

  • Reheating: When ready to enjoy, thaw in the fridge overnight and reheat gently on the stove over low heat, stirring frequently to maintain creaminess. Avoid boiling to prevent the cream from separating.

  • Flavor Boost: For best results, consider adding a splash of fresh cream or a squeeze of lemon juice while reheating to refresh the flavors of this delicious oyster stew recipe.

Expert Tips for the Best Oyster Stew

  • Oyster Care: Ensure oysters are fresh and clean before using; rinse them under cold water to remove any grit or sand.
  • Appropriate Temperature: Avoid boiling the stew after adding oysters; high heat can toughen them. Aim for a gentle simmer instead.
  • Season to Taste: Don’t forget that flavor builds during cooking; taste and adjust seasoning at different stages for the best oyster stew experience.
  • Creamy Consistency: If using a non-dairy milk alternative, check for unsweetened versions to ensure the stew remains savory and delicious.
  • Boost the Flavor: Consider adding herbs or spices like thyme or dill for an extra layer of flavor that complements the briny oysters.

Oyster Stew Recipe Variations

Discover how easy it is to make this oyster stew your own with delightful twists and substitutes!

  • Vegetarian Option: Swap out oysters for hearty mushrooms like shiitake or oyster mushrooms for a savory, umami-rich dish that everyone can enjoy.
  • Gluten-Free Option: Ensure all ingredients, including sauces and crackers, are gluten-free to accommodate dietary needs without losing flavor.
  • Dairy-Free Delight: Use coconut milk or almond milk instead of whole milk and heavy cream for a lighter, dairy-free version that still delivers creaminess.
  • Seasonal Adaptations: Add diced seasonal vegetables such as sweet corn in summer or roasted butternut squash in fall for a unique twist that captures each season’s bounty.
  • Extra Spice Kick: For heat lovers, add diced jalapeños or a pinch of cayenne pepper to elevate the warmth and make your stew exciting.
  • Seafood Medley: Mix in shrimp or lump crab meat alongside the oysters for a delicious seafood medley sure to impress your guests.
  • Herb Infusion: Infuse your stew with fresh herbs—like thyme or dill—during cooking for an added layer of flavor that enhances the ocean essence.
  • Lemon Zest Brightness: Brighten the flavor profile by adding a sprinkle of lemon zest just before serving to elevate freshness with each bite.

Feel free to explore these variations and see how they can bring new life to your comforting stew! And if you love hearty, satisfying meals like this, you might also enjoy our Savory Turkey Patties with Herbs or a delightful Mango Coconut Pudding for dessert!

What to Serve with Luxurious Creamy Oyster Stew?

Elevate your oyster stew experience with these delightful pairings that will make your meal truly unforgettable.

  • Crispy Garlic Bread: The crunchy texture and aromatic garlic butter are perfect for dipping into creamy broth and soaking up flavors.
  • Simple Arugula Salad: A fresh, peppery salad dressed with lemon vinaigrette balances the richness of the stew excellently.
  • Steamed Asparagus with Lemon: Tender asparagus adds a light crunch, while a squeeze of lemon brightens up the meal.
  • Cornbread Muffins: Sweet cornbread enhances the sea flavors, providing a delightful contrast that complements the brininess of the oysters.
  • Chilled White Wine: A glass of crisp Sauvignon Blanc revitalizes the palate, making each bite more enjoyable.
  • Oyster Crackers: Serve these alongside for traditional crunchiness that pairs fantastically well with your oyster stew, inviting just a bit of nostalgia.
  • Homemade Coleslaw: A creamy, tangy slaw adds a refreshing element, cutting through the rich, velvety stew in the most delightful way.
  • Lemon Sorbet: For dessert, a light lemon sorbet cleanses the palate after the savory richness of the oyster stew, rounding off the meal beautifully.
  • Herbed Rice Pilaf: Tender rice with herbs provides a subtle flavor and additional texture, making your dish heartier without overpowering the stew.
  • Miso Soup: Starting with a warm, umami-rich miso soup sets the right tone for your meal while complimenting the oceanic flavors of your oyster stew recipe.

Oyster Stew Recipe FAQs

What kind of oysters should I use for the oyster stew?
Absolutely! Fresh oysters are ideal for this recipe because they provide the unique briny flavor and texture that make the stew special. You can also use canned oysters in a pinch, but keep in mind that the flavor and texture will differ significantly. If you’re unsure about the freshness of the oysters, look for ones that are tightly closed; any that are open should be discarded.

How long can I store leftover oyster stew?
Very! You can store leftover oyster stew in an airtight container in the fridge for up to 3 days. Be sure to let it cool completely before sealing to preserve its creamy texture. If you’ve made a large batch, it’s wise to separate the portions into smaller containers for quick access during the week!

Can I freeze oyster stew for later?
Absolutely! You can freeze oyster stew in a freezer-safe container for up to 2 months. Keep in mind that the texture may change slightly upon thawing, but it will still be tasty! To reheat, thaw it in the fridge overnight, then gently warm it on the stove over low heat while stirring frequently to maintain creaminess. Avoid boiling to prevent the cream from separating.

What if my oyster stew is too thick or too thin?
No worries at all! If your oyster stew turns out too thick, simply thin it out by adding a little more broth or milk until you reach your desired consistency. Conversely, if it’s too thin, let it simmer for a few extra minutes to allow the flavors to meld and the stew to thicken. Always taste and adjust the seasonings along the way to enhance the flavors beautifully.

Are there any dietary concerns I should be aware of?
Very important! If you’re cooking for someone with seafood allergies, you’ll want to avoid oysters altogether. Additionally, this recipe can easily be made gluten-free; just ensure that the Worcestershire sauce and oyster crackers you use are certified gluten-free. For those with dairy sensitivities, substitute the whole milk and heavy cream with non-dairy alternatives without losing richness.

Can I modify the recipe for a vegetarian option?
Of course! You can swap out the oysters for hearty mushrooms such as shiitake or oyster mushrooms, which can capture that umami flavor without the seafood. Sauté the mushrooms until they’re tender, and follow the rest of the recipe as usual for a delicious vegetarian oyster stew alternative. Experimenting is part of the fun in cooking!

Oyster Stew Recipe

Creamy Oyster Stew Recipe for Ocean-Fresh Comfort

This creamy oyster stew recipe brings the coastal flavor with fresh oysters, perfect for a comforting dinner in under 30 minutes.
Prep Time 10 minutes
Cook Time 15 minutes
Total Time 25 minutes
Servings: 4 bowls
Course: Dinner
Cuisine: Seafood
Calories: 350

Ingredients
  

  • 1 pound Fresh Oysters Substitute with canned oysters if needed
  • 3 tablespoons Unsalted Butter Use olive oil for a dairy-free option
  • 1 medium Leek or Onion Shallots can be a milder alternative
  • 1 cup Celery Feel free to omit
  • 1 cup Whole Milk Swap with half-and-half or non-dairy milk
  • 1/2 cup Heavy Cream Consider using more milk for a lighter option
  • 1 tablespoon Worcestershire Sauce Soy sauce can work as a gluten-free substitute
  • 2 dashes Tabasco Sauce Adjust to meet your spice preference
  • 1 teaspoon Smoked Paprika Regular paprika can be used if necessary
  • to taste Salt and White Pepper Adjust based on your taste
  • 2 tablespoons Fresh Parsley Chives can be a lovely substitute
  • 1 cup Oyster Crackers Use gluten-free crackers if necessary

Equipment

  • large pot
  • wooden spoon

Method
 

  1. Begin by shucking fresh oysters and reserving their liquor in a bowl for later use. Dice the leek or onion and chop the celery into small pieces for even cooking.
  2. In a large pot, melt the butter over medium heat. Add the diced leek or onion and chopped celery, sautéing for 3-4 minutes until translucent.
  3. Add the reserved oyster liquor, whole milk, and heavy cream to the pot, stirring gently. Bring to a low simmer and let it simmer for 2-3 minutes.
  4. Fold in the fresh oysters along with Worcestershire sauce and Tabasco. Season with salt and white pepper, cooking for an additional 5-7 minutes.
  5. Remove from heat and serve hot, garnished with parsley and accompanied by oyster crackers.

Nutrition

Serving: 1bowlCalories: 350kcalCarbohydrates: 12gProtein: 23gFat: 25gSaturated Fat: 15gPolyunsaturated Fat: 2gMonounsaturated Fat: 5gCholesterol: 60mgSodium: 780mgPotassium: 500mgFiber: 2gSugar: 3gVitamin A: 800IUVitamin C: 4mgCalcium: 200mgIron: 2mg

Notes

Ensure oysters are fresh and clean. Avoid boiling the stew after adding oysters to prevent toughening. Adjust seasoning to taste during cooking for the best experience.

Tried this recipe?

Let us know how it was!