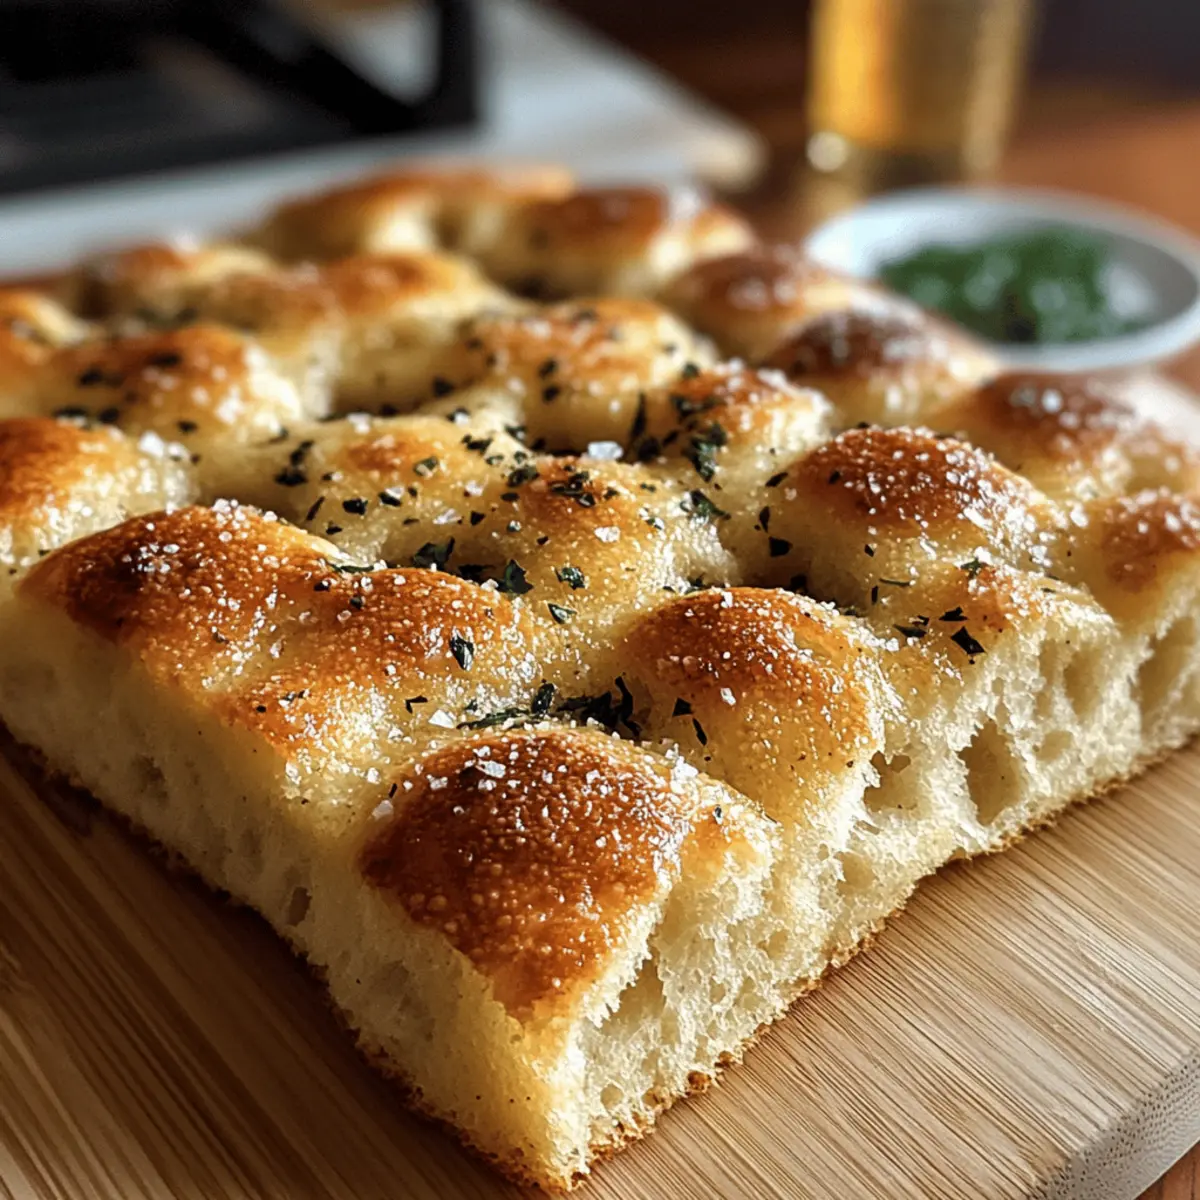
Ferrero Rocher Cookies That Melt in Your Mouth

As I stood in my kitchen, the air filled with the comforting aroma of butter and chocolate, I couldn’t help but feel a little giddy thinking about these Ferrero Rocher Cookies. These treats, inspired by our favorite chocolate hazelnut confection, elevate cookie time to a new level of indulgence. Featuring rich Nutella mixed into the dough, they offer a delightful chewiness that’s perfectly balanced by the satisfying crunch of toasted hazelnuts. Plus, they are incredibly quick to whip up, making them a fantastic last-minute dessert option for any occasion. The combination of flavors is nothing short of magical! If you’re craving a sweet escape from the ordinary, stick around to discover how to create these chewy bites of bliss. What’s your favorite chocolate treat to indulge in?
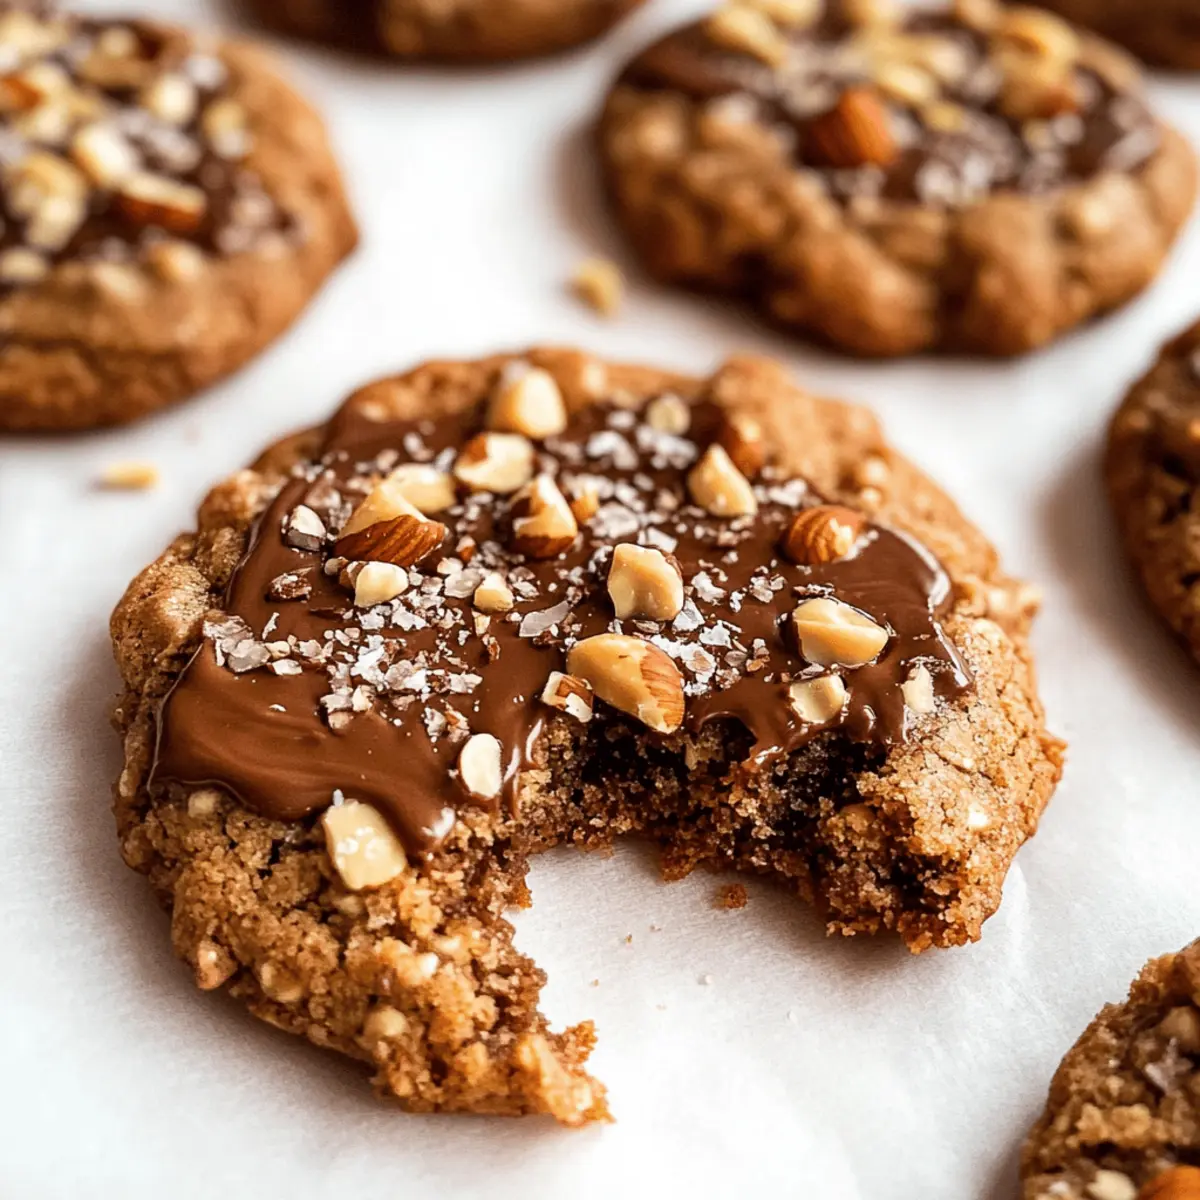
Why Are Ferrero Rocher Cookies Irresistible?

Chewy Delight: Each bite of these Ferrero Rocher Cookies is a perfect fusion of rich Nutella and chewy goodness.

Quick to Make: The preparation is effortless, meaning you can satisfy your sweet tooth in no time, ideal for spontaneous gatherings.

Crowd-Pleaser: Whether serving to friends or family, these cookies are bound to impress and vanish from the plate.

Customization Options: Feel free to experiment with different nuts or add chocolate chips for an extra indulgent touch, just like Chocolate Cranberry Cookies.

Gourmet Finish: Topping with melted Nutella gives each cookie a gourmet touch that elevates them to the next level, making them a memorable treat!

Ferrero Rocher Cookies Ingredients

• Indulge in these delightful hazelnut treats!

For the Dough

  • Unsalted Butter – Adds richness and moisture. Make sure it’s at room temperature for the best texture.
  • Nutella – Provides a creamy chocolate flavor. You can substitute with any chocolate hazelnut spread if preferred.
  • Kosher Salt – Enhances sweetness and balances flavors. Table salt can work in a pinch.
  • Vanilla Extract – Adds aromatic depth. Pure vanilla or vanilla bean extract significantly enhances flavor.
  • Brown Sugar – Gives moisture and a caramel-like taste. White sugar can be used, but it will change the texture.
  • Granulated Sugar – Adds sweetness and helps cookies spread. Feel free to use caster sugar for a finer texture.
  • Eggs – Provide structure and moisture. Ensure they are at room temperature for optimal mixing.
  • Baking Soda – Acts as a leavening agent to ensure cookies rise perfectly. Avoid substituting with baking powder.
  • All-Purpose Flour – Forms the base of the cookie. Cake flour can yield a lighter cookie if you prefer.

For the Mix-Ins

  • Chopped Hazelnuts – Adds crunch and nutty flavor. Toast them before mixing for a more intense taste.
  • Chocolate Chips – Provides extra chocolatey goodness. Choose dark or semisweet chips based on your preference.

For Topping

  • Melted Nutella – Adds a luscious chocolate layer on top. This finishing touch elevates the cookies to gourmet status.

Step‑by‑Step Instructions for Ferrero Rocher Cookies

Step 1: Cream the Butter and Nutella
In a mixing bowl, combine room-temperature unsalted butter and Nutella using an electric mixer. Beat the ingredients together for about 2-3 minutes until the mixture is light, fluffy, and well-blended. This creates a rich base for your Ferrero Rocher cookies, enhancing the chocolatey flavor right from the start.

Step 2: Add Sugars, Salt, and Vanilla
Next, add in the brown sugar, granulated sugar, kosher salt, and vanilla extract to the creamed mixture. Continue mixing for an additional 1-2 minutes until everything is fully combined and the mixture is smooth. The sugars will add sweetness and depth, fostering the delightful taste in your cookies.

Step 3: Incorporate the Eggs
Crack in the eggs, including the egg yolk, into your mixture. Beat the ingredients together until they are creamy and well blended. This step adds moisture and structure to your Ferrero Rocher cookies, ensuring they have that lovely chewy texture we all adore.

Step 4: Mix in Dry Ingredients
Gradually sift in the all-purpose flour and baking soda, stirring gently until just combined. Do not overmix at this stage; the dough for your Ferrero Rocher cookies should remain slightly lumpy. This action helps maintain the soft, chewy center while ensuring the cookies rise beautifully when baked.

Step 5: Fold in Hazelnuts and Chocolate Chips
With a spatula, gently fold in the toasted, chopped hazelnuts and chocolate chips until they are evenly distributed throughout the dough. This adds delightful crunch and extra chocolatey goodness to your Ferrero Rocher cookies, giving each bite a wonderful texture and flavor contrast.

Step 6: Chill the Dough
Cover the cookie dough tightly with plastic wrap and place it in the refrigerator to chill for at least 1 hour, though overnight is ideal for enhanced flavor. Chilling the dough prevents excessive spreading during baking, enabling those scrumptious Ferrero Rocher cookies to hold their shape while achieving that perfect chew.

Step 7: Preheat and Prepare
Preheat your oven to 350°F (180°C). Line baking sheets with parchment paper to ensure easy removal of the cookies. Scoop portions of the chilled dough and roll them into balls, then roll each ball in more chopped hazelnuts. This step adds a beautiful finish while ensuring that nutty goodness is present in every cookie.

Step 8: Bake the Cookies
Place the prepared dough balls on the parchment-lined baking sheets, leaving some space between them. Bake the Ferrero Rocher cookies in the preheated oven for 11-12 minutes, or until the edges are golden brown, while the centers remain soft. The smell of hazelnut and chocolate will surely fill your kitchen!

Step 9: Add Melted Nutella Topping
Remove the cookies from the oven and let them cool slightly on the baking sheet. Once cooled for about 5 minutes, drizzle or spread melted Nutella over each cookie for a delectable finishing touch. Allow the cookies to cool completely on a wire rack, ensuring the Nutella firms up to create a luscious chocolate layer.

Expert Tips for Ferrero Rocher Cookies

  • Room Temperature Ingredients: Ensure your butter and eggs are at room temperature for optimal mixing and texture, creating the best Ferrero Rocher cookies.

  • Avoid Overmixing: Mix the dough just until combined after adding the flour to prevent dense cookies; this helps ensure a chewy texture.

  • Toast Hazelnuts: Toasting your chopped hazelnuts enhances their flavor and adds a delightful crunch, elevating your cookies even further.

  • Chill the Dough: Don’t skip the chilling step; refrigerating the dough helps prevent spreading and pushes the flavor to a new level.

  • Watch the Baking Time: Keep an eye on your cookies in the oven; they should be golden at the edges and soft in the center for that perfect chewy bite.

What to Serve with Ferrero Rocher Cookies

Imagine the delightful experience of savoring each chocolatey bite while you enjoy these scrumptious treats alongside other delicious offerings.

  • Glass of Milk: The classic accompaniment! A cold, creamy glass of milk pairs perfectly with the cookies’ rich Nutella flavor, enhancing each delicious bite.

  • Coffee: A warm cup of coffee complements the sweetness of the Ferrero Rocher cookies and provides a delightful contrast of flavors and aromas.

  • Vanilla Ice Cream: Serve these cookies warm with a scoop of smooth vanilla ice cream on the side for a decadent dessert experience that’s truly irresistible.

  • Fresh Berries: Light and refreshing, a side of juicy raspberries or strawberries adds a burst of freshness that offsets the rich chocolate beautifully.

  • Homemade Hot Chocolate: Intensify the chocolate experience by pairing these cookies with a rich cup of homemade hot chocolate, topped with whipped cream for indulgence.

  • Nutty Trail Mix: For added texture and crunch, serve with a mix of various nuts and dried fruits that echoes the cookie’s hazelnut flavor, creating a balanced snack spread.

  • Cheesecake Bites: Complement the cookies with small bites of creamy cheesecake to contrast the chewy texture and bring a touch of tanginess to the sweetness.

  • Chocolate Milkshake: Indulge your sweet tooth with a thick chocolate milkshake, marrying the flavors of chocolate and hazelnut in a blissfully creamy treat.

  • Buttermilk Pancakes: For a delightful breakfast twist, pair these cookies with fluffy buttermilk pancakes topped with syrup, creating a fun, sweet start to your day.

How to Store and Freeze Ferrero Rocher Cookies

Airtight Container: Store baked Ferrero Rocher cookies in an airtight container at room temperature for up to 4 days to maintain their chewy texture.

Freezing Baked Cookies: For longer enjoyment, freeze baked cookies in a single layer, then transfer them to a freezer bag for up to 2 months.

Freezing Cookie Dough: You can also freeze the cookie dough, wrapped tightly in plastic wrap, for up to 3 months before baking. Just thaw in the fridge before baking.

Reheating Tips: To enjoy cookies warm, reheat them in a microwave for 10-15 seconds or in a preheated oven at 300°F (150°C) for about 5 minutes.

Make Ahead Options

These Ferrero Rocher Cookies are perfect for meal prep enthusiasts! You can prepare the cookie dough up to 24 hours in advance by mixing all your ingredients, then covering it tightly with plastic wrap and refrigerating. The dough benefits from this overnight chill, which enhances the flavors while helping maintain the perfect consistency during baking. If you’re really pressed for time, you can even roll the dough into balls and keep them frozen for up to 3 months; just bake them straight from the freezer—just add an extra minute or two to the baking time. When you’re ready to enjoy these indulgent treats, simply scoop, bake, and top with melted Nutella for that to-die-for finishing touch!

Ferrero Rocher Cookies Variations & Substitutions

Feel free to explore these exciting variations that will make your homemade Ferrero Rocher Cookies truly unique!

  • Nut-Free: Substitute hazelnuts with sunflower seeds or pumpkin seeds for a nut-free alternative without losing crunch.
  • Vegan: Swap butter for coconut oil and eggs for flax eggs (1 tablespoon flaxseed meal + 2.5 tablespoons water), making these indulgent cookies vegan-friendly.
  • Spicy Kick: Add a dash of cinnamon or a pinch of cayenne pepper to the dough for a warming twist that tantalizes your taste buds.
  • Rich Cocoa: Replace some of the flour with cocoa powder for an extra chocolatey flavor that pairs beautifully with the Nutella.
  • Fruity Flavor: Mix in dried cranberries or mini chocolate-covered oranges for a burst of flavor that complements the chocolate wonderfully—like the delicious treat found in Chocolate Cranberry Cookies.
  • Stuffed Cookies: Create cookie sandwiches by adding a layer of Nutella or cookie butter between two baked cookies for a surprise inside.
  • Double Chocolate: Incorporate double the chocolate by mixing in chunks of chocolate along with chocolate chips, ensuring a chocolate lover’s dream!
  • Texture Twist: Use quick oats for a chewy texture variation, giving your Ferrero Rocher Cookies more character while maintaining that delightful crunch.

Experimenting with these variations will ensure every batch of cookies is a delightful surprise, just waiting to be shared with family and friends!
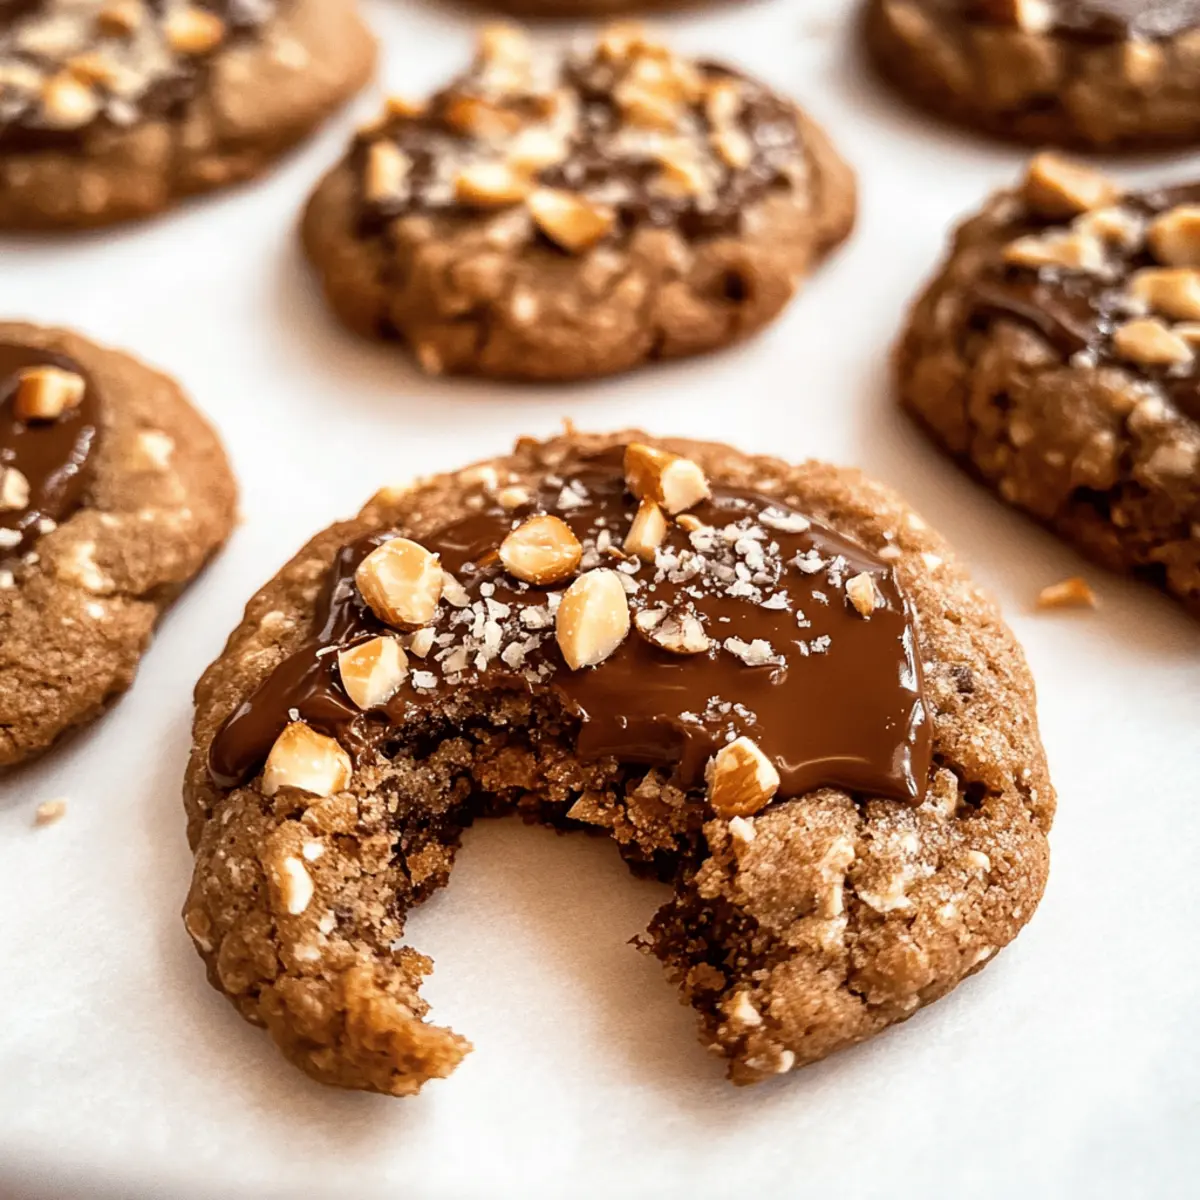
Ferrero Rocher Cookies Recipe FAQs

How can I select ripe ingredients for my Ferrero Rocher Cookies?
Absolutely! For the best flavor, make sure to use room temperature unsalted butter and eggs, which ensures proper mixing and a creamy texture in your cookie dough. When choosing hazelnuts, look for ones that are firm and fresh, storing them in a cool place to maintain their crunchy goodness.

What storage methods work best for Ferrero Rocher Cookies?
Store your baked Ferrero Rocher cookies in an airtight container at room temperature for up to 4 days to keep them chewy. If you’d like to enjoy them for a longer period, consider freezing them. Place baked cookies in a single layer on a baking sheet before transferring them to a freezer bag, where they can last for up to 2 months.

How do I freeze cookie dough for my Ferrero Rocher Cookies?
Very! To freeze the cookie dough, first scoop the chilled dough into balls and place them on a parchment-lined baking sheet in a single layer. Freeze until they’re solid, then transfer them to a freezer-safe bag. This way, you can bake fresh cookies anytime! Just thaw the dough in the fridge overnight before baking.

What are some common troubleshooting tips for making Ferrero Rocher Cookies?
If your cookies turn out too flat, it might be due to not chilling the dough long enough or using softened butter instead of room temperature butter. For a chewier texture, make sure not to overmix when adding the flour, and keep an eye on the baking time—the cookies should be golden at the edges but still soft in the center.

Are Ferrero Rocher Cookies suitable for dietary restrictions?
Absolutely! This recipe is vegetarian-friendly, but be cautious if you’re serving them to guests with nut allergies due to the hazelnuts. You can adapt this recipe by replacing hazelnuts with seeds like sunflower or pumpkin seeds, for a nut-free delight. Always ensure to check the labels on your ingredients for any hidden allergens.

Ferrero Rocher Cookies

Ferrero Rocher Cookies That Melt in Your Mouth

Delight in these Ferrero Rocher Cookies, combining Nutella and hazelnuts for a chewy, indulgent treat.
Prep Time 20 minutes
Cook Time 12 minutes
Chilling Time 1 hour
Total Time 1 hour 32 minutes
Servings: 24 cookies
Course: Dessert
Cuisine: American
Calories: 150

Ingredients
  

For the Dough
  • 1 cup Unsalted Butter Make sure it's at room temperature for the best texture.
  • 1 cup Nutella You can substitute with any chocolate hazelnut spread if preferred.
  • 1 teaspoon Kosher Salt Table salt can work in a pinch.
  • 2 teaspoons Vanilla Extract Pure vanilla or vanilla bean extract significantly enhances flavor.
  • 1 cup Brown Sugar White sugar can be used, but it will change the texture.
  • 1/2 cup Granulated Sugar Feel free to use caster sugar for a finer texture.
  • 2 Eggs Ensure they are at room temperature for optimal mixing.
  • 1 teaspoon Baking Soda Avoid substituting with baking powder.
  • 2 cups All-Purpose Flour Cake flour can yield a lighter cookie if you prefer.
For the Mix-Ins
  • 1 cup Chopped Hazelnuts Toast them before mixing for a more intense taste.
  • 1 cup Chocolate Chips Choose dark or semisweet chips based on your preference.
For Topping
  • 1/2 cup Melted Nutella This finishing touch elevates the cookies to gourmet status.

Equipment

  • Mixing Bowl
  • Electric Mixer
  • Spatula
  • Baking Sheets
  • Parchment paper
  • Refrigerator

Method
 

Preparation Steps
  1. Cream the Butter and Nutella by combining room-temperature unsalted butter and Nutella using an electric mixer for about 2-3 minutes until light and fluffy.
  2. Add brown sugar, granulated sugar, kosher salt, and vanilla extract. Mix for an additional 1-2 minutes until fully combined.
  3. Incorporate the eggs one at a time, beating until creamy and well blended.
  4. Gradually sift in the all-purpose flour and baking soda, stirring gently until just combined to keep the dough slightly lumpy.
  5. Fold in toasted chopped hazelnuts and chocolate chips until evenly distributed.
  6. Chill the dough tightly covered in plastic wrap in the refrigerator for at least 1 hour.
  7. Preheat the oven to 350°F (180°C) and line baking sheets with parchment paper. Roll chilled dough into balls and then in chopped hazelnuts.
  8. Bake the cookies in the preheated oven for 11-12 minutes until edges are golden brown and centers remain soft.
  9. Once cooled slightly, drizzle or spread melted Nutella over each cookie and let cool completely on a wire rack.
Nutrition

Serving: 1cookieCalories: 150kcalCarbohydrates: 19gProtein: 2gFat: 7gSaturated Fat: 3gPolyunsaturated Fat: 1gMonounsaturated Fat: 3gCholesterol: 20mgSodium: 50mgPotassium: 80mgFiber: 1gSugar: 10gVitamin A: 250IUCalcium: 20mgIron: 1mg

Notes

Ensure all ingredients are at room temperature for the best texture in the cookies.

Tried this recipe?

Let us know how it was!

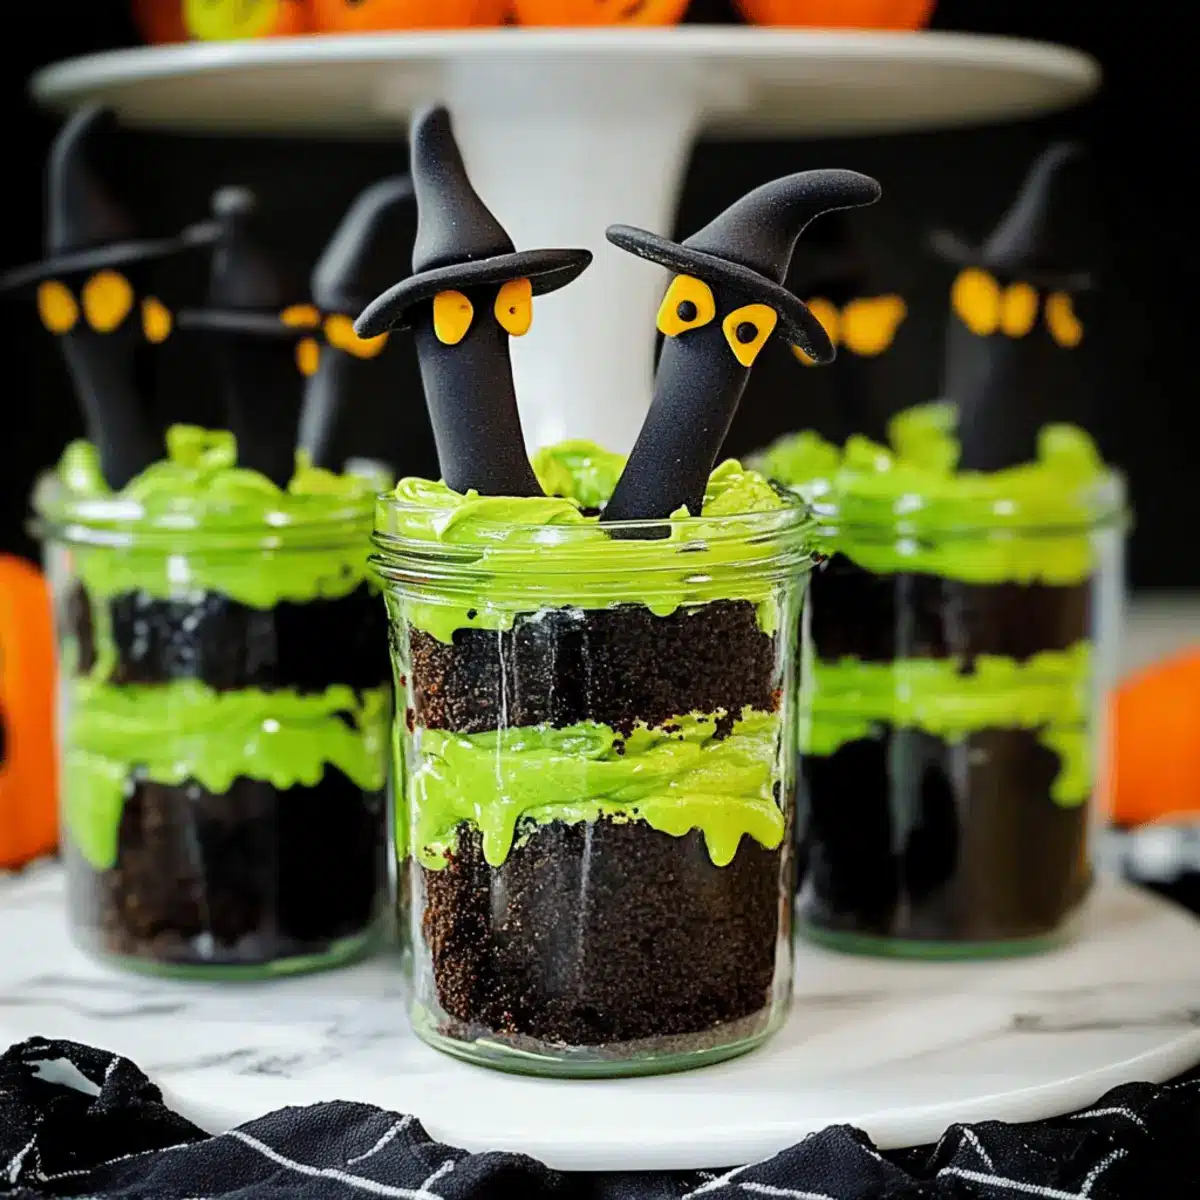
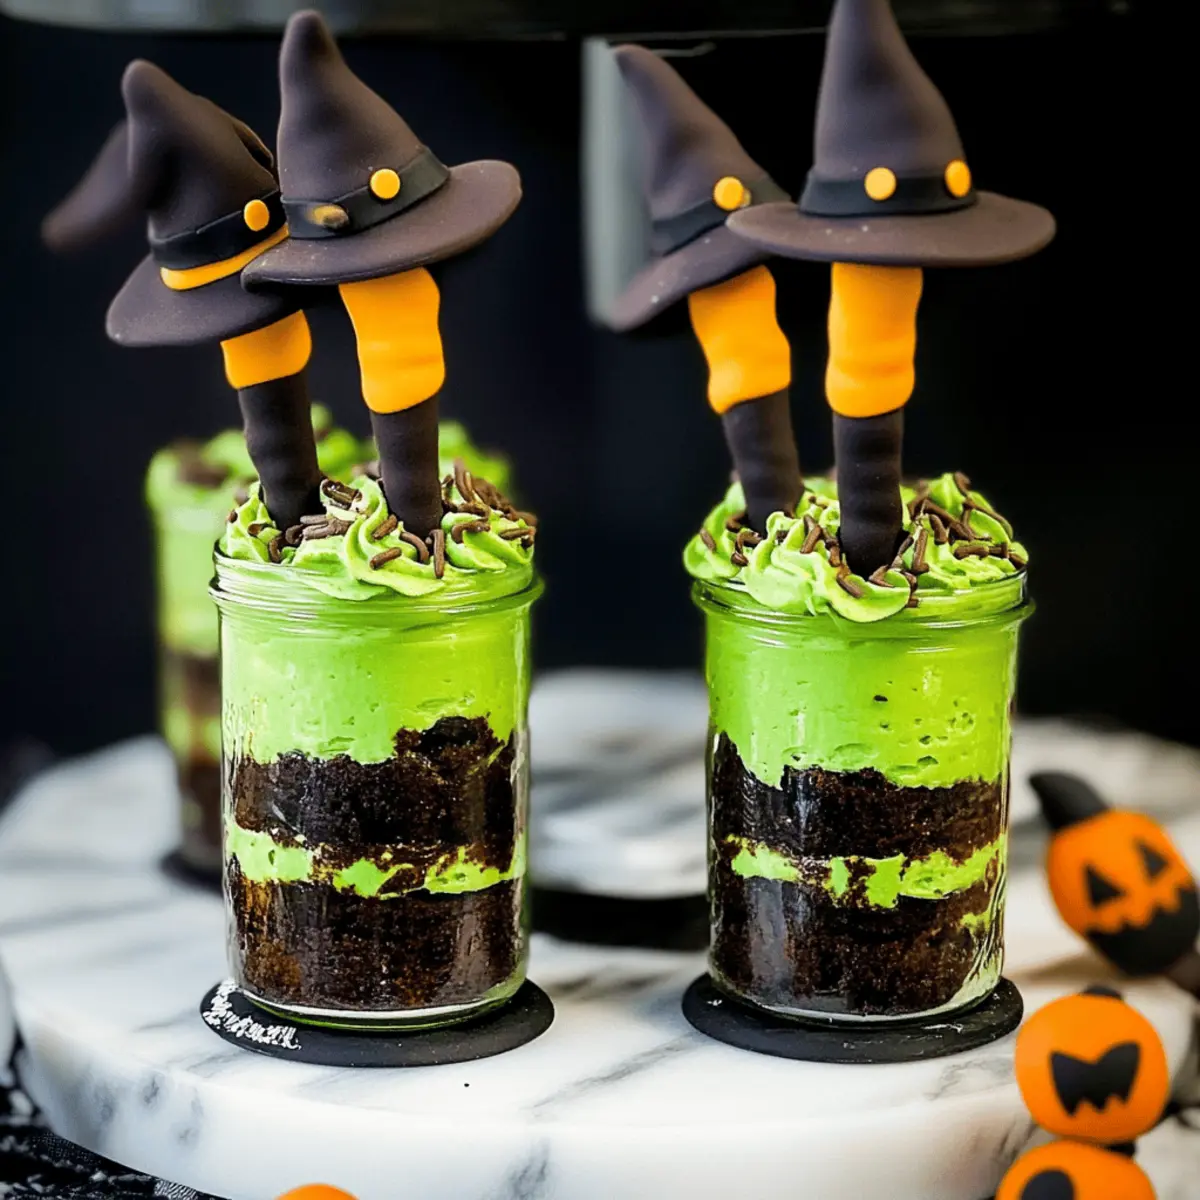
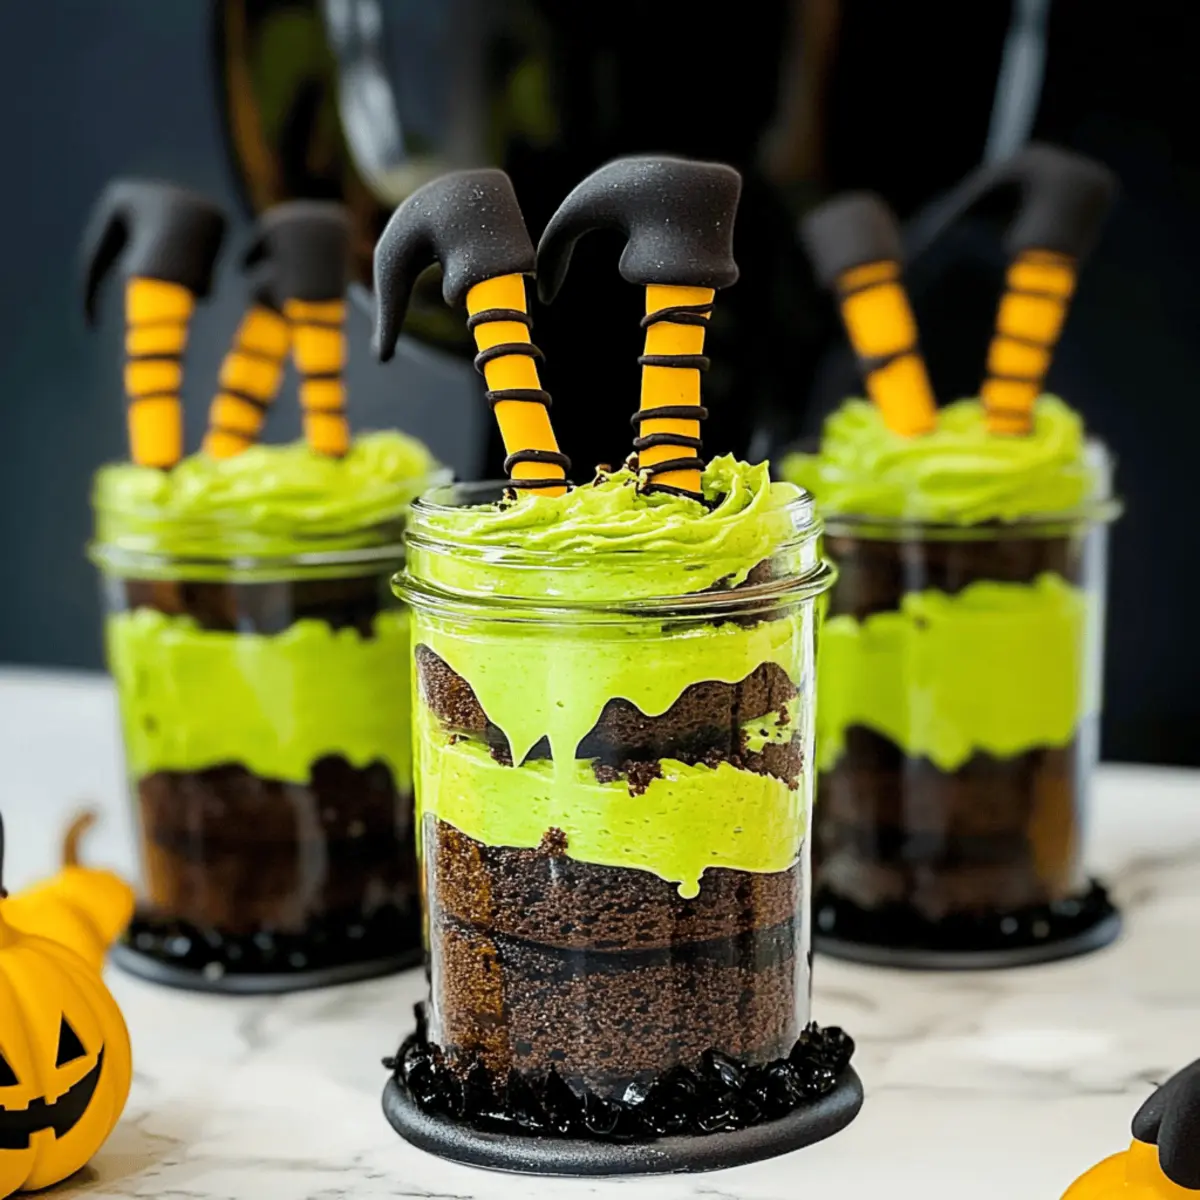
Witches’ Brew Halloween Cake Jars: A Spooktacular Treat!

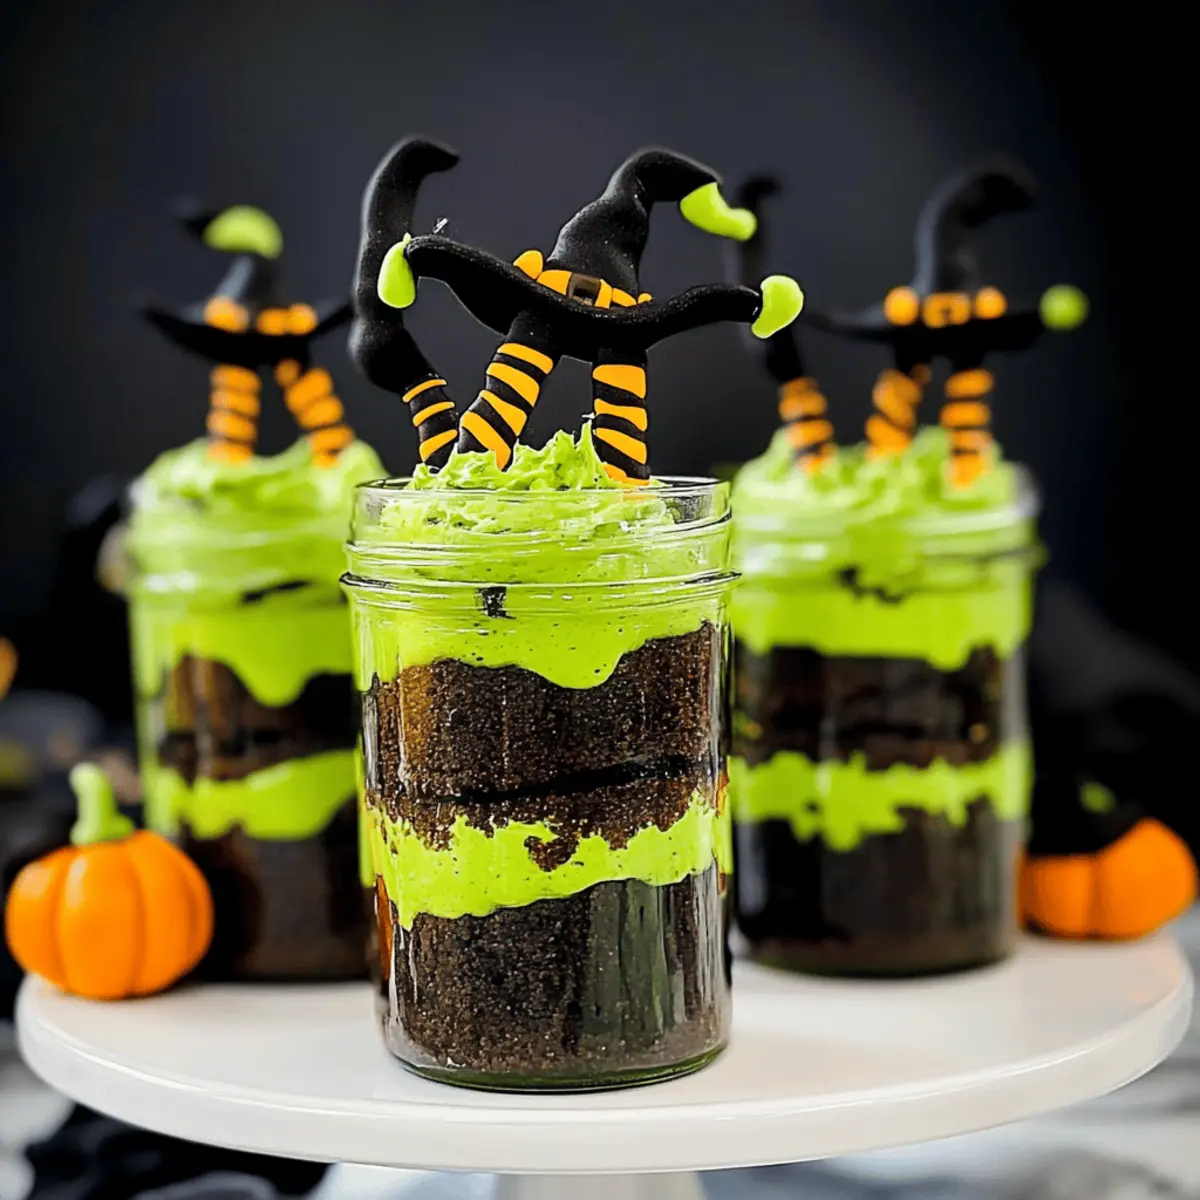
As the sun dips below the horizon and the air turns crisp, I’m reminded that Halloween is just around the corner. There’s something wonderfully nostalgic about this time of year, especially when it involves crafting spooky delights like Witches’ Brew Halloween Cake Jars. These charming layers of rich chocolate cake and vivid green buttercream don’t just taste amazing—they also bring an element of playful whimsy to your festivities. Not only are they a fun and creative twist on traditional desserts, but they’re also a breeze to prepare, making them perfect for those of us who want to impress without spending hours in the kitchen. Ready to whip up some enchanting treats that will wow your family and friends? Let’s dive into the creation of these delightful jars!

Why Make Witches’ Brew Cake Jars?

Simplicity at its finest: This recipe is easy to follow, perfect for both novice bakers and seasoned chefs alike.

Incredible flavor: The combination of moist chocolate cake and creamy buttercream creates a decadent treat that you won’t want to share!

Eye-catching presentation: With charming fondant witch legs peeking out, these jars are sure to be a hit at any Halloween gathering.

Versatile options: Feel free to mix it up with different cake flavors or frostings, like substituting cream cheese frosting for a unique twist.

Fun for all ages: Kids love decorating their own jars, making this a fantastic activity for family gatherings or parties.

Make-ahead potential: Prep these delicious treats ahead of time—just assemble the jars when it’s time to serve! Perfect for busy days leading up to Halloween.

Witches’ Brew Halloween Cake Jars Ingredients

For the Cake

  • Granulated Sugar – Provides sweetness and moisture to the cake; adjust levels to taste as desired.
  • Butter – Adds richness and flavor; opt for unsalted butter for better control of the salt.
  • Eggs – Essential for structure and moisture; substitute with flax eggs for a vegan option.
  • Self-Raising Flour – Ensures the cake rises beautifully; use all-purpose flour combined with baking powder as a substitute.
  • Cocoa Powder – Deepens the chocolate flavor; Dutch-processed cocoa offers a richer taste.
  • Milk – Contributes moisture; replace with plant-based milk for a dairy-free treat.
  • Vanilla Extract – Enriches flavor; almond extract can be an exciting twist.

For the Buttercream

  • Powdered Sugar – Creates a sweet and smooth buttercream frosting; no direct substitutions recommended.
  • Food Coloring – Adds a spooky green hue to the frosting; use gel food coloring to maintain consistency.

For Decoration

  • Orange Fondant – Essential for crafting the witch legs; homemade modeling chocolate can serve as a substitute.
  • Black Fondant – Perfect for detailing; black edible markers can also be used for simplicity.
  • CMC Powder – Aids in hardening fondant; optional but recommended for sturdier legs.

Now that you have your ingredients ready, you’re just a whisk and a bake away from creating these whimsical Witches’ Brew Halloween Cake Jars!

Step‑by‑Step Instructions for Witches’ Brew Halloween Cake Jars

Step 1: Prepare Fondant Legs
Start by mixing CMC powder into orange fondant, kneading until well incorporated. Roll the fondant into thin strips to create witch legs, cutting them into desired lengths. Shape them and add black fondant stripes for detail. Keep the fondant covered to prevent it from drying out while you proceed with the next steps.

Step 2: Bake the Cake
Preheat your oven to 170°C (340°F). In a large mixing bowl, cream together the unsalted butter and granulated sugar until light and fluffy, about 3–5 minutes. Gradually add in the eggs, mixing well after each addition. Sift together the self-raising flour and cocoa powder, and slowly combine with the wet ingredients until just mixed. Pour the batter into a greased 9-inch square baking tin and bake for 45–50 minutes, or until a toothpick inserted into the center comes out clean.

Step 3: Cool the Cake
Once the cake is baked, remove it from the oven and allow it to cool in the tin for 10 minutes. Carefully transfer the cake to a wire rack and let it cool completely. This cooling process is essential; frosting on a warm cake can melt and affect the layers in your Witches’ Brew Halloween Cake Jars.

Step 4: Make the Buttercream
While the cake is cooling, prepare the vibrant green buttercream frosting. In a mixing bowl, beat the unsalted butter until creamy and smooth. Gradually add powdered sugar, continuing to mix until fully combined. Stir in vanilla extract and gel food coloring until desired shade is achieved, ensuring it matches the theme of your Witches’ Brew Halloween Cake Jars.

Step 5: Assemble the Jars
With the cake cooled and buttercream ready, cut the chocolate cake into rounds that fit inside your jars. Layer the cake and buttercream in each jar, alternating between the two and adding festive sprinkles for a fun touch. Once you’ve created your delightful layers, insert the fondant witch legs into the top of each jar, positioning them to give a charming ‘peeking out’ effect, creating the allure of Witches’ Brew Halloween Cake Jars.

How to Store and Freeze Witches’ Brew Halloween Cake Jars

Room Temperature: Enjoy your cake jars fresh for 2-3 days at room temperature. Make sure they are covered to maintain moisture and prevent drying out.

Fridge: Store leftovers covered in the fridge for up to a week. This will help retain the freshness of the cake and buttercream, although the texture may soften slightly.

Freezer: For longer storage, freeze individual jars for up to 2 months. Ensure they are tightly sealed, either in airtight containers or with plastic wrap, to prevent freezer burn.

Reheating: If you prefer your cake jars warm, thaw them overnight in the fridge and microwave for a few seconds, but keep an eye on the fondant, as it may lose its shape when heated.

Witches’ Brew Halloween Cake Jars: Variations & Substitutions

Get ready to conjure up your very own twist on these adorable Halloween treats!

  • Dairy-Free: Swap out regular milk for almond or oat milk to create a completely dairy-free version.
  • Chocolate Lovers: Use a rich chocolate cake instead of classic chocolate to intensify the cocoa flavor and decadence.
  • Vegan Option: Substitute eggs with flax eggs (1 tablespoon ground flaxseed mixed with 2.5 tablespoons water) for a vegan-friendly alternative.
  • Cream Cheese Frosting: Replace traditional buttercream with smooth cream cheese frosting for a delightful tanginess that pairs beautifully with chocolate.
  • Festive Sprinkles: Customize your sprinkles to match different themes! How about pumpkin sprinkles for fall or bright colors for a birthday celebration?
  • Gluten-Free: Use a gluten-free all-purpose flour blend instead of self-raising flour for a celiac-friendly option.
  • Heat It Up: Add a pinch of cayenne or chili powder to the cake batter for a surprising spicy kick that contrasts wonderfully with the sweet frosting.
  • Chocolate Drizzle: For an extra indulgent touch, drizzle some melted dark chocolate over the assembled jars right before serving.

These variations let you tailor the Witches’ Brew Halloween Cake Jars to suit your taste or dietary needs. If you’re inspired, don’t forget to check out my delicious Strawberry Cheesecake Bars or try whipping up some Cookies & Cream Cheesecake Cups as delightful alternatives! Enjoy the magic of Halloween baking!

What to Serve with Witches’ Brew Halloween Cake Jars

Breathe life into your Halloween gathering with delightful accompaniments that complement these spooky treats!

  • Spooky Fruit Salad: A mix of dark grapes, orange slices, and kiwi makes for a vibrant, healthy contrast to the rich cake jars, adding a refreshing burst of flavor.

  • Pumpkin Soup: The creamy texture and warm spices of pumpkin soup provide a comforting balance to the sweet cake jars, perfect for chilly October evenings.

  • Ghostly Meringues: Light and airy meringues shaped like ghosts offer a whimsical treat that pairs well with the richness of the cake jars, creating fun bites between layers of flavor.

  • Ghoulish Hot Chocolate: Rich hot chocolate topped with whipped cream and chocolate shavings introduces a cozy touch, while the chocolate enhances the cake’s flavor profile delightfully.

  • Candy Corn Cupcakes: These festive mini cupcakes echo the Halloween theme and sprinkle a sugary surprise that harmonizes with the flavors of the Witches’ Brew jars, fun for all ages!

  • Graveyard Dirt Pudding: Layers of chocolate pudding and crushed cookies create a playful, layered dessert that matches the spooky spirit, inviting everyone to dig in after the cake jars!

  • Black Licorice Straws: These whimsical straws not only look great but add a unique flavor that complements the sweet notes of the cake jars, making sips even more fun!

  • Spiced Apple Cider: Warm spiced apple cider offers a cozy drink choice that contrasts nicely with the rich dessert, making it a comforting complement to your Halloween spread.

  • Candy Apples: Crisp apples coated in caramel and nuts provide a delightful crunch that can balance the soft textures of the Witches’ Brew Halloween Cake Jars.

Make Ahead Options

These Witches’ Brew Halloween Cake Jars are perfect for meal prep and can save you significant time on party day! You can bake the chocolate cake up to 3 days in advance; just ensure it’s completely cool before wrapping it tightly in plastic wrap to maintain its moisture. The buttercream frosting can also be prepared and stored in the refrigerator for up to 24 hours—just give it a quick whip to restore its creamy texture before assembling. When you’re ready to serve, simply cut the cake into rounds, layer it with frosting in your jars, and finish by adding the fondant witch legs. This method keeps your lovely treats just as delicious and visually appealing, allowing you to enjoy the festive season with minimal stress!

Expert Tips for Witches’ Brew Cake Jars

  • Perfect Cooling: Allow the cake to cool completely before frosting to prevent melting. Frosting a warm cake can create a gooey mess!

  • Vibrant Colors: To achieve that spooky green hue, use gel food coloring, which won’t alter the buttercream’s consistency like liquid coloring might.

  • Fondant Handling: Keep fondant covered while not in use; it dries out quickly. If working in humidity, use CMC powder in your fondant to prevent sagging.

  • Layering Technique: When assembling the layers in the jars, be gentle—but firm—so the cake pieces fit snugly without crushing the buttercream. This makes for a beautifully layered presentation.

  • Taste Variations: Feel free to customize your Witches’ Brew Halloween Cake Jars by trying different cake flavors or frostings, like cream cheese for a tangy twist!

  • Chilled Treats: For a refreshing experience, serve these jars chilled, perfect for Halloween parties or any festive gathering.

Witches’ Brew Halloween Cake Jars Recipe FAQs

What type of sugar should I use for the cake?
I recommend using granulated sugar as it provides the perfect sweetness and moisture to the Witches’ Brew Halloween Cake Jars. While it’s best to stick to the recipe, you can adjust the sugar levels to taste if you prefer a less sweet cake.

How should I store my cake jars to keep them fresh?
For optimal freshness, you can store your cake jars at room temperature for 2-3 days if they are covered. If you prefer to keep them longer, refrigerate them for up to a week. Just remember that refrigerating might soften the texture a bit, so for best results, enjoy them sooner rather than later!

Can I freeze the cake jars for later use?
Absolutely! To freeze your Witches’ Brew Halloween Cake Jars, ensure that each jar is tightly sealed—either with an airtight lid or plastic wrap—to prevent freezer burn. They can be frozen for up to 2 months. When it’s time to enjoy them, thaw them overnight in the fridge and consider warming them gently in the microwave for a few seconds if you’d like.

What should I do if my fondant legs start to sag or lose shape?
If you’re working in a humid environment, incorporate CMC powder into your fondant to help it maintain its shape and prevent sagging. Always keep the fondant covered when not in use to prevent it from drying out. If it does harden, you can gently knead a little shortening into it to restore some pliability before shaping.

Can these cake jars accommodate dietary restrictions?
Yes! You can adapt this recipe for various dietary needs. Substitute eggs with flax eggs for a vegan option, and use plant-based milk instead of regular milk. If anyone has allergies to gluten, you could experiment with gluten-free flour blends in the cake, though I can’t guarantee the same texture.

What if I can’t find orange fondant for the witch legs?
If orange fondant is hard to come by, don’t worry! You can make your own modeling chocolate at home as a substitute. It’s easy to make and gives a similar result while allowing you to customize colors just as you like.

Witches' Brew Halloween Cake Jars

Witches' Brew Halloween Cake Jars: A Spooktacular Treat!

Craft delightful Witches' Brew Halloween Cake Jars with layers of rich chocolate cake and green buttercream for a spooky and fun dessert.
Prep Time 30 minutes
Cook Time 50 minutes
Cooling Time 10 minutes
Total Time 1 hour 30 minutes
Servings: 8 jars
Course: Dessert
Cuisine: American
Calories: 250

Ingredients
  

For the Cake
  • 1 cup Granulated Sugar Provides sweetness and moisture to the cake; adjust levels to taste as desired.
  • 1/2 cup Butter Adds richness and flavor; opt for unsalted butter for better control of salt.
  • 3 large Eggs Essential for structure and moisture; substitute with flax eggs for a vegan option.
  • 1 cup Self-Raising Flour Ensures the cake rises beautifully; use all-purpose flour combined with baking powder as a substitute.
  • 1/2 cup Cocoa Powder Deepens the chocolate flavor; Dutch-processed cocoa offers a richer taste.
  • 1/2 cup Milk Contributes moisture; replace with plant-based milk for a dairy-free treat.
  • 1 teaspoon Vanilla Extract Enriches flavor; almond extract can be an exciting twist.
For the Buttercream
  • 2 cups Powdered Sugar Creates a sweet and smooth buttercream frosting; no direct substitutions recommended.
  • 1 tablespoon Food Coloring Adds a spooky green hue to the frosting; use gel food coloring to maintain consistency.
For Decoration
  • 100 grams Orange Fondant Essential for crafting the witch legs; homemade modeling chocolate can serve as a substitute.
  • 50 grams Black Fondant Perfect for detailing; black edible markers can also be used for simplicity.
  • 1 teaspoon CMC Powder Aids in hardening fondant; optional but recommended for sturdier legs.

Equipment

  • Mixing Bowl
  • 9-inch square baking tin
  • Wire Rack

Method
 

Step-by-Step Instructions
  1. Prepare Fondant Legs: Start by mixing CMC powder into orange fondant, kneading until well incorporated. Roll the fondant into thin strips to create witch legs, cutting them into desired lengths. Shape them and add black fondant stripes for detail. Keep the fondant covered to prevent it from drying out while you proceed with the next steps.
  2. Bake the Cake: Preheat your oven to 170°C (340°F). In a large mixing bowl, cream together the unsalted butter and granulated sugar until light and fluffy, about 3–5 minutes. Gradually add in the eggs, mixing well after each addition. Sift together the self-raising flour and cocoa powder, and slowly combine with the wet ingredients until just mixed. Pour the batter into a greased 9-inch square baking tin and bake for 45–50 minutes, or until a toothpick inserted into the center comes out clean.
  3. Cool the Cake: Once the cake is baked, remove it from the oven and allow it to cool in the tin for 10 minutes. Carefully transfer the cake to a wire rack and let it cool completely. This cooling process is essential; frosting on a warm cake can melt and affect the layers in your Witches' Brew Halloween Cake Jars.
  4. Make the Buttercream: While the cake is cooling, prepare the vibrant green buttercream frosting. In a mixing bowl, beat the unsalted butter until creamy and smooth. Gradually add powdered sugar, continuing to mix until fully combined. Stir in vanilla extract and gel food coloring until desired shade is achieved, ensuring it matches the theme of your Witches' Brew Halloween Cake Jars.
  5. Assemble the Jars: With the cake cooled and buttercream ready, cut the chocolate cake into rounds that fit inside your jars. Layer the cake and buttercream in each jar, alternating between the two and adding festive sprinkles for a fun touch. Once you’ve created your delightful layers, insert the fondant witch legs into the top of each jar, positioning them to give a charming ‘peeking out’ effect, creating the allure of Witches' Brew Halloween Cake Jars.

Nutrition

Serving: 1jarCalories: 250kcalCarbohydrates: 35gProtein: 3gFat: 12gSaturated Fat: 7gPolyunsaturated Fat: 0.5gMonounsaturated Fat: 4.5gCholesterol: 35mgSodium: 150mgPotassium: 120mgFiber: 1gSugar: 20gVitamin A: 5IUCalcium: 3mgIron: 10mg

Notes

Allow the cake to cool completely before frosting to prevent melting. Use gel food coloring for vibrant colors that retain the buttercream's consistency.

Tried this recipe?

Let us know how it was!

Peanut Butter Spider Cookies: Spooky Sweet Halloween Delights

As I rummaged through my pantry last week, I stumbled upon a jar of creamy peanut butter and a few leftover Halloween treats—what a delightful surprise! Inspired by that find, I whipped up a batch of Peanut Butter Spider Cookies that are not only adorable but incredibly easy to make. These cookies are soft and chewy with a rich peanut butter flavor, topped with cute mini Reese’s cups and candy eyeballs, making them the perfect Halloween dessert. Whether you’re planning a spooky gathering or just craving a fun baking project, these tasty treats are sure to be a hit. Plus, they come together in just 26 minutes, making them as quick to whip up as they are fun to decorate! Are you ready to bring a little more sweetness to your spooky season?

What Makes These Cookies a Halloween Hit?

Irresistible cuteness: These Peanut Butter Spider Cookies are a visual delight, featuring sprightly spider designs that are sure to bring smiles to everyone.

Quick preparation: Whipping them up takes only 26 minutes from start to finish, perfect for those last-minute party plans.

Deliciously soft: Each bite bursts with rich peanut butter flavor, balanced by a delightful chewy texture.

Festive appeal: Ideal for Halloween gatherings, they’ll be the center of attention at any spooky event!

Feeling inspired? Pair these treats with my Garlic Butter Shrimp for a savory adventure as well!

Peanut Butter Spider Cookies Ingredients

For the Cookie Dough

  • Unsalted Butter – Provides moisture and richness; you can substitute with margarine if needed.
  • Brown Sugar – Adds sweetness and moisture, perfectly complementing the peanut butter flavor.
  • Granulated Sugar – Enhances sweetness and creates a slightly crisp texture for our delicious cookies.
  • Creamy Peanut Butter – The star of the show, ensuring a soft and rich peanut butter flavor in every bite.
  • Large Egg – Binds the ingredients together and adds moisture; it’s key for cookie structure.
  • Vanilla Extract – Elevates the overall flavor with a hint of warmth.
  • All-Purpose Flour – The foundation of the cookie that gives it structure; you can use a 1:1 gluten-free flour for a gluten-free option.
  • Baking Soda & Baking Powder – Essential leavening agents for achieving the ideal cookie height and texture.
  • Salt – Balances the sweetness beautifully; don’t skip this step!

For the Decor

  • Granulated Sugar (for rolling) – Coats the cookies in sweetness and gives them a lovely sparkle.
  • Mini Reese’s Peanut Butter Cups – Serve as the adorable ‘spider’ body that joins the party theme perfectly!
  • Semi-Sweet Chocolate Chips – Perfect for melting and crafting those whimsical spider legs; you can use any melting chocolate.
  • Candy Eyeballs – Adds character and enhances the visual appeal of your spooky creations; chocolate chips can substitute in a pinch.

Dive into making these Peanut Butter Spider Cookies and bring a smile to every Halloween gathering!

Step‑by‑Step Instructions for Peanut Butter Spider Cookies

Step 1: Prepare Reese’s
Start by placing the mini Reese’s Peanut Butter Cups in the freezer for about 15 minutes. This will ensure they hold their shape when pressed into the warm cookies later. While they chill, preheat your oven to 350°F (175°C) to get it ready for baking these delicious Peanut Butter Spider Cookies.

Step 2: Cream Butter & Sugars
In a large mixing bowl, beat together ½ cup of room temperature unsalted butter, ½ cup brown sugar, and ¼ cup granulated sugar until the mixture is smooth and fluffy, about 2-3 minutes. A hand mixer or stand mixer will work well for this step, creating a light and creamy base that enhances the peanut butter flavor in your cookies.

Step 3: Add Wet Ingredients
Next, mix in ¾ cup of creamy peanut butter, 1 large egg, and 1 teaspoon of vanilla extract until well combined. It should be a thick, smooth batter. This step is crucial for ensuring every bite of your Peanut Butter Spider Cookies is rich with flavor. Make sure there are no lumps before proceeding to the dry ingredients.

Step 4: Combine Dry Ingredients
In a separate bowl, whisk together 1 ½ cups of all-purpose flour, 1 teaspoon of baking soda, ½ teaspoon of baking powder, and a pinch of salt. Gradually add this dry mixture to your peanut butter batter, mixing gently until just combined. Be careful not to overmix, as you want to keep the cookies soft and chewy.

Step 5: Shape Cookies
Using a tablespoon, scoop out dough and roll it into balls, roughly the size of a golf ball. Roll each ball in some granulated sugar for a sparkly finish, then place them on a lined baking sheet, spaced about 2 inches apart. This step is where your Peanut Butter Spider Cookies begin to take shape, ready for the oven!

Step 6: Bake
Bake the cookies in your preheated oven for 8 to 11 minutes, keeping a close eye on them. The cookies are done when the edges are set, but the centers may still look slightly underbaked. This will help create that wonderfully soft texture that makes these cookies so delightful.

Step 7: Cool & Decorate
Immediately after removing them from the oven, press a chilled Reese’s cup into the center of each cookie. Allow the cookies to cool on the baking sheet for 15 to 20 minutes, which helps retain their shape. Meanwhile, melt some semi-sweet chocolate chips in a microwave-safe bowl to create the spider legs.

Step 8: Final Touches
Once the cookies are cool, use a piping bag or a fork to drizzle melted chocolate to form spider legs extending from each Reese’s. Top it off by placing candy eyeballs on the Reese’s, ensuring each Peanut Butter Spider Cookie has its unique personality. These treats are now ready to delight your Halloween guests!

What to Serve with Peanut Butter Spider Cookies

Picture a delightful Halloween gathering filled with laughter, creativity, and the joy of sharing sweet treats that spark smiles.

  • Warm Apple Cider: The cozy flavors of apple and cinnamon enhance the festive atmosphere, offering a comforting drink alongside your cookies.
  • Chocolate Milkshake: Rich and creamy, this shake perfectly complements the peanut butter, adding a playful, indulgent twist that’s sure to please.
  • Pumpkin Spice Cupcakes: With their moist texture and warm spices, these cupcakes echo the fall theme beautifully and create a delightful dessert triad.
  • Fruit Salad: A refreshing mix of seasonal fruits balances the sweetness of the cookies while adding a vibrant, colorful element to the table.
  • Popcorn Balls: Sweet and crunchy, these can serve as another fun treat for the kids, creating an enjoyable contrast to the soft cookies.
  • Caramel Dipping Sauce: Drizzle warm caramel on each cookie for an extra touch of decadence, inviting guests to experiment with flavors and textures.
  • Vanilla Ice Cream: The classic pairing offers a delightful way to enjoy the cookies melted and slightly warm over a scoop of creamy goodness.
  • Gingerbread Cookies: Stay festive with a holiday classic that plays into the seasonal spirit and provides another comforting treat at your gathering.
  • Hot Chocolate Bar: Invite guests to top their steaming cups with whipped cream or mini marshmallows, making it fun while pairing gorgeously with spider cookies.

Make Ahead Options

These Peanut Butter Spider Cookies are perfect for meal prep, allowing you to enjoy delightful treats without the last-minute rush! You can prepare the cookie dough up to 3 days in advance; just refrigerate it in an airtight container to maintain freshness. Additionally, you can freeze formed cookie dough balls for up to 3 months—just roll them in sugar before freezing. When you’re ready to bake, simply place them on a baking sheet and bake straight from the freezer, adding an extra minute to the baking time. This way, you’ll have fresh, delicious cookies that are just as delightful when you serve them!

Peanut Butter Spider Cookies Variations

Feel free to let your creativity shine by customizing these delightful cookies to suit your taste and dietary needs.

  • Almond Butter: Swap peanut butter for almond butter for a nutty twist. The flavor change can be surprisingly delightful, offering a new perspective on these spooky treats!

  • Chocolate Spider Bodies: Use chocolate-covered candies for spider bodies instead of Reese’s cups. This change adds a unique chocolatey taste that’ll appeal to chocolate lovers and fits perfectly with the Halloween theme!

  • Nut-Free: Replace peanut butter with sunbutter or a similar nut-free option to keep these cookies safe for those with allergies. This ensures everyone can enjoy the spooky fun without worry.

  • Reduced Sugar: For a healthier version, you can reduce the sugars by 25% and adjust the sweetness with a touch of honey or maple syrup. Your cookies will still be delicious, but with slightly fewer calories!

  • Gluten-Free: Use a 1:1 gluten-free flour blend instead of regular flour, making these cookies accessible for your gluten-sensitive friends. They’ll be thrilled to join in the fun!

  • Add Spices: Incorporate a dash of cinnamon or nutmeg into the cookie dough for a warm, fall flavor. This small touch can infuse the cookies with an inviting aroma that brings the festive season alive.

  • White Chocolate Legs: Replace semi-sweet chocolate chips with white chocolate for drizzling spider legs. It creates a visually striking contrast against the peanut butter cookies and caters to those who prefer a sweeter flavor.

  • Spicy Kick: Add a pinch of cayenne pepper into the dough for a surprising heat that complements the sweetness beautifully. It’s an adventurous twist that will excite thrill-seekers and spice lovers alike.

Why not whip up a batch of these Peanut Butter Spider Cookies alongside some delightful Fluffy Buttermilk Pancakes for brunch? They make for a perfect Halloween treat table!

How to Store and Freeze Peanut Butter Spider Cookies

Room Temperature: Keep these cookies in an airtight container at room temperature for up to 3 days. Layer with parchment paper if stacking to prevent sticking.

Fridge: For extended freshness, store in the fridge for up to 5 days; this will slightly alter the texture but still keep them delicious.

Freezer: Freeze baked cookies in a single layer for up to 3 months. Once frozen, transfer to a zip-top bag to save space and maintain freshness.

Reheating: To enjoy these Peanut Butter Spider Cookies warm, reheat in the microwave for 10-15 seconds, just until warmed through.

Expert Tips for Peanut Butter Spider Cookies

  • Chill the Reese’s: Make sure to freeze the mini Reese’s before baking to prevent them from melting too much when pressed into the cookies.

  • Cooling Time: Allow the cookies to cool on the baking sheet to maintain their shape and avoid spreading. This is crucial for achieving the perfect texture.

  • Don’t Overmix: Mix the dry ingredients into the wet just until combined. Overmixing can lead to tough cookies, compromising the softness of your Peanut Butter Spider Cookies.

  • Use Quality Peanut Butter: Opt for creamy, non-natural peanut butter for best results—natural varieties can create a grainy texture.

  • Storage Tips: Store cookies in an airtight container at room temperature for up to 3 days. If stacking, place parchment paper between layers to keep them fresh.

Peanut Butter Spider Cookies Recipe FAQs

How do I select the right peanut butter?
Absolutely! When choosing peanut butter for these cookies, opt for a creamy, non-natural variety. Natural peanut butter may contain oils that can alter the texture, making the cookies grainy. Brands like Jif or Skippy work wonderfully, ensuring a rich and smooth flavor.

How can I store my Peanut Butter Spider Cookies?
For optimal freshness, keep your cookies in an airtight container at room temperature for up to 3 days. If you want to extend their shelf life, consider keeping them in the fridge, where they can last up to 5 days. To prevent them from sticking together when stacked, place parchment paper between layers.

Can I freeze my Peanut Butter Spider Cookies?
Absolutely! To freeze your cookies, start by laying them in a single layer on a baking sheet and place them in the freezer for about an hour. Once they’re frozen solid, transfer them to a zip-top freezer bag or an airtight container. They can be stored this way for up to 3 months. When you’re ready to enjoy, thaw them in the fridge overnight or bring them back to room temperature on the countertop.

What do I do if my cookies are too flat?
Very good question! If your Peanut Butter Spider Cookies spread too much while baking, it might be due to several factors. Ensure your butter is at room temperature, not melted, as melted butter can lead to overly flat cookies. Also, double-check that you’re measuring your flour correctly; too little flour can contribute to spreading. It’s best to spoon flour into your measuring cup and level it off, rather than scooping directly from the bag.

Can I make these cookies gluten-free?
Yes, you can! To make your Peanut Butter Spider Cookies gluten-free, substitute the all-purpose flour for a 1:1 gluten-free flour blend. Brands like Bob’s Red Mill or King Arthur Flour offer excellent alternatives that should yield similar results. Just be sure to check that all other ingredients, like the baking powder and chocolate, are gluten-free as well.

Are there any allergy considerations I should be aware of?
Absolutely! These cookies contain common allergens like peanuts, gluten (if using regular flour), and possibly dairy. If making for a crowd or children, it’s wise to inform others of these ingredients. Alternatively, you could use almond butter instead of peanut butter and check for allergy-friendly brands of chocolate. Remember, always substitute with caution and verify labels for accuracy!

Peanut Butter Spider Cookies

Peanut Butter Spider Cookies: Spooky Sweet Halloween Delights

Delightful Peanut Butter Spider Cookies are a spooky, sweet treat, perfect for Halloween gatherings.
Prep Time 15 minutes
Cook Time 11 minutes
Cooling Time 20 minutes
Total Time 26 minutes
Servings: 24 cookies
Course: Dessert
Cuisine: American
Calories: 150

Ingredients
  

For the Cookie Dough
  • 1/2 cup Unsalted Butter Room temperature
  • 1/2 cup Brown Sugar
  • 1/4 cup Granulated Sugar
  • 3/4 cup Creamy Peanut Butter The star ingredient
  • 1 large Egg Binds the ingredients
  • 1 teaspoon Vanilla Extract Adds warmth
  • 1 1/2 cups All-Purpose Flour Or 1:1 gluten-free flour
  • 1 teaspoon Baking Soda Leavening agent
  • 1/2 teaspoon Baking Powder Leavening agent
  • Pinch Salt Balances sweetness
For the Decor
  • 1/4 cup Granulated Sugar For rolling cookies
  • 12 pieces Mini Reese’s Peanut Butter Cups For spider bodies
  • 1 cup Semi-Sweet Chocolate Chips For melting legs
  • 1 cup Candy Eyeballs Enhances visual appeal

Equipment

  • Mixing Bowl
  • Baking Sheet
  • Piping bag or fork

Method
 

Step-by-Step Instructions
  1. Prepare Reese's by placing them in the freezer for about 15 minutes. Preheat your oven to 350°F (175°C).
  2. In a large mixing bowl, beat together butter, brown sugar, and granulated sugar until smooth and fluffy.
  3. Mix in peanut butter, egg, and vanilla extract until well combined.
  4. In a separate bowl, whisk together flour, baking soda, baking powder, and salt. Gradually mix into the wet ingredients until just combined.
  5. Scoop out dough and roll into balls, rolling each ball in sugar before placing on a lined baking sheet.
  6. Bake in the preheated oven for 8 to 11 minutes until edges are set. The centers should look slightly underbaked.
  7. Press a chilled Reese's cup into the center of each cookie right after baking, then allow to cool on the baking sheet.
  8. Melt chocolate chips and drizzle over cookies to form spider legs, then top with candy eyeballs.

Nutrition

Serving: 1cookieCalories: 150kcalCarbohydrates: 20gProtein: 3gFat: 7gSaturated Fat: 3gPolyunsaturated Fat: 1gMonounsaturated Fat: 3gCholesterol: 15mgSodium: 90mgPotassium: 110mgFiber: 1gSugar: 8gVitamin A: 100IUCalcium: 20mgIron: 1mg

Notes

Store cookies in an airtight container at room temperature for up to 3 days, or in the fridge for up to 5 days. Freeze baked cookies for longer storage.

Tried this recipe?

Let us know how it was!

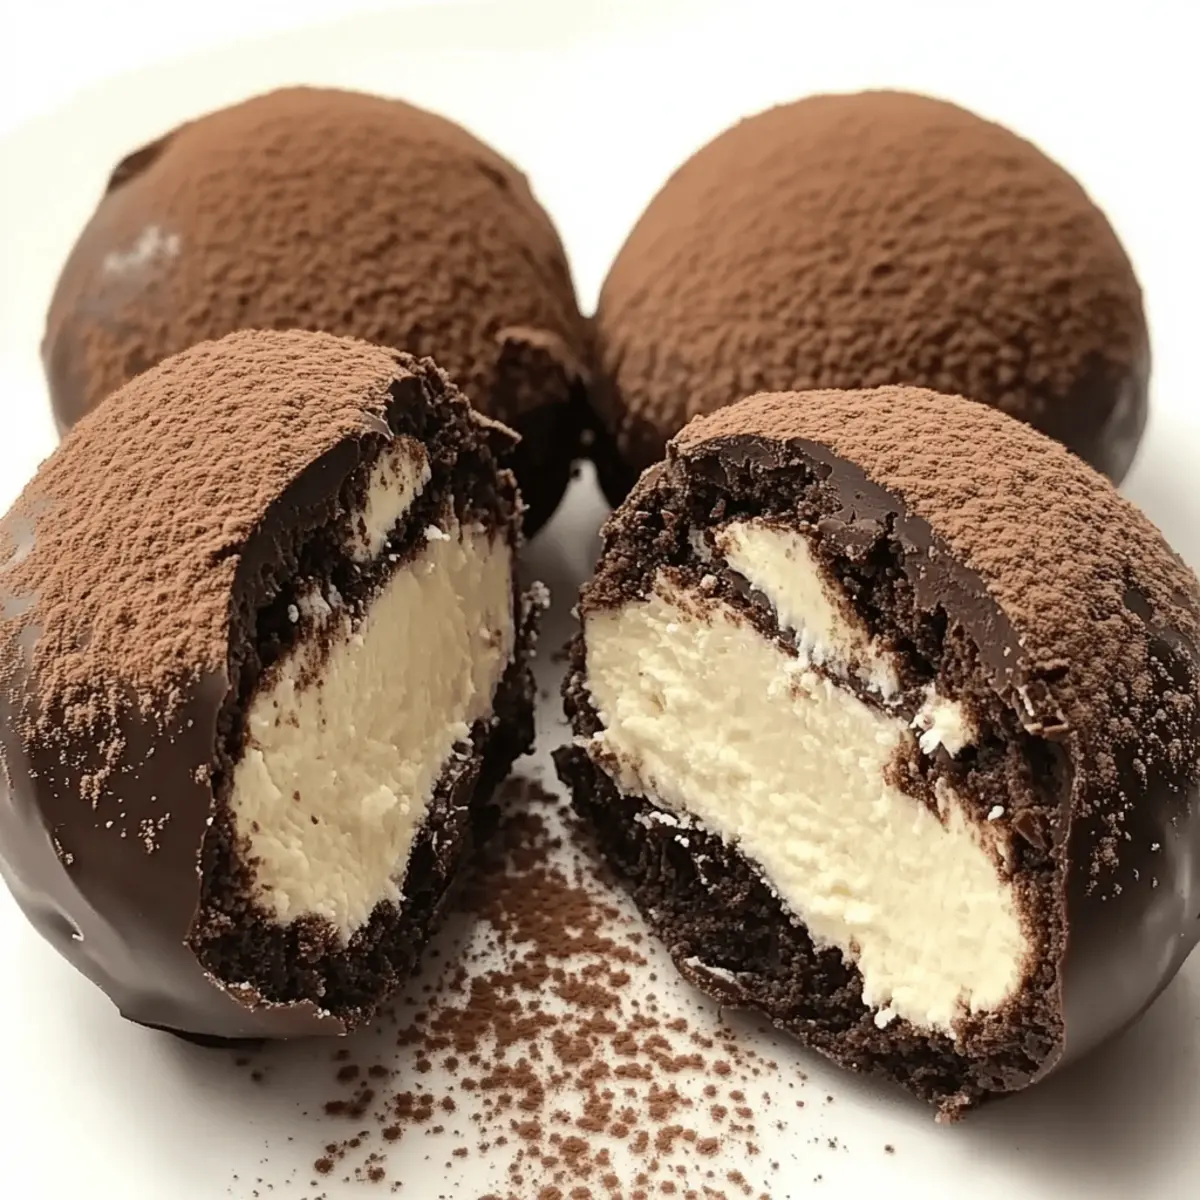
Decadent Tiramisu Truffles Recipe You’ll Love Making!

As I stood in my kitchen, the rich aroma of freshly brewed espresso filled the air, transporting me instantly to a charming café in Italy. Today, I’m thrilled to share my Tiramisu Truffles recipe, a no-bake masterpiece that perfectly captures the essence of the classic Italian dessert in bite-sized form. These delightful treats not only promise a quick prep time, making them ideal for sudden cravings, but they also add a fun twist to any gathering. With layers of creamy mascarpone mingling harmoniously with crunchy ladyfinger cookies, each truffle delivers an irresistible combination of flavors that will leave your taste buds dancing. Are you ready to indulge in this chocolate-coated bliss? Let’s dive into the sweet details!

Why Will You Adore Tiramisu Truffles?

Irresistible Indulgence: These Tiramisu Truffles encapsulate the beloved Italian dessert, offering rich layers of flavor in a convenient, no-bake format.

Quick and Easy: With just a few simple ingredients and no oven necessary, you can whip these up in no time—perfect for unexpected guests or last-minute dessert cravings!

Impressive Presentation: Dusted with cocoa powder, these truffles look as elegant as they taste, making them a delightful addition to any celebration or casual get-together.

Flavor Versatility: Want to mix it up? You can easily adapt the recipe by infusing flavors like orange zest or switching to white chocolate for a sweeter touch.

Crowd-Pleasing Delight: Whether serving at a party or simply enjoying them yourself, these truffles are bound to impress everyone with their creamy texture and delightful flavor. Don’t forget to pair them with a rich cup of espresso or casual treats like Coconut Pudding Dessert for a truly enjoyable experience!

Tiramisu Truffles Recipe Ingredients

For the Filling

  • Mascarpone Cheese – Provides a creamy richness; cream cheese can be used as a substitute for a different flavor.
  • Ladyfinger Cookies – Adds crucial texture and structure; sponge cake or graham crackers can work in a pinch.
  • Espresso – Essential for that bold coffee flavor; feel free to swap with strong brewed coffee if preferred.
  • Sugar – Balances the coffee’s bitterness; adjust to taste according to your sweetness preference.
  • Vanilla Extract – Enhances flavor profile, adding a sweet and aromatic touch.

For the Coating

  • Dark Chocolate – Creates a rich, decadent exterior; opt for high-quality chocolate for the best results.

Optional Dusting

  • Cocoa Powder – Adds an elegant finishing touch that complements the dessert beautifully.

With these ingredients, you’ll be able to create delicious Tiramisu Truffles that are sure to satisfy your cravings!

Step‑by‑Step Instructions for Tiramisu Truffles Recipe

Step 1: Brew Espresso
Begin by brewing one strong cup of espresso and let it cool at room temperature. This step ensures that the espresso retains its bold flavor without melting the mascarpone cheese. Consider using a stovetop espresso maker for optimal strength and taste, which beautifully captures the essence of the Italian coffee experience.

Step 2: Mix Filling
In a mixing bowl, combine the cooled espresso, mascarpone cheese, crushed ladyfinger cookies, sugar, and vanilla extract. Use a spatula or electric mixer to blend everything together until you achieve a smooth consistency with slight chunks of ladyfingers for texture. This will form the delightful filling for your Tiramisu Truffles, packed with rich flavors.

Step 3: Chill Mixture
Cover the bowl with plastic wrap and refrigerate the mixture for about 1 hour. This chilling step allows the truffle filling to firm up, making it easier to shape later. As the mixture cools, it will become more manageable and set, ensuring that your Tiramisu Truffles hold their form beautifully.

Step 4: Form Truffles
After chilling, use a cookie scoop to portion out the mixture into 1-inch balls, rolling them gently in your hands if needed. Place the formed truffles on a parchment-lined baking sheet. This step is crucial to maintaining uniform size and ensuring that each truffle delivers the same delicious experience when enjoyed.

Step 5: Prepare Coating
In a microwave-safe bowl, melt the dark chocolate, stirring every 30 seconds until smooth and glossy. Be cautious not to overheat the chocolate, as it can burn easily. This rich chocolate coating is what will envelop your Tiramisu Truffles, adding a luscious finish to each bite.

Step 6: Coat Truffles
Using a fork, dip each truffle into the melted chocolate, ensuring it’s fully covered, and then lift it out, allowing any excess chocolate to drip off. Return the coated truffles to the parchment-lined baking sheet. This step not only adds a decadent layer but also seals in the flavors of the Tiramisu filling.

Step 7: Set Truffles
Place the baking sheet in the refrigerator and allow the truffles to set for about 30 minutes, or until the chocolate hardens completely. This step is vital for creating a satisfying snap when you bite into each truffle, enhancing the overall texture and flavor balance of the Tiramisu Truffles.

Step 8: Finish
Before serving, dust the truffles lightly with cocoa powder for an elegant touch. This final step not only enhances the presentation but also adds a slight bitterness that complements the sweetness of the chocolate, creating the perfect finishing note for your Tiramisu Truffles.

How to Store and Freeze Tiramisu Truffles

Fridge: Keep Tiramisu Truffles in an airtight container in the refrigerator for up to a week. This helps maintain their creamy texture and flavors.

Freezer: If you want to make them ahead, freeze truffles in a single layer on a baking sheet, then transfer them to an airtight container for up to 2 months. Thaw in the fridge before serving.

Room Temperature: While these truffles are best stored in the fridge, they can be left out at room temperature for up to 2 hours before serving for optimal creaminess.

Reheating: There’s no need to reheat Tiramisu Truffles. Just allow them to sit at room temperature for a few minutes to soften slightly before enjoying.

Expert Tips for Tiramisu Truffles Recipe

  • Cool Espresso: Ensure your espresso is fully cooled before mixing it with the mascarpone to prevent melting and achieving the right texture.

  • Uniform Size: Use a cookie scoop to form truffles of uniform size; this helps with consistency in presentation and ensures even flavor distribution.

  • Chill Well: Allow sufficient time for the mixture to chill for an hour before shaping, as this will make forming the truffles easier and maintain their structure.

  • Gentle Mixing: When adding mascarpone cheese, mix gently to maintain the creamy texture; overmixing can lead to a runny filling.

  • Finishing Touch: Dusting with cocoa powder just before serving adds a beautiful visual and balances the sweetness with a touch of bitterness, enhancing the Tiramisu Truffles recipe.

What to Serve with Tiramisu Truffles?

Delight in the perfect pairings that will elevate your Tiramisu Truffles experience!

  • Espresso: The bold coffee notes enhance the truffles’ flavors while offering a classic Italian experience. Sip it slowly to savor each moment of indulgence.

  • Vanilla Ice Cream: A scoop of creamy vanilla ice cream adds a cool, silky contrast to the rich chocolate coating of the truffles. Together, they create a heavenly dessert duo.

  • Fresh Berries: Raspberries or strawberries bring a burst of freshness and a vibrant color that cuts through the richness, providing a refreshing balance. Serve them alongside for a delightful contrast!

  • Dessert Wine: A glass of sweet dessert wine, like Vin Santo or Moscato, pairs beautifully with the coffee and chocolate, enhancing the overall flavor profile and making each bite feel special.

  • Chocolate Croissants: Flaky, buttery, and slightly warm, chocolate croissants offer a lovely texture contrast while complementing the cocoa-rich flavor of the truffles. Enjoy them for a decadent treat!

  • Pistachio Biscotti: These crunchy cookies introduce a delightful nutty flavor and are perfect for dipping into that extra cup of coffee. A crunchy texture makes this pairing a charming choice!

  • Mixed Nut Medley: A lightly salted nut blend provides a satisfying crunch and savory note, creating a delightful balance to the sweetness of the truffles. It’s perfect for snacking while enjoying dessert!

  • Coconut Pudding Dessert: Light and creamy, the subtle flavors of coconut pudding would be an exciting sweet addition alongside the richly flavored truffles. It adds a tropical twist that’s hard to resist!

Tiramisu Truffles Recipe Variations

Feel free to get creative with your Tiramisu Truffles, adding unique spins that evoke your kitchen’s magic!

  • White Chocolate: Replace dark chocolate with white chocolate for a sweeter, creamier coating. This twist will surprise and delight anyone with a sweet tooth.

  • Citrus Zest: Add a teaspoon of orange or lemon zest to the filling for a fresh, zesty burst of flavor. It brightens each bite and takes these truffles to a refreshing new level.

  • Nutty Surprise: Incorporate finely chopped walnuts or hazelnuts into the mixture for an earthy crunch. The nutty texture pairs beautifully with the creaminess of mascarpone.

  • Liqueur Fusion: Stir in a splash of coffee or hazelnut liqueur for a more indulgent experience. This adds depth and richness that perfectly complements the espresso.

  • Spiced Touch: Infusing the filling with a hint of cinnamon or nutmeg can elevate the flavors, creating a warm and inviting aroma that will remind you of cozy gatherings.

  • Dairy-Free Delight: Use coconut cream instead of mascarpone for a delicious dairy-free alternative. This swap introduces a tropical twist, making the truffles light and inviting.

  • Caramel Drizzle: Top the finished truffles with a drizzle of caramel sauce for an added layer of sweetness. This little touch can transform your truffles into a lavish dessert.

  • Chili Kick: For those daring enough, a pinch of cayenne pepper in the filling offers a surprising kick that plays off the chocolate and coffee brilliantly. It’s an unexpected twist that elevates the experience.

As you experiment with these variations, remember that each twist offers a chance to explore and savor your lovable Tiramisu Truffles. For more delightful inspiration, consider pairing these confectioneries with a cup of your favorite espresso or alongside my luscious Coconut Pudding Dessert. Enjoy the journey of creating these delicious bites!

Make Ahead Options

These Tiramisu Truffles are perfect for meal prep enthusiasts! You can prepare the truffle filling up to 24 hours in advance. Simply mix the mascarpone, crushed ladyfingers, espresso, sugar, and vanilla, and refrigerate it covered. Form the truffles and dip them in chocolate up to 3 days ahead of time to maintain their freshness. Just be sure to store the coated truffles in an airtight container in the refrigerator to keep them at their best. When you’re ready to serve, dust them with cocoa powder for an elegant touch, and enjoy the same rich flavor and texture as if they were freshly made. It’s a delightful time-saver for busy weeknights or unexpected gatherings!

Tiramisu Truffles Recipe FAQs

What kind of espresso should I use?
Absolutely! For the best flavor, use a strong espresso brewed from high-quality coffee beans. You can also use a stovetop espresso maker or a French press if you don’t have an espresso machine. If espresso isn’t available, substitute it with a strong brewed coffee for a similar flavor profile. Just ensure it’s strong enough to mimic the bold flavor that’s essential to traditional tiramisu.

How should I store Tiramisu Truffles?
Great question! Store Tiramisu Truffles in an airtight container in the refrigerator for up to a week. They’re best enjoyed chilled to maintain their creamy texture. If you want to keep them longer, consider freezing them, as described below.

Can I freeze Tiramisu Truffles?
Yes! To freeze Tiramisu Truffles, start by placing them in a single layer on a baking sheet. Once they are frozen solid (about 2 hours), transfer them to an airtight container or freezer bag, layering parchment paper between to prevent sticking. They can be stored in the freezer for up to 2 months. When you’re ready to enjoy, simply thaw them in the fridge for a few hours before serving.

What if my mixture is too runny?
If your filling seems too runny, don’t worry! This can happen if the mascarpone cheese is overmixed or if the espresso is too warm. To salvage it, refrigerate the mixture for an additional 30 to 60 minutes to help it set. If it’s still not firm enough after chilling, consider adding in a few more crushed ladyfinger cookies to thicken the mixture slightly. I often find that adjusting the ratios can also help achieve that perfect consistency.

Can I use other ingredients for dietary considerations?
Definitely! If you need to accommodate allergies or dietary preferences, you can swap out the mascarpone cheese with cream cheese for a unique flavor. For those avoiding gluten, look for gluten-free ladyfingers or use crushed gluten-free cookies. Additionally, always check that the chocolate and other ingredients are suitable for your specific dietary needs.

Tiramisu Truffles Recipe

Decadent Tiramisu Truffles Recipe You’ll Love Making!

Indulge in these Tiramisu Truffles—a no-bake delight echoing the classic Italian dessert.
Prep Time 20 minutes
Chilling Time 1 hour
Total Time 1 hour 20 minutes
Servings: 24 truffles
Course: Dessert
Cuisine: Italian
Calories: 120

Ingredients
  

For the Filling
  • 8 oz Mascarpone Cheese Cream cheese can be used as a substitute.
  • 1 cup Crushed Ladyfinger Cookies Sponge cake or graham crackers can work as substitutes.
  • 1 cup Espresso Can swap with strong brewed coffee.
  • 1/2 cup Sugar Adjust to taste.
  • 1 tsp Vanilla Extract
For the Coating
  • 8 oz Dark Chocolate Opt for high-quality chocolate.
Optional Dusting
  • 2 tbsp Cocoa Powder

Equipment

  • Mixing Bowl
  • Spatula
  • Cookie Scoop
  • Parchment paper
  • Microwave-safe bowl
  • Refrigerator

Method
 

Step‑by‑Step Instructions
  1. Begin by brewing one strong cup of espresso and let it cool at room temperature.
  2. In a mixing bowl, combine the cooled espresso, mascarpone cheese, crushed ladyfinger cookies, sugar, and vanilla extract. Mix until smooth.
  3. Cover the bowl with plastic wrap and refrigerate the mixture for about 1 hour.
  4. Use a cookie scoop to portion out the mixture into 1-inch balls and place them on a parchment-lined baking sheet.
  5. Melt the dark chocolate in a microwave-safe bowl, stirring every 30 seconds until smooth.
  6. Dip each truffle into the melted chocolate using a fork, then place back on the baking sheet.
  7. Refrigerate the truffles for about 30 minutes until the chocolate hardens.
  8. Dust the truffles with cocoa powder before serving.

Nutrition

Serving: 1truffleCalories: 120kcalCarbohydrates: 10gProtein: 2gFat: 8gSaturated Fat: 4gPolyunsaturated Fat: 1gMonounsaturated Fat: 2gCholesterol: 15mgSodium: 30mgPotassium: 100mgFiber: 1gSugar: 5gVitamin A: 200IUCalcium: 50mgIron: 1mg

Notes

Store Tiramisu Truffles in an airtight container in the fridge for up to a week. They can be frozen for up to 2 months.

Tried this recipe?

Let us know how it was!

Irresistible Sweet Cinnamon Twists for Your Breakfast Bliss

The first whiff of warm cinnamon can instantly transport me to my grandmother’s cozy kitchen, where sweet aromas filled the air. Today, I’m excited to share my Easy Sweet Cinnamon Twists, a delightful pastry treat that perfectly marries flaky puff pastry with a gooey cinnamon filling. Ideal for breakfast, brunch, or a soothing snack with your afternoon coffee, these twists are not only a crowd-pleaser but also a breeze to whip up with just a few minimal ingredients. Picture golden-brown pastries, lightly dusted with powdered sugar, promising both visual appeal and satisfying flavor. Whether you’re an experienced home chef or just looking to impress your loved ones without spending hours in the kitchen, these Sweet Cinnamon Twists are here to uplift your culinary repertoire. Ready to roll up your sleeves and bring a touch of nostalgia to your table? Let’s get started!

Why are Sweet Cinnamon Twists so delightful?

Easy Preparation: You’ll love how simple this recipe is, requiring minimal ingredients and basic baking skills.

Flaky and Gooey: Expect a delightful contrast between the crisp puff pastry and the soft, gooey cinnamon filling that melts in your mouth.

Perfect for Any Occasion: These twists shine at breakfast, brunch, or as a delightful snack alongside coffee.

Impress Your Guests: They’re visually stunning with a dusting of powdered sugar, making them perfect for gatherings or cozy weekends.

Versatile Flavor: Feel free to experiment; try adding chopped nuts or drizzling with caramel for added richness! For another easy and delightful snack, explore my Grilled Cinnamon Apples.

These Sweet Cinnamon Twists are bound to become a new family favorite!

Sweet Cinnamon Twists Ingredients

• To make your Sweet Cinnamon Twists, here’s everything you need:

For the Pastry

  • Puff Pastry – Use store-bought sheets for convenience, ensuring a flaky texture.

For the Filling

  • Granulated Sugar – Regular sugar adds sweetness; substitute with brown sugar for deeper flavor.
  • Ground Cinnamon – This spice is essential for that signature warm flavor; choose freshly ground for the best taste.
  • Butter (melted) – Enriches the flavor and helps the filling stick; margarine can be used as an alternative.

For Finishing Touches

  • Egg (optional, for egg wash) – Gives a golden finish; skip for a matte look.
  • Powdered Sugar (for decoration, optional) – A sweet, attractive touch that enhances the presentation of your Sweet Cinnamon Twists.

Step‑by‑Step Instructions for Sweet Cinnamon Twists

Step 1: Preheat the Oven
Begin by preheating your oven to 400°F (200°C). While the oven heats up, line a baking sheet with parchment paper to prevent the Sweet Cinnamon Twists from sticking. This ensures a golden-brown finish once they’re baked and also allows for easy cleanup afterward.

Step 2: Prepare the Puff Pastry
Take your store-bought puff pastry sheets and let them defrost until workable, about 30 minutes at room temperature. Once ready, on a lightly floured surface, roll out the pastry to about 1/8 inch thick. This thickness is key to achieving the perfect flaky texture for your Sweet Cinnamon Twists, so make sure it’s evenly rolled.

Step 3: Make the Cinnamon Sugar Mixture
In a small bowl, mix together granulated sugar and ground cinnamon. Use a whisk or a fork to ensure the two are well combined, creating a sweet spice blend that will enhance the flavor of your Sweet Cinnamon Twists. Set this bowl aside while you brush the pastry with butter.

Step 4: Brush with Butter
Gently melt your butter in the microwave or a small pan, then take a pastry brush to coat the rolled-out puff pastry generously with the melted butter. This will not only add richness to the flavor but will also help the cinnamon-sugar mixture adhere perfectly, ensuring each twist is full of flavor.

Step 5: Sprinkle the Cinnamon Sugar
Evenly sprinkle the cinnamon-sugar mixture over the brushed pastry. Make sure to cover the entire surface with a light, even layer, creating that deliciously sweet filling that will ooze out as the Sweet Cinnamon Twists bake. Be generous but avoid clumping as you distribute the sugar.

Step 6: Cut and Twist the Pastry
Using a sharp knife or pizza cutter, slice the pastry into 1-inch wide strips. Take each strip and twist it several times to form a spiraled shape, then place them on the prepared baking sheet. Ensure there’s enough space between each twist to allow them to expand in the oven while baking.

Step 7: Bake the Twists
If desired, brush the tops of the twists with a little extra melted butter or an egg wash for a glossy finish. Transfer the baking sheet to your preheated oven and bake for 15-20 minutes, watching closely for a golden-brown color. The Sweet Cinnamon Twists should puff beautifully; the aroma will fill your kitchen as they bake.

Step 8: Serve with a Dusting of Sugar
Once baked, remove the Sweet Cinnamon Twists from the oven and let them cool on the baking sheet for a few minutes. If you wish, dust them lightly with powdered sugar before serving. These warm, flaky pastries are best enjoyed fresh and are a delightful complement to your morning coffee or afternoon tea.

Expert Tips for Sweet Cinnamon Twists

  • Preheat Properly: Ensure your oven is fully preheated to 400°F before baking; this step is crucial for achieving those wonderfully puffy Sweet Cinnamon Twists.

  • Even Thickness: Roll the puff pastry to an even 1/8 inch thickness. Uneven areas can lead to inconsistent baking results; you want all twists golden and flaky.

  • Watch the Bake: Keep an eye on your twists during the final few minutes of baking. Overbaking can make them tough—remove them as soon as they’re golden brown!

  • Sweeten Smartly: For a deeper flavor, consider swapping granulated sugar for brown sugar in the filling; this enhances the overall taste of the Sweet Cinnamon Twists.

  • Decorate Delightfully: Don’t skip the powdered sugar dusting! It adds not just sweetness but also a beautiful touch that makes the twists visually appealing and guest-ready.

How to Store and Freeze Sweet Cinnamon Twists

Room Temperature: Keep your Sweet Cinnamon Twists in an airtight container at room temperature for up to 2 days to maintain their flaky texture.

Fridge: If you prefer, you can store them in the fridge for up to 4 days. Just ensure they’re wrapped tightly to prevent drying out.

Freezer: To freeze, place the twists in a single layer on a baking sheet, freeze until solid, then transfer to a zip-top bag for up to 2 months.

Reheating: To revive their flaky nature, reheat in a toaster oven or conventional oven at 350°F (175°C) for about 5-10 minutes. Enjoy them warm!

What to Serve with Sweet Cinnamon Twists?

Indulging in warm Sweet Cinnamon Twists immediately transports you back to cozy mornings filled with laughter and the soothing aroma of cinnamon wafting through the air.

  • Fresh Fruit Salad: A bright medley of seasonal fruits adds vibrant color and a refreshing palate cleanser alongside the sweet twists.

  • Creamy Yogurt Dip: Serve with a side of vanilla or honey-sweetened yogurt for a creamy counterpoint to the flaky, cinnamon-filled pastries. This delightful pairing enhances the enjoyment of each bite.

  • Rich Coffee Brew: A strong cup of coffee perfectly complements the sweetness of the twists, elevating your breakfast experience. The contrast of flavors creates a delightful morning ritual.

  • Homemade Whipped Cream: A dollop of lightly sweetened whipped cream brings a luxurious touch, inviting guests to savor the twists with added richness. This combo can turn a simple pastry into a gourmet dessert.

  • Caramel Sauce Drizzle: Drizzling warm caramel over the twists brings an extra level of indulgence, harmonizing with the cinnamon and creating a stunning appeal. This simple addition can impress guests while adding a touch of decadence.

  • Vanilla Ice Cream: For a special treat, serve these pastries warm with a scoop of vanilla ice cream, creating a comforting dessert that balances warm and cold sensations, perfect for a cozy evening treat.

Sweet Cinnamon Twists: Fun Variations

Feel free to customize your Sweet Cinnamon Twists to make them uniquely yours, indulging in different flavors and textures.

  • Nutty Crunch: Add chopped pecans or walnuts to the cinnamon sugar for an extra layer of crunch. The nuttiness perfectly complements the sweet filling.

  • Pumpkin Spice Delight: Swap ground cinnamon for pumpkin spice for a charming autumn twist. It brings a cozy seasonal flair that’s both inviting and delicious.

  • Caramel Drizzle: After baking, drizzle warm caramel sauce over the twists for a decadent treat. This little indulgence will elevate your pastries to a whole new level of sweetness.

  • Berry Burst: Add a spoonful of jam or fresh berries on top before twisting for a fruity surprise. The contrast of sweet fruit with cinnamon is simply heavenly!

  • Chocolate Twist: Incorporate mini chocolate chips into the filling for a rich, gooey chocolate experience. It gives your Sweet Cinnamon Twists an unexpected yet delightful flavor.

  • Lemon Zest: For a refreshing twist, mix lemon zest into the cinnamon sugar. The citrus brightness undertones will enhance your pastry in a surprising way.

  • Savoury Surprise: For an alternative take, try adding herbs like rosemary or thyme to a cheese mixture, creating a savory version that’s equally delightful.

  • For a Crowd: Bake a batch of Sweet Cinnamon Twists and serve them alongside my scrumptious Sweet Hawaiian Crockpot for an unforgettable brunch spread.

Experiment and find your perfect match within these tasty variations!

Make Ahead Options

These Sweet Cinnamon Twists are perfect for meal prep enthusiasts! You can assemble the twists up to 24 hours in advance, allowing you to refrigerate them (wrapped in plastic wrap) until you’re ready to bake. To maintain their flaky texture, avoid sprinkling on the powdered sugar until just before serving. When ready to enjoy, simply preheat your oven to 400°F (200°C), place the pastry directly on a baking sheet, and bake for 15-20 minutes until golden brown. This way, you’ll have delicious, fresh Sweet Cinnamon Twists, perfect for busy mornings or unexpected guests, all with minimal effort!

Sweet Cinnamon Twists Recipe FAQs

How do I choose the right puff pastry for my Sweet Cinnamon Twists?
Absolutely! When selecting puff pastry, opt for high-quality, all-butter pastry if possible, as it yields the best flaky texture. Look for options that are well-marked as “all-butter.” Always check expiration dates to ensure freshness!

How should I store leftover Sweet Cinnamon Twists?
For the best results, store your Sweet Cinnamon Twists in an airtight container at room temperature for up to 2 days. If you want to keep them longer, they can be refrigerated for up to 4 days; just make sure they’re wrapped tightly to avoid drying out.

Can I freeze Sweet Cinnamon Twists, and how?
Yes, you can! First, arrange the baked twists in a single layer on a baking sheet and freeze them until solid (about 1-2 hours). Then, transfer them to a zip-top bag, removing as much air as possible, and label the bag. They can be frozen for up to 2 months. When ready to enjoy, bake them straight from frozen at 350°F (175°C) for about 10-12 minutes to revive their flaky goodness!

What if my Sweet Cinnamon Twists come out soggy?
Very! If your twists turn out soggy, it might be due to excess moisture. To prevent this, ensure the butter isn’t too hot when applying it to the pastry, as this can create steam. Always keep an eye on them while baking. If they are still soft in the center but brown on the outside, pop them back in the oven for a few extra minutes until fully set!

Are there any dietary considerations for my Sweet Cinnamon Twists?
Of course! If you’re considering allergies, this recipe contains gluten and dairy. For a gluten-free version, look for gluten-free puff pastry available at specialty stores or online. You can substitute margarine for butter if you need a dairy-free option, but be aware of the resulting flavor difference. Always check ingredient labels to ensure they meet specific dietary needs.

Sweet Cinnamon Twists

Irresistible Sweet Cinnamon Twists for Your Breakfast Bliss

These Sweet Cinnamon Twists are a delightful pastry treat combining flaky puff pastry and gooey cinnamon filling, perfect for breakfast or a snack.
Prep Time 30 minutes
Cook Time 20 minutes
Total Time 50 minutes
Servings: 8 twists
Course: Dessert
Cuisine: American
Calories: 180

Ingredients
  

For the Pastry
  • 1 sheet Puff Pastry Use store-bought sheets for convenience
For the Filling
  • 1/2 cup Granulated Sugar Can substitute with brown sugar for deeper flavor
  • 2 tablespoons Ground Cinnamon Freshly ground is best
  • 1/4 cup Butter Melted, margarine can be used as an alternative
For Finishing Touches
  • 1 large Egg Optional, for egg wash
  • 1 cup Powdered Sugar For decoration, optional

Equipment

  • Oven
  • Baking Sheet
  • Parchment paper
  • Pastry Brush
  • Mixing Bowl

Method
 

Step-by-Step Instructions
  1. Preheat your oven to 400°F (200°C) and line a baking sheet with parchment paper.
  2. Let the puff pastry sheets defrost for about 30 minutes until workable. Roll out the pastry to about 1/8 inch thick on a lightly floured surface.
  3. Mix together granulated sugar and ground cinnamon in a small bowl. Set aside.
  4. Melt the butter and coat the rolled-out puff pastry generously with it using a pastry brush.
  5. Evenly sprinkle the cinnamon-sugar mixture over the brushed pastry.
  6. Slice the pastry into 1-inch wide strips and twist each strip to form a spiraled shape before placing them on the baking sheet.
  7. Brush the tops with extra melted butter or an egg wash, then bake for 15-20 minutes until golden brown.
  8. Allow to cool slightly and dust with powdered sugar before serving.

Nutrition

Serving: 1twistCalories: 180kcalCarbohydrates: 25gProtein: 2gFat: 8gSaturated Fat: 5gPolyunsaturated Fat: 0.5gMonounsaturated Fat: 2gCholesterol: 20mgSodium: 200mgPotassium: 50mgFiber: 1gSugar: 10gVitamin A: 250IUCalcium: 15mgIron: 0.5mg

Notes

These Sweet Cinnamon Twists are best enjoyed fresh and can be served with coffee or tea.

Tried this recipe?

Let us know how it was!

Creamy Carrot Cake Smoothie for a Healthy Sweet Start

The first sip hit me like a ray of sunshine on a chilly morning, instantly brightening my day. I’ve always had a soft spot for carrot cake, but finding a way to turn that comforting treat into a nutritious drink felt like a triumph. Meet my Carrot Cake Smoothie—a deliciously creamy blend that combines the warm spices and sweetness of traditional carrot cake with healthy, protein-packed ingredients. Not only does this smoothie serve as a vibrant breakfast option, but it also doubles as a post-workout snack that will keep you fueled and energized throughout the day. With gluten-free and dairy-free options, it’s a versatile choice that even the kids will love! Ready to whip up this smoothie and savor a slice of nostalgia in each sip? Let’s get blending!

Why not blend carrot cake flavors?

Deliciously Nutritious: This Carrot Cake Smoothie marries the beloved flavors of classic carrot cake with nutrient-dense ingredients, giving you a yummy and healthy start to your day.

Quick and Easy: With just a few minutes in the blender, you can savor an energizing drink that’s perfect for busy mornings or post-gym refueling.

Kid-Friendly Fun: Even the pickiest eaters will delight in this sweet, frothy treat that packs the goodness of veggies and protein—making healthy eating a joy for the whole family!

Versatile Swaps: Customize it to your liking! Swap in different fruits like mango or use various nut butters based on your dietary preferences.

Crowd-Pleasing Appeal: Whether you’re hosting brunch or looking for a quick snack, this smoothie is sure to impress everyone, much like a delicious slice of our popular Pistachio Carrot Cake.

Carrot Cake Smoothie Ingredients

For the Base
Large raw carrot – Provides natural sweetness and fiber; substitute with cooked or pre-shredded carrots if necessary.
Frozen medium ripe banana – Adds creaminess and a slight sweetness; use unsweetened applesauce or another frozen fruit if avoiding bananas.
Frozen pineapple chunks – Contributes to a tropical flavor and natural sweetness; substitute with mango or omit for a lower sugar version.
Light coconut milk – Used for creaminess and richness; substitute with almond milk or another milk of choice for a lighter option.
Plain Greek yogurt – Provides protein and creaminess; for a dairy-free option, choose coconut yogurt or a plant-based yogurt.
Gluten-free oats – Adds texture and fiber; they can be omitted for a low-carb version.

For Flavor Enhancement
Pecan butter or almond butter – Adds healthy fats and flavor; any nut or seed butter can be used as a substitute.
Vanilla extract – Enhances overall flavor; use fresh vanilla beans or omit if unavailable.
Ground cinnamon – Adds warm spice notes; substitute with pumpkin pie spice or omit if desired.
Nutmeg (pinch) – Provides a subtle depth of flavor; can be excluded based on preference.

Dive into this delightful Carrot Cake Smoothie, and watch how easily it transforms your morning routine!

Step‑by‑Step Instructions for Carrot Cake Smoothie

Step 1: Prepare the Ingredients
Start by slicing or shredding the large raw carrot to ensure easy blending. Measure out your frozen banana and frozen pineapple chunks, and gather the light coconut milk, plain Greek yogurt, and gluten-free oats. This Carrot Cake Smoothie comes together quickly, so having everything ready to go will make the process seamless.

Step 2: Combine the Base Ingredients
In a high-powered blender, add the prepared carrot, frozen banana, and frozen pineapple. Pour in the creamy light coconut milk and scoop out the Greek yogurt, followed by the gluten-free oats. Layering these ingredients will help them blend more easily, creating that smooth, velvety texture you’re looking for in your Carrot Cake Smoothie.

Step 3: Add Flavor Enhancers
Next, incorporate the nut butter of your choice, whether it be pecan or almond butter. This addition not only enhances the flavor but also adds healthy fats. Don’t forget to include the vanilla extract, ground cinnamon, and a pinch of nutmeg for that signature carrot cake taste.

Step 4: Blend to Perfection
Secure the blender lid tightly and blend on high for 1-2 minutes. You want to ensure that all the ingredients are thoroughly combined and the mixture reaches a smooth, creamy consistency. Keep an eye on it, and stop once the texture resembles a thick shake, reminiscent of your favorite Carrot Cake.

Step 5: Adjust Consistency and Serve
If the smoothie is too thick for your liking, gradually add a bit more coconut milk until you achieve the desired consistency. Once blended to perfection, pour the Carrot Cake Smoothie into your favorite glass or a portable cup for on-the-go enjoyment.

Step 6: Enjoy Immediately or Store
For the best flavor and texture, serve the smoothie immediately. However, if you prefer to prep in advance, you can store it in the refrigerator for up to 24 hours, or freeze portions for later. Just remember to give it a good shake or stir before enjoying to reintroduce all those luscious flavors!

Carrot Cake Smoothie Variations

Feel free to get creative with your Carrot Cake Smoothie! Each delightful twist adds a unique flavor or nutritional boost.

  • Dairy-Free: Substitute Greek yogurt for coconut yogurt or another plant-based yogurt for a creamy, dairy-free option.
    Lactose intolerant? This variation keeps it smooth and gives you that creamy texture without the dairy bite.

  • Fruit Swaps: Experiment with different fruits like mango or peaches instead of banana or pineapple for a fresh twist.
    The sweet and juicy notes of these fruits keep things exciting, providing a whole new flavor experience.

  • Nut-Free: Replace nut butter with tahini or sunflower seed butter for a nut-free alternative packed with flavor.
    Your smoothie will still be rich and creamy, making it a fantastic choice for those with nut allergies!

  • Protein Boost: Add a scoop of your favorite protein powder or a handful of spinach for extra nutrition without compromising taste.
    This little boost will keep you feeling full longer, making the smoothie perfect for powering through your day!

  • Spice It Up: Incorporate pumpkin pie spice instead of cinnamon and nutmeg for a taste of fall in every sip.
    It’s a great way to add warmth and spice, especially if you want to savor seasonal flavors!

  • Sweeten It Up: Swap out frozen fruits with a tablespoon of honey or maple syrup if you prefer a sweeter profile.
    Adjusting sweetness is key for personal preference and can truly elevate your smoothie experience.

  • Oat-Free Option: Omit the gluten-free oats for a lower-carb version that’s still creamy and delicious.
    This variant is light and perfect for those counting carbs while still treating themselves to a delightful drink.

Looking for other exciting treats? Try pairing this smoothie with our delicious Honey Glazed Carrots or indulge in a slice of our tasty Buttermilk Pancakes for a fully satisfying breakfast experience!

Expert Tips for Carrot Cake Smoothie

Blend it well: Ensure you use a high-speed blender for a creamy texture; if your blender is standard, pre-shred the carrot to help it blend smoothly.

Sweetness check: Adjust the sweetness by using vanilla-flavored Greek yogurt, which enhances flavor while keeping the Carrot Cake Smoothie nutritious.

Prep ahead: Save time by preparing smoothie packs—portion the ingredients into bags and freeze them for quick blending in the morning.

Mind the consistency: If the smoothie turns out too thick, simply add a splash more coconut milk to reach your preferred texture for sipping.

Nut-free option: If allergies are a concern, swap out nut butter for tahini or sunflower seed butter—both add delicious flavor without the nuts.

What to Serve with Creamy Carrot Cake Smoothie

Elevate your experience by pairing this delightful smoothie with complementary dishes that satisfy and nourish.

  • Crunchy Granola: A sprinkle of granola adds a delightful crunch and enhances the fiber content, making your breakfast even more satisfying.
  • Fresh Fruit Salad: Brighten your meal with a medley of seasonal fruits, balancing the smoothie’s sweetness and providing a refreshing finish.
  • Nutty Energy Bites: Homemade energy bites made from oats, nuts, and honey create a wholesome on-the-go snack that harmonizes with the smoothie’s flavors.
  • Avocado Toast: The creaminess of avocado on whole-grain toast gives a savory touch, contrasting beautifully with the smoothie’s sweetness.
  • Cinnamon Roll Oatmeal: Enjoy a warm bowl of cinnamon roll oatmeal for a comforting complement that echoes the carrot cake spices while offering heartiness.
  • Iced Herbal Tea: A glass of chilled herbal tea infuses a light, refreshing beverage choice, perfectly cleansing the palate between sips of the smoothie.
  • Coconut Chia Pudding: Creamy chia pudding with coconut flavor mirrors the smoothie’s taste, adding texture and extra nutrients to the spread.
  • Almond Milk Latte: For those craving a caffeine boost, indulge in a silky almond milk latte that pairs wonderfully with the smoothie’s warmth and spices.
  • Carrot Cake Muffins: Continue the carrot cake theme with freshly baked, mini carrot cake muffins that are kid-friendly and perfect for sharing!

How to Store and Freeze Carrot Cake Smoothie

Fridge: Store the smoothie in an airtight container for up to 24 hours. Give it a good shake before enjoying, as ingredients may separate slightly.

Freezer: For longer storage, pour portions into freezer-safe containers or silicone bags and freeze for up to 3 months. Blend again after thawing for a fresh taste.

Preparation Packs: Create smoothie packs by pre-measuring and freezing individual ingredients, making blending easy and quick in the morning.

Reheating: While smoothies are best enjoyed cold, if you prefer a warm version, gently heat on the stove, stirring continuously until warm—but take care not to cook it!

Make Ahead Options

These Carrot Cake Smoothies are a fantastic option for meal prep enthusiasts looking to save time on busy mornings! You can prepare the smoothie base—carrots, banana, pineapple, coconut milk, Greek yogurt, oats, and spices—up to 24 hours in advance by assembling the ingredients in an airtight container and refrigerating them. Alternatively, for longer storage, portion the ingredients into freezer bags and freeze them. When you’re ready to enjoy, simply blend the frozen ingredients straight from the freezer with your nut butter and adjust the consistency with a splash of milk if needed. This way, you’ll have a delicious, nutrient-packed smoothie ready in minutes, just as tasty as if it were freshly made!

Carrot Cake Smoothie Recipe FAQs

What type of carrot should I use for the Carrot Cake Smoothie?
Absolutely! A large raw carrot will give your smoothie the natural sweetness and fiber you need. If you’re short on time, feel free to substitute with cooked or pre-shredded carrots—just remember, they may alter the texture a bit.

How long can I store my Carrot Cake Smoothie in the fridge?
You can keep your delicious smoothie in an airtight container in the refrigerator for up to 24 hours. Just be sure to give it a good shake before enjoying, as some ingredients might separate after sitting.

Can I freeze the Carrot Cake Smoothie?
Very much! For longer storage, pour your smoothie into freezer-safe containers or silicone bags and freeze for up to 3 months. To enjoy, simply thaw overnight in the fridge, then blend again for that fresh, creamy texture!

What to do if my Carrot Cake Smoothie is too thick?
If the smoothie turns out a bit thicker than you like, don’t worry! Simply add a splash more coconut milk or even a little water, and blend again until you achieve your desired consistency. I often recommend adjusting as you go to find that perfect sipping texture.

Are there any allergy considerations I should be aware of?
Absolutely! If you or anyone in your family has nut allergies, you can substitute pecan or almond butter with tahini or sunflower seed butter. For dairy-free, opt for coconut yogurt or your favorite plant-based yogurt. It’s great that this smoothie is flexible to meet various dietary needs!

Can I prepare this smoothie ahead of time?
Yes! To save time on busy mornings, you can create smoothie packs by measuring out all the ingredients and freezing them in individual portions. When you’re ready for a smoothie, just blend the frozen pack with your coconut milk, and it’ll be ready in a flash!

Carrot Cake Smoothie

Creamy Carrot Cake Smoothie for a Healthy Sweet Start

This Carrot Cake Smoothie is a delicious blend of rich flavors and healthy ingredients, perfect for breakfast or as a post-workout snack.
Prep Time 10 minutes
Total Time 10 minutes
Servings: 2 cups
Course: Breakfast
Cuisine: American
Calories: 250

Ingredients
  

For the Base
  • 1 large raw carrot Provides natural sweetness and fiber; substitute with cooked or pre-shredded carrots if necessary.
  • 1 medium frozen ripe banana Adds creaminess and slight sweetness; use unsweetened applesauce or another frozen fruit if avoiding bananas.
  • 1 cup frozen pineapple chunks Contributes a tropical flavor and natural sweetness; substitute with mango or omit for a lower sugar version.
  • 1 cup light coconut milk For creaminess and richness; substitute with almond milk or another milk of choice for a lighter option.
  • 1/2 cup plain Greek yogurt Provides protein and creaminess; for a dairy-free option, choose coconut yogurt or plant-based yogurt.
  • 1/2 cup gluten-free oats Adds texture and fiber; they can be omitted for a low-carb version.
For Flavor Enhancement
  • 2 tablespoons pecan butter or almond butter Adds healthy fats and flavor; any nut or seed butter can be used as a substitute.
  • 1 teaspoon vanilla extract Enhances overall flavor; use fresh vanilla beans or omit if unavailable.
  • 1 teaspoon ground cinnamon Adds warm spice notes; substitute with pumpkin pie spice or omit if desired.
  • pinch nutmeg Provides a subtle depth of flavor; can be excluded based on preference.

Equipment

  • blender

Method
 

Step-by-Step Instructions for Carrot Cake Smoothie
  1. Start by slicing or shredding the large raw carrot to ensure easy blending. Measure out your frozen banana and frozen pineapple chunks, and gather the light coconut milk, plain Greek yogurt, and gluten-free oats.
  2. In a high-powered blender, add the prepared carrot, frozen banana, and frozen pineapple. Pour in the light coconut milk and scoop out the Greek yogurt, followed by the gluten-free oats.
  3. Incorporate the nut butter of your choice, vanilla extract, ground cinnamon, and a pinch of nutmeg.
  4. Secure the blender lid tightly and blend on high for 1-2 minutes until all ingredients are thoroughly combined, achieving a smooth, creamy consistency.
  5. If the smoothie is too thick for your liking, gradually add more coconut milk until you achieve the desired consistency. Pour the Carrot Cake Smoothie into your favorite glass.
  6. Serve the smoothie immediately or store it in an airtight container for up to 24 hours.

Nutrition

Serving: 1cupCalories: 250kcalCarbohydrates: 40gProtein: 6gFat: 9gSaturated Fat: 6gPolyunsaturated Fat: 1gMonounsaturated Fat: 3gCholesterol: 10mgSodium: 100mgPotassium: 500mgFiber: 5gSugar: 20gVitamin A: 3000IUVitamin C: 15mgCalcium: 100mgIron: 1mg

Notes

For a nut-free option, swap out nut butter for tahini or sunflower seed butter.

Tried this recipe?

Let us know how it was!

Irresistible Matcha Cinnamon Rolls for Cozy Mornings

As the scent of warm cinnamon fills the air, visions of cozy mornings flood my mind—a perfect backdrop to savor a unique treat. These Matcha Cinnamon Rolls bring together the earthy richness of matcha and the comforting sweetness of cinnamon, transforming a classic into something extraordinary. With just a few simple ingredients, you’ll whip up soft, fluffy rolls that are not only a feast for the eyes but also a delight for the taste buds. Whether you’re looking for a quick breakfast option or an elegant addition to your brunch table, these rolls are a showstopper that will have everyone asking for seconds. Plus, they’re easy to prep ahead, allowing you to enjoy leisurely mornings without the hassle. So, are you ready to twist your way into a deliciously unique breakfast experience?

Why are Matcha Cinnamon Rolls irresistible?

Flavor Fusion: The blend of matcha and cinnamon offers a unique twist that tantalizes your taste buds with every bite.
Pillowy Perfection: Each roll boasts a soft, fluffy texture that melts in your mouth, making them the ultimate comfort treat.
Quick Prep: Enjoy these rolls without any fuss, as they can be made ahead of time, perfect for busy mornings or surprise guests.
Stunning Presentation: Their vibrant green hue, complemented by a creamy glaze, makes these rolls a stunning centerpiece for any brunch table.
Crowd-Pleaser: With their delightful flavors and beautiful appearance, these Matcha Cinnamon Rolls are sure to impress everyone, even those new to matcha! For more warm delights, don’t forget to check out my Grilled Cinnamon Apples or Butter Brioche Rolls that are equally satisfying!

Matcha Cinnamon Rolls Ingredients

Discover the simple yet essential ingredients you’ll need to create the magic of Matcha Cinnamon Rolls.

For the Dough
All-purpose flour – Essential for structure; you can swap it for whole wheat flour for a nuttier flavor.
Matcha powder – Provides the earthy flavor and vibrant color; always use culinary-grade matcha for baking.
Sugar – Adds sweetness to both dough and filling; feel free to use coconut sugar if you’re looking for a lower-glycemic option.
Active dry yeast – This leavening agent makes the texture fluffy; ensure it’s fresh for the best rise.
Eggs – Enrich the dough with moisture and richness; substitute with a flax egg for a vegan alternative.
Butter – Adds richness and flavor; unsalted butter is best for controlled seasoning.
Milk – Hydrates the dough; non-dairy milk is a great substitute for lactose-free options.

For the Filling
Cinnamon – Infuses the filling with warm sweetness; adjust the amount based on your taste preference.
Sugar – Sweetens the cinnamon filling; use brown sugar for an added depth of flavor.
Butter – Softened for ease in mixing, this binds the filling together perfectly.

For the Glaze
Cream cheese – A tangy base for the glaze; ensure it’s softened for easy mixing.
Powdered sugar – Sweetens and thickens the glaze; stevia can be used for a lower-calorie option.

With these ingredients in hand, you’re well on your way to enjoying the delightful flavors of Matcha Cinnamon Rolls!

Step‑by‑Step Instructions for Matcha Cinnamon Rolls

Step 1: Prepare the Dough
In a large mixing bowl, combine 1 cup of warm milk (around 110°F) with 2 teaspoons of active dry yeast and a pinch of sugar. Let the mixture sit for about 5-10 minutes until it becomes frothy, indicating that the yeast is active. Then, add 3 cups of all-purpose flour, 1/2 cup of sugar, 2 tablespoons of matcha powder, 2 beaten eggs, and 1/4 cup of softened butter. Mix until a soft dough forms.

Step 2: Knead the Dough
Transfer the soft dough onto a floured surface, and begin kneading it for about 5-7 minutes. You want the dough to become smooth and elastic. If it’s too sticky, sprinkle a little more flour as needed. Once the dough is ready, shape it into a ball and place it in a lightly greased bowl to rise.

Step 3: First Rise
Cover the bowl with a damp cloth and place it in a warm area to rise until the dough has doubled in size, which should take about 1 hour. You’ll know it’s ready when you press a finger into the dough, and it springs back gently. This first rise is essential for soft and fluffy Matcha Cinnamon Rolls.

Step 4: Make the Filling
While the dough is rising, prepare the filling by mixing 1/2 cup of softened butter, 1 cup of sugar, and 2 tablespoons of cinnamon in a medium bowl. Mix until fully combined and creamy. This sweet and spiced blend will be spread evenly on the rolled-out dough, creating a delightful experience when you bite into your Matcha Cinnamon Rolls.

Step 5: Shape Rolls
Once the dough has risen, punch it down gently to release any air. On a floured surface, roll it out into a large rectangle, about 1/4-inch thick. Evenly spread the cinnamon filling across the dough, leaving a small border around the edges. Tightly roll the rectangle from one end to the other, forming a long cylinder, then slice it into even pieces.

Step 6: Second Rise
Place the cut rolls in a greased baking dish, ensuring they are slightly spaced apart for room to expand. Cover the dish again with a damp cloth, and let them rise for another 30 minutes in a warm place. After this second rise, the rolls will puff up beautifully, ready for baking into soft, delicious Matcha Cinnamon Rolls.

Step 7: Bake
Preheat your oven to 350°F (175°C). Once the rolls have risen, bake them for 20-25 minutes until they are golden brown on top and the edges are slightly crispy. Avoid overbaking to ensure the rolls remain soft and fluffy. The warm scent of cinnamon and matcha will fill your kitchen, making it hard to resist!

Step 8: Prepare Glaze
While the rolls are baking, prepare the glaze by beating together 4 ounces of softened cream cheese, 1 cup of powdered sugar, and 1 tablespoon of matcha powder until smooth and creamy. Once the rolls are out of the oven, allow them to cool slightly for about 10 minutes before drizzling this luscious glaze over the top, enhancing your Matcha Cinnamon Rolls with a sweet tang.

Make Ahead Options

These Matcha Cinnamon Rolls are perfect for meal prep enthusiasts! You can prepare the dough and refrigerate it overnight before shaping the rolls. Simply follow the first three steps of the recipe and then place the dough in a greased bowl, covered with plastic wrap, to prevent drying out. The next morning, allow the dough to come to room temperature for about 30 minutes before shaping and completing the second rise. Additionally, you can make the filling ahead and store it in the refrigerator for up to 3 days. When you’re ready to bake, just assemble, let rise, and pop them in the oven for deliciously fresh rolls that are just as delightful as if you made them all at once!

How to Store and Freeze Matcha Cinnamon Rolls

Room Temperature: Store leftover rolls in an airtight container at room temperature for up to 2 days to keep them fresh and soft.

Fridge: You can refrigerate Matcha Cinnamon Rolls for up to 1 week. Make sure they’re well-wrapped to prevent drying out.

Freezer: For longer storage, freeze the rolls individually wrapped in plastic wrap and then in a freezer-safe bag for up to 2 months.

Reheating: To enjoy your frozen Matcha Cinnamon Rolls, simply thaw overnight in the fridge, then reheat in a preheated oven at 350°F (175°C) for about 10-12 minutes until warm.

Expert Tips for Matcha Cinnamon Rolls

Yeast Activation: Ensure the milk is warm (about 110°F), not hot, when adding yeast. This prevents killing the yeast and ensures proper rising.

Knead Well: Knead the dough for 5-7 minutes until smooth and elastic. Proper kneading develops the gluten, giving your Matcha Cinnamon Rolls their fluffy texture.

Tight Rolling: Roll the dough tightly when shaping the rolls. This helps keep the lovely swirl intact during baking, creating beautiful, even layers.

Follow Rise Times: Allow the dough to rise until doubled in size. Skipping this step can lead to denser rolls, so patience is key for that pillowy goodness.

Glaze Timing: Wait until the rolls cool slightly before glazing. This helps the glaze adhere and prevents it from melting away into the rolls.

Matcha Cinnamon Rolls Variations & Substitutions

Feel free to explore these delightful variations to make your Matcha Cinnamon Rolls even more unique!

  • Nuts & Chocolate: Add walnuts or chocolate chips to the filling for an enjoyable crunch and rich flavor. Both options elevate the flavor experience, enticing you to mix and match your favorites for the perfect bite.
  • Spice Swap: Replace cinnamon with ginger or nutmeg for a warm, spicy twist. This variation introduces an entirely new depth of flavor, creating a unique sensory experience every time you bake.
  • Fruity Delight: Add dried fruits like cranberries or raisins for a touch of sweetness in your filling. Their chewy texture complements the soft rolls beautifully, adding bursts of flavor that surprise and delight.
  • Glaze Alternatives: Try using a tangy lemon glaze instead of the standard cream cheese. The citrus notes will brighten your rolls, making them perfect for a refreshing brunch treat.
  • Sugar Alternatives: Opt for maple syrup instead of sugar in the filling for a deeper, caramel-like sweetness. This swap introduces a lovely, earthy sweetness that pairs seamlessly with matcha.
  • Flavor Infusion: Brew the milk with vanilla or almond extract for a fragrant twist that enhances the overall flavor profile of your rolls. The subtle essence of these infusions adds an uplifting touch to each bite, making them irresistible!
  • Create Mini Rolls: Roll the dough thinner and cut smaller sections for bite-sized treats. These mini rolls are perfect for gatherings or simply indulging without the guilt.
  • Add Matcha to Filling: For an extra matcha kick, blend a teaspoon of matcha powder into the filling. This enhances the flavor while creating a stunning appearance, making your rolls pop with vibrant color!

Consider pairing these delicious rolls with a warm cup of tea or coffee for a cozy experience. If you’re looking for more delectable treats, check out my Grilled Cinnamon Apples or Butter Brioche Rolls to complement your breakfast spread!

What to Serve with Matcha Cinnamon Rolls

Delightfully warm and sweet, these fluffy rolls are perfect for creating a comforting breakfast or brunch spread that your loved ones will remember.

  • Fresh Berries: Bright, juicy berries add a refreshing burst of flavor that complements the earthy matcha and sweet cinnamon perfectly.
  • Creamy Greek Yogurt: A dollop of yogurt brings a creamy tanginess that balances the sweetness of the rolls, making every bite richer.
  • Herbal Tea: Sipping on a fragrant herbal tea enhances the flavors and adds a calming element to your morning routine, perfect for pairing with warm pastries.
  • Maple Syrup: Drizzling a bit of maple syrup over the rolls adds an additional layer of sweetness that merges beautifully with the cinnamon flavor.
  • Honey Vanilla Latte: The creamy, rich notes of a honey vanilla latte create a warm embrace, harmonizing wonderfully with the soft, sweet rolls.
  • Apple Cinnamon Compote: This warm, spiced apple topping adds a delightful dimension and extra sweetness to your Matcha Cinnamon Rolls, creating a cozy charm.
  • Milkshake: For a playful treat, a matcha or vanilla milkshake sweetly echoes the flavors of the rolls, making it an indulgent breakfast experience.
  • Whipped Cream: Light and fluffy, a dollop of whipped cream on the side provides a luscious contrast, perfect for pairing with your pastry indulgence.

Matcha Cinnamon Rolls Recipe FAQs

What type of matcha should I use for baking?
Absolutely! For baking, always choose culinary-grade matcha powder. This type is specifically made for cooking and has a more robust flavor that holds up well during the baking process. Culinary-grade matcha has a darker, richer green color compared to ceremonial-grade, which is best reserved for sipping.

How do I store leftover Matcha Cinnamon Rolls?
You can keep your delicious Matcha Cinnamon Rolls in an airtight container at room temperature for up to 2 days. If you’d like them to last longer, refrigerate them for up to a week, making sure they’ve been well-wrapped to avoid drying out. To enjoy them warm, just reheat them in the oven for a few minutes before serving.

Can I freeze my Matcha Cinnamon Rolls?
Yes, very much! For freezing, wrap each roll individually in plastic wrap and put them in a freezer-safe bag or container. They’ll keep well in the freezer for up to 2 months. To reheat, simply thaw them overnight in the fridge, then warm them in a preheated oven at 350°F (175°C) for about 10-12 minutes until they’re heated through. This way, you can enjoy that fresh-baked taste on demand!

What should I do if my dough doesn’t rise?
If your dough doesn’t rise, it might be due to the yeast being inactive. Ensure your yeast is fresh and always use warm milk (around 110°F) to activate it properly—a too hot or cold temperature can kill the yeast. Additionally, if your kitchen is too cold, try placing the dough in a slightly warm (turned off) oven or another warm spot to encourage it to rise.

Are Matcha Cinnamon Rolls suitable for those with allergies?
Great question! These rolls contain gluten (from the flour), eggs, and dairy (from the butter and cream cheese). If you’re considering modifications for allergies, you can substitute all-purpose flour with a gluten-free flour blend, use flax eggs for an egg-free version, and replace dairy products with non-dairy alternatives. Always check ingredient labels for cross-contamination if you have severe allergies.

Matcha Cinnamon Rolls

Irresistible Matcha Cinnamon Rolls for Cozy Mornings

These Matcha Cinnamon Rolls are a delightful twist on a classic, combining earthy matcha and sweet cinnamon in a soft, fluffy pastry. Perfect for breakfast or brunch.
Prep Time 30 minutes
Cook Time 25 minutes
Rise Time 1 hour 30 minutes
Total Time 2 hours 25 minutes
Servings: 12 rolls
Course: Breakfast
Cuisine: Baking
Calories: 250

Ingredients
  

Dough Ingredients
  • 3 cups All-purpose flour Whole wheat flour can be used.
  • 2 teaspoons Active dry yeast Ensure it's fresh.
  • 1 cup Warm milk Around 110°F.
  • 1/2 cup Sugar Coconut sugar is a lower-glycemic option.
  • 2 tablespoons Matcha powder Use culinary-grade for baking.
  • 2 large Eggs Substitute with flax egg for vegan.
  • 1/4 cup Unsalted butter Softened.
Filling Ingredients
  • 1 cup Sugar Brown sugar adds depth.
  • 2 tablespoons Cinnamon Adjust based on preference.
  • 1/2 cup Softened butter
Glaze Ingredients
  • 4 ounces Cream cheese Softened.
  • 1 cup Powdered sugar Stevia can be used.
  • 1 tablespoon Matcha powder

Equipment

  • Mixing Bowl
  • Rolling Pin
  • Baking dish
  • Oven

Method
 

Dough Preparation
  1. Combine warm milk, active dry yeast, and a pinch of sugar in a bowl. Let sit for 5-10 minutes until frothy.
  2. Mix in flour, sugar, matcha powder, eggs, and butter until a soft dough forms.
  3. Knead on a floured surface for 5-7 minutes until smooth. Shape into a ball and place in a greased bowl.
  4. Cover and let rise in a warm area until doubled, about 1 hour.
Filling and Baking
  1. Mix softened butter, sugar, and cinnamon in a bowl until creamy.
  2. Roll out the dough into a rectangle and evenly spread the filling. Roll into a cylinder and slice into rolls.
  3. Place cut rolls in a greased baking dish and let rise for another 30 minutes.
  4. Preheat oven to 350°F. Bake rolls for 20-25 minutes until golden brown.
  5. Beat together cream cheese, powdered sugar, and matcha powder for the glaze. Drizzle over cooled rolls.

Nutrition

Serving: 1rollCalories: 250kcalCarbohydrates: 35gProtein: 4gFat: 10gSaturated Fat: 6gPolyunsaturated Fat: 0.5gMonounsaturated Fat: 3gCholesterol: 45mgSodium: 120mgPotassium: 100mgFiber: 1gSugar: 10gVitamin A: 400IUCalcium: 30mgIron: 0.5mg

Notes

Store in an airtight container at room temperature for up to 2 days, refrigerate for 1 week, or freeze for 2 months.

Tried this recipe?

Let us know how it was!

Iced Mango Matcha Latte: Refreshing Bliss for Hot Days

As the sun blazes overhead and the world begins to sizzle, my favorite way to cool off is with a vibrant Iced Mango Matcha Latte. This refreshing summer drink combines the luscious sweetness of ripe mango with the earthy depth of matcha, creating an energizing blend that’s as good for your taste buds as it is for your body. Not only is this delightful treat quick to whip up—taking less than 15 minutes—but it’s also packed with antioxidants, making it a guilt-free indulgence on those hot days. Whether you’re lounging by the pool or enjoying a moment of self-care, this iced latte serves as a delicious alternative to your regular coffee routine. Ready to take your summer beverage game to the next level? Let’s dive in and create this creamy, tropical sensation together!

Why is this latte a must-try?

Refreshing, Tropical Flavor: The combination of juicy mango and rich matcha transports you to a sunny paradise with every sip.
Quick & Easy: This recipe can be made in under 15 minutes, perfect for those busy summer days when you want a delicious treat without the wait.
Health Boost: Packed with antioxidants from matcha and vitamins from mango, this latte is both nourishing and energizing.
Versatile Customizations: Want to switch things up? Try using different fruits or plant-based milks like coconut for an even creamier experience.
Eye-Catching Presentation: With its beautiful layers, this drink is bound to impress anyone you serve it to, making it ideal for summer gatherings or a relaxing afternoon at home. Add in a dash of creativity by exploring Chicken Burritos Mango for a delicious pair!

Iced Mango Matcha Latte Ingredients

For the Base
Fresh or Frozen Mango – Provides natural sweetness and creamy texture; substitute with peaches or strawberries for a fruity twist.
Almond Milk – Acts as a creamy base for the latte; other plant-based milks (e.g., oat or coconut) can also be used for varied flavor profiles.
Matcha Powder – Delivers earthy flavor and antioxidants; choose ceremonial-grade for the best taste.

For Sweetening
Honey or Maple Syrup (optional) – Sweetens the drink further; adjust to taste or omit for a sugar-free version.

For Chilling
Ice Cubes – Chills the drink, keeping it refreshing and delightful on hot days; essential for the best experience.

This Iced Mango Matcha Latte is not only a refreshing summer drink but also offers customization options to suit your personal taste!

Step‑by‑Step Instructions for Iced Mango Matcha Latte

Step 1: Prepare the Mango
Start by peeling, pitting, and chopping fresh mango until you have about one cup. If using frozen mango, simply measure the same amount. Place the mango pieces in a blender, and be sure the blender is securely closed. This will create the smooth and creamy base for your Iced Mango Matcha Latte.

Step 2: Blend the Mango
Add ½ cup of almond milk to the blender with the chopped mango. Blend on high speed until the mixture is velvety and smooth, typically around 30 seconds. You’re aiming for a silky mango puree—this will serve as the refreshing base of your drink, bursting with tropical flavor.

Step 3: Whisk the Matcha
In a separate small bowl, combine 2-3 tablespoons of hot water (not boiling) with your matcha powder. Using a whisk or a frother, whisk the matcha until it is fully dissolved and the consistency is smooth, roughly 1 minute. You want to eliminate any lumps to ensure a creamy finish in your Iced Mango Matcha Latte.

Step 4: Layer the Drink
Grab a tall glass and scoop in the mango puree until it covers the bottom. Next, fill the glass halfway with ice cubes—this keeps your drink wonderfully chilled and refreshing. Take a moment to appreciate the vibrant color of the mango puree before moving on to the next step.

Step 5: Add More Almond Milk
Pour in the remaining almond milk over the ice, allowing it to gently blend with the mango puree underneath. The contrast in colors is beautiful and inviting, creating a stunning visual effect that enhances the drinking experience of your Iced Mango Matcha Latte.

Step 6: Top with Matcha
Finally, slowly pour the whisked matcha over the almond milk layer to create a mesmerizing layered effect. This may take a steady hand, but the magic of the Iced Mango Matcha Latte comes from its eye-catching presentation! The vibrant green matcha will sit beautifully atop the creamy base, ready to be mixed before enjoying.

Step 7: Add Sweetener (Optional)
If desired, drizzle honey or maple syrup on top for added sweetness, adjusting according to your taste preferences. You can also sprinkle a pinch of sea salt to enhance the flavors. Take a moment to appreciate this delightful creation before giving it a gentle stir to blend the flavors beautifully together.

Make Ahead Options

These Iced Mango Matcha Lattes are perfect for busy home cooks looking to save time while enjoying a refreshing drink! You can prepare the mango puree and whisk the matcha up to 24 hours in advance. Simply blend the mango with almond milk, then refrigerate it in an airtight container. For the matcha, mix it with water and store it in another container in the fridge. When you’re ready to enjoy your Iced Mango Matcha Latte, layer the mango puree over ice, pour in the remaining almond milk, and top it with the matcha. Follow these steps for a delicious drink that feels just as fresh, even when made ahead!

What to Serve with Iced Mango Matcha Latte

As you savor your creamy, refreshing iced drink, consider these delightful pairings to complete the experience.

  • Fresh Tropical Fruit: The natural sweetness of fruit enhances the vibrant mango flavor. Enjoy with slices of pineapple or kiwi for an exotic touch.
  • Coconut Chia Pudding: This creamy, nutty pudding contrasts beautifully with the latte’s flavor, offering a delightful texture that’s both delicious and nutritious. Plus, it’s a wonderful source of fiber!
  • Savory Avocado Toast: The richness of avocado on whole-grain bread balances the sweet and earthy notes of the latte, creating a perfect brunch option. You can even add a sprinkle of chili flakes for a subtle kick.
  • Sweet Muffins: Pair with coconut or mango muffins to tie in the tropical theme. Their fluffy, tender texture and slight sweetness complement your iced drink beautifully.
  • Herbal Iced Tea: A refreshing herbal tea, like hibiscus or mint, offers a light counterpart to the rich matcha. It’s perfect for quenching your thirst and enhancing the laid-back mood of your summer day.
  • Light Salad: A crisp salad featuring mixed greens, mango, and citrus dressing brings freshness and contrast to the creamy latte, making it a vibrant, healthful meal option.
  • Dark Chocolate: A few pieces of dark chocolate can elevate your latte experience, enriching the flavors with a hint of bitterness that pairs perfectly with the sweetness of mango.
  • Chilled Sparkling Water: Keep it light and refreshing with a sparkling water infused with fresh mint or basil, enhancing the overall refreshing theme of your meal.
  • Coconut Popsicles: Treat yourself to a frozen coconut treat for dessert after your drifty, creamy latte. The cold popsicle contrasts nicely with the vibrant drink, creating a fun pairing for hot days.
  • Cheese Board: For something savory and indulgent, a small cheese board with mild cheeses like brie or goat cheese rounds out the meal, providing a flavor boost that complements both the mango and matcha elements beautifully.

Expert Tips for Iced Mango Matcha Latte

  • Silky Puree: Use a high-speed blender for the mango to achieve a creamy, smooth texture essential for your Iced Mango Matcha Latte.
  • Clump-Free Matcha: Ensure you whisk the matcha thoroughly with water to avoid any lumps that can affect texture and taste.
  • Layering Technique: Pour matcha gently over the milk to create a stunning layered effect; it enhances the drink’s visual appeal.
  • Serving Fresh: Serve immediately after making for the best flavor and texture, avoiding an overly mixed appearance over time.
  • Custom Sweetness: Adjust honey or maple syrup based on your sweetness preference, keeping it light for a healthier option.

Iced Mango Matcha Latte Variations

Feel free to unleash your creativity and customize this delightful drink with these fun twists!

  • Fruit Swap: Substitute mango with fresh peaches or strawberries for a deliciously different flavor profile. Juicy berries can add a nice tartness and color!

  • Mango Medley: Mix in other seasonal fruits alongside mango, like pineapple or banana. This fruity twist can elevate the tropical vibes of your latte!

  • Creamy Coconut: Use coconut milk instead of almond milk for a richer, creamier texture. This will enhance the tropical taste, reminiscent of sipping a beachy piña colada.

  • Herbal Bliss: For a caffeine-free version, replace matcha with a herbal blend, such as rooibos or peppermint. You’ll create a calming drink, perfect for a late afternoon treat.

  • Nutty Delight: Add a hint of almond or hazelnut extract to the latte to deepen the flavor, and enhance the overall nutty undertones.

  • Spice It Up: Sprinkle in a pinch of cinnamon or a dash of vanilla for a warm touch that complements the tropical flavors beautifully.

  • Sweetness Variations: Experiment with different sweeteners like agave nectar or stevia, or even try a flavored syrup for a playful twist!

  • Ice Alternatives: Consider freezing the mango puree into ice cubes for an intensely flavorful refreshment or blend them into smoothies later, like a heavenly Mango Coconut Pudding!

With such delightful options, your Iced Mango Matcha Latte can be tailored to your heart’s content! Enjoy!

Storage Tips for Iced Mango Matcha Latte

Fridge: Store any leftover Iced Mango Matcha Latte in an airtight container in the refrigerator for up to 3 hours. However, enjoy it fresh for the best flavor and texture.

Freezer: For longer storage, pour the mixture into an ice cube tray. Freeze for up to 3 months, then blend the cubes into a refreshing smoothie later!

Reheating: If you’ve stored it in the fridge, give it a gentle stir before enjoying. Avoid microwaving as it can alter the creamy texture of the latte.

Airtight Containers: Always use airtight containers to minimize exposure to air, which can affect the taste and freshness of your Iced Mango Matcha Latte.

Iced Mango Matcha Latte Recipe FAQs

How do I select the best mango for this latte?
Absolutely! When choosing a mango, look for one that is slightly soft to the touch, indicating ripeness, and free of dark spots. The skin should be vibrant and fragrant, suggesting sweetness. If you can’t find a ripe mango, frozen mango works beautifully and is equally delicious!

How should I store any leftover Iced Mango Matcha Latte?
To enjoy your latte at its best, it’s ideal to drink it fresh. However, if you have leftovers, store them in an airtight container in the refrigerator for up to 3 hours. After that, the texture may change, but it should still be safe to consume.

Can I freeze the Iced Mango Matcha Latte?
Certainly! For longer storage, pour any leftover latte into an ice cube tray and freeze for up to 3 months. When you’re ready for a treat, simply blend the frozen cubes with a splash of almond milk for a quick smoothie! Just blend until smooth and enjoy that tropical flavor once again.

What should I do if my matcha clumps?
Very good question! If you notice clumps in your matcha, whisk it thoroughly with warm water using a frother or a regular whisk. Start with a small amount of water and gradually add more until it is completely dissolved, ensuring a smooth texture. This will create the perfect creamy consistency for your latte.

Is there a way to make this latte suitable for those with dietary restrictions?
Absolutely! This Iced Mango Matcha Latte is naturally vegan when you use plant-based milk like almond or coconut. If you’re avoiding sugar, simply omit the honey or maple syrup and enjoy the natural sweetness of the mango. Always make sure to check for any allergies related to the specific plant-based milk or ingredients you choose!

Iced Mango Matcha Latte

Iced Mango Matcha Latte

Enjoy a refreshing Iced Mango Matcha Latte, a perfect blend of tropical mango and earthy matcha, ideal for hot days.
Prep Time 15 minutes
Total Time 15 minutes
Servings: 1 drink
Course: Drinks
Cuisine: Asian
Calories: 200

Ingredients
  

For the Base
  • 1 cup Fresh or Frozen Mango Provides natural sweetness and creamy texture; substitute with peaches or strawberries.
  • ½ cup Almond Milk Acts as a creamy base; other plant-based milks like oat or coconut can be used.
  • 2-3 tablespoons Matcha Powder Choose ceremonial-grade for the best taste.
For Sweetening
  • to taste Honey or Maple Syrup Optional sweetener; adjust to taste or omit for sugar-free version.
For Chilling
  • as needed Ice Cubes Chills the drink, essential for the refreshing experience.

Equipment

  • blender
  • Whisk or frother
  • Tall glass

Method
 

Step‑By‑Step Instructions
  1. Peel, pit, and chop fresh mango until you have about one cup. Place the mango pieces in a blender.
  2. Add ½ cup of almond milk to the blender with the chopped mango. Blend on high speed until smooth, around 30 seconds.
  3. In a separate small bowl, combine 2-3 tablespoons of hot water with matcha powder. Whisk until smooth, roughly 1 minute.
  4. Scoop the mango puree into a tall glass until it covers the bottom. Fill the glass halfway with ice cubes.
  5. Pour in the remaining almond milk over the ice, allowing it to blend with the mango puree.
  6. Slowly pour the whisked matcha over the almond milk layer to create layers.
  7. Drizzle honey or maple syrup on top for added sweetness, if desired.

Nutrition

Serving: 1drinkCalories: 200kcalCarbohydrates: 30gProtein: 2gFat: 5gSaturated Fat: 0.5gMonounsaturated Fat: 4gSodium: 125mgPotassium: 350mgFiber: 3gSugar: 20gVitamin A: 10IUVitamin C: 50mgCalcium: 15mgIron: 5mg

Notes

Serve immediately after making for the best flavor. Adjust sweetness as per preference.

Tried this recipe?

Let us know how it was!

Chewy Pumpkin Pie Cookies for Cozy Fall Vibes

As I pulled a tray of Pumpkin Pie Cookies from the oven, the warm, inviting aroma of spices wafted through my kitchen, instantly conjuring up images of cozy holiday gatherings. These Thick & Chewy Pumpkin Pie Cookies offer a delightful twist on the classic dessert, combining a soft, chewy texture with a luscious pumpkin filling that melts in your mouth. They’re not only quick to whip up but also a crowd-pleaser, making them the perfect treat for festive get-togethers or a cozy night in. Whether you’re a pumpkin pie aficionado or just looking for a new cookie to impress your friends, these cookies are bound to become a cherished favorite. Ready to step into the world of pumpkin-flavored bliss? Let’s get baking!

Why Are These Cookies a Must-Bake?

Unique Flavors: Each bite offers a delightful combination of pumpkin and warm spices, making them perfect for fall.
Quick & Easy: This recipe comes together in no time, allowing you to enjoy freshly baked cookies without spending hours in the kitchen.
Impressive Texture: With a chewy exterior and luscious filling, these cookies mimic the comfort of traditional pumpkin pie.
Crowd-Pleaser: Perfect for holiday gatherings, they’re sure to win over guests of all ages.
Customizable: Feel free to get creative by adding chocolate chips or experimenting with different spices. For more delicious ideas, check out my Strawberry Icebox Pie and Pumpkin Cream Cold recipes!

Ingredients for Pumpkin Pie Cookies

For the Cookie Dough
All-Purpose Flour – Provides structure; can substitute with gluten-free flour blend for a gluten-free option.
Pumpkin Spice – Adds warm, aromatic flavor; can substitute with cinnamon and nutmeg if unavailable.
Salt – Enhances flavor; no substitutions needed.
Cream Cheese – Contributes to cookie chewiness and richness; may substitute with mascarpone or omit for a dairy-free version.
Unsalted Butter – Adds moisture and flavor; can use coconut oil for a dairy-free option.
Granulated Sugar – Provides sweetness; brown sugar can replace half for a deeper flavor.
Brown Sugar – Adds moisture and a hint of caramel flavor; can be substituted with coconut sugar.
Egg Yolk – Binds the ingredients together; omit for a vegan version, using a flax egg instead.
Vanilla Extract – Enhances flavor; no substitutions needed.
Coarse Sugar for Rolling – For texture and a sweet crust; can use granulated sugar if unavailable.

For the Pumpkin Filling
Egg (for filling) – Binds the filling; no substitutions needed.
Brown Sugar (for filling) – Sweetens the pumpkin filling; no substitutions needed.
Whole Milk – Adds creaminess; can use almond milk or oat milk for a dairy-free version.
Pumpkin Puree – The star ingredient for flavor and texture; can substitute with butternut squash puree.
Vanilla Extract (for filling) – Enhances the flavor of the filling; no substitutions needed.

For Serving
Whipped Cream (optional) – For serving; use dairy-free whipped cream if desired.

Step‑by‑Step Instructions for Pumpkin Pie Cookie

Step 1: Preheat the Oven
Begin by preheating your oven to 350°F (175°C) and line a baking sheet with parchment paper. This initial step sets the stage for baking scrumptious Pumpkin Pie Cookies that will come out perfectly browned! While your oven warms up, gather and measure your ingredients to ensure a smooth preparation process.

Step 2: Prepare the Cookie Dough
In a mixing bowl, whisk together the all-purpose flour, pumpkin spice, and salt until well combined. In a separate bowl, cream together the cream cheese, butter, granulated sugar, and brown sugar using an electric mixer until the mixture is light and fluffy, about 3-4 minutes. Add the egg yolk and vanilla extract to the creamed mixture, combining well before gradually folding in the flour mixture until a thick dough forms.

Step 3: Make the Pumpkin Filling
In another bowl, prepare the filling for your Pumpkin Pie Cookies by whisking together the egg, brown sugar, whole milk, pumpkin puree, and vanilla extract until the mixture is smooth and well blended. This unity of flavors will create a deliciously rich filling that enhances the cookies’ delightful taste. Set the filling aside as you prepare to form the cookies.

Step 4: Form the Cookies
Take your prepared cookie dough and roll it into 2-tablespoon-sized balls, then roll each ball in coarse sugar to create a sweet crust. Arrange the dough balls on your lined baking sheet, leaving enough space between them for spreading. Using a measuring spoon, gently make a well in the center of each ball and carefully fill it with the luscious pumpkin filling.

Step 5: Bake the Cookies
Place the cookie sheet in the preheated oven and bake your Pumpkin Pie Cookies for 14-17 minutes, or until the edges are lightly golden and the filling is set. Keep a close eye on them during the last few minutes of baking. Once finished, remove the cookie sheet from the oven and allow the cookies to cool on wire racks for a few minutes before serving or storing.

Expert Tips for Pumpkin Pie Cookies

Cool Before Serving: Let the cookies cool to room temperature to enhance their flavor and texture before indulging in this delightful pumpkin pie cookie treat.

Uniform Size: Use a kitchen scale to measure 36g for each dough ball. This ensures even baking and consistent texture across all cookies.

Filling Consistency: Make sure the pumpkin filling is smooth, as lumps can disrupt the creamy texture when biting into your cookie.

Watch the Baking Time: Keep a close eye on the cookies during the last few minutes of baking. Overbaking can lead to dryness, while underbaking can leave them too gooey.

Serve Fresh: If serving with whipped cream, do so immediately. Adding it too early can make the cookies soggy, diminishing that cherished chewy texture.

How to Store and Freeze Pumpkin Pie Cookies

Room Temperature: Store your cookies in an airtight container at room temperature for up to 3 days to keep them soft and chewy.

Fridge: For longer storage, place the cookies in the refrigerator in an airtight container, where they can last up to a week.

Freezer: To freeze, layer the cookies between sheets of wax paper in an airtight container, ensuring they don’t stick together. They can be frozen for up to 3 months.

Reheating: When ready to enjoy, thaw at room temperature or warm in the oven at 350°F for about 5-7 minutes. This will restore their delightful chewy texture!

What to Serve with Thick & Chewy Pumpkin Pie Cookies

Indulging in delicious Pumpkin Pie Cookies opens the door to a cozy meal experience that can be beautifully complemented with the right sides and treats.

  • Creamy Mashed Potatoes: These velvety potatoes provide a mellow contrast, balancing the spices in the cookies, creating perfect harmony on your plate.
  • Spiced Hot Cider: The warm notes of cinnamon and apple enhance the cookie’s flavors and offer a seasonal twist that invites comfort on chilly nights.
  • Roasted Brussels Sprouts: Their earthy and slightly bitter flavor cuts through the sweetness of the cookies, making for a delightful, contrasting side.
  • Pumpkin Soup: A warm, comforting bowl of pumpkin soup echoes the cookie’s flavors while adding a creamy texture that’s inviting and satisfying.
  • Vanilla Ice Cream: A scoop of creamy vanilla ice cream served alongside the cookies creates a delightful contrast of textures that celebrates both recipes.
  • Maple Glazed Carrots: Sweet, tender carrots glazed with maple syrup can beautifully echo the cookie’s sweetness while adding a pop of color to your meal.
  • Cranberry Sauce: The tartness of fresh cranberry sauce enhances the sweetness of the cookies, bringing a touch of brightness to your holiday dining table.
  • Dark Chocolate: Pairing a piece of rich dark chocolate with the cookies introduces a sophisticated twist, appealing to those who enjoy deeper, complex flavors.
  • Eggnog: This creamy, spiced beverage perfectly complements the cookies, enhancing the festive feel with each sip.

With these suggestions, your Pumpkin Pie Cookies can take center stage in a meal that’s not only satisfying but also wonderfully seasonal!

Make Ahead Options

These Thick & Chewy Pumpkin Pie Cookies are perfect for busy home cooks looking to save time! You can prepare the cookie dough up to 24 hours in advance by mixing all ingredients and refrigerating the dough tightly wrapped. Additionally, the pumpkin filling can be made up to 3 days ahead and stored in an airtight container in the refrigerator. When you’re ready to bake, simply scoop the chilled dough, fill with the prepared pumpkin filling, and proceed with baking as directed. By preparing ahead, you’ll ensure the cookies taste just as delightful with minimal last-minute effort, allowing you to savor those cozy fall vibes!

Pumpkin Pie Cookie Variations & Substitutions

Feel free to make these delightful Pumpkin Pie Cookies your own with some creative twists and substitutes!

  • Gluten-Free: Use a gluten-free flour blend to cater to dietary needs while retaining the delicious flavor.
  • Dairy-Free: Substitute cream cheese with mascarpone or omit entirely for a dairy-free option! Coconut oil can replace butter for added richness without dairy.
  • Spice It Up: Experiment with a blend of ginger, allspice, or even cardamom for a unique flavor profile. Each spice offers its own warmth and coziness, enhancing the overall cookie experience.
  • Chocolate Delight: Add chocolate chips for a sweet and decadent surprise inside each cookie! The richness of chocolate pairs beautifully with pumpkin’s gentle sweetness.
  • Pumpkin Filling Twist: Swap the pumpkin filling for apple butter for a delightful change. This fruity alternative provides a lovely sweetness and a different texture!
  • Brown Sugar Alternative: Use coconut sugar for a lower glycemic index, bringing that same caramel hint without the refined sugars.
  • Nutty Twist: Mix in chopped pecans or walnuts for a crunchy texture contrast. The nutty bits add depth to every bite, making these cookies even more delightful.
  • Extra Creamy: Swap whole milk for almond or oat milk in the filling for a dairy-free treat while ensuring the filling remains luxuriously creamy.

When you’re looking to expand your dessert repertoire, don’t forget to check out my Chocolate Chip Cookie and Shepherd’s Pie Ground recipes for culinary inspiration!

Pumpkin Pie Cookies Recipe FAQs

What type of pumpkin should I use for the filling?
Absolutely! For the pumpkin filling, I recommend using pure pumpkin puree, which provides the best flavor and texture. If you can’t find it, you can substitute with butternut squash puree, which has a similar taste profile. Look for canned pumpkin puree without additives to keep things simple.

How should I store leftover cookies?
You can store your Pumpkin Pie Cookies in an airtight container at room temperature for up to 3 days. Keeping them at room temperature helps maintain their chewy texture. If you’d like to extend their shelf life, you can refrigerate them for up to a week. Just be sure to let them come to room temperature before enjoying!

Can I freeze these cookies?
Very! To freeze your Pumpkin Pie Cookies, layer them between sheets of wax paper in an airtight container. This method helps prevent sticking and keeps them fresh. You can freeze them for up to 3 months. When you’re ready to enjoy, simply thaw them at room temperature or warm them in the oven at 350°F for about 5-7 minutes to regain that delicious chewy texture.

Why did my cookies come out too dry?
If your Pumpkin Pie Cookies turned out dry, it may be due to overbaking. Keep an eye on them while they bake, especially during the last few minutes; they should be set but still soft in the center. Also, ensure that your measurements are accurate. Using a kitchen scale to weigh out each dough ball (aim for 36g) can help ensure uniform baking.

Can I make these cookies dairy-free or gluten-free?
Very much so! For a gluten-free option, simply substitute the all-purpose flour with a gluten-free blend. If you’re looking to make them dairy-free, use coconut oil in place of butter and consider omitting cream cheese or substituting it with dairy-free mascarpone. You can also use almond milk or oat milk in the filling for a completely dairy-free treat!

Are there any allergen considerations I should be aware of?
Yes, always! These cookies contain common allergens such as wheat (gluten) and dairy. If you’re serving them to guests with allergies, ensure to inform them or provide alternatives like gluten-free flour and dairy-free products. For pet owners, be cautious as ingredients like chocolate, while not included in this recipe, are commonly associated with cookie variations and can be harmful to dogs and cats.

Pumpkin Pie Cookie

Chewy Pumpkin Pie Cookies for Cozy Fall Vibes

Delicious Pumpkin Pie Cookies blend chewy texture with pumpkin filling, perfect for cozy fall vibes.
Prep Time 20 minutes
Cook Time 17 minutes
Cooling Time 10 minutes
Total Time 47 minutes
Servings: 24 cookies
Course: Dessert
Cuisine: American
Calories: 180

Ingredients
  

For the Cookie Dough
  • 2 cups All-Purpose Flour can substitute with gluten-free flour blend
  • 2 teaspoons Pumpkin Spice or substitute with cinnamon and nutmeg
  • 1 teaspoon Salt
  • 4 oz Cream Cheese or substitute with mascarpone
  • 1/2 cup Unsalted Butter or use coconut oil
  • 1/2 cup Granulated Sugar can replace half with brown sugar
  • 1/2 cup Brown Sugar or substitute with coconut sugar
  • 1 large Egg Yolk or omit for a vegan version
  • 1 teaspoon Vanilla Extract
  • 1/4 cup Coarse Sugar for Rolling or use granulated sugar
For the Pumpkin Filling
  • 1 large Egg
  • 1/2 cup Brown Sugar
  • 1/2 cup Whole Milk or use almond milk or oat milk
  • 1 cup Pumpkin Puree or substitute with butternut squash puree
  • 1 teaspoon Vanilla Extract
For Serving
  • 1 cup Whipped Cream optional, use dairy-free if desired

Equipment

  • Baking Sheet
  • Mixing Bowl
  • Electric Mixer
  • Measuring spoons
  • Parchment paper

Method
 

Step-by-Step Instructions
  1. Preheat your oven to 350°F (175°C) and line a baking sheet with parchment paper.
  2. In a mixing bowl, whisk together the all-purpose flour, pumpkin spice, and salt until well combined.
  3. In a separate bowl, cream together the cream cheese, butter, granulated sugar, and brown sugar until light and fluffy, about 3-4 minutes. Add the egg yolk and vanilla extract, mixing well before folding in the flour mixture until a thick dough forms.
  4. In another bowl, whisk together the egg, brown sugar, whole milk, pumpkin puree, and vanilla extract until smooth to prepare the filling.
  5. Roll the cookie dough into 2-tablespoon-sized balls, roll in coarse sugar, and place on the baking sheet. Make a well in the center of each ball and fill with pumpkin filling.
  6. Bake for 14-17 minutes, or until edges are lightly golden and filling is set. Cool on wire racks before serving.

Nutrition

Serving: 1cookieCalories: 180kcalCarbohydrates: 25gProtein: 2gFat: 8gSaturated Fat: 4gPolyunsaturated Fat: 0.5gMonounsaturated Fat: 3.5gCholesterol: 30mgSodium: 150mgPotassium: 80mgFiber: 1gSugar: 12gVitamin A: 520IUVitamin C: 1mgCalcium: 30mgIron: 1mg

Notes

Let the cookies cool before serving to enhance flavor. Use a kitchen scale for even dough balls for consistent texture. Watch baking time closely to avoid overbaking.

Tried this recipe?

Let us know how it was!

Savor the Warmth of Garlic Parmesan Focaccia at Home

As I stood in the kitchen, the rich scent of roasted garlic wafted through the air, instantly transporting me to a bustling Italian bakery. This easy Garlic Parmesan Focaccia combines the comforting flavors of garlic and cheese, transforming ordinary ingredients into a taste of heaven. Not only is this recipe simple to whip up, but it also offers the versatility to serve as a delightful side dish or a base for gourmet sandwiches. The soft and fluffy texture, paired with the crispy golden crust, will have your family and friends coming back for more. Are you ready to knead your way to a perfect loaf? Let’s get started!

Why is Garlic Parmesan Focaccia a Must-Try?

Irresistible Aroma: The heady scent of garlic combined with Parmesan fills your kitchen, creating an inviting atmosphere that makes everyone hungry.

Easy to Make: With minimal ingredients and straightforward steps, this recipe is perfect for novice bakers and seasoned chefs alike.

Versatile Delight: Enjoy it as a side for pasta, soups, or salads, or use it to whip up a gourmet sandwich—your choice!

Crispy Yet Soft: Each bite offers a beautiful contrast between the golden crust and the airy, fluffy interior, ensuring a satisfying experience.

Crowd-Pleasing Appeal: Perfect for family dinners or gatherings, this Garlic Parmesan Focaccia is sure to impress and leave everyone longing for seconds.

Garlic Parmesan Focaccia Ingredients

• Here’s everything you need to create your irresistible Garlic Parmesan Focaccia.

For the Dough

  • All-Purpose Flour – Provides structure and gluten formation for the dough, which is essential for that perfect texture.
  • Instant Yeast – Causes the dough to rise quickly without the need for proofing; ensure it’s fresh for the best results.
  • Salt – Enhances flavor and strengthens gluten; using kosher or sea salt is recommended for optimal taste.
  • Warm Water (110°F) – Activates yeast—be careful, as water that’s too hot can kill it, while cold water slows fermentation.
  • Sugar – Feeds the yeast for leavening and adds a slight sweetness; brown sugar works for a deeper flavor.
  • Extra Virgin Olive Oil – Adds delightful flavor and moisture to the dough, so opt for high-quality oil if possible.

For the Flavor

  • Garlic (3-4 cloves, minced) – Infuses the bread with a savory, aromatic flavor; fresh garlic is preferred, but garlic powder can work in a pinch.
  • Parmesan Cheese (½ cup, freshly grated) – Adds incredible flavor and a crispy crust; try Pecorino Romano for a sharper taste if desired.
  • Dried Italian Herbs or Chopped Rosemary (optional) – Enhances flavor; fresh herbs can provide even more freshness.
  • Flaky Sea Salt (for topping) – Offers a finishing touch of flavor that enhances the overall taste; kosher salt can substitute if necessary.

Step‑by‑Step Instructions for Garlic Parmesan Focaccia

Step 1: Mix Dough
In a mixing bowl, combine warm water (110°F), sugar, and instant yeast. Allow the mixture to sit for about 5 minutes, until it becomes foamy and bubbly. Next, add all-purpose flour and salt, stirring until a sticky dough forms. This dough will be the foundation of your easy Garlic Parmesan Focaccia.

Step 2: Knead
Turn the dough onto a floured surface and knead for 5–6 minutes using a dough hook on low speed, or by hand for 8–10 minutes, until the dough feels smooth and elastic. If you see a lovely sheen forming, you’re on the right track! The kneading process is essential for developing a tender texture in your focaccia.

Step 3: First Rise
Shape the kneaded dough into a ball and place it in a lightly greased bowl, coating it with a drizzle of extra virgin olive oil. Cover the bowl with a clean kitchen towel and set it in a warm area for 1 to 1.5 hours. Wait until the dough has doubled in size—this ensures a soft, fluffy Garlic Parmesan Focaccia.

Step 4: Prepare Garlic Oil
In a small saucepan over medium heat, gently heat additional olive oil. Add the minced garlic, stirring until fragrant, about 1-2 minutes. Be careful not to let the garlic burn, as it will turn bitter. This garlic oil will add aromatic flavor to your focaccia, so set it aside for later use.

Step 5: Stretch and Second Rise
Once the dough has risen, gently transfer it to a greased 9×13-inch baking pan. With your fingertips, press the dough to stretch it into the corners of the pan, taking care not to deflate it. Cover the pan with a towel and let it rise for another 30–45 minutes—this second rise gives the dough its signature airy texture.

Step 6: Add Toppings
Preheat your oven to 425°F (220°C) to prepare for baking. When the dough has risen again, use your fingers to create dimples all over the surface. Brush the dough generously with the prepared garlic oil, then sprinkle it with freshly grated Parmesan cheese, any optional herbs, and flaky sea salt for a delightful finish.

Step 7: Bake
Place the pan in the preheated oven and bake for 20–25 minutes, or until the focaccia is beautifully golden brown and has a crisp crust. Keep an eye on it in the last few minutes, as you want to achieve that perfect golden color without over-baking the bread.

Step 8: Cool and Serve
Once baked, remove the focaccia from the oven and allow it to cool in the pan for about 5–10 minutes to enhance its flavor. Then, transfer it to a wire rack for further cooling. Slice it into pieces when ready, and your fresh Garlic Parmesan Focaccia is ready to enjoy warm or at room temperature!

What to Serve with Garlic Parmesan Focaccia

As you prepare to enjoy your golden delight, consider these delectable pairings that will elevate your meal experience to new heights.

  • Creamy Tomato Soup: This classic comfort food perfectly complements the focaccia’s texture, providing a velvety contrast with each bite of warmth. The savory notes blend beautifully, making every spoonful a delight.

  • Simple Green Salad: A fresh mix of greens with a light vinaigrette offers a crunchy, refreshing balance to the savory bread. The crisp greens contrast the soft focaccia, enhancing the overall dining experience.

  • Roasted Vegetables: Earthy roasted veggies bring sweetness and depth that harmonizes with the garlic and Parmesan. Serve this alongside for a wholesome, flavor-rich plate that will tempt your taste buds.

  • Pasta with Garlic and Olive Oil: Combining bold flavors with garlic pays homage to the focaccia’s foundation. The chewy pasta and light olive oil dressing make for an enticing duo that feels indulgent yet comforting.

  • Herb-Infused Olive Oil: For a simple yet elegant touch, serve your focaccia with a dish of herb-infused olive oil for dipping. The fragrant herbs awaken the flavors of the bread, creating a sensory experience with every bite.

  • Chardonnay: The crisp acidity of a chilled Chardonnay cuts through the richness of the focaccia, ensuring a balanced taste. This delightful pairing transforms your meal into a gourmet experience.

  • Dessert: Tiramisu: Finish your meal on a sweet note with this classic Italian dessert that contrasts with the focaccia’s savory flavors. Its creamy texture and coffee notes create a delightful end to your dining experience.

Variations & Substitutions for Garlic Parmesan Focaccia

Discover delightful ways to personalize your Garlic Parmesan Focaccia and make it truly your own!

  • Whole Wheat Flour: Substitute half the all-purpose flour with whole wheat flour for a nuttier flavor and denser texture.

  • Cheese Swap: Boldly experiment with different cheeses! Cheddar or mozzarella can lend a creamier touch to your focaccia.

  • Herb Infusion: Use fresh herbs like thyme or basil for a refreshing taste twist. Their vibrant flavors elevate the bread to gourmet levels.

  • Flavorful Add-Ins: Mix in sundried tomatoes or olives for bursts of flavor. They add a Mediterranean flair, making for a more robust profile.

  • Spicy Kick: If you crave a bit of heat, sprinkle red pepper flakes on top before baking. It gives the focaccia a delightful warmth.

  • Garlic Lovers: Increase the amount of minced garlic if you want an intense garlic flavor. The aroma will be heavenly!

  • Brushed with Butter: For an extra-rich crust, brush the focaccia with melted garlic butter after baking. This adds a luxurious touch that pairs perfectly with soups and salads.

  • Toppings Galore: Consider topping your focaccia with caramelized onions or fresh arugula after baking for a gourmet finish.

By selecting one or several of these variations, you can turn your focaccia into a unique experience every time. For a perfect pairing, why not enjoy your focaccia alongside some Golden Garlic Butter Shrimp or a vibrant Grilled Garlic Rosemary side? The delicious possibilities are endless!

Make Ahead Options

These Garlic Parmesan Focaccia are perfect for busy weeknights! You can prepare the dough up to 24 hours in advance by following the first three steps, letting it rise, then covering and refrigerating it. The cold environment slows the fermentation process and enhances the flavor. When you’re ready to bake, simply remove the dough from the refrigerator, let it come to room temperature for about 30 minutes, then proceed with the second rise and baking steps. For optimal quality, be sure to brush the dough with garlic oil right before baking to ensure it remains just as delicious. Enjoy effortless meal prep with this versatile focaccia!

Expert Tips for Garlic Parmesan Focaccia

  • Water Temperature: Ensure your warm water is exactly 110°F to activate the yeast properly; too hot can kill it, affecting dough rise.

  • Kneading Technique: When kneading, if the dough feels too sticky, resist adding extra flour. Instead, dedicate enough time for kneading until it becomes elastic.

  • Avoid Deflation: Gently stretch the dough during the second rise to retain air bubbles. If you feel resistance, allow it to rest for 10 minutes before trying again.

  • Garlic Oil Timing: Brush the focaccia with garlic oil just before baking to preserve the garlic flavor; applying it too early may result in burning.

  • Crispy Topping: For an extra crispy crust, bake the focaccia on a lower rack in the oven to ensure even browning. Enjoy your homemade Garlic Parmesan Focaccia!

How to Store and Freeze Garlic Parmesan Focaccia

Room Temperature: Store focaccia in an airtight container at room temperature for up to 3 days to maintain its freshness and soft texture.

Freezer: For longer storage, wrap the focaccia tightly in plastic wrap and then aluminum foil. It can be frozen for up to 3 months, preserving its savory flavors.

Reheating: To refresh your Garlic Parmesan Focaccia, preheat the oven to 350°F (175°C) and bake for 10-15 minutes until warmed through. This helps regain its crispy crust.

Thawing: If frozen, thaw overnight in the fridge before reheating to ensure even warming without drying out the bread.

Garlic Parmesan Focaccia Recipe FAQs

What type of flour is best for Garlic Parmesan Focaccia?
For the best results, use all-purpose flour. It provides the necessary structure and gluten needed for the dough. While you could experiment with whole wheat flour, it will create a denser texture that may not yield the same light, fluffy result.

How should I store Garlic Parmesan Focaccia?
To keep your focaccia fresh, store it in an airtight container at room temperature for up to 3 days. If you have leftovers beyond that, it’s best to freeze it. Simply wrap it tightly in plastic wrap, followed by aluminum foil, and it can remain frozen for up to 3 months.

Can I freeze Garlic Parmesan Focaccia?
Absolutely! To freeze, first allow the focaccia to cool completely. Then wrap it tightly in plastic wrap and aluminum foil. When you’re ready to enjoy it again, thaw it overnight in the refrigerator, and reheat it in a preheated oven at 350°F (175°C) for about 10-15 minutes to restore its beautiful texture.

What should I do if my dough isn’t rising?
If your dough doesn’t rise, it might be due to the temperature of the water being too hot or too cold, which can kill or slow down the yeast. Make sure to maintain the water temperature at around 110°F. Additionally, check if your yeast is fresh; old yeast will not activate. If the dough is resistant during the second rise, cover it and let it rest for about 10 minutes before trying to stretch it again.

Can I make Garlic Parmesan Focaccia dairy-free?
Yes, you can! To make this recipe dairy-free, substitute the Parmesan cheese with nutritional yeast for a cheesy flavor or a dairy-free cheese alternative that’s suitable for melting. Be sure to check ingredient labels for any hidden dairy products if you have a dairy allergy.

Is Garlic Parmesan Focaccia safe for pets?
While the ingredients used in Garlic Parmesan Focaccia are not toxic to pets, it’s best to avoid sharing it with them as garlic can cause digestive upset in some animals, particularly dogs. Always stick to pet-safe snacks for your furry friends.

This Garlic Parmesan Focaccia Recipe FAQs section will help guide you in your baking journey, ensuring you have all the answers you need for a successful homemade bread experience!

Garlic Parmesan Focaccia

Savor the Warmth of Garlic Parmesan Focaccia at Home

Enjoy the delicious Garlic Parmesan Focaccia, a perfect blend of garlic and cheese, ideal as a side dish or for gourmet sandwiches.
Prep Time 30 minutes
Cook Time 25 minutes
Rising Time 1 hour 30 minutes
Total Time 2 hours 25 minutes
Servings: 8 slices
Course: Appetizer
Cuisine: Italian
Calories: 220

Ingredients
  

For the Dough
  • 4 cups All-Purpose Flour
  • 2 teaspoons Instant Yeast Ensure it's fresh
  • 2 teaspoons Salt Kosher or sea salt recommended
  • 1.5 cups Warm Water 110°F
  • 1 tablespoon Sugar Brown sugar works for deeper flavor
  • 0.25 cup Extra Virgin Olive Oil High-quality recommended
For the Flavor
  • 3-4 cloves Garlic Minced
  • 0.5 cup Parmesan Cheese Freshly grated
  • Dried Italian Herbs or Chopped Rosemary Optional
  • Flaky Sea Salt For topping

Equipment

  • Mixing Bowl
  • Dough hook
  • Baking pan
  • Saucepan
  • Wire Rack

Method
 

Step‑by‑Step Instructions
  1. In a mixing bowl, combine warm water, sugar, and instant yeast. Let sit for 5 minutes until foamy.
  2. Turn the dough onto a floured surface and knead for 5–6 minutes with a dough hook or by hand for 8–10 minutes.
  3. Shape the dough into a ball, place in a greased bowl, cover, and let rise in a warm area for 1 to 1.5 hours.
  4. In a saucepan, heat additional olive oil and sauté minced garlic for 1-2 minutes until fragrant.
  5. Transfer the risen dough to a greased baking pan, press to stretch into corners, cover, and let rise for another 30–45 minutes.
  6. Preheat oven to 425°F. Create dimples on the dough, brush with garlic oil, and sprinkle with Parmesan and seasonings.
  7. Bake for 20–25 minutes until golden brown and crisp. Watch closely towards the end.
  8. Cool in the pan for 5–10 minutes, then transfer to a wire rack. Slice and enjoy warm or at room temperature.
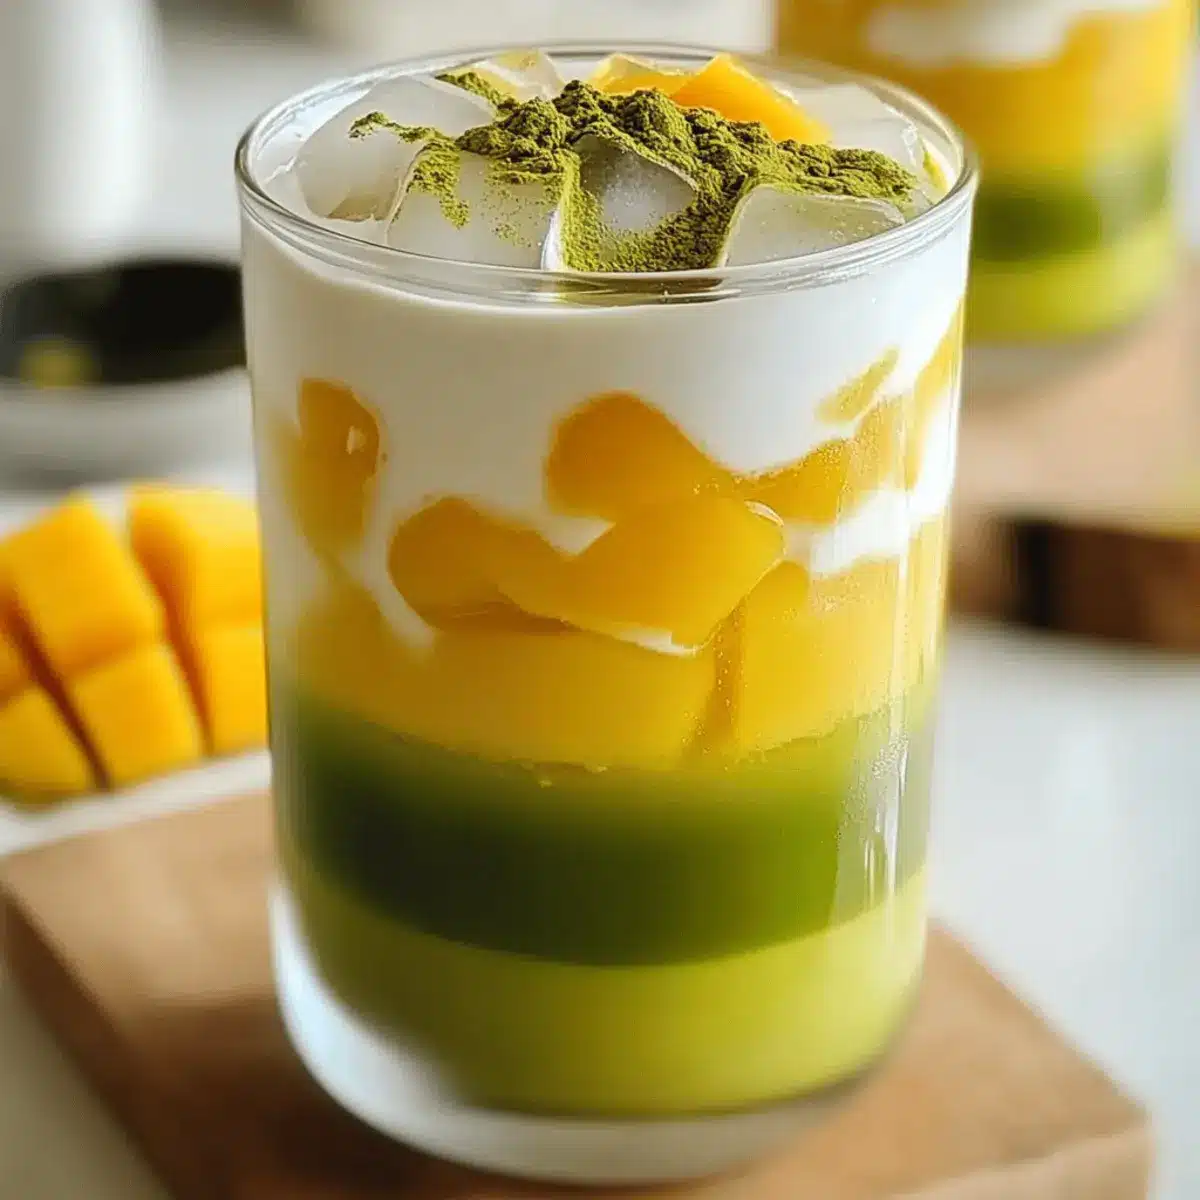
Nutrition

Serving: 1sliceCalories: 220kcalCarbohydrates: 30gProtein: 6gFat: 9gSaturated Fat: 1gCholesterol: 5mgSodium: 400mgPotassium: 150mgFiber: 1gSugar: 1gVitamin A: 2IUCalcium: 8mgIron: 10mg

Notes

For best results, ensure water temperature is exactly 110°F and avoid adding extra flour while kneading.

Tried this recipe?

Let us know how it was!