Delicious Homemade Crepes: Master the Art of Crepes Today!

Introduction to Delicious Homemade Crepes

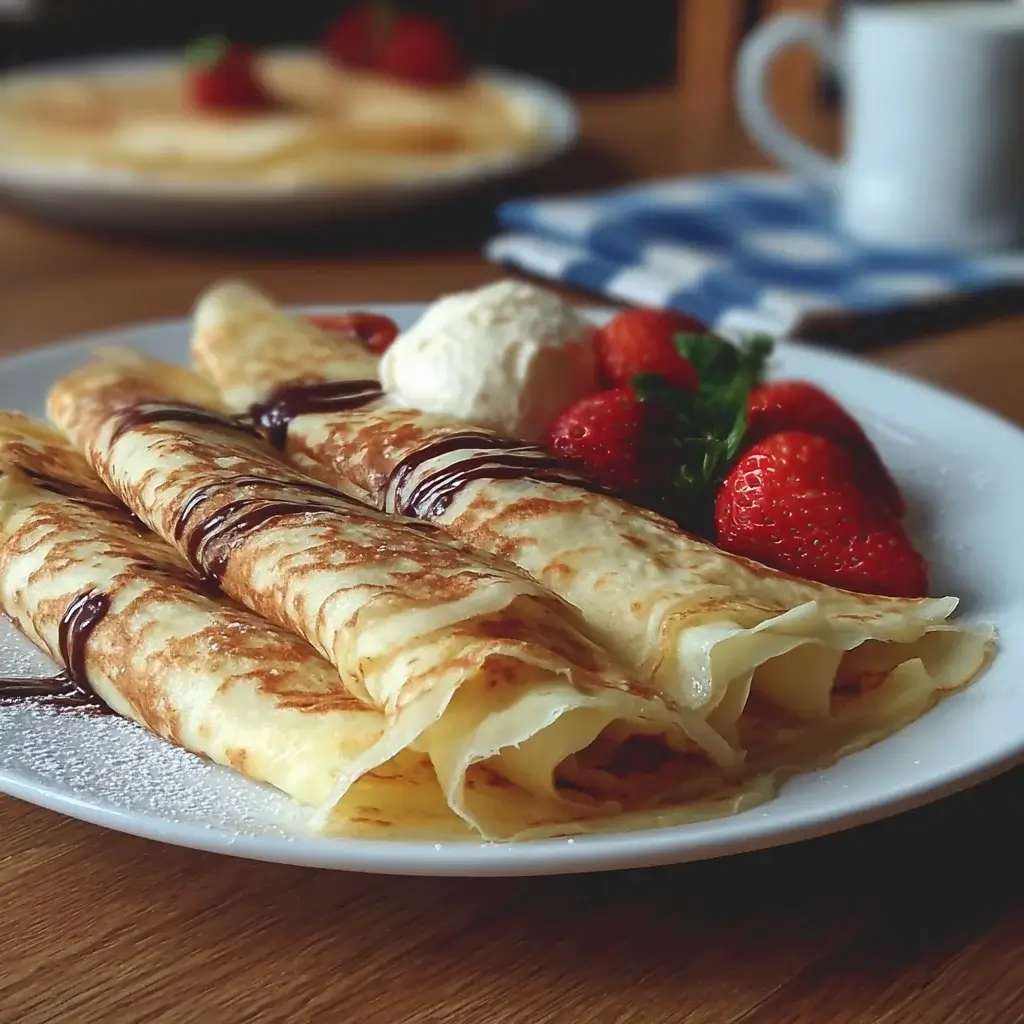
There’s something magical about the first bite of a warm, Delicious Homemade Crepes. It takes me back to lazy Sunday mornings, where the aroma of freshly cooked crepes filled the air, and the family gathered around the table, ready to indulge. These thin pancakes are not just a treat; they’re a canvas for your culinary creativity. Whether you’re in a rush or looking to impress your loved ones, this recipe is your go-to. With just a few simple ingredients, you can whip up a delightful breakfast or dessert that will leave everyone asking for seconds.

Why You’ll Love This Delicious Homemade Crepes

These Delicious Homemade Crepes are a game-changer in the kitchen. They’re incredibly easy to make, requiring minimal ingredients and time. In just 40 minutes, you can create a dish that’s both versatile and delicious. Whether you prefer sweet or savory, crepes can satisfy any craving. Plus, they’re perfect for impressing guests or enjoying a cozy breakfast at home. Who knew something so simple could bring so much joy?

Ingredients for Delicious Homemade Crepes

Creating Delicious Homemade Crepes starts with a handful of simple ingredients that you likely already have in your kitchen. Here’s what you’ll need:

  • All-purpose flour: This is the base of your crepes, providing structure and a light texture. You can swap it for a gluten-free blend if needed.
  • Large eggs: Eggs add richness and help bind the batter together, giving your crepes that perfect, tender bite.
  • Milk: Milk hydrates the flour and creates a smooth batter. Whole milk works best, but feel free to use any milk you prefer.
  • Melted butter: This adds flavor and helps prevent sticking. You can use unsalted butter for a more controlled taste.
  • Sugar: Just a touch of sugar balances the flavors, especially if you’re going for sweet fillings. You can skip it for savory crepes.
  • Salt: A pinch of salt enhances the overall flavor, making your crepes taste even better.
  • Vanilla extract (optional): For a hint of sweetness and warmth, add vanilla if you’re making dessert crepes.

For exact measurements, check the bottom of the article where you can find everything listed for easy printing. With these ingredients, you’re well on your way to mastering the art of crepes!

How to Make Delicious Homemade Crepes

Making Delicious Homemade Crepes is a straightforward process that anyone can master. Follow these simple steps, and you’ll be flipping crepes like a pro in no time!

Step 1: Prepare the Batter

Start by whisking together the all-purpose flour, eggs, milk, melted butter, sugar, salt, and optional vanilla extract in a mixing bowl. The goal is a smooth batter, so take your time. Let it rest for about 30 minutes. This allows the flour to hydrate and the gluten to relax, resulting in tender crepes.

Step 2: Heat the Pan

While the batter rests, heat a non-stick skillet or crepe pan over medium heat. A well-heated pan is crucial for achieving that perfect golden color. Lightly grease the pan with a small amount of butter or cooking spray. This prevents sticking and adds flavor.

Step 3: Pour the Batter

Once the pan is hot, pour about ¼ cup of batter into the center. Quickly tilt and swirl the pan to spread the batter into a thin, even layer. The key is to work fast; you want a delicate crepe, not a thick pancake!

Step 4: Cook the Crepe

Cook the crepe for about 1-2 minutes. Watch for the edges to lift and the bottom to turn lightly golden. When it’s ready, flip it using a spatula and cook for an additional minute on the other side. You’ll know it’s done when it’s set but still soft.

Step 5: Stack and Serve

Remove the crepe from the pan and place it on a plate. Repeat the process with the remaining batter, stacking the cooked crepes on top of each other. This keeps them warm and ready for your favorite fillings. Whether you go sweet or savory, the choice is yours!

Tips for Success

  • Let the batter rest for at least 30 minutes. This ensures tender crepes.
  • Use a non-stick pan for easy flipping and minimal sticking.
  • Keep the heat at medium; too high can burn the crepes.
  • Experiment with flavors by adding spices or extracts to the batter.
  • Stack crepes with parchment paper in between to prevent sticking.

Equipment Needed

  • Non-stick skillet or crepe pan: Essential for easy flipping. A regular frying pan works too.
  • Mixing bowl: For combining your ingredients. Any bowl will do.
  • Whisk: To blend the batter smoothly. A fork can work in a pinch.
  • Spatula: For flipping the crepes. A thin, flexible spatula is ideal.

Variations on Delicious Homemade Crepes

  • Chocolate Crepes: Add cocoa powder to the batter for a rich, chocolatey twist. Perfect for dessert!
  • Cinnamon Sugar Crepes: Mix in a teaspoon of cinnamon for a warm, spiced flavor. Dust with sugar before serving.
  • Savory Herb Crepes: Incorporate fresh herbs like basil or thyme into the batter for a savory option. Great for filling with cheese and veggies.
  • Fruit-Infused Crepes: Blend in pureed fruits like strawberries or bananas for a fruity flavor. Ideal for breakfast!
  • Gluten-Free Crepes: Substitute all-purpose flour with a gluten-free flour blend to accommodate dietary needs.

Serving Suggestions for Delicious Homemade Crepes

  • Fresh Berries: Serve with a side of mixed berries for a refreshing contrast.
  • Maple Syrup: Drizzle warm maple syrup over sweet crepes for added sweetness.
  • Whipped Cream: Top with a dollop of whipped cream for a decadent touch.
  • Herb Salad: Pair savory crepes with a light herb salad for balance.
  • Hot Beverages: Enjoy with coffee or hot chocolate for a cozy meal.

FAQs about Delicious Homemade Crepes

Curious about Delicious Homemade Crepes? Here are some common questions I often hear, along with helpful answers to guide you on your crepe-making journey.

Can I make the crepe batter ahead of time?

Absolutely! You can prepare the batter a day in advance. Just store it in the fridge. Give it a good whisk before using, as it may thicken slightly.

What can I use as fillings for my crepes?

The options are endless! For sweet crepes, think Nutella, fresh fruits, or whipped cream. For savory, try ham and cheese, sautéed mushrooms, or spinach.

How do I store leftover crepes?

Store any leftover crepes in an airtight container in the fridge for up to three days. You can reheat them in a skillet or microwave when you’re ready to enjoy.

Can I freeze crepes?

Yes! Stack the crepes with parchment paper in between and wrap them tightly in plastic wrap. They can be frozen for up to two months. Just thaw and reheat when you’re ready!

What’s the secret to flipping crepes without tearing them?

Patience is key! Wait until the edges lift and the bottom is golden before flipping. A thin, flexible spatula helps too. With practice, you’ll be flipping like a pro!

Final Thoughts

Creating Delicious Homemade Crepes is more than just cooking; it’s about crafting memories. Each crepe you flip brings a sense of accomplishment and joy, whether you’re enjoying them solo or sharing with family and friends. The versatility of crepes means you can tailor them to any occasion, from a cozy breakfast to an elegant dessert. As you master this art, you’ll find that the kitchen becomes a place of creativity and connection. So, roll up your sleeves, gather your ingredients, and let the magic of crepes transform your meals into delightful experiences!

Ranis

Delicious Homemade Crepes: Master the Art of Crepes Today!

Delicious Homemade Crepes are thin pancakes that can be filled with sweet or savory ingredients, perfect for breakfast or dessert.
Prep Time 30 minutes
Cook Time 10 minutes
Total Time 40 minutes
Course: Breakfast/Dessert
Cuisine: French
Calories: 150

Ingredients
  

  • 1 cup all-purpose flour
  • 2 large eggs
  • 1 ½ cups milk
  • 2 tablespoons melted butter
  • 1 tablespoon sugar
  • ¼ teaspoon salt
  • 1 teaspoon vanilla extract optional

Method
 

  1. In a mixing bowl, whisk together the flour, eggs, milk, melted butter, sugar, salt, and vanilla extract until the batter is smooth. Let the batter rest for about 30 minutes to allow the flour to hydrate and the gluten to relax.
  2. Heat a non-stick skillet or crepe pan over medium heat. Lightly grease the pan with a small amount of butter or cooking spray.
  3. Pour about ¼ cup of batter into the center of the hot pan, quickly tilting and swirling the pan to spread the batter into a thin, even layer.
  4. Cook for about 1-2 minutes, or until the edges start to lift and the bottom is lightly golden. Flip the crepe using a spatula and cook for an additional 1 minute on the other side.
  5. Remove the crepe from the pan and place it on a plate. Repeat the process with the remaining batter, stacking the cooked crepes on top of each other.
  6. Serve warm with your favorite fillings such as fresh fruit, Nutella, whipped cream, or savory options like ham and cheese.

Nutrition

Serving: 1crepeCalories: 150kcalCarbohydrates: 20gProtein: 5gFat: 5gSaturated Fat: 2gPolyunsaturated Fat: 3gCholesterol: 70mgSodium: 100mgFiber: 1gSugar: 1g

Notes

  • For a gluten-free version, substitute all-purpose flour with a gluten-free flour blend.
  • Experiment with flavors by adding cocoa powder for chocolate crepes or cinnamon for a warm spice.


Tried this recipe?

Let us know how it was!

Keto Donut Chaffles: Delight in Guilt-Free Indulgence!

Introduction to Keto Donut Chaffles

There’s something magical about the combination of donuts and waffles, isn’t there?

Keto Donut Chaffles bring that delightful fusion right to your kitchen, guilt-free!

Whether you’re navigating a busy morning or looking to impress friends at brunch, these chaffles are your go-to solution.

They’re quick to whip up and satisfy that sweet tooth without derailing your keto journey.

Imagine biting into a warm, fluffy chaffle, the aroma of cinnamon wafting through the air.

It’s a treat that feels indulgent but fits perfectly into your low-carb lifestyle.

Let’s dive into this delicious adventure together!

Why You’ll Love This Keto Donut Chaffles

These Keto Donut Chaffles are a game-changer for anyone craving a sweet treat without the carbs.

They come together in just 20 minutes, making them perfect for busy mornings or spontaneous dessert cravings.

The taste? Absolutely divine!

With a crispy exterior and a soft, fluffy inside, they deliver all the satisfaction of traditional donuts.

Plus, they’re low in sugar and high in protein, so you can indulge without the guilt.

Ingredients for Keto Donut Chaffles

Creating these Keto Donut Chaffles is a breeze, thanks to a handful of simple ingredients.

Here’s what you’ll need to bring this delightful treat to life:

  • Shredded mozzarella cheese: This is the star ingredient, providing that gooey texture we all love.
  • Large eggs: They bind everything together and add richness to the chaffles.
  • Almond flour: A low-carb alternative to regular flour, it gives the chaffles a nice structure.
  • Erythritol (or your preferred sweetener): This sugar substitute keeps things sweet without the carbs.
  • Baking powder: A little leavening agent to help the chaffles rise and become fluffy.
  • Vanilla extract: Adds a warm, sweet flavor that enhances the overall taste.
  • Ground cinnamon: This spice brings a cozy aroma and a hint of warmth to each bite.
  • Salt: Just a pinch to balance the sweetness and enhance the flavors.
  • Cooking spray or oil: Essential for greasing the waffle maker, ensuring your chaffles come out easily.

Feel free to get creative!

For a chocolate twist, consider adding unsweetened cocoa powder.

You can also experiment with different extracts like almond or coconut for unique flavors.

Exact measurements are available at the bottom of the article for your convenience.

How to Make Keto Donut Chaffles

Making Keto Donut Chaffles is a straightforward process that anyone can master.

With just a few simple steps, you’ll be on your way to enjoying these delicious treats.

Let’s break it down step by step!

Step 1: Preheat Your Waffle Maker

Start by preheating your waffle maker according to the manufacturer’s instructions.

This step is crucial!

A hot waffle maker ensures that your chaffles cook evenly and develop that perfect crispy exterior.

Don’t forget to lightly grease it with cooking spray or oil.

This will help prevent sticking and make cleanup a breeze.

Step 2: Combine Dry Ingredients

In a mixing bowl, combine the shredded mozzarella cheese and almond flour.

Mix them together until they’re well blended.

The cheese adds that delightful gooeyness, while the almond flour provides structure.

This combination is what makes these Keto Donut Chaffles so special!

Step 3: Whisk Wet Ingredients

In a separate bowl, whisk together the eggs, erythritol, vanilla extract, ground cinnamon, and salt.

Keep whisking until the mixture is smooth and well combined.

This step is where the magic happens!

The eggs will bind everything together, while the vanilla and cinnamon add a warm, inviting flavor.

Step 4: Mix Everything Together

Now, pour the egg mixture into the bowl with the cheese and almond flour.

Stir until all the ingredients are well combined.

You want a thick batter that holds together nicely.

If it feels too dry, don’t hesitate to add a splash of water or almond milk to loosen it up.

Step 5: Cook the Chaffles

Pour half of the batter into the preheated waffle maker.

Close the lid and cook for about 3-5 minutes.

Keep an eye on them!

You’re looking for a golden brown color and a cooked-through texture.

Once done, carefully remove the chaffle and repeat with the remaining batter.

Step 6: Serve and Enjoy

Allow the chaffles to cool slightly before serving.

This helps them firm up a bit more.

Top them with sugar-free syrup, whipped cream, or your favorite keto-friendly toppings.

The possibilities are endless!

Enjoy your guilt-free indulgence and savor every bite of these delightful Keto Donut Chaffles.

Tips for Success

  • Make sure your waffle maker is fully preheated for the best texture.
  • Don’t skip greasing the waffle maker; it prevents sticking.
  • For extra flavor, try adding a pinch of nutmeg along with the cinnamon.
  • Let the chaffles cool slightly before serving to enhance their structure.
  • Store any leftovers in an airtight container for up to three days.

Equipment Needed

  • Waffle Maker: Essential for creating those perfect chaffles. A non-stick model works best.
  • Mixing Bowls: Use two bowls—one for dry ingredients and one for wet.
  • Whisk: A simple whisk will do, but an electric mixer can save time.
  • Spatula: Handy for mixing and transferring the batter.

Variations

  • Chocolate Keto Donut Chaffles: Add 2 tablespoons of unsweetened cocoa powder to the batter for a rich chocolate flavor.
  • Nutty Delight: Mix in a handful of chopped nuts like walnuts or pecans for added crunch and healthy fats.
  • Berry Bliss: Fold in some fresh or frozen berries, such as blueberries or raspberries, for a fruity twist.
  • Spiced Pumpkin: Substitute some of the almond flour with pumpkin puree and add pumpkin spice for a seasonal treat.
  • Almond Joy: Incorporate shredded coconut and a few chopped almonds for a tropical flavor reminiscent of the candy bar.

Serving Suggestions

  • Pair your Keto Donut Chaffles with a side of fresh berries for a burst of flavor.
  • Enjoy them with a hot cup of coffee or tea to complement the sweetness.
  • For a fun presentation, stack them high and drizzle with sugar-free syrup.
  • Top with whipped cream and a sprinkle of cinnamon for an extra indulgent touch.

FAQs about Keto Donut Chaffles

Can I make these Keto Donut Chaffles dairy-free?

Absolutely! You can substitute the mozzarella cheese with a dairy-free cheese alternative. Just ensure it melts well for that perfect chaffle texture.

How do I store leftover chaffles?

Store any leftover Keto Donut Chaffles in an airtight container in the fridge for up to three days. You can reheat them in the waffle maker or toaster for a quick snack!

Can I freeze Keto Donut Chaffles?

Yes, these chaffles freeze beautifully! Just place them in a single layer on a baking sheet to freeze, then transfer to a freezer bag. They’ll be ready for a quick breakfast or treat anytime.

What can I use instead of erythritol?

If you prefer a different sweetener, feel free to use stevia, monk fruit, or any keto-friendly sweetener you enjoy. Just adjust the quantity to taste, as sweetness levels can vary.

Are Keto Donut Chaffles suitable for meal prep?

Definitely! These chaffles are perfect for meal prep. Make a batch ahead of time, and you’ll have a delicious, low-carb treat ready to go whenever you need it.

Final Thoughts

Keto Donut Chaffles are more than just a recipe; they’re a delightful experience that brings joy to your kitchen.

Each bite is a reminder that you can enjoy sweet treats without compromising your health goals.

The warm, comforting flavors of cinnamon and vanilla create a cozy atmosphere, perfect for sharing with family or savoring solo.

Whether it’s a busy morning or a leisurely brunch, these chaffles fit seamlessly into your day.

So, grab your waffle maker and indulge in this guilt-free pleasure.

You deserve it! Enjoy the journey of creating and tasting these delicious Keto Donut Chaffles.

Ranis

Keto Donut Chaffles: Delight in Guilt-Free Indulgence!

Keto Donut Chaffles are a delicious and guilt-free treat that combines the flavors of donuts and waffles, perfect for those following a keto diet.
Prep Time 10 minutes
Cook Time 10 minutes
Total Time 20 minutes
Servings: 4 servings
Course: Dessert
Cuisine: Keto
Calories: 150

Ingredients
  

  • 1 cup shredded mozzarella cheese
  • 2 large eggs
  • 1/4 cup almond flour
  • 1/4 cup erythritol or your preferred sweetener
  • 1 teaspoon baking powder
  • 1 teaspoon vanilla extract
  • 1/2 teaspoon ground cinnamon
  • 1/4 teaspoon salt
  • Cooking spray or oil for the waffle maker

Method
 

  1. Preheat your waffle maker according to the manufacturer's instructions. Lightly grease it with cooking spray or oil.
  2. In a mixing bowl, combine the shredded mozzarella cheese and almond flour. Mix well.
  3. In a separate bowl, whisk together the eggs, erythritol, vanilla extract, ground cinnamon, and salt until smooth.
  4. Pour the egg mixture into the bowl with the cheese and almond flour. Stir until all ingredients are well combined.
  5. Pour half of the batter into the preheated waffle maker, close the lid, and cook for about 3-5 minutes or until golden brown and cooked through.
  6. Carefully remove the chaffle and repeat with the remaining batter.
  7. Allow the chaffles to cool slightly before serving. You can top them with sugar-free syrup, whipped cream, or your favorite keto-friendly toppings.

Nutrition

Serving: 1chaffleCalories: 150kcalCarbohydrates: 2gProtein: 8gFat: 12gSaturated Fat: 7gPolyunsaturated Fat: 5gCholesterol: 150mgSodium: 200mgFiber: 1g

Notes

  • For a chocolate version, add 2 tablespoons of unsweetened cocoa powder to the batter.
  • Experiment with different extracts like almond or coconut for unique flavors.

Tried this recipe?

Let us know how it was!

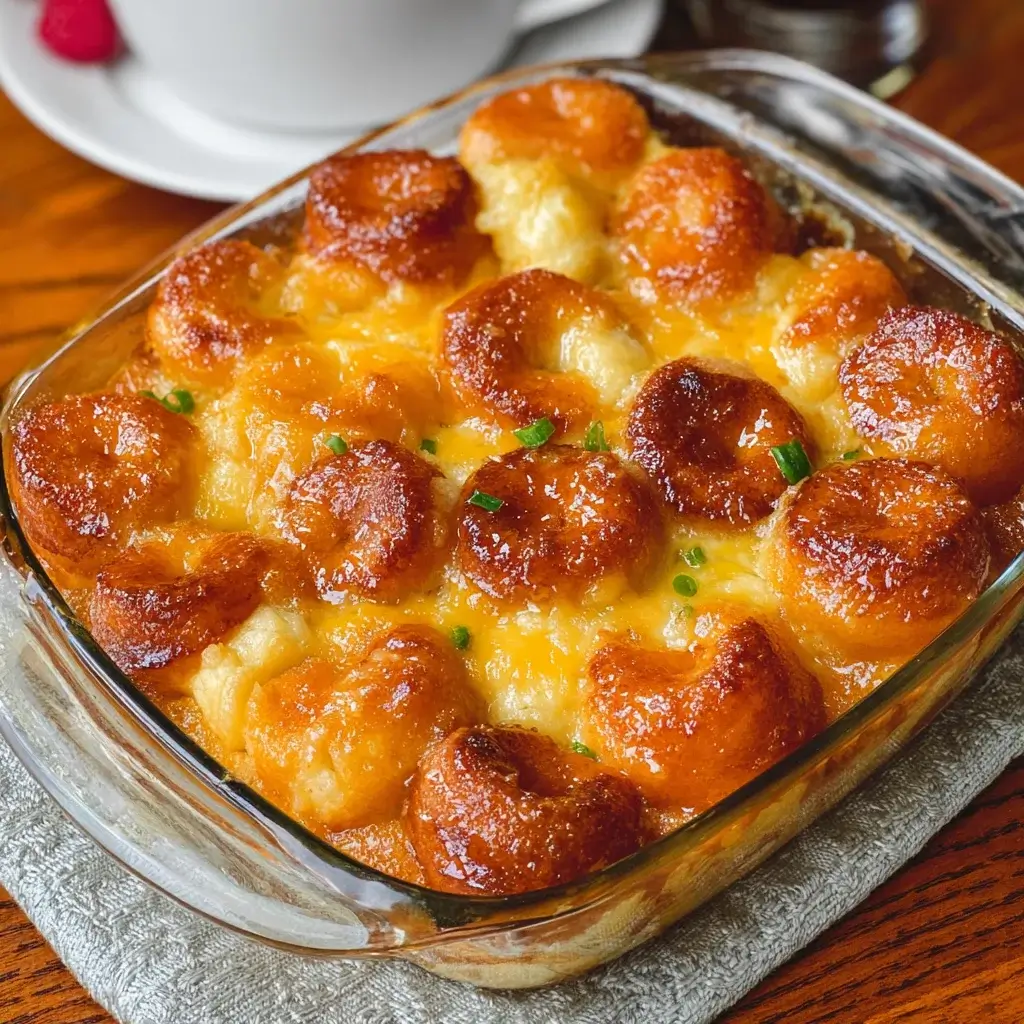
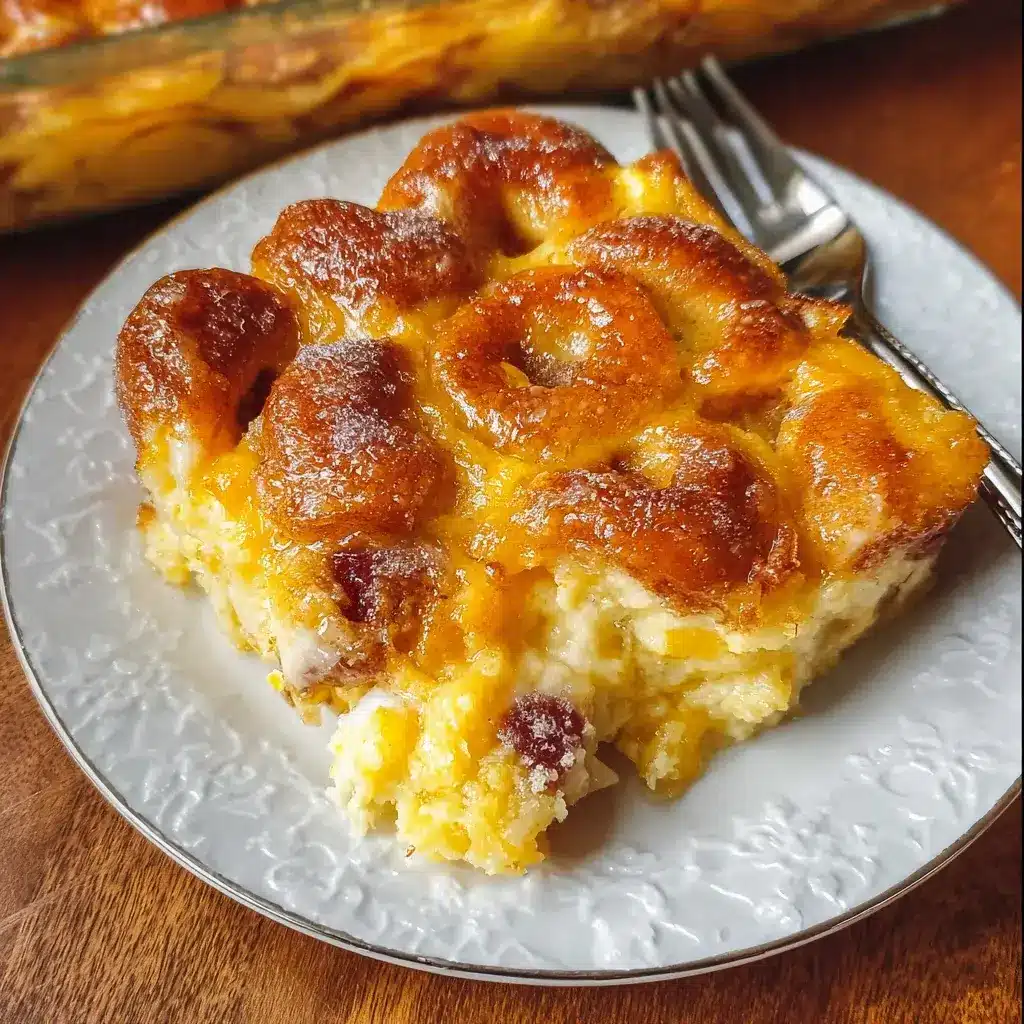
Mini Donut Breakfast Casserole: A Sweet Morning Treat!

Introduction to Mini Donut Breakfast Casserole

There’s something magical about waking up to the smell of freshly baked goods wafting through the house. The Mini Donut Breakfast Casserole captures that essence perfectly. It’s a delightful way to start your day, combining the sweetness of mini glazed donuts with the heartiness of a breakfast casserole. Whether you’re looking to impress your family on a lazy Sunday or need a quick solution for a busy weekday morning, this dish is your answer. It’s simple, satisfying, and sure to bring smiles to the breakfast table. Let’s dive into this sweet morning treat!

Why You’ll Love This Mini Donut Breakfast Casserole

This Mini Donut Breakfast Casserole is a game-changer for your mornings. It’s incredibly easy to whip up, taking just 10 minutes of prep time. The combination of flavors is out of this world, with the sweetness of donuts and the richness of eggs creating a breakfast that feels indulgent yet comforting. Plus, it’s a crowd-pleaser, making it perfect for family gatherings or brunch with friends. Who wouldn’t love a sweet start to their day?

Ingredients for Mini Donut Breakfast Casserole

Gathering the right ingredients is the first step to creating this delightful Mini Donut Breakfast Casserole. Here’s what you’ll need:

  • Mini glazed donuts: These are the star of the show! Their sweetness and soft texture make the casserole irresistible.
  • Large eggs: They provide the structure and richness, binding everything together beautifully.
  • Milk: Adds creaminess and helps create a custard-like base for the casserole.
  • Vanilla extract: A splash of this enhances the overall flavor, making it even more delightful.
  • Ground cinnamon: This warm spice adds a cozy touch, perfect for breakfast.
  • Salt: Just a pinch balances the sweetness and enhances the flavors.
  • Maple syrup: Drizzled on top, it adds a sweet, sticky finish that’s hard to resist.
  • Chocolate chips (optional): For those who want an extra touch of decadence, these can be sprinkled in for a chocolatey surprise.
  • Whipped cream (optional): A dollop on top makes for a beautiful presentation and adds a creamy element.

Feel free to get creative! You can substitute mini glazed donuts with chocolate or cinnamon sugar donuts for a different flavor profile. If you want to add some fruitiness, consider tossing in fresh berries or sliced bananas. For exact measurements, check the bottom of the article where you can find everything available for printing.

How to Make Mini Donut Breakfast Casserole

Creating this Mini Donut Breakfast Casserole is a breeze! Follow these simple steps, and you’ll have a delicious breakfast ready in no time. Let’s get started!

Step 1: Preheat and Prepare

First things first, preheat your oven to 350°F (175°C). This ensures your casserole bakes evenly. While the oven warms up, grab a 9×9-inch baking dish and grease it well. This will help prevent sticking and make serving easier later on.

Step 2: Whisk the Egg Mixture

In a large bowl, crack open those six large eggs. Add in the milk, vanilla extract, ground cinnamon, and salt. Whisk everything together until it’s well combined. You want a smooth mixture that’s ready to embrace those donuts!

Step 3: Combine Donuts and Egg Mixture

Now, it’s time for the star of the show! Take your quartered mini donuts and gently fold them into the egg mixture. Make sure every piece is coated. This is where the magic happens, as the donuts soak up all that deliciousness.

Step 4: Pour into Baking Dish

Carefully pour the donut and egg mixture into your prepared baking dish. Spread it out evenly with a spatula. This helps ensure that every slice has a good mix of donuts and custard.

Step 5: Add Toppings

Drizzle the maple syrup generously over the top. If you’re feeling adventurous, sprinkle some chocolate chips on as well. They’ll melt into gooey pockets of sweetness, making each bite even more delightful!

Step 6: Bake

Pop the baking dish into your preheated oven and let it bake for 25-30 minutes. Keep an eye on it! You’ll know it’s done when the casserole is set and lightly golden on top. The aroma will be irresistible!

Step 7: Cool and Serve

Once baked, allow the casserole to cool for a few minutes. This makes slicing easier. Serve it warm, and don’t forget to add a dollop of whipped cream if you like. It’s the perfect finishing touch!

Tips for Success

  • Use day-old mini donuts for better absorption of the egg mixture.
  • Don’t skip the greasing step; it makes serving a breeze.
  • Let the casserole cool slightly before slicing for cleaner pieces.
  • Experiment with different toppings like nuts or coconut for added texture.
  • For a richer flavor, try using half-and-half instead of milk.

Equipment Needed

  • 9×9-inch baking dish: A standard size for this casserole; you can also use an 8×8-inch dish if that’s what you have.
  • Mixing bowl: Any large bowl will do for whisking the egg mixture.
  • Whisk: A fork can work in a pinch for mixing.
  • Spatula: Essential for spreading the mixture evenly.

Variations

  • Fruit-Infused: Add 1 cup of fresh berries or sliced bananas to the mixture for a fruity twist.
  • Chocolate Lovers: Swap mini glazed donuts for chocolate donuts and increase the chocolate chips for a double chocolate delight.
  • Nutty Crunch: Incorporate chopped nuts like pecans or walnuts for added texture and flavor.
  • Gluten-Free Option: Use gluten-free mini donuts to make this casserole suitable for those with gluten sensitivities.
  • Vegan Version: Substitute eggs with a flaxseed mixture and use plant-based milk and donuts for a vegan-friendly treat.

Serving Suggestions

  • Fresh Fruit: Serve with a side of mixed berries or sliced bananas for a refreshing contrast.
  • Coffee or Tea: Pair with a hot cup of coffee or your favorite tea to complement the sweetness.
  • Presentation: Dust with powdered sugar or drizzle extra maple syrup for a beautiful finish.
  • Breakfast Sandwich: For a heartier meal, add a breakfast sandwich with eggs and bacon on the side.

FAQs about Mini Donut Breakfast Casserole

Can I make Mini Donut Breakfast Casserole ahead of time?

Absolutely! You can prepare the casserole the night before and store it in the fridge. Just cover it tightly with plastic wrap. In the morning, pop it in the oven straight from the fridge, adding a few extra minutes to the baking time.

What type of donuts work best for this recipe?

While mini glazed donuts are the classic choice, feel free to experiment! Chocolate or cinnamon sugar donuts can add a unique twist. Just make sure they’re soft and fresh for the best results.

Can I freeze Mini Donut Breakfast Casserole?

Yes, you can freeze it! After baking, let it cool completely, then slice and wrap individual pieces in plastic wrap. Store them in an airtight container. When you’re ready to enjoy, simply reheat in the oven or microwave.

How do I store leftovers?

Store any leftovers in an airtight container in the fridge for up to three days. Reheat individual slices in the microwave or oven until warmed through. It’s just as delicious the next day!

Can I add other ingredients to the casserole?

Definitely! Feel free to add fresh fruit, nuts, or even a splash of liqueur for an adult twist. Just remember to adjust the sweetness if you add extra ingredients!

Final Thoughts

Creating a Mini Donut Breakfast Casserole is more than just whipping up a dish; it’s about crafting a joyful experience for yourself and your loved ones. The aroma of sweet donuts mingling with warm spices fills the kitchen, setting the stage for a delightful morning. Each slice is a little piece of happiness, perfect for sharing or savoring solo. Whether it’s a special occasion or just a regular Tuesday, this casserole transforms any day into a celebration. So, gather your ingredients, embrace the sweetness, and enjoy the smiles that come with every bite!

Ranis

Mini Donut Breakfast Casserole: A Sweet Morning Treat!

A delightful and sweet breakfast casserole made with mini glazed donuts, perfect for a special morning treat.
Prep Time 10 minutes
Cook Time 30 minutes
Total Time 40 minutes
Servings: 6 servings
Course: Breakfast
Cuisine: American
Calories: 220

Ingredients
  

  • 2 cups mini glazed donuts cut into quarters
  • 6 large eggs
  • 1 cup milk
  • 1 teaspoon vanilla extract
  • 1 teaspoon ground cinnamon
  • 1/4 teaspoon salt
  • 1/2 cup maple syrup
  • 1/2 cup chocolate chips optional
  • Whipped cream for serving (optional)

Method
 

  1. Preheat your oven to 350°F (175°C) and grease a 9x9-inch baking dish.
  2. In a large bowl, whisk together the eggs, milk, vanilla extract, cinnamon, and salt until well combined.
  3. Add the quartered mini donuts to the egg mixture and gently fold until the donuts are evenly coated.
  4. Pour the mixture into the prepared baking dish, spreading it out evenly.
  5. Drizzle the maple syrup over the top and sprinkle with chocolate chips if using.
  6. Bake in the preheated oven for 25-30 minutes, or until the casserole is set and lightly golden on top.
  7. Allow to cool for a few minutes before slicing. Serve warm with whipped cream if desired.

Nutrition

Serving: 1sliceCalories: 220kcalCarbohydrates: 25gProtein: 6gFat: 10gSaturated Fat: 3gPolyunsaturated Fat: 7gCholesterol: 180mgSodium: 200mgFiber: 1gSugar: 10g

Notes

  • For a fruity twist, add 1 cup of fresh berries or sliced bananas into the mixture before baking.
  • Substitute the mini glazed donuts with chocolate or cinnamon sugar donuts for different flavor profiles.

Tried this recipe?

Let us know how it was!

Breakfast Sliders: Discover the Perfect Recipe Today!

Introduction to Breakfast Sliders

There’s something magical about breakfast sliders that brings back memories of lazy Sunday mornings. These delightful little sandwiches are not just a meal; they’re a warm hug on a plate. Perfect for busy weekdays or a weekend brunch with friends, breakfast sliders are a quick solution that packs a punch of flavor. Imagine biting into a soft roll filled with savory sausage, fluffy eggs, and melted cheese. It’s a dish that impresses without the fuss. Trust me, once you try these breakfast sliders, they’ll become a staple in your morning routine!

Why You’ll Love This Breakfast Sliders

Breakfast sliders are the ultimate game-changer for your morning routine. They’re incredibly easy to whip up, taking just 40 minutes from start to finish. The combination of savory sausage, creamy eggs, and gooey cheese nestled in sweet rolls creates a flavor explosion that will have everyone asking for seconds. Plus, they’re perfect for meal prep, making busy mornings a breeze. Who wouldn’t love a hearty breakfast that’s both delicious and convenient?

Ingredients for Breakfast Sliders

Gathering the right ingredients is the first step to creating these mouthwatering breakfast sliders. Here’s what you’ll need:

  • Breakfast sausage: This is the star of the show, bringing savory goodness to each bite. You can use pork sausage or opt for turkey sausage for a lighter twist.
  • Large eggs: They add fluffiness and protein, making these sliders a filling breakfast option.
  • Shredded cheddar cheese: The melty, gooey cheese binds everything together and adds a rich flavor. Feel free to experiment with other cheeses like pepper jack for a spicy kick.
  • Milk: A splash of milk in the egg mixture makes the eggs creamier and more delicious.
  • Salt and black pepper: Essential seasonings that enhance the flavors of the sausage and eggs.
  • Hawaiian sweet rolls: These soft, slightly sweet rolls are perfect for breakfast sliders. Their texture complements the savory filling beautifully.
  • Unsalted butter: Brushing the tops of the rolls with melted butter adds a golden finish and extra flavor.
  • Garlic powder and dried parsley: These add a touch of aromatic flavor and a pop of color to the sliders.

For those looking to spice things up, consider adding diced jalapeños or a dash of hot sauce to the egg mixture. If you prefer a plant-based option, swap the sausage for a meat alternative. You can find the exact quantities for each ingredient at the bottom of the article, ready for printing!

How to Make Breakfast Sliders

Creating breakfast sliders is a straightforward process that yields delicious results. Follow these simple steps, and you’ll have a hearty breakfast ready in no time!

Step 1: Preheat the Oven

Start by preheating your oven to 350°F. Preheating is crucial because it ensures even cooking. You want those sliders to bake perfectly, achieving that golden-brown finish we all crave.

Step 2: Cook the Sausage

In a large skillet over medium heat, add the breakfast sausage. Use a spatula to break it apart as it cooks. You want it browned and fully cooked, which usually takes about 5-7 minutes. Once done, drain any excess grease. This step is key to keeping your sliders from becoming too greasy.

Step 3: Prepare the Egg Mixture

In a mixing bowl, whisk together the eggs, milk, salt, and black pepper until well combined. Pour this mixture into the skillet with the cooked sausage. Stir gently over medium heat until the eggs are just set, about 5 minutes. The goal is fluffy eggs that blend seamlessly with the sausage. Once done, stir in the shredded cheddar cheese until it melts into the mixture.

Step 4: Assemble the Sliders

Slice the Hawaiian rolls in half horizontally. Place the bottom halves in a greased 9×13-inch baking dish. Spoon the sausage and egg mixture evenly over the rolls. Then, place the top halves of the rolls on top. This layering ensures every bite is packed with flavor!

Step 5: Brush with Butter Mixture

In a small bowl, mix the melted butter, garlic powder, and dried parsley. Brush this mixture generously over the top of the rolls. This step not only adds flavor but also gives the sliders a beautiful, golden finish when baked.

Step 6: Bake the Sliders

Cover the baking dish with aluminum foil and bake for 15 minutes. After that, remove the foil and bake for an additional 10 minutes. This two-step baking process helps the tops get that perfect golden brown color while keeping the insides nice and warm.

Step 7: Cool and Slice

Once baked, let the sliders cool for a few minutes. This cooling time is essential for easier slicing. If you dive in too soon, you might end up with a messy situation. After cooling, slice into individual sliders and serve!

Tips for Success

  • Use a non-stick skillet for easy cooking and cleanup.
  • Don’t rush the sausage cooking; browning adds flavor.
  • Whisk the eggs thoroughly for a fluffier texture.
  • Let the sliders cool slightly before slicing to avoid mess.
  • Experiment with different cheeses for unique flavors.
  • Make extra sliders for quick breakfasts throughout the week!

Equipment Needed

  • Large skillet: A non-stick skillet works best, but any skillet will do.
  • Mixing bowl: Use any bowl you have on hand for whisking the egg mixture.
  • Spatula: A sturdy spatula is essential for cooking and serving.
  • Baking dish: A 9×13-inch dish is ideal, but any similar-sized dish will work.
  • Aluminum foil: This helps with even baking; parchment paper is a good alternative.

Variations

  • Spicy Breakfast Sliders: Add diced jalapeños or a splash of hot sauce to the egg mixture for a fiery kick.
  • Veggie Delight: Substitute the sausage with sautéed bell peppers, onions, and spinach for a delicious vegetarian option.
  • Cheese Lovers: Experiment with different cheeses like pepper jack, gouda, or feta for unique flavor profiles.
  • Herb Infusion: Mix in fresh herbs like chives or cilantro into the egg mixture for a fresh taste.
  • Gluten-Free Option: Use gluten-free rolls to make these sliders suitable for those with dietary restrictions.

Serving Suggestions

  • Fresh Fruit Salad: Pair your sliders with a refreshing fruit salad for a balanced meal.
  • Crispy Hash Browns: Serve alongside crispy hash browns for that classic breakfast feel.
  • Hot Sauce: Offer a variety of hot sauces for those who like a spicy kick.
  • Freshly Brewed Coffee: Complement with a cup of strong coffee or a mimosa for brunch.
  • Presentation: Arrange sliders on a platter with toothpicks for easy serving at gatherings.

FAQs about Breakfast Sliders

Can I make breakfast sliders ahead of time?

Absolutely! You can prepare the sausage and egg mixture the night before. Just assemble the sliders and store them in the fridge. In the morning, pop them in the oven for a quick breakfast.

What can I substitute for breakfast sausage?

If you’re looking for alternatives, turkey sausage or plant-based sausage work great. You can also use sautéed vegetables for a vegetarian option that’s just as satisfying.

How do I store leftover breakfast sliders?

Store any leftovers in an airtight container in the fridge for up to three days. Reheat them in the oven or microwave for a quick breakfast fix.

Can I freeze breakfast sliders?

Yes! These sliders freeze well. Just wrap them individually in plastic wrap and place them in a freezer bag. When you’re ready to eat, thaw and reheat in the oven.

What drinks pair well with breakfast sliders?

Breakfast sliders go wonderfully with freshly brewed coffee, orange juice, or even a mimosa for a festive brunch. Choose your favorite to complement the flavors!

Final Thoughts

Making breakfast sliders is more than just cooking; it’s about creating moments. The aroma of sizzling sausage and melting cheese fills the kitchen, inviting everyone to gather around the table. These sliders are perfect for busy mornings or leisurely brunches, bringing joy and satisfaction with every bite. They’re versatile, easy to prepare, and sure to impress family and friends alike. Whether you’re enjoying them solo or sharing with loved ones, breakfast sliders are a delightful way to start the day. Trust me, once you make them, they’ll become a cherished part of your breakfast repertoire!

Ranis

Breakfast Sliders: Discover the Perfect Recipe Today!

Delicious breakfast sliders made with sausage, eggs, and cheese, perfect for a hearty morning meal.
Prep Time 15 minutes
Cook Time 25 minutes
Total Time 40 minutes
Servings: 6 servings
Course: Breakfast
Cuisine: American
Calories: 350

Ingredients
  

  • 1 pound breakfast sausage
  • 8 large eggs
  • 1 cup shredded cheddar cheese
  • 1/2 cup milk
  • 1/2 teaspoon salt
  • 1/4 teaspoon black pepper
  • 1 package 12 count Hawaiian sweet rolls
  • 1/4 cup unsalted butter melted
  • 1 teaspoon garlic powder
  • 1 teaspoon dried parsley

Method
 

  1. Preheat the oven to 350°F.
  2. In a large skillet over medium heat, cook the breakfast sausage until browned and fully cooked, breaking it apart with a spatula as it cooks. Drain any excess grease and set aside.
  3. In a mixing bowl, whisk together the eggs, milk, salt, and black pepper until well combined. Pour the egg mixture into the skillet with the sausage and cook over medium heat, stirring gently until the eggs are just set, about 5 minutes. Remove from heat and stir in the shredded cheddar cheese until melted.
  4. Slice the Hawaiian rolls in half horizontally and place the bottom halves in a greased 9x13-inch baking dish. Spoon the sausage and egg mixture evenly over the rolls, then place the top halves of the rolls on top.
  5. In a small bowl, mix the melted butter, garlic powder, and dried parsley. Brush the mixture over the top of the rolls.
  6. Cover the baking dish with aluminum foil and bake for 15 minutes. Remove the foil and bake for an additional 10 minutes, or until the tops are golden brown.
  7. Let cool for a few minutes before slicing into individual sliders.

Nutrition

Serving: 1sliderCalories: 350kcalCarbohydrates: 18gProtein: 16gFat: 24gSaturated Fat: 10gPolyunsaturated Fat: 14gCholesterol: 200mgSodium: 600mgFiber: 1gSugar: 2g

Notes

  • For a spicy kick, add diced jalapeños or hot sauce to the egg mixture.
  • You can substitute the breakfast sausage with turkey sausage or a plant-based alternative for a lighter option.

Tried this recipe?

Let us know how it was!

Tropical Lime Raspberry Refresher: Quench Your Thirst Today!

Introduction to Tropical Lime Raspberry Refresher

On a sweltering summer day, nothing beats a drink that cools you down and lifts your spirits. The Tropical Lime Raspberry Refresher is just that—a vibrant, thirst-quenching delight that’s as easy to make as it is to enjoy. I remember sipping on fruity beverages during family barbecues, the sun shining down, laughter filling the air. This recipe is perfect for those busy afternoons when you need a quick solution to beat the heat or impress your friends at your next gathering. With fresh raspberries and zesty lime, it’s a refreshing escape in a glass!

Why You’ll Love This Tropical Lime Raspberry Refresher

This Tropical Lime Raspberry Refresher is a game-changer for your summer drink lineup. It’s incredibly easy to whip up, taking just a few minutes of your time. The bright, tangy flavors of lime and sweet raspberries create a taste explosion that dances on your palate. Plus, it’s a fantastic way to impress guests without spending hours in the kitchen. Trust me, once you try it, you’ll be hooked!

Ingredients for Tropical Lime Raspberry Refresher

Gathering the right ingredients is the first step to crafting your Tropical Lime Raspberry Refresher. Here’s what you’ll need:

  • Fresh Raspberries: These little gems are the star of the show, bringing a burst of sweetness and vibrant color.
  • Fresh Lime Juice: The zesty kick from limes adds a refreshing tang that perfectly balances the sweetness of the raspberries.
  • Sugar: This sweetener helps to enhance the natural flavors of the fruit, creating a delightful harmony in every sip.
  • Water: Essential for blending and diluting, it helps to create the perfect consistency for your refresher.
  • Vanilla Extract: A splash of vanilla adds depth and a hint of warmth, elevating the overall flavor profile.
  • Ice Cubes: These are a must for serving, ensuring your drink stays chilled and refreshing.
  • Fresh Mint Leaves (optional): A lovely garnish that not only looks great but also adds a refreshing aroma.

For those looking to mix things up, consider adding sliced strawberries or pineapple for an extra tropical twist. If you prefer a fizzy drink, swap out half the water for club soda or lemon-lime soda. You can find the exact measurements for each ingredient at the bottom of the article, ready for printing!

How to Make Tropical Lime Raspberry Refresher

Creating your Tropical Lime Raspberry Refresher is a breeze! Follow these simple steps, and you’ll have a refreshing drink ready in no time. Let’s dive in!

Step 1: Prepare the Sugar Syrup

Start by combining 1 cup of water and the sugar in a medium saucepan. Heat it over medium heat, stirring until the sugar completely dissolves. This should only take a few minutes. Once it’s dissolved, remove the saucepan from the heat and let it cool to room temperature. This sugar syrup is the secret to sweetening your refresher without any gritty texture!

Step 2: Blend the Raspberries

Next, grab your blender and toss in the fresh raspberries along with the remaining 3 cups of water. Blend until the mixture is smooth and vibrant. The raspberries will release their beautiful color and flavor, creating a luscious base for your drink. Don’t rush this step; a good blend ensures a delightful texture!

Step 3: Strain the Mixture

Now, it’s time to strain the raspberry mixture. Place a fine mesh sieve over a large pitcher and pour the blended raspberries through it. Use a spatula to press down on the mixture, extracting every last drop of juice while leaving the seeds behind. This step is crucial for achieving that smooth, refreshing drink we all love!

Step 4: Combine Ingredients

In your pitcher, add the cooled sugar syrup, fresh lime juice, and a teaspoon of vanilla extract. Stir everything together until well combined. The lime juice adds a zesty punch, while the vanilla brings a subtle warmth that rounds out the flavors beautifully. Trust me, this combination is pure magic!

Step 5: Chill the Refresher

Chilling is key! Place the pitcher in the refrigerator for at least 1 hour before serving. This allows the flavors to meld together and ensures your drink is refreshingly cold. You want it to be icy and invigorating, perfect for those hot summer days!

Step 6: Serve and Enjoy

When you’re ready to serve, fill glasses with ice cubes and pour the Tropical Lime Raspberry Refresher over the ice. For an extra touch, garnish with fresh mint leaves. This not only looks stunning but also adds a delightful aroma. Sip, savor, and enjoy the refreshing burst of flavors!

Tips for Success

  • Use ripe raspberries for the best flavor; they should be bright and fragrant.
  • Don’t skip the straining step; it ensures a smooth drink without seeds.
  • Adjust the sugar to your taste; if you prefer it less sweet, reduce the amount.
  • For a fun twist, try adding a splash of coconut water for extra tropical vibes.
  • Make it ahead of time; it keeps well in the fridge for a couple of days!

Equipment Needed

  • Medium Saucepan: Essential for making the sugar syrup. A small pot works too!
  • Blender: Needed to blend the raspberries. A hand blender can also do the trick.
  • Fine Mesh Sieve: For straining the mixture. A cheesecloth can be a good substitute.
  • Large Pitcher: To combine and chill your refresher. Any large container will suffice.

Variations

  • Berry Medley: Mix in other berries like blueberries or blackberries for a colorful and flavorful twist.
  • Herbal Infusion: Add a few sprigs of basil or rosemary while blending for an aromatic herbal note.
  • Spicy Kick: Incorporate a pinch of cayenne pepper or a slice of jalapeño for a surprising heat that complements the sweetness.
  • Non-Alcoholic Mojito: Transform your refresher into a mocktail by adding soda water and muddled mint leaves.
  • Frozen Treat: Pour the mixture into ice pop molds for a refreshing frozen treat that’s perfect for kids and adults alike!

Serving Suggestions

  • Pair your Tropical Lime Raspberry Refresher with light appetizers like shrimp cocktail or fresh fruit skewers for a delightful summer spread.
  • Serve alongside grilled chicken or fish tacos for a refreshing contrast to savory dishes.
  • For a festive touch, use mason jars for serving and add colorful straws!

FAQs about Tropical Lime Raspberry Refresher

Can I make the Tropical Lime Raspberry Refresher ahead of time?

Absolutely! This refresher can be made a day in advance. Just store it in the refrigerator, and it will be ready to serve when you are. The flavors will meld beautifully, making it even more delicious!

Is this drink suitable for kids?

Yes! The Tropical Lime Raspberry Refresher is a fantastic non-alcoholic option for kids. They’ll love the sweet and tangy flavors, and it’s a great way to keep them hydrated on hot days.

Can I use frozen raspberries instead of fresh?

Definitely! Frozen raspberries work well in this recipe. Just let them thaw slightly before blending. They’ll still provide that vibrant flavor and color you crave in a refreshing drink.

How can I make this drink less sweet?

If you prefer a less sweet refresher, simply reduce the amount of sugar in the syrup. You can also add more lime juice to enhance the tartness, balancing out the sweetness.

What can I substitute for lime juice?

If you don’t have lime juice on hand, lemon juice is a great alternative. It will give you a similar tangy flavor, making your Tropical Lime Raspberry Refresher just as delightful!

Final Thoughts

Creating the Tropical Lime Raspberry Refresher is more than just mixing ingredients; it’s about crafting a moment of joy. Each sip transports you to sun-soaked days, where laughter and good company reign supreme. The vibrant colors and refreshing flavors make it a perfect companion for any gathering or a quiet afternoon on the porch. Whether you’re sharing it with friends or enjoying it solo, this drink is a celebration of summer in a glass. So, grab those fresh raspberries and limes, and let this delightful refresher quench your thirst and brighten your day!

Ranis

Tropical Lime Raspberry Refresher: Quench Your Thirst Today!

A refreshing drink made with fresh raspberries and lime juice, perfect for quenching your thirst on a hot day.
Prep Time 15 minutes
Cook Time 5 minutes
Total Time 1 hour 20 minutes
Servings: 6 servings
Course: Beverage
Cuisine: Tropical
Calories: 120

Ingredients
  

  • 2 cups fresh raspberries
  • 1 cup fresh lime juice about 8-10 limes
  • 1 cup sugar
  • 4 cups water
  • 1 teaspoon vanilla extract
  • Ice cubes
  • Fresh mint leaves for garnish optional

Method
 

  1. In a medium saucepan, combine 1 cup of water and the sugar. Heat over medium heat, stirring until the sugar is completely dissolved. Remove from heat and let it cool to room temperature.
  2. In a blender, combine the fresh raspberries and the remaining 3 cups of water. Blend until smooth.
  3. Strain the raspberry mixture through a fine mesh sieve into a large pitcher to remove the seeds.
  4. Add the cooled sugar syrup, fresh lime juice, and vanilla extract to the pitcher. Stir well to combine.
  5. Chill the mixture in the refrigerator for at least 1 hour before serving.
  6. To serve, fill glasses with ice cubes and pour the tropical lime raspberry refresher over the ice. Garnish with fresh mint leaves if desired.

Nutrition

Serving: 1servingCalories: 120kcalCarbohydrates: 30gProtein: 1gFiber: 1gSugar: 28g

Notes

  • For a sparkling version, substitute half of the water with club soda or lemon-lime soda for a fizzy twist.
  • Add sliced strawberries or pineapple to the pitcher for an extra tropical flavor and a colorful presentation.

Tried this recipe?

Let us know how it was!

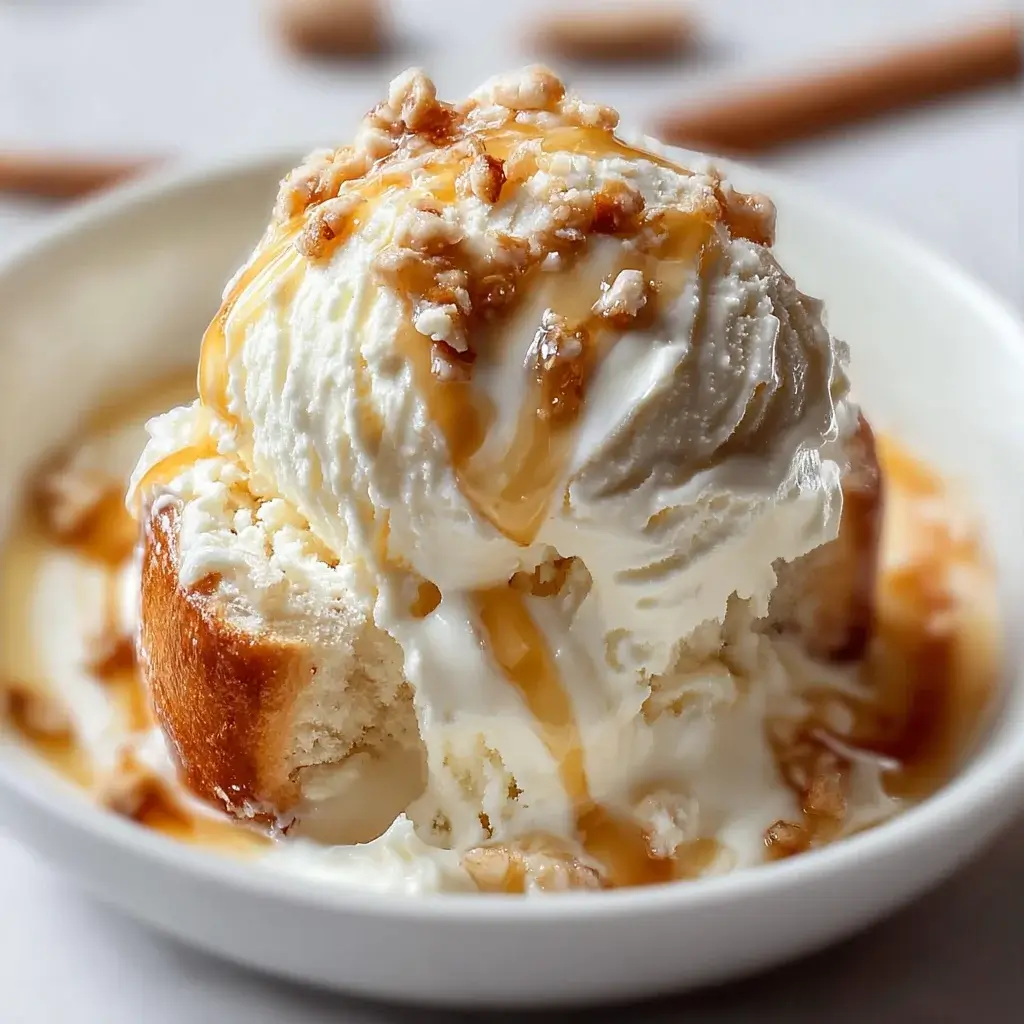
Honey Bun Ice Cream Delight: Indulge in Sweet Bliss!

Introduction to Honey Bun Ice Cream Delight

There’s something magical about dessert that brings us back to simpler times. The first time I tasted Honey Bun Ice Cream Delight, I was transported to my childhood kitchen, where sweet treats were a staple after dinner. This delightful dessert combines the creamy goodness of vanilla ice cream with the nostalgic flavors of honey bun snack cakes. It’s the perfect solution for a busy day or a sweet surprise for loved ones. With minimal effort and maximum flavor, this recipe is sure to become a favorite in your home, just like it did in mine.

Why You’ll Love This Honey Bun Ice Cream Delight

This Honey Bun Ice Cream Delight is a dream come true for anyone craving a quick and delicious dessert. It’s incredibly easy to whip up, taking just 15 minutes of your time. The combination of creamy ice cream and sweet honey buns creates a flavor explosion that’s hard to resist. Plus, it’s a no-bake treat, making it perfect for those hot summer days when you want something sweet without turning on the oven.

Ingredients for Honey Bun Ice Cream Delight

Gathering the right ingredients is the first step to creating this delightful dessert. Here’s what you’ll need:

  • Vanilla Ice Cream: The creamy base of this dessert. Choose a high-quality brand for the best flavor.
  • Whipped Topping: This adds a light, airy texture. You can use store-bought or make your own for a fresher taste.
  • Honey Bun Snack Cakes: These sweet treats bring nostalgia and flavor. Chop them into small pieces for even distribution.
  • Caramel Sauce: A drizzle of this sweet goodness elevates the dessert. You can use store-bought or homemade for a personal touch.
  • Cinnamon Sugar: A mix of cinnamon and sugar adds warmth and sweetness. It’s easy to make at home—just combine one tablespoon of cinnamon with three tablespoons of sugar.
  • Vanilla Extract: A splash of this enhances the overall flavor. Opt for pure vanilla extract for the best results.

For those looking to mix things up, consider these optional ingredients:

  • Chocolate Ice Cream: Swap half of the vanilla for chocolate for a rich twist.
  • Nuts or Chocolate Chips: Add some crunch and extra flavor by folding in chopped nuts or chocolate chips.

Exact measurements for each ingredient can be found at the bottom of the article, ready for printing!

How to Make Honey Bun Ice Cream Delight

Creating this Honey Bun Ice Cream Delight is as easy as pie—well, easier! Follow these simple steps, and you’ll have a dessert that’s sure to impress. Let’s dive in!

Step 1: Combine Ice Cream and Whipped Topping

Start by taking your softened vanilla ice cream and placing it in a large mixing bowl. The key here is to let it sit out for about 10 minutes before mixing. This makes it easier to blend. Add the whipped topping to the bowl. Using a spatula, gently mix them together until you achieve a creamy, smooth consistency. You want it to be well combined but not overly whipped. Trust me, the texture is everything!

Step 2: Fold in Honey Buns and Flavorings

Now comes the fun part! Gently fold in the chopped honey bun snack cakes. These little bites of nostalgia will add sweetness and texture. Next, drizzle in the caramel sauce, sprinkle the cinnamon sugar, and add the vanilla extract. Use a folding motion to combine everything without breaking up the honey buns too much. You want those delightful chunks to remain intact for that perfect bite!

Step 3: Transfer and Smooth

Once everything is mixed, it’s time to transfer your delicious concoction into a 9×5-inch loaf pan. Use a spatula to smooth the top, making it as even as possible. This will help it freeze uniformly. If you’re feeling fancy, you can create a little swirl on top for presentation. It’s all about those little details!

Step 4: Freeze

Cover your loaf pan with plastic wrap or a lid. Pop it in the freezer and let it chill for at least 4 hours, or until it’s firm. This is the hardest part—waiting! But trust me, the end result will be worth it. Just think of that creamy, sweet goodness waiting for you!

Step 5: Serve

When you’re ready to indulge, scoop the ice cream into bowls. For an extra touch of decadence, drizzle some additional caramel sauce on top. You can even sprinkle a bit more cinnamon sugar if you’re feeling adventurous. Each scoop is a little piece of heaven, and I guarantee you’ll be going back for seconds!

Tips for Success

  • Let your ice cream soften for about 10 minutes before mixing for easier blending.
  • Use a rubber spatula for folding; it helps maintain the airy texture.
  • For a smoother finish, ensure your loaf pan is well-greased or lined with parchment paper.
  • Experiment with different toppings like crushed nuts or sprinkles for added flair.
  • Don’t rush the freezing process; patience is key for the perfect scoop!

Equipment Needed

  • Mixing Bowl: A large bowl is essential. A sturdy glass or stainless steel bowl works great.
  • Spatula: Use a rubber spatula for mixing and folding. A wooden spoon can also do the trick.
  • Loaf Pan: A 9×5-inch loaf pan is ideal. Any similar-sized container will work.
  • Plastic Wrap or Lid: To cover your dessert while it freezes.

Variations

  • Chocolate Delight: Swap half of the vanilla ice cream for chocolate ice cream for a rich, indulgent twist.
  • Nutty Crunch: Fold in chopped pecans or walnuts for a delightful crunch that complements the creamy texture.
  • Fruit Fusion: Add diced strawberries or bananas for a fruity burst that balances the sweetness.
  • Gluten-Free Option: Use gluten-free honey bun snack cakes to make this dessert suitable for those with gluten sensitivities.
  • Vegan Version: Substitute vanilla ice cream with a plant-based alternative and use coconut whipped topping for a vegan-friendly treat.

Serving Suggestions

  • Pair with a hot cup of coffee or a chilled glass of milk for a delightful contrast.
  • Serve alongside warm brownies or chocolate chip cookies for a dessert platter.
  • Garnish with fresh mint leaves for a pop of color and freshness.
  • Top with whipped cream and a cherry for a classic sundae look.

FAQs about Honey Bun Ice Cream Delight

As you embark on your journey to create this delightful dessert, you might have a few questions. Here are some common queries about Honey Bun Ice Cream Delight that can help you along the way:

Can I make Honey Bun Ice Cream Delight ahead of time?

Absolutely! This dessert can be made a day or two in advance. Just keep it covered in the freezer until you’re ready to serve. It’s a great make-ahead option for parties or family gatherings.

What if I can’t find honey bun snack cakes?

No worries! You can substitute them with other sweet snack cakes or even cinnamon rolls. Just chop them into small pieces to maintain that delightful texture.

How long can I store leftovers?

Leftovers can be stored in the freezer for up to two weeks. Just make sure it’s well-covered to prevent freezer burn. But let’s be honest, leftovers are rare with this treat!

Can I use different flavors of ice cream?

Definitely! Feel free to experiment with different ice cream flavors. Chocolate, caramel, or even coffee ice cream can add a unique twist to your Honey Bun Ice Cream Delight.

Is this dessert suitable for kids?

Yes! This dessert is a hit with kids and adults alike. Just keep an eye on the sugar content if you’re serving it to little ones. They’ll love the sweet, creamy goodness!

Final Thoughts

Creating Honey Bun Ice Cream Delight is more than just whipping up a dessert; it’s about crafting sweet memories. Each scoop brings a wave of nostalgia, reminding me of carefree days filled with laughter and joy. The combination of creamy ice cream and honey bun snack cakes is a delightful treat that’s perfect for any occasion. Whether you’re sharing it with family or enjoying a quiet moment alone, this dessert is sure to bring a smile to your face. So, grab your ingredients and dive into this sweet adventure—you won’t regret it!

Ranis

Honey Bun Ice Cream Delight: Indulge in Sweet Bliss!

A delightful dessert combining vanilla ice cream, whipped topping, and honey bun snack cakes, drizzled with caramel sauce.
Prep Time 15 minutes
Total Time 4 hours 15 minutes
Servings: 6 servings
Course: Dessert
Cuisine: American
Calories: 220

Ingredients
  

  • 2 cups vanilla ice cream softened
  • 1 cup whipped topping thawed
  • 1/2 cup honey bun snack cakes chopped into small pieces
  • 1/4 cup caramel sauce
  • 1/4 cup cinnamon sugar 1 tablespoon cinnamon mixed with 3 tablespoons sugar
  • 1/2 teaspoon vanilla extract

Method
 

  1. In a large mixing bowl, combine the softened vanilla ice cream and whipped topping. Stir until well blended and creamy.
  2. Gently fold in the chopped honey bun snack cakes, caramel sauce, cinnamon sugar, and vanilla extract until evenly distributed.
  3. Transfer the mixture into a 9x5-inch loaf pan or a similar-sized container. Smooth the top with a spatula.
  4. Cover the container with plastic wrap or a lid and freeze for at least 4 hours or until firm.
  5. Once frozen, scoop the ice cream into bowls and drizzle with additional caramel sauce if desired.

Nutrition

Serving: 1servingCalories: 220kcalCarbohydrates: 30gProtein: 3gFat: 10gSaturated Fat: 5gPolyunsaturated Fat: 5gCholesterol: 30mgSodium: 100mgSugar: 15g

Notes

  • For a chocolate twist, substitute half of the vanilla ice cream with chocolate ice cream.
  • Add chopped nuts or chocolate chips for extra texture and flavor.

Tried this recipe?

Let us know how it was!

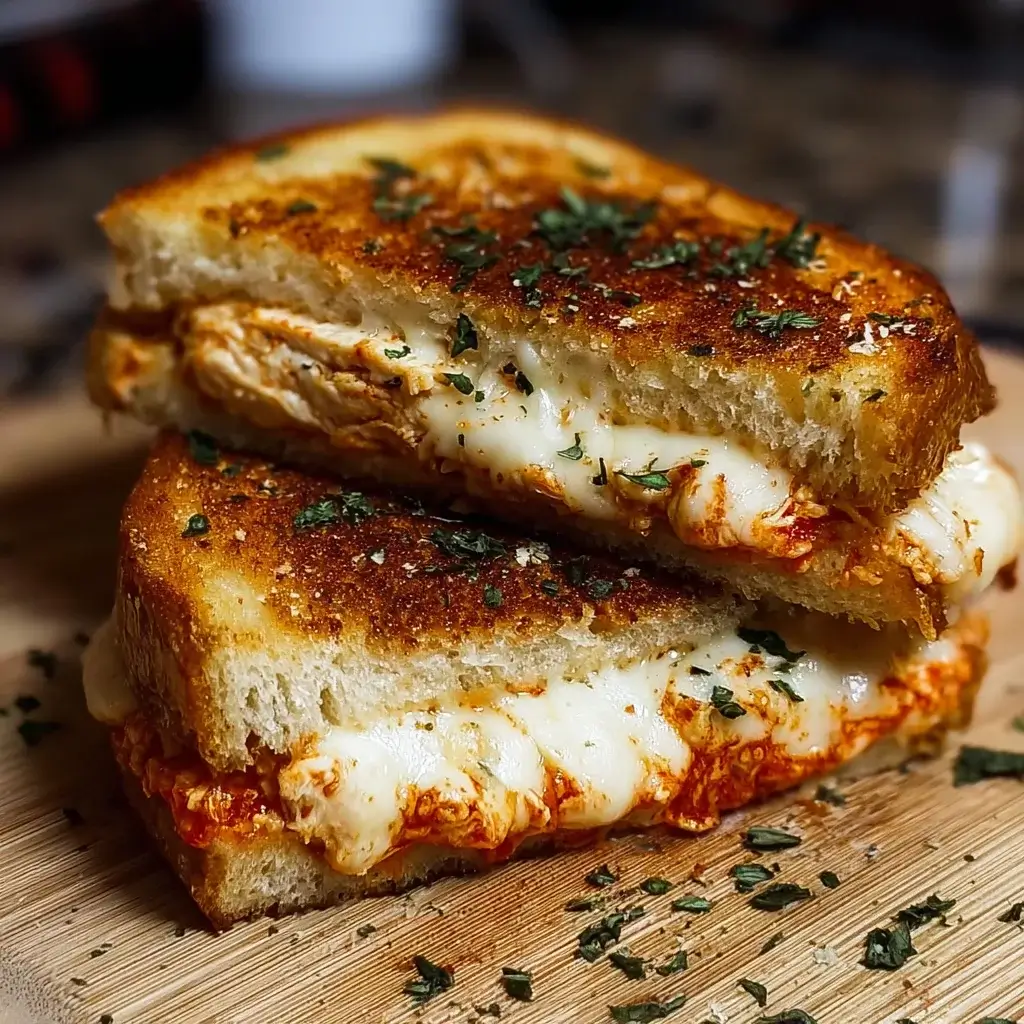
Lazy Chicken Parmesan Grilled Cheese: A Quick Delight!

Introduction to Lazy Chicken Parmesan Grilled Cheese

After a long day, the last thing I want to do is spend hours in the kitchen. That’s where my Lazy Chicken Parmesan Grilled Cheese comes in. It’s the perfect quick solution for busy evenings when you crave something comforting yet delicious. Imagine sinking your teeth into crispy sourdough, gooey cheese, and tender chicken, all wrapped up in one delightful sandwich. This recipe is not just about filling your stomach; it’s about bringing joy to your table with minimal effort. Trust me, your loved ones will be impressed, and you’ll feel like a culinary rockstar!

Why You’ll Love This Lazy Chicken Parmesan Grilled Cheese

This Lazy Chicken Parmesan Grilled Cheese is a game-changer for anyone who loves quick meals without sacrificing flavor. It’s incredibly easy to whip up, taking just 18 minutes from start to finish. The combination of tender chicken, rich marinara, and melty cheese creates a taste explosion that will have you coming back for seconds. Plus, it’s a fantastic way to use leftover chicken, making it a win-win for busy weeknights!

Ingredients for Lazy Chicken Parmesan Grilled Cheese

Gathering the right ingredients is key to making this Lazy Chicken Parmesan Grilled Cheese a success. Here’s what you’ll need:

  • Sourdough bread: This bread adds a delightful crunch and a slightly tangy flavor that pairs perfectly with the filling.
  • Olive oil: A splash of olive oil helps achieve that golden, crispy exterior while adding a hint of richness.
  • Cooked chicken: Shredded chicken is the star of the show. Use leftovers or rotisserie chicken for convenience.
  • Marinara sauce: This classic Italian sauce brings a burst of flavor and moisture to the sandwich.
  • Shredded mozzarella cheese: Melty mozzarella is essential for that gooey texture we all love in a grilled cheese.
  • Grated Parmesan cheese: A sprinkle of Parmesan adds a nutty depth and enhances the overall flavor.
  • Italian seasoning: This blend of herbs elevates the dish, giving it that authentic Italian flair.
  • Salt and pepper: Simple seasonings that enhance the flavors of the other ingredients.
  • Fresh basil leaves (optional): A touch of fresh basil adds a pop of color and a burst of freshness to your sandwich.

For those looking to mix things up, consider substituting the chicken with turkey or a plant-based protein. You can find the exact quantities for each ingredient at the bottom of the article, ready for printing!

How to Make Lazy Chicken Parmesan Grilled Cheese

Now that you have all your ingredients ready, let’s dive into the steps to create this mouthwatering Lazy Chicken Parmesan Grilled Cheese. Each step is simple, and I promise you’ll be savoring this delicious sandwich in no time!

Step 1: Heat the Olive Oil

Start by heating a tablespoon of olive oil in a skillet over medium heat. This oil is your secret weapon for achieving that perfect golden crust. You want it hot enough to sizzle when you add the bread, but not so hot that it smokes. A little patience here goes a long way!

Step 2: Prepare the Chicken Mixture

In a mixing bowl, combine your shredded chicken, marinara sauce, mozzarella, Parmesan, Italian seasoning, salt, and pepper. Stir it all together until everything is well-coated. The aroma of the marinara and cheese will make your mouth water. This mixture is the heart of your sandwich, so make sure it’s flavorful!

Step 3: Assemble the Sandwich

Take one slice of sourdough bread and place it in the skillet. Spoon the chicken mixture generously on top, spreading it evenly. Don’t be shy—load it up! Then, place the second slice of sourdough on top. This is where the magic happens, so make sure it’s snug and ready for grilling.

Step 4: Cook the First Side

Let the sandwich cook for about 3-4 minutes. Keep an eye on it! You want the bottom to turn a beautiful golden brown. If you’re feeling adventurous, gently press down on the sandwich with a spatula to help it crisp up. The smell will be irresistible!

Step 5: Flip and Finish Cooking

Carefully flip the sandwich over. This can be a bit tricky, but a good spatula will help. Cook the other side for another 3-4 minutes until it’s golden and the cheese is melted. You might want to lower the heat slightly to ensure the cheese gets gooey without burning the bread.

Step 6: Serve and Garnish

Once both sides are perfectly golden, remove the sandwich from the skillet. Slice it in half to reveal that cheesy goodness inside. If you’re feeling fancy, garnish with fresh basil leaves for a pop of color and flavor. Now, dig in and enjoy every bite of your Lazy Chicken Parmesan Grilled Cheese!

Tips for Success

  • Use day-old sourdough for extra crunch; it holds up better when grilling.
  • Don’t rush the cooking process; let each side get golden brown for the best texture.
  • Feel free to experiment with different cheeses like provolone or fontina for a unique twist.
  • For a spicier kick, add red pepper flakes to the chicken mixture.
  • Keep a lid on the skillet for a minute to help melt the cheese faster.

Equipment Needed

  • Skillet: A non-stick skillet works best, but any frying pan will do.
  • Spatula: A sturdy spatula is essential for flipping the sandwich without losing its delicious filling.
  • Mixing bowl: Use any bowl you have on hand to combine the chicken mixture.
  • Knife: A sharp knife is needed for slicing the sandwich in half.

Variations

  • Spicy Chicken Parmesan Grilled Cheese: Add diced jalapeños or a sprinkle of cayenne pepper to the chicken mixture for a fiery kick.
  • Caprese Style: Incorporate fresh tomatoes and mozzarella for a Caprese twist, drizzling balsamic glaze on top before serving.
  • Vegetarian Option: Swap the chicken for sautéed mushrooms or eggplant for a hearty, meatless version.
  • Gluten-Free: Use gluten-free bread to make this sandwich suitable for those with gluten sensitivities.
  • Herbed Chicken: Mix in fresh herbs like parsley or oregano to the chicken mixture for an aromatic boost.

Serving Suggestions

  • Side Salad: Pair your sandwich with a light arugula salad drizzled with lemon vinaigrette for a refreshing contrast.
  • Chips: Serve with crispy potato chips or homemade sweet potato fries for a satisfying crunch.
  • Drink: Enjoy with a cold glass of iced tea or a light beer to complement the flavors.
  • Presentation: Cut the sandwich diagonally and serve on a wooden board for a rustic touch.

FAQs about Lazy Chicken Parmesan Grilled Cheese

Can I use store-bought rotisserie chicken for this recipe?

Absolutely! Using store-bought rotisserie chicken is a fantastic time-saver. It’s already cooked and shredded, making your Lazy Chicken Parmesan Grilled Cheese even quicker to prepare.

What can I substitute for sourdough bread?

If sourdough isn’t your thing, feel free to use any sturdy bread like ciabatta or whole wheat. Just make sure it can hold up to the filling without falling apart!

How can I make this dish healthier?

To lighten things up, consider using whole grain bread and reducing the amount of cheese. You can also add more veggies to the chicken mixture for extra nutrients.

Can I make this sandwich ahead of time?

While it’s best enjoyed fresh, you can prepare the chicken mixture in advance and store it in the fridge. Just assemble and grill when you’re ready to eat!

What’s the best way to reheat leftovers?

If you have leftovers, reheat them in a skillet over low heat. This will help maintain that crispy texture while warming the filling evenly. Enjoy your Lazy Chicken Parmesan Grilled Cheese all over again!

Final Thoughts

Creating this Lazy Chicken Parmesan Grilled Cheese is more than just making a meal; it’s about embracing the joy of cooking with ease. Each bite is a delightful reminder that comfort food doesn’t have to be complicated. The crispy bread, melty cheese, and savory chicken come together to create a symphony of flavors that warms the heart. Whether you’re enjoying it solo or sharing it with family, this sandwich brings a sense of satisfaction that’s hard to beat. So, grab your ingredients and let this quick delight become a staple in your kitchen. You won’t regret it!

Ranis

Lazy Chicken Parmesan Grilled Cheese: A Quick Delight!

A quick and delicious twist on classic chicken parmesan, this Lazy Chicken Parmesan Grilled Cheese combines tender chicken, marinara sauce, and gooey cheese between crispy sourdough bread.
Prep Time 10 minutes
Cook Time 8 minutes
Total Time 18 minutes
Servings: 2 servings
Course: Sandwich
Cuisine: Italian-American
Calories: 450

Ingredients
  

  • 2 slices of sourdough bread
  • 1 tablespoon olive oil
  • 1 cup cooked chicken shredded
  • 1/2 cup marinara sauce
  • 1/2 cup shredded mozzarella cheese
  • 1/4 cup grated Parmesan cheese
  • 1 teaspoon Italian seasoning
  • Salt and pepper to taste
  • Fresh basil leaves for garnish optional

Method
 

  1. Heat the olive oil in a skillet over medium heat.
  2. In a bowl, combine the shredded chicken, marinara sauce, mozzarella cheese, Parmesan cheese, Italian seasoning, salt, and pepper. Mix well.
  3. Place one slice of sourdough bread in the skillet. Spoon the chicken mixture on top, spreading it evenly.
  4. Top with the second slice of sourdough bread. Cook for about 3-4 minutes until the bottom is golden brown.
  5. Carefully flip the sandwich and cook for another 3-4 minutes until the other side is golden and the cheese is melted.
  6. Remove from the skillet, slice in half, and garnish with fresh basil leaves if desired.

Nutrition

Serving: 1sandwichCalories: 450kcalCarbohydrates: 30gProtein: 35gFat: 20gSaturated Fat: 8gPolyunsaturated Fat: 12gCholesterol: 80mgSodium: 800mgFiber: 2gSugar: 4g

Notes

  • For a spicier kick, add red pepper flakes to the chicken mixture.
  • Substitute the chicken with turkey or a plant-based protein for a different flavor profile.

Tried this recipe?

Let us know how it was!

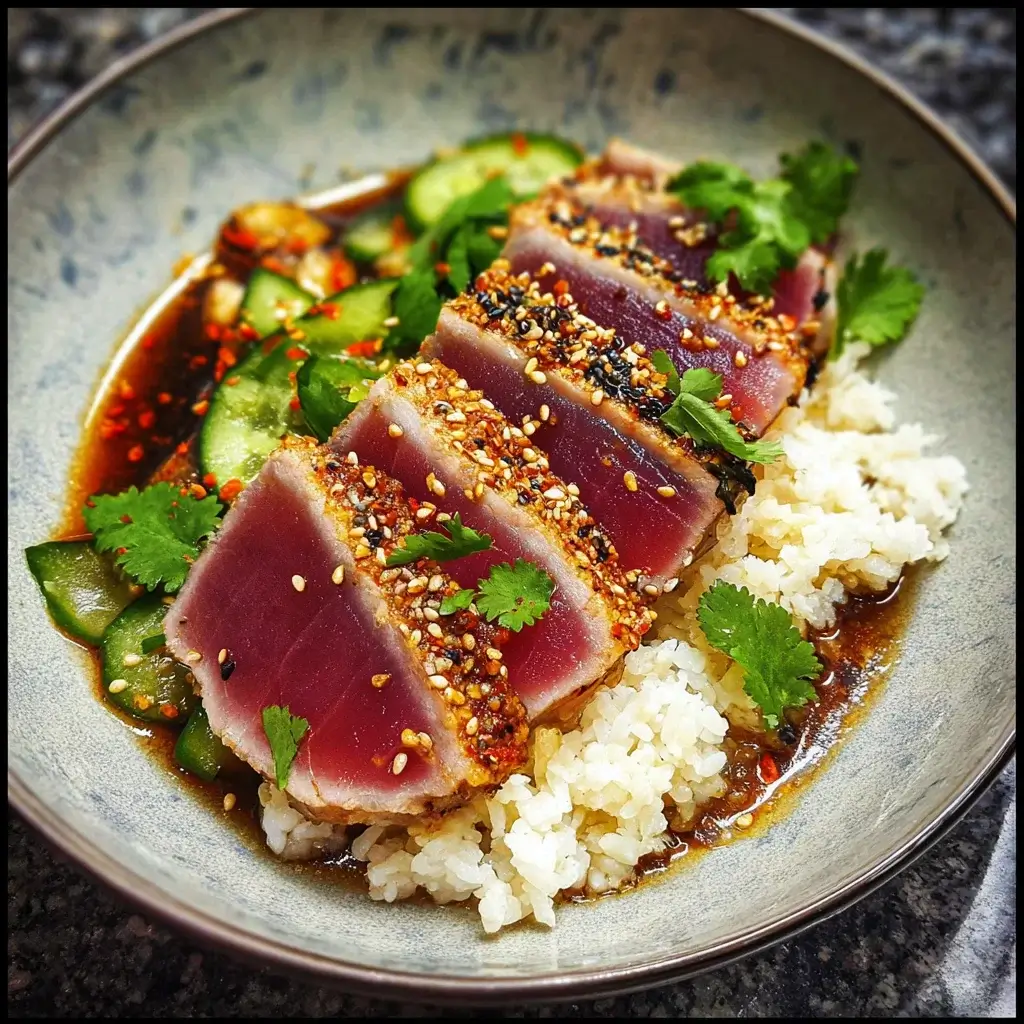
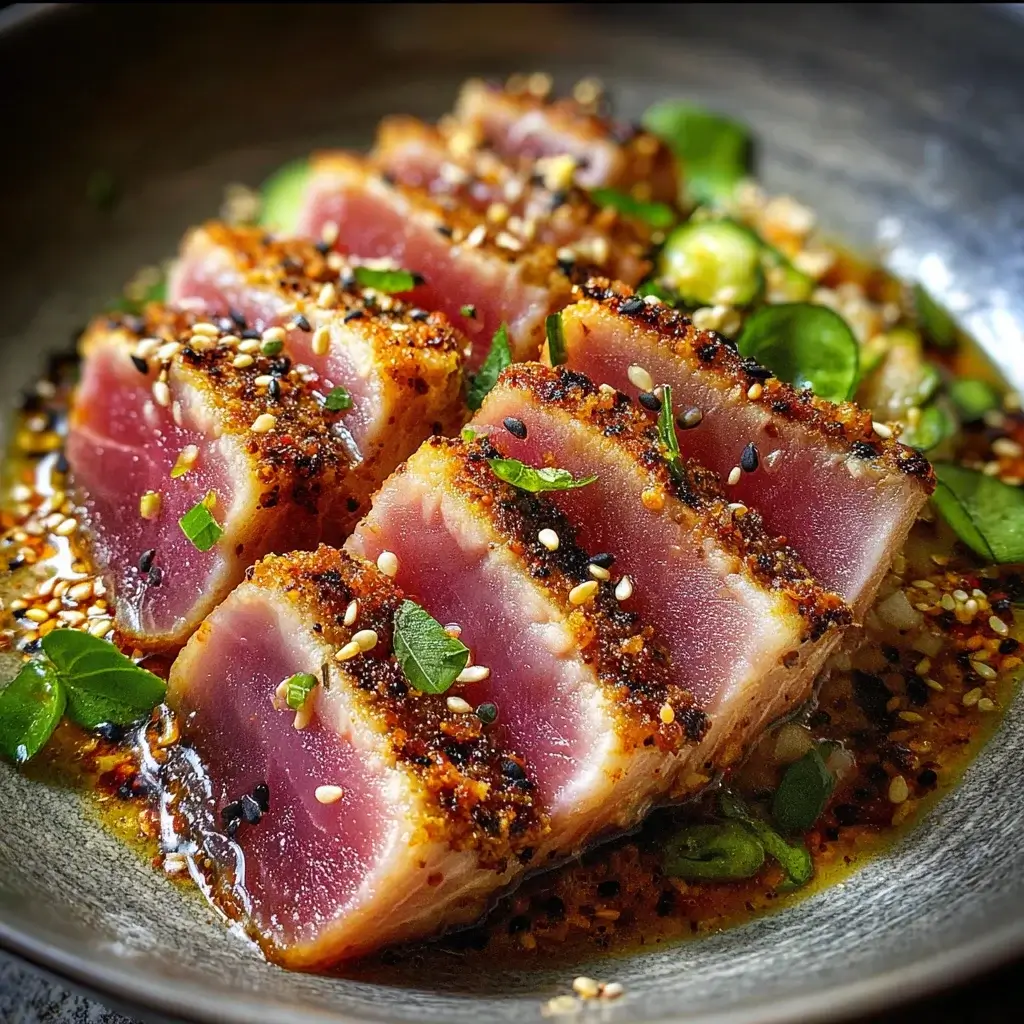
Seared Tuna with Sesame and Ginger: Quick Flavorful Recipe

Introduction to Seared Tuna with Sesame and Ginger

Cooking can sometimes feel like a race against the clock, especially on those busy weeknights. That’s where this Seared Tuna with Sesame and Ginger recipe comes in. It’s quick, flavorful, and perfect for impressing your loved ones without spending hours in the kitchen. I remember the first time I made this dish; the aroma of ginger and sesame filled my home, and my family couldn’t wait to dig in. With just a handful of ingredients and minimal prep, you can create a restaurant-quality meal that’s sure to delight. Let’s dive into this culinary adventure!

Why You’ll Love This Seared Tuna with Sesame and Ginger

This dish is a game-changer for anyone looking to whip up something delicious in no time. The Seared Tuna with Sesame and Ginger is not only quick to prepare, but it also bursts with flavor that will make your taste buds dance. Plus, it’s a healthy option packed with protein. Whether you’re cooking for yourself or hosting friends, this recipe is sure to impress without the stress!

Ingredients for Seared Tuna with Sesame and Ginger

Gathering the right ingredients is the first step to culinary success. For this Seared Tuna with Sesame and Ginger, you’ll need a few key players that come together to create a symphony of flavors.

  • Fresh sushi-grade tuna steaks: The star of the show! Look for bright, firm tuna that’s deep red in color. This ensures freshness and quality.
  • Sesame oil: This adds a rich, nutty flavor that complements the tuna beautifully. It’s a staple in Asian cuisine.
  • Soy sauce: A touch of umami that enhances the overall taste. Opt for low-sodium if you’re watching your salt intake.
  • Fresh ginger: Grated ginger brings a zesty kick and aromatic warmth. It’s a must for that authentic flavor.
  • Honey: This natural sweetener balances the savory elements and adds a hint of sweetness.
  • Garlic: Minced garlic adds depth and a punch of flavor that elevates the dish.
  • Sesame seeds: These can be white or black, adding a delightful crunch and visual appeal to the finished dish.
  • Salt and pepper: Essential for seasoning, these simple ingredients help bring out the flavors of the tuna.
  • Green onions: Sliced for garnish, they add a fresh, crisp element that brightens the dish.

For those looking to spice things up, consider adding a teaspoon of sriracha or red pepper flakes to the marinade. If you’re in a pinch, you can substitute the fresh ginger with ground ginger, though the flavor will be slightly different. All ingredient quantities are available at the bottom of the article for easy printing!

How to Make Seared Tuna with Sesame and Ginger

Now that you have your ingredients ready, it’s time to bring this Seared Tuna with Sesame and Ginger to life. Follow these simple steps, and you’ll be savoring a delicious meal in no time!

Step 1: Prepare the Marinade

Start by whisking together the sesame oil, soy sauce, grated ginger, honey, and minced garlic in a small bowl. This marinade is where the magic begins. The combination of flavors will infuse the tuna with a delightful taste. Make sure everything is well combined; you want each bite to be packed with flavor!

Step 2: Marinate the Tuna

Next, place the fresh sushi-grade tuna steaks in a shallow dish. Pour the marinade over the tuna, ensuring each steak is well coated. Cover the dish and refrigerate for at least 30 minutes. This step is crucial; it allows the flavors to meld beautifully. If you have time, marinating longer will only enhance the taste!

Step 3: Heat the Skillet

While the tuna is marinating, heat a non-stick skillet or grill pan over medium-high heat. You want it hot enough to sear the tuna quickly, creating a nice crust while keeping the inside tender and rare. A well-heated pan is key to achieving that perfect sear!

Step 4: Season the Tuna

Once the tuna has marinated, remove it from the dish, allowing any excess marinade to drip off. Season both sides with salt and pepper. Then, sprinkle sesame seeds evenly over the tuna steaks. This adds a delightful crunch and enhances the dish’s visual appeal. Trust me, it’s worth the extra step!

Step 5: Sear the Tuna

Now it’s time for the fun part! Add the tuna to the hot skillet and sear for about 1-2 minutes on each side for a rare finish. If you prefer it cooked a bit more, feel free to leave it on the heat for an extra minute. Just keep an eye on it; you want that beautiful pink center!

Step 6: Rest and Slice

After searing, remove the tuna from the skillet and let it rest for a minute. This allows the juices to redistribute, making each slice tender and juicy. Once rested, slice the tuna against the grain into thick pieces. Serve it up, and don’t forget to drizzle any remaining marinade on top for an extra burst of flavor!

Tips for Success

  • Use a sharp knife for slicing the tuna; it ensures clean cuts and a beautiful presentation.
  • Don’t overcrowd the skillet; sear in batches if necessary to maintain high heat.
  • Keep an eye on the cooking time; tuna cooks quickly, and you want it rare.
  • Let the tuna rest before slicing to keep it juicy and tender.
  • Experiment with different marinades for unique flavor profiles!

Equipment Needed

  • Non-stick skillet or grill pan: Essential for searing the tuna. A cast-iron skillet works well too.
  • Whisk: For mixing the marinade. A fork can do the job in a pinch.
  • Shallow dish: To marinate the tuna. Any flat container will work.
  • Sharp knife: For slicing the tuna. A chef’s knife is ideal.

Variations

  • Spicy Tuna: Add a teaspoon of sriracha or red pepper flakes to the marinade for a fiery kick.
  • Herb-Infused: Incorporate fresh herbs like cilantro or basil into the marinade for a fresh twist.
  • Gluten-Free Option: Use tamari instead of soy sauce to keep it gluten-free without sacrificing flavor.
  • Fruit-Infused: Add a splash of orange or lime juice to the marinade for a citrusy brightness.
  • Vegetarian Version: Substitute tuna with thick slices of eggplant or tofu, marinating them the same way.

Serving Suggestions

  • Pair the Seared Tuna with Sesame and Ginger with a side of steamed broccoli or asparagus for a healthy touch.
  • Serve over a bed of jasmine rice or quinoa to soak up the delicious marinade.
  • A crisp cucumber salad complements the dish beautifully.
  • For drinks, consider a chilled sake or a light white wine.
  • Garnish with extra sesame seeds and green onions for a stunning presentation!

FAQs about Seared Tuna with Sesame and Ginger

As you embark on your culinary journey with Seared Tuna with Sesame and Ginger, you might have a few questions. Here are some common queries that can help you navigate this delicious dish.

Can I use frozen tuna for this recipe?

Absolutely! Just make sure to thaw it completely in the refrigerator before marinating. Fresh is best, but frozen sushi-grade tuna can work well too.

How do I know when the tuna is cooked properly?

The key is to keep an eye on the color. For a rare finish, the center should be bright pink. If you prefer it more cooked, aim for a light pink center. Remember, tuna cooks quickly!

What can I serve with seared tuna?

Pair it with steamed vegetables, a fresh salad, or over rice for a complete meal. A light soy sauce or ponzu dressing can also enhance the flavors.

Can I make the marinade ahead of time?

Yes! You can prepare the marinade a day in advance and store it in the fridge. Just give it a good whisk before using it to ensure everything is well combined.

Is this dish suitable for meal prep?

Definitely! You can marinate the tuna and sear it ahead of time. Just store it in an airtight container in the fridge. Reheat gently before serving to maintain its tenderness.

Final Thoughts

Cooking Seared Tuna with Sesame and Ginger is more than just preparing a meal; it’s about creating an experience. The vibrant flavors and quick preparation make it a go-to recipe for any occasion. I love how this dish brings a touch of elegance to the table without the fuss. Each bite is a delightful blend of savory and sweet, transporting you to a cozy sushi bar. Whether you’re impressing guests or enjoying a quiet dinner at home, this recipe is sure to bring joy and satisfaction. So grab your ingredients and let the culinary adventure begin!

Ranis

Seared Tuna with Sesame and Ginger: Quick Flavorful Recipe

A quick and flavorful recipe for seared tuna steaks marinated in sesame oil and ginger.
Prep Time 10 minutes
Cook Time 4 minutes
Total Time 44 minutes
Course: Main Course
Cuisine: Japanese
Calories: 320

Ingredients
  

  • 1 pound fresh sushi-grade tuna steaks
  • 2 tablespoons sesame oil
  • 1 tablespoon soy sauce
  • 1 tablespoon fresh ginger grated
  • 1 tablespoon honey
  • 1 teaspoon garlic minced
  • 1 tablespoon sesame seeds white or black
  • Salt and pepper to taste
  • 2 green onions sliced (for garnish)

Method
 

  1. In a small bowl, whisk together the sesame oil, soy sauce, grated ginger, honey, and minced garlic until well combined.
  2. Place the tuna steaks in a shallow dish and pour the marinade over them, ensuring they are well coated. Cover and refrigerate for at least 30 minutes to allow the flavors to meld.
  3. Heat a non-stick skillet or grill pan over medium-high heat.
  4. Remove the tuna from the marinade, allowing excess to drip off, and season both sides with salt and pepper.
  5. Sprinkle sesame seeds evenly over both sides of the tuna steaks.
  6. Add the tuna to the hot skillet and sear for about 1-2 minutes on each side for rare, or longer if desired.
  7. Remove the tuna from the skillet and let it rest for a minute before slicing.
  8. Serve the sliced tuna on a plate, garnished with sliced green onions and any remaining marinade drizzled on top.

Nutrition

Serving: 1servingCalories: 320kcalCarbohydrates: 6gProtein: 40gFat: 15gSaturated Fat: 2gPolyunsaturated Fat: 10gCholesterol: 70mgSodium: 500mgSugar: 6g

Notes

  • For a spicier kick, add a teaspoon of sriracha or red pepper flakes to the marinade.
  • Serve with a side of steamed vegetables or over a bed of rice for a complete meal.

Tried this recipe?

Let us know how it was!

Peanut Butter Frozen Yogurt Bars: Delightfully Easy Recipe!

Introduction to Peanut Butter Frozen Yogurt Bars

There’s something magical about a treat that combines creamy peanut butter and refreshing yogurt.

Peanut Butter Frozen Yogurt Bars are not just a dessert; they’re a delightful escape from the everyday hustle.

Whether you’re looking for a quick solution for a busy day or a sweet surprise to impress your loved ones, these bars fit the bill perfectly.

With just a handful of ingredients and minimal prep time, you can whip up a batch that’s both satisfying and guilt-free.

Let’s dive into this easy recipe that promises to bring joy to your taste buds!

Why You’ll Love This Peanut Butter Frozen Yogurt Bars

These Peanut Butter Frozen Yogurt Bars are a game-changer for anyone craving a sweet treat without the guilt.

They come together in just 10 minutes, making them perfect for busy weeknights or spontaneous gatherings.

The creamy texture and rich peanut butter flavor will have you coming back for more.

Plus, they’re a healthier alternative to store-bought desserts, so you can indulge without the worry.

Ingredients for Peanut Butter Frozen Yogurt Bars

Creating these Peanut Butter Frozen Yogurt Bars is a breeze, thanks to a simple list of ingredients.

Here’s what you’ll need:

  • Plain Greek yogurt: This creamy base adds protein and a tangy flavor, making your bars rich and satisfying.
  • Creamy peanut butter: The star of the show! It brings that nutty goodness and a smooth texture that binds everything together.
  • Honey: A natural sweetener that balances the flavors and adds a touch of sweetness without being overpowering.
  • Vanilla extract: Just a splash enhances the overall flavor, giving your bars a warm, inviting aroma.
  • Mini chocolate chips: These little gems add a delightful crunch and a hint of chocolatey sweetness in every bite.
  • Chopped peanuts (optional): For those who love a bit of extra crunch, these can be sprinkled in for added texture.

Feel free to get creative!

You can swap out the peanut butter for almond butter for a different flavor profile.

If you need a nut-free option, sunflower seed butter works beautifully too.

For a fruity twist, consider adding mashed bananas or pureed strawberries to the yogurt mixture before freezing.

Exact measurements are available at the bottom of the article for your convenience.

How to Make Peanut Butter Frozen Yogurt Bars

Making these Peanut Butter Frozen Yogurt Bars is as easy as pie—well, easier!

With just a few simple steps, you’ll have a delicious treat ready to freeze.

Let’s get started!

Step 1: Mix the Base

In a medium mixing bowl, combine the plain Greek yogurt, creamy peanut butter, honey, and vanilla extract.

Use a whisk or spatula to mix until everything is smooth and well combined.

This creamy base is the heart of your bars, so take your time to blend it well.

The aroma of peanut butter and vanilla will fill your kitchen, making it hard to resist tasting!

Step 2: Add Mix-Ins

Once your base is ready, it’s time to stir in the fun stuff!

Add the mini chocolate chips and chopped peanuts, if you’re using them.

Gently fold these ingredients into the mixture.

This step adds delightful texture and flavor, making each bite a little surprise.

Step 3: Prepare the Baking Dish

Grab an 8×8-inch baking dish and line it with parchment paper.

Make sure to leave some overhang on the sides.

This will make it super easy to lift the bars out once they’re frozen.

Trust me, this little trick saves you from a messy cleanup!

Step 4: Spread and Freeze

Pour the yogurt mixture into the prepared baking dish.

Use a spatula to spread it evenly across the dish.

Once it’s nice and smooth, pop it in the freezer.

Let it freeze for at least 4 hours or until firm.

The anticipation will build as you wait for your delicious bars to set!

Step 5: Cut and Serve

After the bars are frozen solid, it’s time for the grand reveal!

Lift them out of the dish using the parchment paper.

Place them on a cutting board and cut into squares or rectangles.

Serve immediately for a refreshing treat, or store them in an airtight container in the freezer for up to two weeks.

These Peanut Butter Frozen Yogurt Bars are perfect for satisfying your sweet tooth anytime!

Tips for Success

  • Make sure your Greek yogurt is at room temperature for easier mixing.
  • Use a rubber spatula to scrape down the sides of the bowl for a smooth blend.
  • For a creamier texture, let the bars sit at room temperature for a few minutes before cutting.
  • Experiment with different mix-ins like dried fruit or granola for added flavor.
  • Store any leftovers in an airtight container to keep them fresh.

Equipment Needed

  • Mixing bowl: A medium-sized bowl works best; a large one can be used if you prefer more space.
  • Whisk or spatula: Either will do for mixing; a hand mixer can speed things up.
  • Baking dish: An 8×8-inch dish is ideal; a similar-sized container will work too.
  • Parchment paper: Essential for easy removal; aluminum foil can be a substitute.

Variations

  • Fruity Delight: Add 1/2 cup of mashed bananas or pureed strawberries to the yogurt mixture for a refreshing twist.
  • Nut-Free Option: Substitute creamy peanut butter with sunflower seed butter for a nut-free version that’s just as delicious.
  • Chocolate Lovers: Mix in cocoa powder or use chocolate yogurt for an extra chocolatey flavor.
  • Spiced Up: Add a pinch of cinnamon or nutmeg to the base for a warm, cozy flavor profile.
  • Granola Crunch: Fold in some granola for added texture and a satisfying crunch in every bite.

Serving Suggestions

  • Pair these bars with a scoop of fresh fruit salad for a colorful, refreshing contrast.
  • Serve alongside a glass of cold almond milk or a creamy smoothie for a delightful treat.
  • For a fun presentation, drizzle melted chocolate over the bars before serving.
  • Top with a dollop of whipped cream for an indulgent touch.

FAQs about Peanut Butter Frozen Yogurt Bars

Can I use non-dairy yogurt for these bars?

Absolutely! You can substitute plain Greek yogurt with a non-dairy alternative like coconut or almond yogurt. Just ensure it’s thick enough to hold the bars together.

How long do these Peanut Butter Frozen Yogurt Bars last in the freezer?

These bars can be stored in an airtight container in the freezer for up to two weeks. They’re perfect for meal prep or a quick snack!

Can I make these bars without honey?

Yes! If you prefer a sugar-free option, you can use maple syrup or agave nectar instead. You can also skip the sweetener altogether if you like a more tart flavor.

What can I use instead of peanut butter?

If you’re looking for alternatives, almond butter or sunflower seed butter work wonderfully. Each will give a unique twist to the flavor while keeping it delicious!

Can I add protein powder to the mixture?

Definitely! Adding a scoop of your favorite protein powder can boost the nutritional value. Just mix it in with the other ingredients for a protein-packed treat.

Final Thoughts

Creating these Peanut Butter Frozen Yogurt Bars is more than just a cooking task; it’s a joyful experience that brings a sense of accomplishment.

With each creamy bite, you’ll savor the perfect blend of flavors that remind you of carefree summer days.

These bars are not only a delicious treat but also a healthier option that you can feel good about sharing with family and friends.

So, whether you’re enjoying them on a hot afternoon or serving them at a gathering, these bars are sure to bring smiles all around.

Get ready to indulge guilt-free!

Ranis

Peanut Butter Frozen Yogurt Bars: Delightfully Easy Recipe!

Delightfully easy recipe for Peanut Butter Frozen Yogurt Bars that are creamy, delicious, and perfect for a refreshing treat.
Prep Time 10 minutes
Total Time 4 hours 10 minutes
Servings: 8 servings
Course: Dessert
Cuisine: American
Calories: 150

Ingredients
  

  • 1 cup plain Greek yogurt
  • 1/2 cup creamy peanut butter
  • 1/4 cup honey
  • 1 teaspoon vanilla extract
  • 1/4 cup mini chocolate chips
  • 1/4 cup chopped peanuts optional

Method
 

  1. In a medium mixing bowl, combine the Greek yogurt, creamy peanut butter, honey, and vanilla extract. Mix until smooth and well combined.
  2. Stir in the mini chocolate chips and chopped peanuts, if using.
  3. Line an 8x8-inch baking dish with parchment paper, leaving some overhang for easy removal.
  4. Pour the yogurt mixture into the prepared baking dish and spread it evenly with a spatula.
  5. Freeze for at least 4 hours or until firm.
  6. Once frozen, lift the bars out of the dish using the parchment paper. Cut into squares or rectangles.
  7. Serve immediately or store in an airtight container in the freezer for up to 2 weeks.

Nutrition

Serving: 1barCalories: 150kcalCarbohydrates: 10gProtein: 6gFat: 9gSaturated Fat: 2gPolyunsaturated Fat: 7gCholesterol: 5mgSodium: 50mgFiber: 1gSugar: 10g

Notes

  • For a fruity twist, add 1/2 cup of mashed bananas or pureed strawberries to the yogurt mixture before freezing.
  • Substitute almond butter for peanut butter for a different flavor profile, or use a nut-free alternative like sunflower seed butter for a nut-free version.

Tried this recipe?

Let us know how it was!

Apple Cinnamon Baked Oatmeal: A Cozy, Healthy Recipe!

Introduction to Apple Cinnamon Baked Oatmeal

There’s something magical about the aroma of baked oatmeal wafting through the house, especially when it’s infused with the warm spices of apple and cinnamon. This Apple Cinnamon Baked Oatmeal is not just a breakfast; it’s a cozy hug in a bowl. Perfect for those busy mornings or lazy weekends, it’s a dish that brings comfort and nourishment. Whether you’re feeding a family or just treating yourself, this recipe is a quick solution that impresses without the fuss. Let’s dive into this delightful creation that’s as wholesome as it is delicious!

Why You’ll Love This Apple Cinnamon Baked Oatmeal

This Apple Cinnamon Baked Oatmeal is a game-changer for breakfast lovers. It’s incredibly easy to whip up, making it perfect for busy mornings. The delightful combination of sweet apples and warm cinnamon creates a flavor explosion that will have you coming back for seconds. Plus, it’s a healthy option that keeps you full and satisfied, so you can tackle your day with energy and enthusiasm!

Ingredients for Apple Cinnamon Baked Oatmeal

Gathering the right ingredients is the first step to creating this delightful Apple Cinnamon Baked Oatmeal. Here’s what you’ll need:

  • Rolled oats: The base of our dish, providing heartiness and fiber.
  • Baking powder: This helps the oatmeal rise, giving it a fluffy texture.
  • Ground cinnamon: A warm spice that adds depth and sweetness.
  • Salt: Just a pinch enhances all the flavors beautifully.
  • Milk: Dairy or non-dairy options work well, adding moisture and creaminess.
  • Maple syrup or honey: Natural sweeteners that bring a touch of sweetness without overpowering.
  • Eggs: They bind everything together and add protein.
  • Melted coconut oil or butter: For richness and flavor; choose based on your preference.
  • Vanilla extract: A splash of this elevates the overall taste.
  • Apples: Fresh, diced apples provide sweetness and texture; feel free to use your favorite variety.
  • Nuts (optional): Chopped walnuts or pecans add crunch and healthy fats.
  • Dried fruits (optional): Raisins or cranberries can be mixed in for extra sweetness and chewiness.

For exact quantities, check the bottom of the article where you can find a printable version of the recipe!

How to Make Apple Cinnamon Baked Oatmeal

Creating this Apple Cinnamon Baked Oatmeal is a breeze! Follow these simple steps, and you’ll have a warm, delicious breakfast ready in no time. Let’s get started!

Step 1: Preheat and Prepare

First things first, preheat your oven to 350°F (175°C). This is crucial for achieving that perfect bake. While the oven warms up, grease a 9×9-inch baking dish with a bit of coconut oil or butter. This will prevent sticking and make cleanup a snap!

Step 2: Mix Dry Ingredients

In a large bowl, combine the rolled oats, baking powder, ground cinnamon, and salt. Stir them together until well mixed. This dry mixture is the foundation of your oatmeal, so make sure it’s evenly blended for consistent flavor throughout.

Step 3: Whisk Wet Ingredients

In another bowl, whisk together the milk, maple syrup (or honey), eggs, melted coconut oil (or butter), and vanilla extract. This step adds moisture and flavor to your dish. Whisk until everything is smooth and well combined. You’ll love the aroma of vanilla wafting through your kitchen!

Step 4: Combine Ingredients

Now, pour the wet mixture into the bowl with the dry ingredients. Stir gently until everything is combined. This is where the magic begins! You’ll see the oats soaking up the liquid, creating a hearty base for your baked oatmeal.

Step 5: Add Apples and Nuts

Next, fold in the diced apples and any optional nuts or dried fruits you’re using. This step enhances both texture and taste, making each bite a delightful experience. The apples will soften as they bake, adding sweetness and moisture.

Step 6: Bake

Pour the mixture into your prepared baking dish and spread it evenly. Pop it in the oven and bake for 30-35 minutes. As it bakes, your kitchen will fill with the irresistible scent of cinnamon and apples. Trust me, it’s worth the wait!

Step 7: Cool and Serve

Once baked, allow the oatmeal to cool for a few minutes before slicing. This makes serving easier and enhances the flavors. Enjoy it warm, perhaps with a drizzle of maple syrup or a dollop of yogurt on top!

Tips for Success

  • Use old-fashioned rolled oats for the best texture; quick oats can become mushy.
  • Let the baked oatmeal cool slightly before slicing for cleaner pieces.
  • Experiment with spices like nutmeg or ginger for a unique twist.
  • Store leftovers in the fridge for up to a week; reheat for a quick breakfast.
  • Top with fresh fruit or nuts just before serving for added crunch.

Equipment Needed

  • 9×9-inch baking dish: A square dish works best, but any similar size will do.
  • Mixing bowls: Use two bowls—one for dry and one for wet ingredients.
  • Whisk: A whisk is ideal, but a fork can work in a pinch.
  • Spatula: Great for folding in ingredients and serving.

Variations

  • Fruit Swap: Substitute apples with bananas, berries, or peaches for a different flavor profile.
  • Nut-Free Option: Omit nuts or replace them with seeds like pumpkin or sunflower for a nut-free version.
  • Vegan Twist: Use flax eggs instead of regular eggs and opt for non-dairy milk to make it vegan-friendly.
  • Spice It Up: Add a teaspoon of nutmeg or ginger for an extra kick of warmth and flavor.
  • Chocolate Delight: Mix in some dark chocolate chips for a decadent treat that still feels wholesome.

Serving Suggestions

  • Pair with a dollop of Greek yogurt for added creaminess and protein.
  • Serve alongside fresh fruit like berries or sliced bananas for a colorful plate.
  • Drizzle with extra maple syrup or honey for a touch of sweetness.
  • Enjoy with a hot cup of coffee or tea to complement the flavors.

FAQs about Apple Cinnamon Baked Oatmeal

Can I make Apple Cinnamon Baked Oatmeal ahead of time?

Absolutely! You can prepare the mixture the night before and store it in the fridge. Just bake it in the morning for a quick and easy breakfast.

How do I store leftovers?

Store any leftovers in an airtight container in the fridge for up to a week. Reheat individual portions in the microwave for a quick snack or breakfast.

Can I freeze Apple Cinnamon Baked Oatmeal?

Yes, you can freeze it! Cut it into squares, wrap them tightly, and store in the freezer for up to three months. Just thaw and reheat when you’re ready to enjoy.

What can I substitute for eggs in this recipe?

If you’re looking for an egg substitute, try using flax eggs. Mix one tablespoon of ground flaxseed with three tablespoons of water for each egg. Let it sit for a few minutes until it thickens.

Is this recipe suitable for a gluten-free diet?

To make this Apple Cinnamon Baked Oatmeal gluten-free, simply use certified gluten-free rolled oats. This way, you can enjoy a delicious and safe breakfast!

Final Thoughts

There’s a certain joy that comes from sharing a warm dish of Apple Cinnamon Baked Oatmeal with family or friends. It’s more than just a meal; it’s a moment of connection, a cozy start to the day, or a comforting snack. Each bite is a reminder of home, filled with the sweet crunch of apples and the warmth of cinnamon. Whether you’re enjoying it fresh out of the oven or reheating leftovers, this recipe brings a sense of comfort and satisfaction. So, roll up your sleeves and let this delightful dish become a cherished part of your kitchen adventures!

Ranis

Apple Cinnamon Baked Oatmeal: A Cozy, Healthy Recipe!

A cozy and healthy recipe for Apple Cinnamon Baked Oatmeal, perfect for breakfast or a snack.
Prep Time 10 minutes
Cook Time 35 minutes
Total Time 45 minutes
Course: Breakfast
Cuisine: American
Calories: 220

Ingredients
  

  • 2 cups rolled oats
  • 1 teaspoon baking powder
  • 1 teaspoon ground cinnamon
  • 1/2 teaspoon salt
  • 2 cups milk dairy or non-dairy
  • 1/4 cup maple syrup or honey
  • 2 large eggs
  • 2 tablespoons melted coconut oil or butter
  • 1 teaspoon vanilla extract
  • 2 medium apples peeled, cored, and diced
  • 1/2 cup chopped walnuts or pecans optional
  • 1/4 cup raisins or dried cranberries optional

Method
 

  1. Preheat your oven to 350°F (175°C) and grease a 9x9-inch baking dish.
  2. In a large bowl, combine the rolled oats, baking powder, cinnamon, and salt. Mix well.
  3. In another bowl, whisk together the milk, maple syrup (or honey), eggs, melted coconut oil (or butter), and vanilla extract until smooth.
  4. Pour the wet ingredients into the dry ingredients and stir until combined.
  5. Fold in the diced apples, nuts (if using), and raisins or cranberries (if using).
  6. Pour the mixture into the prepared baking dish and spread it evenly.
  7. Bake for 30-35 minutes, or until the top is golden brown and the oatmeal is set.
  8. Allow to cool for a few minutes before slicing and serving.

Nutrition

Serving: 1servingCalories: 220kcalCarbohydrates: 30gProtein: 6gFat: 8gSaturated Fat: 4gPolyunsaturated Fat: 4gCholesterol: 70mgSodium: 200mgFiber: 4gSugar: 10g

Notes

  • For added flavor, try mixing in a teaspoon of nutmeg or a splash of almond extract.
  • Substitute the apples with other fruits like bananas or berries for a different twist.

Tried this recipe?

Let us know how it was!