Chicken Bacon Ranch Stuffed Bread: A Tasty Delight!

Introduction to Chicken Bacon Ranch Stuffed Bread

There’s something magical about the combination of chicken, bacon, and ranch dressing that brings back memories of family gatherings and game days. This Chicken Bacon Ranch Stuffed Bread is not just a meal; it’s a warm hug on a plate. Perfect for busy weeknights or a casual get-together, this dish is a crowd-pleaser that requires minimal effort. With its crispy exterior and gooey, flavorful filling, it’s bound to impress your loved ones. Trust me, once you try this recipe, it will become a staple in your kitchen!

Why You’ll Love This Chicken Bacon Ranch Stuffed Bread

This Chicken Bacon Ranch Stuffed Bread is a game-changer for anyone who craves flavor without the fuss. It’s quick to prepare, taking just 35 minutes from start to finish. The rich, savory filling of chicken and bacon, combined with creamy ranch, creates a taste explosion that’s hard to resist. Plus, it’s perfect for feeding a crowd or enjoying as a cozy meal at home. You’ll find yourself making it again and again!

Ingredients for Chicken Bacon Ranch Stuffed Bread

Gathering the right ingredients is the first step to creating this delicious Chicken Bacon Ranch Stuffed Bread. Here’s what you’ll need:

  • Cooked chicken: Shredded chicken is the star of this dish. You can use rotisserie chicken for convenience or cook your own.
  • Bacon: Crispy bacon adds a smoky crunch. Feel free to use turkey bacon for a lighter option.
  • Ranch dressing: This creamy dressing ties everything together. If you’re feeling adventurous, try a homemade version!
  • Shredded cheddar cheese: Melty cheese is essential for that gooey texture. You can swap it for mozzarella or pepper jack for a twist.
  • Garlic powder: A sprinkle of garlic powder enhances the flavor. Fresh garlic works too, just adjust the amount.
  • Onion powder: This adds depth to the filling. You can substitute with finely chopped onions if you prefer.
  • French bread: A sturdy loaf is perfect for holding all the goodness. Look for a fresh, crusty option at your local bakery.
  • Olive oil: Drizzling olive oil inside the bread adds flavor and helps it crisp up nicely.
  • Fresh parsley: A sprinkle of chopped parsley not only adds color but also a fresh taste to the finished dish.
  • Salt and pepper: Essential for seasoning. Adjust to your taste!

For those who like a little heat, consider adding diced jalapeños or a splash of hot sauce to the filling. If you want to switch things up, blue cheese dressing can replace ranch for a bolder flavor. Exact quantities for each ingredient are available at the bottom of the article for easy printing!

How to Make Chicken Bacon Ranch Stuffed Bread

Creating this Chicken Bacon Ranch Stuffed Bread is a breeze! Follow these simple steps, and you’ll have a delicious meal ready in no time. Let’s dive in!

Step 1: Preheat the Oven

First things first, preheat your oven to 375°F (190°C). This ensures it’s nice and hot when your stuffed bread is ready to bake. A hot oven is key to achieving that perfect golden crust!

Step 2: Prepare the Filling

In a large bowl, combine the shredded chicken, crumbled bacon, ranch dressing, cheddar cheese, garlic powder, onion powder, salt, and pepper. Mix everything well until all the ingredients are evenly coated. This filling is where the magic happens, so make sure it’s well combined!

Step 3: Prepare the Bread

Next, take your French bread and cut it in half lengthwise. You want to create a top and bottom. Hollow out the inside of each half, leaving about a 1-inch border. This creates a cozy little pocket for all that delicious filling!

Step 4: Add Olive Oil

Drizzle the inside of each bread half with olive oil. This adds flavor and helps the bread crisp up beautifully in the oven. Don’t skimp on this step; it makes a difference!

Step 5: Fill the Bread

Now it’s time to spoon the chicken and bacon mixture evenly into each half of the bread. Make sure to pack it in there! You want every bite to be bursting with flavor.

Step 6: Bake

Place the stuffed bread halves on a baking sheet and pop them in the preheated oven. Bake for 15-20 minutes, or until the bread is golden and the cheese is melted. The aroma will be irresistible!

Step 7: Garnish and Serve

Once baked, remove the bread from the oven and let it cool for a few minutes. Garnish with fresh parsley before slicing into pieces. This adds a pop of color and a fresh taste to your delicious creation!

Tips for Success

  • Use rotisserie chicken for a quick and easy filling.
  • Don’t overfill the bread; leave some space for the cheese to melt.
  • For extra crunch, broil the stuffed bread for the last 2 minutes of baking.
  • Let the bread cool slightly before slicing to avoid a messy cut.
  • Experiment with different cheeses for unique flavors!

Equipment Needed

  • Baking sheet: A standard baking sheet works perfectly. If you don’t have one, a large oven-safe dish will do.
  • Mixing bowl: Any large bowl will suffice for mixing the filling.
  • Knife: A sharp knife is essential for cutting the bread.
  • Spoon: Use a sturdy spoon for filling the bread.

Variations

  • Spicy Kick: Add diced jalapeños or a splash of hot sauce to the filling for an extra kick.
  • Cheese Swap: Try using pepper jack cheese for a zesty twist or feta for a Mediterranean flair.
  • Vegetarian Option: Substitute the chicken and bacon with sautéed mushrooms and spinach for a hearty vegetarian version.
  • Herb Infusion: Mix in fresh herbs like dill or chives to elevate the flavor profile.
  • Gluten-Free Bread: Use gluten-free bread to make this dish suitable for those with dietary restrictions.

Serving Suggestions

  • Side Salad: Pair with a crisp garden salad for a refreshing contrast.
  • Chips: Serve with tortilla chips and salsa for a fun crunch.
  • Drinks: Enjoy with a cold beer or a fizzy soda to complement the flavors.
  • Presentation: Slice the stuffed bread into generous pieces and arrange on a platter for a beautiful display.

FAQs about Chicken Bacon Ranch Stuffed Bread

Can I make Chicken Bacon Ranch Stuffed Bread ahead of time?

Absolutely! You can prepare the filling and stuff the bread a few hours in advance. Just cover it and refrigerate until you’re ready to bake. This makes it a great option for meal prep or entertaining!

What can I substitute for ranch dressing?

If ranch isn’t your thing, you can easily swap it for blue cheese dressing or even a homemade yogurt-based dressing. Each option brings a unique flavor to the dish!

How do I store leftovers?

Store any leftover Chicken Bacon Ranch Stuffed Bread in an airtight container in the fridge for up to three days. Reheat in the oven for the best texture!

Can I freeze this stuffed bread?

Yes, you can freeze the stuffed bread before baking. Wrap it tightly in plastic wrap and foil. When you’re ready to enjoy it, bake from frozen, adding a few extra minutes to the cooking time.

What sides pair well with Chicken Bacon Ranch Stuffed Bread?

This dish goes wonderfully with a side salad, some crispy potato wedges, or even a bowl of soup. The options are endless, so feel free to get creative!

Final Thoughts

Cooking is more than just a task; it’s an experience that brings people together. This Chicken Bacon Ranch Stuffed Bread is a perfect example of that joy. With its warm, cheesy filling and crispy crust, it’s a dish that sparks smiles and satisfied bellies. Whether you’re sharing it with family during a cozy dinner or serving it at a gathering with friends, this recipe is sure to create lasting memories. So roll up your sleeves, embrace the flavors, and enjoy the delightful moments that come from sharing a meal made with love!

Ranis

Chicken Bacon Ranch Stuffed Bread: A Tasty Delight!

A delicious and hearty Chicken Bacon Ranch Stuffed Bread filled with shredded chicken, crispy bacon, and creamy ranch dressing, perfect for a satisfying meal.
Prep Time 15 minutes
Cook Time 20 minutes
Total Time 35 minutes
Servings: 4 servings
Course: Main Dish
Cuisine: American
Calories: 450

Ingredients
  

  • 2 cups cooked chicken shredded
  • 6 slices bacon cooked and crumbled
  • 1 cup ranch dressing
  • 1 cup shredded cheddar cheese
  • 1 teaspoon garlic powder
  • 1 teaspoon onion powder
  • 1 loaf of French bread about 12 inches
  • 1 tablespoon olive oil
  • 1 tablespoon fresh parsley chopped (for garnish)
  • Salt and pepper to taste

Method
 

  1. Preheat your oven to 375°F (190°C).
  2. In a large bowl, combine the shredded chicken, crumbled bacon, ranch dressing, cheddar cheese, garlic powder, onion powder, salt, and pepper. Mix well until all ingredients are evenly coated.
  3. Cut the French bread in half lengthwise, creating a top and bottom. Hollow out the inside of each half, leaving about a 1-inch border.
  4. Drizzle the inside of each bread half with olive oil.
  5. Spoon the chicken and bacon mixture evenly into each half of the bread.
  6. Place the stuffed bread halves on a baking sheet and bake in the preheated oven for 15-20 minutes, or until the bread is golden and the cheese is melted.
  7. Remove from the oven and let cool for a few minutes. Garnish with fresh parsley before slicing into pieces.

Nutrition

Serving: 1/4 of the stuffed breadCalories: 450kcalCarbohydrates: 30gProtein: 30gFat: 25gSaturated Fat: 10gPolyunsaturated Fat: 15gCholesterol: 90mgSodium: 800mgFiber: 2gSugar: 2g

Notes

  • For a spicier kick, add diced jalapeños or a splash of hot sauce to the chicken mixture.
  • You can substitute the ranch dressing with blue cheese dressing for a different flavor profile.

Tried this recipe?

Let us know how it was!

Buffalo Chicken Meatballs: The Ultimate Flavor Explosion!

Introduction to Buffalo Chicken Meatballs

There’s something magical about the combination of spicy and savory that makes Buffalo Chicken Meatballs a go-to for any gathering. Whether it’s game day or a casual get-together, these little flavor bombs are sure to impress. I remember the first time I made them; the aroma filled my kitchen, and my friends couldn’t get enough. They’re not just delicious; they’re also a quick solution for busy days when you want to whip up something special without spending hours in the kitchen. Trust me, once you try these, they’ll become a staple in your home!

Why You’ll Love This Buffalo Chicken Meatballs

Buffalo Chicken Meatballs are a game-changer for any home cook. They’re incredibly easy to make, taking just 35 minutes from start to finish. The flavor? Out of this world! Each bite is a perfect blend of spice and savory goodness. Plus, they’re versatile enough to serve as an appetizer or a main dish. Whether you’re hosting friends or just treating yourself, these meatballs are sure to satisfy your cravings!

Ingredients for Buffalo Chicken Meatballs

Gathering the right ingredients is the first step to creating these mouthwatering Buffalo Chicken Meatballs. Here’s what you’ll need:

  • Ground chicken: The star of the show! It’s lean and absorbs flavors beautifully.
  • Breadcrumbs: These add texture and help bind the meatballs together. You can use regular or gluten-free options.
  • Grated Parmesan cheese: A sprinkle of this adds a rich, nutty flavor that elevates the dish.
  • Chopped green onions: Fresh and vibrant, they bring a mild onion flavor and a pop of color.
  • Egg: This acts as a binder, helping the meatballs hold their shape while cooking.
  • Buffalo sauce: The key ingredient that gives these meatballs their signature kick! Feel free to adjust the amount based on your spice tolerance.
  • Garlic powder: A must-have for that aromatic depth. It’s easier than fresh garlic and still packs a punch.
  • Onion powder: This adds a subtle sweetness and enhances the overall flavor profile.
  • Salt and black pepper: Essential seasonings that bring all the flavors together.
  • Olive oil: A drizzle before baking helps achieve that golden-brown crust.

For those looking to spice things up, consider adding a teaspoon of cayenne pepper to the mix. If you prefer a different protein, ground turkey works just as well. You can find the exact quantities for each ingredient at the bottom of the article, ready for printing!

How to Make Buffalo Chicken Meatballs

Creating Buffalo Chicken Meatballs is a straightforward process that anyone can master. Follow these simple steps, and you’ll have a plateful of spicy goodness ready in no time!

Step 1: Preheat the Oven

Start by preheating your oven to 400°F. This step is crucial because it ensures even cooking. While the oven heats up, line a baking sheet with parchment paper. This not only prevents sticking but also makes cleanup a breeze.

Step 2: Mix the Ingredients

In a large mixing bowl, combine all your ingredients: ground chicken, breadcrumbs, Parmesan cheese, green onions, egg, buffalo sauce, garlic powder, onion powder, salt, and black pepper. Use your hands or a spatula to mix everything until well combined. The mixture should be moist but not overly sticky. If it feels too wet, add a bit more breadcrumbs.

Step 3: Form the Meatballs

Now comes the fun part! Using your hands, shape the mixture into meatballs about 1 inch in diameter. This size is perfect for even cooking and easy snacking. Try to keep them uniform in size so they bake evenly. If you find the mixture sticking to your hands, a little water can help.

Step 4: Prepare for Baking

Drizzle olive oil over the meatballs before baking. This step is essential for achieving that golden-brown crust. The oil helps the meatballs crisp up nicely while keeping them juicy inside. Make sure to coat them evenly for the best results.

Step 5: Bake the Meatballs

Place the baking sheet in the preheated oven and bake for 20-25 minutes. Keep an eye on them! You’ll know they’re done when they’re golden brown and cooked through. A meat thermometer should read 165°F in the center. This ensures they’re safe to eat and perfectly juicy.

Step 6: Toss in Buffalo Sauce

For an extra flavor boost, toss the cooked meatballs in additional buffalo sauce right before serving. This step enhances the spiciness and gives them that signature kick. Serve them warm, and watch them disappear!

Tips for Success

  • Use a cookie scoop for uniform meatballs; it saves time and ensures even cooking.
  • Don’t overmix the ingredients; this keeps the meatballs tender.
  • Let the meatballs rest for a few minutes after baking for better flavor absorption.
  • Experiment with different buffalo sauces to find your perfect heat level.
  • Serve with a side of ranch or blue cheese for a cooling contrast.

Equipment Needed

  • Baking sheet: A standard sheet works, but a rimmed one prevents spills.
  • Parchment paper: Use it for easy cleanup; aluminum foil is a good alternative.
  • Mixing bowl: Any large bowl will do; a stand mixer can save time.
  • Cookie scoop: This helps shape uniform meatballs; a tablespoon works too.

Variations

  • Spicy Buffalo Chicken Meatballs: Add a teaspoon of cayenne pepper or a splash of hot sauce to the mixture for an extra kick.
  • Cheesy Buffalo Chicken Meatballs: Incorporate shredded mozzarella or cheddar cheese into the meatball mixture for a gooey surprise.
  • Vegetarian Option: Substitute ground chicken with a plant-based meat alternative or finely chopped mushrooms and beans for a hearty vegetarian version.
  • Herbed Buffalo Chicken Meatballs: Mix in fresh herbs like parsley or cilantro for a burst of freshness.
  • Gluten-Free Version: Use gluten-free breadcrumbs or crushed gluten-free crackers to keep these meatballs suitable for gluten-sensitive diets.

Serving Suggestions

  • Pair with crunchy celery sticks for a refreshing contrast to the spicy meatballs.
  • Serve with creamy blue cheese or ranch dressing for dipping.
  • For drinks, try pairing with a cold beer or a zesty lemonade.
  • Arrange on a platter with fresh herbs for a vibrant presentation.

FAQs about Buffalo Chicken Meatballs

As you dive into the world of Buffalo Chicken Meatballs, you might have a few questions. Here are some common queries that can help you navigate this delicious dish:

Can I make Buffalo Chicken Meatballs ahead of time?

Absolutely! You can prepare the meatballs and store them in the fridge for up to 24 hours before baking. Just remember to cover them tightly to keep them fresh. You can also freeze them for longer storage; just bake them straight from the freezer, adding a few extra minutes to the cooking time.

What can I serve with Buffalo Chicken Meatballs?

These meatballs are versatile! Serve them with celery sticks and blue cheese dressing for a classic pairing. You can also toss them in a salad, serve them in a sub sandwich, or enjoy them with a side of roasted veggies for a complete meal.

How spicy are these meatballs?

The spice level can be adjusted based on your preference. The base recipe is moderately spicy, thanks to the buffalo sauce. If you like it hotter, add cayenne pepper or use a spicier buffalo sauce. For a milder version, reduce the amount of buffalo sauce or opt for a milder brand.

Can I use ground turkey instead of ground chicken?

Yes, ground turkey is a great substitute! It has a similar texture and flavor profile, making it an excellent alternative for those who prefer it. Just keep in mind that turkey can be a bit leaner, so you might want to add a touch more olive oil to keep the meatballs moist.

How do I know when the meatballs are done?

The best way to check for doneness is to use a meat thermometer. The internal temperature should reach 165°F. If you don’t have one, look for a golden-brown color and ensure they’re firm to the touch. They should not be pink in the center.

Final Thoughts

Buffalo Chicken Meatballs are more than just a dish; they’re a celebration of flavor and fun. Each bite is a delightful explosion of spice that brings people together, whether it’s game day or a cozy night in. I love how easy they are to whip up, making them perfect for any occasion. Plus, the joy of watching friends and family devour them is truly rewarding. So, roll up your sleeves, embrace the heat, and let these meatballs become a cherished part of your culinary repertoire. Trust me, you won’t regret it!

Ranis

Buffalo Chicken Meatballs: The Ultimate Flavor Explosion!

Buffalo Chicken Meatballs are a delicious and spicy appetizer made with ground chicken and coated in buffalo sauce, perfect for any gathering.
Prep Time 10 minutes
Cook Time 25 minutes
Total Time 35 minutes
Servings: 4 servings
Course: Appetizer
Cuisine: American
Calories: 250

Ingredients
  

  • 1 pound ground chicken
  • 1/2 cup breadcrumbs
  • 1/4 cup grated Parmesan cheese
  • 1/4 cup chopped green onions
  • 1 large egg
  • 1/4 cup buffalo sauce plus extra for serving
  • 1 teaspoon garlic powder
  • 1 teaspoon onion powder
  • 1/2 teaspoon salt
  • 1/2 teaspoon black pepper
  • 1 tablespoon olive oil

Method
 

  1. Preheat your oven to 400°F. Line a baking sheet with parchment paper.
  2. In a large mixing bowl, combine the ground chicken, breadcrumbs, Parmesan cheese, green onions, egg, buffalo sauce, garlic powder, onion powder, salt, and black pepper. Mix until well combined.
  3. Using your hands, form the mixture into meatballs about 1 inch in diameter and place them on the prepared baking sheet.
  4. Drizzle the olive oil over the meatballs to help them brown.
  5. Bake in the preheated oven for 20-25 minutes or until the meatballs are cooked through and golden brown.
  6. For extra flavor, toss the cooked meatballs in additional buffalo sauce before serving.
  7. Serve warm with celery sticks and blue cheese dressing on the side.

Nutrition

Serving: 1servingCalories: 250kcalCarbohydrates: 10gProtein: 24gFat: 12gSaturated Fat: 3gPolyunsaturated Fat: 9gCholesterol: 70mgSodium: 500mgFiber: 1g

Notes

  • For a spicier kick, add a teaspoon of cayenne pepper to the meatball mixture.
  • You can also substitute ground turkey for the ground chicken if preferred.

Tried this recipe?

Let us know how it was!

Hearty Slow-Cooked Sausage and Vegetable Casserole Delights!

Introduction to Hearty Slow-Cooked Sausage and Vegetable Casserole

There’s something magical about a dish that fills your home with warmth and comfort. The Hearty Slow-Cooked Sausage and Vegetable Casserole does just that.

Picture this: a long day at work, and all you want is a meal that practically cooks itself while you unwind. This casserole is your answer.

With its rich flavors and tender vegetables, it’s perfect for impressing family or friends. Plus, it’s a fantastic way to sneak in those veggies without anyone batting an eye. Let’s dive into this delicious journey together!

Why You’ll Love This Hearty Slow-Cooked Sausage and Vegetable Casserole

This Hearty Slow-Cooked Sausage and Vegetable Casserole is a game-changer for busy weeknights.

It’s incredibly easy to prepare, allowing you to toss everything in the slow cooker and forget about it.

The flavors meld beautifully over time, creating a dish that’s bursting with taste.

Plus, it’s a one-pot wonder, making cleanup a breeze.

Trust me, your taste buds and your schedule will thank you!

Ingredients for Hearty Slow-Cooked Sausage and Vegetable Casserole

Creating a Hearty Slow-Cooked Sausage and Vegetable Casserole is all about using fresh, vibrant ingredients that come together to create a comforting meal. Here’s what you’ll need:

  • Olive oil: This adds a rich flavor and helps brown the sausage, enhancing the overall taste.
  • Italian sausage: Choose between mild or spicy, depending on your heat preference. It’s the star of the dish!
  • Onion: Diced onions bring sweetness and depth to the casserole, making it aromatic.
  • Garlic: Minced garlic adds a punch of flavor that elevates the entire dish.
  • Carrots: Sliced carrots provide a natural sweetness and a pop of color.
  • Celery: This crunchy vegetable adds texture and a subtle earthiness.
  • Red bell pepper: Chopped red bell pepper contributes sweetness and vibrant color.
  • Zucchini: Chopped zucchini is tender and absorbs the flavors beautifully.
  • Diced tomatoes: A can of diced tomatoes (undrained) adds moisture and acidity, balancing the richness of the sausage.
  • Chicken broth: This adds depth and helps meld all the flavors together.
  • Dried oregano: A classic herb that complements the Italian sausage perfectly.
  • Dried thyme: This herb adds an earthy note that enhances the overall flavor profile.
  • Paprika: A sprinkle of paprika gives a subtle smokiness and a lovely color.
  • Salt and pepper: Essential for seasoning, adjust to your taste.
  • Frozen peas: Added at the end for a burst of color and sweetness.
  • Fresh parsley: Chopped parsley is a lovely garnish that adds freshness.

Feel free to get creative! You can swap the Italian sausage for turkey sausage or even a plant-based option for a lighter or vegetarian dish.

For exact quantities, check the bottom of the article where you can find everything available for printing.

How to Make Hearty Slow-Cooked Sausage and Vegetable Casserole

Creating this Hearty Slow-Cooked Sausage and Vegetable Casserole is a straightforward process that rewards you with a comforting meal.

Let’s break it down step by step, ensuring you have all the tips you need for success.

Step 1: Brown the Sausage

Start by heating the olive oil in a large skillet over medium heat.

Add the Italian sausage, breaking it apart with a spoon.

Cook until it’s nicely browned, about 5-7 minutes.

This step is crucial; browning the sausage enhances its flavor.

Once done, transfer the sausage to your slow cooker.

Step 2: Sauté the Vegetables

In the same skillet, toss in the diced onion and minced garlic.

Sauté for 2-3 minutes until the onion turns translucent.

Next, add the sliced carrots, celery, chopped red bell pepper, and zucchini.

Cook for another 5 minutes, stirring occasionally.

This quick sauté brings out the vegetables’ natural sweetness and adds depth to your casserole.

Step 3: Combine Ingredients in Slow Cooker

Now, it’s time to bring everything together.

Pour the sautéed vegetables into the slow cooker with the browned sausage.

Add the undrained diced tomatoes and chicken broth.

Sprinkle in the dried oregano, thyme, paprika, salt, and pepper.

Mix everything well, ensuring the flavors meld together beautifully.

Step 4: Slow Cook to Perfection

Cover your slow cooker and set it to low for 6-8 hours or high for 3-4 hours.

This slow cooking allows the flavors to develop and the vegetables to become tender.

If you’re busy, this is the perfect time to tackle other tasks or relax.

The aroma wafting through your home will be irresistible!

Step 5: Add Peas Before Serving

About 15 minutes before you’re ready to serve, stir in the frozen peas.

This adds a lovely burst of color and sweetness to the dish.

Let them heat through, and then it’s time to dish out your hearty casserole.

Garnish with fresh parsley for a touch of brightness.

Enjoy the satisfaction of a meal that’s both comforting and delicious!

Tips for Success

  • Prep your ingredients the night before to save time in the morning.
  • Don’t skip browning the sausage; it adds a depth of flavor that’s hard to beat.
  • Feel free to mix and match vegetables based on what you have on hand.
  • For a thicker casserole, reduce the chicken broth slightly.
  • Always taste and adjust seasoning before serving for the best flavor.

Equipment Needed

  • Slow cooker: Essential for this recipe; a Dutch oven can work too if you prefer stovetop cooking.
  • Large skillet: For browning the sausage and sautéing the vegetables; a non-stick pan makes cleanup easier.
  • Wooden spoon: Perfect for stirring and breaking up the sausage.
  • Cutting board and knife: For chopping your veggies with ease.

Variations

  • Spicy Kick: Add a pinch of red pepper flakes or use hot Italian sausage for an extra kick.
  • Vegetarian Delight: Swap the sausage for plant-based sausage or chickpeas for a hearty vegetarian option.
  • Root Vegetable Medley: Incorporate sweet potatoes or parsnips for a different flavor profile and added nutrition.
  • Herb Infusion: Experiment with fresh herbs like basil or rosemary for a fragrant twist.
  • Cheesy Goodness: Stir in some shredded cheese, like mozzarella or Parmesan, during the last 30 minutes of cooking for a creamy texture.

Serving Suggestions

  • Crusty Bread: Serve with a side of warm, crusty bread for dipping and soaking up the delicious sauce.
  • Salad: Pair with a fresh green salad dressed in a light vinaigrette for a refreshing contrast.
  • Wine: Enjoy with a glass of red wine, like Chianti, to complement the flavors.
  • Presentation: Garnish with extra parsley and serve in individual bowls for a cozy, inviting look.

FAQs about Hearty Slow-Cooked Sausage and Vegetable Casserole

Can I use different types of sausage in this casserole?

Absolutely! You can swap the Italian sausage for turkey sausage or even a plant-based option. Each choice will bring its unique flavor to the Hearty Slow-Cooked Sausage and Vegetable Casserole.

How can I make this casserole spicier?

If you’re looking for a kick, consider using hot Italian sausage or adding a pinch of red pepper flakes. Both options will elevate the heat in your dish!

Can I prepare this casserole in advance?

Yes! You can prep the ingredients the night before and store them in the fridge. Just combine everything in the slow cooker in the morning for a hassle-free dinner.

What can I serve with this casserole?

This Hearty Slow-Cooked Sausage and Vegetable Casserole pairs wonderfully with crusty bread or a fresh green salad. A glass of red wine also complements the flavors beautifully.

How do I store leftovers?

Store any leftovers in an airtight container in the fridge for up to three days. Reheat in the microwave or on the stovetop, adding a splash of broth if needed to keep it moist.

Final Thoughts

Cooking the Hearty Slow-Cooked Sausage and Vegetable Casserole is more than just preparing a meal; it’s about creating a moment of joy.

As the aromas fill your kitchen, you’ll feel a sense of comfort and satisfaction.

This dish brings family and friends together, sparking conversations and laughter around the table.

With its rich flavors and hearty ingredients, it’s a recipe that warms the soul.

So, whether it’s a busy weeknight or a cozy weekend, this casserole is your go-to for a fulfilling meal that everyone will love.

Enjoy every bite!

Ranis

Hearty Slow-Cooked Sausage and Vegetable Casserole Delights!

A hearty and flavorful slow-cooked casserole featuring Italian sausage and a variety of vegetables, perfect for a comforting meal.
Prep Time 15 minutes
Servings: 6 servings
Course: Main Dish
Cuisine: Italian
Calories: 320

Ingredients
  

  • 2 tablespoons olive oil
  • 1 pound Italian sausage mild or spicy, your choice
  • 1 medium onion diced
  • 2 cloves garlic minced
  • 2 medium carrots sliced
  • 2 celery stalks sliced
  • 1 red bell pepper chopped
  • 1 zucchini chopped
  • 1 can 14.5 ounces diced tomatoes, undrained
  • 1 cup chicken broth
  • 1 teaspoon dried oregano
  • 1 teaspoon dried thyme
  • 1 teaspoon paprika
  • Salt and pepper to taste
  • 1 cup frozen peas
  • Fresh parsley chopped (for garnish)

Method
 

  1. In a large skillet, heat the olive oil over medium heat. Add the Italian sausage and cook until browned, breaking it apart with a spoon, about 5-7 minutes. Transfer the sausage to a slow cooker.
  2. In the same skillet, add the onion and garlic. Sauté for 2-3 minutes until the onion is translucent. Add the carrots, celery, red bell pepper, and zucchini. Cook for another 5 minutes, then transfer the vegetables to the slow cooker.
  3. Pour in the diced tomatoes and chicken broth. Stir in the oregano, thyme, paprika, salt, and pepper. Mix everything well.
  4. Cover the slow cooker and cook on low for 6-8 hours or on high for 3-4 hours, until the vegetables are tender and the flavors meld together.
  5. About 15 minutes before serving, stir in the frozen peas and let them heat through.
  6. Serve hot, garnished with fresh parsley.

Nutrition

Serving: 1servingCalories: 320kcalCarbohydrates: 12gProtein: 20gFat: 22gSaturated Fat: 8gPolyunsaturated Fat: 14gCholesterol: 70mgSodium: 800mgFiber: 3gSugar: 4g

Notes

  • For a heartier dish, add 1 cup of cooked quinoa or rice during the last hour of cooking.
  • Substitute the Italian sausage with turkey sausage or plant-based sausage for a lighter or vegetarian option.

Tried this recipe?

Let us know how it was!

Banana Cinnamon Yogurt Pancakes: Create Fluffy Delights!

Introduction to Banana Cinnamon Yogurt Pancakes

There’s something magical about waking up to the smell of pancakes wafting through the house. These Banana Cinnamon Yogurt Pancakes are not just a breakfast; they’re a warm hug on a plate. Perfect for busy mornings or a leisurely weekend brunch, they combine the sweetness of ripe bananas with the warmth of cinnamon and the creaminess of Greek yogurt. Trust me, this recipe is a game-changer. It’s quick, easy, and sure to impress your loved ones. So grab your apron, and let’s whip up some fluffy delights that will make your mornings brighter!

Why You’ll Love This Banana Cinnamon Yogurt Pancakes

These Banana Cinnamon Yogurt Pancakes are a breakfast dream come true. They’re incredibly easy to whip up, making them perfect for those hectic mornings. The combination of banana and cinnamon creates a flavor explosion that dances on your taste buds. Plus, with Greek yogurt in the mix, you’re getting a nutritious boost. Whether you’re cooking for yourself or impressing family, these pancakes are sure to bring smiles all around!

Ingredients for Banana Cinnamon Yogurt Pancakes

Gathering the right ingredients is the first step to pancake perfection. Here’s what you’ll need for these delightful Banana Cinnamon Yogurt Pancakes:

  • All-purpose flour: The base of your pancakes, providing structure and fluffiness.
  • Baking powder: This leavening agent helps your pancakes rise, making them light and airy.
  • Baking soda: A little boost for extra fluffiness, especially when paired with acidic ingredients.
  • Salt: Just a pinch enhances the flavors and balances the sweetness.
  • Ground cinnamon: Adds warmth and a comforting aroma, making each bite feel like a cozy hug.
  • Plain Greek yogurt: This creamy ingredient not only adds moisture but also packs in protein for a nutritious start to your day.
  • Large ripe banana: The star of the show! Mashed banana brings natural sweetness and moisture.
  • Large eggs: They bind everything together and contribute to the fluffiness.
  • Honey or maple syrup: A touch of sweetness to enhance the flavor; choose your favorite!
  • Vanilla extract: Just a splash adds depth and richness to the batter.
  • Milk: Adjusts the batter consistency; use more if you prefer thinner pancakes.
  • Butter or oil: For cooking, ensuring your pancakes don’t stick and get that golden-brown finish.

For those looking to mix things up, consider adding chocolate chips or nuts for extra flavor and texture. You can find the exact quantities for each ingredient at the bottom of the article, ready for printing!

How to Make Banana Cinnamon Yogurt Pancakes

Now that you have all your ingredients ready, let’s dive into the fun part: making these fluffy Banana Cinnamon Yogurt Pancakes! Follow these simple steps, and you’ll be flipping pancakes like a pro in no time.

Step 1: Prepare the Dry Ingredients

Start by grabbing a mixing bowl. Whisk together the all-purpose flour, baking powder, baking soda, salt, and ground cinnamon. This blend is the foundation of your pancakes, ensuring they rise beautifully and have that warm, comforting flavor. Make sure there are no lumps; a smooth mix is key!

Step 2: Mix the Wet Ingredients

In another bowl, combine the plain Greek yogurt, mashed banana, eggs, honey (or maple syrup), vanilla extract, and milk. Mix until everything is well combined. The yogurt adds creaminess, while the banana brings natural sweetness. This mixture is where the magic begins!

Step 3: Combine Wet and Dry Ingredients

Now, pour the wet ingredients into the bowl with the dry ingredients. Stir gently until just combined. Be careful not to overmix; a few lumps are perfectly fine. If the batter feels too thick, add a splash more milk to reach your desired consistency. You want it to be pourable but not runny!

Step 4: Heat the Skillet

Heat a non-stick skillet or griddle over medium heat. Add a small amount of butter or oil to coat the surface. This step is crucial for achieving that golden-brown crust. If the skillet is too hot, your pancakes might burn, so keep an eye on the temperature!

Step 5: Cook the Pancakes

Pour about 1/4 cup of batter onto the skillet for each pancake. Cook until bubbles form on the surface, which should take about 2-3 minutes. When you see those bubbles, it’s time to flip! Cook for another 2-3 minutes until golden brown. Repeat with the remaining batter, adding more butter or oil as needed.

Step 6: Serve and Enjoy

Once your pancakes are cooked to perfection, serve them warm. Top with sliced bananas, a drizzle of maple syrup, or a dollop of yogurt. Each bite is a delightful combination of flavors and textures. Enjoy your breakfast masterpiece!

Tips for Success

  • Let the batter rest for 5-10 minutes for fluffier pancakes.
  • Use a ladle for even pouring; it helps with uniform pancake sizes.
  • Keep the skillet at medium heat to avoid burning.
  • Experiment with add-ins like chocolate chips or nuts for extra flavor.
  • Don’t rush the flipping; wait for bubbles to form on the surface.

Equipment Needed

  • Mixing bowls: A set of two will do; you can use any large bowls you have.
  • Whisk: Essential for mixing; a fork can work in a pinch.
  • Non-stick skillet or griddle: A cast-iron skillet is a great alternative.
  • Spatula: A flat spatula helps with flipping; a wooden spoon can also work.

Variations

  • Whole Wheat Flour: Swap all-purpose flour for whole wheat flour for a heartier, more nutritious pancake.
  • Dairy-Free Option: Use coconut yogurt and almond milk to make these pancakes dairy-free.
  • Vegan Version: Replace eggs with flaxseed meal mixed with water and use maple syrup instead of honey.
  • Spiced Up: Add a pinch of nutmeg or pumpkin spice for an extra layer of flavor.
  • Fruit Add-Ins: Toss in blueberries or chopped apples for a fruity twist.

Serving Suggestions

  • Fresh Fruit: Serve with a side of mixed berries or sliced strawberries for a refreshing contrast.
  • Yogurt Parfait: Layer pancakes with Greek yogurt and granola for a delightful parfait.
  • Drinks: Pair with freshly brewed coffee or a smoothie for a complete breakfast.
  • Presentation: Stack pancakes high and drizzle with maple syrup for an eye-catching display.

FAQs about Banana Cinnamon Yogurt Pancakes

Can I make Banana Cinnamon Yogurt Pancakes ahead of time?

Absolutely! You can prepare the batter the night before and store it in the fridge. Just give it a good stir before cooking. You can also cook the pancakes in advance and reheat them in the toaster or microwave for a quick breakfast.

What can I substitute for Greek yogurt?

If you don’t have Greek yogurt on hand, you can use regular yogurt or even applesauce for a lighter option. Just keep in mind that the texture and flavor may vary slightly.

How do I store leftover pancakes?

Store any leftover pancakes in an airtight container in the fridge for up to three days. You can also freeze them for longer storage. Just layer them with parchment paper to prevent sticking.

Can I make these pancakes gluten-free?

Yes! Simply substitute the all-purpose flour with a gluten-free flour blend. Make sure to check that your baking powder is gluten-free as well.

What toppings go well with Banana Cinnamon Yogurt Pancakes?

These pancakes are delicious with a variety of toppings! Try fresh fruit, a drizzle of honey or maple syrup, a dollop of yogurt, or even a sprinkle of nuts for added crunch. The possibilities are endless!

Final Thoughts

Making Banana Cinnamon Yogurt Pancakes is more than just cooking; it’s about creating moments. The aroma of cinnamon and banana fills the kitchen, inviting everyone to gather around the table. Each fluffy bite is a reminder of the simple joys in life, whether it’s a busy weekday or a relaxed weekend. These pancakes are not just a meal; they’re a way to connect with family and friends. So, grab your ingredients, and let the laughter and deliciousness unfold. Trust me, once you try these pancakes, they’ll become a cherished part of your breakfast routine!

Ranis

Banana Cinnamon Yogurt Pancakes: Create Fluffy Delights!

Delicious and fluffy pancakes made with banana, cinnamon, and Greek yogurt for a nutritious breakfast.
Prep Time 10 minutes
Cook Time 15 minutes
Total Time 25 minutes
Servings: 4 servings
Course: Breakfast
Cuisine: American
Calories: 210

Ingredients
  

  • 1 cup all-purpose flour
  • 1 tablespoon baking powder
  • 1/2 teaspoon baking soda
  • 1/2 teaspoon salt
  • 1 teaspoon ground cinnamon
  • 1 cup plain Greek yogurt
  • 1 large ripe banana mashed
  • 2 large eggs
  • 2 tablespoons honey or maple syrup
  • 1 teaspoon vanilla extract
  • 2 tablespoons milk more if needed
  • Butter or oil for cooking

Method
 

  1. In a mixing bowl, whisk together the flour, baking powder, baking soda, salt, and cinnamon.
  2. In another bowl, combine the Greek yogurt, mashed banana, eggs, honey (or maple syrup), vanilla extract, and milk. Mix until well combined.
  3. Pour the wet ingredients into the dry ingredients and stir gently until just combined. If the batter is too thick, add a little more milk to reach your desired consistency.
  4. Heat a non-stick skillet or griddle over medium heat and add a small amount of butter or oil.
  5. Pour about 1/4 cup of batter onto the skillet for each pancake. Cook until bubbles form on the surface, about 2-3 minutes. Flip and cook for another 2-3 minutes until golden brown.
  6. Repeat with the remaining batter, adding more butter or oil as needed.
  7. Serve warm with your favorite toppings such as sliced bananas, maple syrup, or yogurt.

Nutrition

Serving: 1pancakeCalories: 210kcalCarbohydrates: 25gProtein: 8gFat: 6gSaturated Fat: 2gPolyunsaturated Fat: 4gCholesterol: 70mgSodium: 300mgFiber: 1gSugar: 8g

Notes

  • For a fluffier pancake, let the batter rest for 5-10 minutes before cooking.
  • Try adding chocolate chips or nuts to the batter for extra flavor and texture.

Tried this recipe?

Let us know how it was!

Lemon Blueberry Loaf: A Refreshing Recipe You’ll Love!

Introduction to Lemon Blueberry Loaf

When life hands you lemons, make a Lemon Blueberry Loaf!

This delightful treat is a perfect blend of tart and sweet, making it an ideal companion for your morning coffee or an afternoon snack.

I remember the first time I baked this loaf; the aroma of fresh lemons and blueberries wafted through my kitchen, instantly lifting my spirits.

Whether you’re looking for a quick solution for a busy day or a dish to impress your loved ones, this recipe is sure to become a favorite.

Let’s dive into the refreshing world of Lemon Blueberry Loaf!

Why You’ll Love This Lemon Blueberry Loaf

This Lemon Blueberry Loaf is a game-changer in the kitchen.

It’s incredibly easy to whip up, making it perfect for those busy weeknights or lazy weekends.

The vibrant flavors of lemon and blueberries dance together, creating a taste that’s both refreshing and comforting.

Plus, it’s versatile enough to serve at brunch, as a snack, or even as a dessert.

Trust me, once you try it, you’ll be hooked!

Ingredients for Lemon Blueberry Loaf

Creating a delicious Lemon Blueberry Loaf starts with gathering the right ingredients.

Here’s what you’ll need:

  • All-purpose flour: The backbone of your loaf, providing structure and texture.
  • Baking powder: This leavening agent helps the loaf rise, giving it that fluffy texture.
  • Baking soda: Works alongside baking powder for an extra lift.
  • Salt: Enhances the flavors, balancing the sweetness of the blueberries.
  • Unsalted butter: Adds richness and moisture; make sure it’s softened for easy mixing.
  • Granulated sugar: Sweetens the loaf and contributes to its lovely golden crust.
  • Large eggs: Bind the ingredients together and add moisture.
  • Vanilla extract: A splash of this adds depth to the flavor profile.
  • Sour cream: Keeps the loaf moist and tender, while adding a slight tang.
  • Fresh lemon juice: The star of the show, providing that zesty brightness.
  • Lemon zest: Intensifies the lemon flavor, giving your loaf a fragrant kick.
  • Fresh blueberries: Bursts of sweetness and color; frozen blueberries work too if thawed.

For those who like to experiment, consider adding poppy seeds for a delightful crunch or a glaze made from powdered sugar and lemon juice for an extra touch of sweetness.

Exact quantities for these ingredients can be found at the bottom of the article, ready for printing!

How to Make Lemon Blueberry Loaf

Baking a Lemon Blueberry Loaf is a delightful journey that fills your kitchen with warmth and tantalizing aromas.

Follow these simple steps, and you’ll have a loaf that’s bursting with flavor and perfect for any occasion.

Step 1: Preheat the Oven

Start by preheating your oven to 350°F (175°C).

This is crucial for ensuring your loaf bakes evenly.

While the oven warms up, prepare your loaf pan by greasing it or lining it with parchment paper.

This will make it easier to remove the loaf later.

Step 2: Mix Dry Ingredients

In a medium bowl, whisk together the all-purpose flour, baking powder, baking soda, and salt.

This step ensures that the leavening agents are evenly distributed throughout the flour.

A well-mixed dry blend leads to a perfectly risen Lemon Blueberry Loaf.

Step 3: Cream Butter and Sugar

In a large bowl, cream the softened butter and granulated sugar together until the mixture is light and fluffy, about 3-4 minutes.

This step is crucial for achieving a light texture in your loaf.

The air you incorporate here will help it rise beautifully.

Step 4: Add Eggs and Flavorings

Add the eggs one at a time, mixing well after each addition.

Then, stir in the vanilla extract, sour cream, fresh lemon juice, and lemon zest until everything is combined.

This builds a rich flavor profile that makes your loaf irresistible.

Step 5: Combine Wet and Dry Ingredients

Gradually add the dry ingredients to the wet mixture, mixing until just combined.

Be careful not to overmix; this will help maintain a tender loaf.

A few lumps are perfectly fine!

Step 6: Fold in Blueberries

Gently fold in the fresh blueberries, taking care not to break them.

These little gems will add bursts of sweetness throughout your loaf.

Their vibrant color will also make your Lemon Blueberry Loaf visually appealing.

Step 7: Bake the Loaf

Pour the batter into your prepared loaf pan and smooth the top with a spatula.

Bake for 50-60 minutes, or until a toothpick inserted into the center comes out clean.

The aroma wafting through your kitchen will be heavenly!

Step 8: Cool and Serve

Once baked, allow the loaf to cool in the pan for about 10 minutes.

Then, transfer it to a wire rack to cool completely.

This cooling process helps set the texture, making it easier to slice and serve.

Tips for Success

  • Use room temperature ingredients for better mixing and a smoother batter.
  • Don’t overmix the batter; a few lumps are okay for a tender loaf.
  • For even baking, place the loaf pan in the center of the oven.
  • Check for doneness a few minutes early to avoid overbaking.
  • Let the loaf cool completely before slicing for cleaner cuts.

Equipment Needed

  • 9×5-inch loaf pan: Essential for shaping your loaf; a round cake pan works in a pinch.
  • Mixing bowls: Use a large bowl for wet ingredients and a medium one for dry; any size will do.
  • Whisk: Perfect for mixing dry ingredients; a fork can also work.
  • Spatula: Great for folding in blueberries and smoothing the batter; a wooden spoon is a good alternative.

Variations

  • Gluten-Free: Substitute all-purpose flour with a gluten-free blend for a delicious gluten-free Lemon Blueberry Loaf.
  • Vegan: Replace eggs with flax eggs (1 tablespoon ground flaxseed mixed with 2.5 tablespoons water per egg) and use plant-based butter or oil.
  • Nutty Twist: Add chopped walnuts or pecans for a delightful crunch and added flavor.
  • Herbal Infusion: Incorporate fresh herbs like thyme or basil for a unique flavor profile that complements the lemon.
  • Berry Medley: Mix in other berries like raspberries or blackberries for a colorful and flavorful loaf.

Serving Suggestions

  • Pair your Lemon Blueberry Loaf with a dollop of whipped cream for a delightful dessert.
  • Serve it alongside a refreshing glass of iced tea or lemonade for a perfect summer treat.
  • For brunch, slice it thin and serve with fresh fruit and yogurt.
  • Drizzle a lemon glaze on top for an elegant presentation.

FAQs about Lemon Blueberry Loaf

Can I use frozen blueberries in my Lemon Blueberry Loaf?

Absolutely! Frozen blueberries work just as well as fresh ones. Just make sure to thaw and drain them before folding them into the batter to avoid excess moisture.

How do I store leftover Lemon Blueberry Loaf?

To keep your loaf fresh, wrap it tightly in plastic wrap or aluminum foil. Store it at room temperature for up to three days, or in the fridge for up to a week. You can also freeze slices for later enjoyment!

Can I make this Lemon Blueberry Loaf gluten-free?

Yes! Simply substitute the all-purpose flour with a gluten-free flour blend. Just ensure it contains xanthan gum for the best texture.

What can I add to enhance the flavor of my loaf?

Consider adding a teaspoon of poppy seeds for a delightful crunch or a lemon glaze made from powdered sugar and lemon juice for an extra sweet touch.

Is this Lemon Blueberry Loaf suitable for breakfast?

Definitely! This loaf is perfect for breakfast or brunch. Pair it with yogurt or a side of fresh fruit for a balanced meal that’s both delicious and satisfying.

Final Thoughts

Baking this Lemon Blueberry Loaf is more than just a culinary task; it’s an experience that fills your home with warmth and joy.

The vibrant flavors of lemon and blueberries create a delightful harmony that’s hard to resist.

Each slice offers a burst of sunshine, perfect for brightening up any day.

Whether you’re sharing it with family or savoring it solo, this loaf brings a sense of comfort and satisfaction.

So, roll up your sleeves, embrace the process, and enjoy the delicious rewards of your efforts.

You’ll find that this recipe quickly becomes a cherished favorite!

Ranis

Lemon Blueberry Loaf: A Refreshing Recipe You’ll Love!

A refreshing Lemon Blueberry Loaf that combines the tartness of lemon with the sweetness of blueberries, perfect for any occasion.
Prep Time 15 minutes
Cook Time 1 hour
Total Time 1 hour 15 minutes
Servings: 8 servings
Course: Dessert
Cuisine: American
Calories: 210

Ingredients
  

  • 2 cups all-purpose flour
  • 1 teaspoon baking powder
  • 1/2 teaspoon baking soda
  • 1/4 teaspoon salt
  • 1/2 cup unsalted butter softened
  • 1 cup granulated sugar
  • 2 large eggs
  • 1 teaspoon vanilla extract
  • 1/2 cup sour cream
  • 1/4 cup fresh lemon juice
  • Zest of 1 lemon
  • 1 cup fresh blueberries or frozen, thawed

Method
 

  1. Preheat your oven to 350°F (175°C). Grease a 9x5-inch loaf pan or line it with parchment paper.
  2. In a medium bowl, whisk together the flour, baking powder, baking soda, and salt. Set aside.
  3. In a large bowl, cream the softened butter and sugar together until light and fluffy, about 3-4 minutes.
  4. Add the eggs one at a time, mixing well after each addition. Stir in the vanilla extract, sour cream, lemon juice, and lemon zest until combined.
  5. Gradually add the dry ingredients to the wet ingredients, mixing until just combined. Be careful not to overmix.
  6. Gently fold in the blueberries.
  7. Pour the batter into the prepared loaf pan and smooth the top.
  8. Bake for 50-60 minutes, or until a toothpick inserted into the center comes out clean.
  9. Allow the loaf to cool in the pan for about 10 minutes before transferring it to a wire rack to cool completely.

Nutrition

Serving: 1sliceCalories: 210kcalCarbohydrates: 30gProtein: 3gFat: 9gSaturated Fat: 5gPolyunsaturated Fat: 4gCholesterol: 40mgSodium: 150mgFiber: 1gSugar: 15g

Notes

  • For a glaze, mix 1 cup of powdered sugar with 2 tablespoons of lemon juice and drizzle over the cooled loaf.
  • Try adding a teaspoon of poppy seeds for a delightful crunch and added texture.

Tried this recipe?

Let us know how it was!

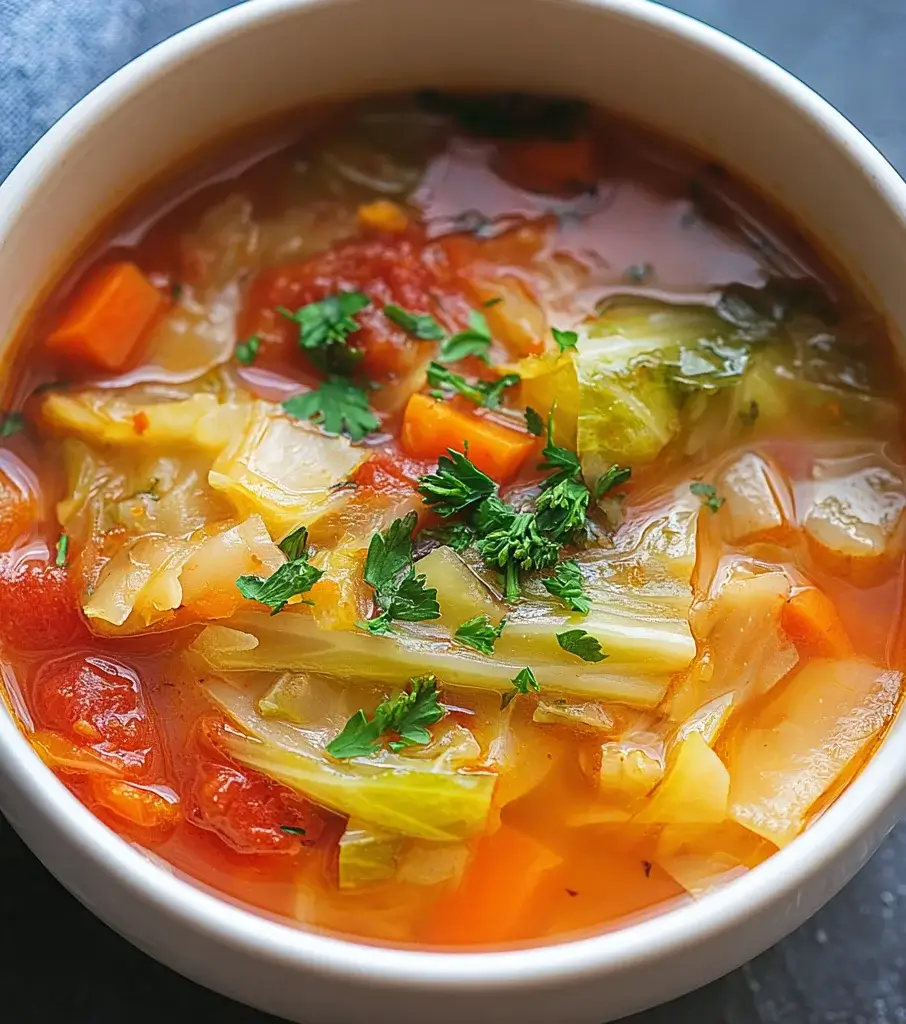
Hearty Cabbage Detox Soup: Revitalize Your Health Today!

Introduction to Hearty Cabbage Detox Soup

There’s something comforting about a warm bowl of soup, especially when it’s packed with nutrients. My journey with the Hearty Cabbage Detox Soup began on a chilly evening when I craved something revitalizing yet simple. This soup is not just a meal; it’s a hug in a bowl. Perfect for busy days or when you want to impress your loved ones, it’s a delightful way to nourish your body. With fresh vegetables and herbs, this recipe is a quick solution that brings warmth and health to your table. Let’s dive into this delicious adventure!

Why You’ll Love This Hearty Cabbage Detox Soup

This Hearty Cabbage Detox Soup is a game-changer for anyone looking to eat healthier without sacrificing flavor. It’s quick to whip up, taking just 45 minutes from start to finish. The vibrant mix of vegetables not only makes it visually appealing but also bursting with taste. Plus, it’s versatile! You can easily customize it based on what’s in your fridge. It’s a delicious way to fuel your body and feel great!

Ingredients for Hearty Cabbage Detox Soup

Gathering the right ingredients is half the fun of cooking! For this Hearty Cabbage Detox Soup, you’ll need a colorful array of fresh vegetables and herbs that not only enhance the flavor but also pack a nutritional punch.

  • Olive oil: A healthy fat that adds richness and helps sauté the aromatics.
  • Onion: Chopped onion brings sweetness and depth to the soup.
  • Garlic: Minced garlic adds a fragrant kick that elevates the overall taste.
  • Green cabbage: The star of the show! It’s crunchy, nutritious, and perfect for detoxing.
  • Carrots: Diced carrots add a touch of sweetness and vibrant color.
  • Celery: Diced celery contributes a refreshing crunch and enhances the soup’s flavor.
  • Bell pepper: Any color works! It adds sweetness and a pop of color.
  • Diced tomatoes: Canned tomatoes provide a rich base and acidity to balance the flavors.
  • Vegetable broth: The liquid gold that brings everything together, making the soup hearty.
  • Dried thyme and oregano: These herbs infuse the soup with aromatic flavors.
  • Red pepper flakes: Optional, but they add a nice heat if you’re feeling adventurous!
  • Salt and pepper: Essential for seasoning and enhancing all the flavors.
  • Green beans: Trimmed and cut, they add a lovely texture and freshness.
  • Frozen peas: These little gems are easy to add and bring a sweet burst of flavor.
  • Fresh lemon juice: A splash of acidity that brightens the soup and enhances the flavors.
  • Fresh parsley: Chopped parsley for garnish adds a fresh touch and a pop of color.

Feel free to customize the ingredients based on what you have on hand! For instance, zucchini or spinach can be great additions. You can find the exact quantities at the bottom of the article, ready for printing!

How to Make Hearty Cabbage Detox Soup

Making this Hearty Cabbage Detox Soup is a breeze! Follow these simple steps, and you’ll have a delicious, nutritious meal ready in no time. Let’s get cooking!

Step 1: Sauté the Aromatics

Start by heating the olive oil in a large pot over medium heat. Once it’s shimmering, toss in the chopped onion. Sauté for about 5 minutes until it turns translucent. The aroma will fill your kitchen, making it hard to resist! Add the minced garlic and cook for another minute. This step lays the flavorful foundation for your soup.

Step 2: Add the Vegetables

Next, it’s time to add the chopped cabbage, diced carrots, diced celery, and bell pepper. Stir everything together and sauté for about 5-7 minutes. You want the vegetables to soften but still retain some crunch. This colorful medley not only looks great but also packs a nutritional punch!

Step 3: Incorporate the Broth and Seasonings

Pour in the diced tomatoes with their juices and the vegetable broth. Stir in the dried thyme, oregano, and red pepper flakes if you’re feeling adventurous. Season with salt and pepper to taste. This is where the magic happens! Bring the mixture to a boil, then reduce the heat to low.

Step 4: Simmer the Soup

Let the soup simmer for about 20 minutes. Stir occasionally to keep everything well combined. The flavors will meld beautifully during this time, creating a hearty base for your detox soup. You’ll notice the vibrant colors and enticing aromas filling your kitchen!

Step 5: Add the Final Ingredients

After 20 minutes, it’s time to add the green beans and frozen peas. These will add a lovely texture and sweetness to the soup. Continue to simmer for an additional 10 minutes until all the vegetables are tender. Don’t forget to stir occasionally!

Step 6: Serve and Enjoy

Finally, stir in the fresh lemon juice to brighten the flavors. Taste and adjust the seasoning if needed. Remove the pot from heat and let it cool slightly. Serve hot, garnished with fresh parsley. Enjoy your Hearty Cabbage Detox Soup with a slice of crusty bread or a light salad for a complete meal!

Tips for Success

  • Prep your ingredients ahead of time to save on cooking time.
  • Don’t skip the sautéing step; it builds flavor!
  • Adjust the seasoning gradually; taste as you go.
  • For a heartier soup, add cooked chicken or beans.
  • Store leftovers in an airtight container for up to 3 days.

Equipment Needed

  • Large pot: A sturdy stockpot works best, but any large pot will do.
  • Cutting board: Essential for chopping your veggies; a plastic or wooden one is fine.
  • Sharp knife: A good chef’s knife makes prep a breeze.
  • Wooden spoon: Perfect for stirring and mixing your ingredients.
  • Measuring cups and spoons: Handy for precise ingredient measurements.

Variations of Hearty Cabbage Detox Soup

  • Protein Boost: Add cooked chicken, turkey, or beans for a heartier meal.
  • Spicy Kick: Toss in some diced jalapeños or a splash of hot sauce for extra heat.
  • Herb Infusion: Experiment with fresh herbs like basil or cilantro for a unique flavor twist.
  • Root Veggies: Substitute or add sweet potatoes or parsnips for a sweeter, earthy taste.
  • Grain Addition: Stir in cooked quinoa or brown rice for added texture and nutrition.
  • Vegan Delight: Keep it plant-based by using vegetable broth and omitting any animal products.

Serving Suggestions for Hearty Cabbage Detox Soup

  • Crusty Bread: Serve with a warm slice of sourdough or whole-grain bread for dipping.
  • Salad: Pair with a light mixed greens salad drizzled with vinaigrette.
  • Herb Garnish: Top with extra fresh parsley or a sprinkle of grated Parmesan for added flavor.
  • Refreshing Drink: Enjoy with a glass of iced herbal tea or sparkling water with lemon.

FAQs about Hearty Cabbage Detox Soup

Can I make Hearty Cabbage Detox Soup ahead of time?

Absolutely! This soup actually tastes even better the next day as the flavors meld together. Just store it in an airtight container in the fridge for up to three days.

Is this soup suitable for a vegan diet?

Yes! The Hearty Cabbage Detox Soup is entirely plant-based, making it a perfect choice for vegans. Just ensure you use vegetable broth instead of chicken broth.

Can I freeze the soup for later?

Definitely! This soup freezes well. Just let it cool completely before transferring it to freezer-safe containers. It can last up to three months in the freezer.

What can I add for extra protein?

If you want to boost the protein content, consider adding cooked chicken, turkey, or even beans like chickpeas or black beans. They blend well with the flavors of the soup.

How can I customize the vegetables in the soup?

The beauty of this detox soup is its versatility! Feel free to swap in any vegetables you have on hand, like zucchini, spinach, or even kale. Just keep the cooking times in mind!

Final Thoughts

Cooking the Hearty Cabbage Detox Soup is more than just preparing a meal; it’s an experience that nourishes both body and soul. Each spoonful is a reminder of the simple joys of home cooking, filled with vibrant flavors and wholesome ingredients. Whether you’re enjoying it on a quiet evening or sharing it with friends, this soup brings warmth and comfort to the table. It’s a delightful way to embrace healthy eating without sacrificing taste. So, grab your pot and let this soup be your next culinary adventure, revitalizing your health one bowl at a time!

Ranis

Hearty Cabbage Detox Soup: Revitalize Your Health Today!

A nutritious and revitalizing soup made with fresh vegetables and herbs, perfect for a detox.
Prep Time 15 minutes
Cook Time 30 minutes
Total Time 45 minutes
Servings: 6 servings
Course: Soup
Cuisine: American
Calories: 120

Ingredients
  

  • 2 tablespoons olive oil
  • 1 medium onion chopped
  • 3 cloves garlic minced
  • 4 cups chopped green cabbage
  • 2 medium carrots diced
  • 2 celery stalks diced
  • 1 bell pepper diced (any color)
  • 1 can 14.5 ounces diced tomatoes, undrained
  • 6 cups vegetable broth
  • 1 teaspoon dried thyme
  • 1 teaspoon dried oregano
  • 1/2 teaspoon red pepper flakes optional
  • Salt and pepper to taste
  • 1 cup green beans trimmed and cut into 1-inch pieces
  • 1 cup frozen peas
  • 2 tablespoons fresh lemon juice
  • Fresh parsley chopped (for garnish)

Method
 

  1. In a large pot, heat the olive oil over medium heat. Add the chopped onion and sauté for about 5 minutes until it becomes translucent. Stir in the minced garlic and cook for another minute until fragrant.
  2. Add the chopped cabbage, diced carrots, diced celery, and diced bell pepper to the pot. Sauté the vegetables for about 5-7 minutes until they begin to soften.
  3. Pour in the diced tomatoes with their juices and the vegetable broth. Stir in the dried thyme, dried oregano, red pepper flakes (if using), and season with salt and pepper to taste.
  4. Bring the mixture to a boil, then reduce the heat to low and let it simmer for about 20 minutes, stirring occasionally.
  5. After 20 minutes, add the green beans and frozen peas to the pot. Continue to simmer for an additional 10 minutes until all the vegetables are tender.
  6. Stir in the fresh lemon juice and adjust seasoning if needed. Remove from heat and let it cool slightly before serving.
  7. Serve hot, garnished with fresh parsley.

Nutrition

Serving: 1cupCalories: 120kcalCarbohydrates: 15gProtein: 4gFat: 5gSaturated Fat: 0.5gPolyunsaturated Fat: 4.5gSodium: 500mgFiber: 4gSugar: 5g

Notes

  • For added protein, consider adding cooked chicken or beans to the soup.
  • Feel free to customize the vegetables based on what you have on hand, such as zucchini, spinach, or kale.

Tried this recipe?

Let us know how it was!

Chicken and Dumplings: A Comforting Recipe You’ll Love!

Introduction to Chicken and Dumplings

There’s something undeniably comforting about a warm bowl of Chicken and Dumplings. It takes me back to my childhood, where the aroma of simmering broth filled the house, promising a hearty meal. This dish is more than just food; it’s a hug in a bowl, perfect for those busy weeknights or when you want to impress your loved ones with minimal effort. With tender chicken, vibrant veggies, and fluffy dumplings, this recipe is a quick solution that brings everyone together. Trust me, once you try it, you’ll understand why it’s a classic favorite!

Why You’ll Love This Chicken and Dumplings

This Chicken and Dumplings recipe is a game-changer for anyone looking for a quick, satisfying meal. It’s easy to whip up, taking just 45 minutes from start to finish. The flavors meld beautifully, creating a dish that’s both hearty and comforting. Plus, it’s a one-pot wonder, which means less cleanup for you. Whether you’re feeding a family or just yourself, this dish is sure to please and warm your heart.

Ingredients for Chicken and Dumplings

Gathering the right ingredients is the first step to creating a delicious bowl of Chicken and Dumplings. Here’s what you’ll need:

  • Olive oil: This is your base for sautéing, adding a rich flavor to the veggies.
  • Onion: Diced onion brings sweetness and depth to the broth.
  • Garlic: Minced garlic adds a punch of flavor that elevates the dish.
  • Carrots: Sliced carrots provide a pop of color and natural sweetness.
  • Celery: This crunchy veggie adds freshness and a subtle earthiness.
  • Dried thyme: A classic herb that complements the chicken beautifully.
  • Dried rosemary: This aromatic herb adds a fragrant touch to the dish.
  • Salt and black pepper: Essential for seasoning, enhancing all the flavors.
  • Chicken broth: The heart of the dish, creating a savory base for everything.
  • Cooked chicken: Shredded chicken is the star protein, making it hearty and filling.
  • Frozen peas: These add a burst of color and sweetness, plus they’re super convenient.
  • Milk: Used in both the broth and dumplings, it adds creaminess.
  • All-purpose flour: The main ingredient for the dumplings, giving them structure.
  • Baking powder: This helps the dumplings rise, making them fluffy.
  • Unsalted butter: Melted butter adds richness to the dumpling mixture.
  • Additional milk (for dumplings): This ensures the dumplings are moist and tender.

Feel free to customize your Chicken and Dumplings! You can use rotisserie chicken for a quicker option or add fresh herbs like parsley or chives for an extra layer of flavor. For exact measurements, check the bottom of the article where you can find everything available for printing.

How to Make Chicken and Dumplings

Now that you have all your ingredients ready, let’s dive into the heart of the matter: making Chicken and Dumplings. This process is straightforward and rewarding, perfect for a cozy night in. Follow these steps, and you’ll have a delicious meal in no time!

Step 1: Sauté the Vegetables

Start by heating the olive oil in a large pot over medium heat. Once it’s shimmering, toss in the diced onion. Cook it until it turns translucent, about 3-4 minutes. Then, add the minced garlic, sliced carrots, and celery. Stir everything together and let it cook for another 5 minutes. You want the veggies to be tender but not mushy. The aroma will be heavenly!

Step 2: Add Seasonings and Broth

Next, sprinkle in the dried thyme, rosemary, salt, and black pepper. These herbs are the secret to a flavorful broth. Pour in the chicken broth and bring the mixture to a gentle simmer. This is where the magic happens, as the flavors meld together beautifully. Let it simmer for a few minutes while you prepare for the next step.

Step 3: Mix in Chicken and Peas

Now, it’s time to add the shredded chicken and frozen peas to the pot. Stir them in gently, allowing the chicken to soak up all that savory goodness. Let the mixture simmer for about 10 minutes. This step ensures that everything is heated through and the flavors are well combined. You’ll start to see the broth thicken slightly, which is a good sign!

Step 4: Prepare the Dumpling Mixture

In a separate bowl, combine the all-purpose flour, baking powder, and salt for the dumplings. Mix them well. Then, add the melted butter and ½ cup of milk. Stir until just combined; don’t overmix! The dough should be thick but still a bit sticky. This is what will create those fluffy dumplings we all love.

Step 5: Cook the Dumplings

Using a spoon, drop generous spoonfuls of the dumpling mixture onto the simmering chicken mixture. Make sure to space them out a bit; they’ll expand as they cook. Once all the dumplings are in, cover the pot with a lid. This is crucial—don’t lift the lid for about 15 minutes! The steam will help the dumplings rise and become fluffy.

Step 6: Check for Doneness

After 15 minutes, it’s time for the moment of truth. Carefully lift the lid and check the dumplings. They should be fluffy and cooked through. If they look a bit doughy, cover and let them steam for a few more minutes. Once they’re perfect, serve your Chicken and Dumplings hot, and enjoy the comforting flavors!

Tips for Success

  • Use rotisserie chicken for a quicker, flavor-packed option.
  • Don’t skip the herbs; they elevate the dish significantly.
  • Keep the lid on while cooking dumplings for the best texture.
  • Adjust seasoning to your taste; everyone loves a personal touch!
  • For extra fluffiness, let the dumpling mixture rest for a few minutes before cooking.

Equipment Needed

  • Large pot: A Dutch oven works great, but any heavy-bottomed pot will do.
  • Wooden spoon: Perfect for stirring; a spatula can work in a pinch.
  • Mixing bowl: Essential for combining your dumpling ingredients.
  • Lid: A tight-fitting lid is crucial for cooking the dumplings evenly.

Variations

  • Herb-Infused Dumplings: Add fresh herbs like parsley or dill to the dumpling mixture for an aromatic twist.
  • Vegetarian Option: Substitute chicken with chickpeas or mushrooms and use vegetable broth for a hearty vegetarian version.
  • Spicy Kick: Incorporate a pinch of cayenne pepper or red pepper flakes into the broth for a bit of heat.
  • Cheesy Dumplings: Mix in shredded cheese like cheddar or mozzarella into the dumpling batter for a rich, cheesy flavor.
  • Gluten-Free Version: Use a gluten-free flour blend in place of all-purpose flour for the dumplings.

Serving Suggestions

  • Pair your Chicken and Dumplings with a crisp green salad for a refreshing contrast.
  • A side of buttery cornbread complements the dish perfectly.
  • Serve with a glass of chilled iced tea or a light white wine.
  • Garnish with fresh parsley for a pop of color and flavor.

FAQs about Chicken and Dumplings

Can I use frozen chicken for this recipe?
Absolutely! If you’re in a pinch, frozen chicken works just fine. Just make sure to cook it thoroughly before shredding it for the dish.

What can I substitute for chicken broth?
If you don’t have chicken broth on hand, vegetable broth is a great alternative. It will still provide a rich flavor to your Chicken and Dumplings.

How do I store leftovers?
Store any leftovers in an airtight container in the fridge for up to three days. Reheat gently on the stovetop, adding a splash of milk or broth to loosen it up.

Can I make this dish ahead of time?
Yes! You can prepare the chicken and broth mixture ahead of time. Just add the dumplings right before serving to keep them fluffy and fresh.

What’s the best way to reheat Chicken and Dumplings?
The best way to reheat is on the stovetop over low heat. Stir occasionally and add a little broth or milk to maintain the creamy texture.

Final Thoughts

Cooking Chicken and Dumplings is more than just preparing a meal; it’s about creating memories and sharing warmth with those you love. The process is simple, yet the results are nothing short of magical. Each spoonful brings a sense of nostalgia, reminding us of cozy family dinners and laughter around the table. Whether you’re enjoying it on a chilly evening or serving it to impress guests, this dish is sure to become a cherished favorite. So roll up your sleeves, gather your ingredients, and let the comforting aroma fill your kitchen. You won’t regret it!

Ranis

Chicken and Dumplings: A Comforting Recipe You’ll Love!

A comforting recipe for Chicken and Dumplings that combines tender chicken, vegetables, and fluffy dumplings in a savory broth.
Prep Time 15 minutes
Cook Time 30 minutes
Total Time 45 minutes
Course: Main Course
Cuisine: American
Calories: 350

Ingredients
  

  • 2 tablespoons olive oil
  • 1 medium onion diced
  • 2 cloves garlic minced
  • 3 medium carrots sliced
  • 2 celery stalks sliced
  • 1 teaspoon dried thyme
  • 1 teaspoon dried rosemary
  • 1/2 teaspoon salt
  • 1/4 teaspoon black pepper
  • 4 cups chicken broth
  • 2 cups cooked chicken shredded
  • 1 cup frozen peas
  • 1 cup milk
  • 1 1/2 cups all-purpose flour
  • 1 tablespoon baking powder
  • 1/2 teaspoon salt
  • 1/4 cup unsalted butter melted
  • 1/2 cup milk for dumplings

Method
 

  1. In a large pot, heat the olive oil over medium heat. Add the diced onion and cook until translucent, about 3-4 minutes. Stir in the minced garlic, carrots, and celery, and cook for another 5 minutes until the vegetables are tender.
  2. Add the dried thyme, dried rosemary, salt, and black pepper to the pot. Pour in the chicken broth and bring to a simmer.
  3. Stir in the shredded chicken and frozen peas. Allow the mixture to simmer for about 10 minutes.
  4. In a separate bowl, combine the flour, baking powder, and salt for the dumplings. Add the melted butter and 1/2 cup of milk, stirring until just combined.
  5. Drop spoonfuls of the dumpling mixture onto the simmering chicken mixture. Cover the pot with a lid and let the dumplings cook for about 15 minutes without lifting the lid.
  6. After 15 minutes, check the dumplings for doneness; they should be fluffy and cooked through. Serve hot.

Nutrition

Serving: 1servingCalories: 350kcalCarbohydrates: 30gProtein: 25gFat: 15gSaturated Fat: 7gPolyunsaturated Fat: 8gCholesterol: 70mgSodium: 800mgFiber: 2gSugar: 5g

Notes

  • For added flavor, consider using rotisserie chicken instead of cooking your own.
  • You can customize the dumplings by adding herbs like parsley or chives for extra freshness.

Tried this recipe?

Let us know how it was!

Creamy Tomato Basil Soup: Discover a Cozy Recipe!

Introduction to Creamy Tomato Basil Soup

There’s something magical about a warm bowl of Creamy Tomato Basil Soup on a chilly day. It wraps around you like a cozy blanket, instantly lifting your spirits. I remember my mom making this soup when I was a kid, filling the house with that irresistible aroma. It’s not just a meal; it’s a hug in a bowl. Whether you’re looking for a quick solution after a long day or a dish to impress your loved ones, this creamy delight is your go-to. Let’s dive into this comforting recipe that’s sure to become a family favorite!

Why You’ll Love This Creamy Tomato Basil Soup

This Creamy Tomato Basil Soup is a game-changer for busy weeknights. It’s quick to whip up, taking just 35 minutes from start to finish. The rich, velvety texture and vibrant flavors will have your taste buds dancing. Plus, it’s a versatile dish that pleases everyone at the table, from picky eaters to gourmet lovers. Trust me, once you try it, you’ll be hooked!

Ingredients for Creamy Tomato Basil Soup

Gathering the right ingredients is the first step to creating a delicious Creamy Tomato Basil Soup. Here’s what you’ll need:

  • Olive oil: A staple in many kitchens, it adds richness and depth to the soup.
  • Onion: Chopped onion brings sweetness and a savory base to the dish.
  • Garlic: Minced garlic infuses the soup with a fragrant kick that elevates the flavor.
  • Crushed tomatoes: The star of the show! They provide the soup’s vibrant color and tangy taste.
  • Vegetable broth: This adds a savory depth, making the soup hearty without meat.
  • Sugar: Just a teaspoon balances the acidity of the tomatoes, enhancing the overall flavor.
  • Dried basil: A classic herb that complements the tomatoes beautifully, giving that Italian flair.
  • Salt and black pepper: Essential seasonings that bring all the flavors together.
  • Heavy cream: This is what makes the soup creamy and luxurious, perfect for a comforting meal.
  • Fresh basil leaves: Chopped fresh basil adds a burst of freshness right before serving.

For those looking to lighten things up, consider substituting the heavy cream with coconut milk or a plant-based cream alternative. If you like a bit of heat, a pinch of red pepper flakes can spice things up. You can find the exact quantities for each ingredient at the bottom of the article, ready for printing!

How to Make Creamy Tomato Basil Soup

Creating a bowl of Creamy Tomato Basil Soup is easier than you might think. Follow these simple steps, and you’ll have a comforting dish ready in no time. Let’s get cooking!

Step 1: Sauté the Aromatics

Start by heating the olive oil in a large pot over medium heat. Once it’s shimmering, toss in the chopped onion. Sauté it for about 5 minutes until it turns translucent. The aroma will fill your kitchen, making your mouth water. Next, add the minced garlic and cook for another minute. This step is crucial; it releases those fragrant oils that make the soup irresistible.

Step 2: Combine the Main Ingredients

Now, it’s time to bring in the stars of the show! Add the crushed tomatoes and vegetable broth to the pot. Sprinkle in the sugar, dried basil, salt, and black pepper. Stir everything together and bring the mixture to a boil. Once it’s bubbling, reduce the heat and let it simmer for 15 minutes. This allows the flavors to meld beautifully, creating a rich base for your soup.

Step 3: Blend the Soup

After simmering, remove the pot from heat. Here comes the fun part! If you have an immersion blender, use it to puree the soup until it’s smooth. If not, carefully transfer the soup in batches to a countertop blender. Just be cautious—hot soup can splatter! Blend until silky and return it to the pot.

Step 4: Add the Cream

With the soup blended, it’s time to make it creamy. Return the pot to low heat and stir in the heavy cream. Let it cook for another 5 minutes, stirring occasionally. This step transforms your soup into a luxurious, velvety delight. If you’re looking for a lighter option, now’s the time to swap in coconut milk or a plant-based cream.

Step 5: Finish with Fresh Basil

Finally, remove the pot from heat and stir in the chopped fresh basil leaves. This adds a burst of freshness that brightens the entire dish. Taste and adjust the seasoning if needed. Serve your Creamy Tomato Basil Soup hot, garnished with extra basil if you like. Enjoy every spoonful of this cozy creation!

Tips for Success

  • Use ripe, high-quality tomatoes for the best flavor.
  • Don’t skip the simmering step; it enhances the soup’s depth.
  • Adjust the seasoning to your taste; a little extra salt can make a big difference.
  • For a smoother texture, blend longer until silky.
  • Garnish with a drizzle of olive oil for an elegant touch.

Equipment Needed

  • Large pot: A sturdy pot is essential for cooking the soup. A Dutch oven works great too.
  • Immersion blender: Perfect for pureeing the soup directly in the pot. A countertop blender is a good alternative.
  • Wooden spoon: Ideal for stirring and mixing ingredients.
  • Measuring cups and spoons: For accurate ingredient measurements.

Variations

  • Spicy Kick: Add a pinch of red pepper flakes or a dash of hot sauce for a zesty twist.
  • Herb Infusion: Experiment with fresh herbs like thyme or oregano for a different flavor profile.

  • Roasted Veggies: Toss in some roasted red peppers or carrots for added sweetness and depth.
  • Cheesy Delight: Stir in some grated Parmesan or mozzarella for a cheesy version of this classic soup.
  • Vegan Option: Substitute heavy cream with coconut milk and use vegetable broth for a completely plant-based dish.

Serving Suggestions

  • Crusty Bread: Serve with a warm, crusty baguette or garlic bread for dipping.
  • Salad Pairing: A fresh green salad with a light vinaigrette complements the soup perfectly.
  • Wine Selection: Enjoy with a glass of red wine, like Chianti, to enhance the flavors.
  • Garnish: Top with a swirl of cream and extra basil for a beautiful presentation.

FAQs about Creamy Tomato Basil Soup

Can I make Creamy Tomato Basil Soup ahead of time?

Absolutely! This soup actually tastes even better the next day as the flavors meld together. Just store it in an airtight container in the fridge for up to three days. Reheat gently on the stove before serving.

Can I freeze Creamy Tomato Basil Soup?

Yes, you can freeze it! Allow the soup to cool completely, then transfer it to freezer-safe containers. It will keep well for up to three months. Just thaw in the fridge overnight before reheating.

What can I serve with Creamy Tomato Basil Soup?

This soup pairs wonderfully with crusty bread, grilled cheese sandwiches, or a fresh salad. It’s a comforting meal that satisfies any craving!

Is this soup suitable for a vegetarian diet?

Yes! This Creamy Tomato Basil Soup is vegetarian-friendly, especially when you use vegetable broth. It’s a hearty option for anyone looking for a meatless meal.

Can I make this soup dairy-free?

Definitely! Substitute the heavy cream with coconut milk or a plant-based cream alternative. This way, you can enjoy a delicious, dairy-free version of this cozy soup.

Final Thoughts

There’s a certain joy that comes from a bowl of Creamy Tomato Basil Soup. It’s more than just a meal; it’s a moment of comfort and warmth. Each spoonful transports you back to simpler times, where the aroma of simmering tomatoes filled the air. This recipe is a reminder that cooking can be both easy and rewarding. Whether you’re sharing it with family or savoring it solo, this soup brings a sense of coziness that’s hard to beat. So, grab your ingredients and let the magic unfold in your kitchen!

Ranis

Creamy Tomato Basil Soup: Discover a Cozy Recipe!

A cozy and creamy tomato basil soup perfect for chilly days.
Prep Time 10 minutes
Cook Time 25 minutes
Total Time 35 minutes
Servings: 4 servings
Course: Soup
Cuisine: Italian
Calories: 320

Ingredients
  

  • 2 tablespoons olive oil
  • 1 medium onion chopped
  • 2 cloves garlic minced
  • 1 can 28 ounces crushed tomatoes
  • 2 cups vegetable broth
  • 1 teaspoon sugar
  • 1 teaspoon dried basil
  • 1/2 teaspoon salt
  • 1/4 teaspoon black pepper
  • 1 cup heavy cream
  • 1/4 cup fresh basil leaves chopped

Method
 

  1. In a large pot, heat the olive oil over medium heat. Add the chopped onion and sauté until translucent, about 5 minutes.
  2. Stir in the minced garlic and cook for an additional 1 minute until fragrant.
  3. Add the crushed tomatoes, vegetable broth, sugar, dried basil, salt, and black pepper. Bring the mixture to a boil, then reduce the heat and let it simmer for 15 minutes.
  4. Remove the pot from heat and use an immersion blender to puree the soup until smooth. If you don’t have an immersion blender, carefully transfer the soup in batches to a countertop blender and blend until smooth.
  5. Return the soup to low heat and stir in the heavy cream. Cook for another 5 minutes, stirring occasionally.
  6. Remove from heat and stir in the fresh basil leaves. Adjust seasoning if necessary.
  7. Serve hot, garnished with additional basil if desired.

Nutrition

Serving: 1cupCalories: 320kcalCarbohydrates: 10gProtein: 4gFat: 30gSaturated Fat: 18gPolyunsaturated Fat: 8gCholesterol: 100mgSodium: 600mgFiber: 2gSugar: 6g

Notes

  • For a lighter version, substitute the heavy cream with coconut milk or a plant-based cream alternative.
  • Add a pinch of red pepper flakes for a spicy kick or top with croutons for added texture.

Tried this recipe?

Let us know how it was!

Ham and Cheese Puff Pastry Pinwheels Delight You Today!

Introduction to Ham and Cheese Puff Pastry Pinwheels

There’s something magical about the aroma of freshly baked goods wafting through the kitchen. It takes me back to my childhood, where every family gathering was filled with laughter and delicious snacks. One of my all-time favorites? Ham and cheese puff pastry pinwheels. These delightful bites are not just a quick solution for a busy day; they’re also a surefire way to impress your loved ones. Flaky, savory, and oh-so-easy to make, they’re perfect for any occasion—be it a game day snack or a fancy appetizer. Let’s dive into this delicious recipe!

Why You’ll Love This Ham and Cheese Puff Pastry Pinwheels

These ham and cheese puff pastry pinwheels are a game-changer in the kitchen. They come together in just 35 minutes, making them perfect for those busy weeknights or last-minute gatherings. The combination of flaky pastry, savory ham, and creamy cheese creates a flavor explosion that’s hard to resist. Plus, they’re versatile enough to adapt to your taste, ensuring everyone leaves the table satisfied. What’s not to love?

Ingredients for Ham and Cheese Puff Pastry Pinwheels

Gathering the right ingredients is the first step to creating these delightful ham and cheese puff pastry pinwheels. Here’s what you’ll need:

  • Puff Pastry: Two sheets of this flaky wonder serve as the base. Thaw them if they’re frozen, and you’re good to go!
  • Sliced Ham: Choose your favorite deli ham. It adds a savory depth that pairs perfectly with the cheese.
  • Shredded Cheddar Cheese: This brings a rich, creamy flavor. Feel free to experiment with different cheeses for a unique twist.
  • Cream Cheese: Softened cream cheese acts as the glue, binding all the flavors together while adding a luscious texture.
  • Dijon Mustard: Just a tablespoon adds a subtle tang that elevates the overall taste.
  • Egg: A beaten egg is used for the egg wash, giving the pinwheels that beautiful golden finish.
  • Garlic Powder: A sprinkle of garlic powder enhances the flavor profile without overpowering the dish.
  • Onion Powder: This adds a hint of sweetness and depth, complementing the ham and cheese beautifully.
  • Salt and Pepper: Essential for seasoning, these staples help balance the flavors.

For those looking to mix things up, consider adding chopped spinach or bell peppers to the filling for extra nutrition and flavor. You can also swap out the ham for cooked bacon or turkey, or try different cheeses like mozzarella or pepper jack. The possibilities are endless!

Exact quantities for each ingredient can be found at the bottom of the article, ready for printing. Happy cooking!

How to Make Ham and Cheese Puff Pastry Pinwheels

Creating these ham and cheese puff pastry pinwheels is a breeze! Follow these simple steps, and you’ll have a delicious snack or appetizer ready in no time. Let’s get started!

Step 1: Preheat the Oven

First things first, preheat your oven to 400°F (200°C). This ensures that your pinwheels bake evenly and come out perfectly golden. While the oven heats up, line a baking sheet with parchment paper. This will prevent sticking and make cleanup a snap!

Step 2: Prepare the Cream Cheese Mixture

In a medium bowl, mix together the softened cream cheese, Dijon mustard, garlic powder, onion powder, salt, and pepper. Stir until everything is well combined. This creamy mixture is the heart of your pinwheels, adding flavor and richness.

Step 3: Roll Out the Puff Pastry

Next, roll out each sheet of puff pastry on a lightly floured surface. This helps smooth out any creases and makes it easier to work with. You want the pastry to be nice and even, so don’t rush this step!

Step 4: Spread the Cream Cheese Mixture

Now, take half of your cream cheese mixture and spread it evenly over each sheet of puff pastry. Make sure to cover the entire surface, as this will ensure every bite is packed with flavor.

Step 5: Layer the Ham and Cheese

Time to layer! Place the sliced ham evenly over the cream cheese mixture. Follow this with an even layer of shredded cheddar cheese. The combination of ham and cheese is what makes these pinwheels so irresistible!

Step 6: Roll the Pastry

Starting from one edge, carefully roll the puff pastry tightly into a log shape. This is where the magic happens! Repeat this process with the second sheet of pastry. Make sure to roll it snugly, so the filling stays inside.

Step 7: Slice the Pinwheels

Once you have your logs, slice each one into 1-inch thick pinwheels. Place them on the prepared baking sheet, leaving a little space between each one. They’ll puff up while baking, so give them room to grow!

Step 8: Brush with Egg Wash

To achieve that beautiful golden color, brush the tops of the pinwheels with the beaten egg. This egg wash not only adds color but also gives them a lovely sheen.

Step 9: Bake the Pinwheels

Now it’s time to bake! Place the baking sheet in the preheated oven and bake for 15-20 minutes. Keep an eye on them; you want them to be puffed and golden brown. The aroma will be irresistible!

Step 10: Cool and Serve

Once baked, allow the pinwheels to cool slightly before serving. This will help them set and make them easier to handle. Trust me, the wait will be worth it when you take that first bite!

Tips for Success

  • Make sure your puff pastry is fully thawed for easy rolling.
  • Don’t overfill the pinwheels; a little goes a long way!
  • Experiment with different cheeses for unique flavors.
  • For extra crunch, sprinkle some sesame seeds on top before baking.
  • Serve warm for the best taste and texture.

Equipment Needed

  • Baking Sheet: A standard baking sheet works perfectly. If you don’t have one, a large oven-safe dish will do.
  • Parchment Paper: This prevents sticking. If unavailable, lightly greasing the baking sheet is a good alternative.
  • Rolling Pin: Essential for rolling out puff pastry. A wine bottle can serve as a makeshift option!
  • Mixing Bowl: Any medium-sized bowl will work for mixing the cream cheese mixture.
  • Knife: A sharp knife is needed for slicing the pinwheels. A pizza cutter can also be handy!

Variations

  • Spinach and Feta: Add chopped spinach and crumbled feta cheese for a Mediterranean twist.
  • Buffalo Chicken: Substitute ham with shredded cooked chicken and mix in buffalo sauce for a spicy kick.
  • Veggie Delight: Use roasted bell peppers, zucchini, and mushrooms instead of meat for a vegetarian option.
  • Herbed Cream Cheese: Mix in fresh herbs like dill or chives into the cream cheese for added flavor.
  • Sweet and Savory: Add a layer of fig jam or apple slices for a sweet contrast to the savory ham and cheese.

Serving Suggestions

  • Pair with Dips: Serve with a side of honey mustard or ranch dressing for dipping.
  • Fresh Salad: A light green salad with vinaigrette complements the richness of the pinwheels.
  • Wine Selection: A chilled white wine or light beer enhances the flavors beautifully.
  • Presentation: Arrange on a platter with fresh herbs for a pop of color.

FAQs about Ham and Cheese Puff Pastry Pinwheels

Can I make these pinwheels ahead of time?

Absolutely! You can prepare the pinwheels and refrigerate them before baking. Just cover them tightly with plastic wrap. When you’re ready to bake, simply pop them in the oven straight from the fridge, adding a couple of extra minutes to the baking time.

What can I substitute for ham?

If ham isn’t your thing, you can easily swap it out for cooked bacon, turkey, or even a plant-based alternative. Each option brings its own unique flavor, so feel free to get creative!

How do I store leftovers?

Leftover ham and cheese puff pastry pinwheels can be stored in an airtight container in the fridge for up to three days. Reheat them in the oven for a few minutes to regain that crispy texture.

Can I freeze these pinwheels?

Yes! These pinwheels freeze beautifully. Just assemble them, slice, and place them on a baking sheet to freeze individually. Once frozen, transfer them to a freezer bag. Bake from frozen, adding a few extra minutes to the cooking time.

What dips pair well with these pinwheels?

These pinwheels are delicious on their own, but they pair wonderfully with dips like honey mustard, ranch dressing, or even a spicy sriracha mayo. Choose your favorite to elevate the flavor experience!

Final Thoughts

Making ham and cheese puff pastry pinwheels is more than just cooking; it’s about creating moments. The joy of pulling a tray of golden, flaky pinwheels from the oven is unmatched. Each bite is a delightful combination of flavors that brings back memories of family gatherings and celebrations. Whether you’re serving them at a party or enjoying them as a late-night snack, these pinwheels are sure to impress. So roll up your sleeves, gather your ingredients, and let the aroma of these delicious treats fill your kitchen. Trust me, your taste buds will thank you!

Ranis

Ham and Cheese Puff Pastry Pinwheels Delight You Today!

Delicious ham and cheese pinwheels made with flaky puff pastry, perfect for a snack or appetizer.
Prep Time 15 minutes
Cook Time 20 minutes
Total Time 35 minutes
Servings: 12 servings
Course: Appetizer
Cuisine: American
Calories: 150

Ingredients
  

  • 2 sheets of puff pastry thawed if frozen
  • 8 ounces sliced ham
  • 8 ounces shredded cheddar cheese
  • 4 ounces cream cheese softened
  • 1 tablespoon Dijon mustard
  • 1 egg beaten, for egg wash
  • 1 teaspoon garlic powder
  • 1 teaspoon onion powder
  • Salt and pepper to taste

Method
 

  1. Preheat your oven to 400°F (200°C) and line a baking sheet with parchment paper.
  2. In a medium bowl, mix the softened cream cheese, Dijon mustard, garlic powder, onion powder, salt, and pepper until well combined.
  3. Roll out each sheet of puff pastry on a lightly floured surface to smooth out any creases.
  4. Spread half of the cream cheese mixture evenly over each sheet of puff pastry.
  5. Layer the sliced ham evenly over the cream cheese mixture, followed by an even layer of shredded cheddar cheese.
  6. Starting from one edge, carefully roll the puff pastry tightly into a log shape. Repeat with the second sheet.
  7. Slice each log into 1-inch thick pinwheels and place them on the prepared baking sheet.
  8. Brush the tops of the pinwheels with the beaten egg to give them a golden color while baking.
  9. Bake in the preheated oven for 15-20 minutes or until the pinwheels are puffed and golden brown.
  10. Allow to cool slightly before serving.

Nutrition

Serving: 1pinwheelCalories: 150kcalCarbohydrates: 7gProtein: 5gFat: 10gSaturated Fat: 4gPolyunsaturated Fat: 6gCholesterol: 30mgSodium: 400mgSugar: 1g

Notes

  • For a twist, add some chopped spinach or bell peppers to the filling for added flavor and nutrition.
  • Substitute the ham with cooked bacon or turkey for a different taste, or use a variety of cheeses like mozzarella or pepper jack for a unique flavor profile.

Tried this recipe?

Let us know how it was!

Beef Chile Colorado: Discover This Flavorful Recipe!

Introduction to Beef Chile Colorado

There’s something magical about a dish that warms you from the inside out, and Beef Chile Colorado is just that. This hearty recipe brings together tender beef chuck and a rich, spicy chile sauce that dances on your taste buds. Whether you’re looking to impress friends at a weekend gathering or simply want a comforting meal after a long day, this dish is your go-to. It’s not just about the flavors; it’s about creating memories around the dinner table. Trust me, once you try this, it’ll become a staple in your kitchen!

Why You’ll Love This Beef Chile Colorado

This Beef Chile Colorado is a game-changer for busy weeknights or lazy weekends. It’s easy to prepare, requiring minimal hands-on time while the flavors meld beautifully as it simmers. The rich, spicy sauce envelops the tender beef, creating a dish that’s bursting with flavor. Plus, it’s versatile! Serve it over rice, in tacos, or with warm tortillas. You’ll find yourself craving it again and again!

Ingredients for Beef Chile Colorado

Gathering the right ingredients is the first step to creating a delicious Beef Chile Colorado. Here’s what you’ll need:

  • Beef Chuck: This cut is perfect for slow cooking, becoming tender and flavorful as it simmers.
  • Vegetable Oil: Used for browning the beef, it helps develop a rich flavor base.
  • Onion: Chopped onions add sweetness and depth to the dish, enhancing the overall flavor.
  • Garlic: Minced garlic brings a fragrant aroma and a punch of flavor that complements the beef.
  • Beef Broth: This adds moisture and richness, making the sauce more robust.
  • Dried Red Chiles: The star of the show! They provide the signature heat and vibrant color. New Mexico or California chiles work best.
  • Ground Cumin: This spice adds an earthy warmth that balances the heat from the chiles.
  • Dried Oregano: A hint of oregano brings a touch of herbal freshness to the dish.
  • Salt and Black Pepper: Essential for seasoning, they enhance all the flavors in the dish.
  • Apple Cider Vinegar: A splash of acidity brightens the flavors and cuts through the richness.
  • Brown Sugar: This adds a subtle sweetness that balances the heat from the chiles.

For those who like it spicy, consider adding jalapeños or a pinch of cayenne pepper to the mix. Fresh cilantro and lime wedges make excellent garnishes, adding a burst of freshness. You can find the exact quantities for each ingredient at the bottom of the article, ready for printing!

How to Make Beef Chile Colorado

Now that you have your ingredients ready, let’s dive into the steps to create this mouthwatering Beef Chile Colorado. Each step is designed to build layers of flavor, ensuring that every bite is a delight. Follow along, and you’ll have a dish that’s sure to impress!

Step 1: Toast the Dried Chiles

Start by toasting the dried chiles in a skillet over medium heat. This process takes just 2-3 minutes. Keep an eye on them; you want them fragrant, not burnt. Toasting enhances their natural flavors, making your sauce richer and more complex. The aroma that fills your kitchen will have you dreaming of the final dish!

Step 2: Soak the Chiles

Once toasted, remove the chiles from the heat and place them in a bowl. Pour 2 cups of hot water over them and let them soak for about 20 minutes. This step is crucial for softening the chiles, allowing them to blend smoothly into your sauce. The soaking process also helps release their vibrant color and flavor, which is essential for that signature Beef Chile Colorado taste.

Step 3: Brown the Beef

In a large pot, heat the vegetable oil over medium-high heat. Add the beef cubes in batches, ensuring not to overcrowd the pot. Brown the beef on all sides, which should take about 5-7 minutes. This step is vital for developing a deep, savory flavor. Once browned, remove the beef and set it aside. The fond left in the pot will add even more flavor to your dish!

Step 4: Sauté the Aromatics

In the same pot, add the chopped onion and cook for about 5 minutes until softened. Stir in the minced garlic and cook for an additional minute. This combination of onions and garlic creates a fragrant base that elevates the entire dish. The sweetness of the onions and the pungency of the garlic work together to create a flavor explosion!

Step 5: Blend the Chile Sauce

Drain the soaked chiles and transfer them to a blender. Add the beef broth, cumin, oregano, salt, pepper, apple cider vinegar, and brown sugar. Blend until smooth. This sauce is the heart of your Beef Chile Colorado, bringing together all those toasty, spicy flavors. A smooth sauce ensures that every bite is packed with flavor, so don’t rush this step!

Step 6: Combine and Simmer

Return the browned beef to the pot and pour the blended chile sauce over the meat. Stir to combine everything well. Bring the mixture to a simmer, cover, and reduce the heat to low. Let it cook for 1.5 to 2 hours, stirring occasionally. This slow cooking allows the flavors to meld beautifully, resulting in tender beef that practically melts in your mouth. The anticipation will be worth it!

Tips for Success

  • Always toast your chiles to enhance their flavor; it makes a world of difference!
  • Don’t rush the browning process; it builds a rich base for your dish.
  • Let the beef simmer low and slow for maximum tenderness.
  • Adjust the spice level by adding more or fewer chiles based on your preference.
  • Garnish with fresh cilantro and lime for a burst of freshness!

Equipment Needed

  • Large Pot: A Dutch oven works great, but any heavy-bottomed pot will do.
  • Skillet: For toasting the chiles; a non-stick skillet is ideal.
  • Blender: A regular blender or an immersion blender will create a smooth sauce.
  • Cutting Board and Knife: Essential for chopping onions and garlic.

Variations of Beef Chile Colorado

  • Vegetarian Option: Substitute beef with hearty vegetables like mushrooms, zucchini, or eggplant. Use vegetable broth instead of beef broth for a rich flavor.
  • Slow Cooker Version: Brown the beef and sauté the aromatics, then transfer everything to a slow cooker. Cook on low for 6-8 hours for a hands-off approach.
  • Spicy Kick: Add diced jalapeños or a splash of hot sauce to the sauce for an extra layer of heat.
  • Different Chiles: Experiment with different types of dried chiles, like ancho or guajillo, for unique flavor profiles.
  • Low-Carb Twist: Serve over cauliflower rice or zucchini noodles instead of traditional rice or tortillas for a low-carb meal.

Serving Suggestions for Beef Chile Colorado

  • Serve over fluffy white rice or warm corn tortillas to soak up the delicious sauce.
  • Pair with a refreshing side salad dressed in lime vinaigrette for a zesty contrast.
  • Top with fresh cilantro and lime wedges for a burst of flavor.
  • Enjoy with a cold Mexican beer or a classic margarita for the perfect meal.

FAQs about Beef Chile Colorado

What type of beef is best for Beef Chile Colorado?
Beef chuck is the ideal cut for this dish. It becomes tender and flavorful when simmered, making it perfect for a hearty stew.

Can I make Beef Chile Colorado in a slow cooker?
Absolutely! Brown the beef and sauté the onions and garlic first, then transfer everything to a slow cooker. Cook on low for 6-8 hours for a delicious, hands-off meal.

How can I adjust the spice level?
To control the heat, you can add more or fewer dried chiles. For an extra kick, consider including diced jalapeños or a dash of cayenne pepper in the sauce.

What can I serve with Beef Chile Colorado?
This dish pairs wonderfully with rice, warm tortillas, or even over nachos. A side salad dressed with lime vinaigrette adds a refreshing contrast.

Can I freeze leftovers?
Yes! Beef Chile Colorado freezes well. Just let it cool completely, then store it in an airtight container. It can be reheated on the stove or in the microwave for a quick meal later.

Final Thoughts

Cooking Beef Chile Colorado is more than just preparing a meal; it’s about creating a warm, inviting experience that brings people together. The rich flavors and tender beef create a comforting dish that feels like a hug on a plate. Whether you’re sharing it with family or enjoying it solo, each bite tells a story of tradition and love. This recipe is a reminder that good food can elevate any occasion, turning an ordinary day into something special. So roll up your sleeves, embrace the process, and savor the joy that comes from making this delightful dish!

Ranis

Beef Chile Colorado: Discover This Flavorful Recipe!

Beef Chile Colorado is a flavorful and hearty dish made with tender beef chuck simmered in a rich and spicy chile sauce.
Prep Time 30 minutes
Cook Time 2 hours
Total Time 2 hours 30 minutes
Servings: 6 servings
Course: Main Course
Cuisine: Mexican
Calories: 380

Ingredients
  

  • 2 pounds beef chuck cut into 1-inch cubes
  • 2 tablespoons vegetable oil
  • 1 large onion chopped
  • 4 cloves garlic minced
  • 2 cups beef broth
  • 2 cups dried red chiles such as New Mexico or California, stems and seeds removed
  • 1 teaspoon ground cumin
  • 1 teaspoon dried oregano
  • 1 teaspoon salt
  • 1/2 teaspoon black pepper
  • 1 tablespoon apple cider vinegar
  • 1 tablespoon brown sugar

Method
 

  1. In a skillet over medium heat, toast the dried chiles for about 2-3 minutes until fragrant. Be careful not to burn them.
  2. Remove from heat and place the chiles in a bowl. Pour 2 cups of hot water over the chiles and let them soak for about 20 minutes until softened.
  3. In a large pot, heat the vegetable oil over medium-high heat. Add the beef cubes in batches, browning them on all sides. Remove the beef and set aside.
  4. In the same pot, add the chopped onion and cook for about 5 minutes until softened. Stir in the minced garlic and cook for an additional minute.
  5. Drain the soaked chiles and transfer them to a blender. Add the beef broth, cumin, oregano, salt, pepper, apple cider vinegar, and brown sugar. Blend until smooth.
  6. Return the browned beef to the pot and pour the blended chile sauce over the meat. Stir to combine.
  7. Bring to a simmer, cover, and reduce the heat to low. Cook for 1.5 to 2 hours, or until the beef is tender, stirring occasionally.
  8. Serve hot with rice, tortillas, or over nachos.

Nutrition

Serving: 1servingCalories: 380kcalCarbohydrates: 8gProtein: 30gFat: 24gSaturated Fat: 8gPolyunsaturated Fat: 16gCholesterol: 90mgSodium: 800mgFiber: 2gSugar: 4g

Notes

  • For a spicier dish, add a few jalapeños or a pinch of cayenne pepper to the blender with the chiles.
  • Serve with fresh cilantro and lime wedges for added flavor.

Tried this recipe?

Let us know how it was!