Bold and Flavorful Salsa Taquera in Just 15 Minutes

As I stood over the stove, the tantalizing aroma of toasting arbol chiles filled the air, transporting me to bustling Mexican markets where vibrant salsas reign supreme. The recipe for this Quick & Spicy 5-Ingredient Salsa Taquera is not only a burst of bold flavor but also a breeze to make, taking just 15 minutes from start to finish. With its smoky kick and fresh twist, this vegan and gluten-free salsa is the perfect companion to all your favorite Mexican dishes, from tacos to burritos. Imagine delighting your family and friends with a homemade condiment that elevates every meal while being easy on your busy schedule. Who knew that just five simple ingredients could create such magic? Are you ready to spice up your kitchen?
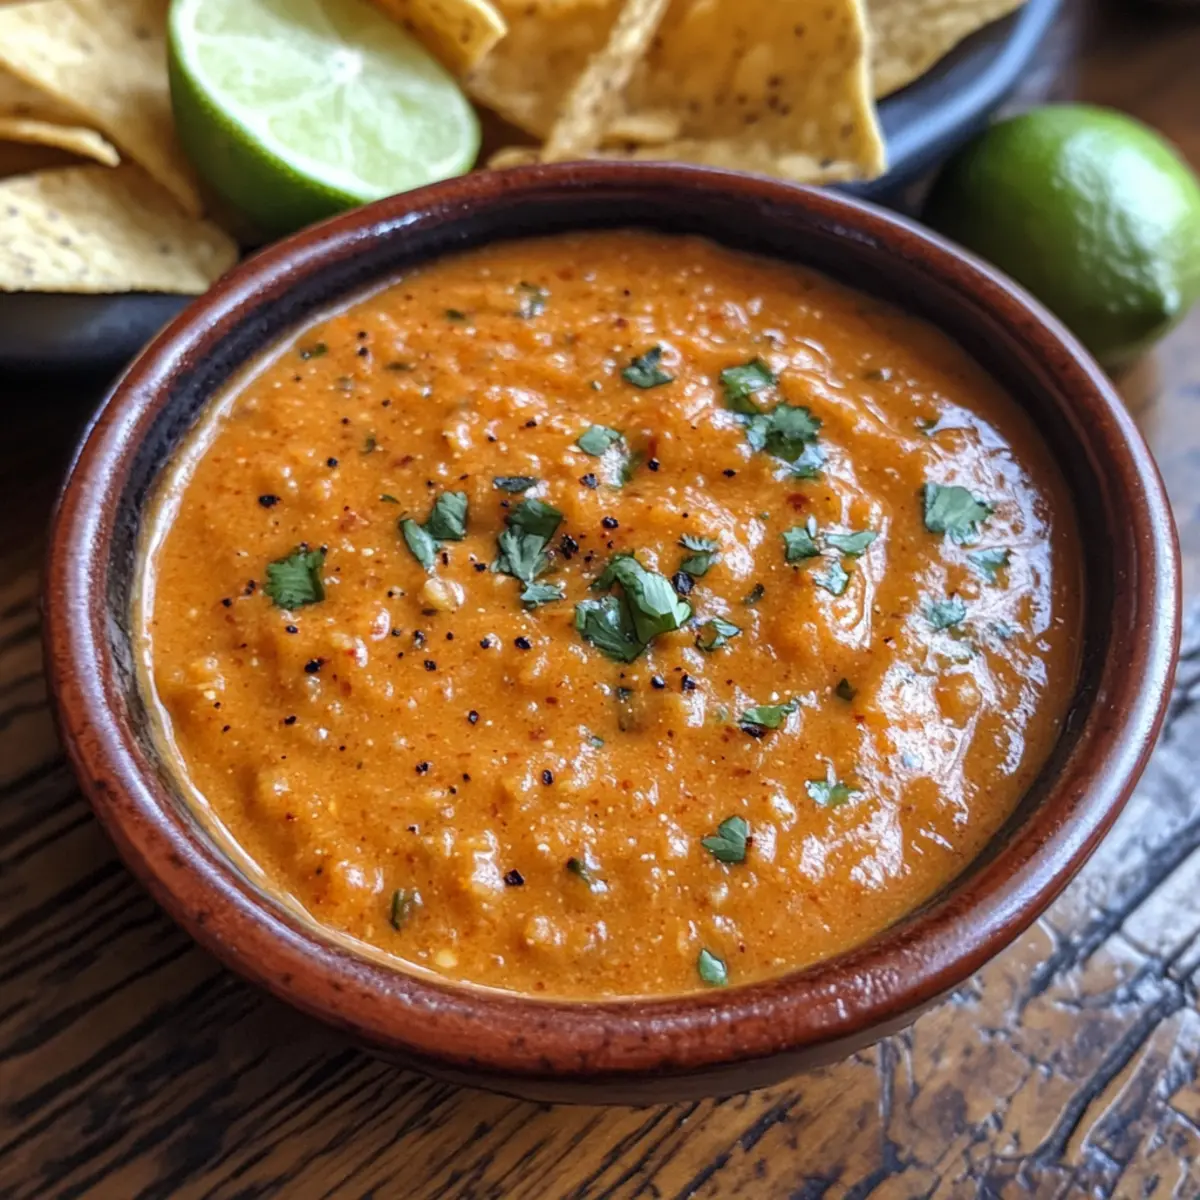
Why is Salsa Taquera a Game-Changer?

Quick Preparation: With only 15 minutes needed, you’ll have fresh, flavorful salsa in no time.

Five Simple Ingredients: The beauty of this recipe lies in its minimalism; just five ingredients unlock endless flavor possibilities!

Versatile Pairing: Perfect for tacos, burritos, or as a lively dip for tortilla chips, this salsa fits seamlessly into any meal. You might also enjoy it alongside Chicken Tacos Salsa or Jerk Chicken Salsa.

Vegan and Gluten-Free: Enjoy this recipe guilt-free, as it caters to a variety of dietary needs without compromising on taste.

Bold Flavors: The combination of smoky arbol chiles and juicy tomatoes provides a delightful kick that will elevate any dish!

Salsa Taquera Ingredients

Prepare to create the ultimate Salsa Taquera with these five essential ingredients!

For the Salsa
Arbol Chiles – The main source of heat and smoky flavor that brings the salsa to life; substitute with piquin chiles for similar intensity or cayenne pepper if you prefer more spice.
Olive Oil – This ingredient adds richness to the salsa and helps in cooking the aromatics for added depth.
White Onion – Provides a natural sweetness to balance the heat; make sure to chop it roughly for even cooking.
Garlic – A crucial flavor enhancer; chop it roughly to mix it seamlessly into the salsa.
Roma Tomatoes – These juicy beauties contribute sweetness and balance the smokiness; you can use canned diced tomatoes if fresh ones aren’t available, but the flavor profile will change.
Lime Juice – A zesty addition that adds acidity and brightness to the mix; avoid lemons since they’re too sweet for this recipe.
Salt – The magic touch that enhances all the flavors in this delicious Salsa Taquera.

Step‑by‑Step Instructions for Salsa Taquera

Step 1: Prepare Chiles
Begin by stemming and lightly shaking out the seeds from 30 arbol chiles. In a medium skillet, toast the chiles over medium heat for 2-3 minutes. You’ll know they’re ready when they become fragrant but be careful not to burn them, as this would introduce an undesirable bitterness to your Salsa Taquera.

Step 2: Soak Chiles
Once toasted, bring a saucepan of water to a boil, then turn off the heat. Add the toasted chiles into the water, allowing them to soak for 15 minutes until they soften. This step prepares the chiles perfectly for blending, ensuring your Salsa Taquera will have a smooth, rich texture.

Step 3: Cook Aromatics
While the chiles soak, heat 2 tablespoons of olive oil in a skillet over medium heat. Add roughly chopped white onion and cook for about 3-4 minutes until translucent, stirring occasionally. Next, toss in the roughly chopped garlic, cooking for an additional 1-2 minutes, followed by the Roma tomatoes. Continue stirring until the tomatoes are tender and lightly browned, around 5 minutes.

Step 4: Blend
Drain the soaked chiles and add them to a blender along with the sautéed onion mixture, juices from 1 lime, and a pinch of salt. Blend the mixture until smooth, adjusting the consistency with a small amount of reserved chile water if necessary. This blending step is crucial for achieving the perfect creamy texture of your Salsa Taquera.

Step 5: Taste and Adjust
After blending, taste your Salsa Taquera and adjust seasoning, adding more salt or lime juice if desired. If the salsa feels too intense, you can mix in a few chopped tomatoes to mellow the flavor. This is your chance to create a balance that suits your taste perfectly, making your homemade salsa absolutely irresistible.
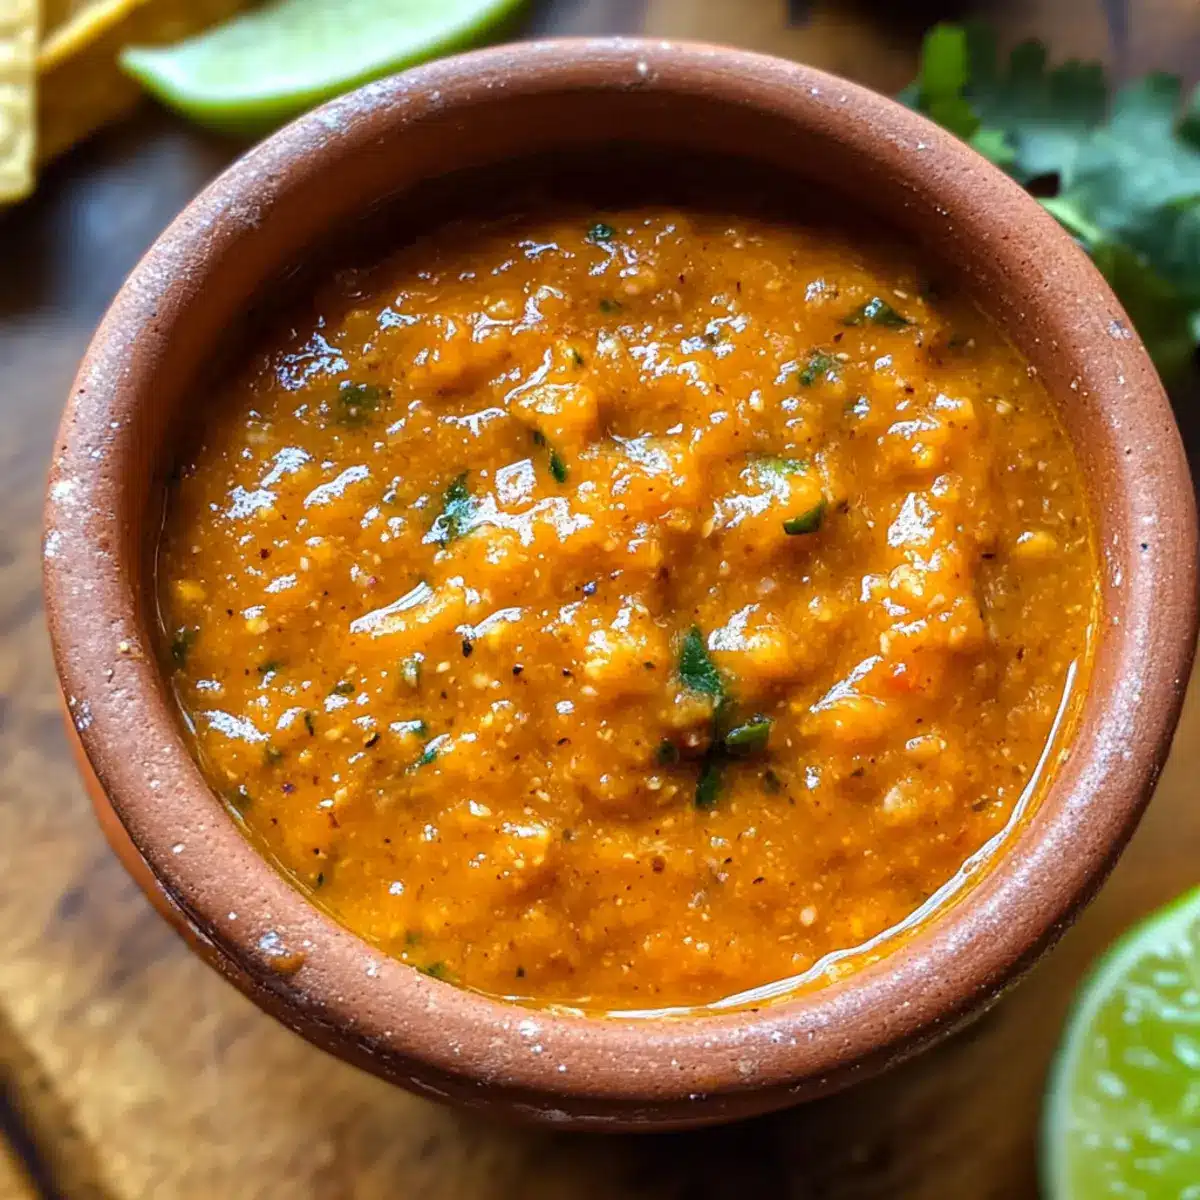
Salsa Taquera Variations & Substitutions

Feel free to explore these delightful twists to personalize your Salsa Taquera experience!

  • Spicy Kick: For extra heat, keep some seeds from the arbol chiles. This simple change transforms your salsa into a fiery condiment that true spice lovers will adore.

  • Tomato Boost: Add an additional Roma tomato or two for an even sweeter salsa. This extra juiciness balances the heat and makes the salsa even more vibrant!

  • Fruit Infusion: Incorporate diced mango or pineapple for a sweet contrast to the spicy chiles. The fruity notes provide a unique twist that will surprise your taste buds.

  • Herb Flare: Mix in finely chopped cilantro or parsley for a burst of freshness. This adds an aromatic layer that enhances the overall flavor profile.

  • Smoky Depth: Drizzle in a touch of smoked paprika for a deeper smoky flavor. This subtle addition can elevate your Salsa Taquera to new heights.

  • Zesty Twist: Substitute lime juice with fresh orange juice for a sweeter citrus note. This twist offers a different brightness that complements the spiciness well.

  • Garlic Lovers: For a bolder garlic flavor, double the amount of garlic in the blend. This will give your salsa a richer, more aromatic quality.

  • Creamy Texture: Blend in a small amount of ripe avocado for a creamy, luscious texture. This adds healthy fats while making your salsa velvety smooth.

If you’re looking for more incredible salsa ideas, consider trying the zesty Jerk Chicken Salsa or the refreshing Grilled Fish Salsa.

What to Serve with Quick & Spicy 5-Ingredient Salsa Taquera

Imagine a lively gathering where every bite is bursting with flavor and freshness. This salsa is the perfect addition to elevate your homemade feast!

  • Crispy Tortilla Chips: Perfect for dipping, their crunch contrasts beautifully with the smooth salsa. The combination creates an addictive snacking experience.

  • Grilled Tacos: Whether filled with savory meat or roasted veggies, the zingy notes of Salsa Taquera urge you to delve into each vibrant bite, making your tacos irresistible.

  • Classic Burritos: Spice up your wrapped creations! The salsa’s smoky warmth harmonizes with rich fillings like beans and cheese, leaving taste buds dancing in delight.

  • Zesty Quesadillas: Pair your cheesy quesadillas with a generous drizzle or side of salsa for a refreshing and flavorful lift. It will make each cheesy bite sing!

  • Savory Avocado Toast: Slather this salsa over mashed avocado on whole-grain toast for a breakfast or snack that’s as vibrant as it is nourishing.

  • Refreshing Mexican Rice: Serve with fluffy cilantro-lime rice for a satisfying side. The bright flavors complement each other, creating a well-rounded meal.

  • Chilled Cerveza: A light, crisp beer pairs wonderfully, balancing the salsa’s heat while enhancing your overall dining experience.

  • Sweet and Spicy Watermelon Salad: The sweetness of watermelon offsets the salsa’s heat, making it an unexpected but delightful pairing with a fresh twist.

How to Store and Freeze Salsa Taquera

Fridge: Store your Salsa Taquera in an airtight container for up to one week. Glass jars are ideal as they don’t retain flavors and keep the salsa fresh.

Freezer: Salsa Taquera can be frozen for up to six months. Portion it into freezer-safe bags or containers, and thaw it in the refrigerator when ready to use.

Reheating: If the texture changes after freezing, blend again with a splash of lime juice or reserved chile water for the perfect consistency.

Room Temperature: It’s best to avoid leaving Salsa Taquera at room temperature for more than 2 hours to maintain its freshness and safety.

Expert Tips for Salsa Taquera

Chiles Matter: Use fresh, pliable arbol chiles for the most vibrant flavor. Dried chiles that are brittle may lead to a flat-tasting Salsa Taquera.

Toast Carefully: When toasting the chiles, keep an eye on them. Too much heat can introduce bitterness, ruining your flavorful condiment.

Smooth Blend: For a silky texture, opt for a high-speed blender. If you prefer, strain the salsa after blending for an even smoother finish.

Adjust Spice Level: Control the heat by removing more or fewer seeds from the chiles before toasting. The more seeds left, the spicier your Salsa Taquera will be!

Taste Test: Always taste your salsa after blending. If it’s lacking, a touch more salt or lime juice can make all the difference.

Make Ahead Options

These Salsa Taquera preparations are perfect for busy home cooks looking to save time during the week! You can toast and soak the arbol chiles up to 24 hours in advance, which helps to streamline the process. Simply follow the initial steps of toasting and soaking, then refrigerate the chiles in an airtight container. The cooked aromatics (onion, garlic, and tomatoes) can also be prepared up to 3 days in advance; store them in the fridge. When you’re ready to whip up your Salsa Taquera, blend the prepped ingredients at your convenience, adding lime juice and salt just before serving for maximum freshness. This way, you’ll enjoy a flavorful salsa that’s just as delicious as freshly made, with minimal effort on busy nights!
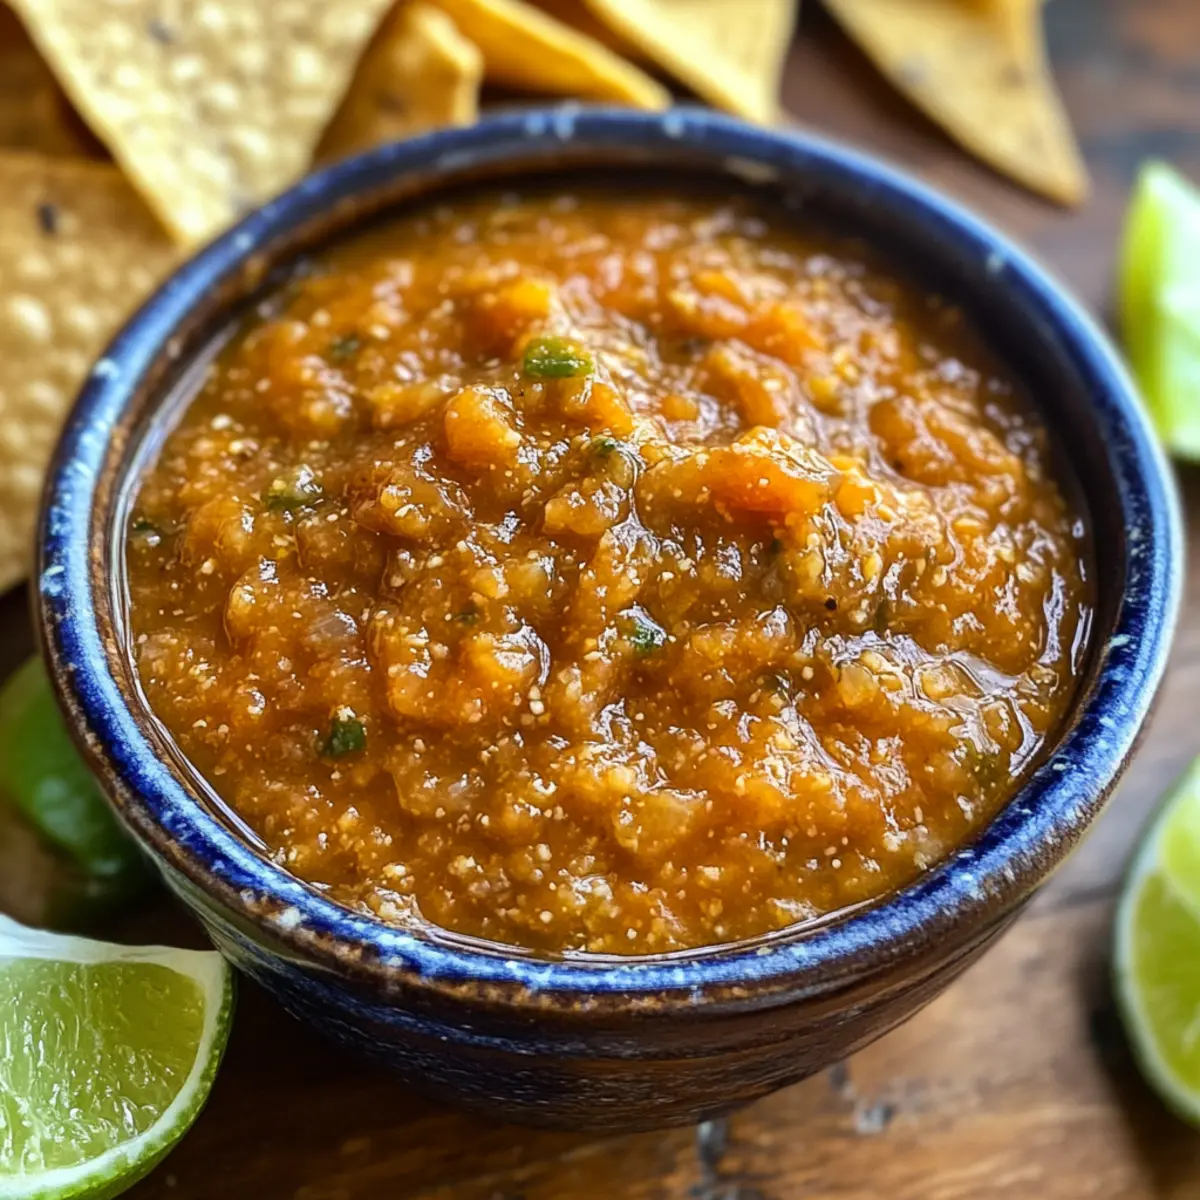
Salsa Taquera Recipe FAQs

How do I choose the right arbol chiles for my Salsa Taquera?
Absolutely! When selecting arbol chiles, look for ones that are fresh and pliable, as opposed to brittle or heavily wrinkled ones. Fresh chiles will provide a vibrant, deep flavor, whereas dried chiles lacking moisture may lead to a flat taste. You can also give an aroma test—if they smell fragrant and spicy, you’re on the right track!

How should I store my Salsa Taquera for the best freshness?
To keep your Salsa Taquera fresh, store it in an airtight container in the refrigerator for up to one week. I recommend using glass jars, as they don’t retain flavors and help maintain the salsa’s vibrant taste. Make sure to keep it sealed tightly to prevent air exposure, which can lead to spoilage.

Can Salsa Taquera be frozen, and how should I do it?
Yes, you can absolutely freeze your Salsa Taquera! Just portion it into freezer-safe bags or containers, leaving some space for expansion as it freezes. It will keep for up to six months. When you’re ready to use it, simply thaw it in the refrigerator overnight. If the texture seems off after thawing, blend it again with a splash of lime juice or a bit of reserved chile water to restore its smooth consistency.

What can I do if my Salsa Taquera turns out too spicy?
No worries! If your Salsa Taquera ends up being spicier than you’d like, you can balance the heat by adding more tomatoes or even a pinch of sugar. Start with half a chopped Roma tomato; blend, then taste, and adjust until you find that perfect flavor profile. The more tomatoes you add, the milder it will get!

Is Salsa Taquera safe for my pets?
While Salsa Taquera is delicious for us humans, I wouldn’t recommend sharing it with pets, especially dogs. Ingredients like garlic and onion can be harmful to them. It’s always best to prepare a pet-friendly treat for your furry friends while you enjoy this zesty salsa!
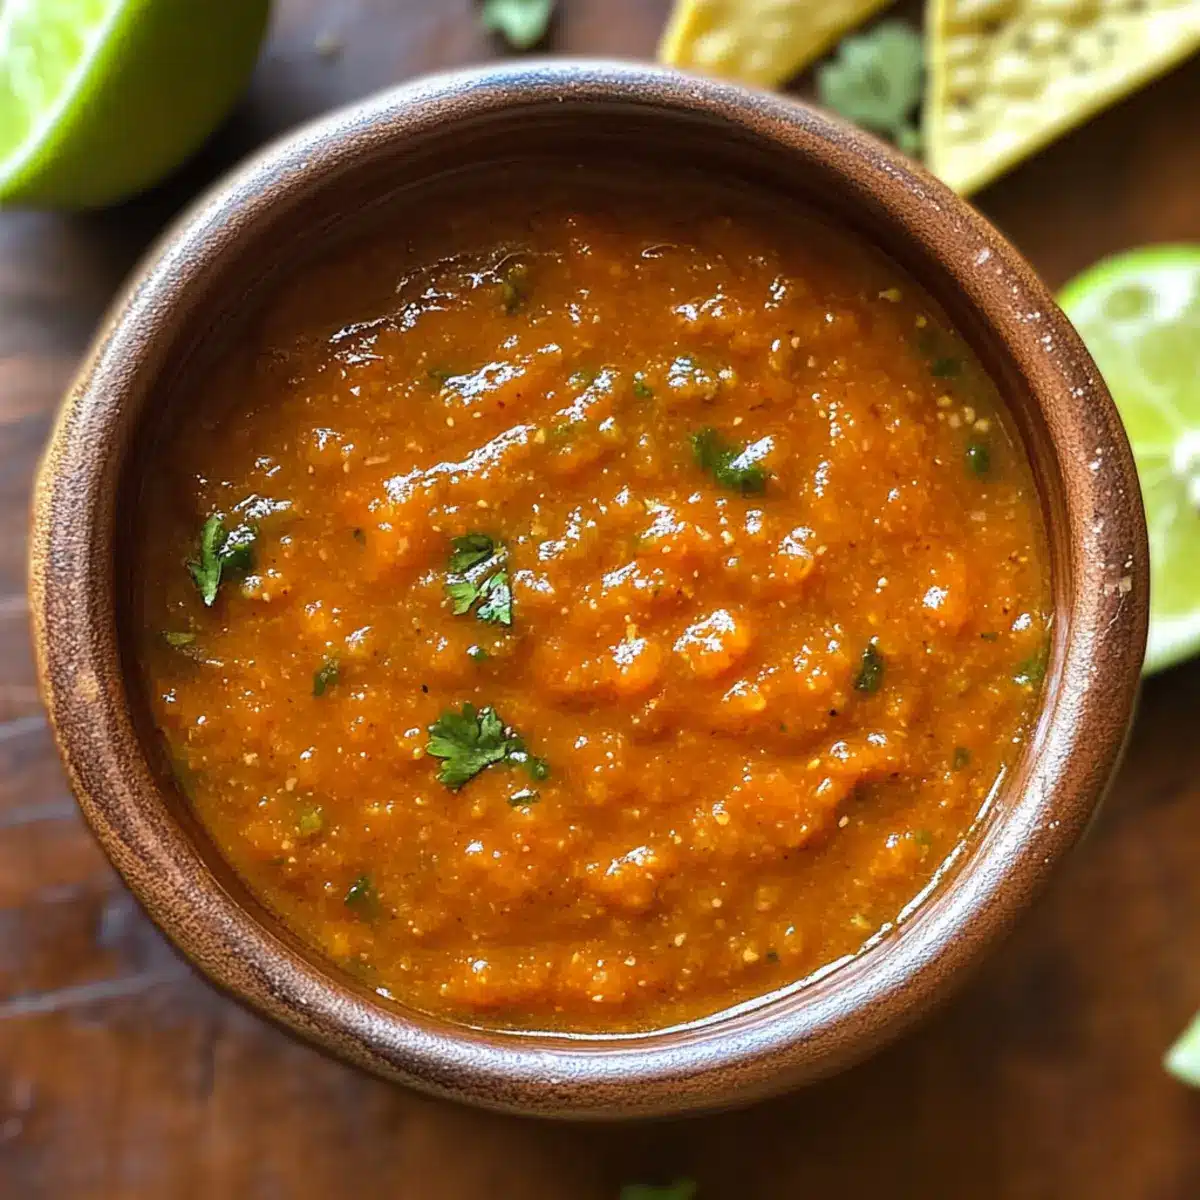
Salsa Taquera

Bold and Flavorful Salsa Taquera in Just 15 Minutes

Experience the burst of bold flavors with this Salsa Taquera, a perfect addition to any Mexican dish.
Prep Time 15 minutes
Total Time 15 minutes
Servings: 4 servings
Course: Appetizer
Cuisine: Mexican
Calories: 50

Ingredients
  

For the Salsa
  • 30 Arbol Chiles Substitute with piquin chiles or cayenne pepper
  • 2 tablespoons Olive Oil For cooking the aromatics
  • 1 White Onion Chop roughly for even cooking
  • 2 cloves Garlic Chop roughly
  • 5 Roma Tomatoes Canned diced tomatoes can be used
  • 1 tablespoon Lime Juice Avoid lemons for this recipe
  • 1 teaspoon Salt To enhance all flavors

Equipment

  • Skillet
  • blender
  • Medium saucepan

Method
 

Preparation Steps
  1. Begin by stemming and lightly shaking out the seeds from arbol chiles. Toast them in a medium skillet over medium heat for 2-3 minutes.
  2. Once toasted, bring a saucepan of water to a boil, then turn off the heat. Add the toasted chiles to soak for 15 minutes.
  3. While the chiles soak, heat olive oil in a skillet and cook roughly chopped white onion for 3-4 minutes until translucent. Add chopped garlic and continue for 1-2 minutes, then add Roma tomatoes and cook for about 5 minutes.
  4. Drain the soaked chiles and add them to a blender with the sautéed onion mixture, lime juice, and salt. Blend until smooth, adjusting with reserved chile water if necessary.
  5. Taste the salsa and adjust seasoning with more salt or lime juice as needed. Add chopped tomatoes to mellow the flavor if too intense.
Nutrition

Serving: 2tablespoonsCalories: 50kcalCarbohydrates: 8gProtein: 1gFat: 2gMonounsaturated Fat: 1gSodium: 200mgPotassium: 150mgFiber: 1gSugar: 2gVitamin A: 500IUVitamin C: 10mgCalcium: 10mgIron: 1mg

Notes

Store Salsa Taquera in an airtight container for up to one week in the fridge or freeze for up to six months. Blend again if texture changes after freezing.

Tried this recipe?

Let us know how it was!

Refreshing Pink Dragonfruit Lemonade for Summer Sips

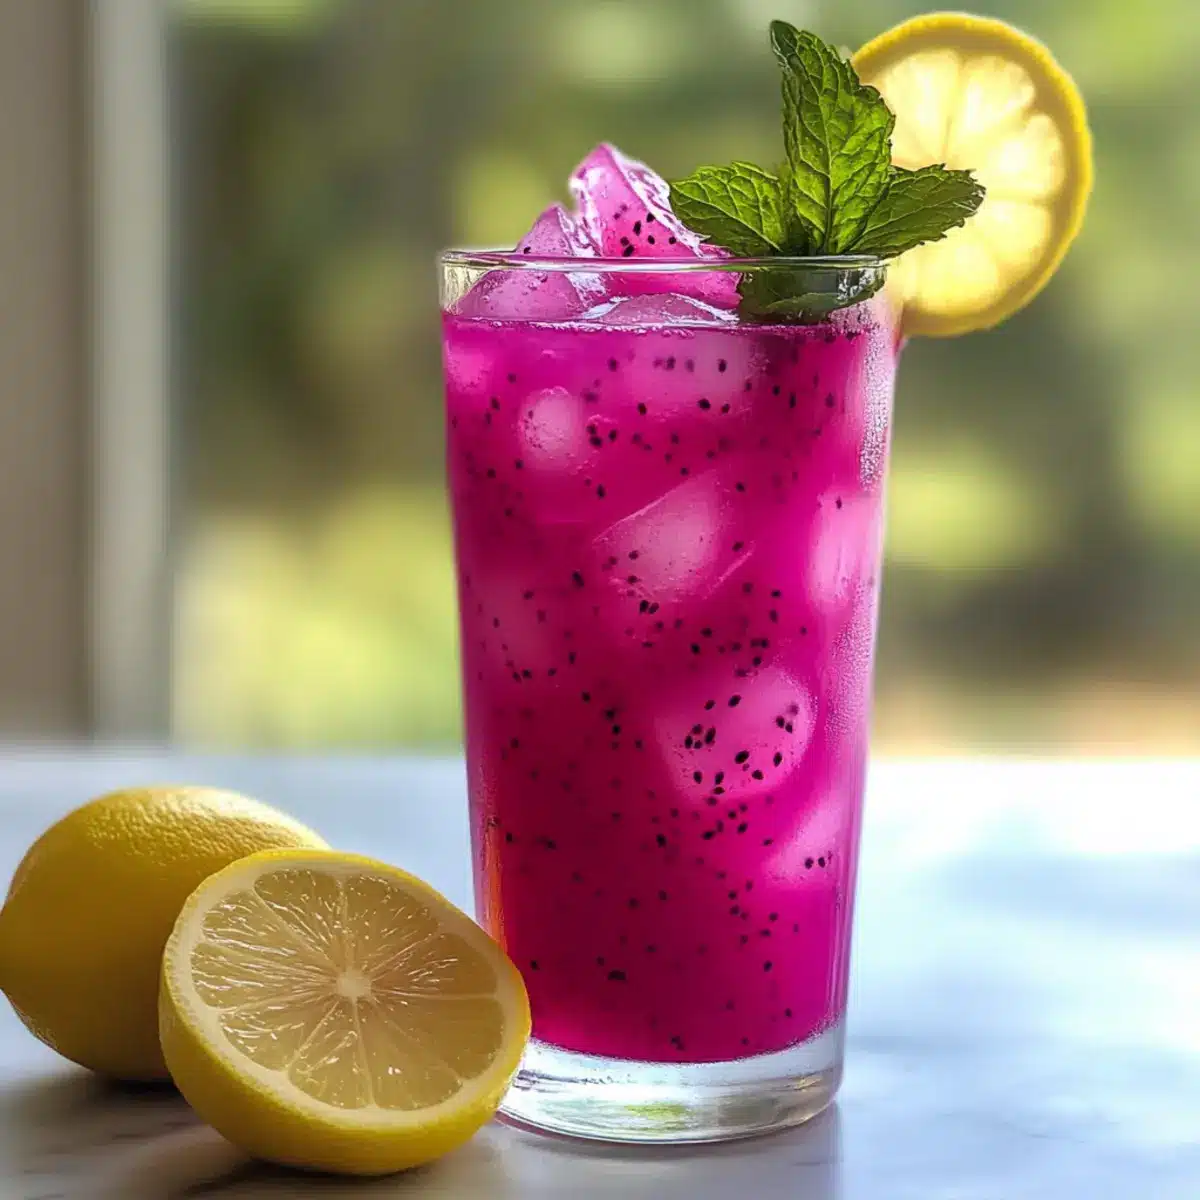
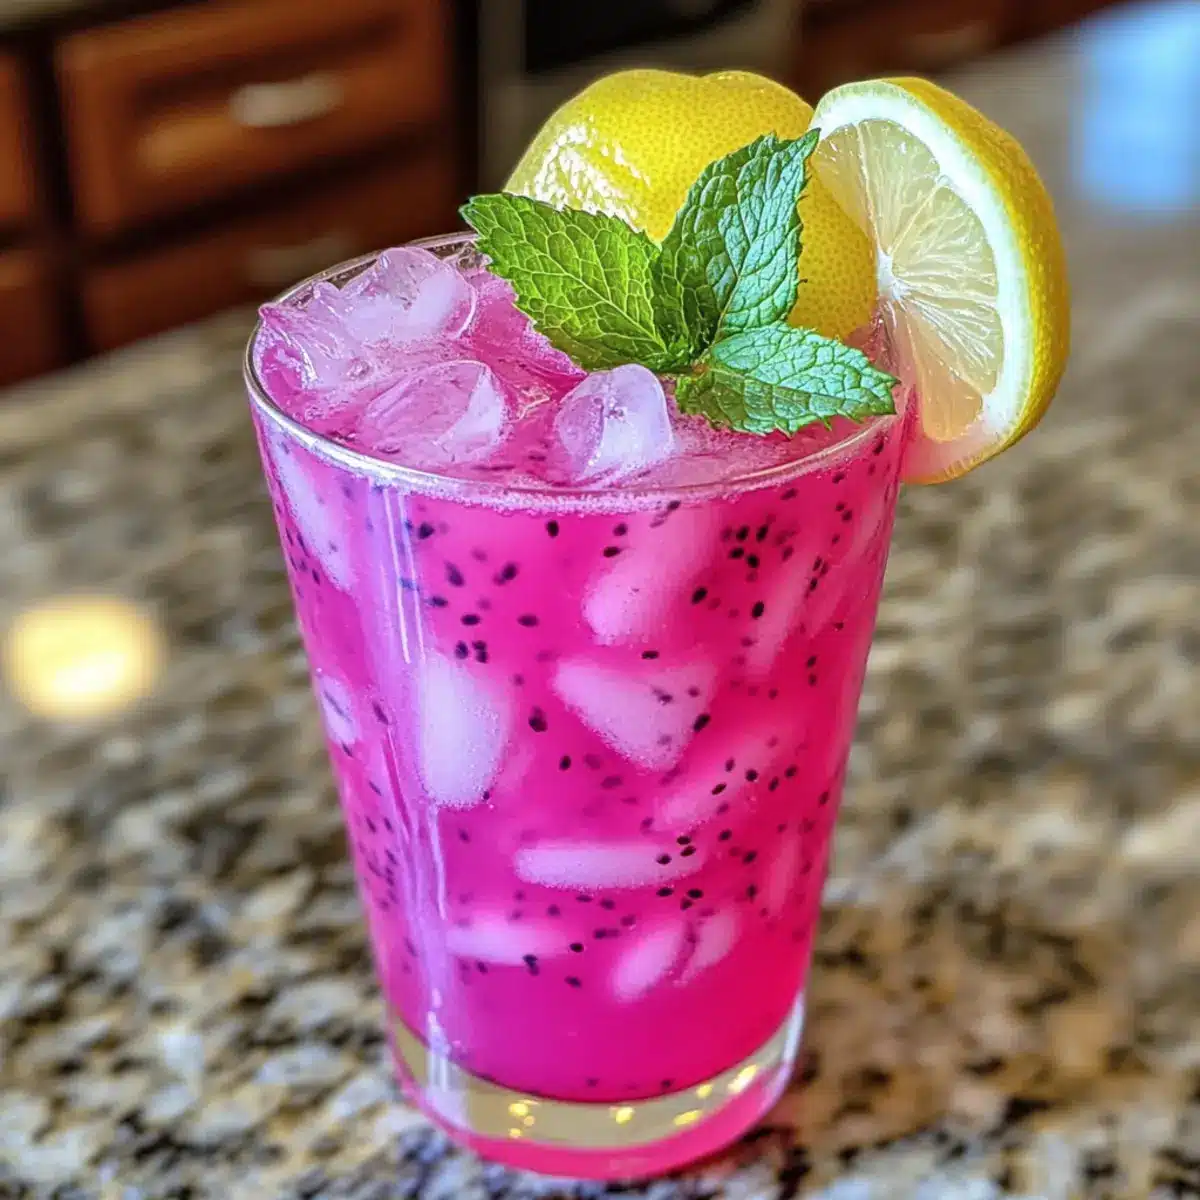
As I poured a glass of this radiant Pink Dragonfruit Lemonade on a sunny afternoon, little did I know I was about to unlock a summer favorite. Bursting with a tropical flair and zesty lemon notes, this vibrant drink is both refreshing and aesthetically pleasing—perfect for those sunny brunches and warm weather gatherings. With just a handful of ingredients, my hustle in the kitchen is minimized; this vegan-friendly, non-alcoholic delight is a low-calorie option that everyone can enjoy. Imagine impressing your friends with a drink that’s not just easy to whip up but also a stunning centerpiece at your table. Curious about how to create this captivating refresher or maybe even explore fun variations like Strawberry Dragonfruit Lemonade? Let’s dive into the recipe!

Why is Pink Dragonfruit Lemonade Amazing?

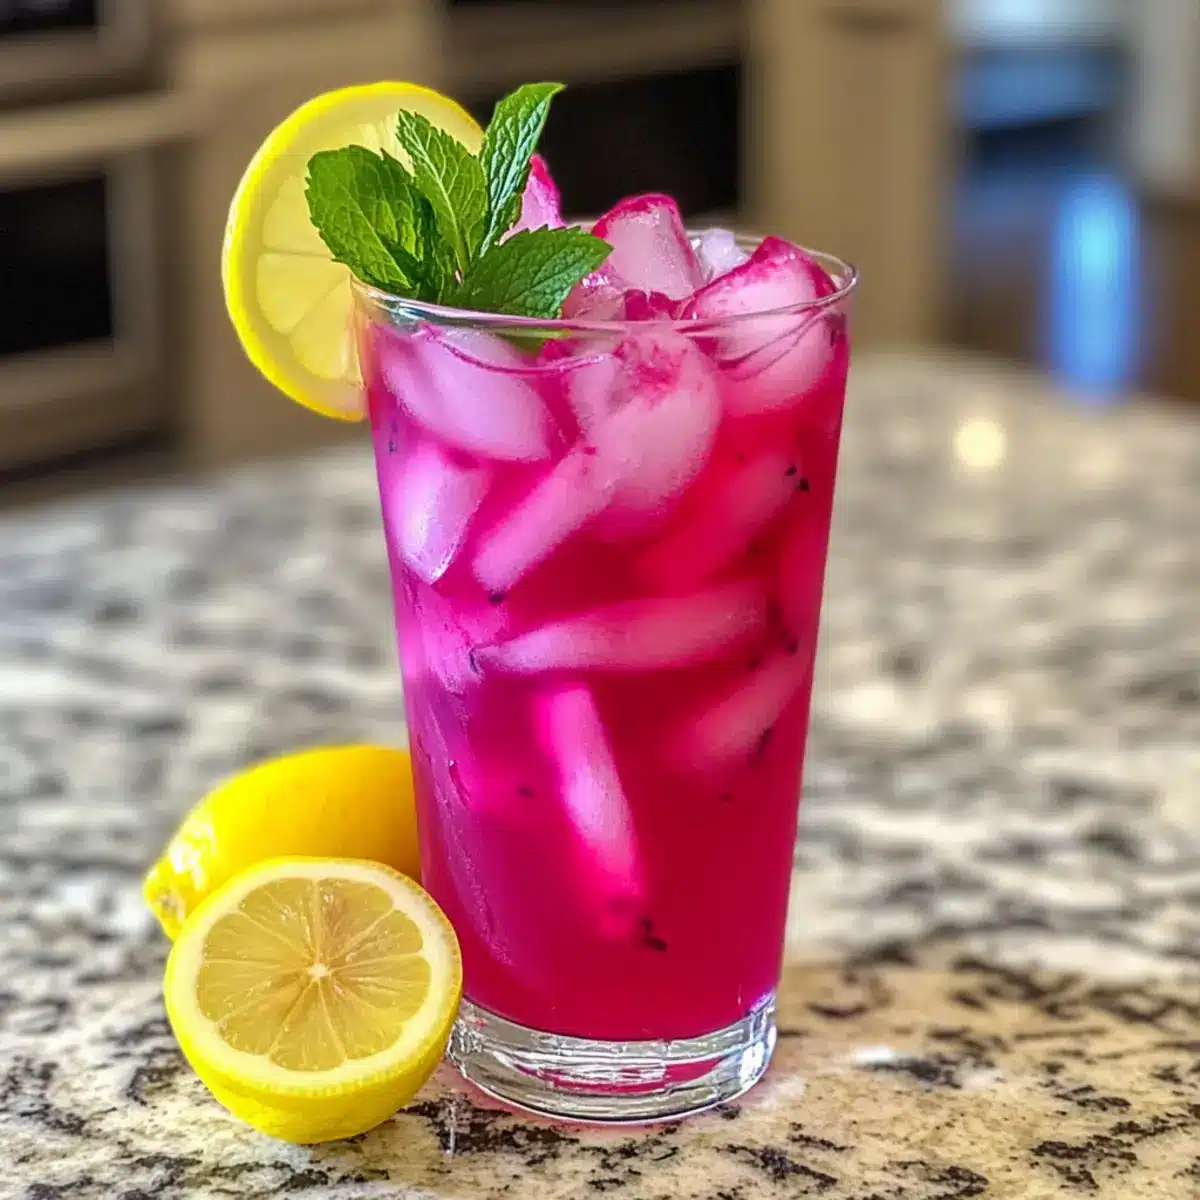
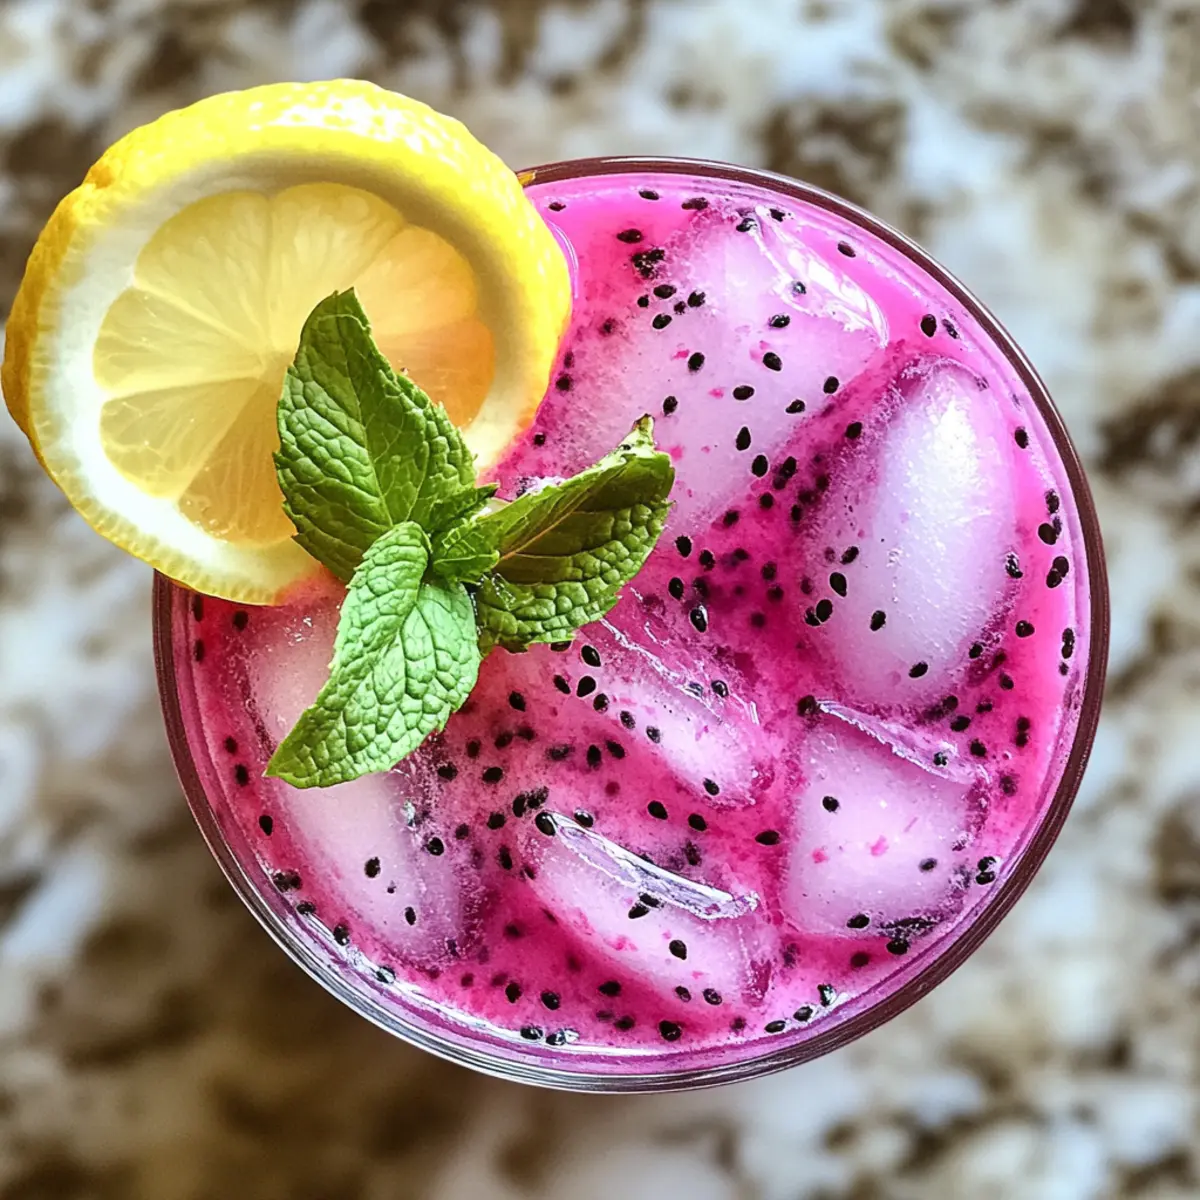
Vibrant Color: This drink boasts a stunning pink hue that catches the eye, making it perfect for impressing guests at summer gatherings.

Ease of Preparation: With minimal ingredients and simple steps, you’ll whip this up in no time—ideal for a quick refreshment!

Refreshing Taste: The delightful blend of tropical dragonfruit and zesty lemon creates a perfectly balanced drink that quenches your thirst.

Versatile Variations: Feel free to customize! Make a Sparkling Dragonfruit Lemonade or try adding fresh strawberries for a twist.

Health-Conscious Choice: Low in calories and vegan-friendly, this lemonade is a guilt-free indulgence that everyone can enjoy.

Crowd Favorite: Whether it’s a casual brunch or a festive barbecue, this Pink Dragonfruit Lemonade is sure to be a hit. Don’t forget to pair it with a refreshing Mango Dragonfruit Refresher for more summer sips!

Pink Dragonfruit Lemonade Ingredients

For the Base

  • Pink Dragonfruit – A naturally vibrant fruit that adds stunning color and mild sweetness; frozen chunks work well for convenience.
  • Freshly Squeezed Lemon Juice – This brings a zesty freshness; always opt for fresh lemons to elevate the flavor.
  • Sugar or Honey – Adjust the sweetener based on your taste preferences; a little goes a long way for our Pink Dragonfruit Lemonade.
  • Cold Water – Helps to dilute the mixture for a refreshing drink; feel free to swap half for sparkling water for an added fizz.

For Serving

  • Ice – Essential for serving the drink chilled; it transforms the lemonade into a perfect summer delight.
  • Lemon Slices – Use for garnish to enhance presentation and a pop of color.
  • Fresh Mint (optional) – A gorgeous touch that adds a refreshing herbal flavor twist to your drink.

Step‑by‑Step Instructions for Pink Dragonfruit Lemonade

Step 1: Blend Dragonfruit
Start by scooping the vibrant pink flesh of the dragonfruit into a blender. Blend on high until you achieve a smooth consistency, which should take about 30 seconds. If you prefer a creamy texture, ensure there are no chunks remaining. This will be the beautiful base of your Pink Dragonfruit Lemonade.

Step 2: Strain (Optional)
If you desire an even smoother drink, pour the blended dragonfruit through a fine mesh strainer into a bowl or pitcher. Use a spatula to press down and extract as much liquid as possible, leaving any pulp behind. This step enhances the drink’s silky texture and helps showcase the stunning color of the Pink Dragonfruit Lemonade.

Step 3: Mix Lemonade
In a large pitcher, combine the freshly squeezed lemon juice with the blended dragonfruit. Add your preferred sweetener, whether sugar or honey, and stir vigorously until fully dissolved. This merging of flavors will create a delightful tartness balanced by the smooth sweetness of the dragonfruit, essential to crafting your Pink Dragonfruit Lemonade.

Step 4: Add Water
Pour in cold water, mixing as you go to ensure that all components blend seamlessly. Aim for about 4 cups to achieve a refreshing consistency that quenches your thirst. If you’re feeling adventurous, consider replacing half the water with sparkling water for a fizzy twist, which adds an exciting effervescence to your Pink Dragonfruit Lemonade.

Step 5: Serve
Prepare to serve by filling glasses with ice, allowing the cold cubes to chill the drink perfectly. Gently pour the luscious Pink Dragonfruit Lemonade over the ice, filling each glass to the brim. For an extra touch of visual appeal, garnish with lemon slices and fresh mint leaves, creating an inviting presentation that’s perfect for summer gatherings.

Pink Dragonfruit Lemonade Variations

Customize your refreshing Pink Dragonfruit Lemonade to fit every occasion and taste preference!

  • Strawberry Twist: Blend in fresh strawberries for a delightful pink hue and extra sweetness. This berry addition brings a refreshing twist.

  • Minty Fresh: Incorporate fresh mint leaves during blending or as a garnish for a herbal aroma that elevates your drink. It’s like summer in a glass!

  • Sparkling Touch: Top off your lemonade with sparkling water or club soda to create a bubbly sensation that dances on your palate. Effervescence elevates every sip!

  • Tropical Fusion: Mix in chunks of pineapple or coconut water for a tropical flavor explosion. This variation makes you feel like you’re on a beach getaway.

  • Peachy Pink: Blend ripe peaches with the dragonfruit for a juicy, sweet flavor that pairs wonderfully with lemon’s tartness. It’s pure summer bliss!

  • Chili Kick: Add a pinch of chili powder or a few slices of jalapeño for a spicy twist that balances the sweetness and enhances flavor complexity. Perfect for adventurous palates!

  • Citrus Blend: Experiment with other citrus fruits like lime or orange juice along with lemon for a zesty flavor mix. The citrus medley brings brightness into every glass.

  • Herbal Infusion: Consider steeping a herbal tea, like hibiscus or chamomile, in the water before mixing to add unique undertones. This can create an inviting aroma and flavor.

For other delicious options, check out a refreshing recipe for a Mango Dragonfruit Refresher to enjoy alongside your lemonade or as a delightful alternative!

What to Serve with Pink Dragonfruit Lemonade

Imagine enjoying a refreshing pink lemonade on a sunny patio; it’s the perfect drink to complement a lively summer meal.

  • Grilled Shrimp Tacos: The zesty lime and savory shrimp perfectly balance the sweetness of the Pink Dragonfruit Lemonade, bringing freshness to your plate.

  • Mango Salsa: This vibrant side dish offers a tropical flair that pairs beautifully, enhancing the fruity notes of your drink.

  • Avocado Caprese Salad: Creamy avocado and juicy tomatoes bring richness that contrasts delightfully with the light, tangy lemonade.

  • Spicy Guacamole with Tortilla Chips: The creaminess and spice of guacamole create a delightful interplay of flavors with the refreshing lemonade.

  • Coconut Rice: Tender and slightly sweet, coconut rice provides a comforting base to savor alongside your drink, adding a tropical twist.

  • Peach Tart: A sweet dessert topped with fresh peaches brings a velvety finish to your meal that mingles perfectly with the refreshing lemonade.

  • Sparkling Water: Keep the vibe light and revitalizing with sparkling water on the side; it complements the freshness of the Pink Dragonfruit Lemonade effortlessly.

  • Minty Fruit Salad: A medley of seasonal fruits sprinkled with fresh mint enhances the drink’s herbal notes, making every sip feel rejuvenating.

  • Grilled Veggie Skewers: These colorful skewers add a smoky depth that beautifully contrasts the sweet and tart flavors of the drink—perfect for a summer feast!

Expert Tips for Pink Dragonfruit Lemonade

  • Perfect Sweetness: Adjust the sugar or honey based on your taste; start with less and add more if needed to keep the Pink Dragonfruit Lemonade balanced.
  • Frozen Convenience: Using frozen dragonfruit is a great way to chill your drink quickly and ensure you have this vibrant fruit on hand year-round.
  • Straining for Smoothness: If you prefer a silky texture, always strain the blended dragonfruit to remove pulp and make the Pink Dragonfruit Lemonade more enjoyable.
  • Sparkling Twist: For a refreshing bubbly version, substitute half the cold water with sparkling water just before serving to add a delightful effervescence.
  • Garnishing Ideas: Enhance presentation and flavor by adding fresh mint or lemon slices; it makes each glass look stunning and adds a refreshing garnish.

Make Ahead Options

These Pink Dragonfruit Lemonade preparations are a lifesaver for busy home cooks looking to maximize their time! You can blend the dragonfruit and mix it with lemon juice and sweetener up to 24 hours in advance; just cover and refrigerate. To maintain freshness, store the mixture in an airtight container, which helps preserve that vibrant hue and flavor. When it’s time to serve, simply add the cold water and ice, stirring gently to combine. For an effervescent twist, pour in half sparkling water just before serving. You’ll impress your guests with minimal effort, enjoying a refreshing drink that tastes just as delicious as if it were made fresh!

How to Store and Freeze Pink Dragonfruit Lemonade

  • Fridge: Store in an airtight container for up to 2 days. Give it a good stir before serving to mix the flavors back together.
  • Freezer: For longer storage, freeze the Pink Dragonfruit Lemonade in ice cube trays. These can be used to chill future drinks while adding a hint of flavor.
  • Reheating: Not applicable, as this lemonade is best enjoyed cold. Simply blend fresh or frozen dragonfruit if you want a quick, fresh version later!
  • Serving Fresh: For the best taste experience, consume fresh whenever possible; the vibrant flavors are at their peak right after mixing.

Pink Dragonfruit Lemonade Recipe FAQs

What is the best way to select ripe pink dragonfruit?
Absolutely! When choosing pink dragonfruit, look for fruits that have bright, even skin with no dark spots or blemishes. A ripe dragonfruit should yield slightly to pressure, feeling firm but not overly soft. If the skin has dark blotches all over or appears shriveled, it’s best to skip it.

How long can I store Pink Dragonfruit Lemonade in the fridge?
Very! You can store your Pink Dragonfruit Lemonade in an airtight container in the refrigerator for up to 2 days. Just remember to give it a good stir before serving, as the ingredients may settle or separate while resting.

Can I freeze Pink Dragonfruit Lemonade?
Absolutely! For freezing, pour the Pink Dragonfruit Lemonade into ice cube trays and freeze until solid. Once frozen, transfer the cubes to a freezer-safe bag. They can be stored for up to 3 months. These tasty cubes not only chill future drinks but also add a hint of dragonfruit flavor.

What if my Pink Dragonfruit Lemonade is too sweet or too tart?
No worries! If your lemonade turns out too sweet, simply add a splash more lemon juice to balance the flavors. Conversely, if it’s too tart, stir in a bit more sweetener, tasting as you go until you achieve the perfect blend. This flexibility is one of the joys of making lemonade at home!

Is Pink Dragonfruit Lemonade suitable for children or those with allergies?
Very! This lemonade is vegan-friendly and low in calories, making it a great choice for everyone, including children. However, always check for allergies, especially to honey if you’re using it as a sweetener. Additionally, if someone is allergic to dragonfruit, it’s best to substitute with another fruit for a similar taste.

What are some fun variations I can make with Pink Dragonfruit Lemonade?
The more the merrier! Consider adding fresh strawberries for a Strawberry Dragonfruit Lemonade, or incorporate fresh mint leaves for a refreshing herbal twist. If you love bubbles, top it off with sparkling water just before serving for a delightful effervescence. Feel free to experiment and find the combination that delights your taste buds the most!

Pink Dragonfruit Lemonade

Refreshing Pink Dragonfruit Lemonade for Summer Sips

This Pink Dragonfruit Lemonade is a vibrant, refreshing drink perfect for summer gatherings, made with tropical flavors and zesty lemon notes.
Prep Time 10 minutes
Total Time 10 minutes
Servings: 4 cups
Course: Drinks
Cuisine: Vegan
Calories: 50

Ingredients
  

For the Base
  • 2 cups Pink Dragonfruit frozen chunks work well for convenience
  • 1 cup Freshly Squeezed Lemon Juice always opt for fresh lemons
  • 1/2 cup Sugar or Honey adjust based on your taste preferences
  • 4 cups Cold Water feel free to swap half for sparkling water
For Serving
  • Lemon Slices for garnish to enhance presentation
  • Fresh Mint (optional) adds a refreshing herbal flavor twist

Equipment

  • blender
  • Strainer
  • pitcher
  • Measuring cups

Method
 

Step-by-Step Instructions for Pink Dragonfruit Lemonade
  1. Start by scooping the vibrant pink flesh of the dragonfruit into a blender. Blend on high until you achieve a smooth consistency, which should take about 30 seconds.
  2. If you desire an even smoother drink, pour the blended dragonfruit through a fine mesh strainer into a bowl or pitcher.
  3. In a large pitcher, combine the freshly squeezed lemon juice with the blended dragonfruit. Add your preferred sweetener and stir vigorously until fully dissolved.
  4. Pour in cold water, mixing as you go to ensure all components blend seamlessly.
  5. Prepare to serve by filling glasses with ice, then gently pour the Pink Dragonfruit Lemonade over the ice, filling each glass to the brim.

Nutrition

Serving: 1cupCalories: 50kcalCarbohydrates: 13gProtein: 1gSodium: 10mgPotassium: 100mgFiber: 1gSugar: 10gVitamin A: 2IUVitamin C: 40mgCalcium: 1mgIron: 1mg

Notes

Adjust the sweetener based on your taste; using frozen dragonfruit is a great way to chill your drink quickly. Strain for a silky texture and consider substituting half the water with sparkling water for a bubbly version.

Tried this recipe?

Let us know how it was!

Delicious Blackberry Cheesecake Brownies for a Sweet Treat

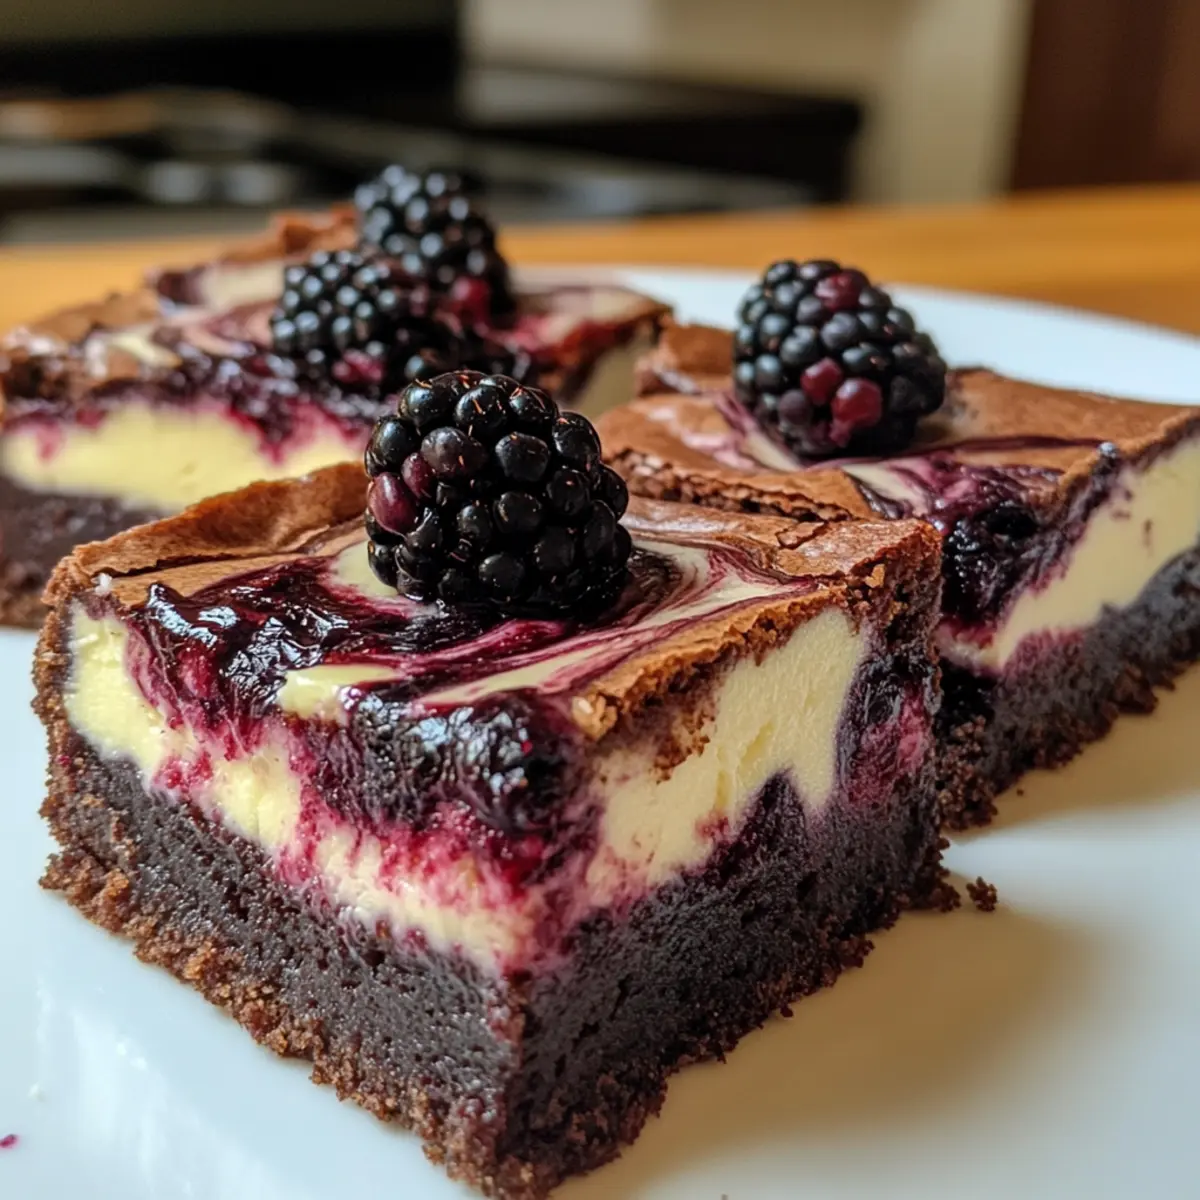
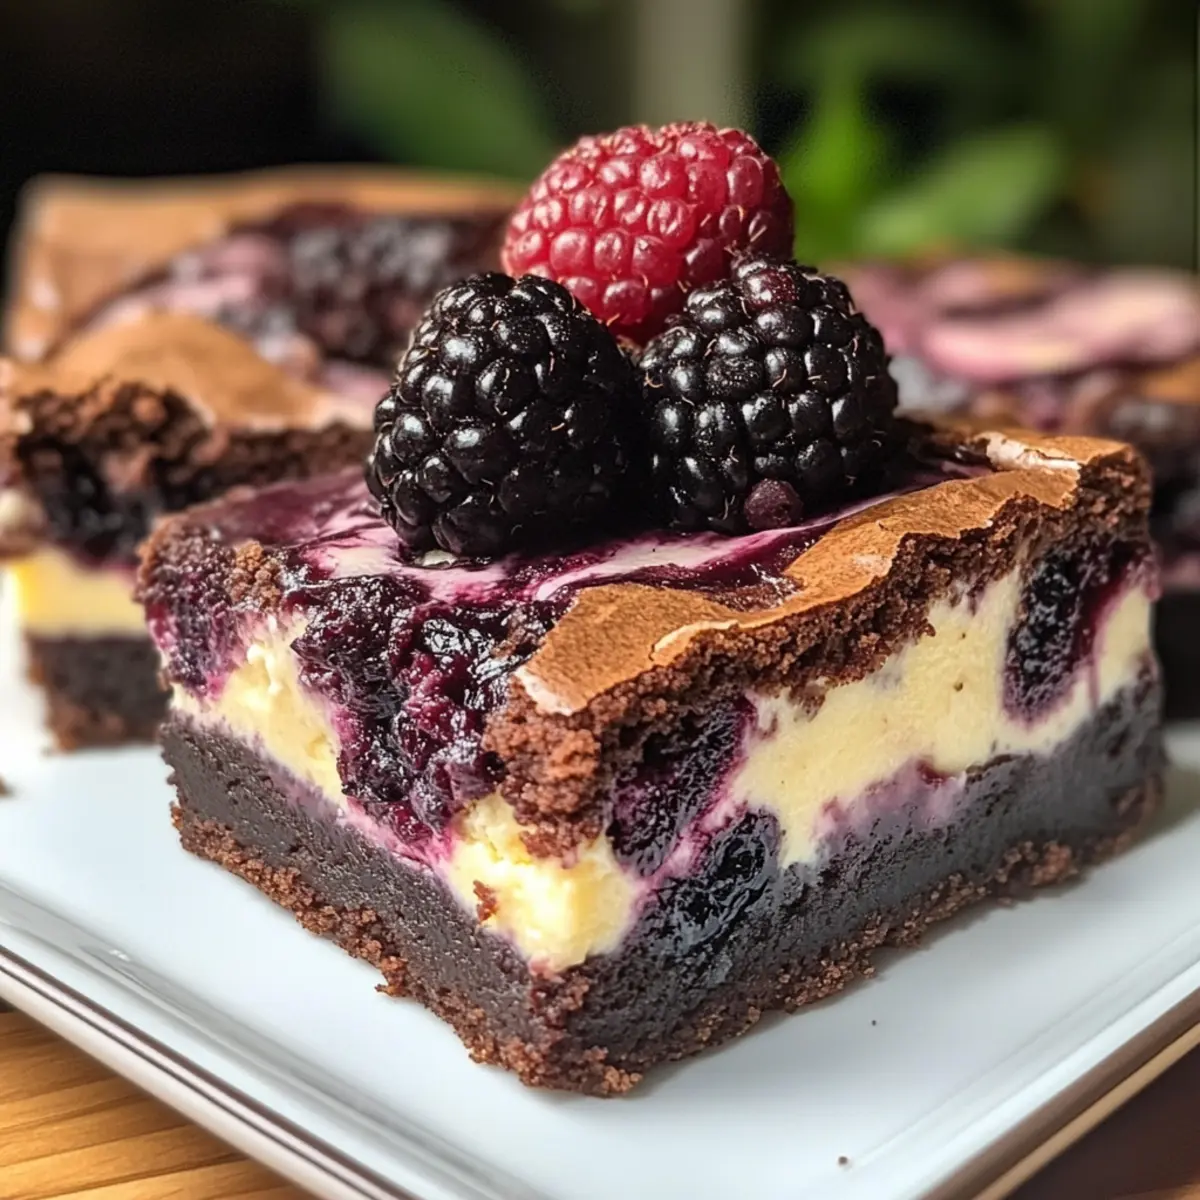
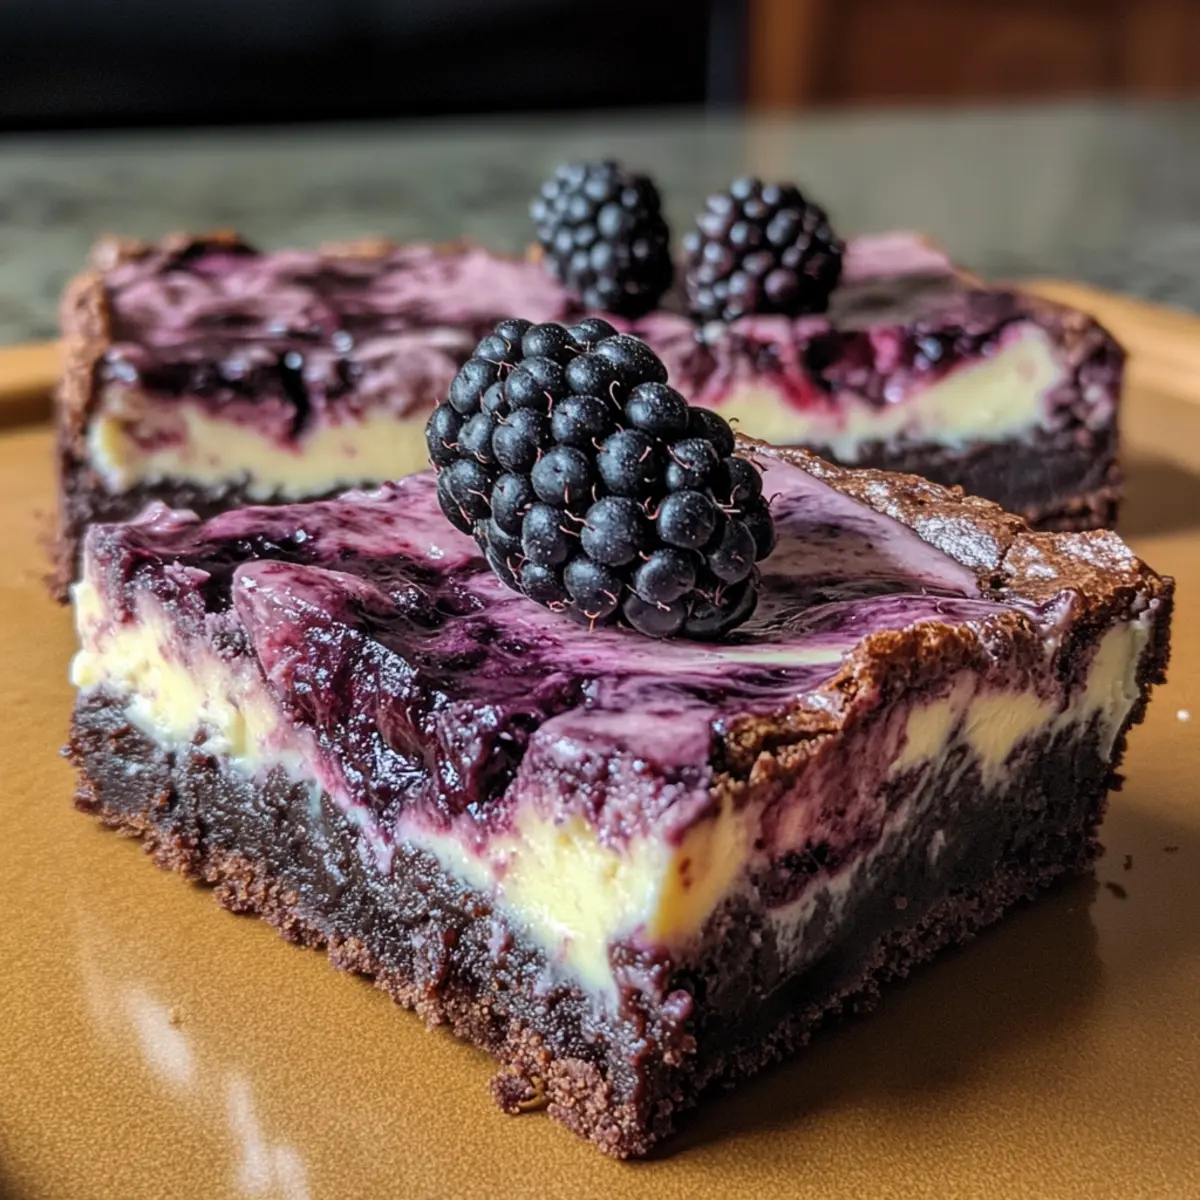
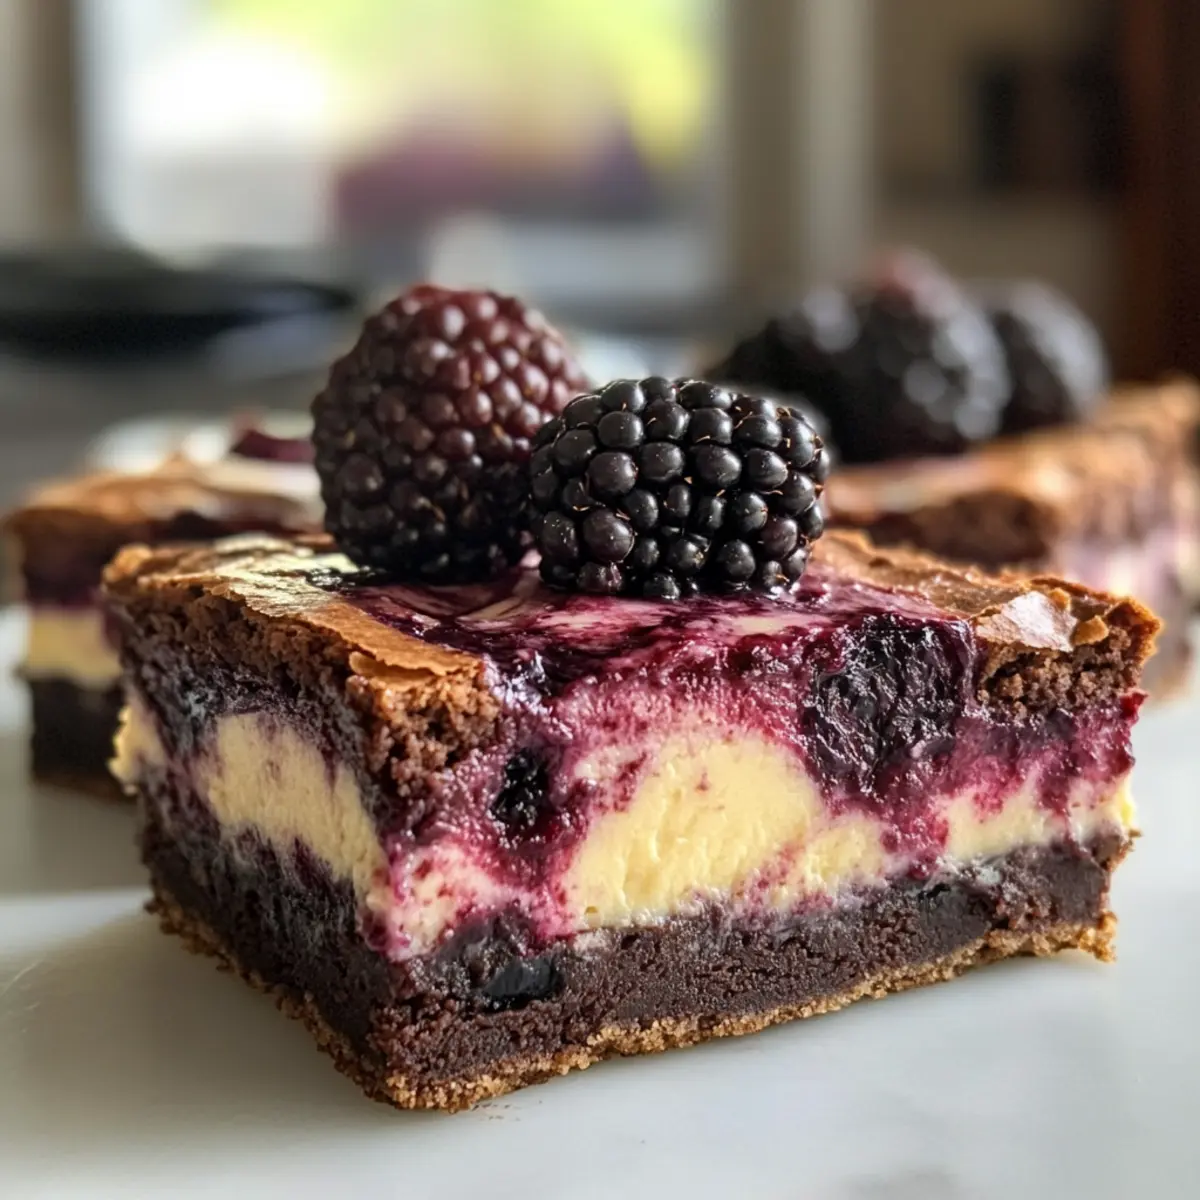
“Did you try the latest bakery’s special?” The question floated through the cafe, igniting my curiosity. I couldn’t get those words out of my head as I reminisced about the creamy, tangy allure of cheesecake combined with my all-time favorite brownies. That longing brought me to create these irresistible Blackberry Cheesecake Brownies. With a luscious brownie base, a velvety cheesecake layer, and a vibrant swirl of sweet-tart blackberry puree, this dessert isn’t just a feast for the eyes; it’s a protein-packed indulgence everyone will adore. These brownies are perfect for gatherings or just a cozy night in, boasting both simplicity in preparation and that delightful balance of chocolate and fruit. Are you ready to explore just how delicious homemade brownies can be? Let’s dive in!

Why Choose Blackberry Cheesecake Brownies?

Decadent Delight: These brownies deliver the rich, fudgy goodness you crave, perfectly blended with creamy cheesecake and a stunning blackberry swirl.

Protein-Packed Indulgence: Not only are these brownies a delicious dessert, but they also pack a protein punch thanks to Greek yogurt and cream cheese!

Crowd-Pleaser: Whether for parties or family dinners, this dessert is guaranteed to please everyone and leave them asking for the recipe.

Versatile & Fun: Feel free to swap blackberries for raspberries or strawberries, creating a new flavor twist every time you bake! Looking for more fruity treats? Check out Strawberry Cheesecake Bars for another scrumptious option.

Quick and Easy: With straightforward instructions, you can whip up these delightful brownies in no time, satisfying your sweet tooth without the hassle.

Elegant Presentation: The vibrant blackberry swirl not only tastes amazing but also transforms the brownies into an eye-catching dessert — perfect for impressing guests!

Blackberry Cheesecake Brownies Ingredients

  • For the Blackberry Puree
    Blackberries – Fresh or frozen, they add a vibrant tangy flavor and beautiful color to the brownies.
    Granulated White Sugar – Essential for balancing the sweetness of the blackberry puree; no substitutions recommended.
    Water – Assists in cooking down blackberries to create a smooth puree; ensure it’s just the right amount.

  • For the Brownie Base
    Unsalted Butter – Provides rich, fudgy texture; can opt for margarine or vegan butter for a dairy-free version.
    Eggs – Two are crucial for a deliciously moist brownie texture; no substitutions will maintain the integrity of the recipe.
    Vanilla Extract – A key ingredient that enhances flavor; feel free to use vanilla bean paste for an added touch.
    Salt – Enhances overall chocolate flavor; can adjust based on personal taste preferences.
    Cocoa Powder – Unsweetened cocoa gives the brownie its chocolatey goodness; avoid using flavored mixes.
    All-Purpose Flour – Adds structure to brownies; a gluten-free flour can be swapped if necessary.

  • For the Cheesecake Layer
    Cream Cheese – Provides rich, creamy texture; Neufchâtel can be used for a lighter variation.
    Greek Yogurt – Adds tang and creaminess to the cheesecake layer, high in protein; sour cream is a suitable alternative.
    Granulated White Sugar – Balances the tang of the cream cheese; the same sugar from the batter can be used.
    Egg – One large egg is necessary for setting the cheesecake; no substitutes recommended.
    Salt – To enhance the sweetness of the cheesecake layer; adjust according to taste.

Now that you have all the essential ingredients for your Blackberry Cheesecake Brownies, get ready to delight your taste buds and wow your friends with this protein-packed, delicious dessert!

Step‑by‑Step Instructions for Blackberry Cheesecake Brownies

Step 1: Prepare Blackberry Puree
In a medium saucepan, combine fresh or frozen blackberries, 1/4 cup granulated white sugar, and 1/4 cup water over medium-high heat. Cook for about 8-10 minutes, stirring occasionally, until the blackberries are soft and bubbly. Use a fine mesh strainer to strain the mixture, discarding the solids, and let the puree cool while you make the brownie base.

Step 2: Brownie Base
Preheat your oven to 325°F (163°C) and line an 8″x8″ baking dish with parchment paper for easy removal. In a microwave-safe bowl, melt 12 tablespoons unsalted butter until just melted. Stir in 1 1/2 cups granulated sugar, 2 eggs, 2 teaspoons vanilla extract, and 1/2 teaspoon salt until well combined. Gently fold in 3/4 cup cocoa powder and 1/2 cup all-purpose flour until no dry streaks remain, then spread the batter evenly in the prepared baking dish.

Step 3: Cheesecake Layer
In a mixing bowl, beat together 8 ounces softened cream cheese, 1/4 cup Greek yogurt, 1 small egg, 1/4 cup granulated sugar, and another 1/2 teaspoon salt using an electric mixer until the mixture is smooth and creamy. Pour this mixture over the brownie batter, carefully spreading it to create an even layer that covers the brownies completely.

Step 4: Add Swirl
Once your cheesecake layer is in place, drizzle the cooled blackberry puree generously over the top. Using a toothpick or a knife, gently swirl the puree into the cheesecake layer without disturbing the brownie base beneath. Aim for a marbled effect, distributing the blackberry throughout for delicious flavor in every bite of your Blackberry Cheesecake Brownies.

Step 5: Bake
Place the baking dish in the preheated oven and bake for approximately 1 hour. To check if they’re done, gently shake the dish; the cheesecake should be set but slightly jiggly in the center, while a toothpick inserted into the brownie layer should come out mostly clean. If the toothpick comes out too wet, bake for an additional 5-10 minutes.

Step 6: Cool and Serve
Once baked, remove the dish from the oven and let it cool on a wire rack. For the best texture, refrigerate the Blackberry Cheesecake Brownies for at least 2 hours before cutting. When you’re ready to serve, slice into 9 large squares, each revealing luscious layers and a beautiful swirl atop!

What to Serve with Blackberry Cheesecake Brownies?

Elevate your dessert experience with these delightful pairings that complement the rich and tangy notes of your brownies.

  • Whipped Cream: A light dollop of fresh whipped cream adds a fluffy texture, enhancing the decadence of the brownies.

  • Vanilla Ice Cream: The cold, creamy contrast of vanilla ice cream perfectly balances the warmth and richness of the brownies, creating a classic duo.

  • Fresh Berries: Serve alongside a medley of fresh blueberries and strawberries to echo the blackberry theme, highlighting the dessert’s fruity undertones.

  • Coffee or Espresso: A cup of robust coffee or a shot of espresso brings out the chocolate flavors, offering a warm contrast that complements dessert beautifully.

Indulge in this pairing for a well-rounded dessert experience. Imagine sinking your fork into a fudgy brownie while savoring a sip of aromatic coffee—pure bliss!

  • Chocolate Sauce: Drizzle warm chocolate sauce on top for a double chocolate treat that chocolate lovers will adore, intensifying the overall flavor.

  • Nutty Granola: A sprinkle of crunchy granola on the side introduces a delightful texture contrast and a hint of wholesome nutty flavor.

  • Mint Tea: Refreshing mint tea creates a cool escape from the richness, cleansing the palate and leaving you ready for more of that enticing brownie experience.

  • Salted Caramel Sauce: An additional drizzle of salted caramel elevates the dessert’s complexity, balancing sweetness and adding a gourmet touch.

Blackberry Cheesecake Brownies Variations

Feel free to get creative with these delicious brownies; customizing them allows you to match your tastes and dietary needs!

  • Berry Swap: Substitute blackberries with raspberries or strawberries for a delightful twist on flavors that adds a unique spin.

  • Vegan Option: Use flax eggs instead of regular eggs and opt for plant-based cream cheese for a completely vegan dessert.

  • Nutty Texture: Add a handful of chopped walnuts or pecans to the brownie batter for a lovely crunch that contrasts the creamy cheesecake layer.

  • Chocolate Lovers: Swirl in chocolate chips into the brownie layer for an extra chocolatey delight that will take your brownies to the next level.

  • Lower Sugar: Replace regular sugar with a sugar substitute like erythritol or stevia for a lower-calorie version that still satisfies your sweet tooth.

  • Cocoa Variation: Experiment with different cocoa powders, like dark or Dutch-processed, for distinctive chocolate notes in your brownie base.

  • Spice It Up: Add a pinch of cinnamon or a splash of espresso powder to the brownie batter for an intriguing depth of flavor that pairs beautifully with chocolate.

  • Swirled with Love: For a colorful twist, try adding a layer of raspberry or strawberry puree alongside the blackberry for a stunning layered effect.

If you’re looking for more fruity options, don’t forget to check out these scrumptious Strawberry Cheesecake Bars that are sure to impress!

How to Store and Freeze Blackberry Cheesecake Brownies

Room Temperature: Store brownies in an airtight container at room temperature for up to 3 days to maintain their freshly baked taste.

Fridge: To extend freshness, refrigerate the brownies in an airtight container for up to 1 week. This slight chill enhances the cheesecake layer’s creamy texture.

Freezer: For long-term storage, wrap individual brownies tightly in plastic wrap and then place them in a freezer-safe bag. They will last up to 3 months without freezer burn.

Reheating: When ready to enjoy, thaw in the fridge overnight or microwave for 10-15 seconds for a warm treat that brings back the flavor of your delicious Blackberry Cheesecake Brownies!

Expert Tips for Blackberry Cheesecake Brownies

  • Perfect Swirl Technique: Use a toothpick to create swirls without disturbing the brownie base; this ensures beautiful presentation and evenly distributed flavor in each bite.

  • Even Baking: Spread the brownie mixture evenly in the baking dish to avoid overcooked edges or undercooked centers with your Blackberry Cheesecake Brownies.

  • Cooling Time: Don’t skip the chilling process! Refrigerate the brownies for at least 2 hours to allow them to set properly, making slicing much easier.

  • Ingredient Quality: Use fresh blackberries if possible for the best flavor; frozen works, but fresh gives a brighter taste and color to your brownies.

  • Texture Testing: Remember that when checking for doneness, the cheesecake will stay slightly jiggy in the center, ensuring a moist, creamy finish—don’t overbake!

Make Ahead Options

These Blackberry Cheesecake Brownies are a fantastic choice for meal prep, allowing you to savor homemade bliss on busy weeknights! You can prepare the blackberry puree and brownie base up to 24 hours in advance—just refrigerate the puree in an airtight container to maintain its vibrant color and flavor. Additionally, the cheesecake layer can also be made and stored separately, ensuring every component remains fresh. When ready to bake, simply assemble the layers and swirl the berry puree before popping them in the oven. This approach not only saves you time but delivers just as delicious results, perfect for satisfying your sweet cravings with minimal effort!

Blackberry Cheesecake Brownies Recipe FAQs

How do I select the best blackberries for this recipe?
Absolutely! When selecting blackberries, look for ones that are plump, shiny, and fully dark in color, which indicates ripeness. Avoid any with dark spots all over or mushy textures, as these may be overripe. If using frozen blackberries, ensure they are unsweetened to maintain the right flavor balance in your brownies.

What is the best way to store leftover brownies?
For sure! Store your Blackberry Cheesecake Brownies in an airtight container at room temperature for up to 3 days. If you want to keep them longer, refrigerate them in a sealed container for up to a week to maintain their moisture and flavor.

Can I freeze Blackberry Cheesecake Brownies?
Absolutely! To freeze, wrap each piece of brownie tightly in plastic wrap, ensuring no air is trapped, then place them in a freezer-safe bag. They can be stored this way for up to 3 months. When you’re ready to enjoy, simply thaw in the fridge overnight or microwave for 10-15 seconds to bring back that fresh bakery taste.

What should I do if my cheesecake layer doesn’t set properly?
Very! If your cheesecake layer doesn’t set properly after baking, it could need more time in the oven. Check for doneness by gently jiggling the pan; the center should be slightly jiggly but not liquid. If needed, bake for an additional 5 to 10 minutes. Allowing them to cool properly and then refrigerating for at least 2 hours will help them set more effectively.

Are these brownies safe for anyone with dairy allergies?
Good question! These Blackberry Cheesecake Brownies contain dairy ingredients such as cream cheese and butter, which might not be suitable for individuals with dairy allergies. For a dairy-free version, you can substitute the cream cheese with a dairy-free cream cheese and use margarine or vegan butter instead of regular butter. Just check your ingredients carefully to ensure all are dairy-free.

Can I make these brownies gluten-free?
Yes, indeed! To convert your Blackberry Cheesecake Brownies to a gluten-free version, simply replace the all-purpose flour with a gluten-free flour blend, such as almond flour or coconut flour. Be sure to check that all other ingredients are also gluten-free, especially the baking powder if used. Enjoy your baking adventure!

Blackberry Cheesecake Brownies

Delicious Blackberry Cheesecake Brownies for a Sweet Treat

Indulge in Blackberry Cheesecake Brownies, a perfect blend of creamy cheesecake and fudgy brownies.
Prep Time 15 minutes
Cook Time 1 hour
Cooling Time 2 hours
Total Time 3 hours 15 minutes
Servings: 9 slices
Course: Dessert
Cuisine: American
Calories: 240

Ingredients
  

For the Blackberry Puree
  • 2 cups Blackberries Fresh or frozen
  • 1/4 cup Granulated White Sugar Essential for balancing sweetness
  • 1/4 cup Water For smooth puree
For the Brownie Base
  • 12 tablespoons Unsalted Butter Can use margarine or vegan butter
  • 2 large Eggs Crucial for moisture
  • 2 teaspoons Vanilla Extract Enhances flavor
  • 1/2 teaspoon Salt Adjust based on personal taste
  • 3/4 cup Cocoa Powder Unsweetened
  • 1/2 cup All-Purpose Flour Can swap for gluten-free flour
For the Cheesecake Layer
  • 8 ounces Cream Cheese Rich and creamy
  • 1/4 cup Greek Yogurt High in protein
  • 1/4 cup Granulated White Sugar Balances tanginess
  • 1 large Egg Necessary for setting
  • 1/2 teaspoon Salt Adjust to taste

Equipment

  • Medium saucepan
  • Microwave-safe bowl
  • Electric Mixer
  • 8x8 baking dish
  • Parchment paper
  • Fine mesh strainer
  • toothpick
  • Wire Rack

Method
 

Step-by-Step Instructions
  1. Prepare Blackberry Puree: In a medium saucepan, combine 2 cups blackberries, 1/4 cup granulated sugar, and 1/4 cup water over medium-high heat. Cook for about 8-10 minutes, stirring occasionally, until soft and bubbly. Strain the mixture and let cool.
  2. Brownie Base: Preheat oven to 325°F (163°C) and line an 8"x8" baking dish with parchment. Melt 12 tablespoons unsalted butter in a microwave-safe bowl. Stir in 1 1/2 cups sugar, 2 eggs, 2 teaspoons vanilla, and 1/2 teaspoon salt. Fold in 3/4 cup cocoa powder and 1/2 cup flour, then spread in the baking dish.
  3. Cheesecake Layer: Beat together 8 ounces cream cheese, 1/4 cup Greek yogurt, 1 egg, 1/4 cup sugar, and 1/2 teaspoon salt until smooth. Pour over brownie batter.
  4. Add Swirl: Drizzle the cooled blackberry puree over the cheesecake layer. Use a toothpick to swirl the puree without disturbing the brownie base.
  5. Bake: Bake for approximately 1 hour. The cheesecake should be set but slightly jiggly. If the toothpick comes out too wet, bake an additional 5-10 minutes.
  6. Cool and Serve: Let cool on a wire rack. Refrigerate for at least 2 hours, then slice into 9 squares before serving.

Nutrition

Serving: 1sliceCalories: 240kcalCarbohydrates: 30gProtein: 4gFat: 12gSaturated Fat: 7gPolyunsaturated Fat: 0.5gMonounsaturated Fat: 4gCholesterol: 60mgSodium: 150mgPotassium: 200mgFiber: 2gSugar: 20gVitamin A: 200IUVitamin C: 15mgCalcium: 80mgIron: 1mg

Notes

Use fresh blackberries for the best flavor and don't skip the cooling time for perfect texture.

Tried this recipe?

Let us know how it was!

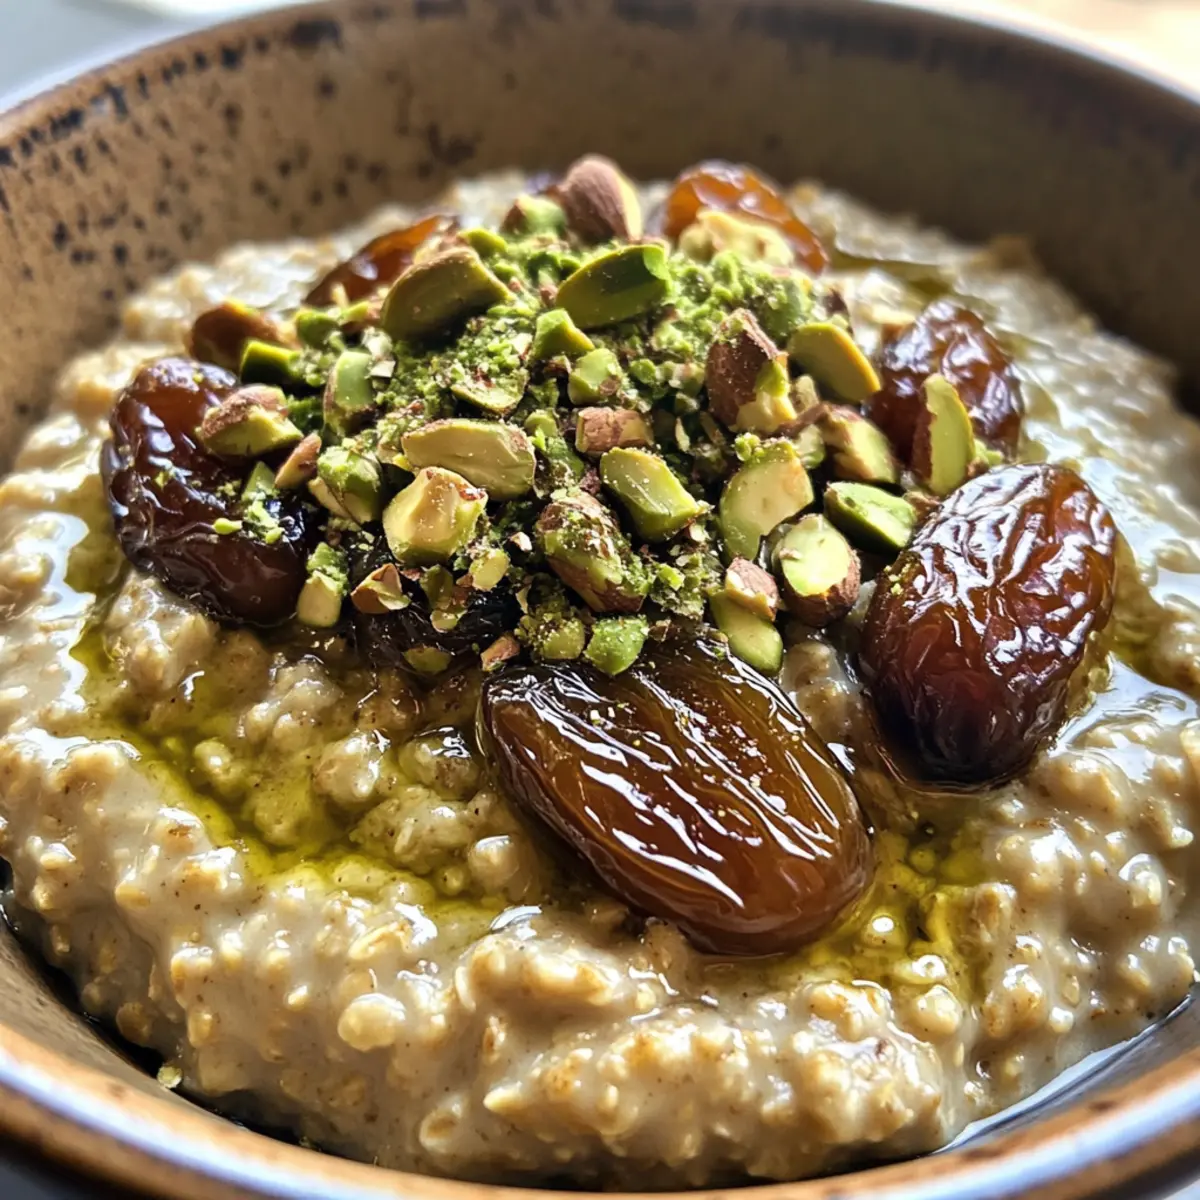
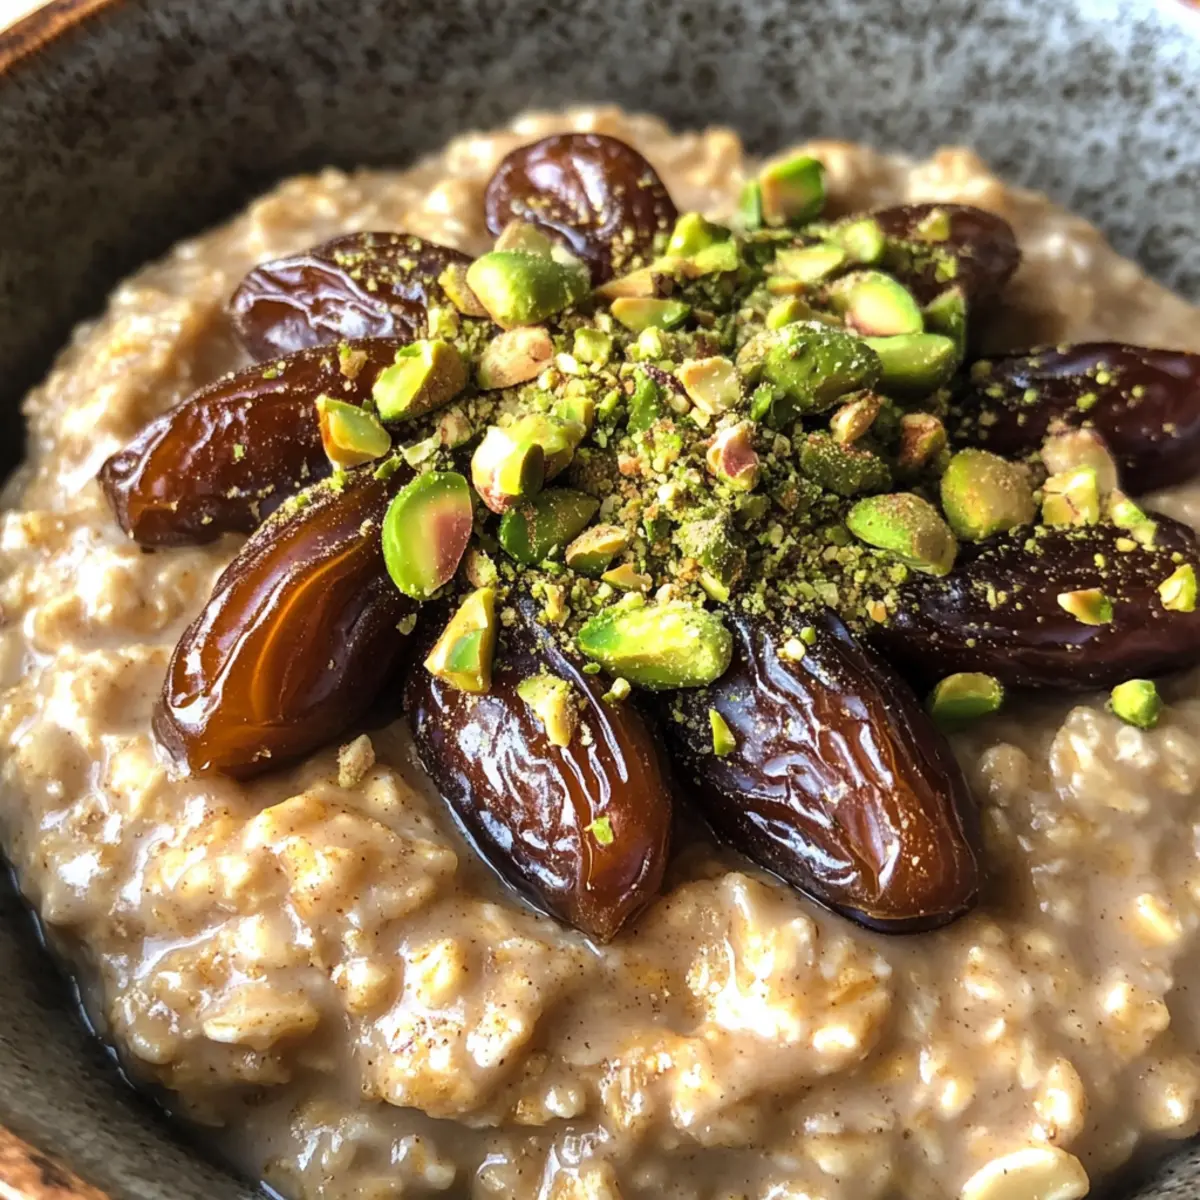
Delicious Cardamom Pistachio Oatmeal for Cozy Mornings

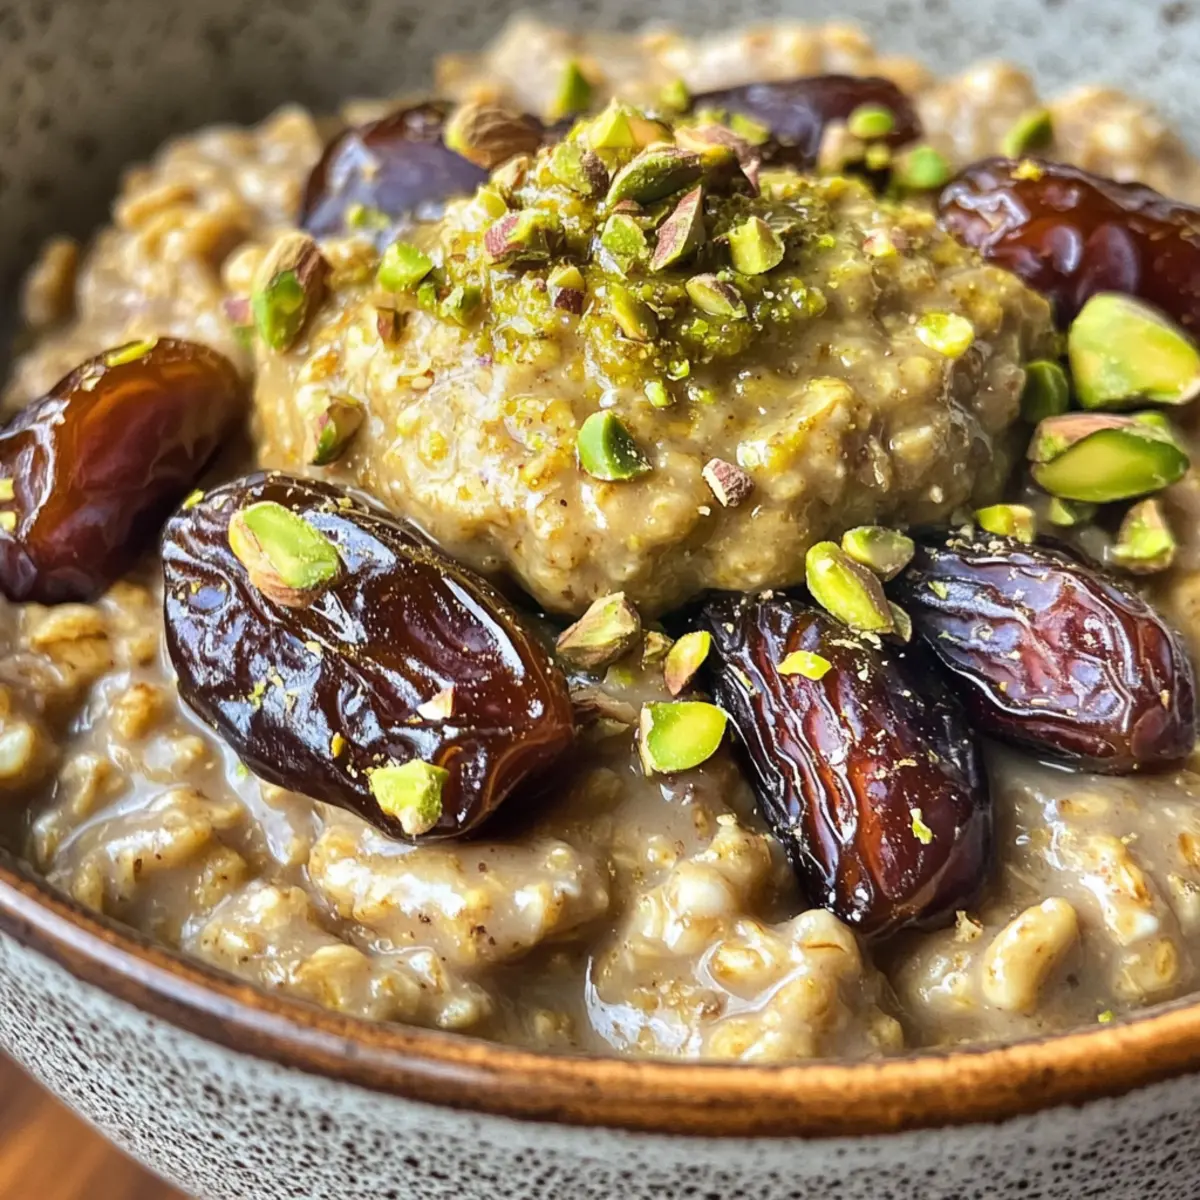
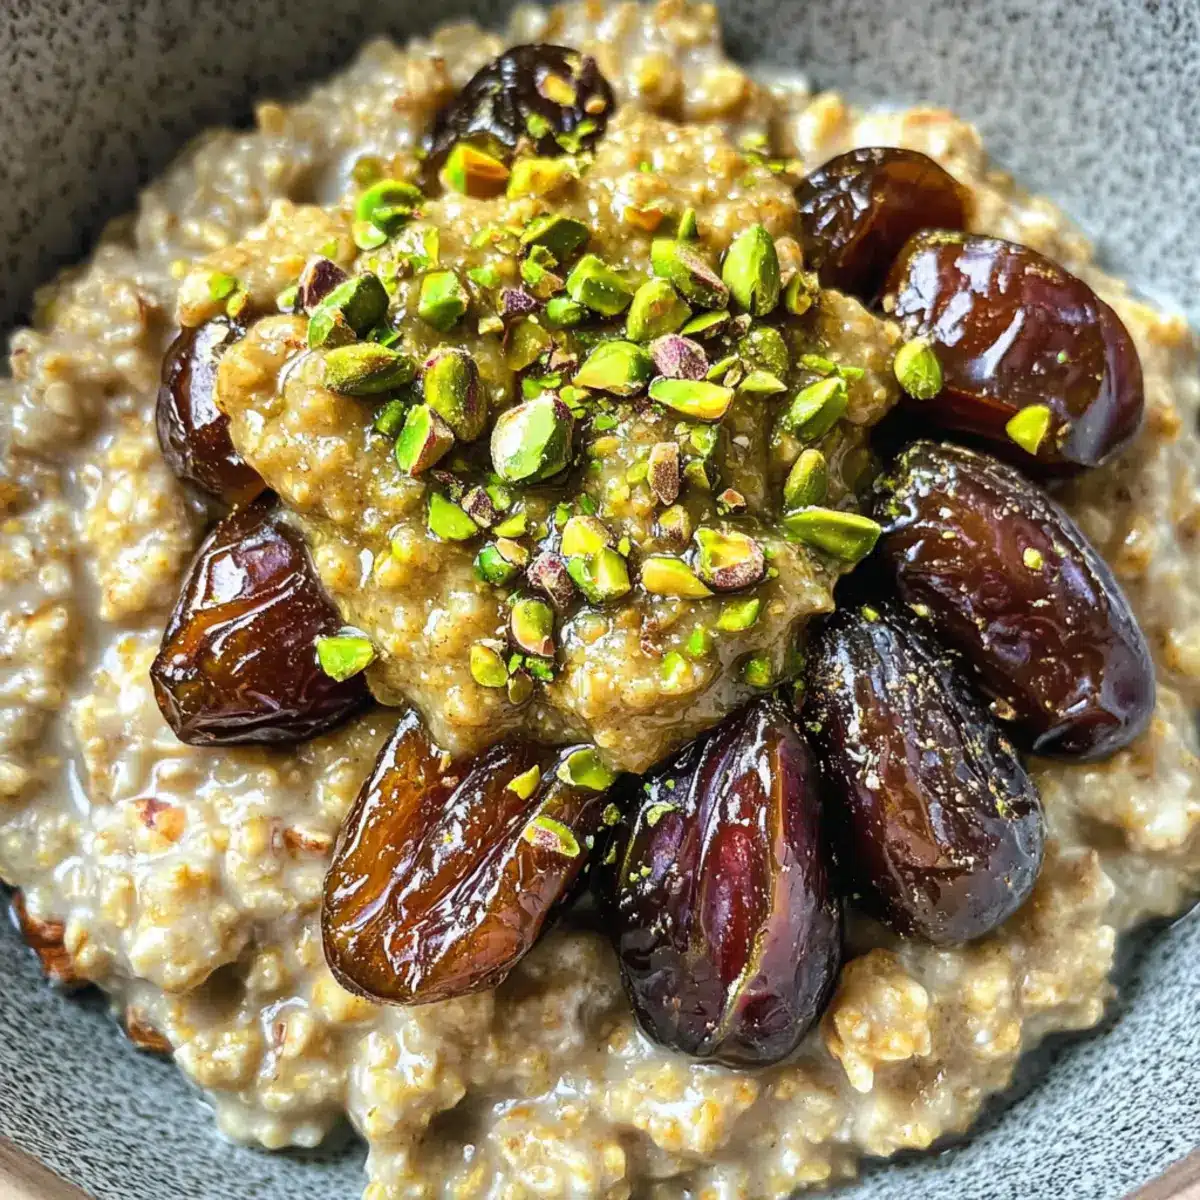
As I stirred the pot of simmering oats, the soothing aroma of cardamom filled my kitchen, transporting me to a sun-drenched café in the heart of the Middle East. This is how my love affair with Creamy Cardamom Pistachio Oatmeal began—an indulgent breakfast that’s not just nourishing but also a joy to prepare. Sweetened naturally with medjool dates and topped with velvety homemade pistachio butter, this recipe is a delightful escape from ordinary mornings. It’s quick to whip up, making it a perfect choice for busy weekdays or leisurely weekend brunches. Who can resist a dish that wraps you in warmth while offering a healthy start to your day? Are you ready to discover how to transform your mornings with this aromatic delight?

Why is this oatmeal so special?

Creamy Bliss: This Cardamom Pistachio Oatmeal is all about indulgence while still being nutrient-packed. Natural Sweetness from medjool dates ensures guilt-free enjoyment, making it the perfect morning pick-me-up. Unique Flavor: The aromatic cardamom and rich pistachio butter create a flavor profile that feels luxurious yet comforting. Quick to Make: Perfect for busy mornings, you’ll have this delicious breakfast ready in just 15 minutes. Whether you want a wholesome brunch or a cozy start to your day, this oatmeal fits all occasions. Plus, you can easily tailor it with variations like adding fruit or swapping nuts—try it as a foundation for your next meal like this Pistachio Carrot Cake!

Cardamom Pistachio Oatmeal Ingredients

For the Oatmeal
Rolled Oats – This is the base ingredient that gives the dish structure and texture; feel free to substitute with steel-cut oats for a chewier consistency.
Almond Milk (or milk of choice) – Adds creaminess to the oatmeal; oat milk or dairy milk work well as substitutes.
Cardamom (whole or ground) – Provides a warm, aromatic flavor; for convenience, ground cardamom can be used instead of whole.
Vanilla Extract – Enhances the overall sweetness and flavor of the oatmeal, making it richer; it’s optional, but highly recommended.
Salt – A small pinch balances the sweetness effectively; don’t skip this step!
Medjool Dates – Naturally sweetens the oatmeal and adds a delightful sticky texture; maple syrup is a great vegan alternative, though you may need to adjust the liquid.

For the Topping
Pistachios – Essential for making homemade pistachio butter and providing a lovely crunch on top; use raw unsalted for the best flavor and color.

This Cardamom Pistachio Oatmeal is your delicious gateway to wholesome breakfasts that don’t compromise on flavor!

Step‑by‑Step Instructions for Cardamom Pistachio Oatmeal

Step 1: Combine Ingredients
In a medium saucepan, combine rolled oats, almond milk, ground cardamom, vanilla extract, a pinch of salt, and chopped Medjool dates. Stir well to ensure all ingredients are evenly distributed. This mixture will form the base of your creamy Cardamom Pistachio Oatmeal, setting the stage for a wonderfully fragrant dish.

Step 2: Heat Mixture
Place the saucepan over medium-high heat and bring the mixture to a gentle boil, stirring occasionally for about 2-3 minutes. Once bubbling, reduce the heat to low and allow it to simmer. Keep an eye on it to prevent sticking, letting it cook for about 5-10 minutes until the oatmeal thickens and reaches a creamy consistency.

Step 3: Rest for Extra Creaminess
Once cooked, remove the saucepan from the heat and cover it with a lid. Let the oatmeal rest for an additional 5-10 minutes. This resting period allows the oats to absorb more liquid, further enhancing the creaminess of your Cardamom Pistachio Oatmeal, resulting in a luxurious texture.

Step 4: Serve and Top
Spoon the oatmeal into bowls, allowing the warm, creamy mixture to fill each dish. Top generously with a dollop of homemade pistachio butter and drizzle with a splash of cold almond milk for contrast. Feel free to sprinkle some chopped pistachios for added flavor and texture, elevating your breakfast experience.

Step 5: Adjust and Enjoy
Taste your Cardamom Pistachio Oatmeal and adjust sweetness or spice to your preference. If you want an extra burst of flavor, consider steeping whole cardamom pods in the milk beforehand. Each bowl should be a comforting, flavorful delight, perfect for cozy mornings or that well-deserved weekend brunch!

How to Store and Freeze Cardamom Pistachio Oatmeal

  • Fridge: Store leftover oatmeal in an airtight container for up to 3 days. Reheat with a splash of almond milk to restore its creamy consistency.

  • Freezer: For longer storage, freeze the oatmeal in individual portions in airtight containers or freezer bags. It can be kept frozen for up to 2 months.

  • Reheating: When ready to enjoy, thaw overnight in the fridge if frozen, then reheat on the stovetop or in the microwave, adding a bit of milk for added creaminess.

  • Texture Tips: After reheating, stir well to reincorporate any liquid that may separate, ensuring a delightful texture for your Cardamom Pistachio Oatmeal every time!

What to Serve with Creamy Cardamom Pistachio Oatmeal?

Savoring a bowl of this luxurious oatmeal opens the door to a world of delightful pairings that elevate your breakfast experience.

  • Fresh Berries: Juicy blueberries or raspberries add a burst of tartness, perfectly balancing the rich flavors of the oatmeal.

  • Crispy Toast with Avocado: Creamy avocado on whole-grain toast provides healthy fats and a lovely contrast in texture for a fulfilling meal.

  • Honey Drizzle: A drizzle of honey adds an extra layer of natural sweetness, enhancing the date flavor while adding a touch of elegance.

  • Chia Seed Pudding: Light and airy, chia pudding packs in even more nutrients and a refreshing texture, making your breakfast feel decadent yet wholesome.

  • Smoothie Bowl: A vibrant smoothie made with spinach and banana not only nourishes but also brings a chill to your morning spread, complementing the warmth of the oatmeal beautifully.

  • Turmeric Latte: Sip on a soothing turmeric latte to complement the spices in your oatmeal. Its golden warmth harmonizes with the aromatic cardamom notes for a comforting experience.

Expert Tips for Cardamom Pistachio Oatmeal

  • Perfect Oat Consistency: Ensure the oats are simmered enough for a creamy oatmeal texture; too little cooking time may leave them gritty.

  • Stir Often: Prevent sticking by stirring the mixture occasionally during cooking—this will help achieve a smooth and creamy base.

  • Sweetness Level: Taste your oatmeal before serving to adjust sweetness; Medjool dates can vary in sweetness, so add more if needed.

  • Blend the Butter: For smooth homemade pistachio butter, use a food processor to achieve the right consistency. Avoid blenders, which may not blend nuts finely enough.

  • Cardamom Caution: If using whole cardamom pods, remember to remove them before serving, as they can add bitterness if left in.

  • Storage Solution: Leftover Cardamom Pistachio Oatmeal can be stored in an airtight container in the fridge for up to 3 days—just reheat with a splash of almond milk for best results.

Cardamom Pistachio Oatmeal Variations

Feel free to explore the endless possibilities for customizing your oatmeal dish to suit your tastes!

  • Nut-Free: Swap pistachios with sunflower seeds or pumpkin seeds for a delicious nut-free breakfast alternative.

  • Fruit-Infused: Stir in fresh berries or sliced bananas while cooking for an extra burst of sweetness and vibrant color.

  • Spiced Twist: Add a dash of nutmeg or cinnamon to enhance the spice profile, giving you a comforting hug in each bite.

  • Creamier Base: For an ultra-creamy texture, blend your cooked oatmeal with additional almond milk, creating a luscious and dreamy consistency.

  • Sugar-Free: Use a ripe banana instead of medjool dates for natural sweetness, perfect for those looking to cut added sugars.

  • Chocolate Delight: Mix in a teaspoon of cocoa powder or top with chocolate chips for a decadent twist, indulging your sweet tooth in the morning.

  • Coconut Bliss: Add shredded coconut to the mix for a tropical flair, enhancing both flavor and texture, making every bite feel like a vacation.

For a unique dessert-inspired breakfast, consider pairing your oatmeal with this delightful Pistachio Carrot Cake. It’s a scrumptious way to elevate those cozy mornings!

Make Ahead Options

These Creamy Cardamom Pistachio Oatmeal bowls are perfect for meal prep enthusiasts! You can prepare the dry ingredients (rolled oats, ground cardamom, and salt) and store them in an airtight container for up to 3 days to save time on busy mornings. Additionally, chop the Medjool dates and refrigerate them in a small container for convenience. When you’re ready to enjoy your oatmeal, simply cook the pre-measured ingredients with almond milk and let it simmer as directed. For the best quality, reheat with a splash of almond milk to maintain creaminess, and don’t forget to add a generous dollop of homemade pistachio butter before serving. Make your mornings easier and more delightful with this make-ahead option!

Cardamom Pistachio Oatmeal Recipe FAQs

How do I select the best medjool dates?
Absolutely! When choosing medjool dates, look for those that are plump and soft, without dark spots all over. They should feel slightly sticky to the touch, which indicates their natural sweetness. If you’re opting for dried ones, ensure they have a vibrant color, as dull shades could mean they are past their prime.

How should I store leftover oatmeal?
You can store any leftover Cardamom Pistachio Oatmeal in an airtight container in the fridge for up to 3 days. To reheat, simply add a splash of almond milk to maintain its creamy texture—this is one of my tricks to reviving leftover oatmeal!

Can I freeze this oatmeal for later?
Yes, indeed! To freeze Cardamom Pistachio Oatmeal, pour it into individual portions in airtight containers or freezer bags after it cools. It can be kept frozen for up to 2 months. When ready to enjoy, thaw it overnight in the fridge and reheat on the stovetop or microwave, adding a bit of almond milk for creaminess.

What should I do if my oatmeal is too thick?
Very good question! If your oatmeal has turned out thicker than you’d like, no need to fret. Just add a splash of almond milk (or water) gradually while stirring it on low heat until it reaches your desired consistency. Sometimes, oatmeal can absorb more liquid than expected based on the oats used, but adjusting is a breeze!

Is this recipe suitable for people with nut allergies?
If someone has nut allergies, it’s essential to skip the pistachios and any nut-based milk. You can substitute almond milk with oat milk or a soy alternative, and for the pistachio butter, consider using sunflower seed butter instead. Just be sure to check all ingredient labels to ensure they’re allergy-friendly.

Can I customize the sweetness level in this oatmeal?
Absolutely! The sweetness can be adjusted to your liking. Start with the mentioned amount of Medjool dates, taste it, and feel free to add more if you prefer a sweeter breakfast. Alternatively, a drizzle of maple syrup or honey can also enhance the flavor to your desired level. Happy customizing!

Cardamom Pistachio Oatmeal

Delicious Cardamom Pistachio Oatmeal for Cozy Mornings

A delightful Cardamom Pistachio Oatmeal that is nourishment for cozy mornings, flavored with cardamom and sweetened with medjool dates.
Prep Time 5 minutes
Cook Time 10 minutes
Resting Time 10 minutes
Total Time 25 minutes
Servings: 2 bowls
Course: Breakfast
Cuisine: Middle Eastern
Calories: 300

Ingredients
  

For the Oatmeal
  • 1 cup Rolled Oats Can substitute with steel-cut oats.
  • 2 cups Almond Milk Or milk of choice.
  • 1 teaspoon Cardamom Ground or whole.
  • 1 teaspoon Vanilla Extract Optional but recommended.
  • 1 pinch Salt Balances the sweetness.
  • 3 pieces Medjool Dates Chopped, for natural sweetness.
For the Topping
  • 1/4 cup Pistachios Raw unsalted preferred.

Equipment

  • Medium saucepan

Method
 

Step‑by‑Step Instructions
  1. In a medium saucepan, combine rolled oats, almond milk, ground cardamom, vanilla extract, a pinch of salt, and chopped Medjool dates. Stir well to ensure all ingredients are evenly distributed.
  2. Place the saucepan over medium-high heat and bring the mixture to a gentle boil, stirring occasionally for about 2-3 minutes. Once bubbling, reduce the heat to low and allow it to simmer for about 5-10 minutes until the oatmeal thickens.
  3. Remove the saucepan from the heat and cover it with a lid. Let the oatmeal rest for an additional 5-10 minutes.
  4. Spoon the oatmeal into bowls, top with homemade pistachio butter and a splash of almond milk. Sprinkle chopped pistachios on top.
  5. Taste and adjust sweetness or spice as desired.

Nutrition

Serving: 1bowlCalories: 300kcalCarbohydrates: 45gProtein: 9gFat: 10gSaturated Fat: 1gPolyunsaturated Fat: 2gMonounsaturated Fat: 7gSodium: 150mgPotassium: 400mgFiber: 7gSugar: 8gCalcium: 300mgIron: 2mg

Notes

Store leftovers in an airtight container in the fridge for up to 3 days. Reheat with a splash of almond milk to restore creaminess.

Tried this recipe?

Let us know how it was!

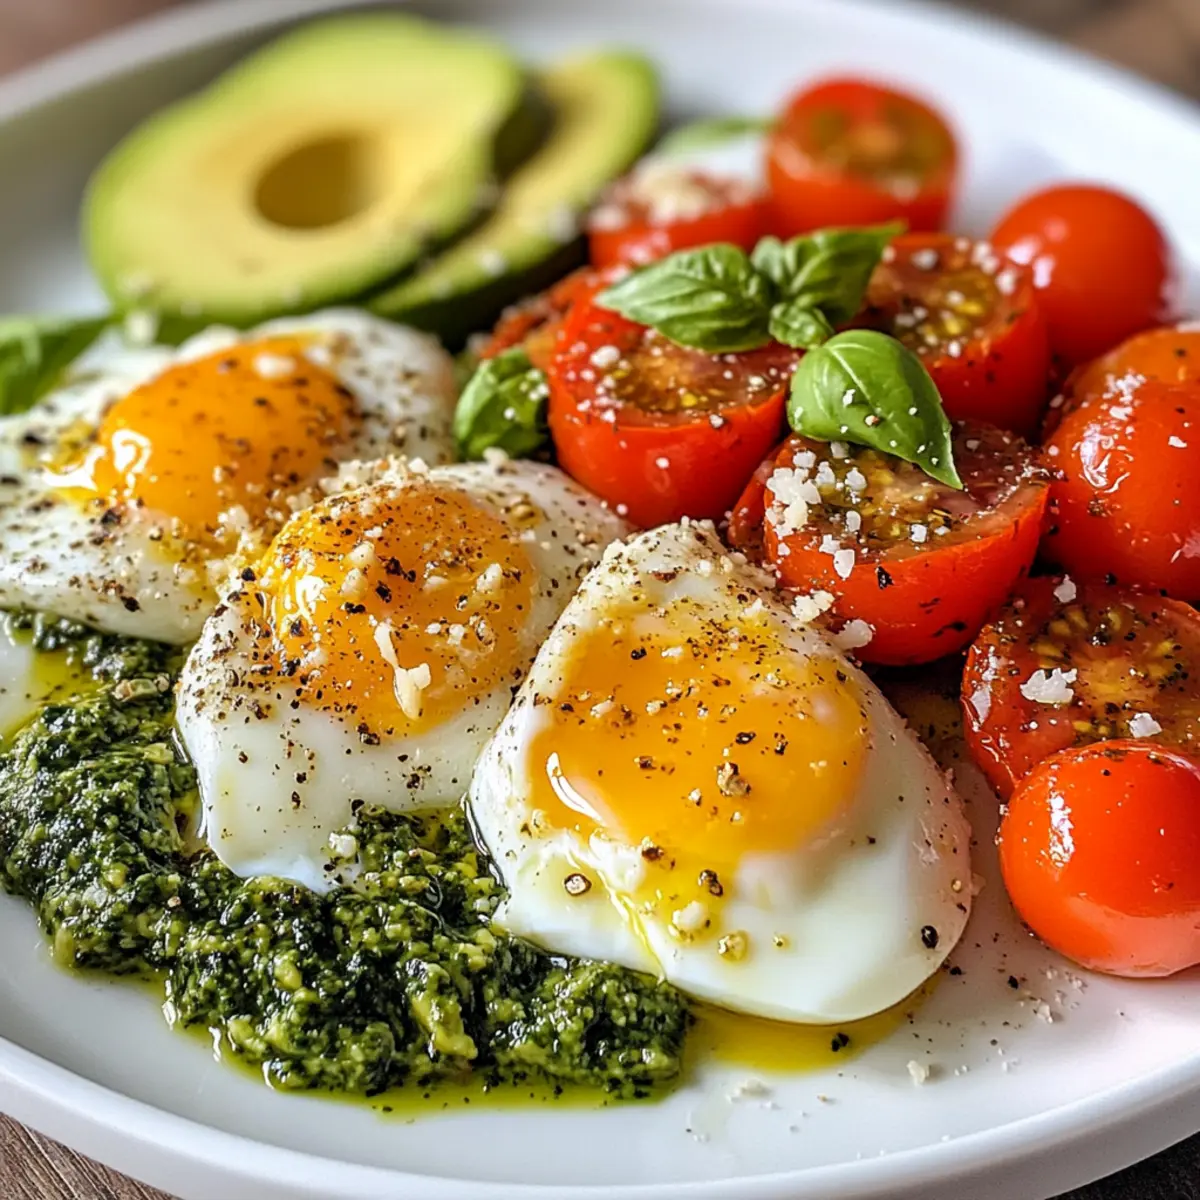
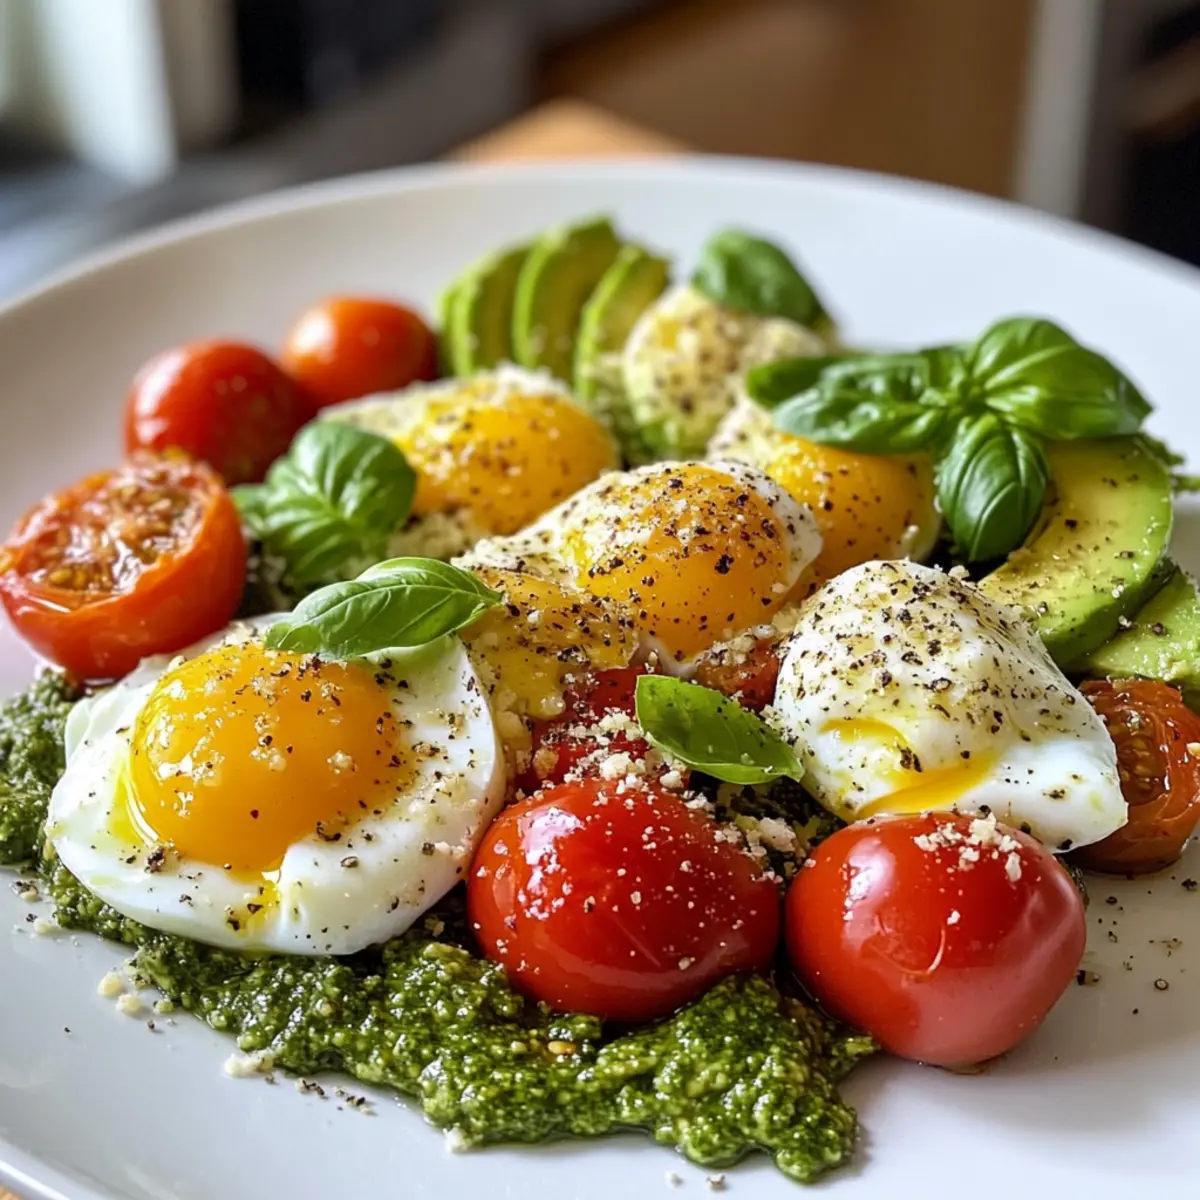
Pesto Tomato, Egg & Avocado Breakfast Salad for a Bright Kickstart

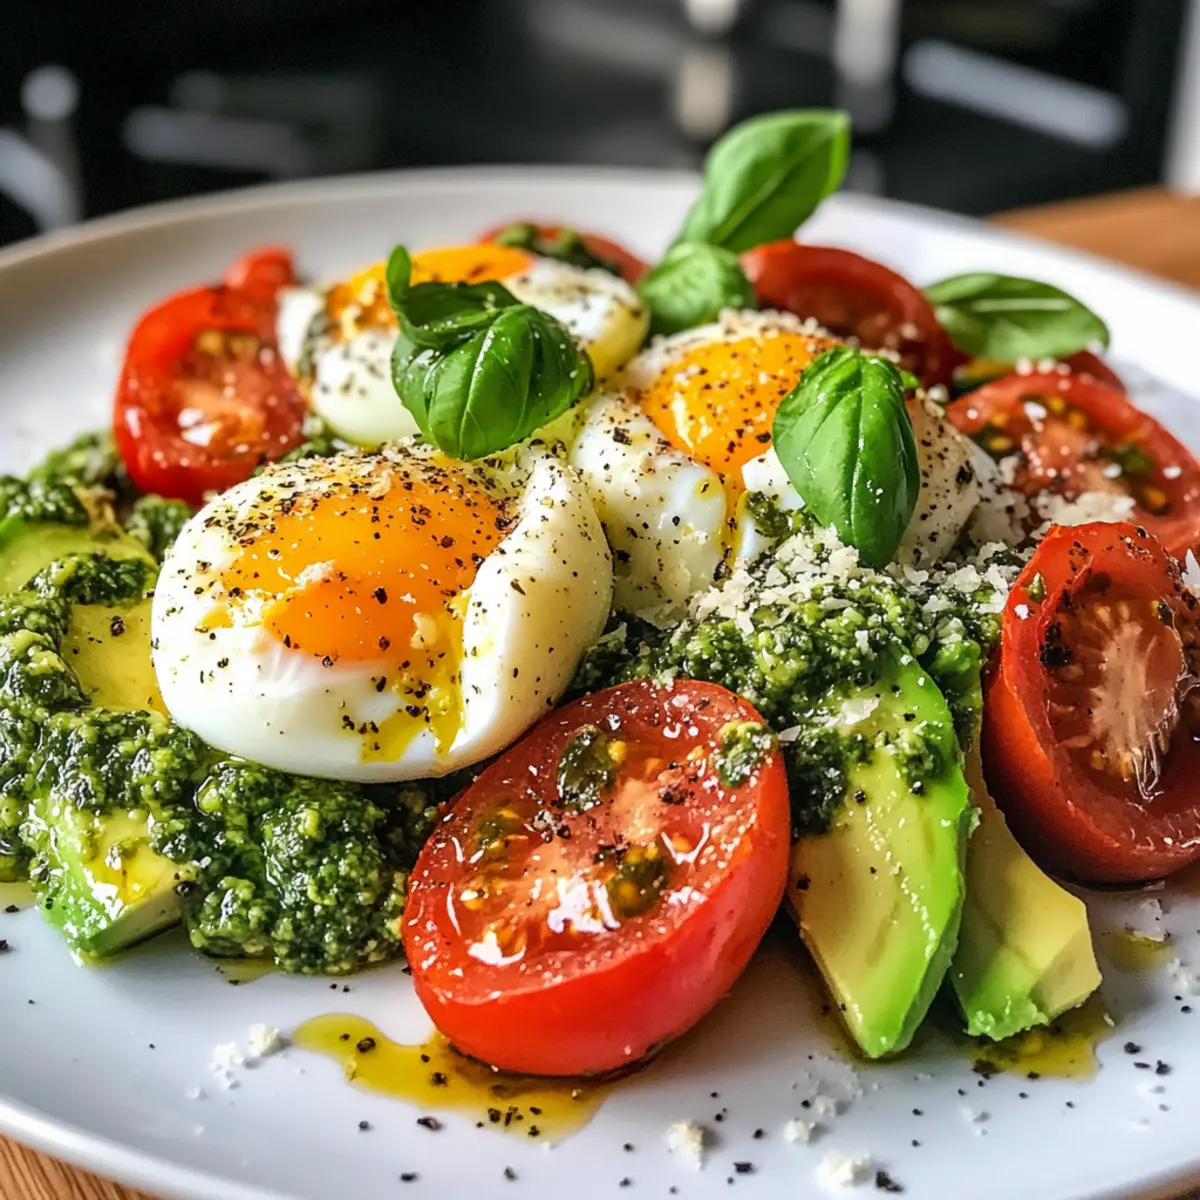
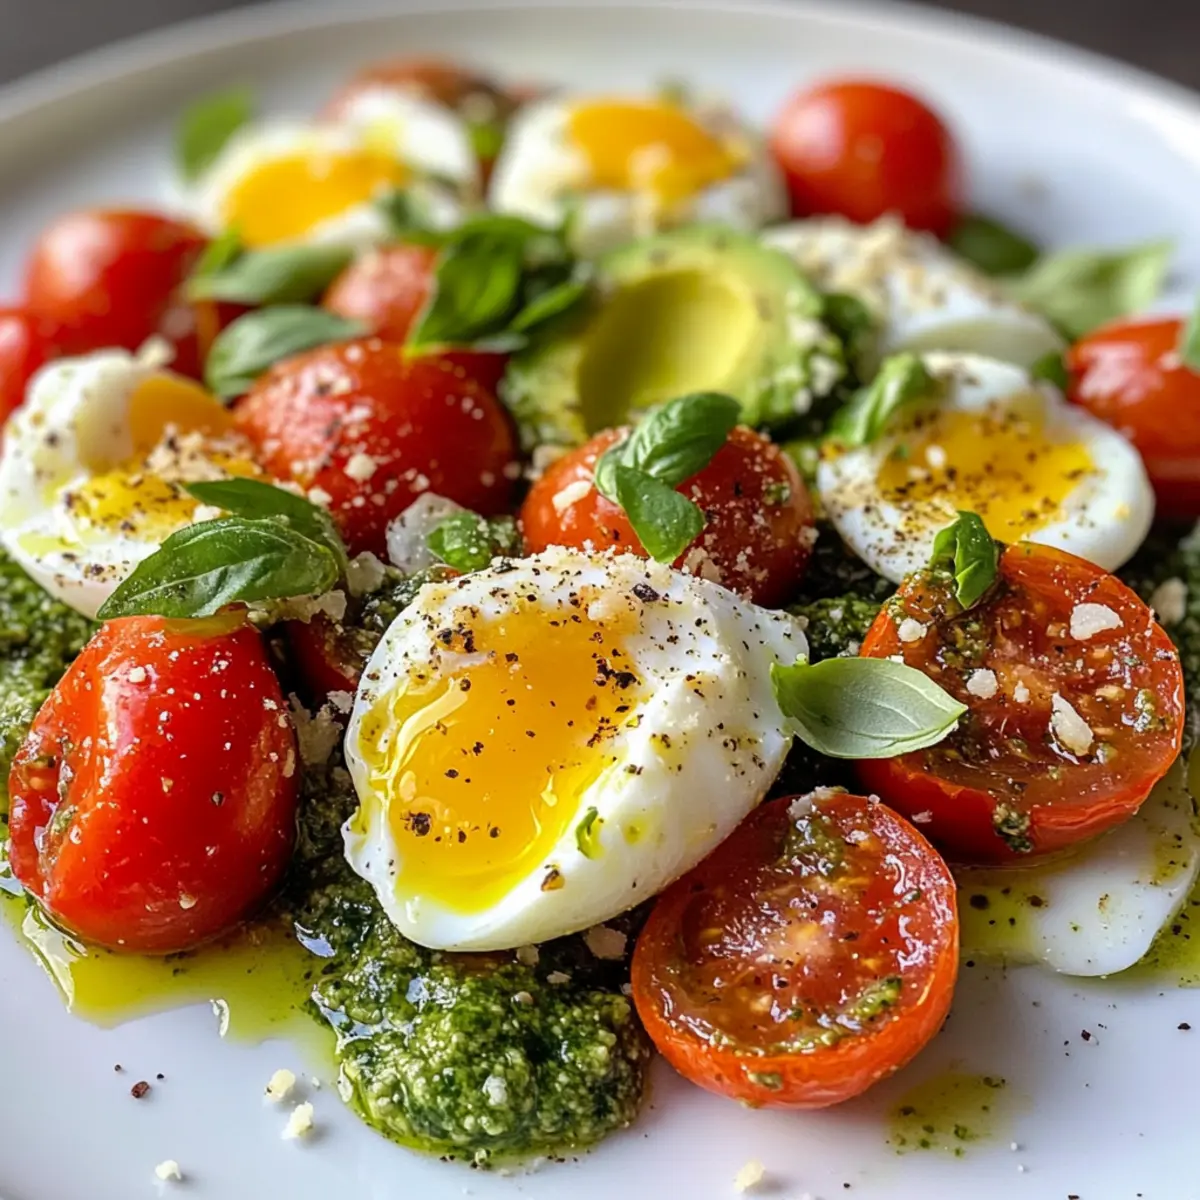
The aroma of fresh basil and slightly toasted avocado fills the kitchen, instantly lifting my spirits as I prepare my favorite morning dish: Pesto Tomato, Egg & Avocado Breakfast Salad. This refreshing take on breakfast brings together the lusciousness of ripe tomatoes and creamy avocado, crowned with perfectly poached eggs for a satisfying start to the day. Best of all, this recipe is quick to whip up, making it a real lifesaver for those bustling mornings when you want something healthy—far from another fast food pitfall. Not only does it deliver a burst of nutrients, but it’s also a delightful feast for the eyes. Are you ready to transform your breakfast game and delight in each colorful bite?

Why is this breakfast salad a must-try?

Quick and Easy: This Pesto Tomato, Egg & Avocado Breakfast Salad comes together in a flash, making it the perfect solution for busy mornings.

Nutritious and Satisfying: Packed with healthy fats, protein, and vibrant veggies, it fuels your day without the heaviness of fast food.

Customizable: Tailor the ingredients to your taste! Swap in different veggies or grains for endless variations, like the tasty Overnight Croissant Breakfast for a change of pace.

Flavor Explosion: The combination of creamy avocado, fresh tomatoes, and zesty basil pesto offers a delightful burst of flavor in every bite.

Visual Appeal: Its bright colors and elegant presentation make it a feast for the eyes, perfect for impressing guests or enjoying a solo morning treat!

Pesto Tomato, Egg & Avocado Breakfast Salad Ingredients

For the Dressing
Olive Oil – Adds healthy fats and richness; substitute with avocado oil for a different flavor profile.
Basil Pesto – Provides a bold, herby flavor that ties the salad together; use store-bought or homemade pesto.

For the Salad Base
Sliced Cherry Tomatoes – Contributes freshness and juiciness; substitute with diced regular tomatoes if cherry tomatoes are unavailable.
Avocados – Adds creaminess and healthy fats; ensure they are ripe for the best texture, or substitute with diced cucumbers for a lighter option.
Parmesan Flakes – Add a savory, salty crunch; substitute with nutritional yeast for a dairy-free version.

For the Eggs
Large Eggs – The source of protein that completes the salad; poaching is recommended for a soft texture, but hard-boiled or scrambled eggs work well too.

For Seasoning
Sea Salt & Pepper – Enhances flavor; adjust seasoning to taste.

This Pesto Tomato, Egg & Avocado Breakfast Salad not only bursts with vibrant flavors but also keeps you energized and ready to tackle the day!

Step‑by‑Step Instructions for Pesto Tomato, Egg & Avocado Breakfast Salad

Step 1: Prepare the Dressing
In a mixing bowl, combine 2 tablespoons of olive oil and 3 tablespoons of basil pesto. Whisk them together until the mixture is smooth and well-blended, achieving a vibrant green hue. This creamy dressing will coat your vegetables beautifully, adding rich flavors to the Pesto Tomato, Egg & Avocado Breakfast Salad.

Step 2: Assemble the Salad Base
Add 1 cup of sliced cherry tomatoes and 1 ripe diced avocado to the bowl with the dressing. Gently toss the mixture until everything is nicely coated, ensuring that the glossy sheen envelops every piece. The colors should pop against each other, making this salad as visually appealing as it is delicious.

Step 3: Add Parmesan Flakes
Sprinkle ¼ cup of Parmesan flakes over the salad and give it another gentle toss. This adds a savory crunch that complements the creamy avocado and juicy tomatoes perfectly. You’ll want to make sure the Parmesan is evenly distributed throughout for that delightful salty burst in each bite.

Step 4: Poach the Eggs
In a pot of simmering water (about 180°F), poach 2 large eggs for 3-4 minutes, or until the whites are set and the yolks remain slightly runny. Use a slotted spoon to remove the eggs, allowing excess water to drain. These perfectly poached eggs will crown your Pesto Tomato, Egg & Avocado Breakfast Salad beautifully.

Step 5: Plate the Salad
Divide the salad mixture evenly onto two plates, creating a colorful bed of tomatoes and avocado. Carefully place the poached eggs on top, letting the warm yolks add a touch of richness to the dish. Your Pesto Tomato, Egg & Avocado Breakfast Salad is now ready to be seasoned.

Step 6: Season to Taste
Finish with a sprinkle of sea salt and freshly cracked black pepper to enhance the flavors. Feel free to adjust the seasoning based on your personal preference. This step adds the final touch to your vibrant breakfast salad, making each forkful bursting with flavor.

What to Serve with Pesto Tomato, Egg & Avocado Breakfast Salad

A delicious breakfast salad deserves the perfect companions to create a feast that delights every sense.
  • Toasted Whole-Grain Bread: The crunchy texture complements the creamy ingredients beautifully, providing the perfect vehicle for any leftover salad remnants on your plate.
  • Citrus Fruit Salad: The bright, zesty flavors of oranges or grapefruit add a refreshing contrast to the rich avocado and egg, brightening your breakfast.
  • Greek Yogurt with Honey: A spoonful of tangy yogurt drizzled with honey offers a delightful balance to the savory elements of the salad, making for an indulgent yet healthy treat.
  • Smoothie with Spinach and Banana: Blend together a fruity smoothie to pack in more nutrients and fiber, creating a well-rounded breakfast experience brimming with energy.
  • Herbed Quinoa: The nuttiness of quinoa enhances the meal’s heartiness while adding a chewy texture that pairs well with the salad’s creaminess. Serve it warm for the best flavor!
  • Iced Herbal Tea: A refreshing drink, such as iced mint or chamomile tea, can cleanse the palate and keep your morning feeling light and invigorating, rounding out your breakfast beautifully.
  • Dark Chocolate Almonds: End on a sweet note with a few chocolate-covered almonds. Their crunch and rich, cocoa flavor provide a satisfying finish after the savory salad.
  • Avocado Toast: If you’re a true avocado lover, serve this alongside a slice of hearty toast topped with more avocado and a sprinkle of sea salt for extra creamy goodness.
  • Fresh OJ: The classic citrus theme continues with a glass of fresh-squeezed orange juice, adding a vibrant flavor that pairs perfectly with each bite.
  • Herbed Frittata: For a heartier option, whip up a fluffy frittata with fresh herbs and a hint of cheese to provide a delicious side that complements the salad’s zest.

Pesto Tomato, Egg & Avocado Breakfast Salad Variations

Feel free to explore these delightful twists on the classic! Each suggestion is designed to inspire your creativity while keeping that fresh and vibrant flair.

  • Add Greens: Stir in some sautéed spinach or arugula for a burst of color and added nutrients. Greens not only elevate the dish visually but enhance its health benefits too.

  • Quinoa Boost: Incorporate cooked quinoa or farro for a delightful grainy texture and extra protein. The nutty flavor of these grains makes each bite even more satisfying.

  • Herb Infusion: Experiment with different herbs like cilantro or dill for a fresh twist. A drizzle of balsamic glaze can elevate it to new levels of deliciousness!

  • Kick of Spice: Toss in some red pepper flakes to add a bit of heat. If you enjoy a little fire in your morning meals, this is the perfect way to spice things up!

  • Cheese Alternatives: Swap in feta or goat cheese for a tangy twist if you’re feeling adventurous. These cheeses add a creamy luxury and pair beautifully with the other ingredients.

  • Swap the Eggs: Try adding poached chicken breast or smoked salmon instead of eggs to change up the protein source. This gives a refreshing flair for those who want a change.

  • Vegan Version: Replace the eggs with silken tofu or chickpeas for a plant-based protein option. This way, you maintain the dish’s heartiness without the use of animal products.

  • Different Veggies: Experiment with bell peppers or roasted zucchini for a twist on texture and flavor. These colorful options not only enhance the flavor but also make your plate even more visually appealing.

Don’t forget, if you’re on the lookout for more vibrant salads and healthy dishes, check out my Tuna Macaroni Salad or the luscious Strawberry Spinach Salad for more inspiration!

Make Ahead Options

These Pesto Tomato, Egg & Avocado Breakfast Salad components are perfect for meal prep! You can prepare the salad base—olive oil, basil pesto, cherry tomatoes, and diced avocados—up to 24 hours in advance and refrigerate them in an airtight container to keep everything fresh. To maintain quality, add the Parmesan flakes just before serving, as they can lose their crunch over time. Poach the eggs fresh to ensure they’re warm and silky on top when you’re ready to eat. This way, you’ll enjoy a delightful breakfast with minimal effort, making your busy mornings that much easier!

Expert Tips for Pesto Tomato, Egg & Avocado Breakfast Salad

  • Perfectly Poached Eggs: Use a non-stick egg poacher for foolproof poached eggs every time and prevent the eggs from sticking.
  • Pesto Adjustment: If you’re unsure about flavor intensity, start with less pesto and gradually mix in more until you reach your desired taste.
  • Ripe Avocados: Ensure your avocados are ripe for optimal creaminess and flavor; an unripe avocado will change the dish’s texture and taste.
  • Toss Gently: When mixing the salad, gently toss to avoid mashing the avocado, ensuring each ingredient retains its unique texture.
  • Seasoning Balance: Taste your salad before serving and adjust the sea salt and pepper. Fresh seasonings can greatly enhance the final result of your Pesto Tomato, Egg & Avocado Breakfast Salad.

How to Store and Freeze Pesto Tomato, Egg & Avocado Breakfast Salad

Fridge: Store any leftover salad components in an airtight container in the fridge for up to 2 days. Keep the poached eggs separate until ready to serve to maintain the best texture.

Prep Storage: To save time, prepare the salad base (tomatoes, avocado, and pesto dressing) ahead of time. Store these in the fridge for up to 1 day before adding poached eggs and seasoning.

Reheating: If you have leftover eggs, gently reheat them in a warm water bath for a few minutes instead of using the microwave, to preserve their texture.

Freezer: It’s best to avoid freezing the Pesto Tomato, Egg & Avocado Breakfast Salad as the vegetables, particularly the avocado, can lose their texture and flavor. Enjoy fresh for the best experience!

Pesto Tomato, Egg & Avocado Breakfast Salad Recipe FAQs

What should I look for when selecting avocados?
Absolutely! You want to choose avocados that yield slightly to gentle pressure when held in your palm—this indicates ripeness. Look for a dark green color and avoid avocados with sunken spots or dark blemishes, as these can indicate overripeness.

How should I store leftover Pesto Tomato, Egg & Avocado Breakfast Salad?
To keep your salad fresh, store the leftover components in an airtight container in the fridge for up to 2 days. If you have poached eggs leftover, keep them separate to maintain their texture. Just pop them on your salad when you’re ready to enjoy it again!

Can I freeze the Pesto Tomato, Egg & Avocado Breakfast Salad?
It’s best to avoid freezing this salad, especially due to the avocado, which can turn mushy and lose flavor upon freezing. Instead, enjoy it fresh! If you have extra dressing left, you can freeze it in ice cube trays to use later.

What if my poached eggs aren’t turning out perfectly?
Very! If your eggs aren’t poaching as you hoped, try these steps: Ensure your water is at a simmer (not a rolling boil) and add a splash of vinegar to help the egg whites coagulate. For even more control, consider using a non-stick egg poacher, which keeps your eggs intact and makes the process much smoother!

Are there any dietary considerations for this salad?
This Pesto Tomato, Egg & Avocado Breakfast Salad is vegetarian and gluten-free! If you have a dairy allergy, simply substitute the Parmesan flakes with nutritional yeast for a cheesy flavor without the dairy. Always check pesto labels if you’re following a strict dietary regimen, as some store-bought options may contain allergens.

Can I customize the ingredients in this salad?
Absolutely! The more, the merrier! You can swap in different veggies like sautéed spinach or even add hearty grains like quinoa for extra texture. This salad is meant to be flexible, allowing you to play with flavors and ingredients that suit your palate perfectly.

Pesto Tomato, Egg & Avocado Breakfast Salad

Pesto Tomato, Egg & Avocado Breakfast Salad for a Bright Kickstart

A refreshing Pesto Tomato, Egg & Avocado Breakfast Salad that delivers a burst of nutrients and flavors for a healthy start.
Prep Time 10 minutes
Cook Time 5 minutes
Total Time 15 minutes
Servings: 2 servings
Course: Breakfast
Cuisine: American
Calories: 300

Ingredients
  

Dressing
  • 2 tablespoons Olive Oil Substitute with avocado oil for a different flavor profile.
  • 3 tablespoons Basil Pesto Use store-bought or homemade pesto.
Salad Base
  • 1 cup Sliced Cherry Tomatoes Substitute with diced regular tomatoes if necessary.
  • 1 large Avocado Ensure it's ripe for the best texture.
  • 1/4 cup Parmesan Flakes Substitute with nutritional yeast for a dairy-free version.
Eggs
  • 2 large Eggs Poaching is recommended for a soft texture.
Seasoning
  • Sea Salt Enhances flavor.
  • Black Pepper Enhances flavor.

Equipment

  • Mixing Bowl
  • slotted spoon
  • pot

Method
 

Preparation
  1. In a mixing bowl, combine olive oil and basil pesto. Whisk until smooth and well-blended.
  2. Add sliced cherry tomatoes and diced avocado to the bowl with the dressing. Gently toss until everything is coated.
  3. Sprinkle Parmesan flakes over the salad and toss gently.
  4. Poach eggs in simmering water for 3-4 minutes. Remove and drain excess water.
  5. Divide the salad onto plates and place the poached eggs on top.
  6. Finish with a sprinkle of sea salt and black pepper to taste.

Nutrition

Serving: 1servingCalories: 300kcalCarbohydrates: 15gProtein: 10gFat: 22gSaturated Fat: 5gMonounsaturated Fat: 15gCholesterol: 210mgSodium: 300mgPotassium: 600mgFiber: 5gSugar: 3gVitamin A: 500IUVitamin C: 15mgCalcium: 150mgIron: 2mg

Notes

This salad can be prepped in advance, and leftovers can be stored in the fridge for up to 2 days.

Tried this recipe?

Let us know how it was!

Mexican Pizza with Cilantro Pesto: A Flavorful Twist

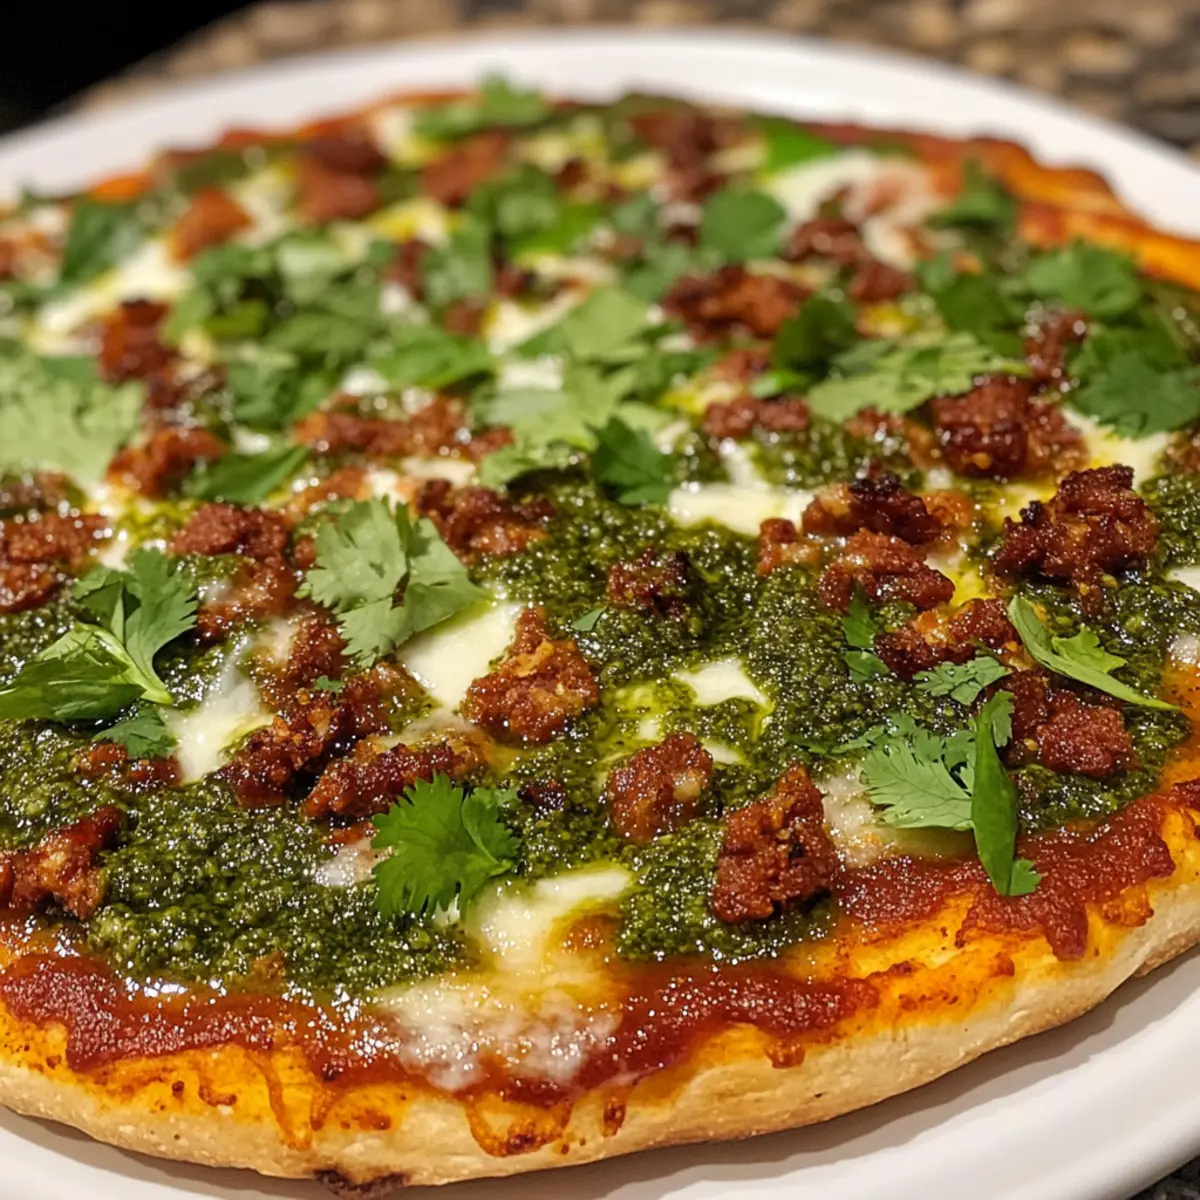
The aroma of sizzling chorizo fills my kitchen, instantly whisking me away to the vibrant streets of Mexico. This Cilantro Pesto Mexican Chorizo Pizza combines the bold flavors of traditional Mexican cuisine with a fresh twist, creating a dish that’s equal parts comforting and exciting. With a crispy crust and a delightful hint of herby cilantro pesto, this pizza is a quick, satisfying choice for a weeknight dinner or a cozy movie night. Plus, it’s perfect for anyone looking to step away from fast food and embrace healthier, homemade options without sacrificing flavor. You’ll love how easily it comes together, letting you impress friends and family without the fuss. What’s your favorite pizza topping to elevate a classic dish?

Why is This Pizza So Special?

Freshness at its finest: The cilantro pesto adds an invigorating burst of flavor that sets this pizza apart from your average slice.
Bursting with flavor: The savory chorizo melds perfectly with creamy cotija cheese for an indulgent experience.
Perfectly versatile: Customize with your favorite toppings, or explore variations like using veggies for a rainbow of flavors.
Time-saving delight: Quick preparation using store-bought dough means you can have this delicious pie on the table in no time!
Crowd pleaser: Whether it’s for date night or a movie marathon, this pizza is sure to impress and satisfy everyone at the table. Add a side salad or pair it with a refreshing drink, and you’re all set for a fantastic evening! For more delicious recipe ideas, check out Mexican Barbecue Chicken or try a fun twist with Pizza Burgers Flavor.

Mexican Pizza Ingredients

Explore the vibrant flavors packed in this Cilantro Pesto Mexican Chorizo Pizza!

For the Cilantro Pesto

  • Cilantro – Bright herb base; substitute with parsley if unavailable.
  • Lime Juice – Adds acidity and brightness; lemon juice can be used as an alternative.
  • Jalapeño – Offers spice and heat; omit seeds for a milder flavor or swap with bell pepper for a non-spicy version.
  • Kosher Salt – Enhances overall flavor; regular salt can work but adjust accordingly.
  • Toasted Pine Nuts – Brings crunch and nuttiness; walnuts or sunflower seeds make good substitutes.
  • Cotija Cheese – Provides a salty creaminess; feta cheese can also be a good replacement.
  • Olive Oil – Binds the pesto ingredients together; any mild oil can work in a pinch.

For the Pizza

  • Prepared Pizza Dough – The base for your pizza; store-bought means easier preparation.
  • Shredded Mozzarella Cheese – Delivers a delightful melt; try provolone or cheddar for different flavor profiles.
  • Chorizo – The star topping that adds spiciness; vegetarian chorizo can be a meatless option.
  • Flour – For dusting the work surface while rolling out the dough.

For Garnishing

  • Sour Cream – Adds creaminess to the finished pizza; Greek yogurt is a great alternative.
  • Torn Cilantro Leaves – Final garnish for a fresh touch; basil can be used for a different aroma.
  • Additional Cotija Cheese – To sprinkle on top for extra creaminess.
  • Toasted Pine Nuts – For that lovely crunch!

Enjoy creating this delightful Mexican pizza with these fresh ingredients!

Step‑by‑Step Instructions for Cilantro Pesto Mexican Chorizo Pizza

Step 1: Preheat and Prepare Dough
Begin by preheating your oven to 450°F (232°C). While the oven heats, take your prepared pizza dough out of the refrigerator and let it come to room temperature, ensuring it will roll out smoothly. This makes the crust of your Cilantro Pesto Mexican Chorizo Pizza deliciously crispy.

Step 2: Create the Cilantro Pesto
In a food processor, combine fresh cilantro, lime juice, jalapeño, kosher salt, toasted pine nuts, cotija cheese, and olive oil. Blend until smooth and creamy, about 1-2 minutes, scraping down the sides as needed. This vibrant cilantro pesto will serve as the flavorful base for your pizza, adding freshness and zest.

Step 3: Cook the Chorizo
In a skillet over medium heat, add your chorizo and cook until browned, approximately 5-7 minutes, breaking it up with a spatula as it cooks. Once thoroughly cooked and crispy, drain the excess fat on a paper towel. This step infuses the pizza with spicy, rich flavors, elevating your Cilantro Pesto Mexican Chorizo Pizza to new heights.

Step 4: Roll Out the Dough
On a lightly floured surface, roll out the pizza dough to fit a greased 9″x12″ sheet pan. Aim for an even thickness to ensure even baking; you’re looking for a dough that’s both pliable and slightly thicker around the edges for a perfect crust. Transferring the dough to the pan, press it into the corners to create a solid base.

Step 5: Assemble the Pizza
Spread the cilantro pesto evenly over the rolled-out dough, making sure to cover every corner. Next, sprinkle shredded mozzarella cheese generously on top, creating a gooey layer of deliciousness. This aromatic pesto and cheese combination makes the perfect starting point for your Cilantro Pesto Mexican Chorizo Pizza.

Step 6: Add Chorizo and Cotija
Evenly distribute the cooked chorizo over the mozzarella, followed by a sprinkle of cotija cheese for that salty, creamy finish. The combination of toppings will create a beautiful mosaic on your pizza, inviting everyone to dive into this flavorful feast.

Step 7: Bake to Perfection
Carefully place the pizza in your preheated oven and bake for 10-14 minutes. Keep an eye on it, looking for a crust that’s golden brown and cheese that’s bubbly and slightly browned. This baking step allows all those vibrant flavors to meld together beautifully in your Cilantro Pesto Mexican Chorizo Pizza.

Step 8: Cool and Garnish
After baking, let the pizza cool for a few minutes on a wire rack. Drizzle a ribbon of sour cream on top, then finish with extra cotija cheese, torn cilantro leaves, and toasted pine nuts for crunch. These garnishes not only enhance the flavor but also add beautiful visual appeal to your delicious pizza.

Step 9: Slice and Serve
Finally, slice the Cilantro Pesto Mexican Chorizo Pizza into pieces and serve hot. The crispy edges and melty cheese will surely impress your family and friends. Enjoy your homemade pizza night, showcasing the vibrant flavors of this unique dish!

Mexican Chorizo Pizza Variations

Feel free to reinvent your Mexican Chorizo Pizza with these exciting twists that will spark your culinary creativity and tantalize your taste buds!

  • Veggie Lover: Add bell peppers, corn, or spinach for a colorful, nutritious twist. Each bite bursts with vibrant textures and flavors!
  • Heat It Up: Incorporate sliced serrano peppers for an extra kick, creating a mouthwatering contrast with the creamy cheese. Spice lovers will relish this fiery upgrade!
  • Cheesy Delight: Swap mozzarella for a blend of provolone and pepper jack for a robust, creamy flavor that elevates the pizza to new heights. Deliciously melty!
  • Gluten-Free: Use a gluten-free pizza crust, ensuring everyone can indulge in the flavors of this delightful pizza. You won’t miss a thing!
  • Dairy-Free: Replace cheese with a dairy-free alternative, such as cashew cheese or a vegan mozzarella, creating a wholesome option for those who are lactose intolerant.
  • Pesto Variation: Try using arugula or basil pesto in place of cilantro for a different herbal flavor profile that still sings with freshness. Each variation tells a new flavor story!
  • Protein Swap: Opt for ground turkey or chicken to make a lighter version, while still enjoying the spiced savory goodness that pairs beautifully with the fresh pesto.
  • Sweet & Spicy: Drizzle honey or a balsamic reduction over the finished pizza for a sweet finish that pairs perfectly with the spicy chorizo. It’s an unexpected, delightful surprise!

For more delightful flavors, don’t forget to check out Smoky Cheddar Mac or treat yourself to No-Bake Cookies and Cream Cheesecake Cups for dessert!

Expert Tips for Mexican Chorizo Pizza

Crust Consistency: Ensure your pizza dough is evenly rolled to prevent thick, undercooked edges that could ruin your Mexican pizza experience.

Chorizo Drainage: Allow the cooked chorizo to drain on paper towels to eliminate excess grease which can make your pizza soggy.

Cooling Time: Let the pizza rest for a few minutes after baking; this helps to set the toppings and makes slicing a breeze.

Flavorful Pesto: Save any leftover cilantro pesto; it’s a fantastic addition to tacos, sandwiches, or even as a salad dressing for a burst of flavor.

Cheese Options: Feel free to experiment with different cheeses; mixing mozzarella with cheddar or pepper jack can add another layer of deliciousness to your Mexican pizza.

Make Ahead Options

These Cilantro Pesto Mexican Chorizo Pizzas are fantastic for meal prep! You can prepare the cilantro pesto up to 24 hours in advance and store it in an airtight container in the refrigerator. The chorizo can also be cooked ahead of time and kept in the fridge for up to 3 days. Just remember to let it cool completely before storing to maintain its texture. When you’re ready to enjoy this flavorful pizza, simply roll out the dough, spread the pesto, layer the cheese and chorizo, and bake as directed. This way, you’ll have a delicious homemade pizza on the table in no time—perfect for busy weeknights!

What to Serve with Cilantro Pesto Mexican Chorizo Pizza

The perfect meal doesn’t just stop at the pizza; it’s about creating a memorable dining experience.

  • Creamy Avocado Salad: A refreshing salad with ripe avocados, lime juice, and a touch of cilantro brightens up each bite and complements the spices of the pizza beautifully.

  • Garlicky Roasted Potatoes: Golden potatoes, drizzled with olive oil and herbs, offer a crispy contrast that pairs perfectly with the gooey, savory flavors of the pizza.

  • Fresh Corn on the Cob: Grilled or boiled, sweet corn seasoned with lime and chili powder adds a delightful, crunchy sweetness that balances the richness of the chorizo.

  • Chilled Mexican Beer: The crispness of a light Mexican lager helps cleanse the palate while enhancing the bold flavors of the chorizo and cilantro pesto.

  • Margarita Cocktail: A zesty margarita, with hints of lime and salt, harmonizes beautifully with the savory notes of the pizza, turning your meal into a festive occasion.

  • Cilantro-Lime Rice: Flavorful rice with a hint of lime and fresh cilantro creates a satisfying side that complements the Mexican theme of the meal.

  • Fruit Salsa: A mango or pineapple salsa adds a sweet and zesty touch, making for a vibrant and colorful addition to your dinner table.

  • Churros for Dessert: Don’t forget dessert! These crispy, cinnamon-sugar-coated treats are a sweet way to end your meal on a high note.

  • Sangria: Refreshing and fruity, a glass of sangria offers a wonderful blend of flavors and a festive feel that perfectly complements your pizza night.

How to Store and Freeze Mexican Chorizo Pizza

Fridge: Store leftover pizza in an airtight container in the refrigerator for up to 3 days. This keeps the flavors fresh and the crust from getting soggy.

Freezer: Wrap slices individually in plastic wrap, then place in a freezer-safe bag. They can be frozen for up to 2 months. For best results, reheat directly from frozen.

Reheating: To enjoy your pizza again, reheat in a preheated oven at 375°F (190°C) for about 10-15 minutes until hot and crispy. This method revives the delicious texture of your Mexican Chorizo Pizza!

Make-Ahead Pesto: Prepare the cilantro pesto a day in advance and store it in the refrigerator, allowing for a smoother cooking experience when you’re ready to make the pizza.

Cilantro Pesto Mexican Chorizo Pizza Recipe FAQs

Can I use different types of cheese for this pizza?
Absolutely! While mozzarella provides a wonderful melt, you can easily swap it for provolone or cheddar for a different flavor experience. Mixing cheeses can create a delicious twist—try adding pepper jack for an extra kick or even a bit of gouda for smokiness.

How should I store leftover Mexican Chorizo Pizza?
To keep your pizza fresh, store any leftovers in an airtight container in the refrigerator for up to 3 days. This helps retain the flavors while preventing the crust from getting soggy. When you’re ready to indulge again, simply reheat it in a preheated oven for the best results!

Can I freeze slices of this pizza?
Yes! To freeze, wrap each slice of pizza in plastic wrap and place them in a freezer-safe bag. The pizza will maintain its quality for up to 2 months. When you’re ready to enjoy a slice, there’s no need to thaw; just bake it directly from frozen at 375°F (190°C) for about 10-15 minutes until hot and crispy.

What should I do if the chorizo releases too much grease?
If your chorizo is particularly greasy, let it drain on paper towels after cooking. This step is essential as it prevents the excess fat from making your pizza soggy, ensuring a delightful texture in every bite.

Is it okay to use store-bought pizza dough?
Very! Using store-bought pizza dough makes this recipe much quicker and easier, perfect for weeknight meals. Make sure to bring it to room temperature before rolling it out for a better texture while baking.

Can I make this pizza vegetarian?
Certainly! If you’d like to enjoy a meat-free version, simply replace chorizo with vegetarian chorizo or your favorite veggies like bell peppers, mushrooms, or zucchini. This keeps all the delicious flavors while accommodating different dietary preferences.

Mexican Pizza and Volver

Mexican Pizza with Cilantro Pesto: A Flavorful Twist

This Mexican pizza features cilantro pesto and chorizo for a flavorful twist that delights the senses.
Prep Time 20 minutes
Cook Time 14 minutes
Cooling Time 5 minutes
Total Time 39 minutes
Servings: 8 slices
Course: Dinner
Cuisine: Mexican
Calories: 350

Ingredients
  

For the Cilantro Pesto
  • 1 bunch Cilantro Substitute with parsley if unavailable.
  • 2 tablespoons Lime Juice Can use lemon juice as an alternative.
  • 1 medium Jalapeño Omit seeds for milder flavor or substitute with bell pepper.
  • 1 teaspoon Kosher Salt Adjust if using regular salt.
  • 1/4 cup Toasted Pine Nuts Walnuts or sunflower seeds can substitute.
  • 1/4 cup Cotija Cheese Feta cheese is also an option.
  • 1/2 cup Olive Oil Any mild oil can work.
For the Pizza
  • 1 round Prepared Pizza Dough Store-bought for easier preparation.
  • 2 cups Shredded Mozzarella Cheese Can use provolone or cheddar.
  • 1 cup Chorizo Vegetarian chorizo is a meatless option.
  • 1 tablespoon Flour For dusting the work surface.
For Garnishing
  • 1/2 cup Sour Cream Greek yogurt is a good alternative.
  • 1/4 cup Torn Cilantro Leaves Basil can be used for a different aroma.
  • 1/4 cup Additional Cotija Cheese Extra creaminess on top.
  • 1/4 cup Toasted Pine Nuts For added crunch.

Equipment

  • Oven
  • Food processor
  • Skillet
  • Rolling Pin
  • Sheet Pan
  • Measuring cups
  • Measuring spoons

Method
 

Step-by-Step Instructions
  1. Preheat your oven to 450°F (232°C) and let the pizza dough come to room temperature.
  2. In a food processor, blend cilantro, lime juice, jalapeño, kosher salt, toasted pine nuts, cotija cheese, and olive oil until smooth.
  3. Cook chorizo in a skillet over medium heat until browned, about 5-7 minutes, and drain excess fat.
  4. Roll out the pizza dough on a floured surface to fit a greased 9"x12" sheet pan.
  5. Spread cilantro pesto over the rolled-out dough and sprinkle mozzarella cheese on top.
  6. Distribute cooked chorizo and sprinkle cotija cheese on top.
  7. Bake in the preheated oven for 10-14 minutes until crust is golden and cheese is bubbly.
  8. Let the pizza cool for a few minutes, then garnish with sour cream, cotija, cilantro, and pine nuts.
  9. Slice the pizza and serve hot.

Nutrition

Serving: 1sliceCalories: 350kcalCarbohydrates: 30gProtein: 16gFat: 20gSaturated Fat: 6gPolyunsaturated Fat: 3gMonounsaturated Fat: 10gCholesterol: 35mgSodium: 550mgPotassium: 280mgFiber: 2gSugar: 2gVitamin A: 10IUVitamin C: 15mgCalcium: 200mgIron: 2mg

Notes

Ensure dough is evenly rolled out to prevent thick edges. Drain chorizo to avoid sogginess. Let pizza rest before slicing for easier cuts.

Tried this recipe?

Let us know how it was!

Creamy Carrot Cake Ice Cream to Satisfy Your Sweet Cravings

As I stirred the mixture, the warm aroma of cinnamon and nutmeg filled my kitchen, instantly transporting me to my grandmother’s cozy home during the holidays. That moment of nostalgia inspired me to create this delightful Carrot Cake Ice Cream. This custard-based dessert captures the sweet earthiness of real carrots, enhanced by aromatic spices reminiscent of a classic carrot cake. Not only is this recipe a heaven-sent way to indulge in a unique dessert, but it’s also perfect for those moments when you want to impress friends or family with something extraordinary—without all the fuss. And the best part? It’s a fun, homemade ice cream treat that you can easily whip up at home. So, are you ready to scoop into this creamy goodness? Let’s dive into how to make this delicious delight!

Why is Carrot Cake Ice Cream Irresistible?

Nostalgic Flavors: This ice cream beautifully captures the essence of classic carrot cake, bringing back memories of cozy family gatherings and holiday feasts.

Custard-Based Delight: The rich custard base gives it a luxurious, creamy texture that is simply unmatched.

Homemade Simplicity: With just a few key ingredients, you can create this gourmet-inspired dessert in your own kitchen.

Versatile Treat: Pair it with slices of carrot cake or enjoy it on its own; it works wonderfully for any occasion!

Crowd-Pleasing Dessert: Impress your guests with this unique twist on a beloved favorite—the combination of flavors and textures is sure to be a hit.

For an even more delightful dessert experience, consider serving it alongside a piece of Pistachio Carrot Cake or garnish it with whipped cream and crunchy graham crackers!

Carrot Cake Ice Cream Ingredients

For the Custard Base

  • 2 cups heavy cream – Provides richness and creaminess; for a dairy-free option, use full-fat coconut milk.
  • 1 cup whole milk – Adds a smooth texture; can be replaced with almond milk for a lighter version.
  • 3/4 cup brown sugar – Adds sweetness and depth with a hint of molasses; white sugar can work in a pinch but will alter flavor.
  • 1/2 tsp ground cinnamon – Offers warmth and a cozy aroma; optional: add a pinch of allspice or cloves for extra spice notes.
  • 1/4 tsp ground ginger – Adds a zesty warmth that enhances the carrot cake flavor.
  • 1/4 tsp ground nutmeg – Complements the spices and provides a sweet, nutty aroma.
  • 1/4 tsp salt – Balances flavors and enhances sweetness.
  • 1 tsp vanilla extract – Adds aromatic sweetness.
  • 4 large egg yolks – Creates a rich custard base for a smooth texture; for an egg-free version, substitute with cornstarch.

For the Carrot Component

  • 1 cup finely grated carrots, steamed until soft – Primary flavor component; ensures a smooth blend. Grate finely to avoid chunks in the ice cream.

Optional Textures

  • 1/2 cup chopped toasted pecans – Adds a crunchy texture; can substitute with gluten-free alternatives.
  • OR 1/2 cup crushed graham crackers – Gives a delightful crunch; can easily swap for a gluten-free version if needed.

This delightful Carrot Cake Ice Cream is sure to leave you craving more—so, gather your ingredients and let’s start making memories! Enjoy crafting and savoring this creamy dessert with family and friends.

Step‑by‑Step Instructions for Carrot Cake Ice Cream

Step 1: Make the Base
In a medium saucepan, combine 2 cups of heavy cream, 1 cup of whole milk, 3/4 cup of brown sugar, 1/2 teaspoon of ground cinnamon, 1/4 teaspoon of ground ginger, 1/4 teaspoon of ground nutmeg, and 1/4 teaspoon of salt. Heat over medium until the mixture is warm and the sugar fully dissolves, stirring gently to avoid boiling, which should take about 5 minutes.

Step 2: Temper the Eggs
While the cream mixture heats, whisk 4 large egg yolks in a mixing bowl until well combined. Gradually add about 1/2 cup of the warm milk mixture to the yolks, whisking continuously to temper the eggs. Then, carefully pour this mixture back into the saucepan, stirring constantly to ensure a smooth blend.

Step 3: Cook the Custard
Continue to heat the mixture over low heat, stirring frequently, until it thickens enough to coat the back of a spoon—this usually takes around 10 to 15 minutes. You’re aiming for a temperature of approximately 170°F, so keep an eye on it to achieve that perfect custard consistency needed for your Carrot Cake Ice Cream.

Step 4: Add Carrots & Vanilla
Remove the custard from the heat, and stir in 1 teaspoon of vanilla extract and 1 cup of finely grated, steamed carrots. Blend the mixture using an immersion blender for a smooth consistency. This step ensures the vibrant carrot flavor is evenly distributed throughout your ice cream base.

Step 5: Chill Thoroughly
Let the mixture cool down to room temperature before refrigerating it. For the best results, cover and chill the mixture in the refrigerator for at least 4 hours or overnight. This will enhance the flavors and ensure a creamy texture for your Carrot Cake Ice Cream.

Step 6: Churn the Ice Cream
Once chilled, pour the mixture into your ice cream maker and churn according to the manufacturer’s instructions. If you’re adding 1/2 cup of chopped toasted pecans or crushed graham crackers for extra texture, fold them in during the last 5 minutes of churning for a delightful crunch.

Step 7: Freeze & Serve
Transfer the churned Carrot Cake Ice Cream into an airtight container, smoothing the top with a spatula. Seal tightly and freeze for at least 4 hours until firm. When you’re ready to enjoy your creamy masterpiece, let it sit at room temperature for a few minutes before scooping for easy serving!

Expert Tips for Carrot Cake Ice Cream

  • Blend Smoothly: Use an immersion blender to ensure the custard and carrot mixture is silky creamy, avoiding any chunks for the best Carrot Cake Ice Cream texture.
  • Chill Well: For optimal creaminess, refrigerate the base overnight. This prolongs flavor melding and guarantees a smoother final product.
  • Watch the Heat: When cooking the custard, avoid boiling; a controlled low heat will help thicken without curdling the eggs.
  • Serve Softly: If the ice cream is too hard to scoop, let it sit at room temperature for 5–10 minutes before serving.
  • Optional Additions: Fold in toasted pecans or graham cracker crumbs during the last minutes of churning for a delightful crunch and added flavor contrast.

What to Serve with Carrot Cake Ice Cream

Looking to create a delightful spread that pairs perfectly with your creamy ice cream treat?

  • Classic Carrot Cake: The ultimate pairing, this cake’s spices harmonize beautifully with the ice cream, creating a nostalgic dessert experience.

  • Whipped Cream Topping: Light and airy, whipped cream adds a deliciously smooth contrast to the rich flavors of the ice cream while enhancing its creaminess.

  • Toasted Pecans: A sprinkle of these nuts adds a crunchy texture and toasted flavor that echoes through both the ice cream and the carrot cake.

  • Cinnamon Sugar Cookies: Complement the flavors with warm cinnamon sugar cookies for a sweet, crunchy contrast that enhances your dessert spread.

  • Maple Glazed Donuts: Their soft, sweet nature pairs with the spiced ice cream, creating an indulgent dessert platter everyone will love.

  • Iced Chai Latte: Brewed with warm spices, this drink meshes beautifully with the creamy dessert, enhancing the overall flavor profile and making for a cozy pairing.

  • Caramel Sauce Drizzle: A rich layer of caramel adds a sumptuous sweetness and depth that completes the whole experience.

  • Fruity Sorbet: The freshness of a berry or citrus sorbet can balance the richness of the Carrot Cake Ice Cream while adding a refreshing bite.

How to Store and Freeze Carrot Cake Ice Cream

Fridge: Store leftovers in an airtight container in the fridge for up to 3 days; however, for best texture and taste, enjoying it fresh is recommended.

Freezer: Transfer the ice cream into a freezer-safe container, pressing parchment paper against the surface to prevent ice crystals. It will keep well for up to 2 weeks without losing its creamy goodness.

Reheating: If the ice cream becomes too hard, allow it to sit at room temperature for 5-10 minutes before scooping for easier serving.

Thawing: Avoid reheating in the microwave, as it can affect texture; instead, let it thaw naturally to preserve the quality of your delicious Carrot Cake Ice Cream.

Carrot Cake Ice Cream Variations

Feel free to play around with these exciting variations to create your perfect delicious treat!

  • Dairy-Free: Swap heavy cream and whole milk with full-fat coconut milk for a luscious, dairy-free version that everyone can enjoy.
  • Nut Free: For a nut-free take, simply omit the pecans or graham crackers and substitute with sunflower seeds for texture.
  • Lower Sugar: Use maple syrup instead of brown sugar for a natural sweetness that enhances the earthiness of the carrots.
  • Extra Spices: Amp up the flavor profile by adding a pinch of allspice or cardamom to the mix; it’ll take your ice cream to the next level with warming spice notes.
  • Frozen Fruits: Blend in a handful of frozen shredded pineapple for a delightful fruity twist that pairs wonderfully with the spiced carrot flavors.
  • Cream Cheese Swirl: Create an indulgent surprise by swirling cream cheese frosting into the churned ice cream for a decadent finish.
  • Tropical Delight: Add shredded coconut for a delightful tropical twist that enhances the creamy ice cream experience.
  • Heat Kick: A pinch of cayenne pepper or a dash of chili powder can introduce a surprising and exciting heat that contrasts beautifully with the sweet flavors.

Your Carrot Cake Ice Cream can be customized to your liking! Pair it with some slices of Patriotic Poke Cake for a festive gathering or enjoy it alongside smooth pieces from a Cookies Cream Cheesecake. The possibilities are endless; so have fun and enjoy every scoop!

Make Ahead Options

These Creamy Carrot Cake Ice Cream treats are perfect for busy weeknights and special occasions alike! You can prepare the custard base (Steps 1-4) up to 24 hours in advance; simply chill it overnight, which allows the flavors to deepen. After chilling, you can churn the ice cream and freeze it for another 4 hours. To maintain quality, ensure the container is airtight, and press parchment paper on the surface before sealing to prevent ice crystals from forming. When ready to serve, let it sit at room temperature for just a few minutes before scooping for a smooth, creamy experience that’s just as delicious as freshly made!

Carrot Cake Ice Cream Recipe FAQs

How do I select ripe carrots for this recipe?
When choosing carrots, look for ones that are firm and have smooth, unblemished skin. Avoid any that show signs of wilting or have dark spots all over. Younger, smaller carrots are usually sweeter and more tender, perfect for this delightful ice cream!

What is the best way to store Carrot Cake Ice Cream?
To ensure your Carrot Cake Ice Cream remains fresh and creamy, store it in an airtight container sealed tightly. If you can, place a piece of parchment paper directly on the surface of the ice cream to minimize air exposure, which helps prevent ice crystals. This ice cream can be stored in the freezer for up to 2 weeks.

Can I freeze Carrot Cake Ice Cream?
Absolutely! Once churned, transfer your Carrot Cake Ice Cream into a freezer-safe container, smoothing the top with a spatula. Seal the container tightly and freeze for at least 4 hours for it to become firm. For best texture, consume it within 2 weeks for optimal flavor and creaminess.

What should I do if my ice cream is too hard to scoop?
If you find your Carrot Cake Ice Cream is too hard, let it sit at room temperature for about 5-10 minutes—this will allow it to soften just enough for easy scooping. Avoid using a microwave to thaw, as it can alter the texture of your creamy delight.

Are there any dietary considerations I should keep in mind?
This recipe contains eggs and dairy, making it unsuitable for those with egg or dairy allergies. For a dairy-free version, substitute heavy cream with full-fat coconut milk and use almond or soy milk. You can replace egg yolks with cornstarch to maintain the creamy texture while making it egg-free.

Can I make this ice cream without an ice cream maker?
Certainly! If you don’t have an ice cream maker, pour the chilled custard mixture into a large bowl and place it in the freezer. Stir the mixture every 30 minutes for about 2-3 hours, or until it reaches a smooth, creamy consistency. This manual method will take a bit longer, but the deliciousness will still shine through!

Carrot Cake Ice Cream

Creamy Carrot Cake Ice Cream to Satisfy Your Sweet Cravings

This Creamy Carrot Cake Ice Cream is a nostalgic dessert that combines the rich flavors of carrot cake with a refreshing ice cream twist.
Prep Time 15 minutes
Cook Time 25 minutes
Chill Time 4 hours
Total Time 4 hours 40 minutes
Servings: 8 cups
Course: Dessert
Cuisine: American
Calories: 300

Ingredients
  

Custard Base
  • 2 cups heavy cream or full-fat coconut milk for a dairy-free option
  • 1 cup whole milk or almond milk for a lighter version
  • 3/4 cup brown sugar or white sugar if necessary
  • 1/2 tsp ground cinnamon optional: add allspice or cloves for extra spice
  • 1/4 tsp ground ginger
  • 1/4 tsp ground nutmeg
  • 1/4 tsp salt
  • 1 tsp vanilla extract
  • 4 large egg yolks or substitute with cornstarch for egg-free version
Carrot Component
  • 1 cup finely grated carrots steamed until soft
Optional Textures
  • 1/2 cup chopped toasted pecans or gluten-free alternative
  • 1/2 cup crushed graham crackers substitutable with gluten-free version if necessary

Equipment

  • Ice Cream Maker
  • Medium saucepan
  • Mixing Bowl
  • immersion blender

Method
 

Step-by-Step Instructions
  1. In a medium saucepan, combine 2 cups of heavy cream, 1 cup of whole milk, 3/4 cup of brown sugar, 1/2 teaspoon of ground cinnamon, 1/4 teaspoon of ground ginger, 1/4 teaspoon of ground nutmeg, and 1/4 teaspoon of salt. Heat over medium until warm and sugar dissolves, about 5 minutes.
  2. While the cream mixture heats, whisk 4 large egg yolks in a mixing bowl until combined. Gradually add about 1/2 cup of the warm mixture to the yolks, whisking continuously to temper. Pour this back into the saucepan, stirring constantly.
  3. Continue to heat over low, stirring frequently, until thick enough to coat the back of a spoon, about 10 to 15 minutes.
  4. Remove from heat, stir in 1 teaspoon of vanilla extract and 1 cup of finely grated, steamed carrots. Blend using an immersion blender.
  5. Let the mixture cool to room temperature before refrigerating. Chill in the refrigerator for at least 4 hours or overnight.
  6. Once chilled, pour into an ice cream maker and churn according to instructions. If adding textures, fold in during the last 5 minutes.
  7. Transfer to an airtight container, smooth the top, seal, and freeze for at least 4 hours until firm.

Nutrition

Serving: 1cupCalories: 300kcalCarbohydrates: 30gProtein: 5gFat: 18gSaturated Fat: 10gPolyunsaturated Fat: 2gMonounsaturated Fat: 4gCholesterol: 150mgSodium: 100mgPotassium: 200mgFiber: 1gSugar: 20gVitamin A: 500IUVitamin C: 2mgCalcium: 150mgIron: 1mg

Notes

This Carrot Cake Ice Cream is a unique treat that can be paired with carrot cake or enjoyed on its own, making it perfect for impressing guests or a cozy family dessert.

Tried this recipe?

Let us know how it was!

Spicy Blackberry Margarita: A Refreshing Summer Twist

As I was mixing drinks for a recent summer get-together, a vibrant Spicy Blackberry Margarita caught everyone’s attention. The blend of juicy blackberries with a zesty kick from Tajin seasoning and refreshing tequila created an instant buzz among my guests. Not only is this easy-to-make cocktail perfect for outdoor gatherings and those sultry summer nights, but it also offers a crowd-pleasing twist with bold flavors that keep everyone coming back for more. Plus, don’t fret if you’re opting for a flavorsome mocktail—the recipe is versatile enough to satisfy both cocktail lovers and teetotalers! Ready to shake things up at your next party? Let’s dive into how you can whip up this refreshing drink that’s bound to impress!

Why is this margarita the ultimate summer drink?

Vibrant and Refreshing: The Spicy Blackberry Margarita brings a burst of flavor that perfectly captures the essence of summer, thanks to the juicy blackberries and zesty Tajin seasoning.

Easy-to-Make: With just a few simple ingredients and a quick prep time, this cocktail is perfect for any home chef looking to impress without hassle.

Versatile Options: Whether you enjoy cocktails or mocktails, this recipe can be easily adapted to suit everyone’s preferences. Try it alongside dishes like grilled shrimp or spicy tacos for a complete meal experience!

Crowd-Pleasing Delight: Its unique blend of sweet, spicy, and citrus notes makes it the star of any summer gathering, guaranteed to leave your guests craving another sip.

Prepare to wow your friends with this refreshing drink that stands out from the usual summer offerings!

Spicy Blackberry Margarita Ingredients

For the Cocktail

  • Tajin Seasoning – adds a spicy kick when rimming the glass; substitute with chili powder or sea salt mixed with lime zest for a creative twist.
  • 1 oz Tequila – the base spirit that brings depth; use any blanco or reposado tequila for best results.
  • 1 oz Blackberry Liquor – contributes sweetness and blackberry flavor; Crème de mûre is a perfect alternative if needed.
  • ½ oz Grand Marnier – introduces citrus notes to enhance the drink; feel free to swap it with any orange-flavored liqueur.
  • 3 oz Spicy Margarita Mix – provides that zingy flavor; choose your favorite brand for a personalized touch.
  • 1 teaspoon Blackberry Syrup – intensifies blackberry essence; homemade versions work wonderfully too!

For the Garnish

  • Lime Wheel – adds a refreshing citrus finish to each sip.
  • Slice of Jalapeño – gives an extra kick; thinner slices allow for better control of spice level.
  • Fresh Blackberries – adds a splash of color and fresh flavor, making your cocktail visually appealing!

With these simple ingredients, your Spicy Blackberry Margarita will be a hit at any summer gathering!

Step‑by‑Step Instructions for Spicy Blackberry Margarita

Step 1: Prepare the Glass
Begin by rimming a cocktail glass with fresh lime juice, ensuring an even coat around the rim. Then, dip the glass into Tajin seasoning, allowing it to adhere, creating a beautifully spicy edge. Set the glass aside, and take a moment to admire the vibrant Tajin as it complements the ice-cold drink to come.

Step 2: Fill the Glass
Next, fill the prepared glass about three-quarters full with ice. Choose large ice cubes for slower melting, keeping your Spicy Blackberry Margarita chilled and flavorful. The sight of the ice glistening in the glass sets the stage for the refreshing drink that awaits.

Step 3: Mix the Ingredients
In a cocktail shaker, combine 1 oz of tequila, 1 oz of blackberry liquor, ½ oz of Grand Marnier, 3 oz of spicy margarita mix, and 1 teaspoon of blackberry syrup. Secure the shaker lid and shake vigorously for about 15 seconds. The blend of ingredients will create a beautiful fusion of colors, showcasing the delightful blackberry hues.

Step 4: Pour the Mixture
Carefully pour the shaken mixture into the prepared glass filled with ice. Let the vibrant colors of your Spicy Blackberry Margarita cascade and mingle with the glistening ice, creating an inviting appearance that invites everyone to take a sip right away.

Step 5: Garnish the Drink
To elevate your cocktail, garnish it with a lime wheel positioned on the rim, a thin slice of jalapeño for an extra bold kick, and a few fresh blackberries thrown on top. This not only enhances the visual appeal of your drink but also introduces fresh elements that greet your senses with each sip.

Step 6: Serve and Enjoy
Once your glass is beautifully adorned, serve your delightful Spicy Blackberry Margarita immediately. Encourage your guests to take a moment and appreciate the vibrant colors and inviting aroma before enjoying the refreshing flavors. Cheers to a perfect summer gathering with this crowd-pleasing cocktail!

Make Ahead Options

Preparing your Spicy Blackberry Margarita ahead of time can save you precious moments during busy summer gatherings! You can mix the tequila, blackberry liquor, Grand Marnier, spicy margarita mix, and blackberry syrup together up to 24 hours in advance—just be sure to store it in an airtight container in the refrigerator to maintain the vibrant flavors. The Tajin-rimmed glasses can also be prepped ahead (just keep the rim dry until serving). When it’s time to serve, simply fill the prepared glasses with ice, pour in your pre-mixed cocktail, and garnish with a lime wheel, jalapeño slice, and fresh blackberries. This method allows you to enjoy refreshing cocktails without the last-minute rush, ensuring your Spicy Blackberry Margarita is just as delicious!

Expert Tips for the Best Spicy Blackberry Margarita

  • Shake Well: Ensure to shake the cocktail vigorously for at least 15 seconds. This helps the flavors meld, resulting in a well-balanced Spicy Blackberry Margarita.

  • Control the Spice: Slice the jalapeño thinly for garnishing. Thinner slices allow you to manage the heat level, keeping the cocktail enjoyable without overwhelming spice.

  • Chill Your Glass: For an extra refreshing experience, chill your glass in the freezer before preparing the cocktail. This keeps your drink colder for longer.

  • Mix It Up: Don’t hesitate to experiment! Swap out the tequila for vodka or make it a mocktail with club soda and orange juice for a non-alcoholic option.

  • Quality Ingredients: Choose high-quality spirits and fresh ingredients. Great flavors come from fresh blackberries and real tequila, boosting the sweetness and depth of your Spicy Blackberry Margarita.

Spicy Blackberry Margarita Variations & Substitutions

Feel free to mix things up with these creative variations to your Spicy Blackberry Margarita that are sure to delight your palate!

  • Mocktail Version: Substitute tequila with club soda and Grand Marnier with orange juice for a refreshing non-alcoholic option. This twist keeps all the vibrant flavors while making it accessible for everyone to enjoy.

  • Herb Infusion: Add fresh mint or basil to the cocktail shaker for a refreshing herbal twist. Just a few leaves will elevate the flavor profile and add a lovely aromatic touch.

  • Fruit Flavors: Experiment with different berries, like raspberries or strawberries, instead of blackberries. Each berry provides unique sweetness and creates a colorful display in your drink.

  • Heat Adjustment: If you’re a spice lover, muddle a few slices of jalapeño in the shaker before mixing. This will boost the spice level significantly and ignite your taste buds!

  • Citrus Zing: Add a splash of fresh lime or grapefruit juice to enhance the citrus notes. This extra acidity brightens the cocktail and balances the sweetness beautifully.

  • Lower Sugar Option: Use a sugar-free margarita mix or reduce the amount of blackberry syrup for a healthier alternative without sacrificing flavor.

  • Smoky Flavor: For a deep, smoky twist, substitute regular tequila with mezcal. This adds a unique, rich layer to your Spicy Blackberry Margarita that adventurous palates will love!

  • Flavor Pairing: Try serving this drink alongside dishes like grilled shrimp or spicy tacos, just like with our Spicy Korean Gochujang or Spicy Thai Basil. The flavors complement each other wonderfully!

What to Serve with Spicy Blackberry Margarita

Elevate your summer gatherings with delightful pairings that will perfectly complement your vibrant cocktail.

  • Grilled Shrimp Tacos: The zesty flavors of the shrimp enhance the drink’s spiciness while adding tantalizing textures.
  • Spicy Chicken Quesadillas: These crispy delights pair beautifully; their savory richness balances the margarita’s sweetness.
  • Crispy Nachos: Serve with a fresh salsa or guacamole. The crunchiness is a perfect match for the smooth cocktail.
  • Watermelon Feta Salad: The cooling sweetness of watermelon and salty feta offers a refreshing contrast to the spicy raspberry notes.
  • Tropical Fruit Skewers: Juicy and colorful, these fruity additions bring a sweet twist to each sip of the margarita, enhancing its vibrant charm.
  • Cucumber Lime Spritzer: For a non-alcoholic option, this refreshing drink mirrors the margarita’s citrus notes while cooling off spice intensity.
  • Chocolate Mousse: End on a sweet note. The richness and creaminess of the mousse provide a delightful finish after sipping your cocktail. Enjoy the balance of flavors!

How to Store and Freeze Spicy Blackberry Margarita

  • Refrigerator: Store any leftover mixed cocktail in an airtight container and consume within 3 days for the best flavor. Keep the ingredients separate until ready to serve for optimal freshness.

  • Freezer: While it’s best to serve your Spicy Blackberry Margarita fresh, you can freeze the mixed ingredients as a slushy treat. Pour into a freezer-safe container and use within 1 month.

  • Pre-Mixing: For an efficient prep, measure out the ingredients ahead of time and store them in the fridge for up to 24 hours. Just shake with ice before serving for that fresh taste!

  • Reheating: If your mix has been in the freezer, let it thaw in the fridge overnight and shake well before serving. The taste will be slightly different, but it remains a flavorful and delightful choice!

Spicy Blackberry Margarita Recipe FAQs

What kind of blackberries should I use for the cocktail?
Absolutely! For the best flavor, opt for ripe, juicy blackberries that are plump and dark purple. Avoid any that have dark spots all over or feel mushy, as these might not have the desired sweetness. Fresh is always best, but if they’re out of season, consider using frozen blackberries—just let them thaw before mixing.

How should I store leftover Spicy Blackberry Margarita?
To keep the cocktail fresh, store any leftover mixed drink in an airtight container in the refrigerator. It’s best enjoyed within 3 days for optimal flavors. If you’ve got non-mixed ingredients, you can keep them separately in the fridge until you’re ready to serve.

Can I freeze the Spicy Blackberry Margarita?
Very! Freezing the mixed ingredients into a slushy treat is a fun option. To do this, simply pour the mixture into a freezer-safe container and use it within 1 month. When you’re ready to enjoy, let it thaw in the fridge overnight, then shake it well before serving to bring back that delicious blend of flavors.

What if my Spicy Blackberry Margarita is too spicy?
No worries! If you find the heat from the jalapeño too intense, you can reduce the amount used for garnishing. Alternatively, swap out the jalapeño for a milder pepper, or omit it entirely if you prefer a lighter drink. You can also balance out the spice by adding more blackberry syrup for sweetness, allowing you to customize your cocktail to your taste preferences.

Is this recipe suitable for a gluten-free diet?
Absolutely! All the ingredients in this Spicy Blackberry Margarita can be gluten-free. Just double-check that the margarita mix and any brands you use are labeled gluten-free. This makes it a fantastic option for friends and family who may have dietary restrictions, allowing everyone to join in the fun.

Spicy Blackberry Margarita

Spicy Blackberry Margarita: A Refreshing Summer Twist

Enjoy a Spicy Blackberry Margarita, a refreshing summer cocktail featuring juicy blackberries and zesty Tajin for an unforgettable taste.
Prep Time 10 minutes
Total Time 10 minutes
Servings: 1 cocktail
Course: Drinks
Cuisine: Mexican
Calories: 200

Ingredients
  

For the Cocktail
  • 1 oz Tequila Use any blanco or reposado tequila for best results.
  • 1 oz Blackberry Liquor Crème de mûre is a perfect alternative if needed.
  • ½ oz Grand Marnier Feel free to swap with any orange-flavored liqueur.
  • 3 oz Spicy Margarita Mix Choose your favorite brand for a personalized touch.
  • 1 teaspoon Blackberry Syrup Homemade versions work wonderfully too!
For the Garnish
  • 1 slice Lime Wheel Adds a refreshing citrus finish.
  • 1 slice Jalapeño Thinner slices allow for better control of spice level.
  • 3 Fresh Blackberries Adds color and fresh flavor.
For the Rim
  • as needed Tajin Seasoning Adds a spicy kick when rimming the glass.

Equipment

  • cocktail shaker
  • cocktail glass
  • measuring jigger

Method
 

Step-by-Step Instructions
  1. Begin by rimming a cocktail glass with fresh lime juice, then dip the glass into Tajin seasoning.
  2. Fill the prepared glass about three-quarters full with ice.
  3. In a cocktail shaker, combine tequila, blackberry liquor, Grand Marnier, spicy margarita mix, and blackberry syrup. Shake vigorously for 15 seconds.
  4. Carefully pour the mixture into the prepared glass filled with ice.
  5. Garnish with a lime wheel, a thin slice of jalapeño, and a few fresh blackberries.
  6. Serve your delicious Spicy Blackberry Margarita immediately.

Nutrition

Serving: 1cocktailCalories: 200kcalCarbohydrates: 25gSodium: 5mgPotassium: 120mgSugar: 20gVitamin C: 15mg

Notes

Experiment with non-alcoholic versions by replacing alcohol with club soda and orange juice, and adjust spice levels to your liking.

Tried this recipe?

Let us know how it was!

Deliciously Crunchy Roasted Almonds: Perfect for Holiday Snacking

As I walked through the bustling holiday market, the air was filled with the irresistible aroma of warm spices and roasted nuts. Inspired by those delightful scents, I knew I had to recreate that magic at home. Enter my Oven-Roasted Almond and Pecan Nibbles—a perfect blend of sweet and savory that transforms simple nuts into a show-stopping holiday snack. These little bites are not only incredibly easy to prepare but also make for a fantastic crowd-pleaser at any festive gathering. Just imagine setting out a bowl of these crunchy delights, and watch as friends and family gather around to savor each flavorful morsel. Curious about how to whip up this delectable treat? Let’s dive into the recipe together!

Why Are Roasted Almonds So Irresistible?

Simplicity at Its Core: Preparing these oven-roasted almond and pecan nibbles requires just a few simple steps, making it perfect for home cooks of any skill level.
Crowd-Pleasing Crunch: The delightful mixture of sweet and savory flavors will keep your guests coming back for more.
Versatile Snacking: These nibbles can be enjoyed on their own or added to your favorite cheese boards, elevating your holiday parties. Plus, if time is short, try them alongside my Roasted Strawberry Whipped recipe for a quick and delightful appetizer!
Make-Ahead Marvel: Prep them a few days in advance to ease your holiday stress, ensuring you can enjoy the festivities without fuss. With such fantastic taste and ease, these roasted almonds will surely become a seasonal staple!

Roasted Almond Ingredients

• Discover the key players for this delightful snack!

For the Nuts
Whole Raw Almonds – The star ingredient, providing that satisfying crunch as you nibble.
Raw Pecan Halves – These add a rich depth and make each bite even more delicious.

For the Coating
Egg White – This binds all the delicious spices and flavors, ensuring every nut is perfectly coated.
Cold Water – Used to froth the egg white, resulting in an ideal binding mixture.
Vanilla Extract – A splash of sweetness that elevates the overall flavor profile.
Melted Butter – Gives a richness to the mix, helping to achieve that irresistible golden-brown finish.

For the Sweetness & Spice
Cinnamon – Delivers a warm, cozy flavor; adjust according to your taste preference.
White Sugar – Provides just the right amount of sweetness to balance the savory ingredients.
Brown Sugar – Adds a luscious caramel note, perfect for those sweet-loving friends!
Salt – Essential for enhancing the flavors; don’t skip this step!

These oven-roasted almonds are the perfect holiday snack to impress your guests and keep them coming back for more!

Step‑by‑Step Instructions for Oven-Roasted Almond and Pecan Nibbles

Step 1: Preheat the Oven
Start by preheating your oven to 250°F (120°C). This low temperature will allow the almond and pecan nibbles to roast slowly, enhancing their natural flavors and ensuring a perfect crunch. While the oven warms up, gather your ingredients and prepare your workspace for a smooth cooking experience.

Step 2: Prepare the Baking Pan
Line a 10 x 15-inch jelly roll pan with parchment paper, creating a non-stick surface for the nuts. This is essential for easy cleanup later! Make sure the parchment is flat against the bottom so that the oven-roasted almonds and pecan nibbles become evenly roasted without sticking.

Step 3: Whip the Egg White
In a mixing bowl, lightly beat the egg white with a splash of cold water until frothy, which should take about 1-2 minutes. This frothy mixture acts as the binder for your nuts. Next, stir in the vanilla extract and melted butter, blending them well until you have a creamy, aromatic mixture ready to coat your almonds and pecans.

Step 4: Coat the Nuts
Add the whole raw almonds and raw pecan halves to the egg mixture. Gently stir until each nut is well-coated, ensuring an even distribution of flavors. The nuts should glisten with the mixture, indicating they are ready for the next step. This coating is what will make your oven-roasted almonds and pecan nibbles taste divine.

Step 5: Mix the Sugar and Spices
In a separate bowl, combine the white sugar, brown sugar, cinnamon, and salt. This blend will add both sweetness and depth to the roasted nuts. Sprinkle this sugary-spicy mixture over the coated nuts, stirring gently to ensure every nibble captures that delightful flavor balance.

Step 6: Spread on the Pan
Carefully spread the coated nut mixture evenly on the prepared jelly roll pan. Make sure the nuts are in a single layer to allow even roasting. This is crucial, as overcrowding the pan can lead to unevenly roasted almonds and pecans, detracting from the delightful crunchiness you’re aiming for.

Step 7: Bake for Perfection
Place the pan in the preheated oven and bake for 1 hour. Be sure to stir the nuts every 15 minutes to promote even cooking and prevent burning. You’ll know they are ready when they turn golden brown and dry to the touch, filling your kitchen with a mouthwatering aroma that beckons everyone to the holiday snacking table.

Step 8: Cool and Store
Once baked, remove the pan from the oven and let the oven-roasted almond and pecan nibbles cool completely on the pan. This cooling process is vital for achieving that perfect crunchy texture. Once cooled, transfer them to airtight containers for storage, where they will stay fresh for up to two weeks, ready to serve at your holiday gatherings.

Expert Tips for Roasted Almonds

  • Watch the Time: Keep a close eye on your almonds while baking; the perfect roast should be golden and dry, not burnt or chewy.

  • Froth It Right: Ensure the egg white is well-frothed for optimal coating of the roasted almonds, which helps all the spices and flavors stick better.

  • Even Coating: Toss the nuts gently in the egg mixture to achieve a uniform coat, which is crucial for maintaining the delicious sweet and savory balance.

  • Ingredient Swap: Feel free to mix nuts! If you love variety, substitute pecans for walnuts or cashews for a delightful change of flavor.

  • Season to Taste: Adjust the cinnamon or add a pinch of cayenne for heat, making these roasted almonds as mild or spicy as you desire.

Roasted Almonds Variations and Substitutions

Feel free to experiment with these variations and make this recipe truly your own! Every twist brings a new layer of flavor and love.

  • Nut Swap: Substitute pecans for walnuts or cashews to explore different tastes. Each nut brings its unique personality, enhancing your snack experience.

  • Spice it Up: Add a pinch of cayenne pepper for a hint of heat. This surprise kick will elevate your roasted almonds to a new level of excitement, perfect for spice lovers!

  • Sweet Twist: Use maple syrup in place of sugar for a natural, earthy sweetness. It infuses a lovely depth of flavor that’s delightful and enhances the holiday spirit.

  • Herb Infusion: Incorporate rosemary or thyme for an aromatic twist. These herbs will transform your nibbles into gourmet treats that will impress on any cheese board.

  • Chocolate Drizzle: Drizzle melted dark chocolate over the cooled nuts for a sweet-savory treat. This guilty pleasure will have everyone coming back for more, offering a luxurious twist on your roasted nibbles.

  • Savory Seasoning: Experiment with garlic powder or smoked paprika for a savory profile. These bold flavors will charm your guests at every gathering, turning simple snacks into standout appetizers.

  • Coconut Crunch: Toss in unsweetened shredded coconut for a tropical twist. This addition will create a delightful textural contrast while adding a hint of sweetness—perfect for winter festivities!

These fun variations are sure to inspire unique creations and help keep your holiday snacking exciting. For more delicious ideas, don’t miss my Roasted Carrot Lentil dish, which pairs beautifully with these sweet and savory roasted almonds!

Make Ahead Options

These Oven-Roasted Almond and Pecan Nibbles are perfect for busy home cooks looking to save time during the holiday rush! You can prepare the nut mixture up to 24 hours in advance by coating the almonds and pecans with the egg white and spice blend, then store it in an airtight container in the refrigerator. For optimal flavor and texture, bake them fresh just before serving—simply spread the coated nuts on a prepared pan and bake at 250°F (120°C) for about 1 hour, stirring periodically. This way, your nibbles will be just as delicious, ensuring a delightful crunch at your gatherings without the last-minute stress!

What to Serve with Oven-Roasted Almond and Pecan Nibbles

As you prepare your kitchen for a festive gathering, these nutty bites are just the beginning of your holiday feast.

  • Cheese Platter: A selection of cheeses complements the nuttiness perfectly, offering creaminess with every crunchy nibble. Try sharp cheddar or creamy brie for a delightful contrast.

  • Fruit Salad: A refreshing fruit salad can balance the rich flavors of the roasted almonds and pecans, adding a burst of freshness to your holiday spread. Think tangy berries and sweet citrus fruits.

  • Sparkling Wine: A glass of bubbly pairs beautifully with these crunchy delights, enhancing their rich flavors while providing a celebratory touch to your gatherings.

  • Savory Olives: The briny richness of savory olives creates a great counterpoint to the sweet and spiced notes of the nuts, adding depth to your snacking experience.

  • Dark Chocolate: Serving a plate of dark chocolate truffles alongside these roasted almonds creates a perfect sweet-salty balance, elevating your dessert table to a new level of indulgence.

  • Roasted Veggies: Roast seasonal vegetables like Brussels sprouts or carrots for a hearty side that contrasts the light and crunchy texture of the nibbles, keeping the holiday vibe vibrant and cheerful.

How to Store and Freeze Roasted Almonds

Airtight Container: Store your oven-roasted almonds in an airtight container at room temperature for up to two weeks to maintain their amazing crunch and flavor.

Freezer: For longer storage, freeze your roasted almonds in a freezer-safe bag or container for up to three months. Just remember to thaw them at room temperature before snacking!

Reheating: If desired, reheat in the oven at 350°F (175°C) for 5-10 minutes to crisp them up again before serving, enhancing those delicious roasted flavors.

Oven-Roasted Almond and Pecan Nibbles Recipe FAQs

How do I select the best almonds for roasting?
Absolutely! Look for whole raw almonds that are plump and have a uniform color. Avoid any that have dark spots or are overly brittle, as these indicate aging or poor quality. Fresh almonds will provide the best crunch and flavor in your roasted almond recipe.

How should I store my oven-roasted almond and pecan nibbles?
I recommend storing your roasted almonds in an airtight container at room temperature. They will stay fresh and crunchy for up to two weeks. If you live in a humid environment, consider placing a food-safe desiccant packet in the container to absorb moisture.

Can I freeze my roasted almonds for later use?
Absolutely! To freeze your roasted almonds, place them in an airtight, freezer-safe bag or container. They will maintain their quality for up to three months. When you’re ready to enjoy them, simply thaw them at room temperature. If you prefer them warm, reheat in the oven at 350°F (175°C) for 5-10 minutes.

What should I do if my roasted almonds are chewy?
Very! If your roasted almonds turn out chewy, it’s likely they were undercooked. Make sure to bake them until they are golden brown and dry—this usually takes about an hour. Stirring every 15 minutes ensures that they cook evenly. If they are already cool and too soft, you can try re-baking them for another 10–15 minutes to bring back that crunch.

Are these roasted almonds safe for people with nut allergies?
Please note that these oven-roasted almond and pecan nibbles contain nuts, so they’re not suitable for anyone with nut allergies. However, feel free to substitute the almonds and pecans with seeds, such as pumpkin or sunflower seeds, to create a nut-free snack that everyone can enjoy!

Can my pets enjoy the roasted almonds?
Very! While nuts can often be safe for pets, it’s always best to avoid sharing as they can be high in fat. If you want to treat your furry friends, consider giving them small amounts only on special occasions, and make sure they don’t have any added sugars or salt.

Roasted Almonds

Deliciously Crunchy Roasted Almonds: Perfect for Holiday Snacking

Enjoy these roasted almonds, a perfect holiday snack that's easy to make and always a crowd-pleaser.
Prep Time 15 minutes
Cook Time 1 hour
Cooling Time 30 minutes
Total Time 1 hour 45 minutes
Servings: 8 cups
Course: Appetizer
Cuisine: American
Calories: 150

Ingredients
  

For the Nuts
  • 2 cups Whole Raw Almonds
  • 1 cup Raw Pecan Halves
For the Coating
  • 1 large Egg White
  • 1 tablespoon Cold Water
  • 1 teaspoon Vanilla Extract
  • 2 tablespoons Melted Butter
For the Sweetness & Spice
  • 1 teaspoon Cinnamon
  • 1 tablespoon White Sugar
  • 1 tablespoon Brown Sugar
  • 1/2 teaspoon Salt

Equipment

  • Oven
  • Mixing Bowl
  • Baking pan
  • Parchment paper

Method
 

Step‑by‑Step Instructions for Oven-Roasted Almond and Pecan Nibbles
  1. Preheat your oven to 250°F (120°C).
  2. Line a 10 x 15-inch jelly roll pan with parchment paper.
  3. Lightly beat the egg white with cold water until frothy.
  4. Stir in vanilla extract and melted butter until creamy.
  5. Add almonds and pecan halves to the egg mixture and stir gently.
  6. Mix white sugar, brown sugar, cinnamon, and salt in a bowl.
  7. Sprinkle the sugar-spice mixture over the coated nuts.
  8. Spread the coated nuts evenly on the baking pan.
  9. Bake for 1 hour, stirring every 15 minutes until golden brown.
  10. Let them cool completely on the pan before storing.

Nutrition

Serving: 1ozCalories: 150kcalCarbohydrates: 6gProtein: 5gFat: 13gSaturated Fat: 1gPolyunsaturated Fat: 0.5gMonounsaturated Fat: 8gSodium: 110mgPotassium: 200mgFiber: 3gSugar: 3gCalcium: 50mgIron: 1mg

Notes

These roasted almonds can be stored in an airtight container for up to two weeks.

Tried this recipe?

Let us know how it was!

Ultimate Bacon Sandwich with Sweet Onions & Chipotle Mayo

As the sun dips low and the day winds down, there’s something undeniably comforting about the smell of bacon sizzling away in the kitchen. This isn’t just any bacon sandwich; it’s the BEST Bacon Sandwich with Caramelized Onions & Chipotle Mayo, and it’s a true game-changer. With crispy bacon nestled between lightly toasted bread, sweet caramelized onions, and a zesty chipotle mayo, this sandwich delivers an explosion of flavor in every bite. Perfect for those moments when you want something quick yet satisfying, it also makes meal prep a breeze. Whether you’re coming home from a long day or hosting friends, this sandwich is sure to impress. Who’s ready to tantalize your taste buds and elevate your sandwich game?

Why is this bacon sandwich a must-try?

Irresistible Flavor: This sandwich bursts with rich, savory bacon, sweet caramelized onions, and a smoky chipotle mayo that adds a delightful twist. Each bite is a mouthwatering experience!

Easy to Make: With simple steps and no complicated techniques, even novice cooks can whip this up in no time.

Versatile Comfort: Perfect as a quick lunch or a heartwarming dinner, this sandwich can be adapted to fit your cravings. Want something lighter? Swap bacon for turkey bacon!

Crowd-Pleaser: Friends and family will gather around, eager for more of this delicious creation—it’s a guaranteed hit at any gathering!

Meal Prep Friendly: You can prepare components like the chipotle mayo and caramelized onions in advance, making it timely and hassle-free when hunger strikes. For another quick fix, check out my Grilled Chicken Sandwich for a delightful variation!

Bacon Sandwich Ingredients

For the Bacon and Onions
Bacon – Adds savory flavor and crispy texture; consider using thick-cut bacon for extra richness.
Onion (½ medium, sliced thin) – Sweetness when caramelized enhances the depth of the sandwich; cook until golden brown for the best flavor.

For the Chipotle Mayo
Mayonnaise (2 tablespoons) – This creamy base enhances mouthfeel; using Greek yogurt can lighten it up.
Adobo Sauce (½ teaspoon) – Provides a smoky, spicy kick; sriracha can be used for a different flavor profile or adjust to taste.

For the Sandwich Assembly
Sandwich Bread (2 slices) – The foundation that holds all ingredients; artisanal bread adds a gourmet touch.
Tomato (1 small, sliced) – Adds juiciness and fresh flavor; use ripe heirloom tomatoes for the best taste.
Arugula (¼ cup) – Offers a peppery bite and freshness to balance flavors; spinach or mixed greens can be substituted if preferred.

This ultimate bacon sandwich recipe is ready to elevate your next meal with delightful flavors! Enjoy!

Step‑by‑Step Instructions for BEST Bacon Sandwich with Caramelized Onions & Chipotle Mayo

Step 1: Cook Bacon
In a medium-sized frying pan, place over medium heat and add your bacon strips. Fry the bacon for about 10 minutes, flipping occasionally until it’s crispy and golden brown. Once cooked, transfer the bacon to a paper towel-lined plate to drain excess fat, leaving about 2 tablespoons of rendered fat in the pan for the next step.

Step 2: Caramelize Onions
With the remaining bacon fat still in the pan, reduce the heat to medium-low and add the thinly sliced onions. Sauté the onions, stirring frequently for around 10 minutes, until they turn a beautiful golden brown and become sweetly fragrant. This step is essential for creating the perfect flavor meld in your bacon sandwich.

Step 3: Prepare Chipotle Mayo
While your onions are caramelizing, grab a small bowl and combine 2 tablespoons of mayonnaise with ½ teaspoon of adobo sauce. Stir the mixture until well-blended and creamy. This smoky chipotle mayo will bring a spicy depth to your BEST Bacon Sandwich and complement the richness of the bacon perfectly.

Step 4: Toast Bread
Once the onions are caramelized and your chipotle mayo is ready, return the pan to heat and add your two slices of bread. Toast each side for about 1-2 minutes, or until golden brown and crispy, taking care to absorb any delicious bacon fat left in the pan. This will provide a perfect crunchy base for your sandwich.

Step 5: Assemble Sandwich
Now it’s time to build your ultimate bacon sandwich! Start with one slice of toasted bread, generously spread the chipotle mayo on top. Layer it with crispy bacon, followed by the sweet caramelized onions, fresh tomato slices, and a handful of arugula for a peppery kick. Finally, top it off with the second slice of toasted bread to complete this flavor-packed delight.

Expert Tips for the Best Bacon Sandwich

Crispy Bacon: Make sure your bacon is cooked to a perfect crisp. Soggy bacon can ruin the sandwich’s texture; don’t rush this part!

Golden Onions: Caramelize onions until they achieve a deep golden brown color. This enhances the sweetness and complexity of your bacon sandwich.

Toasting Technique: Toast the bread just before assembling. This ensures each bite is crunchy and prevents the sandwich from becoming soggy.

Spice Control: Be mindful of the adobo sauce in your chipotle mayo. Adjust the amount to suit your spice tolerance, ensuring everyone can enjoy this delicious sandwich.

Ingredient Quality: Opt for high-quality ingredients, especially the bacon and bread. They significantly influence the flavor and overall satisfaction of your bacon sandwich.

Bacon Sandwich Variations & Substitutions

Feel free to get creative and make this sandwich your own with these delightful tweaks and substitutions!

  • Turkey Bacon: Swap out traditional bacon for turkey bacon for a leaner option without sacrificing flavor. It’s a fantastic way to enjoy the same crunch with less fat.

  • Artisan Bread: Use different types of bread, like focaccia or ciabatta, to add unique flavors and textures. Each bread type brings its own character to this savory classic.

  • Avocado Boost: Add sliced avocado for an extra layer of creaminess and healthy fats. This will create a delightful contrast with the crispy bacon and zesty mayo.

  • Fried Egg: Top your sandwich with a sunny-side-up egg for an indulgent twist. The runny yolk mingling with the bacon and chipotle mayo? Pure heaven!

  • Spicy Heat: Increase the kick by including jalapeños or a sprinkle of crushed red pepper flakes. This will elevate the sandwich if you’re a fan of heat!

  • Mayo Alternatives: Create variations of the chipotle mayo by incorporating mustard or a dash of hot sauce for added zing. Or, try using vegan mayo for a plant-based alternative.

  • Greens Galore: Replace arugula with spinach or mixed greens for varied textures and flavors. Each green brings a different fresh note that can refresh the taste of your sandwich.

  • Veggie Delight: Go meatless by using grilled veggies such as zucchini or bell peppers in place of bacon. This option creates a satisfying and colorful twist on the classic bacon sandwich!

As you explore these variations, consider pairing your newly crafted bacon sandwich with a light salad or some crispy sweet potato fries for a well-rounded meal. If you’re craving something quick but equally delicious, why not try a refreshing Tuna Salad Sandwich or serve alongside some delectable Honey BBQ Bacon Chicken? Enjoy your culinary adventure!

Make Ahead Options

This BEST Bacon Sandwich with Caramelized Onions & Chipotle Mayo is ideal for meal prep enthusiasts! You can prepare the chipotle mayo and caramelized onions up to 3 days in advance and store them in airtight containers in the refrigerator. The creamy mayo will maintain its flavor, while the onions will stay sweet and tender when kept sealed. To refresh the sandwich right before serving, simply reheat the onions gently in a pan and toast your bread just until golden. Layer everything as described, and you’ll enjoy a delicious, time-saving meal that’s just as satisfying as when made fresh!

What to Serve with the BEST Bacon Sandwich with Caramelized Onions & Chipotle Mayo

As you savor the rich flavors of this indulgent sandwich, think about how to create a complete meal that delights the senses.

  • Sweet Potato Fries: Crispy and slightly sweet, they add a delightful contrast to the smoky sandwich, making each bite even more satisfying.

  • Crisp Green Salad: Tossed with a light vinaigrette, it refreshes the palate and ensures a lovely balance of textures. The freshness of greens complements the richness of the bacon perfectly.

  • Coleslaw: A crunchy, tangy slaw adds a refreshing crunch, cutting through the richness of the sandwich. It’s a classic pairing that never disappoints.

  • Pickles: Tangy and briny, pickles bring brightness, enhancing the sandwich’s flavors and providing a satisfying crunch in every bite.

  • Fruit Salad: Seasonal fruits, like ripe berries or juicy melons, offer a sweet finish that contrasts beautifully with the savory elements of the sandwich, creating a well-rounded meal.

  • Iced Tea: A refreshing glass of iced tea provides a sweet and subtly acidic note that pairs well with the sandwich’s smoky profile. Add a hint of mint for an extra layer of freshness.

  • Chocolate Chip Cookies: For dessert, warm cookies provide a sweet finale. Their gooey richness harmonizes beautifully with the flavors of the bacon, making for a delightful end to your meal.

How to Store and Freeze Bacon Sandwich

Fridge: Store any leftover bacon sandwich in an airtight container for up to 3 days. Keep the components separate to maintain freshness and prevent sogginess.

Freezer: While it’s best enjoyed fresh, you can freeze the bacon and caramelized onions separately in airtight bags for up to 2 months. Thaw in the fridge before reheating.

Reheating: To reheat, warm bacon in a skillet over medium heat until crispy, and sauté the caramelized onions until heated through. Toast fresh bread for an enjoyable redo of this Bacon Sandwich.

Prepping Ahead: Consider making the chipotle mayo and caramelized onions in advance to save time during meal prep. Store them in the fridge for up to a week.

BEST Bacon Sandwich with Caramelized Onions & Chipotle Mayo Recipe FAQs

How do I select the best bacon for this sandwich?
Absolutely! Look for high-quality, thick-cut bacon for a more indulgent and crispy texture. The thicker cut holds up better during cooking, giving you that satisfying crunch in every bite. Try to choose bacon without dark spots or an overly intense smell for the best flavor.

What’s the best way to store leftover bacon sandwiches?
It’s best to store any leftover sandwich components separately. Place the bacon and caramelized onions in airtight containers in the fridge for up to 3 days. Keep the bread separately to avoid it becoming soggy. When you’re ready to enjoy, simply reheat the bacon and onions before assembling the sandwich fresh!

Can I freeze the bacon and caramelized onions?
Yes! You can freeze the bacon and caramelized onions separately for up to 2 months. To do so, make sure they’re completely cooled, then place them in airtight freezer bags. For best results, label your bags with the date. When you’re ready to eat, thaw them in the fridge overnight before reheating in a skillet.

What should I do if my caramelized onions aren’t browning properly?
Very good question! If the onions aren’t browning, you might be cooking them on too high heat. Reduce the heat to medium-low and allow them to cook longer, stirring frequently. Patience is key! They should take about 10 minutes to turn a rich, golden brown. Adding a pinch of sugar can help speed up the caramelization process.

Are there any dietary considerations I should keep in mind?
Certainly! If you or someone you’re serving has dietary restrictions, consider substituting ingredients. For gluten-free options, use gluten-free bread, and for a lighter version, swap bacon for turkey bacon or a plant-based alternative. Always check mayonnaise for allergens if serving guests, and feel free to personalize toppings, like using avocado for added creaminess.

How can I enhance the flavor of the chipotle mayo?
The more the merrier! You can experiment by adding minced garlic or lime juice for brightness. If you prefer a smoky note, consider incorporating a dash of smoked paprika or even a sprinkle of cumin. Start with small amounts and adjust to your personal taste—get creative and make it your special twist!

Bacon Sandwich

Ultimate Bacon Sandwich with Sweet Onions & Chipotle Mayo

This ultimate bacon sandwich features caramelized onions and chipotle mayo, making it the best bacon sandwich for any occasion.
Prep Time 10 minutes
Cook Time 20 minutes
Total Time 30 minutes
Servings: 2 sandwiches
Course: Lunch
Cuisine: American
Calories: 450

Ingredients
  

For the Bacon and Onions
  • 4 slices Bacon Thick-cut bacon for extra richness
  • 0.5 medium Onion Sliced thin, caramelized for sweetness
For the Chipotle Mayo
  • 2 tablespoons Mayonnaise Can use Greek yogurt for a lighter option
  • 0.5 teaspoon Adobo Sauce Adjust to taste for spice
For the Sandwich Assembly
  • 2 slices Sandwich Bread Artisanal bread adds a gourmet touch
  • 1 small Tomato Sliced, ripe heirloom tomatoes for flavor
  • 0.25 cup Arugula Can substitute with spinach or mixed greens

Equipment

  • Frying pan
  • small bowl

Method
 

Step-by-Step Instructions
  1. Cook Bacon: In a medium-sized frying pan, cook bacon strips over medium heat for about 10 minutes until crispy. Drain excess fat.
  2. Caramelize Onions: Add sliced onions to the bacon fat in the pan, sauté for around 10 minutes until golden brown and fragrant.
  3. Prepare Chipotle Mayo: In a small bowl, combine mayonnaise with adobo sauce and stir until creamy.
  4. Toast Bread: Toast slices of bread in the same pan for 1-2 minutes until golden brown.
  5. Assemble Sandwich: Spread chipotle mayo on toasted bread, layer bacon, caramelized onions, tomato slices, and arugula, top with second slice of bread.

Nutrition

Serving: 1sandwichCalories: 450kcalCarbohydrates: 30gProtein: 20gFat: 30gSaturated Fat: 8gPolyunsaturated Fat: 2gMonounsaturated Fat: 12gCholesterol: 40mgSodium: 900mgPotassium: 600mgFiber: 2gSugar: 3gVitamin A: 500IUVitamin C: 4mgCalcium: 50mgIron: 2mg

Notes

Crispy bacon and properly caramelized onions are essential for perfect flavor and texture. Use high-quality ingredients for the best result.

Tried this recipe?

Let us know how it was!