Soft and Buttery Sourdough Discard Hot Dog Buns You’ll Love

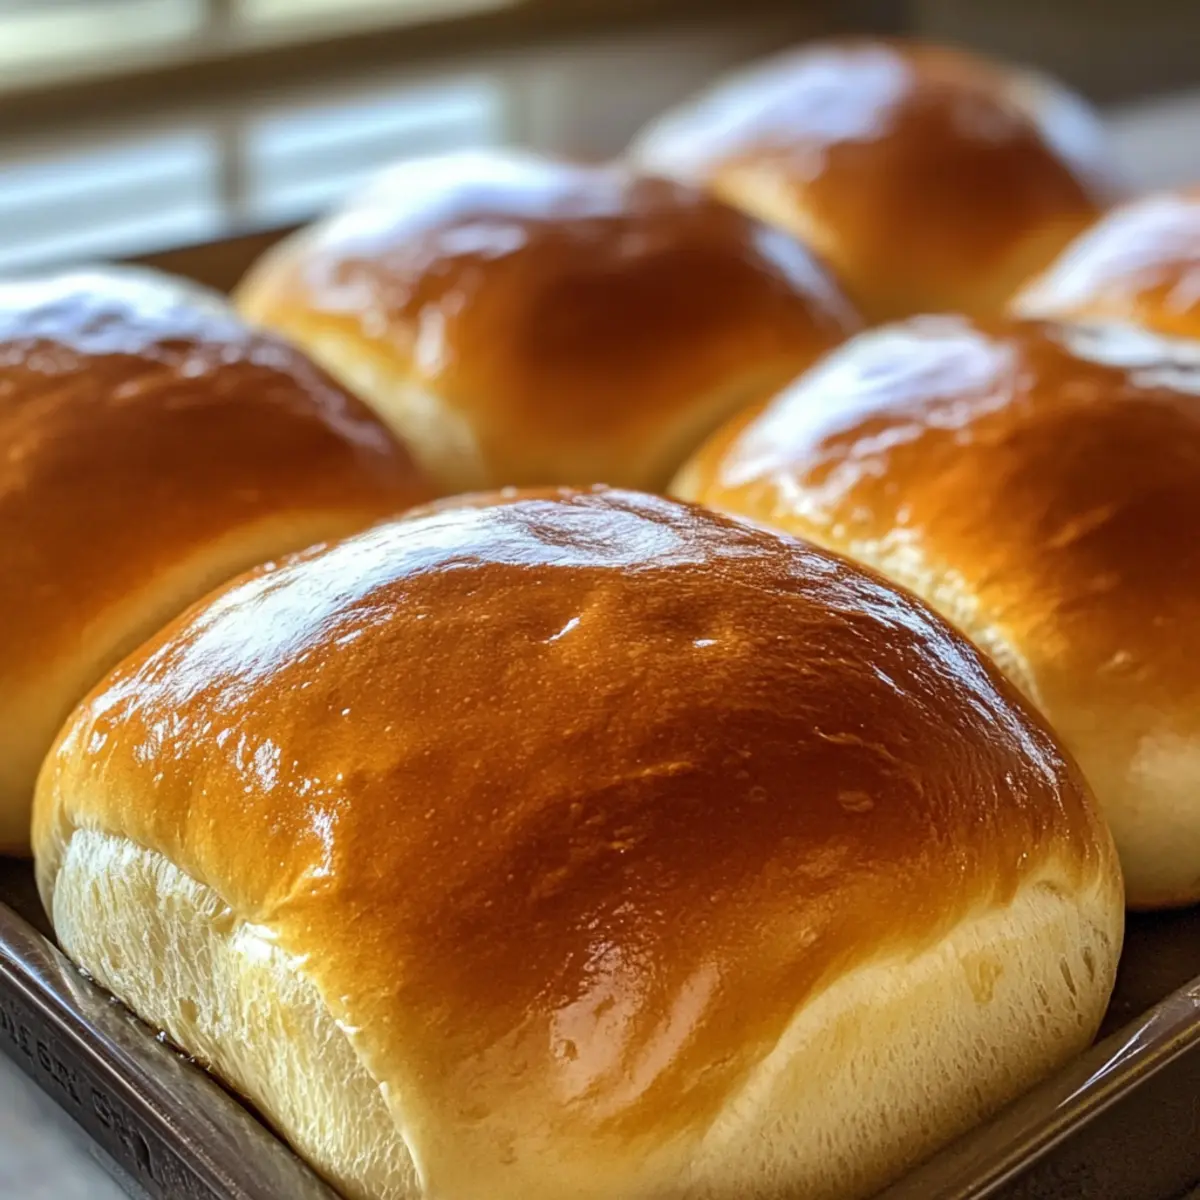
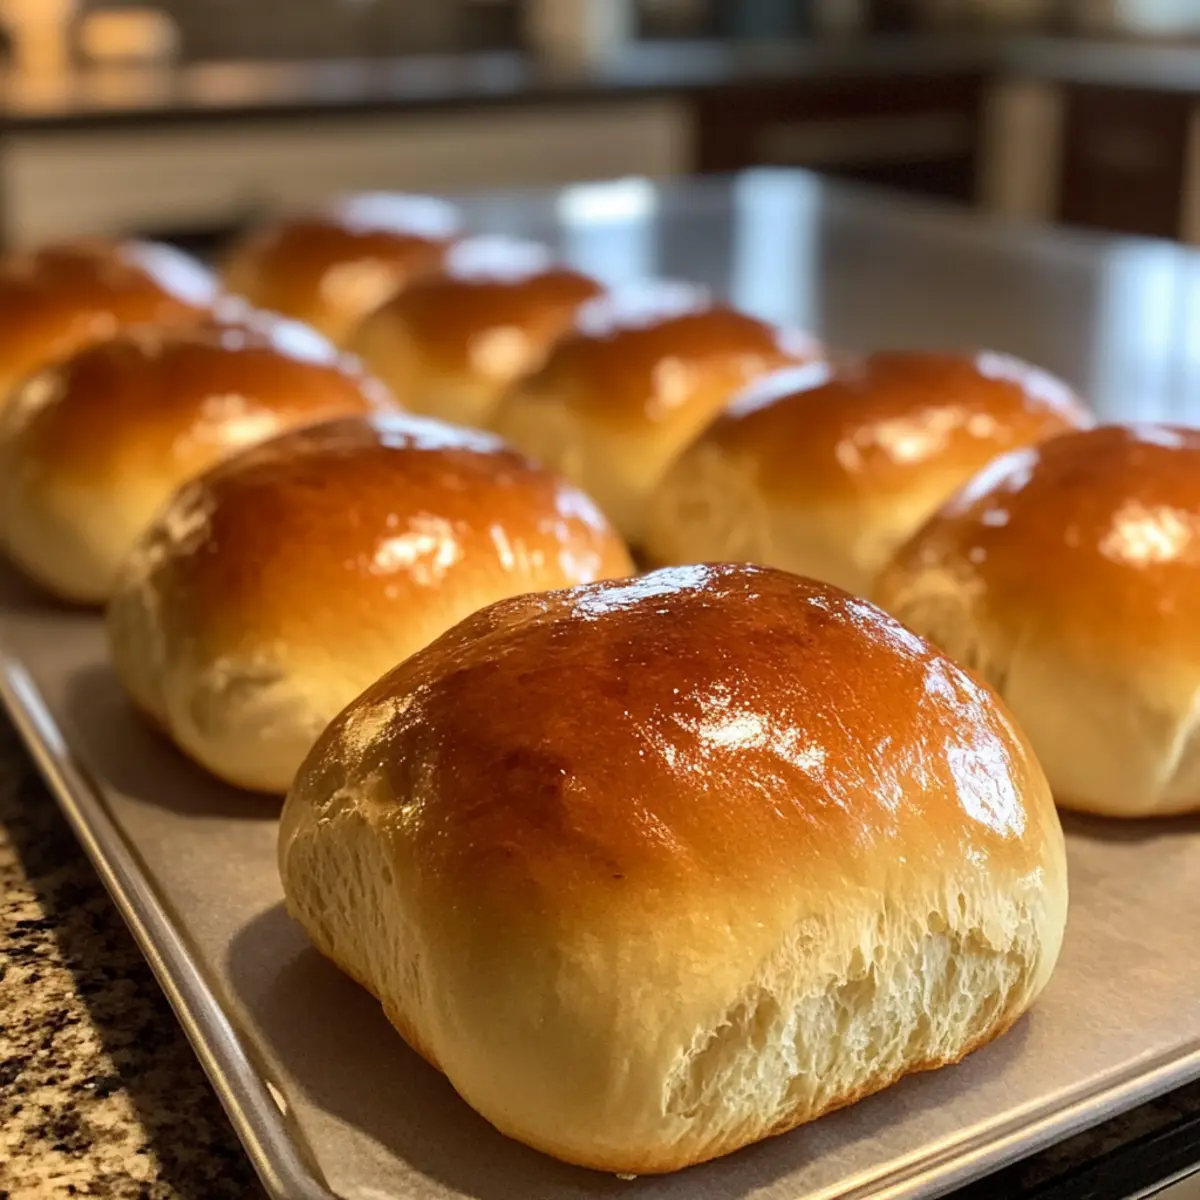
As I stood in my kitchen, the warm aroma of baking bread transported me back to carefree summer days filled with backyard barbecues and laughter. Nothing elevates a hot dog quite like a homemade bun, and that’s where these Soft and Buttery Sourdough Discard Hot Dog Buns come into play. Not only are they quick to prepare, but they also offer a fantastic way to use up sourdough discard, turning what would be waste into something delicious and satisfying. These buns are fluffy and tender, making them an absolute crowd-pleaser for grilling season. Imagine biting into a fresh, buttery bun that gives your favorite hot dogs a gourmet touch. Curious about how to whip these up in your own kitchen? Let’s dive in!
Why Make Sourdough Discard Buns?

Deliciously Unique: These soft and buttery sourdough discard hot dog buns offer a special twist on a classic favorite, making your BBQs unforgettable.

Quick Prep: With simple steps, you’ll find that homemade never felt this easy—perfect for busy summer days.

Waste Not, Want Not: This recipe shows how to creatively use sourdough discard, embracing sustainable cooking practices.

Crowd-Pleasing: Their fluffy texture and rich flavor will have everyone asking for seconds.

Versatile Options: Enjoy them not just for hot dogs, but as burger buns or even paired with your favorite dips. Try spicing them up for an extra layer of flavor!

Elevate your next gathering—these buns will transform ordinary meals into extraordinary experiences. For even more delightful ways to utilize your sourdough starter, check out our guide on using sourdough discard effectively.

Sourdough Discard Hot Dog Bun Ingredients

Here’s everything you need to make these delightful sourdough discard hot dog buns that will elevate your BBQ experience!

For the Dough
Warm Milk (220 grams) – Provides moisture and aids yeast activation; substitute with almond milk for a dairy-free option.
Granulated Sugar (40 grams) – Adds sweetness and helps activate yeast; can be replaced with honey or maple syrup for a natural alternative.
Sourdough Discard (150 grams) – Provides distinctive tang and improves texture; use thick discard for best results—fresh or refrigerated works.
Instant Yeast (1 teaspoon) – Helps the buns rise quickly; use active dry yeast if you have it, but it may require proofing.
Unbleached Bread Flour (420 grams) – Offers structure and chewiness; all-purpose flour can be used, but the buns might be less chewy.
Butter (2 tablespoons, softened) – Adds richness and flavor; substitute with vegan butter for a dairy-free version.
Salt (1 teaspoon) – Enhances flavor and controls yeast activity; no direct substitute, but kosher salt works well.

For the Topping
Egg Whites (1 tablespoon for wash) – Gives a shiny finish when brushed on before baking; omit for vegan buns or use plant-based milk wash instead.
Melted Butter (2 tablespoons for brushing) – Adds flavor and encourages browning; for a healthier option, use olive oil.

Get ready to enjoy the warm, buttery bliss of homemade buns—perfect for your next summer BBQ!

Step‑by‑Step Instructions for Soft and Buttery Sourdough Discard Hot Dog Buns

Step 1: Mix the Base
In a medium mixing bowl, stir together 220 grams of warm milk and 40 grams of granulated sugar until fully dissolved. Then, add 150 grams of sourdough discard and 1 teaspoon of instant yeast, mixing until well combined. The mixture should be smooth, inviting, and slightly frothy, signaling that the yeast is activated and ready to work its magic.

Step 2: Combine the Dry Ingredients
Gradually incorporate 420 grams of unbleached bread flour into the milk mixture, stirring until a shaggy dough forms. Once combined, transfer the dough to a lightly floured surface and begin kneading for about 5 minutes. The dough should become smooth and elastic; this texture is crucial for creating those soft and buttery sourdough discard hot dog buns.

Step 3: Add Butter and Salt
After achieving a smooth dough, add 2 tablespoons of softened butter and 1 teaspoon of salt to the mixture. Knead the dough further for another 5 minutes until the butter is fully incorporated, and the dough remains pliable and elastic. You’ll notice the rich aroma of butter blending into your dough, setting the stage for the delicious buns to come.

Step 4: First Rise
Place the dough in a lightly greased bowl, covering it with a clean kitchen towel or plastic wrap. Allow it to rise in a warm place until nearly doubled in size, which should take about 1 to 2 hours. Keep an eye out for the dough puffing up beautifully; when it’s about twice its original size, you’re all set to move to the next step.

Step 5: Portion the Dough
Once risen, gently deflate the dough and transfer it to a lightly floured surface. Divide the dough into 8 equal pieces (approximately 108 grams each). Shape each piece into a smooth ball, ensuring an even texture. This portioning will help create uniform hot dog buns that look as good as they taste.

Step 6: Rest the Dough Balls
After shaping, let the dough balls rest on the floured surface for about 30 minutes, covered with a towel to prevent drying out. During this time, the dough will relax, making it easier to roll into the perfect hot dog bun shape and contributing to their fluffy texture.

Step 7: Shape into Logs
Taking one rested dough ball at a time, roll it out gently into a 7-inch log shape. Repeat this for all dough balls, placing them neatly on a lined baking sheet. Ensure they have some space between them, allowing for proper rising and a great final look once baked.

Step 8: Second Rise
Cover the shaped logs with a cloth and let them rise again until they double in size, taking about 45 minutes this time. You’ll notice the buns puffing up nicely, ready to create that delightful texture for your soft and buttery sourdough discard hot dog buns.

Step 9: Preheat the Oven
While the buns are rising, preheat your oven to 375°F (190°C). This temperature is perfect for baking the buns evenly, resulting in a golden-brown exterior that will make your kitchen smell absolutely divine.

Step 10: Prepare the Egg Wash
In a small bowl, whisk 1 tablespoon of egg whites with a splash of water to create an egg wash. Gently brush the top of each bun with this mixture before baking, ensuring even coverage for a shiny finish. This step helps ensure that your sourdough discard hot dog buns not only taste fantastic but look stunning too.

Step 11: Bake the Buns
Place the baking sheet in the preheated oven and bake the buns for about 25 minutes. Keep an eye out for a golden-brown color, which will indicate they’re done. For even baking, you might want to rotate the sheet halfway through to achieve that perfect coloration on all sides.

Step 12: Add Butter and Cool
Once baked, remove the hot dog buns from the oven and immediately brush the tops with 2 tablespoons of melted butter for an extra kick of flavor. Allow them to cool slightly on a wire rack; this will help maintain their softness and make them easier to slice for serving.

How to Store and Freeze Sourdough Discard Hot Dog Buns

Room Temperature: Store leftover buns in an airtight container at room temperature for up to 2 days to maintain their softness and flavor.

Fridge: If you plan to keep them longer, place the buns in the refrigerator for up to 5 days. Ensure they are wrapped tightly to prevent drying out.

Freezer: For longer storage, freeze the buns in a freezer-safe bag or container for up to 3 months. Thaw in the refrigerator or at room temperature before use.

Reheating: To enjoy your sourdough discard hot dog buns warm, reheat in the oven at 350°F (175°C) for about 5–10 minutes. This will restore their fluffy texture.

What to Serve with Soft and Buttery Sourdough Discard Hot Dog Buns

These delectable buns are perfect for creating a delightful, mouthwatering meal that’s sure to please everyone at your gathering.

  • Grilled Sausages: Juicy sausages make for a classic pairing, with their smoky flavors beautifully complementing the soft, buttery texture of the buns.

  • Coleslaw: The crunch of a tangy coleslaw adds a refreshing contrast, balancing the bun’s richness while enhancing its comfort-food appeal.

  • Corn on the Cob: Sweet, buttery corn on the cob offers a nostalgic essence to your meal, evoking memories of summer barbecues and carefree days.

  • BBQ Baked Beans: Richly flavored, sweet, and savory baked beans create a hearty side that melds perfectly with the fluffy buns, inviting everyone to take seconds.

  • Potato Salad: A creamy, versatile potato salad can bring both texture and flavor to the table, making every bite feel like a backyard feast.

  • Craft Beer or Lemonade: Pair your hot dog and bun experience with a refreshing craft beer or homemade lemonade to enliven the flavors and elevate mealtime enjoyment.

Embrace the beautiful textures and lively flavors as you serve these delightful combinations at your next gathering!

Make Ahead Options

These sourdough discard hot dog buns are not only delicious but also perfect for meal prep! You can prepare the dough up to 24 hours in advance. Simply follow the first four steps of the recipe, covering the dough after it has risen, and refrigerate it overnight. When you’re ready to bake, let the dough come to room temperature for about 30 minutes, then proceed with shaping and the second rise. For even more convenience, you can shape the buns and freeze them before the second rise, allowing you to enjoy freshly baked buns whenever you want! Just let them thaw and rise at room temperature for about 1-2 hours before baking—your homemade treat will taste just as fresh and fluffy, saving you time and effort on busy days!

Expert Tips for Sourdough Discard Hot Dog Buns

Knead Well: Ensure thorough kneading for a smooth, elastic dough. This will promote a good rise and ensure fluffy sourdough discard hot dog buns.

Temperature Matters: Monitor the proofing temperature closely. If it’s too warm, the dough may rise too quickly and lead to overproofing.

Cool Completely: Allow the buns to cool entirely before slicing. This helps maintain their softness and prevents them from becoming sticky.

Weigh Your Ingredients: Use a digital kitchen scale for precise measurements. Accurate amounts lead to better results in your sourdough discard hot dog buns.

Experiment with Flours: Try using whole wheat or spelt flour for different flavors and textures in your buns. Don’t hesitate to be creative!

Sourdough Discard Hot Dog Bun Variations

Feel free to mix things up with these delightful variations; your taste buds will thank you!

  • Whole Wheat: Swap some all-purpose flour with whole wheat flour for a nuttier flavor and a healthier twist.

  • Herbed Buns: Incorporate dried herbs like rosemary or thyme into the dough to infuse each bite with savory aroma and depth.

  • Spicy Kick: Add a pinch of cayenne pepper or red pepper flakes for a subtle heat that elevates your grilled toppings.

  • Sweet Twist: Add a few tablespoons of honey or a sprinkle of cinnamon to the dough for a touch of sweetness that complements breakfast sausages.

  • Savory Seeds: Top your buns with sesame or poppy seeds before baking for added texture and a beautiful finish.

  • Vegan Pleasure: Substitute all dairy ingredients with plant-based alternatives to make these buns completely vegan and just as delicious.

  • Cheesy Delight: Mix in shredded cheese, like cheddar or mozzarella, for a gooey surprise inside each bun to take your hot dog experience up a notch.

  • Burger Buns: Shape the dough into larger rounds for perfectly soft burger buns that can cradle all your favorite toppings.

These options will help you create a personalized culinary experience that’s sure to impress! And if you’re curious about more fun ways to use up that sourdough starter, check out our guide on using sourdough discard effectively for even more inspiration.
Sourdough Discard Hot Dog Buns Recipe FAQs

How do I choose the right sourdough discard for this recipe?
Absolutely! For the best results, use a thick and active sourdough discard that has been recently fed. Fresh or refrigerated discard can work well, but thick discard will give your buns a more distinctive tang and enhance the texture.

How should I store leftover buns?
Store any leftover sourdough discard hot dog buns in an airtight container at room temperature for up to 2 days. If you want to keep them longer, you can refrigerate them for up to 5 days. Just be sure to wrap them tightly to avoid drying out!

Can I freeze these buns?
Yes, you can freeze sourdough discard hot dog buns for up to 3 months! Slice the buns beforehand for easy use later. Place them in a freezer-safe bag or container, making sure to squeeze out as much air as possible. When you’re ready to enjoy them, simply thaw them in the refrigerator or at room temperature, and reheat in the oven at 350°F (175°C) for about 5-10 minutes for that freshly baked taste.

What can I do if my dough doesn’t rise properly?
Very! If your dough isn’t rising well, check the temperature of your proofing area—it should be warm, but not too hot. Overproofing can also lead to collapse, so ensure you monitor the dough closely. If you suspect your yeast is old, you can test its potency: mix a little yeast with warm water and sugar and wait for bubbles to form. If it doesn’t bubble, it’s time to replace the yeast!

Are these buns suitable for those with dietary restrictions?
Absolutely! You can make them dairy-free by substituting the milk and butter with almond milk and vegan butter. For an egg-free version, simply skip the egg wash or use a plant-based milk wash for a similar shiny finish. Just watch out for any other potential allergens specific to your guests.

What if I don’t have unbleached bread flour?
No problem! All-purpose flour can work as a substitute, but keep in mind that your sourdough discard hot dog buns may be slightly less chewy. If you’re feeling adventurous, try experimenting with whole wheat or spelt flour for different flavors and textures!

Sourdough Discard Hot Dog Buns

Soft and Buttery Sourdough Discard Hot Dog Buns You’ll Love

These Sourdough Discard Hot Dog Buns are soft, buttery, and perfect for BBQs, turning waste into deliciousness.
Prep Time 30 minutes
Cook Time 25 minutes
Resting Time 30 minutes
Total Time 1 hour 25 minutes
Servings: 8 buns
Course: Lunch
Cuisine: American
Calories: 210

Ingredients
  

For the Dough
  • 220 grams Warm Milk Substitute with almond milk for a dairy-free option.
  • 40 grams Granulated Sugar Can be replaced with honey or maple syrup.
  • 150 grams Sourdough Discard Use thick discard for best results.
  • 1 teaspoon Instant Yeast Use active dry yeast if necessary.
  • 420 grams Unbleached Bread Flour All-purpose flour can be used.
  • 2 tablespoons Butter Substitute with vegan butter for a dairy-free version.
  • 1 teaspoon Salt Kosher salt works well as a substitute.
For the Topping
  • 1 tablespoon Egg Whites Omit for vegan buns or use plant-based milk wash.
  • 2 tablespoons Melted Butter Use olive oil for a healthier option.

Equipment

  • Mixing Bowl
  • Baking Sheet
  • Kitchen towel
  • Whisk

Method
 

Step-by-Step Instructions
  1. In a medium mixing bowl, stir together warm milk and granulated sugar until fully dissolved. Add sourdough discard and instant yeast, mixing until smooth and slightly frothy.
  2. Gradually incorporate unbleached bread flour into the milk mixture, stirring until a shaggy dough forms. Transfer to a floured surface and knead for about 5 minutes until smooth and elastic.
  3. Add softened butter and salt to the dough, kneading further for 5 minutes until incorporated.
  4. Place the dough in a greased bowl, cover, and let it rise in a warm place until nearly doubled, about 1 to 2 hours.
  5. Gently deflate the dough and divide into 8 equal pieces. Shape each piece into a smooth ball.
  6. Let the dough balls rest for about 30 minutes, covered with a towel.
  7. Roll each dough ball into a 7-inch log and place on a lined baking sheet.
  8. Cover the shaped logs and let them rise until doubled in size, about 45 minutes.
  9. Preheat your oven to 375°F (190°C).
  10. Whisk egg whites with water to create an egg wash. Brush the top of each bun with the mixture.
  11. Bake the buns for about 25 minutes until golden-brown.
  12. Remove from oven and brush with melted butter. Allow to cool on a wire rack.
Nutrition

Serving: 1bunCalories: 210kcalCarbohydrates: 30gProtein: 5gFat: 8gSaturated Fat: 5gPolyunsaturated Fat: 0.5gMonounsaturated Fat: 2.5gCholesterol: 25mgSodium: 300mgPotassium: 120mgFiber: 1gSugar: 2gVitamin A: 300IUCalcium: 75mgIron: 1mg

Notes

For a great texture, ensure thorough kneading and monitor the proofing temperature closely.

Tried this recipe?

Let us know how it was!

Sweet Baby Ray’s Crockpot Chicken for Effortless Family Meals

As I stood in my kitchen, the rich aroma of barbecue sauce wafted through the air, instantly lifting my spirits after a long day. There’s something undeniably comforting about Sweet Baby Ray’s Crockpot Chicken, a dish that effortlessly combines tender chicken breasts with that signature tangy-sweet sauce we all love. This easy slow cooker recipe transforms busy weeknights into stress-free culinary experiences, making it possible to serve up a family-friendly meal without spending hours at the stove. With just a handful of ingredients and minimal prep time, you too can create a juicy, satisfying dinner that warms the heart and pleases the palate. So, are you ready to make a meal that your loved ones will rave about? Let’s dive into this delightful recipe!

Why is this recipe a weeknight lifesaver?

Simplicity at its Core: This Sweet Baby Ray’s Crockpot Chicken requires minimal effort, making it perfect for busy weeknights or last-minute dinners.

Deliciously Versatile: Customize your dish by adding veggies like bell peppers or onions for added nutrition, or swap in chicken thighs for a richer flavor.

Family Favorites: Everyone in your house will love the tangy-sweet barbecue sauce that brings joy to the dinner table, transforming meal time into quality family bonding.

Meal Prep Friendly: With just a few ingredients and a slow cooker, spend less time in the kitchen and more time enjoying meals. Consider pairing with options like Zucchini Sweet Potato Beef Skillet for a complete meal!

Satisfying Texture: The juicy chicken, stained with a sticky yet balanced sauce, is sure to impress, striking the perfect note between tender and flavorful.

Crowd-Pleasing Appeal: This recipe is not just a meal; it’s a comforting experience that brings everyone to the table, making it a go-to recipe for gatherings, too.

Sweet Baby Ray’s Crockpot Chicken Ingredients

For the Chicken
Chicken Breasts – Use boneless, skinless for a tender texture that melts in your mouth.

For the Sauce
Sweet Baby Ray’s Barbecue Sauce – This gives the dish its signature tangy sweetness; no need for fancy alternatives!
Chicken Broth/Water – Adds moisture to the chicken while enhancing its flavor; substitute with vegetable broth for a lighter taste.
Worcestershire Sauce – Provides a depth of flavor; though there’s no direct substitute, soy sauce can work as an alternative.
Honey (optional) – Sweetens the sauce; feel free to omit or swap with brown sugar for a different sweetness.

Seasoning
Salt and Pepper – Essential for seasoning; adjust according to your taste preferences.

For Garnish
Fresh Parsley – Adds a pop of freshness and color when sprinkled on top before serving.

Step‑by‑Step Instructions for Sweet Baby Ray’s Crockpot Chicken

Step 1: Prepare Chicken
Begin by seasoning your boneless, skinless chicken breasts with salt and pepper, ensuring they’re well coated for maximum flavor. Arrange the seasoned chicken in a single layer at the bottom of your slow cooker. This helps the chicken cook evenly and absorb the delicious flavors of the Sweet Baby Ray’s Crockpot Chicken.

Step 2: Mix Sauce
In a medium bowl, combine the Sweet Baby Ray’s barbecue sauce, chicken broth, Worcestershire sauce, and honey if you’re using it. Stir the mixture until it’s well blended, creating a tangy-sweet sauce that will soak into the chicken as it cooks. This step is essential for infusing rich flavors into your crockpot dish.

Step 3: Pour Sauce
Carefully pour the sauce mixture over the seasoned chicken breasts, ensuring they are fully coated and covered in the sweet barbecue goodness. Use a spatula to spoon any remaining sauce from the bowl over the chicken for an extra flavor boost. This will create a luscious glaze as the chicken cooks slowly.

Step 4: Cook
Cover the crockpot with its lid and set it to cook on low for 4 to 6 hours or on high for 2 to 3 hours. The chicken is done when it reaches an internal temperature of 165°F and is tender enough to shred easily with a fork. The long cooking time allows the flavors to meld beautifully.

Step 5: Serve
Once cooked, carefully remove the chicken from the crockpot and transfer it to a serving platter. Drizzle the remaining sauce over the chicken for an irresistible finish. If desired, sprinkle fresh parsley on top for a touch of color and freshness. Pair this Sweet Baby Ray’s Crockpot Chicken with rice or vegetables for a complete meal.

What to Serve with Sweet Baby Ray’s Crockpot Chicken

Elevate your meal experience with delightful sides that perfectly complement the rich, tangy flavors of this beloved dish.

  • Creamy Mashed Potatoes: The velvety texture and buttery flavor balance the tangy sweetness of the chicken beautifully, creating a cozy contrast on your plate.

  • Coleslaw: The crunchy, cool slaw adds a refreshing bite, cutting through the richness and enhancing each satisfying forkful with its tangy vinaigrette.

  • Cornbread: Soft, sweet cornbread makes an irresistible pairing, soaking up the barbecue sauce while adding warmth and comfort to your meal.

  • Steamed Broccoli: Bright green broccoli provides a fresh, nutrient-packed element, while its gentle crunch balances out the buttery chicken.

  • Rice Pilaf: Fluffy rice pilaf serves as a perfect base, allowing the sticky sauce to coat each grain and pull the whole dish together in harmony.

  • Grilled Peppers and Onions: Sautéing these veggies adds a smoky depth that contrasts delightfully with the sweetness, elevating your backyard BBQ experience.

  • Sweet Potato Fries: Crispy sweet potato fries offer a sweet, crunchy counterpart, making every bite a taste sensation while still keeping with the sweet barbecue theme.

  • Iced Tea or Lemonade: Pair your meal with refreshing iced tea or homemade lemonade, whose zesty notes perfectly complement the rich, savory flavors of the chicken.

Make Ahead Options

These Sweet Baby Ray’s Crockpot Chicken are perfect for meal prep enthusiasts! You can season the chicken breasts and place them in the crockpot up to 24 hours in advance to save valuable time during busy evenings. Additionally, you can mix the barbecue sauce, broth, Worcestershire sauce, and honey (if using) ahead of time and store it in the refrigerator. When you’re ready to cook, just pour the sauce over the chicken, cover, and set your slow cooker to low for 4-6 hours or high for 2-3 hours. This ensures your meal will be just as delicious, allowing you to enjoy quality family time without the hassle!

How to Store and Freeze Sweet Baby Ray’s Crockpot Chicken

Fridge: Store leftovers in an airtight container for up to 3 days. Ensure the chicken is cooled before sealing to maintain texture and flavor.

Freezer: For longer storage, freeze the cooled Sweet Baby Ray’s Crockpot Chicken in a freezer-safe container for up to 3 months. Thaw in the fridge before reheating.

Reheating: Reheat gently in the microwave or on the stovetop with a splash of chicken broth to retain moisture. Heat until the internal temperature reaches 165°F.

Make-Ahead: Prepare the sauce and chicken in advance; store them separately in the fridge for up to 2 days. Assemble and cook in the slow cooker when you’re ready for a delicious meal.

Expert Tips for Sweet Baby Ray’s Crockpot Chicken

  • Single Layer Chicken: Ensure the chicken breasts are arranged in a single layer in the crockpot. This promotes even cooking and flavor absorption.

  • Check for Doneness: Use a meat thermometer to ensure chicken reaches an internal temperature of 165°F. Adjust cooking time based on the thickness of your chicken breasts.

  • Sauce Infusion: For an extra burst of flavor, consider marinating the chicken in the barbecue sauce for a few hours before cooking. It enhances the overall taste of your Sweet Baby Ray’s Crockpot Chicken.

  • Cooking Time Variations: Keep in mind that slow cooker temperatures can vary. If using a high setting, check for tenderness around the 2-hour mark.

  • Customize Your Dish: Feel free to add veggies like bell peppers or onions for a nutritious one-pot meal or swap chicken breasts for thighs for a richer flavor profile.

  • Keep It Fresh: Garnish with fresh parsley before serving for a pop of color and a hint of freshness that enhances this comforting dish.

Sweet Baby Ray’s Crockpot Chicken Variations

Feel free to let your creativity shine and customize this dish in delightful ways that suit your taste!

  • Thighs Instead of Breasts: Swap chicken breasts for thighs for a richer, juicier flavor that melts in your mouth.

  • Vegetable Boost: Add bell peppers, onions, or even corn into the crockpot for a colorful, nutritious one-pot meal.

  • Honey Hickory Sauce: Use honey or hickory-smoked barbecue sauce for a twist of flavor that brings a unique depth to your chicken.

  • Spicy Kick: For some heat, toss in a few diced jalapeños or a splash of hot sauce to please the spice lovers at your table.

  • Onion Soup Mix: Stir in a packet of onion soup mix with the sauce for an added layer of savory goodness that enhances the flavor profile beautifully.

  • Citrusy Twist: Add the juice of an orange or lime to the sauce for a bright citrus note that complements the barbecue sauce beautifully.

  • Sweet & Tangy: Mix in a tablespoon of apple cider vinegar for a tangy finish that perfectly balances the sweetness of the barbecue.

  • BBQ Chicken Tacos: Transform leftovers into fun tacos! Serve the pulled chicken in corn tortillas with fresh toppings; it’s a perfect way to repurpose and enjoy.

Why stop here? For even more flavor combinations, consider pairing this with a hearty side like Grilled Chicken Sandwich with Avocado Chipotle Mayo or serve alongside Chicken Cashew Broccoli Stir Fry for an exciting dinner experience!

Sweet Baby Ray’s Crockpot Chicken Recipe FAQs

What type of chicken should I use for this recipe?
Absolutely! For the best results, I recommend using boneless, skinless chicken breasts. They turn out tender and juicy when cooked in the slow cooker, allowing the sweet barbecue sauce to infuse wonderfully. If you prefer a richer flavor, you can also use chicken thighs.

How should I store leftovers?
Very easy! Store any leftover Sweet Baby Ray’s Crockpot Chicken in an airtight container in the refrigerator for up to 3 days. Make sure it’s fully cooled before sealing to keep the texture and flavors intact. Reheating is best done gently in the microwave or on the stovetop.

Can I freeze the cooked chicken?
Definitely! You can freeze the Sweet Baby Ray’s Crockpot Chicken in a freezer-safe container for up to 3 months. Just let it cool completely before freezing. When you’re ready to enjoy it again, thaw it in the fridge overnight and reheat gently, adding a bit of chicken broth if needed to retain moisture.

What if my chicken isn’t cooking evenly?
If you notice your chicken isn’t cooking evenly, ensure that it’s arranged in a single layer in the crockpot. If you’re cooking on low, give it the full 4-6 hours, but do use a meat thermometer. Chicken should reach an internal temperature of 165°F. If it’s still not tender after this time, the chicken pieces may be thicker, and you can cook it for an additional 30 minutes or so on low.

Are there any dietary considerations I should keep in mind?
Yes! If you’re preparing this dish for someone with allergies, check the ingredients in the Sweet Baby Ray’s barbecue sauce for potential allergens, like gluten or high fructose corn syrup. You can also make a homemade barbecue sauce using your preferred ingredients to control what goes into your meal.

How can I customize this recipe to suit my family’s taste?
The more the merrier! One great way to customize is by adding vegetables like bell peppers or onions into the crockpot alongside the chicken. They’ll cook down beautifully and add flavor and nutrition. If you want to experiment with different BBQ flavors, try various Sweet Baby Ray’s sauces like honey or hickory smoked for a delightful twist.

Sweet Baby Ray’s Crockpot Chicken

Sweet Baby Ray’s Crockpot Chicken for Effortless Family Meals

Sweet Baby Ray’s Crockpot Chicken is a comforting dish combining tender chicken breasts with a tangy-sweet sauce, perfect for family meals.
Prep Time 10 minutes
Cook Time 6 hours
Total Time 6 hours 10 minutes
Servings: 4 servings
Course: Chicken
Cuisine: American
Calories: 250

Ingredients
  

For the Chicken
  • 1 lb Boneless, Skinless Chicken Breasts
For the Sauce
  • 1 cup Sweet Baby Ray’s Barbecue Sauce
  • 1/2 cup Chicken Broth or Water Substitute with vegetable broth for a lighter taste
  • 2 tbsp Worcestershire Sauce Soy sauce can work as an alternative
  • 1 tbsp Honey Optional; can swap with brown sugar
Seasoning
  • 1 tsp Salt
  • 1 tsp Pepper
For Garnish
  • 2 tbsp Fresh Parsley For garnish

Equipment

  • Slow Cooker

Method
 

Step-by-Step Instructions
  1. Season the chicken breasts with salt and pepper, arrange them at the bottom of the slow cooker.
  2. In a bowl, combine the barbecue sauce, chicken broth, Worcestershire sauce, and honey. Mix well.
  3. Pour the sauce mixture over the chicken, ensuring it's fully coated.
  4. Cover and cook on low for 4 to 6 hours or high for 2 to 3 hours until the chicken reaches 165°F.
  5. Remove the chicken from the crockpot, drizzle with sauce, and sprinkle with parsley before serving.

Nutrition

Serving: 1servingCalories: 250kcalCarbohydrates: 14gProtein: 30gFat: 5gSaturated Fat: 1gCholesterol: 70mgSodium: 600mgPotassium: 500mgSugar: 8gCalcium: 2mgIron: 6mg

Notes

Ensure chicken is in a single layer for even cooking. Adjust cooking time based on thickness of chicken breasts. Can add vegetables for a nutritious meal.

Tried this recipe?

Let us know how it was!

Savory Senegalese Chicken Recipe That’ll Thrill Your Taste Buds

Stepping into the vibrant world of Senegalese cuisine, I was instantly captivated by the tantalizing aroma of marinated chicken simmering away. That’s when I discovered my love for this authentic Poulet Yassa, a delicious Senegalese Chicken recipe that’s as easy to prepare as it is delightful to savor. With tender chicken thighs soaked in a marinade of lemon, Dijon mustard, and garlic, and the sweet melody of caramelized onions dancing through the air, this dish is perfect for reviving family dinner nights or impressing guests with minimal effort. Plus, it’s a keto-friendly option that packs a flavorful punch without compromising your dietary goals. Ready to take your taste buds on a culinary adventure? Let’s dive into the recipe!

Why is Poulet Yassa a Must-Try?

Exotic Flavor: Experience the unique blend of lemon, garlic, and mustard, creating a vibrant flavor profile that will transport your taste buds to Senegal.

Simplicity: With just a handful of ingredients and straightforward steps, making Poulet Yassa is a breeze, perfect for both beginners and seasoned cooks.

Keto-Friendly: This dish is not only delicious but also aligns with your dietary goals, making it an excellent choice for low-carb meal planning. Pair it with cauliflower rice for a tasty twist!

Crowd-Pleaser: Whether you’re hosting a dinner party or preparing a family meal, this dish is sure to impress with its savory richness and eye-catching presentation.

Leftover Delight: The flavors only get better with time, making it a wonderful option for meal prep or easy leftover lunches. Enjoy a hassle-free experience with this mouthwatering recipe!

Senegalese Chicken Recipe Ingredients

For the Marinade
Chicken Thighs – The heart of this dish, ensuring a juicy and tender experience.
Garlic Cloves – Fresh is best for a fragrant punch; powdered garlic works in a pinch.
Dijon Mustard – Adds a tangy depth to the marinade; whole grain is a lovely substitute.
Lemon Juice – Always opt for fresh to brighten up the flavors; bottled can work if needed.
Smoked Paprika – Infuses a delightful smokiness; regular paprika can be used, though it lacks that smoky essence.
Cayenne Pepper – Adjust for spice lovers; perfect to amp up the flavor.
Bouillon Powder – Enhances the umami; homemade stock is a fresh and flavorful alternative.
Salt – Adjust according to your taste preferences.

For Cooking
Olive Oil – For browning the chicken and sautéing onions; any neutral oil can also work.
Onions – Sweet and savory when caramelized; yellow or white onions are ideal here.
Chicken Broth – Keeps everything moist and adds depth; vegetable broth is a lighter option for a plant-based twist.

This Senegalese Chicken Recipe brings together an unforgettable medley of flavors that’s easy to prepare and rich in tradition! Enjoy crafting this culinary masterpiece at home!

Step‑by‑Step Instructions for Senegalese Chicken Recipe

Step 1: Prepare the Marinade
In a large bowl, combine minced garlic, sliced onions, fresh lemon juice, Dijon mustard, smoked paprika, cayenne pepper, bouillon powder, and salt. Mix well until smooth, then add the chicken thighs, ensuring each piece is thoroughly coated. Cover the bowl and let the chicken marinate in the refrigerator for at least 2 hours, or overnight for enhanced flavors, making sure the marinade clings beautifully to the meat.

Step 2: Brown the Chicken
Heat a generous drizzle of olive oil in a large skillet over medium-high heat. Once the oil is shimmering, carefully remove the chicken thighs from the marinade, letting any excess drip off. Place them in the skillet and brown for about 4–5 minutes on each side until golden brown and crispy. This step seals in the juiciness, so keep an eye on the beautiful color developing before moving to the next stage.

Step 3: Caramelize Onions
With the chicken set aside, add the reserved marinade and sliced onions to the same skillet over medium-low heat. Stir occasionally, allowing the onions to soften and caramelize over about 5 minutes. They should become translucent and start developing a rich, golden color, infusing the pan with wonderful flavors, which will form the base of your tantalizing sauce in the Senegalese chicken recipe.

Step 4: Cook the Chicken
Return the browned chicken thighs to the skillet and pour in the chicken broth, ensuring each piece is bathed in the luscious liquid. Cover the skillet and let the mixture simmer for 15-20 minutes, adjusting the heat as necessary. The chicken should reach an internal temperature of 165°F, becoming tender and soaking up all the vibrant flavors of the caramelized onion sauce.

Make Ahead Options

These Poulet Yassa are perfect for busy home cooks looking to save time during the week! You can prepare the marinade (including garlic, lemon juice, and spices) up to 24 hours in advance and marinate the chicken thighs overnight for maximum flavor. Additionally, you can slice the onions and store them in an airtight container in the refrigerator for up to 3 days. On the day you plan to serve, simply brown the marinated chicken and caramelize the onions, then simmer it all together with chicken broth. By prepping these components ahead of time, you’ll ensure that your Senegalese chicken recipe is just as delicious without the last-minute rush!

What to Serve with Authentic Poulet Yassa?

Elevate your meal experience by pairing this savory chicken dish with delightful accompaniments that enhance its flavors and textures.

  • Fluffy Jasmine Rice: Its subtle sweetness and light texture soak up the tangy sauce, making each bite a comforting delight.

  • Cauliflower Rice: A keto-friendly option that provides a nutty flavor and absorbs the dish’s vibrant sauce beautifully, keeping the meal low-carb.

  • Simple Steamed Vegetables: Adding seasonal veggies like broccoli or asparagus introduces freshness and a crisp contrast to the tender chicken.

  • Garlic Bread: A warm, crusty side that brings an additional layer of flavor, perfect for sopping up the luscious sauce.

  • Spicy Tomato Salsa: Its zesty brightness complements the rich flavors of the poulet yassa, creating a delightful balance on your plate.

  • Chilled Sparkling Water: Refreshing and bubbly, it cleanses the palate, making each bite of the rich chicken shine even brighter.

Each of these pairings not only complements the Poulet Yassa but also creates a beautiful, well-rounded meal that will satisfy and impress your loved ones.

Senegalese Chicken Recipe Variations

Feel free to have fun with this recipe; let your creativity shine through deliciously!

  • Chicken Breasts: Swap thighs with breasts for a leaner option, adjusting cooking time to keep them juicy.
  • Add Color: Toss in chopped bell peppers when caramelizing onions for a vibrant, crunchy contrast.
  • Vegetarian Option: Use hearty mushrooms or jackfruit instead of chicken for a plant-based delight that still absorbs the marinade’s flavors.
  • Tropical Twist: Include cubed mango in the sauce during the last few minutes of cooking for a sweet and tangy accent.
  • Extra Heat: Spice things up by adding fresh diced jalapeños to the marinade or sprinkle on some red pepper flakes before serving.
  • Herb Infusion: Mix in fresh thyme or cilantro during cooking to elevate the dish with aromatic herbal notes.
  • Creamy Finish: Stir in a dollop of coconut cream right before serving for a deliciously creamy texture and tropical flair.

Explore these variations and find your perfect twist! For another fantastic chicken adventure, check out my recipe for Air Fryer Chicken or indulge in some flavorful Green Chile Chicken.

Expert Tips for Senegalese Chicken Recipe

  • Marinate Longer: Aim for an overnight marination if possible. This enhances the flavors of the chicken, making every bite burst with the essence of the marinade.

  • Brown It Right: Ensure the chicken is well-browned before moving on to caramelizing the onions. This step creates a depth of flavor, so take your time!

  • Onion Magic: Stir occasionally while caramelizing onions. Patience is key—allow them to turn golden and sweet, as they form the heart of the sauce in your Senegalese chicken recipe.

  • Adjust Consistency: If the sauce becomes too thick during reheating, add a splash of chicken broth to loosen it up. This keeps the dish juicy and delicious!

  • Taste Test: Always adjust the seasoning toward the end of cooking. Taste your dish and tweak it to fit your preferences, ensuring a delightful meal every time.

Storage Tips for Senegalese Chicken Recipe

Fridge: Store leftover Senegalese chicken in an airtight container for up to 3 days. This helps retain its delicious flavors and ensures safety.

Freezer: For longer storage, freeze the chicken in a suitable container or freezer bag for up to 6 months. Be sure to label and date for easy reference.

Reheating: When ready to enjoy, thaw overnight in the refrigerator, then reheat on the stovetop or in the microwave until heated through, adding a splash of broth if needed to maintain moisture.

Serving: Enjoy the flavors as is or pair with fresh side dishes like cauliflower rice or steamed veggies to enhance your meal!

Poulet Yassa (Senegalese Chicken) Recipe FAQs

What type of chicken is best for Poulet Yassa?
Absolutely! Chicken thighs are the ideal choice for this Senegalese Chicken recipe as they are juicy and tender, capturing all the rich flavors from the marinade. If you prefer, you can also use drumsticks or breasts, but remember that thighs will give you the most succulent results.

How should I store leftovers of Poulet Yassa?
Very simply! Store your leftover Poulet Yassa in an airtight container in the refrigerator for up to 3 days. Make sure it’s cooled to room temperature before sealing it up. This keeps your dish flavorful and safe to enjoy later!

Can I freeze Poulet Yassa?
Yes, you can! To freeze, place the cooled chicken in a freezer-safe container or a resealable freezer bag, making sure to remove as much air as possible. Your Poulet Yassa will stay fresh for up to 6 months. When you’re ready to enjoy it again, allow it to thaw in the refrigerator overnight before reheating.

What if my onions don’t caramelize properly?
No worries at all! If your onions are not caramelizing, try lowering the heat slightly and give them more time. Stir them occasionally, allowing them to soften and develop that lovely golden color. Patience is key; it typically takes about 5–10 minutes to achieve that sweet, rich caramelization.

Is there a way to make this recipe more keto-friendly?
Definitely! This Senegalese chicken recipe is already quite low in carbs, but you can serve it with cauliflower rice instead of traditional rice to further reduce carbs. Adding more non-starchy vegetables like zucchini or bell peppers during cooking can also enhance the nutrient content while keeping your meal keto-friendly.

Can my pets share in the Poulet Yassa?
It’s best to keep this dish to yourself! While plain chicken can be great for pets, the marinade contains ingredients like garlic and onion that are harmful to them. Always prepare a plain portion without seasoning if you want to share your cooking adventures with your furry friends!

Senegalese Chicken Recipe

Savory Senegalese Chicken Recipe That’ll Thrill Your Taste Buds

This Senegalese Chicken Recipe brings together an unforgettable medley of flavors that's easy to prepare and rich in tradition.
Prep Time 2 hours
Cook Time 25 minutes
Total Time 2 hours 25 minutes
Servings: 4 servings
Course: Chicken
Cuisine: Senegalese
Calories: 400

Ingredients
  

For the Marinade
  • 2 pounds Chicken Thighs Juicy and tender
  • 4 cloves Garlic Minced
  • 1/4 cup Dijon Mustard Whole grain is a substitute
  • 1/4 cup Lemon Juice Fresh preferred
  • 1 teaspoon Smoked Paprika Regular paprika can be used
  • 1/2 teaspoon Cayenne Pepper Adjust to taste
  • 1 teaspoon Bouillon Powder Enhances umami
  • 1 teaspoon Salt Adjust to preference
For Cooking
  • 2 tablespoons Olive Oil For browning and sautéing
  • 2 onions Onions Sliced, yellow or white preferred
  • 1 cup Chicken Broth Keeps everything moist

Equipment

  • large bowl
  • Skillet

Method
 

Preparation
  1. In a large bowl, combine minced garlic, sliced onions, fresh lemon juice, Dijon mustard, smoked paprika, cayenne pepper, bouillon powder, and salt. Mix well until smooth, then add the chicken thighs, ensuring each piece is thoroughly coated. Cover the bowl and let the chicken marinate in the refrigerator for at least 2 hours, or overnight for enhanced flavors.
  2. Heat olive oil in a skillet over medium-high heat. Remove chicken thighs from the marinade and place them in the skillet, browning for about 4-5 minutes on each side until golden brown.
  3. Add reserved marinade and sliced onions to the skillet over medium-low heat. Stir occasionally and allow onions to caramelize for about 5 minutes.
  4. Return browned chicken to the skillet, pour in chicken broth, cover, and let simmer for 15-20 minutes, until the chicken reaches an internal temperature of 165°F.

Nutrition

Serving: 1plateCalories: 400kcalCarbohydrates: 10gProtein: 30gFat: 25gSaturated Fat: 5gPolyunsaturated Fat: 10gMonounsaturated Fat: 8gCholesterol: 120mgSodium: 600mgPotassium: 700mgFiber: 2gSugar: 2gVitamin A: 10IUVitamin C: 50mgCalcium: 50mgIron: 2mg

Notes

This recipe is a crowd-pleaser and perfect for meal prep. The flavors develop beautifully over time.

Tried this recipe?

Let us know how it was!

Delicious Afghan Rice: A Flavorful Journey to Comfort Food

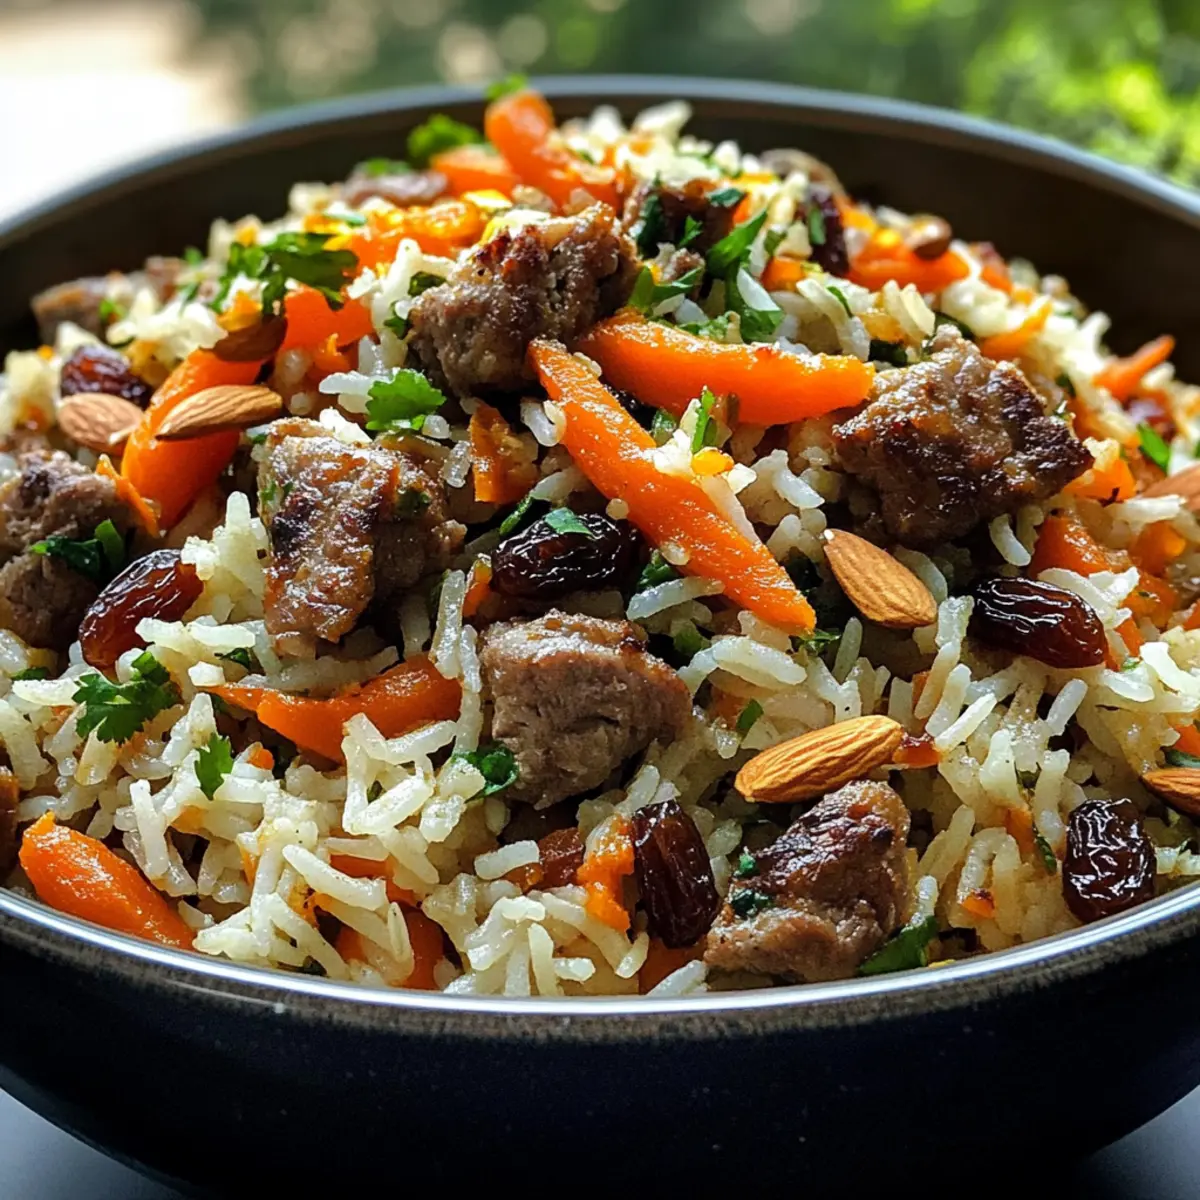
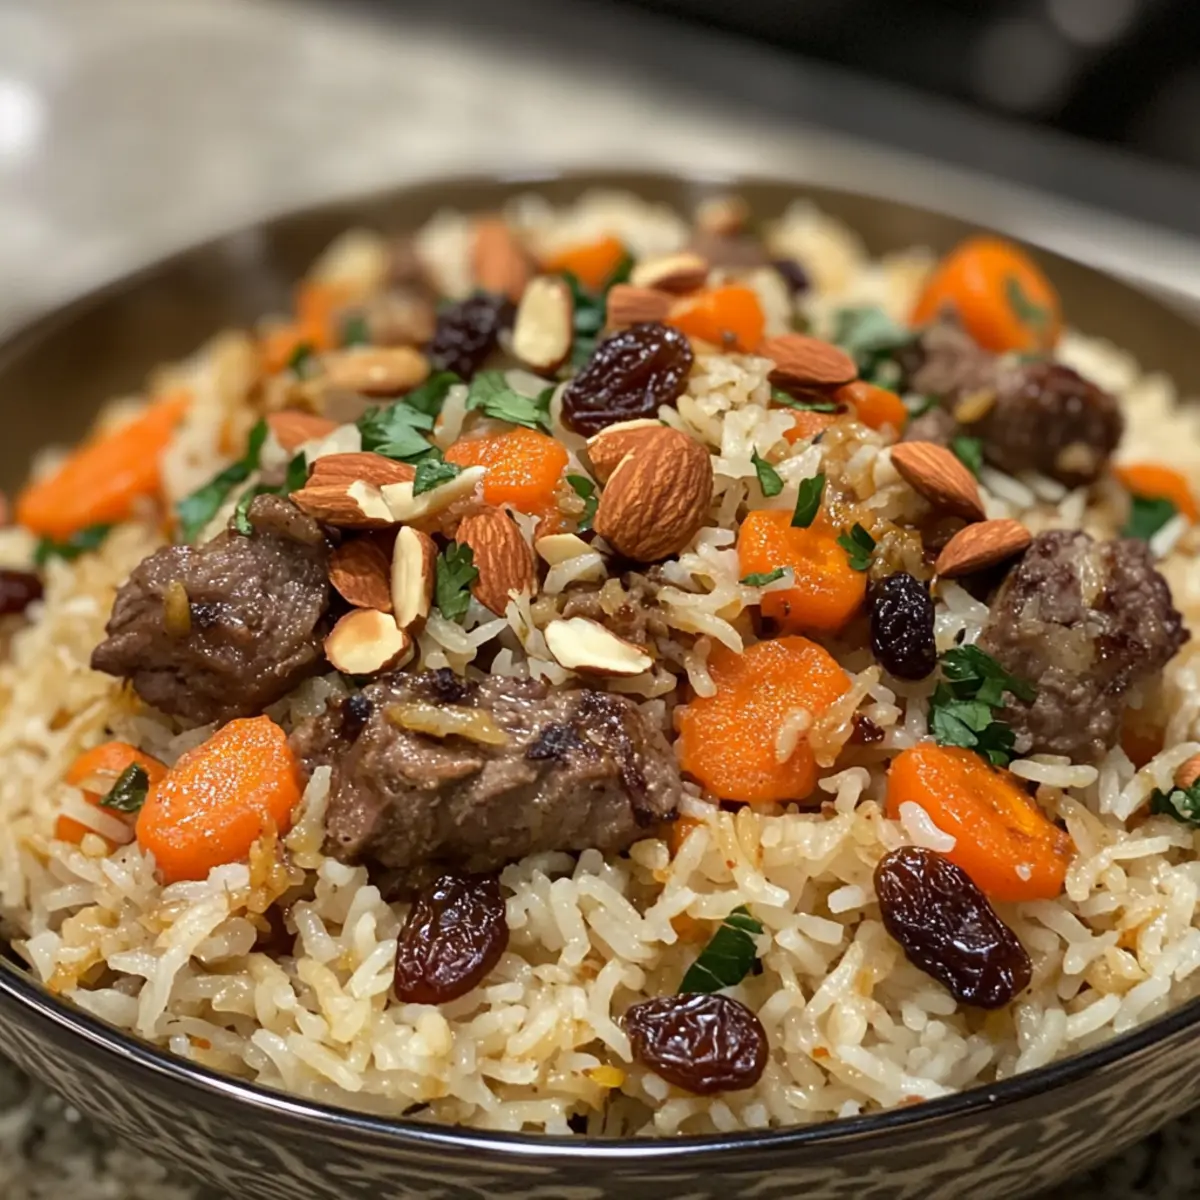
As I stood in my kitchen, the aroma of warm spices wafted through the air, instantly transporting me to the vibrant streets of Kabul. Today, I’m thrilled to share my take on Kabuli Pulao, an iconic Afghan rice dish that has become a beloved staple in my home. This delightful recipe combines fragrant basmati rice with tender lamb, subtly infused with a symphony of spices and topped with caramelized carrots, toasted almonds, and sweet raisins. Not only is this Afghan Rice incredibly satisfying to make, but it also serves as a crowd-pleaser that can easily become the star of any gathering. Plus, for my vegetarian friends, there’s a delicious plant-based twist that captures all those enticing flavors without the meat. Ready to tantalize your taste buds and impress your loved ones? Let’s dive into the world of Kabuli Pulao!

Why is Kabuli Pulao a Must-Try?

Exquisite Flavors: Each bite of this Afghan Rice bursts with spices, tender lamb, and a hint of sweetness from the carrots and raisins.

Easy to Make: The step-by-step process is simple, allowing home cooks of all levels to create this stunning dish without stress.

Versatile Options: Whether you go traditional or vegan, you’ll love how easily this recipe adapts without sacrificing flavor.

Perfect for Gatherings: Impress your family and friends with the vibrant presentation and rich taste, making it an ideal centerpiece for festive occasions.

Leftovers Love: Kabuli Pulao stores beautifully! Enjoy it reheated, perhaps with a side of Shirazi salad for a refreshing twist.

Afghan Rice Ingredients

For the Rice
Basmati Rice – Essential for its fluffiness; soak for 30 minutes to enhance texture.
Water or Broth – Use broth for deeper flavor and richness in your Afghan rice.

For the Aromatics
Cumin Seeds – Adds earthy warmth; substitute with black caraway seeds if needed.
Green & Black Cardamom Pods – Essential for that authentic Afghan flavor; don’t skip this!
Cloves – Provides aromatic depth to the dish.
Cinnamon Stick – Gives a hint of sweetness and warmth.
Onion (Yellow or Vidalia) – Caramelizes beautifully to build base flavor.
Garlic – Enhances the overall aroma and depth of flavor.
Salt & Black Pepper – Necessary for seasoning; adjust to your taste.

For the Protein
Lamb Shank or Boneless Lamb – Tenderizes during cooking, infusing great flavor; can be replaced with tofu for a vegan option.

For the Toppings
Shredded Carrots – Adds sweetness and vibrant color.
Raw Almonds – Provides a delightful crunch; soak and peel before roasting.
Raisins – Offers a sweet contrast; soak them for the best texture.
Sugar – Used for caramelizing; it balances flavors beautifully in the dish.

Optional Ingredients
Cooking Oil – Avocado or sesame oil works wonderfully for sautéing.
Ghee – For added richness and flavor.
Additional Sugar – Can be used while sautéing carrots and raisins for extra sweetness.
Ground Cardamom – For an extra burst of aromatic flavor in your Afghan rice.

Step‑by‑Step Instructions for Afghan Rice

Step 1: Prep the Rice
Begin by rinsing 2 cups of basmati rice under cold water until the water runs clear, removing excess starch. Then, soak the rinsed rice in water for 30 minutes to ensure fluffiness once cooked. Drain the rice well and set it aside while you prepare the other components for the authentic Kabuli Pulao.

Step 2: Sauté the Onions
In a heavy-bottomed pot, heat 2 tablespoons of cooking oil over medium heat. Add one finely chopped onion and sauté until golden brown, stirring frequently, about 8-10 minutes. Once golden, remove the onions with a slotted spoon and set them aside on a paper towel to absorb excess oil, leaving the aromatic essence in the pot.

Step 3: Sear the Lamb
In the same pot, increase the heat to medium-high and add 1.5 pounds of lamb shank or boneless lamb pieces. Sear the meat for about 5-7 minutes, turning until browned on all sides. Then, add the sautéed onions and 3 cloves of minced garlic, stirring for about 2 minutes until fragrant, infusing the lamb with rich flavors for your Afghan rice.

Step 4: Simmer the Meat
Now, add whole spices like ½ teaspoon of cumin seeds, 2 green cardamom pods, 2 black cardamom pods, 4 cloves, and a cinnamon stick into the pot. Pour in 4 cups of water or broth alongside 1 teaspoon of salt. Bring this mixture to a rolling boil, then reduce the heat to low and simmer for 1 to 1½ hours until the lamb is fork-tender, resulting in a robust flavor.

Step 5: Prepare the Toppings
While the lamb simmers, preheat your oven to 350°F (175°C) for roasting the toppings. Arrange ½ cup of soaked and peeled raw almonds and 1 cup of shredded carrots on a baking sheet. Roast for approximately 10-15 minutes until the almonds are golden and the carrots are tender, which will add delightful flavor and texture to your Kabuli Pulao.

Step 6: Make Caramel Sauce
In a small saucepan, combine 2 tablespoons of sugar with a splash of water over medium heat. Allow this mixture to boil without stirring until it turns a rich caramel color, about 3-5 minutes. Watch closely to prevent burning, as this will add a lovely sweetness to your Afghan rice once drizzled over it later in the process.

Step 7: Assemble the Pulao
Once the lamb is tender, add the drained basmati rice directly into the pot, ensuring the rice is evenly distributed. Stir gently to combine, then cover the pot with a tight-fitting lid. Cook on low heat for approximately 15-20 minutes, allowing the rice to absorb the flavorful broth and steam, creating fluffy and aromatic Afghan rice.

Step 8: Add Caramel and Toppings
Once the rice is cooked and all the water has evaporated, drizzle the prepared caramel sauce evenly over the rice. Gently fluff the rice with a fork, then layer the sautéed carrots and roasted almonds on top for a beautiful presentation. Cover again and steam for an additional 5 minutes to enhance the flavors.

Step 9: Serve the Dish
Carefully transfer the Kabuli Pulao to a large serving platter, fluffing the rice once more with a fork. Garnish with any remaining toppings and serve warm, accompanied by a side of yogurt sauce or salad for a refreshing contrast, celebrating the exquisite flavors of this Afghan rice dish with your friends and family.

Make Ahead Options

Kabuli Pulao is an excellent candidate for meal prep, making your busy weeknights a breeze! You can prepare the rice and lamb up to 24 hours in advance. Simply marinate the lamb with spices and store it in the fridge, then cook it on the day you plan to serve. You can also chop the carrots and soak the almonds ahead (up to 3 days) to keep everything ready to go. When you’re set to enjoy this delicious Afghan rice, reheat the lamb and onions in a pot, add the soaked rice and simmer until fluffy, then finish with the caramel sauce and toppings. This way, you’ll achieve just as delicious results with minimal effort!

Expert Tips for Kabuli Pulao

Properly Measure Rice: Always use a 1:2 rice-to-water ratio for fluffy Afghan rice; adjust based on the type of rice used.

Avoid Overcooking: Keep an eye on the lamb; simmer until tender but not mushy. It should easily fall off the bone for the best texture.

Control Sweetness: For those who prefer a less sweet dish, reduce the sugar in the caramel or omit it entirely while sautéing the carrots and raisins.

Topping Variations: Feel free to experiment with different nuts like pistachios or walnuts for added flavor and crunch.

Rest Time Matters: Allow the assembled Kabuli Pulao to sit for a few minutes before serving; this helps the flavors meld beautifully.

Proper Storage for Afghan Rice

Fridge: Store leftover Afghan rice in an airtight container for up to 3 days. When ready to enjoy again, reheat gently on the stove, adding a splash of water to keep it moist.

Freezer: You can freeze Afghan rice for up to 2-3 months in freezer-safe containers. Make sure to cool it completely before freezing to preserve its texture and flavor.

Reheating: Thaw frozen rice overnight in the fridge before reheating. Use a stove or microwave, adding a splash of broth or water to achieve that perfectly fluffy consistency.

Taste Maintenance: To keep the flavors as vibrant as the day it was made, seal the rice well to prevent freezer burn and loss of aroma.

Afghan Rice: Tasty Variations Await

Feel free to adapt this Afghan rice recipe and make it your own—the possibilities are as delightful as the, warm, aromatic spices!

  • Vegan Delight: Replace lamb with seared tofu, tempeh, or chickpeas and use vegetable stock for a hearty vegetarian dish. Enjoy all the beloved flavors without compromising on your dietary choices.

  • Nutty Twist: Experiment with different nuts like pistachios or walnuts for a unique texture and slight flavor variation. These could offer a delightful crunch alongside the sweet carrots and raisins, enhancing your dish’s appeal.

  • Slightly Sweet: If you prefer less sweetness, reduce the sugar for the caramel sauce or skip it entirely when sautéing the carrots. This lets the natural flavors shine through while still keeping your dish delightful.

  • Spicy Kick: Add a pinch of cayenne pepper or red chili flakes to the sautéed onions for a hint of heat. This subtle spice elevates your tasteful Afghan rice beautifully and is great for spice lovers!

  • Citrusy Zest: Incorporate the zest of a lemon or orange into the rice as it simmers for a fresh citrus twist. The bright flavor can complement the sweet components, adding a refreshing depth to the dish.

  • Dairy-Free Upgrade: Use coconut oil instead of traditional cooking oils, lending a wonderful aroma and slightly sweet undertone that pairs superbly with the spices.

  • Wild Rice Mix: For a fun twist, blend in some wild rice with your basmati rice. This creates a beautiful medley of colors and flavors, elevating your Afghan rice experience.

And for a lovely side, consider serving your Afghan rice with a refreshing Shirazi salad, which complements the flavors wonderfully!

What to Serve with Authentic Kabuli Pulao?

Elevate your dining experience with delightful accompaniments that beautifully complement this Afghan rice masterpiece.

  • Yogurt Sauce: This cooling sauce provides a creamy contrast, balancing the spices of the Kabuli Pulao for a refreshing bite.

  • Shirazi Salad: A vibrant mix of tomatoes, cucumbers, and herbs that adds a crisp texture, enhancing the meal’s overall freshness.

  • Flatbreads: Serve warm naan or lavash for a rustic touch, perfect for scooping up the flavorful rice and tender lamb.

  • Spicy Pickles: Introduce zest with tangy pickles, balancing the sweetness from the raisins and caramelized carrots for an extra flavor punch.

  • Herbed Tea: A fragrant infusion of mint or cardamom tea brings warmth and complements the aromatic spices in the Afghan rice, creating a heartwarming pairing.

  • Baklava: End your meal on a sweet note with this honey-soaked pastry, sharing the same delicious richness found in Kabuli Pulao and leaving a lasting impression.

Adding these elements will create a wholesome dining experience, allowing you to savor each component of this Afghan rice dish.

Kabuli Pulao (Afghan Rice) Recipe FAQs

What type of rice should I use for Kabuli Pulao?
Absolutely! Basmati rice is ideal for Kabuli Pulao due to its unique fluffiness and aromatic qualities. Soaking it for 30 minutes before cooking is crucial for achieving that perfect texture. If you can’t find Basmati, Sella Basmati is a great substitute.

How should I store leftover Kabuli Pulao?
To keep your delicious Afghan rice fresh, store it in an airtight container in the fridge for up to 3 days. When reheating, simply add a splash of water to avoid drying it out, and warm it gently on the stove or in the microwave for the best results.

Can I freeze Kabuli Pulao?
Yes! You can freeze Kabuli Pulao for up to 2-3 months. Just make sure to allow it to cool completely before transferring it into freezer-safe containers. When you’re ready to enjoy, thaw it overnight in the fridge, and then reheat, adding a bit of broth or water to maintain that fluffy texture.

What can I do if my lamb is tough after cooking?
No worries! If your lamb isn’t tender after simmering for 1 to 1½ hours, try adding a little more liquid and cooking it a bit longer on low heat. Make sure the pot is covered tightly to retain moisture, allowing the meat to become fork-tender. A heavy-bottomed pot can also help prevent burning.

Are there any dietary considerations I should keep in mind?
Of course! For a vegan version of Kabuli Pulao, substitute the lamb with seared tofu, tempeh, or chickpeas, and use vegetable broth instead of meat broth. This dish is also gluten-free, dairy-free, egg-free, and soy-free if you ensure the broth and additional ingredients align with these needs!

How can I adjust the sweetness of the dish?
If you prefer a less sweet flavor profile, consider reducing the amount of sugar you use in the caramel or skip it altogether when sautéing the carrots and raisins. Taste the broth and adjust the seasoning to ensure a beautifully balanced flavor in your Afghan rice!

Afghan Rice

Delicious Afghan Rice: A Flavorful Journey to Comfort Food

Experience the vibrant flavors of Afghan Rice in this delightful Kabuli Pulao recipe that combines aromatic spices and tender lamb.
Prep Time 30 minutes
Cook Time 1 hour 30 minutes
Resting Time 5 minutes
Total Time 2 hours 5 minutes
Servings: 6 servings
Course: Dinner
Cuisine: Afghan
Calories: 450

Ingredients
  

For the Rice
  • 2 cups Basmati Rice soak for 30 minutes
  • 4 cups Water or Broth broth for deeper flavor
For the Aromatics
  • ½ teaspoon Cumin Seeds substitute with black caraway seeds if needed
  • 2 pieces Green Cardamom Pods essential for flavor
  • 2 pieces Black Cardamom Pods essential for flavor
  • 4 pieces Cloves provides aromatic depth
  • 1 stick Cinnamon Stick adds sweetness and warmth
  • 1 pieces Onion (Yellow or Vidalia) finely chopped
  • 3 cloves Garlic minced
  • 1 teaspoon Salt adjust to taste
  • 1 teaspoon Black Pepper adjust to taste
For the Protein
  • 1.5 pounds Lamb Shank or Boneless Lamb can be replaced with tofu for a vegan option
For the Toppings
  • 1 cup Shredded Carrots adds sweetness and color
  • ½ cup Raw Almonds soak and peel before roasting
  • 1 cup Raisins soak for best texture
  • 2 tablespoons Sugar for caramelizing
Optional Ingredients
  • 2 tablespoons Cooking Oil avocado or sesame oil for sautéing
  • 2 tablespoons Ghee for added richness
  • 2 tablespoons Additional Sugar for extra sweetness while sautéing
  • Ground Cardamom for extra aromatic flavor

Equipment

  • Heavy-bottomed pot
  • Baking Sheet
  • Small saucepan
  • slotted spoon

Method
 

Step-by-Step Instructions
  1. Prep the Rice: Rinse 2 cups of basmati rice under cold water until the water runs clear, then soak for 30 minutes. Drain and set aside.
  2. Sauté the Onions: Heat 2 tablespoons of cooking oil in a pot. Add chopped onion and sauté until golden brown (8-10 minutes). Remove onions and set aside.
  3. Sear the Lamb: In the same pot, increase heat and add 1.5 pounds of lamb. Sear for 5-7 minutes until browned. Add sautéed onions and 3 minced garlic cloves; stir for 2 minutes.
  4. Simmer the Meat: Add ½ teaspoon cumin seeds, 2 green cardamom pods, 2 black cardamom pods, 4 cloves, and 1 cinnamon stick. Pour in 4 cups of water or broth and 1 teaspoon of salt. Simmer for 1 to 1½ hours until fork-tender.
  5. Prepare the Toppings: Preheat oven to 350°F (175°C). Arrange ½ cup soaked almonds and 1 cup shredded carrots on a baking sheet and roast for 10-15 minutes.
  6. Make Caramel Sauce: In a small saucepan, combine 2 tablespoons of sugar with a splash of water. Boil until caramel color (3-5 minutes).
  7. Assemble the Pulao: Once lamb is tender, add drained rice to the pot. Stir gently, cover, and cook on low for 15-20 minutes.
  8. Add Caramel and Toppings: Drizzle caramel over the rice, fluff with a fork, and layer sautéed carrots and roasted almonds on top. Steam for 5 minutes.
  9. Serve the Dish: Transfer Kabuli Pulao to a serving platter, fluffing the rice. Garnish and serve warm with yogurt sauce or salad.

Nutrition

Serving: 1servingCalories: 450kcalCarbohydrates: 65gProtein: 25gFat: 15gSaturated Fat: 4gPolyunsaturated Fat: 2gMonounsaturated Fat: 8gCholesterol: 75mgSodium: 600mgPotassium: 450mgFiber: 3gSugar: 6gVitamin A: 500IUVitamin C: 3mgCalcium: 80mgIron: 3mg

Notes

Properly measure rice for a fluffy texture. Adjust sweetness to taste and feel free to experiment with toppings.

Tried this recipe?

Let us know how it was!

Creamy White Chocolate Strawberry Smoothie Bowl Delight

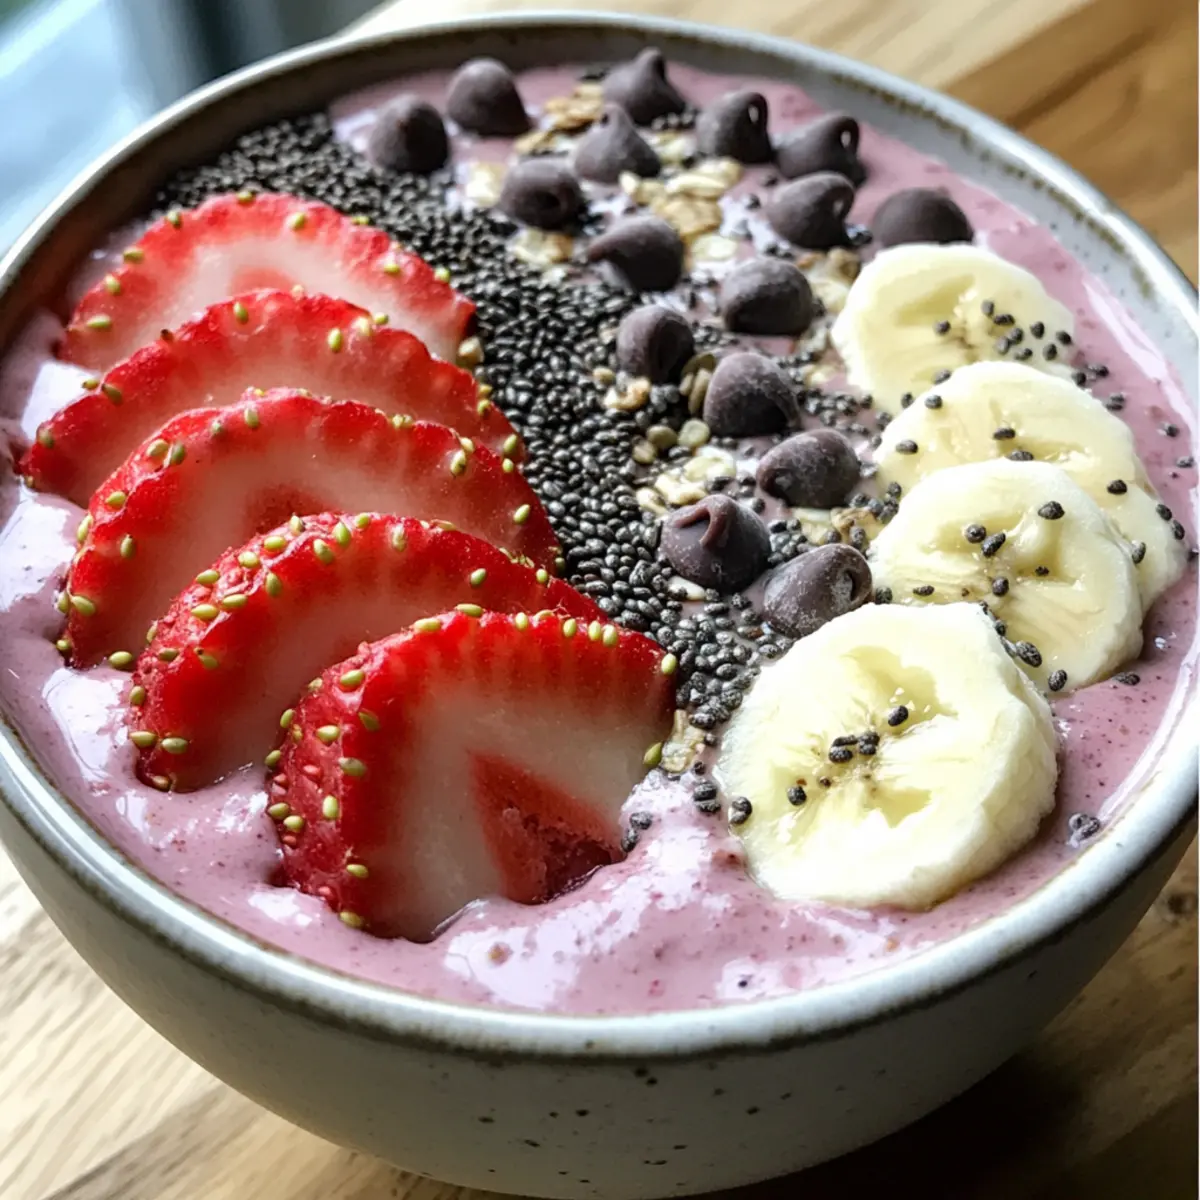
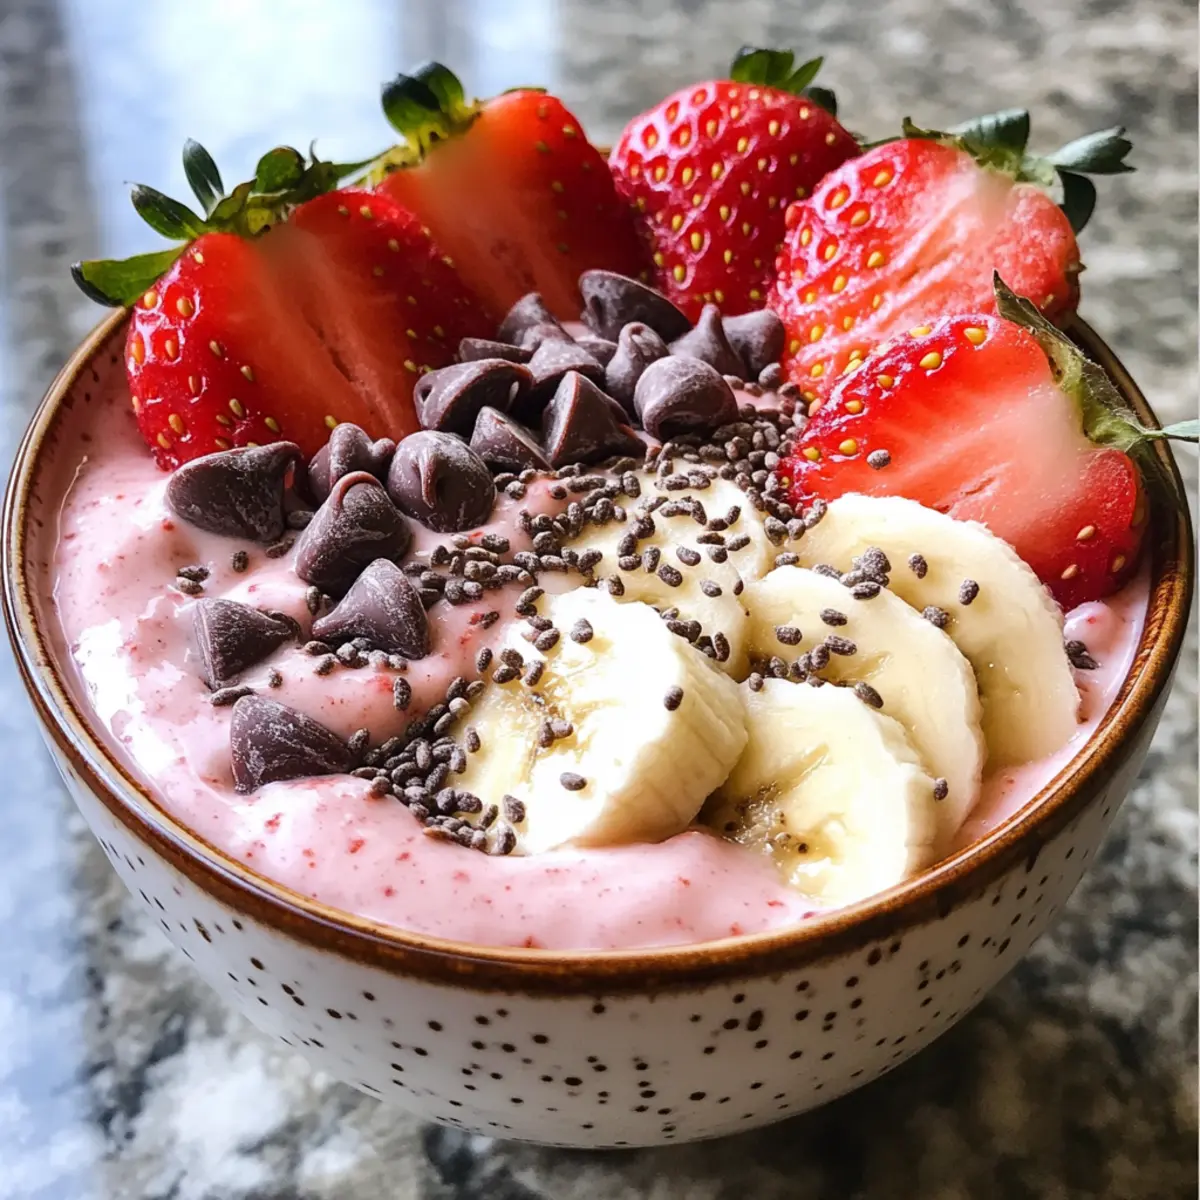
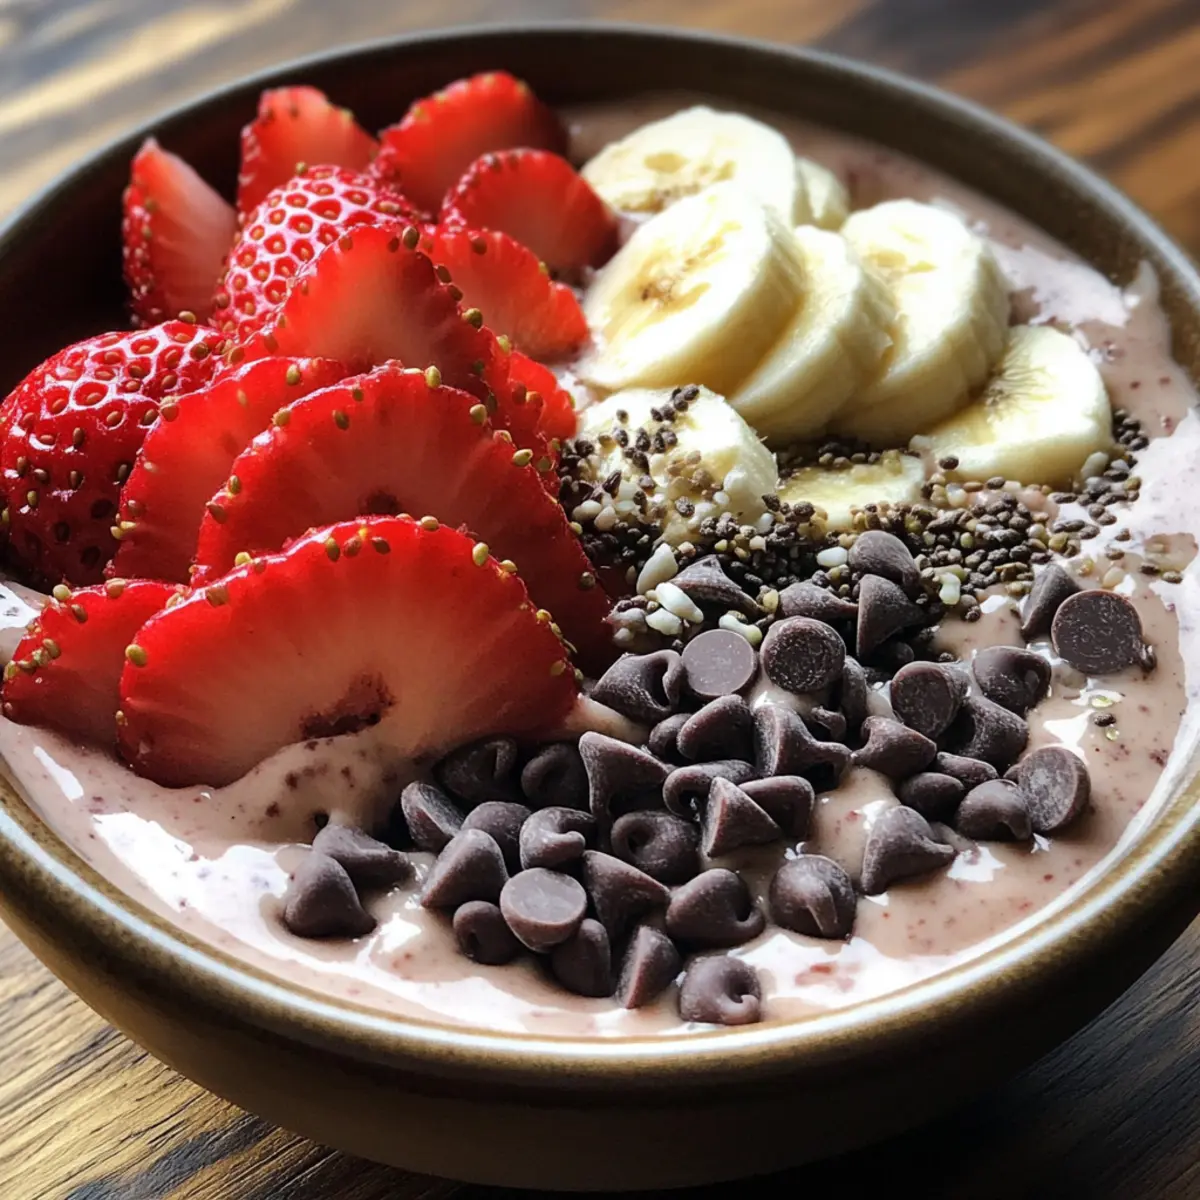
As I stood in my kitchen one sunny morning, the rich aroma of strawberries filled the air, whisking me away to my favorite summer moments. Before me lay the key to a blissful breakfast: a White Chocolate Strawberry Smoothie Bowl. This recipe has quickly become a staple in my home, marrying creamy goodness with a fruity twist that’s not just satisfying but also health-conscious. Packed with plant-based protein and bursting with flavors, it’s a guilt-free treat that feels indulgent yet boosts my energy for the day ahead. Plus, it’s incredibly quick to whip up, making it perfect for busy mornings or a refreshing snack. Are you ready to blend your way to a delightful breakfast bowl? Let’s dive into this nutritious adventure together!

Why is this smoothie bowl a must-try?

Indulgence, yet guilt-free: This White Chocolate Strawberry Smoothie Bowl offers the rich taste of white chocolate without compromising your healthy lifestyle.
Quick and easy: Ready in minutes, it’s perfect for busy mornings or as a satisfying snack.
Vegan and gluten-free: Enjoy this creamy treat knowing it meets your dietary preferences effortlessly.
Customizable: Swap ingredients or toppings like nuts or seeds for a personalized touch that suits your taste.
Nutrient-packed: With 17 grams of plant protein, this bowl isn’t just tasty—it’s a powerhouse of nutrition!
Looking for more delicious options? Try these White Chocolate Cranberry cookies or Roasted Strawberry Whipped ricotta toast for added variety in your kitchen!

White Chocolate Strawberry Smoothie Bowl Ingredients

• The perfect blend of indulgence and health!

For the Smoothie Base

  • ½ cup coconut milk – Provides a creamy base; substitute with almond, soy, or cashew milk for different flavors.
  • 2 tbsp cashew butter – Key ingredient for achieving the white chocolate flavor; do not skip! Can substitute with almond butter or tahini for a variation.
  • 1 pinch Himalayan salt – Balances sweetness and enhances flavor; sea salt can be used as a substitute.
  • 1 scoop chocolate vegan protein powder – Adds protein and depth; swap this for any favorite plant-based protein powder.
  • 2 cups frozen strawberries – Creates a thick, creamy consistency and natural sweetness; can be replaced with mixed berries or other frozen fruits.
  • 2 frozen bananas – Adds sweetness and creaminess; use more or less banana based on desired sweetness or substitute with avocado for creaminess.

Toppings

  • Fresh strawberry slices – Adds a burst of fresh flavor and a pop of color to your bowl.
  • Vegan chocolate chips – For a decadent touch that complements the white chocolate flavor.
  • Cacao nibs – Provides a crunchy texture while offering a rich chocolate flavor.
  • Hemp seeds – Boosts nutrition with additional protein and healthy fats.
  • Granola – A perfect crunchy topping for added texture and flavor.

Enjoy making your White Chocolate Strawberry Smoothie Bowl, and let the flavors transport you to a sunny morning paradise!

Step‑by‑Step Instructions for White Chocolate Strawberry Smoothie Bowl

Step 1: Gather Your Ingredients
Start by measuring out your ingredients for the White Chocolate Strawberry Smoothie Bowl. You’ll need ½ cup of coconut milk, 2 tablespoons of cashew butter, 1 scoop of chocolate vegan protein powder, a pinch of Himalayan salt, 2 cups of frozen strawberries, and 2 frozen bananas. Having everything ready will streamline the blending process!

Step 2: Combine Ingredients in Blender
Add the coconut milk first to your high-powered blender, followed by the cashew butter, salt, protein powder, frozen strawberries, and bananas. This layering ensures a smooth blend. Secure the lid tightly, ensuring no spills while blending all these nutritious elements together!

Step 3: Start Blending
Begin by blending at a low speed for about 5 to 10 seconds. This gentle start allows the ingredients to mix without splattering. As you see everything integrating, gradually increase the speed to high for the next 1 to 2 minutes until the mixture is completely smooth and creamy.

Step 4: Check for Consistency
Once the White Chocolate Strawberry Smoothie Bowl reaches a luscious and creamy consistency, stop the blender. If needed, use a tamper to push any stubborn ingredients down for even blending. The goal is to achieve a thick texture, similar to soft-serve ice cream.

Step 5: Serve in a Bowl
Scoop the creamy smoothie mixture into a chilled bowl. If you’ve prepped bowls in the freezer, they will help keep your smoothie cold longer. The vibrant color should be enticing, signaling that it’s time to dress your bowl!

Step 6: Add Toppings
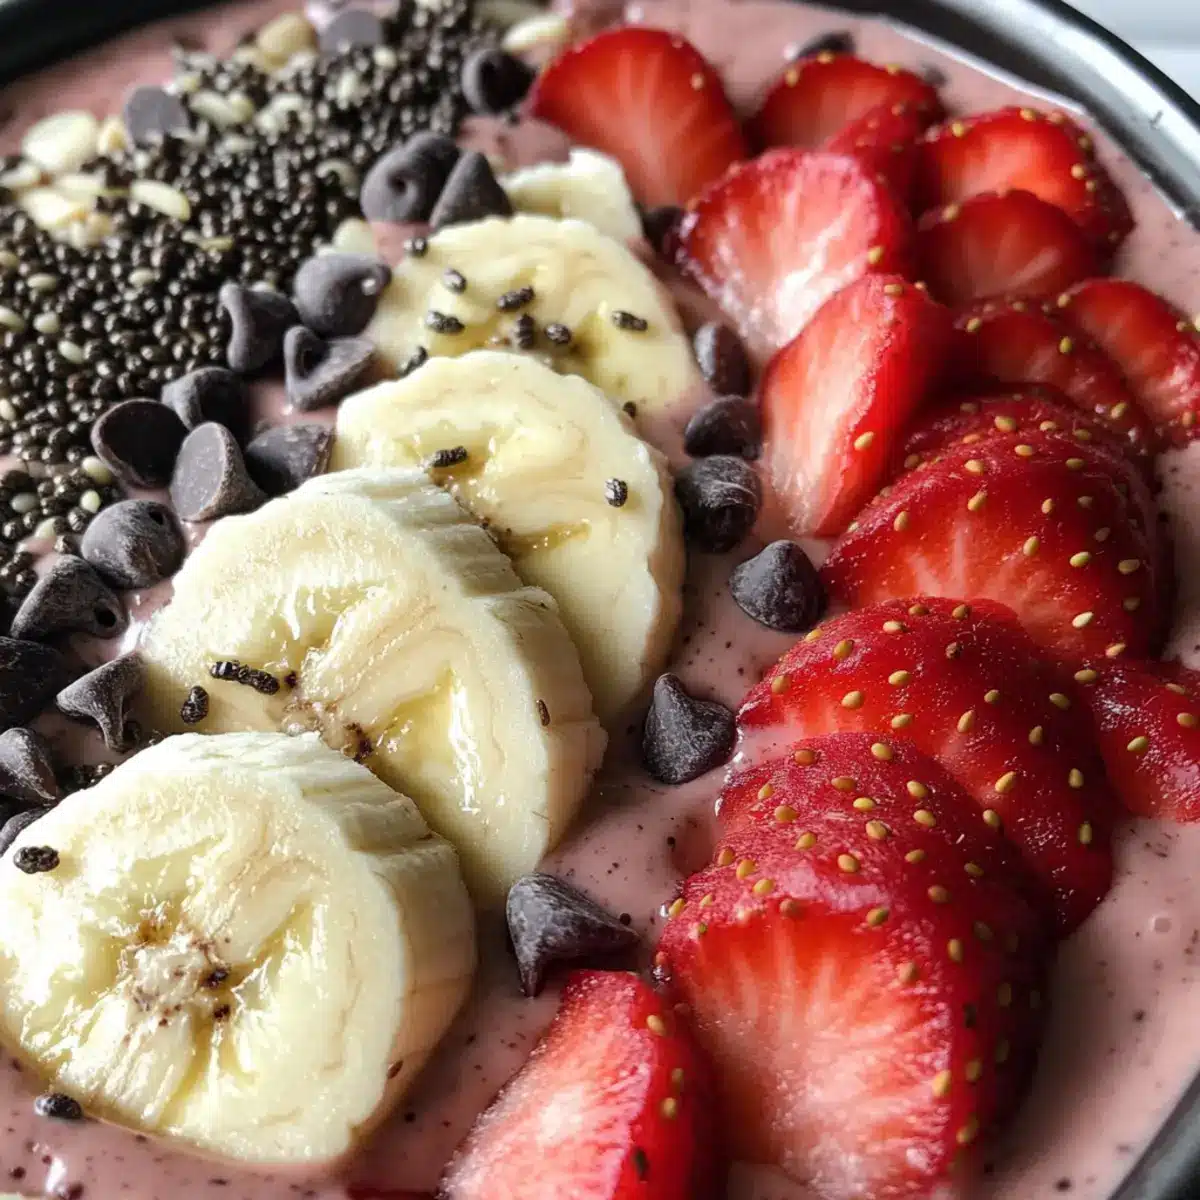
Now, let your creativity shine! Top your White Chocolate Strawberry Smoothie Bowl with fresh strawberry slices, vegan chocolate chips, cacao nibs, or a sprinkle of granola and hemp seeds. Each topping not only adds nutrition but also a flavorful crunch that enhances this delightful breakfast bowl.

Step 7: Enjoy Immediately
Serve your smoothie bowl right after topping, as it’s best enjoyed fresh. With each spoonful, relish the creamy blend of strawberries and the rich undertones from the cashew butter—this healthy treat is sure to brighten your day!

What to Serve with Healthy White Chocolate Strawberry Smoothie Bowl

Brighten your breakfast table with delightful pairings that enhance your smoothie bowl experience.

  • Crunchy Granola: A sprinkle of your favorite granola adds satisfying texture and a wholesome crunch that complements the creaminess of the smoothie bowl.
  • Toasted Almonds: Sliced and lightly toasted, almonds contribute a nutty flavor and a delightful crunch that pairs beautifully with the smoothness of the bowl.
  • Fresh Fruit Salad: A colorful mix of seasonal fruits elevates freshness, bringing vibrant colors and additional nutrition to your meal. Try adding kiwi or blueberries for a fruity burst!
  • Chia Seed Pudding: Prepare a simple chia seed pudding for a protein-rich, creamy addition that pairs wonderfully with the fruity notes of your smoothie bowl.
  • Coconut Yogurt: A dollop of coconut yogurt adds extra creaminess while reinforcing the tropical flavors of the smoothie. Plus, it keeps everything plant-based!
  • Herbal Tea: Refresh with a warm cup of herbal tea, like chamomile or Peppermint. It’s a soothing contrast that perfectly balances the vibrant flavors in your bowl.
  • Almond Milk Latte: For a cozy touch, sip on an almond milk latte. The nutty notes harmonize beautifully with the rich strawberry sweetness.
  • Dark Chocolate Shavings: A touch of dark chocolate shavings on top creates a decadent twist, enhancing the rich taste without overwhelming the dish.

With these delightful pairings, your Healthy White Chocolate Strawberry Smoothie Bowl becomes an elevated breakfast or snack that nourishes both body and soul!

Expert Tips for White Chocolate Strawberry Smoothie Bowl

  • Liquid First: Always add coconut milk or other liquids first in the blender. This prevents ingredients from getting stuck and ensures a smoother blend.
  • Avoid Over-Blending: Blend only until smooth; over-blending can make your smoothie bowl thinner. Aim for a thick, creamy texture!
  • Chill Your Bowls: Pre-chill your serving bowls in the freezer. It helps keep the smoothie cold longer, enhancing the refreshing experience.
  • Use High-Powered Blender: Invest in a high-powered blender for blending frozen fruits. It delivers the best consistency for your White Chocolate Strawberry Smoothie Bowl without any chunks.
  • Customize Toppings: Don’t hesitate to personalize your toppings! Nuts, seeds, or even fresh mint can elevate your smoothie bowl, adding crunch and flavor.

How to Store and Freeze White Chocolate Strawberry Smoothie Bowl

Fridge: Store any leftover smoothie bowl in an airtight container in the refrigerator for up to 1-2 days. Keep in mind that the texture may change slightly.

Freezer: If you want to freeze the smoothie bowl, pour it into ice cube trays or silicone molds. It can be frozen for up to 1 month. Blend again with a splash of coconut milk to restore creaminess.

Reheating: While this dish is best enjoyed fresh, you can thaw frozen portions overnight in the fridge and blend with a little coconut milk to rejuvenate the creamy texture.

Serving Suggestion: Serve immediately after blending for the best taste and mouthfeel. Toppings can be added just before enjoying!

White Chocolate Strawberry Smoothie Bowl Variations

Feel free to elevate your smoothie bowl with these delightful twists tailored just for you!

  • Nut-Free: Use sunflower seed butter instead of cashew butter if you’re avoiding nuts. This provides a creamy base without compromising flavor.
  • Protein Boost: Add chia seeds or hemp hearts to your toppings for extra protein and a delightful crunch. They pack a nutritious punch while keeping it plant-based!
  • Berry Blast: Swap strawberries for a mix of blueberries and raspberries for a tangy flavor. This not only changes the taste but also adds vibrant color!
  • Creamy Avocado: Substitute one banana with half an avocado for a richer texture. It adds creaminess without overwhelming sweetness, perfect for those who enjoy a unique twist.
  • Coconut Love: For an extra tropical flair, sprinkle toasted coconut flakes on top. This adds texture while enhancing the creamy coconut flavor from your base.
  • Enhanced Sweetness: Drizzle some agave syrup or maple syrup atop your smoothie bowl if you’re craving more sweetness. It complements the fruity flavors beautifully.
  • Choco-Mint Delight: Stir in a few drops of peppermint extract for a refreshing twist. The cool mint flavor pairs wonderfully with the strawberries!
  • Incredible Spice: Add a dash of cinnamon or a sprinkle of nutmeg for an unexpected warmth in flavor. It can elevate the overall taste to a cozy level!

With these variations, your White Chocolate Strawberry Smoothie Bowl can become a unique masterpiece each time you prepare it! If you’re exploring more fun recipes, don’t miss out on the delightful Red White Blue Fruit Kabobs or the sweet treats like Patriotic Chocolate Chip cookies for a splash of holiday spirit!

Make Ahead Options

These White Chocolate Strawberry Smoothie Bowls are perfect for busy mornings and meal prep enthusiasts! You can prepare the smoothie base up to 24 hours in advance by blending all the ingredients (coconut milk, cashew butter, protein powder, frozen strawberries, and bananas) and storing it in an airtight container in the refrigerator. This keeps the flavors vibrant while saving time. Just before serving, give the mixture a quick stir and scoop into chilled bowls. To maintain that creamy texture, avoid adding toppings until you’re ready to enjoy—this ensures they stay fresh and crunchy. Grab your spoon, and indulge in a wholesome breakfast without any last-minute fuss!

White Chocolate Strawberry Smoothie Bowl Recipe FAQs

How do I choose ripe strawberries for the smoothie bowl?
Absolutely! Look for strawberries that are vibrant red with a natural sheen. Avoid ones with white tips or dark spots all over, as this indicates overripeness. Also, choose berries that are firm to the touch for the best flavor and texture in your smoothie bowl.

How should I store leftover smoothie bowl?
You can store any leftover White Chocolate Strawberry Smoothie Bowl in an airtight container in the refrigerator for up to 1-2 days. Just remember, while it will still be safe to eat, the texture may slightly change, becoming a bit more fluid. If you want it thicker upon serving, just give it a quick stir before enjoying!

Can I freeze the smoothie bowl? If so, how?
Absolutely! To freeze your White Chocolate Strawberry Smoothie Bowl, pour any leftover mixture into ice cube trays or silicone molds. You can freeze it for up to 1 month. When you’re ready to enjoy, simply toss the frozen cubes back into the blender with a splash of coconut milk until it’s creamy again—this will revitalize the texture beautifully!

What if my smoothie bowl turns out too thin?
If your smoothie bowl comes out thinner than expected, don’t worry! You can simply add a handful of frozen strawberries or bananas and blend again until thickened. Additionally, make sure to blend just until smooth, as over-blending can introduce air, making it too thin. Aim for a texture similar to soft-serve ice cream!

Are there any dietary considerations I should keep in mind for this smoothie bowl?
Very much so! This recipe is vegan, gluten-free, and packed with plant-based protein, making it suitable for a variety of dietary preferences. However, if you’re allergic to nuts, you can swap out the cashew butter for sunflower seed butter, and use oat milk instead of coconut milk. Always double-check labels for any hidden allergens in your ingredients!

White Chocolate Strawberry Smoothie Bowl

Creamy White Chocolate Strawberry Smoothie Bowl Delight

Enjoy a guilt-free indulgence with this White Chocolate Strawberry Smoothie Bowl, packed with plant-based protein and bursting with flavors.
Prep Time 10 minutes
Total Time 10 minutes
Servings: 2 bowls
Course: Breakfast
Cuisine: Vegan
Calories: 350

Ingredients
  

Smoothie Base
  • 0.5 cup coconut milk Substitute with almond, soy, or cashew milk for different flavors.
  • 2 tbsp cashew butter Key ingredient for achieving the white chocolate flavor; can substitute with almond butter or tahini.
  • 1 pinch Himalayan salt Balances sweetness; sea salt can be used as a substitute.
  • 1 scoop chocolate vegan protein powder Swap for any favorite plant-based protein powder.
  • 2 cups frozen strawberries Can be replaced with mixed berries or other frozen fruits.
  • 2 frozen bananas Use more or less banana based on desired sweetness; substitute with avocado for creaminess.
Toppings
  • 1 cup fresh strawberry slices Adds a burst of fresh flavor.
  • 0.5 cup vegan chocolate chips For a decadent touch.
  • 2 tbsp cacao nibs Provides a crunchy texture.
  • 2 tbsp hemp seeds Boosts nutrition with additional protein.
  • 1 cup granola A perfect crunchy topping.

Equipment

  • blender

Method
 

Preparation Steps
  1. Gather your ingredients: coconut milk, cashew butter, protein powder, Himalayan salt, frozen strawberries, and frozen bananas.
  2. Combine ingredients in the blender: add coconut milk first, followed by cashew butter, salt, protein powder, frozen strawberries, and bananas.
  3. Start blending at a low speed for 5 to 10 seconds, then gradually increase to high for 1 to 2 minutes until smooth.
  4. Check for consistency; use a tamper if necessary to ensure a thick, creamy texture.
  5. Serve in a chilled bowl, ideally prepped in the freezer.
  6. Add toppings: fresh strawberry slices, vegan chocolate chips, cacao nibs, hemp seeds, or granola.
  7. Enjoy immediately for the best taste!

Nutrition

Serving: 1bowlCalories: 350kcalCarbohydrates: 40gProtein: 17gFat: 15gSaturated Fat: 5gSodium: 250mgPotassium: 600mgFiber: 8gSugar: 20gVitamin A: 2IUVitamin C: 120mgCalcium: 10mgIron: 8mg

Notes

Customize toppings according to your preferences for added crunch and flavor.

Tried this recipe?

Let us know how it was!

Basil Chicken with Coconut Curry Sauce for Quick Family Meals

As I stirred the fragrant spices in my kitchen, it hit me—there’s nothing quite like the comfort of a homemade meal. Enter Basil Chicken with Coconut Curry Sauce, a dish that wraps you in a warm embrace with its creamy texture and aromatic herbs. This is the kind of recipe that’s not only quick to prepare but also a crowd-pleaser, making it perfect for weeknight dinners or cozy family gatherings. What I love most is how easily it adapts to include your favorite veggies or proteins, ensuring no one goes home hungry. Whether you’re a curry lover or just dipping your toe into Indian cuisine, get ready for a delightful culinary adventure. Are you ready to elevate your dinner game?

Why is This Recipe a Must-Try?

Vibrant Flavors: Each bite of this Basil Chicken with Coconut Curry Sauce bursts with a delicious medley of spices and creamy coconut, creating an unforgettable taste experience.

Quick and Easy: With a preparation time of only about 30 minutes, busy weeknights don’t have to compromise flavor, making this dish a practical choice for families.

Versatile Options: Feel free to customize by swapping in shrimp or firm tofu, or bulk it up with your favorite vegetables like bell peppers or spinach.

Crowd-Pleasing Delight: This dish is sure to impress, transforming even the pickiest eaters into fans of homemade curry! You might want to serve it alongside a refreshing salad or pair it with a classic Grilled Chicken Sandwich for a complete meal.

Comforting Texture: The creamy sauce envelops the tender chicken, providing a cozy warmth that’s just right for family gatherings or rainy days.

With these delicious details, you’ll find that this recipe perfectly balances ease, flavor, and an inviting presentation that will leave everyone asking for seconds!

Basil Chicken with Coconut Curry Sauce Ingredients

For the Chicken

  • Boneless Skinless Chicken Breast Halves – The main protein source, offering tenderness; swap with shrimp or firm tofu for a vegetarian option.
  • Salt – Enhances overall flavor; consider using low-sodium salt for a healthier alternative.
  • Pepper – Adds heat and depth to the dish.
  • Chili Powder – Infuses additional spice; adjust to taste based on your heat preference.

For the Sauce

  • Curry Powder – Provides warm, aromatic flavor; you can substitute with garam masala for a different spice profile.
  • Olive Oil – Adds richness during sautéing; any neutral oil may work instead.
  • Medium Red Onion – Brings sweetness and depth; don’t skip this for a flavor boost.
  • Garlic (5 cloves, minced) – Contributes a pungent flavor that’s essential to the dish.
  • Jalapeño Pepper (seeded and finely chopped) – Introduces a mild heat; substitute with bell pepper if you prefer no spice.
  • Dried Basil – Imparts an aromatic quality that brightens the flavors; fresh basil can elevate it even more.
  • Ground Ginger – Adds warmth and a touch of sweetness; fresh ginger is a great substitute if available.

For Creaminess

  • Coconut Milk (1 can, regular or light) – Forms the creamy base of the curry sauce; swap with almond, soy, or oat milk for a non-coconut version.
  • Cream (1/2 cup) – Richens the sauce; use half-and-half or milk for a lighter sauce option.
  • Cornstarch (1 tablespoon) – Thickens the sauce to perfection.

This Basil Chicken with Coconut Curry Sauce brings bold flavors and creamy comfort to your table, and feel free to experiment with vegetables or proteins to make it uniquely yours!

Step‑by‑Step Instructions for Basil Chicken with Coconut Curry Sauce

Step 1: Prep the Chicken
Begin by cutting boneless skinless chicken breast halves into 1-inch pieces and placing them in a mixing bowl. In a separate bowl, combine curry powder, salt, pepper, and chili powder, then sprinkle the mixture over the chicken. Toss everything together to coat well, ensuring each piece is seasoned. For deeper flavor, marinate this in the refrigerator for 1 to 2 hours before cooking.

Step 2: Sauté the Aromatics
In a large frying pan, heat 2 tablespoons of olive oil over medium-high heat until shimmering. Add the chopped medium red onion and sauté for about 3-4 minutes until it becomes translucent. Next, stir in minced garlic, finely chopped jalapeño, dried basil, and ground ginger. Continue cooking for another 2-3 minutes, allowing the aromatics to meld beautifully and infuse the oil with their inviting fragrances.

Step 3: Cook the Chicken
Once the aromatics are ready, add the marinated chicken pieces into the skillet. Cook them for about 5-6 minutes, stirring occasionally, until the chicken is no longer pink and lightly browned. You’ll know it’s done when the juices run clear and the internal temperature reaches 165°F. This will prepare your chicken for the creamy sauce that follows.

Step 4: Create the Coconut Curry Sauce
In a bowl, whisk together one can of coconut milk, ½ cup of cream, and 1 tablespoon of cornstarch until smooth and well combined. Pour this mixture into the skillet with the cooked chicken. Stir continuously, bringing the sauce to a simmer. As it thickens, which should take about 5-10 minutes, the colors will brighten and the dish will start bubbling gently, signaling readiness.

Step 5: Serve Your Dish
Once the Basil Chicken with Coconut Curry Sauce has reached the desired thickness, immediately serve it over hot cooked rice. Consider using fluffy jasmine or basmati rice for a beautiful contrast. Top your dish with fresh basil leaves for an extra flavor punch and a lovely presentation. Enjoy the inviting aroma as you prepare for a scrumptious meal that’s perfect for family gatherings!

Variations & Substitutions for Basil Chicken with Coconut Curry Sauce

Feel free to play around with this recipe to tailor it to your tastes and dietary needs!

  • Vegetarian Option: Replace chicken with firm tofu or tempeh for a satisfying plant-based dish. These proteins soak up the delicious sauce beautifully.
  • Seafood Swap: Use shrimp instead of chicken for a delightful seafood twist. Just add them during the last few minutes of cooking for perfectly tender shrimp.
  • Veggie Boost: Add additional vegetables like bell peppers, snap peas, or baby spinach to enhance nutrition and add vibrant colors to the dish. Fresh veggies bring delightful crunch!
  • Spice Level Adjustment: Scale the heat by using fewer jalapeños or opting for a milder pepper, such as a poblano. Tailoring heat levels means everyone can enjoy this dish!
  • Dairy-Free Delight: Substitute the cream with coconut cream or a vegan alternative like cashew cream for a completely dairy-free version without sacrificing richness.
  • Grain Alternatives: Serve it over quinoa or cauliflower rice instead of traditional rice for a gluten-free or lower-carb option. With their unique flavors, they elevate the dish!
  • Flavor Enhancement: Add a splash of lime or lemon juice before serving for a zesty finish that brightens the entire dish. It’s a secret weapon for elevating flavors!
  • Herb Twist: Feel free to swap out dried basil for cilantro or mint for an exciting flavor change. Fresh herbs add bursts of freshness that complement the coconut curry.

For a yummy culinary adventure, consider pairing this dish with a refreshing salad or serve it alongside a delightful Jerk Chicken Burritos for a full meal! You might also enjoy the comforting texture from a bowl of Coconut Curry Soup.

Make Ahead Options

These Basil Chicken with Coconut Curry Sauce are perfect for those busy weeknights! You can marinate the chicken up to 24 hours in advance, ensuring it’s infused with flavor while keeping it tender. Additionally, you can prepare the sauce without the coconut milk and cream, refrigerating the mixture for up to 3 days. When you’re ready to serve, simply reheat the chicken and sauce on the stovetop, then stir in the coconut milk and cream until warmed through. This simple step will help maintain the rich, creamy texture and taste, making your meal feel just as fresh as when it was first cooked. Enjoy effortless family dinners with this make-ahead option!

What to Serve with Basil Chicken with Coconut Curry Sauce

Imagine a cozy night in with a delicious meal that warms your heart and satisfies your family’s appetites.

  • Fluffy Jasmine Rice: Its aromatic grain is the perfect base, soaking up the creamy curry sauce and enhancing the flavor of the dish.
  • Crispy Naan Bread: Soft and pillowy, naan serves as a delightful vessel for scooping up the savory sauce, adding a satisfying texture.
  • Refreshing Cucumber Salad: Crunchy cucumbers tossed in a zesty dressing bring a cool contrast to the warm, spicy curry. A sprinkle of herbs adds brightness and freshness!
  • Roasted Vegetable Medley: Caramelized bell peppers, zucchini, and carrots provide an additional layer of sweetness and nutrition, complementing the flavors beautifully.
  • Mango Chutney: The sweet and tangy chutney contrasts perfectly with the savory elements of the dish, enhancing each bite with a burst of tropical flavor.
  • Mint Yogurt Sauce: Creamy yogurt mixed with fresh mint cools the palate and balances the spices, making it a delightful accompaniment.
  • Chilled Coconut Water: A refreshing drink that echoes the coconut notes in the curry, while hydrating and perfectly pairing with the vibrant spices.
  • Gulab Jamun: Round off your meal with these sweet, syrup-soaked delights that close the dinner with a delightful sweetness, perfect after the savory spice!

These pairing ideas will make your Basil Chicken with Coconut Curry Sauce shine, creating a memorable dining experience your loved ones will cherish!

Proper Storage for Basil Chicken with Coconut Curry Sauce

Fridge: Store leftover Basil Chicken with Coconut Curry Sauce in an airtight container for up to 3 days. Reheat gently on the stove or microwave to retain the creamy texture.

Freezer: Freeze in an airtight container for up to 2 months. To reheat, let it thaw in the fridge overnight and warm it on the stove, adding a splash of coconut milk if needed.

Reheating: When reheating, do so slowly over medium heat to prevent the chicken from becoming dry. Stir occasionally to ensure even warming.

Airtight Containers: Ensure the container used for storage is airtight to prevent moisture loss and maintain the dish’s rich flavor and creaminess.

Expert Tips for Basil Chicken with Coconut Curry Sauce

  • Marinate Longer: Allow the chicken to marinate longer for a depth of flavor that truly enhances your Basil Chicken with Coconut Curry Sauce.

  • Adjust Spice Levels: Feel free to adjust the number of jalapeños based on your family’s heat preferences; removing seeds will reduce the spice too.

  • Watch Cooking Time: Avoid overcooking the chicken—aim for just cooked through to keep it juicy and tender in your curry sauce.

  • Perfect Pairings: While rice is a must, consider serving with salads, naan bread, or roasted veggies for a well-rounded meal experience.

  • Experiment with Vegetables: Add your favorite vegetables like bell peppers or spinach to boost nutrition and flavor—this dish is wonderfully adaptable!

Basil Chicken with Coconut Curry Sauce Recipe FAQs

What’s the best way to select ripe ingredients for this recipe?
Absolutely! When choosing your chicken, look for boneless skinless breast halves that are firm and have a pink hue without any dark spots. For the vegetables, select fresh jalapeños that are bright green, and red onions with smooth, shiny skins. Fresh basil should be vibrant and fragrant, while coconut milk should have a creamy consistency without curdling.

How do I store leftovers of Basil Chicken with Coconut Curry Sauce?
To store this delightful dish, place it in an airtight container and refrigerate for up to 3 days. When reheating, do so gently on the stove or in the microwave to maintain that creamy texture. It’s perfect for enjoying a hearty meal again!

Can I freeze Basil Chicken with Coconut Curry Sauce?
Yes! You can freeze this meal in an airtight container for up to 2 months. To reheat, it’s best to let it thaw in the refrigerator overnight, and then warm it on the stove. If it seems too thick, add a splash of coconut milk while stirring over medium heat to achieve that creamy consistency again.

How do I prevent the chicken from becoming dry?
The key is to avoid overcooking the chicken! Cook it until it’s just no longer pink and has reached an internal temperature of 165°F. If reheating leftovers, do so slowly over medium heat, stirring occasionally, to keep it moist and tender.

Are there any allergy considerations for this recipe?
Definitely! This recipe uses common allergens like chicken and coconut. If cooking for someone with allergies, consider using firm tofu instead of chicken for a vegetarian option. Always double-check ingredients like coconut milk or cream for allergens, as some brands may include added ingredients that could trigger reactions.

Can I adjust this recipe for dietary preferences?
Very! This dish is adaptable; you can substitute shrimp or firm tofu as protein sources. You can also adjust the heat level by modifying the jalapeño quantity or opting for milder vegetables instead. For a lower-calorie option, swap regular cream for half-and-half or reduce the amount used. Enjoy the flexibility!

Basil Chicken with Coconut Curry Sauce

Basil Chicken with Coconut Curry Sauce for Quick Family Meals

This Basil Chicken with Coconut Curry Sauce is quick, creamy, and full of vibrant flavors, making it a must-try for any curry lover.
Prep Time 30 minutes
Cook Time 20 minutes
Total Time 50 minutes
Servings: 4 servings
Course: Chicken
Cuisine: Indian
Calories: 450

Ingredients
  

For the Chicken
  • 1 pound Boneless Skinless Chicken Breast Halves Can swap with shrimp or firm tofu
  • 1 teaspoon Salt Consider using low-sodium salt
  • 1 teaspoon Pepper
  • 1 teaspoon Chili Powder Adjust to taste
For the Sauce
  • 2 tablespoons Curry Powder Substitute with garam masala if desired
  • 2 tablespoons Olive Oil Any neutral oil may work
  • 1 medium Red Onion Chopped
  • 5 cloves Garlic Minced
  • 1 medium Jalapeño Pepper Seeded and finely chopped
  • 1 tablespoon Dried Basil Fresh basil can elevate the flavor
  • 1 teaspoon Ground Ginger Fresh ginger is a great substitute
For Creaminess
  • 1 can Coconut Milk Regular or light
  • 1/2 cup Cream Can use half-and-half or milk
  • 1 tablespoon Cornstarch For thickening the sauce

Equipment

  • Frying pan
  • Mixing Bowl
  • Whisk

Method
 

Step-by-Step Instructions
  1. Cut boneless skinless chicken breast halves into 1-inch pieces and place in a mixing bowl. In a separate bowl, combine curry powder, salt, pepper, and chili powder, then sprinkle over chicken. Toss to coat well and marinate for 1 to 2 hours if possible.
  2. Heat 2 tablespoons of olive oil in a large frying pan over medium-high heat. Add chopped red onion and sauté for about 3-4 minutes until translucent. Stir in garlic, jalapeño, dried basil, and ground ginger, cooking for another 2-3 minutes.
  3. Add marinated chicken pieces to the skillet. Cook for about 5-6 minutes, stirring occasionally, until chicken is no longer pink and lightly browned.
  4. In a bowl, whisk together coconut milk, cream, and cornstarch until smooth. Pour the mixture into the skillet with the cooked chicken and stir continuously, bringing it to a simmer and allowing it to thicken for 5-10 minutes.
  5. Once thickened, serve the Basil Chicken with Coconut Curry Sauce over hot cooked rice and top with fresh basil leaves.

Nutrition

Serving: 1servingCalories: 450kcalCarbohydrates: 30gProtein: 25gFat: 30gSaturated Fat: 15gPolyunsaturated Fat: 3gMonounsaturated Fat: 5gCholesterol: 75mgSodium: 700mgPotassium: 600mgFiber: 2gSugar: 4gVitamin A: 10IUVitamin C: 15mgCalcium: 6mgIron: 10mg

Notes

This dish is versatile; feel free to substitute proteins or add your favorite vegetables to suit your taste.

Tried this recipe?

Let us know how it was!

Savory Sardine or Mussel Salad on Toast for Easy Indulgence

As I stood at the kitchen counter, watching the beautiful toast transform from pale to golden brown under the broiler, the anticipation was almost palpable. Nothing stirs my appetite like a vibrant Sardine or Mussel Salad on Toast with Capers, where every bite is a delightful surprise. This quick and easy seafood appetizer not only satisfies those late-night cravings, but it also makes for an impressive starter at gatherings. You’ll love how the crunchy toast meets the creamy salad, elevated by the zingy capers. Perfect for those busy weeknights and pledge to avoid fast food, this dish takes mere minutes to whip up—no cooking required beyond toasting! Could a homemade meal get any simpler or tastier? Grab your favorite seafood, and let’s dive into this fresh Mediterranean-inspired delight!

Why Should You Make This Salad?

Quick and Easy: This recipe is crafted for busy lives, needing just a few minutes and minimal effort—perfect for when you want a homemade meal without the fuss.

Flavor Explosion: Bursting with flavor from the sardines or mussels and the zesty capers, it’s a delightful treat that’s light yet satisfying.

Versatile Ingredients: Use either fresh or canned seafood, and feel free to mix in fresh herbs or veggies for a personal touch! Don’t miss trying it as a topping for your favorite bread types.

Crowd-Pleaser: Perfect for entertaining, this dish is not only visually appealing but also garners raves from both seafood lovers and skeptics alike. Serve it alongside a refreshing Strawberry Spinach Salad for a stunning meal.

Healthy Indulgence: With a punch of protein and omega-3 fatty acids, you can indulge guilt-free. This salad is as nutritious as it is flavorful!

Sardine or Mussel Salad on Toast Ingredients

For the Salad

  • Sardines or Mussels – The star of the show, providing delightful flavor and important nutrients; opt for canned if you’re short on time.
  • Capers – These little gems add a tangy, briny burst that elevates the salad’s profile; rinse if they’re in salt to reduce saltiness.
  • Olive Oil – Adds a rich mouthfeel and helps bind the salad together; feel free to substitute with avocado oil for a different flavor twist.
  • Lemon Juice – Brightens the dish beautifully; freshly squeezed lemon is best for that vibrant zing.

For the Toast

  • Bread (1 slice per serving) – Provides a crunchy base; choose your favorite variety and toast until golden for optimal texture.

Optional Ingredients

  • Fresh Herbs – Parsley or dill will add a pop of freshness; while optional, they are highly recommended to round out the flavors.
  • Vegetables – Diced cucumbers or tomatoes can elevate freshness and add a satisfying crunch; experiment as you wish!

Dive into making your Sardine or Mussel Salad on Toast and transform simple ingredients into a sensational treat!

Step‑by‑Step Instructions for Sardine or Mussel Salad on Toast

Step 1: Prepare the Toast
Start by preheating your oven’s broiler. While it heats, place slices of your chosen bread on a baking sheet. Toast them under the broiler for about 2-3 minutes, watching closely until they turn a beautiful golden brown. This crispy base will provide the perfect contrast to the creamy flavors of your Sardine or Mussel Salad on Toast.

Step 2: Mix the Salad
In a medium-sized bowl, combine your drained sardines or mussels with 2 tablespoons of olive oil and 1/4 cup of freshly squeezed lemon juice. Add in a generous handful of washed capers, and gently toss the ingredients together using a fork. Aim for a consistency where the seafood and capers are well distributed but still retain some texture.

Step 3: Serve
Once your toast is ready, remove it from the oven and let it cool for a minute. Spoon the Sardine or Mussel Salad mixture generously onto each slice of toast, ensuring every bite is loaded with flavors. If desired, sprinkle fresh herbs like parsley or dill on top to enhance the presentation and taste, making your dish visually appealing and even more delicious.

Step 4: Enjoy Immediately
Serve your Sardine or Mussel Salad on Toast right away while the bread is crispy. This dish shines when enjoyed fresh, ensuring a satisfying crunch with every bite. Pair it with a light salad or your favorite beverage for a complete, fulfilling meal that beautifully blends quick preparation with gourmet flavor.

Expert Tips for Sardine or Mussel Salad on Toast

  • Drain Well: Ensure the canned seafood is thoroughly drained to prevent a soggy toast. Overly wet ingredients can ruin the texture.
  • Check Freshness: If using fresh mussels, ensure they are alive before cooking; discard any that don’t close when tapped.
  • Herb Power: Fresh herbs add complexity. Don’t skip them—try parsley or dill to elevate your Sardine or Mussel Salad on Toast.
  • Taste Balance: Adjust the lemon juice according to your taste preference; a bit more can brighten flavors, while less can mellow the dish down.
  • Flavor Wait: Let the salad sit for a few minutes before serving to allow the ingredients to meld together for enhanced flavor.
  • Toast Variety: Experiment with different types of bread! Whole grain, rye, or even gluten-free options can change the dish’s character entirely.

Storage Tips for Sardine or Mussel Salad on Toast

Fridge: Store any leftover Sardine or Mussel Salad mixture in an airtight container for up to 2 days to retain freshness. Avoid storing on the toast to keep the bread crispy.

Freezer: It’s not recommended to freeze the salad, as the texture of both sardines/mussels and capers can change significantly when thawed.

Reheating: If you have leftover toast, reheat it in the oven for a couple of minutes to restore crispness before serving. Always keep the salad separate until ready to enjoy!

Serving Freshness: For the best experience, enjoy the salad on toast immediately after preparation, as it’s irresistibly tasty when freshly made.

Make Ahead Options

These Sardine or Mussel Salad on Toast are absolutely ideal for meal prep enthusiasts! You can prepare the salad mixture, which includes the sardines or mussels, capers, olive oil, and lemon juice, up to 24 hours in advance. Simply combine the ingredients in an airtight container and refrigerate to keep the flavors fresh. To maintain quality, avoid toasting the bread until you’re ready to serve, as this ensures it stays crispy. When it’s time to enjoy, toast your bread, then generously spoon the chilled salad onto the crispy toast. This way, you’ll have a quick and delightful appetizer ready to impress your guests or to enjoy during a busy weeknight!

What to Serve with Sardine or Mussel Salad on Toast?

Elevate your meal experience with these delightful pairings that complement the fresh and zesty notes of your seafood salad.

  • Light Green Salad: A refreshing side with mixed greens and a citrus vinaigrette will balance the rich flavors beautifully.

  • Chilled White Wine: A crisp Sauvignon Blanc or a light Pinot Grigio enhances the seafood essence and provides a refreshing sip between bites.

  • Garlic Bread: The crunchy, buttery layers of garlic bread juxtapose nicely with the creamy salad, offering a satisfying texture contrast.

  • Cucumber Gazpacho: This chilled soup adds a cool, refreshing element to your meal, making it perfect for warm days. The subtle cucumber flavors are a delightful match.

  • Tomato Salad with Feta: Juicy tomatoes with creamy feta bring a Mediterranean flair that complements the salad, adding both sweetness and tang.

  • Herbed Quinoa: A light side of quinoa mixed with fresh herbs can elevate your dish’s nutritional profile while bringing an aromatic texture to each bite.

  • Sparkling Water with Lemon: A bubbly drink enhances your dining experience; its effervescence and citrus notes brighten the meal.

  • Fruit Sorbet: For a refreshing dessert, serve a scoop of fruit sorbet. Its lightness and fruity vibes cool the palate after the savory salad.

Sardine or Mussel Salad on Toast Variations

Feel free to switch things up with these delightful variations that will excite your taste buds!

  • Tuna Twist: Substitute sardines with tuna for a milder flavor that still packs a punch. This variation creates a satisfying texture with a familiar taste.

  • Gluten-Free Option: Use gluten-free bread or lettuce wraps to enjoy this dish without the gluten. Lettuce wraps add a refreshing crunch—perfect for a light, summer meal.

  • Herb Infusion: Add more fresh herbs like basil or chives to amplify flavor complexity. The bright green accents not only look appealing but also elevate the dish’s aroma.

  • Chunky Veggies: Toss in diced cucumbers or cherry tomatoes to add freshness and crunch. This twist adds a lovely summer vibe and makes it even more colorful.

  • Spicy Kick: For those who love a bit of heat, add a few dashes of hot sauce or red pepper flakes. This spice will transform the dish into a zesty delight you can’t resist.

  • Creamy Variation: Mix in a dollop of Greek yogurt or mayonnaise for a creamier texture. This variation enriches the salad and makes each bite even more indulgent.

  • Avocado Bliss: Add sliced or mashed avocado to your salad for extra creaminess and healthy fats. The buttery texture complements the brininess of the capers perfectly!

  • Mediterranean Flavor: Incorporate sun-dried tomatoes or olives for a Mediterranean flair. These ingredients bring a whole new aroma and flavor profile to your dish.

Explore these variations alongside the delicious Sardine or Mussel Salad on Toast to find your new favorite! And for a delightful side, consider pairing it with a refreshing Italian Chopped Salad or the zesty Steak Fajita Salad. Enjoy your culinary adventures!

Sardine or Mussel Salad on Toast Recipe FAQs

What’s the best way to select fresh sardines or mussels?
Absolutely! When choosing fresh mussels, they should be tightly closed, and any that remain open after tapping should be discarded. For sardines, look for shiny skin and a fresh smell, avoiding those with dark spots or a strong odor.

How should I store leftover Sardine or Mussel Salad?
Store any leftovers in an airtight container in the fridge for up to 2 days. However, I recommend keeping the salad mixture separate from the toast to ensure the bread stays crispy. This way, you can still enjoy that delightful crunch on your next serving!

Can I freeze the sardine or mussel salad?
Freezing isn’t suggested for this salad, as both sardines and mussels can change in texture when thawed, potentially becoming mushy. Instead, finish any leftovers within a couple of days for the best experience!

What if I’m allergic to fish?
No problem! If you have a fish allergy, you can substitute the sardines or mussels with canned chicken or chickpeas for a similar texture and protein boost. Keep in mind, though, that the flavor profile will change a bit, but it can still be delicious!

How can I ensure my toast stays crispy?
To achieve that perfect crispy toast, make sure to use a good amount of oil on your bread, and toast it until golden brown. For an extra crispy finish, you could broil the toast for just a minute longer, but be sure to watch it closely to avoid burning!

Can I make adjustments to the salad ingredients?
Very! Feel free to play with the recipe by adding diced tomatoes or cucumbers for extra crunch and flavor. You may also swap out capers for olives or pickles if that suits your taste better—let your creativity shine!

Sardine or Mussel Salad on Toast

Savory Sardine or Mussel Salad on Toast for Easy Indulgence

Enjoy a flavorful Sardine or Mussel Salad on Toast that is quick to prepare and perfect for any occasion.
Prep Time 5 minutes
Cook Time 3 minutes
Total Time 8 minutes
Servings: 2 servings
Course: Salad
Cuisine: Mediterranean
Calories: 250

Ingredients
  

For the Salad
  • 1 can Sardines or Mussels opt for canned if you’re short on time
  • 2 tablespoons Capers rinse if they’re in salt to reduce saltiness
  • 2 tablespoons Olive Oil substitute with avocado oil if desired
  • 1/4 cup Lemon Juice freshly squeezed is best
For the Toast
  • 1 slice Bread toast until golden for optimal texture
Optional Ingredients
  • Fresh Herbs parsley or dill are recommended
  • Vegetables diced cucumbers or tomatoes can elevate freshness

Equipment

  • Oven
  • Baking Sheet
  • Mixing Bowl
  • Fork

Method
 

Step-by-Step Instructions
  1. Preheat your oven’s broiler. Place slices of chosen bread on a baking sheet and toast under the broiler for about 2-3 minutes until golden brown.
  2. In a medium-sized bowl, combine drained sardines or mussels with olive oil and lemon juice. Add rinsed capers and gently toss the ingredients.
  3. Once toast is ready, remove from oven and let cool briefly. Generously spoon the Sardine or Mussel Salad mixture onto each slice of toast.
  4. Serve immediately while the bread is crispy, optionally topping with fresh herbs for enhanced flavor.

Nutrition

Serving: 1servingCalories: 250kcalCarbohydrates: 30gProtein: 14gFat: 10gSaturated Fat: 2gPolyunsaturated Fat: 2gMonounsaturated Fat: 6gCholesterol: 25mgSodium: 640mgPotassium: 300mgFiber: 2gSugar: 1gVitamin A: 200IUVitamin C: 10mgCalcium: 80mgIron: 1mg

Notes

For the best experience, enjoy the salad on toast immediately after preparation as it’s irresistibly tasty when freshly made.

Tried this recipe?

Let us know how it was!

Irresistibly Creamy Pistachio Mousse Cups You’ll Love

As I stood in my kitchen, the fragrant aroma of roasted pistachios filled the air, transporting me to a sun-drenched Mediterranean café. That’s when the idea struck me: why not recreate these delightful Pistachio Mousse Cups at home? This easy dessert dazzles not only with its vibrant green color, but also with its silky texture that seems to float on your taste buds. Perfect for any occasion, you’ll love how quickly you can whip it up, making it a hit whether you’re hosting friends or treating yourself after a long day. Plus, with options for nut-free, vegan, and gluten-free variations, there’s a twist to suit everyone’s palate. Ready to indulge in a bit of elegance? Let’s dive into making these scrumptious cups!

Why Are Pistachio Mousse Cups Irresistible?

Elegance in Every Bite: The silky texture of these mousse cups will captivate your senses, making each spoonful a luxurious experience.

Quick & Easy: With just a few simple ingredients, you can whip up this no-bake dessert in no time, allowing you to impress guests without spending hours in the kitchen.

Customizable Delight: From nut-free to vegan options, this recipe invites creativity, ensuring everyone can join in on the deliciousness.

Showstopper Appeal: Their vibrant green color is not only stunning but also makes them a perfect centerpiece for any gathering.

Layered Flavor: Want more? Consider elevating your treat with layers of berry sauce or a sprinkle of chocolate shavings for added flair, similar to how you might enhance Pistachio Carrot Cake or Cookies and Cream Cheesecake Cups.

Effortless Storage: Plus, these mousse cups are perfect for meal prep, as they can be stored in the fridge for days, making them a convenient indulgence anytime!

Pistachio Mousse Cups Ingredients

Get ready to create this delightful dessert!

For the Mousse

  • Pistachio Paste – Gives the mousse its signature nutty flavor; opt for quality without fillers for the best taste.
  • Heavy Cream – Creates a rich, creamy texture; full-fat is essential for that irresistible mouthfeel.
  • Sugar – Balances the flavors; feel free to adjust to match your sweet tooth!

For the Toppings

  • Whipped Cream – Adds an airy touch on top, making each scoop even more delightful.
  • Chopped Pistachios – Introduces a lovely crunch, enhancing the aesthetic and flavor of your Pistachio Mousse Cups.
  • Chocolate Shavings – A decadent finishing touch that complements the pistachio beautifully.

Feel free to explore variations such as nut-free or vegan options for even more delicious possibilities!

Step‑by‑Step Instructions for Pistachio Mousse Cups

Step 1: Prepare the Mousse Base
In a mixing bowl, combine high-quality pistachio paste with heavy cream. Using an electric mixer on medium speed, whip the mixture for about 3–5 minutes until stiff peaks form, creating a lush, airy consistency. You’ll know it’s ready when it holds its shape well and has a rich, creamy texture that fills the bowl.

Step 2: Sweeten the Mousse
Gently fold in the sugar to your whipped pistachio cream. Use a rubber spatula to carefully integrate the sugar, ensuring the mixture remains light and airy. Taste as you go to achieve your desired sweetness, making your Pistachio Mousse Cups perfectly delightful without overpowering the nutty flavor.

Step 3: Chill the Mousse
Spoon the pistachio mousse mixture into individual cups or bowls, creating lovely portions for serving. Cover each cup with plastic wrap to avoid any unwanted odors or textures. Place them carefully in the refrigerator and chill for at least 2 hours, allowing the flavors to meld and the texture to set beautifully.

Step 4: Serve with Flair
Once chilled, remove the Pistachio Mousse Cups from the refrigerator and prepare to garnish. Top each cup with a dollop of freshly whipped cream for added richness and a pop of texture. Sprinkle with chopped pistachios and chocolate shavings to elevate the presentation and invite your guests to indulge in your handcrafted dessert.

Make Ahead Options

These Pistachio Mousse Cups are perfect for busy home cooks looking to simplify their dessert preparations! You can make the mousse base up to 24 hours in advance. To prep ahead, simply combine the pistachio paste and heavy cream, whip until stiff peaks form, and fold in the sugar. Spoon the mixture into individual cups, cover with plastic wrap to prevent drying out, and refrigerate until you’re ready to serve. If you want to add a special touch, top with whipped cream and garnishes just before serving to maintain their fresh, vibrant look. This way, you’ll have delicious, restaurant-quality desserts with minimal effort, even on hectic weeknights!

Pistachio Mousse Cups Variations

Ready to get creative? These delightful Pistachio Mousse Cups can be easily customized to suit your taste and dietary needs!

  • Nut-Free: Swap pistachio paste with sunflower seed butter for a delicious, nut-free alternative. This ensures everyone can enjoy the mousse without worry.

  • Vegan: Use coconut cream instead of heavy cream and sweeten with maple syrup for a rich, dairy-free experience. The coconut adds a lovely tropical note that beautifully complements the pistachio flavor.

  • Flavored Mousse: For an aromatic twist, add a few drops of almond extract or orange blossom water to the mixture. This elevates the flavor profile and introduces an enchanting essence to your mousse.

  • Chocolate Lovers: Incorporate cocoa powder or melted dark chocolate into the mousse base for a decadent chocolate-pistachio fusion. Imagine the richness of chocolate dancing with the nutty pistachio—truly irresistible!

  • Fruity Twist: Layer the bottom of your cups with berry sauce before adding the mousse. The freshness of the berries brings a bright contrast that pairs wonderfully with the creamy texture. You can even try it alongside White Blue Dirt for a festive flair!

  • Rich Caramel Drizzle: Drizzle caramel sauce on top of the mousse for an added dimension of sweetness and flavor. It’s a delightful surprise that enhances each bite.

  • Spicy Kick: For adventurous palates, try adding a pinch of cayenne pepper or cinnamon to the mousse. The heat will create an exciting contrast with the smoothness and sweetness.

  • Crunchy Topping: Top your mousse with crushed pretzels or spiced nuts to add some unexpected crunch. The savory elements perfectly balance the sweet and creamy mousse, much like a Cookies and Cream Cheesecake Cup!

With these variations, you can craft a unique dessert for every occasion and happy palate.

Storage Tips for Pistachio Mousse Cups

  • Fridge: Store leftover Pistachio Mousse Cups in an airtight container for up to 3 days. This keeps them fresh while maintaining that dreamy texture you love.
  • Freezer: Mousse cups can be frozen for up to 1 month. Make sure to use an airtight container, and thaw them in the refrigerator before serving for optimal consistency.
  • Reheating: There’s no need to reheat! Simply serve chilled or at room temperature to enjoy the delightful flavors of your Pistachio Mousse Cups.
  • Avoid Odors: To prevent unwanted flavors, make sure the containers are tightly sealed, preventing any odors from affecting the luscious mousse.

What to Serve with Pistachio Mousse Cups

Create a lovely dining experience by complementing these divine mousse cups with delightful pairings that tantalize the senses.

  • Fresh Berries: Their natural tartness cuts through the richness, providing a refreshing contrast that brightens every bite. Strawberries or raspberries make elegant companions, adding a pop of color and flavor to your dessert.

  • Shortbread Cookies: The buttery crunch of shortbread lends a delightful texture that pairs perfectly with the creamy mousse, creating a balanced contrast that’s simply irresistible.

  • Chocolate Sauce: Drizzled or served on the side, a rich chocolate sauce enhances the nutty flavor, adding depth while tantalizing the taste buds with a hint of decadence.

  • Mint Leaves: A few fresh mint leaves sprinkled on top not only elevate the visual appeal but also offer a refreshing herbal note that beautifully complements the pistachio.

  • Coconut Whipped Cream: A vegan alternative with subtle sweetness and creamy texture, coconut whipped cream brings an exotic flair that pairs harmoniously with the pistachio flavor.

  • Sparkling Water: For a refreshing drink, a glass of sparkling water with a twist of lemon or lime cleanses the palate, enhancing the experience of these dreamy mousse cups.

  • Decadent Coffee: A well-brewed cup of espresso or cappuccino provides a warm, comforting finish to your meal, balancing the sweetness of the dessert while enhancing its nuttiness through contrast.

Let your creativity run wild and mix and match these pairings to share a feast that’s both sophisticated and comforting!

Expert Tips for Pistachio Mousse Cups

  • Ingredient Quality: Always choose fresh, premium pistachio paste and heavy cream to ensure rich flavors and textures in your Pistachio Mousse Cups.

  • Whipping Technique: Start whipping the cream at a low speed, gradually increasing to medium. This prevents splatter and helps achieve the perfect stiff peaks without overwhipping.

  • Gentle Incorporation: When folding in sugar, do so with care to maintain the mousse’s airy structure; overmixing can deflate the whipped cream.

  • Chill for Best Results: Never skip the chilling step! It’s essential for firming up the mousse and melding the flavors, resulting in a delicious final product.

  • Experiment with Variations: Don’t hesitate to personalize your Pistachio Mousse Cups! Try out nut-free or vegan substitutions to cater to different dietary preferences while keeping the deliciousness intact.

Pistachio Mousse Cups Recipe FAQs

How do I choose the right pistachio paste?
Absolutely! When selecting pistachio paste, look for high-quality options that have no fillers or artificial flavors. The best pistachio paste is a vibrant green color, indicating freshness. Check the ingredient list—pure pistachio paste should consist of just pistachios without added sugars or oils for the most authentic flavor.

What’s the best way to store leftover mousse?
Very good question! Leftover Pistachio Mousse Cups can be stored in an airtight container in the fridge for up to 3 days. Make sure to cover them tightly to retain their lovely texture and flavor. If you need to keep them longer, consider freezing them.

Can I freeze Pistachio Mousse Cups?
Yes, you can freeze them! To do so, place the mousse in an airtight container, ensuring it’s covered properly to prevent freezer burn. It can be stored for up to 1 month. When you’re ready to enjoy, simply transfer the mousse to the refrigerator to thaw overnight. This gentle method will help maintain its creamy texture.

What should I do if my mousse is too runny?
Don’t worry; this can happen sometimes! If your mousse turns out too runny, it might be due to under-whipped cream. To rescue it, return the mousse to a mixing bowl and gently re-whip it until you achieve stiff peaks. It’s important to fold it carefully after adding sugar, as overmixing can deflate it. Chill the mousse again after adjusting its consistency.

Are there any dietary considerations for Pistachio Mousse Cups?
Absolutely! If you have guests with dietary restrictions, consider offering nut-free or vegan variations. For nut-free, swap the pistachio paste with sunflower seed butter; for vegan, use coconut cream in place of heavy cream and sweeten with maple syrup. Always double-check that your ingredients are free from allergens, especially for those with nut sensitivities.

Pistachio Mousse Cups

Irresistibly Creamy Pistachio Mousse Cups You’ll Love

Delight in these Pistachio Mousse Cups, a creamy dessert perfect for any occasion.
Prep Time 15 minutes
Chilling Time 2 hours
Total Time 2 hours 15 minutes
Servings: 4 cups
Course: Dessert
Cuisine: Mediterranean
Calories: 350

Ingredients
  

For the Mousse
  • 150 grams Pistachio Paste Opt for quality without fillers.
  • 1 cup Heavy Cream Full-fat is essential.
  • 1/2 cup Sugar Adjust to taste.
For the Toppings
  • 1 cup Whipped Cream Adds an airy touch.
  • 1/2 cup Chopped Pistachios For garnish.
  • 1/4 cup Chocolate Shavings Decadent finishing touch.

Equipment

  • Mixing Bowl
  • Electric Mixer
  • Rubber Spatula
  • Plastic Wrap

Method
 

Step-by-Step Instructions
  1. Combine pistachio paste with heavy cream in a mixing bowl. Whip on medium speed for 3–5 minutes until stiff peaks form.
  2. Gently fold in sugar to the whipped pistachio cream with a rubber spatula, keeping the mixture airy.
  3. Spoon mixture into cups, cover with plastic wrap, and chill in the refrigerator for at least 2 hours.
  4. Garnish with whipped cream, chopped pistachios, and chocolate shavings before serving.

Nutrition

Serving: 1cupCalories: 350kcalCarbohydrates: 30gProtein: 4gFat: 25gSaturated Fat: 15gPolyunsaturated Fat: 2gMonounsaturated Fat: 8gCholesterol: 100mgSodium: 60mgPotassium: 300mgFiber: 2gSugar: 20gVitamin A: 500IUCalcium: 50mgIron: 1mg

Notes

Use fresh, premium ingredients for the best results. Chill is essential for firming up the mousse.

Tried this recipe?

Let us know how it was!

Refreshing Lavender Lemonade That’s Perfect for Summer Sips

On a sun-soaked afternoon, the gentle scent of lavender dances through my kitchen as I whip up a batch of Homemade Lavender Lemonade. This refreshing drink is not just a thirst-quencher; it perfectly marries the zesty brightness of lemons with the soothing charm of floral notes. Whether you’re hosting a summer picnic or just want to impress at your next gathering, this delightful beverage is bound to be a showstopper. With its quick prep time and customizable sweetness, you can tailor it to suit your taste or dietary preferences—perfect for anyone looking to step away from fast food. Curious how to make this elegant addition to your summer sips? Let’s dive into the recipe!

Why Choose Lavender Lemonade?

Refreshing: This delightful drink offers a unique twist on traditional lemonade, perfect for hot summer days and gatherings.

Customizable: Easily tailor the sweetness to your liking with honey, agave, or even fresh fruit. Experiment with flavors to find your perfect blend!

Quick to make: In just a few simple steps, you can whip up a batch that will impress your guests and keep you refreshed.

Elegant: With its stunning lavender hue, this lemonade is not just tasty but a beautiful addition to your table.

Taste Profile: The harmonious blend of floral and citrus awakens your palate, reminiscent of a lovely garden in full bloom. Enjoy it alongside light dishes, such as grilled chicken salad or crispy spring rolls!

Lavender Lemonade Ingredients

For the Lavender Syrup
Water – Base liquid; use filtered water for a cleaner taste.
Sugar – Sweetener; substitute with honey or agave for a more natural option.
Lavender Buds – Flavor agent; ensure to use culinary-grade lavender for the best results.

For the Lemonade
Lemon Juice – Flavor enhancer; freshly squeezed juice is essential for that vibrant taste.
Ice – Chilling agent; crucial for a refreshing drink; consider adding lemon slices or mint leaves for garnish.

This collection of ingredients makes crafting your Lavender Lemonade a delightful and enjoyable experience!

Step‑by‑Step Instructions for Lavender Lemonade

Step 1: Make Lavender Syrup
In a medium saucepan, combine 1 cup of filtered water and 1 cup of sugar. Add 1 tablespoon of culinary-grade lavender buds, then heat over medium heat, stirring gently until the sugar dissolves, about 5 minutes. Avoid boiling the mixture to preserve the delicate flavor of the lavender. You’ll know it’s ready when it’s clear and fragrant.

Step 2: Steep Lavender
Once the sugar has dissolved, remove the saucepan from heat and let it steep for 15 to 20 minutes. During this time, the lavender infuses its lovely floral notes into the syrup, turning it a beautiful lavender hue. Keep an eye on the color change and aroma; it should sweeten while maintaining a light floral essence.

Step 3: Strain Syrup
After steeping, pour the syrup through a fine mesh strainer into a bowl to filter out the lavender buds. Allow the syrup to cool for about 10 minutes, ensuring you capture all the fragrant goodness. The result should be a lovely, aromatic syrup that will serve as the base for your Lavender Lemonade.

Step 4: Juice Lemons
While the syrup cools, take 4 to 6 fresh lemons and squeeze them to extract around 1 cup of juice. Use a handheld juicer or a fork to maximize juice extraction, straining out any seeds or pulp as you go. The freshly squeezed lemon juice is essential for that zesty flavor you want in your Lavender Lemonade.

Step 5: Combine Ingredients
In a large pitcher, mix the cooled lavender syrup with the freshly squeezed lemon juice and 4 cups of cold filtered water. Stir the mixture well, ensuring the flavors meld together beautifully. Taste to see if you want to adjust sweetness or acidity, and feel free to add more water or syrup according to your preference.

Step 6: Serve
To serve the Lavender Lemonade, fill your glasses with ice and pour the chilled mixture over the ice. For an elegant touch, garnish each glass with fresh lemon slices, mint leaves, or a sprinkle of lavender buds. Enjoy this refreshing drink while it’s cold, letting the delightful flavors dance on your palate!

Make Ahead Options

Making Lavender Lemonade ahead of time is a fantastic way to save time for busy gatherings or picnics! You can prepare the lavender syrup up to 3 days in advance and store it in an airtight container in the refrigerator, ensuring that the floral flavors stay vibrant. Simply combine the cooled lavender syrup with the freshly squeezed lemon juice and cold water no more than 24 hours before serving to maintain its fresh taste. When you’re ready to impress your guests, just pour the mixture over ice and garnish with lemon slices or mint. This way, you’ll have a refreshing, elegant drink that’s just as delightful as when it’s freshly made, all with minimal effort!

Lavender Lemonade Variations & Substitutions

Feel free to let your creativity flow as you customize this delightful drink to suit your personal taste and dietary needs!

  • Sweetener Swap: Use honey or maple syrup instead of sugar for a more natural sweetness.
  • Fruit Infusion: Add muddled berries or fresh peaches for a fruity twist that brightens the lemonade.
  • Herb Enhancements: Incorporate fresh basil or mint alongside the lavender for an aromatic herbal note.
  • Spicy Kick: Introduce a hint of fresh ginger or a pinch of cayenne for a spicy surprise in every sip.
  • Citrus Variations: Mix in fresh grapefruit or lime juice with the lemon for citrus complexity that dances on your palate.
  • Sparkling Twist: Replace still water with sparkling water for a fizzy, festive twist perfect for special occasions.
  • Lavender Berry Blend: Combine dried lavender with essential oils of ripe blueberries or raspberries to elevate the floral notes and create a vibrant flavor experience.

As you explore your creativity with these variations, consider serving your Lavender Lemonade alongside a refreshing watermelon feta salad or perhaps a delightful batch of homemade spring rolls to enhance your summer gathering experience!

What to Serve with Lavender Lemonade

Elevate your summer gatherings by pairing this delicious lemonade with dishes that enhance its refreshing floral notes.

  • Crispy Spring Rolls: These light and crunchy rolls are filled with fresh vegetables, making them a perfect contrast to the sweet, floral lavender.

  • Grilled Chicken Salad: The savory grilled chicken brings hearty flavors that balance beautifully with the tangy lemonade, creating a satisfying meal.

  • Watermelon Feta Salad: Combining sweet watermelon with salty feta, this vibrant salad complements the aromatic lemonade, adding a delightful texture.

  • Lemon Basil Pasta: This aromatic pasta dish showcases zesty flavors that echo the lemonade, fusing freshness and savoriness in each bite.

  • Mint Iced Tea: Refreshing and cool, mint tea enhances the lavender notes, creating a harmonious blend of flavors for sipping in the sun.

  • Lemon Sorbet: For dessert, this light and tangy sweet treat provides a perfect palate cleanser alongside your lavender lemonade, making every sip feel indulgent.

Expert Tips for Lavender Lemonade

  • Fresh Ingredients: Always use fresh lemons and culinary-grade lavender buds for the best flavor. Avoid any bottled lemon juice to truly enhance your Lavender Lemonade.

  • Sweetness Adjustment: Taste your lemonade before serving to ensure the sweetness is to your liking. You can easily add more syrup or a natural sweetener like agave as needed.

  • Avoid Over-Steeping: Don’t steep lavender for more than 20 minutes; longer steeping can lead to bitterness, ruining the delicate flavor profile.

  • Chill It Right: Serve your Lavender Lemonade ice-cold for maximum refreshment. Adding ice cubes made from lavender syrup can elevate the presentation and flavor.

  • Experiment with Variations: Feel free to swap out sweeteners or add fruits and herbs like basil or berries to create unique flavor combinations that suit your tastes!

How to Store and Freeze Lavender Lemonade

Fridge: Store Lavender Lemonade in an airtight container in the refrigerator for up to 5 days. Always give it a gentle stir before serving as flavors may settle.

Freezer: For longer preservation, freeze Lavender Lemonade in ice cube trays for up to 3 months. Pop the cubes into smoothies or blend them into a slush for a refreshing treat.

Thawing: To enjoy frozen lemonade, transfer cubes to the refrigerator to thaw overnight, or blend directly into a slushy drink for an instant refreshment.

Serving Tip: Add a few fresh mint leaves or lemon slices when serving to elevate your Lavender Lemonade experience!

Lavender Lemonade Recipe FAQs

What kind of lavender should I use?
Absolutely! For the best flavor, it’s essential to use culinary-grade lavender. Avoid decorative or aromatic lavender varieties, as they may not be safe for consumption. If you’re using fresh lavender, double the amount to about 2 tablespoons, as it has a milder flavor compared to dried buds.

How should I store Lavender Lemonade?
You can store Lavender Lemonade in an airtight container in the refrigerator for up to 5 days. Just remember to give it a gentle stir before serving, as the flavors may settle. If you’re looking to make it ahead for an event, this storage method is perfect!

Can I freeze Lavender Lemonade?
Absolutely! To freeze Lavender Lemonade, pour it into ice cube trays and freeze for up to 3 months. These flavorful ice cubes can be used in future drinks or blended into slushes for a refreshing treat. To thaw, simply transfer the cubes to the refrigerator or blend them directly into a slushy mix when you’re craving a cold drink.

What if my Lavender Lemonade turns out too sweet?
No worries! If you find your Lavender Lemonade is too sweet, you can easily adjust it to taste. Start by adding more cold water to dilute the sweetness. You can also squeeze in more fresh lemon juice to balance the flavors. Always taste as you go!

Is there a way to make this Lavender Lemonade non-alcoholic for kids?
Very! This Lavender Lemonade is inherently non-alcoholic, making it a perfect refreshment for kids and adults alike. Just ensure that your ingredients are suitable for everyone. For added fun, consider letting children help with garnishing using lemon slices and fresh mint!

Can I use other sweeteners instead of sugar?
Certainly! If you’re looking for alternatives, honey, agave syrup, or even maple syrup can work wonderfully in your Lavender Lemonade. Just keep in mind that the sweetness levels may differ slightly, so taste and adjust as needed for your perfect blend!

Lavender Lemonade

Refreshing Lavender Lemonade That's Perfect for Summer Sips

Enjoy a refreshing twist with Lavender Lemonade, blending zesty lemons and floral notes for the perfect summer drink.
Prep Time 20 minutes
Cook Time 5 minutes
Steeping Time 20 minutes
Total Time 45 minutes
Servings: 4 cups
Course: Drinks
Cuisine: American
Calories: 120

Ingredients
  

For the Lavender Syrup
  • 1 cup Filtered water Base liquid; use filtered water for a cleaner taste.
  • 1 cup Sugar Sweetener; substitute with honey or agave for a more natural option.
  • 1 tablespoon Culinary-grade lavender buds Ensure to use culinary-grade lavender for the best results.
For the Lemonade
  • 1 cup Fresh lemon juice Use freshly squeezed juice for that vibrant taste.
  • 4 cups Cold filtered water Combine with syrup and lemon juice.
  • Ice Ice Chilling agent; consider adding lemon slices or mint leaves for garnish.

Equipment

  • Medium saucepan
  • Fine mesh strainer
  • pitcher
  • Handheld juicer

Method
 

Step-by-Step Instructions
  1. In a medium saucepan, combine 1 cup of filtered water and 1 cup of sugar. Add 1 tablespoon of culinary-grade lavender buds, then heat over medium heat, stirring gently until the sugar dissolves, about 5 minutes.
  2. Once the sugar has dissolved, remove the saucepan from heat and let it steep for 15 to 20 minutes.
  3. After steeping, pour the syrup through a fine mesh strainer into a bowl to filter out the lavender buds. Allow the syrup to cool for about 10 minutes.
  4. While the syrup cools, take 4 to 6 fresh lemons and squeeze them to extract around 1 cup of juice.
  5. In a large pitcher, mix the cooled lavender syrup with the freshly squeezed lemon juice and 4 cups of cold filtered water.
  6. To serve, fill your glasses with ice and pour the chilled mixture over the ice, garnishing with fresh lemon slices or mint leaves.

Nutrition

Serving: 1cupCalories: 120kcalCarbohydrates: 30gSodium: 5mgPotassium: 80mgSugar: 29gVitamin C: 25mg

Notes

Store Lavender Lemonade in an airtight container in the refrigerator for up to 5 days. Freeze in ice cube trays for longer preservation.

Tried this recipe?

Let us know how it was!

Moist Carrot Cake Banana Bread with Velvety Cream Cheese Frosting

As I pulled a steaming loaf from the oven, the air filled with the enticing aroma of sweet bananas mingling with warm spices—talk about a sensory delight! This Moist Carrot Cake Banana Bread is a delicious blend of two classics that make every bite an experience worth savoring. With the perfect balance of rich flavors and a tender crumb, it’s the ideal quick bread for any occasion, whether you’re surprising friends at brunch or celebrating Easter with family. Plus, slathering it with creamy homemade frosting adds an irresistible finish that transforms this quick bread into a dessert masterpiece. Are you ready to indulge in a slice of this delightful fusion? Let’s get baking!

Why is this bread so irresistible?

Irresistible Fusion: This Carrot Cake Banana Bread beautifully merges the best of both worlds, delivering a moist quick bread enriched with warm spices and sweet banana goodness.

Quick to Prepare: With straightforward ingredients and minimal prep time, it’s perfect for busy bakers craving homemade joy.

Delectable Cream Cheese Frosting: The luxurious cream cheese frosting elevates the flavor profile, inviting you to indulge.

Versatile Treat: Enjoy it as breakfast, a dessert, or a special snack with your favorite cup of coffee or tea!

Memorable Impressions: Whether you’re hosting a gathering or just treating yourself, this bread promises smiles and compliments, making it a must-try at your next event! Don’t forget to also check out my delicious Buttermilk Pancakes for another crowd-pleaser!

Carrot Cake Banana Bread Ingredients

For the Bread

  • Butter – Adds moisture and richness; substitute with margarine for a dairy-free option.
  • Granulated Sugar – Provides sweetness and structure; can use coconut sugar for a lower glycemic index.
  • Brown Sugar – Contributes caramel flavor and moisture, enhancing overall taste.
  • Eggs – Acts as a binder; flax eggs work well for a vegan version, keeping the recipe inclusive.
  • All-Purpose Flour – Forms the base of the bread structure; opt for gluten-free flour to accommodate dietary needs.
  • Baking Soda – This leavening agent ensures a nice rise for your carrot cake banana bread.
  • Salt – Enhances flavor; a key component for balancing sweetness.
  • Mashed Bananas – Adds natural sweetness and moisture; around 3-4 medium bananas will do wonders! Consider unsweetened applesauce for a lower-sugar alternative.
  • Vanilla Extract – Provides aromatic depth to the flavor profile.
  • Ground Cinnamon – Introduces warmth and spice; optional nutmeg, ginger, or allspice can add even more flavor complexity.
  • Shredded Carrots – Brings texture, moisture, and nutrition while honoring the classic carrot cake tradition.

For the Cream Cheese Frosting

  • Cream Cheese – The creamy and tangy base of the frosting; make sure it’s softened for easy mixing.
  • Butter – Adds richness to the frosting; ensure it’s softened for better incorporation.
  • Powdered Sugar – Sweetens and helps achieve that delightful frosting consistency.
  • Vanilla Extract – Elevates frosting flavor, making it irresistible.
  • Ground Cinnamon – Adds a cozy warmth to your frosting, tying together those comforting flavors.

With these ingredients, you’re just a step away from creating an unforgettable Carrot Cake Banana Bread that’s sure to delight!

Step‑by‑Step Instructions for Moist Carrot Cake Banana Bread

Step 1: Preheat and Prepare Pans
Begin by preheating your oven to 350°F (175°C) and greasing two 8×4 inch loaf pans with butter or cooking spray. This will ensure your Moist Carrot Cake Banana Bread releases easily once baked. As the oven heats, gather your ingredients, setting the stage for a delightful baking experience.

Step 2: Cream the Butters and Sugars
In a large mixing bowl, cream together softened butter, granulated sugar, and brown sugar using a hand mixer or stand mixer on medium speed. Mix for about 3-5 minutes until the mixture is light and fluffy, giving it a pale, airy appearance. This step enhances the moisture of your quick bread, making it truly irresistible.

Step 3: Add Eggs and Vanilla
Next, beat in two eggs one at a time, along with a splash of vanilla extract, until everything is well combined. The mixture should take on a slightly thicker consistency. This step adds essential moisture and a touch of flavor to your Carrot Cake Banana Bread, ensuring a tender crumb.

Step 4: Incorporate Dry Ingredients
Sift in your all-purpose flour, baking soda, ground cinnamon, and salt directly into the mixing bowl. Gently stir the mixture with a spatula or wooden spoon until just combined; be careful not to overmix. This will help maintain the softness of the bread while ensuring that your dry ingredients are evenly distributed for the best flavor.

Step 5: Fold in Fruits and Veggies
Now it’s time to fold in the shredded carrots and mashed bananas gently into the batter. Use a light hand to combine everything until the fruits and veggies are evenly mixed throughout. These ingredients will not only add natural sweetness but also moisture to your Carrot Cake Banana Bread, resulting in a wonderfully rich texture.

Step 6: Transfer and Bake
Pour the prepared batter evenly into your greased loaf pans, smoothing the tops with a spatula. Place the pans in the preheated oven and bake for 30-35 minutes. Check for doneness by inserting a toothpick into the center; it should come out clean or with just a few moist crumbs clinging to it.

Step 7: Cool Before Frosting
Once baked, remove the pans from the oven and allow the bread to cool in the pans for about 10 minutes. After this, turn the loaves out onto wire racks to cool completely. Allowing your Carrot Cake Banana Bread to cool ensures the frosting will adhere properly without melting into a gooey mess.

Step 8: Make the Cream Cheese Frosting
For the cream cheese frosting, beat together softened cream cheese and butter until smooth and creamy. Gradually add in powdered sugar, vanilla extract, and a sprinkle of ground cinnamon. Mix until you achieve a fluffy, spreadable consistency, ready to elevate the flavors of your moist quick bread.

Step 9: Frost and Serve
Once your Carrot Cake Banana Bread has cooled completely, generously spread the cream cheese frosting over the top of the loaves. Slice into generous pieces and serve, reveling in the delightful flavors with each bite. This beautiful fusion of carrot cake and banana bread is sure to become a family favorite!

How to Store and Freeze Carrot Cake Banana Bread

Fridge: Store leftover Carrot Cake Banana Bread in an airtight container for up to 1 week. This keeps it moist and fresh, allowing you to enjoy its flavors longer.

Freezer: For longer storage, wrap the cooled bread tightly in plastic wrap and then in aluminum foil. It can be frozen for up to 3 months; thaw overnight in the fridge before enjoying.

Reheating: To serve warm, slice individual pieces and microwave for 10-15 seconds until slightly warmed. It’s perfect for a cozy snack or breakfast.

Room Temperature: If consumed within a day or two, you can leave Carrot Cake Banana Bread wrapped at room temperature. Just be sure it’s covered to keep it moist!

Carrot Cake Banana Bread Variations

Feel free to get creative with these delightful variations, each one tailored to inspire your taste buds!

  • Nuts: Add chopped walnuts or pecans for a satisfying crunch. They introduce a lovely texture and nutty flavor that beautifully pairs with the sweetness of banana and spice of carrots.

  • Raisins: Incorporate golden raisins or dried cranberries for a burst of chewiness. Their natural sweetness complements the bread perfectly, reminiscent of traditional carrot cake flavors.

  • Tropical Twist: For a tropical flair, include crushed pineapple (drained) into the batter. This adds a refreshing sweetness and moisture that takes your quick bread to a whole new level.

  • Coconut Delight: Stir in shredded coconut for extra texture and a hint of tropical aroma. Its subtle sweetness can elevate the overall flavor profile, making it even more indulgent.

  • Chocolate Chips: Mix in semi-sweet or dark chocolate chips for a rich, decadent treat. Who doesn’t love chocolate? It adds a delightful surprise to your moist bread!

  • Spice It Up: Don’t shy away from adding a pinch of nutmeg or ginger for an extra layer of warmth and complexity. These spices will dance joyfully alongside the cinnamon and enhance the bread’s flavor.

  • Fruit Boost: Swap some of the mashed bananas for unsweetened applesauce for a fruity twist and lower sugar option. This will give you a moist texture while lightening the calories.

  • Frosting Variation: Try using a flavored cream cheese frosting, like lemon or orange zest infused, to add a zingy brightness. This will give your Carrot Cake Banana Bread an unexpected yet delightful twist!

Remember, the beauty of homemade treats is in the personal touch—so mix and match these ideas to create your perfect version. And if you love experimenting in the kitchen, why not also check out my scrumptious Pistachio Carrot Cake or this vibrant Roasted Carrot Lentil Salad for more delicious inspirations?

What to Serve with Moist Carrot Cake Banana Bread

Indulging in a warm slice of this delightful quick bread opens the door to a world of appetizing pairings that can elevate your experience.

  • Creamy Mashed Potatoes: The silky texture and buttery flavor of mashed potatoes contrast beautifully with the sweetness of the bread, creating a satisfying balance.

  • Fresh Fruit Salad: A vibrant mix of berries and tropical fruits adds a refreshing burst to your meal, enhancing the fruity notes of the banana bread.

  • Herbed Cream Cheese Spread: This tangy, savory spread offers a delightful contrast, enhancing the rich flavors of the cream cheese frosting on your Carrot Cake Banana Bread.

  • Warm Vanilla Milk: Smooth and comforting, a cup of warm vanilla milk pairs nicely with the sweet spices in the bread, making it a cozy drink choice.

  • Simple Green Salad: A light salad with fresh greens, cucumbers, and a zesty vinaigrette adds a refreshing crunch that complements the dense sweetness of the bread.

  • Iced Lemon Tea: The bright acidity of iced lemon tea refreshes the palate, while its slight sweetness matches perfectly with the moist, rich banana bread.

  • Chocolate Chip Cookies: For those with a sweet tooth, serving a small cookie alongside adds a delightful crunch and an extra dose of indulgence.

  • Coffee or Espresso: Nothing beats the classic pairing of coffee with a sweet treat. The bold flavors of your favorite brew enhance the warmth of the spices in the bread and make every bite more enjoyable.

Expert Tips for Carrot Cake Banana Bread

  • Ingredient Temperature: Ensure all ingredients are at room temperature before mixing. This promotes even blending and contributes to a better texture in your Carrot Cake Banana Bread.

  • Avoid Overmixing: Mix just until combined after adding dry ingredients. Overmixing can lead to a dense bread; gentle folding keeps it light and moist.

  • Banana Texture: Mash your bananas with a fork but leave some small lumps for added texture. This keeps the banana flavor prominent without becoming overly mushy.

  • Watch Your Browning: If the top of your bread browns too quickly, cover it loosely with aluminum foil in the last 10 minutes of baking. This prevents burning while allowing the inside to cook fully.

  • Cooling Time: Let your Carrot Cake Banana Bread cool in the pans for 10 minutes before transferring to wire racks. This helps maintain its shape and prevents sticking.

  • Flavor Enhancements: Experiment with spices! Adding a pinch of nutmeg or ginger can elevate the flavor profile of your bread even further.

Make Ahead Options

These Carrot Cake Banana Bread loaves are a fantastic option for meal prep! You can prepare the batter up to 24 hours in advance and refrigerate it, ensuring all the flavors meld beautifully. Just remember to cover the bowl tightly to prevent any drying or browning. Additionally, you can shred the carrots and mash the bananas a day ahead and store them separately in the refrigerator. When ready to bake, simply combine the prepped ingredients, pour into your greased pans, and bake as directed. This way, you’ll have all the deliciousness with minimal effort on the day you’re ready to enjoy your delectable quick bread!

Carrot Cake Banana Bread Recipe FAQs

How do I select ripe bananas for the best flavor?
Absolutely! Choose bananas that are well-ripe with a few brown spots; they should feel slightly soft when you press them. These perfectly ripe bananas will offer the natural sweetness and moisture that elevate your Carrot Cake Banana Bread to the next level.

What’s the best way to store leftover Carrot Cake Banana Bread?
You can store leftover Carrot Cake Banana Bread in an airtight container at room temperature for 1-2 days. For longer storage, wrap it tightly in plastic wrap, then aluminum foil, and freeze for up to 3 months. Just allow it to thaw overnight in the refrigerator before enjoying!

Can I freeze Carrot Cake Banana Bread?
Yes, you can! To freeze your Carrot Cake Banana Bread, first allow it to cool completely. Then, wrap individual slices or whole loaves in plastic wrap, followed by aluminum foil to protect against freezer burn. When ready to enjoy, simply remove it from the freezer and thaw in the refrigerator for a few hours or overnight.

Why did my Carrot Cake Banana Bread come out dense?
Very! A dense bread may result from overmixing the batter or using cold ingredients. Make sure to mix until just combined, and try to use room temperature ingredients. If you accidentally overmix, your bread may still turn out delicious, but a gentle touch is key for that perfect light crumb.

Are there any dietary considerations to keep in mind?
Definitely! This recipe can be adapted for different dietary needs. For a dairy-free option, substitute butter with margarine and use dairy-free cream cheese for the frosting. Additionally, if there are allergies to nuts, consider omitting any possible nut toppings or additions. Always check individual ingredient labels to ensure they align with dietary restrictions.

Carrot Cake Banana Bread

Moist Carrot Cake Banana Bread with Velvety Cream Cheese Frosting

This Moist Carrot Cake Banana Bread blends sweet bananas and warm spices, delivering a delightful dessert experience.
Prep Time 15 minutes
Cook Time 35 minutes
Cooling Time 10 minutes
Total Time 1 hour
Servings: 12 slices
Course: Dessert
Cuisine: American
Calories: 250

Ingredients
  

For the Bread
  • 1 cup Butter Softened; can substitute with margarine for dairy-free option.
  • 1 cup Granulated Sugar Can use coconut sugar for lower glycemic index.
  • 1/2 cup Brown Sugar Contributes caramel flavor and moisture.
  • 2 large Eggs Can substitute with flax eggs for vegan version.
  • 2 cups All-Purpose Flour Gluten-free flour can be used.
  • 1 teaspoon Baking Soda For leavening.
  • 1/2 teaspoon Salt Enhances flavor.
  • 3-4 medium Mashed Bananas Consider using unsweetened applesauce for a lower-sugar option.
  • 1 teaspoon Vanilla Extract
  • 1 teaspoon Ground Cinnamon Optional spices can include nutmeg, ginger, or allspice.
  • 1 cup Shredded Carrots Adds texture and nutrition.
For the Cream Cheese Frosting
  • 8 oz Cream Cheese Softened.
  • 1/2 cup Butter Softened.
  • 2 cups Powdered Sugar
  • 1 teaspoon Vanilla Extract
  • 1/2 teaspoon Ground Cinnamon

Equipment

  • Mixing Bowl
  • Hand mixer
  • Loaf pans
  • Spatula

Method
 

Baking Instructions
  1. Preheat your oven to 350°F (175°C) and grease two 8x4 inch loaf pans with butter or cooking spray.
  2. In a large mixing bowl, cream together softened butter, granulated sugar, and brown sugar until light and fluffy, about 3-5 minutes.
  3. Beat in the eggs one at a time, along with a splash of vanilla extract, until well combined.
  4. Sift in the all-purpose flour, baking soda, ground cinnamon, and salt. Stir gently until just combined.
  5. Fold in the shredded carrots and mashed bananas gently into the batter.
  6. Pour the prepared batter into the greased loaf pans and bake for 30-35 minutes.
  7. Once baked, allow the bread to cool in the pans for about 10 minutes before transferring to wire racks.
  8. For the frosting, beat together softened cream cheese and butter until smooth. Gradually add powdered sugar, vanilla extract, and ground cinnamon.
  9. Once cooled, generously spread the cream cheese frosting over the top of the loaves.

Nutrition

Serving: 1sliceCalories: 250kcalCarbohydrates: 35gProtein: 3gFat: 12gSaturated Fat: 7gPolyunsaturated Fat: 1gMonounsaturated Fat: 4gCholesterol: 40mgSodium: 180mgPotassium: 150mgFiber: 1gSugar: 15gVitamin A: 500IUVitamin C: 2mgCalcium: 20mgIron: 1mg

Notes

Ensure all ingredients are at room temperature for better blending. Avoid overmixing to keep the bread light and moist.

Tried this recipe?

Let us know how it was!