Delicious Honey Walnut Shrimp: Elevate Your Homemade Dinner

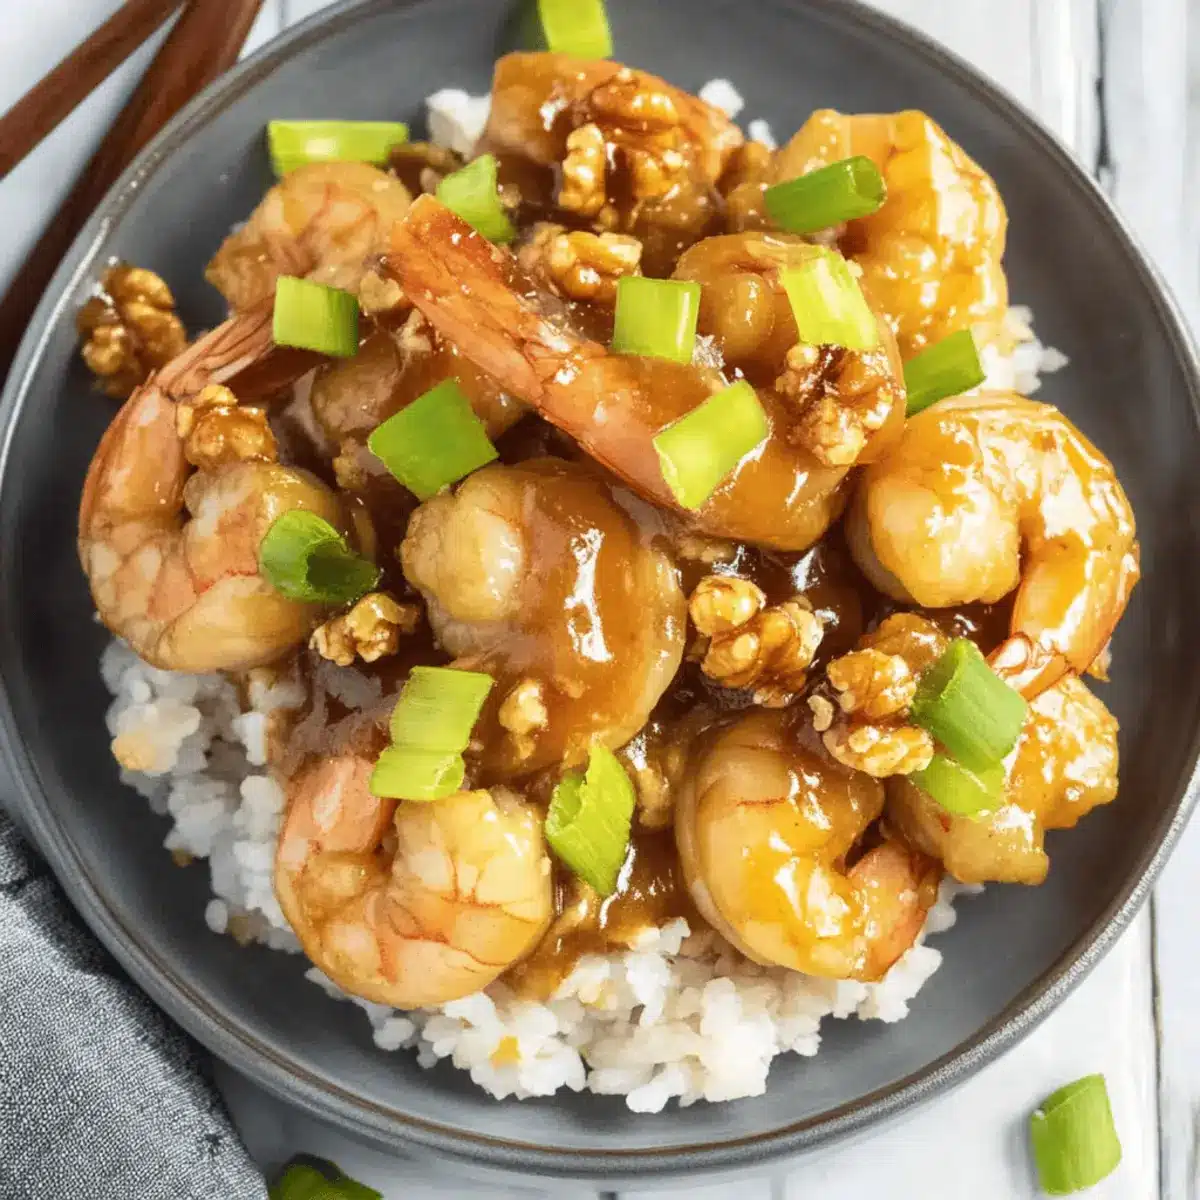
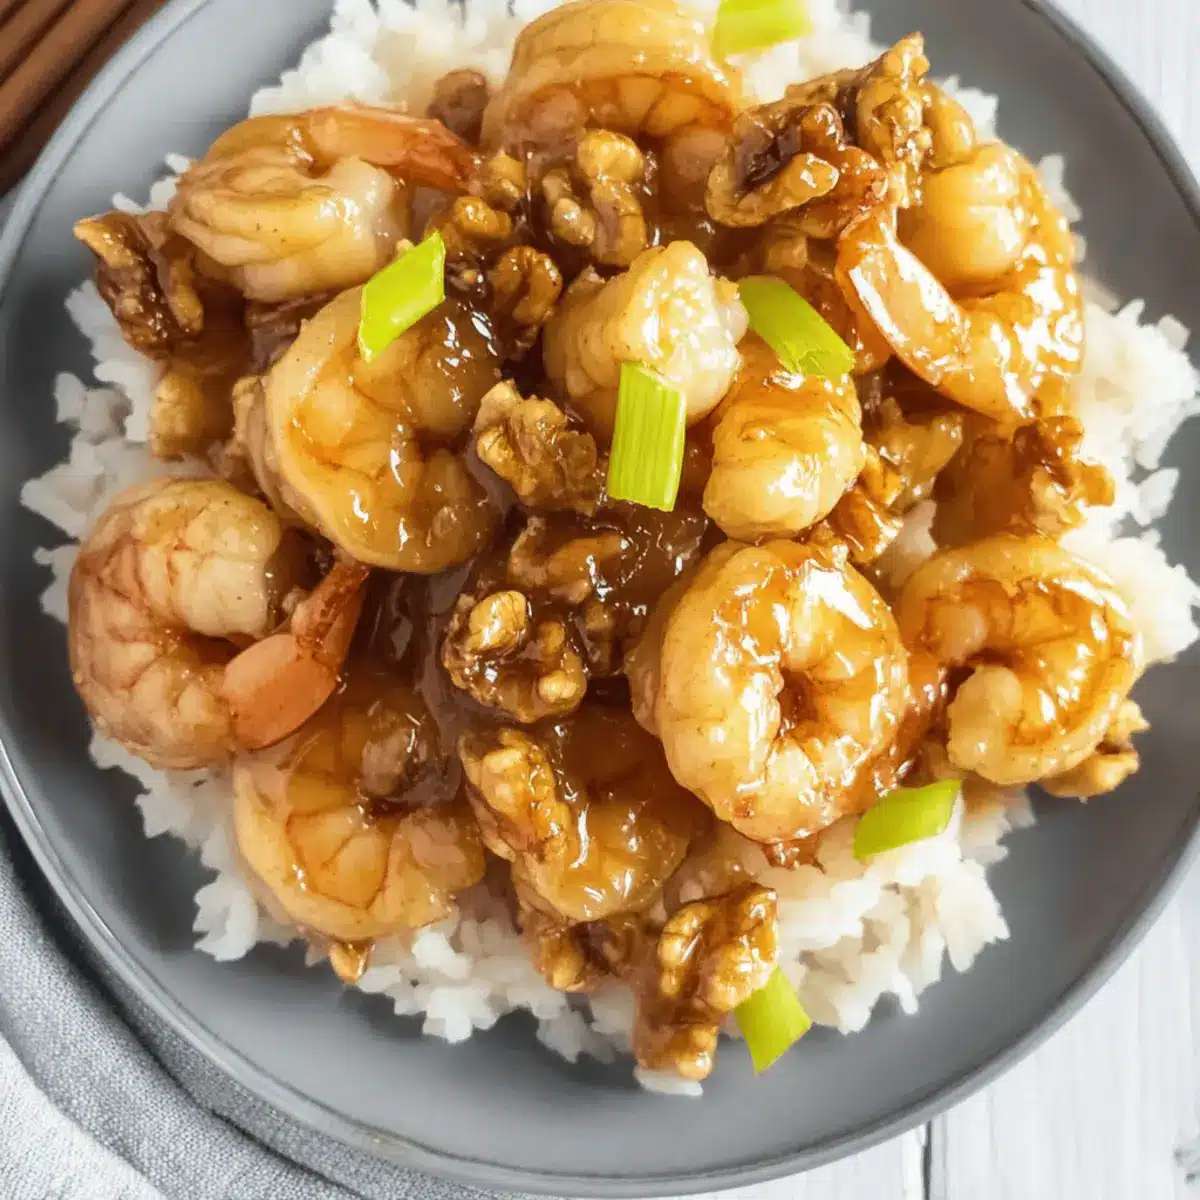
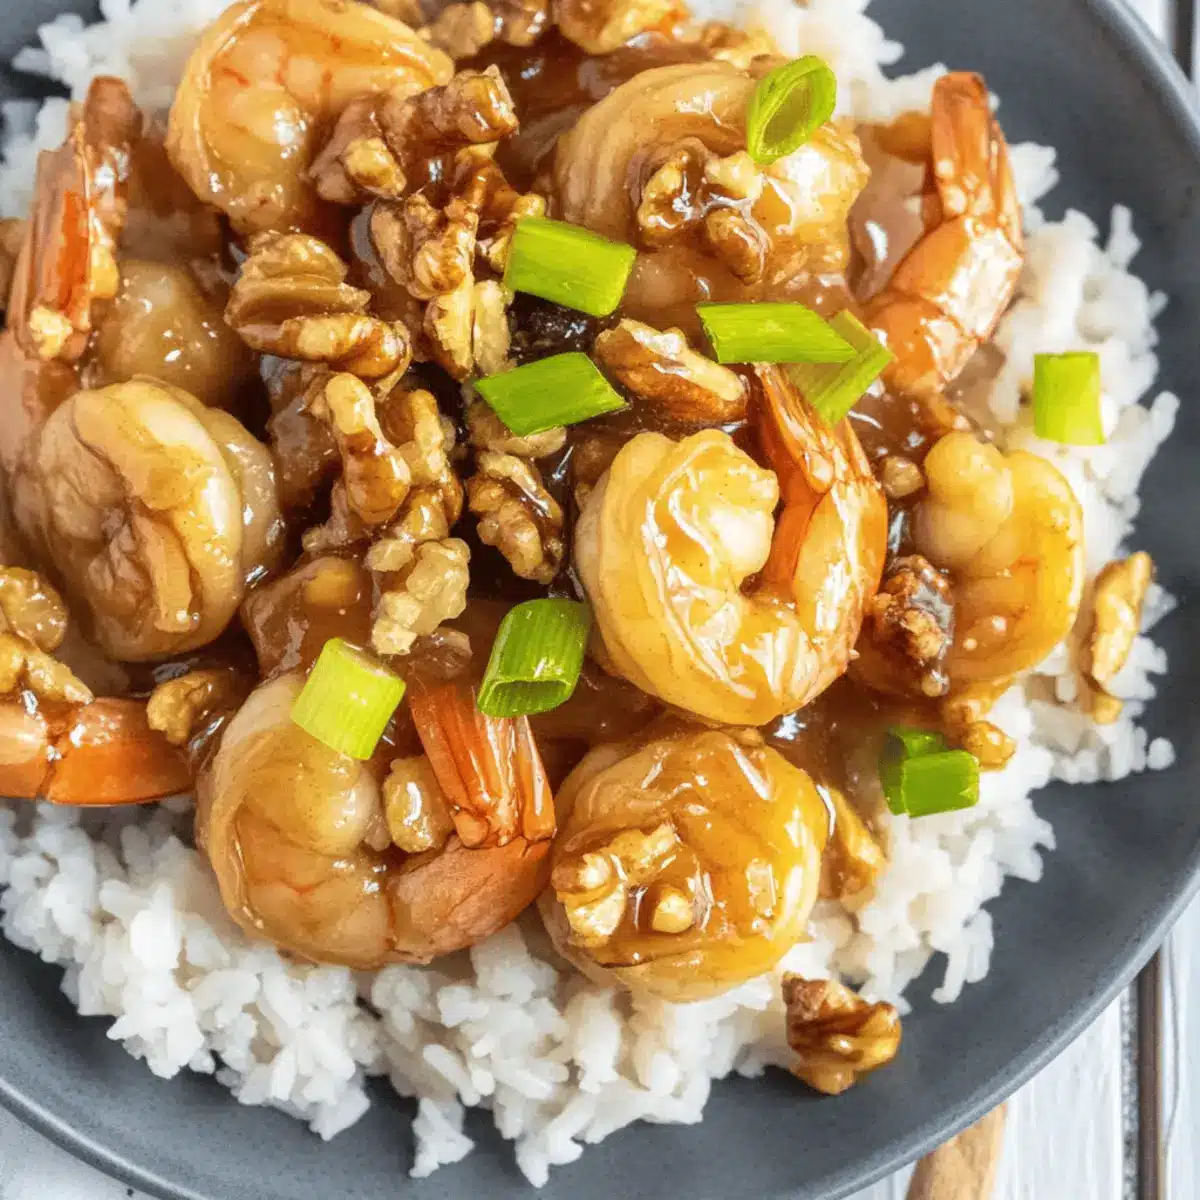
As I stood in my kitchen, the enticing aroma of frying shrimp immediately transported me back to my favorite local Chinese takeout spot. I could almost hear the sizzling sound as crispy Honey Walnut Shrimp took shape before my eyes. This beloved dish is a delightful marriage of crunchy, golden shrimp drenched in a creamy, sweet sauce, all topped with irresistible candied walnuts. Not only is it a quick, hassle-free recipe to whip up, but it also surpasses anything fast food can offer, elaborate and unforgettable. Imagine serving this crowd-pleaser at your next dinner gathering; you’ll not only impress your guests but also show them that homemade goodness can be just as indulgent and decadent! So, are you ready to bring a taste of takeout nirvana into your own home? Let’s dive into making this crunchy, creamy delight!

Why is Honey Walnut Shrimp a must-try?

Irresistible Flavors: Get ready for a flavor explosion with the blend of creamy sauce and sweet, crunchy walnuts.
Quick and Easy: This recipe is designed for busy folks craving a delicious homemade meal without spending hours in the kitchen.
Versatile Dish: Customize with wild shrimp or substitute walnuts with almonds for a twist!
Crowd-Pleaser: Perfect for entertaining, it’s sure to impress family and friends, making every gathering memorable.
Nostalgic Comfort: Evoke those takeout cravings right at home and elevate your dinner game above fast food.
Don’t forget to serve it on a bed of Jasmine rice for the full experience, and if you have a craving for seafood, try our Garlic Butter Shrimp for another tantalizing option!

Honey Walnut Shrimp Ingredients

For the Fried Shrimp
Large Shrimp (peeled and deveined) – The star of the dish; opt for wild-caught for enhanced flavor and health benefits.
Egg Whites – Helps create a light batter; can be replaced with aquafaba for a vegan version.
Cornstarch – Provides that perfect crispiness; all-purpose flour can be used as an alternative if needed.
Vegetable Oil – Essential for frying; canola or peanut oil will add delightful nuances to the flavor.

For the Candied Walnuts
Walnut Halves – Adds nuttiness and crunch; try substituting with almonds for a fresh twist.
Granulated Sugar – Enhances sweetness and aids in caramelizing the walnuts; consider using coconut sugar for a deeper flavor.
Water – Helps in cooking the walnuts to achieve that sweet candy coating.

For the Creamy Sauce
Mayonnaise – Acts as the base for a rich sauce; Greek yogurt can lighten this up while keeping it creamy.
Honey – Infuses sweetness and complexity; substitute with maple syrup if you’re craving a unique taste.
Condensed Milk – Contributes to creaminess and extra sweetness; feel free to omit if you prefer a less sweet profile.
Crushed Red Pepper Flakes – Adds that perfect hint of heat; adjust according to your spice tolerance for the ideal balance.

These simplified steps and tasty ingredients make crafting the perfect Honey Walnut Shrimp a delightful culinary adventure, bringing the magic of homemade Chinese cuisine right to your table!

Step‑by‑Step Instructions for Honey Walnut Shrimp

Step 1: Prepare the Candied Walnuts
In a saucepan, combine 1 cup of water and 1 cup of granulated sugar over medium heat. Add 1 cup of walnut halves and boil for about 2 minutes, stirring occasionally until the sugar dissolves. Using a slotted spoon, transfer the walnuts onto a parchment-lined baking sheet to cool and dry, ensuring they have a sugary coating that hardens as they cool.

Step 2: Make the Creamy Sauce
In a mixing bowl, combine ½ cup of mayonnaise, ¼ cup of honey, and ¼ cup of condensed milk. Whisk together until you achieve a smooth and creamy consistency. Add a pinch of crushed red pepper flakes for a gentle kick, adjusting to taste. Set the sauce aside, allowing the flavors to meld while you prepare the shrimp.

Step 3: Prepare the Shrimp Batter
In a clean bowl, whisk together 2 egg whites and ½ cup of cornstarch until soft peaks form. You want a light and airy batter that will cling to the shrimp, ensuring a crispy texture when fried. Make sure the mixture is well combined but not overmixed for the best results in your Honey Walnut Shrimp.

Step 4: Heat the Oil for Frying
In a deep skillet, pour enough vegetable oil to submerge the shrimp, approximating about 2 inches deep. Heat the oil over medium-high heat until it reaches around 350°F (175°C). To test the oil, drop in a small amount of batter; it should immediately bubble and sizzle, indicating it’s hot enough for frying those delightful shrimp.

Step 5: Fry the Shrimp
Dip each shrimp into the batter, coating it thoroughly before carefully placing it into the hot oil. Fry the shrimp in batches for 2-3 minutes per side, or until they turn golden brown and crispy. Use a slotted spoon to transfer the cooked shrimp onto a paper towel-lined plate to absorb excess oil, keeping them warm while you fry the remaining batches.

Step 6: Combine and Serve
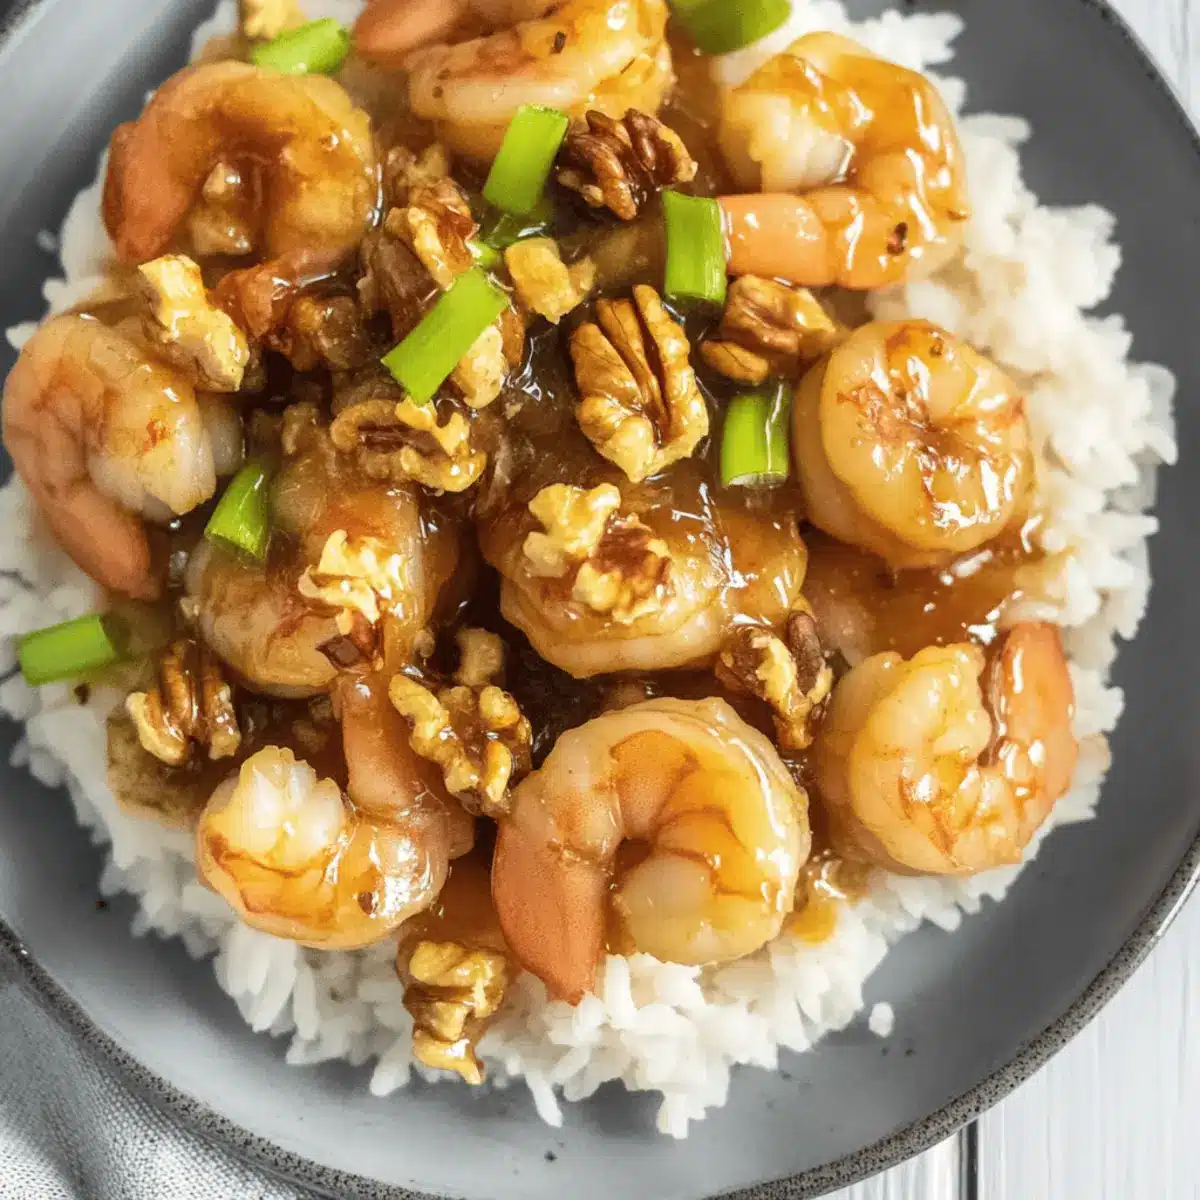
Once all the shrimp are fried, toss them gently in the creamy sauce until they are fully coated. Arrange the Honey Walnut Shrimp on a serving platter and sprinkle the candied walnuts atop the shrimp, adding not just flavor but also a beautiful presentation. Serve immediately over a bed of Jasmine rice for a delightful homemade meal!

Honey Walnut Shrimp Variations & Substitutions

Feel free to get creative and customize your Honey Walnut Shrimp with these delicious variations!

  • Dairy-Free: Replace mayonnaise with avocado or cashew cream for a rich, creamy sauce without dairy.
    Try blending soaked cashews for an extra luxurious texture, offering a delightful alternative that everyone will enjoy.

  • Whole30-Friendly: Opt for a creamy blend of tahini and coconut milk for the sauce, leaving out the sweeteners. This twist keeps it compliant and still incredibly tasty!

  • Spicy Kick: Add extra crushed red pepper flakes or a dash of hot sauce to the creamy mixture for an amplified heat level. This bold addition creates a vibrant flavor that daring palettes will love!

  • Nut-Free: Swap out walnuts with sunflower seeds or pumpkin seeds for a nut-free topping that still adds crunch. This tasty twist makes it suitable for school lunches or gatherings with nut allergies.

  • Healthy Twist: Use air-fried shrimp instead of deep-frying for a lighter version that still boasts delicious flavor; it’s a great way to enjoy the same beloved dish guilt-free.

  • Savory Boost: Mix in a tablespoon of soy sauce with the creamy sauce for added umami. This savory element brings depth to the dish, turning it into a flavor powerhouse that will have your guests asking for seconds!

  • Crispy-Pork Topping: For a unique spin, sprinkle crispy bacon bits on top instead of or in addition to walnuts. This unexpected twist adds a smokey crunch that contrasts beautifully with the sweetness.

  • Chicken Variation: Swap shrimp for tender chicken breast or thighs for a satisfying, hearty option. Drenched in the same sauce, it transforms into a comforting dish that’s equally loved!

Feeling adventurous? Pair the Honey Walnut Shrimp with a side of Grilled Honey BBQ chicken or a light salad like Grilled Honey Glazed carrots for a well-rounded, flavorful meal!

How to Store and Freeze Honey Walnut Shrimp

Fridge: Store leftover Honey Walnut Shrimp in an airtight container for up to 3 days. Keep the shrimp and sauce separate to maintain crispiness.

Freezer: For longer storage, freeze the cooked and cooled shrimp in a single layer on a baking sheet. Once frozen, transfer to a sealed freezer bag for up to 1 month.

Reheating: To reheat, place frozen shrimp in a preheated oven at 375°F (190°C) for about 15 minutes until heated through and crispy.

Make-Ahead Tips: Prepare the sauce and candied walnuts 1-2 days in advance, storing them in the fridge separately from the shrimp.

What to Serve with Honey Walnut Shrimp

Ready to elevate your homemade dinner experience with the perfect side dishes to complement your crispy Honey Walnut Shrimp?

  • Jasmine Rice: The fragrant, fluffy rice absorbs the creamy sauce beautifully, making every bite even more delicious.
  • Stir-Fried Vegetables: Crunchy bell peppers, bok choy, and snap peas add vibrant colors and nutrients, creating a well-rounded plate. Their texture balances the softness of the shrimp perfectly.
  • Steamed Broccoli: Lightly steamed broccoli not only enhances the dish’s visual appeal but also adds freshness, complementing the rich flavors of the shrimp.
  • Spring Rolls: Crisp and filled with fresh veggies, spring rolls provide a delightful crunch and paired dipping sauce that enhances the overall meal experience.
  • Cucumber Salad: A zesty cucumber salad brings a refreshing, tangy element to your dinner, cutting through the richness of the shrimp. The contrast will leave your taste buds dancing!
  • Chardonnay: A glass of chilled Chardonnay harmonizes wonderfully with the flavors of Honey Walnut Shrimp, offering a touch of elegance and depth to your dining experience.
  • Mango Sorbet: For dessert, mango sorbet provides a light and fruity finish after your indulgent meal, cleansing the palate beautifully.
  • Kung Pao Chicken: If you’re feeling adventurous, pair it with kung pao chicken for a spicy twist that will surely satisfy any cravings for some heat!

These delightful pairings transform your Honey Walnut Shrimp into a wholesome and memorable meal!

Expert Tips for Honey Walnut Shrimp

  • Choose Quality Shrimp: Always opt for wild-caught shrimp to enhance flavor and health benefits; farmed shrimp can lack taste and texture.
  • Proper Oil Temperature: Ensure your oil is at 350°F (175°C) for optimal frying; too cool oil will result in soggy shrimp instead of crispy Honey Walnut Shrimp.
  • Whisk Wisely: When making the batter, avoid over-mixing; a light hand keeps the shrimp airy and ensures a crispy texture when fried.
  • Coat and Dip: Dipping shrimp in the batter should be thorough but not clumpy; a consistent coat leads to that perfect crunch.
  • Serve Fresh: Enjoy your Honey Walnut Shrimp right after preparation for the best texture; reheating can soften the crispy coating.

Make Ahead Options

These Honey Walnut Shrimp are perfect for meal prep enthusiasts! You can prepare the creamy sauce and candied walnuts up to 3 days in advance, storing them separately in airtight containers in the refrigerator to maintain their freshness and crunch. To prevent the shrimp from becoming soggy, avoid battering and frying them until you’re ready to enjoy the dish. When it’s time to serve, simply fry the shrimp in hot oil for 2-3 minutes, toss them in the creamy sauce, and top with freshly candied walnuts. This way, you’ll have a restaurant-quality meal ready with minimal last-minute effort, making it an ideal choice for busy weeknights!

Honey Walnut Shrimp Recipe FAQs

What shrimp should I use for Honey Walnut Shrimp?
Absolutely! For the best flavor and health benefits, opt for wild-caught shrimp. They not only taste superior but also tend to be more sustainable than farmed options. Look for shrimp that are firm and translucent, with a light saltwater scent.

How should I store leftover Honey Walnut Shrimp?
Very good question! Store any leftover shrimp in an airtight container in the refrigerator for up to 3 days. To maintain the crispiness, it’s best to keep the shrimp separate from the sauce. I often place the shrimp in one container and the sauce in another.

Can I freeze Honey Walnut Shrimp?
Of course! To freeze, first let the cooked shrimp cool completely. Arrange them in a single layer on a baking sheet and freeze until solid. Then, transfer them to a sealed freezer bag, where they can be stored for up to 1 month. This method prevents them from sticking together!

How do I reheat frozen Honey Walnut Shrimp?
Great question! Preheat your oven to 375°F (190°C). Place the frozen shrimp on a baking sheet lined with parchment paper and heat for about 15 minutes or until they are heated through and crispy. This method keeps them nice and crunchy, unlike microwaving, which can make them soggy.

Are there any dietary considerations for Honey Walnut Shrimp?
Absolutely! If you’re preparing this dish for someone with allergies, be cautious of nuts and shellfish, which are common allergens. For a lighter version, you can substitute mayonnaise with Greek yogurt and avoid condensed milk if extra sweetness isn’t desired. Always double-check ingredient labels to ensure safety for those with dietary restrictions.

Honey Walnut Shrimp

Delicious Honey Walnut Shrimp: Elevate Your Homemade Dinner

Indulge in delectable Honey Walnut Shrimp, a flavorful blend of crispy shrimp, creamy sauce, and sweet walnuts.
Prep Time 20 minutes
Cook Time 15 minutes
Total Time 35 minutes
Servings: 4 servings
Course: Dinner
Cuisine: Chinese
Calories: 450

Ingredients
  

For the Fried Shrimp
  • 1 pound Large Shrimp (peeled and deveined) Opt for wild-caught for enhanced flavor.
  • 2 large Egg Whites Can be replaced with aquafaba for a vegan version.
  • ½ cup Cornstarch Provides perfect crispiness.
  • 2 cups Vegetable Oil Canola or peanut oil recommended.
For the Candied Walnuts
  • 1 cup Walnut Halves Try substituting with almonds.
  • 1 cup Granulated Sugar Consider using coconut sugar.
  • 1 cup Water
For the Creamy Sauce
  • ½ cup Mayonnaise Greek yogurt can lighten this up.
  • ¼ cup Honey Substitute with maple syrup if desired.
  • ¼ cup Condensed Milk Feel free to omit for less sweetness.
  • ¼ teaspoon Crushed Red Pepper Flakes Adjust according to spice tolerance.

Equipment

  • Saucepan
  • Mixing Bowl
  • Deep skillet
  • slotted spoon
  • Parchment paper

Method
 

Step-by-Step Instructions
  1. In a saucepan, combine 1 cup of water and 1 cup of granulated sugar over medium heat. Add 1 cup of walnut halves and boil for about 2 minutes, stirring occasionally. Transfer the walnuts to a parchment-lined baking sheet.
  2. In a mixing bowl, combine ½ cup of mayonnaise, ¼ cup of honey, and ¼ cup of condensed milk. Whisk together until smooth, then add a pinch of crushed red pepper flakes.
  3. In a clean bowl, whisk together 2 egg whites and ½ cup of cornstarch until soft peaks form.
  4. Heat 2 cups of vegetable oil in a deep skillet until it reaches approximately 350°F (175°C). Test the oil with a small amount of batter.
  5. Dip each shrimp into the batter, coating it thoroughly, then fry in batches for 2-3 minutes per side until golden brown.
  6. Once fried, toss the shrimp gently in the creamy sauce, arrange on a platter, and sprinkle the candied walnuts on top.

Nutrition

Serving: 1servingCalories: 450kcalCarbohydrates: 45gProtein: 20gFat: 25gSaturated Fat: 4gPolyunsaturated Fat: 2gMonounsaturated Fat: 15gCholesterol: 150mgSodium: 600mgPotassium: 300mgFiber: 2gSugar: 15gVitamin A: 200IUVitamin C: 2mgCalcium: 50mgIron: 1mg

Notes

Serve immediately over a bed of Jasmine rice for the best experience.

Tried this recipe?

Let us know how it was!

Irresistible Homemade Sweet Chili Sauce for Every Dish

As I reached for the vibrant red bell pepper in my fridge, a wave of inspiration hit me. I realized that nothing could elevate my meals quite like a jar of homemade Sweet Chili Sauce. This quick and easy condiment delivers a delightful balance of sweetness and a gentle kick of spice, making it a dear companion for all your favorite fried, grilled, and roasted dishes. With just a handful of simple ingredients, you’ll find yourself whisked away to the vibrant streets of Thailand, all from the comfort of your kitchen. Not only will this sauce impress your taste buds, but it’s also a fabulous way to impress guests with minimal effort. I can already envision serving it alongside crispy spring rolls or drizzling it over grilled chicken. Are you ready to dive into the world of homemade sauce that will spice up your culinary creations? Let’s get started!

Why is homemade Sweet Chili Sauce a must?

Flavorful Fusion: This homemade Sweet Chili Sauce brings together the perfect balance of sweet and spicy, transforming any dish into a gourmet experience.

Quick & Easy: With just a few simple ingredients, it’s a breeze to whip up, making it perfect for busy weeknights or last-minute gatherings.

Versatility at Its Best: Use it as a dipping sauce for Lumpiang Shanghai, drizzle it on fried chicken, or even blend it with grilled veggies for a zesty flair.

Trusted Quality: Skip store-bought options filled with preservatives; making your sauce ensures freshness and flavor.

Impressive Homemade Touch: Serve this vibrant sauce to guests, and you’ll leave them amazed by your culinary skills, just like you would with a Sweet Hawaiian Crockpot or Crispy Chili Beef.

Dive into this delightful recipe and elevate your meals today!

Sweet Chili Sauce Ingredients

• The perfect blend for your homemade condiment.

  • Big Red Bell Pepper: Adds sweetness and base flavor. Substitute with any mild/sweet red pepper.
  • Bird’s Eye Chili: Provides a mild heat. Substitute with chili flakes (start with ½ teaspoon).
  • Yellow Onion: Contributes aromatic flavors. Any onion type can be used.
  • Garlic: Enhances flavor depth. Fresh garlic is preferred; avoid using garlic powder.
  • Water: Forms the base of the sauce. No substitutions necessary.
  • Vinegar: Adds tanginess and helps preserve. Rice vinegar can be a substitute.
  • Salt: Balances flavors. Sea salt is preferred.
  • Sugar: Adds sweetness and viscosity. Brown sugar can be used for a richer flavor.
  • Potato Starch/Corn Starch: Thicken the sauce. Only use if you want a thicker consistency; omit if a thinner sauce is preferred.

This flavorful Sweet Chili Sauce is just the beginning of your culinary adventure!

Step‑by‑Step Instructions for Homemade Sweet Chili Sauce

Step 1: Prepare the Ingredients
Start by coarsely chopping one big red bell pepper, one bird’s eye chili, one yellow onion, and a couple of garlic cloves. Use a sharp knife and cutting board for safety, aiming for roughly equal-sized pieces to ensure even cooking. Their vibrant colors will bring a fresh aroma to your kitchen and set the stage for your delicious homemade Sweet Chili Sauce.

Step 2: Blend the Mixture
Transfer the chopped ingredients into a blender or food processor. Add one cup of water to help the blending process. Pulse until finely minced—be careful not to puree it into a smooth paste. You want a textured mixture that holds small bits of each ingredient. This step should take about 30 seconds to 1 minute, creating a colorful blend that captures the essence of Thai flavors.

Step 3: Cook the Sauce Base
Pour the blended mixture into a medium saucepan over medium heat. Add half a cup of sugar, one teaspoon of salt, and a quarter cup of vinegar to the pan. Stir the ingredients well as they heat up, ensuring the sugar and salt dissolve completely. Let it simmer for about 3 to 5 minutes until it starts to bubble gently, releasing a delightful aroma that signifies the flavors are melding beautifully.

Step 4: Thicken the Sauce
In a small bowl, mix one tablespoon of potato starch with two tablespoons of cold water to form a smooth paste. Once the sauce has simmered and the sugar is dissolved, slowly stir this mixture into the saucepan. Continue to cook, stirring constantly, until the sauce slightly thickens to your desired consistency—about 2 to 3 minutes. It should have a glossy sheen and a rich red hue that makes your homemade Sweet Chili Sauce truly irresistible.

Step 5: Cool and Store
Remove the saucepan from the heat once thickened. Allow the sauce to cool for about 15 minutes at room temperature, during which time it will continue to thicken slightly. Once cool, transfer it to a sterilized jar using a funnel for easy pouring. Seal it tightly and store it in the refrigerator. Your homemade Sweet Chili Sauce can be enjoyed immediately, but for the best flavor, let it sit for a day before using.

Expert Tips for Homemade Sweet Chili Sauce

  • Choose Fresh Ingredients: Using fresh bell peppers and garlic greatly enhances the flavor. Always opt for vibrant, firm ones to make your Sweet Chili Sauce unforgettable.

  • Watch the Heat: Adjust the heat by controlling the amount of bird’s eye chili you add. Start with a little, then increase to your preference for that perfect spice level.

  • Avoid Over-Cooking: When thickening the sauce, stir constantly and keep an eye to prevent overcooking. This keeps your Sweet Chili Sauce from losing its beautifully glossy texture.

  • Add a Zesty Kick: For an extra zing, mix in some fresh lime juice just before cooling. This twist will elevate the flavors and give your sauce a fresh touch.

  • Storage Matters: Always sterilize the jar before use to prolong the shelf life of your Sweet Chili Sauce. A clean storage container is key to maintaining its vibrant taste.

What to Serve with Homemade Sweet Chili Sauce

Imagine a beautiful spread filled with diverse textures and flavors that complement the silky sweetness and gentle spice of your sauce.

  • Crispy Spring Rolls: The crunch of fried spring rolls perfectly matches the sauce’s rich flavors, creating a delightful contrast in every bite. They are a classic pairing that encapsulates the essence of Thai cuisine.

  • Grilled Chicken Skewers: Succulent grilled chicken drizzled with homemade Sweet Chili Sauce enhances the smoky flavors and adds an irresistible glaze that elevates the dish. Perfect for dinner parties!

  • Fried Tempura Vegetables: Delightfully crispy tempura veggies, like zucchini and bell pepper, take on a new dimension when dipped in the sauce, providing both a joyful crunch and a burst of flavor.

  • Lumpiang Shanghai: These savory Filipino spring rolls filled with ground meat are enhanced by the sweet and spicy kick, making them an absolute crowd-pleaser at gatherings.

  • Pan-Seared Shrimp: Tossed in a light coat of the sauce, pan-seared shrimp gains a glossy finish that children and adults alike will dive into with delight.

  • Thai Coconut Rice: The subtle sweetness of coconut rice pairs wonderfully with the tartness of your sauce, offering a fragrant base that complements any main dish.

  • Fresh Cucumber Salad: A refreshing cucumber salad adds crunch and coolness, balancing the heat from the homemade Sweet Chili Sauce with its crispness and subtle tang.

  • Craft Beer or Light White Wine: A refreshing drink can elevate your meal. Consider a crisp lager or a fruity Riesling, which harmonize beautifully with the flavors of Thai dishes, enhancing your dining experience.

Let these pairing ideas inspire your next meal and showcase your culinary flair while enjoying the delightful flavors of homemade Sweet Chili Sauce!

Sweet Chili Sauce Variations & Substitutions

Feel free to personalize your Sweet Chili Sauce and make it uniquely yours with these creative twists!

  • Zesty Lime: Add the juice of a lime for a bright, tangy kick that livens up the sauce.
  • Fresh Herbs: Toss in some chopped cilantro or basil for an aromatic freshness that elevates your dish.
  • Reduced Sugar: Swap out half the sugar for honey or agave syrup for a more natural sweetness.
  • Extra Spicy: For a fiery flavor, mix in extra chilies or a dash of hot sauce to ramp up the heat.
  • Smoky Flavor: Add a splash of smoked paprika for a complex depth that beautifully complements the sweetness.

For a delightful twist, try blending in some fresh ginger along with your ingredients. It adds a warm, spicy undertone that pairs wonderfully with grilled meats.

Craving something a bit different? Use this sauce as a glaze for your favorite grilled chicken, just as you would with Parmesan Crusted Chicken with Creamy Garlic Sauce for an unforgettable meal.

With these variations, your homemade Sweet Chili Sauce will be the star of any plate!

Make Ahead Options

These homemade Sweet Chili Sauce preparations make your life so much easier! You can coarsely chop the bell pepper, bird’s eye chili, onion, and garlic up to 24 hours in advance—just store them in an airtight container in the refrigerator to maintain freshness. Prepare the blended mixture and refrigerate it for up to 3 days before cooking. When you’re ready to finish the sauce, simply heat your mixture in a saucepan, add the sugar and vinegar, and continue with the thickening process. This approach allows you to enjoy a restaurant-quality condiment effortlessly, saving you precious time on busy weeknights!

How to Store and Freeze Sweet Chili Sauce

Fridge: Store your homemade Sweet Chili Sauce in an airtight jar in the refrigerator for up to 4 weeks. This helps retain its vibrant flavors and ensures it stays fresh.

Freezer: For long-term storage, freeze the sauce in ice cube trays. Once frozen, transfer the cubes to a resealable bag and store for up to 3 months. Thaw as needed for quick use.

Reheating: To use frozen sauce, simply thaw the desired amount in the refrigerator overnight, or reheat gently on the stove over low heat. Avoid boiling to preserve the sauce’s texture.

Quality Check: Before using, always check for any off smells or discoloration. Proper storage of your Sweet Chili Sauce will give you delicious results every time!

Sweet Chili Sauce Recipe FAQs

How do I choose the right bell pepper for this recipe?
Absolutely! Look for bell peppers that are firm, vibrant, and free from dark spots all over. A big red bell pepper will add a wonderful sweetness. If you can’t find red ones, any mild or sweet pepper will do—green or yellow varieties can work, too!

What’s the best way to store homemade Sweet Chili Sauce?
To store your delicious Sweet Chili Sauce, transfer it to a sterilized, airtight jar and keep it in the refrigerator. It can last up to 4 weeks this way. Be sure to label the jar with the date you made it, so you can keep track of its freshness.

Can I freeze Sweet Chili Sauce for later use?
Very! For long-term storage, pour the sauce into ice cube trays and freeze until solid. Once frozen, pop the cubes into a resealable plastic bag and store them in the freezer for up to 3 months. Whenever you’re ready to enjoy it, simply thaw a cube overnight in the refrigerator or gently reheat it on the stove.

What if my sauce is too thick or too thin?
To fix a sauce that’s too thick, add a little water while gently heating it and stir until you reach your desired consistency. If it’s too thin, make a slurry by mixing a small amount of potato starch or cornstarch with a bit of cold water, then stir it into the sauce while it simmers to thicken. Keep stirring to avoid lumps, aiming for that perfect glossy finish!

Is there a way to make this sauce compatible with dietary restrictions?
Yes! If you’re avoiding sugar, try substituting with natural sweeteners like honey or agave syrup. For those with allergies, ensure you use gluten-free vinegar and double-check all ingredient labels. If making it for your pets, it’s best to avoid any added sugar or salt, as those can be harmful to them. Always consult your vet for specific dietary needs.

How can I enhance the flavor of my Sweet Chili Sauce?
Absolutely, adding a splash of fresh lime juice just before cooling can greatly amplify the flavor! You might also consider mixing in some finely chopped cilantro or a pinch of ginger for an extra layer of depth. Play around with the ingredients to customize it to your taste!

Sweet Chili Sauce

Irresistible Homemade Sweet Chili Sauce for Every Dish

This delicious homemade Sweet Chili Sauce balances sweetness and spice, elevating any dish effortlessly.
Prep Time 10 minutes
Cook Time 10 minutes
Cooling Time 15 minutes
Total Time 35 minutes
Servings: 10 servings
Course: Drinks
Cuisine: Thai
Calories: 20

Ingredients
  

Sweet Chili Sauce Ingredients
  • 1 large Red Bell Pepper Adds sweetness and base flavor.
  • 1 piece Bird’s Eye Chili Provides a mild heat.
  • 1 medium Yellow Onion Contributes aromatic flavors.
  • 2 cloves Garlic Enhances flavor depth; fresh preferred.
  • 1 cup Water Forms the base of the sauce.
  • 1/4 cup Vinegar Adds tanginess; rice vinegar can be used.
  • 1/2 teaspoon Salt Balances flavors; sea salt preferred.
  • 1/2 cup Sugar Adds sweetness and viscosity.
  • 1 tablespoon Potato Starch/Corn Starch Thickens the sauce; omit for thinner consistency.

Equipment

  • blender
  • Saucepan
  • cutting board
  • knife
  • Funnel
  • sterilized jar

Method
 

Step-by-Step Instructions for Homemade Sweet Chili Sauce
  1. Coarsely chop the red bell pepper, bird's eye chili, yellow onion, and garlic cloves.
  2. Blend the chopped ingredients with water until finely minced, aiming for a textured mixture.
  3. Pour the blended mixture into a saucepan, add sugar, salt, and vinegar; simmer for 3-5 minutes.
  4. Mix potato starch with cold water and stir into the saucepan; continue cooking until thickened.
  5. Remove from heat and cool for 15 minutes; store in a sterilized jar in the refrigerator.

Nutrition

Serving: 1tablespoonCalories: 20kcalCarbohydrates: 5gSodium: 100mgPotassium: 40mgSugar: 4gVitamin A: 250IUVitamin C: 10mgCalcium: 2mg

Notes

For optimal flavor, let the sauce sit for a day before using. Adjust heat level by varying the amount of chili used.

Tried this recipe?

Let us know how it was!

Creamy Fondant Potatoes: Irresistibly Elegant Comfort Food

As I stood in my kitchen, the fragrant aroma of sizzling garlic and fresh thyme wafted through the air, reminding me why home cooking always reigns supreme. Enter the Elegant Creamy Fondant Potatoes, a dish that transforms everyday russet or Yukon Gold potatoes into a gourmet side that wows your taste buds without fuss. The magic lies in their crispy, golden crust encasing a pillowy, creamy center—perfect for elevating your weeknight dinners or special gatherings. Plus, they’re adaptable, accommodating both vegetarian diets with a simple swap to vegetable broth and those who appreciate a touch of elegance in their meals. Are you ready to impress your guests while keeping the cooking process uncomplicated? Let’s dive into the world of fondant potatoes that are destined to become a beloved staple in your kitchen!

Why Are Fondant Potatoes Irresistible?

Elegant, creamy goodness: These fondant potatoes combine classic French cooking techniques with everyday ingredients, delivering an impressive dish even the novice cook can master.
Versatile variations: Easily adapt with substitutes like vegan butter or vegetable broth for a delicious vegetarian option, making them a hit for everyone at your table.
Show-stopping presentation: With their crispy edges and silky interiors, they truly steal the spotlight, elevating any meal, whether it’s a family gathering or a cozy dinner for two.
Flavor-packed simplicity: Minimal effort yields extraordinary flavors, allowing you to enjoy more time with your guests and less time in the kitchen.
Perfect pairing: Serve alongside your favorite mains like grilled salmon or roasted chicken for a rounded, satisfying meal that leaves everyone wanting more. For more delectable side dish inspiration, check out our Cheesy French Potatoes or Summer Corn Chowder.

Creamy Fondant Potatoes Ingredients

For the Potatoes
Potatoes – Choose large russet or Yukon Gold for optimal fluffiness and creaminess; Yukon Gold offers a richer flavor.
Unsalted Butter – Adds a velvety richness; swap with vegan butter for a non-dairy option.
Vegetable Oil – Essential for searing; olive oil works beautifully as an alternative.

For the Broth
Vegetable or Chicken Broth – Enhances the flavor depth; use vegetable broth for a vegetarian-friendly touch.
Garlic Cloves – Infuses aromatic flavor; feel free to add more for a bolder garlic taste.
Fresh Thyme – Provides delightful herbal notes; rosemary or parsley can be wonderful substitutes.

Seasoning
Salt & Pepper – Essential for seasoning; adjust according to taste for the perfect finish.

Make these Creamy Fondant Potatoes your new go-to side dish, and watch them steal the show at your next gathering!

Step‑by‑Step Instructions for Creamy Fondant Potatoes

Step 1: Preheat the Oven
Begin this delightful journey by preheating your oven to 400°F (200°C). This temperature is crucial for achieving the perfect balance of crispy and creamy. While the oven warms up, gather your ingredients and equipment: a sharp knife, a cutting board, and an oven-safe skillet to ensure a seamless cooking experience.

Step 2: Prepare the Potatoes
Peel your russet or Yukon Gold potatoes and cut them into 2-inch thick cylindrical pieces. This uniformity is essential for even cooking, allowing the potatoes to develop their creamy interior and golden crust. Set the cut potatoes aside in a bowl of cold water to prevent browning while you prepare the next steps.

Step 3: Heat the Skillet
In your oven-safe skillet, heat about two tablespoons of vegetable oil over medium-high heat until it shimmers. This is the perfect temperature to get a gorgeous sear on the potatoes, enhancing their flavor. A hot skillet is key here, as it promotes that wonderful caramelization we’re aiming for in these creamy fondant potatoes.

Step 4: Sear the Potatoes
Carefully place the potato pieces cut-side down into the hot skillet and let them sear for 4-5 minutes until they develop a golden brown crust. This step is crucial for building flavor, so don’t rush it! Once they reach a lovely golden hue, flip the potatoes gently to cook the other sides briefly.

Step 5: Add Butter and Baste
After flipping the potatoes, add a couple of tablespoons of unsalted butter into the skillet. Allow the butter to melt and baste the potatoes for about 2 minutes. This will infuse them with a rich flavor, making your creamy fondant potatoes irresistibly delicious and adding a luxurious touch to the dish.

Step 6: Pour in the Broth
Pour in your vegetable or chicken broth until the potatoes are halfway submerged. Add in crushed garlic cloves and fresh thyme for an aromatic explosion of flavor. The broth not only enhances the taste but also ensures that the potatoes remain moist while baking. Be sure to bring the mixture to a gentle boil before the next step.

Step 7: Season and Transfer
Season the broth well with salt and pepper to taste. Once you’ve achieved the desired seasoning, carefully transfer the skillet to your preheated oven. This step marks the transition to the baking phase, where the magic of the creamy fondant potatoes truly happens, so close the oven door and set your timer.

Step 8: Bake to Perfection
Bake the potatoes for 30-35 minutes, or until they are fork-tender. At this point, the tops should be turning a delightful golden brown while the insides become creamy and soft. The aroma wafting through your kitchen will be a clear sign that your creamy fondant potatoes are almost ready.

Step 9: Rest Before Serving
Once baked, remove the skillet from the oven and let the fondant potatoes sit for about 5 minutes. This resting period helps the flavors meld beautifully while allowing any excess broth to be absorbed, enhancing their creamy texture.

Step 10: Elegant Garnish (Optional)
For an elegant finishing touch, garnish your creamy fondant potatoes with fresh thyme or parsley before serving. This not only adds a pop of color but also elevates the dish’s appealing presentation. Your guests will be astounded by the stunning beauty and delectable taste of your creamy fondant potatoes!

Storage Tips for Creamy Fondant Potatoes

Fridge: Store leftovers in an airtight container for up to 3-4 days. Ensure they’re fully cooled before sealing to maintain their texture.

Freezer: For longer storage, freeze fondant potatoes for up to 2 months. Arrange in a single layer and separate with parchment paper to prevent sticking while freezing.

Reheating: When ready to enjoy again, cover with foil and reheat in a 350°F (175°C) oven until warmed through. This helps maintain their creamy consistency and deliciousness.

Prep Ahead: If you plan to make them in advance, you can peel and cut the potatoes up to 24 hours ahead. Store them in cold water to prevent browning, ensuring they’re fresh when you’re ready to cook your creamy fondant potatoes.

Expert Tips for Creamy Fondant Potatoes

  • Cut Evenly: Ensure uniform potato cuts for consistent cooking; uneven sizes can lead to some being undercooked while others are overdone.

  • Searing Matters: Don’t skip the searing step; it enhances the flavor through caramelization, creating that irresistible crispy outer layer on your creamy fondant potatoes.

  • Taste as You Go: Always taste the broth before adding salt; this helps you customize the seasoning for your palate and ensures perfection.

  • Cover When Reheating: When reheating leftovers, cover with foil to retain moisture; this keeps the fondant potatoes from drying out and preserves their creamy texture.

  • Serve Fresh: Fondant potatoes are best enjoyed immediately after baking; however, they can sit at room temperature for up to 2 hours without losing their charm.

Variations & Substitutions for Creamy Fondant Potatoes

Feel free to explore these delicious variations that will take your fondant potatoes to the next level!

  • Vegetarian Option: Use vegetable broth in place of chicken broth to make a delightful vegetarian version—perfectly satisfying without sacrificing flavor.

  • Herb Infusion: Substitute fresh thyme with rosemary or sage for an aromatic twist that adds depth and enhances the flavor profile of your dish.

  • Creamy Delight: Replace half of the broth with half-and-half for a richer, creamier texture that truly elevates your fondant potatoes to decadent comfort food.

  • Cheesy Indulgence: Stir in freshly grated Parmesan cheese during the last few minutes of baking, providing a savory richness that complements the buttery flavor incredibly.

  • Spicy Kick: Add a sprinkle of cayenne pepper or red pepper flakes to the broth for those who enjoy a little heat in their meals. This combination will surely awaken your taste buds!

  • Smoky Flavor: Incorporate smoked paprika into your seasonings to introduce a warm, smoky essence—this adds complexity and makes every bite unforgettable.

  • Sweet Potato Variation: Try switching out the russets for sweet potatoes for a naturally sweet flavor that pairs beautifully with the broth and herbs. This is a crowd-pleaser, especially for those with a sweet tooth.

  • Gourmet Touch: For a luxurious finish, drizzle with truffle oil right before serving or serve alongside a red wine reduction for that fine dining experience right at home.

Don’t forget that these creamy fondant potatoes not only shine on their own but also complement lovely dishes like Grilled Garlic Potatoes or pair wonderfully with a comforting Creamy Chicken Fettuccine Alfredo for a complete meal. Get ready to impress guests and savor every bite!

Make Ahead Options

These Creamy Fondant Potatoes are a fantastic choice for meal prep enthusiasts! You can peel and cut your potatoes up to 24 hours in advance; simply store them submerged in cold water in the refrigerator to prevent browning. Additionally, the broth mixture can be prepared up to 3 days ahead—just combine the vegetable broth, garlic, and thyme, then refrigerate it until you’re ready to use. When it’s time to serve, reheat the broth gently, sear the potatoes as described, pour in the broth, and continue with baking. This method allows you to enjoy your elegant side dish with minimal last-minute effort, ensuring they remain just as delicious and impressive!

What to Serve With Creamy Fondant Potatoes

There’s nothing quite like crafting a beautiful meal where every bite harmonizes, and these fondant potatoes are the perfect canvas.

  • Roasted Chicken: The juicy, tender meat of roasted chicken perfectly complements the creamy texture of fondant potatoes, making for a comforting combo that feels like a warm hug.

  • Grilled Salmon: The flaky, rich flavors of grilled salmon provide a delightful contrast to the buttery fondant potatoes, creating a satisfying balance on your plate.

  • Sautéed Spinach: Quick-cooked spinach adds a burst of color and fresh, earthy flavor that brightens up the dish, enhancing the gourmet feel of the meal. A zesty squeeze of lemon on the spinach heightens the experience.

  • Herb Salad: A refreshing herb salad with a tangy vinaigrette pairs wonderfully, adding a crunchy texture that cuts through the creaminess of the potatoes, inviting every guest to dig in.

  • Red Wine: A full-bodied Merlot creates an elegant pairing that enhances the sophisticated flavors of the fondant potatoes. The wine’s rich, fruity notes make every bite more indulgent.

  • Roasted Vegetables: Colorful roasted veggies like carrots and Brussels sprouts not only add visual appeal but also offer a sweet, caramelized flavor that beautifully rounds out the earthy taste of the potatoes.

  • Creamy Mushroom Sauce: Drizzling a savory mushroom sauce over the potatoes elevates the dish to fine dining status, enriching each bite with umami depth and a luxurious creaminess.

  • Chocolate Mousse: For dessert, a light chocolate mousse serves as a sweet end to the meal, its airy texture providing a perfect contrast to the hearty fondant potatoes.

Creamy Fondant Potatoes Recipe FAQs

How do I select the best potatoes for fondant potatoes?
Absolutely! For the creamiest and fluffiest fondant potatoes, choose large russet or Yukon Gold potatoes. Russets provide a nice fluffiness, while Yukon Golds offer a richer, creamier flavor. Make sure to pick potatoes that are firm with no dark spots or bruising, as these could affect the cooking quality.

What’s the best way to store leftovers of creamy fondant potatoes?
Very! To store your leftovers, place them in an airtight container and keep them in the fridge for up to 3-4 days. Make sure they are completely cooled before sealing. For best results, consume them fresh, as reheated fondant potatoes may lose some of their original creamy texture.

Can I freeze fondant potatoes?
Absolutely! You can freeze creamy fondant potatoes for up to 2 months. To do this, arrange the cooled potatoes in a single layer on a baking sheet and separate them with parchment paper to prevent sticking. Once frozen, transfer the potatoes to an airtight freezer bag or container. When you’re ready to enjoy them again, bake from frozen at 350°F (175°C) until heated through.

What should I do if my fondant potatoes don’t get crispy?
Don’t worry! If your fondant potatoes aren’t getting crispy enough, it could be due to inadequate searing. Make sure your skillet is hot enough before adding the potatoes. Also, ensure they’re not overcrowded in the skillet, as this can create steam instead of a crispy crust. Next time, try a higher heat during the initial sear to achieve that gorgeous golden-brown exterior.

Are there any dietary considerations I should be aware of for fondant potatoes?
Yes! If you’re catering to dietary restrictions, you can easily make creamy fondant potatoes vegetarian by substituting the chicken broth with vegetable broth. Furthermore, if you’re hosting guests with dairy allergies, swap out the unsalted butter for a high-quality vegan butter. It’s always good to check for any specific allergies beforehand to ensure everyone can enjoy this delicious dish!

Creamy Fondant Potatoes

Creamy Fondant Potatoes: Irresistibly Elegant Comfort Food

Creamy Fondant Potatoes are a gourmet side that wows your taste buds without fuss, featuring a crispy crust and a creamy interior.
Prep Time 15 minutes
Cook Time 35 minutes
Resting Time 5 minutes
Total Time 55 minutes
Servings: 4 servings
Course: Dinner
Cuisine: French
Calories: 250

Ingredients
  

For the Potatoes
  • 4 large russet or Yukon Gold potatoes Choose Yukon Gold for richer flavor.
  • 3 tablespoons unsalted butter Use vegan butter for non-dairy option.
  • 2 tablespoons vegetable oil Olive oil works well as an alternative.
For the Broth
  • 2 cups vegetable or chicken broth Use vegetable broth for vegetarian option.
  • 3 cloves garlic Add more for bolder flavor.
  • 2 sprigs fresh thyme Rosemary or parsley can be substituted.
Seasoning
  • to taste salt
  • to taste pepper

Equipment

  • Oven-safe skillet
  • sharp knife
  • cutting board

Method
 

Step-by-Step Instructions
  1. Preheat your oven to 400°F (200°C). Gather your ingredients and equipment.
  2. Peel and cut the potatoes into 2-inch thick cylindrical pieces. Soak in cold water to prevent browning.
  3. Heat vegetable oil in the skillet over medium-high heat until it shimmers.
  4. Sear the potato pieces cut-side down for 4-5 minutes until golden brown, then flip to cook the other sides.
  5. Add unsalted butter to the skillet and baste the potatoes for about 2 minutes.
  6. Pour in the broth until the potatoes are halfway submerged. Add crushed garlic and thyme.
  7. Season with salt and pepper. Transfer the skillet to the preheated oven.
  8. Bake for 30-35 minutes or until fork-tender and golden brown.
  9. Let the potatoes rest for about 5 minutes after baking.
  10. Garnish with fresh thyme or parsley before serving.

Nutrition

Serving: 1servingCalories: 250kcalCarbohydrates: 35gProtein: 3gFat: 12gSaturated Fat: 7gPolyunsaturated Fat: 1gMonounsaturated Fat: 4gCholesterol: 30mgSodium: 500mgPotassium: 600mgFiber: 3gSugar: 1gVitamin A: 5IUVitamin C: 20mgCalcium: 2mgIron: 6mg

Notes

Ensure uniform potato cuts for consistent cooking and do not skip the searing step for enhanced flavor.

Tried this recipe?

Let us know how it was!

Soft Mango Cookies with Vanilla Glaze for a Tropical Treat

As the golden sunlight streams through my kitchen window, I’m enveloped in a tropical breeze that can only mean one thing: it’s time for some delightful mango cookies. This soft and tender Mango Cookies recipe, adorned with a sweet vanilla glaze, transforms those lush, juicy mango chunks into a comforting treat perfect for any occasion. Not only are these cookies incredibly easy to whip up in under 15 minutes, but their cake-like texture and fruity notes make them a versatile indulgence for breakfast, a snack, or dessert. Whether shared with friends over coffee or savored alone as a midday pick-me-up, these cookies are sure to turn every bite into a mini celebration of summer. Ready to bring a taste of the tropics into your home? Let’s dive into this delightful recipe!

Why are mango cookies so irresistible?

Tropical Flavors: These cookies are bursting with sweet, fruity goodness, highlighting the vibrant taste of ripe mangoes. Soft Texture: The cake-like consistency melts in your mouth, offering a tender bite that’s hard to resist. Quick Prep: With just 15 minutes of prep time, you’ll have a delicious treat in a flash. Versatile Treats: Perfect for breakfast or dessert, they easily adapt to any time of day. Drizzled Delight: The sweet vanilla glaze adds a layer of flavor that elevates each cookie, creating a delightful balance. Pair them with a refreshing Mango Dragonfruit Refresher for a complete tropical experience.

Mango Cookies Ingredients

For the Cookie Dough

  • All-Purpose Flour – A tender base; use plain flour for the perfect structure.
  • Baking Powder – A vital leavening agent; ensure it’s fresh for optimal rise.
  • Salted Butter – Adds richness and moisture; can substitute with unsalted butter, adding a pinch of salt.
  • Granulated Sugar – Provides sweetness and texture; replacing with coconut sugar adds a caramel note.
  • Brown Sugar – Introduces moisture and deeper flavor; can replace with an extra 2 tablespoons of granulated sugar.
  • Egg – A binding agent that adds richness; for a vegan option, use a flax egg (1 tbsp flaxseed meal + 2.5 tbsp water).
  • Vanilla Extract – Enhances flavor; using pure vanilla will give the best taste.
  • Milk – Provides moisture and texture; almond or coconut milk works as a dairy-free alternative.
  • Mango (fresh or frozen) – The star ingredient; ensure it’s ripe for optimal sweetness.

For the Vanilla Glaze

  • Powdered Sugar – The base of the glaze; to thicken, add more sugar; to thin, add milk or mango juice.

These mango cookies are an inviting treat that can easily become the highlight of your baking adventures! Enjoy the delicious results!

Step‑by‑Step Instructions for Soft Mango Cookies with Vanilla Glaze

Step 1: Cream Butter and Sugars
In a large mixing bowl, use an electric mixer to cream ½ cup of softened salted butter with ½ cup granulated sugar and ½ cup brown sugar. Beat on medium speed for 2-3 minutes until the mixture is light and fluffy, appearing pale in color. This step is crucial as it creates the base of your delightful mango cookies.

Step 2: Incorporate Liquid Ingredients
Add 1 large egg and 2 tablespoons of milk to the creamed butter and sugars. Mix on low speed until the ingredients are just combined, ensuring a smooth batter without overmixing. The mixture should blend seamlessly, creating a rich and moist dough that will hold the luscious mango chunks beautifully.

Step 3: Add Dry Ingredients
Gradually sift in 2 cups of all-purpose flour and 1 teaspoon of baking powder. Use a rubber spatula to gently fold in the flour until just combined, being careful not to overmix. The dough should have a soft, slightly sticky texture, ready to showcase the vibrant mango bits that are about to be added.

Step 4: Fold in Mango
Carefully fold in 1 cup of diced fresh or thawed frozen mango using your spatula. Gently mix until the mango chunks are evenly distributed throughout the dough, preserving their integrity. This step infuses your soft mango cookies with juicy bursts of flavor in every delicious bite.

Step 5: Chill Dough
Cover the mixing bowl with plastic wrap and refrigerate the dough for at least 30 minutes, or preferably up to 2 days. Chilling is important as it enhances the flavors and helps the dough firm up, preventing excess spreading while baking your soft cookies.

Step 6: Preheat Oven
Preheat your oven to 350°F (180°C) and line two baking sheets with parchment paper. This preparation ensures an even baking surface for your mango cookies, allowing them to develop that perfect soft texture while preventing sticking.

Step 7: Shape Cookies
Scoop the chilled dough, using about 1.5 tablespoons for each cookie, and place them onto the lined baking sheets, ensuring they are spaced 3 inches apart. The dough should still be slightly soft, allowing for a beautiful rise as they bake, resulting in fluffy mango cookies.

Step 8: Bake
Place the baking sheets in the preheated oven and bake the cookies for 14-16 minutes. They are ready when they spring back lightly when poked, and their edges start to turn a light golden color. Keep an eye on them to ensure perfect doneness!

Step 9: Cool
Remove the baking sheets from the oven and allow the mango cookies to cool for 10 minutes on the sheets. This cooling time lets them firm up slightly before transferring them to a wire rack, where they will cool completely and develop their tender texture.

Step 10: Make Glaze
In a small bowl, whisk together 1 cup of powdered sugar, 1 teaspoon of vanilla extract, and 2 tablespoons of milk until smooth. The glaze should be thick yet pourable; adjust its consistency as needed with additional milk or powdered sugar for your desired thickness.

Step 11: Drizzle on Cookies
Once the cookies have cooled, drizzle the vanilla glaze generously over each cookie using a spoon or a piping bag for elegant presentation. The glaze adds a delightful sweetness that complements the soft mango cookies, providing a beautiful finish to your tropical treat.

Mango Cookies Variations & Substitutions

Feel free to put your own spin on these delightful cookies and make them truly yours!

  • Fruit Swap: Substitute mango with diced pineapple or peach for a refreshing twist on flavor. Both fruits bring a lovely sweetness that complements the soft cookie base beautifully.
  • Nutty Crunch: Add walnuts or macadamia nuts to the dough for a satisfying crunch. The contrast between the soft texture of the cookies and the crispy nuts creates a delightful eating experience.
  • Spice It Up: Incorporate cinnamon or nutmeg to give your cookies a warm, comforting aroma. Just a pinch of spice can elevate the flavor profile, making them even more irresistible.
  • Dairy-Free Delight: Use coconut milk or almond milk instead of regular milk for a creamy, dairy-free version. This swap keeps them just as moist while catering to dietary preferences.
  • Vegan Option: For a completely vegan treat, simply replace the egg with a flax egg (1 tablespoon flaxseed meal + 2.5 tablespoons water). This plant-based alternative binds the ingredients beautifully without sacrificing taste.
  • Glaze Variations: Switch up the vanilla extract in the glaze for almond extract or even a touch of lime juice for a tangy twist. Each option brings its unique flavor, keeping things exciting!
  • Cookie Shapes: Try scooping the dough into different shapes or even using cookie cutters to make fun and festive cookies. Children will love their unique forms; it’s a fun way to get everyone involved in the kitchen.
  • Add Some Heat: For those who like a kick, mix in a dash of cayenne pepper or chili powder into the dough. The sweet heat contrast will surprise and delight your taste buds!

Explore these variations and make your mango cookies a personal masterpiece. Perhaps enjoy them with a side of Chocolate Cranberry Cookies for a delightful dessert spread!

Make Ahead Options

These soft mango cookies are perfect for meal prep enthusiasts looking to save time on busy days! You can prepare the dough up to 2 days in advance by chilling it in the refrigerator, allowing the flavors to meld beautifully. Simply cover the mixing bowl tightly with plastic wrap to maintain freshness. If you’re short on time, you can also scoop the shaped cookies onto the baking sheets and freeze them for up to 3 months; just bake straight from frozen, adding an extra minute or two to the baking time. When you’re ready to enjoy, bake the cookies until they spring back lightly when touched, and drizzle with the vanilla glaze for that sweet finishing touch. Enjoy restaurant-quality mango cookies any day of the week!

Storage Tips for Mango Cookies

  • Room Temperature: Store unglazed mango cookies at room temperature in an airtight container for up to 2 days. This keeps them soft and ready for snacking anytime.

  • Fridge: Glazed mango cookies can be stored in the refrigerator for up to 1 week. Ensure they’re in an airtight container to maintain their freshness and prevent the glaze from becoming too hard.

  • Freezer: For longer storage, freeze ungazed mango cookies for 2-3 months. Place them in a single layer on a baking sheet until solid, then transfer to a freezer-safe bag. Thaw in the refrigerator overnight before glazing.

  • Reheating: To enjoy them warm, reheat mango cookies briefly in the microwave for about 10-15 seconds. This will restore their soft, tender texture, making each bite feel freshly baked!

What to Serve with Soft and Tender Mango Cookies with Sweet Vanilla Glaze?

These tropical treats are the perfect excuse to create a delightful meal that enhances the experience of savoring every soft, sweet bite.

  • Creamy Coconut Rice: Its subtle sweetness mirrors the mango’s tropical flavor, creating a harmonious pairing for a light dessert or breakfast experience.

  • Tropical Fruit Salad: A colorful medley of pineapple, kiwi, and berries adds freshness and balances the richness of the cookies, making it a refreshing side.

  • Chilled Lemonade: The zesty notes complement the sweetness of the cookies beautifully; it’s a refreshing beverage that elevates your snacking experience.

  • Crispy Granola: Serve with a scoop on the side for an added crunch that contrasts the soft texture of the mango cookies, perfect for breakfast or snack time.

  • Vanilla Ice Cream: A scoop of creamy ice cream harmonizes with the vanilla glaze, making the dessert indulgently rich and incredibly satisfying after a meal.

  • Herbal Tea: Enjoying a hot cup of chamomile or ginger tea softens the sweetness of the cookies and offers a delightful moment of relaxation.

  • Almond Biscotti: The crunchy texture of the biscotti provides a delightful contrast to the tender cookies while enhancing the overall experience of your tropical treat.

  • Mango Lassi: This creamy, yogurt-based drink enriches the mango flavor in the cookies, offering a refreshing and smooth pairing that is simply irresistible.

Expert Tips for Perfect Mango Cookies

  • Butter Temperature: Ensure butter is softened but not melted. This will give your mango cookies the right texture to be soft and tender.

  • Avoid Overmixing: When adding the dry ingredients, mix just until combined. Overmixing can lead to tough cookies instead of soft, cake-like goodness.

  • Thoroughly Chill Dough: Don’t skip chilling the dough! This step helps prevent excessive spreading and enhances the flavors, making your mango cookies even more delightful.

  • Baking Sheet Care: Use high-quality baking sheets and avoid worn-out ones, as they can affect the baking results and the lovely softness of your cookies.

  • Fresh Mango Check: If using fresh mango, ensure it’s ripe for the sweetest flavor. Overripe or under-ripe mangoes won’t provide the best taste in your cookies.

  • Experiment with Glaze: Adjust the glaze to your liking; if you want a thicker coating, add more powdered sugar. For a flavored twist, try adding a touch of mango juice to the glaze for an extra fruity kick!

Soft and Tender Mango Cookies with Sweet Vanilla Glaze Recipe FAQs

What kind of mango should I use for the cookies?
Absolutely! For the best results, use ripe mangoes that are slightly soft to the touch and have a sweet aroma. Look for those without dark spots or blemishes, as these can indicate overripeness. If you’re in a pinch, frozen mango works well too; just ensure it’s thawed and excess moisture is drained before adding it to your dough.

How should I store my mango cookies?
To keep your mango cookies fresh, store them in an airtight container. Unglazed cookies can be kept at room temperature for up to 2 days, while glazed cookies will maintain their deliciousness in the fridge for up to 1 week. Ensure the container is sealed properly; this will help retain their soft texture and delightful flavor.

Can I freeze the mango cookies? If so, how?
Certainly! For optimal freshness, freeze ungazed mango cookies for up to 2-3 months. First, arrange them in a single layer on a baking sheet until they’re solid—this prevents them from sticking together. Once frozen, transfer them to a freezer-safe bag. When you’re ready to enjoy them, simply thaw them in the refrigerator overnight, and they’ll be ready for glazing!

What can I do if my cookies come out too dry?
If your mango cookies turn out dry, don’t fret! Before baking, ensure you didn’t overmix the dough, as this can lead to tough cookies. Also, consider adding a tablespoon of milk to the dough to increase moisture. If it’s already too late, a drizzle of the vanilla glaze can add extra softness and sweetness we all love.

Are these cookies suitable for people with allergies?
Very! These mango cookies are not specifically designed for any dietary restrictions; however, they do contain common allergens like gluten, dairy, and eggs. For a vegan alternative, replace the egg with a flax egg and use a plant-based milk. Always check the substituents to ensure they’re safe for anyone with allergies. Sharing is caring, so be sure to inform your guests of any modifications!

Mango Cookies

Soft Mango Cookies with Vanilla Glaze for a Tropical Treat

Delightful mango cookies bursting with tropical flavors and vanilla glaze, perfect for any occasion.
Prep Time 15 minutes
Cook Time 16 minutes
Chilling Time 30 minutes
Total Time 1 hour 1 minute
Servings: 12 cookies
Course: Dessert
Cuisine: Tropical
Calories: 150

Ingredients
  

For the Cookie Dough
  • 2 cups All-Purpose Flour Use plain flour for the perfect structure.
  • 1 teaspoon Baking Powder Ensure it's fresh for optimal rise.
  • 0.5 cups Salted Butter Can substitute with unsalted butter, adding a pinch of salt.
  • 0.5 cups Granulated Sugar Replacing with coconut sugar adds a caramel note.
  • 0.5 cups Brown Sugar Can replace with an extra 2 tablespoons of granulated sugar.
  • 1 large Egg For a vegan option, use a flax egg (1 tbsp flaxseed meal + 2.5 tbsp water).
  • 1 teaspoon Vanilla Extract Using pure vanilla will give the best taste.
  • 2 tablespoons Milk Almond or coconut milk works as a dairy-free alternative.
  • 1 cup Mango (fresh or frozen) Ensure it’s ripe for optimal sweetness.
For the Vanilla Glaze
  • 1 cup Powdered Sugar Add more sugar to thicken; milk or mango juice to thin.

Equipment

  • Mixing Bowl
  • Electric Mixer
  • Rubber Spatula
  • Baking Sheets
  • Parchment paper
  • Whisk

Method
 

Step‑by‑Step Instructions
  1. Cream ½ cup of softened salted butter with ½ cup granulated sugar and ½ cup brown sugar for 2-3 minutes until light and fluffy.
  2. Add 1 large egg and 2 tablespoons of milk, mixing on low speed just until combined.
  3. Gradually sift in 2 cups of all-purpose flour and 1 teaspoon of baking powder. Fold until just combined.
  4. Fold in 1 cup of diced mango until evenly distributed.
  5. Cover the bowl with plastic wrap and refrigerate for at least 30 minutes.
  6. Preheat the oven to 350°F (180°C) and line two baking sheets with parchment paper.
  7. Scoop the chilled dough using 1.5 tablespoons for each cookie and place them onto the baking sheets, spaced 3 inches apart.
  8. Bake for 14-16 minutes until the edges turn light golden.
  9. Cool for 10 minutes on the baking sheets before transferring to a wire rack.
  10. In a small bowl, whisk 1 cup of powdered sugar, 1 teaspoon of vanilla extract, and 2 tablespoons of milk until smooth.
  11. Drizzle the vanilla glaze over the cooled cookies.

Nutrition

Serving: 1cookieCalories: 150kcalCarbohydrates: 20gProtein: 2gFat: 7gSaturated Fat: 4gPolyunsaturated Fat: 0.5gMonounsaturated Fat: 2.5gCholesterol: 20mgSodium: 125mgPotassium: 50mgFiber: 0.5gSugar: 10gVitamin A: 200IUVitamin C: 3mgCalcium: 20mgIron: 0.5mg

Notes

Remember to soften the butter properly and avoid overmixing to ensure soft cookies. Chilling the dough is crucial for the best texture.

Tried this recipe?

Let us know how it was!

Magical Harry Potter Chocolate Bonbons Made in Minutes

It was a chilly evening, and as I flipped through some old cookbooks, I stumbled upon a magical idea: Harry Potter Chocolate Bonbons. Instantly, I was transported to the whimsical world of Honeydukes, with its endless sugary delights. This easy, no-bake recipe requires just four simple ingredients and can be made in under 30 minutes, making it perfect for both chocolate lovers and Hogwarts enthusiasts alike. The satisfying crunch of graham cracker blended with creamy peanut butter creates a delightful contrast to the smooth, chocolatey coating. Whether you’re planning a movie marathon or want to impress your friends with a sweet surprise, these bonbons are the perfect treat. Are you ready to conjure up some magic in your kitchen? Let’s get started!

Why Are These Bonbons So Magical?

Irresistible Crunch: The delightful texture of graham cracker crumbs provides a satisfying crunch, perfectly balancing the creamy peanut butter filling.
Quick and Easy: With just four ingredients, you’ll whip up these no-bake delights in under 30 minutes—ideal for spontaneous gatherings or sweet cravings!
Versatile Customization: Feel free to experiment with coatings like dark chocolate or colorful white chocolate to create your own unique flavor combinations.
Crowd Pleaser: These Harry Potter Chocolate Bonbons are bound to impress both guests and family alike; they make enchanting additions to movie marathons or themed parties.
Whimsical Experience: Inspired by the magical world of Hogwarts, each bite transports you straight to Honeydukes—a sweet escape for fans and foodies. Check out our White Chocolate Cranberry for another delightful treat!

Harry Potter Chocolate Bonbons Ingredients

For the Bonbons

  • Graham Cracker Crumbs – Provides a crunchy texture that is essential for these delightful Harry Potter chocolate bonbons; use gluten-free graham crackers for a gluten-free option.
  • Powdered Sugar – Adds a touch of sweetness and helps bind the ingredients together; if needed, regular sugar can be powdered in a blender.
  • Creamy Peanut Butter – Acts as a delicious binder and enhances the flavor profile; substitute with almond or sunflower seed butter for nut-free alternatives.
  • Chocolate (White or Milk) – Coats the bonbons and adds indulgent richness; opt for dark chocolate if you prefer a stronger chocolate flavor or choose dairy-free chocolate for a vegan treat.

Optional Topping

  • Sprinkles or Crushed Nuts – Add these for a fun and crunchy finish; they can make each bonbon visually stunning and appealing!

Step‑by‑Step Instructions for Harry Potter Chocolate Bonbons

Step 1: Prepare Graham Cracker Crumbs
Begin by crushing 12 graham crackers into fine crumbs to form the base of your Harry Potter chocolate bonbons. Use a food processor for a quick and even consistency, or place them in a zip-lock bag and smash with a rolling pin if you prefer a hands-on approach. Aim for a texture similar to sand for the best results.

Step 2: Combine Ingredients
In a mixing bowl, combine the graham cracker crumbs and powdered sugar, ensuring they are well blended. Then, pour in the creamy peanut butter and mix until the ingredients are fully incorporated. Use a spatula or your hands to ensure every bit of crumb is coated with the peanut butter, creating a sticky, cohesive mixture perfect for forming bonbons.

Step 3: Form Bonbons
Take small portions of the mixture and roll them into round balls, about 1 inch in diameter. Place the rolled bonbons onto a parchment-lined baking sheet, leaving space between each ball to avoid sticking. This step is where the magic begins, as your delightful Harry Potter chocolate bonbons start to take shape!

Step 4: Melt Chocolate
In a microwave-safe bowl, melt your choice of chocolate, using either white or milk chocolate for coating. Heat in 15-second bursts, stirring after each interval until the chocolate is completely smooth and glossy—this should take about 1-2 minutes total. If using white chocolate, consider adding food coloring to make your bonbons even more enchanting!

Step 5: Coat Bonbons
Once melted, dip each bonbon into the chocolate, ensuring they are completely coated. Use a fork to lift them out, allowing excess chocolate to drip off. Carefully place each coated bonbon back onto the lined baking sheet. This chocolate enveloping adds an indulgent finish to your no-bake Harry Potter chocolate bonbons.

Step 6: Set Chocolate
Let the coated bonbons sit at room temperature for approximately 30 minutes until the chocolate hardens. Alternatively, for a quicker set, place the baking sheet in the refrigerator for about 10 minutes. The finished chocolate coating should be smooth and glossy, making your bonbons look irresistibly tempting.

Make Ahead Options

These Harry Potter Chocolate Bonbons are perfect for meal prep enthusiasts looking to save time on busy days! You can prepare the mixture of graham cracker crumbs, powdered sugar, and creamy peanut butter up to 24 hours in advance. Simply roll the mixture into balls and refrigerate them, which helps maintain their firmness and flavor. When you’re ready to serve, melt the chocolate and coat the bonbons. For best results, dip the bonbons just before serving to keep the chocolate coating fresh and glossy. This way, you’ll have delightful treats on hand, ready to impress friends and family with minimal effort!

Harry Potter Chocolate Bonbons Variations

Feel free to let your creativity shine as you customize these magical treats to suit your taste buds!

  • Nut-Free Delight: Swap creamy peanut butter for almond or sunflower seed butter to accommodate nut allergies without sacrificing flavor.

  • Vegan Option: Use dairy-free chocolate for coating and ensure the peanut butter is made from 100% peanuts for a completely vegan treat. “More alternatives” opens up a fun new world!

  • Spiced Up: Add a pinch of cinnamon or nutmeg to the graham cracker mixture for a warm, aromatic twist—an unexpected yet delightful flavor surprise!

  • Colorful Coating: Enhance your bonbons by using food coloring to tint white chocolate for a festive occasion, creating a vibrant and eye-catching treat.

  • Texture Variety: Mix in some crushed nuts or sprinkles to the chocolate coating for added crunch; this will give a fun texture and an even more enticing appearance.

  • Flavor Swaps: Consider using crushed vanilla wafers or crushed cookies instead of graham cracker crumbs for a whimsical flavor twist.

  • Chocolate Variety: Choose dark chocolate for a richer experience, or experiment with flavored chocolate, like orange or raspberry, to make your bonbons uniquely yours.

  • Celebration Touch: Drizzle melted chocolate or icing on top of the bonbons for a decorative touch, making them stand out for parties or special gatherings.

For another easy dessert idea that brings flavor and fun, try our White Chocolate Cranberry cookies, perfect for those who love a fruity twist. Each variation unveils a new layer of delightful possibilities!

What to Serve with Harry Potter Chocolate Bonbons?

Indulging in these delightful chocolate bonbons is a treat that can be elevated with the perfect pairings.

  • Fluffy Marshmallow Mousse: A light and airy dessert that complements the rich chocolate bonbons, adding a touch of whimsy. The creamy mousse creates a delightful contrast with the bonbons’ crunch.

  • Fizzy Fruit Punch: Serve a vibrant, fruity punch for a refreshing balance against the sweetness of the bonbons. The carbonation and colorful fruits transform any gathering into a magical celebration.

  • Creamy Vanilla Ice Cream: A scoop of velvety vanilla ice cream adds a cool, creamy element alongside the chocolate bonbons. This classic combination takes the sweetness to delightful new heights.

  • Chocolate Milkshakes: Whip up some thick chocolate milkshakes to create a fun, nostalgic feeling. The rich flavor echoes the bonbons and makes for a perfect duo enjoyed on a cozy night in.

  • Buttery Popcorn: Lightly salted popcorn offers a playful textural contrast to the sweet bonbons. The buttery flavor will excite your taste buds while enhancing your snacking experience.

  • Nutty Biscotti: Serve with crunchy biscotti for a delightful dunking experience. The nutty flavors and the firm texture create a lovely pairing that adds sophistication.

  • Warm Chai Latte: The spiced warmth of a chai latte pairs beautifully with the sweet richness of the bonbons. Sip it slowly, allowing the contrasting flavors to dance together, creating a cozy atmosphere.

Storage Tips for Harry Potter Chocolate Bonbons

Room Temperature: Store the bonbons in an airtight container at room temperature for up to 7 days. Keep them away from direct sunlight and heat to maintain freshness.

Fridge: For extra freshness, you can refrigerate the bonbons; they can last up to 2 weeks. Just be sure to place them in a sealed container to prevent moisture and odors from affecting their flavor.

Freezer: If you want to store the Harry Potter chocolate bonbons longer, they can be frozen for up to 3 months. Use an airtight container or freezer-safe bag to prevent freezer burn.

Reheating: When ready to enjoy, simply thaw the bonbons in the fridge overnight or at room temperature for a couple of hours before serving. Avoid reheating as it can ruin the chocolate coating.

Tips for the Best Harry Potter Chocolate Bonbons

  • Perfect Texture: Ensure graham cracker crumbs are finely pulverized; this provides the ideal base for your bonbons, avoiding any graininess in the texture.
  • Mix Smoothly: Use smooth peanut butter to prevent clumps; avoid natural peanut butters that separate, as this can lead to inconsistent mixing.
  • Melting Chocolate: Melt chocolate in short bursts to prevent overheating; overcooked chocolate can become thick and clumpy, ruining your coating.
  • Chill for Firmness: If you want firmer bonbons, allow the mixture to chill in the refrigerator before rolling into balls; this makes shaping easier.
  • Add Fun Toppings: Experiment with colorful sprinkles or crushed nuts to give your Harry Potter chocolate bonbons an enchanting finish and add extra flavor!

Harry Potter Chocolate Bonbons Recipe FAQs

What type of graham crackers should I use?
Absolutely! For the best results, use plain graham crackers without any added flavors. If you’re looking for a gluten-free option, gluten-free graham crackers work perfectly—just make sure to check the label to ensure they fit your dietary needs.

How should I store leftover bonbons?
Store your Harry Potter chocolate bonbons in an airtight container. At room temperature, they will stay fresh for up to 7 days. For extended freshness, keep them in the refrigerator for up to 2 weeks. Just make sure to avoid any moisture by using a sealed container!

Can I freeze chocolate bonbons?
Yes, you can! To freeze your bonbons, place them in an airtight container or a freezer-safe bag. They can be stored for up to 3 months. When you’re ready to enjoy them, thaw the bonbons in the fridge overnight or at room temperature for a couple of hours. Avoid reheating them to preserve that delightful chocolate coating!

What should I do if my chocolate is clumping while melting?
Very important! If your melted chocolate appears clumpy, it may have been overheated. To fix this, try adding a small amount of vegetable oil or coconut oil to the bowl and stir until smooth. Also, remember to melt chocolate in short bursts (15 seconds) and stir often to maintain the proper consistency.

Can I make these bonbons nut-free?
Absolutely! You can substitute the creamy peanut butter with almond or sunflower seed butter to accommodate allergies. Just ensure that the alternative you use is smooth to maintain the right texture in your bonbons.

How can I tell when the chocolate coating has set?
To check if the chocolate has set correctly, gently touch a test bonbon with your finger after about 30 minutes at room temperature. It should feel firm and not sticky. If it’s not quite hard yet, give it a bit more time. If it sets in the fridge, about 10 minutes should do the trick!

Harry Potter Chocolate Bonbons

Magical Harry Potter Chocolate Bonbons Made in Minutes

Delightful Harry Potter Chocolate Bonbons, made in minutes with four simple ingredients—perfect for chocolate lovers.
Prep Time 15 minutes
Setting Time 30 minutes
Total Time 45 minutes
Servings: 12 bonbons
Course: Dessert
Cuisine: British
Calories: 100

Ingredients
  

For the Bonbons
  • 12 pieces Graham Crackers Crushed into fine crumbs
  • 1 cup Powdered Sugar Can substitute regular sugar blended to powder
  • 1 cup Creamy Peanut Butter Can use almond or sunflower seed butter for nut-free
  • 1 cup Chocolate (White or Milk) Can opt for dark chocolate or dairy-free
Optional Topping
  • Sprinkles or Crushed Nuts For fun and crunchy finish

Equipment

  • Mixing Bowl
  • Food processor
  • Microwave-safe bowl
  • Spatula
  • Parchment paper

Method
 

Step-by-Step Instructions
  1. Begin by crushing 12 graham crackers into fine crumbs.
  2. In a mixing bowl, combine graham cracker crumbs and powdered sugar.
  3. Pour in creamy peanut butter and mix until fully incorporated.
  4. Roll small portions into balls about 1 inch in diameter.
  5. Melt chocolate in a microwave-safe bowl in 15-second bursts.
  6. Dip each bonbon into melted chocolate and place on a lined baking sheet.
  7. Let chocolate harden at room temperature for about 30 minutes.

Nutrition

Serving: 1bonbonCalories: 100kcalCarbohydrates: 12gProtein: 3gFat: 5gSaturated Fat: 2gMonounsaturated Fat: 3gSodium: 50mgPotassium: 50mgFiber: 1gSugar: 8gCalcium: 1mgIron: 2mg

Notes

Store bonbons in an airtight container; they last up to 7 days at room temperature, 2 weeks in the fridge, or 3 months in the freezer.

Tried this recipe?

Let us know how it was!

Creamy Cajun Pasta: A Quick, Flavor-Packed Family Favorite

As I stirred the pot, the air filled with a tantalizing mix of spices that instantly transported me to the lively streets of New Orleans. This Creamy Cajun Pasta recipe combines the richness of creamy sauce with the zesty punch of Cajun seasoning, bringing together tender shrimp, juicy chicken, and savory sausage in a single pan. Perfect for busy weeknights, this quick meal not only pleases the family but also impresses guests craving something special. Picture a robust flavor experience in just 30 minutes—comforting yet sophisticated. Trust me, after one bite, you’ll want to make this vibrant dish a staple in your home. Ready to dive into the bold world of Cajun cooking?

Why Is Creamy Cajun Pasta a Must-Try?

Simplicity: With just a single pan required, this dish makes cleanup a breeze—ideal for busy cooks!
Flavor Explosion: A harmonious blend of Cajun spices dances on your palate, bringing life to every bite.
Versatile Options: You can easily swap proteins or veggies, allowing you to customize this recipe for any occasion.
Quick & Convenient: Whip it up in under 30 minutes—perfect for weeknight dinners or last-minute guests!
Family-Friendly: Kids and adults alike will enjoy this creamy, hearty meal, making it a sure crowd-pleaser.
For more flavorful dinners, check out my Chicken Fettuccine Alfredo or the delightful Mushroom Pasta Delightful to satisfy those comfort food cravings!

Creamy Cajun Pasta Ingredients

For the Pasta
Linguine Pasta – Perfect base; feel free to swap with fettuccine or penne for varied textures.

For the Protein
Shrimp (peeled and deveined) – Offers delightful seafood flavor; substitute with chicken or tofu if desired.
Boneless, Skinless Chicken Breasts – Lean and juicy addition; ground turkey is a fitting replacement.
Andouille Sausage – Smoky and spicy; any smoked sausage works well or can be skipped for a lighter twist.

For the Vegetables
Yellow Onion – Sweetness and depth; shallots can be a nice alternative.
Green Bell Pepper – Adds crunch; try red or yellow for a dash of color.
Minced Garlic – Essential for that aromatic boost; garlic powder can be an easy substitute.

For the Sauce
Olive Oil – Key for sautéing; vegetable oil can be used if preferred.
Cajun Seasoning – Delivers authentic kick; adjust according to your preferred spice level.
Salt & Black Pepper – Vital for flavor enhancement; season progressively throughout cooking.
Ground Thyme – Offers extra depth; dried oregano can take its place if needed.
Canned Crushed Tomatoes – Adds acidity and body; fresh ripe tomatoes work beautifully too.
Chicken Broth – Forms the sauce’s foundation; swap for vegetable broth for a vegetarian-friendly option.
Heavy Cream (or Half-and-Half) – Creates that luscious creamy texture; whole milk or non-dairy options are great lighter alternatives.
Grated Parmesan Cheese – A rich finishing touch; opt for nutritional yeast for a dairy-free version.

Optional Ingredient
Brown Sugar – Balances out the heat; completely optional if you prefer a spicier dish.

This Creamy Cajun Pasta recipe is ready to turn every dinner into a celebration!

Step‑by‑Step Instructions for Creamy Cajun Pasta

Step 1: Cook Shrimp
Begin by heating 1 tablespoon of olive oil in a large skillet over medium heat. Once the oil shimmers, add the peeled and deveined shrimp, sautéing them for 2-3 minutes until they turn pink and opaque. Stir occasionally to ensure even cooking. Once done, remove the shrimp from the skillet and set them aside on a plate.

Step 2: Brown Chicken
In the same skillet, add a little more olive oil if needed. Add boneless, skinless chicken breasts and cook for about 7 minutes, turning occasionally, until they are golden brown and cooked through. You’ll know they’re ready when there’s no pink remaining in the center. Transfer the chicken to the plate with the shrimp and cover loosely to keep warm.

Step 3: Sauté Vegetables
Lower the heat slightly and add the chopped yellow onion, green bell pepper, and minced garlic to the skillet. Sauté the vegetables for 3-4 minutes, stirring frequently until the onion becomes translucent and the bell pepper softens. Sprinkle in the Cajun seasoning and optional brown sugar, mixing well to coat the veggies with flavor.

Step 4: Create Sauce
Pour in the canned crushed tomatoes and chicken broth, stirring to combine. Raise the heat back to medium-high, bringing the mixture to a gentle simmer. Let it cook for 2-3 minutes until the sauce thickens slightly and the flavors meld together, creating a vibrant base for your Creamy Cajun Pasta.

Step 5: Add Cream and Cheese
Reduce the heat to low and stir in the heavy cream along with the grated Parmesan cheese. Continuously mix for about 2 minutes until the cheese is melted and the sauce is creamy and well combined. This step transforms your sauce into the luxurious, velvety texture that makes the Creamy Cajun Pasta irresistible.

Step 6: Combine Pasta and Proteins
Add the cooked linguine to the sauce, gently tossing it to coat the pasta evenly. Then, fold in the sautéed shrimp and chicken, ensuring each piece is embraced by the creamy sauce. Cook everything together for another minute, allowing the flavors to meld beautifully, creating a hearty one-pan meal.

Step 7: Serve Warm
Remove the skillet from heat and plate the Creamy Cajun Pasta immediately. For an extra touch, garnish with additional grated Parmesan cheese and sprinkle fresh herbs if desired. Serve warm and enjoy this flavorful dish that’s sure to have your family asking for seconds!

Creamy Cajun Pasta Variations & Substitutions

Feel free to explore these delightful twists that will take your Creamy Cajun Pasta to new heights!

  • Protein Swap: Replace shrimp with chicken or tofu to suit your taste or dietary needs. If you’re feeling adventurous, grilled salmon could be a fantastic addition!
  • Pasta Variety: Try using different pastas like fettuccine or penne for a unique texture. With so many options, the possibilities are endless!
  • Vegetable Boost: Incorporate seasonal vegetables like zucchini or spinach for added nutrition and vibrant color. They’ll infuse the dish with fresh flavors and keep things exciting.
  • Cheese Alternatives: For a lighter dish, use low-fat cream cheese or Greek yogurt instead of heavy cream. Both give a creamy touch without the heaviness.
  • Spice It Up: If you love heat, increase the Cajun seasoning or add a dash of cayenne pepper. Just a pinch can amplify that beautiful kick!
  • Herb Infusion: Stir in fresh herbs like basil or parsley right before serving to enhance the dish’s aroma and freshness. It makes each bite feel like a breath of fresh air.
  • Nutty Flavor: Add a handful of toasted pecans or walnuts for an unexpected crunch that elevates both texture and flavor.
  • Seafood Deluxe: Combine shrimp with scallops or crab meat for a sumptuous seafood feast. It’s a lovely way to celebrate those coastal flavors!

The beauty of this Creamy Cajun Pasta lies in its adaptability, so don’t hesitate to get creative! If you’re looking for more inspiration, check out my seafood bisque soup for a comforting option or the Summer Corn Chowder that’s perfect for warm days.

Make Ahead Options

These Creamy Cajun Pasta components are perfect for meal prep enthusiasts! You can chop your vegetables and even cook the proteins (shrimp, chicken, and sausage) up to 24 hours in advance, storing them in airtight containers in the refrigerator. The sauce can also be prepared and refrigerated for up to 3 days to enhance the flavors. When you’re ready to serve, simply reheat the sauce over low heat, incorporate the cooked pasta, and fold in the proteins. This way, your flavorful dish maintains its delightful quality and comes together in minutes, allowing for a satisfying homemade meal with minimal effort on those busy weeknights.

How to Store and Freeze Creamy Cajun Pasta

  • Fridge: Store leftover Creamy Cajun Pasta in an airtight container for up to 4 days. Make sure to let it cool before sealing to keep it fresh longer.
  • Freezer: For long-term storage, freeze portions in freezer-safe containers for up to 3 months. Thaw in the refrigerator overnight before reheating.
  • Reheating: When ready to enjoy, reheat in a skillet over low heat, adding a splash of chicken broth or cream to restore its creamy texture. Stir frequently for even heating.
  • Avoid: Be mindful not to refreeze after thawing, as it may affect the texture and flavor of the creamy pasta.

Expert Tips for Creamy Cajun Pasta

  • Perfectly Cook Shrimp: Sauté shrimp just until they turn pink to avoid rubberiness. Timing is key for that perfect texture!
  • Prep Ahead: Chop your vegetables beforehand to streamline cooking and make weeknight meals even quicker.
  • Thicken Sauce Easily: If your sauce appears too thin, mix a tablespoon of cornstarch with cold water and stir it in to thicken without changing flavor.
  • Control the Spice: Adjust the Cajun seasoning to your taste; if you’re sensitive to heat, start with a smaller amount and gradually increase.
  • Store Leftovers Right: Keep leftover Creamy Cajun Pasta in an airtight container in the fridge for up to 4 days for easy reheating later.

What to Serve with Creamy Cajun Pasta?

Enjoying a delicious meal goes beyond just the main dish; it’s about creating a full experience! Here are some delightful pairings to enhance your Creamy Cajun Pasta.

  • Garlic Bread: This classic side is perfect for soaking up that luscious sauce and adds a comforting crunch to your meal.
  • Caesar Salad: Crisp romaine, tangy dressing, and crunchy croutons complement the rich creaminess while offering a refreshing contrast.

Serve the salad lightly dressed to keep the focus on the flavors.

  • Roasted Corn on the Cob: The natural sweetness of corn adds a delightful additional texture, balancing the spiciness of the Cajun flavors.
  • Steamed Broccoli: This vibrant green veggie introduces a fresh element, providing a nutrient boost and a satisfying bite that pairs well with the creamy sauce.

For something to sip on, consider a chilled white wine or a sparkling lemonade!

  • Lemonade or Iced Tea: Refreshing beverages like these enhance the meal experience, cutting through the richness and making every bite delightful.
  • Chocolate Mousse: End the meal on a sweet note with a rich, indulgent dessert; its smooth texture beautifully complements the meal’s flavors.

These side dishes elevate your dining experience, transforming your Creamy Cajun Pasta into a feast that satisfies the senses.

Creamy Cajun Pasta Recipe FAQs

How do I select ripe ingredients for my Creamy Cajun Pasta?
Absolutely! For the best flavor, choose shrimp that are firm and have a mild ocean scent. Look for chicken breasts that are pale pink and moist, avoiding any with dark spots or a slimy texture. Your peppers should be bright and firm, while onions should be free of soft spots or wrinkles. Fresh ingredients lead to vibrant flavors!

What are the best storage methods for leftover Creamy Cajun Pasta?
Very! Store any leftover Creamy Cajun Pasta in an airtight container for up to 4 days in the refrigerator. Ensure it cools down completely before sealing to maintain freshness. If you need to keep it longer, freezing is an option.

Can I freeze Creamy Cajun Pasta and how?
Of course! To freeze, portion your Creamy Cajun Pasta into freezer-safe containers or bags, removing excess air. It will be good for up to 3 months. Thaw overnight in the refrigerator when you’re ready to enjoy it again. Reheat over low heat in a skillet, adding a bit of broth or cream to help regain its creamy texture.

What should I do if my sauce is too thin?
No worries! If your sauce turns out thinner than desired, you can thicken it by making a cornstarch slurry. Mix 1 tablespoon of cornstarch with 2 tablespoons of cold water until smooth. Gradually stir it into the simmering sauce and cook for an additional minute or two until it thickens.

Are there any dietary considerations for this recipe, such as allergies?
Definitely! If you’re cooking for someone with allergies, be sure to check the Cajun seasoning for gluten or other common allergens. You can easily swap heavy cream with coconut milk or a plant-based cream for dairy-free needs. Tofu can also replace shrimp for a vegetarian alternative.

Can I use different proteins or veggies?
Absolutely! This Creamy Cajun Pasta is super versatile. You can substitute shrimp for chicken, tofu, or even vegetable options like chickpeas. Likewise, feel free to replace the green bell pepper with zucchini or spinach for a flavorful twist. The more the merrier when it comes to customizing your dish!

Creamy Cajun Pasta

Creamy Cajun Pasta: A Quick, Flavor-Packed Family Favorite

This Creamy Cajun Pasta recipe combines creamy sauce with Cajun seasoning, shrimp, chicken, and sausage for a quick, flavorful family dinner.
Prep Time 10 minutes
Cook Time 20 minutes
Total Time 30 minutes
Servings: 4 servings
Course: Dinner
Cuisine: American, Cajun
Calories: 620

Ingredients
  

For the Pasta
  • 8 oz linguine pasta Feel free to swap with fettuccine or penne for varied textures.
For the Protein
  • 12 oz shrimp peeled and deveined
  • 2 medium boneless, skinless chicken breasts Lean and juicy addition
  • 8 oz andouille sausage Smoky and spicy
For the Vegetables
  • 1 medium yellow onion Shallots can be a nice alternative.
  • 1 medium green bell pepper Try red or yellow for a dash of color.
  • 3 cloves minced garlic Essential for that aromatic boost.
For the Sauce
  • 2 tbsp olive oil Key for sautéing
  • 2 tbsp cajun seasoning Adjust according to your preferred spice level.
  • to taste salt & black pepper Season progressively throughout cooking.
  • 1 tsp ground thyme Dried oregano can take its place if needed.
  • 28 oz canned crushed tomatoes Adds acidity and body.
  • 1 cup chicken broth Swap for vegetable broth for a vegetarian-friendly option.
  • 1 cup heavy cream or Half-and-Half
  • 1/2 cup grated parmesan cheese A rich finishing touch.
Optional Ingredient
  • 1 tbsp brown sugar Balances out the heat.

Equipment

  • large skillet

Method
 

Step-by-Step Instructions for Creamy Cajun Pasta
  1. Step 1: Cook Shrimp - Heat olive oil in a large skillet over medium heat. Add shrimp, sautéing for 2-3 minutes until pink and opaque. Remove from skillet.
  2. Step 2: Brown Chicken - In the same skillet, add more olive oil if needed. Cook chicken for about 7 minutes until golden brown and cooked through. Transfer to the plate with shrimp.
  3. Step 3: Sauté Vegetables - Add chopped onion, bell pepper, and garlic to the skillet. Sauté for 3-4 minutes until onion is translucent. Sprinkle in Cajun seasoning and optional brown sugar.
  4. Step 4: Create Sauce - Pour in crushed tomatoes and chicken broth, stirring to combine. Bring to a simmer, cooking for 2-3 minutes until sauce thickens.
  5. Step 5: Add Cream and Cheese - Reduce heat to low, stir in heavy cream and Parmesan, mixing for about 2 minutes until melted and creamy.
  6. Step 6: Combine Pasta and Proteins - Add cooked linguine to the sauce, tossing to coat, then fold in shrimp and chicken. Cook together for another minute.
  7. Step 7: Serve Warm - Plate the pasta immediately, garnishing with more Parmesan and herbs. Serve warm.

Nutrition

Serving: 1servingCalories: 620kcalCarbohydrates: 70gProtein: 34gFat: 22gSaturated Fat: 10gPolyunsaturated Fat: 2gMonounsaturated Fat: 8gCholesterol: 175mgSodium: 900mgPotassium: 600mgFiber: 4gSugar: 5gVitamin A: 1500IUVitamin C: 40mgCalcium: 200mgIron: 3.5mg

Notes

Store leftovers in an airtight container in the fridge for up to 4 days. For long-term, freeze in freezer-safe containers for up to 3 months.

Tried this recipe?

Let us know how it was!

Pineapple Sriracha Chicken: A Sweet and Spicy Delight

There’s nothing quite like the excitement of a backyard gathering, especially when the star of the show is a sizzling Pineapple Sriracha Chicken Outdoor Pizza. This delightful dish marries the sweetness of juicy pineapple with the fiery kick of sriracha, making it a must-try for your next cookout. What’s even better? It’s a quick and easy recipe that promises a golden crust and melty cheese, perfect for impressing friends and family without the fuss. Plus, it’s highly customizable—sub in grilled veggies for a vegetarian delight or swap the sauce for something uniquely yours. Ready to elevate your outdoor cooking game with this crowd-pleaser? Keep reading to discover how to craft this flavor-packed pizza!

Why is this pizza so special?

Quick and Easy: This Pineapple Sriracha Chicken Outdoor Pizza is a breeze to prepare, taking less than 30 minutes from start to finish—perfect for those busy weeknights or spontaneous gatherings.

Customizable Options: Whether you’re catering to vegetarians by swapping chicken for grilled veggies or adding jalapeños for an extra kick, this recipe allows you to get creative!

Crowd-Pleasing Flavor: The sweet pineapple paired with spicy sriracha will have everyone reaching for a second slice. It’s a combination that’s sure to please all palates!

Perfect for Outdoor Cooking: Cooking this pizza outdoors not only enhances the flavor but also makes for a fun grilling experience that brings friends and family together.

Great for Leftovers: If there are any slices left, they store wonderfully! Enjoy them the next day or toss them in a salad for a delightful twist. For more flavor-packed chicken ideas, check out my Sriracha Ground Chicken and Grilled Chicken Sandwich.

Pineapple Sriracha Chicken Ingredients

• Perfect for a flavorful outdoor pizza night!

  • For the Dough

  • Pizza Dough – You can use store-bought for ease, or make your own for a personal touch.

  • Semolina Flour – This prevents sticking on the pizza peel, ensuring a smooth transfer to the oven.

  • For the Toppings

  • Olive Oil – Adds flavor and helps the sauce adhere nicely to the dough.

  • Pizza Sauce – Use your favorite variety, whether homemade or store-bought, to bring moisture and richness.

  • Shredded Mozzarella Cheese – This cheese melts beautifully; feel free to substitute with provolone for a twist.

  • Diced Pineapple – Fresh is best for sweetness and juiciness, but drained canned will work in a hurry.

  • Diced Chicken – Pre-cooked or leftover chicken makes this recipe even quicker.

  • Blackstone Pineapple Sriracha Seasoning – Optional but adds additional spice; you can make a substitute with garlic powder, cayenne, and sugar.

  • Sriracha Sauce – Drizzle this on top before serving for that essential spicy kick that elevates the flavor.

With the Pineapple Sriracha Chicken ingredients sorted, you’re on your way to a quick and easy culinary delight that’s perfect for any outdoor occasion!

Step‑by‑Step Instructions for Pineapple Sriracha Chicken Outdoor Pizza

Step 1: Preheat the Pizza Oven
Begin by preheating your outdoor pizza oven to a scorching 500-600°F. This high temperature is crucial for achieving a perfectly crispy crust. Ensure the oven is heated for about 10-15 minutes before you start assembling your pizza, allowing the stone to absorb the heat.

Step 2: Prepare the Pizza Dough
Take your pizza dough and stretch or roll it out into a 12-14 inch circle on a lightly floured surface. Aim for a uniform thickness, around 1/4 inch, which will ensure even cooking. You should see little bubbles developing in the dough, indicating it’s ready for the next steps.

Step 3: Dust the Pizza Peel
Sprinkle semolina flour generously over your pizza peel or baking sheet. This will help prevent the stretched dough from sticking as you work with it. A lightly floured surface is essential—opt for the semolina’s texture, as it adds a slight crunch to the crust when baked.

Step 4: Brush with Olive Oil
Carefully transfer your rolled-out dough onto the prepared peel. Drizzle a thin layer of olive oil over the surface of the dough, using a brush or the back of a spoon to spread it evenly. This step not only enhances the flavor of your Pineapple Sriracha Chicken pizza but also helps the sauce adhere better.

Step 5: Spread the Pizza Sauce
Spread a generous amount of pizza sauce evenly over the dough, leaving a small border around the edges. Use the back of a spoon for an even application, ensuring that every bite will be flavorful. The sauce will create a delicious base that complements the other toppings beautifully.

Step 6: Add Cheese and Toppings
Layer a thick blanket of shredded mozzarella cheese over the sauce, creating a cheesy foundation. Next, sprinkle diced pineapple and chicken evenly across the top. The sweetness of the pineapple will balance the savory chicken, making your Pineapple Sriracha Chicken pizza a flavor sensation.

Step 7: Optional Spice it Up
If you desire that extra kick, sprinkle the optional Blackstone Pineapple Sriracha seasoning over the toppings. This adds a burst of flavor. Alternatively, you can mix garlic powder, cayenne, and sugar to create a home-spiced version. Your pizza is now prepped for the oven!

Step 8: Bake the Pizza
With all your toppings in place, slide the pizza onto the heated pizza stone in your outdoor oven. Cook for 2-3 minutes, keeping a close eye on it. The crust should be golden brown, and the cheese should be bubbling and melted—these visual cues signal that your pizza is perfectly cooked.

Step 9: Finish with Sriracha
Once done, carefully remove the pizza from the oven and let it cool for a moment. Drizzle sriracha sauce artfully on top for that essential sweet-heat finish. This final touch elevates the flavor profile, ensuring your Pineapple Sriracha Chicken Outdoor Pizza is a delightful feast!

Expert Tips for Pineapple Sriracha Chicken

Preheat Properly: Preheating your outdoor pizza oven to 500-600°F is crucial for achieving a crispy crust and perfectly melted cheese.

Watch the Time: Cooking this pizza is quick, taking only 2-3 minutes. Keep an eye on it to avoid burning, as even a few seconds can make a big difference.

Use Semolina Flour: Applying semolina flour on the pizza peel helps prevent sticking, ensuring a smooth transfer to the oven. This little trick can save you frustration!

Balance the Toppings: Avoid a soggy pizza by keeping a good balance between sauce and toppings. Too much sauce can lead to a messy result—keep it light!

Customize Wisely: Feel free to get creative with the toppings—switch the chicken for grilled vegetables, or add jalapeños for an extra kick. Enjoy making your Pineapple Sriracha Chicken unique!

Let Rest for Flavor: Allow the pizza to sit for a minute after baking before slicing. This helps the flavors meld together and makes for easier handling.

What to Serve with Pineapple Sriracha Chicken Outdoor Pizza

Elevate your pizza night experience with delectable sides and refreshing drinks that will delight your taste buds and impress your guests.

  • Crispy Garlic Bread: Perfectly toasted with a buttery garlic spread, this crispy delight complements the sweet and spicy pizza beautifully.

  • Mixed Greens Salad: A light and fresh salad with a tangy vinaigrette balances the richness of the cheese and toppings, adding a refreshing crunch.

  • Grilled Vegetables: Assorted vegetables like zucchini, bell peppers, and asparagus bring a smoky flavor and vibrant color, enhancing the outdoor cooking theme.

  • Sweet Potato Fries: Their natural sweetness pairs wonderfully with the spicy sriracha, creating a delightful contrast in flavors and textures.

  • Fruit Skewers: Fresh, juicy fruit skewers offer a refreshing and healthy option to cleanse the palate between bites of pizza.

  • Cold Brew Lemonade: This zesty drink refreshes and cuts through the richness of the pizza, making each bite even more enjoyable.

  • Chocolate Chip Cookies: A warm, gooey cookie serves as the perfect indulgent dessert to end your meal on a sweet note.

Pineapple Sriracha Chicken Variations

Inviting you to explore a world of delicious possibilities, these variations will elevate your Pineapple Sriracha Chicken Outdoor Pizza experience.

  • Vegetarian Version: Substitute chicken with grilled vegetables like bell peppers, zucchini, and mushrooms for a fresh take. You can still enjoy that delightful sweet and spicy flavor profile—perfect for veggie lovers!

  • BBQ Fusion: Use BBQ sauce in place of pizza sauce for a tangy-sweet twist. This unexpected flavor combination will bring a smoky richness that pairs beautifully with the pineapple.

  • Cheesy Upgrade: Incorporate a blend of cheeses such as feta or Gouda for a gourmet touch. The slight tang of feta or the creamy melt of Gouda adds depth and richness to the pizza.

  • Tropical Twist: Add jalapeños for an extra spicy kick or toasted coconut flakes for a unique flair. This combo takes you on a delicious tropical getaway while still delivering that classic sweet-heat experience.

  • Herb-Infused: Top with fresh herbs like basil or cilantro right before serving for an aromatic finish. The fresh herbiness elevates every slice, making it feel even more special.

  • Gluten-Free Option: Easily make this pizza suitable for dietary restrictions by using gluten-free pizza dough. It’s just as delicious without the gluten!

  • Extra Crunch: Sprinkle crushed nuts like peanuts or cashews before serving for added texture. This delightful crunch enhances the experience, bringing a satisfying contrast to the gooey cheese and juicy toppings.

For more flavor-packed ideas, consider pairing your pizza with a vibrant salad or adding some zing with my Thai Chicken Meatball recipe. Enjoy getting creative!

How to Store and Freeze Pineapple Sriracha Chicken

Fridge: Store any leftover Pineapple Sriracha Chicken pizza in an airtight container for up to 2 days. This keeps the flavors intact while preventing the crust from getting soggy.

Freezer: For longer storage, wrap slices tightly in plastic wrap and then in aluminum foil, or place them in a freezer-safe bag. They can be frozen for up to 3 months.

Reheating: To reheat, place the pizza on a baking sheet and warm in a preheated oven at 375°F for about 10-15 minutes, until heated through and the crust is crispy again.

Make-Ahead Tip: Prepare ingredients in advance, chopping the chicken and pineapple, and storing them in the refrigerator. This allows for a quick assembly when you’re ready to cook!

Make Ahead Options

These Pineapple Sriracha Chicken Outdoor Pizza components are perfect for busy weeknights! You can prepare the pizza dough and store it in an airtight container in the refrigerator for up to 24 hours; this ensures it remains light and fluffy after refrigeration. Additionally, pre-dice the pineapple and chicken, and keep them in separate containers in the fridge for up to 3 days. When you’re ready to serve, simply roll out the dough, assemble the toppings, and slide your pizza into the preheated oven. The flavors will be just as vibrant and delicious, providing you with a quick and satisfying meal that delights your family or guests!

Pineapple Sriracha Chicken Recipe FAQs

What type of pizza dough should I use for the Pineapple Sriracha Chicken pizza?
Absolutely! You can use store-bought pizza dough for convenience, or make your own for a more personal touch. If you opt for homemade, let it rest for at least one hour to rise. This will give you a beautiful texture and flavor!

How should I store leftover Pineapple Sriracha Chicken pizza?
Store any leftover pizza slices in an airtight container in the refrigerator for up to 2 days. Make sure to keep it covered to prevent the crust from becoming soggy while maintaining that delicious flavor!

Can I freeze the Pineapple Sriracha Chicken pizza?
Yes, you can! To freeze, wrap individual slices tightly in plastic wrap and then in aluminum foil, or place them in a freezer-safe bag to minimize air exposure. They can be frozen for up to 3 months. When you’re ready to enjoy, reheat in a preheated oven at 375°F for about 10-15 minutes, and you’ll have a tasty treat waiting for you!

What should I do if my pizza dough is sticking to the peel?
Very! If you notice your pizza dough sticking, it’s likely not enough semolina flour was used on the peel. Make sure to sprinkle a generous amount of semolina flour before placing the dough on. Additionally, check that your dough is nicely stretched and not too wet, which can cause sticking as well.

Is there a vegetarian option for the Pineapple Sriracha Chicken pizza?
Absolutely! You can easily make a vegetarian version by swapping out the chicken for grilled veggies such as bell peppers, zucchini, and mushrooms. This not only provides a delicious alternative but also adds a burst of color to your pizza.

Can I use different types of cheese?
Yes! While shredded mozzarella cheese works beautifully for melting, you can certainly customize your pizza by incorporating a blend of cheeses. Try adding provolone for a sharper flavor or even some feta for an unexpected tang!

Pineapple Sriracha Chicken

Pineapple Sriracha Chicken: A Sweet and Spicy Delight

Pineapple Sriracha Chicken marries sweet pineapple with spicy sriracha in a delightful outdoor pizza recipe.
Prep Time 15 minutes
Cook Time 3 minutes
Cooling Time 5 minutes
Total Time 23 minutes
Servings: 4 slices
Course: Chicken
Cuisine: American
Calories: 300

Ingredients
  

For the Dough
  • 1 package Pizza Dough Store-bought or homemade
  • 1 cup Semolina Flour For dusting the pizza peel
For the Toppings
  • 2 tablespoons Olive Oil For brushing
  • 1 cup Pizza Sauce Your favorite variety
  • 2 cups Shredded Mozzarella Cheese Substitutable for provolone
  • 1 cup Diced Pineapple Fresh or drained canned
  • 1 cup Diced Chicken Pre-cooked or leftover
  • 1 tablespoon Blackstone Pineapple Sriracha Seasoning Optional for added spice
  • 2 tablespoons Sriracha Sauce For drizzle before serving

Equipment

  • Outdoor pizza oven
  • Pizza Peel
  • Baking Sheet
  • Rolling Pin

Method
 

Preparation Steps
  1. Preheat your outdoor pizza oven to a scorching 500-600°F.
  2. Stretch or roll the pizza dough into a 12-14 inch circle on a lightly floured surface.
  3. Sprinkle semolina flour generously over your pizza peel.
  4. Transfer the rolled-out dough onto the peel and drizzle olive oil evenly over the surface.
  5. Spread a generous amount of pizza sauce evenly over the dough.
  6. Layer shredded mozzarella cheese over the sauce, then add diced pineapple and chicken.
  7. Sprinkle optional seasoning over the toppings for extra flavor.
  8. Slide the pizza onto the heated pizza stone and bake for 2-3 minutes.
  9. Remove from oven, let cool for a moment, and drizzle with sriracha before serving.

Nutrition

Serving: 1sliceCalories: 300kcalCarbohydrates: 36gProtein: 15gFat: 12gSaturated Fat: 5gPolyunsaturated Fat: 2gMonounsaturated Fat: 3gCholesterol: 40mgSodium: 500mgPotassium: 250mgFiber: 2gSugar: 4gVitamin A: 200IUVitamin C: 10mgCalcium: 150mgIron: 1.5mg

Notes

This pizza is perfect for outdoor gatherings and can be customized with different toppings.

Tried this recipe?

Let us know how it was!

Indulge in Creamy Cinnamon-Vanilla Custard Pie Bliss

The aroma of warm cinnamon and sweet vanilla fills the air, wrapping us in the comforts of the holiday season. As I prepare to share my Christmas Eve Cinnamon-Vanilla Creamy Custard Pie, I can already envision the smiles it will bring to my loved ones gathered around the table. This delightful holiday dessert stands out not just for its richness but also for its make-ahead convenience, allowing you to savor more moments with family and friends instead of slaving away in the kitchen. With a buttery, flaky crust cradling a silky custard that’s both gluten-free and dairy-free adaptable, it’s a perfect showstopper for any festive gathering. Are you ready to create a dessert that will leave everyone asking for seconds?

Why is this pie the ultimate holiday treat?

Comforting, Irresistible Flavor: The blend of creamy custard with warm cinnamon and sweet vanilla creates a dessert that feels like a cozy hug.
Make-Ahead Magic: Prepare this pie in advance, freeing up your holiday schedule for what truly matters—family and friends.
Gluten-Free & Dairy-Free Options: With simple swaps, this dessert can cater to various dietary needs without sacrificing taste.
Elegant Presentation: Serve chilled with a dollop of whipped cream, making it an eye-catching centerpiece for any festive table.
Versatile Customizations: Feel free to play with spices or toppings, personalizing each bite to your liking and keeping the experience fresh and exciting.

Creamy Cinnamon-Vanilla Custard Pie Ingredients

  • For the Crust
    All-Purpose Flour – Creates the structure of the pie crust. Use a gluten-free blend for a gluten-free option.
    Salt – Enhances flavor. Essential for overall taste balance.
    Unsalted Butter – Provides flakiness and richness. Use cold and cubed for best texture.
    Ice Water – Helps form the crust dough. Add gradually until the dough holds together.

  • For the Custard
    Whole Milk – Gives creaminess to the custard. Substitute with full-fat coconut milk for a dairy-free version.
    Granulated Sugar – Sweetens the custard. Adjust according to preference.
    Eggs – Adds richness and aids in thickening. Use large, fresh eggs for best results.
    Cornstarch – Thickening agent for a smooth custard texture.
    Vanilla Extract – For flavor. Opt for pure vanilla for optimal taste.
    Ground Cinnamon – Infuses warmth and spice into the custard. Feel free to explore additional spices.

  • For the Topping
    Whipped Cream (optional) – Adds lightness and decor. Consider adding citrus zest for a fresh contrast.

Step‑by‑Step Instructions for Creamy Cinnamon-Vanilla Custard Pie

Step 1: Prepare the Crust
In a mixing bowl, whisk together all-purpose flour and salt until combined. Cut the cold, cubed unsalted butter into the flour mixture using a pastry cutter until it resembles coarse crumbs. Gradually add ice water, one tablespoon at a time, mixing until the dough holds together. Form into a disc, wrap in plastic, and chill in the refrigerator for 30 minutes.

Step 2: Roll and Bake
Preheat your oven to 375°F (190°C). On a floured surface, roll out the chilled dough into a circle about 12 inches in diameter. Carefully fit the dough into a 9-inch pie dish, trimming any excess. Prick the bottom with a fork to prevent bubbling, then place parchment paper on top and fill with pie weights. Blind bake for 15 minutes, remove weights, and bake for an additional 5-7 minutes until golden brown. Allow the crust to cool.

Step 3: Make the Custard
In a saucepan, heat whole milk over medium heat until steaming but not boiling. In a separate bowl, whisk together large eggs, granulated sugar, cornstarch, and pure vanilla extract until smooth. Ensure your mixing bowl is stable by placing it on a damp cloth to prevent slipping.

Step 4: Combine Mixtures
Gradually pour the steaming milk into the egg mixture while whisking continuously to temper the eggs. This gradual warming will prevent curdling. Once combined, return the mixture to the saucepan over low heat. Stir constantly with a wooden spoon for 8-10 minutes until the custard thickens and coats the back of the spoon.

Step 5: Add Flavor
Remove the saucepan from heat and stir in cold cubed butter and ground cinnamon until completely melted and incorporated. The creamy cinnamon-vanilla custard should be smooth and fragrant, giving a warm essence of holiday spices that will charm your guests.

Step 6: Strain Custard
To achieve the silkiest texture for your creamy cinnamon-vanilla custard pie, pass the custard through a fine-mesh sieve into a clean bowl. This step will catch any impurities or lumps, ensuring a velvety custard that sets beautifully.

Step 7: Fill the Crust
Carefully pour the strained custard into the cooled pie crust. Make sure to fill it to just below the rim for a perfect presentation. Smooth the top with a spatula if necessary, then prepare for the second baking.

Step 8: Bake Again
Lower the oven temperature to 325°F (160°C) and bake the filled pie for 30-35 minutes. Look for the edges of the custard to be set while the center still has a slight jiggle. This subtle movement indicates a perfect creamy texture once it cools.

Step 9: Cool and Chill
After baking, let the pie cool at room temperature for 1 hour. This gradual cooling allows the flavors to meld beautifully. Then transfer the pie to the refrigerator and chill for at least 4 hours, preferably overnight, to achieve the best texture and taste.

Step 10: Serve
When ready to serve your stunning creamy cinnamon-vanilla custard pie, top with a dollop of fresh whipped cream and a light sprinkle of cinnamon for an elegant finish. This delightful touch complements the flavors and invites everyone to indulge in the festive spirit.

What to Serve with Christmas Eve Cinnamon-Vanilla Creamy Custard Pie

As the aroma of cinnamon fills the air, it’s time to enhance your holiday gathering with delightful companions to this creamy dessert.

  • Spiced Apple Compote: A warm, spiced apple topping adds a delightful contrast to the creamy custard, bringing a hint of tartness to each bite. This compote can be served warm, creating a cozy, comforting experience.

  • Candied Nuts: Crunchy, caramelized nuts provide a sweet and crunchy texture that beautifully complements the silky pie. Sprinkle them on top for an added festive touch, merging richness with a delightful crunch.

  • Fresh Berries: Add a burst of freshness with strawberries, raspberries, or blueberries. Their natural tartness cuts through the richness of the custard, creating a balanced flavor profile that leaves everyone craving more.

  • Vanilla Bean Ice Cream: Serving a scoop of creamy vanilla bean ice cream alongside enhances the dessert experience with extra creaminess and temperature contrast. Let it melt ever so slightly into the custard for sheer bliss!

  • Hot Chocolate or Spiced Cider: Warm drinks like rich hot chocolate or spiced apple cider provide a comforting sip that resonates with holiday spirit. Pairing these beverages with dessert creates a full sensory experience.

  • Gingerbread Cookies: Sweet, spiced, and slightly crispy, gingerbread cookies add a delightful holiday charm. Enjoy them alongside to dip into the custard or as a crunchy companion to enhance every mouthful.

  • Peppermint Bark: A seasonal favorite, this chocolatey treat with a minty twist serves as an excellent palate cleanser while highlighting the holiday flavors. Serve it alongside for a refreshing finish to the meal.

Make Ahead Options

The Christmas Eve Cinnamon-Vanilla Creamy Custard Pie is a fantastic make-ahead option for your holiday gatherings! You can prepare the crust up to 24 hours in advance, simply wrap it tightly and refrigerate until you’re ready to fill it. The custard can also be made ahead and stored in the fridge for up to 3 days; just remember to cover it with plastic wrap to prevent a skin from forming. When you’re ready to serve, pour the custard into the cooled crust, bake, and let it chill for at least 4 hours before indulging. With these prep steps, you can enjoy a delicious, stress-free dessert, perfect for any busy home cook.

Creamy Cinnamon-Vanilla Custard Pie Variations

Feel free to explore different options and make this delightful recipe your own with these fun twists!

  • Gluten-Free: Substitute all-purpose flour with a gluten-free flour blend for the crust. Your pie will be just as flaky and delicious!

  • Dairy-Free: Swap whole milk with full-fat coconut milk or almond milk for a rich dairy-free custard that doesn’t compromise on creaminess.

  • Sugar-Free: Use sugar substitutes like monk fruit sweetener to lower the calorie count while retaining that lovely sweetness.

  • Add-In Options: Enhance the custard with spices like nutmeg or cardamom. A sprinkle of these fragrant spices can elevate the flavor profile beautifully.

  • Alcohol Variation: For an adult twist, incorporate a splash of spiced rum or bourbon into the custard. It adds a festive kick that pairs well with the warmth of cinnamon.

  • Garnishing: Top with fresh berries or a drizzle of caramel for a pop of color and a touch of elegance. It makes every slice visually appealing!

  • Texture Twist: For a fun texture, fold in some crushed cookies or nuts into the custard before baking. This adds delightful crunch to your creamy pie.

  • Fruit Topping: Consider adding sliced bananas or a layer of berry compote on top after chilling. This adds freshness and a tangy contrast to the pie’s richness.

If you’re looking for more delightful recipes, check out my Strawberry Icebox Pie for another easy and refreshing option or try the comforting Summer Corn Chowder that warms you up!

Expert Tips for Creamy Cinnamon-Vanilla Custard Pie

  • Chill the Crust: Make sure to chill your crust dough before rolling it out; this ensures optimal flakiness and prevents shrinkage during baking.

  • Prevent Curdling: When combining the warm milk with the egg mixture, always pour slowly while whisking constantly. This gentle process keeps your custard smooth and prevents curdling.

  • Silky Custard: To achieve a luxurious texture, strain your custard through a fine-mesh sieve before filling the crust. This little step makes all the difference in your creamy cinnamon-vanilla custard pie.

  • Perfect Baking: Pay attention to the baking times; the custard should be slightly jiggly in the center when you take it out. It will continue to set as it cools.

  • Flavor Enhancements: Feel free to get creative! Adding a hint of nutmeg or vanilla bean can elevate the warm spices and give your creamy cinnamon-vanilla custard pie a unique twist.

Storage Tips for Creamy Cinnamon-Vanilla Custard Pie

Fridge: Cover the pie with plastic wrap or foil and refrigerate for up to 3 days to keep it fresh and flavorful.

Freezer: For longer storage, wrap the pie tightly in plastic wrap and then aluminum foil. It can be frozen for up to 1 month without losing its creamy goodness.

Thawing: To enjoy your frozen pie, move it to the fridge to thaw overnight or at room temperature for a few hours.

Reheating: If serving warm, gently reheat individual slices in the microwave at low power for about 20-30 seconds.

Creamy Cinnamon-Vanilla Custard Pie Recipe FAQs

How do I know if my eggs are fresh?
You can check the freshness of your eggs by placing them in a bowl of water. Fresh eggs will sink to the bottom and lay flat on their sides. If the eggs stand upright or float, it’s best to discard them. Using fresh large eggs is crucial for the richness of your creamy cinnamon-vanilla custard pie.

What’s the best way to store leftovers?
Cover the pie with plastic wrap or aluminum foil and refrigerate it for up to 3 days. This method helps maintain its creamy texture and flavors. For longer storage, tightly wrap the pie in plastic wrap followed by aluminum foil to keep it fresh for up to 1 month in the freezer.

How can I freeze my creamy cinnamon-vanilla custard pie?
To freeze your pie, allow it to cool completely. Then, wrap it securely in plastic wrap, followed by a layer of aluminum foil. This double-wrapping prevents freezer burn and preserves the creamy goodness. When ready to enjoy, transfer the pie to the fridge to thaw overnight. It can also be thawed at room temperature for a few hours.

What should I do if my custard curdles while cooking?
If you notice your custard curdling, don’t panic! Immediately remove it from the heat and try to whisk vigorously to break up the curds. If that doesn’t work, you can strain the custard through a fine-mesh sieve to remove lumps, then return the smooth mix to the saucepan. Heat gently while continuously stirring until it thickens properly.

Can I make the pie dairy-free?
Absolutely! To create a dairy-free version of your creamy cinnamon-vanilla custard pie, simply substitute whole milk with full-fat coconut milk or almond milk. Both alternatives provide a creamy texture and delicious flavor without dairy. Enjoy without worry while still delighting in every bite!

What if I want to make the pie gluten-free?
Very! Just use a gluten-free flour blend that is designed for baking in place of the all-purpose flour. I often make this substitution, and the result is still a buttery, flaky crust that complements the rich custard beautifully. It’s a lovely option for those needing to avoid gluten!

These FAQs will ensure that your dessert experience is enjoyable and successful, making this creamy cinnamon-vanilla custard pie a delightful addition to your holiday celebrations!

Creamy Cinnamon-Vanilla Custard Pie

Indulge in Creamy Cinnamon-Vanilla Custard Pie Bliss

This Creamy Cinnamon-Vanilla Custard Pie is a comforting holiday treat rich in flavor and perfect for gatherings.
Prep Time 30 minutes
Cook Time 45 minutes
Chilling Time 4 hours
Total Time 5 hours 15 minutes
Servings: 8 slices
Course: Dessert
Cuisine: American
Calories: 350

Ingredients
  

For the Crust
  • 1 1/4 cups All-Purpose Flour Use a gluten-free blend for a gluten-free option.
  • 1/4 teaspoon Salt Essential for overall taste balance.
  • 1/2 cup Unsalted Butter Use cold and cubed for best texture.
  • 3-4 tablespoons Ice Water Add gradually until the dough holds together.
For the Custard
  • 2 cups Whole Milk Substitute with full-fat coconut milk for a dairy-free version.
  • 3/4 cup Granulated Sugar Adjust according to preference.
  • 4 large Eggs Use large, fresh eggs for best results.
  • 1/4 cup Cornstarch
  • 1 teaspoon Vanilla Extract Opt for pure vanilla for optimal taste.
  • 1 teaspoon Ground Cinnamon Feel free to explore additional spices.
For the Topping
  • 1 cup Whipped Cream Optional; consider adding citrus zest for a fresh contrast.

Equipment

  • Mixing Bowl
  • pastry cutter
  • nine-inch pie dish
  • Saucepan
  • fine-mesh sieve
  • Spatula

Method
 

Preparation Steps
  1. In a mixing bowl, whisk together all-purpose flour and salt until combined. Cut the cold, cubed unsalted butter into the flour mixture using a pastry cutter until it resembles coarse crumbs. Gradually add ice water, one tablespoon at a time, mixing until the dough holds together. Form into a disc, wrap in plastic, and chill in the refrigerator for 30 minutes.
  2. Preheat your oven to 375°F (190°C). On a floured surface, roll out the chilled dough into a circle about 12 inches in diameter. Carefully fit the dough into a 9-inch pie dish, trimming any excess. Prick the bottom with a fork to prevent bubbling, then place parchment paper on top and fill with pie weights. Blind bake for 15 minutes, remove weights, and bake for an additional 5-7 minutes until golden brown. Allow the crust to cool.
  3. In a saucepan, heat whole milk over medium heat until steaming but not boiling. In a separate bowl, whisk together large eggs, granulated sugar, cornstarch, and pure vanilla extract until smooth. Ensure your mixing bowl is stable by placing it on a damp cloth to prevent slipping.
  4. Gradually pour the steaming milk into the egg mixture while whisking continuously to temper the eggs. This gradual warming will prevent curdling. Once combined, return the mixture to the saucepan over low heat. Stir constantly with a wooden spoon for 8-10 minutes until the custard thickens and coats the back of the spoon.
  5. Remove the saucepan from heat and stir in cold cubed butter and ground cinnamon until completely melted and incorporated. The creamy cinnamon-vanilla custard should be smooth and fragrant, giving a warm essence of holiday spices that will charm your guests.
  6. To achieve the silkiest texture for your creamy cinnamon-vanilla custard pie, pass the custard through a fine-mesh sieve into a clean bowl. This step will catch any impurities or lumps, ensuring a velvety custard that sets beautifully.
  7. Carefully pour the strained custard into the cooled pie crust. Make sure to fill it to just below the rim for a perfect presentation. Smooth the top with a spatula if necessary, then prepare for the second baking.
  8. Lower the oven temperature to 325°F (160°C) and bake the filled pie for 30-35 minutes. Look for the edges of the custard to be set while the center still has a slight jiggle. This subtle movement indicates a perfect creamy texture once it cools.
  9. After baking, let the pie cool at room temperature for 1 hour. This gradual cooling allows the flavors to meld beautifully. Then transfer the pie to the refrigerator and chill for at least 4 hours, preferably overnight, to achieve the best texture and taste.
  10. When ready to serve your stunning creamy cinnamon-vanilla custard pie, top with a dollop of fresh whipped cream and a light sprinkle of cinnamon for an elegant finish. This delightful touch complements the flavors and invites everyone to indulge in the festive spirit.

Nutrition

Serving: 1sliceCalories: 350kcalCarbohydrates: 40gProtein: 5gFat: 20gSaturated Fat: 12gPolyunsaturated Fat: 0.5gMonounsaturated Fat: 3gCholesterol: 100mgSodium: 200mgPotassium: 150mgFiber: 1gSugar: 20gVitamin A: 500IUCalcium: 100mgIron: 1mg

Notes

Make sure to chill your crust dough before rolling it out for optimal flakiness. Always pour slowly when combining the warm milk with the egg mixture to prevent curdling.

Tried this recipe?

Let us know how it was!

Irresistible Mini Cheesecakes Recipe: No-Bake & Totally Delicious

As I stood in my kitchen, the enticing scent of sweet vanilla wafted through the air, instantly transporting me to my favorite dessert spot. Today, I’m sharing my favorite Mini Cheesecakes Recipe, featuring a delightful vanilla wafer crust that effortlessly combines rich creaminess with a satisfying crunch. Best of all, this no-bake dessert comes together in no time, perfect for those last-minute gatherings or a cozy evening treat. With endless options for customization—from decadent toppings to dairy-free alternatives—you can tailor these mini cheesecakes to suit any palate. So, whether you’re a busy parent or a seasoned home-chef, get ready to impress your friends and family with a treat that looks gourmet but is incredibly simple to make! What flavor twist will you try first?

Why Are Mini Cheesecakes So Irresistible?

No-Bake Convenience: These mini cheesecakes come together effortlessly, allowing you to skip the oven entirely. Perfect for busy nights or unplanned get-togethers!

Customizable Flavors: With endless variations, you can switch up the crust or filling to match your mood. Try almond extract for a twist or fresh fruit purees for fruity goodness.

Impressive Presentation: These treats look fancy, making them perfect for impressing guests at dinner parties or family gatherings.

Texture Delight: Enjoy the creamy filling paired with a satisfying crunch from the vanilla wafer crust, reminiscent of your favorite restaurant dessert.

For other easy meal ideas, explore my recipes for Hobo Casserole or Turkey Patties with Herbs. You won’t regret it!

Mini Cheesecakes Recipe Ingredients

• Here’s what you’ll need to whip up these delicious, no-bake mini cheesecakes!

For the Crust

  • Finely crushed vanilla wafers – Provides a sweet, buttery crunch for the base; feel free to substitute with graham crackers or chocolate wafers for a unique flavor twist.
  • Unsalted butter – Binds the wafer crumbs together for a solid crust; coconut oil can be used as a dairy-free option for a healthier alternative.

For the Filling

  • Full-fat cream cheese – Forms the smooth filling; make sure it’s softened for easy mixing, or opt for a low-fat version if desired.
  • Granulated sugar – Adds the right amount of sweetness to the cheesecake.
  • Full-fat sour cream – Enhances creaminess and adds a delightful tang; Greek yogurt may serve as a tasty alternative.
  • Large eggs – Provides structure; avoid overmixing after adding to keep your filling smooth and crack-free.
  • Pure vanilla extract – Infuses the filling with rich flavor; variations can include other extracts for a fun twist.
  • Salt – Balances the sweetness and enhances the overall flavor of the cheesecake.

Optional Garnishes

  • Fresh berries – Add a burst of flavor and color.
  • Whipped cream – A dollop on top makes these mini cheesecakes extra special!
  • Lemon zest – For a zesty finish that brightens the dessert.
  • Melted chocolate drizzle – Perfect for chocolate lovers looking to indulge.
  • Caramel sauce – A delightful addition for those who enjoy a touch of decadence.

Now that you have your ingredients ready, let’s dive into the easy instructions that will have these mini cheesecakes chilling in your fridge in no time!

Step‑by‑Step Instructions for Mini Cheesecakes Recipe

Step 1: Preheat the Oven
Begin by preheating your oven to 325°F (160°C). While it warms up, take a moment to line a 12-cup muffin tin with paper liners, ensuring a clean release for your mini cheesecakes later on. This setup is crucial for the perfect no-bake treat!

Step 2: Prepare the Crust
In a mixing bowl, combine finely crushed vanilla wafers with melted butter until the crumbs are fully moistened. Using a tablespoon or your fingers, firmly press this mixture into the bottom of each muffin liner to form the base of your Mini Cheesecakes. The crust should be compact and evenly spread for a delightful crunch.

Step 3: Pre-Bake the Crust
Place the muffin tin in the preheated oven and bake the crusts for 5-7 minutes, or until they are slightly golden. You’ll notice a fragrant aroma filling your kitchen! Once ready, remove them from the oven and allow the crusts to cool completely in the tin. This step provides a sturdy foundation for your cheesecakes.

Step 4: Mix the Filling
In a large mixing bowl, beat the softened cream cheese with an electric mixer until it’s smooth and creamy. Gradually add granulated sugar, full-fat sour cream, pure vanilla extract, and a pinch of salt, mixing until well combined. Take care not to overmix to ensure your filling remains smooth and creamy for the Mini Cheesecakes.

Step 5: Add Eggs to Filling
Once your mixture is well combined, add the large eggs one at a time, mixing gently until just incorporated. This method helps to maintain a silky texture while preventing overmixing, which can lead to cracks. Aim for a smooth consistency without any lumps in your filling!

Step 6: Fill the Crusts
Carefully spoon the cream cheese filling into the pre-baked crusts, filling each one about 2/3 to 3/4 full. As you fill them, gently tap the muffin tin on the counter to release any air bubbles trapped within. This technique ensures a smooth surface for your Mini Cheesecakes!

Step 7: Bake the Cheesecakes
Return the muffin tin to the oven and bake for 18-22 minutes, or until the edges are set and the centers are still slightly jiggly. Keep a close eye on them during baking, as this slight jiggle will allow them to properly firm up as they cool.

Step 8: Cool & Chill
Once baked, turn off the oven, and crack open the oven door, letting the cheesecakes cool inside for about 30 minutes. This gentle cooling prevents sudden temperature changes that could lead to cracks. After this, transfer them to the refrigerator and chill for at least 3-4 hours, allowing the flavors to meld beautifully.

Step 9: Serve Your Mini Cheesecakes
After chilling, your Mini Cheesecakes are ready to be served! Carefully remove them from the muffin tin and garnish with fresh berries, whipped cream, or your favorite toppings. These delightful no-bake treats are now ready to impress your family and friends!

Mini Cheesecakes Recipe Variations

Explore the endless possibilities of flavor and texture as you craft your mini cheesecakes, perfectly suited to your taste!

  • Dairy-Free: Substitute full-fat cream cheese with almond or cashew cream cheese to create a deliciously creamy, dairy-free dessert. You’ll love the richness without the dairy!

  • Graham Cracker Crust: Swap vanilla wafers for crushed graham crackers for that classic cheesecake taste, adding a touch of nostalgia to every bite.

  • Chocolate Twist: For a luscious chocolate version, mix cocoa powder into the cream cheese filling or top with melted chocolate drizzle. Who can resist chocolaty goodness?

  • Mixed Berry Filling: Blend fresh fruit purees into the filling for a fruity explosion of flavor. Use strawberries, blueberries, or raspberries for a vibrant burst that looks stunning!

  • Nutty Crunch: Incorporate crushed nuts into the crust for added texture. Try pecans or almonds for a delightful crunch that pairs beautifully with the creaminess.

  • Zesty Lemon: Infuse the filling with lemon zest or juice for a refreshing tang that brightens up the sweetness. Delightful in every way, this variation is perfect for spring!

  • Caramel Swirl: Add a luscious caramel swirl in the cream cheese filling before baking for an indulgent dessert that is a crowd-pleaser. Each slice brings joy to every bite!

As you dive into these variations, you may also enjoy whipping up other easy meals like Sweet Potato Beef or some irresistible Grilled Honey Kabobs. Happy cooking!

What to Serve with Mini Cheesecakes with Vanilla Wafer Crust

Elevate your dessert experience by pairing these delightful mini cheesecakes with complementary sides that enhance their creamy richness and crunchy texture.

  • Fresh Berries: A medley of strawberries, blueberries, and raspberries adds a burst of freshness that beautifully contrasts the sweetness of the cheesecake. Their vibrant colors also make your dessert visually stunning!

  • Whipped Cream: A dollop of fluffy whipped cream adds a light, airy texture, creating balance with the rich filling. It’s an essential addition that elevates the dessert to a new level of indulgence.

  • Caramel Sauce: Drizzling warm caramel sauce over the top brings a sweet richness that enhances the overall flavor. It adds depth and a beautiful glossy finish for presentation.

  • Chocolate Ganache: This rich, silky chocolate sauce can be drizzled over the cheesecakes for chocolate lovers. The combination of flavors creates a decadent and irresistible treat.

  • Coffee or Espresso: A cup of freshly brewed coffee or a shot of espresso pairs perfectly, balancing the sweetness with a bitter note that enhances the cheesecake’s creamy flavors. It’s the perfect way to unwind after a meal.

  • Lemon Sorbet: For a refreshing contrast, serve a scoop of zesty lemon sorbet alongside the cheesecakes. This bright, tangy treat helps cleanse the palate after the rich dessert.

  • Nut Crust Variations: Consider serving your cheesecakes with a side of cashew or almond crumbles. These nutty bites enhance the crunchy element and add an appealing texture to each bite.

  • Mint Leaves: A few fresh mint leaves can be placed on top or alongside the cheesecakes for a delightful aromatic experience. The mint adds a refreshing touch that lightens the dessert.

Indulge in these pairings and transform your mini cheesecakes into a dessert spread that will surely impress your family and friends!

Helpful Tricks for Mini Cheesecakes

  • Room Temperature Ingredients: Ensure your cream cheese, sour cream, and eggs are at room temperature for a smooth batter, minimizing lumps in your Mini Cheesecakes.

  • Mixing Caution: Avoid overmixing after adding the eggs to maintain a creamy texture. Overmixing can lead to cracks as the cheesecakes bake.

  • Chilling is Key: Don’t skip the chilling time; it’s essential for the flavors to meld and the texture to firm up. A well-chilled cheesecake is always more delicious!

  • Crust Technique: When preparing your crust, press the crumbs firmly and evenly into the muffin liners to ensure stability. This solid foundation will enhance the crunch!

  • Watch the Bake Time: Keep a close eye on the cheesecakes during baking. They should be slightly jiggly in the center when done, ensuring a perfect texture.

Make Ahead Options

These Mini Cheesecakes are perfect for meal prep enthusiasts! You can prepare the crust by combining finely crushed vanilla wafers with melted butter and pressing it into the liners up to 24 hours in advance. Simply cover the muffin tin with plastic wrap and refrigerate to keep the crust fresh. You can also mix the filling a day before—store it in an airtight container in the fridge. When you’re ready to serve, just fill the pre-prepared crusts with the cheesecake filling and bake for 18-22 minutes. This way, you’ll have delicious mini cheesecakes ready to impress, saving you time on busy weeknights!

How to Store and Freeze Mini Cheesecakes

  • Fridge: Store your mini cheesecakes in an airtight container for up to 3-4 days. This helps maintain their creamy texture while keeping them fresh and delicious.

  • Freezer: These delightful treats can be frozen for up to 1 month. Wrap each mini cheesecake tightly in plastic wrap, then place them in a freezer-safe container.

  • Thawing: For best results, thaw your mini cheesecakes overnight in the refrigerator before serving. This ensures they regain their perfect creamy consistency.

  • Reheating: Since these mini cheesecakes are served chilled, there’s no need to reheat them. Enjoy them cold for the ultimate refreshing treat!

Mini Cheesecakes with Vanilla Wafer Crust Recipe FAQs

What type of vanilla wafers should I use?
You can use any brand of finely crushed vanilla wafers for the crust. If you’re feeling adventurous, feel free to swap them with graham crackers or chocolate wafers for a unique twist. Just make sure they are finely crushed to achieve that perfect crust!

How long can I store my mini cheesecakes?
Absolutely! These mini cheesecakes can be stored in an airtight container in the refrigerator for up to 3-4 days. Make sure they are well-sealed to maintain their creamy texture and delightful taste during this time.

Can I freeze mini cheesecakes?
Yes, you can! To freeze your mini cheesecakes, wrap each one tightly in plastic wrap and then place them in a freezer-safe container. They can be frozen for up to 1 month. For the best results, thaw them overnight in the refrigerator before serving.

What if my cheesecake cracks during baking?
If you notice cracks forming, don’t worry too much! This can occur if the mixture was overmixed after adding the eggs or if the temperature changes drastically. To prevent this, ensure your ingredients are at room temperature, and avoid overmixing—mix just until combined. This gentle approach keeps your mini cheesecakes smooth!

Can I make these mini cheesecakes dairy-free?
Absolutely! For a delicious dairy-free version, substitute the full-fat cream cheese with almond or cashew cream cheese, and swap the sour cream with coconut yogurt. These alternatives retain the creamy texture while accommodating dietary needs!

What garnishes work best for mini cheesecakes?
The more the merrier! Fresh berries, a dollop of whipped cream, lemon zest, or even a drizzle of melted chocolate or caramel sauce can elevate your mini cheesecakes. Toppings add flavor and visual appeal, making them extra special for any occasion!

Mini Cheesecakes Recipe

Irresistible Mini Cheesecakes Recipe: No-Bake & Totally Delicious

Try this Mini Cheesecakes Recipe for a no-bake dessert that is delicious, creamy, and customizable.
Prep Time 30 minutes
Cook Time 22 minutes
Chilling Time 4 hours
Total Time 4 hours 52 minutes
Servings: 12 cheesecakes
Course: Dessert
Cuisine: American
Calories: 250

Ingredients
  

For the Crust
  • 1 cup finely crushed vanilla wafers Can substitute with graham crackers or chocolate wafers
  • 1/2 cup unsalted butter Melted; can substitute with coconut oil for a dairy-free option
For the Filling
  • 16 oz full-fat cream cheese Softened for easy mixing
  • 3/4 cup granulated sugar
  • 1/2 cup full-fat sour cream Greek yogurt may be used
  • 2 large eggs At room temperature
  • 1 tbsp pure vanilla extract
  • 1/4 tsp salt
Optional Garnishes
  • 1 cup fresh berries
  • 1 cup whipped cream
  • 1 tbsp lemon zest
  • 1/2 cup melted chocolate drizzle
  • 1/2 cup caramel sauce

Equipment

  • Muffin Tin
  • Mixing Bowl
  • Electric Mixer

Method
 

Preparation
  1. Preheat your oven to 325°F (160°C) and line a 12-cup muffin tin with paper liners.
  2. In a mixing bowl, combine finely crushed vanilla wafers and melted butter until moistened. Press the mixture into the bottom of each muffin liner.
  3. Place the muffin tin in the preheated oven and bake the crusts for 5-7 minutes until slightly golden, then cool completely.
  4. In a large mixing bowl, beat the softened cream cheese until smooth. Gradually add sugar, sour cream, vanilla, and salt, mixing until combined.
  5. Add the eggs one at a time, mixing gently until just incorporated for a smooth texture.
  6. Spoon the filling into the pre-baked crusts, filling about 2/3 to 3/4 full.
  7. Bake for 18-22 minutes until edges are set and centers are jiggly. Let them cool in the oven for 30 minutes.
  8. Transfer to the refrigerator and chill for at least 3-4 hours before serving.
  9. Remove from muffin tin and garnish as desired before serving.

Nutrition

Serving: 1cheesecakeCalories: 250kcalCarbohydrates: 22gProtein: 3gFat: 18gSaturated Fat: 10gPolyunsaturated Fat: 1gMonounsaturated Fat: 4gCholesterol: 55mgSodium: 210mgPotassium: 100mgSugar: 12gVitamin A: 500IUCalcium: 50mgIron: 0.5mg

Notes

Ensure all ingredients are at room temperature for best results. Avoid overmixing to maintain a smooth texture.

Tried this recipe?

Let us know how it was!

Irresistible Chocolate Chip Cupcakes That Everyone Will Love

As I whisked the batter for these Chocolate Chip Cupcakes, the sweet aroma of melting chocolate wafted through my kitchen, instantly transporting me to my childhood. There’s something so heartwarming about baking that reminds me of cozy family gatherings, making these delightful treats perfect for any occasion. In just 35 minutes, you can whip up a batch that not only satisfies your sweet tooth but can also be easily customized for everyone—whether they’re gluten-free, vegan, or simply a chocolate lover! These cupcakes are quick, easy, and sure to impress, making them a go-to dessert for any busy home chef. What unique twist are you thinking of adding to your batch today?

Why Will You Love These Cupcakes?

Customizable Delight: These Chocolate Chip Cupcakes are a blank canvas, ready for your personal touches, from gluten-free to vegan options.

Quick and Easy: With only 35 minutes from start to finish, you’ll have warm, delicious cupcakes ready to tantalize your taste buds—perfect for spontaneous cravings!

Family-Friendly Flavor: The rich chocolate flavor and creamy frosting make these cupcakes a sure hit for all ages, guaranteeing smiles at any gathering.

Versatile Variations: Whether you prefer a nutty crunch or a zesty twist, the recipe encourages creativity, allowing you to experiment with different add-ins and flavors.

Crowd-Pleasing: Impress guests or elevate cozy nights in; these cupcakes are just the treat to share, bringing everyone together with joy.

Storage Made Simple: Keep the fun going—store unfrosted cupcakes for days or freeze them for later, ensuring deliciousness is always within reach!

Ready to try other delightful treats? Check out the White Chocolate Cranberry Cookies or the indulgent Patriotic Chocolate Chip Cookie Pie for more sweet inspiration!

Chocolate Chip Cupcake Ingredients

• Create your perfect batch with these must-have ingredients!

For the Cupcake Batter

  • All-purpose flour – Provides structure and a light texture; you can swap with whole wheat flour for added nutrition.
  • Baking soda – This leavening agent makes your cupcakes rise; always use fresh for the best results.
  • Salt – Enhances the sweetness while balancing flavors; no need for substitutions here!
  • Unsalted butter – Adds rich flavor and moisture; for a dairy-free option, use coconut oil instead.
  • Granulated sugar – Sweetens the batter beautifully; it’s best not to substitute here for optimum sweetness.
  • Eggs – Bind the ingredients together and add moisture; use 1/4 cup unsweetened applesauce for an egg-free alternative.
  • Vanilla extract – Infuses a warm, comforting flavor; almond extract is a delightful substitute for a unique twist.
  • Milk – Introduces richness and moisture; opt for almond milk to make the recipe dairy-free.
  • Chocolate chips – Enhance the cupcake with chocolate flavor; choose between semi-sweet, dark, or white chocolate chips for your favorite taste!

Now that you have everything ready, get excited about whipping up these irresistible Chocolate Chip Cupcakes that everyone will adore!

Step‑by‑Step Instructions for Chocolate Chip Cupcakes

Step 1: Preheat and Prepare
Begin by preheating your oven to 350°F (175°C). While the oven warms up, line a standard 12-cup cupcake pan with paper liners to prevent sticking. This simple prep step ensures that your Chocolate Chip Cupcakes bake evenly and are easy to remove.

Step 2: Mix Dry Ingredients
In a medium bowl, whisk together 1 ½ cups of all-purpose flour, 1 teaspoon of baking soda, and ½ teaspoon of salt until well combined. This crucial step helps aerate the flour, promoting a light and fluffy texture in your cupcakes. Set this mixture aside while you work on the wet ingredients.

Step 3: Cream Butter and Sugar
In a large mixing bowl, cream together ½ cup of softened unsalted butter and 1 cup of granulated sugar using an electric mixer on medium speed for about 3-5 minutes. You want the mixture to become light and fluffy, which will create a tender crumb in the final cupcakes.

Step 4: Incorporate Eggs and Vanilla
Add 2 large eggs to the butter-sugar mixture one at a time, mixing well after each addition. Then, stir in 2 teaspoons of vanilla extract until everything is well blended. This step enriches the batter’s flavor and adds moisture for luscious Chocolate Chip Cupcakes that everyone will love.

Step 5: Combine Dry and Wet Ingredients
Gradually incorporate the dry flour mixture into the wet ingredients, alternating with ½ cup of milk, mixing on low speed until just combined. Be careful not to overmix; you want a smooth batter without lumps. This blending brings all the flavors together, ensuring a delightful cupcake texture.

Step 6: Fold in Chocolate Chips
Gently fold in 1 cup of chocolate chips, ensuring they are evenly distributed throughout the batter. This step adds bursts of chocolatey goodness that enhance each bite of your Chocolate Chip Cupcakes. Just be careful not to overmix, as this can result in denser cupcakes.

Step 7: Fill and Bake
Spoon the batter into the lined cupcake pan, filling each liner about two-thirds full. Bake in the preheated oven for 18-20 minutes, or until a toothpick inserted into the center comes out clean with a few crumbs. The cupcakes should be lightly golden and spring back when gently touched.

Step 8: Cool Before Frosting
Once baked, remove the cupcakes from the oven and let them cool in the pan for about 5 minutes. Then, transfer them to a wire rack to cool completely. This is an essential step that ensures your frosting won’t melt when you finally top your delightful Chocolate Chip Cupcakes with creamy goodness.

Make Ahead Options

These Chocolate Chip Cupcakes are perfect for meal prep, making your busy weeknights a little sweeter! You can prepare the batter up to 24 hours in advance; simply mix all the ingredients, then cover and refrigerate the bowl. This allows the flavors to deepen while keeping the batter fresh! If you’ve baked some in advance, unfrosted cupcakes can be stored at room temperature in an airtight container for up to 3 days, ensuring they retain their delightful texture. When you’re ready to serve, just frost them with your creamy topping, and enjoy these delicious Chocolate Chip Cupcakes that taste as fresh as the day they were baked!

What to Serve with Chocolate Chip Cupcakes

Indulge in a delightful spread that complements the sweetness of these irresistible cupcakes, turning your baking adventure into a memorable feast!

  • Vanilla Ice Cream: This creamy classic adds a cool, smooth contrast to the rich chocolate flavors. A scoop of vanilla perfectly balances the sweetness, making each bite an experience.

  • Fresh Berries: Juicy strawberries, raspberries, or blueberries bring a tart freshness, enhancing the overall flavor profile. The combination of sweetness and acidity is heavenly!

  • Fruity Smoothie: A refreshing berry or banana smoothie can be a delightful drink option alongside. The vibrant flavors of a smoothie elevate your dessert table with a fruity twist.

  • Coffee: A warm cup of coffee pairs beautifully with chocolate flavors, enhancing the taste while offering a comforting experience. The richness of coffee rounds out your cupcake delight.

  • Chocolate Mousse: For the true chocolate lover, pairing these cupcakes with a light chocolate mousse creates a decadent dessert duo. The creamy texture of the mousse complements the cupcakes wonderfully.

  • Nutty Trail Mix: For an unexpected twist, serve a crunchy trail mix alongside. The mix of textures provides a delightful contrast to the soft cupcakes, inviting a fun snacking experience.

  • Whipped Cream: Light and airy whipped cream can add a perfect touch. A dollop on top transforms each cupcake into an elegant dessert.

Elevate your serving suggestions and enjoy these Chocolate Chip Cupcakes in good company!

Storage Tips for Chocolate Chip Cupcakes

  • Room Temperature: Unfrosted Chocolate Chip Cupcakes can be stored at room temperature in an airtight container for up to 3 days. This keeps them fresh and soft, perfect for a sweet treat anytime.

  • Fridge: Once frosted, place your cupcakes in an airtight container and refrigerate them for up to 5 days. This helps maintain the creamy frosting while keeping the cupcakes delightful.

  • Freezer: For longer storage, freeze unfrosted cupcakes for up to 3 months. Wrap each cupcake tightly in plastic wrap and place them in a freezer-safe container. Thaw overnight in the fridge before frosting to enjoy later.

  • Reheating: If you like your cupcakes warm, simply place them in the microwave for about 10-15 seconds. This makes the chocolate chips even more melty and delicious!

Expert Tips for Chocolate Chip Cupcakes

Room Temperature Ingredients: Use room temperature butter, eggs, and milk for a smoother batter that incorporates well and yields a lighter cupcake.

Avoid Overmixing: When folding in chocolate chips, mix gently. Overmixing can lead to denser cupcakes, which means less of that delightful, fluffy texture.

Check for Doneness: Use a toothpick to check your cupcakes. It should come out with a few crumbs, not wet batter, to ensure perfectly baked Chocolate Chip Cupcakes.

Cool Completely: Allow your cupcakes to cool completely on a wire rack before frosting. This prevents your creamy frosting from melting and sliding off.

Experiment Freely: Don’t hesitate to try different add-ins, like nuts or flavored extracts! This allows you to customize your Chocolate Chip Cupcakes and keep flavors exciting.

Chocolate Chip Cupcakes Variations & Substitutions

Feel free to personalize these Chocolate Chip Cupcakes and make them uniquely yours, adding delightful twists that awaken the senses!

  • Gluten-Free: Use a gluten-free flour blend to make these cupcakes safe for those with gluten sensitivities without sacrificing taste.

  • Dairy-Free: Swap out butter for coconut oil and milk for almond milk for a deliciously creamy texture without dairy.

  • Vegan: Substitute eggs with 1/4 cup of unsweetened applesauce and slather your cupcakes with dairy-free frosting—the flavor stays rich and satisfying.

  • Nutty Delight: Fold in ½ cup of chopped walnuts or pecans to add a crunchy element that pairs beautifully with the soft cupcake texture.

  • Citrus Twist: Grate the zest of one orange or lemon into your batter for a refreshing burst of citrus that perfectly complements the chocolatey sweetness.

  • Mocha Frosting: Mix in 1-2 teaspoons of espresso powder into your frosting for a coffee-infused treat that will awaken your taste buds.

  • Double Chocolate: Use chocolate cake mix instead of vanilla for a double chocolate experience that will make any chocolate lover swoon.

  • Spicy Kick: A pinch of cinnamon or cayenne pepper in the batter adds a surprising warmth that contrasts delightfully with the sweetness of the cupcakes.

For more exciting options, consider whipping up some luscious Patriotic Chocolate Chip Cookie Pie or enjoying the sweet tang of White Chocolate Cranberry Cookies!

Chocolate Chip Cupcakes Recipe FAQs

How do I select the best chocolate chips for my cupcakes?
Absolutely! For the best flavor, I recommend using high-quality semi-sweet chocolate chips. If you’re feeling adventurous, go for dark chocolate for a richer taste or white chocolate for a sweeter touch. Always check the packaging for ingredients if you’re accommodating dietary restrictions!

How should I store my Chocolate Chip Cupcakes?
Unfrosted cupcakes can be stored at room temperature in an airtight container for up to 3 days, ensuring they remain moist and delicious. Once frosted, keep them in the fridge to maintain the creaminess, consuming them within 5 days. Remember to let them come to room temperature for the best flavor when serving!

Can I freeze Chocolate Chip Cupcakes? If so, how?
You can! To freeze unfrosted Chocolate Chip Cupcakes, wrap each one tightly in plastic wrap and place them in a freezer-safe container. They can be stored in the freezer for up to 3 months. When you’re ready to enjoy them, simply thaw overnight in the fridge and frost before serving. This keeps your treats fresh and ready for any occasion!

What should I do if my cupcakes sink in the middle?
This can happen sometimes! If you notice your cupcakes sinking, it could be due to a few reasons, such as overmixing the batter, which causes them to become dense, or an incorrect oven temperature. To avoid this, make sure to fold in ingredients gently and always check your oven calibration with an oven thermometer for accurate baking.

Can these cupcakes accommodate dietary restrictions?
Very! This recipe is incredibly versatile. To make it gluten-free, swap all-purpose flour with a gluten-free blend. For a dairy-free version, use coconut oil instead of butter and almond milk. If you’re looking for a vegan option, replace eggs with unsweetened applesauce and use dairy-free frosting, creating delightful cupcakes for everyone!

How can I enhance the flavor of my cupcakes?
I often experiment with various add-ins! You can stir in citrus zest, like orange or lemon, for a fresh twist or even mix in a pinch of cinnamon for a hint of spice. Each adjustment can elevate your Chocolate Chip Cupcakes spectacularly—so get creative and find your favorite combination!

Chocolate Chip Cupcakes

Irresistible Chocolate Chip Cupcakes That Everyone Will Love

These Chocolate Chip Cupcakes are quick, customizable, and a crowd-pleaser, perfect for any occasion and sure to delight everyone.
Prep Time 15 minutes
Cook Time 20 minutes
Cooling Time 5 minutes
Total Time 35 minutes
Servings: 12 cupcakes
Course: Dessert
Cuisine: American
Calories: 210

Ingredients
  

For the Cupcake Batter
  • 1.5 cups all-purpose flour Can substitute with whole wheat flour for added nutrition.
  • 1 teaspoon baking soda Always use fresh for the best results.
  • 0.5 teaspoon salt Enhances sweetness and balances flavors.
  • 0.5 cups unsalted butter For dairy-free, use coconut oil.
  • 1 cups granulated sugar Best not to substitute for optimum sweetness.
  • 2 large eggs Can substitute with 1/4 cup unsweetened applesauce for egg-free.
  • 2 teaspoons vanilla extract Almond extract can be used for a unique twist.
  • 0.5 cups milk Almond milk can be used for a dairy-free option.
  • 1 cups chocolate chips Choose between semi-sweet, dark, or white chocolate chips.

Equipment

  • Oven
  • cupcake pan
  • Mixing bowls
  • Electric Mixer
  • Measuring cups
  • Measuring spoons
  • Rubber Spatula

Method
 

Step-by-Step Instructions
  1. Preheat your oven to 350°F (175°C) and line a standard 12-cup cupcake pan with paper liners.
  2. In a medium bowl, whisk together the flour, baking soda, and salt until well combined.
  3. In a large mixing bowl, cream together the softened butter and granulated sugar until light and fluffy, about 3-5 minutes.
  4. Add the eggs one at a time, mixing well after each addition, then stir in the vanilla extract.
  5. Gradually incorporate the dry mixture into the wet ingredients, alternating with the milk, mixing on low until just combined.
  6. Gently fold in the chocolate chips ensuring they are evenly distributed throughout the batter.
  7. Fill the lined cupcake pan about two-thirds full and bake for 18-20 minutes or until a toothpick comes out clean.
  8. Let the cupcakes cool in the pan for about 5 minutes before transferring to a wire rack to cool completely.

Nutrition

Serving: 1cupcakeCalories: 210kcalCarbohydrates: 30gProtein: 2gFat: 10gSaturated Fat: 6gPolyunsaturated Fat: 0.5gMonounsaturated Fat: 3gCholesterol: 35mgSodium: 150mgPotassium: 120mgFiber: 1gSugar: 15gVitamin A: 200IUCalcium: 50mgIron: 1mg

Notes

Use room temperature ingredients for a smoother batter. Avoid overmixing to maintain fluffiness. Store unfrosted cupcakes at room temperature for up to 3 days or freeze for up to 3 months.

Tried this recipe?

Let us know how it was!