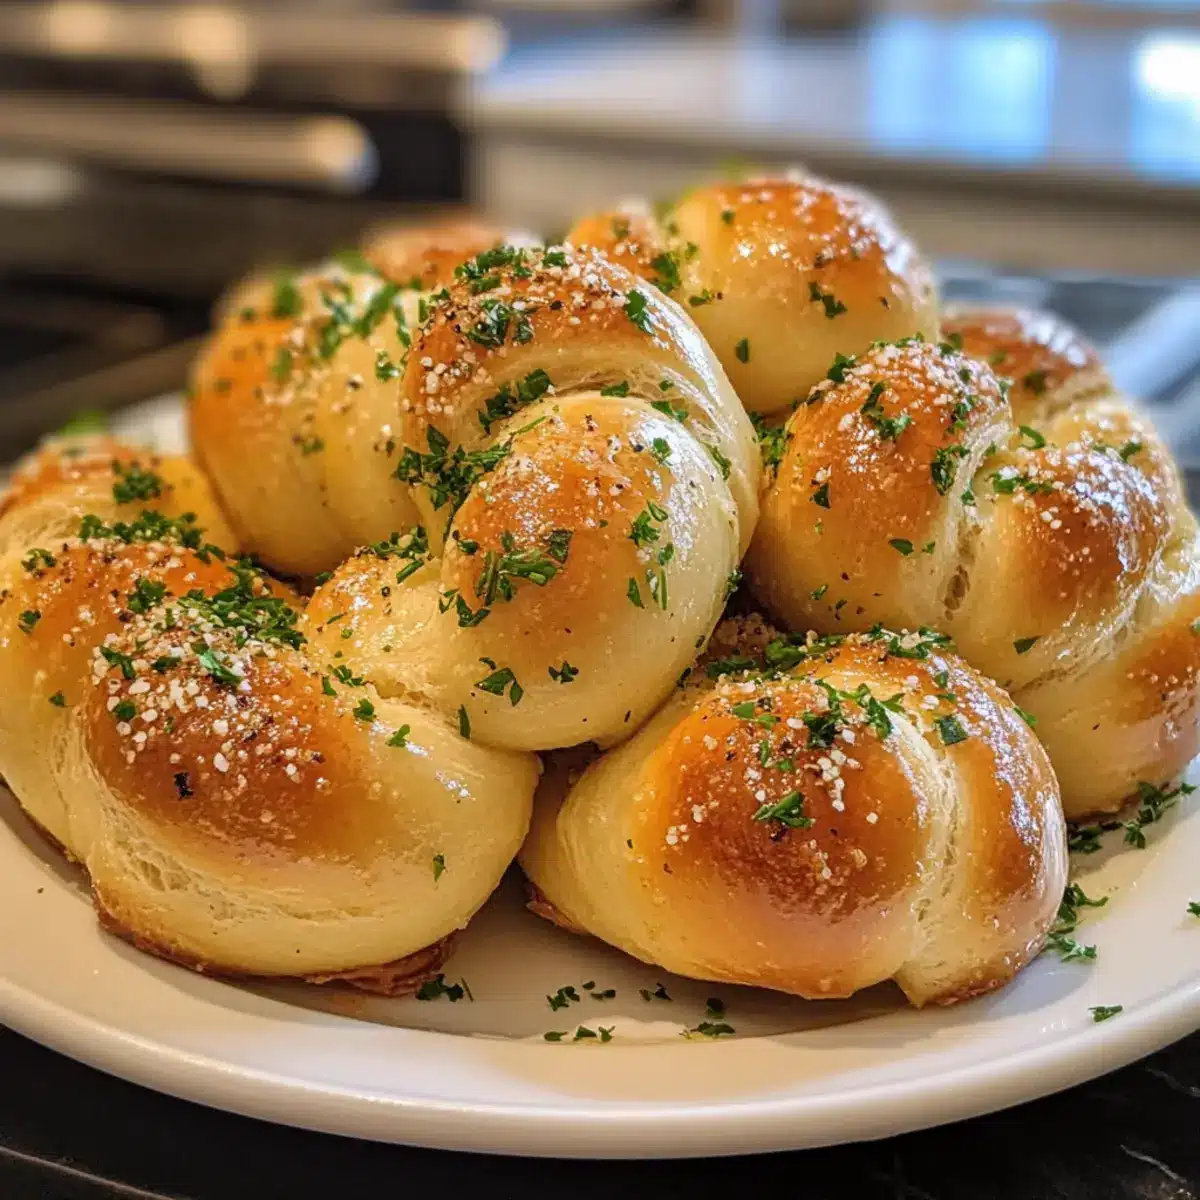
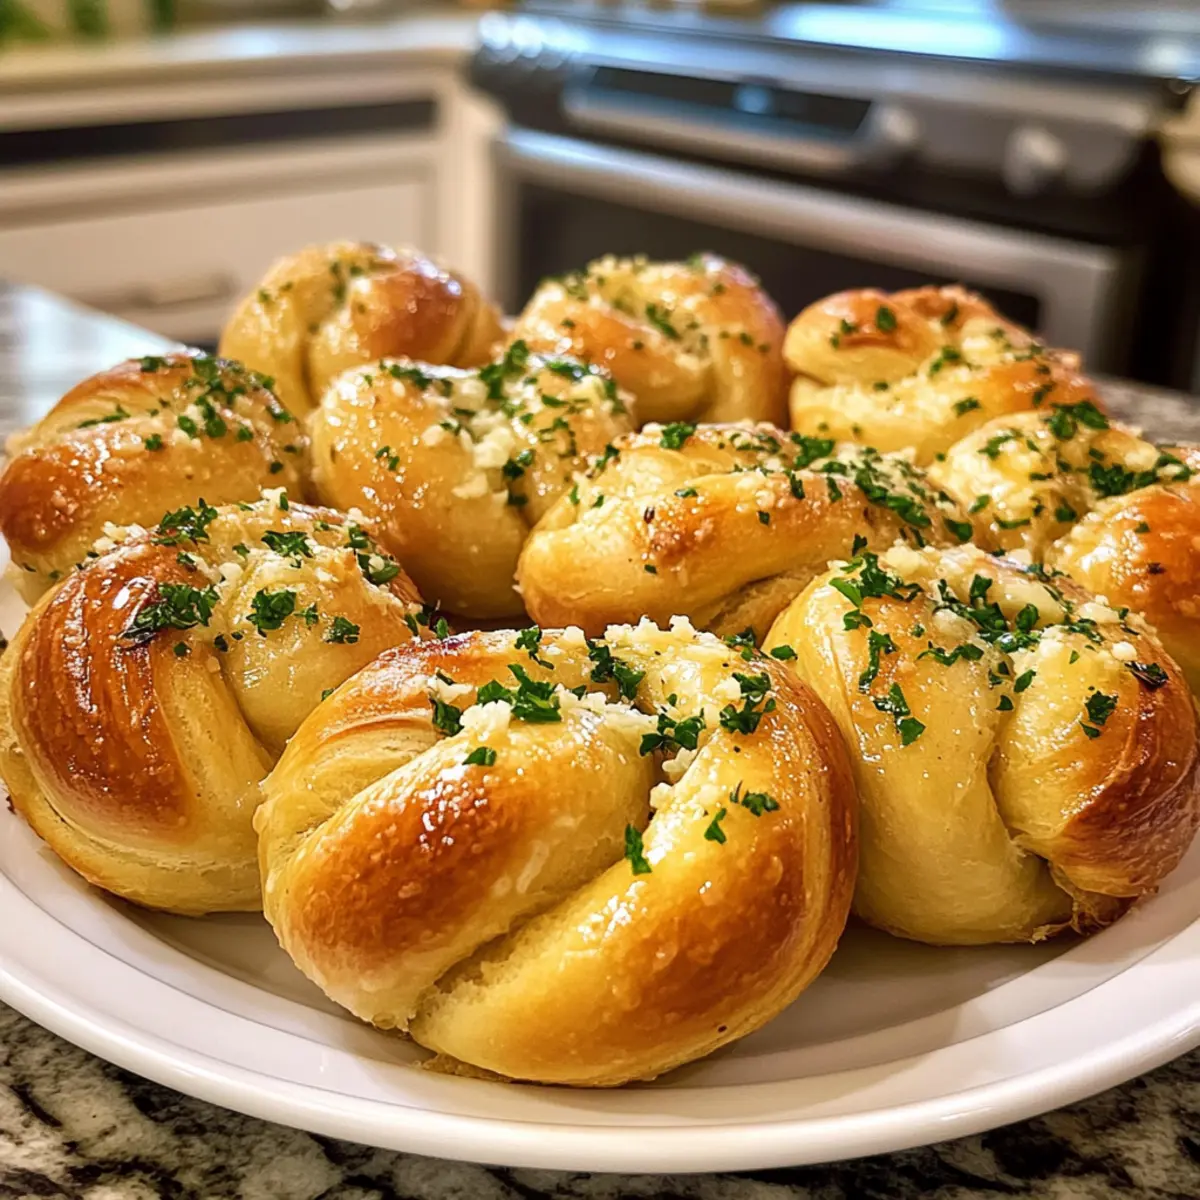
Gluten-Free Garlic Knots: Soft, Easy, and Ready in Under an Hour

The aroma of freshly baked bread can transport you back to your childhood kitchen, but what if I told you that you can whip up a batch of Soft Gluten-Free Garlic Knots in under an hour? That’s right! These delightful knots, dipped in a rich garlic butter sauce, are not just easy to make but also gluten-free, perfect for those looking to savor homemade goodness without the heaviness of traditional bread. Imagine pulling apart a warm, doughy knot and relishing that buttery garlic flavor, all while knowing that each bite is lovingly crafted by your own hands. Whether you’re prepping for family dinner, a cozy movie night, or just a quick snack, these knots promise to be a crowd-pleaser. Are you ready to bring the magic of homemade garlic knots into your kitchen? Let’s get started!
Why Are These Garlic Knots Irresistible?

Softness and Chewy Texture: These garlic knots are incredibly soft, offering that perfect pizzeria-style chew without any gluten.

Quick and Easy: With a prep time of under an hour, you’ll have these knots ready to serve in no time – no kneading required!

Flavorful Garlic Butter: Drenched in a rich garlic butter sauce, each bite bursts with savory goodness, making these knots an addictive snack or side.

Versatile Options: Feel free to customize them with herbs or toppings, just like you do for your favorite Honey Garlic Shrimp or Lemon Garlic Shrimp dishes!

Dairy-Free Alternative: Easily adapt these knots for dairy-free diets with simple ingredient swaps, ensuring everyone at the table can enjoy them.

Crowd-Pleaser: Perfect for family dinners, parties, or casual movie nights, these garlic knots will be the star of any gathering!

Gluten-Free Garlic Knot Ingredients

For the Dough

  • Gluten-free all-purpose flour – This provides the essential structure for your garlic knots; I recommend Cup4Cup for the best texture!
  • Granulated sugar – Adds a touch of sweetness that harmonizes beautifully with the garlic flavor.
  • Instant rapid rise yeast – Key for leavening, ensuring your knots rise quickly and become fluffy.
  • Psyllium husk powder – Serves as a binder, mimicking gluten to achieve that perfect gluten-free texture; you can also use ground flaxseed as a substitute if needed.
  • Baking powder – Gives an extra lift to the dough for a lighter, fluffier knot.
  • Salt – Enhances the flavor of the garlic knots, ensuring every bite is seasoned well.
  • Warm water – Activates the yeast; ensure it’s about 110°F for the best results.
  • Large egg – Provides moisture and helps bind everything together; for a vegan option, replace with a flaxseed egg.

For the Flavor

  • Olive oil – Adds moisture and richness; can easily be swapped with vegan butter for a non-dairy option.
  • Melted butter – Essential for brushing over the knots; this is where the delightful garlic flavor shines; substitute with olive oil if desired.
  • Grated parmesan – Introduces a cheesy essence; omit or switch to nutritional yeast for a dairy-free experience.

For the Garlic Butter Topping

  • Garlic powder – Infuses the knots with a rich garlic flavor, essential for that classic experience.
  • Dried oregano – Adds a warm, herbaceous note that complements the garlic perfectly.
  • Dried parsley – Brightens up the flavor profile and adds a touch of color.
  • Kosher salt – To season the garlic butter mixture, enhancing the overall taste.

Now that you have your delicious Gluten-Free Garlic Knot ingredients ready, let’s move on to crafting these mouthwatering bites that are sure to impress everyone!

Step‑by‑Step Instructions for Gluten-Free Garlic Knots

Step 1: Generate the Dough
In a stand mixer, combine 2 cups of gluten-free all-purpose flour, 1 tablespoon of sugar, 2 teaspoons of instant rapid rise yeast, 2 teaspoons of psyllium husk powder, 1 teaspoon of baking powder, and 1/2 teaspoon of salt. Mix on low speed until well blended. Gradually add 3/4 cup of warm water (about 110°F), 1 large egg, and 2 tablespoons of olive oil. Stir on low for 1 minute, then beat on medium for 5 minutes until the dough is stiff yet smooth.

Step 2: Prepare to Shape
Preheat your oven to 375°F and line a baking sheet with parchment paper. Grease a 1/4 cup measuring cup with olive oil. Scoop approximately 1/4 cup of dough and roll it into a long rope, about 9 inches in length. Tie the rope into a knot, ensuring it holds its shape, and place it on the prepared baking sheet. Repeat this process until all dough is shaped into knots.

Step 3: Allow Rising
Once all the knots are shaped and on the baking sheet, cover them loosely with a clean kitchen towel. Allow the knots to rise in a warm location for about 15 minutes. This helps the dough expand and become fluffier, crucial for achieving the soft texture that defines these Gluten-Free Garlic Knots, while the oven finishes preheating.

Step 4: Make the Garlic Topping
In a small bowl, melt 4 tablespoons of butter and mix in 1 teaspoon of garlic powder, 1 teaspoon of dried oregano, and 1 teaspoon of dried parsley. Brush half of this garlic butter mixture generously over the unbaked knots to enhance their flavor. The remaining mixture will be used later for a final touch after baking.

Step 5: Bake
Carefully place the baking sheet in the preheated oven and bake for 15-17 minutes. Keep an eye on them; you’ll know they’re done when the knots turn golden brown and have an internal temperature of 190°F. The aroma of these delicious gluten-free garlic knots will fill your kitchen as they bake!

Step 6: Final Flavor
As soon as the Gluten-Free Garlic Knots come out of the oven, use a brush to apply the remaining garlic butter topping over the hot knots. This will add an irresistible sheen and boost their flavor even further. Let them cool for a few minutes before serving, allowing the buttery goodness to soak in.

Make Ahead Options

These Soft Gluten-Free Garlic Knots are a dream for meal prep enthusiasts! You can prepare the dough and shape the knots up to 24 hours in advance. Simply follow the instructions up to the rising stage, cover the shaped knots tightly with plastic wrap, and refrigerate. This keeps the dough fresh and prevents over-proofing. When it’s time to bake, preheat your oven and allow the knots to sit at room temperature for 15-20 minutes before brushing them with the garlic butter and baking. This way, you’ll have warm, delicious garlic knots ready to impress with minimal effort, all while saving precious time on busy weeknights!

Expert Tips for Gluten-Free Garlic Knots

  • Fresh Yeast: Ensure your instant rapid rise yeast is fresh. Expired yeast won’t rise properly, resulting in dense knots.

  • Avoid Refrigeration: Don’t refrigerate the cooked garlic knots. Refrigeration can dry them out; they are best enjoyed fresh the same day.

  • Perfect Water Temperature: Use warm water at about 110°F to activate the yeast effectively. Too hot or too cold water can hinder dough rising.

  • Dough Consistency: The dough should be stiff but smooth. If it’s too wet or sticky, add a bit more gluten-free flour for the right texture.

  • Customize Flavors: Feel free to mix in additional toppings like minced garlic or Italian herbs to elevate your gluten-free garlic knots to new flavor heights.

  • Reheat Properly: When reheating leftovers, place a damp paper towel over the knots in the microwave or wrap them in foil in the oven to keep them moist.

Variations & Substitutions for Gluten-Free Garlic Knots

Feel free to get creative with these garlic knots and make them your own with exciting twists and swaps!

  • Dairy-Free: Substitute melted butter with vegan butter or olive oil to keep these knots dairy-free and just as delicious.

  • Flavored Garlic Butter: Infuse your garlic butter with fresh minced garlic for an extra layer of flavor that elevates the knots.

  • Herb-Infused: Mix in fresh herbs like rosemary or thyme into the dough for a fragrant twist that enhances every bite.

  • Cheesy Delight: Swap out grated parmesan for nutritional yeast to add cheesy flavor while keeping the recipe dairy-free. Each knot rings with savory goodness!

  • Spicy Kick: Add a pinch of red pepper flakes to the garlic butter for a delightful heat that complements the garlic and elevates the flavor profile.

  • Textural Variation: For added crunch, sprinkle sesame seeds or poppy seeds over the knots before baking, providing a pleasing contrast to the soft inside.

  • Whole Grain Boost: Replace half of the gluten-free flour with almond flour or oat flour for a nuttier taste and richer texture.

  • Savory Stuffing: Consider stuffing the knots with a mixture of vegan cheese or caramelized onions before shaping them to add a surprise element in each bite!

These variations can offer different textures and flavors, transforming your garlic knots into a unique culinary experience! If you’re intrigued, you might enjoy these flavorsome dishes, like Garlic Butter Shrimp or Crusted Chicken Garlic, as they also embrace the art of elevating everyday ingredients. Happy baking!

How to Store and Freeze Gluten-Free Garlic Knots

  • Room Temperature: Best enjoyed fresh, store leftover knots in an airtight container for up to 1 day at room temperature.

  • Fridge: If you have leftovers, they can be refrigerated for up to 3 days in a sealed container, although this may alter the texture slightly.

  • Freezer: For longer storage, wrap individual knots in plastic wrap and place them in a ziplock bag, freezing for up to 3 months.

  • Reheating: When ready to enjoy, reheat frozen garlic knots in a preheated oven at 350°F for about 10-15 minutes or microwave with a damp paper towel to maintain moisture.

What to Serve with Soft Gluten-Free Garlic Knots

Warm, inviting, and full of flavor, these garlic knots are the perfect addition to a cozy family meal or gathering.

  • Marinara Sauce: Dipping these knots into a rich, tangy marinara sauce enhances their flavor profile and adds a touch of zest.

  • Garden Salad: A fresh garden salad with vibrant greens and a light vinaigrette serves as a crisp contrast to the soft, buttery knots. It’s a refreshing way to balance the meal.

  • Homemade Alfredo Sauce: Creamy Alfredo sauce makes for a delightful alternative to marinara, perfect for those looking for a luscious dipping experience, offering a rich and savory pairing.

  • Roasted Vegetables: Sweet roasted vegetables provide a satisfying texture and complement the garlic knots beautifully, adding a nutritious element to your meal.

  • Italian Sausage: Sizzling Italian sausage brings hearty protein into the mix, creating a comforting, balanced dish that pairs deliciously with the garlic knots.

  • Chardonnay or Sauvignon Blanc: A chilled glass of Chardonnay or Sauvignon Blanc enhances the flavors of the meal, offering a crisp and refreshing sip that pairs well with the buttery garlic flavor.

  • Chocolate Chip Cookies: For dessert, soft chocolate chip cookies create a perfect sweet ending to a savory meal, leaving your taste buds satisfied and joyful.
Soft Gluten-Free Garlic Knots Recipe FAQs

What type of gluten-free flour should I use?
I highly recommend using Cup4Cup gluten-free all-purpose flour for the best texture in your garlic knots. This particular blend closely mimics regular flour and provides a soft, chewy outcome. If you’re using another brand, ensure it includes xanthan gum, or add it separately to help with binding.

How should I store leftover gluten-free garlic knots?
For your leftover garlic knots, they are best stored in an airtight container at room temperature for up to 1 day. If you’re looking for longer storage, place them in the fridge for about 3 days, though the texture may slightly change. Make sure to avoid refrigeration if possible, as they tend to dry out.

Can I freeze gluten-free garlic knots?
Absolutely! To freeze your garlic knots, wrap each one in plastic wrap and then place them in a ziplock bag. They can be stored in the freezer for up to 3 months. When you’re ready to enjoy them again, simply reheat them in a preheated oven at 350°F for 10-15 minutes, or use the microwave with a damp paper towel to keep them moist.

What should I do if my dough is too sticky?
If your dough becomes too sticky and unmanageable, don’t worry! Just add a bit more gluten-free all-purpose flour gradually until you reach a smooth, stiff consistency. Remember, the dough should be firm but pliable to achieve those perfect knots.

Are these garlic knots safe for my allergies?
These garlic knots are naturally gluten-free and can be adjusted for dairy-free diets as well. You can substitute the melted butter with olive oil or a vegan alternative and use a flaxseed egg in place of the regular egg for those with egg allergies. Always check brands of ingredients to ensure they meet your dietary requirements.

How can I enhance the flavor of these garlic knots?
To take your gluten-free garlic knots up a notch, consider adding minced fresh garlic or extra herbs like rosemary or thyme into the dough mixture. You could also sprinkle some crushed red pepper flakes on top before baking for a hint of spice! Feel free to get creative with your favorite flavor combinations!

Gluten-Free Garlic Knots

Gluten-Free Garlic Knots: Soft, Easy, and Ready in Under an Hour

Soft Gluten-Free Garlic Knots are easy to make and perfect for any occasion, dipped in rich garlic butter sauce.
Prep Time 15 minutes
Cook Time 17 minutes
Rising Time 15 minutes
Total Time 47 minutes
Servings: 12 knots
Course: Appetizer
Cuisine: American
Calories: 150

Ingredients
  

For the Dough
  • 2 cups Gluten-free all-purpose flour Cup4Cup recommended
  • 1 tablespoon Granulated sugar
  • 2 teaspoons Instant rapid rise yeast Fresh yeast recommended
  • 2 teaspoons Psyllium husk powder Can substitute ground flaxseed
  • 1 teaspoon Baking powder
  • 1/2 teaspoon Salt
  • 3/4 cup Warm water About 110°F
  • 1 large Egg Substitute with flaxseed egg for vegan option
For the Flavor
  • 2 tablespoons Olive oil Can substitute with vegan butter
  • 4 tablespoons Melted butter Can substitute with olive oil
  • 1/4 cup Grated parmesan Omit or use nutritional yeast for dairy-free
For the Garlic Butter Topping
  • 1 teaspoon Garlic powder Essential for flavor
  • 1 teaspoon Dried oregano
  • 1 teaspoon Dried parsley
  • 1 teaspoon Kosher salt

Equipment

  • Stand Mixer
  • Baking Sheet
  • Measuring cups
  • Parchment paper
  • Mixing Bowl

Method
 

Step-by-Step Instructions
  1. In a stand mixer, combine 2 cups of gluten-free all-purpose flour, 1 tablespoon of sugar, 2 teaspoons of instant rapid rise yeast, 2 teaspoons of psyllium husk powder, 1 teaspoon of baking powder, and 1/2 teaspoon of salt. Mix on low speed until well blended. Gradually add 3/4 cup of warm water, 1 large egg, and 2 tablespoons of olive oil. Stir on low for 1 minute, then beat on medium for 5 minutes until the dough is stiff yet smooth.
  2. Preheat your oven to 375°F and line a baking sheet with parchment paper. Grease a 1/4 cup measuring cup with olive oil. Scoop approximately 1/4 cup of dough and roll it into a long rope, about 9 inches in length. Tie the rope into a knot, ensuring it holds its shape, and place it on the prepared baking sheet. Repeat until all dough is shaped into knots.
  3. Cover the knots loosely with a clean kitchen towel and allow them to rise in a warm location for about 15 minutes.
  4. In a small bowl, melt 4 tablespoons of butter and mix in 1 teaspoon of garlic powder, 1 teaspoon of dried oregano, and 1 teaspoon of dried parsley. Brush half of this garlic butter mixture over the unbaked knots.
  5. Bake for 15-17 minutes until golden brown.
  6. Brush the remaining garlic butter topping over the hot knots before serving.

Nutrition

Serving: 1knotCalories: 150kcalCarbohydrates: 20gProtein: 3gFat: 6gSaturated Fat: 2gPolyunsaturated Fat: 1gMonounsaturated Fat: 2gCholesterol: 30mgSodium: 200mgPotassium: 100mgFiber: 1gSugar: 1gVitamin A: 300IUCalcium: 50mgIron: 0.5mg

Notes

Best enjoyed fresh on the same day; store in an airtight container at room temperature for up to 1 day or refrigerate for up to 3 days. For freezing, wrap in plastic and place in a ziplock bag for up to 3 months.

Tried this recipe?

Let us know how it was!

Lemon Pepper Tofu: A Zesty Vegan Meal Under 30 Minutes

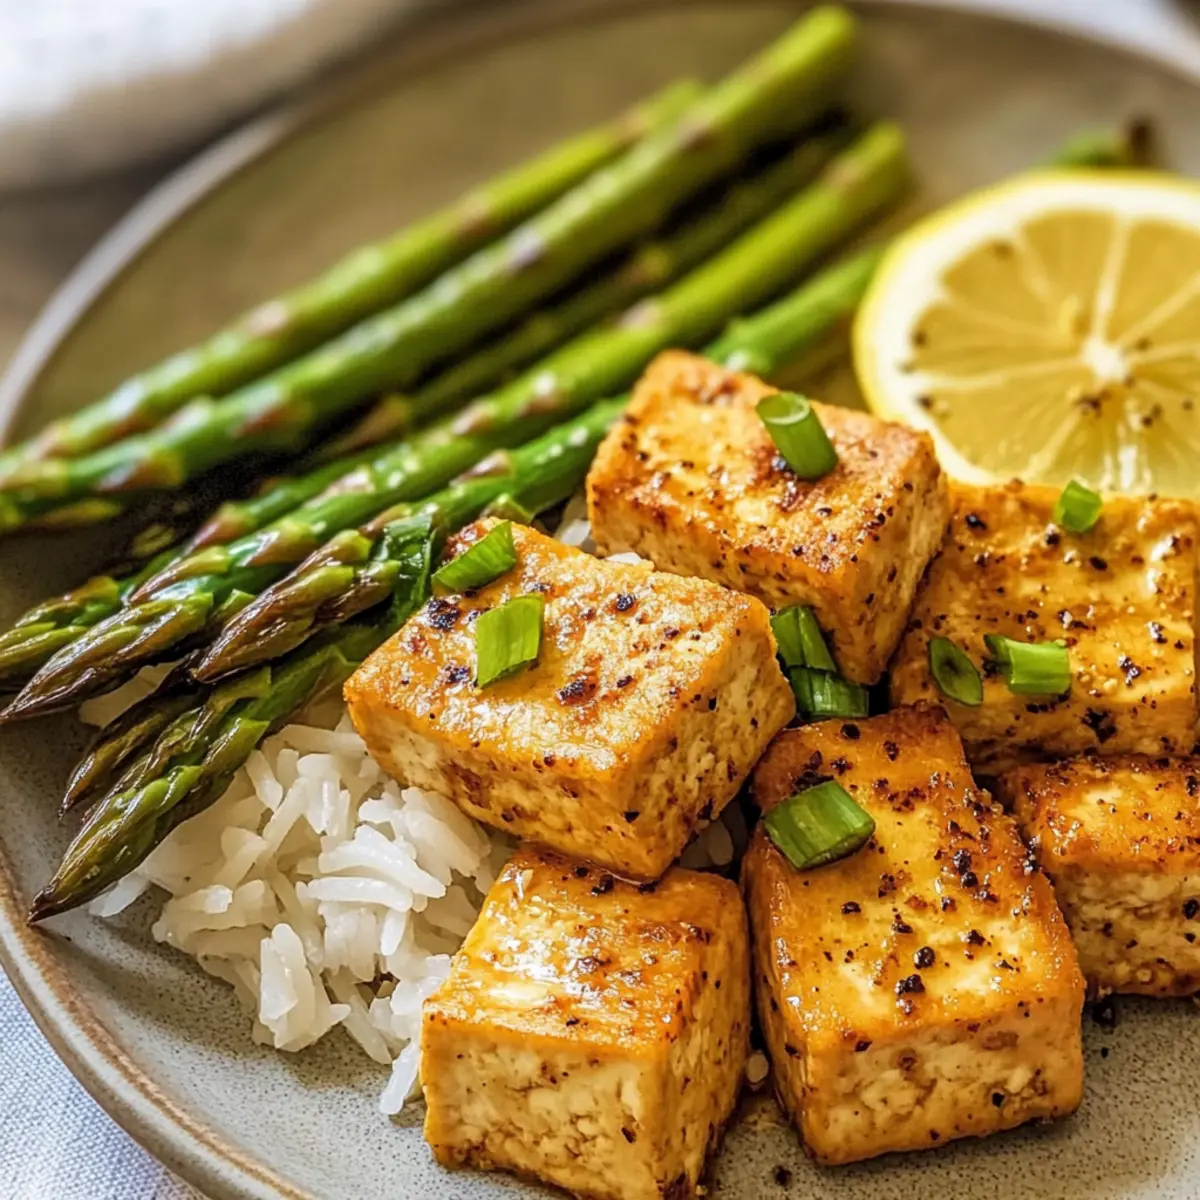
There’s something undeniably satisfying about cozying up to a plate of vibrant colors and bold flavors. My latest creation, Lemon Pepper Tofu with Roasted Asparagus, is not only a feast for the eyes but also a delightful surprise for the taste buds. This quick vegan delight comes together in under 30 minutes, making it the perfect solution for busy weeknights. With crispy, golden tofu seasoned with a zesty sauce and paired with tender asparagus, this recipe is both high in protein and a healthy alternative to quick takeout. Whether you’re a seasoned home-chef or just starting your culinary journey, this dish promises a burst of freshness without the fuss. Curiosity piqued? Let’s dive into how you can whip up this delightful meal!

Why is Lemon Pepper Tofu a Must-Try?

Quick and Easy: This recipe comes together in under 30 minutes, perfect for busy weeknights!

Vibrant Flavors: The zesty lemon and cracked black pepper ignite your taste buds, making every bite a refreshing experience.

Healthful Ingredients: Packed with high-protein tofu and nutrient-rich asparagus, it’s a satisfying, guilt-free meal option.

Versatile Base: Feel free to swap asparagus for other veggies like broccoli or carrots; this dish adapts to your preferences.

Crowd-Pleasing Appeal: Even friends and family who aren’t vegan will love this! Pair it with sides like Lemon Garlic Shrimp or Chicken Stuffed Peppers for a memorable feast.

Lemon Pepper Tofu Ingredients

For the Tofu

  • Super Firm Tofu – This type yields the best texture and crispy results when cooked.
  • Cornstarch – Coats the tofu to achieve a delightful crunch; all-purpose flour can work as a substitute.
  • Oil – Opt for high smoke point oils like avocado or canola for frying the tofu.

For the Asparagus

  • Asparagus – A nutrient-rich veggie that pairs perfectly with the savory tofu; feel free to swap with broccoli or carrots for variety.
  • Nutritional Yeast – Enhances the umami flavor of the asparagus, can be omitted if desired.
  • Lemon Juice – Freshly squeezed lemon juice adds the acidity necessary to brighten the dish.

For the Flavoring

  • Lemon Zest – This step enhances the citrusy aroma; ensure zest comes from organic lemons to avoid pesticides.
  • Cracked Black Pepper – Adds a warming heat exceptional in this Lemon Pepper Tofu dish; adjust based on your spice preference.
  • Garlic – Fresh cloves provide that aromatic depth; powdered garlic can be used in a pinch.
  • Red Pepper Flakes – Omit or reduce for a milder kick, based on your taste tolerance.

With these delightful ingredients in hand, you’re just a few steps away from preparing a zesty, satisfying meal that highlights the vibrant flavors of Lemon Pepper Tofu!

Step‑by‑Step Instructions for Lemon Pepper Tofu with Roasted Asparagus

Step 1: Prep the Asparagus
Begin by preheating your oven to 400°F (200°C). While it’s warming up, trim the tough ends off the asparagus and arrange them on a lined baking sheet. Drizzle with olive oil and season generously with salt, pepper, nutritional yeast, lemon juice, and lemon zest. Toss everything gently to coat, then spread the asparagus in an even layer—this ensures even roasting. Bake for about 15-20 minutes until tender and slightly crispy.

Step 2: Prepare the Tofu
While the asparagus is roasting, take a block of super firm tofu and slice it into your desired shapes—cubes or rectangles work great. In a mixing bowl, combine cornstarch, salt, and cracked black pepper. Add the sliced tofu to this mixture and toss until every piece is well coated in the cornstarch mix. This will create a crispy exterior for your Lemon Pepper Tofu.

Step 3: Fry the Tofu
Next, heat a generous amount of oil in a large non-stick skillet over medium-high heat. Once the oil is shimmering, carefully add the tofu pieces in a single layer, making sure not to overcrowd the pan. Cook for 5-7 minutes until they turn golden brown and crispy on one side, then gently flip and fry for an additional 5-7 minutes until all sides are beautifully golden and crunchy.

Step 4: Make the Sauce
In the same skillet, remove the fried tofu and set it aside on a plate. Lower the heat to medium and add minced garlic and red pepper flakes to the remaining oil, sautéing for about 1 minute until fragrant. Next, pour in lemon juice and stir, allowing it to cook and thicken slightly, which should take about 2-3 minutes. This fresh sauce will nicely tie in with the flavors of the Lemon Pepper Tofu.

Step 5: Combine and Serve
Now, return the crispy tofu to the skillet and toss it gently in the lemon sauce, ensuring every piece is well-coated with that vibrant flavor. After 1-2 minutes of heating the tofu with the sauce, remove from heat. Serve the flavorful Lemon Pepper Tofu alongside the roasted asparagus, garnishing with a sprinkle of extra lemon zest for that delightful citrus punch. Enjoy!

Expert Tips for Lemon Pepper Tofu

  • Crispier Tofu: Freeze and press the tofu before cooking to enhance its texture. This simple step improves crispiness immensely.

  • Coating Consistency: Ensure the tofu is thoroughly coated in cornstarch to achieve an optimal crunch during frying. Skipping this may result in soggy tofu.

  • Lemon Balance: Adjust the quantity of lemon juice and cracked black pepper according to your taste preference. Some lemons are tangier than others, so taste as you go!

  • Diverse Veggies: Don’t hesitate to swap the asparagus for other vegetables like broccoli or carrots. This Lemon Pepper Tofu dish adapts beautifully to seasonal produce.

  • Cooking Oil Choice: Use oils with a high smoke point, such as avocado or canola, for frying. Olive oil can burn at high temperatures, affecting flavor.

How to Store and Freeze Lemon Pepper Tofu

Fridge: Store cooled Lemon Pepper Tofu and asparagus in an airtight container for up to 4 days. Reheat gently in the oven for the best texture.

Freezer: For longer storage, you can freeze the tofu (without the asparagus) for up to 3 months. Slice and fry before freezing, then store in a freezer-safe container.

Reheating: When ready to enjoy, reheat in a skillet over medium heat until warmed through, adding a splash of lemon juice for freshness.

Wrap It Up: If you plan on taking leftovers for lunch, ensure you separate the tofu and asparagus to maintain optimal textures during storage.

Lemon Pepper Tofu Variations & Substitutions

Feel free to explore these enticing variations, elevating your Lemon Pepper Tofu experience!

  • Veggie Swap: Replace asparagus with broccoli, carrots, or bell peppers for a colorful twist. Each vegetable brings its unique flavor and texture!

  • Soy-Free: Use coconut aminos instead of soy sauce or tamari for a soy-free option while still enjoying the umami depth.

  • Creamy Delight: Stir in a dollop of vegan cream or cashew cream into the sauce for a rich, creamy texture that complements the tofu beautifully.

  • Herb Infusion: Experiment with fresh herbs like oregano or basil to enhance the flavor profile. The aromatic herbs give a lovely garden-fresh essence.

  • Citrus Zest: Add a splash of lime or orange juice along with the lemon for a vibrant citrus symphony that dances on your palate.

  • Spice It Up: For those who love heat, incorporate sriracha or chili paste into the sauce. It gives an exciting kick to the dish without losing the lemon flavor.

Exploring variations not only keeps meals exciting but also allows you to cater to your family’s taste preferences. Whether you’re pairing this dish with a delicious side like Lemon Garlic Shrimp or enjoying it solo, the options are endless. Dive into the world of flavors and make this recipe uniquely yours!

Make Ahead Options

These Lemon Pepper Tofu with Roasted Asparagus are perfect for meal prep enthusiasts! You can chop and season the asparagus and marinate the tofu with cornstarch, salt, and pepper up to 24 hours in advance, storing them separately in airtight containers in the refrigerator to maintain freshness. When you’re ready to enjoy, simply roast the asparagus and fry the prepped tofu, following the recipe instructions for a delicious finish. This prep saves you valuable time on busy weeknights while ensuring your dish is just as flavorful and satisfying as made fresh. Trust me, you’ll have a vibrant meal ready in no time!

What to Serve with Lemon Pepper Tofu with Roasted Asparagus

Elevate your meal by pairing this vibrant, zesty dish with complementary sides and beverages that add even more flavor and satisfaction.

  • Coconut Quinoa: This grain has a delightful nutty flavor that harmonizes beautifully with the lemony tofu while providing a satisfying base.
  • Garlic Herb Rice: Serve steamed rice infused with garlic and herbs; it’s light yet filling, offering a great texture contrast to the crispy tofu.
  • Crunchy Salad: A fresh mixed greens salad with a tangy vinaigrette balances the dish perfectly. The crispness of the veggies adds an extra layer of freshness.
  • Grilled Vegetables: Charred bell peppers, zucchini, or eggplant add a smoky note to your plate, enhancing the overall experience of your meal.
  • Herb-Infused Olive Oil: Drizzle this fragrant oil over your tofu for an additional depth of flavor and an aromatic finish that elevates the dish.
  • Fruit-Infused Sparkling Water: Refreshing and light, a sparkling water with lemon or cucumber enhances the dish’s citrusy undertones while keeping your palate cleansed.
  • Chocolate Avocado Mousse: For a sweet ending, this creamy dessert is rich yet healthy, making a wonderful contrast to the savory flavors of your meal.
  • Lemon Sorbet: A vibrant and refreshing dessert that echoes the zesty notes of the main dish, offering a lovely, cool finish.

Lemon Pepper Tofu Recipe FAQs

How do I select the best tofu for this recipe?
Absolutely! For the best results, choose super firm tofu. It holds its shape beautifully and crisps up nicely when cooked. Look for tofu with a clean, firm texture and a pack date that’s as recent as possible. The fresher, the better!

What is the best way to store leftovers of Lemon Pepper Tofu?
Very! Place any leftover Lemon Pepper Tofu and asparagus in an airtight container in the fridge. They’ll stay fresh for up to 4 days. When reheating, I recommend using the oven instead of a microwave to maintain crispiness. Just place them on a baking sheet and reheat at 350°F (175°C) for about 10-15 minutes until warmed through.

Can I freeze Lemon Pepper Tofu?
Certainly! To freeze, slice and fry the tofu first, then let it cool completely. Store the tofu in a freezer-safe container or bag, separating it from the asparagus, and it can last for up to 3 months. When you’re ready to enjoy it, simply reheat in a skillet over medium heat, adding a splash of lemon juice to refresh the flavors.

What should I do if my tofu isn’t crispy after frying?
No worries! If your tofu isn’t crispy, it may not have been coated evenly in cornstarch or might have been overcrowded in the pan while frying. To fix this, ensure each piece is well-coated before frying and fry in batches if necessary. You could also try increasing the heat slightly to achieve a golden, crunchy exterior.

Is this recipe suitable for those with allergies?
Absolutely! Lemon Pepper Tofu can be modified to meet various dietary needs. However, it does contain sesame oil if you choose to use it for frying. If there are specific allergies such as soy or gluten, consider opting for chickpea tofu or an appropriate substitute, and ensure your cornstarch or flour is gluten-free. Always check ingredient labels to be safe.

What vegetable substitutes can I use for asparagus?
Very! If asparagus isn’t your thing, feel free to swap it for other vibrant veggies like broccoli, carrots, or even bell peppers! Just adjust the roasting time based on the thickness of the vegetables—thicker veggies may take a bit longer, whereas thinly sliced ones will cook faster. Mix and match based on what you have on hand!

Lemon Pepper Tofu

Lemon Pepper Tofu: A Zesty Vegan Meal Under 30 Minutes

Lemon Pepper Tofu is a quick and flavorful vegan meal packed with protein.
Prep Time 10 minutes
Cook Time 20 minutes
Total Time 30 minutes
Servings: 2 servings
Course: Dinner
Cuisine: Vegan
Calories: 300

Ingredients
  

For the Tofu
  • 1 block Super Firm Tofu This type yields the best texture and crispy results when cooked.
  • 3 tablespoons Cornstarch Coats the tofu to achieve a delightful crunch.
  • 2 tablespoons Oil Opt for high smoke point oils like avocado or canola for frying.
For the Asparagus
  • 1 bunch Asparagus A nutrient-rich veggie that pairs perfectly with the savory tofu.
  • 2 tablespoons Nutritional Yeast Enhances the umami flavor of the asparagus.
  • 2 tablespoons Lemon Juice Freshly squeezed adds acidity to brighten the dish.
For the Flavoring
  • 1 tablespoon Lemon Zest Enhances the citrusy aroma.
  • 1 teaspoon Cracked Black Pepper Adjust based on your spice preference.
  • 2 cloves Garlic Fresh cloves provide aromatic depth.
  • 1/2 teaspoon Red Pepper Flakes Omit or reduce for a milder kick.

Equipment

  • Baking Sheet
  • Mixing Bowl
  • Non-stick skillet

Method
 

Step-by-Step Instructions
  1. Preheat your oven to 400°F (200°C). Trim the tough ends off the asparagus and arrange them on a lined baking sheet. Drizzle with olive oil and season with salt, pepper, nutritional yeast, lemon juice, and lemon zest. Toss to coat and spread evenly. Bake for 15-20 minutes until tender and slightly crispy.
  2. Slice the tofu into your desired shapes. In a mixing bowl, combine cornstarch, salt, and black pepper. Toss the sliced tofu in the mixture until coated.
  3. Heat oil in a large non-stick skillet over medium-high heat. Add tofu pieces in a single layer without overcrowding. Cook for 5-7 minutes until golden brown, then flip and fry for another 5-7 minutes until crispy.
  4. Remove fried tofu and lower heat. In the same skillet, sauté minced garlic and red pepper flakes in remaining oil for about 1 minute. Pour in lemon juice and cook until it thickens, about 2-3 minutes.
  5. Return the tofu to the skillet and toss gently in the lemon sauce for 1-2 minutes. Serve alongside roasted asparagus, garnishing with extra lemon zest.

Nutrition

Serving: 1servingCalories: 300kcalCarbohydrates: 15gProtein: 20gFat: 18gSaturated Fat: 2gPolyunsaturated Fat: 4gMonounsaturated Fat: 11gSodium: 400mgPotassium: 600mgFiber: 5gSugar: 2gVitamin A: 100IUVitamin C: 15mgCalcium: 200mgIron: 2mg

Notes

Crispier tofu can be achieved by freezing and pressing it before cooking. Adjust lemon juice and cracked black pepper to your taste. Use high smoke point oils for frying.

Tried this recipe?

Let us know how it was!

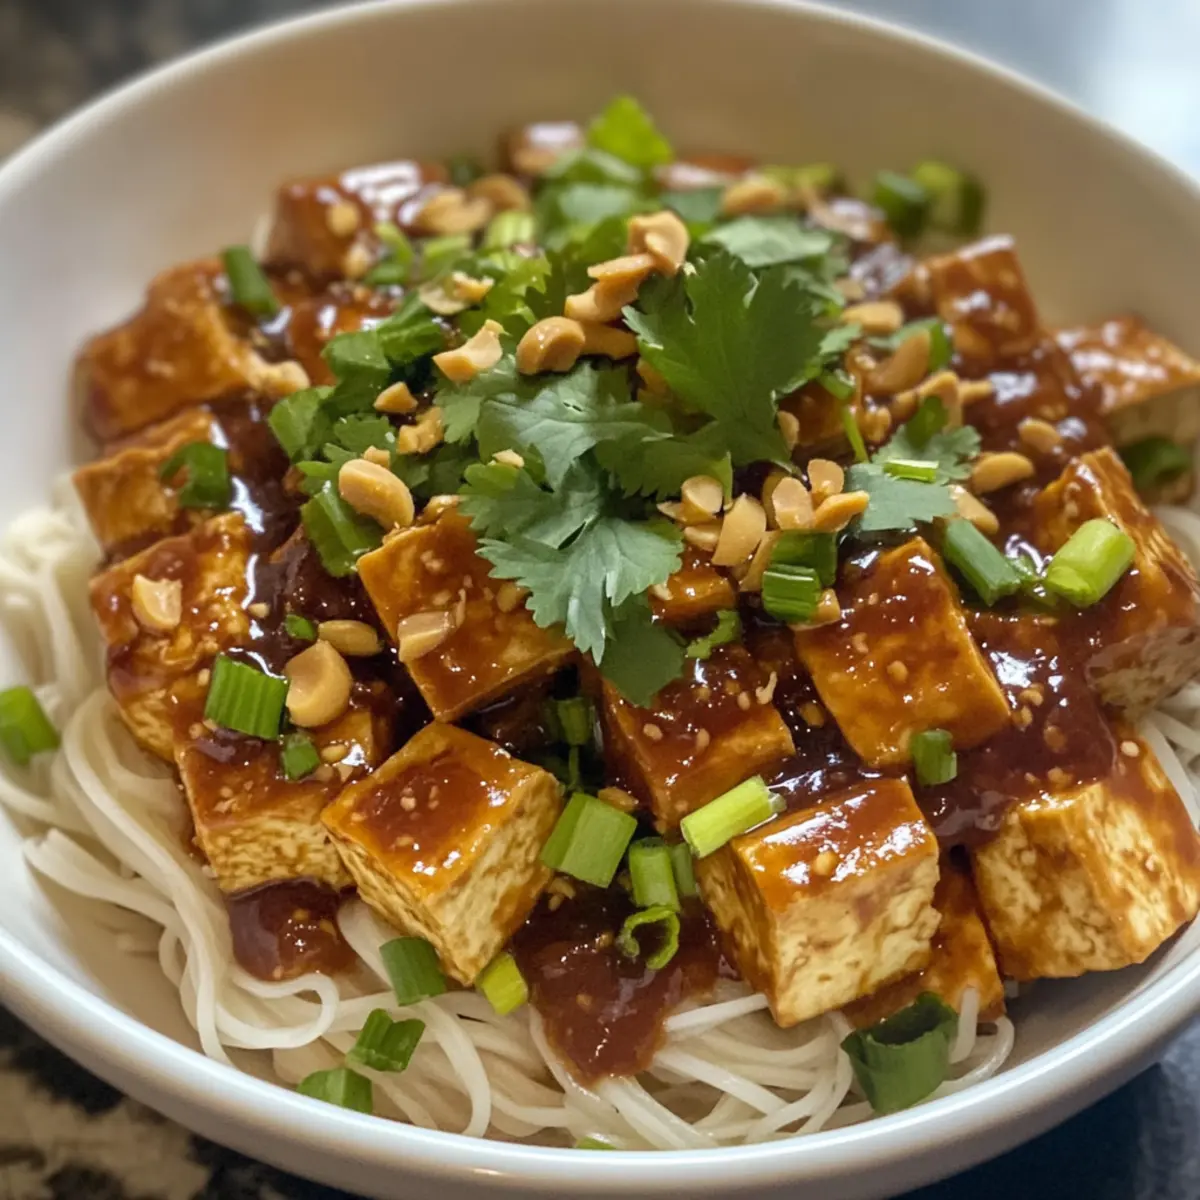
Hoisin Peanut Lime Cold Silken Tofu That Refreshes Your Palate

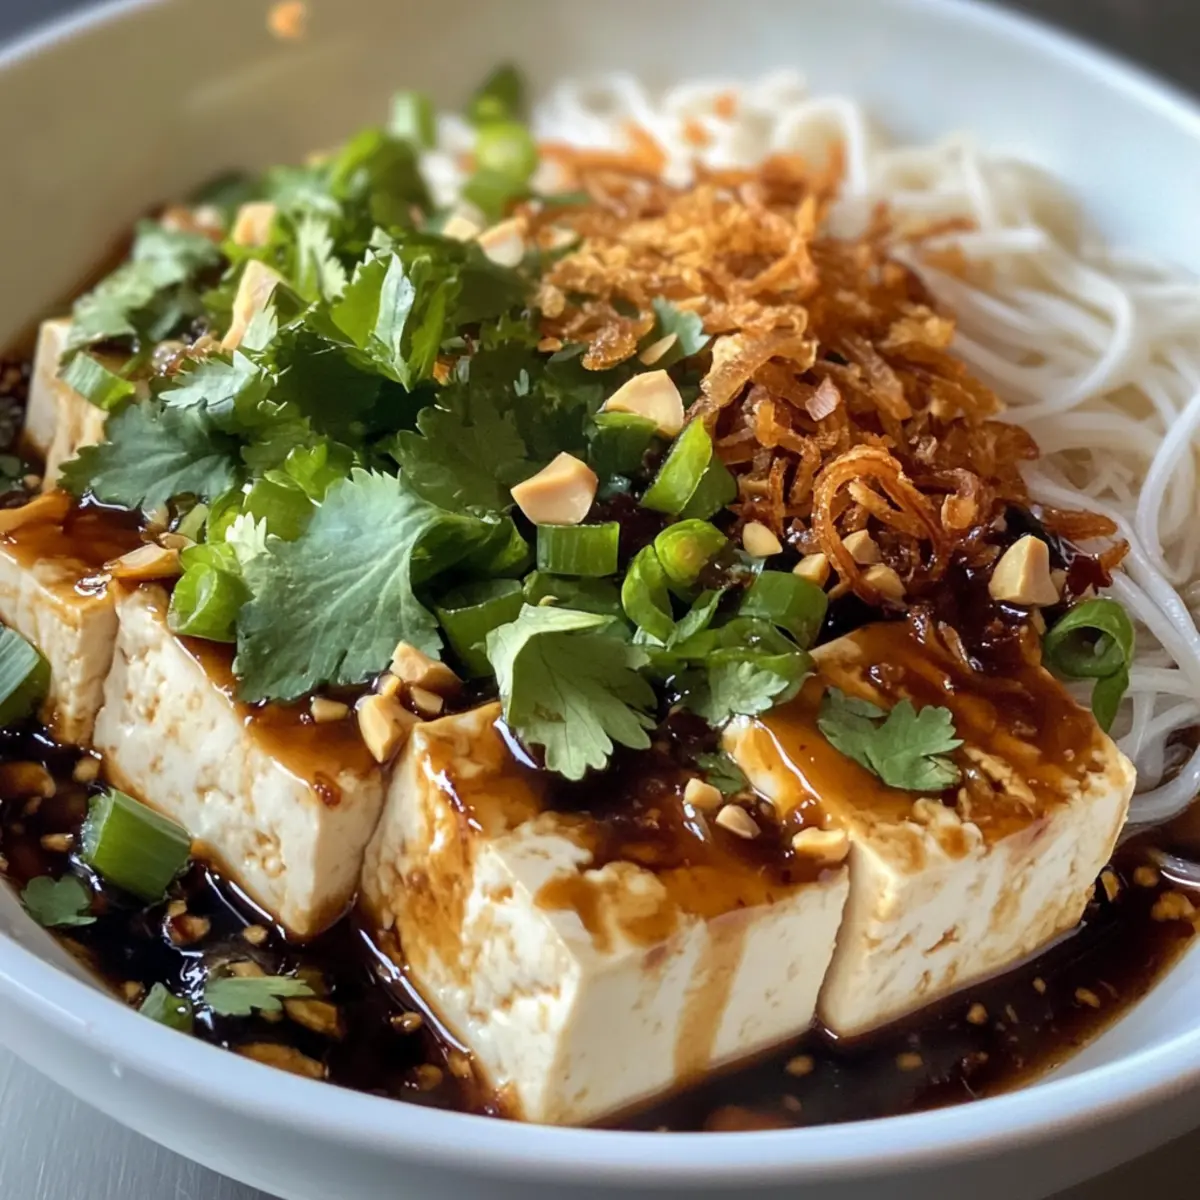
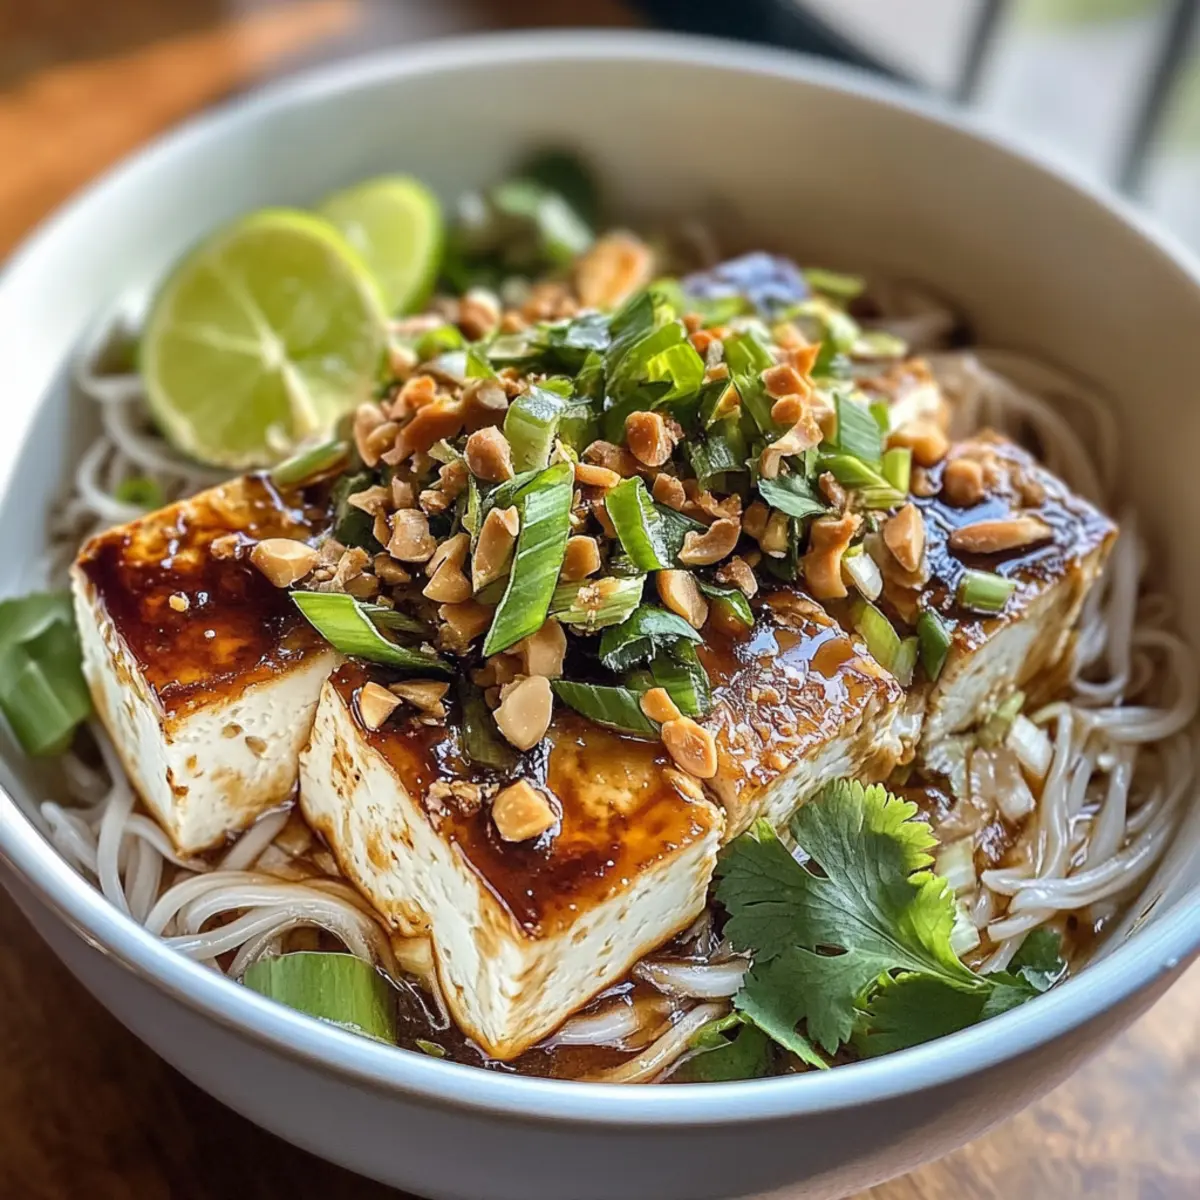
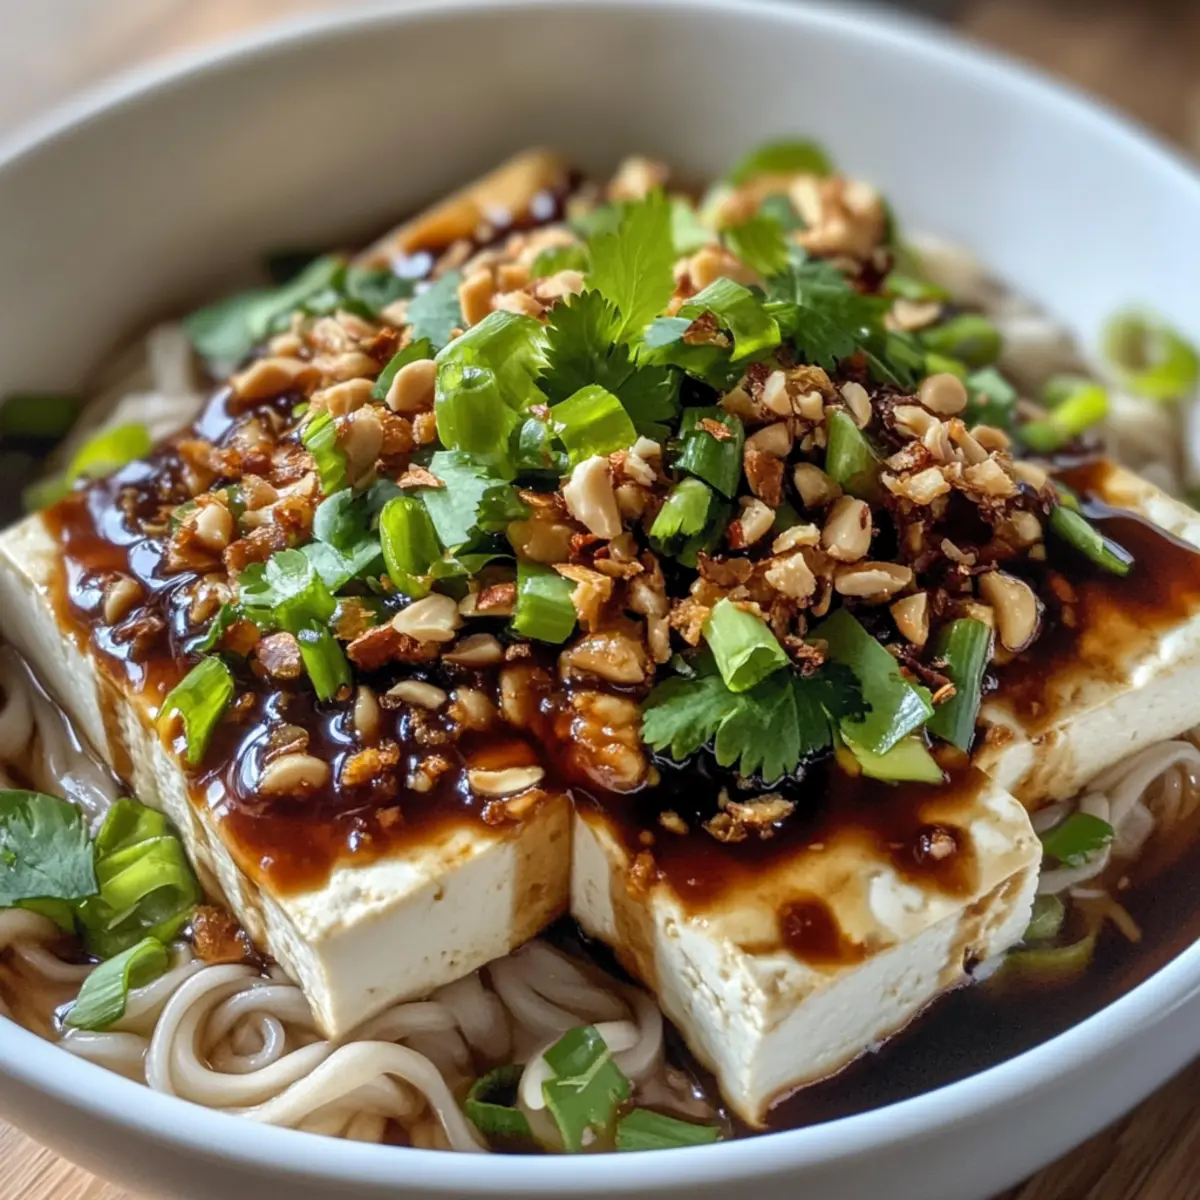
As I stood in my kitchen, the vibrant colors of fresh ingredients beckoning, I felt a spark of excitement knowing I was about to create something truly special: Hoisin Peanut Lime Cold Silken Tofu. This recipe is a gem for anyone seeking a quick yet satisfying meal. In just 20 minutes, you can whip up a delightfully refreshing dish that combines silky tofu with a tangy, savory sauce. Not only is it a crowd-pleaser, but it’s also perfect for those embracing a plant-based lifestyle. Whether you enjoy it as a light starter, a delicious snack, or a complete meal over noodles, the flavors will transport you to a sunny afternoon in your favorite Asian eatery. Curious to dive in and taste the harmony of hoisin, peanut, and lime? Let’s get cooking!

Why is this dish a must-try?

Simplicity at its Finest: In just 20 minutes, you can prepare this delightful dish without any intricate techniques.

Savory, Sweet, and Spicy: The rich Hoisin Peanut Lime Sauce combines bold flavors that will truly tantalize your taste buds.

Perfectly Versatile: Enjoy it as a light starter or over noodles for a filling main course that suits any occasion.

Plant-Based Goodness: This recipe is not only vegan-friendly but also packed with wholesome ingredients that make it a guilt-free indulgence.

Quick Cleanup: Minimal prep and cooking means more time to relax and enjoy your meal – just serve and savor! Looking for more inspiration? Try our delicious Pumpkin Cream Cold to complement your culinary journey!

Ingredients for Hoisin Peanut Lime Cold Silken Tofu

• Prepare to delight your taste buds with these simple yet essential ingredients!

For the Tofu

  • Silken Tofu – Provides a creamy texture; the main protein source that perfectly absorbs the sauce.

For the Hoisin Peanut Lime Sauce

  • Hoisin Sauce – Brings sweetness and umami flavor; can substitute with soy sauce mixed with a bit of sugar if unavailable.
  • Peanut Butter – Adds richness and creaminess; chunky peanut butter offers texture while smooth peanut butter gives a velvety sauce.
  • Lime Juice – Offers tartness; juice from about two small limes is ideal for a fresh zing.
  • Sugar – Balances the sauce’s acidity; adjust to taste for the perfect sweetness.
  • Garlic – Adds depth of flavor; minced for even distribution in your sauce.
  • Soy Sauce – Enhances umami flavor; adjust according to your preference for seasoning.
  • Chili Oil – Provides heat; optional based on your spice tolerance.
  • Sesame Oil – Adds a nutty aroma; a small touch is sufficient for flavor enhancement.
  • Water – Use to adjust the sauce consistency; add as needed for your desired thickness.

For the Toppings

  • Fried Shallots – Adds a delightful crunch and flavor; sprinkle generously over the tofu.
  • Chopped Green Onions or Cilantro – Fresh herbs that brighten the dish and enhance presentation.

For Serving

  • Wheat Noodles – Serve alongside the tofu; choose your preferred kind to complement the dish, and season with soy sauce or chili oil if desired.

Step‑by‑Step Instructions for Hoisin Peanut Lime Cold Silken Tofu

Step 1: Prepare Tofu
Start by carefully removing the silken tofu from its packaging. Drain any excess water by gently pressing on it. For best results, transfer the tofu to a plate and place it in the refrigerator to chill for at least 10 minutes, allowing it to firm slightly while you prepare the sauce.

Step 2: Make Sauce
In a mixing bowl, combine hoisin sauce, peanut butter, lime juice, sugar, minced garlic, soy sauce, chili oil, sesame oil, and a splash of water. Whisk the ingredients together until the mixture is smooth and well-combined, resembling a thick but pourable consistency. Adjust the flavors to your liking, adding more sugar or lime juice if desired for balance.

Step 3: Cook Noodles (if desired)
If you choose to serve this dish with noodles, bring a pot of water to a rolling boil. Add the wheat noodles and cook according to package instructions, usually around 3-5 minutes, until they achieve a nice chew. Drain the noodles, rinse them briefly under cold water to stop the cooking process, and set aside in a bowl.

Step 4: Assemble
Retrieve the chilled silken tofu and slice it into bite-sized pieces or cubes. Place the tofu on a serving platter and generously pour the prepared Hoisin Peanut Lime Sauce over the top, ensuring each piece is coated. Sprinkle fried shallots and chopped green onions or cilantro as vibrant garnishes, adding both flavor and visual appeal.

Step 5: Serve Noodles
If using noodles, take the prepared wheat noodles and place them in individual serving bowls. Drizzle any remaining sauce over the noodles, seasoning with extra soy sauce or chili oil to taste. Toss gently to combine and create a delightful bed for the silken tofu, making it a complete and satisfying dish.

Expert Tips for Hoisin Peanut Lime Cold Silken Tofu

  • Chill the Tofu: Ensure your silken tofu is well-chilled before serving; this enhances its creamy texture and complements the sauce beautifully.

  • Adjust the Sauce: Taste the Hoisin Peanut Lime Sauce before serving, and tweak the sugar and lime juice to hit that perfect balance of sweet and tangy, tailored to your preference.

  • Serve Fresh: While this dish is delicious, it’s best enjoyed freshly assembled. If making ahead, keep the sauce separate to prevent the tofu from absorbing excess moisture.

  • Garnish for Impact: Don’t skip the fried shallots and fresh herbs—they add essential crunch and freshness that elevate this dish, making your Hoisin Peanut Lime Cold Silken Tofu truly shine.

  • Perfectly Cooked Noodles: If adding wheat noodles, be mindful not to overcook them. They should be firm and chewy, providing a delightful contrast to the silky tofu.

Storage Tips for Hoisin Peanut Lime Cold Silken Tofu

Fridge: Store any leftover silken tofu in an airtight container in the fridge for up to 3 days. Keep it uncoated with sauce to prevent excess moisture.

Freezer: Avoid freezing the assembled dish, as the tofu’s texture may change. If you have leftover sauce, freeze it in a sealed bag for up to 1 month, then thaw before use.

Reheating: If you prefer enjoying the dish warm, gently heat the tofu and noodles together in a pan over low heat, adding a splash of water or extra sauce for moisture, ensuring even warmth without compromising the tofu’s is delicate texture.

Sauce Storage: The Hoisin Peanut Lime Sauce can be stored in the fridge for up to a week in a tight-lidded container.

What to Serve with Hoisin Peanut Lime Cold Silken Tofu

Elevate your dining experience by pairing this refreshing dish with delightful complements that enhance its flavors.

  • Crispy Vegetable Spring Rolls: These light, crunchy rolls add a satisfying crunch and vibrant vegetables that complement the creamy tofu beautifully.

  • Chilled Cucumber Salad: Refreshing and zesty, this salad provides a cool contrast, balancing the rich flavors of the Hoisin Peanut Lime sauce.

  • Sesame Garlic Noodles: These flavorful noodles, tossed in a light sesame sauce, create a perfect harmony with the tofu, offering a fulfilling bite that’s both savory and tangy.

  • Miso Soup: A warm bowl of miso soup brings a comforting umami flavor alongside the chilled dish, creating a wonderful temperature contrast.

  • Crisp Radish Slaw: A crunchy slaw with a hint of lime will mimic the tanginess of the sauce while adding a pop of color and texture to your meal.

  • Asian Pear Salad: The sweetness and crunch of Asian pears introduce a refreshing balance that will keep your palate delighted and intrigued.

  • Green Tea: A sophisticated green tea enhances the meal with its earthy undertones while providing a palate cleanser between bites.

  • Mango Sticky Rice: This dessert brings a sweet, creamy finish that perfectly complements the savory hoisin flavors of the main dish!

  • Fresh Coconut Water: Hydrate and refresh with a naturally sweet drink that pairs effortlessly with the vibrant tastes of the meal.

Hoisin Peanut Lime Cold Silken Tofu Variations

Feel free to get creative and make this dish your own with these delightful twists and substitutions!

  • Firm Tofu: Swap silken tofu for firm tofu for a denser, chewier texture.
  • Nut Butter Swap: Replace peanut butter with almond or cashew butter for a different nutty flavor profile that retains creaminess.
  • Veggie Boost: Add sweet bell peppers or cucumber slices for a refreshing crunch; they’ll beautifully complement the silky tofu.
  • Spice It Up: Mix in some sriracha for a spicy kick! This adds just the right amount of heat to elevate the dish.
  • Cilantro-Lime Vibes: Toss in chopped cilantro and an extra squeeze of lime juice to enhance the freshness and bring more vibrant flavors.
  • Zesty Lemon: Use lemon juice instead of lime for a totally different citrusy zing; this can refresh the entire flavor experience.
  • Cooked Ingredients: Incorporate cooked edamame or shredded carrots for added texture and nutrition – these will blend wonderfully with the sauce.
  • Soba Noodles: For your side of noodles, try using soba instead of wheat noodles! They introduce a nutty flavor and pair well with the hoisin sauce.

Looking for something sweet to complement your meal? Enjoy a cozy cup of our Pumpkin Cream Cold for the perfect finish to your culinary experience!

Make Ahead Options

These Hoisin Peanut Lime Cold Silken Tofu are perfect for meal prep enthusiasts! You can prepare the Hoisin Peanut Lime Sauce up to 3 days in advance, storing it in an airtight container in the refrigerator to maintain its vibrant flavors. Just make sure to whisk it again before serving, as it may thicken slightly. You can also chill the silken tofu ahead of time, but avoid pouring the sauce over the tofu until just before serving to prevent water release and maintain the silky texture. When you’re ready to enjoy, simply slice the chilled tofu, pour the sauce over, and garnish with fried shallots and green onions for a delightful meal that saves you time on busy weeknights!

Hoisin Peanut Lime Cold Silken Tofu Recipe FAQs

How do I choose the right silken tofu?
Absolutely! For this recipe, I recommend opting for either super-soft or regular silken tofu. Check that the tofu is free from dark spots or cracks in the packaging, as these can indicate spoilage. Always choose the freshest option, which will enhance the texture of your dish.

How should I store leftovers?
Very importantly, to maintain freshness, store any leftover silken tofu in an airtight container in the fridge for up to 3 days. It’s best to keep the tofu separate from the sauce to prevent moisture from compromising its silky texture. If you have leftover sauce, it can be kept in a sealed container in the fridge for about one week.

Can I freeze the sauce?
Absolutely! If you have extra Hoisin Peanut Lime Sauce, you can freeze it in a sealed plastic bag for up to 1 month. When you’re ready to use it, simply thaw it in the fridge overnight or warm it gently in a pan over low heat. Make sure to stir well before serving to restore its creamy consistency.

What should I do if my sauce is too thick?
If you find that your sauce is thicker than desired, don’t worry! Just add a little more water, a tablespoon at a time, while whisking until you reach your preferred consistency. Taste and adjust for sweetness or acidity with more lime juice or sugar if needed. It’s all about personal preference!

Is this recipe suitable for those with allergies?
Good question! This dish is vegan and plant-based, but it does contain peanut butter. If you or someone you’ll be serving has nut allergies, you can substitute the peanut butter with sunflower seed butter or tahini, which would still provide a nice, creamy texture without nuts. Always check packaged ingredients for any hidden allergens!

Hoisin Peanut Lime Cold Silken Tofu

Hoisin Peanut Lime Cold Silken Tofu That Refreshes Your Palate

This Hoisin Peanut Lime Cold Silken Tofu is a quick and refreshing dish perfect for any occasion.
Prep Time 20 minutes
Cook Time 5 minutes
Total Time 25 minutes
Servings: 4 servings
Course: Salad
Cuisine: Asian
Calories: 250

Ingredients
  

For the Tofu
  • 1 block Silken Tofu Provides a creamy texture
For the Hoisin Peanut Lime Sauce
  • 3 tablespoons Hoisin Sauce Brings sweetness and umami flavor
  • 2 tablespoons Peanut Butter Chunky or smooth for desired texture
  • 2 tablespoons Lime Juice Juice from about two small limes
  • 1 tablespoon Sugar Adjust to taste
  • 1 clove Garlic Minced for flavor depth
  • 1 tablespoon Soy Sauce Enhances umami flavor
  • 1 teaspoon Chili Oil Optional based on spice tolerance
  • 1 teaspoon Sesame Oil Adds a nutty aroma
  • 2 tablespoons Water Adjust sauce consistency as needed
For the Toppings
  • 1/4 cup Fried Shallots For crunch and flavor
  • 2 tablespoons Chopped Green Onions or Cilantro For garnish and freshness
For Serving
  • 200 grams Wheat Noodles Cook according to package instructions

Equipment

  • Mixing Bowl
  • pot
  • Whisk
  • Serving Platter
  • knife

Method
 

Preparation Steps
  1. Start by carefully removing the silken tofu from its packaging. Drain any excess water by gently pressing on it. Chill in refrigerator for 10 minutes.
  2. In a mixing bowl, combine hoisin sauce, peanut butter, lime juice, sugar, minced garlic, soy sauce, chili oil, sesame oil, and a splash of water. Whisk until smooth.
  3. If serving with noodles, bring a pot of water to boil, add noodles, and cook for 3-5 minutes. Drain and rinse under cold water.
  4. Slice chilled tofu into bite-sized pieces and place on a serving platter. Pour sauce over the top, coating the tofu. Garnish with fried shallots and herbs.
  5. If using noodles, place them in bowls, drizzling with remaining sauce. Toss gently and serve alongside the tofu.

Nutrition

Serving: 1servingCalories: 250kcalCarbohydrates: 30gProtein: 10gFat: 10gSaturated Fat: 2gPolyunsaturated Fat: 3gMonounsaturated Fat: 5gSodium: 600mgPotassium: 300mgFiber: 4gSugar: 5gVitamin A: 500IUVitamin C: 20mgCalcium: 100mgIron: 2mg

Notes

Best enjoyed freshly assembled. Keep the sauce separate if making ahead to prevent excess moisture on tofu.

Tried this recipe?

Let us know how it was!

Honey Cornbread Cookies – Sweet Southern Comfort in Every Bite

As the warm aroma of honey and cornmeal fills my kitchen, I can’t help but feel a wave of nostalgia wash over me. It’s funny how certain flavors transport us back to cherished moments, isn’t it? These Honey Cornbread Cookies capture that essence perfectly, offering a delightful combination of soft, cornbread-like texture with just the right amount of sweet honey flavor. Not only are they simple to whip up, but they also make for a crowd-pleasing treat that everyone will adore. Plus, they can easily be tailored for gluten-free diets without sacrificing taste. Are you ready to indulge in a cookie that feels like a warm hug? Let’s dive into this delicious recipe!

Why Are These Cookies a Must-Try?

Comforting Flavors: Each bite of these Honey Cornbread Cookies offers a delightful combination of sweet honey and tender cornbread, creating a nostalgic taste that everyone loves.

Easy to Make: With straightforward ingredients and simple steps, even beginner bakers can whip these up quickly.

Gluten-Free Option: You can easily swap in gluten-free flour for a delicious treat that everyone can enjoy.

Versatile Variations: Feel free to get creative by adding chocolate chips or nuts, or even swapping honey for maple syrup for a unique twist.

Perfect for Any Occasion: These cookies are great for afternoon snacks, gatherings, or just a cozy night in with a cup of tea.

Embrace the warmth of home-cooked goodness and bring these cookies to your next gathering, just like my favorite Honey Garlic Shrimp dish complements any meal!

Honey Cornbread Cookies Ingredients

For the Cookies

  • All-Purpose Flour – Provides sturdy structure; can substitute with gluten-free flour blend for a gluten-free version.
  • Yellow Cornmeal – Adds a distinctive flavor and texture; white cornmeal can be used if yellow is unavailable.
  • Baking Powder & Baking Soda – Essential leavening agents for a fluffy cookie; ensure freshness for the best rise.
  • Salt – Enhances overall flavor; do not skip this step, as it balances the sweetness.
  • Unsalted Butter – Contributes to richness and moisture; coconut oil is a great dairy-free option.
  • Honey – Imparts natural sweetness and moistness; agave syrup can be swapped for a different sweetness profile.
  • Granulated Sugar – Adds extra sweetness and helps achieve crisp edges; reduce for less sweetness.
  • Eggs – Provide binding and richness; flax eggs are a perfect vegan substitute.
  • Buttermilk – Offers tangy flavor and moisture; milk mixed with vinegar or lemon juice works in a pinch.
  • Vanilla Extract – Adds depth of flavor; almond extract creates a nice alternative flavor note.

Optional Additions

  • Chocolate Chips – For a sweet, indulgent twist in your cookies.
  • Chopped Nuts – Adds texture and nuttiness; walnuts or pecans work beautifully.
  • Orange Zest – Infuses a refreshing citrus touch to brighten up the flavor profile.

Indulge in these delightful Honey Cornbread Cookies that blend comfort with creativity!

Step‑by‑Step Instructions for Honey Cornbread Cookies

Step 1: Preheat the Oven
Begin by preheating your oven to 350°F (175°C). While the oven warms up, line two baking sheets with parchment paper to prevent sticking and facilitate easy cleanup. This vital first step ensures that your Honey Cornbread Cookies bake evenly, achieving that perfect golden brown edge we all love.

Step 2: Mix the Dry Ingredients
In a medium bowl, whisk together 1 cup of all-purpose flour, 1 cup of yellow cornmeal, 1 tablespoon of baking powder, ½ teaspoon of baking soda, and ½ teaspoon of salt. Mixing these dry ingredients thoroughly helps to distribute the leavening agents evenly, which is crucial for achieving a light and fluffy texture in your cookies. Set this bowl aside for later use.

Step 3: Cream the Butter and Sweeteners
In a separate large bowl, beat together ½ cup of softened unsalted butter, ½ cup of honey, and ½ cup of granulated sugar. Use an electric mixer on medium speed for about 2-3 minutes until the mixture is light and fluffy. This creaming process incorporates air, giving your Honey Cornbread Cookies a tender lift as they bake.

Step 4: Incorporate the Eggs and Vanilla
Next, add in 2 large eggs, one at a time, mixing well after each addition to ensure an even blend. Then, pour in 1 teaspoon of vanilla extract. This step infuses your cookie dough with delightful flavors, creating a rich base that complements the sweetness of the honey while ensuring a moist cookie texture.

Step 5: Combine Wet and Dry Ingredients
Gently alternate adding the dry mixture and ½ cup of buttermilk to the bowl, starting and ending with the dry ingredients. Mix just until combined, avoiding overmixing to keep your Honey Cornbread Cookies tender. The batter should be thick yet cohesive, indicating it’s ready for the next step.

Step 6: Shape the Cookies
Using a rounded tablespoon, drop dollops of dough onto the prepared baking sheets, spacing them about 1½ inches apart. This spacing allows room for the cookies to spread as they bake. The dough will appear soft but should hold its shape, preparing for a delightful rise in the oven.

Step 7: Bake the Cookies
Place the baking sheets in the preheated oven and bake for 10-12 minutes. Keep an eye out for the edges turning lightly golden and the centers appearing set. This visual cue tells you that your Honey Cornbread Cookies are ready to emerge from the oven, bringing that sweet aroma to your kitchen.

Step 8: Cool the Cookies
Once baked, let the cookies cool on the sheets for about 5 minutes. This resting time allows them to firm up before transferring them to a wire rack to cool completely. This step prevents breakage and ensures that your Honey Cornbread Cookies maintain their delightful shape and texture.

How to Store and Freeze Honey Cornbread Cookies

Room Temperature: Keep your cookies in an airtight container at room temperature for up to 4 days to maintain their softness.

Freezer: Store Honey Cornbread Cookies in a freezer-safe container separated by parchment paper for up to 3 months.

Thawing: When ready to enjoy, thaw cookies at room temperature for about 30 minutes before serving to restore their lovely texture.

Reheating: If desired, microwave for 5 seconds to soften them if they feel a bit dry after storage.

What to Serve with Honey Cornbread Cookies

Indulge in a delightful meal experience by pairing these sweet treats with complementary flavors and textures that make every bite a joy.

  • Creamy Buttermilk Mashed Potatoes: The rich, tangy flavor of buttermilk mashed potatoes provides a lovely contrast to the sweetness of the cookies, enhancing their flavors.

  • Savory Chili: A warm bowl of chili balances the sweetness of the Honey Cornbread Cookies, creating a perfect cozy meal for cool evenings.

  • Fresh Fruit Salad: A mix of seasonal fruits adds refreshing brightness and texture, balancing the richness of the cookies in a light, vibrant way.

  • Honey Butter: Spread warm honey butter atop the cookies for an extra layer of sweetness that complements their rich honey flavor and soft texture.

  • Black Tea: The delicate tannins in black tea harmonize with the sweet notes of the cookies, making for a comforting afternoon snack experience.

  • Vanilla Ice Cream: A scoop of creamy vanilla ice cream alongside the warm cookies creates a delightful melt-in-your-mouth experience that is utterly satisfying.

  • Chocolate Drizzle: A drizzle of melted chocolate over the cookies adds a touch of indulgence, enriching their flavors and bringing a delightful visual appeal.

Each of these sides enhances the warmth and comfort of these delightful Honey Cornbread Cookies, making your meal truly special!

Honey Cornbread Cookies Variations

Feel free to add your personal touch and elevate your Honey Cornbread Cookies to new flavor horizons!

  • Maple Syrup: Swap honey for maple syrup for a rich, earthy sweetness that deepens the flavor profile.

  • Citrus Zest: Add a hint of orange or lemon zest to brighten up your cookies with a refreshing twist. Just imagine the fragrant citrus notes mingling with the warm honey!

  • Nutty Crunch: Stir in some chopped pecans or walnuts for a delightful crunch and added nuttiness in every bite.

  • Chocolate Delight: Fold in chocolate chips to introduce a sweet surprise that beautifully contrasts the cornbread texture. Perfect for chocolate lovers!

  • Pumpkin Spice: Sprinkle in some pumpkin spice seasoning to embrace the cozy fall flavors that pair beautifully with honey.

  • Dairy-Free Option: Replace buttermilk with almond milk mixed with a splash of vinegar for a dairy-free take that doesn’t skimp on flavor.

  • Spicy Kick: Infuse a pinch of cayenne or chili powder for a surprising heat that enhances the sweetness of the cookies. This will surely intrigue anyone taking a bite!

  • Coconut Twist: Use shredded coconut for an exotic texture that offers a hint of tropical flavor, turning your cookies into a different cultural experience.

These variations are just the beginning! Experimenting with flavors can lead to delightful surprises, much like my popular Honey Sriracha Ground dish. Embrace the creativity and share your unique spin with friends and family!

Expert Tips for Honey Cornbread Cookies

  • Fresh Ingredients: Use fresh baking powder and baking soda to ensure your cookies rise properly. Stale leavening agents can lead to flat cookies.

  • Mixing Wisely: Avoid overmixing the dough. Mix just until combined to keep your Honey Cornbread Cookies tender and fluffy.

  • Butter Temperature: Make sure your butter is softened but not melted. Softened butter incorporates air and gives the cookies their soft texture while melted butter can lead to greasy cookies.

  • Spacing Matters: Space your cookie dough about 1½ inches apart on the baking sheet. This allows for even spreading and prevents cookies from merging into each other while baking.

  • Cool Completely: Allow cookies to cool completely on a wire rack. This prevents them from becoming too soft and helps maintain their delightful texture.

  • Storage Tips: Store cooled Honey Cornbread Cookies in an airtight container at room temperature for up to 4 days. For longer freshness, freeze them and reheat in the microwave for a warm treat later.

Make Ahead Options

These Honey Cornbread Cookies are a delightful treat that perfectly lends itself to meal prep! You can prepare the dough up to 24 hours in advance by mixing all the ingredients and storing it in an airtight container in the refrigerator; this prevents them from drying out and enhances the flavors. Alternatively, you can shape the cookies and freeze them directly on a baking sheet until solid, then transfer them to a freezer bag for up to 3 months. When ready to bake, simply place the frozen cookies on a baking sheet and add an extra minute or two to the baking time. With these make ahead tips, you’ll enjoy fresh, oven-baked Honey Cornbread Cookies with ease, even on the busiest days!

Honey Cornbread Cookies Recipe FAQs

How do I choose the right cornmeal for this recipe?
When selecting cornmeal, look for yellow cornmeal for the traditional flavor and texture described in the recipe. However, if yellow cornmeal is unavailable, white cornmeal makes a suitable substitute, still providing that delightful cornbread essence.

What is the best way to store leftover cookies?
To keep your Honey Cornbread Cookies fresh, store them in an airtight container at room temperature for up to 4 days. If they start to dry out, a quick 5-second zap in the microwave can help restore their softness.

Can I freeze the cookies for later enjoyment?
Absolutely! You can freeze your Honey Cornbread Cookies by placing them in a freezer-safe container, separated by parchment paper, for up to 3 months. When you’re ready to enjoy them, simply thaw at room temperature for about 30 minutes. If needed, microwave for 5 seconds to refresh their texture.

What should I do if my cookies turn out too dry?
If your cookies end up dry, it may be due to overbaking or using too much flour. To remedy dry cookies next time, ensure you measure flour accurately by spooning it into the measuring cup and leveling it off. Also, check the cookies at the lower baking time to ensure they remain soft and chewy in the center.

Are these cookies safe for people with nut allergies?
Yes, the base recipe for Honey Cornbread Cookies is nut-free, making it safe for those with nut allergies. However, if you plan to add ingredients like chocolate chips, always check the labels for potential cross-contamination, just to be sure!

Can I make these cookies vegan?
Certainly! To create a vegan version of Honey Cornbread Cookies, simply replace the eggs with flax eggs (1 tablespoon of ground flaxseed mixed with 3 tablespoons of water per egg, allowed to sit for 5 minutes to thicken) and substitute the honey with agave syrup.

Honey Cornbread Cookies

Honey Cornbread Cookies - Sweet Southern Comfort in Every Bite

Indulge in these delightful Honey Cornbread Cookies that blend comfort with sweet honey flavor and cornbread-like texture.
Prep Time 15 minutes
Cook Time 12 minutes
Cooling Time 5 minutes
Total Time 32 minutes
Servings: 24 cookies
Course: Dessert
Cuisine: Southern
Calories: 150

Ingredients
  

For the Cookies
  • 1 cup all-purpose flour can substitute with gluten-free flour
  • 1 cup yellow cornmeal white cornmeal can be used if yellow is unavailable
  • 1 tbsp baking powder ensure freshness for best rise
  • 0.5 tsp baking soda ensure freshness for best rise
  • 0.5 tsp salt balances sweetness
  • 0.5 cup unsalted butter can use coconut oil as dairy-free option
  • 0.5 cup honey can swap for agave syrup
  • 0.5 cup granulated sugar reduce for less sweetness
  • 2 large eggs flax eggs for a vegan substitute
  • 0.5 cup buttermilk milk mixed with vinegar or lemon juice can be used
  • 1 tsp vanilla extract almond extract can be used as an alternative
Optional Additions
  • 1 cup chocolate chips for a sweet twist
  • 0.5 cup chopped nuts walnuts or pecans work beautifully
  • 1 tbsp orange zest for refreshing citrus touch

Equipment

  • Oven
  • Mixing bowls
  • Electric Mixer
  • Baking Sheets
  • Parchment paper

Method
 

Step-by-Step Instructions
  1. Preheat your oven to 350°F (175°C) and line two baking sheets with parchment paper.
  2. In a medium bowl, whisk together flour, cornmeal, baking powder, baking soda, and salt.
  3. In a separate large bowl, cream together butter, honey, and sugar for about 2-3 minutes.
  4. Add eggs one at a time, mixing well after each addition. Stir in vanilla.
  5. Alternate adding the dry mixture and buttermilk to the bowl, mixing just until combined.
  6. Drop rounded tablespoons of dough onto prepared sheets, spaced about 1½ inches apart.
  7. Bake for 10-12 minutes until edges are golden and centers are set.
  8. Cool on sheets for 5 minutes before transferring to a wire rack.

Nutrition

Serving: 1cookieCalories: 150kcalCarbohydrates: 25gProtein: 2gFat: 6gSaturated Fat: 4gCholesterol: 30mgSodium: 120mgPotassium: 60mgFiber: 1gSugar: 9gVitamin A: 200IUCalcium: 20mgIron: 0.5mg

Notes

Store cooled Honey Cornbread Cookies in an airtight container at room temperature for up to 4 days. For longer freshness, freeze them and reheat in the microwave.

Tried this recipe?

Let us know how it was!

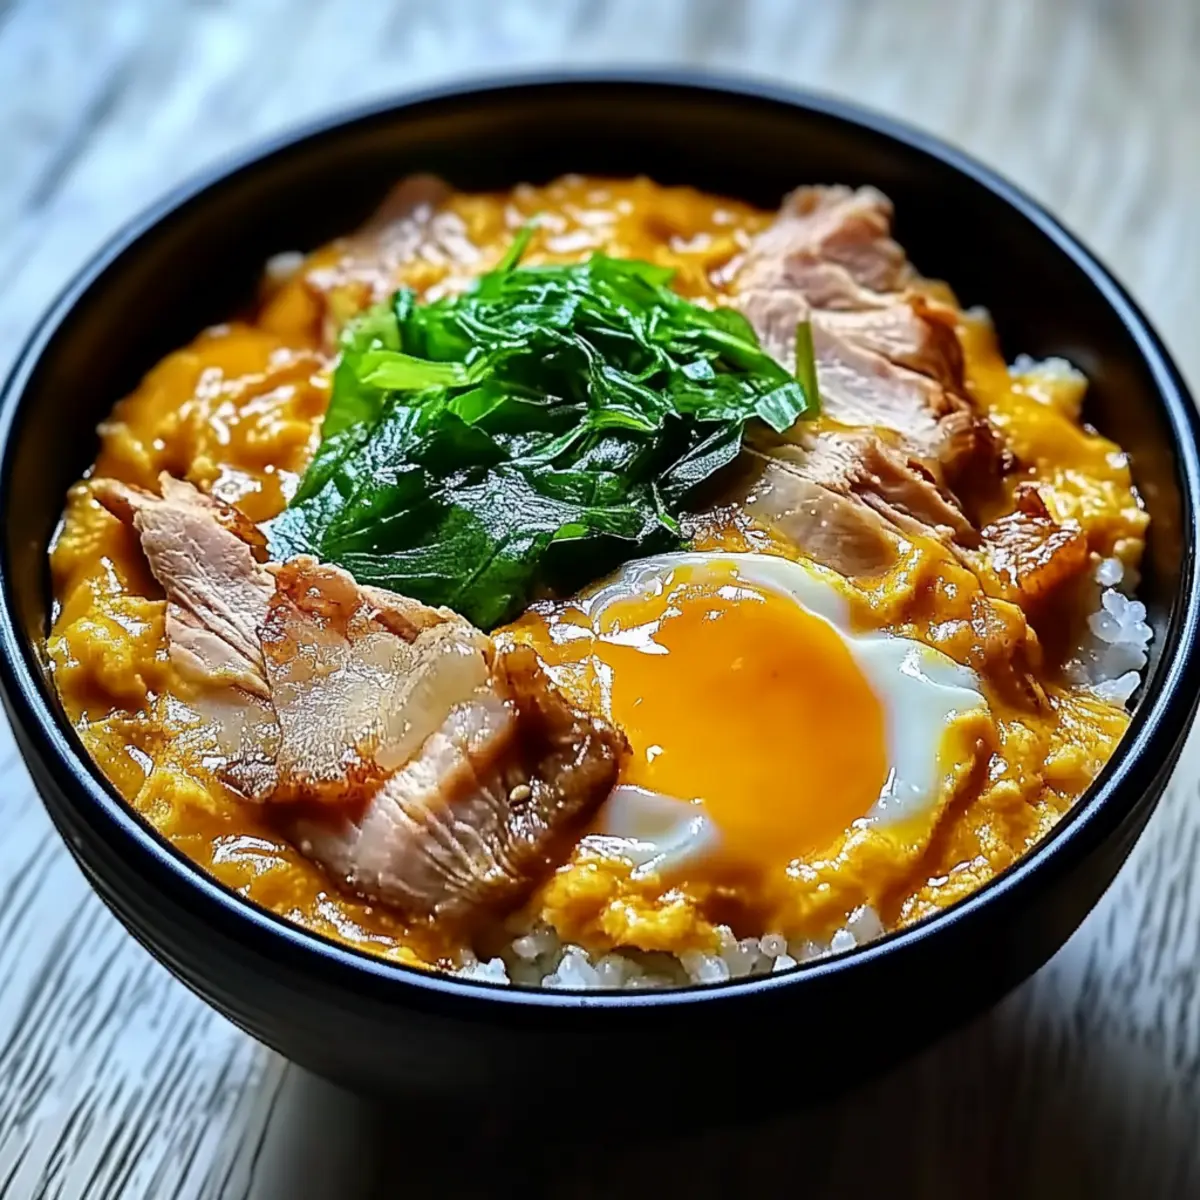
Ultimate Oyakodon Recipe: Cozy Comfort in a Rice Bowl

As I stood in my kitchen, the sweet scent of sautéing onions wafted through the air, instantly transporting me to a cozy Japanese eatery. This Ultimate Oyakodon Recipe is a beautiful celebration of simplicity, featuring tender chicken, perfectly cooked eggs, and comforting rice all in one bowl. It’s the quintessential Japanese comfort food, ideal for those bustling weeknights when time is short but you crave something heartfelt and satisfying. In just under 30 minutes, you can whip up a wholesome meal that’s not only easy to prepare but also a definite crowd-pleaser. And let’s face it, who wouldn’t want a dish that warms both the belly and soul? Ready to experience a taste of Japan right in your home? Let’s dive in!

Why is Oyakodon a Must-Try?

Comforting, Heartwarming Dish: This Ultimate Oyakodon recipe delivers a soothing bowl of goodness that feels like a warm hug after a long day.

Quick and Easy: With just a handful of ingredients and under 30 minutes of cooking time, it’s perfect for busy weeknights when you want a homemade meal without the fuss.

Flavor Explosion: The sweet onions, tender chicken, and creamy eggs come together for a flavor profile that’s both savory and satisfying.

Endless Variations: Whether you stick to the classic or switch things up with veggies or tofu, this dish is adaptable to your taste preferences.

Family-Friendly: Kids and adults alike will love this delightful rice bowl, making it an ideal choice for family dinners. You can even pair it with other comforting dishes like Hobo Casserole Discover for a feast!

Ultimate Oyakodon Recipe Ingredients

For the Rice
Short-grain Japanese rice – Essential for the perfect sticky texture that complements the dish beautifully.

For the Chicken
Boneless, skinless chicken thighs – Recommended for their tenderness and flavor that infuses the broth.

For the Eggs
Fresh eggs – Use high-quality, fresh eggs for a rich, creamy consistency that elevates the dish.

For the Onion
Yellow onions – Their natural sweetness enhances the overall flavor of your Ultimate Oyakodon.

For the Broth
Dashi – Provides that signature umami flavor; instant dashi powder is a quick alternative if time is short.
Low-sodium soy sauce – Offers depth of flavor without being overly salty: a healthier option for cooking.
Mirin (sweet rice wine) – Adds a touch of sweetness; mix honey with water if it’s not available.

For Sweetness
Sugar – Adjust according to your taste to balance the flavors perfectly; it enhances the dish’s comforting profile.

Feel free to explore different flavors and ingredients as you make this Ultimate Oyakodon recipe your own!

Step‑by‑Step Instructions for Ultimate Oyakodon Recipe

Step 1: Prepare Ingredients
Begin by slicing 1 medium yellow onion and 2 boneless, skinless chicken thighs into bite-sized pieces, ensuring they are uniform for even cooking. Measure out 2 cups of short-grain Japanese rice, rinsing it under cold water until it runs clear. Gather your dashi, soy sauce, mirin, and sugar for easy access during cooking.

Step 2: Cook Rice
In a rice cooker or a saucepan, add the rinsed rice along with the appropriate amount of water based on your cooker instructions. Cook according to your method, usually about 15-20 minutes on medium to high heat until the rice is tender and sticky. Once done, fluff the rice with a fork and keep it covered to maintain warmth.

Step 3: Make Dashi
While the rice cooks, pour 2 cups of water into a medium saucepan and bring it to a gentle simmer over medium heat. Add the instant dashi powder according to package instructions or use homemade dashi if you have it ready. Stir occasionally, and you’ll notice the beautiful umami aroma filling your kitchen in about 5 minutes.

Step 4: Sauté Onions
Add the sliced onions to the simmering dashi, cooking them gently for about 5-7 minutes until they soften and become translucent. This will enhance their sweetness and release wonderful flavors into the broth. Stir occasionally to ensure they cook evenly without browning.

Step 5: Add Chicken
Next, introduce the chicken pieces into the pot with the softened onions. Cook the chicken in the dashi for approximately 5-8 minutes until it turns tender and fully cooked, stirring gently to coat the chicken in the flavorful broth. You’ll know it’s done when the chicken is no longer pink in the center.

Step 6: Incorporate Eggs
While the chicken cooks, crack 2 fresh eggs into a bowl and whisk until just combined for a fluffy texture. Once the chicken is fully cooked, pour the eggs slowly over the chicken mixture in the pot. Cover with a lid and let it steam for about 2-3 minutes on low heat, allowing the eggs to set into a silky custard.

Step 7: Serve
To serve your Ultimate Oyakodon, spoon a generous amount of the chicken and egg mixture over a bowl of fluffy rice. Drizzle some of the dashi broth from the pot over the top for added flavor, ensuring each bite is bursting with savory goodness. Garnish with green onions for a fresh touch if desired.

Ultimate Oyakodon Recipe Variations

Feel free to get creative with your Ultimate Oyakodon; it’s a dish that welcomes all sorts of delicious adaptations!

  • Vegetarian: Substitute chicken with firm tofu for a plant-based twist. Just sauté it until golden brown for added flavor and texture.

  • Extra Veggies: Add in peas, spinach, or bell peppers to boost nutrition and color. Toss them in with the onions for a vibrant dish that’s as beautiful as it is tasty.

  • Spicy Kick: For some heat, sprinkle chili flakes or drizzle sriracha over the top before serving. The combination of flavors with a bit of spice can elevate your Oyakodon experience to new heights.
  • Broth Variations: Swap the dashi for other broth options like chicken or vegetable stock to customize the flavor. Each broth will lend a different character, inviting a bit of culinary exploration.

  • Savory Herbs: Incorporate fresh herbs, such as cilantro or scallions, to brighten the dish. They add freshness and complement the savory elements beautifully.

  • Umami Bomb: Mix in a splash of miso paste into your broth for an intense umami flavor that will take your dish to the next level. It’s a small change that makes a big difference!

  • Sweet Layers: Instead of sugar, try using agave syrup or maple syrup for a natural sweetness. The rich flavors will interact wonderfully with the savory notes.

This Ultimate Oyakodon recipe is only the beginning; you might want to check out delightful pairings like Fudgy Brownies for dessert or team it up with our savory Crab Crunchies Snack to round out your meal. Enjoy your culinary adventure!

Storage Tips for Ultimate Oyakodon

Fridge: Store leftovers in an airtight container for up to 2 days. This preserves the flavor and texture of the chicken and eggs.

Freezer: For longer storage, freeze the chicken and egg mixture without the rice for up to 2 months. When ready to enjoy, thaw in the fridge overnight before reheating.

Reheating: Gently reheat the Oyakodon on the stovetop over low heat or in the microwave, adding a splash of dashi or water to maintain moisture and the creamy egg texture.

Room Temperature: It’s best to avoid leaving Oyakodon out at room temperature for more than 2 hours to prevent any food safety issues.

What to Serve with Ultimate Oyakodon

Elevate your dining experience by pairing this comforting bowl of Japanese goodness with delightful side dishes and drinks.

  • Crispy Tempura: Lightly battered and fried vegetables or shrimp, providing a crunchy contrast to the creamy Oyakodon.

  • Miso Soup: A warm bowl of this traditional soup adds umami depth and warmth, beautifully complementing the flavors of your rice bowl.

  • Japanese Pickles: Known as tsukemono, these tangy, crunchy pickled veggies offer a refreshing balance that cuts through the richness of the dish.

  • Steamed Broccoli: Tender, vibrant broccoli adds a nutritious element, enhancing the meal’s color and providing a slight bitter contrast.

  • Sake or Japanese Beer: Sipping on a chilled sake or a light beer enhances the overall experience, harmonizing perfectly with your Oyakodon.

  • Green Salad: A fresh salad with a sesame dressing brings a crisp and light texture, refreshing the palate between bites of the rich rice bowl.

  • Mochi Ice Cream: For dessert, this velvety treat offers a sweet and chewy finish, rounding off the meal with delightful flavors.

Expert Tips for the Ultimate Oyakodon Recipe

  • Perfect Egg Texture: Whisk the eggs just until combined to achieve a light and fluffy texture when cooked. Overmixing can lead to a dense outcome.

  • Avoid Overcooking: Keep a close eye on the eggs while steaming. Overcooking can result in a rubbery texture—aim for that creamy custard finish.

  • Use a Lid: Cover the pot while the eggs cook. This steams them gently, ensuring they set beautifully without needing to be stirred.

  • Taste as You Go: Always taste your dashi broth and adjust sweetness with sugar and mirin to ensure the right balance in your Ultimate Oyakodon.

  • Ingredient Quality Counts: Fresh, high-quality ingredients make a noticeable difference in flavor and texture, accentuating the comforting essence of this dish.

Make Ahead Options

This Ultimate Oyakodon recipe is a lifesaver for busy cooks looking to save time without compromising flavor! You can prep the chicken and onions up to 24 hours in advance by slicing them and storing them in an airtight container in the refrigerator. Additionally, you can rinse and soak the rice ahead of time, keeping it in cold water until you’re ready to cook. When you’re ready to enjoy your meal, simply follow the recipe from the sautéing step. Just remember to whisk your eggs right before pouring them into the pot to maintain their fluffy texture. Preparing in advance makes mealtime a breeze, ensuring you can serve a delicious, comforting dish with minimal effort!

Ultimate Oyakodon Recipe FAQs

What type of chicken should I use for Oyakodon?
Absolutely! I recommend using boneless, skinless chicken thighs for their tenderness and flavor. They cook evenly and absorb the delicious broth beautifully, providing a moist texture that’s essential for this comforting dish.

How should I store leftover Oyakodon?
Leftovers can be stored in an airtight container in the fridge for up to 2 days. Just make sure to keep the rice separate if possible, as this helps maintain the quality. Reheat gently to preserve the silky egg texture, adding a splash of dashi or water if needed.

Can I freeze Oyakodon?
Very! For longer storage, I suggest freezing just the chicken and egg mixture (without the rice) for up to 2 months. To freeze, let it cool completely, then place it in a freezer-safe container. When you’re ready to enjoy, thaw it overnight in the fridge and reheat gently.

How do I know if my eggs are overcooked?
One of the key aspects of Oyakodon is achieving that creamy custard texture. If your eggs look rubbery or dry, they’ve likely been overcooked. To avoid this, steam them until just set—2 to 3 minutes is usually perfect. Keep a close eye as they cook!

Can this recipe be adapted for dietary restrictions?
Absolutely! If you’re looking for a vegetarian version, simply substitute chicken with firm tofu and enhance the veggie count by adding peas or spinach. You can also adjust the sweetness and sodium levels by using less sugar or low-sodium soy sauce to cater to specific dietary needs.

What rice works best for Oyakodon?
Short-grain Japanese rice is preferred for its sticky texture that complements the dish perfectly. It provides a wonderful base to carry the tender chicken and silky eggs. If you can’t find it, sushi rice is a good alternative, providing similar characteristics.

Ultimate Oyakodon Recipe

Ultimate Oyakodon Recipe: Cozy Comfort in a Rice Bowl

Discover the Ultimate Oyakodon Recipe—a quintessential Japanese comfort food featuring chicken, eggs, and rice in one satisfying bowl.
Prep Time 10 minutes
Cook Time 20 minutes
Total Time 30 minutes
Servings: 2 bowls
Course: Breakfast
Cuisine: Japanese
Calories: 450

Ingredients
  

For the Rice
  • 2 cups Short-grain Japanese rice Essential for sticky texture.
For the Chicken
  • 2 pieces Boneless, skinless chicken thighs Recommended for tenderness and flavor.
For the Eggs
  • 2 pieces Fresh eggs Use high-quality for creamy consistency.
For the Onion
  • 1 medium Yellow onion Natural sweetness enhances flavor.
For the Broth
  • 2 cups Water For dashi preparation.
  • 1 tablespoon Dashi Provides signature umami flavor.
  • 2 tablespoons Low-sodium soy sauce Depth of flavor without excess salt.
  • 1 tablespoon Mirin Adds sweetness; honey-water mix is an alternative.
For Sweetness
  • 1 teaspoon Sugar Adjust to taste for flavor balance.

Equipment

  • Rice cooker
  • Medium saucepan
  • Mixing Bowl

Method
 

Preparation Steps
  1. Slice the onion and chicken into bite-sized pieces, and rinse the rice until the water runs clear.
  2. Cook the rice in a rice cooker or saucepan according to instructions, about 15-20 minutes.
  3. Simmer water in a saucepan, add dashi and stir for about 5 minutes.
  4. Sauté onions in dashi for 5-7 minutes until translucent.
  5. Add chicken to the pot and cook for 5-8 minutes until fully cooked.
  6. Whisk eggs and pour over chicken, cover and steam for 2-3 minutes.
  7. Serve chicken and egg mixture over rice, drizzle with dashi broth.

Nutrition

Serving: 1bowlCalories: 450kcalCarbohydrates: 50gProtein: 25gFat: 15gSaturated Fat: 4gPolyunsaturated Fat: 1gMonounsaturated Fat: 1gCholesterol: 200mgSodium: 800mgPotassium: 600mgFiber: 2gSugar: 4gVitamin A: 300IUVitamin C: 5mgCalcium: 40mgIron: 3mg

Notes

Taste broth and adjust sweetness with sugar and mirin as needed. Quality of ingredients highly affects the dish's flavor and texture.

Tried this recipe?

Let us know how it was!

Cheesy Korean Mochi Bread That Melts in Your Mouth

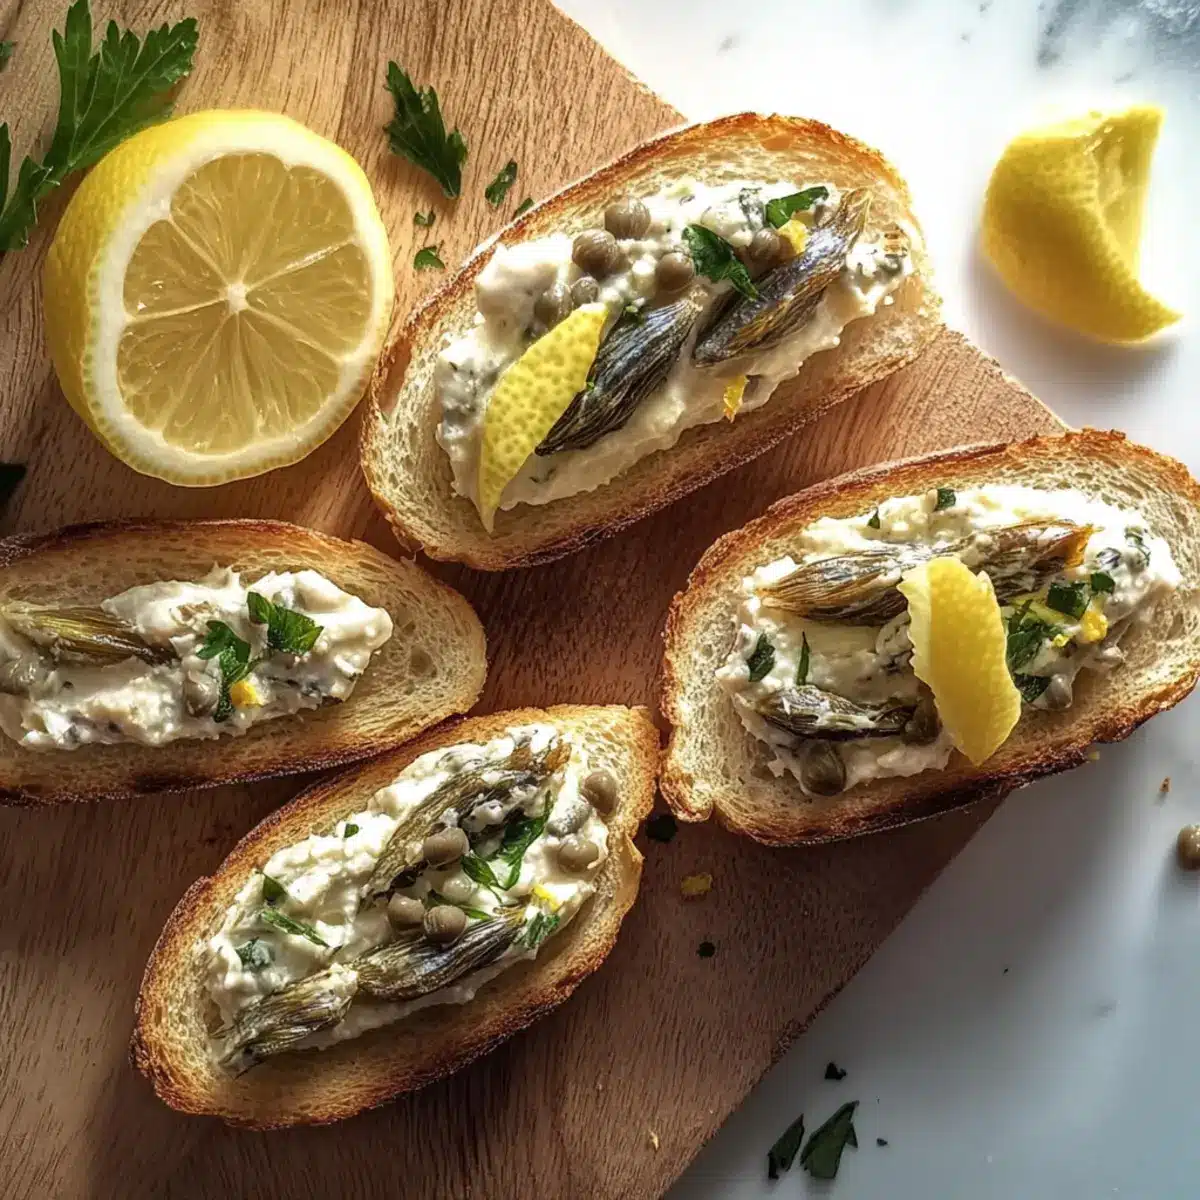
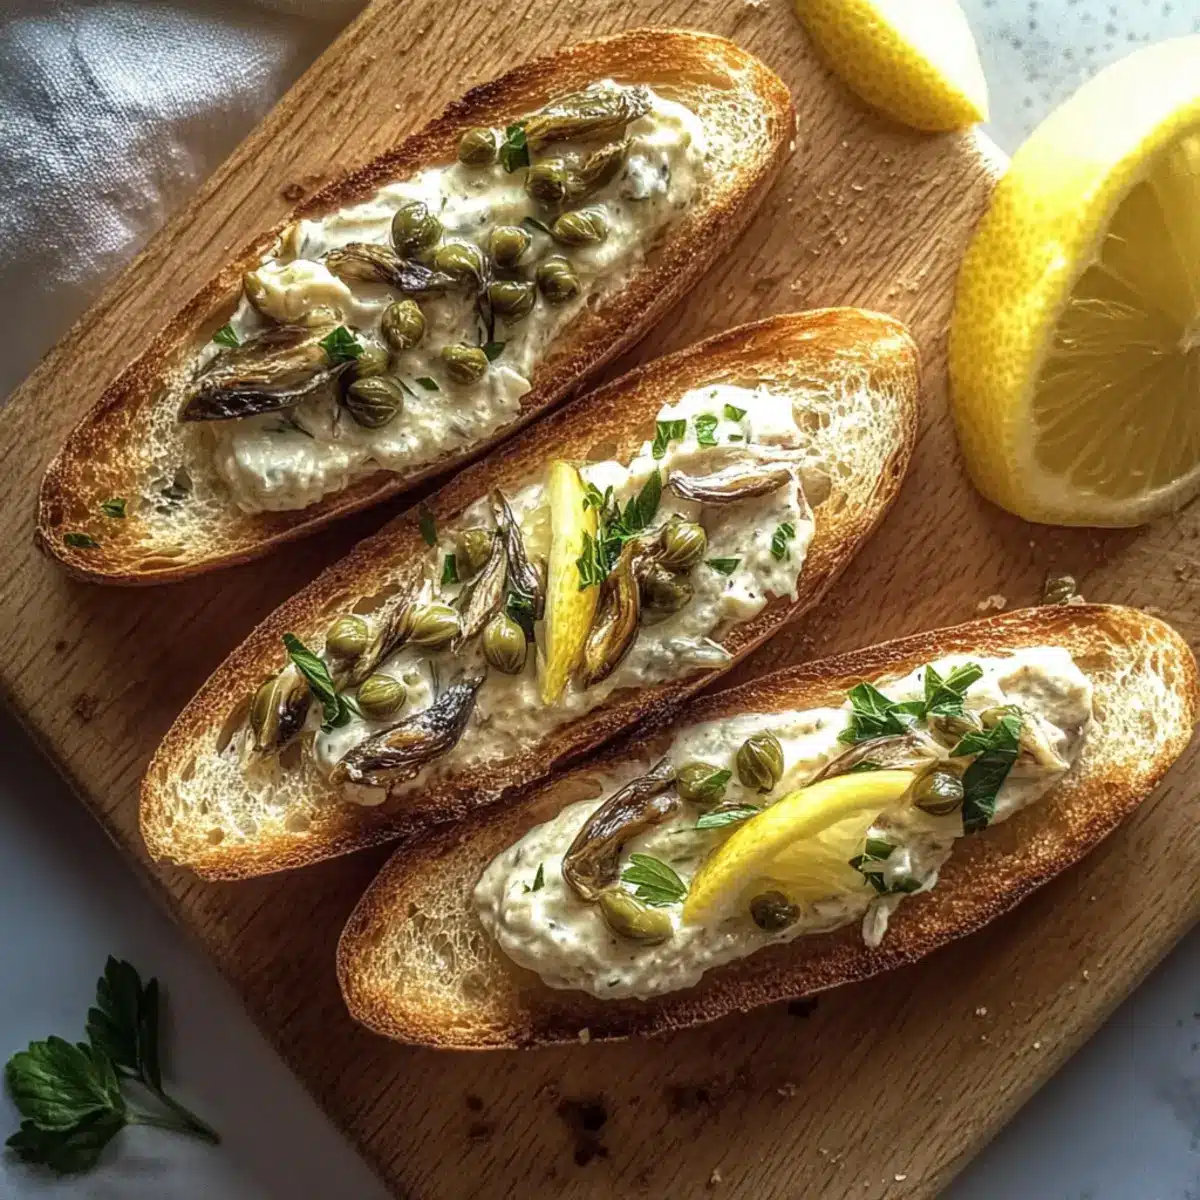
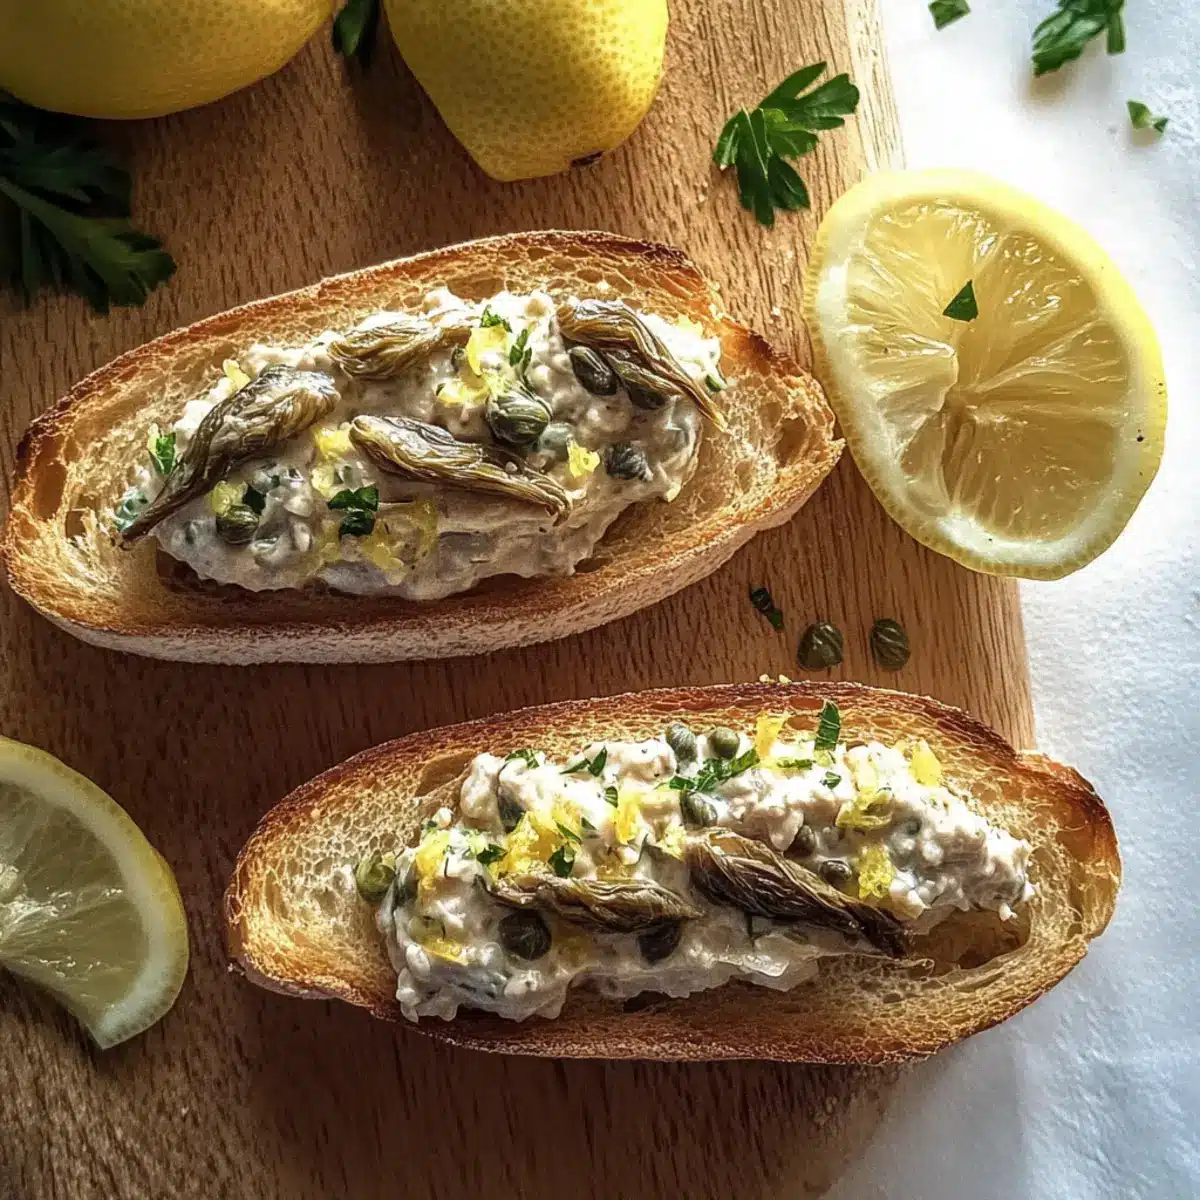
The aromatic sizzle of capers dancing in the pan is music to my ears, instantly transporting me to a cozy kitchen filled with delicious moments. Today, I’m excited to share my recipe for Lemon-Garlic Sardine Toasts, where pantry staples transform into a delightful, gourmet snack. This dish not only zips together in under 15 minutes, making it the perfect quick recipe for busy weeknights, but it also packs a nutritious punch with omega-rich sardines. Topped with crispy capers and a fresh sprinkle of parsley, these toasts are sure to impress at your next gathering or serve as a satisfying solo treat. Ready to elevate your snacking game? Let’s dive into this easy and flavorful adventure!

Why Will You Adore This Recipe?

Simplicity at Its Best: Whip up these Lemon-Garlic Sardine Toasts in under 15 minutes, making them an unbeatable choice for quick snacks.

Nutritious and Flavorful: Packed with omega-3 fatty acids and fresh ingredients, these toasts are both delicious and healthy.

Versatile Ingredients: Feel free to swap sardines with other canned fish like tuna, or customize with your preferred herbs.

Crowd-Pleasing Appeal: Serve these at gatherings or enjoy them solo; their gourmet feel is sure to impress anyone.

Crunchy Delight: With the crispiness of fried capers and toasted bread, each bite delivers a satisfying texture that will keep you coming back for more.

For an extra twist, consider pairing them with a refreshing side salad or use the remaining sardine mash for a perfect topping on crackers. Enjoy!

Lemon-Garlic Sardine Toast Ingredients

For the Sardine Mixture

  • Sardines in Olive Oil – Provides protein and essential omega-3 fatty acids; substitute with mackerel or tuna if desired.
  • Lemon (zest and juice) – Adds brightness and acidity to balance the richness; always use fresh lemons for the best flavor.
  • Garlic (minced) – Offers robust flavor; adjust the quantity based on your personal taste preference.
  • Olive Oil – Enhances richness; reserve some for frying capers or use a neutral oil if unavailable.
  • Red-Pepper Flakes (optional) – Adds heat; sprinkle according to your spice tolerance.
  • Salt & Pepper – Essential for seasoning; adjust to taste for the perfect balance.

For the Bread and Toppings

  • Baguette or Crusty Bread (about ½” thick) – Serves as the base for the toast; slightly stale bread crisps better when toasted.
  • Capers – Provide briny flavor and crunch; be sure to rinse well before use.
  • Fresh Parsley or Chives (for garnish) – Adds freshness and visual appeal to your delightful toasts.

Elevate your snack game with these Lemon-Garlic Sardine Toasts – a quick and nutritious option that transforms pantry staples into a tasty delight!

Step-by-Step Instructions for Lemon-Garlic Sardine Toasts

Step 1: Crisp the Capers
In a skillet, heat 2 tablespoons of olive oil over medium-high heat. Once shimmering, carefully add the rinsed capers and fry them for about 2 minutes until they are golden and crisp. You’ll know they’re ready when they look puffy and have a delightful crunch. Use a slotted spoon to transfer the capers to a paper towel-lined plate to drain excess oil.

Step 2: Toast the Bread
While the capers cool, prepare the bread by placing thick slices of baguette on a baking tray. Turn on your broiler and broil the bread for approximately 2 minutes on each side until it achieves a beautiful golden-brown color. Keep a close eye on the bread to prevent burning; it should be crispy and slightly toasted when you take it out.

Step 3: Make the Sardine Mash
In a mixing bowl, flake one can of sardines with a fork until you achieve a chunky consistency. Add in the zested lemon rind, freshly squeezed lemon juice, minced garlic, a splash of remaining olive oil, and optional red-pepper flakes. Season everything generously with salt and pepper. Mix until well combined, keeping some texture intact for a delightful sardine experience.

Step 4: Assemble the Toasts
Once the toasted bread has cooled slightly, spread a generous layer of the sardine mash onto each slice. Use the back of a spoon to create a nice, even layer. After that, top each toast with the crispy capers, ensuring you distribute them evenly for maximum crunch. Finish with a sprinkle of chopped parsley or chives to add a touch of freshness and color.

Step 5: Serve Immediately
These Lemon-Garlic Sardine Toasts are best enjoyed warm for that optimal crunch you desire. Plate them up and serve immediately to your guests or to yourself for a delightful snack. The combination of crunchy bread, savory sardine mixture, and crispy capers will surely impress anyone lucky enough to indulge!

What to Serve with Lemon-Garlic Sardine Toasts

These hearty toasts beckon for delightful companions to create a satisfying meal that tantalizes the taste buds.

  • Mixed Green Salad: A light, refreshing side with a lemon vinaigrette enhances the zesty flavor of the toasts while adding crispness.
  • Roasted Vegetables: Savory, caramelized veggies like zucchinis and bell peppers bring a warm, comforting contrast to the crunchy toast. They round out the meal beautifully.
  • Chilled White Wine: A glass of Pinot Grigio or Sauvignon Blanc complements the briny sardines while balancing the richness of the olive oil.
  • Warm Tomato Soup: The comforting acidity of a rich tomato soup pairs superbly with the savory toasts, creating a cozy combination.
  • Pesto Pasta: A small serving of cool pesto pasta provides a herby, flavorful counterpoint to the sardine’s creaminess, enhancing the overall dining experience.
  • Olive Tapenade: Spread a little tapenade on the side for an extra punch of flavor that harmonizes with the Mediterranean theme of the dish.
  • Fresh Fruit Chutney: A sweet and spicy chutney, such as mango or peach, can add a surprising burst of flavor, brightening up every bite of sardine toast.
  • Cheesy Korean Mochi Bread: A soft and chewy bread that melts in your mouth offers a delightful twist, providing various textures to enjoy alongside the toasts.

How to Store and Freeze Lemon-Garlic Sardine Toasts

Fridge: Store any leftover sardine mash in an airtight container for up to 2 days. Toast the bread fresh right before serving for optimal crunch.

Freezer: Although it’s best not to freeze assembled toasts, you can freeze the sardine mixture. Store it in a freezer-safe container for up to one month. Thaw in the fridge before serving.

Reheating: If you’ve stored leftover toasts, reheat them in a toaster oven or under a broiler for a few minutes until warmed through and crispy.

Serving Tip: Enjoy these toasts immediately after assembling for the best flavor and texture; the crispy capers truly shine when fresh!

Variations & Substitutions for Lemon-Garlic Sardine Toasts

Feel free to get creative with this delightful recipe; there are so many ways to make it your own!

  • Tuna Twist: Substitute sardines with canned tuna for a milder flavor that’s equally delicious.
  • Mackerel Magic: For a richer taste, try using mackerel instead of sardines. It provides a slightly different texture and more robust taste.
  • Gluten-Free Option: Choose gluten-free bread or even crispy rice crackers for a delightful, crunchy alternative base.
  • Herb Infusion: Mix in fresh herbs like dill or cilantro to elevate the flavor profile and add a touch of freshness.
  • Spicy Kick: Add a touch of sriracha or harissa to the sardine mixture for a spicy variant that brings heat and depth.
  • Creamy Variation: Stir in a spoonful of cream cheese or Greek yogurt for a creamier sardine mash that spreads beautifully on the toast.
  • Savory Cheese: Sprinkle grated parmesan or crumbled feta on top before serving for an extra layer of flavor and deliciousness.
  • Sweet Drizzle: Consider drizzling your finished toasts with a bit of hot honey or balsamic reduction for an unexpected sweet contrast to the savory flavors.

While you’re at it, why not pair these toasts with a refreshing salad or use the leftovers on the go? You could even spread the sardine mash on crackers for a quick snack that won’t disappoint! Check out our Cheesy French Onion or the flavor-packed Korean Steak Sandwich to accompany these flavorful toasts on your gourmet spread!

Make Ahead Options

These Lemon-Garlic Sardine Toasts are perfect for meal prep, allowing you to simplify your busy weeknights! You can prepare the sardine mash up to 3 days in advance; just mix the sardines, lemon juice, zest, garlic, and seasoning as instructed, then store it in an airtight container in the refrigerator. To maintain the quality, ensure the container is tightly sealed to prevent drying out. When you’re ready to serve, broil the bread fresh for that satisfying crunch and top with your prepared sardine mixture and crispy capers. This way, you can enjoy a delicious, gourmet snack in minutes—saving you time without sacrificing flavor!

Expert Tips for Lemon-Garlic Sardine Toasts

Crispier Capers: Rinse capers well before frying to eliminate excess salt and ensure they crisp up perfectly.

Perfect Bread Choice: Use slightly stale baguette for optimal toasting; it’ll crisp beautifully without becoming too soft.

Texture Matters: Keep the sardine mash slightly chunky for delightful bites, avoiding a smooth paste that lacks character.

Flavor Boost: Don’t hesitate to add a drizzle of hot honey or a sprinkle of smoked paprika for an extra layer of flavor to your toasts.

Garnish Wisely: Fresh parsley or chives not only enhance flavor but also add a pop of color that elevates presentation.

Enjoy these tips as you prepare your Lemon-Garlic Sardine Toasts, transforming a quick recipe into a gourmet experience!

Lemon-Garlic Sardine Toasts Recipe FAQs

How do I choose the best sardines for this recipe?
Absolutely! When selecting sardines, look for those packed in olive oil, as they not only provide essential omega-3 fatty acids but also add richness to the dish. Freshness matters too; check the expiration date on the can and avoid those with dark spots or signs of damage. If sardines aren’t available, feel free to substitute with mackerel or tuna for a similar taste.

What is the best way to store leftover sardine mash?
Very good question! To keep your sardine mash fresh, transfer any leftovers into an airtight container and place it in the refrigerator. It can last for up to 2 days. Just remember to toast your bread fresh before serving to maintain that delightful crunch everyone loves.

Can I freeze the sardine mixture for later use?
Yes, you can! To freeze the sardine mixture, scoop it into a freezer-safe container and label it with the date. It should keep well for up to one month. When you’re ready to enjoy, simply thaw it in the refrigerator overnight before using. For optimal flavor, it’s best to freeze the mixture rather than the assembled toasts.

What if the capers didn’t get crispy?
No worries! If your capers aren’t crispy, it may be due to frying at a lower temperature or not rinsing off excess salt. Next time, ensure the oil is hot enough before adding the capers; they should sizzle upon contact. If they still seem soft, try increasing the frying time slightly until they puff up and turn golden.

Are these Sardine Toasts suitable for people with allergies?
Great question! These toasts contain fish, garlic, and gluten (from the bread), which are common allergens. For a gluten-free option, choose gluten-free bread or serve the sardine mash on crackers. If anyone has a garlic allergy, the minced garlic can be omitted, though it does enhance the flavor. Always check with guests to accommodate their dietary needs.

How can I enhance the flavor of the sardine mixture?
I often like to experiment with flavor! You can boost the taste by adding a drizzle of hot honey for a sweet heat or mixing in fresh herbs like dill or cilantro. A splash of lemon juice right before serving can also brighten everything up. Enjoy playing with these combinations to suit your palate!

Cheesy Korean Mochi Bread

Cheesy Korean Mochi Bread That Melts in Your Mouth

Experience the delightful texture of Cheesy Korean Mochi Bread that melts in your mouth, perfect for snacking or entertaining.
Prep Time 5 minutes
Cook Time 10 minutes
Total Time 15 minutes
Servings: 4 toasts
Course: Appetizer
Cuisine: Korean
Calories: 200

Ingredients
  

For the Sardine Mixture
  • 1 can Sardines in Olive Oil Substitute with mackerel or tuna if desired.
  • 1 each Lemon (zest and juice) Use fresh lemons for the best flavor.
  • 1 clove Garlic (minced) Adjust based on personal taste.
  • 2 tablespoons Olive Oil Reserve some for frying capers.
  • 1/2 teaspoon Red-Pepper Flakes (optional) Add according to spice tolerance.
  • to taste Salt & Pepper Essential for seasoning.
For the Bread and Toppings
  • 4 slices Baguette or Crusty Bread (about ½" thick) Slightly stale bread crisps better.
  • 1/4 cup Capers Rinse well before use.
  • to taste Fresh Parsley or Chives (for garnish) Adds freshness and visual appeal.

Equipment

  • Skillet
  • Mixing Bowl
  • Baking tray

Method
 

Step-by-Step Instructions for Lemon-Garlic Sardine Toasts
  1. In a skillet, heat 2 tablespoons of olive oil over medium-high heat. Add the rinsed capers and fry them for about 2 minutes until golden and crisp. Remove and drain on a paper towel.
  2. Prepare the bread by placing thick slices of baguette on a baking tray. Broil the bread for approximately 2 minutes on each side until golden brown.
  3. In a mixing bowl, flake the sardines with a fork. Add lemon zest, lemon juice, minced garlic, a splash of olive oil, and optional red-pepper flakes. Season with salt and pepper; mix well.
  4. Spread a generous layer of sardine mash onto each slice of toasted bread. Top with crispy capers and sprinkle with parsley or chives.
  5. Serve immediately for the best flavor and texture.

Nutrition

Serving: 1toastCalories: 200kcalCarbohydrates: 22gProtein: 10gFat: 8gSaturated Fat: 1.5gPolyunsaturated Fat: 2gMonounsaturated Fat: 4gCholesterol: 30mgSodium: 400mgPotassium: 200mgFiber: 2gSugar: 1gVitamin A: 200IUVitamin C: 12mgCalcium: 50mgIron: 1mg

Notes

For optimal crunch, store leftover sardine mash in an airtight container and toast bread fresh before serving.
Tried this recipe?

Let us know how it was!

Savor Dan Dan Charred Cabbage: A Flavorful Vegan Delight

As I pulled my roasted cabbage from the oven, the rich aroma enveloped my kitchen, instantly sparking a wave of excitement. This isn’t just any cabbage—it’s my Dan Dan Charred Cabbage with Crispy Tofu and Sesame Sauce, a vibrant twist on the classic Dan Dan Noodles. What makes this vegan delight so special? First, it’s quick and easy to prepare, perfect for those busy weeknights when you crave something nourishing yet impressive. Second, it’s packed with flavor and offers a satisfying crunch, making it the kind of dish that even non-vegans will rave about. With each bite, you’ll experience the umami explosion of the perfectly seared cabbage, crispy tofu, and that luscious sesame sauce. Curious about how to recreate this scrumptious dish at home? Let’s dive into the recipe!

Why is Dan Dan Charred Cabbage a Must-Try?

Quick Preparation: This dish comes together in no time, making it ideal for busy weekdays or last-minute gatherings.

Flavor Explosion: The rich blend of sesame, spices, and herbs creates an umami-packed sensation that will leave you craving more.

Healthy Choice: Packed with plant-based protein and fiber, this meal is not only delicious but nutritious, perfect for those mindful of their diet.

Versatile Ingredients: Swap in any variety of cabbage or other veggies like broccoli for a unique twist, catering to your taste preferences.

Crowd-Pleaser: Even the most devoted carnivores will be impressed by the delightful taste and texture of this hearty, vegan dish!

Dan Dan Charred Cabbage Ingredients

For the Cabbage and Tofu

  • Cabbage – a core vegetable that provides a hearty base; feel free to use any variety you have on hand.
  • Tofu – the main protein source; crumbled and seasoned for added flavor, with firm or extra-firm tofu recommended for the best texture.

For the Sauce

  • Sesame Paste – adds a nutty flavor; you can substitute with peanut butter if you’re in the mood for a different taste.
  • Tamari – a gluten-free soy sauce alternative; a must for keeping the recipe suitable for gluten-sensitive diets.
  • Sambal Oelek – provides heat; adjust the quantity based on your spice preference for that perfect kick.
  • Mirin & Hoisin Sauce – contribute sweetness and depth; for a nut-free version, consider using maple syrup or agave in place of hoisin.
  • Vegetable Broth – adds moisture for roasting; if you’re in a pinch, water can work as a substitute.

For the Garnish

  • Peanuts – add texture and freshness as garnish; if there are allergies, almonds or sesame seeds make excellent substitutes.
  • Scallions – a bright, fresh addition to finish your dish; don’t skip these for that extra pop of flavor!

Step‑by‑Step Instructions for Dan Dan Charred Cabbage

Step 1: Preheat the Oven
Begin by preheating your oven to 400°F (200°C). While the oven warms up, prepare a baking sheet by lining it with parchment paper to prevent sticking. This will ensure an easy clean-up after roasting your Dan Dan Charred Cabbage and crispy tofu.

Step 2: Prepare the Tofu
Crumble the firm or extra-firm tofu onto the prepared baking sheet. In a small bowl, mix together coriander, paprika, five spice, tamari, potato starch, and a drizzle of oil. Toss the crumbled tofu thoroughly with this mixture to coat, spreading it evenly across the baking sheet. Bake in the preheated oven for 20 minutes until just golden.

Step 3: Finish the Tofu
After 20 minutes, carefully remove the baking sheet and drizzle the baked tofu with mirin and hoisin sauce. Toss the tofu again to ensure even coverage, then return the baking sheet to the oven for an additional 5 to 10 minutes. The tofu should become crispy and golden during this time, offering a delightful crunch in your Dan Dan Charred Cabbage.

Step 4: Prepare the Cabbage
While the tofu bakes, cut the cabbage into wedges, ensuring each piece remains intact. Season both sides of the wedges with a blend of coriander, five spice, white pepper, and salt. This seasoning is essential for enhancing the flavor of your Dan Dan Charred Cabbage.

Step 5: Sear the Cabbage
In a large, hot pan, add a splash of oil and carefully place the seasoned cabbage wedges cut-side down. Sear the cabbage for about 5 minutes until it develops a beautiful, deep brown color. This step adds a wonderful charred flavor that will elevate your dish.

Step 6: Bake the Cabbage
Once seared, nestle the cabbage wedges closely together in the pan. Drizzle vegetable broth over the wedges to keep them moist while roasting. Transfer the pan to the oven and bake for 20 to 25 minutes, or until the cabbage is tender and slightly caramelized, completing your Dan Dan Charred Cabbage.

Step 7: Make the Sauce
In a bowl, whisk together sesame paste, minced garlic, tamari, sambal oelek, black pepper, five spice, and maple syrup. Gradually thin the sauce with additional vegetable broth until it reaches your desired consistency. This rich sauce will bring all the elements of the dish together beautifully.

Step 8: Serve the Dish
To serve, generously spoon the sauce over the roasted cabbage wedges, then top with the crispy tofu crumble. Finally, sprinkle chopped peanuts and sliced scallions atop the dish for a finishing touch of freshness and crunch. Your delightful Dan Dan Charred Cabbage is now ready to impress!

Dan Dan Charred Cabbage Variations & Substitutions

Feel free to get creative and put your own spin on this delightful dish with these variations that will enhance your Dan Dan Charred Cabbage!

  • Different Cabbage: Experiment with Savoy or Napa cabbage for a unique texture and flavor twist that still shines in this dish.
  • Nut-Free Option: Replace the crushed peanuts with toasted sunflower seeds or pumpkin seeds for a nut-free garnish that still adds delightful crunch.
  • Add Veggies: Toss in some roasted broccoli or cauliflower to elevate the dish, giving it added nutrition and varied textures. Incorporating colorful veggies not only enhances the visual appeal but also offers a more rounded flavor profile.
  • Spicy Kick: For those who enjoy extra heat, include some chili flakes or fresh minced chili for a spicier sauce variation that will ignite your taste buds.
  • Herby Twist: Fresh herbs like cilantro or mint added at the end can bring a fresh flavor burst, brightening the palate and enhancing the Asian-inspired flavors.
  • Gluten-Free Swap: While tamari is a great gluten-free option, you could also try coconut aminos as a lower-sodium alternative that complements the other ingredients beautifully.
  • Sweetness Level: If you prefer a sweeter sauce, increase the amount of maple syrup or agave to taste. This can help balance the heat and acidity, making it a more tailored experience just for you.
  • Creamy Texture: For those who love a creamier sauce, you could mix in a dollop of vegan yogurt or coconut cream to the sauce before serving, adding depth and richness to each bite.

Don’t hesitate to mix and match these variations or try using other versatile recipes like Crispy Baked Tofu or Spicy Vegetable Stir-Fry for even more exciting ideas. Enjoy your culinary adventure!

Make Ahead Options

Dan Dan Charred Cabbage is an excellent choice for meal prep! You can prepare the crispy tofu and the rich sesame sauce up to three days in advance, storing them separately in airtight containers in the refrigerator. To keep the tofu crispy, wait to bake it until you’re ready to serve. The cabbage can also be cut into wedges and seasoned up to 24 hours ahead; just cover it tightly to prevent browning. When you’re ready to eat, simply sear and roast the cabbage, and finish by baking the tofu. With these make-ahead tips, you’ll enjoy delicious, time-saving meals that are just as satisfying as freshly made!

What to Serve with Dan Dan Charred Cabbage

Create the perfect dining experience to complement this delectable dish!

  • Steamed Jasmine Rice: Fluffy and aromatic, jasmine rice makes a beautiful base, absorbing the rich sesame sauce and enhancing your meal’s flavor.

  • Miso Soup: A warm bowl of miso soup brings a comforting umami quality that pairs beautifully with the charred cabbage’s bold hints.

  • Crispy Spring Rolls: These crunchy delights stuffed with fresh vegetables bring an exciting texture contrast and fresh flavors that balance the dish.

  • Garlic Noodles: Silky noodles stir-fried with garlic and soy for a garlicky punch that harmonizes well with the robust tastes of your cabbage.

  • Sautéed Bok Choy: With its mild flavor and slight crunch, sautéed bok choy is an elegant side that adds a fresh and vibrant element to the meal.

  • Chilled Cucumber Salad: A refreshing salad with a zingy dressing helps cleanse your palate and contrasts the warm, savory cabbage.

  • Fresh Lemonade: A glass of zesty homemade lemonade brightens up the meal with its sweetness and acidity, enhancing every bite.

  • Coconut Tapioca Pudding: End your meal on a sweet note with creamy and subtly sweet coconut tapioca; it creates an inviting finish to your Asian-inspired dinner.

How to Store and Freeze Dan Dan Charred Cabbage

Fridge: Store leftover Dan Dan Charred Cabbage, tofu, and sauce in separate airtight containers for up to 4 days to maintain freshness and texture.

Freezer: If you want to freeze, keep tofu and cabbage separate, stored in airtight containers for up to 3 months. Thaw in the fridge before reheating.

Reheating: To enjoy again, reheat the cabbage and tofu in a hot pan or microwave until warmed through. Avoid reheating the sauce separately to keep its rich consistency.

Portioning: Consider portioning leftovers before storage to simplify meal prep for quick, tasty meals throughout the week.

Expert Tips for Dan Dan Charred Cabbage

  • Perfect Your Tofu: Crumble the tofu evenly for uniform cooking; if the pieces are too large, they may not crisp up well.

  • Season Generously: Don’t shy away from seasoning; the cabbage requires a good amount of spices to shine through in your Dan Dan Charred Cabbage.

  • Watch the Oven: Keep an eye on the tofu and cabbage while roasting to prevent burning; all ovens vary, so adjust cooking times as needed.

  • Storage Wisdom: Store leftovers in separate airtight containers to maintain texture, preserving the crispy tofu and tender cabbage for up to 4 days.

  • Customize Heat Levels: Experiment with the sambal oelek amount; start small and taste, as it’s easier to add heat than to reduce it in your dish.

Dan Dan Charred Cabbage Recipe FAQs

How do I select the best cabbage for this recipe?
Absolutely! Look for a cabbage that feels heavy for its size, with tightly-packed leaves and no dark spots or wilting. Varieties like Savoy or Napa can bring unique textures, but green or red cabbage works beautifully as well.

How long can I store leftover Dan Dan Charred Cabbage?
You can store leftovers in separate airtight containers for up to 4 days. Just be sure to keep the crispy tofu, tender cabbage, and sauce apart to maintain their textures until you’re ready to enjoy them again.

Can I freeze Dan Dan Charred Cabbage?
Very! To freeze, store the tofu and charred cabbage separately in airtight containers for up to 3 months. When you’re ready to enjoy, thaw them in the fridge overnight, then reheat in a hot pan or microwave until warmed through.

What should I do if my cabbage isn’t browning properly?
If your cabbage isn’t browning, make sure your pan is hot enough before you start searing. Cook in batches if needed, and remember to add a little more oil if it’s sticking. The broiler can also be your friend for that final char!

Are there any dietary considerations I should be aware of?
Definitely! This recipe is naturally vegan and gluten-free if you use tamari. If preparing for those with nut allergies, substitute peanuts with sesame seeds or omit entirely. Always double-check your condiments and sauces to ensure they meet dietary needs.

Dan Dan Charred Cabbage

Savor Dan Dan Charred Cabbage: A Flavorful Vegan Delight

Discover the exceptional taste of Dan Dan Charred Cabbage, a vibrant vegan dish full of umami and crunch.
Prep Time 10 minutes
Cook Time 45 minutes
Total Time 55 minutes
Servings: 4 servings
Course: Salad
Cuisine: Vegan
Calories: 350

Ingredients
  

For the Cabbage and Tofu
  • 1 head Cabbage Any variety as per preference
  • 14 oz Tofu Firm or extra-firm, crumbled
For the Sauce
  • 3 tbsp Sesame Paste Can substitute with peanut butter
  • 3 tbsp Tamari Gluten-free soy sauce
  • 1 tbsp Sambal Oelek Adjust for spice preference
  • 2 tbsp Mirin
  • 2 tbsp Hoisin Sauce Maple syrup or agave can be used
  • 1 cup Vegetable Broth Water can be a substitute
For the Garnish
  • 1/4 cup Peanuts Chopped; can substitute with almonds or sesame seeds
  • 2 stalks Scallions Sliced

Equipment

  • Oven
  • Baking Sheet
  • Parchment paper
  • Large Pan
  • small bowl

Method
 

Step-by-Step Instructions
  1. Preheat your oven to 400°F (200°C) and line a baking sheet with parchment paper.
  2. Crumble the tofu onto the baking sheet, mix spices and oil in a bowl, toss the tofu in it, then bake for 20 minutes.
  3. After 20 minutes, drizzle the tofu with mirin and hoisin, toss again, and bake for an additional 5 to 10 minutes.
  4. Cut the cabbage into wedges and season with spices on both sides.
  5. In a hot pan, add oil and sear the cabbage cut-side down for about 5 minutes.
  6. Nestle the cabbage in the pan, drizzle with vegetable broth, and bake for 20 to 25 minutes until tender.
  7. Whisk together sauce ingredients, thinned with vegetable broth to desired consistency.
  8. Serve the roasted cabbage topped with crispy tofu, sauce, peanuts, and scallions.

Nutrition

Serving: 1servingCalories: 350kcalCarbohydrates: 28gProtein: 15gFat: 22gSaturated Fat: 3gPolyunsaturated Fat: 5gMonounsaturated Fat: 10gSodium: 800mgPotassium: 600mgFiber: 6gSugar: 4gVitamin A: 1200IUVitamin C: 60mgCalcium: 200mgIron: 3mg

Notes

Store leftovers in separate containers for up to 4 days. Reheat cabbage and tofu together to maintain texture.

Tried this recipe?

Let us know how it was!

Irresistible Nutella Pinwheel Cookies for Sweet Moments

You know that blissful moment when you bite into a cookie and are instantly transported to sweeter times? Let me tell you about these Crunchy Nutella Pinwheel Cookies that capture this magic with every swirl. With their buttery, melt-in-your-mouth greatness and a rich Hazelnut filling, they’re perfect for breakfast, an indulgent snack, or dessert—pairing beautifully with a steaming cup of coffee or tea. This quick and easy recipe not only delights the senses but also comes together in no time, making it a crowd-pleaser for young and old alike. Who wouldn’t want to surround their kitchen with the heavenly aroma of freshly baked cookies? Are you ready to impress your family and friends with these delightful treats?

Who can resist these Nutella cookies?

Irresistible flavors: These Nutella Pinwheel Cookies deliver a delightful blend of buttery crispness and creamy hazelnut goodness in every bite.
Quick and easy: Perfect for busy bakers, this recipe comes together rapidly, ensuring you spend more time enjoying and less time preparing.
Crowd-pleaser: Ideal for all occasions, these cookies are sure to impress at gatherings, family dinners, or simply as a treat for yourself.
Versatile twists: Swap out Nutella for your favorite spreads or add festive sprinkles to customize these cookies for any celebration or mood.
Store and enjoy: These cookies can be made ahead and stored, so you can indulge on your own schedule. Don’t forget to check out my Bake Cookies Cream recipe for another easy and delicious option!

Nutella Pinwheel Cookies Ingredients

For the Cookie Dough

  • All-Purpose Flour – Provides structure to the cookies; look for flour with at least 11% protein for optimal texture.
  • Egg – Acts as a binder to enrich the dough; using room temperature eggs helps achieve better incorporation.
  • Butter – Adds a rich, creamy flavor; always use softened butter for easier mixing and tenderness. Can substitute with margarine for a dairy-free option.
  • Granulated Sugar – Sweetens the cookies, contributing to a delightful crunch; don’t skimp on this for the best taste!
  • Vanilla Extract – Elevates the flavor profile; feel free to switch it up with almond extract for a nutty twist.
  • Salt – Balances sweetness; omit if using salted butter, but always consider a touch for flavor enhancement.

For the Filling

  • Nutella – The star of these cookies, providing a luscious hazelnut flavor that melts beautifully; warm it slightly for easier spreading, or try any favorite hazelnut spread.

With these simple ingredients, you’ll be well on your way to creating these enchanting Nutella Pinwheel Cookies. Let the baking adventures begin!

Step‑by‑Step Instructions for Nutella Pinwheel Cookies

Step 1: Mix the Dough
Start by placing the all-purpose flour and softened butter into a large mixing bowl. Use a pastry cutter or your fingers to mix them together until the mixture resembles coarse crumbs. This process should take about 2-3 minutes. Next, add in the egg, granulated sugar, salt, and vanilla extract, and mix until the dough almost comes together, leaving no dry flour pockets.

Step 2: Knead and Chill
Transfer the dough onto a lightly floured surface and knead it gently until smooth, about 2 minutes. Shape it into a disc, wrap it in plastic wrap, and refrigerate for 30 minutes. This resting time is crucial as it allows the dough to firm up, making it easier to roll out later while enhancing the overall flavor of your Nutella Pinwheel Cookies.

Step 3: Roll Out the Dough
Once chilled, remove the dough from the refrigerator and place it on a large sheet of parchment paper. With a rolling pin, roll the dough into a rectangle approximately 7×11 inches in size. Aim for an even thickness of about 1/4 inch. Keep an eye on the edges to ensure they are not too thin to maintain structure when you spread the filling.

Step 4: Spread the Nutella
Gently spread the softened Nutella over the rolled-out dough, making sure to leave a 1/2 inch border all around. This prevents the Nutella from spilling out when you roll it. Use an offset spatula or the back of a spoon to create an even layer, ensuring every bite of your Nutella Pinwheel Cookies will be filled with that delicious hazelnut goodness.

Step 5: Roll and Chill Again
Starting from the long side, carefully roll the dough into a tight log, making sure to keep everything snug but not overly tight to avoid squeezing out the filling. Once rolled, wrap the log tightly in plastic wrap, and refrigerate again for another 30 minutes. Chilling the log makes it easier to slice and helps maintain the pinwheel shape during baking.

Step 6: Preheat the Oven
While the log is chilling, preheat your oven to 350°F (180°C). This ensures your Nutella Pinwheel Cookies will bake evenly and develop a lovely golden color. Prepare a baking sheet by lining it with parchment paper to prevent sticking and to facilitate easy cleanup after your cookies are done baking.

Step 7: Slice the Log
After chilling, remove the log from the refrigerator. Use a sharp knife to slice it into 1/2 inch thick pieces, ensuring the thickness is uniform for even baking. Trim the ends of the log if they are uneven, and place the cookie slices on the prepared parchment-lined baking sheet, leaving space between each one to allow for spreading during baking.

Step 8: Bake and Cool
Bake your Nutella Pinwheel Cookies in the preheated oven for about 20 minutes, or until the edges are golden and the cookies feel slightly firm to the touch. Once done, allow them to cool on the baking sheet for 5 minutes before transferring them to a wire rack. This brief cooling helps them firm up, ensuring a perfect texture that’s both crunchy and tender.

How to Store and Freeze Nutella Pinwheel Cookies

Room Temperature: Keep cooled Nutella Pinwheel Cookies in an airtight container for up to 2 days, ensuring they remain crunchy and delightful.

Fridge: If you want them to last a bit longer, store cookies in the refrigerator for up to 5-6 days. Make sure they are in a sealed container to prevent drying out.

Freezer: For longer storage, freeze the cookies in a single layer on a baking sheet for about 1 hour, then transfer to a freezer-safe bag for up to 3 months.

Reheating: To enjoy cookies from the fridge or freezer, simply let them come to room temperature or warm them in a microwave for a few seconds for that fresh-baked taste.

Make Ahead Options

These Nutella Pinwheel Cookies are perfect for busy home cooks who want to save time without sacrificing flavor! You can prepare the dough up to 24 hours in advance; simply knead and chill it, then store it wrapped tightly in plastic wrap in the refrigerator. You can also slice the log into individual pieces and refrigerate them for up to 3 days. For utmost freshness, bake the cookies only shortly before serving. If you prefer, bake the cookies and freeze them for up to 3 months. Just reheat in the oven for about 5 minutes at 350°F (180°C) before enjoying these indulgent treats—still just as delicious and ready to brighten your day!

Nutella Pinwheel Cookies Variations

Embrace your creativity and let these Nutella Pinwheel Cookies shine with delightful twists that excite both the palate and the imagination!

  • Jam Switch: Replace Nutella with your favorite fruit jam for a sweet, tart surprise that brightens every bite.

  • Chocolate Heaven: Use dark or milk chocolate spread instead for an extra indulgent cocoa flavor that chocolate lovers will adore.

  • Nutty Crunch: Add chopped hazelnuts or walnuts to the filling for a satisfying crunch that contrasts beautifully with the smoothness of the dough and spread.

  • Spicy Kick: Mix a pinch of cinnamon or cayenne pepper into the dough for a subtle warmth that pairs nicely with the rich hazelnut taste.

  • Festive Sprinkles: Add colorful sprinkles to the Nutella filling before rolling for a joyful pop of color and fun—perfect for birthday parties!

  • Orange Zest: Incorporate some orange zest into the dough for a refreshing citrus twist that brightens and enhances the flavor profile.

Don’t forget, if you’re in the mood for a different treat altogether, check out my Chocolate Cranberry Cookies for a delightful alternative that combines sweet and tart! Embrace the joy of baking, and let these cookies be a fun canvas for your culinary creativity!

What to Serve with Crunchy Nutella Pinwheel Cookies

Indulge your senses as you create a delightful spread of complementary dishes to elevate your cookie experience.

  • Creamy Mashed Potatoes: Their rich, buttery flavor creates a savory contrast to the sweet cookies, making for a balanced meal experience.

  • Hot Chocolate: A warm mug of velvety hot chocolate beautifully enhances the gooey hazelnut taste of the cookies, creating an irresistible sweet treat.

  • Fresh Fruit Salad: The acidity and crunch of sliced fruits like strawberries and kiwi provide a refreshing counterpoint, cutting through the rich cookie flavors.

  • Coffee: A steaming cup of coffee pairs perfectly, balancing the sweetness while enhancing the chocolatey notes of Nutella in every bite.

  • Vanilla Ice Cream: The silky texture and coolness of vanilla ice cream elevate the cookies to a heavenly dessert platter, merging flavors that delight the palate.

  • Cheesecake Bites: These creamy, rich bites create a luxurious dessert duo, adding different textures that enhance the enjoyment of your cookies.

  • Chocolate Chip Muffins: The warm, soft muffins echo the comforting flavors of your cookies while adding a tender crumble that’s simply heavenly.

  • Almond Milk: A smooth, subtly sweet beverage like almond milk offers a lighter sip to complement the rich Nutella, making it a delightful pairing.
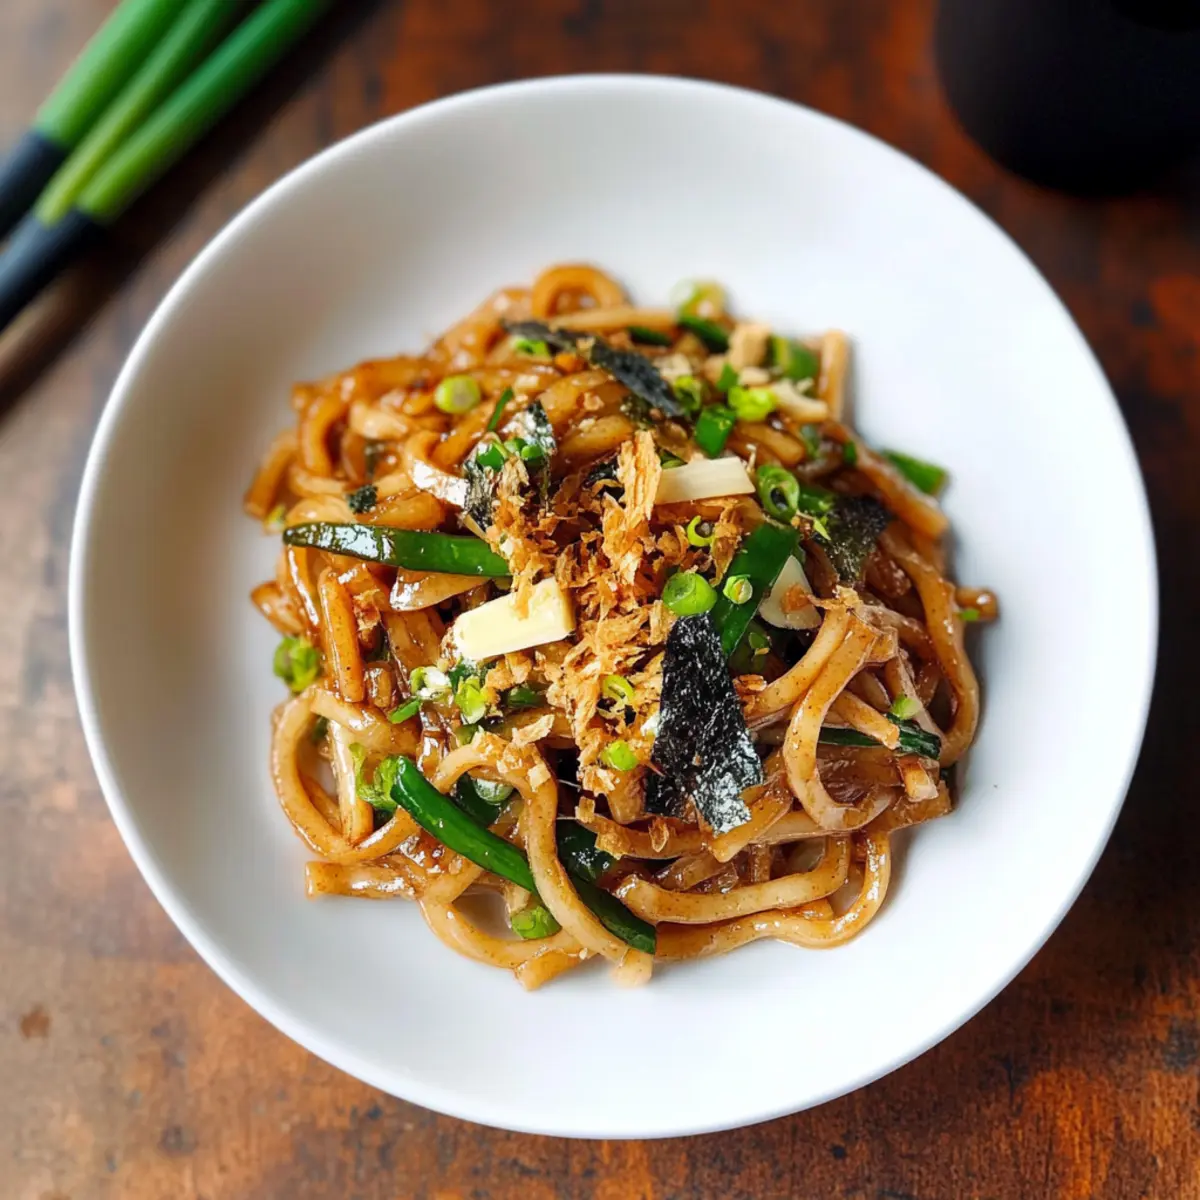
  • Mixed Berry Compote: A tangy compote drizzled over the cookies brightens the flavors, adding a burst of freshness that perfectly complements the indulgence.

Expert Tips for Nutella Pinwheel Cookies

  • Smooth Dough: Ensure your dough is kneaded until smooth to achieve the best texture. Avoid overworking, which can lead to tough cookies.
  • Parchment Magic: Use parchment paper for rolling and lining the baking sheet. This prevents sticking and simplifies both the rolling process and cleanup.
  • Uniform Slices: When cutting the log, aim for even thickness for uniform baking. If the ends are uneven, trim them off for neat cookies.
  • Proper Storage: Keep cooled Nutella Pinwheel Cookies in an airtight container for up to 2 days at room temperature. They can also be refrigerated and enjoyed within 5-6 days.
  • Chill Time Matters: Do not skip on chilling the dough and log as this helps maintain the cookie shape and enhances flavor.

Nutella Pinwheel Cookies Recipe FAQs

How do I choose ripe ingredients for Nutella Pinwheel Cookies?
Absolutely! When selecting ingredients, make sure your butter is at room temperature for easier mixing—this ensures the cookies turn out tender. For the egg, using room temperature eggs allows for better incorporation into the dough, resulting in a smoother texture.

How should I store my Nutella Pinwheel Cookies?
You’ll want to keep your cooled Nutella Pinwheel Cookies in an airtight container at room temperature for up to 2 days. If you’re storing them for longer, place them in the fridge, where they can last up to 5-6 days without drying out. Just be sure they’re sealed well!

Can I freeze Nutella Pinwheel Cookies?
Very! To freeze your cookies, place them on a baking sheet in a single layer and freeze for about 1 hour until firm. Then, transfer them into a freezer-safe bag, ensuring to remove as much air as possible. They can be frozen for up to 3 months. When you’re ready to enjoy them, let them thaw at room temperature or warm them briefly in the microwave.

What can I do if my dough is too crumbly?
If your dough is crumbly, you might need to adjust the moisture level. Try adding a splash of milk, a teaspoon at a time, until the dough just comes together. Using softened butter helps too, as it binds the ingredients better. A smooth, pliable dough is essential for slicing and rolling.

Are there any dietary considerations with Nutella Pinwheel Cookies?
Indeed! For those with dairy sensitivities, you can substitute the butter with margarine. Keep in mind that Nutella contains hazelnuts, which are a common allergen. If you’re serving these to guests, always check for nut allergies, and feel free to use a different spread if needed.

How long can I keep the cookie dough before baking?
You can prepare the cookie dough a day in advance! Just wrap it tightly in plastic wrap and keep it in the fridge. When you’re ready to bake, slice and follow the baking steps—this makes it incredibly convenient for busy days.

Nutella Pinwheel Cookies

Irresistible Nutella Pinwheel Cookies for Sweet Moments

These Nutella Pinwheel Cookies are a delightful treat, combining buttery crispness with creamy hazelnut goodness.
Prep Time 10 minutes
Cook Time 20 minutes
Chill Time 1 hour
Total Time 1 hour 30 minutes
Servings: 24 cookies
Course: Dessert
Cuisine: American
Calories: 120

Ingredients
  

For the Cookie Dough
  • 2 cups All-Purpose Flour Look for flour with at least 11% protein for optimal texture.
  • 1 large Egg Using room temperature eggs helps achieve better incorporation.
  • 1 cup Butter Always use softened butter for easier mixing and tenderness.
  • 3/4 cup Granulated Sugar Don't skimp on this for the best taste!
  • 1 teaspoon Vanilla Extract Feel free to switch it up with almond extract for a nutty twist.
  • 1/4 teaspoon Salt Omit if using salted butter, but consider a touch for flavor enhancement.
For the Filling
  • 1/2 cup Nutella Warm it slightly for easier spreading.

Equipment

  • Mixing Bowl
  • Rolling Pin
  • Parchment paper
  • Baking Sheet
  • sharp knife

Method
 

Step-by-Step Instructions
  1. Start by placing the all-purpose flour and softened butter into a large mixing bowl. Mix until the mixture resembles coarse crumbs.
  2. Add in the egg, granulated sugar, salt, and vanilla extract, and mix until the dough almost comes together.
  3. Transfer the dough onto a lightly floured surface and knead gently until smooth, about 2 minutes.
  4. Shape it into a disc, wrap it in plastic wrap, and refrigerate for 30 minutes.
  5. Once chilled, roll the dough into a rectangle approximately 7x11 inches in size.
  6. Gently spread the softened Nutella over the rolled-out dough, leaving a 1/2 inch border.
  7. Starting from the long side, carefully roll the dough into a tight log and wrap in plastic wrap.
  8. Refrigerate again for another 30 minutes.
  9. Preheat your oven to 350°F (180°C) while the log is chilling.
  10. Slice the log into 1/2 inch thick pieces and place on a parchment-lined baking sheet.
  11. Bake for about 20 minutes, then cool on the baking sheet for 5 minutes before transferring to a wire rack.

Nutrition

Serving: 1cookieCalories: 120kcalCarbohydrates: 15gProtein: 1gFat: 6gSaturated Fat: 3gPolyunsaturated Fat: 0.5gMonounsaturated Fat: 2gCholesterol: 20mgSodium: 50mgPotassium: 60mgFiber: 0.5gSugar: 6gVitamin A: 200IUCalcium: 10mgIron: 0.5mg

Notes

Ensure your dough is kneaded until smooth to achieve the best texture. Use parchment paper for rolling and lining the baking sheet.

Tried this recipe?

Let us know how it was!

Cabbage Glass Noodles Stir Fry: A Quick Comfort Food Gem

In just 10 minutes, my kitchen transforms into a fragrant haven as I whip up a dish that feels both cozy and vibrant: Cabbage Glass Noodle Stir Fry. This delightful combination of crunchy cabbage and silky mung bean noodles creates an irresistible quick meal that’s perfect for those busy weeknights or when I crave a comforting side for my stir fries. Not only is it effortlessly quick to prepare, but it’s also easily adaptable for vegan and gluten-free diets, making it a versatile favorite for everyone at the table. The delightful textures and flavors unfold with every bite. Curious about how to make this dish your own? Let’s dive into the recipe!

What Makes This Stir Fry Special?

Quick and Easy: This Cabbage Glass Noodle Stir Fry comes together in just 10 minutes, perfect for hectic weeknight dinners!

Adaptable: With vegan and gluten-free options, it’s a dish everyone can enjoy without compromising on flavor.

Savory Depth: The blend of garlic, soy sauce, and dried chilies creates a tantalizing taste that elevates simple ingredients into something extraordinary.

Versatile Ingredients: Feel free to substitute or add protein like shrimp or tofu, making it an adaptable dish that suits all preferences.

Crowd-Pleaser: With its crunchy cabbage and silky noodles, this stir fry is sure to impress family or guests and is a fantastic side to dishes like Air Fryer Chicken or Coca-Cola Chicken Wings.

Bring comfort and excitement back to your meals with this delightful stir fry!

Cabbage Glass Noodle Ingredients

Get ready to whip up this mouthwatering dish!

For the Stir Fry

  • Mung Bean Vermicelli – The star ingredient; soak in boiling water to rehydrate, or swap with rice vermicelli for a different texture.
  • Cabbage – Adds a nice crunch and bulk; use 1/4 head (12 oz / 350 g) sliced into 1/2″ (1 cm) pieces.
  • Salt – Essential for enhancing flavors; just a pinch will do to season the cabbage.
  • Peanut Oil (or Vegetable Oil) – Provides richness during sautéing; choose peanut oil for a nutty touch.
  • Dried Chili Peppers – Introduces aromatic heat; keep them whole for a milder flavor profile.
  • Garlic (3 cloves, minced) – Brings savory depth to the dish; fresh garlic makes all the difference.
  • Light Soy Sauce (2 tablespoons) – The main seasoning; offers a savory umami flavor that’s hard to resist.
  • Dark Soy Sauce (1/2 teaspoon) – Adds color and extra depth; a little goes a long way!
  • Sugar (1/2 teaspoon) – Balances the salty flavors and enhances overall taste.

Feel free to explore this Cabbage Glass Noodle Stir Fry as you mix and match ingredients to suit your taste!

Step‑by‑Step Instructions for Cabbage Glass Noodles Stir Fry

Step 1: Prepare Noodles
Bring a pot of water to a rolling boil and add the dry mung bean vermicelli. Cook for about 3-4 minutes until the noodles are al-dente, then drain them in a colander. Rinse with cold tap water to stop the cooking process, and with kitchen scissors, cut the noodles into 3-inch (8 cm) strands for easy stirring and eating.

Step 2: Mix Sauce
In a small bowl, combine the light soy sauce, dark soy sauce, and sugar. Use a whisk or a spoon to mix until the sugar is fully dissolved. Set this savory sauce aside, as it will add depth and flavor to your Cabbage Glass Noodle Stir Fry later in the recipe.

Step 3: Sauté Aromatics
Heat a large skillet or wok over medium-high heat and pour in 2 tablespoons of peanut oil. Once hot, add the whole dried chili peppers and minced garlic, stirring frequently for about 30 seconds. Allow the spices to become fragrant, taking care not to burn the garlic, which is crucial for enhancing the flavor of your stir fry.

Step 4: Cook Cabbage
Add the sliced cabbage to the hot skillet, sprinkling a pinch of salt over it. Stir-fry the cabbage for 2-3 minutes, allowing it to wilt slightly while maintaining a bit of crunch. You’ll know it’s ready when the cabbage turns bright green and softens but still retains its texture, setting the base for the delicious stir fry.

Step 5: Combine Ingredients
Now, add the prepared glass noodles to the skillet along with the savory sauce you mixed earlier. Use tongs or a spatula to gently toss the noodles with the cabbage, ensuring they absorb the sauce evenly. Stir everything together for about 2-3 minutes until the noodles are heated through and the cabbage is tender, creating a harmonious blend of flavors.

Step 6: Adjust Seasoning
Taste your Cabbage Glass Noodle Stir Fry and adjust the seasoning if necessary. If you prefer more saltiness, sprinkle in a bit more salt while stirring. Once satisfied, transfer your delicious stir fry to a serving plate, ready to be enjoyed!

What to Serve with Cabbage Glass Noodle Stir Fry

Looking to create a well-rounded meal that excites your taste buds? Discover the perfect pairings to complement your delicious stir fry.

  • Steamed Broccoli: This vibrant green veggie adds a pop of color and slightly bitter contrast, enriching the overall flavor profile of the meal.
  • Sesame Chicken Skewers: Juicy and tender, these skewers bring a savory element to your table, elevating your stir fry experience to new heights!
  • Coconut Rice: Creamy and subtly sweet, coconut rice balances the dish’s savory notes while adding a delightful tropical flair.
  • Garlic Edamame: Soft and tender, these earthen pods add a nutty undertone, enriching every bite of your stir fry. Pair it for a crunchy, satisfying side!
  • Homemade Spring Rolls: Fresh, colorful, and filled with veggies, spring rolls add a refreshing crunch that complements the stir fry’s textures wonderfully.
  • Mango Salad: A zesty and fruity escape, the mango salad offers a tangy contrast that beautifully balances the savory stir fry flavors, making each bite an adventure.
  • Chilled Green Tea: To wash it all down, a refreshing cup of chilled green tea enhances flavors while offering a calming finish after your meal.

Each of these pairings brings unique flavors and textures, transforming your Cabbage Glass Noodle Stir Fry into an unforgettable dining experience!

Cabbage Glass Noodles Stir Fry Variations

Customize your stir fry experience with these delightful twists that will inspire your taste buds and make this dish your own!

  • Vegan Delight: Replace any animal proteins with tofu or tempeh for a hearty, plant-based option. Both add texture and soak up flavors beautifully.

  • Gluten-Free Twist: Use tamari instead of light and dark soy sauces to keep this dish gluten-free without sacrificing taste.

  • Protein-Packed: Add shrimp, chicken, or beef for a filling meal that incorporates extra protein — perfect for hungry family members!

  • Spicy Kick: Toss in more dried chili peppers or a drizzle of sriracha for a dish that truly ignites your palate. It’s fantastic for heat lovers!

  • Veggie Medley: Swap cabbage for bok choy, spinach, or bell peppers. Each brings unique flavor and texture, making the dish colorful and nutritious.

  • Nutty Flavor: Add a handful of toasted peanuts or cashews right before serving for that satisfying crunch. The nuttiness enhances your eating experience.

  • Herb Infusion: Top with fresh cilantro or green onions for a fresh herbaceous note. This simple addition can brighten the flavors remarkably.

For more delicious ideas, don’t forget to check out how to make a vibrant Cashew Broccoli Stir or venture into the bold flavors of Spicy Korean Noodles. The possibilities are endless!

How to Store and Freeze Cabbage Glass Noodle Stir Fry

Fridge: Store leftovers in an airtight container for up to 2 days. Reheat in a pan over low heat, adding a splash of water to retain moisture.

Freezer: For longer storage, freeze in a freezer-safe container for up to 1 month. Thaw overnight in the fridge before reheating.

Reheating: To reheat, use a skillet over medium heat, adding a little oil or water to prevent sticking. Stir until heated through, usually about 5-7 minutes.

Note: Freshness is key for the best texture; enjoy the Cabbage Glass Noodle Stir Fry shortly after preparation for optimal taste.

Helpful Tricks for Cabbage Glass Noodles Stir Fry

  • Perfect Noodles: Soak mung bean vermicelli in boiling water just until al-dente; overcooking will make them mushy in the stir fry.
  • Flavor Boost: Use fresh garlic and adjust the number of dried chili peppers according to your heat preference; fresh ingredients elevate the Cabbage Glass Noodle Stir Fry!
  • Don’t Skip Salt: A pinch of salt is essential for enhancing the cabbage’s natural flavors; taste and adjust to achieve the right balance.
  • Taste Test: Always taste your stir fry before serving; if it feels flat, a dash more soy sauce or salt can work wonders!
  • Versatile Veggies: Feel free to use other vegetables or proteins; the beauty of a stir fry is in its adaptability.

Make Ahead Options

These Cabbage Glass Noodle Stir Fry preparations are ideal for busy home cooks looking to save time! You can prepare the mung bean noodles and chop the cabbage up to 24 hours in advance by storing them separately in airtight containers in the refrigerator. This helps maintain their texture and prevents the noodles from becoming mushy. The sauce can also be mixed and refrigerated for added convenience. When you’re ready to cook, simply heat a skillet, sauté the aromatics, add the cabbage and noodles, and pour in the prepared sauce. With these steps prepped ahead, you’ll enjoy a quick, delicious meal with minimal effort, just as tasty as if you made it from scratch!

Cabbage Glass Noodle Stir Fry Recipe FAQs

What is the best way to select cabbage for this stir fry?
When choosing cabbage, look for heads that are firm and heavy for their size, with tightly packed leaves. Avoid any cabbage with dark spots all over, as that could indicate spoilage. Fresh cabbage will give your Cabbage Glass Noodle Stir Fry a delightful crunch and vibrant flavor!

How should I store leftover Cabbage Glass Noodle Stir Fry?
After enjoying your meal, allow leftovers to cool completely before transferring them to an airtight container. Refrigerate for up to 2 days. To reheat, gently warm in a skillet over low heat, adding a splash of water to maintain moisture for the best texture.

Can I freeze Cabbage Glass Noodle Stir Fry?
Absolutely! To freeze, let the dish cool completely, then transfer it to a freezer-safe container. It can last in the freezer for up to 1 month. When ready to eat, thaw it overnight in the refrigerator, then reheat in a pan with a little oil or water to prevent sticking, which should take about 5-7 minutes.

What can I do if my noodles turn mushy during cooking?
If you find your noodles have become mushy, it might be because they were soaked too long in boiling water. To avoid this in the future, soak them just until al-dente, roughly 3-4 minutes. Always rinse them with cold water afterward to stop the cooking process. Even if mishaps happen, toss them back into the stir fry; seasoning can help enhance flavors!

Is this recipe suitable for people with gluten sensitivities?
Yes! For a gluten-free version of Cabbage Glass Noodle Stir Fry, simply replace light and dark soy sauce with tamari, which is made without wheat. This way, everyone can savor this delicious dish without worry.

What modifications can I make for a vegan version?
The great news is that this Cabbage Glass Noodle Stir Fry is already vegan-friendly! Just ensure that the soy sauce you use is labeled vegan (some brands may contain trace amounts of fish sauce). You can also add tofu or chickpeas as a protein option to make it even heartier!

Cabbage Glass Noodles Stir Fry

Cabbage Glass Noodles Stir Fry: A Quick Comfort Food Gem

Quick and delicious Cabbage Glass Noodles Stir Fry, perfect for busy weeknights.
Prep Time 5 minutes
Cook Time 10 minutes
Total Time 15 minutes
Servings: 2 servings
Course: Dinner
Cuisine: Asian
Calories: 250

Ingredients
  

For the Stir Fry
  • 1 package Mung Bean Vermicelli soaked in boiling water
  • 1/4 head Cabbage sliced into 1/2" (1 cm) pieces
  • a pinch Salt for seasoning
  • 2 tablespoons Peanut Oil or Vegetable Oil
  • 2 Dried Chili Peppers whole for milder flavor
  • 3 cloves Garlic minced
  • 2 tablespoons Light Soy Sauce
  • 1/2 teaspoon Dark Soy Sauce
  • 1/2 teaspoon Sugar

Equipment

  • Large skillet or wok
  • colander
  • small bowl
  • Whisk or spoon

Method
 

Step-by-Step Instructions
  1. Bring a pot of water to a rolling boil and add the dry mung bean vermicelli. Cook for about 3-4 minutes until al-dente, then drain and rinse with cold water.
  2. In a small bowl, combine light soy sauce, dark soy sauce, and sugar. Mix until sugar is dissolved.
  3. Heat a skillet over medium-high heat and pour in peanut oil. Add dried chili peppers and minced garlic, stirring for 30 seconds.
  4. Add sliced cabbage to the skillet, sprinkle with salt, and stir-fry for 2-3 minutes until it wilts but remains crunchy.
  5. Add the prepared glass noodles and savory sauce to the skillet. Toss everything together for another 2-3 minutes until heated through.
  6. Taste and adjust seasoning if necessary, then serve immediately.

Nutrition

Serving: 1servingCalories: 250kcalCarbohydrates: 30gProtein: 6gFat: 12gSaturated Fat: 2gPolyunsaturated Fat: 3gMonounsaturated Fat: 7gSodium: 700mgPotassium: 300mgFiber: 2gSugar: 1gVitamin A: 20IUVitamin C: 80mgCalcium: 5mgIron: 8mg

Notes

Fresh ingredients elevate the dish. Soak noodles just until al-dente. This dish is adaptable with other vegetables or proteins.

Tried this recipe?

Let us know how it was!

Delicious Best Yaki Udon Recipe in Just 15 Minutes

The aroma of sizzling noodles wafting through the kitchen is an invitation I simply can’t resist! This Best Yaki Udon Recipe promises to fill your home with an enticing blend of savory soy sauce and rich dashi flavor in under 15 minutes. Perfect for those busy weeknights, this dish transforms simple udon noodles into a delightful meal that’s both quick and absolutely satisfying. Not only is it a treat for the taste buds, but it also offers a wonderful opportunity to get creative—feel free to toss in your favorite veggies for extra nutrition and color. Whether you’re enjoying it fresh off the stove or saving some for later, I guarantee everyone will be asking for more. Ready to dive into a bowl of this comforting simplicity? Let’s get cooking!

Why is Yaki Udon a Must-Try?

Simplicity Made Delicious: This Best Yaki Udon Recipe comes together in a mere 15 minutes, making it an ideal option for busy weeknights or whenever you crave a quick yet satisfying meal.

Endless Customization: Feel free to add your favorite veggies for added flavor and nutrition. Carrots or bell peppers beautifully complement the noodles.

Savory Comfort: With every bite, the rich umami flavor from dashi and soy sauce will transport your taste buds straight to Japan.

Crowd-Pleaser: Perfect for family dinners or casual get-togethers, this dish is sure to impress anyone at your table.

Leftover Love: Enjoy it fresh or refrigerate for up to two days. Reheat quickly for a delectable lunch!

For more quick meals, check out my Sweet Potato Beef or Fryer Chicken Drumsticks recipes!

Best Yaki Udon Ingredients

For the Noodles
Udon Noodles – Thick, chewy noodles that are the star of the dish; use fresh or frozen for best results.
Water – Essential for boiling the noodles and ensuring a tender texture; don’t forget to reserve some for sautéing!

For the Sauce
Butter – Adds a rich flavor; I recommend salted butter for a balanced taste.
Soy Sauce – The key ingredient for that deep, savory flavor; this ingredient is crucial for authentic yaki udon!
Dashi Powder – Infuses the dish with umami; you can use dashi stock concentrate as a convenient alternative.

For the Garnish
Green Onions – Adds freshness and crunch; chop them finely for a bright garnish.
Nori (Seaweed) Shredded – Optional but recommended for extra umami flavor and a lovely touch of texture.
Bonito Flakes (Katsuobushi) – Adds a finishing umami punch; feel free to omit if you prefer a vegetarian option.

This combination of ingredients makes the Best Yaki Udon Recipe a symphony of flavors, making cooking a delightful experience!

Step‑by‑Step Instructions for Best Yaki Udon Recipe

Step 1: Noodle Prep
Bring a large pot of water to a rolling boil over high heat. Add fresh or frozen udon noodles, cooking them for 2–3 minutes until they’re tender but still chewy. If using dried noodles, follow the package instructions, usually around 4–6 minutes. Once cooked, drain the noodles and toss them with a splash of sesame oil to prevent sticking if not using immediately.

Step 2: Heat the Sauce
In a large frying pan or wok, melt 2 tablespoons of salted butter over medium-high heat. Once the butter is bubbling and sizzling, sprinkle in 1 teaspoon of dashi powder and a splash of water to create a savory base. Stir well and continue to cook for about 1 minute until everything is combined and aromatic.

Step 3: Add Noodles
Toss the cooked udon noodles into the pan with the dashi-butter mix. Use tongs to gently fold the noodles, sautéing them for 3–4 minutes. You’re aiming for a slight crispness and a light brown color, so keep an eye out for that delicious golden hue while ensuring the noodles get coated in the flavorful sauce.

Step 4: Season
Once the noodles have achieved a lovely texture, remove the pan from heat and drizzle in 2 tablespoons of soy sauce. Quickly toss the noodles again to evenly distribute the rich flavors throughout. The noodles should be glossy and fragrant, showcasing the essence of this Best Yaki Udon Recipe.

Step 5: Plate and Garnish
Spoon the steaming yaki udon onto serving plates, creating a nice bed of noodles. Finely chop a couple of green onions and sprinkle them generously over the top for freshness. If desired, add a sprinkle of shredded nori and bonito flakes to elevate those umami notes, turning this dish into a beautiful presentation for family and friends.

What to Serve with Quick and Delicious Yaki Udon?

A colorful array of sides can elevate your meal and create harmony on the plate, inviting endless flavors.

  • Miso Soup: A warm, umami-rich broth that harmonizes with yaki udon, adding a comforting touch to your dining experience.
  • Steamed Edamame: Fresh and lightly salted, these vibrant green beans provide a crunchy contrast and a delightful pop of flavor.
  • Garlic Broccoli: Tender florets sautéed in garlic and soy sauce share an earthy richness that pairs beautifully with the savory noodles.
  • Pickled Cucumbers: Crisp and tangy, they cleanse the palate and balance the dish’s richness, making every bite refreshing.
  • Japanese Potato Salad: Creamy and slightly sweet, this dish brings a delightful texture that complements the chewy udon experience.
  • Tempura Vegetables: Lightly battered and fried, they add a satisfying crunch, drawing attention without overwhelming the main dish.
  • Chilled Tofu Salad: Silken tofu with a drizzle of soy sauce and sesame oil introduces a creamy, refreshing element to the meal.
  • Sake or Green Tea: A subtly sweet drink like sake, or a fragrant green tea serves to enhance the flavors without distracting.
  • Mochi Ice Cream: Round off your meal with this sweet treat, combining soft and chewy textures for a delightful finish.

Best Yaki Udon Recipe Variations

Feel free to get creative with this delightful dish and make it your own!

  • Veggie-packed: Add sautéed bell peppers, carrots, or snap peas for added nutrition and vibrant color.

  • Dairy-Free: Swap butter for coconut oil or vegan butter for a rich, dairy-free alternative that doesn’t skimp on flavor.

  • Extra Heat: For a spicy kick, toss in some red pepper flakes or a splash of chili oil just before serving, turning up the flavor profile in a delightful way.

  • Protein Boost: Enhance your dish by adding pre-cooked tofu, shrimp, or chicken, creating a more filling meal for protein lovers.

  • Noodle Twist: Use rice noodles or soba noodles as a fun twist, catering to different taste preferences while still delivering on texture.

  • Broth Upgrade: Replace water with vegetable or chicken broth for cooking noodles, enhancing the flavor depth with each bite.

  • Herb Infusion: Toss in freshly chopped cilantro or basil right before serving to add freshness and an aromatic flair to your yaki udon.

  • Savory Surprise: Drizzle with sesame oil or sprinkle with sesame seeds for an added crunch and nutty flavor that perfectly complements the umami base.

By exploring these variations, you can easily customize your Yaki Udon experience. And if you’re looking for more easy recipes, you might want to try my Grilled Honey Kabobs or Savory Turkey Patties!

How to Store and Freeze Best Yaki Udon

Fridge: Store leftover yaki udon in an airtight container for up to 2 days. Reheat in the microwave for about one minute, ensuring it’s evenly heated.

Freezer: Avoid freezing yaki udon, as the noodles may become mushy upon thawing. It’s best enjoyed fresh for the optimal texture.

Room Temperature: If you plan to serve it at a gathering, keep yaki udon at room temperature for no more than 2 hours to maintain food safety.

Reheating: For best results when reheating, add a splash of water and cover the dish to retain moisture, preventing the noodles from drying out.

Expert Tips for the Best Yaki Udon

  • Fresh Noodles: Use fresh or frozen udon noodles for the best texture; cooking dried noodles can lead to a mushy outcome.
  • Butter Perfected: Melt the butter thoroughly before adding the dashi and water; this enhances the overall richness of the sauce.
  • Watch the Heat: Keep an eye on the pan; too high heat can burn the butter while too low won’t crisp the noodles properly.
  • Soy Sauce Balance: Start with less soy sauce; you can always add more, but it’s hard to fix an overpowering flavor.
  • Quick Serving: Enjoy yaki udon immediately for the best texture; it’s great fresh but can lose its charm when stored too long.

This will ensure you create the Best Yaki Udon Recipe that everyone will love!

Make Ahead Options

These Best Yaki Udon noodles are perfect for meal prep! You can cook the udon noodles up to 24 hours in advance, storage is key here—just drain them and toss them with a splash of sesame oil to keep them from sticking, then refrigerate. You can also mix the dashi powder with butter and water for the sauce ahead of time, place it in an airtight container, and store it in the fridge for up to 3 days—this helps to develop the flavors. When you are ready to serve, simply reheat the sauce, toss in your pre-cooked noodles, add the soy sauce, and sauté until everything is heated through for a quick, delicious meal! Enjoy the convenience without sacrificing flavor!

Best Yaki Udon Recipe FAQs

What type of udon noodles should I use?
I highly recommend using fresh or frozen udon noodles for the best texture and flavor. If you only have dried udon, that’s okay too! Just be sure to cook them according to the package instructions, usually around 4-6 minutes, to achieve that perfect chewy consistency.

How should I store leftover yaki udon?
Store any leftover yaki udon in an airtight container in the fridge for up to 2 days. When you’re ready to enjoy it again, simply reheat in the microwave for about one minute. If you’d like, add a splash of water before reheating to keep it moist.

Can I freeze yaki udon?
Avoid freezing yaki udon as the noodles can become mushy and lose their delightful texture when thawed. It’s truly best enjoyed fresh! If you have to freeze it, I recommend separating the best yaki udon components before freezing; you can freeze veggies and protein separately but keep the cooked noodles chilled.

What should I do if my noodles are too sticky?
If your noodles are sticking together, they may have overcooked or not been rinsed after boiling. To remedy this, you can toss them with a splash of sesame oil immediately after cooking to help separate them. If they are already in the frying pan, sprinkle a few drops of water and stir them gently to loosen them up.

Are there any dietary considerations for yaki udon?
Absolutely! If you’re cooking for someone with gluten sensitivities, you can substitute the udon noodles with gluten-free alternatives like rice noodles. Additionally, if you or your guests are vegetarian, you can omit the bonito flakes for a fully plant-based meal. Always ensure to check your ingredients if allergies are a concern, particularly with soy sauce.

Best Yaki Udon Recipe

Delicious Best Yaki Udon Recipe in Just 15 Minutes

This Best Yaki Udon Recipe promises to fill your home with an enticing blend of savory soy sauce and rich dashi flavor in under 15 minutes.
Prep Time 5 minutes
Cook Time 10 minutes
Total Time 15 minutes
Servings: 2 plates
Course: Dinner
Cuisine: Japanese
Calories: 450

Ingredients
  

For the Noodles
  • 200 grams Udon Noodles Fresh or frozen for best results.
  • 2 cups Water For boiling noodles.
For the Sauce
  • 2 tablespoons Salted Butter
  • 1 tablespoon Soy Sauce Crucial for authentic flavor.
  • 1 teaspoon Dashi Powder Can use dashi stock concentrate as an alternative.
For the Garnish
  • 2 tablespoons Green Onions Finely chopped for garnish.
  • 1 tablespoon Nori (Seaweed) Shredded Optional.
  • 1 tablespoon Bonito Flakes (Katsuobushi) Optional.

Equipment

  • large pot
  • Frying pan
  • Tongs

Method
 

Step-by-Step Instructions
  1. Bring a large pot of water to a rolling boil over high heat. Add udon noodles and cook them for 2–3 minutes until tender but still chewy.
  2. In a large frying pan, melt butter over medium-high heat. Add dashi powder and a splash of water, stirring well for about 1 minute.
  3. Toss the cooked udon noodles into the pan, sautéing for 3–4 minutes until slightly crisp and golden.
  4. Remove from heat and drizzle in soy sauce, tossing the noodles to distribute the flavors.
  5. Plate the noodles and garnish with chopped green onions, nori, and bonito flakes as desired.

Nutrition

Serving: 1plateCalories: 450kcalCarbohydrates: 60gProtein: 12gFat: 20gSaturated Fat: 10gPolyunsaturated Fat: 1gMonounsaturated Fat: 8gCholesterol: 30mgSodium: 800mgPotassium: 300mgFiber: 2gSugar: 2gVitamin A: 100IUVitamin C: 5mgCalcium: 40mgIron: 2mg

Notes

Enjoy yaki udon immediately for the best texture; refrigerate leftovers for up to 2 days.

Tried this recipe?

Let us know how it was!