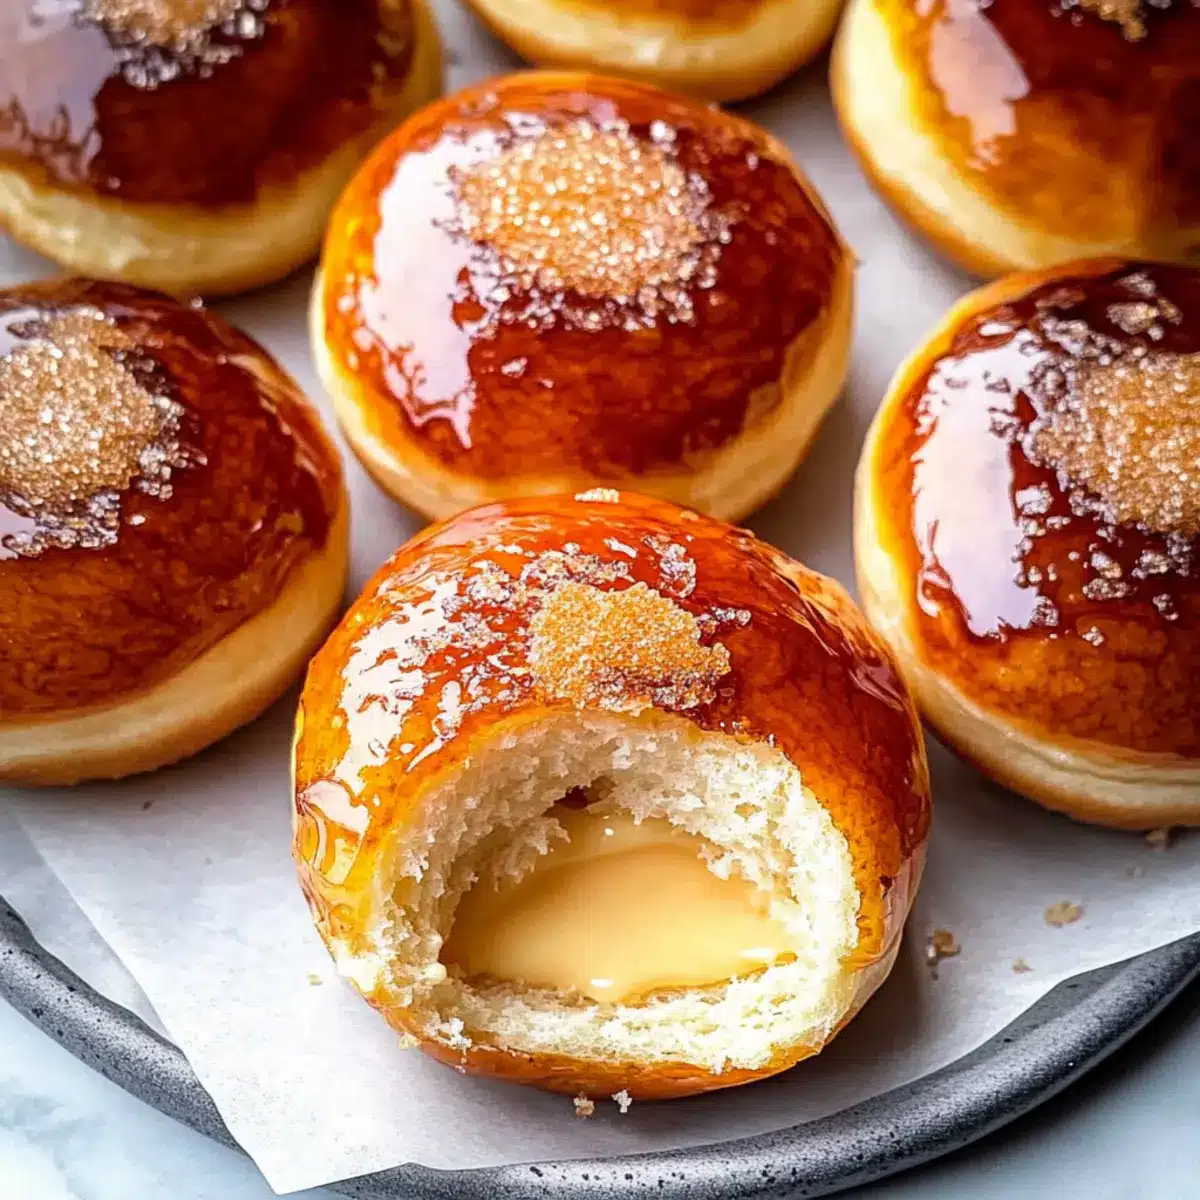
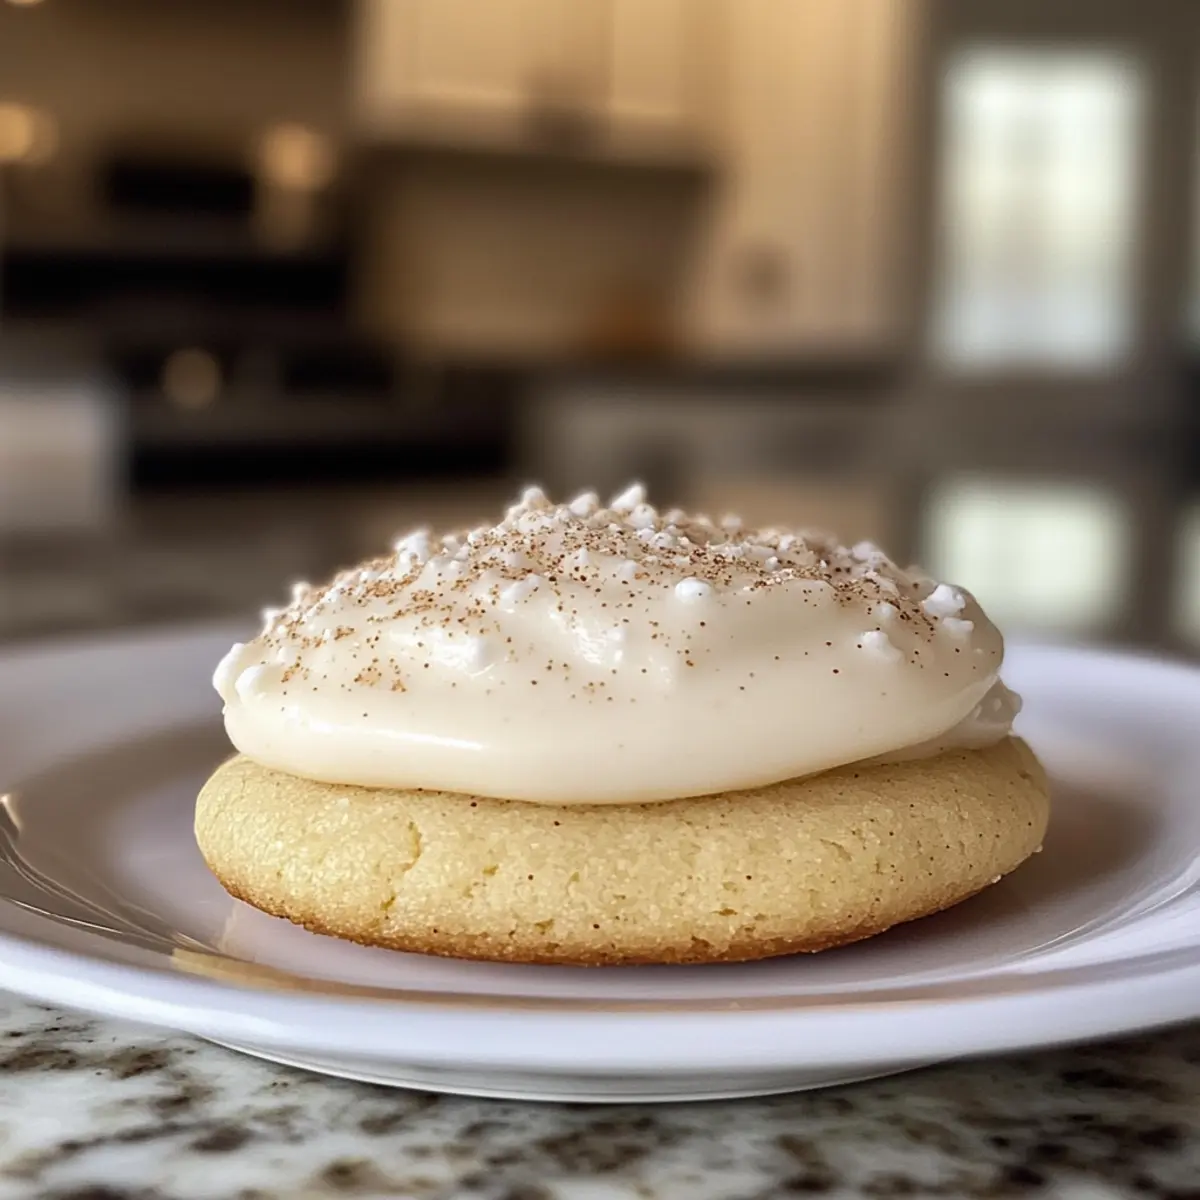
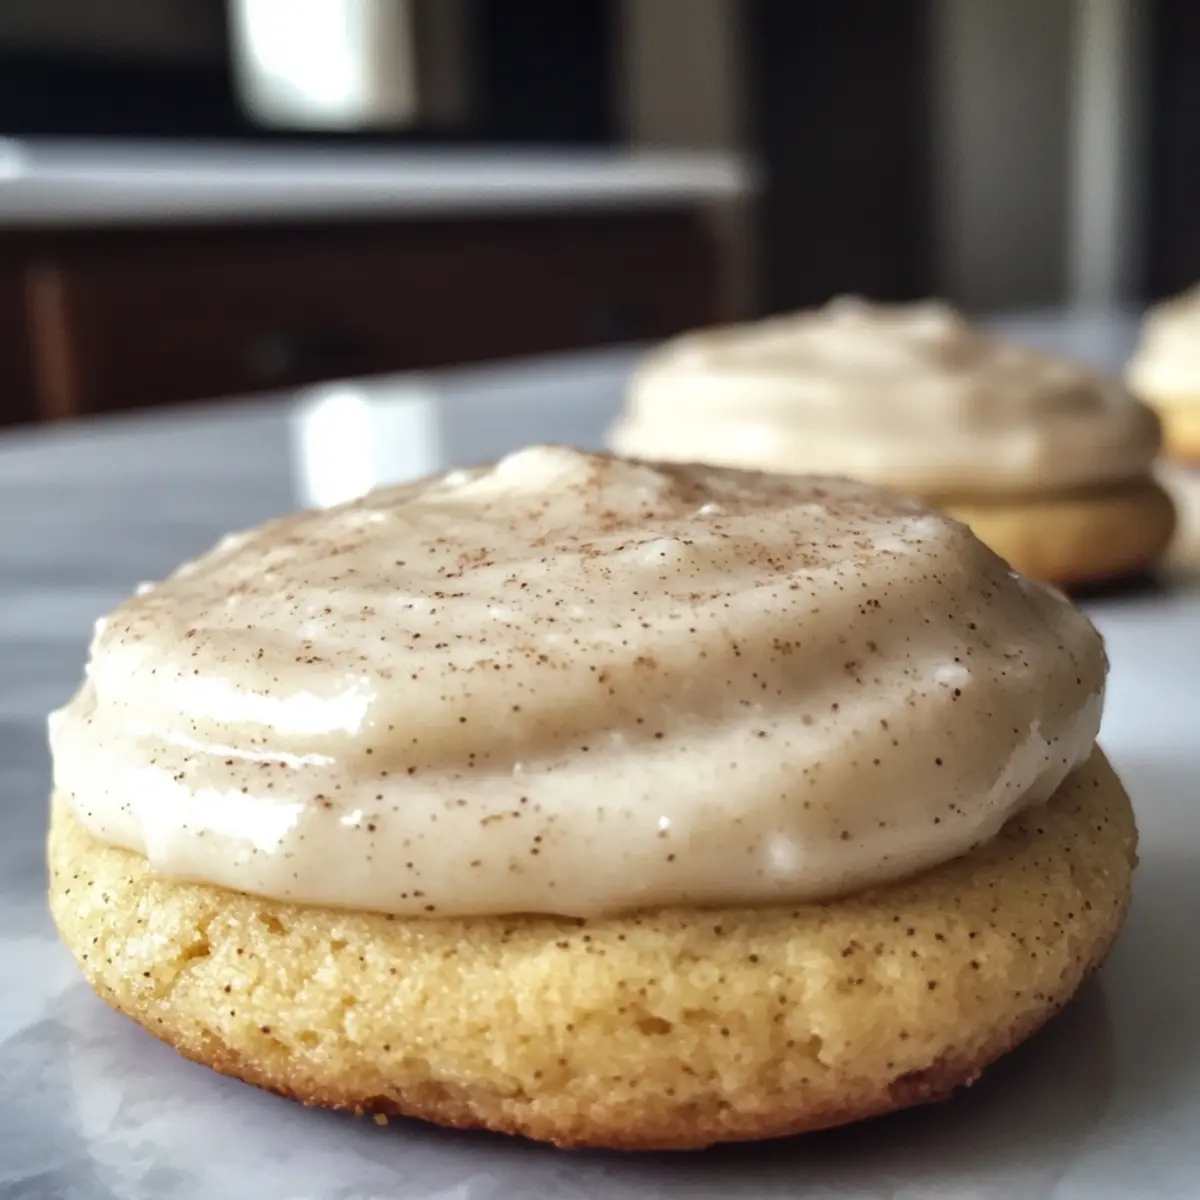
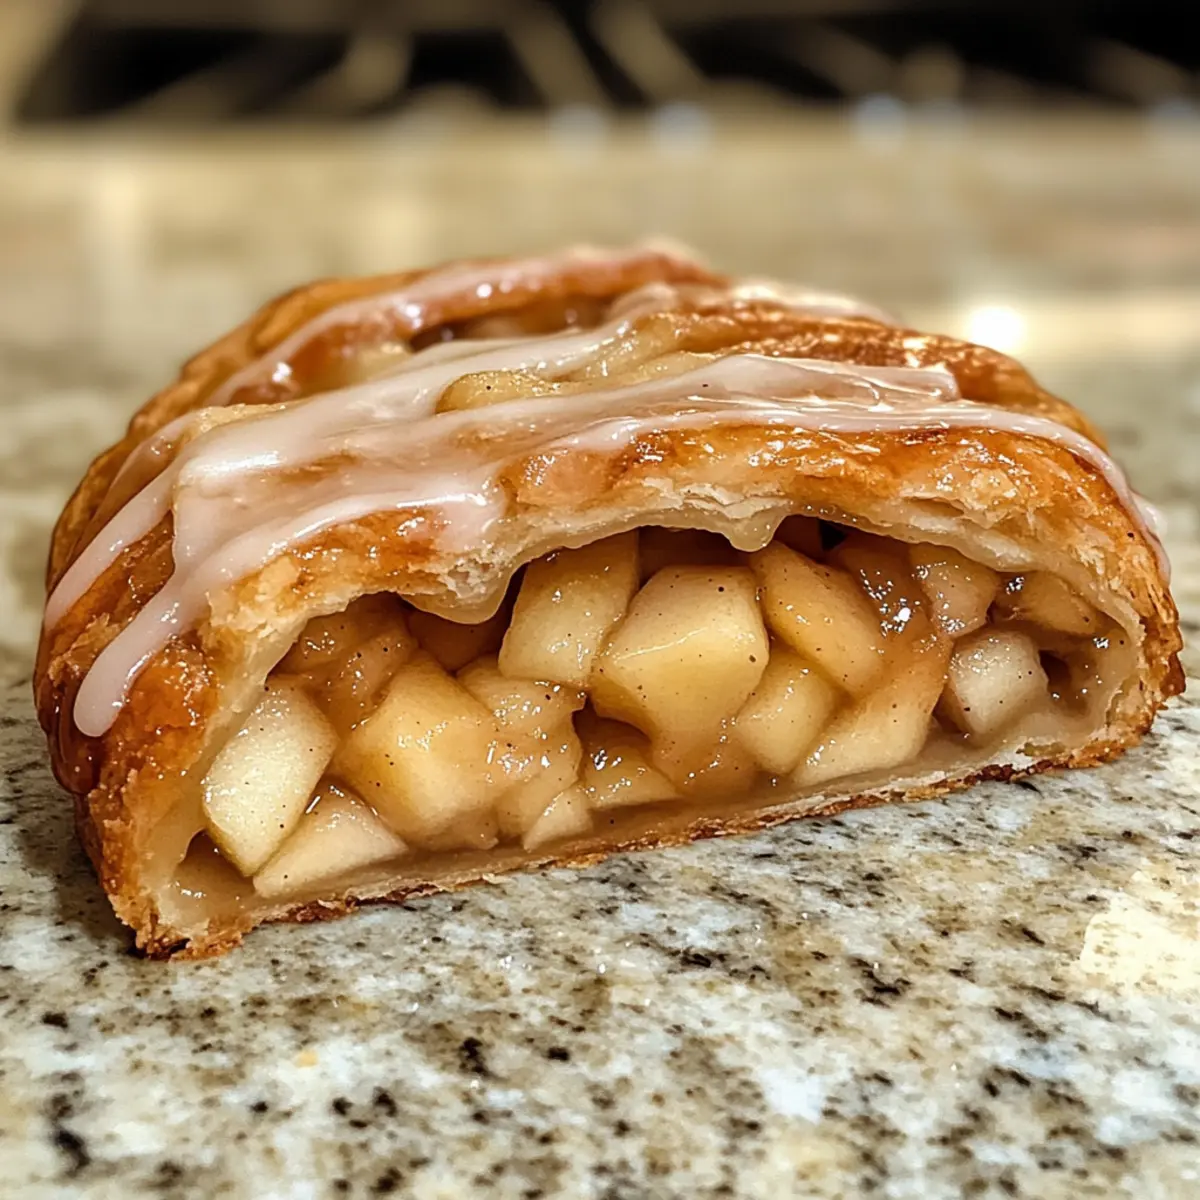
Indulge in Soft Baked Crème Brûlée Donuts at Home

As I was flipping through my favorite pastry book, the idea of combining two beloved delights struck me: What if I could merge the creamy indulgence of crème brûlée with the fluffy charm of donuts? That thought led me to these delightful Baked Crème Brûlée Donuts, and let me tell you—they are a game changer! With a wonderfully soft texture and a rich pastry cream filling, they take your average donut to new heights. Plus, they’re baked, not fried, making them a guilt-free pleasure you can enjoy anytime. Whether for a special brunch or a sweet after-dinner treat, these donuts promise to impress. Curious about how to whip up these golden beauties? Let’s dive into the recipe!
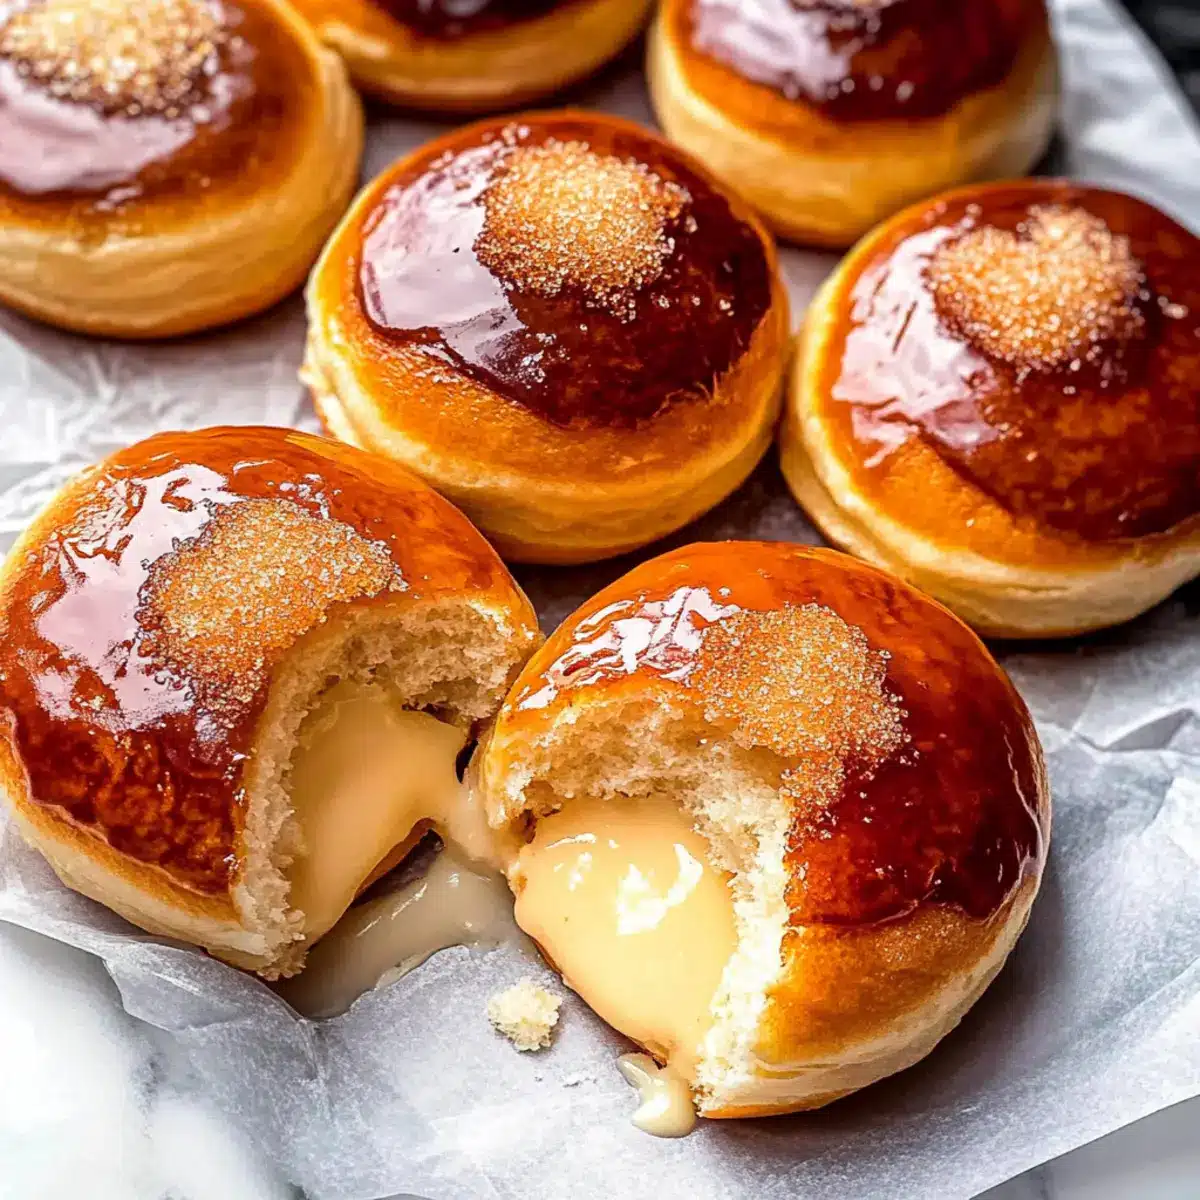
Why are Baked Crème Brûlée Donuts a must-try?

Indulgent Flavor: These Baked Crème Brûlée Donuts pack a punch with their rich pastry cream filling and crispy sugar topping, making each bite a dream come true.

Easy to Make: The straightforward steps allow even the beginner baker to create these irresistible goodies without hassle.

Versatile: Feel free to experiment with flavors—try adding almond or citrus extracts in the pastry cream for a fun twist!

Perfect for Any Occasion: Whether it’s a weekend brunch or a cozy dessert, these donuts will surely impress family and friends.

Better-for-You Treat: Baked instead of fried, they provide a delicious indulgence without the extra guilt!

Pair with a cup of coffee or tea for a delightful experience, and for more delicious options, check out Baked Vegetable Egg or Texas Roadhouse Style Baked for your next meal!

Baked Crème Brûlée Donuts Ingredients

For the Pastry Cream
Milk – Essential for moisture; any milk will work, dairy or non-dairy.
Egg Yolks – Provide richness; no substitutions for the best flavor and texture.
Cornstarch – Thickens the filling; can substitute with all-purpose flour in a pinch.
Sugar – Add sweetness; use granulated or caster sugar for a fine texture.
Butter – Adds richness; non-dairy margarine can be used as a substitute.
Vanilla – Infuses flavor; opt for pure vanilla extract for the best results.

For the Donut Dough
Flour – The structure provider; all-purpose flour works best.
Yeast – Leavens the dough; use instant yeast for consistent results.
Salt – Enhances flavor; essential in small amounts, can omit if needed.
Granulated Sugar – Sweetens the donuts; great to use for a delightful taste.

For the Sugar Topping
Granulated Sugar – Creates the crispy topping; light or dark brown sugar can add depth.

With these ingredients ready, your adventure in creating Baked Crème Brûlée Donuts is just around the corner!

Step‑by‑Step Instructions for Baked Crème Brûlée Donuts

Step 1: Prepare the Pastry Cream
Begin by heating 2 cups of milk in a saucepan over medium heat until it bubbles gently. In a separate bowl, whisk together 4 egg yolks, ¼ cup of cornstarch, and ½ cup of sugar until smooth. Gradually pour the hot milk into the egg mixture while whisking continuously, then strain the mixture back into the saucepan. Cook on medium heat, stirring frequently, until the pastry cream thickens, about 5-7 minutes. Remove from heat, stir in 2 tablespoons of butter and 1 teaspoon of vanilla extract, and let cool completely.

Step 2: Make Donut Dough
In a large mixing bowl, combine 1 cup of warm milk, 2 tablespoons of sugar, and 2 teaspoons of instant yeast. Let it sit for about 5 minutes until frothy. Next, add 2 large eggs and ¼ cup of melted butter, whisking to combine. Gradually add 3 ½ cups of all-purpose flour and ½ teaspoon of salt. Mix until a soft dough forms, then knead on a floured surface for about 5-7 minutes until elastic. Place the dough in a greased bowl, cover with a clean towel, and let it rise in a warm spot for 1-2 hours, or until doubled in size.

Step 3: Shape Donuts
Once the dough has risen, punch it down gently to release the air. Roll the dough out on a floured surface to about ½ inch thick. Use a donut cutter to cut out donut shapes, placing them on a lined baking sheet. Re-roll scraps to cut additional donuts. Cover the shaped donuts with a towel and let them rise for another 30-60 minutes until puffy and soft.

Step 4: Bake Donuts
Preheat your oven to 350°F (175°C). Once the donuts have risen, place them in the oven and bake for 12-15 minutes, or until they are lightly golden and spring back when gently pressed. Remove them from the oven and let them cool completely on a wire rack.

Step 5: Fill Donuts
After your donuts have cooled, fill a piping bag fitted with a round tip with the chilled pastry cream. Carefully insert the tip into the side of each donut, gently squeezing to fill it with the creamy goodness. Ensure you fill them without overstuffing, to avoid leakage.

Step 6: Prepare Sugar Topping
In a small saucepan, heat ½ cup of granulated sugar over medium heat, stirring constantly until it melts and turns a deep golden brown, resembling caramel. Remove from heat and allow it to cool slightly. Dip the tops of each filled donut into the melted sugar, letting any excess drip off. Place them on a wire rack to allow the sugar topping to harden completely, creating a delicious crispy crust.
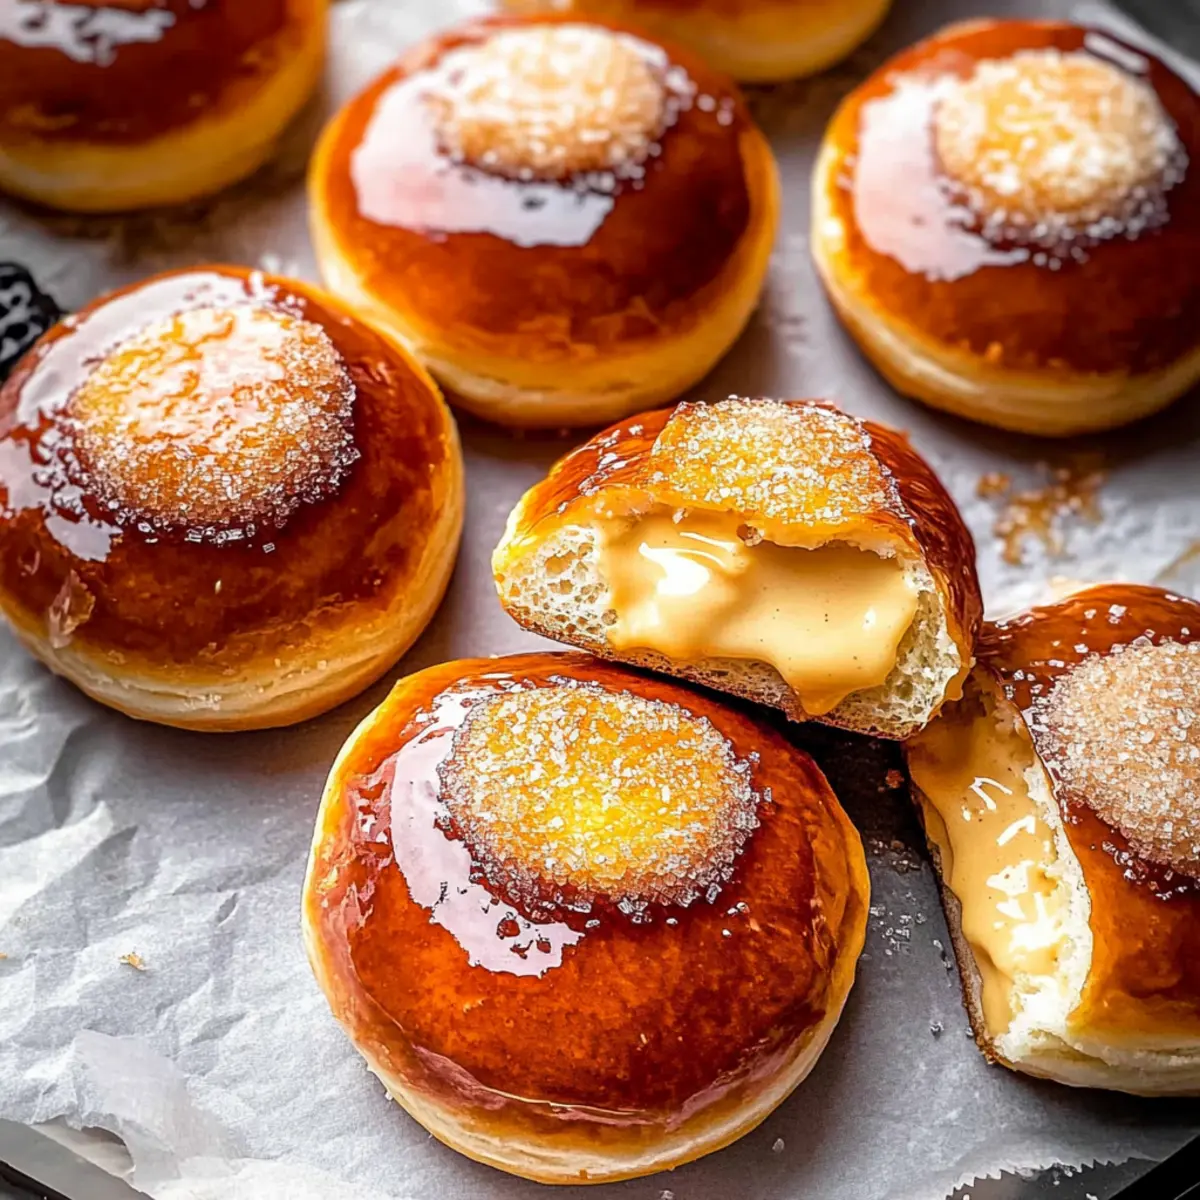
Expert Tips for Baked Crème Brûlée Donuts

  • Cool Before Filling: Ensure donuts are completely cooled before filling to prevent the pastry cream from becoming soupy and leaking out.

  • Monitor Sugar Temperature: When making the burnt sugar topping, keep a close eye on it; it can go from perfect to burnt in seconds.

  • Dough Consistency: If the donut dough seems too wet, add a little more flour, but be cautious not to overwork it, which can lead to tough donuts.

  • Flour Variety: Stick with all-purpose flour for the best texture in your donuts. Avoid using whole wheat flour, as it can make them dense.

  • Piping Technique: Use a piping bag with a round tip for a clean fill; insert the tip into the side of the donut gently to ensure even filling.

Enjoy making your Baked Crème Brûlée Donuts and share these warm, delightful treats with friends and family!

What to Serve with Fluffy Baked Crème Brûlée Donuts

Elevate your homemade experience by complementing these delightful donuts with flavorful companions that enhance each bite.

  • Fresh Berries: Add a burst of fruity freshness with strawberries, raspberries, or blueberries that contrast beautifully with the rich creaminess.

  • Latte or Coffee: A warm, frothy milk latte or a bold cup of coffee provides a comforting pairing, balancing the sweetness and texture.

  • Whipped Cream: A dollop of lightly sweetened whipped cream brings extra lightness and creaminess that pairs perfectly with the crispy topping.

  • Vanilla Ice Cream: For a luxurious dessert option, serve your donuts warm with a scoop of vanilla ice cream, creating a delightful warm-cold contrast.

Indulge your senses by serving them alongside a steaming cup of tea or coffee. You could even sprinkle a bit of cinnamon on top for that cozy touch!

  • Chocolate Sauce: Drizzle some melted chocolate or a chocolate syrup over your donuts for a decadent addition that adds richness and sweetness.

  • Fruit-Infused Iced Tea: Quench your thirst with a refreshing glass of iced tea infused with citrus or mint, balancing the richness of the donuts.

With these pairings, your leisurely brunch or dessert will feel truly special and unforgettable!

How to Store and Freeze Baked Crème Brûlée Donuts

Fridge: Store the filled donuts in an airtight container for up to 3 days to maintain freshness. Enjoy them at room temperature or slightly warmed.

Freezer: Freeze unfilled donuts by wrapping them individually in plastic wrap and placing them in a freezer bag. They can be stored for up to 2 months.

Reheating: To enjoy previously frozen Baked Crème Brûlée Donuts, thaw in the fridge overnight, then warm in the oven at 350°F (175°C) for about 8-10 minutes.

Additional Tip: For the best texture, avoid filling donuts with pastry cream until ready to serve; this helps preserve their delightful fluffiness.

Make Ahead Options

These Baked Crème Brûlée Donuts are perfect for busy home cooks looking to save time! You can prepare the pastry cream and refrigerate it up to 3 days in advance; just make sure it’s cooled completely before storing to maintain its creamy texture. The donut dough can be made and shaped into donuts, then covered and refrigerated for up to 24 hours before baking. When it’s time to bake, simply take them out of the fridge and let them rise at room temperature for about 30-60 minutes before baking. With these make-ahead options, you’ll have delicious, fresh donuts ready with minimal effort during busy mornings!

Baked Crème Brûlée Donuts Variations

Transform these luscious delights into your own signature treat with a few simple twists!

  • Custard Swap: Replace the homemade pastry cream with ready-to-use custard or vanilla pudding for quick filling. It’s a time-saver without skimping on flavor!

  • Flavored Extracts: Add your favorite extracts, like almond or orange, to the pastry cream for a refreshing flavor twist. It can elevate the taste and give your donuts a special flair.

  • Air-Fried Option: For a healthier twist, try air frying the donut dough instead of baking. You’ll still enjoy a soft, fluffy texture with fewer calories.

  • Chocolate Delight: Incorporate cocoa powder into the flour for a rich chocolate version. Top with melted chocolate instead of sugar for a decadent treat.

  • Gluten-Free Version: Use a 1:1 gluten-free flour blend to make these donuts gluten-free without sacrificing taste or texture. Everyone can enjoy the fun!

  • Spiced Variation: Add a pinch of cinnamon or nutmeg to the donut dough for a warm, comforting spice flavor. It’s especially delightful in the cooler months!

  • Fruit-Filled Donuts: Substitute the pastry cream with fruit preserves or a jam of your choice for a burst of fruity flavor. Think raspberry or lemon—yum!

  • Crispy Coconut Topping: Mix toasted coconut into the sugar topping before applying for an extra crunch and tropical flair. It’s perfect for a summer treat!

Ready to embrace creativity in the kitchen? Try pairing these donuts with a delightful cup of coffee or explore more delicious recipes like Air Fryer Baked or Roadhouse Style Baked. Enjoy your baking adventure!
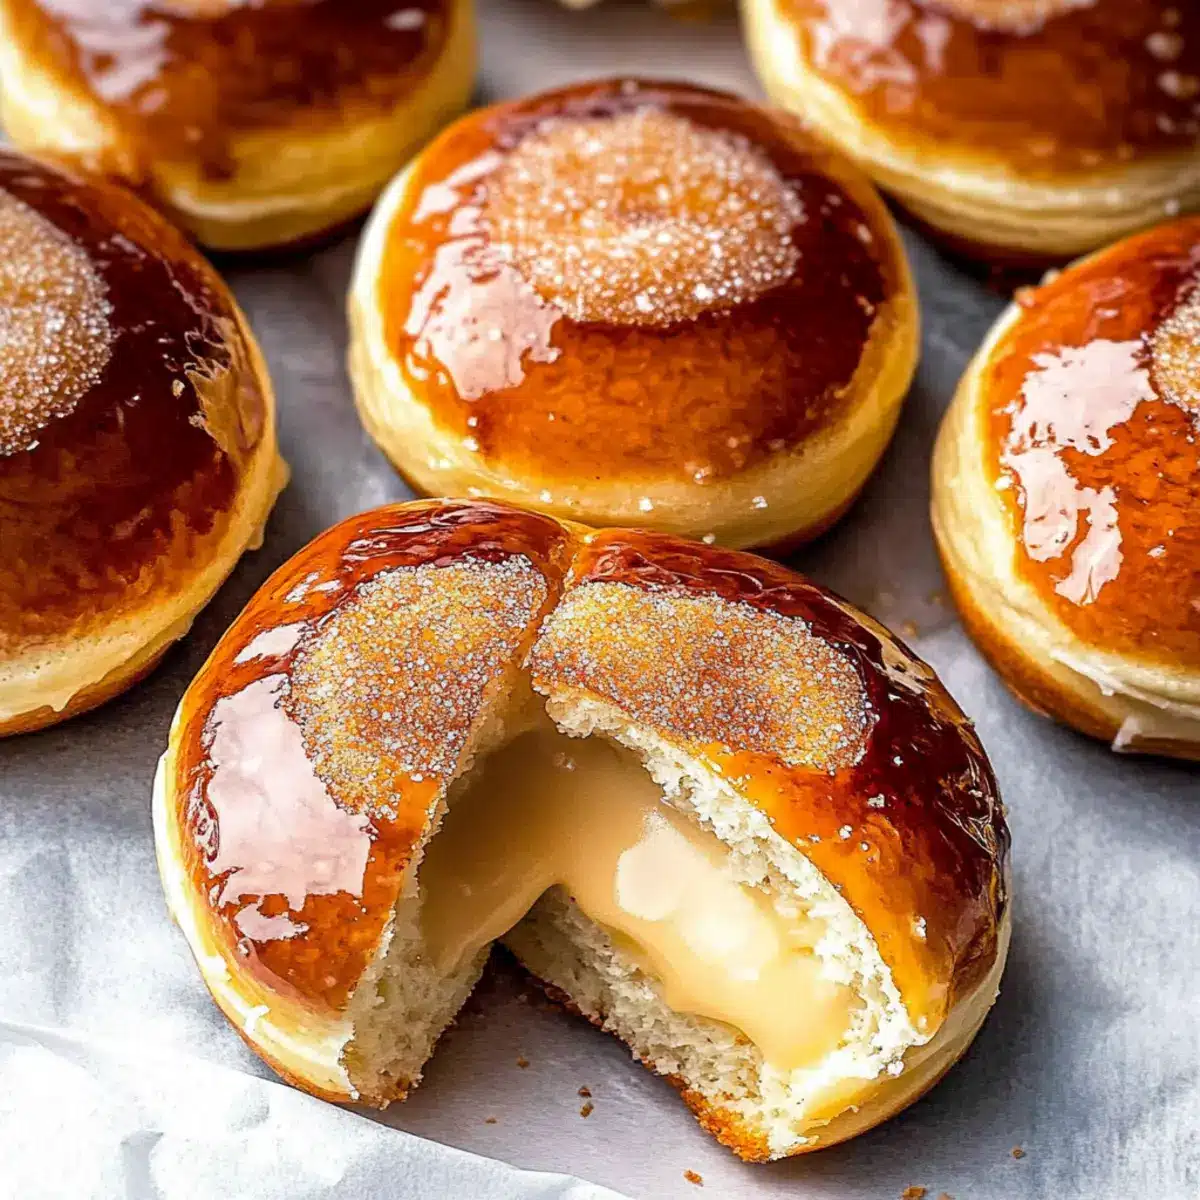
Baked Crème Brûlée Donuts Recipe FAQs

What kind of milk should I use for the pastry cream?
You can use any type of milk, whether dairy or non-dairy, for this recipe. I often opt for whole milk for extra richness, but almond milk or oat milk work beautifully too!

How do I store my Baked Crème Brûlée Donuts?
Store the filled donuts in an airtight container in the refrigerator for up to 3 days. For the best texture, I recommend enjoying them at room temperature or giving them a quick warm-up in the microwave for about 10-15 seconds.

Can I freeze Baked Crème Brûlée Donuts?
Absolutely! To freeze unfilled donuts, wrap each one individually in plastic wrap and place them in a freezer bag. They can be stored for up to 2 months. When you’re ready to enjoy them, thaw in the fridge overnight and reheat in the oven at 350°F (175°C) for 8-10 minutes.

Why do my donuts collapse after baking?
This can happen if the donut dough is not kneaded enough or if the yeast is old. Ensure that you knead the dough until it’s smooth and elastic and check the expiration date on your yeast before using it. If your dough feels too sticky, a little extra flour can help.

Are there any allergy considerations for these donuts?
Yes, these Baked Crème Brûlée Donuts contain common allergens such as eggs, flour, and dairy. If you’re accommodating allergies, try using almond milk, and ensure you have a gluten-free all-purpose flour for a safe alternative. Always consult your guests to ensure they can enjoy this delightful treat!

Can I use a different sugar for the burnt sugar topping?
Certainly! While granulated sugar is the best choice for achieving that iconic crispy topping, you can experiment with light or dark brown sugar for a little extra flavor. Just keep an eye on it as it cooks, as it may caramelize at different rates!
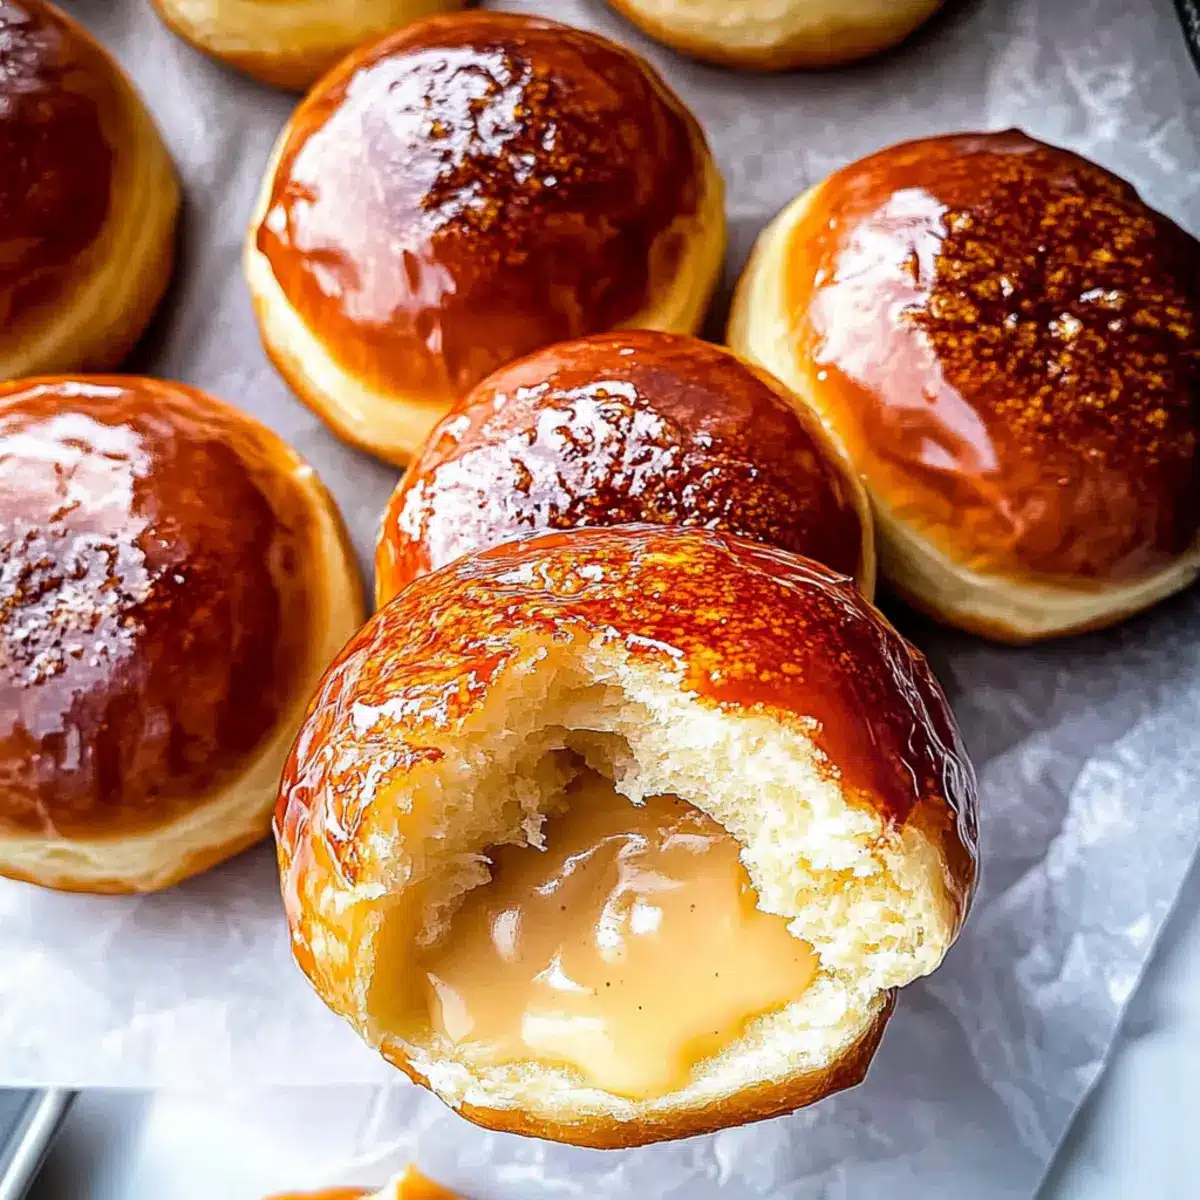
Baked Crème Brûlée Donuts

Indulge in Soft Baked Crème Brûlée Donuts at Home

Experience the delightful fusion of creamy pastry and fluffy donuts with Baked Crème Brûlée Donuts.
Prep Time 30 minutes
Cook Time 15 minutes
Rising Time 2 hours
Total Time 2 hours 45 minutes
Servings: 12 donuts
Course: Dessert
Cuisine: French
Calories: 250

Ingredients
  

For the Pastry Cream
  • 2 cups milk any milk will work, dairy or non-dairy
  • 4 large egg yolks provide richness
  • ¼ cup cornstarch can substitute with all-purpose flour
  • ½ cup sugar use granulated or caster sugar
  • 2 tablespoons butter non-dairy margarine can be used
  • 1 teaspoon vanilla opt for pure vanilla extract
For the Donut Dough
  • 3.5 cups all-purpose flour the structure provider
  • 2 teaspoons instant yeast for consistent results
  • ½ teaspoon salt essential in small amounts
  • 2 tablespoons granulated sugar sweetens the donuts
  • 1 cup warm milk for making the dough
  • 2 large eggs for dough enrichment
  • ¼ cup melted butter adds richness
For the Sugar Topping
  • ½ cup granulated sugar creates the crispy topping

Equipment

  • Saucepan
  • Mixing Bowl
  • Whisk
  • Donut Cutter
  • piping bag
  • Baking Sheet
  • Wire Rack

Method
 

Step-by-Step Instructions for Baked Crème Brûlée Donuts
  1. Prepare the Pastry Cream: Heat 2 cups of milk in a saucepan over medium heat until it bubbles. Whisk together 4 egg yolks, ¼ cup of cornstarch, and ½ cup of sugar in a separate bowl. Gradually pour hot milk into the egg mixture while whisking, strain back into the saucepan, and cook until thickened. Stir in 2 tablespoons butter and 1 teaspoon vanilla, then cool completely.
  2. Make Donut Dough: Combine 1 cup warm milk, 2 tablespoons sugar, and 2 teaspoons yeast in a mixing bowl. Let sit for 5 minutes. Add 2 large eggs and ¼ cup melted butter, whisk to combine. Gradually add 3 ½ cups flour and ½ teaspoon salt, mix to form a soft dough, then knead for 5-7 minutes. Place in a greased bowl, cover, and let rise for 1-2 hours.
  3. Shape Donuts: Punch down the dough, roll out to ½ inch thick, cut out donut shapes with a cutter, and place on a lined baking sheet. Re-roll scraps and let them rise for another 30-60 minutes.
  4. Bake Donuts: Preheat oven to 350°F. Bake donuts for 12-15 minutes until golden and springy. Cool on a wire rack.
  5. Fill Donuts: Fill a piping bag with the chilled pastry cream and fill each cooled donut carefully to avoid overstuffing.
  6. Prepare Sugar Topping: Heat ½ cup granulated sugar in a saucepan until melted and golden brown, cool slightly, dip tops of donuts into melted sugar for a crispy topping.
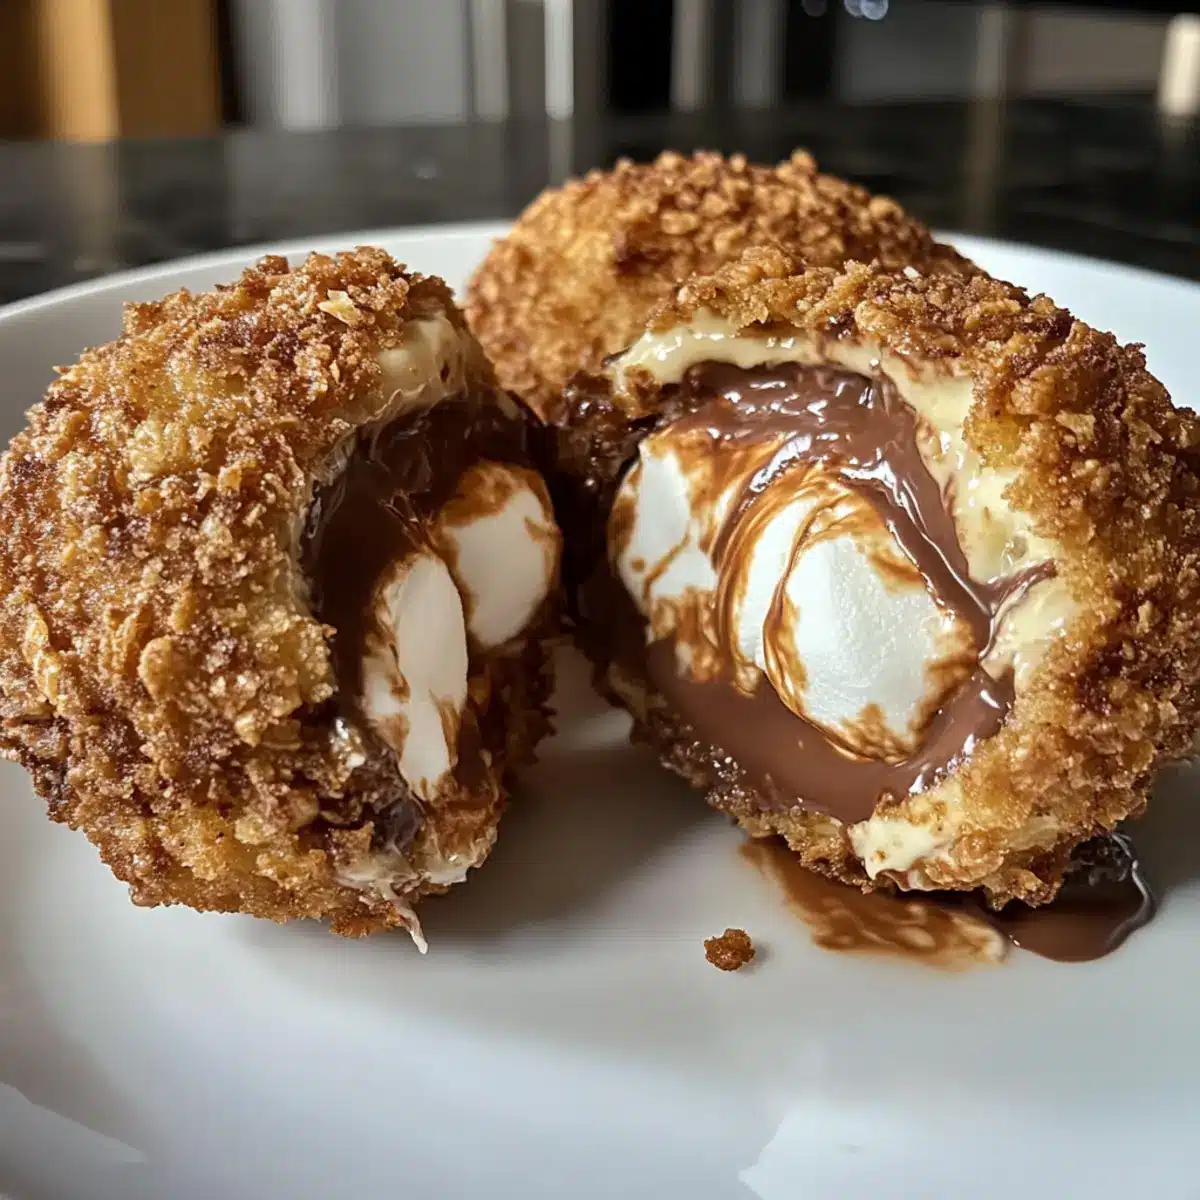
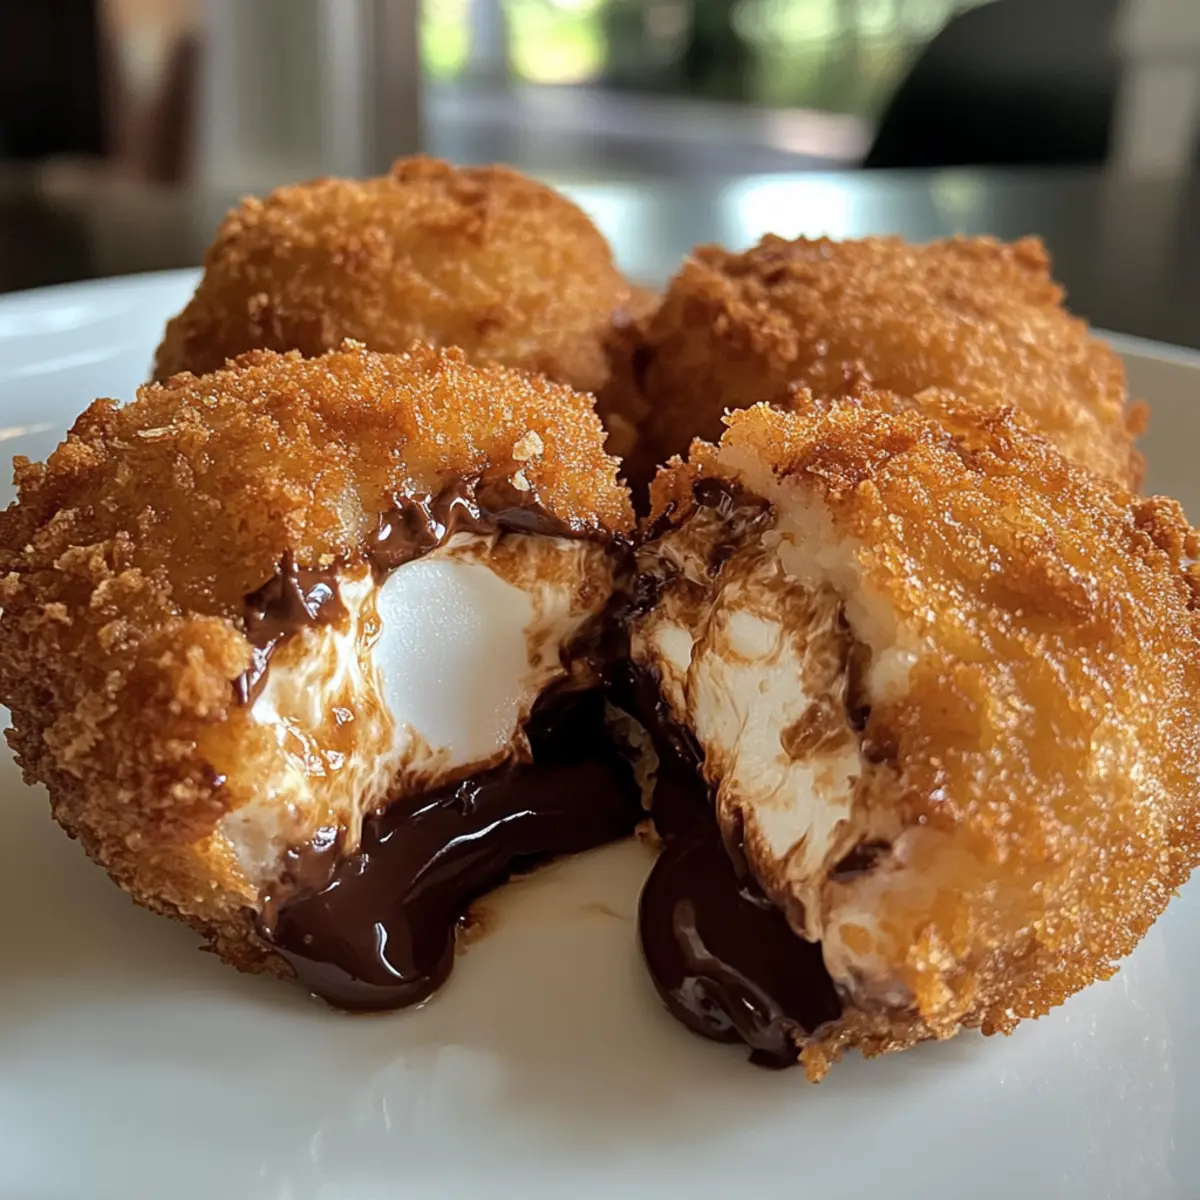
Nutrition

Serving: 1donutCalories: 250kcalCarbohydrates: 30gProtein: 4gFat: 12gSaturated Fat: 7gPolyunsaturated Fat: 1gMonounsaturated Fat: 3gCholesterol: 70mgSodium: 150mgPotassium: 120mgFiber: 1gSugar: 10gVitamin A: 300IUCalcium: 80mgIron: 1mg

Notes

Ensure donuts are completely cooled before filling. Monitor sugar temperature while making the topping.

Tried this recipe?

Let us know how it was!

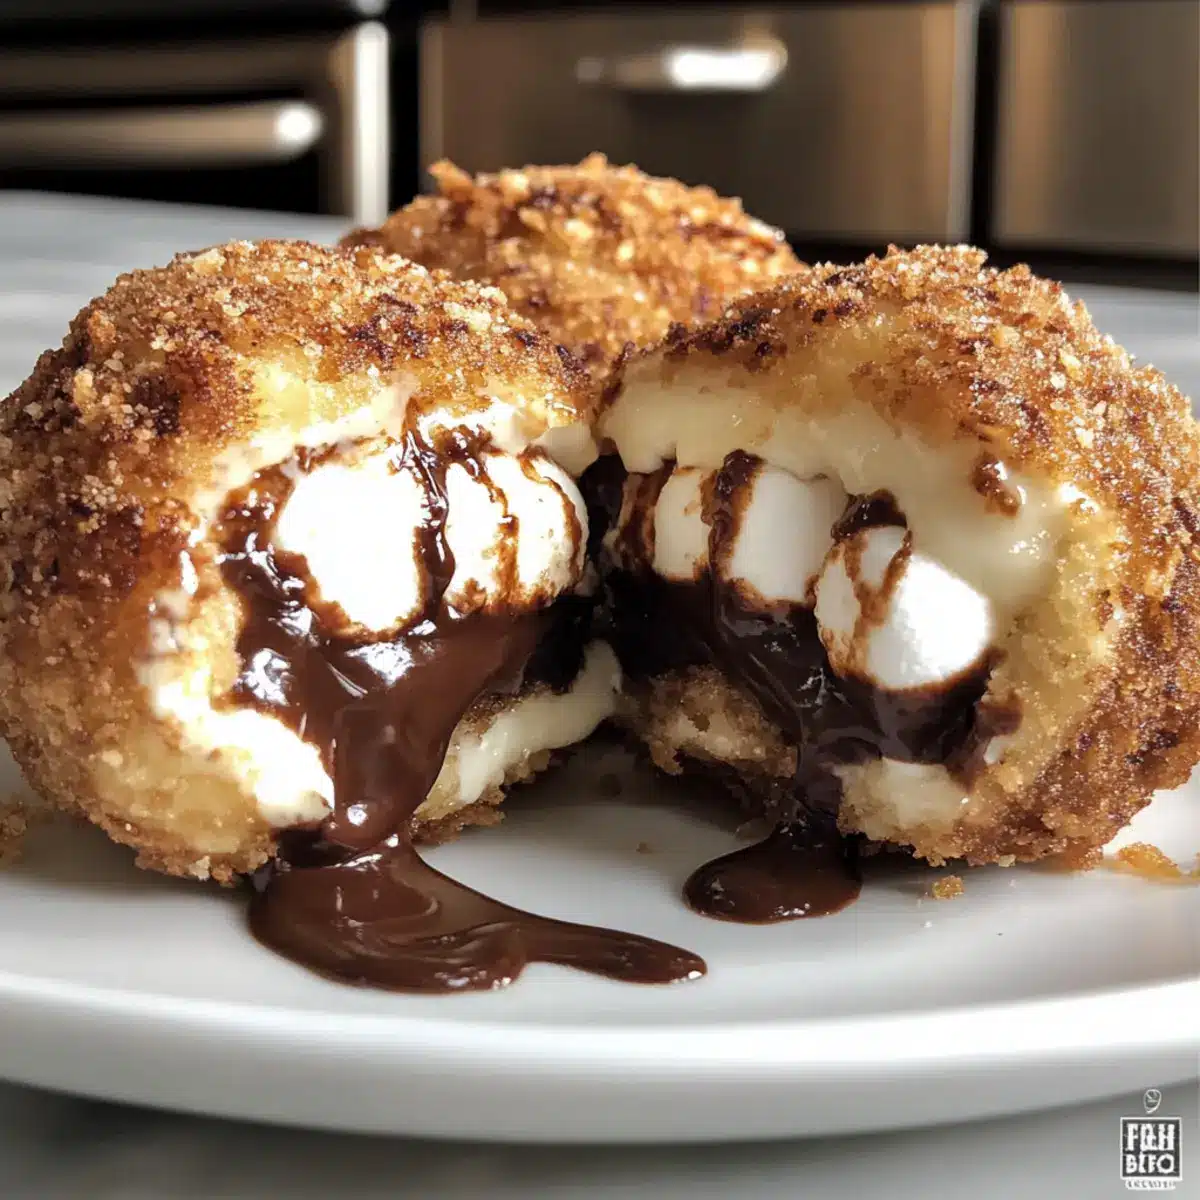
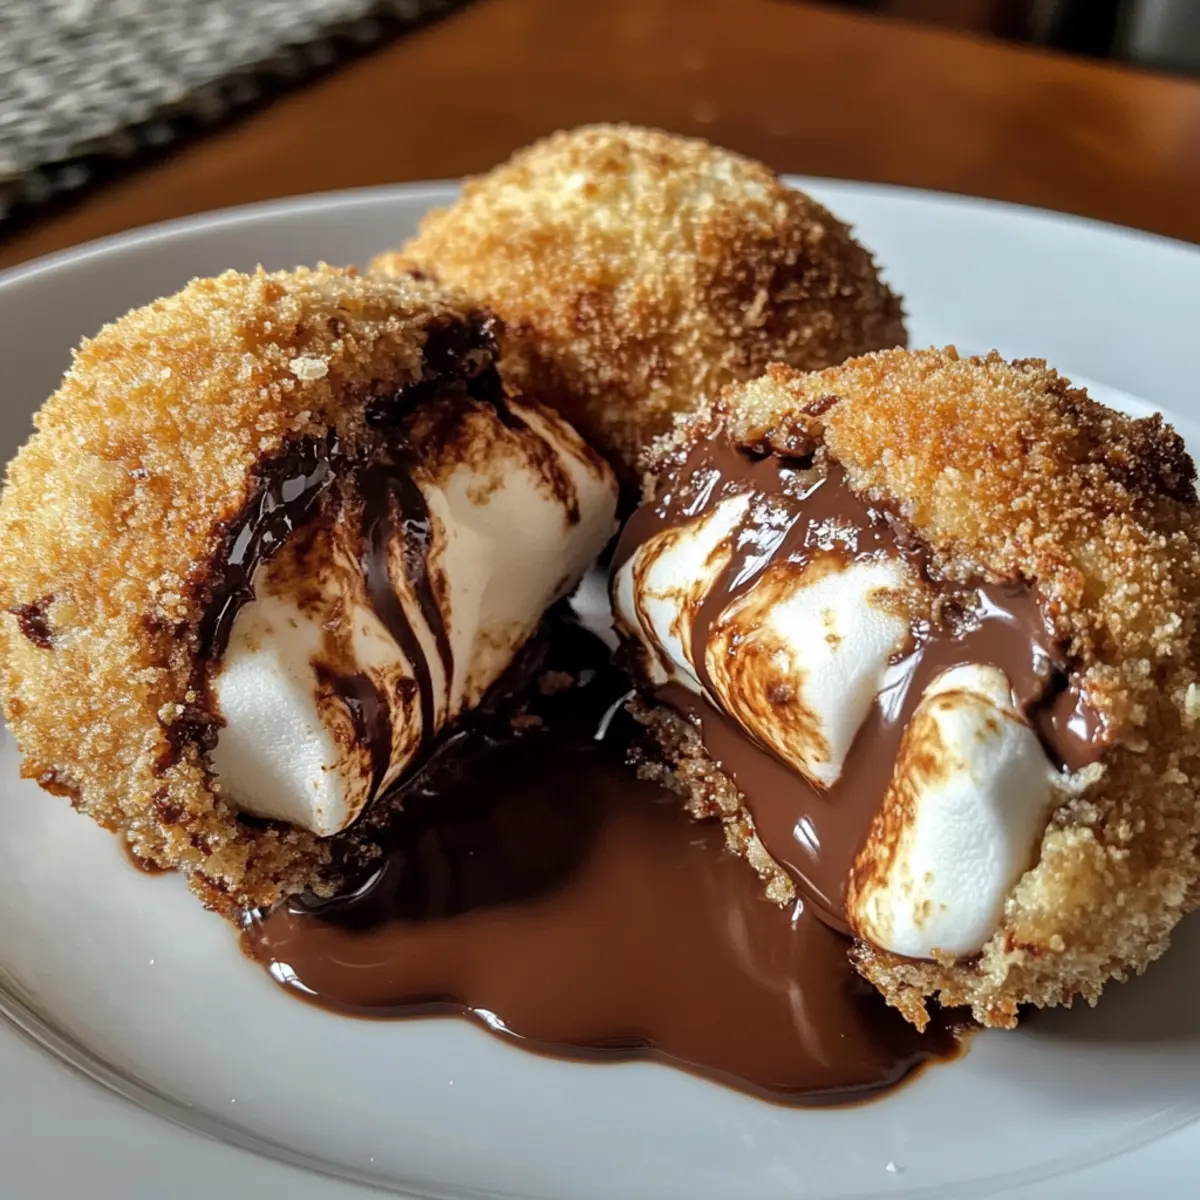
Irresistibly Crispy Fried S’mores Bombs for Dessert Lovers

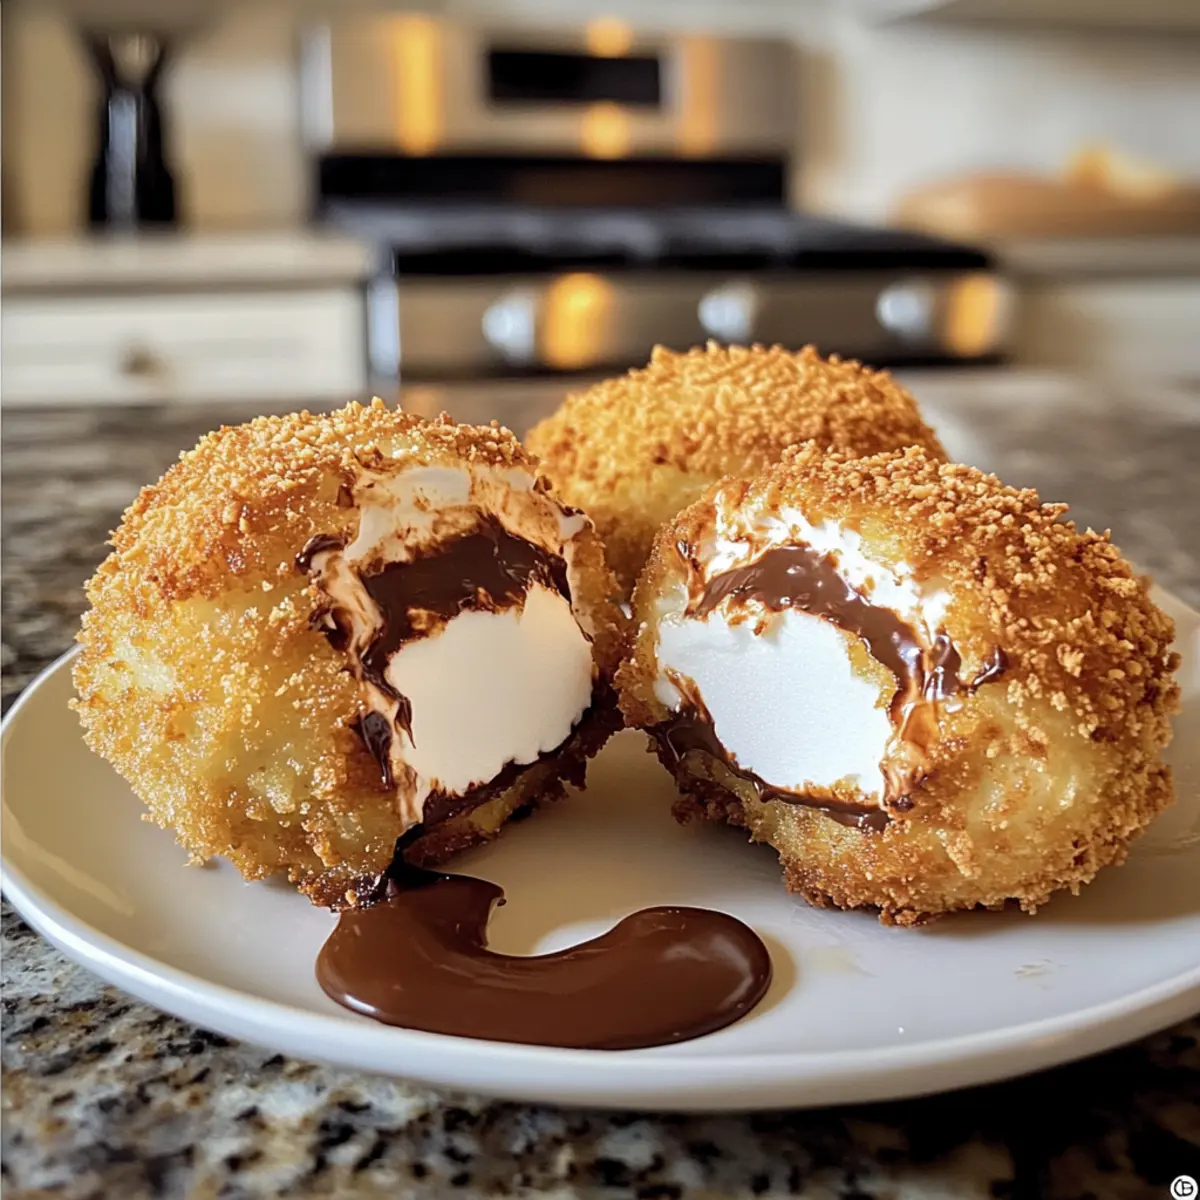
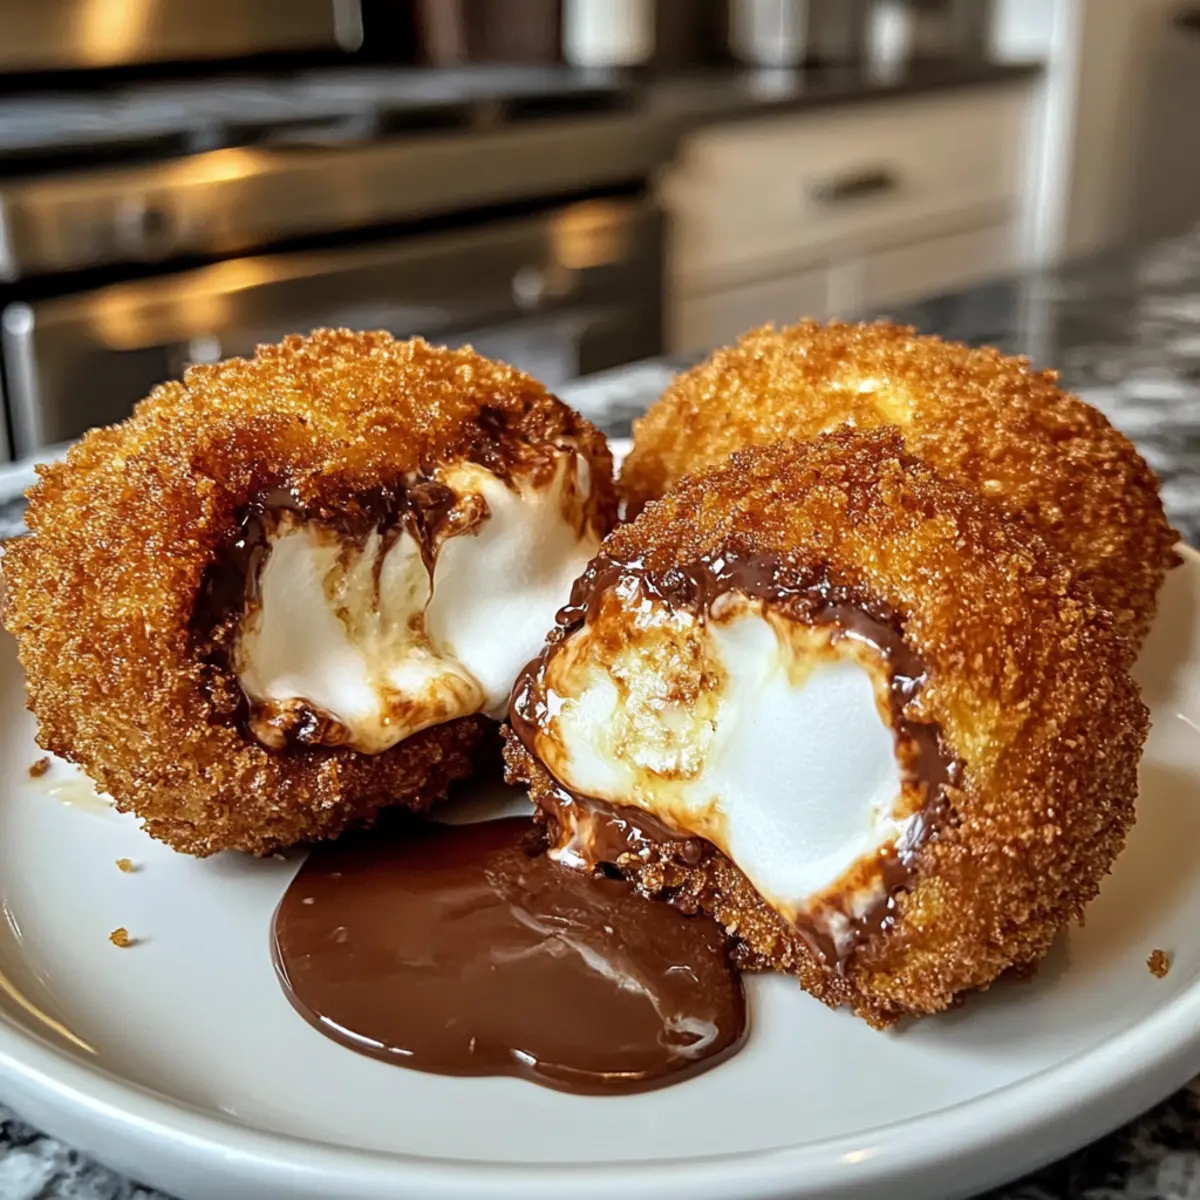
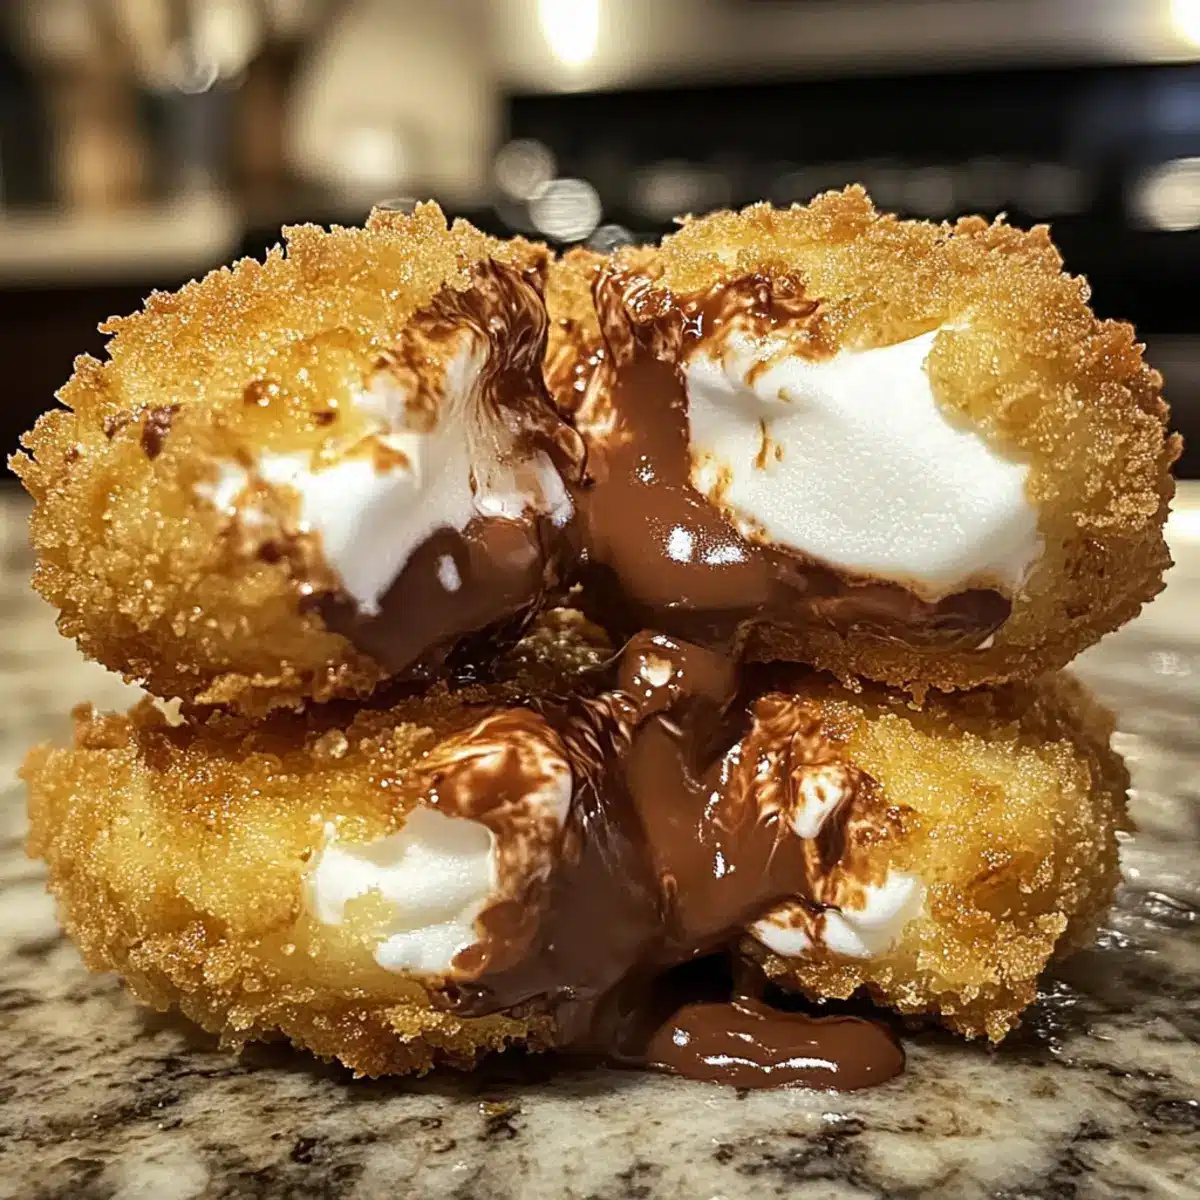
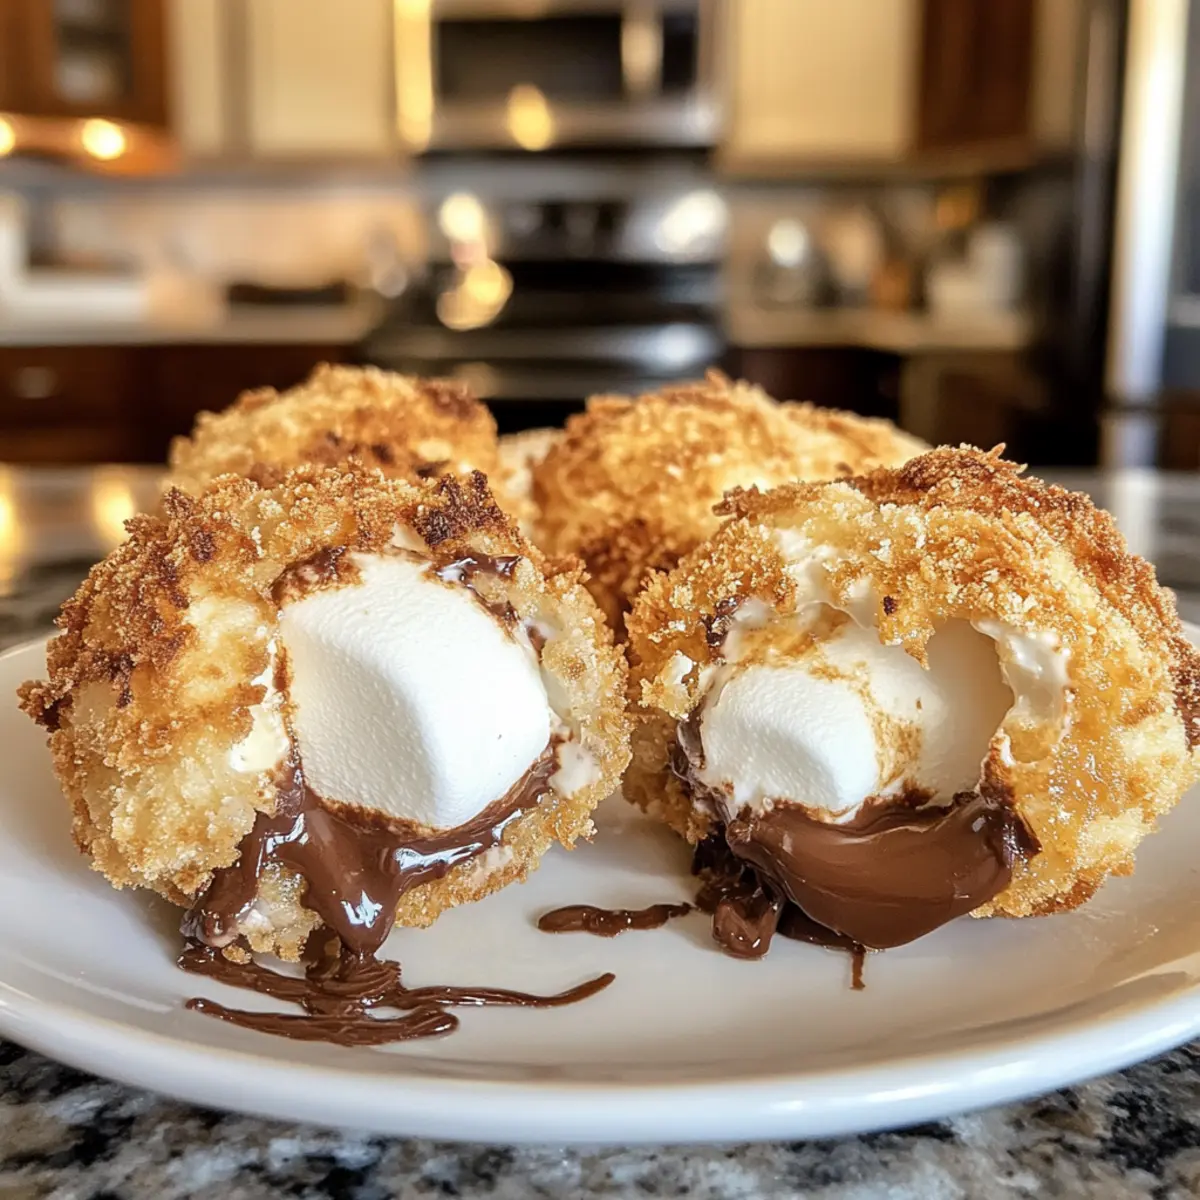
A sweet aroma wafts through the kitchen, tinged with nostalgia for summer nights spent around a campfire. But this time, we’re taking the classic s’mores to a whole new level with Fried S’mores Bombs! These heavenly little bites blend the gooey goodness of marshmallows with melty chocolate and crunchy graham cracker, all wrapped in a crispy golden shell. Whether you’re planning a cozy family dessert or wanting to impress your friends at a party, these quick and indulgent treats will surely be the star of the show. Plus, they’re incredibly simple to whip up, making them a crowd-pleaser for any occasion. Are you ready to dive into this delightful twist on an all-time favorite?

Why are Fried S’mores Bombs a Must-Try?

Quick, Decadent Delight: These Fried S’mores Bombs are a hassle-free way to bring indulgent flavor to your dessert table, with minimal prep time involved.

Nostalgic Flavor: Relive summer nights as gooey chocolate and toasted marshmallows marry perfectly in each crispy bite, offering comfort and joy for all ages.

Crowd Favorite: Perfect for parties and gatherings, these treats are sure to charm your guests and leave them asking for seconds!

Simple Ingredients: With common pantry staples like graham crackers and chocolate, you can whip up these tasty bombs anytime, making them an ideal go-to.

Customizable Fun: Easy variations allow you to experiment with different flavors, like Nutella or flavored marshmallows, ensuring everyone finds a favorite combination!

Enjoy them warm and serve them alongside a scoop of ice cream for that extra splash of excitement!

Fried S’mores Bombs Ingredients

For the Filling
Graham Crackers – Provide the classic s’mores flavor and a crunchy texture; alternative: use digestive biscuits for a different taste.
Chocolate Squares – Deliver rich sweetness; substitution: milk chocolate can be swapped for dark chocolate for a richer flavor.
Marshmallows – Contribute gooiness and sweetness; preparation note: use mini marshmallows for easier filling.

For the Batter
Eggs – Ensure binding of the batter; alternative: flaxseed meal mixed with water can be used as a vegan binder.
Flour – Adds structure to the batter; gluten-free flour can be substituted to accommodate dietary restrictions.

For Frying
Oil (for frying) – Needed for frying to create a crispy exterior; can use vegetable oil or canola oil based on preference.

These ingredients work together to create the perfect Fried S’mores Bombs that are sure to impress at your next gathering!

Step‑by‑Step Instructions for Fried S’mores Bombs

Step 1: Prepare the Filling
Begin by crushing the graham crackers in a bowl until fine. Next, add the chocolate squares and mini marshmallows, mixing everything until well combined. This sweet filling will create a gooey center for your Fried S’mores Bombs. Once mixed, set the bowl aside while you prepare to form the bombs.

Step 2: Form the Bombs
Spoon equal portions of the filling onto a clean flat surface, using about a tablespoon for each bomb. Roll the scoop into a ball shape, ensuring the chocolate and marshmallows are sealed inside with the graham cracker mixture. Aim for a tight seal as you work to prevent the filling from leaking during frying.

Step 3: Prepare the Batter
In a medium bowl, whisk together the eggs until they are frothy. Gradually add the flour, mixing until a thick batter forms. This batter will coat the Fried S’mores Bombs, giving them that crispy outer layer. Ensure it’s smooth and lump-free to achieve the best texture while frying.

Step 4: Heat the Oil
In a deep frying pan, pour enough oil to cover the bottom, about an inch deep, and heat over medium heat until the oil reaches about 350°F (175°C). You can test the oil’s readiness by dropping a small bit of batter into it; if it sizzles and rises, it’s time to fry. This ensures the bombs will turn golden and crisp.

Step 5: Dip and Coat
Carefully dip each s’mores ball into the batter, coating it thoroughly. Let any excess batter drip off back into the bowl, as a thick coat can cause the bombs to be greasy. Ensure every bomb is evenly covered to achieve that delightful crunch once fried.

Step 6: Fry the Bombs
Gently place the coated bombs into the hot oil, ensuring not to overcrowd the pan. Fry for about 1-2 minutes on each side, or until they turn a beautiful golden brown, watching closely to avoid burning. The sizzling sound and golden color will signal they are nearing doneness.

Step 7: Drain and Cool
Once perfectly fried, use a slotted spoon to remove the s’mores bombs from the oil. Place them on a plate lined with paper towels to drain excess oil. This step is crucial for avoiding greasy fried treats; let them cool for a few minutes before serving, as the filling will be very hot.

Step 8: Serve and Savor
Serve the Fried S’mores Bombs warm for the best gooey experience. Pair them with a scoop of vanilla ice cream or fresh fruit to enhance the indulgence. Sharing is optional, as these delicious treats are bound to become a favorite for everyone at your gathering!

How to Store and Freeze Fried S’mores Bombs

Room Temperature: Store Fried S’mores Bombs in an airtight container at room temperature for up to 2 days. Enjoy them fresh for the best texture!

Fridge: If you need to keep them longer, refrigerate in an airtight container for up to 5 days. This will maintain their taste, but they may lose some crispiness.

Freezer: For longer storage, freeze the bombs individually on a baking sheet until firm, then transfer to a freezer-safe bag. They’ll last for up to 2 months so you can enjoy Fried S’mores Bombs whenever the craving strikes!

Reheating: To refresh, reheat in an oven at 350°F (175°C) for about 5-8 minutes, which will help restore their crispy exterior and gooey center.

What to Serve with Fried S’mores Bombs?

Treat yourself to a delightful dessert experience, where each bite of sweetness invites a symphony of flavors and textures!

  • Vanilla Ice Cream: Adds a creamy, cool contrast to the warm, gooey bombs, creating a classic dessert duo that pleases every palate.
  • Fresh Berries: The tartness of strawberries or raspberries brightens the indulgence, offering a refreshing balance to the rich filling.
  • Chocolate Sauce: Drizzling this molten delight over each bomb enhances the chocolate flavor, elevating the experience to decadent heights.
  • Caramel Dip: This sweet, buttery sauce creates a heavenly combination with the s’mores flavors, making every bite extravagantly delicious.
  • Whipped Cream: A dollop of light and airy whipped cream gives a fluffy touch, perfectly complementing the savory crunch of the bombs.
  • Mint Tea: A warm cup of mint tea refreshes the palate, balancing the richness while adding an aromatic flair to your dessert spread.
  • Coconut Cream: Creamy and tropical, this blend brings a luscious nuttiness to the table, making each bite feel like a little vacation.
  • Pumpkin Spice Latte: Embrace the flavors of the season with this cozy drink that pairs wonderfully with the warmth of fried s’mores bombs.
  • Chocolate Milkshake: This indulgent treat doubles the chocolate joy while considering the textural contrasts and flavors that play beautifully together.

Make Ahead Options

These Fried S’mores Bombs are perfect for busy weeknights or gatherings, allowing you to prep in advance for effortless entertaining! You can prepare the filling (graham cracker, chocolate, and marshmallow mixture) up to 24 hours ahead by storing it in an airtight container in the refrigerator to maintain freshness. Meanwhile, you can also shape the bombs, but it’s best to do this only a couple of hours before frying. When you’re ready to enjoy, simply proceed with the batter and frying instructions. For optimal texture, avoid refrigerating the formed bombs for too long, as this may impact their crispiness. Just fry them as directed, and you’ll have quick, tasty Fried S’mores Bombs that are just as delicious as if made fresh!

Expert Tips for Fried S’mores Bombs

  • Oil Temperature: Ensure the oil is hot enough before frying to avoid soggy bombs. Test with a small amount of batter; if it sizzles, you’re ready!

  • Pan Crowding: Avoid overcrowding the pan to maintain the oil temperature. Fry in batches if needed, as this allows for even cooking and a perfect crispy texture.

  • Cooling Time: Remember to let the Fried S’mores Bombs cool slightly on paper towels after frying. This will prevent burns from the hot filling inside.

  • Sealing Filling: Make sure to form the bombs tightly, sealing in the chocolate and marshmallows to prevent leakage during frying.

  • Batter Consistency: Keep the batter smooth and thick, as a thin batter can lead to greasy bombs. Adjust flour as needed for the perfect coating.

Fried S’mores Bombs: Delicious Variations

Feel free to let your culinary creativity shine by customizing these delightful Fried S’mores Bombs with various flavors and ingredients!

  • Peanut Butter Surprise: Swap out chocolate for creamy peanut butter for an added nutty dimension that pairs wonderfully with marshmallows.
    This twist will delight any peanut butter lover and provide a fun contrast to the classic flavors.

  • Nutty Crunch: Add crushed nuts or toffee bits into the filling to create a delightful crunch inside each bomb.
    This addition brings a satisfying texture and elevates the flavor profile, making every bite even more enjoyable.

  • Flavored Marshmallows: Use flavored marshmallows, such as caramel or strawberry, for a unique spin on the traditional filling.
    This small change can transform your Fried S’mores Bombs into a colorful and exciting treat that surprises your taste buds.

  • Dairy-Free Dream: Substitute almond milk or coconut milk for the eggs and use a dairy-free chocolate to make these bombs suitable for a dairy-free diet.
    Enjoy the same crispy and gooey experience without compromising on flavor, and serve them to a wider audience.

  • Spicy Kicks: Add a pinch of cinnamon or cayenne pepper into the batter to introduce a playful heat that complements the sweetness.
    This daring twist will certainly keep your guests on their toes and challenge their taste buds in the best way possible!

  • Gluten-Free Option: Use gluten-free flour instead of regular flour to make these treats accessible for those with dietary restrictions.
    You can still achieve that golden brown, crispy exterior without sacrificing taste or texture, ensuring everyone can enjoy them.

  • Mini Bombs: Make bite-sized versions by forming smaller bombs and frying them in batches.
    These mini delights are perfect for parties or gatherings, allowing everyone to indulge without feeling too guilty!

Incorporating these variations can take your Fried S’mores Bombs to delightful new heights. For extra pleasure, consider pairing them with a scoop of homemade ice cream for an extra touch of gourmet flair, just like in my easy ice cream recipes. Enjoy every gooey, crispy moment!

Fried S’mores Bombs Recipe FAQs

How do I select ripe and fresh ingredients for Fried S’mores Bombs?
Absolutely! When picking graham crackers, ensure they are fresh and without any cracks or hard edges, which may indicate staleness. For chocolate squares, opt for high-quality chocolate without any signs of discoloration. Mini marshmallows should also be soft, with no hard or tough pieces; that means they are fresh and will melt beautifully in your bombs.

How should I store leftover Fried S’mores Bombs?
Very simple! Store your Fried S’mores Bombs in an airtight container at room temperature for up to 2 days to avoid them getting soggy. If you’re looking to keep them longer, you can refrigerate them for up to 5 days. Just remember, they may lose some crispiness in the fridge, so enjoy them fresh if you can!

What’s the best way to freeze Fried S’mores Bombs?
Here’s how to freeze them for later! First, place each Fried S’mores Bomb on a baking sheet lined with parchment paper, ensuring they aren’t touching. Freeze them until firm, about 1-2 hours. Then, transfer them to a freezer-safe bag or container, separating layers with parchment paper if needed. They will last up to 2 months in the freezer!

What if my Fried S’mores Bombs turn out greasy?
If you find your Fried S’mores Bombs are greasy, it usually indicates the oil was not hot enough when frying. Always check that oil is heated to about 350°F (175°C) before dropping in your bombs. Also, avoid overcrowding the pan to maintain oil temperature. If this happens, let them rest on paper towels for a few minutes to absorb any excess oil.

Can I make Fried S’mores Bombs vegan or gluten-free?
Absolutely! To make them vegan, replace the eggs with a mixture of 1 tablespoon of flaxseed meal and 2.5 tablespoons of water, stirred and set aside until gel-like. For a gluten-free version, swap the regular flour with a gluten-free flour blend. Both adjustments will keep the spirit of the recipe while accommodating dietary needs!

Fried S’mores Bombs

Irresistibly Crispy Fried S’mores Bombs for Dessert Lovers

Fried S’mores Bombs are a delightful twist on the classic treat, offering a crispy exterior and gooey chocolate filling.
Prep Time 15 minutes
Cook Time 10 minutes
Cooling Time 5 minutes
Total Time 30 minutes
Servings: 12 bombs
Course: Dessert
Cuisine: American
Calories: 180

Ingredients
  

For the Filling
  • 2 cups Graham Crackers Alternative: use digestive biscuits for a different taste.
  • 1 cup Chocolate Squares Substitution: milk chocolate can be swapped for dark chocolate.
  • 1 cup Marshmallows Preparation note: use mini marshmallows for easier filling.
For the Batter
  • 2 large Eggs Alternative: flaxseed meal mixed with water can be used as a vegan binder.
  • 1 cup Flour Gluten-free flour can be substituted.
For Frying
  • 2 cups Oil (for frying) Can use vegetable oil or canola oil based on preference.

Equipment

  • Deep frying pan
  • Mixing bowls
  • slotted spoon

Method
 

Step‑by‑Step Instructions for Fried S’mores Bombs
  1. Begin by crushing the graham crackers in a bowl until fine. Add the chocolate squares and mini marshmallows, mixing everything until well combined.
  2. Spoon equal portions of the filling onto a flat surface, using about a tablespoon for each bomb. Roll each scoop into a ball shape.
  3. In a medium bowl, whisk together the eggs until frothy. Gradually add the flour, mixing until a thick batter forms.
  4. In a deep frying pan, pour enough oil to cover the bottom and heat over medium heat until it reaches 350°F (175°C).
  5. Carefully dip each s’mores ball into the batter, coating it thoroughly and letting excess batter drip off.
  6. Gently place the coated bombs into the hot oil, frying for about 1-2 minutes on each side until golden brown.
  7. Once fried, remove the bombs from the oil and place them on paper towels to drain excess oil.
  8. Serve the Fried S’mores Bombs warm, optionally pairing with vanilla ice cream.

Nutrition

Serving: 1bombCalories: 180kcalCarbohydrates: 25gProtein: 2gFat: 8gSaturated Fat: 3gPolyunsaturated Fat: 1gMonounsaturated Fat: 3gCholesterol: 40mgSodium: 160mgPotassium: 50mgFiber: 1gSugar: 8gVitamin A: 150IUCalcium: 30mgIron: 0.5mg

Notes

Enjoy with a scoop of ice cream for added delight. Ensure oil is at the right temperature before frying for the best results.

Tried this recipe?

Let us know how it was!

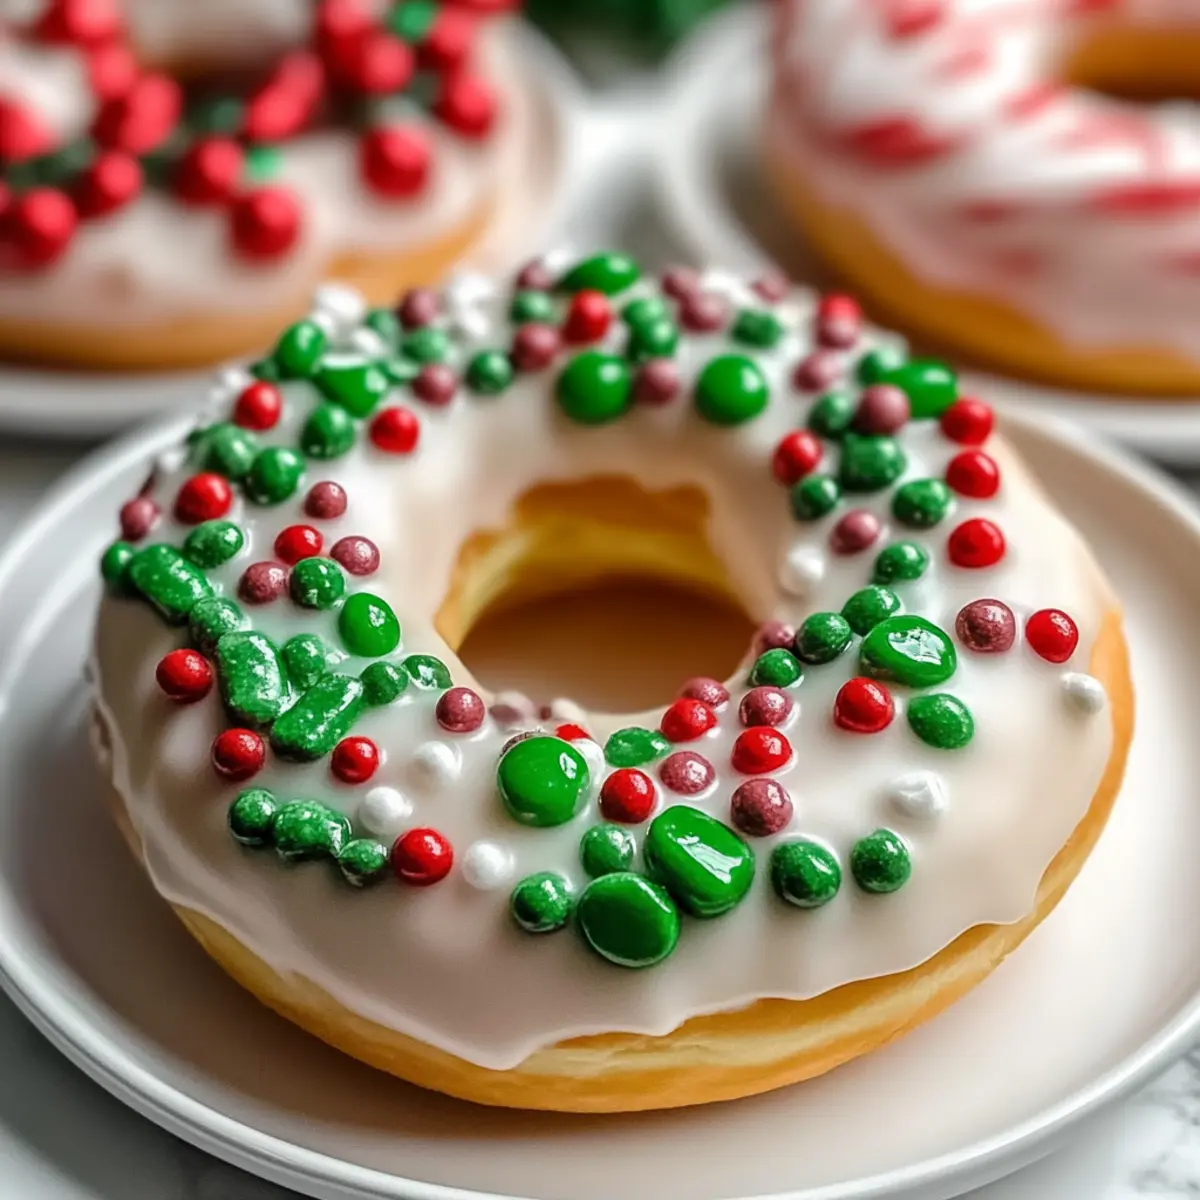
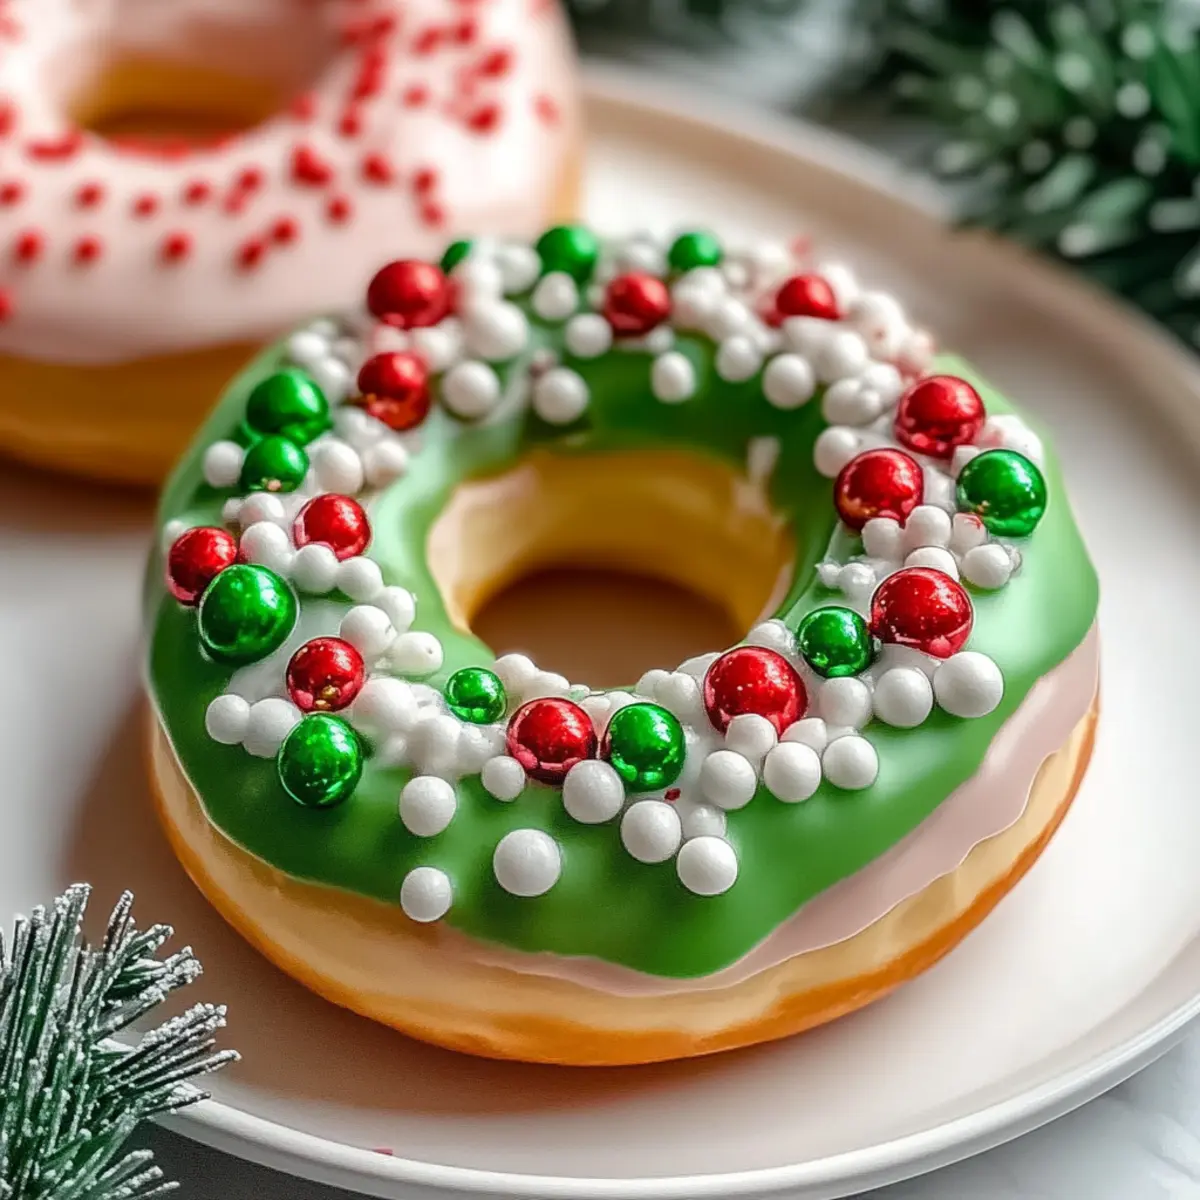
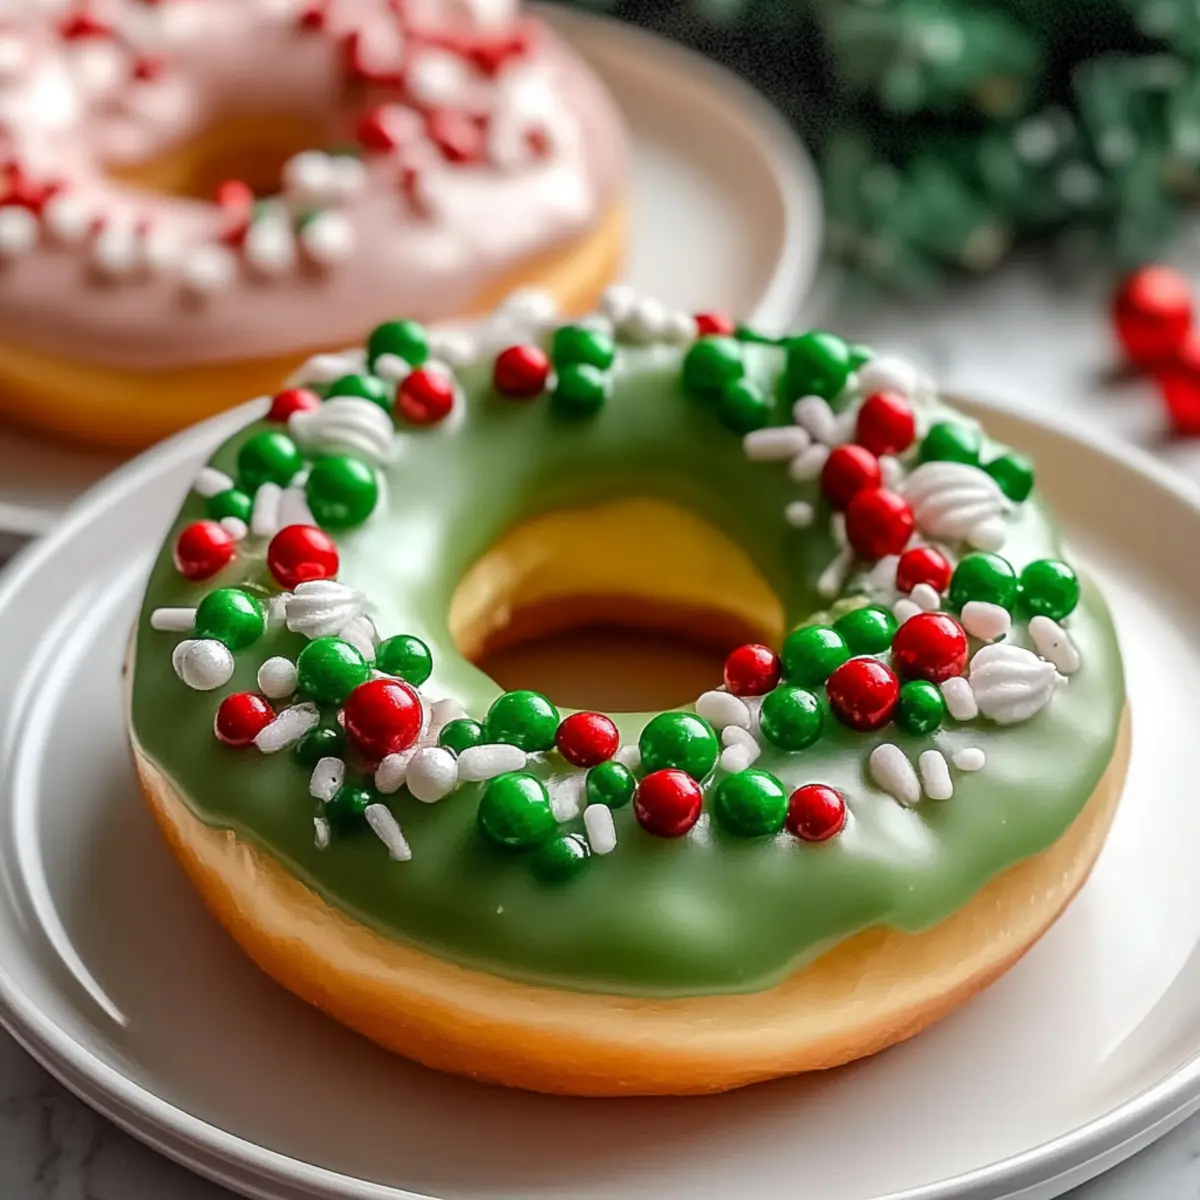
Vegan Christmas Wreath Doughnuts for a Festive Delight

Amid the hustle and bustle of the holiday season, few things can bring a smile quite like the sight of warm doughnuts fresh from the oven. Enter my Vegan Christmas Wreath Doughnuts, an enchanting twist on a classic treat that’s perfect for sharing. These delightful baked goodies not only add a pop of festive cheer to your holiday table but are also a breeze to whip up—no frying required! With endless customizable options to cater to dietary needs and a hint of spiced goodness, they’re sure to become a seasonal staple. Will you decorate them with a luscious vanilla glaze or go all out with festive buttercream? Let’s dive into the sweet details and create some holiday magic!

Why are these doughnuts a holiday must?

Festively Fun: These Vegan Christmas Wreath Doughnuts are not just a treat but a conversation starter, beautifully shaped to resemble holiday wreaths.

Customizable Delights: Tailor the flavors to your taste, from zesty orange to a spicy ginger kick, making every batch unique.

Quick and Easy: Made in under 30 minutes, these baked goodies are a perfect last-minute addition to festivities!

Family-Friendly: Everyone will love getting involved in the decoration, creating sweet memories together.

Healthier Indulgence: With just 180 calories per doughnut, they offer a delightful alternative to traditional fried desserts.

Pair these with a cup of your favorite warm drink for a cozy holiday experience. Why not check out our guide on easy vegan baking to keep the deliciousness coming this season?

Vegan Christmas Wreath Doughnuts Ingredients

For the Doughnut Batter

  • Dairy-Free Milk – Adds moisture to the batter; almond or soy milk is great, and oat milk is perfect for nut-free versions.
  • Apple Cider Vinegar – Provides acidity to curdle the milk, creating a buttermilk effect; lemon juice can be a good substitute.
  • Plain Flour – The main structure component of the doughnut; use gluten-free all-purpose flour for a gluten-free option.
  • Baking Powder – Acts as a leavening agent for fluffiness; make sure it’s fresh for the best rise.
  • Ground Nutmeg – Adds a cozy warm flavor; you can replace it with extra cinnamon if preferred.
  • Ground Cinnamon – Enhances the festive taste; using fresh cinnamon ensures the best flavor.
  • Ground Ginger – Provides a nice spice kick; omit if you prefer a milder doughnut.
  • Salt – Balances sweetness and elevates flavors.
  • White Sugar – Sweetens the doughnuts; coconut sugar offers a deeper, caramel-like sweetness.
  • Vanilla Extract – Infuses deep flavor; pure vanilla is recommended for the best taste.
  • Almond Extract – Optional for that delightful nutty hint; omit for nut-free doughnuts.
  • Zest of 1 Orange – Adds a burst of citrus brightness; feel free to skip this if desired.
  • Melted Coconut Oil – Provides moisture and richness; melted vegan butter is also a fantastic option.

For the Vanilla Glaze

  • Melted Coconut Oil – Serves as the base for the glaze; light vegetable oil is a suitable alternative.
  • Vanilla Extract – Flavors the glaze beautifully.
  • Dairy-Free Milk – Adjusts the consistency for a perfect glaze.
  • Icing Sugar – Sweetens and gives texture; opt for powdered sugar for a fine finish.

For the Buttercream

  • Dairy-Free Butter – The main fat for the buttery richness.
  • Icing Sugar – Sweetens and helps thicken the buttercream.
  • Vanilla Extract – Enhances the flavor profile of the buttercream.
  • Dairy-Free Milk – Makes the buttercream pipeable when mixed in.
  • Green Food Coloring – Adds a festive touch for decorating.
  • Sprinkles/Mini Red Candies – Optional decorative elements for a joyful finish.

These Vegan Christmas Wreath Doughnuts are not just visually appealing; they’re stuffed with delightful flavors and wholesome ingredients, making them an irresistible treat for the holiday season!

Step‑by‑Step Instructions for Vegan Christmas Wreath Doughnuts

Step 1: Preheat and Prepare
Start by preheating your oven to 350°F (175°C). While it’s heating, grease your doughnut pans with a little coconut oil or non-stick spray to ensure the doughnuts release easily after baking. This step is crucial for achieving those beautiful, festive shapes for your Vegan Christmas Wreath Doughnuts.

Step 2: Create the Vegan Buttermilk
In a medium bowl, combine the dairy-free milk and apple cider vinegar. Let this mixture sit for about 5 minutes until it curdles slightly, creating a vegan buttermilk effect. This tangy element will enhance the flavor and texture of your doughnuts, making them light and fluffy.

Step 3: Mix the Dry Ingredients
In a large mixing bowl, whisk together the plain flour, baking powder, ground nutmeg, ground cinnamon, ground ginger, and salt. This dry mixture will serve as the foundation for your Vegan Christmas Wreath Doughnuts, providing the perfect balance of flavors. Make sure to sift the flour for a smoother batter consistency.

Step 4: Combine Wet Ingredients
In a separate bowl, mix the sugar, prepared dairy-free buttermilk, vanilla extract, almond extract (if using), and melted coconut oil. Stir until smooth and well combined. This sweet mixture will provide moisture and flavor, ensuring your doughnuts are soft and delicious.

Step 5: Combine Wet and Dry Mixtures
Gently fold the wet mixture into the dry ingredients until just combined. Be careful not to overmix, as this could lead to dense doughnuts. Lightly blending the ingredients helps maintain the fluffy texture that we’re aiming for in our Vegan Christmas Wreath Doughnuts.

Step 6: Fill the Doughnut Pans
Using a piping bag or a spoon, fill each doughnut cavity halfway with the batter. This allows space for the doughnuts to rise without overflowing. Make sure they’re evenly filled for consistent baking and to achieve those lovely wreath shapes.

Step 7: Bake to Perfection
Place the filled doughnut pans in the preheated oven and bake for 8-10 minutes. The doughnuts are ready when they are lightly golden and spring back when touched. Keep an eye on them to ensure they don’t over-bake and dry out.

Step 8: Cool and Transfer
Once baked, remove the pans from the oven and let them cool for about 5 minutes. Gently transfer the doughnuts to a wire rack to cool completely. This step is essential to prevent them from becoming soggy when you glaze them later.

Step 9: Prepare the Vanilla Glaze
In a mixing bowl, combine melted coconut oil, vanilla extract, dairy-free milk, and icing sugar. Stir until smooth, adjusting the milk for the desired consistency. The glaze should be thick enough to adhere to the doughnuts yet runny enough for that beautiful drip effect.

Step 10: Glaze the Doughnuts
Once the doughnuts are completely cool, dip the tops into the glaze, allowing the excess to drip off. Place them back on the wire rack and let the glaze set for a few minutes. This step ensures a shiny finish on your festive Vegan Christmas Wreath Doughnuts.

Step 11: Make the Buttercream
Beat the dairy-free butter in a bowl until creamy. Gradually add icing sugar, vanilla extract, and dairy-free milk until you reach a pipeable consistency. Color with green food coloring for a festive touch, and mix until fully incorporated.

Step 12: Decorate and Serve
Pipe the green buttercream onto the glazed doughnuts in a wreath shape, adding sprinkles or mini red candies for a charming festive touch. Serve these delightful Vegan Christmas Wreath Doughnuts to friends and family, and watch them light up with joy!

Make Ahead Options

These Vegan Christmas Wreath Doughnuts are perfect for meal prep enthusiasts looking to save time during the busy holiday season! You can prepare the doughnut batter up to 24 hours in advance; just mix your dry ingredients and wet ingredients separately, and refrigerate the wet mixture to keep it fresh. Additionally, the baked doughnuts can be stored in an airtight container at room temperature for up to 3 days or in the fridge for up to 5 days. To maintain their delightful texture, simply reheat them slightly before glazing. When you’re ready to serve, dip them in the vanilla glaze and decorate with buttercream for that festive touch, ensuring they remain just as delicious as when freshly baked!

How to Store and Freeze Vegan Christmas Wreath Doughnuts

Room Temperature: Keep baked doughnuts in an airtight container at room temperature for up to 3 days to maintain their fluffy texture and delightful flavor.

Fridge: If you prefer them chilled, place the doughnuts in the fridge for up to 5 days. Make sure they are in a sealed container to prevent them from drying out.

Freezer: For longer storage, freeze ungrazed doughnuts in a single layer on a baking sheet, then transfer to a freezer-safe bag or container. They can be frozen for up to 1 month.

Reheating: To enjoy them warm, pop the frozen doughnuts in the oven at 350°F (175°C) for about 5-7 minutes, or until heated through, then glaze as desired.

Vegan Christmas Wreath Doughnuts Variations

Customize your baking adventure with these delightful twists that elevate your Vegan Christmas Wreath Doughnuts to a whole new level of festive joy!

  • Nut-Free: Omit the almond extract and choose dairy-free milk that suits your needs, like oat milk for a nut-free option.
  • Gluten-Free: Swap plain flour for a gluten-free all-purpose blend to cater to gluten sensitivities without sacrificing flavor.
  • Flavor Enhancements: Add spices like cardamom or a hint of cayenne for an unexpected depth. Orange or lemon zest can brighten the batter and lift spirits!
  • Sweetness Alternatives: Substitute white sugar for maple syrup or agave nectar; just adjust your liquid ratios to maintain batter consistency.
  • Berry Bliss: Toss in a handful of dried cranberries or chopped dates for a chewy texture and bursts of natural sweetness with every bite.
  • Spiced Treasure: Boost up the warm notes by adding a dash of cloves or even a sprinkle of nutmeg for a comforting holiday twist.
  • Chocolatey Delight: Throw in some vegan chocolate chips for a decadent touch that melts beautifully into the soft doughnuts.
  • Fruity Fusion: Use mashed bananas or unsweetened applesauce instead of half the sugar for a fruitier version that adds natural sweetness and moisture.

Feel free to mix and match these variations! If you’re curious about broader baking ideas, check out our guide on easy vegan baking to keep your holiday treats exciting!

What to Serve with Vegan Christmas Wreath Doughnuts

Warm up your holiday gatherings with these delightful treats, perfect alongside your favorite seasonal pairings.

  • Spiced Chai Latte: The warm spices in chai beautifully complement the flavors of these doughnuts, creating a cozy winter experience.
  • Rich Hot Cocoa: A sweet indulgence that pairs perfectly with the velvety glaze, enhancing the festive vibe of your celebration.
  • Fresh Fruit Salad: A refreshing contrast to the sweetness, with citrus fruits bringing brightness that lifts the doughnut experience.
  • Gingerbread Cookies: Embrace the season by serving these classic cookies alongside your doughnuts, enhancing the festive flavor profile.
  • Vegan Eggnog: Creamy and spiced, this traditional drink adds a nostalgic touch that harmonizes with the doughnut’s sweet charm.
  • Maple Syrup Drizzle: Elevate each doughnut with a drizzle of maple syrup, adding a touch of sweetness that enhances their flavor.

These delectable Vegan Christmas Wreath Doughnuts become a real showstopper when served with these perfect accompaniments, making your holiday gathering unforgettable!

Expert Tips for Vegan Christmas Wreath Doughnuts

  • Gentle Mixing: Avoid overmixing the batter to keep your Vegan Christmas Wreath Doughnuts light and fluffy. Fold just until combined for the best texture.

  • Fresh Ingredients: Ensure your baking powder and spices are fresh. Old baking powder will lead to flat doughnuts, while stale spices can dull the delightful flavors.

  • Cooling Time: Let your doughnuts cool completely before glazing. This prevents the glaze from slipping off and ensures a beautiful finish.

  • Piping Perfection: For stunning decoration, use a piping bag with a star tip for the buttercream. This adds a festive flair to your doughnuts, making them even more special!

  • Flavor Tweaks: Feel free to play with flavors! Substituting orange zest or adding a hint of cardamom can create a unique twist on the traditional recipe.

  • Storing Leftovers: Store any uneaten doughnuts in an airtight container at room temperature for up to 3 days. They’re best enjoyed fresh, but will still be delicious!

Vegan Christmas Wreath Doughnuts Recipe FAQs

How do I select ripe ingredients for my Vegan Christmas Wreath Doughnuts?
Absolutely! When choosing dairy-free milk, look for fresh brands without any additives that can alter the flavor. For fruits like citrus, seek vibrant oranges with firm skin—avoid any that have dark spots or seem soft. Fresh spices, particularly ground cinnamon and nutmeg, should be aromatic. If you can grind spices fresh, that’s even better for flavor!

How should I store Vegan Christmas Wreath Doughnuts, and how long will they last?
These delightful doughnuts can be stored at room temperature for up to 3 days when kept in an airtight container. If you’d like them to last longer, pop them in the fridge for up to 5 days. Just remember to seal them well to ensure they stay moist and fluffy! When serving, I recommend giving them a little warm-up before enjoying.

Can I freeze my Vegan Christmas Wreath Doughnuts?
Certainly! To freeze ungrazed doughnuts, first, lay them out on a baking sheet in a single layer for about 1-2 hours. Once they are frozen solid, transfer them to a freezer-safe bag or container, where they can stay fresh for up to 1 month. When you’re ready to enjoy them, simply reheat in the oven at 350°F (175°C) for 5-7 minutes, then add your glaze for that fresh-baked taste!

What should I do if my doughnuts come out too dense?
Very common! If your doughnuts turn out dense, ensure you didn’t overmix the batter—gently fold the wet and dry ingredients together until just combined for optimal fluffiness. Also, check that your baking powder is fresh; expired baking powder won’t leaven effectively, resulting in dense doughnuts. For next time, be cautious with measuring; the right flour-to-liquid ratio is essential.

Are these doughnuts suitable for those with allergies?
Yes, indeed! The Vegan Christmas Wreath Doughnuts are perfect for various dietary needs. To make them nut-free, simply omit almond extract and use oat milk. They can also easily be adjusted to be gluten-free using a gluten-free flour blend. Always check labels for any cross-contamination if allergies are a concern, especially with ingredients like baking powder or specialty dairy-free options.

Vegan Christmas Wreath Doughnuts

Vegan Christmas Wreath Doughnuts for a Festive Delight

Vegan Christmas Wreath Doughnuts are a delightful, festive treat perfect for sharing during the holiday season.
Prep Time 15 minutes
Cook Time 10 minutes
Cooling Time 5 minutes
Total Time 30 minutes
Servings: 12 doughnuts
Course: Dessert
Cuisine: Vegan
Calories: 180

Ingredients
  

For the Doughnut Batter
  • 1 cup Dairy-Free Milk almond, soy, or oat milk
  • 1 tablespoon Apple Cider Vinegar or lemon juice
  • 2 cups Plain Flour or gluten-free all-purpose flour
  • 1 tablespoon Baking Powder ensure freshness
  • 1/4 teaspoon Ground Nutmeg or extra cinnamon
  • 1 teaspoon Ground Cinnamon fresh is best
  • 1/2 teaspoon Ground Ginger optional
  • 1/4 teaspoon Salt
  • 3/4 cup White Sugar or coconut sugar
  • 1 teaspoon Vanilla Extract pure recommended
  • 1/2 teaspoon Almond Extract optional
  • 1 tablespoon Zest of 1 Orange optional
  • 1/4 cup Melted Coconut Oil or melted vegan butter
For the Vanilla Glaze
  • 1/4 cup Melted Coconut Oil or light vegetable oil
  • 1 teaspoon Vanilla Extract
  • 2 tablespoons Dairy-Free Milk for consistency
  • 1 cup Icing Sugar or powdered sugar
For the Buttercream
  • 1/2 cup Dairy-Free Butter
  • 1 cup Icing Sugar
  • 1 teaspoon Vanilla Extract
  • 1 tablespoon Dairy-Free Milk for pipeable consistency
  • a few drops Green Food Coloring for decoration
  • as desired Sprinkles/Mini Red Candies optional

Equipment

  • Doughnut pans
  • Mixing bowls
  • Whisk
  • piping bag

Method
 

Step-by-Step Instructions
  1. Preheat your oven to 350°F (175°C) and grease your doughnut pans.
  2. Combine the dairy-free milk and apple cider vinegar in a bowl and let sit for 5 minutes.
  3. Whisk together the flour, baking powder, nutmeg, cinnamon, ginger, and salt in a separate bowl.
  4. Mix sugar, dairy-free buttermilk, vanilla extract, almond extract, and melted coconut oil until smooth.
  5. Fold the wet mixture into the dry ingredients until just combined.
  6. Fill each doughnut cavity halfway with the batter using a piping bag or spoon.
  7. Bake for 8-10 minutes until golden and springy.
  8. Cool for 5 minutes, then transfer to a wire rack.
  9. Mix melted coconut oil, vanilla extract, dairy-free milk, and icing sugar to make the glaze.
  10. Dip the cooled doughnuts in the glaze and let it set.
  11. Beat the dairy-free butter, then mix in icing sugar, vanilla, and milk for the buttercream.
  12. Pipe green buttercream onto doughnuts and add sprinkles or candies.

Nutrition

Serving: 1doughnutCalories: 180kcalCarbohydrates: 30gProtein: 1gFat: 6gSaturated Fat: 5gSodium: 150mgPotassium: 100mgFiber: 1gSugar: 10gCalcium: 2mgIron: 4mg

Notes

For best results, avoid overmixing and ensure ingredients are fresh.

Tried this recipe?

Let us know how it was!

Baked Crème Brûlée Donuts – A Decadent Delight at Home

Biting into these Baked Crème Brûlée Donuts is like diving into a cloud of bliss—soft, pillowy, and utterly unforgettable. The combination of homemade yeast dough and rich pastry cream filled with creamy custard flavors makes these donuts a divine indulgence! Not only are they surprisingly easy to whip up, but they also offer a delightful twist on traditional dessert that’s sure to impress your family and friends. Imagine serving these at your next gathering, where the golden tops crackle with a satisfying crunch, revealing the velvety filling inside. Are you ready to elevate your dessert game and try something new? Let’s dive into this deliciously fun baking adventure!

Why You’ll Love These Donuts

Decadent Delight: These Baked Crème Brûlée Donuts are not just a treat; they’re a culinary experience that mixes two beloved desserts into one heavenly bite.

Effortlessly Impressive: With straightforward steps, even novice bakers can create a show-stopping dessert that will impress friends and family alike.

Irresistible Contrast: Enjoy the combination of a fluffy donut, creamy filling, and a crunchy caramel topping that provides a perfect texture clash in every bite.

Versatile Indulgence: Feeling adventurous? You can swap fillings or add flavor extracts to customize these donuts based on your cravings, transforming them into your own signature treat.

Best Fresh and Warm: Trust me when I say, there’s nothing like enjoying these donuts fresh out of the oven. They’re perfect for gatherings, brunch, or simply when you want to indulge yourself! If you like baked goods, you’ll also love my Air Fryer Baked Potatoes or Roadhouse Style Baked Salmon.

Baked Crème Brûlée Donuts Ingredients

For the Pastry Cream

  • Milk – Adds moisture and richness; can substitute with almond or oat milk for a dairy-free option.
  • Egg Yolks – Provide structure and creaminess; use a custard or pudding mix as a quicker alternative.
  • Cornstarch – Thickens the pastry cream; can use arrowroot as an alternative if needed.
  • Sugar – Sweetens both the pastry cream and sugar topping; coconut sugar can be used for a lower glycemic index.
  • Butter – Adds richness and flavor; substitute with non-dairy butter for a vegan option.
  • Vanilla Extract – Enhances flavor in the filling; vanilla bean paste can add a more intense flavor.

For the Donut Dough

  • Flour – The base for the yeast donut dough; can substitute with gluten-free flour blend.
  • Salt – Essential for enhancing flavors and balancing sweetness.
  • Active Dry Yeast – Provides leavening for the dough; instant yeast can be used for faster preparation.
  • Sugar (for dough) – Sweetens the donut dough; no substitutes recommended.
  • Water – Activates the yeast and hydrates the dough; warm water is best for optimal yeast activation.

For the Sugar Topping

  • Sugar – Used for the crunchy burnt topping; monitor carefully while cooking to avoid burning.

These Baked Crème Brûlée Donuts are not only a delightful treat but a wonderful way to satisfy your sweet tooth while impressing loved ones!

Step‑by‑Step Instructions for Baked Crème Brûlée Donuts

Step 1: Prepare Pastry Cream
Begin by warming 2 cups of milk in a saucepan over medium heat until it bubbles gently. In a separate bowl, whisk together 3 egg yolks, 2 tablespoons of cornstarch, and 1/2 cup of sugar until smooth. Gradually pour the hot milk into the egg mixture while whisking continuously, then strain it back into the saucepan. Cook over medium heat, stirring constantly, until thickened (about 5-7 minutes). Remove from heat and stir in 2 tablespoons of butter and 1 teaspoon of vanilla extract. Allow the pastry cream to cool, then set aside.

Step 2: Make Dough
In a mixing bowl, combine 1/2 cup of warm water, 2 teaspoons of active dry yeast, and 1 tablespoon of sugar. Let it sit for about 5-10 minutes until frothy. Add 3 cups of all-purpose flour, 1/2 teaspoon of salt, and the remaining wet ingredients (including additional 1/4 cup of sugar) to the mixture. Mix until the dough forms, then knead it on a floured surface for about 8-10 minutes until smooth and elastic. Place in a greased bowl, cover with plastic wrap, and let rise in a warm area until doubled (45 minutes to 2 hours).

Step 3: Shape Donuts
After the dough has risen, punch it down gently to release the air. On a floured surface, roll out the dough to about 1/2-inch thickness. Use a donut cutter or two round cutters to cut out donut shapes. Place the donuts on a parchment-lined baking sheet, ensuring they are not touching. Cover with a kitchen towel and let them rise until doubled in size again, for about 30-60 minutes.

Step 4: Bake Donuts
Preheat your oven to 375°F (190°C). Once the donuts have risen, place them in the preheated oven and bake for approximately 10-12 minutes or until they are golden brown. Remove the donuts from the oven and transfer them to a wire rack to cool completely.

Step 5: Fill Donuts
Once the baked crème brûlée donuts have cooled, prepare a piping bag fitted with a small round tip. Gently insert the tip into the side of each donut and fill with the prepared pastry cream until you feel slight resistance; avoid overfilling to prevent splitting. Set the filled donuts aside.

Step 6: Make Sugar Topping
In a skillet over medium heat, combine 1 cup of sugar with a few tablespoons of water, stirring until combined. Cook until the mixture turns a golden brown color, about 5-7 minutes, swirling the pan occasionally. Once ready, remove from heat. Dip the tops of each filled donut into the hot sugar mixture and let them sit on the wire rack until the sugar hardens, creating a delightful crunchy topping.
Expert Tips for Baked Crème Brûlée Donuts

  • Cool Before Filling: Ensure the donuts are completely cooled before filling with pastry cream to avoid a soupy disaster inside.

  • Don’t Rush the Rise: Allow the second rise time for fluffy donuts. Skipping this step may result in dense, chewy bites instead of light, airy goodness.

  • Watch the Sugar: Caramelizing sugar for the topping can be tricky. Keep the heat moderate and stir often to prevent burning and achieve that perfect, golden crunch.

  • Perfect Piping: Use a piping bag with a small round tip for filling to control the amount of pastry cream, ensuring your donuts are filled just right.

  • Flavor Variations: Experiment with different flavor extracts or fillings to make these baked crème brûlée donuts your own unique creation.

  • Freshness is Key: Enjoy these delicious donuts fresh the same day for the best texture and flavor experience.

How to Store and Freeze Baked Crème Brûlée Donuts

Fridge: Keep filled donuts stored in an airtight container in the fridge for up to 3 days to maintain freshness.

Freezer: If you want to save some for later, freeze the donuts without the sugar topping in a sealed freezer bag for up to 2 months.

Reheating: To enjoy your baked crème brûlée donuts, simply thaw overnight in the fridge and warm them in a 350°F (175°C) oven for about 5-7 minutes to regain their softness.

Burnt Sugar Topping: For the best texture, make the burnt sugar topping fresh as needed, since it’ll lose its crunch if stored.

Baked Crème Brûlée Donuts Variations

Feel free to get creative with these baked crème brûlée donuts! Each twist adds a unique flavor or experience, making them even more delightful.

  • Fruit Jam Filling: Swap the pastry cream for your favorite fruit jam to introduce a sweet and tangy surprise inside. Raspberry or lemon curd will add a burst of freshness!

  • Chocolate Lovers: Replace the pastry cream with chocolate ganache for a rich and indulgent donut that satisfies any chocolate craving. The silky filling creates a decadent joy with each bite.
  • Spiced Pumpkin: Add pumpkin puree and spices (cinnamon, nutmeg) to your pastry cream for a seasonal flavor that’s perfect for fall. This warm twist will make every bite feel like a cozy hug.

  • Nutty Twist: Stir in ground almonds or hazelnuts into the pastry cream for an earthy flavor and delightful texture. This will add a nice crunch and complexity to your sweet filling.

  • Gluten-Free Option: Substitute all-purpose flour with a gluten-free blend to accommodate dietary restrictions without sacrificing taste. The fluffy texture remains, leaving a delightful experience for everyone.

  • Vegan Delight: Use non-dairy milk and butter along with a plant-based egg substitute to create a vegan version of these donuts. The resulting treat is just as rich and satisfying!

  • Chili Infused Sugar: Add a pinch of cayenne or chili powder to the burnt sugar topping for a subtle heat that enhances the sweetness. This adds an adventurous twist that’s sure to thrill your taste buds!

  • Maple Glaze: Instead of the burnt sugar topping, drizzle a warm maple glaze over the donuts for a sweet finish that creates a cozy, breakfast-like feel. It’s a comforting way to start or end your day!

For more ideas and sweet inspirations, check out my Baked Vegetable Egg Casserole for a hearty breakfast option or savor my Roadhouse Style Baked Salmon for another indulgent yet easy meal!

What to Serve with Baked Crème Brûlée Donuts

Pairing these delightful treats with complementary dishes can elevate your dessert experience to new heights.

  • Fresh Berries: Juicy strawberries or blueberries add a refreshing burst of flavor that contrasts beautifully with the rich donuts. Their natural sweetness and acidity cut through the donut’s indulgence, making each bite more balanced.

  • Whipped Cream: Light and airy, a dollop of freshly whipped cream brings a luscious creaminess to each bite. It can be flavored with vanilla or a hint of almond for an extra touch of elegance.

  • Espresso or Coffee: A robust cup of espresso or your favorite brewed coffee creates a perfect pairing, enhancing the flavors of the donuts while providing a delightful contrast with its boldness.

  • Chocolate Sauce: Drizzle warm chocolate sauce over your Baked Crème Brûlée Donuts for a decadent twist that allows the flavors to meld beautifully. The richness of the chocolate with the creamy filling will have everyone swooning.

  • Mint Leaves: For a pop of color and a refreshing sensation, garnish with fresh mint leaves. Their bright flavor enhances the experience, making each bite feel revitalizing.

  • Custard Sauce: A drizzle of smooth custard sauce amplifies the creme brûlée experience. Its silky texture adds another layer of indulgence, especially if you opt for a light vanilla or caramel infusion.

  • Lemon Sorbet: This light, refreshing sorbet serves as a palate cleanser that will elevate the sweetness of the donuts. The citrus notes will awaken your taste buds, making this pairing a delightful way to finish off a meal.

  • Coconut Flakes: Toasted coconut flakes sprinkled on top of the donuts add crunchy texture and a hint of tropical flavor. This adds an exciting contrast to the creamy and soft donut, perfect for warm days!

  • Sparkling Wine: Celebrate special occasions with a glass of sparkling wine, whose fizzy notes will dance beautifully with the rich flavors of your Baked Crème Brûlée Donuts.

Indulge in these pairings to create a memorable serving experience that showcases the delightful essence of your donuts!

Make Ahead Options

These Baked Crème Brûlée Donuts are perfect for meal prep, allowing busy cooks to enjoy a homemade treat without the last-minute rush! You can prepare the pastry cream and donut dough up to 24 hours in advance; simply refrigerate the pastry cream in an airtight container to maintain its creamy texture and prevent skin formation. The donut dough can be stored in the fridge after the first rise. When you’re ready to bake, let the dough warm and rise again for about 30-60 minutes before shaping and cooking. Fill the donuts only right before serving to keep them fresh, and make the sugar topping last minute to ensure it stays crunchy. Enjoy your deliciously easy baking experience!

Baked Crème Brûlée Donuts Recipe FAQs

How do I select the best ingredients for Baked Crème Brûlée Donuts?
Absolutely! For the best flavor, choose milk that is fresh and rich; whole milk is ideal. When selecting eggs, go for large, free-range eggs to ensure quality. Look for active dry yeast that’s within its expiration date and has a slightly granular texture. For the cornstarch, make sure it’s fresh as it should be powdery and free of lumps. Remember, using high-quality ingredients will elevate your donuts!

What is the best way to store filled Baked Crème Brûlée Donuts?
Very! Store filled donuts in an airtight container in the fridge. They’ll stay fresh for up to 3 days. If you plan to enjoy them later, it’s better to freeze unfilled donuts; just make sure to keep the sugar topping separate until you’re ready to serve to maintain that delightful crunch!

Can I freeze Baked Crème Brûlée Donuts and if so, how?
Certainly! To freeze your donuts, allow them to cool completely after baking. Place the unfilled donuts in a single layer on a baking sheet to flash freeze for about 1 hour. Once frozen, transfer them to a sealed freezer bag and store for up to 2 months. When ready to enjoy, thaw them overnight in the fridge and warm them gently for that freshly-baked feel!

What should I do if my donut dough doesn’t rise?
Oh no! If your dough doesn’t rise, it could be a yeast issue. Make sure your yeast is active; you can test it by mixing it with warm water and sugar, letting it sit for 5-10 minutes—if it bubbles, you’re good! If not, you might need to replace your yeast. Also, check the temperature of your rising area; ideally, it should be warm, about 75-80°F (24-27°C). Relax, things happen in baking; you can always give it another try!

Can I make Baked Crème Brûlée Donuts without using dairy?
Absolutely! You can substitute the dairy ingredients in this recipe quite easily. Use almond or oat milk for the milk, and opt for non-dairy butter in the pastry cream. For the eggs, consider using a custard mix or a flaxseed egg substitute (1 tablespoon of ground flaxseed mixed with 3 tablespoons of water for each egg) to achieve that creamy texture. Just remember, flavor and texture might slightly vary, but it’ll still be delicious!

Is there a way to make the burnt sugar topping ahead of time?
Not really! The burnt sugar topping is best made fresh just before serving, as it tends to lose its delightful crunch when stored. However, if you need some prep done in advance, you can prepare the pastry cream and donuts ahead of time—just make sure to fill and top them right before you’re ready to enjoy your treats!

Baked Crème Brûlée Donuts

Baked Crème Brûlée Donuts – A Decadent Delight at Home

Baked Crème Brûlée Donuts are a delightful twist on traditional dessert, offering soft, pillowy goodness filled with creamy custard flavors.
Prep Time 30 minutes
Cook Time 12 minutes
Rising Time 1 hour
Total Time 1 hour 42 minutes
Servings: 12 donuts
Course: Dessert
Cuisine: American
Calories: 250

Ingredients
  

For the Pastry Cream
  • 2 cups Milk can substitute with almond or oat milk for a dairy-free option
  • 3 large Egg Yolks use a custard or pudding mix as a quicker alternative
  • 2 tablespoons Cornstarch can use arrowroot as an alternative if needed
  • 1/2 cup Sugar coconut sugar can be used for a lower glycemic index
  • 2 tablespoons Butter substitute with non-dairy butter for a vegan option
  • 1 teaspoon Vanilla Extract vanilla bean paste can add a more intense flavor
For the Donut Dough
  • 3 cups Flour can substitute with gluten-free flour blend
  • 1/2 teaspoon Salt essential for enhancing flavors
  • 2 teaspoons Active Dry Yeast instant yeast can be used for faster preparation
  • 1/2 cup Sugar no substitutes recommended
  • 1/2 cup Warm Water activates the yeast
For the Sugar Topping
  • 1 cup Sugar monitor carefully to avoid burning

Equipment

  • Saucepan
  • Mixing Bowl
  • Donut Cutter
  • piping bag
  • Baking Sheet
  • Wire Rack

Method
 

Step-by-Step Instructions
  1. Prepare Pastry Cream: Warm milk in a saucepan until it bubbles. Whisk together egg yolks, cornstarch, and sugar until smooth. Gradually add hot milk while whisking. Strain back into saucepan and cook until thickened. Stir in butter and vanilla extract and allow to cool.
  2. Make Dough: Combine warm water, yeast, and sugar in a bowl and let sit until frothy. Add flour, salt, and additional sugar. Mix and knead until smooth. Let rise until doubled in size.
  3. Shape Donuts: Roll out dough and cut out donut shapes. Place on baking sheet and let rise again.
  4. Bake Donuts: Preheat oven to 375°F (190°C) and bake donuts until golden brown. Cool on a wire rack.
  5. Fill Donuts: Fill a piping bag with pastry cream and fill each donut.
  6. Make Sugar Topping: Combine sugar and water in a skillet over medium heat and cook until golden brown. Dip donut tops in the mixture and let sit until hardened.

Nutrition

Serving: 1donutCalories: 250kcalCarbohydrates: 35gProtein: 3gFat: 12gSaturated Fat: 7gMonounsaturated Fat: 3gCholesterol: 50mgSodium: 180mgPotassium: 100mgFiber: 1gSugar: 15gVitamin A: 300IUCalcium: 50mgIron: 1mg

Notes

Cool before filling, allow for proper rising time, and make the sugar topping fresh for best results.

Tried this recipe?

Let us know how it was!

Fried S’mores Bombs: Irresistibly Gooey Dessert Delight

As I stood in my kitchen, craving something sweet yet comforting, I found myself thinking back to those blissful nights around the campfire. That nostalgic warmth inspired the creation of these Fried S’mores Bombs — the perfect way to indulge your sweet tooth without a long wait! In just 12 minutes, you can whip up this quick recipe that transforms the classic s’mores experience into a crispy, gooey, and wholly satisfying dessert treat. Whether you’re hosting a gathering or just need to appease a late-night craving, these little wonders promise to deliver warm chocolate and marshmallow goodness wrapped in a delicate fried shell. Ready to dive into your own savory adventure? Let’s get frying!

Why Are Fried S’mores Bombs Irresistible?

Decadent Delight: Every bite offers a burst of melt-in-your-mouth chocolate paired with gooey marshmallow, taking your dessert game to new heights.

Quick & Easy: Whip these up in just 12 minutes, perfect for those unexpected sweet cravings.

Crowd-Pleasing Treat: Guests and family alike will rave about this indulgent twist on a classic campfire favorite!

Versatile Variations: Feel free to experiment with different fillings like Nutella or flavored chocolates to keep things exciting.

Comforting Nostalgia: These Fried S’mores Bombs bring the cozy sweetness of childhood memories to your kitchen, making them perfect for any age.

Serve with Style: Dust with powdered sugar and pair with fresh berries for an impressive presentation that won’t take much time at all!

Fried S’mores Bombs Ingredients

For the Filling

  • Marshmallows – Provide sweetness and a gooey texture; mini marshmallows can be used for easier melting.
  • Chocolate Bars – Offer rich chocolate flavor and creaminess; try milk chocolate, dark chocolate, or flavored chocolate for a twist.

For the Outer Layer

  • Pillsbury Pie Crust or Puff Pastry – Forms the outer layer, creating a crispy shell when fried; refrigerated crescent dough can also work well.

For Frying

  • Oil for Frying – Essential for producing a crispy texture; vegetable oil or canola oil is recommended due to high smoke points.

Step‑by‑Step Instructions for Fried S’mores Bombs

Step 1: Prepare the Dough
Roll out the Pillsbury pie crust or puff pastry on a clean surface. Cut the dough into 4×4-inch squares, ensuring you have enough for each Fried S’mores Bomb. Keep the squares even for consistent frying and a beautiful finish. This preparation will lay the foundation for the gooey chocolate and marshmallow filling soon to come.

Step 2: Fill the Squares
Place a chocolate square and a marshmallow in the center of each dough square. Carefully fold the dough over to encase the filling, pinching and sealing the edges tightly to prevent any leakage during frying. Create a nice, secure pocket that promises to keep that delicious molten center inside each Fried S’mores Bomb.

Step 3: Heat the Oil
In a large frying pan, pour in enough oil for frying and heat it over medium heat. Allow the oil to reach approximately 350°F, which you can test by dropping a small piece of dough into the oil; it should sizzle immediately. This crucial step ensures that your Fried S’mores Bombs achieve that ideal crispy texture.

Step 4: Fry the Bombs
Carefully place a few filled dough squares into the hot oil, making sure not to overcrowd the pan. Fry each side for about 2 to 3 minutes or until they turn a rich golden brown. Keep an eye on them, as the bubble and fragrance of the oil signal they’re getting close to perfection.

Step 5: Drain and Cool
Once golden brown, use a slotted spoon to remove the Fried S’mores Bombs from the oil. Place them on a plate lined with paper towels to absorb excess oil. Let them cool for a few moments, ensuring you can enjoy that melty chocolate and gooey marshmallow filling without getting burned.

Step 6: Serve Warm
Dust the Fried S’mores Bombs with powdered sugar for an extra touch of sweetness and elegance. Consider serving them alongside fresh berries for a delightful contrast in flavors. Share with friends or family and watch their faces light up with joy as they dive into this delightful dessert treat!

Fried S’mores Bombs: Flavorful Twists Awaits!

Feel free to add your personal touch to these delightful treats and explore delicious variations that make every batch a unique experience.

  • Peanut Butter Cups: Replace chocolate with peanut butter cups for a rich, nutty surprise inside each bomb. The creamy peanut butter melds beautifully with gooey marshmallow for an indulgent twist.

  • Nutella Delight: Swap the chocolate bar for Nutella for a chocolaty hazelnut flavor that elevates your Fried S’mores Bombs to new heights. Pairing Nutella with marshmallow creates an unforgettable experience bridging both flavors.

  • Dairy-Free Option: Use dark chocolate and dairy-free pastry dough to whip up a delightful version for those avoiding dairy. The rich flavors still shine, without sacrificing taste—a treat for everyone.

  • Graham Cracker Crunch: Add crushed graham crackers to the filling to enhance the classic s’mores experience. This little extra adds a satisfying crunch that will have everyone reminiscing about campfire stories.

  • Spicy Chocolate: For a kick, consider swapping in chili-infused chocolate. The heat contrasts beautifully with the sweet marshmallow, creating surprising flavor explosions with each bite.

  • Coconut Flake Wonder: Incorporate shredded coconut into the filling for an exotic twist. The tropical flavor adds a delightful layer, making each bomb taste like a beachy getaway.

  • Stuffed with Fruit: Fresh cherries or raspberries added to the filling provide a burst of natural sweetness and acidity, balancing the richness beautifully. This surprising twist will be a guaranteed crowd-pleaser!

  • Bourbon Infusion: Mix a tablespoon of bourbon into your melted chocolate before assembling the filling for a grown-up version of the classic treat. The bourbon’s depth of flavor makes every bite distinctive and memorable.

With endless possibilities, you can turn your Fried S’mores Bombs into a treat everyone will be talking about! For an even sweeter experience, consider serving them with a scoop of vanilla ice cream or whipped cream, which echoes that beloved campfire comfort.

Expert Tips for Fried S’mores Bombs

  • Perfect Oil Temperature: Ensure your oil reaches 350°F before frying to achieve that delightful crispy texture. A simple test is to drop in a small piece of dough.

  • Seal It Well: Pinch the dough edges tightly to prevent the chocolate and marshmallow filling from leaking during frying. A good seal makes all the difference!

  • Don’t Overcrowd: Fry in small batches to maintain the oil temperature. Overcrowding will lead to soggy bombs rather than crispy, indulgent treats.

  • Cooling Time: Allow the Fried S’mores Bombs to rest on paper towels after frying to absorb excess oil. This ensures a lighter, crunchier bite.

  • Explore Fillings: Feel free to experiment with different chocolate variations or add graham cracker crumbs inside for added flavor and texture to your Fried S’mores Bombs.

Make Ahead Options

Planning to enjoy Fried S’mores Bombs but short on time? Good news! You can prepare the filling (chocolate squares and marshmallows) up to 24 hours in advance. Simply assemble the filled dough squares and refrigerate them on a parchment-lined baking sheet to keep them from sticking together. When you’re ready to serve, heat the oil and fry the bombs directly from the fridge for a crispy, fresh taste. Remember, sealing the dough tightly is essential to maintain that gooey center throughout; this will ensure each bite is just as enjoyable as if you made them on the spot. Enjoy impressing your family and friends with these delightful treats without the last-minute rush!

What to Serve with Fried S’mores Bombs

Imagine a cozy gathering where your Fried S’mores Bombs steal the spotlight, perfectly complemented by delightful sides and sweet finishes.

  • Fresh Berries: Their tartness cuts through the sweetness of the bombs, creating a refreshing bite that balances the indulgence beautifully.
    Serve a mix of strawberries and raspberries for a burst of color and flavor that elevates your dessert presentation.

  • Vanilla Ice Cream: A cold, creamy scoop alongside your warm Fried S’mores Bombs provides a luscious contrast, enhancing the overall experience.
    The melting ice cream forms a delightful pool to dip into, making each bite even more indulgent.

  • Chocolate Sauce: Drizzle warm chocolate sauce over the bombs for an extra layer of decadence that chocolate lovers will adore.
    It adds another texture to savor and guarantees a sweet delight in every morsel.

  • Marshmallow Fluff Dip: For the ultimate s’mores experience, serve a side of marshmallow fluff dip for dunking.
    This fun addition invites everyone to enjoy the gooey goodness in a whole new way!

  • Chilled Lemonade: A refreshing lemonade is the perfect drink to cut through the sweetness of the dessert, leaving guests refreshed.
    The citrus notes make for a bright pairing that brings a summer vibe, regardless of the season.

  • Powdered Sugar Dusting: For a simple yet elegant touch, dust the Fried S’mores Bombs with powdered sugar at serving.
    This adds a delicate sweetness and a gorgeous visual appeal that makes every treat feel special.

How to Store and Freeze Fried S’mores Bombs

Fridge: Store leftovers in an airtight container in the refrigerator for up to 2 days. This keeps your Fried S’mores Bombs fresh and ready for indulgence.

Freezer: For longer storage, freeze them in a single layer on a baking sheet before transferring to a freezer-safe container. They can last up to 2 months.

Reheating: To restore crispiness, reheat in an air fryer or a hot oven at 350°F for about 5-7 minutes. This method ensures that every bite is as delicious as when they were freshly made.

Room Temperature: Although best enjoyed warm, they can be left at room temperature for a few hours if serving immediately. Just remember to consume them quickly to maintain that delectable texture!

Fried S’mores Bombs Recipe FAQs

How should I select my chocolate bars for Fried S’mores Bombs?
Absolutely! I recommend using high-quality chocolate bars, as they significantly enhance the flavor. Whether you choose milk chocolate for its creaminess, dark chocolate for a rich depth, or flavored chocolates like caramel or raspberry, go for what excites your taste buds! Also, consider using a mix of chocolates for a delightful flavor explosion in each bite.

How can I store leftovers of Fried S’mores Bombs?
Very! To keep your Fried S’mores Bombs at their best, store any leftovers in an airtight container in the refrigerator. They will stay fresh for up to 2 days. Just remember to let each bomb cool completely before sealing them in to maintain their crispy exterior.

Can I freeze Fried S’mores Bombs for later?
Absolutely! To freeze, first arrange the Fried S’mores Bombs in a single layer on a baking sheet and place them in the freezer until they are solid. This prevents them from sticking together. Then transfer them to a freezer-safe container or a zip-top bag, where they will keep well for up to 2 months. When you’re ready to enjoy, reheat in an air fryer or a hot oven at 350°F for about 5-7 minutes until crispy and warm.

What if my Fried S’mores Bombs leak chocolate or marshmallow while frying?
Don’t worry—this can happen! To avoid leaking in the future, ensure the dough edges are well-sealed by pinching them tightly. If some filling does escape during frying, your bombs will still taste delicious! In the next batch, you might also try using fewer fillings to help keep it contained while still enjoying that gooey goodness in your treats.

Are Fried S’mores Bombs suitable for a gluten-free diet?
Certainly! You can make Fried S’mores Bombs gluten-free by using a gluten-free pastry dough, such as a store-bought gluten-free pie crust. Just make sure to check the labels to ensure all ingredients are gluten-free. This way, everyone can savor these delightful treats without worry!

How long can I leave Fried S’mores Bombs at room temperature?
Fried S’mores Bombs can be left at room temperature for a few hours if you’re serving them right away. However, to maintain that perfect texture and gooey interior, it’s best to consume them soon after frying. If they sit out for too long, consider rejuvenating them in the oven before serving again!

Fried S’mores Bombs

Fried S’mores Bombs: Irresistibly Gooey Dessert Delight

Savor the deliciousness of Fried S’mores Bombs, a sweet treat that combines chocolate and marshmallows in a crispy shell.
Prep Time 12 minutes
Cook Time 6 minutes
Cooling Time 5 minutes
Total Time 23 minutes
Servings: 4 bombs
Course: Dessert
Cuisine: American
Calories: 250

Ingredients
  

For the Filling
  • 1 cup mini marshmallows for easier melting
  • 2 bars chocolate bars can use milk, dark, or flavored chocolate
For the Outer Layer
  • 1 package Pillsbury Pie Crust or Puff Pastry or refrigerated crescent dough
For Frying
  • enough oil for frying vegetable or canola oil recommended

Equipment

  • Large frying pan
  • slotted spoon

Method
 

Step‑by‑Step Instructions for Fried S’mores Bombs
  1. Roll out the Pillsbury pie crust or puff pastry on a clean surface. Cut the dough into 4x4-inch squares.
  2. Place a chocolate square and a marshmallow in the center of each dough square. Pinch and seal the edges tightly.
  3. In a large frying pan, heat oil over medium heat to 350°F.
  4. Carefully place filled dough squares into the hot oil, frying each side for 2 to 3 minutes until golden brown.
  5. Remove the Fried S’mores Bombs from the oil using a slotted spoon and place them on paper towels to absorb excess oil.
  6. Dust with powdered sugar and serve warm alongside fresh berries.

Nutrition

Serving: 1bombCalories: 250kcalCarbohydrates: 30gProtein: 3gFat: 14gSaturated Fat: 6gPolyunsaturated Fat: 1gMonounsaturated Fat: 4gCholesterol: 10mgSodium: 150mgPotassium: 120mgFiber: 1gSugar: 10gVitamin A: 200IUCalcium: 20mgIron: 1mg

Notes

Store leftovers in an airtight container in the fridge for up to 2 days or freeze for up to 2 months.

Tried this recipe?

Let us know how it was!

Frosted Holiday Eggnog Cookies That Bring Joy to Your Table

As the holiday season approaches, my kitchen transforms into a fragrant wonderland of spices and sweetness. There’s something undeniably special about creating Frosted Holiday Eggnog Cookies, where the cozy notes of nutmeg and cinnamon come together to evoke cherished memories. These delightful cookies, draped in creamy eggnog frosting, not only elevate any festive gathering but also whisk you away from the monotony of fast food with comforting homemade goodness. Whip them up in no time and watch them disappear from the platter—who knew warm, satisfying treats could be this easy? Are you ready to fill your home with the cheerful spirit of the holidays and treat yourself to these delightful delights?

Why Are These Cookies So Irresistible?

Festive Flavors: The enchanting blend of nutmeg, cinnamon, and spiced rum will undoubtedly transport you to joyful holiday memories.

Easy to Make: With simple ingredients and straightforward steps, these cookies are perfect for even novice bakers craving a homemade treat!

Gorgeous Presentation: The rich eggnog frosting adds a beautiful finishing touch, making these cookies ideal for gatherings or as a thoughtful gift.

Crowd-Pleasing Delight: Everyone loves a soft, frosted cookie! Your friends and family will be begging for the recipe. If you love cookies, don’t forget to check out my Bake Cookies Cream for a delicious twist!

Quick to Prepare: With a chilled dough that’s ready in just 2 hours, you can whip these treats up quickly and enjoy them fresh from the oven.

Warm Aroma: As they bake, your kitchen will fill with a cozy scent that’s guaranteed to create comforting holiday vibes.

Frosted Holiday Eggnog Cookie Ingredients

For the Cookies

  • Butter (2 1/2 sticks, room temperature) – Provides a rich and soft texture, making these cookies irresistible.
  • Brown Sugar (1 cup, packed) – Adds sweetness and moisture with a delightful caramel hint.
  • Egg Yolks (4 large) – Acts as a rich binder to hold the cookies together.
  • Eggnog (1/4 cup) – Infuses the cookies with classic eggnog flavor and moisture.
  • Spiced Rum (1 tablespoon) or Rum Extract (1 teaspoon) – Elevates the flavor profile with festive warmth; omit for a non-alcoholic version.
  • All-Purpose Flour (3 cups) – Forms the structure of the cookies; critical for texture.
  • Baking Powder (1 teaspoon) – Helps the cookies rise for a light, fluffy texture.
  • Salt (1/4 teaspoon) – Balances sweetness and enhances other flavors.
  • Nutmeg (1/2 teaspoon, freshly ground) – Brings a warm, spiced note typical of holiday baking.
  • Cinnamon (1/2 teaspoon) – Offers comforting warmth and depth to the flavor.
  • Allspice (Pinch) – Contributes a unique complexity that complements the eggnog taste.

For the Frosting

  • Butter (6 tablespoons, room temperature) – Essential for a creamy texture in the frosting.
  • Confectioner’s Sugar (2 1/4 cups) – Sweetens the frosting and creates a smooth finish.
  • Spiced Rum (1 1/2 teaspoons) or Rum Extract (1/4 teaspoon) – Adds that signature flavor; feel free to leave it out for a non-alcoholic treat.
  • Eggnog (2 tablespoons) – Lends richness and eggnog flavor to the frosting.
  • Nutmeg (1/4 teaspoon, freshly grated) – Boosts the holiday essence and pairs beautifully with the frosting.
  • Cinnamon (Pinch) – Deepens the overall warmth and flavor; no substitutions recommended.

Other Considerations

  • Flour for counter – Dust your surface to prevent sticking while rolling out the dough.
  • Holiday Sprinkles – Optional for that festive, decorative touch!

Let the spirit of the holidays and the taste of these frosted holiday eggnog cookies fill your home!

Step-by-Step Instructions for Frosted Holiday Eggnog Cookies

Step 1: Prepare the Cookie Dough
In a stand mixer, beat 2 1/2 sticks of room temperature butter on medium speed until pale and creamy, approximately 2 minutes. Gradually add 1 cup of packed brown sugar, continuing to beat for an additional minute until fluffy. Add in 4 large egg yolks one at a time, mixing well after each addition, then blend in 1/4 cup of eggnog and 1 tablespoon of spiced rum until just combined.

Step 2: Combine Dry Ingredients
In a medium bowl, whisk together 3 cups of all-purpose flour, 1 teaspoon of baking powder, 1/4 teaspoon of salt, 1/2 teaspoon of freshly ground nutmeg, 1/2 teaspoon of cinnamon, and a pinch of allspice. Gradually add this dry mixture to the wet ingredients in the mixer bowl. Blend on low speed until combined, being careful not to overmix, which will keep your Frosted Holiday Eggnog Cookies tender.

Step 3: Chill Dough
Once your dough is well mixed, wrap it tightly in plastic wrap and refrigerate for at least 2 hours. This chilling step helps flavors to meld and makes the dough easier to roll out later. As the dough firms up, you’ll find that it yields perfectly shaped holiday cookies after baking.

Step 4: Make the Frosting
While the dough chills, prepare the luscious eggnog frosting. In a mixing bowl, cream together 6 tablespoons of room temperature butter and 2 1/4 cups of confectioner’s sugar until smooth and fluffy. Mix in 1 1/2 teaspoons of spiced rum, 2 tablespoons of eggnog, 1/4 teaspoon of freshly grated nutmeg, and a pinch of cinnamon until creamy and well combined. Set aside for later.

Step 5: Preheat Oven
Preheat your oven to 325°F, ensuring that the heating element is set to the upper third of the oven. This temperature creates the perfect environment for baking your Frosted Holiday Eggnog Cookies to a light golden brown while ensuring they stay soft and tender inside.

Step 6: Cut and Bake Cookies
Once the dough has chilled, roll it out on a floured surface to about 1/4 inch thick. Use festive cookie cutters to shape your cookies, then place them on parchment-lined baking sheets, spacing them about an inch apart. Bake in the preheated oven for approximately 12 minutes, or until the cookies are lightly browned underneath but still soft to the touch.

Step 7: Cool and Frost
Remove the cookies from the oven and allow them to cool on wire racks for about 10 minutes. Once cooled, frost each cookie generously with the creamy eggnog frosting, creating a delightful swirl or pattern as you spread. If desired, sprinkle holiday sprinkles on top while the frosting is still wet for a festive touch.

Tips for the Best Frosted Holiday Eggnog Cookies

  • Room Temperature Butter: Ensure your butter is at room temperature to achieve a creamy texture when mixed, which helps your cookies stay soft.

  • Don’t Overmix: After adding the dry ingredients, mix just until combined. Overmixing can lead to tough cookies, detracting from the soft, tender texture you want in your Frosted Holiday Eggnog Cookies.

  • Chill Thoroughly: Allow the dough to chill for at least 2 hours. This step not only helps the flavors develop but also makes it easier to roll and shape your cookies.

  • Check Doneness: Bake until lightly browned underneath—cookies will continue to firm up as they cool. Soft cookies will remain tender after cooling.

  • Frost While Warm: Frost the cookies while they are still slightly warm, so the delicious eggnog frosting spreads easily and clings beautifully to the cookie.

Frosted Holiday Eggnog Cookies Variations

Ready to put your personal twist on these delightful treats? Customize your frosted holiday eggnog cookies and delight your family with new flavors and textures!

  • Dairy-Free: Replace butter with coconut oil and use non-dairy eggnog for a lactose-free version that doesn’t compromise on flavor.

  • Spice It Up: Experiment with different spices, such as ginger or cardamom, for a unique twist that brings an exciting new flavor profile.

  • Nut-Free: If you’re catering to nut allergies, simply omit any nutmeg and allspice. You can still achieve deliciousness with just cinnamon!

  • Double the Frosting: Feel like indulging a bit more? Double the frosting recipe! A thicker layer of creamy goodness always makes cookies more irresistible.

  • Add Chocolate: For a delightful pairing, mix in some chocolate chips to the cookie dough. The chocolate complements the festive flavors beautifully.

  • Mini Cookie Bites: Create bite-sized versions by rolling the dough into smaller balls. A fun way to serve up these treats for parties!

  • Drizzle with Caramel: For added sweetness, drizzle warm caramel sauce over the top of the frosted cookies. This creates an irresistible gooey topping everyone will adore.

  • Gingerbread Twist: Incorporate molasses and replace some of the spices to give your cookies a gingerbread flavor, perfect for the holidays. If you’re a fan of classic ginger snaps, this variation is a must-try!

No matter which variation you choose, your frosted holiday eggnog cookies will be a hit! And don’t forget to check out my scrumptious Chocolate Cranberry Cookies for another festive treat that everyone will love!

Make Ahead Options

These Frosted Holiday Eggnog Cookies are a fantastic choice for busy home cooks who want to bring festive cheer without the last-minute rush! You can prepare the cookie dough up to 24 hours in advance; simply wrap it tightly in plastic wrap and refrigerate to keep it fresh. The eggnog frosting can also be made ahead and stored in an airtight container for up to 3 days—just give it a quick stir before using to restore its creamy consistency. When you’re ready to bake, roll out your chilled dough, cut into shapes, and bake as instructed. Finish with frosting and festive sprinkles right before serving for delicious, homemade cookies that taste just as delightful as if made fresh!

How to Store and Freeze Frosted Holiday Eggnog Cookies

Fridge: Store your frosted cookies in an airtight container for up to 5 days to maintain their freshness and flavor.

Freezer: For longer storage, freeze the un-frosted cookies in a single layer on a baking sheet for about 1-2 hours, then transfer them to a freezer bag or airtight container. They can be frozen for up to 3 months.

Thawing: When ready to enjoy, thaw the cookies in the fridge overnight. Frost them after thawing to keep the frosting looking fresh and vibrant.

Reheating: If desired, you can warm frozen cookies in a preheated oven at 300°F for a few minutes to restore their delightful softness before serving.

What to Serve with Eggnog Cookies with Eggnog Frosting

Cozy up your holiday gatherings with delightful pairings that enhance the cheer of these sweet treats.

  • Creamy Hot Chocolate: The rich, chocolatey flavors complement the spiced sweetness of the cookies, creating a comforting duo perfect for wintry evenings.

  • Spiced Apple Cider: This warm, fragrant drink echoes the spices in the cookies, offering a delightful balance of flavors that warms the soul.

  • Nutty Pecan Pie: The buttery pecans and sweet filling provide a delightful contrast to the soft, frosted cookies, making for an irresistible dessert platter.

  • Vanilla Ice Cream: A scoop of melty ice cream over warm cookies is pure bliss, allowing the creamy texture to enhance the rich flavors of eggnog.

  • Gingerbread Latte: This seasonal favorite brings a festive coffee kick that pairs nicely with the soft sweetness, elevating your cookie experience to new heights.

  • Holiday Cheese Board: Incorporate a selection of cheeses, nuts, and seasonal fruits to create a festive platter, offering variety that enhances the cookie’s sweet notes.

  • Cinnamon Sugar Churros: The warm, crispy churros add a fun texture contrast and will delight your guests with their sugary cinnamon embrace alongside eggnog cookies.

  • Mulled Wine: The warm spices in mulled wine beautifully harmonize with the flavors of nutmeg and cinnamon in the cookies, creating a festive drink option.

Frosted Holiday Eggnog Cookies Recipe FAQs

What type of eggnog should I use for the cookies?
Absolutely! For optimal flavor, I recommend using a rich, full-fat eggnog. If you’re aiming for a lighter option or need a lactose-free treat, try using non-dairy eggnog alternatives available in most stores!

How should I store my Frosted Holiday Eggnog Cookies?
Very simple! To keep your frosted cookies fresh, store them in an airtight container in the refrigerator for up to 5 days. Ensure they are not stacked directly on top of each other to avoid smudging the frosting.

Can I freeze the cookies, and how?
Yes! It’s easy to freeze your cookies. After baking and cooling the cookies, freeze them un-frosted on a baking sheet for about 1-2 hours until firm. Then, transfer them to a freezer-safe bag or container. They can remain safe in the freezer for up to 3 months. When you’re ready to enjoy, thaw them in the fridge overnight before frosting!

What should I do if my cookies spread too much while baking?
If that happens, don’t worry! The main culprit is often the temperature of the butter; it should be soft but not melted. Ensure your dough is well-chilled, and if necessary, add a bit more flour to reach the right consistency. A chill of at least 2 hours helps keep them from spreading too much during baking.

Are these cookies suitable for those with specific dietary restrictions?
Yes, you can easily adjust them! For a dairy-free version, substitute butter with margarine or coconut oil and use non-dairy eggnog. Be aware of any allergies, especially with nuts and gluten, when selecting ingredients. If you’re avoiding alcohol, simply omit the spiced rum; they’ll still taste delightful!

How can I add extra flavor to my Frosted Holiday Eggnog Cookies?
The more the merrier! Try incorporating additional spices like ground ginger or cardamom into the cookie dough or frosting for a unique twist. You could even use flavored extracts, like vanilla or almond, to complement the eggnog flavor perfectly. Enjoy experimenting!

Frosted Holiday Eggnog Cookies

Frosted Holiday Eggnog Cookies That Bring Joy to Your Table

Delight in Frosted Holiday Eggnog Cookies, a festive treat filled with nutmeg and cinnamon flavors, perfect for holiday gatherings.
Prep Time 30 minutes
Cook Time 12 minutes
Chilling Time 2 hours
Total Time 2 hours 42 minutes
Servings: 24 cookies
Course: Dessert
Cuisine: American
Calories: 150

Ingredients
  

Cookies
  • 2.5 sticks Butter, room temperature Provides a rich and soft texture
  • 1 cup Brown Sugar, packed Adds sweetness and moisture
  • 4 large Egg Yolks Acts as a rich binder
  • 0.25 cup Eggnog Infuses cookies with classic flavor
  • 1 tablespoon Spiced Rum Elevates flavor; omit for non-alcoholic
  • 3 cups All-Purpose Flour Forms cookie structure
  • 1 teaspoon Baking Powder Helps cookies rise
  • 0.25 teaspoon Salt Balances sweetness
  • 0.5 teaspoon Nutmeg, freshly ground Brings warmth
  • 0.5 teaspoon Cinnamon Offers warm depth
  • pinch Allspice Adds complexity
Frosting
  • 6 tablespoons Butter, room temperature Essential for creamy texture
  • 2.25 cups Confectioner’s Sugar Sweetens frosting
  • 1.5 teaspoons Spiced Rum Adds signature flavor
  • 2 tablespoons Eggnog Lends richness
  • 0.25 teaspoon Nutmeg, freshly grated Boosts holiday essence
  • pinch Cinnamon Deepens overall warmth
Other Considerations
  • Flour for counter Dust for rolling out dough
  • Holiday Sprinkles Optional decorative touch

Equipment

  • Stand Mixer
  • Mixing bowls
  • Baking Sheets
  • Parchment paper

Method
 

Preparation
  1. Prepare the Cookie Dough: Beat the butter until creamy, add brown sugar, then mix in egg yolks, eggnog, and spiced rum.
  2. Combine Dry Ingredients: Whisk flour, baking powder, salt, nutmeg, cinnamon, and allspice, then blend with wet mixture.
  3. Chill Dough: Wrap dough in plastic wrap and refrigerate for at least 2 hours.
  4. Make the Frosting: Cream butter and sugar, then mix in spiced rum, eggnog, nutmeg, and cinnamon.
  5. Preheat Oven: Set to 325°F and prepare for baking.
  6. Cut and Bake Cookies: Roll out chilled dough, cut into shapes, and bake for about 12 minutes.
  7. Cool and Frost: Cool cookies before frosting and add sprinkles if desired.

Nutrition

Serving: 1cookieCalories: 150kcalCarbohydrates: 20gProtein: 1gFat: 7gSaturated Fat: 4gPolyunsaturated Fat: 0.5gMonounsaturated Fat: 2gCholesterol: 20mgSodium: 80mgPotassium: 30mgSugar: 10gVitamin A: 200IUCalcium: 20mgIron: 0.5mg

Notes

Ensure butter is at room temperature and do not overmix the dough.

Tried this recipe?

Let us know how it was!

Vegan Ube and Cheese Pandesal: Sweet Rolls Everyone Will Love

As I opened the oven, a wave of warm, sweet aroma danced around the kitchen, instantly transporting me to the heart of the Philippines. There’s something magical about the combination of soft, fluffy bread rolls and the vibrant colors of ube—you can’t help but smile! Today, I’m excited to share my take on Vegan Ube and Cheese Pandesal, where rich purple yam meets savory vegan mozzarella for a delightful twist on this beloved Filipino classic. Perfect for breakfast or a cozy snack, these rolls are not only quick to whip up but also a crowd-pleaser, making them a great addition to any gathering. So, are you ready to dive into this tasty adventure? Let’s get baking!

Why is Vegan Ube Pandesal So Irresistible?

Unique Flavor Fusion: The sweet, earthy notes of ube perfectly complement the creamy, savory vegan cheese, making each bite an explosion of flavor.
Vegan Delight: Enjoy a plant-based twist on a classic, allowing everyone—including your vegan friends—to indulge in these delicious rolls.
Easy to Make: With straightforward steps, even beginner bakers can master this recipe and impress their loved ones.
Perfect for Any Occasion: Whether it’s breakfast alongside your favorite coffee or a snack during the day, these rolls fit seamlessly into any meal. Try pairing them with a cozy cup of tea or a touch of Cookies Cream Cheesecake for a delightful combo!

Vegan Ube and Cheese Pandesal Ingredients

• Let’s gather everything you need for these delightful rolls!

For the Dough
Ube Powder – Provides color and flavor; substitute with fresh ube if available for a vibrant twist.
Hot Water – Used to dissolve the ube powder into a smooth puree; make sure it’s steaming hot for the best results.
All-Purpose Flour – Forms the structure of the bread; can be replaced with gluten-free flour for a wholesome alternative.
Sugar – Adds a touch of sweetness; adjust to taste, especially if making plain pandesal.
Instant Yeast – Helps the dough rise; avoid substituting with active dry yeast unless adjusting the method accordingly.
Salt – Enhances the overall flavor; don’t skip it, as it balances the sweetness beautifully.
Warm Soy Milk (or Oat Milk) – Adds moisture and serves as a dairy substitute; almond milk works well too.
Neutral Oil (e.g., Vegetable Oil) – Contributes fat for tenderness in the dough; coconut oil can provide an extra flavor dimension.

For the Filling
Ube Halaya (or Spread) – Acts as a luscious filling that complements the bread perfectly; any sweet jam can also be a delightful alternative.
Vegan Mozzarella Cheese Shreds – Provides a creamy, savory element; feel free to substitute with other non-dairy cheese options you love.

For the Coating
Fine Breadcrumbs (or Almond Meal) – Adds a lovely texture to the rolls; opt for gluten-free breadcrumbs if needed.

Step‑by‑Step Instructions for Vegan Ube and Cheese Pandesal

Step 1: Prepare Ube Puree
Start by mixing ube powder into hot water in a bowl, stirring until the mixture is smooth and free of lumps. You want the water to be steaming hot for the best results. Once combined, set the ube puree aside to cool slightly while you gather the dry ingredients.

Step 2: Prepare Dry Ingredients
In a large mixing bowl, whisk together all-purpose flour, sugar, instant yeast, and salt until evenly distributed. This ensures that the flavors and leavening agents are well combined. Make a well in the center to make it easier to incorporate the wet ingredients in the next step.

Step 3: Combine Wet Ingredients
Pour the warm soy milk and neutral oil into the well in the dry mixture, followed by the cooled ube puree. Mix this together using a spatula or your hands until it forms a sticky dough, which should come together in about 3-4 minutes. If the dough is too sticky, don’t hesitate to sprinkle on a bit more flour.

Step 4: Knead the Dough
Transfer the dough to a lightly floured surface and knead gently for about 4-5 minutes, or until it becomes smoother and elastic. The texture should be soft but not overly tacky. Practice patience here, as kneading is critical for achieving the fluffy texture typical of Vegan Ube and Cheese Pandesal.

Step 5: First Rise
Place the kneaded dough in a greased bowl, covering it with a damp kitchen towel to retain moisture. Allow it to rise in a warm spot for about 1 hour or until the dough has doubled in size. You’ll know it’s ready when it feels puffy to the touch and has noticeably expanded.

Step 6: Divide Dough
Once the dough has risen, gently punch it down to release the air. Turn it out onto a floured surface and divide it into equal pieces, approximately 20 pieces of about 58-60 grams each. Be sure to shape these pieces into balls and keep them covered to prevent drying out while you prepare the filling.

Step 7: Shape Pandesal
Take each piece of dough and flatten it into a circle with your fingers. Spoon a small amount of ube halaya and a sprinkle of vegan mozzarella cheese into the center. Carefully pinch the edges to seal the filling inside, then roll the dough ball in breadcrumbs for an extra crunchy texture.

Step 8: Second Rise
Arrange the shaped pandesal on a baking tray lined with parchment paper, making sure to leave some space between each roll. Cover them again with a kitchen towel and let them proof for 20-30 minutes until puffed up slightly. This second rise is essential for achieving their light, airy texture.

Step 9: Bake
Preheat your oven to 180°C (350°F). Once the dough has risen, place the baking tray in the oven and bake for 20-22 minutes. You’ll know they are done when the tops are firm to the touch and have turned a delightful golden color.

Step 10: Cool & Serve
After baking, remove the pandesal from the oven and let them cool slightly on a wire rack. These Vegan Ube and Cheese Pandesal are best enjoyed warm, offering that perfect balance of sweet and savory flavors that makes them irresistible!

How to Store and Freeze Vegan Ube and Cheese Pandesal

Room Temperature: Keep the pandesal in an airtight container for up to 2 days at room temperature to maintain softness.

Fridge: Store in the refrigerator for up to 1 week, ensuring they are sealed tightly to prevent drying out.

Freezer: Freeze the unbaked shaped pandesal for up to 2 months. Just thaw and let them rise before baking for fresh, warm rolls anytime.

Reheating: When ready to enjoy, reheat the pandesal in an oven toaster at 350°F for a few minutes until warm. Perfect for reliving that delightful Vegan Ube and Cheese Pandesal experience!

Vegan Ube and Cheese Pandesal Variations

Feeling adventurous in the kitchen? Let’s explore some delightful twists on this classic Filipino treat that will surprise and delight your taste buds!

  • Plain Pandesal: Omit the ube filling altogether, increasing the sugar to 8-12 tablespoons for a classic sweet version. This allows you to enjoy the soft texture of the pandesal on its own.

  • Fruit-Filled: Exchange the ube filling with your favorite fruit preserves, like strawberry or mango. The sweet burst of fruit will give each bite a refreshing twist.

  • Chocolate Surprise: For a delectable dessert option, substitute ube halaya with vegan chocolate spread. Imagine the sweetness of chocolate melting against fluffy bread—simply divine!

  • Spicy Kick: Add a pinch of chili flakes or fresh jalapeños to the cheese filling for a spicy contrast. The heat mingling with the sweetness of ube creates an exciting flavor explosion.

  • Nutty Flavor: Incorporate ground nuts like almonds or walnuts into the dough or filling. Their crunch and earthy flavor add another layer of texture and richness.

  • Savory Twist: Swap the vegan mozzarella for a tangy vegan cream cheese, and mix in herbs like chives or dill. This savory rendition is perfect for a brunch spread alongside your favorite coffee.

  • Seasonal Additions: Try adding pumpkin spice or cinnamon to the dough for a seasonal twist. These warm spices transform each roll into a cozy treat, especially enjoyable in the fall.

  • Healthy Options: Substitute coconut oil with applesauce in the dough for a lighter version. This not only reduces fat but also adds a hint of natural sweetness!

For a delightful addition to your breakfast, consider pairing your Vegan Ube and Cheese Pandesal with cozy beverages like tea or a warm cup of Grilled Chicken Sandwich. Enjoy exploring these variations, and don’t hesitate to let your creativity shine!

Expert Tips for Vegan Ube Pandesal

  • Right Temperature: Ensure all liquids are warm, but not too hot, which can kill the yeast. This keeps your Vegan Ube and Cheese Pandesal fluffy.
  • Kneading Patience: Don’t rush the kneading process. A soft, elastic dough is key, so gradually add flour as needed to maintain stickiness without making it too stiff.
  • Perfect Dough Consistency: If using fresh ube, skip the added water when making the puree to keep the dough from becoming too wet or hard to handle.
  • Watch the Rising: The first rise should be in a warm place. If your kitchen is cool, you can turn on the oven briefly to create a warm environment, then turn it off before placing the dough inside.
  • Breadcrumb Coating: For a crunchier texture, ensure to roll the shaped pandesal in breadcrumbs evenly. This adds a delightful contrast to the soft bread.
  • Freezing Tips: If you want to make a batch ahead, shape the pandesal and freeze them before the second rise. Thaw and let rise before baking for fresh rolls anytime!

What to Serve With Vegan Ube and Cheese Pandesal

Pair these delightful rolls with the perfect accompaniments to create a memorable meal.

  • Creamy Coconut Soup: A warming coconut soup adds a rich, comforting element that contrasts beautifully with the fluffy texture of the pandesal.
  • Savory Tofu Scramble: This protein-packed dish is seasoned to perfection and complements the subtle sweetness of the rolls, making breakfast a hearty experience.
  • Fresh Fruit Platter: Light and refreshing, seasonal fruits like mango or pineapple cleanse the palate and enhance the tropical vibe of the meal.
  • Herbal Tea: A fragrant cup of chamomile or mint tea elevates your snack time, providing a soothing accompaniment to the sweet and savory flavors.
  • Coconut Mango Smoothie: Blend up this vibrant drink for a fruity twist, combining creamy coconut milk with fresh mango to echo the flavors in the pandesal.
  • Mango Salsa: Vibrant, zesty mango salsa adds a burst of freshness that pairs wonderfully with the rich ube and vegan cheese filling.
  • Chocolate Avocado Mousse: For dessert, this creamy and decadent treat makes for a delightful finish—a sweet contrast to the bread rolls that feels indulgent yet light.
  • Filipino Coffee: A cup of strong coffee brewed in the traditional Filipino way, served black or with sweetened condensed milk, ties the meal together perfectly.
  • Vanilla Ice Cream: A scoop of vanilla ice cream juxtaposes the warm, soft rolls beautifully, making for an unbeatable dessert option after enjoying your vegan pandesal.

Make Ahead Options

These Vegan Ube and Cheese Pandesal are a fantastic option for meal prep enthusiasts! You can prepare the dough and shape the rolls up to 24 hours in advance. Simply follow the first seven steps of the recipe, shape the pandesal, and place them on a baking tray. Cover tightly with plastic wrap and refrigerate overnight to maintain quality. When you’re ready to bake, allow them to proof at room temperature for about 30 minutes before popping them into a preheated oven. This method ensures that you can enjoy freshly baked rolls on busy mornings without the hassle! Just remember, baking them while fresh ensures they’re as deliciously soft and fluffy as they should be.

Vegan Ube and Cheese Pandesal Recipe FAQs

How do I choose the best ube for this recipe?
Absolutely! When selecting ube, look for fresh, firm tubers without any dark spots or wrinkles. Fresh ube should have vibrant purple skin and a smooth surface. If you can’t find fresh ube, ube powder is a fantastic alternative that still delivers that rich flavor and color.

What is the best way to store leftover Vegan Ube and Cheese Pandesal?
Very! To keep your pandesal soft and fresh, store them in an airtight container at room temperature for up to 2 days. For longer storage, refrigeration is an option for up to 1 week, but ensure they’re well-sealed to avoid drying out.

Can I freeze the Vegan Ube and Cheese Pandesal?
Absolutely! To freeze, shape your pandesal and place them on a baking sheet lined with parchment paper, ensuring they are not touching. Freeze until solid, then transfer them to a freezer-safe bag for up to 2 months. When you’re ready, thaw them overnight in the refrigerator and let them rise before baking!

What if my dough does not rise well?
No worries! If your dough isn’t rising, it could be due to the yeast being expired or not enough warmth during the rising period. Try placing the dough in a warm spot, perhaps with a gentle heat source, and ensure your liquids are warm—typically around 110°F (43°C). If your dough feels too dense, knead in a little more flour while being careful not to make it too tough.

Are these pandesal safe for people with allergies?
Definitely! This vegan recipe is free from animal products and dairy, making it suitable for many diets. However, those with gluten allergies should opt for gluten-free flour as a substitute. Always check ingredient labels, especially for processed items like breadcrumbs and vegan cheese, as they can vary and may contain allergens.

Can I make plain pandesal instead of the ube version?
Very! To create a delightful plain pandesal, increase the sugar content to 8-12 tablespoons based on your sweetness preference. Follow the same instructions while omitting the ube filling. You can get creative with your fillings later or serve them simply with butter or jam!

Vegan Ube and Cheese Pandesal

Vegan Ube and Cheese Pandesal: Sweet Rolls Everyone Will Love

Discover the delightful Vegan Ube and Cheese Pandesal, combining sweet ube flavor with creamy vegan cheese in a perfect breakfast roll.
Prep Time 30 minutes
Cook Time 22 minutes
Rising Time 1 hour
Total Time 1 hour 52 minutes
Servings: 20 rolls
Course: Breakfast
Cuisine: Filipino
Calories: 180

Ingredients
  

For the Dough
  • 1 cup Ube Powder Substitute with fresh ube if available for a vibrant twist.
  • 1 cup Hot Water Ensure it's steaming hot.
  • 4 cups All-Purpose Flour Can be replaced with gluten-free flour.
  • ¼ cup Sugar Adjust to taste.
  • 2 teaspoons Instant Yeast Avoid substituting with active dry yeast.
  • 1 teaspoon Salt Essential for balancing sweetness.
  • 1 cup Warm Soy Milk (or Oat Milk) Almond milk works well too.
  • ¼ cup Neutral Oil (e.g., Vegetable Oil) Coconut oil adds extra flavor.
For the Filling
  • ½ cup Ube Halaya (or Spread) Acts as a luscious filling.
  • 1 cup Vegan Mozzarella Cheese Shreds Feel free to substitute with other non-dairy cheese.
For the Coating
  • 1 cup Fine Breadcrumbs (or Almond Meal) Opt for gluten-free breadcrumbs if needed.

Equipment

  • Mixing Bowl
  • Spatula
  • Baking tray
  • Oven
  • Wire Rack

Method
 

Step-by-Step Instructions
  1. Prepare Ube Puree: Mix ube powder into hot water in a bowl, stirring until smooth. Set aside to cool.
  2. Prepare Dry Ingredients: In a bowl, whisk all-purpose flour, sugar, instant yeast, and salt. Make a well in the center.
  3. Combine Wet Ingredients: Pour warm soy milk and neutral oil into the well and add cooled ube puree. Mix until sticky dough forms.
  4. Knead the Dough: Transfer to floured surface and knead for 4-5 minutes until smooth and elastic.
  5. First Rise: Place dough in greased bowl, cover with kitchen towel, and let rise for 1 hour until doubled.
  6. Divide Dough: Punch down dough, turn onto a floured surface, and divide into 20 pieces. Shape into balls.
  7. Shape Pandesal: Flatten each dough piece, add ube halaya and vegan cheese, then seal and roll in breadcrumbs.
  8. Second Rise: Arrange on tray, cover, and let proof for 20-30 minutes until slightly puffed.
  9. Bake: Preheat oven to 180°C (350°F) and bake for 20-22 minutes until golden.
  10. Cool & Serve: Let pandesal cool on a wire rack. Best enjoyed warm.

Nutrition

Serving: 1rollCalories: 180kcalCarbohydrates: 25gProtein: 3gFat: 6gSaturated Fat: 1gPolyunsaturated Fat: 0.5gSodium: 250mgPotassium: 100mgFiber: 1gSugar: 4gVitamin C: 2mgCalcium: 2mgIron: 5mg

Notes

Ensure all liquids are warm to keep your Vegan Ube and Cheese Pandesal fluffy. Be patient with kneading for the best texture.

Tried this recipe?

Let us know how it was!

Star-Shaped Cheese Appetizers with Spicy Pepper Jelly Magic

The moment I first pulled out a golden tray of these festive star-shaped cheese appetizers, I knew I had a crowd-pleaser on my hands. With a delightful combination of creamy cheese tucked within flaky puff pastry and a kick of red hot pepper jelly, these little stars are sure to shine at any gathering. What I love most is how effortlessly they come together, making them a quick, easy party food solution that will impress your guests without keeping you in the kitchen for hours. Plus, you can get creative by customizing the fillings to suit different tastes – think goat cheese or even a herby ricotta blend! Are you ready to make a show-stopping appetizer that will have everyone asking for seconds?

Why Are These Star-Shaped Appetizers a Hit?

Effortless Preparation: You won’t believe how easy it is to whip up these festive treats! Just roll out puff pastry and cut it into star shapes.

Versatile Fillings: Enjoy experimenting with flavors! Whether you stick to classic cheese or try herbed ricotta, the options are endless.

Crowd-Pleasing Appeal: With their delightful combination of creamy and spicy, these appetizers will have your guests raving.

Perfect for Any Occasion: From holiday gatherings to casual get-togethers, they suit all celebrations. Pair them with a refreshing drink for a delightful experience!

Make-Ahead Magic: Need to save time? Assemble these star-shaped wonders ahead of time and bake just before serving for a warm, flaky surprise. You might also love serving them alongside Cheeseburger Pockets Snack or Cheddar Mac Cheese for a fantastic spread.

Star-Shaped Cheese Appetizers Ingredients

For the Pastry
Puff Pastry – Use thawed frozen puff pastry for the best flaky texture.

For the Cheese Filling
Cream Cheese – This creates a creamy base; feel free to substitute with ricotta or goat cheese for a twist.
Shredded Cheese – Choose cheddar, mozzarella, or any beloved cheese blend to amp up the flavor.

For the Spicy Kick
Red Hot Pepper Jelly – This spicy, sweet addition gives these star-shaped cheese appetizers their signature flair; try other jams if you prefer a milder taste.

For the Egg Wash
Egg – Brush on the pastry to achieve a golden brown finish; a milk wash works as an alternative.

Step‑by‑Step Instructions for Star-Shaped Cheese Appetizers

Step 1: Prep Pastry
Begin by preheating your oven to 400°F (200°C). Next, take your thawed puff pastry and roll it out on a lightly floured surface until it’s about 1/8 inch thick. This will ensure your star-shaped cheese appetizers have a flaky, tender backdrop. Keep an eye out for cracks, as you want the pastry to remain smooth before cutting.

Step 2: Cut Shapes
Using a star-shaped cutter, cut out desired shapes from the pastry. Aim for uniform sizes to ensure even baking. You should get at least 24 stars, so reroll any dough scraps and continue cutting until you’ve utilized the full pastry sheet. These will be the vessels for your delicious cheese filling.

Step 3: Prepare Filling
In a mixing bowl, combine cream cheese and shredded cheese until the mixture is creamy and well-blended. This flavorful creaminess will be the heart of your star-shaped cheese appetizers. You can also opt to add herbs or spices at this stage for an extra punch of flavor, making each bite irresistible.

Step 4: Assemble
Spoon a small dollop of the cheese mixture onto half of the star shapes, avoiding overfilling to prevent any leaks during baking. Carefully place another star shape on top, making sure to align the points. This layered assembly will create pockets of cheesy goodness that are sure to delight your guests.

Step 5: Seal Edges
Gently press the edges of the pastry stars together to seal the filling inside. For added security, you can use a fork to crimp the edges which also adds a decorative touch. Then, brush each star with a lightly beaten egg wash, giving them that beautiful golden sheen as they bake.

Step 6: Bake
Arrange your assembled star-shaped cheese appetizers on a baking sheet lined with parchment paper, ensuring they are spaced apart for even heat circulation. Place them in the preheated oven and bake for 15 minutes or until they puff up and turn golden brown. Watch closely as they bake, as the transformation will be delightful!

Step 7: Serve
Once baked, remove the stars from the oven and let them cool for a minute. Top each warm appetizer with a generous dollop of red hot pepper jelly for that perfect sweet and spicy contrast. These star-shaped cheese appetizers are ready to shine on your table, bringing joy to your gatherings!

How to Store and Freeze Star-Shaped Cheese Appetizers

Fridge: Store baked star-shaped cheese appetizers in an airtight container for up to 2 days to maintain their freshness and flaky texture.

Freezer: If you have unbaked leftovers, you can freeze them for up to 1 month. Arrange them on a baking sheet before freezing to prevent sticking, then transfer to an airtight container.

Reheating: To enjoy leftovers, reheat in a preheated oven at 350°F (175°C) for about 10-15 minutes until warmed through and crispy.

Make-Ahead Tip: Assemble the appetizers and refrigerate for up to 2 hours before baking for a convenient party preparation option.

Make Ahead Options

These Star-Shaped Cheese Appetizers are a fantastic make-ahead solution for busy home cooks! You can assemble the pastries up to 24 hours in advance; simply prepare, fill, and seal them, then refrigerate until you’re ready to bake. To maintain their quality, place a piece of parchment paper between layers if stacking them. On the day of your gathering, preheat your oven, brush with an egg wash, and bake them for about 15 minutes until golden brown. This way, you’ll serve warm, flaky treats with creamy filling and a hint of spice, ensuring effortless hosting while delighting your guests!

Expert Tips for Star-Shaped Cheese Appetizers

  • Thaw Properly: Ensure your puff pastry is fully thawed before using. This prevents cracking and results in a flakier texture.

  • Fill with Care: Don’t overfill the pastries! A spoonful of cheese mixture is enough; overstuffing can lead to bursting during baking.

  • Golden Finish: For that perfect golden color, brush with an egg wash. If you run out of eggs, a milk wash works wonderfully too!

  • Baking Time: Keep an eye on the oven: bake until pastries are puffed and golden brown for the best tasting star-shaped cheese appetizers.

  • Experiment Boldly: Feel free to customize your cheese filling! Mixing different types of cheese or adding herbs can elevate the flavor profile significantly.

What to Serve with Star-Shaped Cheese Appetizers?

Elevate your festive gatherings with delightful pairings that complement the creamy, spicy goodness of these appetizers.

  • Crispy Green Salad: A fresh, crunchy salad adds brightness and balances the rich flavors of the cheese. Toss in some citrus vinaigrette for a zesty touch.

  • Garlic Breadsticks: These warm, buttery sticks are perfect for dipping into any leftover pepper jelly. Their chewy texture offers a delightful contrast to the flaky pastries.

  • Classic Champagne: This bubbly beverage beautifully complements the rich cheese with its refreshing effervescence and fruity notes, making your gathering feel extra special.

  • Mini Quiches: These savory bites provide another layer of flavor. Their creamy egg filling and flaky crust echo the textures of your star-shaped cheese appetizers.

  • Sweet Fruit Platter: A vibrant array of fruits, such as grapes, strawberries, and melon, brings a sweet juxtaposition to the spicy kick of the red hot pepper jelly.

  • Herbed Cream Cheese Dip: Serve this alongside an assortment of crackers. The herby notes enhance the overall flavor profile and keep the party vibe going!

  • Sparkling Water with Lime: Refreshing and non-alcoholic, this drink cleanses the palate between bites, allowing the rich flavors of your appetizers to shine.

Adding these complementary dishes to your spread will ensure a taste sensation that your guests won’t soon forget!

Star-Shaped Cheese Appetizers Variations

Embrace your creativity and make these star-shaped cheese appetizers your own with delightful twists!

  • Cheese Swap: Try using feta or pepper jack for a zingy twist. Each cheese adds a unique flavor that can transform the whole dish.
  • Herby Kick: Add fresh herbs like chives or parsley to the cheese filling. This will elevate the taste and add a fragrant nose to your appetizers.
  • Fruit Twist: Instead of red hot pepper jelly, experiment with other jams like apricot or raspberry for a completely different flavor profile!
  • Spicy Option: For those who love heat, add some diced jalapeños to the cheese mixture. This adds a delightful kick that spice lovers will adore.
  • Veggie Boost: Incorporate sautéed vegetables like spinach or mushrooms for added texture and nutrition. This not only enhances flavor but also adds color to your dish.
  • Sweet Surprise: Mix in a teaspoon of honey to the cheese filling for a delicious sweet contrast that balances the spice of the jelly.
  • Mini Versions: Use mini star cutters to create bite-sized appetizers that are perfect for snacking and can be served at parties. They’ll disappear in seconds!
  • Savory Alternatives: Experiment with savory spreads. For a different flavor kick, a dollop of olive tapenade can be an unexpected yet delicious addition.

Pair these variations with a selection of Cheddar Mac Cheese or Strawberry Cheesecake Bars for an impressive spread that will leave your guests craving more!

Star-Shaped Cheese Appetizers Recipe FAQs

How do I choose the best puff pastry for these appetizers?
Absolutely! For the best results, opt for high-quality frozen puff pastry that is fully thawed before starting. Look for a brand that has a good balance of butter and flour to ensure a flaky texture once baked. If it’s too cold, it may crack when rolling out, affecting the final product.

What is the best way to store baked star-shaped cheese appetizers?
To keep your baked star-shaped cheese appetizers at their freshest, store them in an airtight container in the refrigerator for up to 2 days. If they seem to lose their crispiness, just pop them back into the oven at 350°F (175°C) for a few minutes to revive their flaky texture!

Can I freeze unbaked star-shaped cheese appetizers?
Certainly! To freeze unbaked appetizers, lay them out on a baking sheet lined with parchment paper and freeze until solid. Then, transfer them to an airtight container or freezer bag and store for up to 1 month. When you’re ready to bake, just add a few extra minutes to the baking time, no need to thaw!

What troubleshooting tips do you have for overfilled pastries?
Very good question! If you overfill the pastries, they may burst while baking. For the best results, only spoon a small dollop of the cheese mixture onto half of the star shapes. If you encounter patched or leaking pastries, allow them to cool briefly, then use a small piece of dough to patch any gaps before serving.

Are these appetizers suitable for vegetarians?
Yes, these star-shaped cheese appetizers are vegetarian-friendly! However, make sure to double-check your cheese choices, as some cheeses may use animal rennet. If you’re serving to guests with dietary restrictions, consider using plant-based cheeses which can also add a fun twist to the flavor profile.

How can I customize the filling for these appetizers?
The more the merrier when it comes to creativity! You can experiment by incorporating different types of cheese such as feta or pepper jack, or even adding fresh herbs like chives or parsley to the cheese mixture. Mix and match your fillings to appeal to various tastes, ensuring each bite is a delightful surprise for your guests!

Star-Shaped Cheese Appetizers

Star-Shaped Cheese Appetizers with Spicy Pepper Jelly Magic

These star-shaped cheese appetizers are a crowd-pleaser, featuring creamy cheese in flaky pastry with spicy pepper jelly.
Prep Time 30 minutes
Cook Time 15 minutes
Total Time 45 minutes
Servings: 24 pieces
Course: Appetizer
Cuisine: American
Calories: 150

Ingredients
  

For the Pastry
  • 1 pack Puff Pastry thawed
For the Cheese Filling
  • 8 oz Cream Cheese can substitute with ricotta or goat cheese
  • 1 cup Shredded Cheese cheddar, mozzarella, or any preferred blend
For the Spicy Kick
  • 1/2 cup Red Hot Pepper Jelly or other milder jams if desired
For the Egg Wash
  • 1 large Egg or milk wash as alternative

Equipment

  • Oven
  • Mixing Bowl
  • Star-shaped cutter
  • Baking Sheet
  • Parchment paper
  • Fork

Method
 

Step-by-Step Instructions
  1. Preheat oven to 400°F (200°C). Roll out puff pastry to about 1/8 inch thick.
  2. Cut out star shapes using a star-shaped cutter, aiming for uniform sizes.
  3. Combine cream cheese and shredded cheese in a bowl until creamy and well-blended.
  4. Spoon cheese mixture onto half of the star shapes and place another star shape on top.
  5. Press edges to seal, using a fork to crimp them for decoration. Brush with egg wash.
  6. Bake for 15 minutes or until golden brown. Watch closely while baking.
  7. Let cool for a minute and add a dollop of red hot pepper jelly before serving.

Nutrition

Serving: 1pieceCalories: 150kcalCarbohydrates: 12gProtein: 5gFat: 10gSaturated Fat: 6gPolyunsaturated Fat: 1gMonounsaturated Fat: 2gCholesterol: 30mgSodium: 200mgPotassium: 50mgSugar: 2gVitamin A: 200IUCalcium: 100mgIron: 1mg

Notes

Make ahead by assembling up to 2 hours before baking. Store in an airtight container in the fridge for up to 2 days or freeze unbaked for 1 month.

Tried this recipe?

Let us know how it was!

Savory Chinese Ginger Scallion Chicken in Minutes

As I pulled a fresh batch of ginger from my pantry, the aroma flooded my kitchen, transforming my cozy space into a vibrant Asian marketplace. This is how Chinese Ginger Scallion Poached Chicken makes its entrance on my dinner table—a dish that is not only healthful but also a breeze to whip up. With its juicy, tender chicken and a punch of fresh ginger and scallions, this recipe offers a delightful twist on the typical weeknight dinner. It’s perfect for those evenings when time is short but you still crave something satisfying. Plus, it’s a wonderful way to add a nutritious option to your repertoire without the fuss of complicated cooking. Are you ready to experience the magic of this dish? Let’s dive into the recipe!

Why is this recipe a must-try?

Simplicity at Its Best: This recipe requires minimal ingredients and effort, making it perfect for busy evenings. Nutritious and Light: Packed with protein and low in calories, it’s a guilt-free dish the whole family will enjoy. Flavor Explosion: Fresh ginger and scallions create a vibrant taste that brightens any meal. Think of pairing it with options like Grilled Chicken Sandwich for variety! Versatile Alternatives: Feel free to experiment with tofu for a vegetarian twist or add veggies to the poaching liquid for extra nutrition. Meal Prep Hero: The flavors deepen over time, making leftovers even more delightful—a win for your weekly meal prep!

Chinese Ginger Scallion Chicken Ingredients

For the Chicken
Chicken Drumsticks – Main protein source; substitute with thighs or breasts for a different flavor and texture.
Reserved Water – Used to create the sauce, enriched with flavors from cooking the chicken; essential for authentic taste.

For the Sauce
Ginger – Adds warmth and aromatic flavor; always use fresh for the best results.
Scallions – Provides freshness and crunch; remember to use only the white parts during poaching.
Olive/Sesame Oil – Adds richness to the sauce; sesame oil lends a more authentic Asian flavor.
Low Sodium Soy Sauce – For seasoning and umami depth; opt for regular soy sauce if low sodium isn’t available.
Coconut Sugar/Regular Sugar – Balances savory flavors with sweetness; brown sugar is a suitable alternative.

Using these ingredients, you’ll create a delicious and healthful Chinese Ginger Scallion Chicken that everyone at the table will love!

Step‑by‑Step Instructions for Chinese Ginger Scallion Chicken

Step 1: Prepare the Poaching Liquid
Begin by filling a large pot with 6 cups of water and place it over high heat. Bring the water to a rolling boil, which should take about 5 minutes. This will be the base for your flavorful Chinese Ginger Scallion Chicken. Once boiling, ensure that you have all your ingredients ready for the next step.

Step 2: Add Chicken and Aromatics
Once your water is boiling, carefully add the chicken drumsticks, sliced ginger, and the white parts of the scallions to the pot. Watch as the water returns to a boil, which should only take a minute or two. Once boiling again, reduce the heat to medium-low, allowing everything to simmer gently for about 10 minutes. This will infuse the chicken with delicious flavors.

Step 3: Allow Chicken to Steep
After the 10 minutes of simmering, turn off the heat and cover the pot tightly with a lid. Let the chicken sit in the hot water for an additional 5 minutes. This gentle steeping process ensures the chicken remains tender and juicy for your Chinese Ginger Scallion Chicken dish.

Step 4: Cool Down the Chicken
Prepare an ice water bath in a large bowl while the chicken is resting. Using tongs, carefully transfer the chicken drumsticks into the ice water to cool completely for about 20 minutes. This technique stops the cooking process and helps maintain the chicken’s tender texture while intensifying its flavor.

Step 5: Mix the Sauce Ingredients
While the chicken is cooling, grab a bowl and prepare the sauce for your Chinese Ginger Scallion Chicken. Combine olive oil, low sodium soy sauce, coconut sugar, and approximately 1/2 cup of the reserved chicken cooking water. Whisk in more sliced ginger and finely chopped scallions to create a vibrant and flavorful sauce.

Step 6: Serve the Dish
Once the chicken has cooled, remove it from the ice bath and gently shred it onto a serving plate. Drizzle the flavorful sauce you prepared in the previous step all over the shredded chicken. This finishing touch highlights the aromatic ginger and scallion flavors, making your Chinese Ginger Scallion Chicken irresistibly inviting.

How to Store and Freeze Chinese Ginger Scallion Chicken

Fridge: Store leftovers in an airtight container for up to 3 days. The flavors will deepen over time, enhancing your next meal.

Freezer: For longer storage, freeze the shredded chicken and sauce in a freezer-safe container for up to 3 months. Thaw in the fridge before reheating.

Reheating: Gently reheat the chicken in a pan over low heat, adding a splash of water or broth to maintain moisture and prevent drying out. Enjoy the delicious flavors!

Meal Prep: This dish is perfect for meal prep! Cook a batch ahead of time and enjoy a nutritious, flavorful meal throughout the week.

Expert Tips for Chinese Ginger Scallion Chicken

Marinate for More Flavor: Consider marinating the chicken in the sauce for 30 minutes before cooking. This enhances the savory taste, making every bite delicious.

Perfect Cooking Temp: Avoid overcooking the chicken by using a meat thermometer; it should reach an internal temperature of 165°F (74°C) for juicy, tender results.

Chill to Retain Tenderness: Don’t skip the ice water bath after cooking; it helps keep the chicken moist and firm while enhancing the flavors of the dish.

Watch the Sodium: Be mindful of sodium levels in soy sauce; opt for low sodium versions to keep the dish healthier without sacrificing flavor.

Customize Your Veggies: Experiment by adding sliced bell peppers or carrots in the poaching liquid for extra nutrition and vibrant color to your Chinese Ginger Scallion Chicken.

Variations & Substitutions for Chinese Ginger Scallion Chicken

Feel free to put your own spin on this dish—you’ll find plenty of delicious ways to customize it!

  • Vegetarian Option: Swap chicken for tofu or tempeh, marinating it in the sauce before poaching for a tasty twist.
  • Crispy Add-In: Toss in sliced bell peppers or carrots to the poaching liquid, enhancing both flavor and nutrition in every bite.
  • Spicy Kick: Add red pepper flakes or Sriracha to the sauce for a spicy variation that brings heat to your meal!
  • Herb Infusion: Mix in fresh cilantro or basil to the sauce before serving, adding an aromatic depth that pairs beautifully with the ginger.
  • Nutty Flavor: Replace olive oil with toasted sesame oil for richer, more complex flavor, truly evoking that authentic Asian essence.
  • Sweet Alternative: Use honey instead of coconut sugar for a natural sweetness that complements the savory notes beautifully.
  • Rice Twist: Serve alongside coconut rice or jasmine rice for an aromatic side dish that complements the ginger and scallions.
  • Hearty Option: Add quinoa or farro as a bed for the chicken, making your meal even heartier while keeping it nutritious and delicious.

With these variations, your Chinese Ginger Scallion Chicken can become a versatile meal that’s worth making time and again. Enjoy experimenting and find your favorite combinations!

Make Ahead Options

These Chinese Ginger Scallion Poached Chicken are perfect for meal prep enthusiasts! You can prepare the poached chicken up to 24 hours in advance; simply follow the cooking instructions and let the chicken cool completely before refrigerating. To enhance the flavor, mix the sauce ingredients and store them separately in the fridge for up to 3 days. This separation helps maintain the quality of the chicken and sauce until you’re ready to serve. When it’s time to enjoy your dish, simply reheat the chicken gently and drizzle the chilled sauce on top for a delicious meal that tastes just as great as when freshly made. This way, you can enjoy a wholesome dinner on busy weeknights with minimal effort!

What to Serve with Chinese Ginger Scallion Poached Chicken

As you savor the vibrant flavors of poached chicken, let’s create a delightful dining experience with complementary dishes that will elevate your meal.

  • Steamed Jasmine Rice: The perfect bed for the juicy chicken, allowing its savory sauce to soak in, creating a mouthwatering combination.

  • Sautéed Green Vegetables: Think tender bok choy or bright snap peas, bringing a fresh crunch that perfectly balances the chicken’s tender texture.

  • Cucumber Salad: A refreshing side with crisp cucumber and a tangy dressing, adding a light and zesty contrast to the warm chicken. This dish can awaken your taste buds in every bite!

  • Miso Soup: A warm and comforting accompaniment with earthy flavors, perfect for deepening the Asian experience on your table.

  • Chili Garlic Edamame: For those who enjoy a spicy kick, these tender soybeans provide a satisfying bite and a wonderful textural contrast to the smooth chicken.

  • Sesame Noodles: These flavorful noodles dressed in sesame oil and soy sauce make for a delightful side that harmonizes with the poached chicken’s subtle flavors. Their chewiness complements the dish beautifully.

  • Green Tea: A soothing drink choice following the meal. Green tea’s earthy notes cleanse the palate and enhance the lightness of the dish.

  • Mango Sticky Rice: For dessert, this sweet treat brings tropical vibes, making a delightful conclusion to your ginger-infused dinner experience.

Chinese Ginger Scallion Poached Chicken Recipe FAQs

How do I choose the right ingredients for this recipe?
Absolutely! When selecting chicken drumsticks, look for ones that are plump and free of dark spots. For the ginger, fresh is always best; it should be firm with smooth skin. Scallions should be bright green and crisp, with no wilting or yellowing.

How should I store leftovers of the poached chicken?
You can store leftovers in an airtight container in the refrigerator for up to 3 days. The sauce’s flavors will deepen over this time, making the dish even more delightful when you reheat it. I often enjoy it as a quick lunch by pairing it with fresh steamed rice!

Can I freeze Chinese Ginger Scallion Chicken?
Certainly! To freeze, place the shredded chicken and sauce in a freezer-safe container, ensuring to expel as much air as possible. This can be stored for up to 3 months. When you’re ready to enjoy it, let it thaw in the fridge overnight, and then reheat gently in a pan with a splash of water to keep it moist.

What should I do if the chicken is overcooked?
If you find your chicken has gone a bit dry, no worries! You can shred it and let it marinate in the sauce for a bit longer. The sauce adds moisture and flavor back into the chicken. It’s a great way to salvage your dish, and trust me, it will still taste amazing!

Is this recipe suitable for various dietary preferences?
Yes! This recipe can be made vegetarian by swapping the chicken with firm tofu or tempeh. You can also add more veggies like bell peppers or carrots to the poaching liquid for added nutrition and variety. Always check for any allergies related to soy sauce or sesame oil, though!

How can I enhance the flavors of the dish?
For a more robust flavor profile, consider marinating the chicken in the sauce for about 30 minutes before cooking. You can also add additional spices or herbs during the cooking process to customize it to your liking. The more, the merrier!

Chinese Ginger Scallion Chicken

Savory Chinese Ginger Scallion Chicken in Minutes

A quick and delicious recipe for Chinese Ginger Scallion Chicken that's both healthful and easy to prepare.
Prep Time 15 minutes
Cook Time 15 minutes
Cooling Time 20 minutes
Total Time 50 minutes
Servings: 4 pieces
Course: Chicken
Cuisine: Chinese
Calories: 320

Ingredients
  

For the Chicken
  • 6 cups water for poaching
  • 4 pieces chicken drumsticks substitute with thighs or breasts if desired
For the Sauce
  • 3 tablespoons fresh ginger sliced
  • 4 pieces scallions white parts only
  • 2 tablespoons olive oil or sesame oil for an authentic taste
  • 1/4 cup low sodium soy sauce or regular soy sauce
  • 2 tablespoons coconut sugar or regular sugar

Equipment

  • large pot
  • Whisk
  • bowl
  • Tongs

Method
 

Step-by-Step Instructions
  1. Fill a large pot with 6 cups of water and bring it to a rolling boil, which takes about 5 minutes.
  2. Once boiling, add the chicken drumsticks, sliced ginger, and white parts of the scallions to the pot. Allow the water to return to a boil, then reduce heat to medium-low and simmer for about 10 minutes.
  3. Turn off the heat and cover the pot tightly. Let chicken steep in the hot water for an additional 5 minutes.
  4. Prepare an ice water bath in a large bowl. Transfer the chicken drumsticks to the ice water to cool completely for about 20 minutes.
  5. While cooling, combine olive oil, low sodium soy sauce, coconut sugar, and about 1/2 cup of reserved cooking water in a bowl. Whisk in more sliced ginger and chopped scallions.
  6. Remove the chicken from the ice bath, shred it onto a serving plate, and drizzle the sauce over the top.

Nutrition

Serving: 1pieceCalories: 320kcalCarbohydrates: 10gProtein: 28gFat: 18gSaturated Fat: 3gPolyunsaturated Fat: 5gMonounsaturated Fat: 9gCholesterol: 80mgSodium: 600mgPotassium: 350mgFiber: 1gSugar: 2gVitamin A: 500IUVitamin C: 5mgCalcium: 30mgIron: 1mg

Notes

Consider marinating the chicken in the sauce for 30 minutes before cooking for added flavor. Use a meat thermometer to ensure the chicken reaches 165°F (74°C) for perfect results. Store leftovers in an airtight container for up to 3 days.

Tried this recipe?

Let us know how it was!

Wisconsin Apple Kringle: Your New Favorite Cozy Dessert

As the warm aroma of spiced apples wafted through my kitchen, I couldn’t help but reminisce about the special gatherings where homemade treats took center stage. Today, I’m excited to share my take on a Wisconsin Apple Kringle—a flaky, Danish-inspired pastry that elegantly cradles a luscious apple pie filling. This delightful dessert is not only a feast for the senses but also a fantastic crowd-pleaser, perfect for both festive celebrations and cozy breakfasts. With its beautiful presentation and straightforward preparation, this recipe eliminates the fast food fatigue and adds a touch of homemade charm to your table. So, are you ready to embrace the delightful world of baked goods and impress everyone with this stunning kringle?

Have You Tried Wisconsin Apple Kringle?

Irresistible Flavor: The combination of spiced apples and buttery pastry creates a mouthwatering experience that embodies cozy comfort.
Unique Presentation: Its elegant oval shape not only looks beautiful but also makes it perfect for serving at gatherings.
Quick to Make: Despite its stunning appearance, this recipe is easy to follow, saving you time without sacrificing quality.
Versatile Delight: Enjoy it warm for breakfast or as a delightful dessert alongside a scoop of ice cream—like a delicious twist on the classic apple pie!
Crowd-Pleaser: Whether shared at a festive gathering or enjoyed at home, this Wisconsin Apple Kringle is bound to impress family and friends alike. Give it a try after whipping up some Grilled Cinnamon Apples as a perfect side!

Wisconsin Apple Kringle Ingredients

For the Dough

  • All-Purpose Flour – Provides the essential structure and texture for that flaky pastry; try substituting with whole wheat flour for a heartier bite.
  • Sugar – Adds a hint of sweetness; brown sugar can deepen the flavor profile beautifully.
  • Salt – Enhances all flavors in the pastry; consider using sea salt for a gourmet touch.
  • Cold Butter – Creates those desirable flaky layers; it must be cold to achieve the best texture—avoid margarine for optimal results.
  • Active Dry Yeast – Acts as the leavening agent to give the dough lift; ensure it’s fresh for the best rise.
  • Milk – Infuses moisture and richness into the dough; whole milk is preferable, or opt for nut milk for a dairy-free alternative.
  • Egg – Binds the ingredients together while adding richness; substitute with flaxseed meal for a vegan version, if desired.

For the Filling

  • Spiced Apple Filling – Offers a delicious sweet and tart flavor; store-bought filling works just as well for convenience.

For the Glaze

  • Vanilla Extract – Provides an aromatic and flavorful touch to the glaze; almond extract can be a lovely alternative to try.
  • Powdered Sugar – Sweetens the glaze for that perfect finishing touch; granulated sugar, blended into a powder, can work in a pinch.

Step‑by‑Step Instructions for Wisconsin Apple Kringle

Step 1: Prepare the Dough
In a large mixing bowl, combine the all-purpose flour, sugar, salt, and active dry yeast. Cut in the cold butter until the mixture resembles coarse crumbs. Gradually add in the milk and egg, mixing until a soft dough forms. This process should take about 5 minutes, and your dough will be slightly sticky yet manageable.

Step 2: Chill
Cover the dough with plastic wrap and refrigerate for at least 30 minutes. Chilling allows the butter to firm up, ensuring that the Wisconsin Apple Kringle has a flaky texture once baked. You can chill it longer if desired, enhancing the flavors and making it easier to shape later.

Step 3: Shape the Kringle
Preheat your oven to 375°F (190°C). On a lightly floured surface, roll out the chilled dough into a large oval shape, about 1/4 inch thick. Spread the spiced apple filling generously down the center of the dough, leaving edges to fold over. Carefully fold the dough over the filling, pinching the edges to seal, and form into an oval or horseshoe shape on a lined baking sheet.

Step 4: Bake
Place the shaped kringle in the preheated oven and bake for 25–30 minutes, or until it’s golden brown and the filling is bubbling slightly. Keep an eye on the kringle in the last few minutes for that perfect golden hue which indicates that it’s ready to come out.

Step 5: Add Glaze
Once baked, allow the Wisconsin Apple Kringle to cool for about 10 minutes on a wire rack. In a small bowl, whisk together the powdered sugar and vanilla extract until smooth. Drizzle this sweet glaze over the warm kringle to finish off this delightful pastry, allowing it to seep into the cracks for extra sweetness.

What to Serve with Wisconsin Apple Kringle

Enjoy this delightful pastry alongside dishes that bring out its spiced apple goodness and buttery richness, creating a cozy meal experience.

  • Whipped Cream: A dollop of whipped cream adds a light, airy counterpoint to the rich flavors, enhancing each slice’s indulgence.
  • Vanilla Ice Cream: The creamy texture melts deliciously into the warm kringle, making for a tempting contrast that guests will adore.
  • Hot Tea: A soothing cup of herbal or spiced tea pairs perfectly, complementing the comforting warmth of the baked pastry.
  • Caramel Sauce: Drizzling a bit of caramel on top creates a luxurious finish, elevating the dessert to a whole new level of sweetness.
  • Fresh Fruit Salad: Bright, juicy fruits like berries and citrus provide a refreshing, tangy side that balances the sweetness of the kringle.
  • Cinnamon Sugar Donuts: These little bites of heaven bring a delightful twist and crunchy texture that harmonizes beautifully with the soft pastry.
  • Chai Latte: The warm spices in a chai latte echo the flavors of the kringle, making for a comforting beverage that’s perfect for cool evenings.
  • Red Wine: A glass of sweet red wine complements the apple filling with notes of rich fruit, making it an excellent pairing for adult gatherings.

Make Ahead Options

Preparing Wisconsin Apple Kringle ahead of time is a smart way to save precious minutes during busy mornings or festive gatherings! You can make the dough and refrigerate it for up to 24 hours, which helps develop flavor and makes shaping easier. Simply wrap the dough tightly in plastic wrap to prevent drying out. Additionally, the spiced apple filling can be prepared and stored in the fridge for up to 3 days. When you’re ready to serve, just roll out the chilled dough, fill it with the prepped apples, and bake as directed. With these make-ahead strategies, your Wisconsin Apple Kringle will be just as delicious but with a lot less last-minute fuss!

Expert Tips for Wisconsin Apple Kringle

  • Chill Dough Well: Refrigerating your dough for at least 30 minutes makes it easier to handle and promotes flakiness; don’t skip this step!
  • Use Fresh Yeast: Ensure your active dry yeast is fresh for a perfectly risen dough. Expired yeast can lead to disappointing results.
  • Seal Edges Firmly: To prevent filling from leaking during baking, pinch the dough edges tightly. Take your time for a clean presentation!
  • Brush with Egg Wash: For an extra shiny, golden crust, brush the kringle with an egg wash before baking. This little step makes a huge difference!
  • Experiment with Fillings: While spiced apple is traditional, don’t hesitate to try different fruit fillings to customize your Wisconsin Apple Kringle to your taste.

Wisconsin Apple Kringle Variations & Substitutions

Get ready to make this delightful pastry your own with these fun twists and substitutions that will satisfy your cravings!

  • Whole Wheat Flour: Swap all-purpose flour for whole wheat flour to add a nutty flavor and denser texture.
  • Vegan Delight: Substitute the egg with flaxseed meal mixed with water for a plant-based version that doesn’t sacrifice taste.
  • Brown Sugar: Use brown sugar in place of regular sugar for a rich, caramel-like depth in sweetness.
  • Fruit Filling: Try filling with cherry or peach instead of apple for a deliciously unique flavor twist.
  • Cinnamon Infusion: A pinch of cinnamon or nutmeg in the dough adds warmth and elevates the overall flavor profile.
  • Almond Extract Glaze: Replace vanilla extract with almond extract in the glaze for a nutty twist that beautifully complements the apple filling.
  • Nut Topping: Sprinkle chopped walnuts or pecans on top of the kringle before baking for an added crunch.
  • Spicy Kick: Add a dash of cayenne or black pepper to the apple filling for a surprising heat that contrasts with the sweetness.

Feel free to mix and match these variations! Whether you’re looking to try something new or accommodate dietary restrictions, these simple swaps can transform your Wisconsin Apple Kringle into a new family favorite. And for a delightful finish, why not serve it alongside some Grilled Cinnamon Apples for that extra touch of fall flavor?

How to Store and Freeze Wisconsin Apple Kringle

Room Temperature: Store the kringle in an airtight container for up to 2 days to maintain freshness and prevent drying out.

Fridge: If you wish to keep it longer, refrigerate the Wisconsin Apple Kringle for up to 5 days in an airtight container to preserve its delicious flavor.

Freezer: Wrap the cooled kringle tightly in plastic wrap and then in aluminum foil. It can be frozen for up to 3 months for a delightful treat later on.

Reheating: To enjoy your kringle warm, reheat in the oven at 350°F (175°C) for about 10 minutes. This will restore its flaky texture beautifully!

Wisconsin Apple Kringle Recipe FAQs

How do I select ripe apples for the spiced apple filling?
Absolutely! Look for firm apples without dark spots or bruises. Varieties like Granny Smith provide a nice tartness, while Honeycrisp brings sweetness. Aim for medium to large apples for the best filling.

How should I store leftover Wisconsin Apple Kringle?
To maintain its delightful flavor, keep the kringle in an airtight container at room temperature for up to 2 days. If you’d like it to last longer, refrigerate it for up to 5 days. Just be sure to let it cool completely before storing!

Can I freeze Wisconsin Apple Kringle?
Yes, you can! Once cooled, wrap the kringle tightly in plastic wrap and then in aluminum foil. It will stay fresh in the freezer for up to 3 months. When you’re ready to enjoy, simply reheat it in the oven at 350°F (175°C) for about 10 minutes or until warmed through.

What should I do if my dough doesn’t rise?
Very! If your dough doesn’t rise, first check the freshness of your active dry yeast—it should bubble when mixed with warm water. Ensure your ingredients are at the correct temperature and create a warm, draft-free environment for the dough to rise. A warm oven or a cozy spot on the countertop works well.

Are there any allergy considerations for this Wisconsin Apple Kringle?
Of course! This recipe contains wheat, dairy, and eggs, which are common allergens. For a gluten-free version, you can use a gluten-free flour blend. Substitute the milk with almond or soy milk for a dairy-free option, and flaxseed meal can replace the egg for a vegan version as well.

Can I use a different filling besides spiced apples?
Absolutely! You can mix it up by using other fruit fillings like cherry, peach, or even cream cheese. Just ensure that the filling is not too liquidy to avoid sogginess. Experimenting with flavors makes baking even more fun!

Wisconsin Apple Kringle

Wisconsin Apple Kringle: Your New Favorite Cozy Dessert

Wisconsin Apple Kringle is a deliciously flaky pastry filled with spiced apples, perfect for cozy breakfasts and festive gatherings.
Prep Time 35 minutes
Cook Time 30 minutes
Chilling Time 30 minutes
Total Time 1 hour 35 minutes
Servings: 8 slices
Course: Dessert
Cuisine: American
Calories: 320

Ingredients
  

For the Dough
  • 2 cups All-Purpose Flour Whole wheat flour can be substituted for a heartier bite.
  • 2 tablespoons Sugar Brown sugar can deepen the flavor.
  • 1 teaspoon Salt Sea salt can be used for a gourmet touch.
  • 1 cup Cold Butter Cold butter is essential for a flaky texture.
  • 1 packet Active Dry Yeast Ensure it's fresh for best results.
  • 1 cup Milk Whole milk is preferable for richness.
  • 1 large Egg Can be substituted with flaxseed meal for vegan version.
For the Filling
  • 2 cups Spiced Apple Filling Store-bought filling works for convenience.
For the Glaze
  • 1 teaspoon Vanilla Extract Almond extract can be used as an alternative.
  • 1 cup Powdered Sugar Can substitute with granulated sugar blended into powder.

Equipment

  • Mixing Bowl
  • Baking Sheet
  • Wire Rack
  • small bowl

Method
 

Step‑by‑Step Instructions
  1. In a large mixing bowl, combine the all-purpose flour, sugar, salt, and active dry yeast. Cut in the cold butter until the mixture resembles coarse crumbs. Gradually add in the milk and egg, mixing until a soft dough forms. This process should take about 5 minutes.
  2. Cover the dough with plastic wrap and refrigerate for at least 30 minutes. Chilling allows the butter to firm up, ensuring that the Wisconsin Apple Kringle has a flaky texture once baked.
  3. Preheat your oven to 375°F (190°C). On a lightly floured surface, roll out the chilled dough into a large oval shape, about 1/4 inch thick. Spread the spiced apple filling generously down the center of the dough, leaving edges to fold over. Carefully fold the dough over the filling, pinching the edges to seal, and form into an oval or horseshoe shape on a lined baking sheet.
  4. Place the shaped kringle in the preheated oven and bake for 25–30 minutes, or until it is golden brown and the filling is bubbling slightly. Keep an eye on the kringle in the last few minutes for a perfect golden hue.
  5. Once baked, allow the Wisconsin Apple Kringle to cool for about 10 minutes on a wire rack. In a small bowl, whisk together the powdered sugar and vanilla extract until smooth. Drizzle this sweet glaze over the warm kringle.

Nutrition

Serving: 1sliceCalories: 320kcalCarbohydrates: 42gProtein: 4gFat: 15gSaturated Fat: 9gPolyunsaturated Fat: 1gMonounsaturated Fat: 5gCholesterol: 40mgSodium: 180mgPotassium: 150mgFiber: 1gSugar: 10gVitamin A: 400IUVitamin C: 2mgCalcium: 25mgIron: 1mg

Notes

Store in an airtight container at room temperature for up to 2 days; refrigerate for up to 5 days, or freeze for up to 3 months.

Tried this recipe?

Let us know how it was!