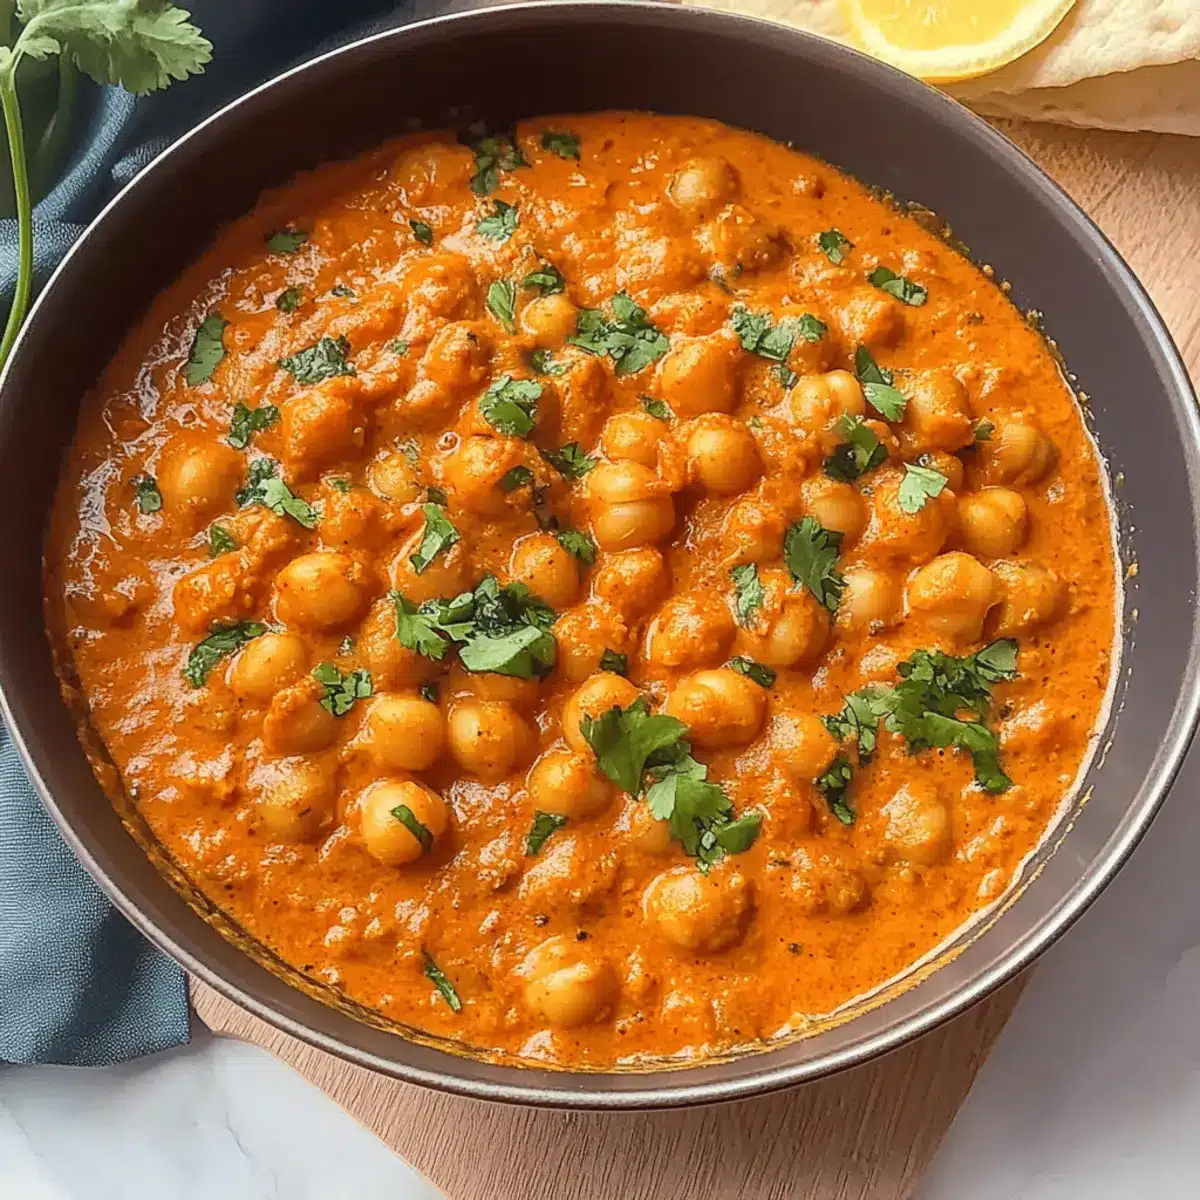
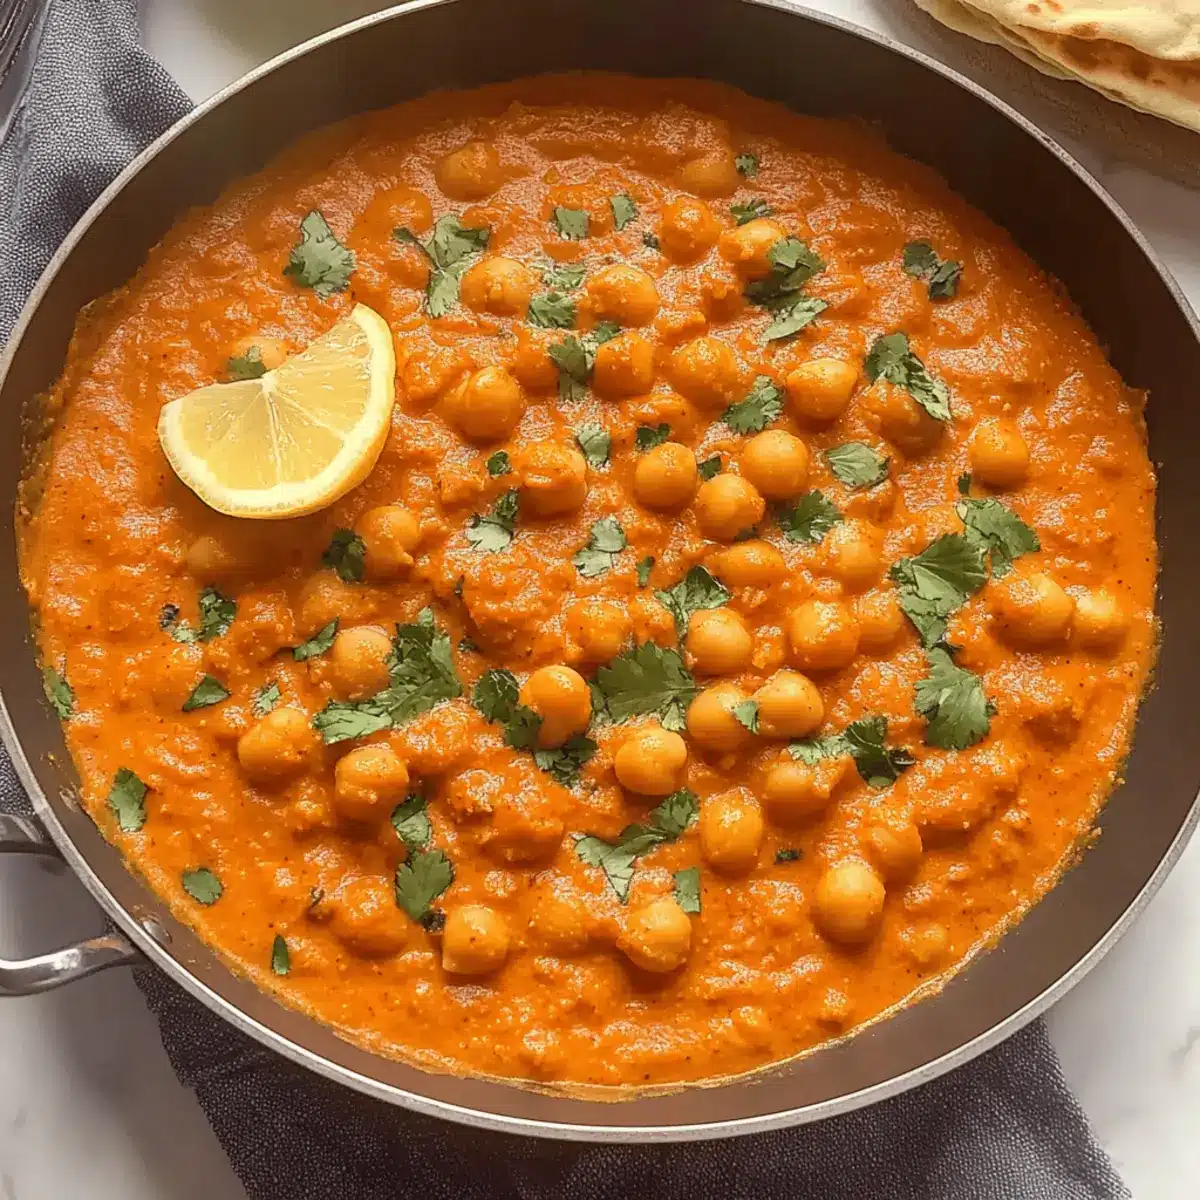
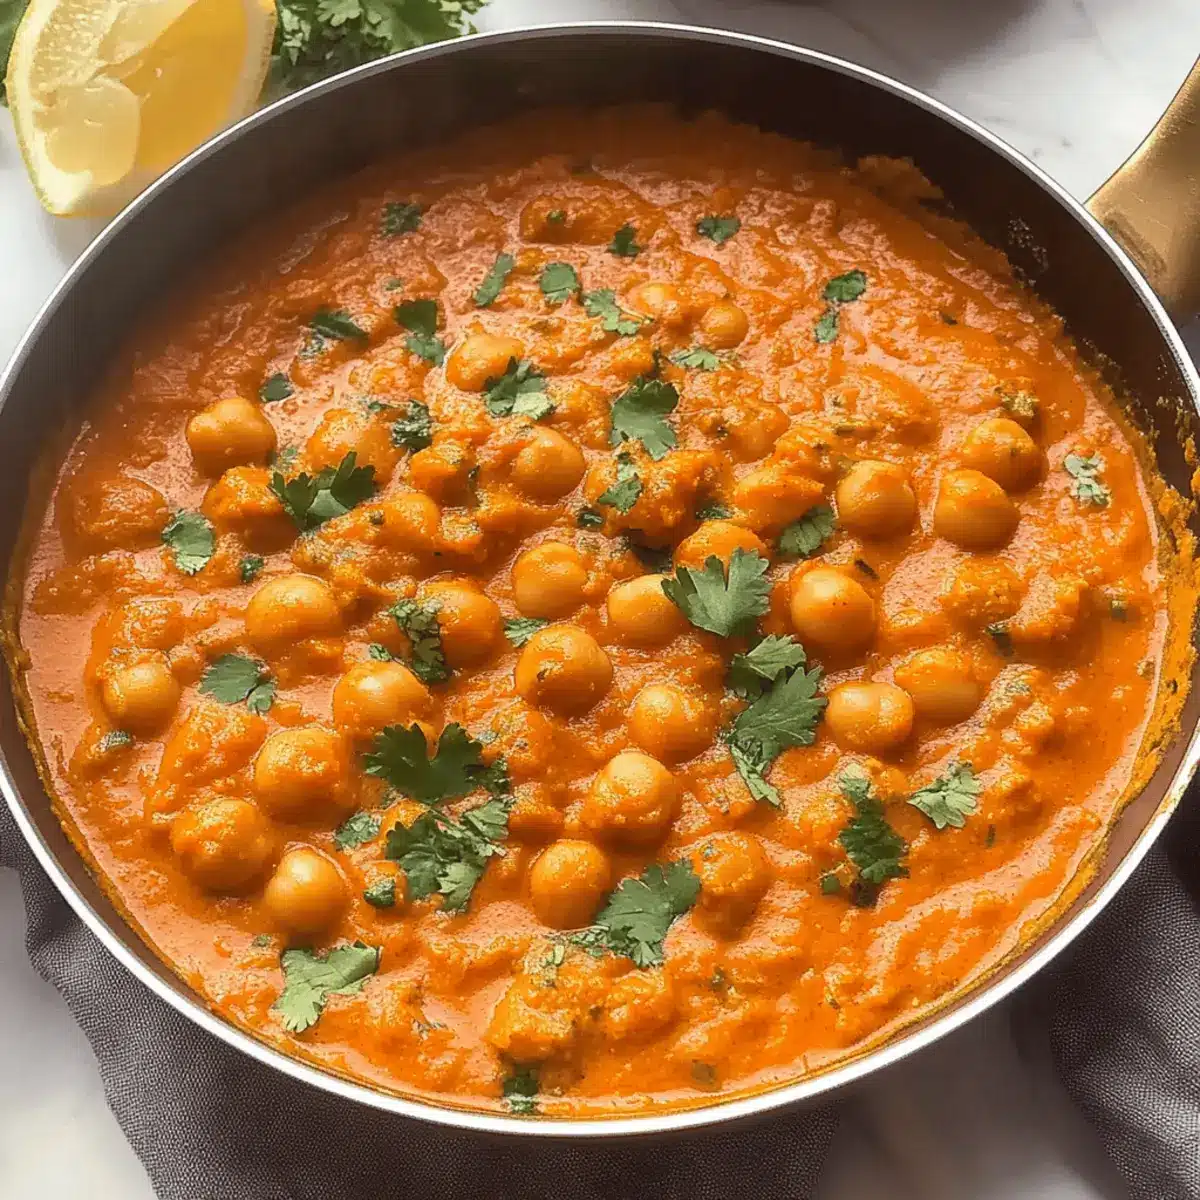
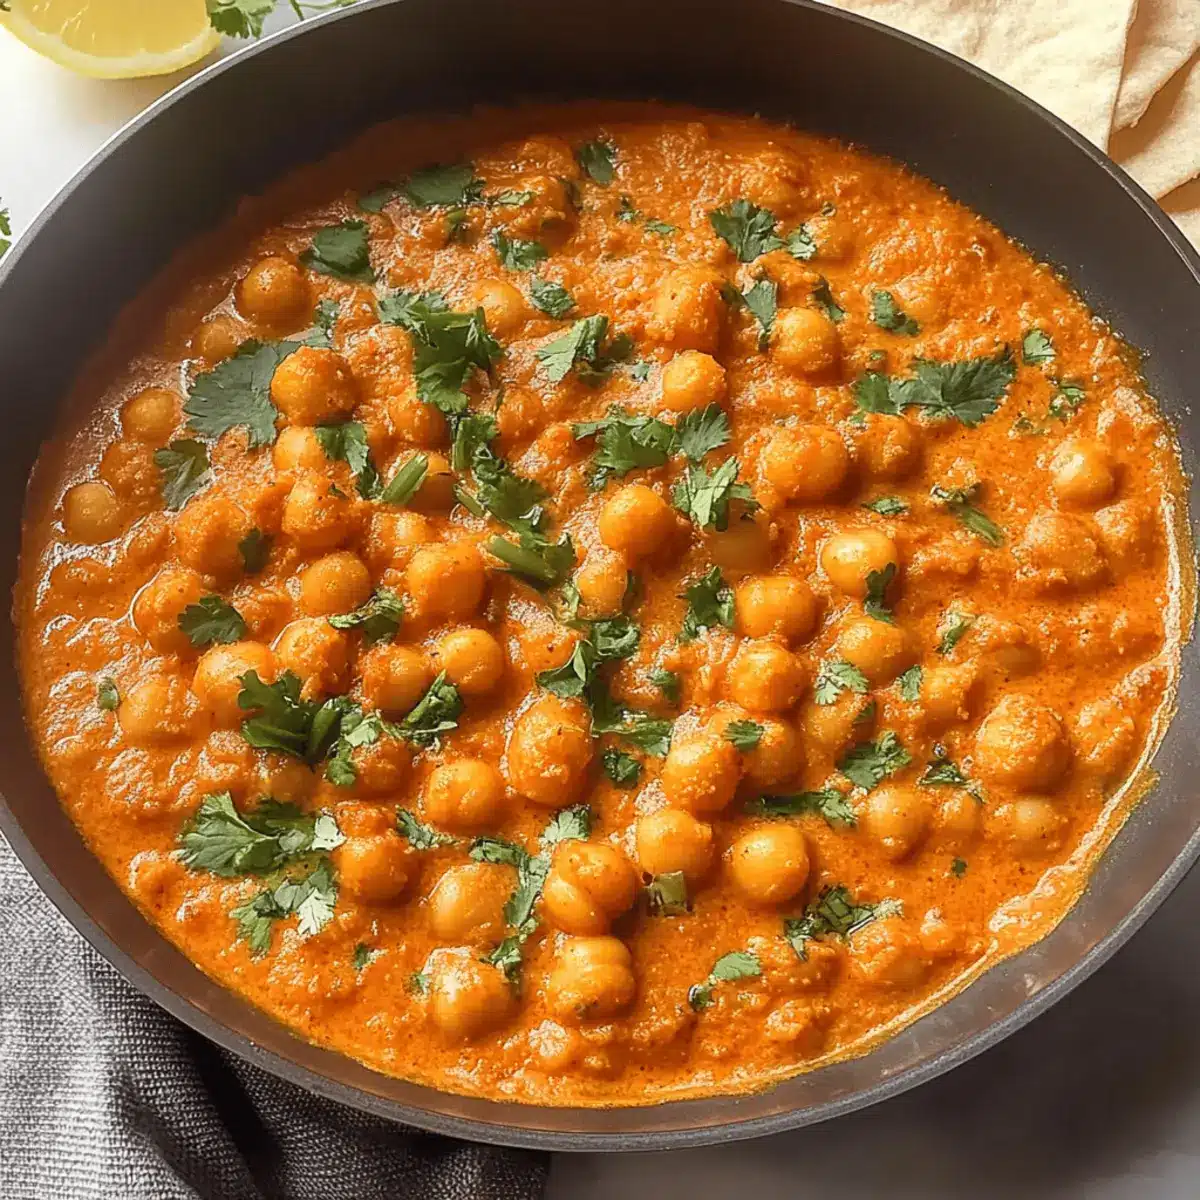
Creamy Indian Butter Chickpeas: Your New Favorite Comfort Meal

The enticing aroma of spices wafted through my kitchen as I prepared to make my own version of Indian Butter Chickpeas. It’s one of those delightful dishes that not only satisfy cravings for comfort food but also strikes the perfect balance between rich flavors and vegetarian goodness. This Easy Indian Butter Chickpeas recipe can be your go-to meal, ready in just 30 minutes and all in one pot! Imagine a creamy, velvety sauce enveloping tender chickpeas, making it a truly nourishing and fulfilling meal. Plus, it’s a welcome relief for anyone looking to swap fast food for something homemade and wholesome. Grab your ingredients, and let’s dive into this vibrant world of Indian flavors together—your taste buds will thank you!

Why are Indian Butter Chickpeas so special?

Creamy Comfort: This dish is a warm hug on a plate, featuring a rich, velvety sauce that makes it utterly satisfying. Quick & Easy: Ready in just 30 minutes, it’s perfect for weeknight dinners. Versatile: Serve it with fluffy basmati rice, crusty garlic naan, or even a refreshing cucumber raita for a complete meal. Nutritious Delight: Packed with protein from chickpeas and bursting with flavor from aromatic spices, it’s a healthy alternative to fast food. For more quick meal inspiration, check out our Garlic Butter Shrimp or indulge in the sweetness of Honey Butter Brioche.

Indian Butter Chickpeas Ingredients

For the Sauce
Butter – Adds richness and flavor. Substitution: Use vegan butter for a dairy-free option.
Red Onion – Offers sweetness and depth. No substitutions necessary, though yellow onion can be used.
Garlic (2 cloves) – Enhances flavor complexity. Use garlic powder if fresh is not available (1/2 tsp).
Fresh Ginger (1 tbsp) – Adds warmth and spice. Can substitute with ground ginger (1 tsp).
Tomato Paste (1 tsp) – Provides richness and base flavor. No direct substitution; could omit for a lighter flavor.
Turmeric Powder (1 tsp) – Adds color and earthiness. No substitutions needed.
Ground Cumin (1 tsp) – Offers a warm, earthy tone. Could swap with ground coriander for a different flavor base.
Ground Coriander (0.5 tsp) – Complements the cumin with a citrusy note. Omit if unavailable; can increase cumin slightly.
Chili Powder (0.5 tsp) or Red Chili – Adds mild heat. Can adjust quantity to control spice level.
Garam Masala (2 tsp) – Brings a complex aromatic profile. Essential for authentic flavor; no substitutes.
Salt (0.5 tsp) – Enhances overall flavor. Use to taste based on dietary needs.
Crushed Tomatoes (400g) – Forms the sauce base with acidity and sweetness. No substitutes, but fresh or sundried tomatoes blended can work.
Heavy Cream (125ml) or Coconut Milk – Adds creaminess and balances spices. Substitute with coconut milk for a dairy-free option.

For Garnishing
Lemon Juice (¼ – ½) – Brightens flavors and adds acidity. Adjust to taste; lime can be used as a substitute.
Cilantro (chopped) – For garnish, adds freshness. Can substitute with parsley if cilantro is not preferred.

These Indian Butter Chickpeas ingredients combine to create a delightful dish that’s not only flavorful but also easy to whip up in your own kitchen!

Step‑by‑Step Instructions for Indian Butter Chickpeas

Step 1: Sauté the Onion
Begin by melting 2 tablespoons of butter in a large skillet over medium heat. Once the butter is bubbly, add one diced red onion and sauté for 5-6 minutes until it turns soft and translucent, stirring occasionally. This fragrant base will set the tone for your Indian Butter Chickpeas, enhancing their richness.

Step 2: Add Garlic and Ginger
Next, incorporate 2 minced garlic cloves and 1 tablespoon of grated fresh ginger into the skillet. Cook for an additional minute, stirring constantly until the mixture becomes aromatic and the garlic is lightly golden. This step infuses the dish with delightful flavors essential to the Indian Butter Chickpeas.

Step 3: Toast the Spices
Stir in 1 teaspoon each of tomato paste, turmeric powder, ground cumin, ground coriander, and chili powder, along with 2 teaspoons of garam masala and 0.5 teaspoons of salt. Allow the spices to cook for 1-2 minutes, stirring continuously; you’ll notice the spices’ vibrant colors and aroma enhance the cooking pan, deepening the flavor profile of your dish.

Step 4: Add Crushed Tomatoes
Now, pour in a 400g can of crushed tomatoes, stirring to combine everything evenly. If you prefer a smoother sauce for your Indian Butter Chickpeas, you can use an immersion blender to purée the mixture to your desired consistency. Let it simmer gently for about 2-3 minutes, allowing the flavors to meld beautifully.

Step 5: Incorporate the Chickpeas
Add a 540g can of drained and rinsed chickpeas to the sauce, stirring well. Bring the mixture to a gentle simmer and let it cook for 10 minutes, allowing the chickpeas to absorb the flavors and the sauce to thicken slightly. You’ll see the sauce coat the chickpeas, creating a luscious consistency that’s signature to this dish.

Step 6: Stir in Cream or Coconut Milk
Reduce the heat to low, then stir in 125ml of heavy cream or coconut milk, along with the juice of half a lemon. Gently warm through for about 2-3 minutes, ensuring everything is heated without boiling. This step creates the creamy texture that makes Indian Butter Chickpeas so comforting and delicious.

Step 7: Garnish and Serve
Finally, serve the Indian Butter Chickpeas hot, garnished with freshly chopped cilantro. Pair with fluffy basmati rice, garlic naan, or a refreshing cucumber raita for a complete meal. The vibrant colors and aromatic spices will invite everyone to enjoy this delightful and hearty dish!

How to Store and Freeze Indian Butter Chickpeas

Fridge: Store leftovers in an airtight container for up to 4 days to maintain freshness and flavor.

Freezer: Freeze in a sealed container or freezer bag for up to 3 months. Thaw overnight in the fridge before reheating.

Reheating: Gently reheat on the stovetop over low heat, adding a splash of water or extra cream to loosen the sauce if needed. Enjoy your Indian Butter Chickpeas warm!

Room Temperature: For safety, avoid leaving out at room temperature for more than 2 hours, especially if it’s warm outside.

Expert Tips for Indian Butter Chickpeas

  • Creaminess Achieved: Use full-fat coconut milk for a vegan alternative that maintains the dish’s creamy texture without compromising on taste.
  • Avoid Overcooking: Stir continuously while toasting spices to prevent burning, which can make your Indian Butter Chickpeas bitter.
  • Blend for Smoothness: For a restaurant-quality finish, blend the sauce until velvety before adding the chickpeas. This enhances the overall experience.
  • Custom Spice Levels: Adjust chili powder based on your spice tolerance; starting with less and adding more allows you to customize this dish perfectly.
  • Fresh Herb Boost: Always finish with fresh cilantro; it brightens flavors and enhances the presentation of your Indian Butter Chickpeas.

Indian Butter Chickpeas Variations & Substitutions

Feel free to explore these variations and substitutions to make this dish uniquely yours, as you savor the delightful flavors of Indian cuisine!

  • Spinach Addition: Boost nutrition by adding fresh spinach or kale during the last few minutes of cooking for vibrant color and extra vitamins.
  • Lentil Option: Swap out chickpeas for cooked lentils for a different texture while keeping it legume-packed and satisfying.
  • Potato Enhancement: Toss in boiled or diced potatoes to make the dish heartier and provide an exciting texture contrast alongside the creamy sauce.
  • Herb Swap: Experiment with fresh herbs like mint or parsley instead of cilantro to give a refreshing twist to your Indian Butter Chickpeas.
  • Coconut & Lime: Use coconut cream and a splash of lime juice for a tropical flair, bringing a delightful brightness to the dish.
  • Spice Swap: Try adding curry leaves or fenugreek for a deeper, aromatic flavor—the perfect way to further enhance your sauce.
  • Heat Adjustment: To control the spice level, increase or decrease the amount of chili powder or add a pinch of cayenne pepper for an extra kick!
  • Nutty Delight: Stir in some cashew or almond butter for added creaminess and a subtle nutty flavor that elevates your vegetarian dish.

Once you try these variations, you might find your new favorite way to enjoy this fantastic dish! For a delightful pairing, serve with some Buttermilk Pancakes Discover to balance the warmth.

What to Serve with Indian Butter Chickpeas

Elevate your Indian Butter Chickpeas meal with these delightful sides that balance flavors and textures beautifully.

  • Fluffy Basmati Rice: The light and aromatic rice absorbs the creamy sauce, creating a satisfying bite with every forkful.

  • Garlic Naan: This warm, pillowy bread is perfect for scooping up the rich chickpeas, adding a comforting layer of flavor to your meal.

  • Cucumber Raita: The cool, refreshing yogurt dip complements the spices in the chickpeas, taming any heat while adding a creamy texture.

  • Roasted Vegetables: A medley of seasonal veggies adds a lovely char that contrasts with the creamy sauce, enhancing your meal’s overall nutrition.

  • Lentil Salad: A protein-packed lentil salad brings a nutty flavor and additional texture, making for a wholesome and filling dinner.

  • Mango Chutney: The sweet and tangy chutney cuts through the richness of the chickpeas, offering a burst of flavor that keeps every bite exciting.

  • Masala Chai: This spiced tea is a delightful drink option that warms you up and complements the dish’s flavors beautifully.

  • Mango Lassi: A sweet, creamy yogurt-based drink, it pairs wonderfully with the spices in the chickpeas while adding a refreshing touch to your meal.

  • Coconut Pudding: For dessert, a light coconut pudding rounds off the meal perfectly, echoing the dish’s creamy elements while providing a sweet finish.

Make Ahead Options

These Indian Butter Chickpeas are ideal for meal prep, allowing you to enjoy a comforting dish any busy night! You can sauté the onions, garlic, and ginger, and prepare the spice mixture up to 24 hours in advance; just refrigerate it in an airtight container. Additionally, you can cook the entire sauce with chickpeas and let it cool, storing it for up to 3 days in the fridge. To maintain the creamy texture, stir in the cream or coconut milk just before serving. When you’re ready to enjoy your meal, simply reheat the sauce gently on the stove and serve it garnished with fresh cilantro for a delightful dish that saves you time without sacrificing flavor.

Indian Butter Chickpeas Recipe FAQs

How do I choose the best chickpeas for this recipe?
Absolutely! For the best flavor and texture, opt for canned chickpeas that are firm and not mushy. If using dried chickpeas, make sure they are soaked overnight and cooked until tender for about 1 to 1.5 hours. Avoid those with dark spots, as they can indicate spoilage.

What is the best way to store leftovers of Indian Butter Chickpeas?
For maximum freshness, store your Indian Butter Chickpeas in an airtight container in the fridge for up to 4 days. Be sure to let the dish cool down to room temperature before sealing it to avoid condensation that can make the sauce watery.

Can I freeze Indian Butter Chickpeas?
Yes! Indian Butter Chickpeas freeze beautifully. Pour your cooled dish into a sealed container or a freezer bag, and they’ll stay fresh for up to 3 months. When you’re ready to enjoy them again, simply thaw overnight in the fridge and reheat on the stovetop over low heat until warm.

What can I do if my sauce is too thick or too thin?
Very! If your sauce is too thick, add a bit of water or more cream until you reach your desired consistency while simmering. If it’s too thin, simmer it uncovered for a few more minutes to reduce and thicken the sauce. Stir occasionally to prevent sticking.

How do I adjust this recipe for food allergies or dietary restrictions?
I often make substitutions to cater to dietary needs! For a gluten-free option, ensure your spices are labeled gluten-free. If you’re dairy-free or vegan, use coconut milk instead of heavy cream, and vegan butter for added richness. Always double-check ingredient labels for allergens before cooking.

Can my pets eat Indian Butter Chickpeas?
While chickpeas are generally safe for dogs in moderation, be cautious with spices, onions, and garlic, as they can be harmful to pets. If sharing with furry friends, prepare a plain version without these ingredients to keep them safe.

Indian Butter Chickpeas

Creamy Indian Butter Chickpeas: Your New Favorite Comfort Meal

This delightful Indian Butter Chickpeas recipe combines rich flavors, comfort, and vegetarian goodness, perfect for a satisfying meal.
Prep Time 10 minutes
Cook Time 20 minutes
Total Time 30 minutes
Servings: 4 servings
Course: Dinner
Cuisine: Indian
Calories: 300

Ingredients
  

For the Sauce
  • 2 tablespoons Butter Substitution: Use vegan butter for a dairy-free option.
  • 1 medium Red Onion Optional: Yellow onion can be used.
  • 2 cloves Garlic Use garlic powder if fresh is not available (1/2 tsp).
  • 1 tablespoon Fresh Ginger Can substitute with ground ginger (1 tsp).
  • 1 teaspoon Tomato Paste Could omit for a lighter flavor.
  • 1 teaspoon Turmeric Powder No substitutions needed.
  • 1 teaspoon Ground Cumin Could swap with ground coriander for a different flavor base.
  • 0.5 teaspoon Ground Coriander Omit if unavailable; can increase cumin slightly.
  • 0.5 teaspoon Chili Powder Can adjust quantity to control spice level.
  • 2 teaspoons Garam Masala Essential for authentic flavor; no substitutes.
  • 0.5 teaspoon Salt Use to taste based on dietary needs.
  • 400 grams Crushed Tomatoes No substitutes, but fresh or sundried tomatoes blended can work.
  • 125 ml Heavy Cream Substitute with coconut milk for a dairy-free option.
For Garnishing
  • 0.25 to 0.5 Lemon Juice Adjust to taste; lime can be used as a substitute.
  • 1 bunch Cilantro Can substitute with parsley if cilantro is not preferred.

Equipment

  • large skillet
  • immersion blender

Method
 

Step-by-Step Instructions for Indian Butter Chickpeas
  1. Melt 2 tablespoons of butter in a large skillet over medium heat. Add one diced red onion and sauté until soft and translucent.
  2. Incorporate 2 minced garlic cloves and 1 tablespoon of grated fresh ginger. Cook for an additional minute until aromatic.
  3. Stir in 1 teaspoon each of tomato paste, turmeric powder, ground cumin, ground coriander, and chili powder, along with 2 teaspoons of garam masala and 0.5 teaspoons of salt. Cook for 1-2 minutes.
  4. Pour in a 400g can of crushed tomatoes, stirring to combine. Let it simmer gently for about 2-3 minutes.
  5. Add a 540g can of drained and rinsed chickpeas to the sauce. Simmer gently for 10 minutes.
  6. Reduce heat to low, then stir in 125ml of heavy cream or coconut milk with the juice of half a lemon. Warm through for 2-3 minutes.
  7. Serve hot, garnished with freshly chopped cilantro.

Nutrition

Serving: 1servingCalories: 300kcalCarbohydrates: 38gProtein: 10gFat: 12gSaturated Fat: 7gPolyunsaturated Fat: 1gMonounsaturated Fat: 4gCholesterol: 30mgSodium: 500mgPotassium: 600mgFiber: 8gSugar: 5gVitamin A: 1000IUVitamin C: 10mgCalcium: 50mgIron: 3mg

Notes

Store leftovers in an airtight container for up to 4 days. Freeze for up to 3 months. Reheat gently on the stovetop.

Tried this recipe?

Let us know how it was!

Crispy Thai Shrimp in a Blanket: A Must-Try Appetizer

As I dipped my fingers into a plate of crispy Thai Shrimp in a Blanket, I couldn’t help but marvel at the delightful crunch that met my ears—a symphony of textures that instantly transports me to the vibrant streets of Thailand. This beloved appetizer, known for its perfect blend of marinated shrimp wrapped in golden spring roll wrappers, is a crowd-pleaser that’s not only easy to prepare but also offers gluten-free options for diverse dietary needs. Whether you’re hosting a gathering or craving something special just for yourself, this recipe beautifully accommodates your culinary desires. And the fun twist? You can enjoy it fresh from the fryer or even make-ahead and store it for those spontaneous snack attacks. Are you ready to elevate your appetizer game? Let’s roll!

Why is this Thai Shrimp so special?

Crispy Texture: The combination of golden spring roll wrappers gives each bite a satisfying crunch, perfectly contrasting the juicy shrimp inside.

Crowd-Pleasing Delight: Whether at a party or a weekday dinner, these bites are sure to impress your guests.

Versatile Ingredients: Customize your shrimp infusion with fresh herbs or a spicy twist, fitting various dietary preferences easily!

Quick Preparation: Whip up a plate in no time; you’ll spend less time cooking and more time enjoying.

Make-Ahead Convenience: Assemble ahead and freeze for a delicious snack that’s ready to fry whenever cravings strike.

Cultural Charm: Bring the taste of Thailand home with a dish that celebrates hospitality and colorful cuisine! Pair this with a refreshing salad or soup like Som Tum for a complete experience.

Thai Shrimp in a Blanket Ingredients

For the Shrimp
Shrimp – Fresh, large shrimp provide a succulent filling; opt for tail-on for easier handling.
Minced Garlic – Adds aromatic flavor to the shrimp; fresh is preferred for maximum potency.
Oyster Sauce – Adds umami richness to the marinade; substitute with soy sauce for vegetarian options.
Soy Sauce – Contributes saltiness; use low-sodium if preferred.
Sugar – Balances flavors; can be reduced for less sweetness.
Ground White Pepper – Offers a peppery bite; substitute with black pepper if necessary.
Sesame Oil – Enhances nuttiness and depth; use toasted sesame oil for stronger flavor.

For the Wrappers
Spring Roll Wrappers – Create a crispy outer layer; cut wrappers into thirds for easy wrapping.
Egg (beaten) – Acts as a sealant for the wrappers; can omit for a vegan version.

For Frying
Oil for frying – Use a high smoke point oil (e.g., vegetable or canola); adjust frying temperature for optimal crispiness.

For Dipping
Sweet Chili Sauce – Traditional dipping sauce that complements the dish; alternatives include garlic-soy vinaigrette or lime-fish sauce.

With these ingredients, preparing the delicious Thai Shrimp in a Blanket will be a breeze! Whether you are gearing up for a special gathering or a simple family dinner, this recipe is bound to impress.

Step‑by‑Step Instructions for Thai Shrimp in a Blanket

Step 1: Marinate the Shrimp
In a mixing bowl, combine oyster sauce, soy sauce, sugar, ground white pepper, sesame oil, and minced garlic. Add the fresh large shrimp to the marinade and mix well until each piece is coated. Let the shrimp marinate for 20 minutes at room temperature, allowing the flavors to infuse and enhance the shrimp’s natural sweetness.

Step 2: Prepare the Wrappers
While the shrimp is marinating, take your spring roll wrappers and cut each one into thirds. This will create strips that are easier to work with when wrapping the marinated shrimp. Keep the wrappers covered with a damp cloth to prevent them from drying out as you work through the recipe for the Thai Shrimp in a Blanket.

Step 3: Wrap the Shrimp
Take a strip of the prepared spring roll wrapper and place a marinated shrimp at one end. Roll it tightly, making sure to enclose the shrimp completely, and seal the edge with a dab of the beaten egg. Repeat this process until all the shrimp are wrapped, ensuring they are snug for a delightful crisp when fried.

Step 4: Heat the Oil
In a deep frying pan, pour enough oil to submerge the wrapped shrimp about halfway and heat it over medium-high heat. The ideal frying temperature is around 350°F (175°C). To check the temperature, drop a small piece of wrapper into the oil; if it sizzles, the oil is ready for frying your delicious Thai Shrimp in a Blanket.

Step 5: Fry the Wrapped Shrimp
Carefully place a few wrapped shrimp into the hot oil without crowding the pan. Fry them for about 2-3 minutes on each side or until they turn golden brown and crispy. Use a slotted spoon to turn them for even cooking, ensuring a beautifully crunchy exterior and succulent shrimp interior.

Step 6: Drain and Serve
Once they’re perfectly golden and crispy, remove the wrapped shrimp from the oil using the slotted spoon and place them on a plate lined with paper towels to drain excess oil. Serve the Thai Shrimp in a Blanket hot with a side of sweet chili sauce for dipping, enhancing that delightful flavor with each delicious bite.

Thai Shrimp in a Blanket Variations

Feel free to get creative with your Thai Shrimp in a Blanket—there are so many delightful ways to customize this dish!

  • Herb-Infused: Add fresh Thai basil or cilantro for a vibrant twist; the aromatic herbs elevate each bite beautifully.
  • Creamy Fusion: Blend cream cheese or jalapeños into the shrimp filling for a creamy, spicy kick; it’s a surprising and delicious twist!
  • Baked Option: Consider baking or air-frying the rolls for a healthier alternative that still delivers a satisfying crunch when you bite in.
  • Coconut Surprise: Add shredded coconut inside the wrappers for a sweet, tropical note that complements the shrimp perfectly.
  • Citrusy Zest: Incorporate lemongrass into the marinade for an aromatic citrus flair that brightens the overall flavor profile.
  • Spicy Kick: For those who love heat, mix chili flakes into the filling; it will add that extra zing that spice lovers crave!
  • Vegetarian Delight: Replace shrimp with a crunchy mix of vegetables like zucchini, carrots, and mushrooms for a vibrant vegetarian version.
  • Sweet & Tangy Dipping: Try serving with a homemade garlic-soy vinaigrette or a lime-fish sauce instead of sweet chili for a tangy dip!

The possibilities are endless with this versatile recipe! If you’re looking for other shrimp inspirations, consider making Garlic Butter Shrimp or enjoying a comforting bowl of Tom Yum Goong. Experiment and find your perfect combination!

What to Serve with Crispy Thai Shrimp in a Blanket

Elevate your dining experience with delightful pairings that complement the crispy, flavor-packed bite of this classic appetizer.

  • Fresh Thai Salad: A vibrant mix of tangy lime, crunchy vegetables, and herbs like cilantro sum up the essence of Thai cuisine, enhancing the meal’s freshness.
  • Tom Yum Soup: This fragrant soup filled with bold flavors of lemongrass, lime, and spiced shrimp introduces warmth and zest, serving as a perfect contrast to the crispy rolls.
  • Jasmine Rice: Light and subtly fragrant, jasmine rice offers a soothing base for soaking up the sweet chili sauce, balancing flavors beautifully.
  • Dipping Sauces: Try a selection of sauces such as peanut sauce and sweet chili for variety; they elevate the experience with creamy richness and spice.
  • Coconut Rice: Rich coconut flavor and a touch of sweetness create wonderful harmony with the savory shrimp, adding a tropical touch to your meal.
  • Spicy Green Papaya Salad: The crunch and spice from this classic dish amplify the shrimp’s flavors while offering a refreshing palate cleanser with each bite.
  • Thai Iced Tea: A beautifully creamy and sweet beverage, it cools the palate amidst the spice, making it an essential companion for a true Thai feast.
  • Lime Sorbet: A refreshing and light dessert, lime sorbet cleanses the palate after the bold flavors of the shrimp and pairs wonderfully with the zesty theme.

Expert Tips for Thai Shrimp in a Blanket

Oil Temperature: Maintain the oil around 350°F (175°C) for frying; too hot will burn wrappers, while too cool can make them greasy.

Wrapper Care: Keep spring roll wrappers covered with a damp cloth while assembling to prevent them from drying out and becoming brittle.

Shrimp Quality: Choose fresh, large shrimp for the best results. Frozen shrimp can work, but fresh provides superior flavor and texture.

Pre-Assembly: Make shrimp rolls ahead of time and refrigerate for several hours or freeze for up to a month before frying; thaw slightly to reduce splatter.

Serving Suggestion: Pair with a light Thai salad or a dipping sauce like sweet chili for a complete culinary experience that will delight everyone!

How to Store and Freeze Thai Shrimp in a Blanket

Fridge: Store leftover Thai Shrimp in a Blanket in an airtight container for up to 3 days. Reheat in the oven for crispiness, avoiding the microwave.

Freezer: You can freeze assembled rolls for up to a month. Thaw in the fridge before frying for best results, minimizing splatter during cooking.

Reheating: For optimal texture, reheat fried shrimp in a preheated oven at 350°F (175°C) for about 10 minutes to regain crispness.

Make-Ahead: Consider preparing the shrimp rolls in advance; they can be refrigerated for a few hours before frying, making it a convenient option for entertaining.

Make Ahead Options

These Crispy Thai Shrimp in a Blanket are perfect for meal prep enthusiasts! You can easily prepare the filling and wrap the shrimp up to 24 hours in advance. Simply marinate the shrimp and assemble the rolls, then refrigerate them tightly wrapped in plastic wrap to keep them moist and fresh. For even longer storage, you can freeze the assembled rolls for up to a month—just remember to slightly thaw them in the fridge before frying to minimize splatter. When you’re ready to serve, heat the oil and fry them straight from the fridge or after thawing; they will be just as delicious with that perfect crunch and juicy shrimp interior!

Thai Shrimp in a Blanket Recipe FAQs

What type of shrimp should I use for this recipe?
Absolutely! For the best flavor and texture, choose fresh, large shrimp. Look for shrimp that are firm to the touch and have a slightly sweet scent. If you opt for frozen shrimp, make sure to thaw them properly in the refrigerator and pat them dry before marinating.

How do I store leftover Thai Shrimp in a Blanket?
You can store leftover Thai Shrimp in a Blanket in an airtight container in the fridge for up to 3 days. To reheat them without losing their crispy texture, place them in a preheated oven at 350°F (175°C) for about 10 minutes. Avoid using the microwave, as it can make them soggy.

Can I freeze the wrapped shrimp before frying?
Very! Assemble the wrapped shrimp and place them in a single layer on a baking sheet, then freeze them until solid. Transfer the frozen rolls to a zip-top bag and store for up to a month. When you’re ready to fry them, thaw the rolls in the fridge for a few hours to minimize splatter.

Why are my shrimp rolls greasy after frying?
If your shrimp rolls turn out greasy, it may be due to the oil temperature being too low. Make sure your oil is heated to around 350°F (175°C) before adding the rolls; you can test it by dropping a small piece of wrapper into the oil. If it sizzles, you’re good to go!

Can I make this recipe gluten-free?
Absolutely! Simply substitute regular soy sauce with a gluten-free version, and ensure your spring roll wrappers are gluten-free as well. This way, you can enjoy these delicious Thai Shrimp in a Blanket without any dietary concerns.

What should I serve with Thai Shrimp in a Blanket?
Pair your shrimp rolls with a refreshing Thai salad, like Som Tum, for a balanced meal. You can also serve them alongside sweet chili sauce for dipping, which enhances the flavor perfectly. Enjoy creating a delightful feast that’s sure to impress!

Thai Shrimp in a Blanket

Crispy Thai Shrimp in a Blanket

Experience the delightful crunch of Crispy Thai Shrimp in a Blanket, a must-try appetizer that combines marinated shrimp and golden spring roll wrappers.
Prep Time 20 minutes
Cook Time 10 minutes
Total Time 30 minutes
Servings: 4 pieces
Course: Appetizer
Cuisine: Thai
Calories: 180

Ingredients
  

For the Shrimp
  • 1 pound Fresh large shrimp Tail-on preferred
  • 3 cloves Minced garlic Fresh is preferred
  • 2 tablespoons Oyster sauce Substitute with soy sauce for vegetarian
  • 2 tablespoons Soy sauce Low-sodium if preferred
  • 1 teaspoon Sugar Can reduce for less sweetness
  • 1 teaspoon Ground white pepper Substitute with black pepper if necessary
  • 1 tablespoon Sesame oil Use toasted sesame oil for stronger flavor
For the Wrappers
  • 10 sheets Spring roll wrappers Cut into thirds
  • 1 large Egg Beaten, can omit for vegan
For Frying
  • 2 cups Oil for frying High smoke point oil recommended
For Dipping
  • 1 cup Sweet chili sauce Traditional dipping sauce

Equipment

  • Mixing Bowl
  • Deep frying pan
  • slotted spoon

Method
 

Marination and Wrapping
  1. In a mixing bowl, combine oyster sauce, soy sauce, sugar, ground white pepper, sesame oil, and minced garlic. Add the fresh large shrimp and mix well. Let marinate for 20 minutes.
  2. While the shrimp is marinating, cut spring roll wrappers into thirds and keep covered with a damp cloth.
  3. Take a strip of wrapper, place a marinated shrimp at one end, roll tightly, and seal with beaten egg. Repeat until all shrimp are wrapped.
Frying
  1. Heat oil in a deep frying pan to around 350°F (175°C).
  2. Carefully add wrapped shrimp to hot oil without crowding. Fry for 2-3 minutes each side until golden brown.
  3. Remove fried shrimp with a slotted spoon and drain on paper towels. Serve hot with sweet chili sauce.

Nutrition

Serving: 1pieceCalories: 180kcalCarbohydrates: 10gProtein: 12gFat: 9gSaturated Fat: 1.5gPolyunsaturated Fat: 2gMonounsaturated Fat: 5gCholesterol: 70mgSodium: 400mgPotassium: 200mgFiber: 1gSugar: 1gVitamin A: 500IUVitamin C: 3mgCalcium: 20mgIron: 0.5mg

Notes

Best served fresh and hot; can be made ahead and frozen for up to a month.

Tried this recipe?

Let us know how it was!

Creamy Indian Butter Chickpeas for Quick Comfort Food

As I stirred the pot, the aroma of warm spices and rich tomatoes filled my kitchen, transporting me straight to a bustling Indian market. This Creamy Vegetarian Indian Butter Chickpeas recipe is my take on a beloved classic—completely plant-based yet irresistibly comforting. With just one pan and 30 minutes, I can whip up a hearty meal that pleases my family and friends, perfect for those weeknights when time is tight. The tender chickpeas, enveloped in a spiced, buttery sauce, not only satisfy cravings but also deliver a nutritious punch packed with protein and fiber. Isn’t it amazing how a quick dish can bring everyone together? Let’s dive into this vibrant recipe that’s bound to become a new favorite on your dinner table!

Why are Indian Butter Chickpeas a must-try?

Quick and Easy: This recipe comes together in just 30 minutes, making it perfect for busy weeknights.

One-Pan Wonder: No need for multiple pots and pans; everything cooks beautifully in a single skillet.

Hearty and Nutritious: Packed with protein and fiber from chickpeas, this dish offers a satisfying meal without sacrificing on nutrition.

Rich Flavor: The combination of spices creates a deep, comforting flavor that’s sure to impress family and friends.

Versatile Options: Feel free to customize by adding leafy greens or garnishing with fresh herbs, just like with my Honey Butter Brioche for a perfect side!

Make this delightful recipe a staple in your home, and enjoy the comforting, flavorful experience that is sure to satisfy everyone at the table.

Indian Butter Chickpeas Ingredients

For the Sauce

  • Butter – Adds richness and flavor; use vegan butter for a dairy-free option.
  • Red Onion – Provides sweetness and depth; yellow onion can be used as a substitute.
  • Garlic (2 cloves, minced) – Enhances aroma and taste; fresh garlic is preferred for stronger flavor.
  • Fresh Ginger (1 tbsp, grated) – Adds a spicy kick; ground ginger can substitute but will change the flavor.
  • Tomato Paste (1 tsp) – Thickens sauce and intensifies tomato flavor; can omit in a pinch.
  • Turmeric Powder (1 tsp) – Provides earthy flavor and a vibrant color.
  • Ground Cumin (1 tsp) – Offers a warm, nutty taste essential for authentic flavor.
  • Ground Coriander (0.5 tsp) – Adds a citrusy note that balances other spices.
  • Chili Powder (0.5 tsp or 1 diced red chili) – For desired heat; adjust according to spice preference.
  • Garam Masala (2 tsp) – A spice blend for the traditional Indian flavor.
  • Salt (0.5 tsp) – Enhances all flavors in the dish.
  • Crushed Tomatoes (1 x 400g tin) – Forms the base of the sauce for a robust flavor.

For Creaminess

  • Heavy Cream (125ml) or Coconut Milk – Provides creaminess; coconut milk for a dairy-free version.

For Balancing Flavors

  • Lemon Juice (¼ – ½) – Adds acidity for a well-rounded taste.
  • Chopped Cilantro – For garnish and fresh aroma to finish the dish.

This delightful recipe for Indian Butter Chickpeas is sure to brighten your dinner table with its vibrant and comforting flavors!

Step‑by‑Step Instructions for Indian Butter Chickpeas

Step 1: Sauté the Aromatics
In a large skillet, melt 2 tablespoons of butter over medium heat. Once melted, add 1 diced red onion and sauté for 5-6 minutes until it becomes soft and translucent. The aromas will begin to fill your kitchen, providing a fragrant base for your Indian Butter Chickpeas.

Step 2: Enhance the Flavor
Add 2 minced garlic cloves and 1 tablespoon of grated fresh ginger to the skillet. Stir and cook for an additional minute until fragrant; be careful not to burn the garlic. This step will infuse your dish with an irresistible aroma, setting the stage for the rich sauce to come.

Step 3: Toast the Spices
Stir in 1 teaspoon of tomato paste along with the spices: 1 teaspoon turmeric powder, 1 teaspoon ground cumin, 0.5 teaspoon ground coriander, and 0.5 teaspoon chili powder. Cook for 1-2 minutes, stirring constantly to toast the spices and deepen their flavors. The mixture should have a vibrant color, promising a delicious Indian Butter Chickpeas dish.

Step 4: Add the Tomatoes
Pour in 1 tin (400g) of crushed tomatoes, stirring well to combine everything into a cohesive sauce. For a smoother texture, consider blending the sauce with an immersion blender at this stage. Let the mixture simmer for 2-3 minutes, allowing the flavors to meld and the sauce to thicken slightly.

Step 5: Incorporate the Chickpeas
Add 540g of drained chickpeas to the skillet and stir to coat them in the sauce. Reduce the heat to low, cover the pan, and let it simmer for 10 minutes. This will allow the chickpeas to absorb the rich flavors of the spiced sauce, creating a heartwarming dish.

Step 6: Finish with Creaminess
Stir in 125ml of heavy cream or coconut milk, along with the juice of half a lemon for acidity. Warm through for an additional 2-3 minutes, stirring until everything is combined and creamy. The sauce should be rich and inviting, instantly elevating your Indian Butter Chickpeas to a comforting comfort food.

Step 7: Garnish and Serve
Once heated through, remove from heat and garnish with freshly chopped cilantro. This final touch adds a burst of color and fresh aroma. Serve your Indian Butter Chickpeas over basmati rice or with garlic naan, and watch your loved ones savor every bite!
Indian Butter Chickpeas Variations & Substitutions

Feel free to let your creativity shine by customizing this recipe to suit your taste and dietary needs!

  • Vegan Swap: Replace butter with vegan butter for a delicious dairy-free twist. Enjoy the same rich flavor without compromising your dietary choice.

  • Extra Greens: Add a handful of fresh spinach or kale in the last few minutes of cooking for a nutrient boost. These greens will wilt beautifully, enhancing the dish’s color and health benefits.

  • Coconut Cream: For an even creamier sauce, consider using full-fat coconut cream instead of heavy cream. This adds a luscious texture and an extra hint of tropical flavor.

  • Flavorful Additions: Toss in roasted bell peppers or zucchini for a pop of color and additional layers of flavor. These veggies can enhance the heartiness of your meal, making it even more satisfying.

  • Spicy Kick: Love heat? Throw in some diced jalapeños or a pinch more chili powder to elevate the spice level. Just be cautious and adjust until it hits your perfect sweet spot!

  • Protein Boost: Add a can of drained and rinsed black beans or lentils for an extra protein kick and hearty texture. This variation not only increases the nutritional value but also makes the dish even more filling.

  • Potato Delight: Incorporate boiled and cubed potatoes to add a delightful twist. The potatoes absorb the flavors of the sauce beautifully, creating a comforting experience reminiscent of home cooking.

  • Artisan Touch: Top your Indian Butter Chickpeas with a sprinkle of toasted nuts or seeds, such as cashews or sunflower seeds, right before serving. This adds a delightful crunch that complements the creamy sauce perfectly.

Whether you’re whipping it up for a cozy family dinner or impressing guests, these tweaks can help you create a signature dish that everyone will love. For more comforting recipes, check out my easy Garlic Butter Shrimp or indulge in the sweetness of freshly baked Honey Butter Brioche. Enjoy each delightful bite!

How to Store and Freeze Indian Butter Chickpeas

Fridge: Store in an airtight container for up to 4 days; this helps retain the rich flavors and creamy texture of the Indian Butter Chickpeas.

Freezer: For longer storage, freeze in portions for up to 3 months. Use freezer-safe containers or bags, and ensure they are well-sealed to prevent freezer burn.

Reheating: Thaw in the fridge overnight, then reheat on the stovetop over low heat, stirring occasionally, until warmed through. You may want to add a splash of water or coconut milk to maintain creaminess.

Airtight Storage: Ensure the container is airtight to help preserve the flavors and texture of this delightful curry.

Expert Tips for Indian Butter Chickpeas

  • Spice Adjustment: Feel free to control the heat by adjusting the chili powder. A little can go a long way; start with less if you’re unsure!

  • Blend for Smoothness: For a creamier texture, consider blending the sauce before adding the chickpeas. This elevates the richness of your Indian Butter Chickpeas.

  • Customize Ingredients: Want extra nutrients? Toss in some spinach or kale during the last few minutes of cooking to enhance both flavor and nutrition.

  • Leftover Storage: Store any leftovers in an airtight container for up to 4 days. Freeze portions for up to 3 months, thawing in the fridge overnight before reheating.

  • Garnish with Freshness: Always finish with freshly chopped cilantro for an aromatic garnish that brightens your dish and adds a burst of color!

What to Serve with Creamy Vegetarian Indian Butter Chickpeas

Indulging in the rich, spiced flavors of this plant-based delight opens up endless possibilities for complementary dishes that make for a complete meal.

  • Basmati Rice: Fluffy and aromatic, basmati rice absorbs the curry’s sauce beautifully, enhancing the overall dining experience. Its delicate texture perfectly balances the richness of the butter chickpeas.

  • Garlic Naan: Warm, soft naan is perfect for scooping up every last bit of sauce. The garlic adds an extra layer of flavor that pairs beautifully with the creamy curry.

  • Cucumber Raita: This cool yogurt sauce provides a refreshing counterpoint to the warmth of the spices. It balances flavors and adds a delightful crunch, making each bite feel special.

  • Spiced Roasted Vegetables: A medley of roasted seasonal veggies adds color and a slightly sweet, earthy element to the meal. Toss them in spices for a harmonious match with the chickpeas.

  • Mango Chutney: A spoonful of fruity mango chutney adds a sweet contrast that brightens every mouthful of buttery sauce, enhancing the dish’s overall taste experience.

  • Lemon Quinoa Salad: Light and zesty, a quinoa salad with lemon juice and fresh herbs brings in a fresh, citrusy flavor that invigorates the palate. It’s a refreshing side that beautifully complements your cozy chickpeas.

  • Chai Tea: Round out your meal with a warm cup of spiced chai tea. The warmth and fragrant spices echo the flavors in your butter chickpeas, creating an inviting end to your dinner experience.

  • Chocolate Samosas: For dessert, indulge in crispy chocolate samosas filled with sweet chocolate or fruits. These sweet bites add a fun and delightful twist to your meal.

Make Ahead Options

These Creamy Vegetarian Indian Butter Chickpeas are perfect for meal prep enthusiasts! You can prepare the sauce up to 24 hours in advance, simply making sure to refrigerate it in an airtight container to maintain its vibrant flavors. Chop the onions, garlic, and ginger and store them together, and you can also measure out the spices for quick assembly. When you’re ready to serve, just heat the sauce in a skillet, add the chickpeas, and simmer for about 10 minutes. Finally, stir in the cream or coconut milk and lemon juice, warming through for that fresh and creamy finish. This way, you’ll have a comforting meal on the table with minimal effort during busy weeknights!

Indian Butter Chickpeas Recipe FAQs

What kind of chickpeas should I use for this recipe?
Absolutely! You can use canned chickpeas (540g) for convenience, as they are already cooked and ready to use. If you prefer dried chickpeas, make sure to soak them overnight and cook them thoroughly beforehand, as they require a longer cooking time to soften.

How should I store leftovers of Indian Butter Chickpeas?
For optimal freshness, store your Indian Butter Chickpeas in an airtight container in the fridge for up to 4 days. Be sure to let the dish cool to room temperature before sealing. This will help retain its rich flavor and creamy texture.

Can I freeze Indian Butter Chickpeas?
Yes! You can freeze your Indian Butter Chickpeas for up to 3 months. To do so, portion them into freezer-safe containers or bags, ensuring they are well-sealed to prevent freezer burn. When ready to enjoy, simply thaw in the fridge overnight and reheat gently on the stovetop.

What if the sauce is too thick after storage?
If your sauce thickens after storing, no worries! Add a splash of water or coconut milk while reheating over low heat; this will restore the creamy consistency. Stir frequently until heated through, and enjoy it as wonderfully as the first time!

Are there any allergens I should consider?
While this recipe is primarily vegetarian, please note that some ingredients like heavy cream or coconut milk could trigger dairy allergies. If you have any dietary concerns, feel free to substitute with almond milk or another non-dairy alternative for your Indian Butter Chickpeas.

Can pets eat this dish?
It’s best not to share Indian Butter Chickpeas with pets, especially due to the spices and potential allergens like garlic. Always ensure to stick to pet-safe food options for your furry friends!

Indian Butter Chickpeas

Creamy Indian Butter Chickpeas for Quick Comfort Food

Enjoy this quick and easy Indian Butter Chickpeas recipe, a comforting and nutritious dish packed with protein and rich flavors.
Prep Time 10 minutes
Cook Time 30 minutes
Total Time 40 minutes
Servings: 4 servings
Course: Dinner
Cuisine: Indian
Calories: 320

Ingredients
  

For the Sauce
  • 2 tablespoons Butter Use vegan butter for a dairy-free option.
  • 1 medium Red Onion Yellow onion can be used as a substitute.
  • 2 cloves Garlic Minced; fresh garlic is preferred for stronger flavor.
  • 1 tablespoon Fresh Ginger Grated; ground ginger can substitute but will change the flavor.
  • 1 teaspoon Tomato Paste Can omit in a pinch.
  • 1 teaspoon Turmeric Powder Provides earthy flavor and a vibrant color.
  • 1 teaspoon Ground Cumin Essential for authentic flavor.
  • 0.5 teaspoon Ground Coriander Adds citrusy note that balances other spices.
  • 0.5 teaspoon Chili Powder Adjust according to spice preference.
  • 2 teaspoons Garam Masala A spice blend for traditional Indian flavor.
  • 0.5 teaspoon Salt Enhances all flavors in the dish.
  • 1 tin (400g) Crushed Tomatoes Forms the base of the sauce.
For Creaminess
  • 125 ml Heavy Cream Coconut milk can be used for a dairy-free version.
For Balancing Flavors
  • 0.5 medium Lemon Juice Adds acidity for a well-rounded taste.
  • Chopped Cilantro For garnish and fresh aroma.

Equipment

  • Skillet

Method
 

Step-by-Step Instructions
  1. In a large skillet, melt 2 tablespoons of butter over medium heat. Add 1 diced red onion and sauté for 5-6 minutes until soft.
  2. Add 2 minced garlic cloves and 1 tablespoon of grated fresh ginger to the skillet. Stir and cook for an additional minute until fragrant.
  3. Stir in 1 teaspoon of tomato paste along with the spices: 1 teaspoon turmeric powder, 1 teaspoon ground cumin, 0.5 teaspoon ground coriander, and 0.5 teaspoon chili powder. Cook for 1-2 minutes, stirring constantly.
  4. Pour in 1 tin of crushed tomatoes, stirring well to combine. Let the mixture simmer for 2-3 minutes.
  5. Add 540g of drained chickpeas to the skillet and stir to coat them in the sauce. Cover and let it simmer for 10 minutes.
  6. Stir in 125ml of heavy cream or coconut milk, along with the juice of half a lemon for acidity. Warm through for an additional 2-3 minutes.
  7. Garnish with freshly chopped cilantro and serve over basmati rice or with garlic naan.

Nutrition

Serving: 1servingCalories: 320kcalCarbohydrates: 42gProtein: 12gFat: 15gSaturated Fat: 8gPolyunsaturated Fat: 1gMonounsaturated Fat: 6gCholesterol: 30mgSodium: 500mgPotassium: 600mgFiber: 10gSugar: 4gVitamin A: 1000IUVitamin C: 10mgCalcium: 80mgIron: 3mg

Notes

Feel free to customize by adding leafy greens or garnishing with fresh herbs. Store leftovers for up to 4 days or freeze for up to 3 months.

Tried this recipe?

Let us know how it was!

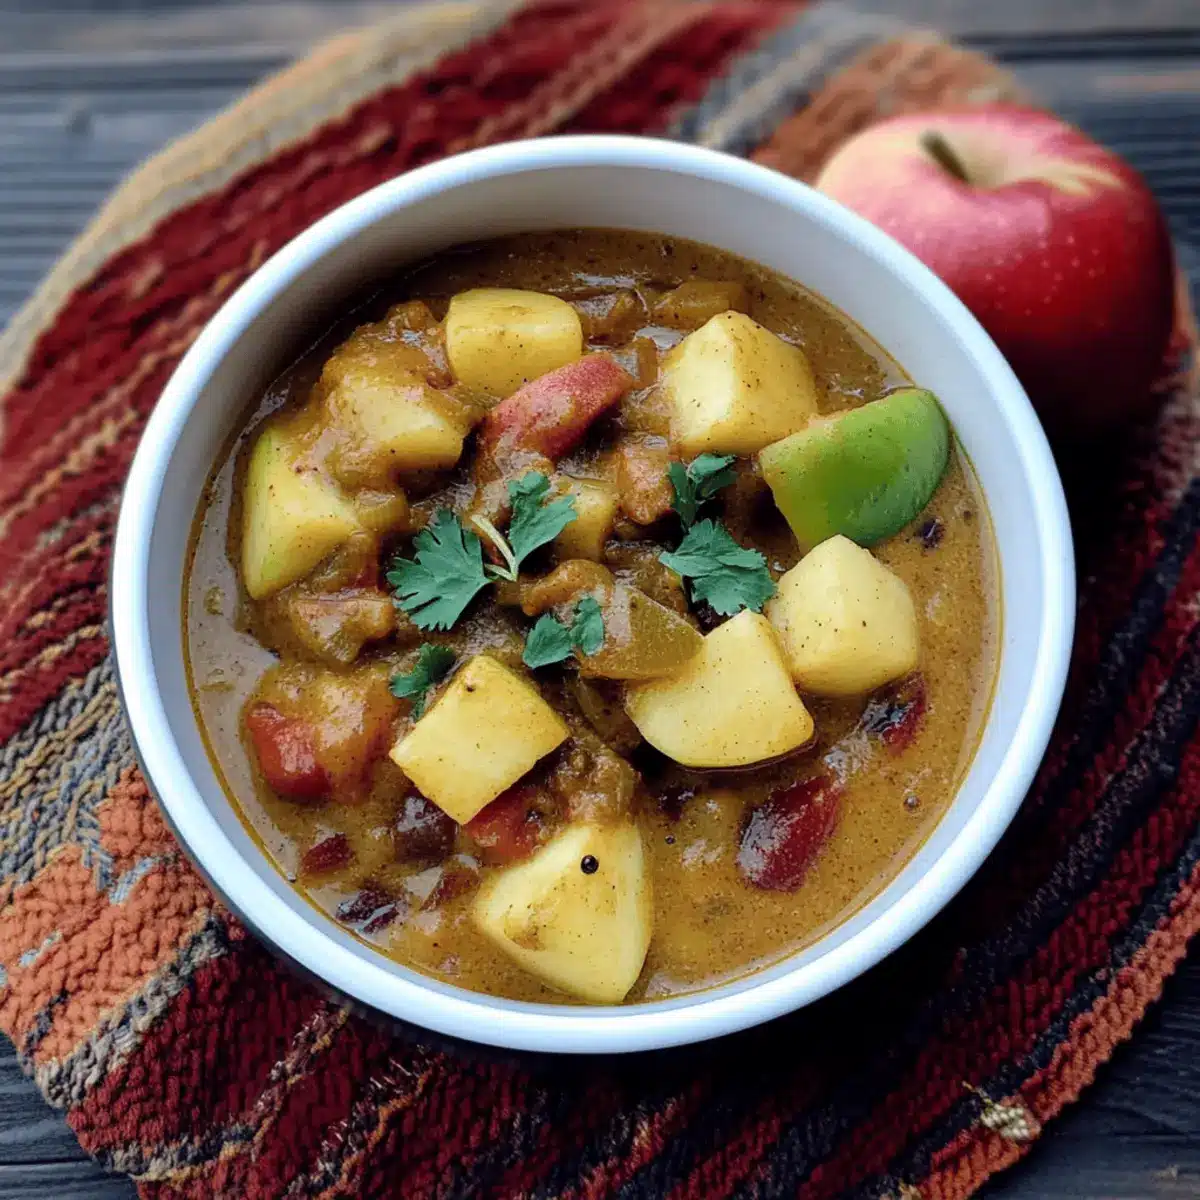
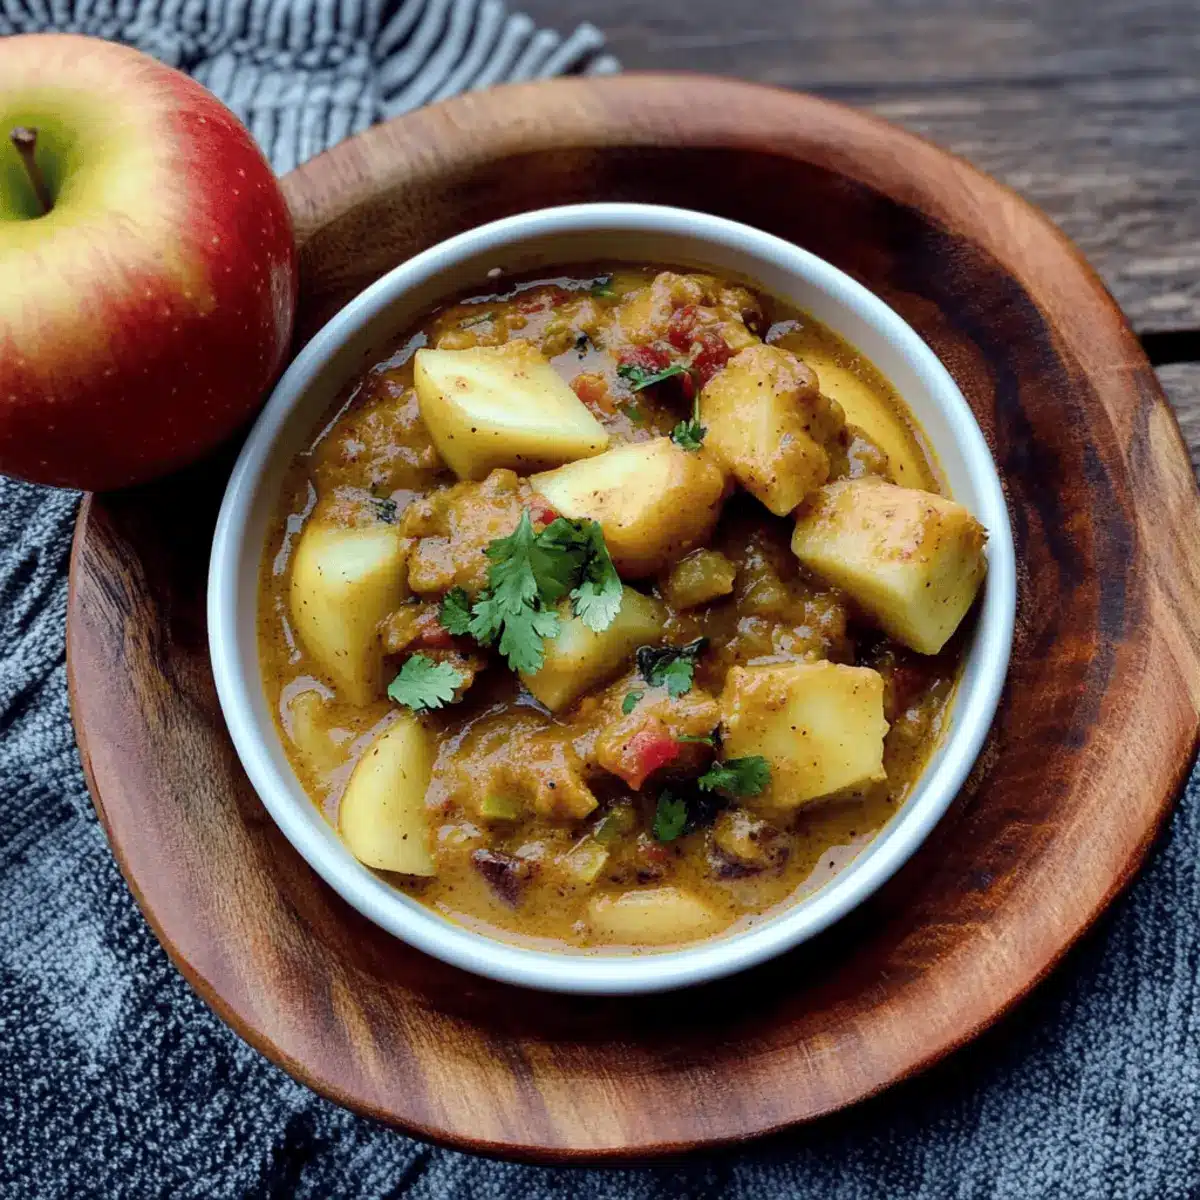
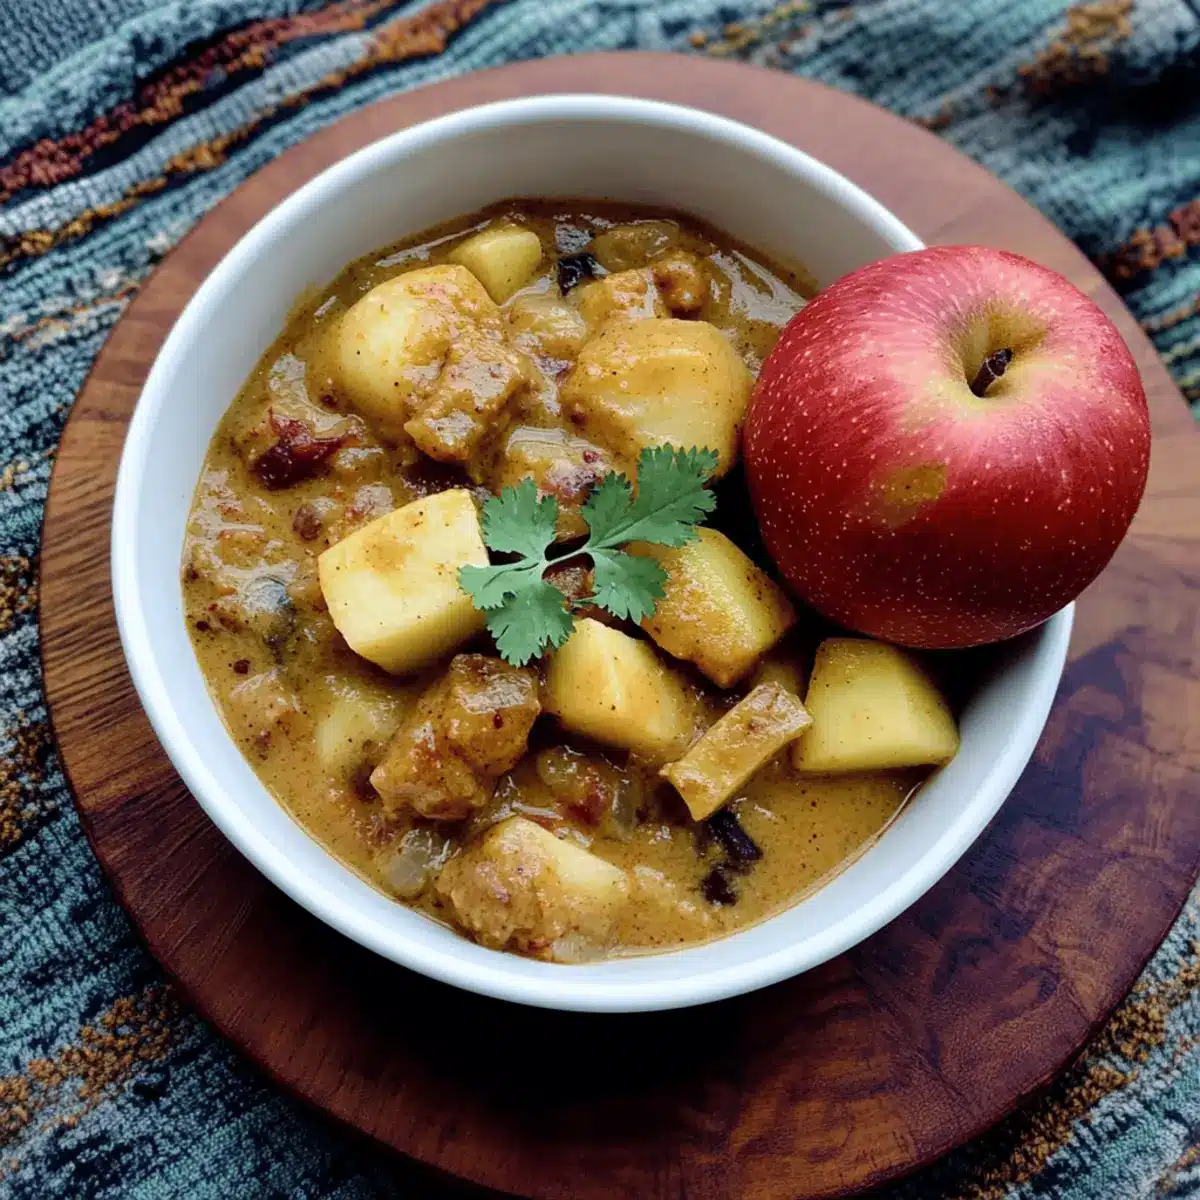
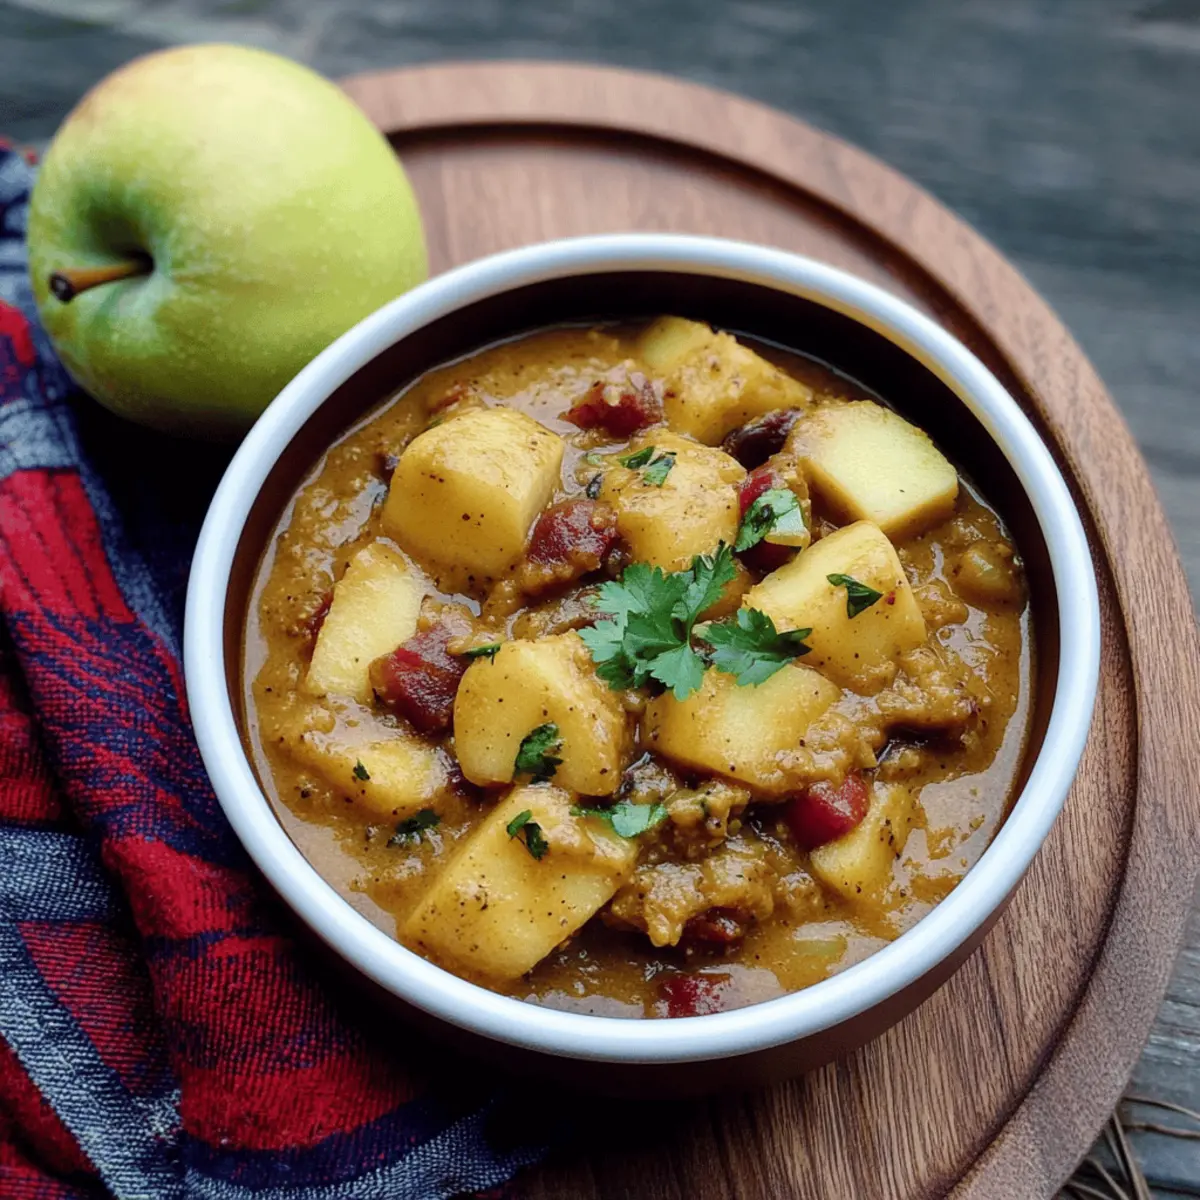
Creamy Apple Curry Bliss – A Unique Vegan Experience

When I stumbled upon a bag of apples in my kitchen, my first thought was to make a pie, but then I decided to mix things up! Enter my Creamy Vegan Apple Curry—a surprising twist that transforms the humble apple into a savory delight. With its rich, creamy texture and a touch of mild spice, this unique vegan dish reinvents your typical curry experience. Perfect for busy weeknights, it’s not only simple to prepare but also wonderfully adaptable, allowing you to use whatever veggies you have on hand. Plus, it’s gluten-free, making it a wholesome choice for everyone at the table! Intrigued by how apples pair with spices? Let’s dive into this delicious journey together!

Why is this Apple Curry So Unique?

Surprising Ingredients: This Creamy Vegan Apple Curry incorporates unexpected elements like apples and peanut butter, challenging traditional curry notions.
Flavor Fusion: The mild spice combined with creamy coconut creates a harmonious blend that delights the taste buds.
Versatile Recipe: Adapt to your pantry’s contents—swap veggies, legumes, or even the cream base for personal tastes.
Quick Cooking: Perfect for busy nights, this dish comes together in about 30 minutes, saving you precious time.
Crowd-Pleaser: Serve it with rice or naan, and watch diners rave about this unusual but satisfying culinary experience! For more unique recipes, check out this article on vegan alternatives.

Creamy Apple Curry Ingredients

For the Base
Coconut Oil – A flavorful fat for cooking; substitute with vegetable oil like sunflower or canola for a lighter option.
Onions – Adds natural sweetness and depth to the dish; no substitution needed for full flavor.
Garlic – Provides a rich aromatic touch; fresh garlic is preferred but garlic powder can work in a pinch.

For the Main Ingredients
Apples (6 cups/650g, cubed) – The star of the recipe, bringing natural sweetness; opt for tart varieties like Granny Smith for balance.
Potatoes (1½ cups/200g, cubed) – Adds heft and structure; sweet potatoes make a fantastic substitute.
Courgette/Zucchini (1½ cups/200g, cubed) – Contributes moisture and texture; bell peppers or seasonal veggies can be great alternatives.
Squash (1½ cups/200g, cubed) – Introduces sweetness; butternut or hokkaido squash is ideal, but carrots can also work.

For the Spices
Curry Powder (3 tsp) – The primary spice base for the curry; adjust the amount based on your taste preferences.
Garam Masala (2 tsp) – Adds warmth and complexity; no need for substitutions here, but you can explore different spice blends if desired.
Tandoori Masala (2 tsp) – Enhances the color and flavor; if you lack this spice, mix 1 tsp of garam masala and 1 tsp of paprika as a substitute.

For the Creaminess
Coconut Milk (1 cup/240ml) or Soy Cream – Essential for that luscious creaminess; choose based on your dietary needs.
Water (1½ cups/350ml) – To create the sauce; adjust quantity depending on your preferred consistency.
Peanut Butter (1 tbsp) – Brings a nutty creaminess to the dish; can be omitted if there are allergy concerns or replaced with almond butter.

For Protein and Texture
Adzuki Beans (1 can/240g, canned or cooked) – Add protein and texture; feel free to substitute with chickpeas or omit for a lighter dish.

This Creamy Apple Curry is not just a recipe; it’s an adventure waiting to happen in your kitchen!

Step‑by‑Step Instructions for Creamy Vegan Apple Curry

Step 1: Sauté the Aromatics
In a large frying pan, melt 2 tablespoons of coconut oil over medium-high heat. Once hot, add 1 diced onion and sauté for about 5 minutes until the onions begin to brown and soften. Stir frequently to ensure even cooking, as this forms the flavorful base for your creamy vegan apple curry.

Step 2: Add Garlic and Spices
Next, add 3 minced cloves of garlic to the pan along with 3 teaspoons of curry powder, 2 teaspoons of garam masala, and 2 teaspoons of tandoori masala. Stir these into the mixture and cook for an additional minute until fragrant, watching closely to prevent burning. This step is crucial to release the spices’ full flavors.

Step 3: Incorporate the Apples and Veggies
Now it’s time to introduce the star ingredient! Add 6 cups of cubed apples and your choice of vegetables, such as 1½ cups each of cubed potatoes, courgette, and squash. Stir everything well to coat the ingredients in the spices and sauté for about 2 minutes, allowing the apples to begin softening.

Step 4: Create the Sauce
Pour in 1 cup of coconut milk (or soy cream), along with 1½ cups of water and 1 teaspoon of salt. Add 1 tablespoon of peanut butter for extra creaminess. Stir everything until combined, bringing the mixture to a gentle boil. Keep an eye on it to ensure it doesn’t stick to the bottom of the pan.

Step 5: Simmer Until Tender
Reduce the heat to low-medium and let the creamy vegan apple curry simmer for approximately 15 minutes. Stir occasionally, allowing the potatoes and squash to cook through and become tender. You’ll know it’s ready when the vegetables are soft and the sauce has thickened slightly.

Step 6: Add Protein with Beans
After simmering, stir in 1 can of drained adzuki beans. Continue to simmer for an additional 3 minutes, just until the beans are heated through. This step adds a hearty texture and boosts the protein content of your creamy vegan apple curry.

Step 7: Allow to Cool
Once cooked, remove the pan from heat and let the curry cool for about 10 minutes. This cooling period helps the flavors meld together, creating a more cohesive and delicious dish. The aromas will be enticing, inviting everyone to the table!

Step 8: Serve and Enjoy
Serve your Creamy Vegan Apple Curry warm alongside fluffy basmati rice, warm naan, or crispy popadoms. Garnish with fresh coriander if desired, adding a burst of color and freshness to your plate. Enjoy this unique twist on curry that’s sure to delight!

Expert Tips for Creamy Vegan Apple Curry

  • Right Apples: Choose tart varieties like Granny Smith for balance; sweet apples can overpower the dish and dilute the flavor.

  • Cut Evenly: Ensure the vegetables and apples are cut into similar-sized cubes to ensure even cooking and a delightful texture.

  • Spice Control: Feel free to adjust the amount of curry and garam masala based on your spice preference; start small and increase as desired!

  • Simmer Wisely: Allow the curry to simmer long enough for the flavors to meld; a rushed cooking process can lead to bland results.

  • Storage Tip: This Creamy Vegan Apple Curry stays fresh in the fridge for up to three days; reheat gently to maintain its creamy consistency.

What to Serve with Creamy Vegan Apple Curry?

When it comes to rounding out your meal, there are several delightful pairings that will elevate your dining experience with this flavorful curry.

  • Fluffy Basmati Rice: Perfect for soaking up the creamy sauce, this fragrant rice balances the dish’s spices seamlessly.

  • Warm Naan Bread: Soft and chewy, naan adds a comforting touch, ideal for scooping up the curry for a satisfying bite.

  • Crispy Popadoms: These crunchy lentil crackers provide a lovely texture contrast, adding a fun crunch to your meal.

  • Red Lentil Flatbreads: Rich in fiber, these are a wholesome accompaniment that complements the curry’s creamy goodness while adding more nutrition.

  • Fresh Coriander Garnish: Sprinkling fresh cilantro on top brings a burst of flavor and a vibrant pop of color, enhancing the dish’s appeal.

  • Chutney: A tangy mango or mint chutney on the side elevates the sweetness and spice, creating an exciting flavor dynamic.

By pairing these delightful accompaniments with your Creamy Vegan Apple Curry, you can craft a beautiful and satisfying meal that brings joy to your table!

Make Ahead Options

These Creamy Vegan Apple Curry preparations are perfect for busy cooks looking to save time during hectic weeknights! You can chop up the vegetables (like potatoes, zucchini, and squash) and apples, then store them in an airtight container in the fridge for up to 24 hours. The spices can also be measured out and mixed in advance to ensure a quick cooking process. When you’re ready to serve, sauté the aromatics, toss in the prepped ingredients, and finish by adding the coconut milk and beans. This way, you’ll enjoy restaurant-quality results with minimal fuss, making weeknight dinners delightful!

Creamy Apple Curry Variations

Feel free to tweak this recipe to match your cravings and pantry! Discover how these simple swaps and additions can transform your dish.

  • Sweet Potato: Substitute regular potatoes with sweet potatoes for a touch of sweetness and creaminess.
  • Greens Galore: Stir in fresh spinach or kale towards the end of cooking for an extra nutrient boost and vibrant color.
  • Creamy Silken Tofu: Replace coconut milk with silken tofu blended until smooth for a lower-calorie creamy option.
  • Heat It Up: Add a pinch of cayenne pepper or fresh chili for a spicy kick, complementing the apples beautifully.
  • Nut-Free: Omit peanut butter entirely or swap it with sunflower seed butter to maintain creaminess without the nuts.
  • Experiment with Beans: Swap adzuki beans for lentils or black beans for a completely different texture and flavor experience.
  • Herb Twist: Fresh herbs like cilantro or basil can be added just before serving to provide a fresh twist on flavor.
  • Curry Fusion: Explore different spice blends such as Thai curry paste for a new flavor direction that elevates the apples in unexpected ways.

Your kitchen is your playground, so feel free to make this Creamy Apple Curry uniquely yours! For more ideas, check out the section on cooking techniques to elevate your culinary skills.

How to Store and Freeze Creamy Apple Curry

Fridge: Keep the curry in an airtight container for up to 3 days. This allows the flavors to develop further and makes it easy to enjoy later.

Freezer: For longer storage, freeze the cream curry for up to 2 months in a sealed freezer bag or container. Ensure you leave some space for expansion as it freezes.

Thawing: When ready to enjoy your frozen creamy apple curry, thaw overnight in the fridge. Reheat gently on the stove, adding a splash of water to restore creaminess and prevent it from thickening too much.

Reheating: Reheat in a saucepan over low heat or in the microwave, stirring occasionally to ensure it heats evenly while enjoying the delicious flavors of your creamy apple curry.

Creamy Vegan Apple Curry Recipe FAQs

What type of apples work best for this curry?
Absolutely! Tart varieties like Granny Smith or Honeycrisp are fantastic choices. They provide a lovely balance of sweetness and tartness that complements the spices perfectly. Avoid overly sweet apples, which can overpower the dish.

How should I store the leftover curry?
To store your creamy apple curry, place it in an airtight container and refrigerate it. It will stay fresh for up to 3 days. When you’re ready to enjoy it again, you can reheat gently on the stove or microwave, adding a splash of water if it has thickened too much.

Can I freeze this creamy apple curry?
Very much so! You can freeze the curry for up to 2 months in a sealed freezer bag or container. Just make sure to leave some space for the dish to expand as it freezes. When you’re ready to eat it, thaw overnight in the refrigerator and reheat gently, stirring occasionally for even warming.

What if my curry turns out too spicy?
If you find your curry is too spicy for your taste, there are a couple of ways to mellow it out. You can add a nearby ingredient like coconut milk or a bit of sugar (to balance the spice) to soften the heat. Another option is to stir in more vegetables to absorb some of the spice without compromising the dish.

Can I make this dish nut-free?
Absolutely! If you have nut allergies or simply prefer to keep it nut-free, you can omit the peanut butter altogether or substitute it with sunflower seed butter for a similar creamy texture without the nuts. Just be sure to adjust the flavors a bit to maintain that delicious richness!

Is this recipe suitable for pets?
While the curry is vegan, be cautious if you plan to share it with pets. Certain spices (like garlic) and ingredients (like salt) can be harmful to dogs and cats. It’s always best to prepare separate, pet-friendly meals for your furry friends!

https://veganonboard.com/wp-content/uploads/2018/10/DSC_1328.jpg

Creamy Apple Curry Bliss – A Unique Vegan Experience

Experience a delightful twist on curry with our Creamy Vegan Apple Curry, featuring apples and a combination of spices.
Prep Time 15 minutes
Cook Time 30 minutes
Cooling Time 10 minutes
Total Time 55 minutes
Servings: 4 servings
Course: Dinner
Cuisine: Vegan
Calories: 320

Ingredients
  

For the Base
  • 2 tbsp Coconut Oil Can be substituted with vegetable oil.
  • 1 Onion, diced Adds natural sweetness.
  • 3 cloves Garlic, minced Fresh preferred, powder can be used.
For the Main Ingredients
  • 6 cups Apples, cubed Tart varieties like Granny Smith recommended.
  • 1.5 cups Potatoes, cubed Sweet potatoes are a good substitute.
  • 1.5 cups Courgette/Zucchini, cubed Substitute with bell peppers if desired.
  • 1.5 cups Squash, cubed Butternut or hokkaido squash ideal.
For the Spices
  • 3 tsp Curry Powder Adjust based on taste.
  • 2 tsp Garam Masala No substitutions needed.
  • 2 tsp Tandoori Masala Alternative: 1 tsp garam masala + 1 tsp paprika.
For the Creaminess
  • 1 cup Coconut Milk or Soy Cream Choose based on dietary needs.
  • 1.5 cups Water Adjust for preferred consistency.
  • 1 tbsp Peanut Butter Can be omitted for allergy concerns.
For Protein and Texture
  • 1 can Adzuki Beans, drained Substitute with chickpeas if desired.

Equipment

  • Large frying pan

Method
 

Step-by-Step Instructions for Creamy Vegan Apple Curry
  1. In a large frying pan, melt coconut oil over medium-high heat. Add diced onion and sauté for about 5 minutes until browned.
    https://veganonboard.com/wp-content/uploads/2018/10/DSC_1328.jpg
  2. Add minced garlic, curry powder, garam masala, and tandoori masala. Stir and cook for an additional minute until fragrant.
    https://veganonboard.com/wp-content/uploads/2018/10/DSC_1328.jpg
  3. Introduce cubed apples, potatoes, courgette, and squash. Stir and sauté for about 2 minutes.
    https://veganonboard.com/wp-content/uploads/2018/10/DSC_1328.jpg
  4. Pour in coconut milk, water, and salt. Add peanut butter and stir until combined. Bring to a gentle boil.
    https://veganonboard.com/wp-content/uploads/2018/10/DSC_1328.jpg
  5. Reduce heat and let simmer for approximately 15 minutes, stirring occasionally until vegetables are tender.
    https://veganonboard.com/wp-content/uploads/2018/10/DSC_1328.jpg
  6. Stir in drained adzuki beans and simmer for an additional 3 minutes to heat through.
    https://veganonboard.com/wp-content/uploads/2018/10/DSC_1328.jpg
  7. Remove from heat and let cool for about 10 minutes to meld flavors.
    https://veganonboard.com/wp-content/uploads/2018/10/DSC_1328.jpg
  8. Serve warm alongside rice or naan, garnished with fresh coriander if desired.
    https://veganonboard.com/wp-content/uploads/2018/10/DSC_1328.jpg

Nutrition

Serving: 1cupCalories: 320kcalCarbohydrates: 50gProtein: 9gFat: 12gSaturated Fat: 10gPolyunsaturated Fat: 1gMonounsaturated Fat: 1gSodium: 400mgPotassium: 700mgFiber: 7gSugar: 10gVitamin A: 500IUVitamin C: 15mgCalcium: 50mgIron: 2mg

Notes

Store leftovers in an airtight container for up to 3 days in the fridge. Freeze for up to 2 months. Thaw overnight in the fridge before reheating.

Tried this recipe?

Let us know how it was!

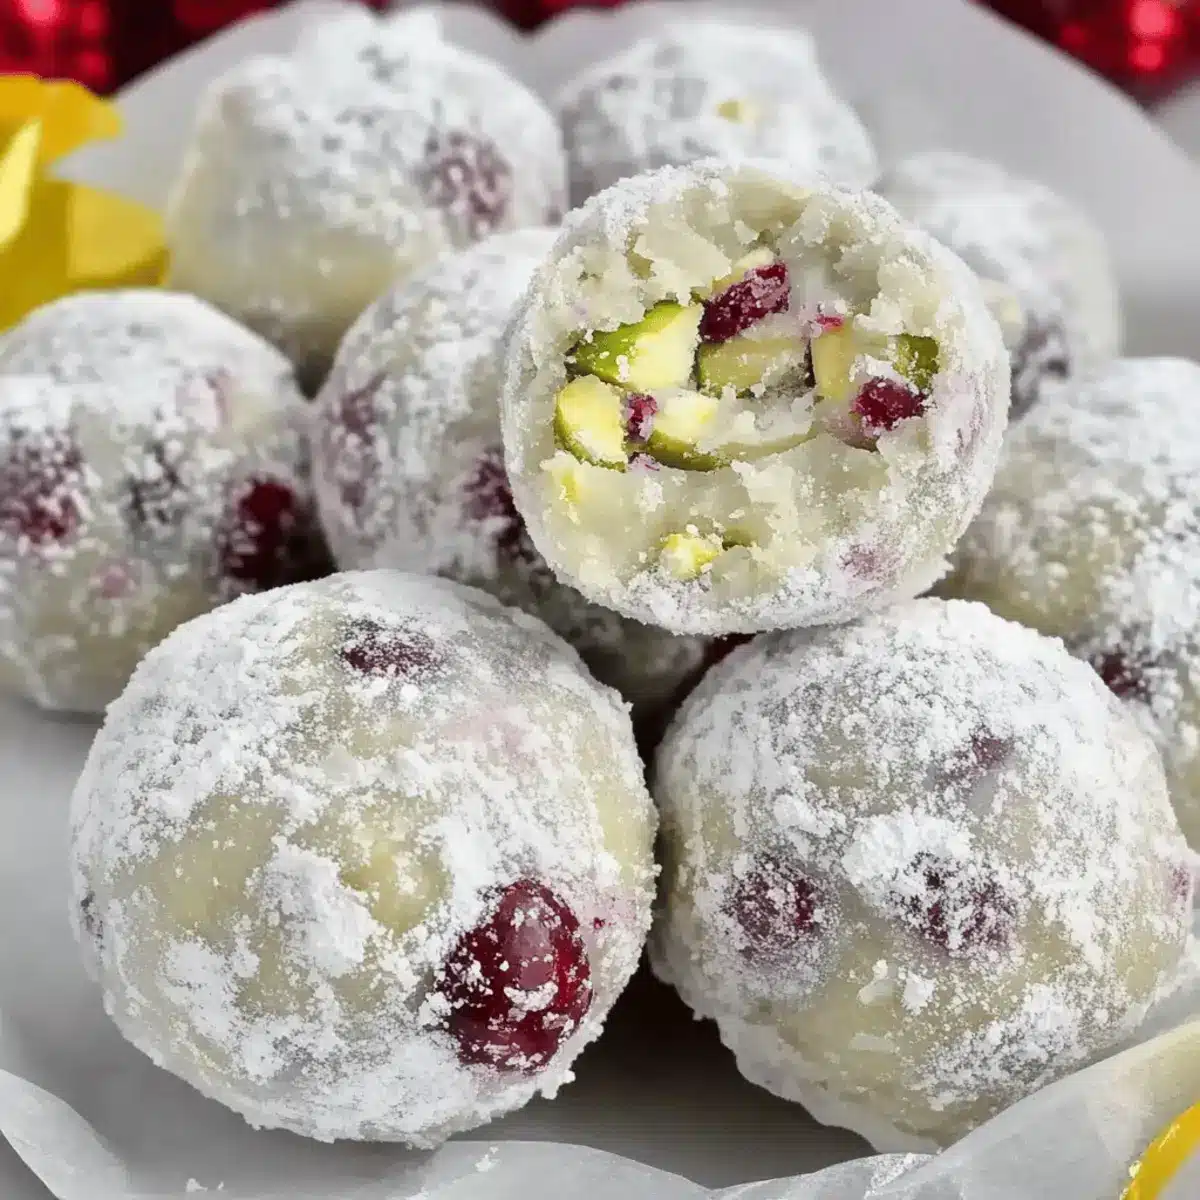
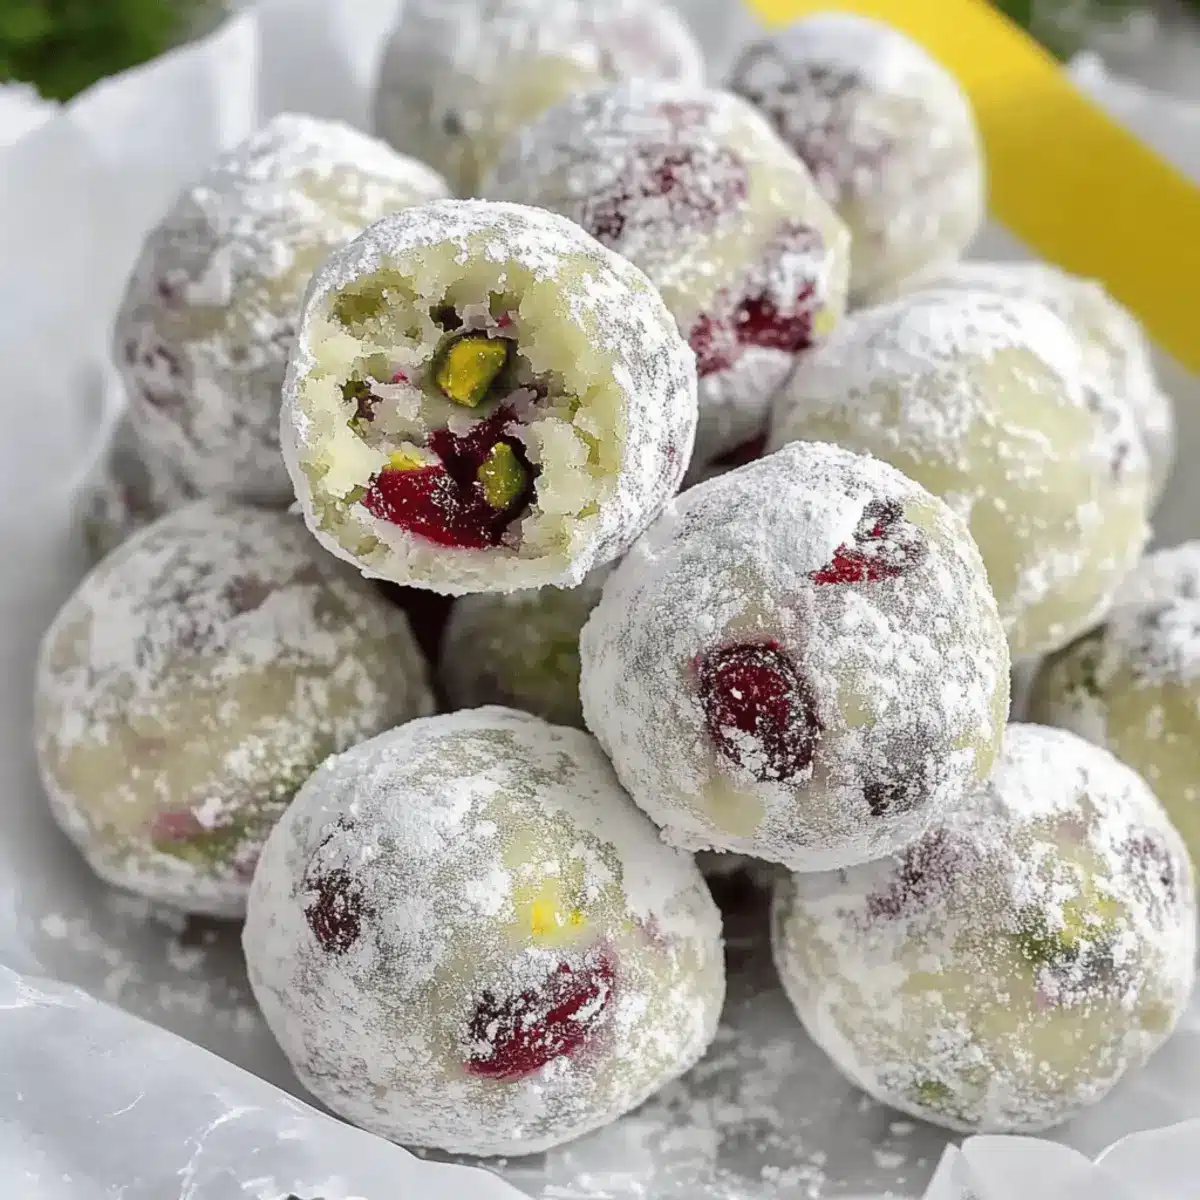
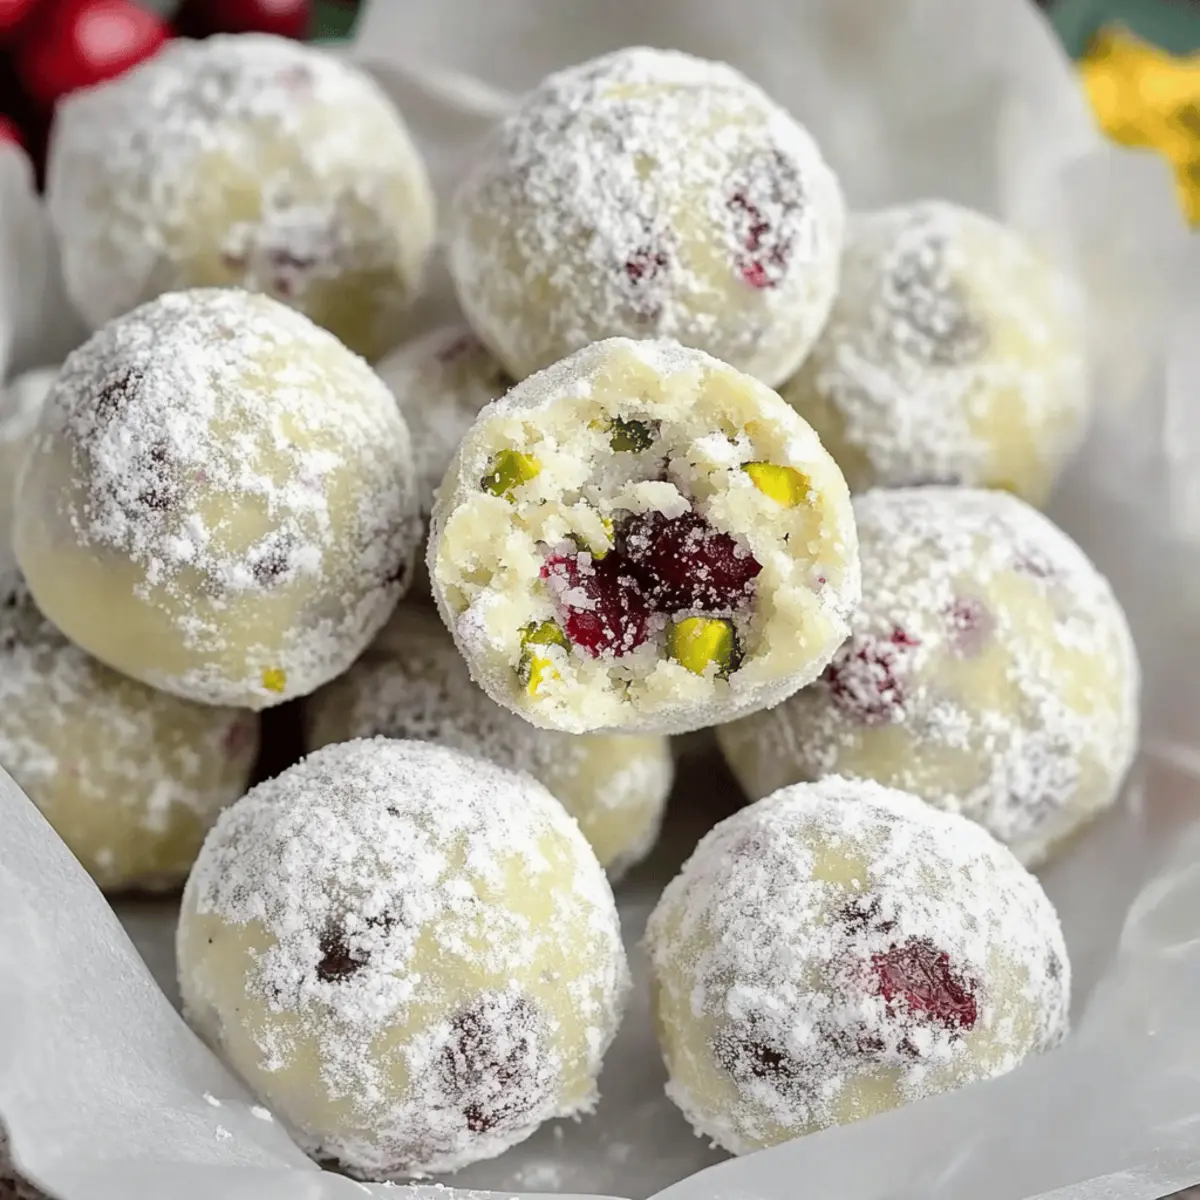
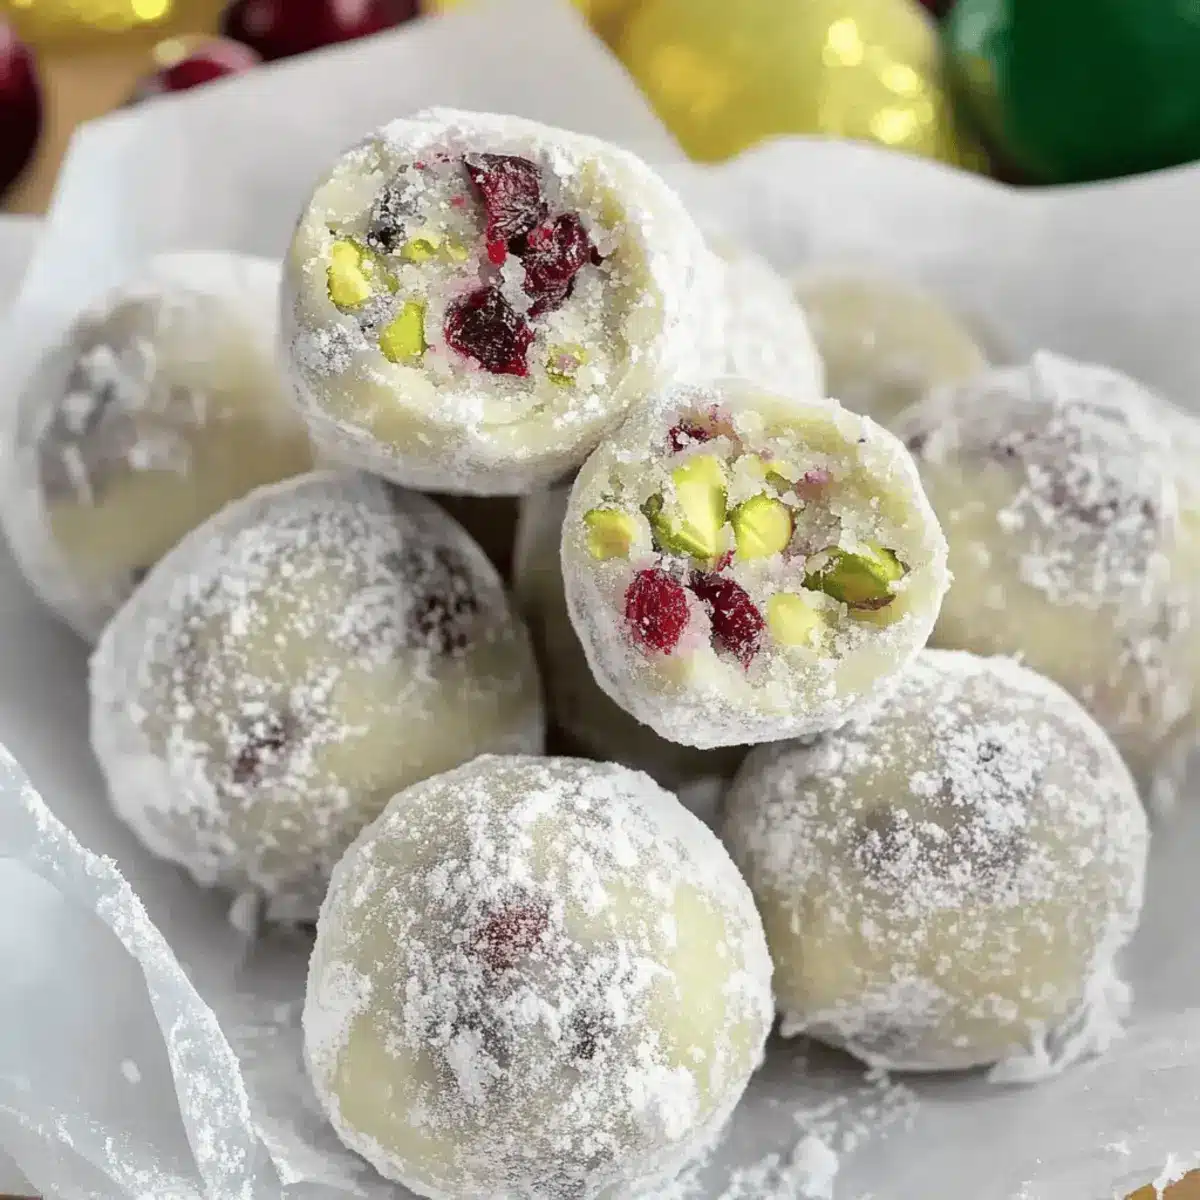
Cranberry Pistachio Truffles: Easy No-Bake Holiday Treats

As I stood in my kitchen, surrounded by festive spirit and the aroma of holiday sweets, I knew it was time to whip up something extraordinary. Enter the Cranberry Pistachio White Chocolate Truffles, a no-bake delight that not only captures the essence of the season but also adds a touch of elegance to any gathering. With their perfect balance of tart cranberries, crunchy pistachios, and smooth white chocolate, these truffles are a showstopper on the Christmas dessert table. Not only are they incredibly easy to prepare ahead of time, but they also double as charming homemade gifts. Whether you’re looking to impress at a holiday party or simply treat yourself to a little indulgence, these delightful bites are sure to unfold a sweet moment of joy. Curious how to make these festive treats? Let’s dive into this simple recipe!

Why are these truffles a must-try?

Festive Flavor Explosion: The blend of tart cranberries and rich pistachios provides a delightful contrast that will have your taste buds dancing with joy.

No-Bake Convenience: Perfect for busy holiday schedules, these truffles come together in no time, making them an easy choice for festive gatherings.

Versatile Treats: Customize your truffles with different nuts or even swap cranberries for dried cherries for a twist on flavor!

Elegant Presentation: With their snowball appearance, they add a touch of sophistication to any dessert tray, making them ideal for gifting or sharing at parties.

Crowd-Pleasing Appeal: These truffles are guaranteed to impress guests — say goodbye to boring desserts and hello to delicious conversations! Check out our White Chocolate Cranberry for more festive delights.

Cranberry Pistachio Truffles Ingredients

For the Truffle Mixture

  • Cranberries – Provides a tartness that perfectly balances the sweetness of the white chocolate; use unsweetened for a bolder flavor.
  • Pistachios – Adds rich, nutty flavors and lovely color; choose roasted and salted for extra crunch or raw for a milder taste.
  • White Chocolate – The heart of these truffles; opt for high-quality chocolate to ensure a smooth and creamy finish, or swap for dark chocolate for a unique twist.
  • Butter – Contributes to a rich texture; you can substitute with margarine or give it a lighter touch if you prefer.
  • Heavy Cream – Ensures a silky-smooth consistency and binds everything together.
  • Powdered Sugar – For rolling the truffles, giving them a sweet dusting and a festive look.

For the Coating

  • Additional Powdered Sugar – Perfect for rolling the finished truffles; adds sweetness and enhances the snowball appearance, making them perfect for holiday displays.

Step‑by‑Step Instructions for Cranberry Pistachio Truffles

Step 1: Prep Ingredients
Begin by finely chopping ½ cup of dried cranberries and ⅓ cup of pistachios, ensuring they are small enough to easily blend into the truffle mixture. This aromatic medley not only adds texture but will create a festive flavor in your Cranberry Pistachio Truffles. Set aside the chopped nuts and cranberries while you prepare the chocolate mixture.

Step 2: Melt Mixtures
In a double boiler, gently melt 8 ounces of high-quality white chocolate along with 2 tablespoons of butter and ¼ cup of heavy cream over low heat. Stir continuously for about 5 minutes until the mixture is smooth and glossy, with no lumps remaining. Watch for the chocolate to become completely melted and creamy – this will ensure the best texture for your truffles.

Step 3: Combine
Once the chocolate mixture is fully melted, remove it from the heat and allow it to cool slightly for about 2 minutes. Carefully stir in the chopped cranberries and pistachios until they are evenly distributed throughout the chocolate. This step is essential for ensuring that each bite of your Cranberry Pistachio Truffles has a balanced flavor profile and delightful crunch.

Step 4: Chill
Pour the truffle mixture into a shallow container and spread it evenly. Cover with plastic wrap and refrigerate for approximately 2 hours or until the mixture is firm enough to handle. This cooling period is crucial as it allows the flavors to meld and sets the mixture for easy shaping into truffles later.

Step 5: Form Truffles
Once the mixture is firm, take small portions using a melon baller or teaspoon and roll them into small balls, about 1 inch in diameter. Aim for a smooth surface as you shape each piece into a perfectly round truffle. The hands-on process of forming the Cranberry Pistachio Truffles adds a personal touch to each delightful bite.

Step 6: Coat and Serve
Roll each truffle in powdered sugar before placing them on a serving platter. This not only adds sweetness but also enhances their festive appeal, resembling little snowballs. Arrange your Cranberry Pistachio Truffles in an airtight container for gifting or display them on a holiday dessert tray, ready to impress your guests or share with loved ones.

Cranberry Pistachio Truffles Variations

Feel free to get creative with these truffles and make them your own with some delightful twists!

  • Dried Fruit Swap: Substitute cranberries with dried cherries or apricots for a unique sweet and tangy flavor that dances on the palate.

  • Nutty Alternatives: Replace pistachios with almonds or hazelnuts for a rich, alternate nutty flavor. Each nut brings its distinct essence, enhancing your truffle experience.

  • Flavor Infusion: Experiment with flavored chocolates like mint or orange to create a zesty, unexpected profile that’ll surprise your guests.

  • Coconut Crunch: Mix in shredded coconut along with the nuts for a tropical twist. The added texture brings out a delightful crunch that complements the creaminess beautifully.

  • Spicy Kick: For a hint of warmth, sprinkle in a touch of cayenne pepper or chili powder. It’s a surprising layer of flavor that pairs well with the sweetness.

  • Vegan Version: Swap white chocolate for dairy-free chocolate and replace cream with coconut cream to create a delectable vegan treat.

  • Booster Toppings: After rolling in powdered sugar, coat truffles in crushed pistachios or cocoa powder for an added layer of texture and beauty.

  • Holiday Spice: Add a pinch of cinnamon or nutmeg to the mixture for an aromatic touch that embodies the festive spirit. Your kitchen will smell heavenly!

As you explore these variations, don’t forget to check out our Pistachio Carrot Cake for another delightful twist on the classic dessert!

What to Serve with Cranberry Pistachio White Chocolate Truffles

Elevate your holiday gatherings with delightful pairings that complement these festive truffles in flavor and presentation.

  • Rich Hot Chocolate: A cozy cup of rich hot chocolate creates a perfect contrast to the sweetness of the truffles, enhancing the indulgent experience.

  • Cheese Platter: A selection of creamy cheeses like brie or tangy goat cheese offers a delightful contrast to the truffles’ sweetness, making each bite memorable.

  • Fresh Berries: Juicy strawberries or raspberries provide a refreshing tartness that balances the richness of the truffles beautifully. They also add vibrant color to your dessert spread.

  • Spiced Nuts: Crunchy spiced nuts like candied pecans or spicy almonds give a satisfying crunch that pairs well with the smooth texture of the truffles.

  • Sparkling Wine: A glass of bubbly adds a celebratory touch and enhances the festive atmosphere, harmonizing perfectly with the flavors of cranberries and pistachios.

  • Homemade Eggnog: Creamy, spiced eggnog complements the sweet notes of the truffles, creating a comforting and nostalgic holiday vibe that guests will love.

  • Coconut Macarons: These chewy and sweet treats provide an exotic flavor that contrasts nicely with the tartness of the cranberries while keeping the dessert table festive.

  • Peppermint Bark: The refreshing taste of peppermint bark offers a delightful contrast, making it a familiar and lovely addition to your holiday dessert spread.

  • Vanilla Ice Cream: A scoop of silky vanilla ice cream serves as a perfect canvas, allowing the truffles to shine when enjoyed together.

  • Citrus Sorbet: A light and refreshing sorbet cleanses the palate and prepares your taste buds for the sweet indulgence of the truffles.

How to Store and Freeze Cranberry Pistachio Truffles

Fridge: Store your Cranberry Pistachio Truffles in an airtight container in the refrigerator for up to one week. This preserves their fresh flavor and ideal texture.

Freezer: If you want to keep them longer, freeze the truffles for up to three months. Place them in a single layer on a baking sheet before transferring to an airtight container, ensuring they don’t stick together.

Thawing: To enjoy your frozen truffles, simply transfer them to the fridge to thaw overnight. Let them sit at room temperature for a few minutes before serving for optimal softness.

Reheating: These truffles are best enjoyed chilled, so no reheating is necessary! Just roll them in powdered sugar again if needed before serving.

Expert Tips for Cranberry Pistachio Truffles

  • Quality Ingredients: Use high-quality white chocolate and fresh cranberries for the best flavor and texture. Poor ingredients can lead to disappointing results.

  • Chopping Technique: Finely chop cranberries and pistachios to ensure even distribution in the truffle mixture. Larger pieces can affect the truffle’s texture and size.

  • Temperature Check: Make sure the melted chocolate and butter are at similar temperatures to avoid separation. Too hot or too cold can ruin the mixture.

  • Chill Time: Allow plenty of time for chilling; the longer they sit, the better the flavors meld. Don’t rush this vital step!

  • Rolling Tip: If the truffle mixture feels too hard to shape, let it sit at room temperature for a few minutes. This makes it easier to form your Cranberry Pistachio Truffles.

  • Storage Secrets: Store truffles in an airtight container in the fridge for up to a week. If freezing, keep them in a single layer to prevent sticking.

Make Ahead Options

These Cranberry Pistachio White Chocolate Truffles are a dream for meal prep! You can finely chop the cranberries and pistachios up to 24 hours in advance, storing them in an airtight container in the refrigerator to maintain freshness. Additionally, the truffle mixture can be prepared and chilled for up to 3 days before rolling into truffles. Just melt the white chocolate mixture, combine, and chill as instructed, then shape and coat them in powdered sugar right before serving for a delightful touch. This way, you’ll save time on busy days while ensuring your festive treats remain just as delicious and beautiful as ever!

Cranberry Pistachio White Chocolate Truffles Recipe FAQs

What type of cranberries should I use?
Absolutely! You can use dried unsweetened cranberries for a bolder tartness, or opt for Craisins for a sweeter flavor. Just make sure they’re chopped finely for even distribution.

How should I store my Cranberry Pistachio Truffles?
You can store your truffles in an airtight container in the refrigerator for up to one week. This keeps them fresh and delicious. If you plan to keep them longer, freezing is a great option!

Can I freeze these truffles?
Yes, you can freeze your Cranberry Pistachio Truffles for up to three months! To do this, arrange them in a single layer on a baking sheet to freeze individually before transferring to an airtight container. This prevents them from sticking together.

What should I do if my chocolate mixture separates?
If you experience separation in your chocolate mixture, don’t worry! Reheat it gently over low heat while stirring. You can also add a small amount of warm milk, whisking continuously until it comes back together smoothly.

Are these truffles safe for people with nut allergies?
Great question! Since these truffles contain pistachios, they are not safe for those with nut allergies. However, you can substitute the pistachios with seeds like sunflower or pumpkin seeds for a nut-free version that still packs a crunch!

What if my truffle mixture is too hard to scoop?
If your mixture is too hard, let it sit at room temperature for about 5 to 10 minutes. This will soften it slightly and make it much easier to scoop and roll into perfect little truffles. Enjoy the process!

Cranberry Pistachio Truffles

Cranberry Pistachio Truffles: Easy No-Bake Holiday Treats

Cranberry Pistachio Truffles are no-bake delights combining tart cranberries, crunchy pistachios, and smooth white chocolate, perfect for festive gatherings.
Prep Time 30 minutes
Cook Time 5 minutes
Chill Time 2 hours
Total Time 2 hours 35 minutes
Servings: 24 truffles
Course: Dessert
Cuisine: American
Calories: 120

Ingredients
  

For the Truffle Mixture
  • 0.5 cup Dried Cranberries Chopped, unsweetened for bolder flavor
  • 0.333 cup Pistachios Chopped, roasted and salted preferred
  • 8 ounces White Chocolate High-quality chocolate for best texture
  • 2 tablespoons Butter Can substitute with margarine
  • 0.25 cup Heavy Cream
  • 0.5 cup Powdered Sugar For rolling truffles
For the Coating
  • 0.5 cup Additional Powdered Sugar For rolling the finished truffles

Equipment

  • Double boiler
  • Shallow container
  • Melon baller

Method
 

Step-by-Step Instructions
  1. Finely chop ½ cup of dried cranberries and ⅓ cup of pistachios, then set aside.
  2. In a double boiler, melt 8 ounces of white chocolate, 2 tablespoons of butter, and ¼ cup of heavy cream over low heat for about 5 minutes.
  3. Remove the melted chocolate mixture from heat and stir in the chopped cranberries and pistachios.
  4. Pour the mixture into a shallow container, cover with plastic wrap, and refrigerate for approximately 2 hours.
  5. Once firm, roll the mixture into small balls, about 1 inch in diameter.
  6. Roll each truffle in powdered sugar and arrange on a serving platter.

Nutrition

Serving: 1truffleCalories: 120kcalCarbohydrates: 15gProtein: 1gFat: 7gSaturated Fat: 4gPolyunsaturated Fat: 1gMonounsaturated Fat: 2gCholesterol: 10mgSodium: 15mgPotassium: 50mgSugar: 12gVitamin A: 100IUCalcium: 20mgIron: 0.5mg

Notes

Use high-quality ingredients for best results. Store in an airtight container in the fridge for up to a week or freeze for up to three months.

Tried this recipe?

Let us know how it was!

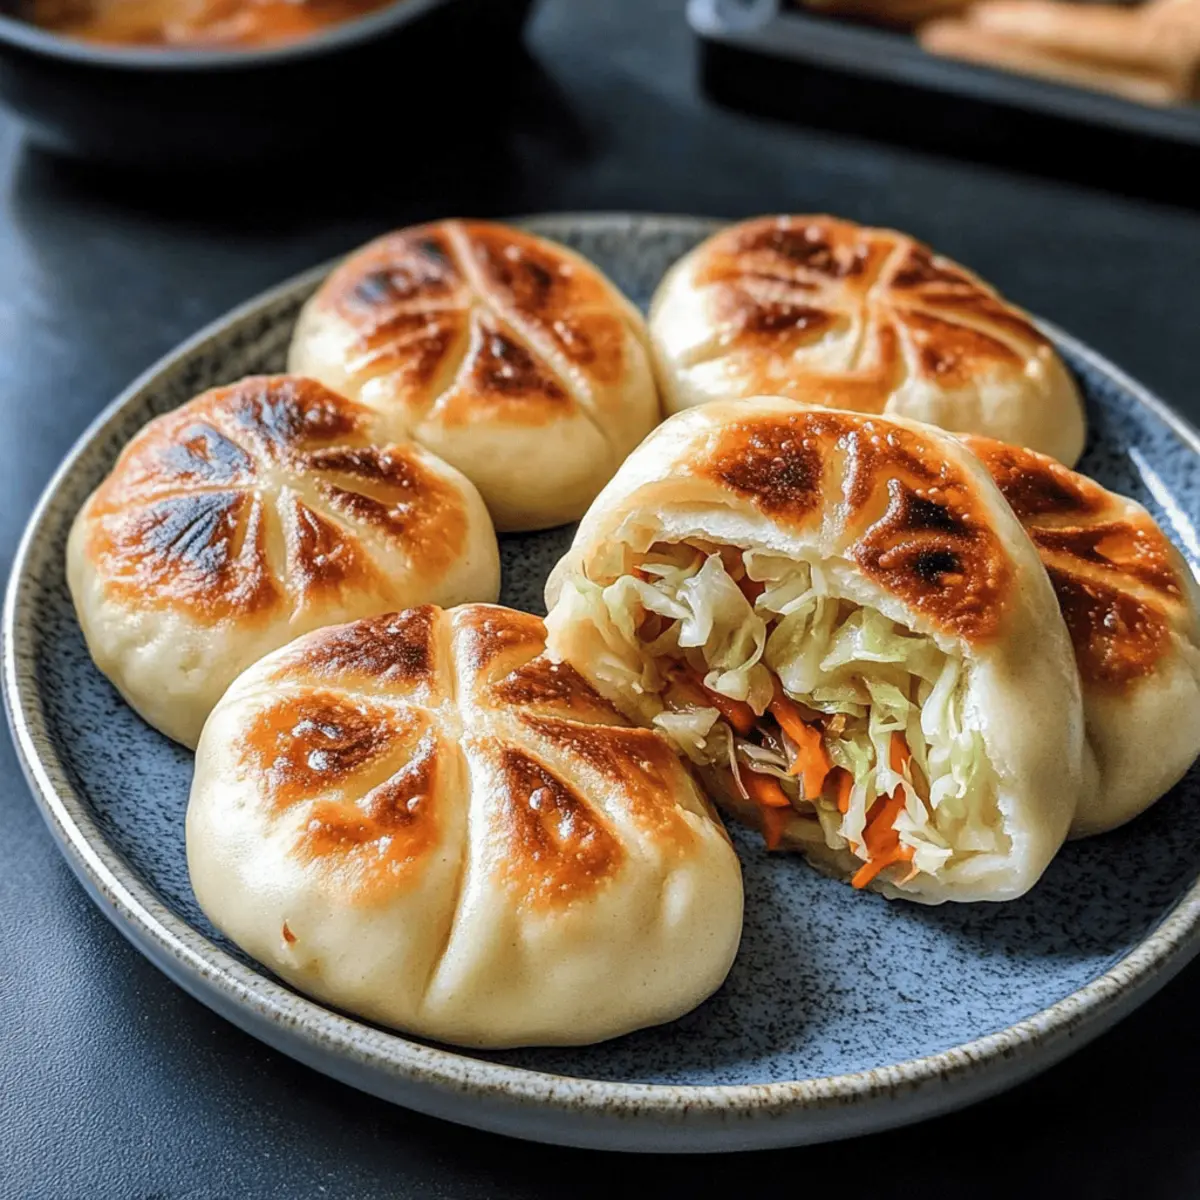
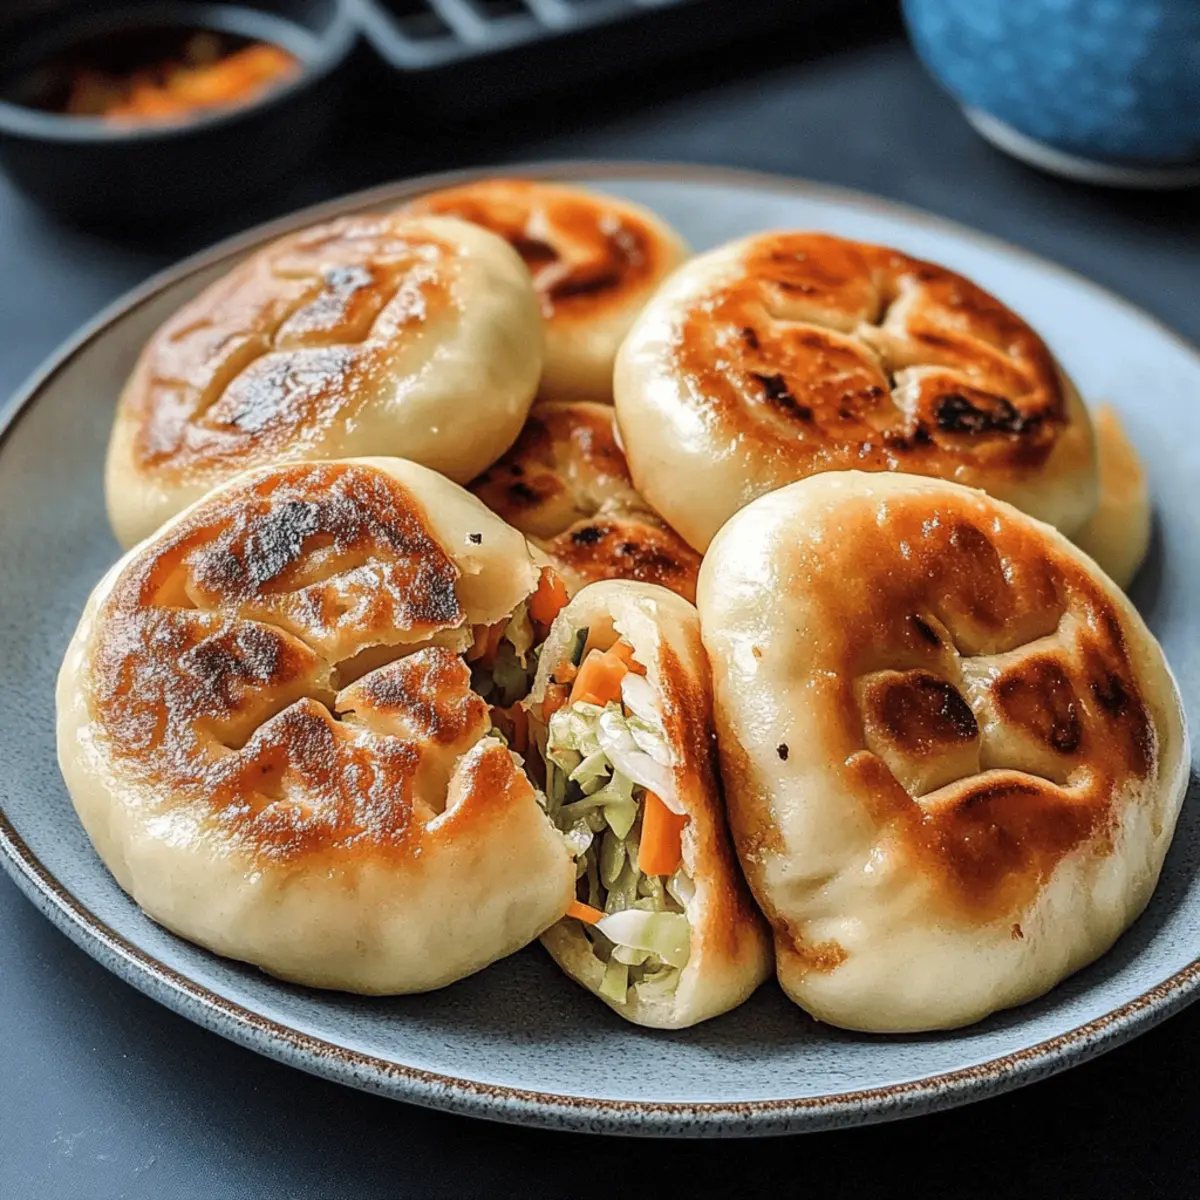
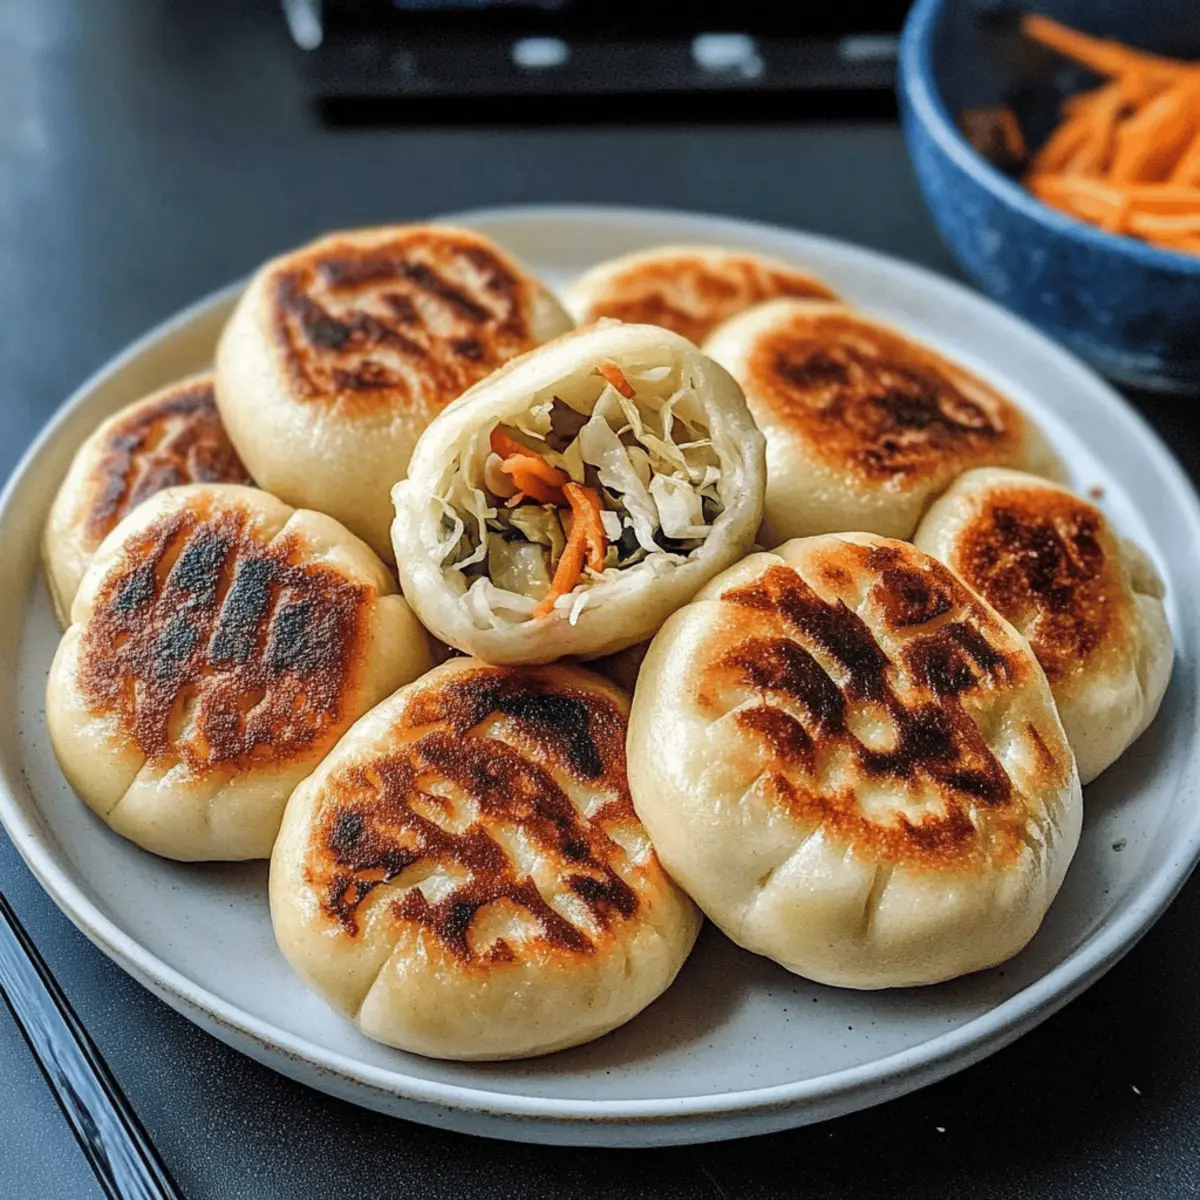
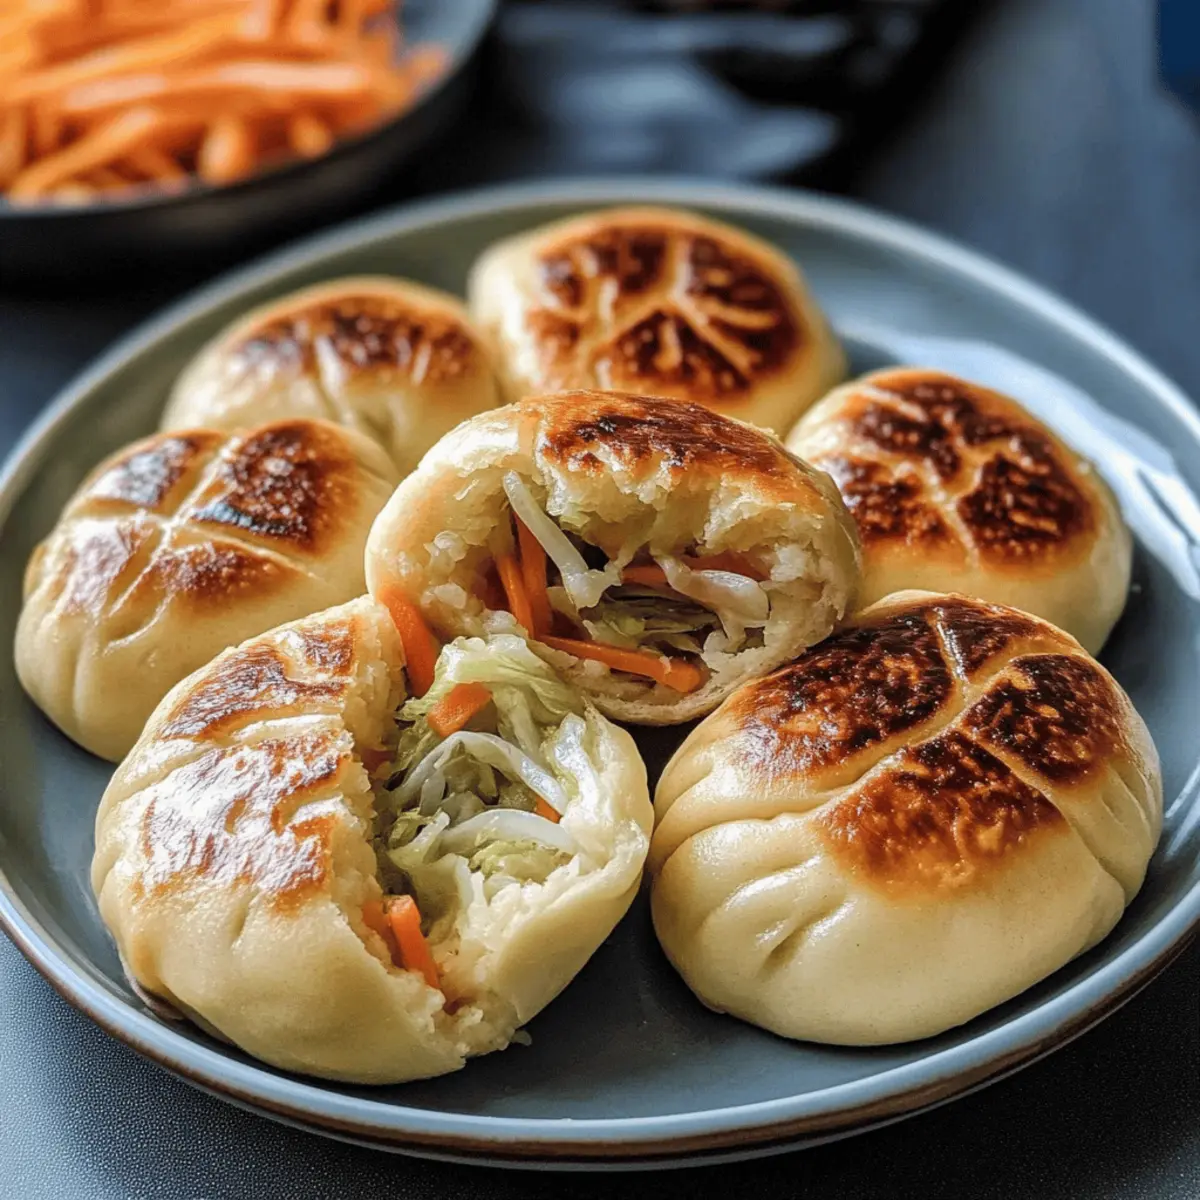
Crispy Fried Cabbage Noodle Buns – A Flavorful Delight

The moment I took my first bite of pan-fried buns from a bustling Taipei street vendor, I was transported to a world of crispy, chewy delight. Inspired by this unforgettable experience, I’ve created my own vegan version: Fried Cabbage Noodle Buns. These gems feature a golden, crunchy exterior that gives way to a satisfyingly soft inside, lovingly filled with a savory medley of cabbage, vermicelli noodles, and vibrant veggies. One of the best parts? This recipe is not only a breeze to whip up but also perfect for meal prepping—just freeze a batch for later, and you’ve got a quick snack ready to go. Who’s ready to dive into comfort food that’s both delicious and guilt-free? Let’s get cooking!

Why are Fried Cabbage Noodle Buns irresistible?

Deliciously Crispy: Each bun boasts a perfectly crispy exterior that contrasts beautifully with its soft, chewy center.

Flavor Explosion: Packed with a mouthwatering mix of cabbage, vermicelli noodles, and vibrant vegetables, these buns deliver a robust taste experience.

Easy to Make: Simple ingredients mean you can whip these up even on a busy weeknight—perfect for home cooks of any skill level!

Meal Prep Friendly: Freeze them for a quick snack or appetizer anytime. Just reheat and enjoy—no more boring fast food!

Crowd-Pleaser: Impress friends and family with this vegan twist on a beloved classic, sure to win over even non-vegans.

For more delicious ideas, check out my recipe for Spicy Korean Noodles. Enjoy your foray into the world of homemade comfort food!

Fried Cabbage Noodle Buns Ingredients

For the Dough

  • All-Purpose Flour – Provides the ideal structure and chewiness for your buns. Can substitute with gluten-free flour for a gluten-free version.
  • Instant Dry Yeast – Ensures fluffy dough by enabling it to rise. Avoid using active dry yeast without proofing; may substitute with baking powder, but the texture will differ.
  • Sugar – Adds a subtle sweetness to balance flavors. Can be omitted if you prefer a savory dough.
  • Salt – Enhances overall flavor in the dough. Essential in bringing all the ingredients together.
  • Warm Soy Milk (or other non-dairy milk) – Hydrates and adds tenderness to the dough. Almond or oat milk are excellent alternatives.
  • Toasted Sesame Oil (or neutral oil) – Infuses a delightful depth of flavor. Can use olive oil in a pinch, though it will alter the flavor slightly.

For the Filling

  • Raw Shredded Cabbage – The primary filling ingredient that provides a fresh crunch. Bok choy or napa cabbage can be used as alternatives.
  • Uncooked Vermicelli Noodles – Adds a chewy texture that pairs perfectly with the cabbage. Rice noodles can be utilized if needed.
  • Finely Shredded Carrot – Introduces sweetness and color to the filling. Diced bell pepper can serve as a substitute.
  • Chopped Scallions or Chives – Adds an onion-like flavor to the mixture. Yellow onion works if you’re out of scallions.
  • Soy Sauce – Contributes umami richness to the filling. Low-sodium soy sauce is a great substitute; tamari can replace it for a gluten-free option.
  • Neutral Oil (for cooking the filling) – Sauté vegetables to perfection. Can be substituted with vegetable or canola oil if necessary.

For Cooking

  • Additional Neutral Oil – Required for pan-frying to achieve that crispy outer layer. An oil with a high smoke point, like canola or grapeseed oil, works well here.

This Fried Cabbage Noodle Buns recipe is not only fulfilling, but it also gives you the chance to explore flavors from the streets of Taipei right in your kitchen. Happy cooking!

Step‑by‑Step Instructions for Fried Cabbage Noodle Buns

Step 1: Prepare the Dough
In a large mixing bowl, combine the all-purpose flour, sugar, instant dry yeast, and salt. Create a well in the center and pour in warm soy milk and toasted sesame oil. Mix until a rough dough forms. Knead the dough on a lightly floured surface for about 8–10 minutes until smooth and elastic. Place the dough into a greased bowl, cover with a damp towel, and let it rise in a warm area for at least 2 hours, or until it doubles in size.

Step 2: Cook the Filling
While the dough is rising, soak the vermicelli noodles in boiling water for about 5 minutes until soft, then drain and chop them into small pieces. In a large skillet, heat 1 tablespoon of neutral oil over medium heat. Add the chopped scallions, shredded carrots, and cabbage, sautéing for 4–5 minutes until the vegetables are tender. Stir in the chopped noodles, soy sauce, and sesame oil, mixing well. Drain any excess liquid to keep the filling firm.

Step 3: Prepare the Wrappers
After the dough has risen, punch it down gently to release air. Divide the dough into 12 or 16 equal pieces, each weighing about 38g. Roll each piece into a ball, then flatten into a disc about 3–5 inches in diameter on a lightly floured surface. Aim for a thickness that is sturdy enough to hold the filling, ensuring the edges are slightly thinner than the center for the perfect Fried Cabbage Noodle Buns.

Step 4: Assemble the Buns
Place a generous spoonful of the filling in the center of each disc. Carefully fold the edges towards the center, pinch, and twist to seal the buns tightly, forming a round shape. Ensure the filling is completely enclosed to prevent it from spilling out during cooking. Arrange the assembled buns on a floured tray, covering them lightly with a towel while you prepare to cook.

Step 5: Cook the Buns
In a non-stick skillet, heat 2 tablespoons of neutral oil over medium heat. Once hot, place the sealed buns, creased-side down, into the skillet without overcrowding. Cook for about 4–5 minutes, or until the bottoms are golden brown and crispy. Carefully add 1 tablespoon of water per bun to the skillet, cover immediately, and steam for 5–6 minutes; this helps to cook the insides while keeping the exteriors crispy.

Step 6: Serve and Enjoy
Once the steaming is complete and the water has evaporated, remove the lid and check for doneness. The buns should have a beautifully crisp golden crust. Practicing your frying technique will enhance your Fried Cabbage Noodle Buns. Transfer them to a serving platter, and serve warm with soy sauce for dipping or a sprinkle of sesame seeds for an added crunch!

Make Ahead Options

These Fried Cabbage Noodle Buns are a fantastic choice for meal prep! You can prepare the filling (cooked vegetables and vermicelli noodles) up to 3 days in advance and store it in the refrigerator. Additionally, you can assemble the buns and refrigerate them for up to 24 hours; just be sure to cover them with a damp cloth to prevent drying out. When you’re ready to enjoy, simply pan-fry and steam the buns as directed. This approach allows you to savor the same deliciousness with minimal effort on busy weeknights, ensuring every bite remains just as delightful as fresh!

Variations & Substitutions for Fried Cabbage Noodle Buns

Inviting your creativity to shine, these scrumptious buns can be easily customized to fit your tastes and dietary needs.

  • Gluten-Free: Swap all-purpose flour with a 1:1 gluten-free flour blend for a similar texture that everyone can enjoy.
  • Spicy Kick: Add crushed red pepper flakes or minced fresh chilies to the filling for a delightful spicy twist.
  • Herbaceous Burst: Mix in fresh herbs, like cilantro or basil, into the filling for an aromatic touch that brightens each bite.
  • Protein Boost: Substitute half the veggie filling with mashed tofu or crumbled tempeh for added protein and a heartier filling.
  • Savory Alternative: Replace the cabbage with shredded mushrooms or zucchini for a different flavor and texture profile.
  • Cheesy Goodness: Stir in nutritional yeast or vegan cheese into the filling for a cheesy flavor without dairy.
  • Extra Crunch: Top your buns with toasted sesame seeds or finely chopped roasted peanuts before serving for an irresistible crunch.

For even more tasty ideas, don’t miss my recipe for Spicy Korean Noodles. These additions will surely elevate your next batch of Fried Cabbage Noodle Buns to new culinary heights!

Helpful Tricks for Fried Cabbage Noodle Buns

  • Don’t Overfill: Keep the filling moderate; too much can cause the buns to burst while cooking. A generous tablespoon is usually perfect.

  • Seal Properly: Ensure each bun is tightly sealed by pinching and twisting the edges well. This prevents any filling from leaking during frying.

  • Control the Moisture: Drain excess liquid from the filling thoroughly to avoid soggy buns. A firmer filling keeps the buns crispy and delicious.

  • Wrappers’ Thickness: Roll the dough to a consistent thickness—around 1/8 inch works best. Thinner wrappers may break, while thicker ones can be doughy.

  • Frying Technique: Start with a hot pan and oil for that ideal crispy layer. Once browned, add water and cover immediately to steam, ensuring the inside is cooked.

  • Freezing Wisely: If making a batch, freeze uncooked buns in a single layer before transferring them to a container. This prevents sticking, allowing you to fry them straight from frozen when desired.

How to Store and Freeze Fried Cabbage Noodle Buns

Room Temperature: Enjoy the buns fresh out of the pan for the best texture. If leftovers remain, store them in an airtight container for up to 1 day.

Fridge: Place cooled buns in an airtight container and refrigerate for up to 5 days. Reheat in a non-stick skillet over low heat, adding a splash of water to restore moisture.

Freezer: For long-term storage, freeze uncooked buns in a single layer on a baking sheet. Once solid, transfer to a freezer-safe bag for up to 3 months. Fry them directly from frozen—no thawing needed!

Reheating: To reheat cooked buns, use a pan with a little oil, adding a tablespoon of water and covering for a few minutes to steam them back to perfection. Enjoy your Fried Cabbage Noodle Buns whenever you crave a quick snack!

What to Serve with Fried Cabbage Noodle Buns

The perfect pairing can elevate your homemade vegan buns to a delectable meal, blending flavors and textures beautifully.

  • Soy Dipping Sauce: A classic combination, this savory sauce enhances the umami flavors of the buns, making each bite even more delightful.
  • Crispy Garlic Greens: Sautéed greens add a burst of freshness and crunch, complementing the tender filling perfectly.

These greens can be made with bok choy or spinach. Simply toss them in garlic and a dash of soy sauce for a quick side that harmonizes with the dietary theme.

  • Spicy Chili Oil: Drizzling a little spicy chili oil adds a kick, elevating the flavor profile and providing a satisfying heat that enhances the rich filling.
  • Quick Pickled Vegetables: Bright, tangy pickles of cucumbers or radishes help balance the richness of the buns, refreshing your palate between bites.

This zingy side adds a vibrant crunch and adds a delightful contrast in flavors.

  • Coconut Rice: Creamy coconut rice serves as a luxurious base, perfectly soaking up any leftover sauce while delivering a smooth texture that isn’t overwhelming.
  • Chilled Green Tea: This refreshing beverage cools the palate and complements the dish’s flavors. Its lightness makes it an excellent drink choice.
  • Mango Sticky Rice: For dessert, this sweet treat delights with its pairing of warm rice and luscious mango. A favorite wonder, it rounds out the meal beautifully.

Fried Cabbage Noodle Buns Recipe FAQs

What type of cabbage is best for the filling?
Absolutely! Raw shredded cabbage is the star here, providing crunch and freshness. You can use bok choy or napa cabbage as tasty alternatives if those are more accessible.

How should I store leftover fried cabbage noodle buns?
Stored properly, cooled buns will last in an airtight container in the fridge for up to 5 days. For the best reheating experience, just warm them in a non-stick skillet with a splash of water over low heat to bring back their crispy texture.

Can I freeze fried cabbage noodle buns?
Yes! For best results, freeze uncooked buns in a single layer on a baking sheet first. Once they are solid, transfer them to a freezer-safe bag for up to 3 months. When ready to enjoy, fry them straight from the freezer—no thawing required!

What can I do if my dough doesn’t rise?
If your dough doesn’t rise, it might be due to the yeast. Make sure your yeast is fresh and activate it by mixing it with warm liquid and sugar before adding it to the flour. Also, ensure that the environment for rising is warm (around 75°F to 85°F) to aid the process.

Are these buns safe for those with nut allergies?
Yes! This fried cabbage noodle bun recipe is nut-free as long as you ensure to use non-dairy milks that avoid nuts, like soy or oat milk. Always double-check product labels to confirm there are no cross-contaminations.

How can I tell when my buns are fully cooked?
To ensure your fried cabbage noodle buns are perfectly cooked, check for a beautifully golden crust on the outside. You can also carefully open one to see if the filling is hot and steamy. If steaming results in a crispy texture, you know you nailed it!

Fried Cabbage Noodle Buns

Crispy Fried Cabbage Noodle Buns – A Flavorful Delight

Fried Cabbage Noodle Buns are a delicious, vegan snack featuring a crispy exterior and savory filling.
Prep Time 30 minutes
Cook Time 25 minutes
Resting Time 2 hours
Total Time 2 hours 55 minutes
Servings: 12 buns
Course: Appetizer
Cuisine: Asian
Calories: 150

Ingredients
  

Dough Ingredients
  • 2 cups All-Purpose Flour Can substitute with gluten-free flour for a gluten-free version.
  • 1 packet Instant Dry Yeast Avoid using active dry yeast without proofing; may substitute with baking powder.
  • 1 tablespoon Sugar Can be omitted if you prefer a savory dough.
  • 1 teaspoon Salt Essential in bringing all the ingredients together.
  • 3/4 cup Warm Soy Milk Almond or oat milk are excellent alternatives.
  • 2 tablespoons Toasted Sesame Oil Can use olive oil in a pinch.
Filling Ingredients
  • 2 cups Raw Shredded Cabbage Bok choy or napa cabbage can be used as alternatives.
  • 1 cup Uncooked Vermicelli Noodles Rice noodles can be utilized if needed.
  • 1 medium Finely Shredded Carrot Diced bell pepper can serve as a substitute.
  • 1/2 cup Chopped Scallions or Chives Yellow onion works if you’re out of scallions.
  • 2 tablespoons Soy Sauce Low-sodium soy sauce is a great substitute.
  • 1 tablespoon Neutral Oil Can be substituted with vegetable or canola oil.
Cooking Ingredients
  • 2 tablespoons Additional Neutral Oil An oil with a high smoke point, like canola or grapeseed oil, works well here.

Equipment

  • Mixing Bowl
  • Skillet
  • Rolling Pin
  • Measuring cups
  • Measuring spoons

Method
 

Dough Preparation
  1. In a large mixing bowl, combine the all-purpose flour, sugar, instant dry yeast, and salt. Create a well in the center and pour in warm soy milk and toasted sesame oil. Mix until a rough dough forms.
  2. Knead the dough on a lightly floured surface for about 8–10 minutes until smooth and elastic. Place the dough into a greased bowl, cover with a damp towel, and let it rise in a warm area for at least 2 hours, or until it doubles in size.
Filling Cooking
  1. While the dough is rising, soak the vermicelli noodles in boiling water for about 5 minutes until soft, then drain and chop them into small pieces.
  2. In a large skillet, heat 1 tablespoon of neutral oil over medium heat. Add the chopped scallions, shredded carrots, and cabbage, sautéing for 4–5 minutes until the vegetables are tender.
  3. Stir in the chopped noodles, soy sauce, and sesame oil, mixing well. Drain any excess liquid to keep the filling firm.
Wrapper Preparation
  1. After the dough has risen, punch it down gently to release air. Divide the dough into 12 or 16 equal pieces, each weighing about 38g.
  2. Roll each piece into a ball, then flatten into a disc about 3–5 inches in diameter on a lightly floured surface.
Bun Assembly
  1. Place a generous spoonful of the filling in the center of each disc. Carefully fold the edges towards the center, pinch, and twist to seal the buns tightly.
  2. Arrange the assembled buns on a floured tray, covering them lightly with a towel while you prepare to cook.
Bun Cooking
  1. In a non-stick skillet, heat 2 tablespoons of neutral oil over medium heat. Once hot, place the sealed buns, creased-side down, into the skillet.
  2. Cook for about 4–5 minutes, or until the bottoms are golden brown and crispy. Carefully add 1 tablespoon of water per bun to the skillet, cover immediately, and steam for 5–6 minutes.
Serving
  1. Once the steaming is complete, remove the lid and check for doneness. The buns should have a beautifully crisp golden crust.
  2. Transfer them to a serving platter, and serve warm with soy sauce for dipping or a sprinkle of sesame seeds for an added crunch!

Nutrition

Serving: 1bunCalories: 150kcalCarbohydrates: 25gProtein: 3gFat: 5gSaturated Fat: 0.5gPolyunsaturated Fat: 1gMonounsaturated Fat: 2gSodium: 200mgPotassium: 150mgFiber: 2gSugar: 1gVitamin A: 500IUVitamin C: 20mgCalcium: 20mgIron: 1mg

Notes

Ensure a well-sealed bun to prevent any filling from leaking during frying. Proper moisture control is key for crispiness.

Tried this recipe?

Let us know how it was!

Crispy Fried Clams Recipe: Summer’s Crunchy Delight at Home

The sound of crackling oil brings back memories of carefree summers spent at the beach, where freshly fried clams were always a highlight. This Crispy Fried Clams Recipe captures that nostalgic essence, inviting you to indulge in a delightful seafood treat right in your own kitchen. With a light and airy coating that leads to juicy, tender clams, this dish is a perfect choice for impressing friends or spoiling yourself without breaking the bank on a restaurant meal. Not only is it quick and easy to prepare, but it’s also a fun way to explore gluten-free and dairy-free options, making it a versatile crowd-pleaser. Ready to bring a taste of the shore to your table? Let’s dive in!

Why You’ll Love This Crispy Fried Clams Recipe

Nostalgic Flavor: Each bite takes you back to summer beach days, delivering a taste of tradition right at home.

Simple Process: You’ll enjoy a fuss-free cooking experience! The steps are easy enough for beginner cooks but delicious enough to impress seasoned chefs.

Versatile Options: Whether you prefer gluten-free flour or a dairy-free milk substitute, this recipe adapts beautifully to your dietary needs.

Serve with Style: Pair with classic sides like coleslaw or crispy fries for a meal that really shines. Looking to switch things up? Try these Crispy Air Fryer Chicken Wings or Zucchini Leek Fritters for a perfect sidekick.

Crowd-Pleasing Delight: Perfect for gatherings or casual family dinners, these crispy fried clams will have everyone talking! Grab some lemon wedges for that extra zing and watch your friends dive right in.

Crispy Fried Clams Ingredients

For the Clams

  • Shucked Clams – Main ingredient providing the seafood flavor; can substitute with cherrystones, littlenecks, or Manila clams for variety.

For the Coating

  • Corn Flour – Adds a crisp texture for a satisfying crunch; essential for achieving the perfect fried exterior.
  • All-Purpose Flour – Provides structure and absorbs moisture during frying; gluten-free flour can be used as a substitute.
  • Salt – Enhances overall flavor and is crucial for seasoning the batter; key for bringing out the taste in the clams.
  • Freshly Ground Black Pepper – Offers a mild heat; adjust to personal preference for depth in the flavor profile.
  • Cayenne Pepper – Adds spiciness for an extra kick; omit if a milder flavor is desired.

For the Batter

  • Buttermilk or Evaporated Milk – Provides moisture ensuring the batter sticks to the clams; use almond or oat milk for a dairy-free option.

For Frying

  • Oil for Frying – Necessary for achieving a crispy texture; peanut oil is preferred but vegetable oil can also be used.

This Crispy Fried Clams Recipe not only brings the familiar taste of summer into your kitchen but also makes it easy for everyone to enjoy. Are you ready to get cooking?

Step‑by‑Step Instructions for Crispy Fried Clams Recipe

Step 1: Prepare Clams
Rinse the shucked clams under cold running water to remove any grit, and pat them dry using paper towels. Ensuring they are clean and free of moisture helps the batter adhere better during frying, ultimately leading to a satisfying crunch in your Crispy Fried Clams.

Step 2: Mix Batter
In a large mixing bowl, combine the corn flour, all-purpose flour, salt, freshly ground black pepper, and cayenne pepper. Whisk the mixture until it is evenly blended, which will create a flavorful coating for your clams that contributes to their crispy exterior.

Step 3: Coat Clams
Take each clam and dip it into the buttermilk, ensuring it is thoroughly coated. After that, allow any excess buttermilk to drip off before transferring the clam into the flour mixture. This step is crucial for forming a flavorful and crispy crust on your delicious fried clams.

Step 4: Preheat Oven
Set your oven to 200°F and place a rack over a baking sheet inside. This setup will keep your fried clams warm and maintain their crispiness while you finish frying the batches. Keeping an eye on this warm zone is key as you prepare your Crispy Fried Clams!

Step 5: Heat Oil
In a deep, heavy pot, pour enough oil for frying and heat it to 360°F. Use a cooking thermometer to monitor the temperature closely to ensure that the oil is hot enough for frying. The right temperature is essential for achieving that perfect golden-brown color and crisp texture in your clams.

Step 6: Fry Clams
Carefully place a few coated clams into the hot oil without crowding the pot. Fry for 90 seconds to 2 minutes, until they turn a beautiful golden brown. Keep a close watch on their color, as golden crusted clams indicate they are ready to be removed and enjoyed in your Crispy Fried Clams recipe.

Step 7: Keep Warm
Once fried, transfer the crispy clams onto the rack in your preheated oven to maintain warmth and crispiness. This method helps prevent them from getting soggy while you finish frying the remaining clams.

Step 8: Serve
Serve your hot and crispy fried clams immediately, accompanied by zesty dipping sauces and fresh lemon wedges. Relishing this delightful dish brings the essence of summer right to your table, making every bite a delicious indulgence.

Expert Tips for Crispy Fried Clams Recipe

  • Batch Frying: Fry the clams in small batches to maintain the oil temperature—this ensures each clam gets that perfect crispy texture without becoming greasy.

  • Temperature Check: Use a cooking thermometer to monitor the oil at 360°F. If it’s too low, your clams may absorb excess oil and lose that desired crunch.

  • Avoid Sogginess: After frying, keep clams warm in the oven set at 200°F. This prevents them from becoming soggy as you cook the rest, ensuring every clam stays crispy.

  • Customize the Crunch: Feel free to mix in chopped herbs or spices into the flour for extra flavor. A little Old Bay seasoning can make your Crispy Fried Clams Recipe even more special!

  • Careful Reheating: When reheating leftovers, skip the microwave! Instead, use an oven at 375°F for a crispy finish that brings back that fresh-fried taste.

Crispy Fried Clams Recipe Variations

Feel free to unleash your creativity and customize this crispy fried clams recipe with exciting twists and substitutions!

  • Gluten-Free: Substitute all-purpose flour with gluten-free flour to enjoy a gluten-free version without sacrificing flavor.

  • Dairy-Free: Opt for almond or oat milk instead of buttermilk for a delicious, dairy-free alternative that doesn’t skimp on taste.

  • Herb-Enhanced: Incorporate finely chopped herbs like parsley or dill into the flour mixture for a fragrant and fresh flavor boost.

  • Spicy Kick: Add minced jalapeños or a splash of your favorite hot sauce to the buttermilk to elevate the heat and zest.

  • Crispy Panko: For an extra layer of crunch, mix panko breadcrumbs with the flour before coating the clams. It adds a delightful texture that’s hard to resist!

  • Zesty Citrus: Brighten up your batter by adding lemon or lime zest to the flour mixture. This citrusy addition complements the clams beautifully.

  • Seasoning Twist: Mix in some Old Bay seasoning or your favorite seafood spice blend to give your clams that iconic coastal flavor.

  • Veggie Delight: Swap out clams for slices of zucchini or eggplant to create a delicious veggie version that’s just as crispy and satisfying.

Once you’ve enjoyed your crispy fried clams, consider pairing them with refreshing sides like coleslaw or crispy fries. If you’re looking for more inspiration, give our Crispy Air Fryer Chicken Wings a try or savor the delightful flavors of Zucchini Leek Fritters for the perfect combo!

What to Serve with Crispy Fried Clams Recipe

Elevate your dining experience with complementary sides that enhance every crunchy bite, making your meal truly memorable.

  • Creamy Coleslaw: This classic side provides a cool, crunchy contrast to the warm, crispy clams, adding freshness to every mouthful.
  • Zesty Potato Salad: A tangy potato salad brings a hearty element to the table, perfectly balancing the lightness of the fried clams. The creaminess and zestiness will surely please your palate.
  • Crispy French Fries: Golden fries add that comforting crunch while soaking up any extras from your meal. They’re like a classic companion to the seafood theme.
  • Fresh Corn on the Cob: Sweet, juicy corn pairs beautifully with fried clams, offering a burst of flavor that complements the dish. A drizzle of butter with a sprinkle of salt makes each bite irresistible.
  • Garlic Butter Bread: Use this flavorful bread to mop up the delicious dipping sauces, creating a rich and satisfying experience with every bite.
  • Tangy Dipping Sauces: Consider serving your fried clams with classic tartar sauce, a spicy remoulade, or a refreshing lemon aioli to enhance the seafood flavor. A squeeze of lemon brings an extra zing!
  • Chilled White Wine: A crisp, chilled glass of Sauvignon Blanc or a light Pinot Grigio cuts through the richness of the clams, refreshing your palate between bites.
  • Lemon Wedges: Serve wedges to squeeze onto your clams, elevating the dish with a burst of citrus that brightens the flavors beautifully.

Explore these pairings to craft an unforgettable meal that brings the essence of summer closer with every bite of your crispy fried clams recipe!

Make Ahead Options

These Crispy Fried Clams are perfect for meal prep enthusiasts looking to save time on busy weeknights! You can prepare the batter by combining the corn flour, all-purpose flour, salt, black pepper, and cayenne pepper up to 24 hours in advance. Store it in an airtight container in the refrigerator to maintain freshness. Additionally, you can clean and dry the clams a day ahead and keep them refrigerated in a sealed bag. When you’re ready to serve, simply dip the prepared clams into buttermilk and proceed with frying them. This way, you’ll enjoy the same delightful taste without feeling rushed!

How to Store and Freeze Crispy Fried Clams

Fridge: Store any leftover crispy fried clams in an airtight container for up to 2 days. This helps to maintain freshness and prevent sogginess while storing.

Freezer: For longer storage, freeze cooled clams in a single layer on a baking sheet until solid, then transfer them to a freezer-safe bag. They can stay fresh for up to 2 months.

Reheating: When you’re ready to enjoy your crispy fried clams again, reheat them in a preheated oven at 375°F. This method helps to restore their crunchiness, making them just as delightful as when first cooked.

Crispy Fried Clams Recipe FAQs

What type of clams should I use for this recipe?
Absolutely! You can use shucked clams like cherrystones, littlenecks, or Manila clams for a delicious seafood flavor. Each type brings its unique taste, so feel free to experiment with what’s available or your personal favorites!

How should I store leftover crispy fried clams?
Store leftover crispy fried clams in an airtight container in the refrigerator for up to 2 days. Before storing, allow the clams to cool completely to avoid condensation inside the container. This will help maintain their freshness and prevent them from getting soggy.

Can I freeze crispy fried clams?
Very! To freeze, first place the cooled clams in a single layer on a baking sheet and freeze until solid. Once frozen, transfer them to a freezer-safe bag. They can be stored this way for up to 2 months. When you want to enjoy them again, just reheat them in a preheated oven at 375°F to regain that wonderful crisp.

What should I do if my clams turn out soggy?
If your clams come out soggy, this may be due to not maintaining the oil temperature while frying. To fix this, it’s best to avoid crowding the pot and check that your oil reaches the ideal 360°F before adding in the clams. Frying in small batches can also help prevent excess oil absorption, ensuring that every clam stays crispy!

Are there dietary considerations for this recipe?
Absolutely! You have the option to make this recipe gluten-free by substituting all-purpose flour with a gluten-free flour blend. For a dairy-free alternative, simply use almond or oat milk instead of buttermilk. These modifications allow everyone to indulge in this crispy fried clams recipe without compromise!

Crispy Fried Clams Recipe

Crispy Fried Clams Recipe: Summer's Crunchy Delight at Home

This Crispy Fried Clams Recipe is a quick and delightful seafood treat, perfect for bringing a taste of the beach to your kitchen.
Prep Time 15 minutes
Cook Time 10 minutes
Resting Time 10 minutes
Total Time 35 minutes
Servings: 4 servings
Course: Appetizer
Cuisine: Seafood
Calories: 300

Ingredients
  

For the Clams
  • 1 pound Shucked Clams Can substitute with cherrystones, littlenecks, or Manila clams for variety.
For the Coating
  • 1 cup Corn Flour Essential for achieving the perfect fried exterior.
  • 1 cup All-Purpose Flour Gluten-free flour can be used as a substitute.
  • 1 teaspoon Salt Enhances flavor and is crucial for seasoning.
  • 1 teaspoon Freshly Ground Black Pepper Adjust to personal preference.
  • 1/2 teaspoon Cayenne Pepper Omit if a milder flavor is desired.
For the Batter
  • 1 cup Buttermilk or Evaporated Milk Use almond or oat milk for a dairy-free option.
For Frying
  • 4 cups Oil for Frying Peanut oil is preferred but vegetable oil can also be used.

Equipment

  • Deep frying pot
  • Mixing Bowl
  • Cooking thermometer
  • Baking Sheet
  • Rack

Method
 

Crispy Fried Clams Instructions
  1. Rinse the shucked clams under cold running water to remove any grit, and pat them dry using paper towels.
  2. In a large mixing bowl, combine the corn flour, all-purpose flour, salt, freshly ground black pepper, and cayenne pepper. Whisk the mixture until it is evenly blended.
  3. Take each clam and dip it into the buttermilk, ensuring it is thoroughly coated. Allow any excess buttermilk to drip off before transferring the clam into the flour mixture.
  4. Set your oven to 200°F and place a rack over a baking sheet inside to keep your fried clams warm.
  5. In a deep pot, pour enough oil for frying and heat it to 360°F.
  6. Carefully place a few coated clams into the hot oil. Fry for 90 seconds to 2 minutes until they turn golden brown.
  7. Transfer the crispy clams onto the rack in your preheated oven to maintain warmth and crispiness.
  8. Serve your hot and crispy fried clams immediately, accompanied by zesty dipping sauces and fresh lemon wedges.

Nutrition

Serving: 1servingCalories: 300kcalCarbohydrates: 30gProtein: 15gFat: 10gSaturated Fat: 2gPolyunsaturated Fat: 3gMonounsaturated Fat: 5gCholesterol: 40mgSodium: 600mgPotassium: 300mgFiber: 2gVitamin A: 200IUVitamin C: 1mgCalcium: 50mgIron: 1mg

Notes

Batch fry the clams to maintain oil temperature for optimal crispiness. Reheat leftovers in an oven at 375°F for best results.

Tried this recipe?

Let us know how it was!

Easy Reindeer Cupcakes That Will Brighten Your Holiday!

The smell of freshly baked cupcakes wafting through the kitchen instantly transports me back to my childhood, where holiday baking meant more than just treats; it was a joyous gathering of family and creativity. My latest adventure in festive baking led to these Easy Reindeer Cupcakes—a delightful holiday dessert that not only pleases the palate but also brings smiles to every face at the table. Perfect for holiday gatherings, these kid-friendly cupcakes are simple to create with minimal fuss and maximum fun, made even better by the joy of decorating together. When it comes to elevating your holiday dessert spread, these whimsical creations stand out as both charming and delicious. Curious about how to transform ordinary cupcakes into these delightful reindeer? Let’s dive in!

Why Are These Reindeer Cupcakes Special?

Kid-Friendly Fun: These Easy Reindeer Cupcakes are the ultimate family activity, combining baking and decorating into one joyful experience.

Festive Presentation: The adorable reindeer faces bring a cheerful vibe to any holiday gathering, making them a perfect centerpiece for your dessert table.

Simple Decorations: With easy-to-find ingredients and decorations, you don’t need to be a pro to create these eye-catching cupcakes.

Deliciously Moist: Enjoy soft cupcakes that are enhanced with creamy icing, delivering a treat that’s as delightful to taste as it is to look at.

Perfect for Gatherings: Whether for classroom celebrations or holiday parties, these cupcakes are sure to please guests of all ages, just like my Patriotic Star Brownies.

Make Ahead: Bake them a day early for a stress-free experience, allowing you to soak up the holiday spirit instead of worrying about last-minute desserts!

Easy Reindeer Cupcake Ingredients

For the Cupcakes
Cupcakes – Use your favorite homemade recipe or a boxed mix; for boxed, add pudding and an extra egg for moisture.
Cupcake baking pan – Essential for shaping the cupcakes into delightful forms.
Cooling rack – Crucial to allow baked cupcakes to cool properly, preventing sogginess.
Festive cupcake liners – Choose cheerful designs and colors to enhance presentation during the holidays.

For the Decorations
Cookie scoop – Perfect for portioning cupcake batter evenly, ensuring uniform shapes.
Candy melts chocolate – Ideal for creating smooth candy antlers; melts easily for decoration.
Wilton #4 decorating tips (2) – Great for detailing work like drawing chocolate antlers and eyes.
Wilton #10 decorating tips (2) – Used for applying icing to give a professional finish to your cupcakes.
Disposable decorating bags – Facilitate mess-free icing application; simply toss after use.

For the Icing
Wilton red icing – Adds a festive touch for the reindeer noses, bringing life to your creations.
Wilton brown icing – Perfect for swirling on top to mimic the fluffy fur of a reindeer.
Wilton black decorator icing – Useful for creating the eyes, adding character to your reindeer.

For the Final Touches
Parchment paper – Great for letting chocolate decorations dry after shaping without sticking.
Eyeball sprinkles – Optional pop of fun for an extra silly look that kids love!

Get ready to transform ordinary cupcakes into Easy Reindeer Cupcakes that will surely brighten up your holiday festivities!

Step‑by‑Step Instructions for Easy Reindeer Cupcakes

Step 1: Preheat and Prepare
Begin by preheating your oven to 350°F (175°C). Line your cupcake baking pan with festive cupcake liners to set the cheerful tone for your Easy Reindeer Cupcakes. If you’re using a boxed mix, remember to add a small box of pudding and an extra egg to ensure moist cupcakes.

Step 2: Mix the Batter
In a large mixing bowl, prepare your cupcake batter according to your recipe or the box instructions. Stir until smooth, ensuring there are no lumps. Once your batter is ready, use a cookie scoop to evenly portion it into the lined cupcake wells, filling each about two-thirds full to allow for rising.

Step 3: Bake the Cupcakes
Transfer the filled cupcake pan to the preheated oven and bake for about 17 minutes, or until a toothpick inserted in the center comes out clean. Keep an eye on them as they bake; you want them lightly golden on top. Once done, remove the cupcakes from the oven and let them cool for 5 minutes in the pan before transferring them to a cooling rack.

Step 4: Melt the Candy Melts
While the cupcakes are cooling, place the candy melts in a microwave-safe bowl. Heat them in the microwave on low power, stirring every 30 seconds until completely melted and smooth. This will be used to create the adorable antlers for your Easy Reindeer Cupcakes, so ensure it’s not too hot to handle.

Step 5: Create Chocolate Antlers
Prepare a sheet of parchment paper on a flat surface. Fit a disposable decorating bag with a Wilton #4 tip, then fill it with the melted candy melts. Pipe “Y” shaped antlers onto the parchment paper, making a few extras in case of breakage. Allow the chocolate to cool and harden completely.

Step 6: Cool the Cupcakes
Once the cupcakes have cooled for about 15-20 minutes on the cooling rack, ensure they are completely cool before decorating. This prevents the icing from melting and losing its shape, ensuring your Easy Reindeer Cupcakes will look spectacular.

Step 7: Prepare the Icing
As your cupcakes cool, prepare your decorating bags. Fill one with brown icing using a Wilton #10 tip for the fur-like swirl on the cupcakes, and another bag with red icing for the noses. Finally, fill a third bag with black icing using a Wilton #4 tip for detailing the eyes.

Step 8: Decorate with Brown Icing
Take each completely cooled cupcake and swirl the brown icing on top, starting at the edge and moving toward the center to create that lovely fluffy appearance. This will mimic the soft fur of the reindeer for your festive cupcakes and enhance their playful character.

Step 9: Add the Antlers and Details
Once the brown icing is perfectly swirled, carefully place the chocolate antlers atop each cupcake. Use the black icing to pipe two small dots for the eyes, bringing your Easy Reindeer Cupcakes to life.

Step 10: Finish with Noses
To complete your fun and festive creations, use the red icing to add a bright dot in the center of each cupcake for the reindeer noses. Stand back and admire your adorable holiday treats; they’re now ready to spread holiday cheer at any gathering!

What to Serve with Easy Reindeer Cupcakes

These delightful cupcakes are not just a treat on their own; they make a perfect addition to any festive gathering!

  • Hot Chocolate Bar: Create a cozy drink station with various toppings. The rich and creamy hot chocolate pairs wonderfully with the sweetness of the cupcakes, making it a hit with kids and adults alike.

  • Candy Cane Cookies: These traditional holiday cookies add a crunchy texture and minty flavor to complement the reindeer cupcakes. The red and white colors also echo the festive spirit of your dessert table.

  • Fruit and Nut Platter: A vibrant platter of fresh fruits and assorted nuts balances the sweetness of the cupcakes. The juicy fruit provides a refreshing contrast, while the nuts add a satisfying crunch.

  • Festive Punch: A sparkling and fruity punch provides a festive touch to your gathering. This bubbly drink enhances the holiday cheer and pairs delightfully with the soft, sweet cupcakes.

  • Ice Cream Sundae Station: Set up a make-your-own sundae bar featuring vanilla ice cream and toppings like crushed cookies or sprinkles. The combination of warm cake and cold ice cream is pure indulgence that everyone will enjoy.

  • Christmas-themed Fruit Cake: A moist fruitcake, rich with flavors, complements the festive cupcake theme while offering a different texture and taste. Perfect for those who enjoy a more traditional holiday dessert experience.

Elevate your holiday dessert table and create cherished memories by pairing these festive treats!

Expert Tips for Easy Reindeer Cupcakes

  • Boxed Mix Boost: If you’re using a boxed mix, enhance moisture by adding a small box of pudding and an extra egg; this ensures soft cupcakes that everyone’s sure to love.

  • Extra Antlers: Always make extra chocolate antlers when decorating your Easy Reindeer Cupcakes; chocolate can break during the drying process, and nobody wants bare reindeer!

  • Cooling Caution: Let the cupcakes cool completely before decorating. If they’re warm, the icing will melt, ruining your delightful reindeer designs.

  • Swirling Icing: For a gorgeous swirl effect, start icing from the outer edge of each cupcake and work your way toward the center; this gives your cupcakes a fluffy, inviting look.

  • Simple Supplies: Gather all your ingredients and tools before starting to keep the baking process fun and seamless; a little preparation goes a long way in the kitchen!

How to Store and Freeze Easy Reindeer Cupcakes

Room Temperature: Store unfrosted cupcakes in an airtight container at room temperature for up to 3 days to keep them fresh and soft.

Fridge: If frosted, keep Easy Reindeer Cupcakes in the fridge for up to 5 days in a sealed container. Allow them to come to room temperature before serving for the best flavor and texture.

Freezer: For longer storage, freeze unfrosted cupcakes for up to 2 months. Wrap each cupcake individually in plastic wrap and place them in a freezer-safe bag.

Reheating: To enjoy thawed cupcakes, allow them to sit at room temperature, or gently reheat in the microwave for 10-15 seconds until warm, preserving their delightful moistness.

Easy Reindeer Cupcakes Variations

Feel free to add your own twist to these delightful cupcakes for a unique holiday treat!

  • Peanut Butter M&M Noses: Swap the red icing nose for a delicious peanut butter M&M for a tasty twist.

  • Chocolate Antlers: Use dark chocolate melts for a more intense flavor, making your reindeer a bit more sophisticated.

  • Nutty Sprinkle Topping: Add chopped nuts on the brown icing for a crunchy texture that complements the sweetness perfectly.

  • Fun Flavorings: Experiment with cupcake flavors, like incorporating almond or mint extract for a festive taste explosion!

  • Different Icing Techniques: Try using a star tip for the icing to mimic fluffy fur in a delightful 3D effect.

  • Colorful Sprinkles: Instead of chocolate antlers, top with colorful sprinkles for a rainbow of holiday cheer!

  • Gluten-Free Option: Use a gluten-free cake mix to make these cupcakes accessible to friends with dietary restrictions.

  • Mini Cupcake Version: Bake mini versions of these reindeer cupcakes for a cute finger-food treat that’s perfect for kids and parties.

With these variations, you can create a cupcake display that’s not only irresistibly adorable but also full of exciting flavors and textures, just like my Cheeseburger Pockets Snack or Sausage Foil Packets. Enjoy your creative baking journey!

Make Ahead Options

These Easy Reindeer Cupcakes are perfect for meal prep enthusiasts looking to save time during the bustling holiday season! You can bake the cupcakes up to 24 hours in advance; just cool them completely and store them in an airtight container at room temperature to maintain their moisture. The chocolate antlers can also be made a day before—simply pipe them on parchment paper and let them dry. When you’re ready to serve, decorate the cupcakes with the brown, red, and black icing and add the antlers to create a fun presentation. This way, you’ll have adorable holiday treats with minimal effort, letting you enjoy the festive spirit!

Easy Reindeer Cupcakes Recipe FAQs

What type of cupcakes can I use for the Easy Reindeer Cupcakes?
You can use either your favorite homemade cupcake recipe or a boxed mix for these delightful treats. If you opt for a boxed mix, I highly recommend adding a small box of pudding and an extra egg to ensure your cupcakes turn out moist and delicious.

How should I store Easy Reindeer Cupcakes?
Unfrosted cupcakes can be stored in an airtight container at room temperature for up to 3 days. If your cupcakes are already decorated, keep them in the fridge in a sealed container for up to 5 days. Always allow them to come to room temperature before serving for the best taste and texture!

Can I freeze Easy Reindeer Cupcakes?
Absolutely! You can freeze unfrosted cupcakes for up to 2 months. Wrap each cupcake individually in plastic wrap to protect them from freezer burn, and then place them in a labeled freezer-safe bag. When you’re ready to enjoy them, simply let them thaw at room temperature or warm them in the microwave for 10-15 seconds.

What should I do if the chocolate antlers break during decorating?
It happens to the best of us! That’s why I suggest piping a few extra chocolate antlers just in case of any mishaps. If they do break, you can simply create new ones or even get creative with candy alternatives like pretzels for a different look!

Are there any dietary considerations for Easy Reindeer Cupcakes?
Yes! Be mindful of diets that may include allergies to common ingredients like egg, dairy, or gluten. You can make these cupcakes egg-free by using a substitute like applesauce or a commercial egg replacer. For gluten-free options, consider utilizing a gluten-free cake mix. Always check the labels of your icing and decorations as well, especially if you have guests with specific dietary needs!

Easy Reindeer Cupcakes

Easy Reindeer Cupcakes That Will Brighten Your Holiday!

These Easy Reindeer Cupcakes are a delightful holiday dessert that combines fun baking and decorating for a joyful family experience.
Prep Time 20 minutes
Cook Time 17 minutes
Cooling Time 20 minutes
Total Time 57 minutes
Servings: 12 cupcakes
Course: Dessert
Cuisine: American
Calories: 200

Ingredients
  

For the Cupcakes
  • Homemade or boxed cupcake mix For boxed, add pudding and an extra egg for moisture.
  • Festive cupcake liners Choose cheerful designs.
For the Decorations
  • Cookie scoop For portioning cupcake batter.
  • Candy melts chocolate For creating antlers.
  • 2 Wilton #4 decorating tips For detailing work.
  • 2 Wilton #10 decorating tips For applying icing.
  • Disposable decorating bags For mess-free icing application.
For the Icing
  • Wilton red icing For the reindeer noses.
  • Wilton brown icing For swirling on top.
  • Wilton black decorator icing For creating the eyes.
For the Final Touches
  • Parchment paper For letting chocolate decorations dry.
  • Eyeball sprinkles Optional for a fun look.

Equipment

  • Cupcake baking pan
  • cooling rack
  • Microwave-safe bowl
  • Disposable decorating bags
  • Parchment paper

Method
 

Step‑by‑Step Instructions
  1. Preheat your oven to 350°F (175°C) and line a cupcake baking pan with festive cupcake liners.
  2. Prepare your cupcake batter as per your recipe or box instructions and use a cookie scoop to fill cupcake wells.
  3. Bake for 17 minutes or until a toothpick comes out clean. Let them cool for 5 minutes before transferring to a cooling rack.
  4. Melt the candy melts on low power in the microwave until smooth; ensure it’s not too hot to handle.
  5. Pipe 'Y' shaped antlers onto parchment paper and allow them to cool and harden completely.
  6. Ensure cupcakes are cool before decorating to prevent the icing from melting.
  7. Prepare decorating bags with brown icing for swirls, red icing for noses, and black icing for eyes.
  8. Swirl the brown icing on top of each cooled cupcake, mimicking the soft fur of a reindeer.
  9. Place chocolate antlers on each cupcake and pipe two small dots for eyes using black icing.
  10. Finish with a red icing dot for the noses to complete your festive creations.

Nutrition

Serving: 1cupcakeCalories: 200kcalCarbohydrates: 30gProtein: 2gFat: 8gSaturated Fat: 4gPolyunsaturated Fat: 0.5gMonounsaturated Fat: 1gCholesterol: 30mgSodium: 150mgPotassium: 100mgFiber: 1gSugar: 15gVitamin A: 5IUCalcium: 2mgIron: 4mg

Notes

Make extra chocolate antlers in case of breakage, and let cupcakes cool completely before decorating.

Tried this recipe?

Let us know how it was!

Crispy Blueberry Grilled Cheese That Will Amaze Your Tastebuds

Have you ever found yourself daydreaming of a sandwich that effortlessly merges sweet and savory in one delightful bite? The Crispy Blueberry Grilled Cheese Sandwich is here to make that dream a reality! With velvety white cheddar and gooey mozzarella melted to perfection, this sandwich pairs beautifully with a luscious homemade blueberry compote, turning an ordinary meal into a tantalizing experience. Not only is it a feast for the senses, but it’s also a quick fix for brunch or a stylish snack to impress your friends. Plus, you can easily customize it to suit your taste buds. Are you ready to dive into this unique blend of flavors that even your inner gourmet chef will adore?

Why is this sandwich so special?

Unique Flavor Fusion: The combination of sweet blueberries and savory cheeses creates a mouthwatering taste sensation that’s hard to resist.

Delightfully Crispy: Enjoy a perfectly golden crust that shatters with each bite, thanks to the well-chosen bread and expert cooking techniques.

Quick and Easy: With just a few simple ingredients, this sandwich can be whipped up in no time, making it perfect for last-minute cravings or casual brunches.

Endless Customization: Feel free to swap in different cheeses or herbs, allowing you to play with flavors and make this dish your own.

Crowd-Pleasing Appeal: Whether for a cozy lunch or a fancy snack, the Crispy Blueberry Grilled Cheese is bound to impress family and friends alike! Pair it with a side of Grilled Garlic Rosemary Smashed Potatoes for a complete meal experience.

Crispy Blueberry Grilled Cheese Ingredients

For the Sandwich
Bread – 4 slices; a hearty bread adds structure and crunch, making it ideal for grilling.
White Cheddar Cheese – 1 cup, shredded; offers a sharp flavor that complements the blueberries beautifully; choose medium to sharp for the best taste.
Mozzarella Cheese – 1 cup, shredded; provides that stretchy, gooey texture, ideally with whole milk for optimal meltability.
Butter – 4 tablespoons; essential for cooking, it ensures a rich flavor and golden crust.

For the Blueberry Compote
Fresh Blueberries – 1 cup; delivers natural sweetness and tartness when cooked down, perfect for this Crispy Blueberry Grilled Cheese.
White Sugar – 1/3 cup; enhances the sweetness of the compote; feel free to substitute with honey for a more wholesome option.
Lemon Juice – 1 tablespoon; adds acidity to balance the sweetness, with fresh juice being the best choice.
Lemon Thyme – 1 sprig; infuses an herbaceous note into the compote; substitute with regular thyme if you don’t have lemon thyme.

Optional Garnishes
Flaky Sea Salt – a sprinkle elevates the flavors and adds a contrasting crunch to the creamy sandwich.
Fresh Thyme – for a lovely touch of color and flavor on top before serving.

Dive into this delightful experience, and don’t hesitate to explore various flavor combinations with your ingredients!

Step‑by‑Step Instructions for Crispy Blueberry Grilled Cheese

Step 1: Make Blueberry Compote
In a medium saucepan, combine 1 cup of fresh blueberries, 1/3 cup of white sugar, 1 tablespoon of lemon juice, and a sprig of lemon thyme. Over medium-high heat, bring the mixture to a boil, then reduce the heat to medium-low. Simmer for about 10-15 minutes, stirring occasionally, until the compote thickens and bubbles gently. Remove from heat and let it cool slightly.

Step 2: Prepare Bread
While your blueberry compote cools, lay out 4 slices of your hearty bread on a clean surface. Generously spread the homemade blueberry compote over each slice, ensuring even coverage to infuse every bite with flavor. Next, sprinkle 1 cup of shredded white cheddar and 1 cup of shredded mozzarella evenly on two of the slices, creating a delightful mountain of cheesy goodness.

Step 3: Assemble Sandwiches
Once your cheese layers are ready, place the remaining slices of bread on top, compote side down, to form two sandwiches. Press down gently to secure the filling. This will help all the delicious ingredients meld together beautifully when cooked, making your Crispy Blueberry Grilled Cheese a true delight with each bite.

Step 4: Cook Sandwiches
In a large skillet, melt 2 tablespoons of butter over medium heat. Once the butter is sizzling and fragrant, carefully place the sandwiches in the skillet. Cook them for about 2-3 minutes, or until the bottom is golden brown and crispy. Use a spatula to gently flip the sandwiches and add the remaining butter to the pan if needed, cooking the other side for another 2-3 minutes until the cheese melts and both sides are perfectly browned.

Step 5: Finish & Serve
Remove the sandwiches from the skillet and let them rest for a minute before slicing them in half. For an extra touch of flavor, sprinkle a pinch of flaky sea salt on top and add fresh thyme if desired. Serve your Crispy Blueberry Grilled Cheese warm, either as a stand-alone treat or alongside your favorite dipping soups.

What to Serve with Crispy Blueberry Grilled Cheese

Transform your meal into a delightful experience with these tasty pairings that beautifully enhance the flavors of your sandwich.

  • Tomato Soup: This classic pairing offers a comforting, tangy contrast to the sweetness of the blueberry compote. Perfect for dipping!
  • Mixed Green Salad: Light and refreshing, a salad with a citrus vinaigrette adds a crispness that balances the richness of the grilled cheese.
  • Sweet Potato Fries: Crispy and savory, sweet potato fries bring buttery flavor and a pleasant texture to the table, making it an irresistible combo.
  • Fruit Salad: Bright and vibrant, a medley of fresh fruits complements the sweet elements of the sandwich while providing a refreshing burst of flavor.
  • Chips and Guacamole: For something a little different, crunchy tortilla chips with creamy guacamole offer a delightful texture contrast and flavor depth.
  • Sparkling Lemonade: A refreshing drink that cuts through the richness of the sandwich, sparkling lemonade revitalizes your palate with each sip.
  • Crispy Bacon: Add a bit of crunch and savory goodness; crispy bacon adds depth and flavor, making each bite even more indulgent.
  • Roasted Veggies: A side of roasted seasonal vegetables elevates the whole meal, introducing a caramelized sweetness that pairs perfectly with the cheese.
  • Pecan Pie Bars: End on a sweet note with these treats; their nutty flavor and buttery texture echo the sandwich’s comforting elements beautifully.

Crispy Blueberry Grilled Cheese Variations

Embrace your creativity and take this unique sandwich to the next level with these exciting twists and substitutes!

  • Different Cheeses: Swap white cheddar for goat cheese or gouda to introduce distinct flavors that complement blueberries beautifully. Each cheese gives a new character to the sandwich, making it an adventurous culinary delight.

  • Herb Substitution: Try basil or mint instead of lemon thyme for a fresh and fragrant twist. These herbs bring out different notes in the compote, enhancing the sweet-savory balance.

  • Gluten-Free Bread: Use gluten-free bread to cater to dietary needs without sacrificing taste or texture. Simply pick your favorite gluten-free variety for a delightful, inclusive option.

  • Berry Variations: Substitute blueberries with raspberries or strawberries for a different fruity essence. Each berry offers its unique sweetness and tartness, giving you endless possibilities.

  • Sweetener Swap: Replace white sugar in the compote with honey or maple syrup for a natural sweetness and a hint of additional flavor complexity. This small change can make the compote feel even more wholesome.

  • Add Heat: Spice it up by adding a sprinkle of chili flakes or diced jalapeños to the cheese layer. This heat can elevate the sandwich into an exciting savory treat, balancing beautifully with the sweetness of the blueberries.

  • Crunch Factor: Incorporate crushed nuts like walnuts or pecans into the cheese mixture for added texture. The crunch provides a delightful contrast to the soft cheese and juicy fruit.

  • Sides to Consider: Pair it with a light arugula salad dressed with lemon vinaigrette or alongside a bowl of Tomato Soup for a classic comfort meal. Both lend a refreshing or hearty balance to the richness of the sandwich.

The Crispy Blueberry Grilled Cheese is a canvas—each variation can be a delicious masterpiece! Let your kitchen creativity shine as you explore these delightful options.

How to Store and Freeze Crispy Blueberry Grilled Cheese

Fridge: Store any leftover Crispy Blueberry Grilled Cheese sandwiches in an airtight container for up to 3 days. To maintain quality, it’s best to reheat in a skillet.

Freezer: For longer preservation, wrap sandwiches tightly in plastic wrap and place them in a freezer-safe bag. They can be frozen for up to 1 month.

Reheating: When ready to enjoy, reheat in a skillet over medium heat for 3-5 minutes, flipping halfway. This ensures a crispy exterior while the cheese melts beautifully.

Compote Storage: Leftover blueberry compote can be refrigerated in an airtight container for up to 1 week, perfect for spreading on toast or topping pancakes!

Expert Tips for Crispy Blueberry Grilled Cheese

  • Compote Consistency: Ensure your blueberry compote is thick to avoid a soggy sandwich. Let it simmer until it reaches a desirable texture.
  • Cheese Choice: Always use block cheese and shred it yourself for the best melt. Pre-shredded cheese often contains anti-caking agents that hinder melting.
  • Heat Matters: Cook your sandwiches over medium-low heat. This allows the cheese to melt thoroughly without burning the bread.
  • Butter Coverage: Spread butter evenly on the bread for uniform crispiness; a well-buttered surface ensures every bite is deliciously golden.
  • Timing is Key: Allow the compote to cool slightly before assembling the sandwich. This helps maintain the texture and prevents the bread from getting too wet.

Make Ahead Options

These Crispy Blueberry Grilled Cheese sandwiches are perfect for meal prep enthusiasts! You can prepare the blueberry compote up to 3 days in advance, allowing the flavors to deepen, and store it in an airtight container in the refrigerator. Additionally, you can assemble the sandwiches (without cooking) and refrigerate them for up to 24 hours; just make sure to cover them tightly to prevent the bread from becoming soggy. When you’re ready to enjoy, just heat butter in a skillet and cook the sandwiches for 2-3 minutes per side until golden and the cheese is melty. This way, you’ll have a delicious, gourmet meal on the table with minimal effort!

Crispy Blueberry Grilled Cheese Recipe FAQs

What type of bread should I use for the Crispy Blueberry Grilled Cheese?
For the best structure and crunch, I recommend a hearty bread such as sourdough or whole grain. These types hold up well against the gooey melted cheese and fruity compote without becoming soggy.

How long can I store leftover sandwiches in the fridge?
Leftover Crispy Blueberry Grilled Cheese sandwiches can be stored in an airtight container for up to 3 days. For the best results, reheat them in a skillet, which will help retain that delicious crispy texture.

Can I freeze my Crispy Blueberry Grilled Cheese?
Absolutely! To freeze, wrap the sandwiches tightly in plastic wrap and place them in a freezer-safe bag. They can be kept in the freezer for up to 1 month. When you’re ready to eat, simply reheat them in a skillet over medium heat for 3-5 minutes, flipping halfway to ensure even warming.

What if my blueberry compote turns out too thin?
If your compote is too thin, don’t worry! Simply return it to the saucepan and simmer it on medium heat for an additional 5-10 minutes, stirring occasionally until it thickens to your desired consistency. Remember, a thicker compote will help prevent soggy sandwiches.

Is this recipe suitable for those with dairy allergies?
This Crispy Blueberry Grilled Cheese contains dairy products, including cheese and butter. For a dairy-free version, you can experiment with plant-based cheese alternatives and a dairy-free butter substitute. Just be sure to check the labels, as some products may still contain allergens.

How do I ensure the cheese melts perfectly?
To achieve gooey, melted cheese, always shred your cheese from a block rather than using pre-shredded options. Pre-shredded cheese often has anti-caking agents that inhibit melting. Also, cook the sandwich over medium-low heat to allow the cheese to melt thoroughly without burning the bread.

Crispy Blueberry Grilled Cheese

Crispy Blueberry Grilled Cheese That Will Amaze Your Tastebuds

Crispy Blueberry Grilled Cheese combines sweet and savory flavors in a delightful sandwich that will amaze your tastebuds.
Prep Time 15 minutes
Cook Time 10 minutes
Cooling Time 5 minutes
Total Time 30 minutes
Servings: 2 sandwiches
Course: Lunch
Cuisine: American
Calories: 450

Ingredients
  

For the Sandwich
  • 4 slices Hearty Bread Adds structure and crunch
  • 1 cup White Cheddar Cheese, shredded Medium to sharp flavor
  • 1 cup Mozzarella Cheese, shredded Whole milk for optimal meltability
  • 4 tablespoons Butter Essential for cooking, ensures rich flavor
For the Blueberry Compote
  • 1 cup Fresh Blueberries Natural sweetness
  • 1/3 cup White Sugar Enhances sweetness
  • 1 tablespoon Lemon Juice Fresh juice preferred
  • 1 sprig Lemon Thyme Infuses herbaceous note
Optional Garnishes
  • Flaky Sea Salt Elevates flavors
  • Fresh Thyme Adds color and flavor

Equipment

  • Medium saucepan
  • large skillet
  • Spatula

Method
 

Step-by-Step Instructions
  1. In a medium saucepan, combine blueberries, sugar, lemon juice, and lemon thyme. Bring to a boil, then simmer for 10-15 minutes until thickened. Let cool slightly.
  2. Spread blueberry compote over 4 slices of bread. Top two slices with cheddar and mozzarella.
  3. Form sandwiches with the remaining slices of bread, compote side down, and press down gently.
  4. Melt 2 tablespoons of butter in a skillet over medium heat. Cook sandwiches for 2-3 minutes, flip, and cook the other side until golden and cheese melts.
  5. Let sandwiches rest for a minute, slice in half, add optional toppings, and serve warm.

Nutrition

Serving: 1sandwichCalories: 450kcalCarbohydrates: 50gProtein: 18gFat: 22gSaturated Fat: 13gPolyunsaturated Fat: 0.5gMonounsaturated Fat: 6.5gCholesterol: 60mgSodium: 800mgPotassium: 300mgFiber: 2gSugar: 10gVitamin A: 400IUVitamin C: 5mgCalcium: 350mgIron: 2.5mg

Notes

For optimal results, use block cheese and shred it yourself. Cook over medium-low heat for thorough melting without burning the bread.

Tried this recipe?

Let us know how it was!

Classic Christmas Toffee That’s Irresistibly Crunchy and Buttery

As I stirred the bubbling caramel, the fragrant scent of vanilla and butter filled my kitchen, instantly sparking holiday nostalgia. This Classic Christmas Toffee isn’t just a treat; it’s a beloved tradition waiting to brighten your festive season. With its satisfying crunch and velvety chocolate layer, it’s a quick and effortless way to impress your family and friends—perfect for both gifting and indulging while curled up with a classic holiday movie. Plus, this recipe is naturally gluten-free, and I’ve included options to make it nut-free or dairy-free, so everyone can join in the sweetness. Curious about how to create this delightful holiday treat? Let’s dive into the world of toffee-making!

Why is this Christmas Toffee a must-try?

Irresistible crunch: The texture of this toffee is a delightful mix of golden brown crispiness and a smooth chocolate layer, creating a perfect balance that will have everyone reaching for seconds.

Quick prep time: With just a few simple ingredients, you’ll whip up this festive treat in no time, making it an ideal recipe for busy holiday schedules or last-minute gift ideas.

Versatile variations: Whether you prefer pecans, walnuts, or a nut-free alternative, this classic can be customized to suit your tastes or dietary needs—like my American Potato Salad that shines with personalized touches!

Crowd-pleaser: This toffee is sure to impress friends and family alike; bring it to gatherings, or package it beautifully for holiday gifting.

Nostalgic delight: Baking this Christmas toffee is not just about the treat itself—it’s about creating memories filled with holiday spirit and sweetness, making it a cherished tradition year after year.

Classic Christmas Toffee Ingredients

• Dive into the sweet world of making Classic Christmas Toffee with these essential ingredients!

For the Toffee

  • Chopped Pecans or Almonds – Adds a delightful crunch and nutty flavor; swap with walnuts, hazelnuts, or seeds for a nut-free version.
  • Granulated Sugar – Delivers the perfect sweetness; can be replaced with coconut sugar or maple sugar in a 1:1 ratio for a less refined option.
  • Butter – Provides rich flavor and structure; for a dairy-free alternative, use equal amounts of coconut oil to achieve a subtle coconut taste.
  • Vanilla Extract – Enhances the sweet caramel flavor; make sure to mix thoroughly for an even blend.
  • Salt – Balances the sweetness, making it an essential component for flavor enhancement.
  • Chocolate Chips – Topping that adds sweetness and richness; choose semi-sweet or dark chocolate based on your preference.
  • Water – Assists in melting the sugar and creating a smooth caramel consistency.

Step‑by‑Step Instructions for Classic Christmas Toffee

Step 1: Prepare Your Dish
Begin by preparing your 9×9 inch baking dish. Line the bottom and sides with parchment paper, ensuring there’s an overhang for easy removal later. This step is crucial for creating the perfect Classic Christmas Toffee without sticking. Preheat your oven to 350°F if you plan to toast your pecans for extra flavor.

Step 2: Toast the Nuts
Spread 1 cup of chopped pecans evenly on the bottom of the lined dish. If you haven’t already toasted them, place the dish in the preheated oven for about 5-7 minutes, until they are fragrant and slightly golden. Allow them to cool while preparing the toffee, enhancing the nutty flavor of your Classic Christmas Toffee.

Step 3: Make the Caramel Mixture
In a medium-sized pot, combine 1 cup of butter, 1 cup of granulated sugar, 1/4 cup of water, and 1/2 teaspoon of salt. Stir the mixture over medium heat until the butter melts and everything is well combined. Once bubbling, this will create the rich base for your Classic Christmas Toffee, so keep stirring to promote even heating.

Step 4: Monitor the Temperature
Attach a candy thermometer to the pot and continue stirring the caramel mixture. You’re aiming for the hard crack stage, which is 300°F. This process can take about 10-15 minutes, so be patient. As the caramel thickens and colors, it’ll turn a beautiful golden brown, signaling that it’s almost ready.

Step 5: Add the Vanilla
When your caramel reaches 300°F, carefully remove it from the heat. Stir in 1 teaspoon of vanilla extract, mixing it thoroughly to incorporate the flavor. The caramel will bubble up, so take caution. This vanilla-infused caramel is the heart of your Classic Christmas Toffee and will delight those who taste it.

Step 6: Pour Over Pecans
Quickly pour the hot caramel mixture over the toasted pecans in your prepared dish, spreading it evenly with a spatula. The caramel should flow smoothly over the nuts, creating a beautiful layer. Allow it to sit for about 2 minutes to start cooling slightly, which will help with the chocolate layer later.

Step 7: Add the Chocolate Chips
While the caramel is warm, sprinkle chocolate chips evenly over the hot toffee layer. After about 4 minutes, the chocolate will begin to melt. You can cover the dish temporarily to create a nice melting environment for the chocolate, ensuring a smooth and cohesive topping.

Step 8: Swirl the Chocolate
Once the chocolate chips are melted (after about 4 minutes), use a spatula or a knife to gently swirl them across the toffee for a decorative finish. For an extra touch, sprinkle a handful of chopped pecans and a pinch of flaked sea salt over the top, enhancing the flavor and visual appeal of your Classic Christmas Toffee.

Step 9: Cool Completely
Let the toffee cool completely at room temperature for about 4 hours, or expedite the process by refrigerating it for about 1-2 hours. You’ll know it’s set when it’s firm to the touch. This cooling phase is essential to achieving the perfect crunchy texture in your Classic Christmas Toffee.

Step 10: Cut and Serve
Once the toffee is fully cooled, use the parchment overhang to lift it out of the dish. Place it on a cutting board and use a sharp knife to slice it into pieces. Enjoy your homemade Classic Christmas Toffee as a festive treat or package it beautifully for gifting.

Make Ahead Options

These Classic Christmas Toffee treats are ideal for busy home cooks looking to save time during the festive season! You can prepare the caramel mixture up to 24 hours in advance; simply store it in an airtight container in the refrigerator. For maximum quality, allow it to come to room temperature before pouring it over the pecans. You can also toast and store the nuts (up to 3 days ahead) to enhance their flavor without any added stress. When you’re ready to finish your toffee, just heat the caramel mixture gently to loosen it, pour it over the nuts, and follow with chocolate chips to create that irresistible layer. With a little prep, you’ll have a delightful holiday treat with minimal effort!

Expert Tips for Classic Christmas Toffee

  • Temperature Control: Monitor the temperature closely while cooking to prevent burning. A candy thermometer is essential for achieving the correct hard crack stage necessary for classic Christmas toffee.

  • Stir Consistently: To ensure even melting without burning, stir the caramel mixture continuously. This will help distribute heat evenly and prevent hot spots.

  • Nut Options: For nut-free variations, consider using sunflower seeds or pumpkin seeds instead of pecans or almonds. This way, anyone with nut allergies can still enjoy the treat!

  • Butter vs. Coconut Oil: If making a dairy-free version, remember that coconut oil can impart a subtle flavor. Use it wisely to enhance your classic Christmas toffee without overpowering it.

  • Cooling Time: Patience is key! Make sure to let the toffee cool completely for at least 4 hours, ensuring that it achieves the desired crunchy texture.

Classic Christmas Toffee: Delicious Twists

Feel free to explore exciting variations of your Classic Christmas Toffee, customizing it just the way you like!

  • Nut-Free: Swap out all nuts for pumpkin seeds or sunflower seeds for a delightful crunch without allergens. These seeds provide a unique flavor while keeping the toffee’s delightful texture intact.

  • Dairy-Free: Replace butter with coconut oil to make the toffee dairy-free—just remember, it’ll add a subtle coconut flavor that can be quite tasty!

  • Brown Sugar: Opt for brown sugar instead of granulated for a richer flavor profile. The molasses in brown sugar adds depth and moisture, enhancing the overall taste of your toffee.

  • Add Spices: Mix in a teaspoon of cinnamon or nutmeg to the caramel for a warm, festive twist. This fragrant addition will evoke cozy holiday memories with every bite!

  • Chocolate Variants: Use white chocolate chips or a combination of dark and milk chocolate for a fun flavor mix. Each type of chocolate will bring its own character to your toffee delight.

  • Flavor Infusion: Consider adding a splash of almond or hazelnut extract to the caramel for a delightful surprise. This subtle change can elevate the sweet notes, making your classic treat even more special.

  • Sea Salt Topping: Finish with a sprinkle of flaky sea salt to enhance the sweetness and balance flavors. This contrast will leave your taste buds dancing in delight!

  • Decadent Mix-Ins: Add crushed candy canes or toffee bits on top of the chocolate before it sets for an added festive crunch, reminiscent of the holidays.

Every variation allows you to share your personality and taste preferences, making this toffee experience truly unique. And if you’re feeling adventurous, try pairing it with some homemade American Potato Salad for a delicious spread at your holiday gathering! Enjoy creating your own spin on this festive favorite!

What to Serve with Classic Christmas Toffee

Creating the perfect holiday spread becomes effortless when you pair this delightful toffee with complementary flavors and textures.

  • Creamy Hot Chocolate: The warmth and richness of hot chocolate perfectly balance the sweetness of the toffee, making for a cozy treat.

  • Salted Caramel Brownies: The fudgy texture of brownies combined with a drizzle of salted caramel complements the crunchy toffee beautifully, creating a decadent dessert duo.

  • Vanilla Ice Cream: A scoop of velvety vanilla ice cream creates a delightful contrast to the toffee’s crunch, making every bite a creamy, sweet experience.

  • Holiday Fruit Salad: A refreshing fruit salad filled with citrus and berries offsets the sweetness of the toffee, adding a vibrant freshness to your festive table.

  • Nutty Snack Mix: A crunchy mix of nuts and pretzels provides a satisfying texture contrast, enhancing the delicious nutty flavors found in the toffee itself.

  • Sparkling Apple Cider: This bubbly beverage’s crisp acidity complements the sweet richness of the toffee, making it a festive and refreshing pairing.

Adding these options to your holiday table will create an inviting atmosphere while elevating your toffee indulgence!

How to Store and Freeze Classic Christmas Toffee

Room Temperature: Store your Classic Christmas Toffee in an airtight container at room temperature for up to 2 weeks to maintain its crunchy texture.

Fridge: If you prefer longer storage, refrigerate it in a sealed container for up to a month. Just be aware that chilling may slightly alter the texture.

Freezer: For extended storage, freeze the toffee in an airtight container or freezer bag for up to 3 months. Thaw it at room temperature before enjoying.

Reheating: If you’d like to refresh the chocolate layer, briefly microwave the toffee for 10-15 seconds. Enjoy the irresistible crunch and flavor all over again!

Classic Christmas Toffee Recipe FAQs

How do I choose the best nuts for my Classic Christmas Toffee?
I recommend using fresh, unsalted nuts to enhance the flavor of your toffee. Look for nuts that are firm and free of dark spots or rancid smells. If you want a nut-free version, sunflower seeds or pumpkin seeds work wonderfully and provide a similar crunch!

What’s the best way to store Classic Christmas Toffee?
Store your Classic Christmas Toffee in an airtight container at room temperature for about 2 weeks. If you need to keep it longer, refrigerate it for up to a month. Just be cautious, as refrigeration can affect its crispiness slightly.

Can I freeze Classic Christmas Toffee? How?
Absolutely! To freeze your Classic Christmas Toffee, place it in an airtight container or a freezer-safe bag, making sure to remove as much air as possible. It can last up to 3 months in the freezer. When you’re ready to enjoy it, simply thaw it at room temperature for a delightful treat!

What should I do if my caramel burns during cooking?
If you notice that your caramel begins to color too quickly or burns, it’s a good idea to remove it from heat immediately. You can try adding a splash of water to thin the mixture slightly, but it may not have the same consistency. Always stir continuously to avoid hot spots. Remember, caramel can be finicky, so patience is key!

Is this Classic Christmas Toffee suitable for those with allergies?
Yes! This recipe is naturally gluten-free and can easily be adapted for nut-free or dairy-free diets. For nut allergies, use sunflower or pumpkin seeds in place of nuts and substitute coconut oil for butter for a dairy-free option. Just ensure all other ingredients do not contain allergens.

Classic Christmas Toffee

Classic Christmas Toffee That's Irresistibly Crunchy and Buttery

This Classic Christmas Toffee is a crunchy and buttery treat that embodies holiday nostalgia, perfect for gifting and indulging.
Prep Time 15 minutes
Cook Time 30 minutes
Cooling Time 4 hours
Total Time 4 hours 45 minutes
Servings: 24 pieces
Course: Dessert
Cuisine: American
Calories: 200

Ingredients
  

Toffee Ingredients
  • 1 cup Chopped Pecans or Almonds Can substitute with walnuts, hazelnuts, or seeds for nut-free version.
  • 1 cup Granulated Sugar Can replace with coconut sugar or maple sugar in a 1:1 ratio.
  • 1 cup Butter For dairy-free, use equal amounts of coconut oil.
  • 1 teaspoon Vanilla Extract Mix thoroughly for an even blend.
  • 1/2 teaspoon Salt Essential for flavor enhancement.
  • 1 cup Chocolate Chips Use semi-sweet or dark chocolate based on preference.
  • 1/4 cup Water Helps in melting the sugar.

Equipment

  • 9x9 inch baking dish
  • Candy Thermometer
  • medium-sized pot
  • Spatula
  • Parchment paper

Method
 

Step-by-Step Instructions
  1. Prepare your 9x9 inch baking dish by lining it with parchment paper, leaving overhang for easy removal later. Preheat your oven to 350°F if toasting pecans.
  2. Spread 1 cup of chopped pecans evenly in the lined dish. If not toasted yet, place in preheated oven for 5-7 minutes until fragrant and slightly golden.
  3. In a medium pot, combine 1 cup of butter, 1 cup of granulated sugar, 1/4 cup of water, and 1/2 teaspoon of salt. Stir over medium heat until butter melts.
  4. Attach a candy thermometer and continue stirring, aiming for the hard crack stage at 300°F, which can take about 10-15 minutes.
  5. Once at 300°F, carefully remove from heat and stir in 1 teaspoon of vanilla extract.
  6. Quickly pour the hot caramel over toasted pecans, spreading evenly with a spatula. Allow to sit for about 2 minutes.
  7. While warm, sprinkle chocolate chips over the hot toffee layer. Cover the dish temporarily for about 4 minutes until chocolate melts.
  8. Gently swirl the melted chocolate using a spatula or knife for a decorative finish. Optionally, sprinkle some chopped pecans and flaked sea salt on top.
  9. Let the toffee cool completely at room temperature for about 4 hours or refrigerate for 1-2 hours until firm.
  10. Once fully cooled, lift the toffee out using the parchment, place on a cutting board and slice into pieces.

Nutrition

Serving: 1pieceCalories: 200kcalCarbohydrates: 20gProtein: 2gFat: 11gSaturated Fat: 6gPolyunsaturated Fat: 1gMonounsaturated Fat: 4gCholesterol: 30mgSodium: 50mgPotassium: 50mgFiber: 1gSugar: 15gVitamin A: 300IUCalcium: 20mgIron: 0.7mg

Notes

Monitor the cooking temperature closely to prevent burning. Stir continuously to ensure even melting. For nut-free options, consider using sunflower or pumpkin seeds. Use coconut oil wisely if making a dairy-free version. Patience is key for cooling time to achieve crunchy texture.

Tried this recipe?

Let us know how it was!