Pineapple Sriracha Chicken: A Sweet and Spicy Delight

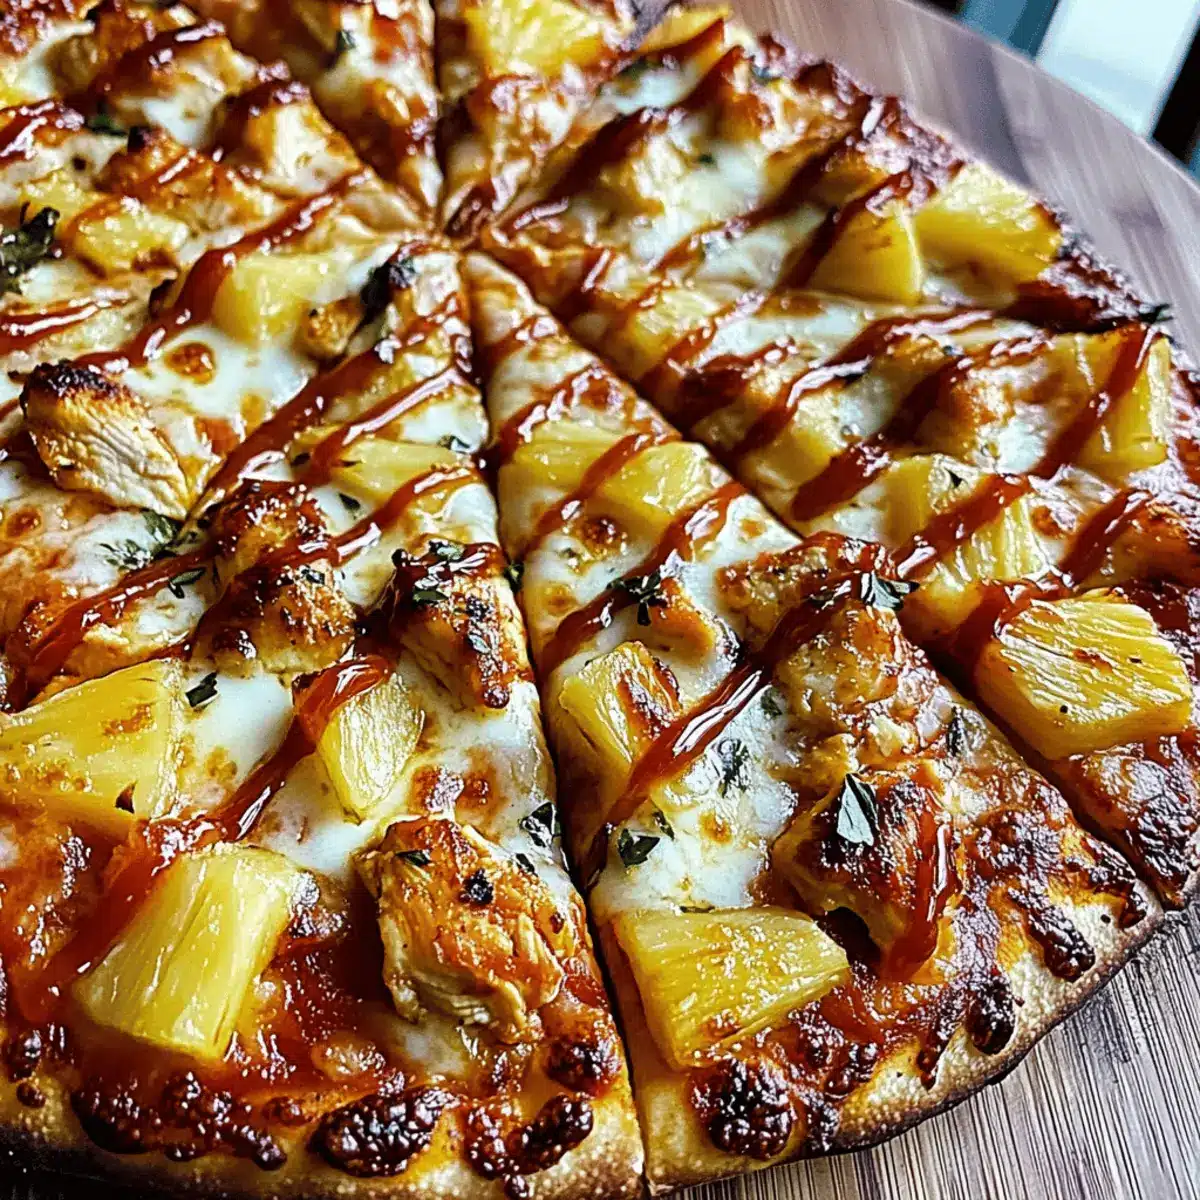
There’s nothing quite like the excitement of a backyard gathering, especially when the star of the show is a sizzling Pineapple Sriracha Chicken Outdoor Pizza. This delightful dish marries the sweetness of juicy pineapple with the fiery kick of sriracha, making it a must-try for your next cookout. What’s even better? It’s a quick and easy recipe that promises a golden crust and melty cheese, perfect for impressing friends and family without the fuss. Plus, it’s highly customizable—sub in grilled veggies for a vegetarian delight or swap the sauce for something uniquely yours. Ready to elevate your outdoor cooking game with this crowd-pleaser? Keep reading to discover how to craft this flavor-packed pizza!
Why is this pizza so special?

Quick and Easy: This Pineapple Sriracha Chicken Outdoor Pizza is a breeze to prepare, taking less than 30 minutes from start to finish—perfect for those busy weeknights or spontaneous gatherings.

Customizable Options: Whether you’re catering to vegetarians by swapping chicken for grilled veggies or adding jalapeños for an extra kick, this recipe allows you to get creative!

Crowd-Pleasing Flavor: The sweet pineapple paired with spicy sriracha will have everyone reaching for a second slice. It’s a combination that’s sure to please all palates!

Perfect for Outdoor Cooking: Cooking this pizza outdoors not only enhances the flavor but also makes for a fun grilling experience that brings friends and family together.

Great for Leftovers: If there are any slices left, they store wonderfully! Enjoy them the next day or toss them in a salad for a delightful twist. For more flavor-packed chicken ideas, check out my Sriracha Ground Chicken and Grilled Chicken Sandwich.

Pineapple Sriracha Chicken Ingredients

• Perfect for a flavorful outdoor pizza night!

  • For the Dough

  • Pizza Dough – You can use store-bought for ease, or make your own for a personal touch.

  • Semolina Flour – This prevents sticking on the pizza peel, ensuring a smooth transfer to the oven.

  • For the Toppings

  • Olive Oil – Adds flavor and helps the sauce adhere nicely to the dough.

  • Pizza Sauce – Use your favorite variety, whether homemade or store-bought, to bring moisture and richness.

  • Shredded Mozzarella Cheese – This cheese melts beautifully; feel free to substitute with provolone for a twist.

  • Diced Pineapple – Fresh is best for sweetness and juiciness, but drained canned will work in a hurry.

  • Diced Chicken – Pre-cooked or leftover chicken makes this recipe even quicker.

  • Blackstone Pineapple Sriracha Seasoning – Optional but adds additional spice; you can make a substitute with garlic powder, cayenne, and sugar.

  • Sriracha Sauce – Drizzle this on top before serving for that essential spicy kick that elevates the flavor.

With the Pineapple Sriracha Chicken ingredients sorted, you’re on your way to a quick and easy culinary delight that’s perfect for any outdoor occasion!

Step‑by‑Step Instructions for Pineapple Sriracha Chicken Outdoor Pizza

Step 1: Preheat the Pizza Oven
Begin by preheating your outdoor pizza oven to a scorching 500-600°F. This high temperature is crucial for achieving a perfectly crispy crust. Ensure the oven is heated for about 10-15 minutes before you start assembling your pizza, allowing the stone to absorb the heat.

Step 2: Prepare the Pizza Dough
Take your pizza dough and stretch or roll it out into a 12-14 inch circle on a lightly floured surface. Aim for a uniform thickness, around 1/4 inch, which will ensure even cooking. You should see little bubbles developing in the dough, indicating it’s ready for the next steps.

Step 3: Dust the Pizza Peel
Sprinkle semolina flour generously over your pizza peel or baking sheet. This will help prevent the stretched dough from sticking as you work with it. A lightly floured surface is essential—opt for the semolina’s texture, as it adds a slight crunch to the crust when baked.

Step 4: Brush with Olive Oil
Carefully transfer your rolled-out dough onto the prepared peel. Drizzle a thin layer of olive oil over the surface of the dough, using a brush or the back of a spoon to spread it evenly. This step not only enhances the flavor of your Pineapple Sriracha Chicken pizza but also helps the sauce adhere better.

Step 5: Spread the Pizza Sauce
Spread a generous amount of pizza sauce evenly over the dough, leaving a small border around the edges. Use the back of a spoon for an even application, ensuring that every bite will be flavorful. The sauce will create a delicious base that complements the other toppings beautifully.

Step 6: Add Cheese and Toppings
Layer a thick blanket of shredded mozzarella cheese over the sauce, creating a cheesy foundation. Next, sprinkle diced pineapple and chicken evenly across the top. The sweetness of the pineapple will balance the savory chicken, making your Pineapple Sriracha Chicken pizza a flavor sensation.

Step 7: Optional Spice it Up
If you desire that extra kick, sprinkle the optional Blackstone Pineapple Sriracha seasoning over the toppings. This adds a burst of flavor. Alternatively, you can mix garlic powder, cayenne, and sugar to create a home-spiced version. Your pizza is now prepped for the oven!

Step 8: Bake the Pizza
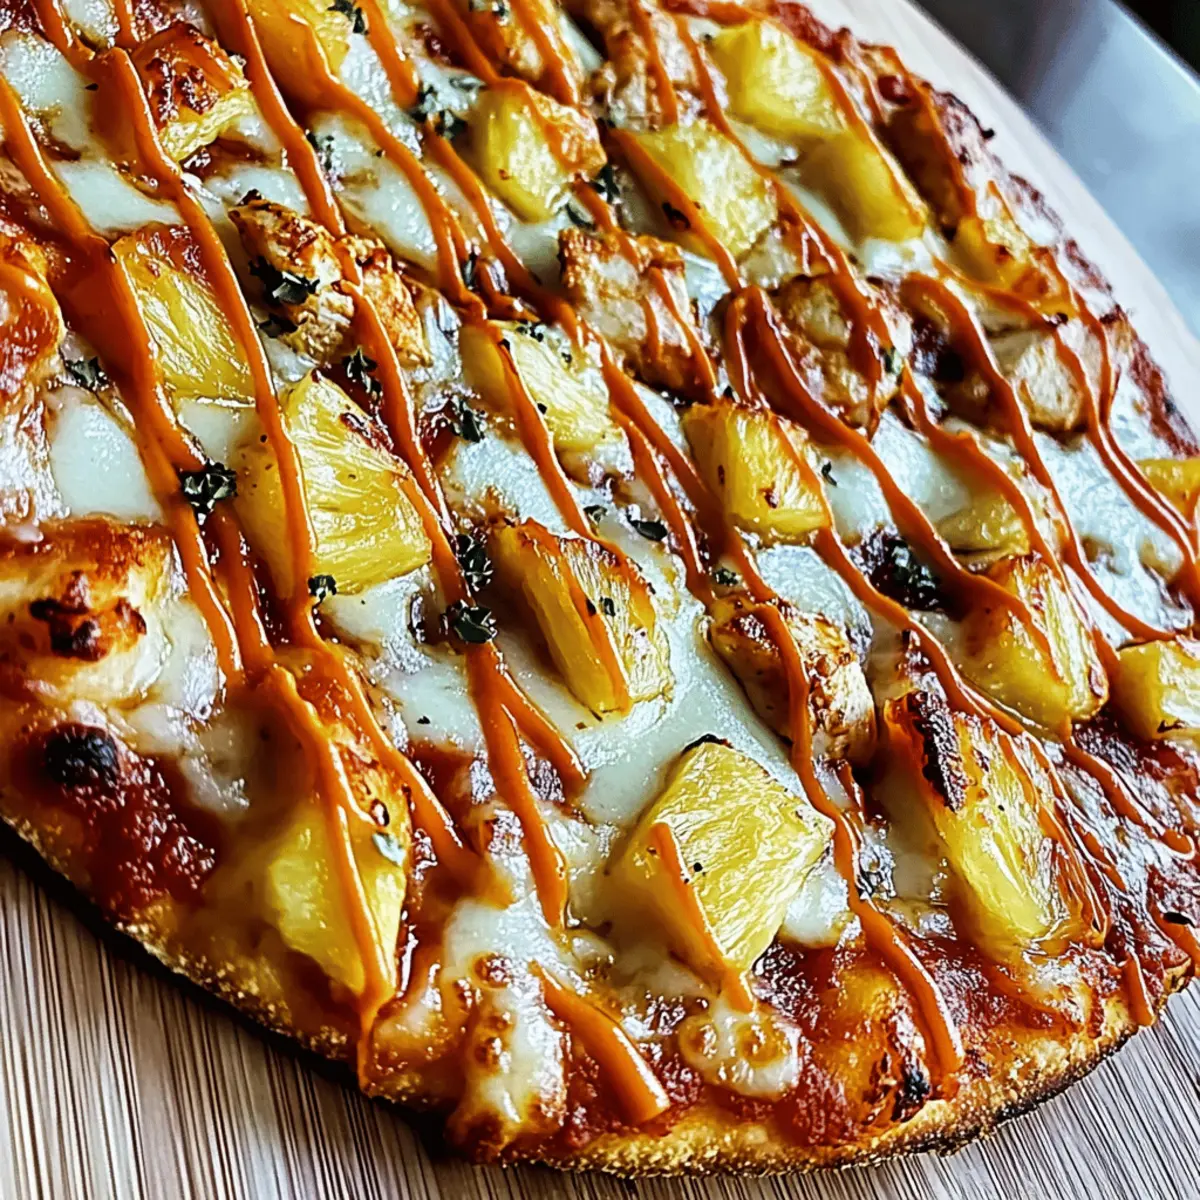
With all your toppings in place, slide the pizza onto the heated pizza stone in your outdoor oven. Cook for 2-3 minutes, keeping a close eye on it. The crust should be golden brown, and the cheese should be bubbling and melted—these visual cues signal that your pizza is perfectly cooked.

Step 9: Finish with Sriracha
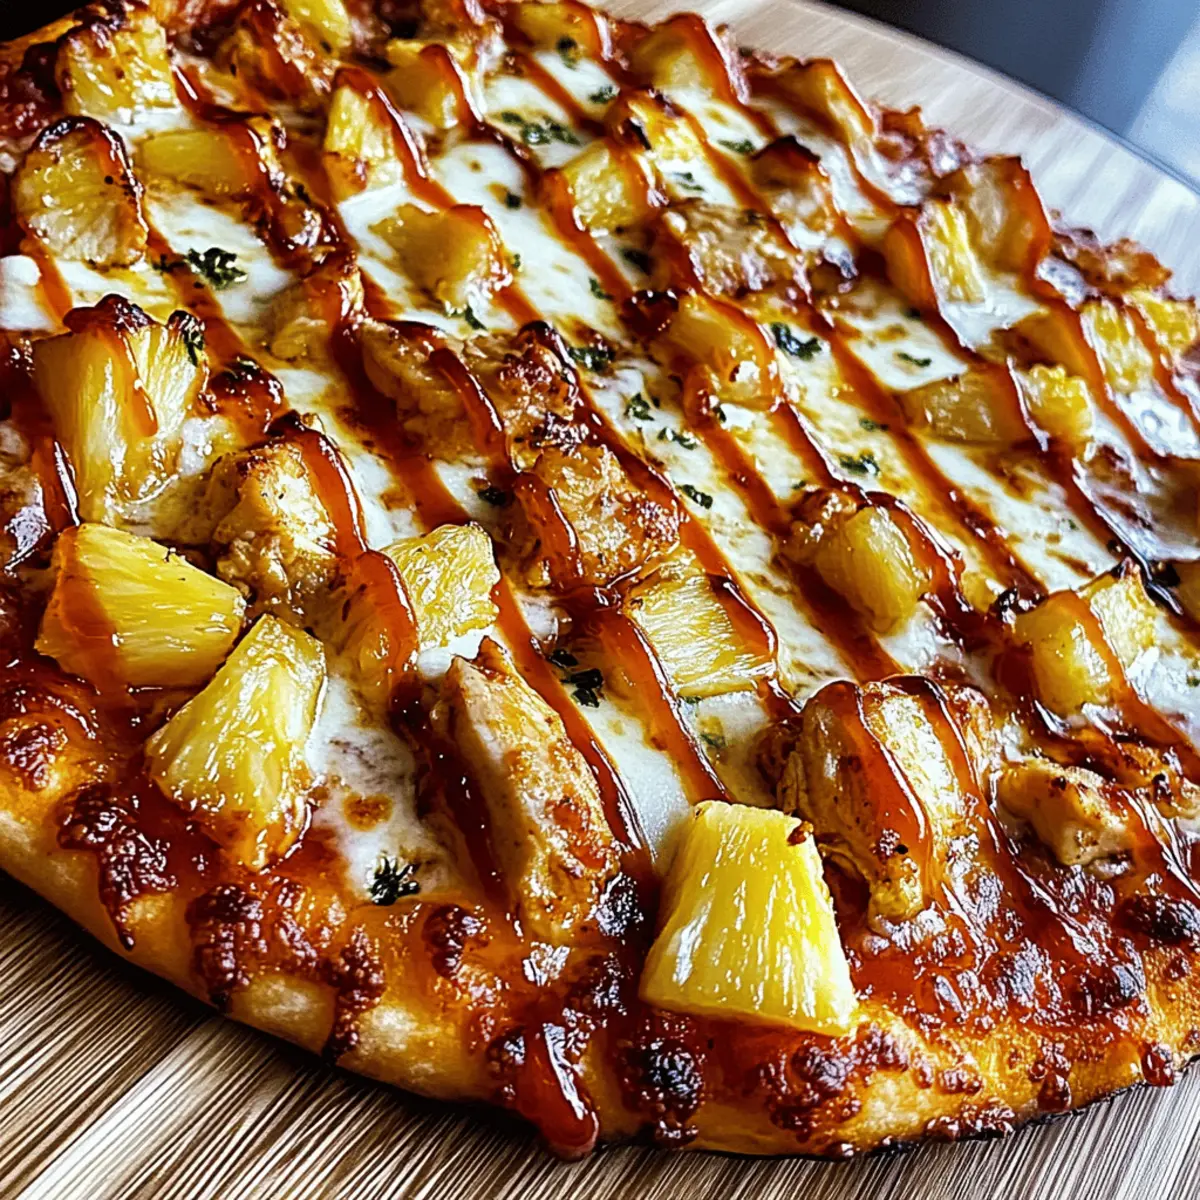
Once done, carefully remove the pizza from the oven and let it cool for a moment. Drizzle sriracha sauce artfully on top for that essential sweet-heat finish. This final touch elevates the flavor profile, ensuring your Pineapple Sriracha Chicken Outdoor Pizza is a delightful feast!
Expert Tips for Pineapple Sriracha Chicken

Preheat Properly: Preheating your outdoor pizza oven to 500-600°F is crucial for achieving a crispy crust and perfectly melted cheese.

Watch the Time: Cooking this pizza is quick, taking only 2-3 minutes. Keep an eye on it to avoid burning, as even a few seconds can make a big difference.

Use Semolina Flour: Applying semolina flour on the pizza peel helps prevent sticking, ensuring a smooth transfer to the oven. This little trick can save you frustration!

Balance the Toppings: Avoid a soggy pizza by keeping a good balance between sauce and toppings. Too much sauce can lead to a messy result—keep it light!

Customize Wisely: Feel free to get creative with the toppings—switch the chicken for grilled vegetables, or add jalapeños for an extra kick. Enjoy making your Pineapple Sriracha Chicken unique!

Let Rest for Flavor: Allow the pizza to sit for a minute after baking before slicing. This helps the flavors meld together and makes for easier handling.

What to Serve with Pineapple Sriracha Chicken Outdoor Pizza

Elevate your pizza night experience with delectable sides and refreshing drinks that will delight your taste buds and impress your guests.

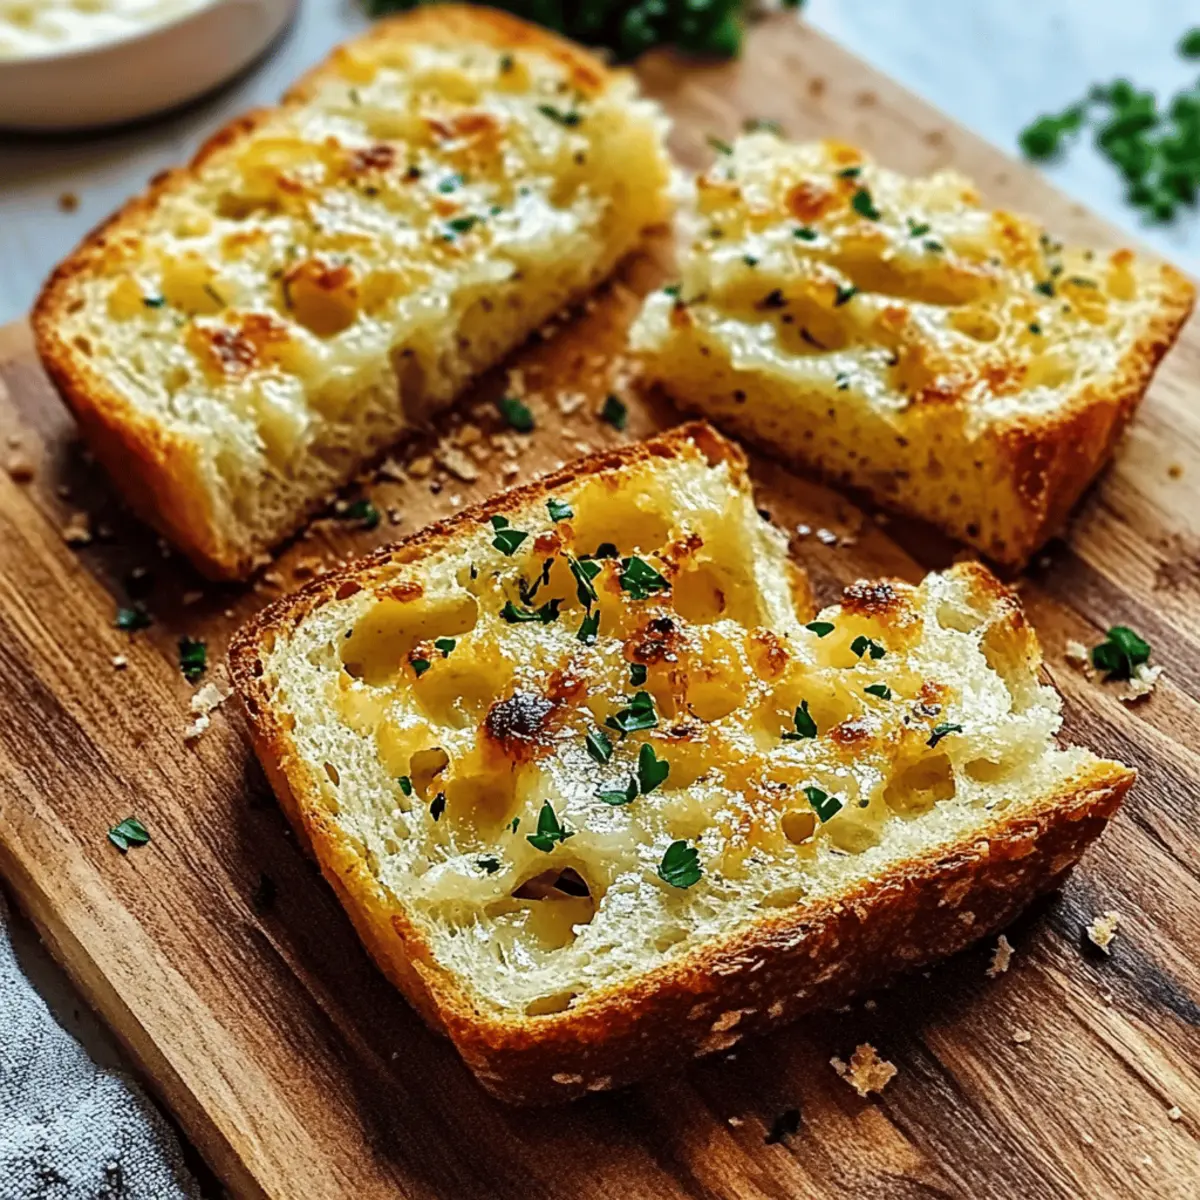
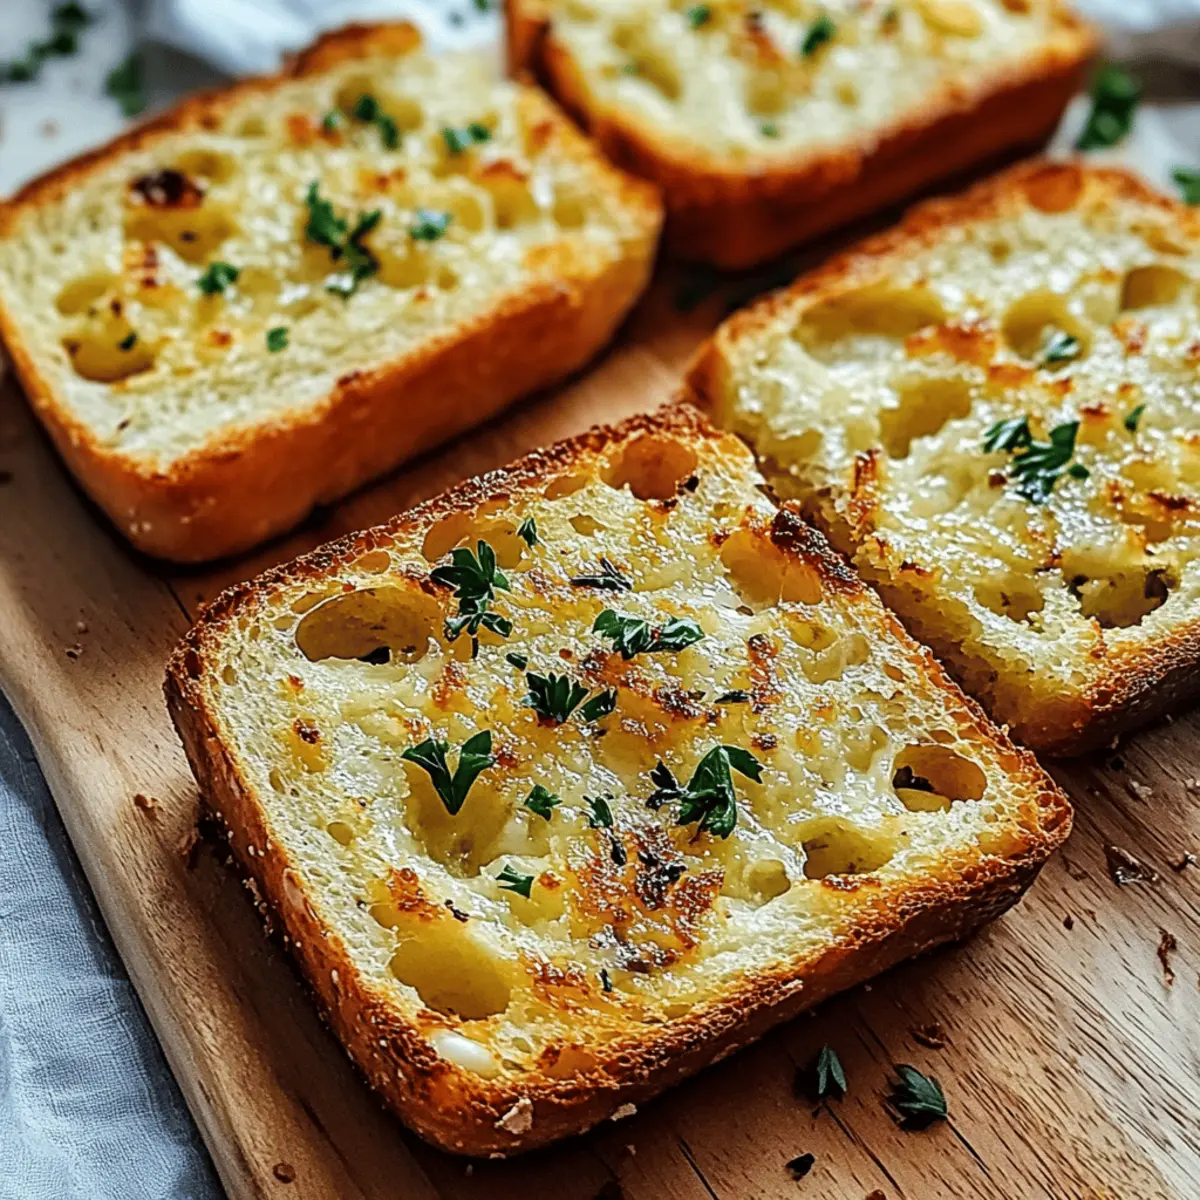
  • Crispy Garlic Bread: Perfectly toasted with a buttery garlic spread, this crispy delight complements the sweet and spicy pizza beautifully.

  • Mixed Greens Salad: A light and fresh salad with a tangy vinaigrette balances the richness of the cheese and toppings, adding a refreshing crunch.

  • Grilled Vegetables: Assorted vegetables like zucchini, bell peppers, and asparagus bring a smoky flavor and vibrant color, enhancing the outdoor cooking theme.

  • Sweet Potato Fries: Their natural sweetness pairs wonderfully with the spicy sriracha, creating a delightful contrast in flavors and textures.

  • Fruit Skewers: Fresh, juicy fruit skewers offer a refreshing and healthy option to cleanse the palate between bites of pizza.

  • Cold Brew Lemonade: This zesty drink refreshes and cuts through the richness of the pizza, making each bite even more enjoyable.

  • Chocolate Chip Cookies: A warm, gooey cookie serves as the perfect indulgent dessert to end your meal on a sweet note.

Pineapple Sriracha Chicken Variations

Inviting you to explore a world of delicious possibilities, these variations will elevate your Pineapple Sriracha Chicken Outdoor Pizza experience.

  • Vegetarian Version: Substitute chicken with grilled vegetables like bell peppers, zucchini, and mushrooms for a fresh take. You can still enjoy that delightful sweet and spicy flavor profile—perfect for veggie lovers!

  • BBQ Fusion: Use BBQ sauce in place of pizza sauce for a tangy-sweet twist. This unexpected flavor combination will bring a smoky richness that pairs beautifully with the pineapple.

  • Cheesy Upgrade: Incorporate a blend of cheeses such as feta or Gouda for a gourmet touch. The slight tang of feta or the creamy melt of Gouda adds depth and richness to the pizza.

  • Tropical Twist: Add jalapeños for an extra spicy kick or toasted coconut flakes for a unique flair. This combo takes you on a delicious tropical getaway while still delivering that classic sweet-heat experience.

  • Herb-Infused: Top with fresh herbs like basil or cilantro right before serving for an aromatic finish. The fresh herbiness elevates every slice, making it feel even more special.

  • Gluten-Free Option: Easily make this pizza suitable for dietary restrictions by using gluten-free pizza dough. It’s just as delicious without the gluten!

  • Extra Crunch: Sprinkle crushed nuts like peanuts or cashews before serving for added texture. This delightful crunch enhances the experience, bringing a satisfying contrast to the gooey cheese and juicy toppings.

For more flavor-packed ideas, consider pairing your pizza with a vibrant salad or adding some zing with my Thai Chicken Meatball recipe. Enjoy getting creative!

How to Store and Freeze Pineapple Sriracha Chicken

Fridge: Store any leftover Pineapple Sriracha Chicken pizza in an airtight container for up to 2 days. This keeps the flavors intact while preventing the crust from getting soggy.

Freezer: For longer storage, wrap slices tightly in plastic wrap and then in aluminum foil, or place them in a freezer-safe bag. They can be frozen for up to 3 months.

Reheating: To reheat, place the pizza on a baking sheet and warm in a preheated oven at 375°F for about 10-15 minutes, until heated through and the crust is crispy again.

Make-Ahead Tip: Prepare ingredients in advance, chopping the chicken and pineapple, and storing them in the refrigerator. This allows for a quick assembly when you’re ready to cook!

Make Ahead Options

These Pineapple Sriracha Chicken Outdoor Pizza components are perfect for busy weeknights! You can prepare the pizza dough and store it in an airtight container in the refrigerator for up to 24 hours; this ensures it remains light and fluffy after refrigeration. Additionally, pre-dice the pineapple and chicken, and keep them in separate containers in the fridge for up to 3 days. When you’re ready to serve, simply roll out the dough, assemble the toppings, and slide your pizza into the preheated oven. The flavors will be just as vibrant and delicious, providing you with a quick and satisfying meal that delights your family or guests!
Pineapple Sriracha Chicken Recipe FAQs

What type of pizza dough should I use for the Pineapple Sriracha Chicken pizza?
Absolutely! You can use store-bought pizza dough for convenience, or make your own for a more personal touch. If you opt for homemade, let it rest for at least one hour to rise. This will give you a beautiful texture and flavor!

How should I store leftover Pineapple Sriracha Chicken pizza?
Store any leftover pizza slices in an airtight container in the refrigerator for up to 2 days. Make sure to keep it covered to prevent the crust from becoming soggy while maintaining that delicious flavor!

Can I freeze the Pineapple Sriracha Chicken pizza?
Yes, you can! To freeze, wrap individual slices tightly in plastic wrap and then in aluminum foil, or place them in a freezer-safe bag to minimize air exposure. They can be frozen for up to 3 months. When you’re ready to enjoy, reheat in a preheated oven at 375°F for about 10-15 minutes, and you’ll have a tasty treat waiting for you!

What should I do if my pizza dough is sticking to the peel?
Very! If you notice your pizza dough sticking, it’s likely not enough semolina flour was used on the peel. Make sure to sprinkle a generous amount of semolina flour before placing the dough on. Additionally, check that your dough is nicely stretched and not too wet, which can cause sticking as well.

Is there a vegetarian option for the Pineapple Sriracha Chicken pizza?
Absolutely! You can easily make a vegetarian version by swapping out the chicken for grilled veggies such as bell peppers, zucchini, and mushrooms. This not only provides a delicious alternative but also adds a burst of color to your pizza.

Can I use different types of cheese?
Yes! While shredded mozzarella cheese works beautifully for melting, you can certainly customize your pizza by incorporating a blend of cheeses. Try adding provolone for a sharper flavor or even some feta for an unexpected tang!
Pineapple Sriracha Chicken

Pineapple Sriracha Chicken: A Sweet and Spicy Delight

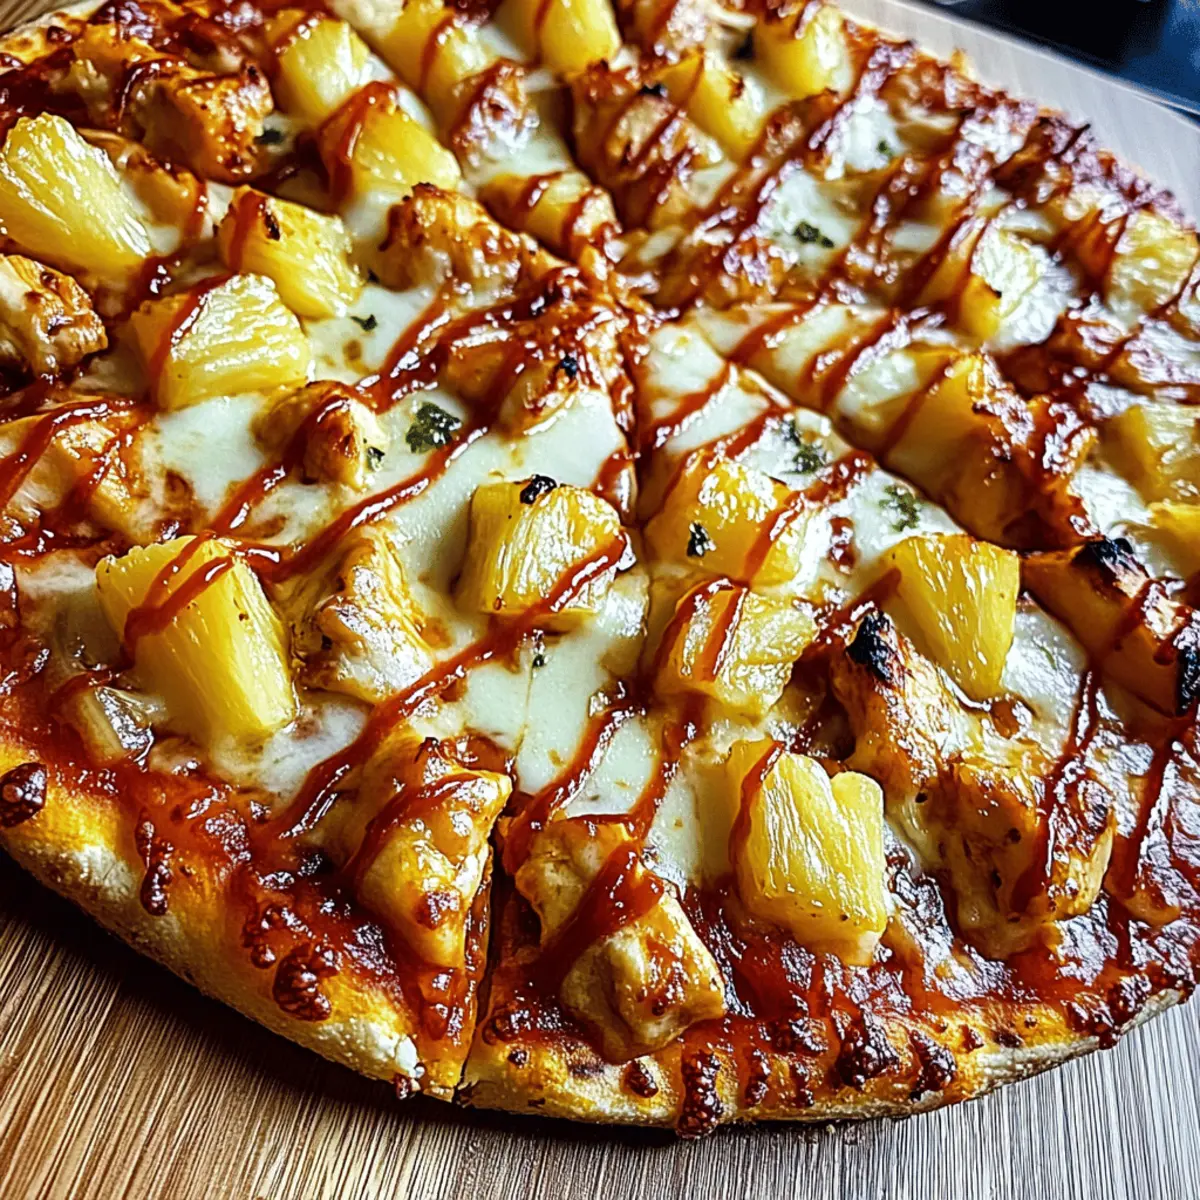
Pineapple Sriracha Chicken marries sweet pineapple with spicy sriracha in a delightful outdoor pizza recipe.
Prep Time 15 minutes
Cook Time 3 minutes
Cooling Time 5 minutes
Total Time 23 minutes
Servings: 4 slices
Course: Chicken
Cuisine: American
Calories: 300

Ingredients
  

For the Dough
  • 1 package Pizza Dough Store-bought or homemade
  • 1 cup Semolina Flour For dusting the pizza peel
For the Toppings
  • 2 tablespoons Olive Oil For brushing
  • 1 cup Pizza Sauce Your favorite variety
  • 2 cups Shredded Mozzarella Cheese Substitutable for provolone
  • 1 cup Diced Pineapple Fresh or drained canned
  • 1 cup Diced Chicken Pre-cooked or leftover
  • 1 tablespoon Blackstone Pineapple Sriracha Seasoning Optional for added spice
  • 2 tablespoons Sriracha Sauce For drizzle before serving

Equipment

  • Outdoor pizza oven
  • Pizza Peel
  • Baking Sheet
  • Rolling Pin

Method
 

Preparation Steps
  1. Preheat your outdoor pizza oven to a scorching 500-600°F.
  2. Stretch or roll the pizza dough into a 12-14 inch circle on a lightly floured surface.
  3. Sprinkle semolina flour generously over your pizza peel.
  4. Transfer the rolled-out dough onto the peel and drizzle olive oil evenly over the surface.
  5. Spread a generous amount of pizza sauce evenly over the dough.
  6. Layer shredded mozzarella cheese over the sauce, then add diced pineapple and chicken.
  7. Sprinkle optional seasoning over the toppings for extra flavor.
  8. Slide the pizza onto the heated pizza stone and bake for 2-3 minutes.
  9. Remove from oven, let cool for a moment, and drizzle with sriracha before serving.

Nutrition

Serving: 1sliceCalories: 300kcalCarbohydrates: 36gProtein: 15gFat: 12gSaturated Fat: 5gPolyunsaturated Fat: 2gMonounsaturated Fat: 3gCholesterol: 40mgSodium: 500mgPotassium: 250mgFiber: 2gSugar: 4gVitamin A: 200IUVitamin C: 10mgCalcium: 150mgIron: 1.5mg

Notes

This pizza is perfect for outdoor gatherings and can be customized with different toppings.

Tried this recipe?

Let us know how it was!

Irresistible Mini Cheesecakes Recipe: No-Bake & Totally Delicious

As I stood in my kitchen, the enticing scent of sweet vanilla wafted through the air, instantly transporting me to my favorite dessert spot. Today, I’m sharing my favorite Mini Cheesecakes Recipe, featuring a delightful vanilla wafer crust that effortlessly combines rich creaminess with a satisfying crunch. Best of all, this no-bake dessert comes together in no time, perfect for those last-minute gatherings or a cozy evening treat. With endless options for customization—from decadent toppings to dairy-free alternatives—you can tailor these mini cheesecakes to suit any palate. So, whether you’re a busy parent or a seasoned home-chef, get ready to impress your friends and family with a treat that looks gourmet but is incredibly simple to make! What flavor twist will you try first?

Why Are Mini Cheesecakes So Irresistible?

No-Bake Convenience: These mini cheesecakes come together effortlessly, allowing you to skip the oven entirely. Perfect for busy nights or unplanned get-togethers!

Customizable Flavors: With endless variations, you can switch up the crust or filling to match your mood. Try almond extract for a twist or fresh fruit purees for fruity goodness.

Impressive Presentation: These treats look fancy, making them perfect for impressing guests at dinner parties or family gatherings.

Texture Delight: Enjoy the creamy filling paired with a satisfying crunch from the vanilla wafer crust, reminiscent of your favorite restaurant dessert.

For other easy meal ideas, explore my recipes for Hobo Casserole or Turkey Patties with Herbs. You won’t regret it!

Mini Cheesecakes Recipe Ingredients

• Here’s what you’ll need to whip up these delicious, no-bake mini cheesecakes!

For the Crust

  • Finely crushed vanilla wafers – Provides a sweet, buttery crunch for the base; feel free to substitute with graham crackers or chocolate wafers for a unique flavor twist.
  • Unsalted butter – Binds the wafer crumbs together for a solid crust; coconut oil can be used as a dairy-free option for a healthier alternative.

For the Filling

  • Full-fat cream cheese – Forms the smooth filling; make sure it’s softened for easy mixing, or opt for a low-fat version if desired.
  • Granulated sugar – Adds the right amount of sweetness to the cheesecake.
  • Full-fat sour cream – Enhances creaminess and adds a delightful tang; Greek yogurt may serve as a tasty alternative.
  • Large eggs – Provides structure; avoid overmixing after adding to keep your filling smooth and crack-free.
  • Pure vanilla extract – Infuses the filling with rich flavor; variations can include other extracts for a fun twist.
  • Salt – Balances the sweetness and enhances the overall flavor of the cheesecake.

Optional Garnishes

  • Fresh berries – Add a burst of flavor and color.
  • Whipped cream – A dollop on top makes these mini cheesecakes extra special!
  • Lemon zest – For a zesty finish that brightens the dessert.
  • Melted chocolate drizzle – Perfect for chocolate lovers looking to indulge.
  • Caramel sauce – A delightful addition for those who enjoy a touch of decadence.

Now that you have your ingredients ready, let’s dive into the easy instructions that will have these mini cheesecakes chilling in your fridge in no time!

Step‑by‑Step Instructions for Mini Cheesecakes Recipe

Step 1: Preheat the Oven
Begin by preheating your oven to 325°F (160°C). While it warms up, take a moment to line a 12-cup muffin tin with paper liners, ensuring a clean release for your mini cheesecakes later on. This setup is crucial for the perfect no-bake treat!

Step 2: Prepare the Crust
In a mixing bowl, combine finely crushed vanilla wafers with melted butter until the crumbs are fully moistened. Using a tablespoon or your fingers, firmly press this mixture into the bottom of each muffin liner to form the base of your Mini Cheesecakes. The crust should be compact and evenly spread for a delightful crunch.

Step 3: Pre-Bake the Crust
Place the muffin tin in the preheated oven and bake the crusts for 5-7 minutes, or until they are slightly golden. You’ll notice a fragrant aroma filling your kitchen! Once ready, remove them from the oven and allow the crusts to cool completely in the tin. This step provides a sturdy foundation for your cheesecakes.

Step 4: Mix the Filling
In a large mixing bowl, beat the softened cream cheese with an electric mixer until it’s smooth and creamy. Gradually add granulated sugar, full-fat sour cream, pure vanilla extract, and a pinch of salt, mixing until well combined. Take care not to overmix to ensure your filling remains smooth and creamy for the Mini Cheesecakes.

Step 5: Add Eggs to Filling
Once your mixture is well combined, add the large eggs one at a time, mixing gently until just incorporated. This method helps to maintain a silky texture while preventing overmixing, which can lead to cracks. Aim for a smooth consistency without any lumps in your filling!

Step 6: Fill the Crusts
Carefully spoon the cream cheese filling into the pre-baked crusts, filling each one about 2/3 to 3/4 full. As you fill them, gently tap the muffin tin on the counter to release any air bubbles trapped within. This technique ensures a smooth surface for your Mini Cheesecakes!

Step 7: Bake the Cheesecakes
Return the muffin tin to the oven and bake for 18-22 minutes, or until the edges are set and the centers are still slightly jiggly. Keep a close eye on them during baking, as this slight jiggle will allow them to properly firm up as they cool.

Step 8: Cool & Chill
Once baked, turn off the oven, and crack open the oven door, letting the cheesecakes cool inside for about 30 minutes. This gentle cooling prevents sudden temperature changes that could lead to cracks. After this, transfer them to the refrigerator and chill for at least 3-4 hours, allowing the flavors to meld beautifully.

Step 9: Serve Your Mini Cheesecakes
After chilling, your Mini Cheesecakes are ready to be served! Carefully remove them from the muffin tin and garnish with fresh berries, whipped cream, or your favorite toppings. These delightful no-bake treats are now ready to impress your family and friends!

Mini Cheesecakes Recipe Variations

Explore the endless possibilities of flavor and texture as you craft your mini cheesecakes, perfectly suited to your taste!

  • Dairy-Free: Substitute full-fat cream cheese with almond or cashew cream cheese to create a deliciously creamy, dairy-free dessert. You’ll love the richness without the dairy!

  • Graham Cracker Crust: Swap vanilla wafers for crushed graham crackers for that classic cheesecake taste, adding a touch of nostalgia to every bite.

  • Chocolate Twist: For a luscious chocolate version, mix cocoa powder into the cream cheese filling or top with melted chocolate drizzle. Who can resist chocolaty goodness?

  • Mixed Berry Filling: Blend fresh fruit purees into the filling for a fruity explosion of flavor. Use strawberries, blueberries, or raspberries for a vibrant burst that looks stunning!

  • Nutty Crunch: Incorporate crushed nuts into the crust for added texture. Try pecans or almonds for a delightful crunch that pairs beautifully with the creaminess.

  • Zesty Lemon: Infuse the filling with lemon zest or juice for a refreshing tang that brightens up the sweetness. Delightful in every way, this variation is perfect for spring!

  • Caramel Swirl: Add a luscious caramel swirl in the cream cheese filling before baking for an indulgent dessert that is a crowd-pleaser. Each slice brings joy to every bite!

As you dive into these variations, you may also enjoy whipping up other easy meals like Sweet Potato Beef or some irresistible Grilled Honey Kabobs. Happy cooking!

What to Serve with Mini Cheesecakes with Vanilla Wafer Crust

Elevate your dessert experience by pairing these delightful mini cheesecakes with complementary sides that enhance their creamy richness and crunchy texture.

  • Fresh Berries: A medley of strawberries, blueberries, and raspberries adds a burst of freshness that beautifully contrasts the sweetness of the cheesecake. Their vibrant colors also make your dessert visually stunning!

  • Whipped Cream: A dollop of fluffy whipped cream adds a light, airy texture, creating balance with the rich filling. It’s an essential addition that elevates the dessert to a new level of indulgence.

  • Caramel Sauce: Drizzling warm caramel sauce over the top brings a sweet richness that enhances the overall flavor. It adds depth and a beautiful glossy finish for presentation.

  • Chocolate Ganache: This rich, silky chocolate sauce can be drizzled over the cheesecakes for chocolate lovers. The combination of flavors creates a decadent and irresistible treat.

  • Coffee or Espresso: A cup of freshly brewed coffee or a shot of espresso pairs perfectly, balancing the sweetness with a bitter note that enhances the cheesecake’s creamy flavors. It’s the perfect way to unwind after a meal.

  • Lemon Sorbet: For a refreshing contrast, serve a scoop of zesty lemon sorbet alongside the cheesecakes. This bright, tangy treat helps cleanse the palate after the rich dessert.

  • Nut Crust Variations: Consider serving your cheesecakes with a side of cashew or almond crumbles. These nutty bites enhance the crunchy element and add an appealing texture to each bite.

  • Mint Leaves: A few fresh mint leaves can be placed on top or alongside the cheesecakes for a delightful aromatic experience. The mint adds a refreshing touch that lightens the dessert.

Indulge in these pairings and transform your mini cheesecakes into a dessert spread that will surely impress your family and friends!

Helpful Tricks for Mini Cheesecakes

  • Room Temperature Ingredients: Ensure your cream cheese, sour cream, and eggs are at room temperature for a smooth batter, minimizing lumps in your Mini Cheesecakes.

  • Mixing Caution: Avoid overmixing after adding the eggs to maintain a creamy texture. Overmixing can lead to cracks as the cheesecakes bake.

  • Chilling is Key: Don’t skip the chilling time; it’s essential for the flavors to meld and the texture to firm up. A well-chilled cheesecake is always more delicious!

  • Crust Technique: When preparing your crust, press the crumbs firmly and evenly into the muffin liners to ensure stability. This solid foundation will enhance the crunch!

  • Watch the Bake Time: Keep a close eye on the cheesecakes during baking. They should be slightly jiggly in the center when done, ensuring a perfect texture.

Make Ahead Options

These Mini Cheesecakes are perfect for meal prep enthusiasts! You can prepare the crust by combining finely crushed vanilla wafers with melted butter and pressing it into the liners up to 24 hours in advance. Simply cover the muffin tin with plastic wrap and refrigerate to keep the crust fresh. You can also mix the filling a day before—store it in an airtight container in the fridge. When you’re ready to serve, just fill the pre-prepared crusts with the cheesecake filling and bake for 18-22 minutes. This way, you’ll have delicious mini cheesecakes ready to impress, saving you time on busy weeknights!

How to Store and Freeze Mini Cheesecakes

  • Fridge: Store your mini cheesecakes in an airtight container for up to 3-4 days. This helps maintain their creamy texture while keeping them fresh and delicious.

  • Freezer: These delightful treats can be frozen for up to 1 month. Wrap each mini cheesecake tightly in plastic wrap, then place them in a freezer-safe container.

  • Thawing: For best results, thaw your mini cheesecakes overnight in the refrigerator before serving. This ensures they regain their perfect creamy consistency.

  • Reheating: Since these mini cheesecakes are served chilled, there’s no need to reheat them. Enjoy them cold for the ultimate refreshing treat!

Mini Cheesecakes with Vanilla Wafer Crust Recipe FAQs

What type of vanilla wafers should I use?
You can use any brand of finely crushed vanilla wafers for the crust. If you’re feeling adventurous, feel free to swap them with graham crackers or chocolate wafers for a unique twist. Just make sure they are finely crushed to achieve that perfect crust!

How long can I store my mini cheesecakes?
Absolutely! These mini cheesecakes can be stored in an airtight container in the refrigerator for up to 3-4 days. Make sure they are well-sealed to maintain their creamy texture and delightful taste during this time.

Can I freeze mini cheesecakes?
Yes, you can! To freeze your mini cheesecakes, wrap each one tightly in plastic wrap and then place them in a freezer-safe container. They can be frozen for up to 1 month. For the best results, thaw them overnight in the refrigerator before serving.

What if my cheesecake cracks during baking?
If you notice cracks forming, don’t worry too much! This can occur if the mixture was overmixed after adding the eggs or if the temperature changes drastically. To prevent this, ensure your ingredients are at room temperature, and avoid overmixing—mix just until combined. This gentle approach keeps your mini cheesecakes smooth!

Can I make these mini cheesecakes dairy-free?
Absolutely! For a delicious dairy-free version, substitute the full-fat cream cheese with almond or cashew cream cheese, and swap the sour cream with coconut yogurt. These alternatives retain the creamy texture while accommodating dietary needs!

What garnishes work best for mini cheesecakes?
The more the merrier! Fresh berries, a dollop of whipped cream, lemon zest, or even a drizzle of melted chocolate or caramel sauce can elevate your mini cheesecakes. Toppings add flavor and visual appeal, making them extra special for any occasion!

Mini Cheesecakes Recipe

Irresistible Mini Cheesecakes Recipe: No-Bake & Totally Delicious

Try this Mini Cheesecakes Recipe for a no-bake dessert that is delicious, creamy, and customizable.
Prep Time 30 minutes
Cook Time 22 minutes
Chilling Time 4 hours
Total Time 4 hours 52 minutes
Servings: 12 cheesecakes
Course: Dessert
Cuisine: American
Calories: 250

Ingredients
  

For the Crust
  • 1 cup finely crushed vanilla wafers Can substitute with graham crackers or chocolate wafers
  • 1/2 cup unsalted butter Melted; can substitute with coconut oil for a dairy-free option
For the Filling
  • 16 oz full-fat cream cheese Softened for easy mixing
  • 3/4 cup granulated sugar
  • 1/2 cup full-fat sour cream Greek yogurt may be used
  • 2 large eggs At room temperature
  • 1 tbsp pure vanilla extract
  • 1/4 tsp salt
Optional Garnishes
  • 1 cup fresh berries
  • 1 cup whipped cream
  • 1 tbsp lemon zest
  • 1/2 cup melted chocolate drizzle
  • 1/2 cup caramel sauce

Equipment

  • Muffin Tin
  • Mixing Bowl
  • Electric Mixer

Method
 

Preparation
  1. Preheat your oven to 325°F (160°C) and line a 12-cup muffin tin with paper liners.
  2. In a mixing bowl, combine finely crushed vanilla wafers and melted butter until moistened. Press the mixture into the bottom of each muffin liner.
  3. Place the muffin tin in the preheated oven and bake the crusts for 5-7 minutes until slightly golden, then cool completely.
  4. In a large mixing bowl, beat the softened cream cheese until smooth. Gradually add sugar, sour cream, vanilla, and salt, mixing until combined.
  5. Add the eggs one at a time, mixing gently until just incorporated for a smooth texture.
  6. Spoon the filling into the pre-baked crusts, filling about 2/3 to 3/4 full.
  7. Bake for 18-22 minutes until edges are set and centers are jiggly. Let them cool in the oven for 30 minutes.
  8. Transfer to the refrigerator and chill for at least 3-4 hours before serving.
  9. Remove from muffin tin and garnish as desired before serving.
Nutrition

Serving: 1cheesecakeCalories: 250kcalCarbohydrates: 22gProtein: 3gFat: 18gSaturated Fat: 10gPolyunsaturated Fat: 1gMonounsaturated Fat: 4gCholesterol: 55mgSodium: 210mgPotassium: 100mgSugar: 12gVitamin A: 500IUCalcium: 50mgIron: 0.5mg

Notes

Ensure all ingredients are at room temperature for best results. Avoid overmixing to maintain a smooth texture.

Tried this recipe?

Let us know how it was!

Irresistible Chocolate Chip Cupcakes That Everyone Will Love

As I whisked the batter for these Chocolate Chip Cupcakes, the sweet aroma of melting chocolate wafted through my kitchen, instantly transporting me to my childhood. There’s something so heartwarming about baking that reminds me of cozy family gatherings, making these delightful treats perfect for any occasion. In just 35 minutes, you can whip up a batch that not only satisfies your sweet tooth but can also be easily customized for everyone—whether they’re gluten-free, vegan, or simply a chocolate lover! These cupcakes are quick, easy, and sure to impress, making them a go-to dessert for any busy home chef. What unique twist are you thinking of adding to your batch today?

Why Will You Love These Cupcakes?

Customizable Delight: These Chocolate Chip Cupcakes are a blank canvas, ready for your personal touches, from gluten-free to vegan options.

Quick and Easy: With only 35 minutes from start to finish, you’ll have warm, delicious cupcakes ready to tantalize your taste buds—perfect for spontaneous cravings!

Family-Friendly Flavor: The rich chocolate flavor and creamy frosting make these cupcakes a sure hit for all ages, guaranteeing smiles at any gathering.

Versatile Variations: Whether you prefer a nutty crunch or a zesty twist, the recipe encourages creativity, allowing you to experiment with different add-ins and flavors.

Crowd-Pleasing: Impress guests or elevate cozy nights in; these cupcakes are just the treat to share, bringing everyone together with joy.

Storage Made Simple: Keep the fun going—store unfrosted cupcakes for days or freeze them for later, ensuring deliciousness is always within reach!

Ready to try other delightful treats? Check out the White Chocolate Cranberry Cookies or the indulgent Patriotic Chocolate Chip Cookie Pie for more sweet inspiration!

Chocolate Chip Cupcake Ingredients

• Create your perfect batch with these must-have ingredients!

For the Cupcake Batter

  • All-purpose flour – Provides structure and a light texture; you can swap with whole wheat flour for added nutrition.
  • Baking soda – This leavening agent makes your cupcakes rise; always use fresh for the best results.
  • Salt – Enhances the sweetness while balancing flavors; no need for substitutions here!
  • Unsalted butter – Adds rich flavor and moisture; for a dairy-free option, use coconut oil instead.
  • Granulated sugar – Sweetens the batter beautifully; it’s best not to substitute here for optimum sweetness.
  • Eggs – Bind the ingredients together and add moisture; use 1/4 cup unsweetened applesauce for an egg-free alternative.
  • Vanilla extract – Infuses a warm, comforting flavor; almond extract is a delightful substitute for a unique twist.
  • Milk – Introduces richness and moisture; opt for almond milk to make the recipe dairy-free.
  • Chocolate chips – Enhance the cupcake with chocolate flavor; choose between semi-sweet, dark, or white chocolate chips for your favorite taste!

Now that you have everything ready, get excited about whipping up these irresistible Chocolate Chip Cupcakes that everyone will adore!

Step‑by‑Step Instructions for Chocolate Chip Cupcakes

Step 1: Preheat and Prepare
Begin by preheating your oven to 350°F (175°C). While the oven warms up, line a standard 12-cup cupcake pan with paper liners to prevent sticking. This simple prep step ensures that your Chocolate Chip Cupcakes bake evenly and are easy to remove.

Step 2: Mix Dry Ingredients
In a medium bowl, whisk together 1 ½ cups of all-purpose flour, 1 teaspoon of baking soda, and ½ teaspoon of salt until well combined. This crucial step helps aerate the flour, promoting a light and fluffy texture in your cupcakes. Set this mixture aside while you work on the wet ingredients.

Step 3: Cream Butter and Sugar
In a large mixing bowl, cream together ½ cup of softened unsalted butter and 1 cup of granulated sugar using an electric mixer on medium speed for about 3-5 minutes. You want the mixture to become light and fluffy, which will create a tender crumb in the final cupcakes.

Step 4: Incorporate Eggs and Vanilla
Add 2 large eggs to the butter-sugar mixture one at a time, mixing well after each addition. Then, stir in 2 teaspoons of vanilla extract until everything is well blended. This step enriches the batter’s flavor and adds moisture for luscious Chocolate Chip Cupcakes that everyone will love.

Step 5: Combine Dry and Wet Ingredients
Gradually incorporate the dry flour mixture into the wet ingredients, alternating with ½ cup of milk, mixing on low speed until just combined. Be careful not to overmix; you want a smooth batter without lumps. This blending brings all the flavors together, ensuring a delightful cupcake texture.

Step 6: Fold in Chocolate Chips
Gently fold in 1 cup of chocolate chips, ensuring they are evenly distributed throughout the batter. This step adds bursts of chocolatey goodness that enhance each bite of your Chocolate Chip Cupcakes. Just be careful not to overmix, as this can result in denser cupcakes.

Step 7: Fill and Bake
Spoon the batter into the lined cupcake pan, filling each liner about two-thirds full. Bake in the preheated oven for 18-20 minutes, or until a toothpick inserted into the center comes out clean with a few crumbs. The cupcakes should be lightly golden and spring back when gently touched.

Step 8: Cool Before Frosting
Once baked, remove the cupcakes from the oven and let them cool in the pan for about 5 minutes. Then, transfer them to a wire rack to cool completely. This is an essential step that ensures your frosting won’t melt when you finally top your delightful Chocolate Chip Cupcakes with creamy goodness.

Make Ahead Options

These Chocolate Chip Cupcakes are perfect for meal prep, making your busy weeknights a little sweeter! You can prepare the batter up to 24 hours in advance; simply mix all the ingredients, then cover and refrigerate the bowl. This allows the flavors to deepen while keeping the batter fresh! If you’ve baked some in advance, unfrosted cupcakes can be stored at room temperature in an airtight container for up to 3 days, ensuring they retain their delightful texture. When you’re ready to serve, just frost them with your creamy topping, and enjoy these delicious Chocolate Chip Cupcakes that taste as fresh as the day they were baked!

What to Serve with Chocolate Chip Cupcakes

Indulge in a delightful spread that complements the sweetness of these irresistible cupcakes, turning your baking adventure into a memorable feast!

  • Vanilla Ice Cream: This creamy classic adds a cool, smooth contrast to the rich chocolate flavors. A scoop of vanilla perfectly balances the sweetness, making each bite an experience.

  • Fresh Berries: Juicy strawberries, raspberries, or blueberries bring a tart freshness, enhancing the overall flavor profile. The combination of sweetness and acidity is heavenly!

  • Fruity Smoothie: A refreshing berry or banana smoothie can be a delightful drink option alongside. The vibrant flavors of a smoothie elevate your dessert table with a fruity twist.

  • Coffee: A warm cup of coffee pairs beautifully with chocolate flavors, enhancing the taste while offering a comforting experience. The richness of coffee rounds out your cupcake delight.

  • Chocolate Mousse: For the true chocolate lover, pairing these cupcakes with a light chocolate mousse creates a decadent dessert duo. The creamy texture of the mousse complements the cupcakes wonderfully.

  • Nutty Trail Mix: For an unexpected twist, serve a crunchy trail mix alongside. The mix of textures provides a delightful contrast to the soft cupcakes, inviting a fun snacking experience.

  • Whipped Cream: Light and airy whipped cream can add a perfect touch. A dollop on top transforms each cupcake into an elegant dessert.

Elevate your serving suggestions and enjoy these Chocolate Chip Cupcakes in good company!

Storage Tips for Chocolate Chip Cupcakes

  • Room Temperature: Unfrosted Chocolate Chip Cupcakes can be stored at room temperature in an airtight container for up to 3 days. This keeps them fresh and soft, perfect for a sweet treat anytime.

  • Fridge: Once frosted, place your cupcakes in an airtight container and refrigerate them for up to 5 days. This helps maintain the creamy frosting while keeping the cupcakes delightful.

  • Freezer: For longer storage, freeze unfrosted cupcakes for up to 3 months. Wrap each cupcake tightly in plastic wrap and place them in a freezer-safe container. Thaw overnight in the fridge before frosting to enjoy later.

  • Reheating: If you like your cupcakes warm, simply place them in the microwave for about 10-15 seconds. This makes the chocolate chips even more melty and delicious!

Expert Tips for Chocolate Chip Cupcakes

Room Temperature Ingredients: Use room temperature butter, eggs, and milk for a smoother batter that incorporates well and yields a lighter cupcake.

Avoid Overmixing: When folding in chocolate chips, mix gently. Overmixing can lead to denser cupcakes, which means less of that delightful, fluffy texture.

Check for Doneness: Use a toothpick to check your cupcakes. It should come out with a few crumbs, not wet batter, to ensure perfectly baked Chocolate Chip Cupcakes.

Cool Completely: Allow your cupcakes to cool completely on a wire rack before frosting. This prevents your creamy frosting from melting and sliding off.

Experiment Freely: Don’t hesitate to try different add-ins, like nuts or flavored extracts! This allows you to customize your Chocolate Chip Cupcakes and keep flavors exciting.

Chocolate Chip Cupcakes Variations & Substitutions

Feel free to personalize these Chocolate Chip Cupcakes and make them uniquely yours, adding delightful twists that awaken the senses!

  • Gluten-Free: Use a gluten-free flour blend to make these cupcakes safe for those with gluten sensitivities without sacrificing taste.

  • Dairy-Free: Swap out butter for coconut oil and milk for almond milk for a deliciously creamy texture without dairy.

  • Vegan: Substitute eggs with 1/4 cup of unsweetened applesauce and slather your cupcakes with dairy-free frosting—the flavor stays rich and satisfying.

  • Nutty Delight: Fold in ½ cup of chopped walnuts or pecans to add a crunchy element that pairs beautifully with the soft cupcake texture.

  • Citrus Twist: Grate the zest of one orange or lemon into your batter for a refreshing burst of citrus that perfectly complements the chocolatey sweetness.

  • Mocha Frosting: Mix in 1-2 teaspoons of espresso powder into your frosting for a coffee-infused treat that will awaken your taste buds.

  • Double Chocolate: Use chocolate cake mix instead of vanilla for a double chocolate experience that will make any chocolate lover swoon.

  • Spicy Kick: A pinch of cinnamon or cayenne pepper in the batter adds a surprising warmth that contrasts delightfully with the sweetness of the cupcakes.

For more exciting options, consider whipping up some luscious Patriotic Chocolate Chip Cookie Pie or enjoying the sweet tang of White Chocolate Cranberry Cookies!

Chocolate Chip Cupcakes Recipe FAQs

How do I select the best chocolate chips for my cupcakes?
Absolutely! For the best flavor, I recommend using high-quality semi-sweet chocolate chips. If you’re feeling adventurous, go for dark chocolate for a richer taste or white chocolate for a sweeter touch. Always check the packaging for ingredients if you’re accommodating dietary restrictions!

How should I store my Chocolate Chip Cupcakes?
Unfrosted cupcakes can be stored at room temperature in an airtight container for up to 3 days, ensuring they remain moist and delicious. Once frosted, keep them in the fridge to maintain the creaminess, consuming them within 5 days. Remember to let them come to room temperature for the best flavor when serving!

Can I freeze Chocolate Chip Cupcakes? If so, how?
You can! To freeze unfrosted Chocolate Chip Cupcakes, wrap each one tightly in plastic wrap and place them in a freezer-safe container. They can be stored in the freezer for up to 3 months. When you’re ready to enjoy them, simply thaw overnight in the fridge and frost before serving. This keeps your treats fresh and ready for any occasion!
What should I do if my cupcakes sink in the middle?
This can happen sometimes! If you notice your cupcakes sinking, it could be due to a few reasons, such as overmixing the batter, which causes them to become dense, or an incorrect oven temperature. To avoid this, make sure to fold in ingredients gently and always check your oven calibration with an oven thermometer for accurate baking.

Can these cupcakes accommodate dietary restrictions?
Very! This recipe is incredibly versatile. To make it gluten-free, swap all-purpose flour with a gluten-free blend. For a dairy-free version, use coconut oil instead of butter and almond milk. If you’re looking for a vegan option, replace eggs with unsweetened applesauce and use dairy-free frosting, creating delightful cupcakes for everyone!

How can I enhance the flavor of my cupcakes?
I often experiment with various add-ins! You can stir in citrus zest, like orange or lemon, for a fresh twist or even mix in a pinch of cinnamon for a hint of spice. Each adjustment can elevate your Chocolate Chip Cupcakes spectacularly—so get creative and find your favorite combination!

Chocolate Chip Cupcakes

Irresistible Chocolate Chip Cupcakes That Everyone Will Love

These Chocolate Chip Cupcakes are quick, customizable, and a crowd-pleaser, perfect for any occasion and sure to delight everyone.
Prep Time 15 minutes
Cook Time 20 minutes
Cooling Time 5 minutes
Total Time 35 minutes
Servings: 12 cupcakes
Course: Dessert
Cuisine: American
Calories: 210

Ingredients
  

For the Cupcake Batter
  • 1.5 cups all-purpose flour Can substitute with whole wheat flour for added nutrition.
  • 1 teaspoon baking soda Always use fresh for the best results.
  • 0.5 teaspoon salt Enhances sweetness and balances flavors.
  • 0.5 cups unsalted butter For dairy-free, use coconut oil.
  • 1 cups granulated sugar Best not to substitute for optimum sweetness.
  • 2 large eggs Can substitute with 1/4 cup unsweetened applesauce for egg-free.
  • 2 teaspoons vanilla extract Almond extract can be used for a unique twist.
  • 0.5 cups milk Almond milk can be used for a dairy-free option.
  • 1 cups chocolate chips Choose between semi-sweet, dark, or white chocolate chips.

Equipment

  • Oven
  • cupcake pan
  • Mixing bowls
  • Electric Mixer
  • Measuring cups
  • Measuring spoons
  • Rubber Spatula

Method
 

Step-by-Step Instructions
  1. Preheat your oven to 350°F (175°C) and line a standard 12-cup cupcake pan with paper liners.
  2. In a medium bowl, whisk together the flour, baking soda, and salt until well combined.
  3. In a large mixing bowl, cream together the softened butter and granulated sugar until light and fluffy, about 3-5 minutes.
  4. Add the eggs one at a time, mixing well after each addition, then stir in the vanilla extract.
  5. Gradually incorporate the dry mixture into the wet ingredients, alternating with the milk, mixing on low until just combined.
  6. Gently fold in the chocolate chips ensuring they are evenly distributed throughout the batter.
  7. Fill the lined cupcake pan about two-thirds full and bake for 18-20 minutes or until a toothpick comes out clean.
  8. Let the cupcakes cool in the pan for about 5 minutes before transferring to a wire rack to cool completely.

Nutrition

Serving: 1cupcakeCalories: 210kcalCarbohydrates: 30gProtein: 2gFat: 10gSaturated Fat: 6gPolyunsaturated Fat: 0.5gMonounsaturated Fat: 3gCholesterol: 35mgSodium: 150mgPotassium: 120mgFiber: 1gSugar: 15gVitamin A: 200IUCalcium: 50mgIron: 1mg

Notes

Use room temperature ingredients for a smoother batter. Avoid overmixing to maintain fluffiness. Store unfrosted cupcakes at room temperature for up to 3 days or freeze for up to 3 months.

Tried this recipe?

Let us know how it was!

Delicious Roasted Garlic Bread: Guilt-Free Comfort Food

The warm, inviting scent of roasted garlic wafting through your kitchen can transform any moment into a cherished memory. In my quest for a guilt-free indulgence, I’ve perfected this Lightened-Up Roasted Garlic Bread recipe, turning a classic favorite into a healthy treat without sacrificing flavor. Not only is it quick to prepare, but it also pairs beautifully with a variety of dishes, whether you’re cozying up with a bowl of soup or elevating your dinner with a side of buttery goodness. Imagine crispy edges enveloping a soft, fragrant center, making every bite a delightful experience. Ready to discover how easy it is to elevate your meals with this versatile recipe? Let’s dive in!

Why is Roasted Garlic Bread so irresistible?

Comforting Aroma: The heavenly scent of roasted garlic fills your kitchen, inviting everyone to gather around the table.
Guilt-Free Indulgence: Enjoy all the flavors of traditional garlic bread without the heaviness, making it a perfect light option.
Customizable: Tailor it to your taste—add cheese, herbs, or even a spicy kick to make it uniquely yours.
Quick Prep: With minimal ingredients and straightforward steps, this recipe fits effortlessly into your busy schedule.
Versatile Pairing: Whether served with soups, salads, or pasta, this savory delight enhances any meal beautifully. Get ready to impress your family and friends with this scrumptious creation!

Roasted Garlic Bread Ingredients

For the Bread

  • Ciabatta or French Bread – A sturdy loaf provides the perfect base; opt for one that can hold up to the creamy spread.

For the Garlic Spread

  • Roasted Garlic – This adds deep, savory flavor; ensure it’s roasted until soft and lightly browned for the best results.
  • Softened Butter or Vegan Butter/Olive Oil – This gives moisture and flavor; swap in vegan options for a guilt-free delight.
  • Salt – Essential for enhancing the flavors; adjust according to your taste preference.

For Garnish

  • Fresh Parsley or Basil/Thyme – These fresh herbs brighten the dish; mix and match to find your favorite flavor combination.

This Lightened-Up Roasted Garlic Bread combines rich roasted garlic and a hint of fresh herbs, making it the perfect guilt-free indulgence for any occasion!

Step‑by‑Step Instructions for Lightened-Up Roasted Garlic Bread

Step 1: Preheat the Oven
Begin by preheating your oven to 400°F (200°C). This temperature is ideal for achieving that perfect golden-brown garlic bread. While the oven warms up, gather your ingredients and equipment, including a baking sheet lined with parchment paper. A properly preheated oven ensures a beautifully crispy texture, making your Lightened-Up Roasted Garlic Bread truly delightful.

Step 2: Prepare the Bread
Carefully slice your ciabatta or French bread horizontally into two equal slabs. Place these pieces cut-side up on the lined baking sheet. This allows for even exposure to heat and maximum flavor infusion. Look for a loaf that has a sturdy structure to support the creamy garlic spread. The goal is to create the perfect canvas for your Lightened-Up Roasted Garlic Bread.

Step 3: Roast the Garlic
Next, roast your garlic until it’s soft and lightly brown. This usually takes about 30-40 minutes. Wrap the garlic bulbs in foil, drizzling a little olive oil over them, and place them directly on the oven rack. The roasting will bring out a rich, sweet flavor. Once done, let them cool slightly before mashing for your garlic spread.

Step 4: Make the Garlic Spread
In a bowl, mash the roasted garlic until smooth and creamy. Blend in softened butter or vegan butter to reach your desired consistency. Add a pinch of salt to enhance the flavors and mix well until the spread is light and fluffy. This garlicky mixture will form the heart of your Lightened-Up Roasted Garlic Bread, so ensure it’s well combined and flavorful.

Step 5: Spread the Mixture
Generously spread the garlic butter mixture over each half of the prepared bread. Use a spatula or the back of a spoon to ensure an even coat that reaches all edges. This is where the magic happens, as the flavors begin to meld. The more coverage, the richer the taste you’ll enjoy in your Lightened-Up Roasted Garlic Bread!

Step 6: Bake to Perfection
Place the baking sheet in the preheated oven and bake for about 5 minutes for a soft result. For a golden, crispy finish, bake for 10-12 minutes, keeping an eye on the bread as it toasts. You’ll want to see the edges crisp up while the center stays soft. The aroma of the Lightened-Up Roasted Garlic Bread wafting from the oven is simply irresistible!

Step 7: Garnish and Serve
Once baked, remove the bread from the oven and sprinkle with freshly chopped parsley or your favorite herbs. Slice into 2-3 inch pieces for easy sharing. Serving your Lightened-Up Roasted Garlic Bread warm is key, as it enhances the experience. Gather your loved ones around the table to enjoy this guilt-free treat alongside your favorite dishes!

Make Ahead Options

These Lightened-Up Roasted Garlic Bread slices are perfect for meal prep enthusiasts! You can prepare the garlic spread up to 24 hours in advance by mashing the roasted garlic with softened butter, salt, and herbs, then storing it in an airtight container in the refrigerator. Additionally, you can slice the unbaked bread and keep it at room temperature until you’re ready to bake. When it’s time to serve, simply spread the prepped garlic mixture on the bread and bake for about 10-12 minutes until golden and crispy. This not only saves time on busy weeknights but also ensures you’ll have that irresistible, fresh-out-of-the-oven taste without the last-minute rush!

Roasted Garlic Bread Variations & Substitutions

Feel free to get creative and personalize your roasted garlic bread to match your taste buds!

  • Cheesy Delight: Add shredded mozzarella or parmesan on top for a melty, decadent finish. The gooey cheese elevates the dish, turning every slice into an indulgence.

  • Herb Medley: Swap parsley for fresh basil or thyme to explore new aromatic dimensions. Each herb brings its unique essence, inviting delightful flavors that dance on your palate.

  • Vegan Option: Substitute traditional butter with vegan butter or olive oil for a guilt-free treat. This ensures everyone can savor the deliciousness, regardless of dietary preferences.

  • Spicy Twist: Mix in red pepper flakes for a zesty kick that will ignite your senses. This simple addition transforms the classic flavor into a bold and exciting experience.

  • Citrus Infusion: Grate a hint of lemon zest into the garlic spread for a refreshing lift. The brightness of citrus introduces a vibrant aspect that balances the richness beautifully.

  • Nutty Flavor: Fold in some ground walnuts or pistachios for a delightful crunch. This unexpected twist enhances texture and adds a lovely, earthy flavor profile.

  • Caramelized Onions: For an added layer of sweetness, blend in some caramelized onions with the garlic spread. Their rich flavor harmonizes perfectly with the dish, giving an extra gourmet touch.

  • Pesto Perfection: Spread a layer of basil pesto before adding your garlic mixture. This delightful combination of flavors will transform your roasted garlic bread into something truly extraordinary.

Want more interesting recipes to go along with your delightful garlic bread? Try serving it with a warm bowl of Honey Garlic Shrimp or a comforting Lemon Garlic Shrimp spaghetti. Happy cooking!

Expert Tips for Lightened-Up Roasted Garlic Bread

  • Slicing Technique: Use a serrated knife to slice the bread evenly; this prevents squishing the loaf and ensures clean edges for your Roasted Garlic Bread.

  • Storing Leftovers: Wrap any leftover garlic bread in foil or place it in an airtight container. This helps maintain freshness and prevents it from becoming stale.

  • Flavor Adjustment: If you prefer a milder garlic taste, roast the garlic for a shorter time, or use less in your spread. Don’t forget to taste as you mix!

  • Crispy Finish: For extra crunch, broil the bread for the last minute of baking. Just keep a close eye to avoid burning!

  • Quick Prep Ahead: Prepare your garlic spread one day in advance and store it in the fridge. This saves time when you’re ready to bake your Roasted Garlic Bread!

What to Serve with Lightened-Up Roasted Garlic Bread

Imagine creating a delightful dinner experience, where every bite harmonizes with the rich flavors of roasted garlic and adds warmth to your table.

  • Creamy Tomato Soup: This classic pairing offers a comforting, tangy contrast to the savory garlic bread, elevating your meal with each dunk.

  • Pasta Primavera: Bright, fresh vegetables combined with pasta create a colorful dish that complements the robust flavors of the garlic bread beautifully.

  • Grilled Vegetable Salad: The smoky, charred notes of grilled veggies bring a delightful crunch and earthy flavor, balancing the richness of the bread.

  • Herbed Quinoa: Light and fluffy, this protein-packed side adds a nutty texture that bestows a wholesome touch to your meal’s spread.

  • Caesar Salad: With its crisp greens and creamy dressing, this salad provides a refreshing bite that contrasts wonderfully with the warmth of the garlic bread.

  • White Wine: A chilled glass of Sauvignon Blanc or a light Pinot Grigio brings out the savory notes, making dinner feel even more special.

Indulge your senses and bring your loved ones together with these delightful pairings that turn a simple meal into a memorable feast!

How to Store and Freeze Roasted Garlic Bread

Fridge: Store leftover roasted garlic bread in an airtight container or wrap tightly in foil. It will stay fresh for up to 3 days.

Freezer: For longer storage, freeze individual slices wrapped in plastic wrap, then place them in a freezer bag. They can be stored for up to 3 months for easy access later.

Reheating: To reheat, pop the frozen slices in a toaster or oven at 350°F (175°C) for about 10-15 minutes until warmed through and crispy. Enjoy your delicious roasted garlic bread without the guilt!

Room Temperature: If you plan to eat within a day, you can store the bread unwrapped at room temperature, but be sure to consume it within 24 hours for optimal freshness.

Lightened-Up Roasted Garlic Bread Recipe FAQs

What type of bread works best for making roasted garlic bread?
For this Lightened-Up Roasted Garlic Bread, I recommend using ciabatta or French bread. These sturdy loaves provide the ideal structure needed to hold the creamy garlic spread without getting soggy. Look for a bread with a nice crust that can give you those crispy edges—it’s a game changer!

How should I store leftover roasted garlic bread?
Absolutely! To keep your leftover roasted garlic bread fresh, wrap it tightly in foil or store it in an airtight container. This will help retain moisture and prevent it from drying out. It’s best when consumed within 3 days, so make sure to enjoy those leftovers while they’re still delicious!

Can I freeze roasted garlic bread?
Yes, you can! To freeze your Lightened-Up Roasted Garlic Bread, slice individual pieces and wrap them in plastic wrap. Place the wrapped slices in a freezer bag, squeezing out as much air as possible. They can be stored in the freezer for up to 3 months. When you’re ready to enjoy, just pop the frozen slices in the toaster or oven to reheat.

What can I do if my garlic spread is too thick?
Don’t worry, this can happen! If your garlic spread turns out too thick, simply add a bit more softened butter or a splash of olive oil to loosen it up. Mix well until you reach your desired consistency. You want it to be spreadable but still thick enough to cling to the bread, enhancing the flavor without running off.

Are there any dietary considerations for this roasted garlic bread?
Yes! This recipe is quite versatile. For a vegan option, simply use vegan butter or olive oil in place of regular butter. Additionally, if you have a garlic allergy, you can consider using other flavorings such as finely chopped shallots or garlic-infused oils to keep a savory essence in the bread without using actual garlic. Enjoy customizing based on your dietary needs!

How do I know when my roasted garlic bread is done baking?
Keeping an eye on your Lightened-Up Roasted Garlic Bread is crucial! After about 10-12 minutes in the oven, it should develop golden-brown edges, while the center remains soft. You can also give it a gentle press; if it bounces back, it’s ready! For a crispier finish, broil it for an additional minute—but watch that it doesn’t burn!

Roasted Garlic Bread

Delicious Roasted Garlic Bread: Guilt-Free Comfort Food

This delightful Roasted Garlic Bread combines rich flavors while remaining guilt-free, making it the perfect addition to any meal.
Prep Time 10 minutes
Cook Time 15 minutes
Total Time 25 minutes
Servings: 4 slices
Course: Appetizer
Cuisine: Italian
Calories: 180

Ingredients
  

For the Bread
  • 1 loaf Ciabatta or French Bread Sturdy loaf
For the Garlic Spread
  • 1 head Roasted Garlic Roast until soft and lightly browned
  • 4 tablespoons Softened Butter or Vegan Butter Can use olive oil as a substitute
  • 1 teaspoon Salt Adjust according to taste
For Garnish
  • 2 tablespoons Fresh Parsley or Basil/Thyme Mix and match herbs

Equipment

  • Oven
  • Baking Sheet
  • Parchment paper
  • Serrated Knife
  • Mixing Bowl
  • Spatula

Method
 

Step-by-Step Instructions
  1. Preheat your oven to 400°F (200°C).
    Roasted Garlic Bread
  2. Carefully slice your ciabatta or French bread horizontally into two equal slabs and place cut-side up on a lined baking sheet.
    Roasted Garlic Bread
  3. Roast the garlic wrapped in foil for 30-40 minutes until soft and lightly brown.
    Roasted Garlic Bread
  4. Mash the roasted garlic until creamy and blend in softened butter or vegan butter. Add salt and mix well.
    Roasted Garlic Bread
  5. Spread the garlic butter mixture generously over each half of the prepared bread.
    Roasted Garlic Bread
  6. Bake in the preheated oven for about 10-12 minutes until edges are crisp and center remains soft.
    Roasted Garlic Bread
  7. Garnish with freshly chopped herbs, slice into pieces, and serve warm.
    Roasted Garlic Bread

Nutrition

Serving: 1sliceCalories: 180kcalCarbohydrates: 20gProtein: 2gFat: 10gSaturated Fat: 4gPolyunsaturated Fat: 1gMonounsaturated Fat: 5gCholesterol: 15mgSodium: 300mgPotassium: 150mgFiber: 1gSugar: 1gVitamin A: 200IUCalcium: 15mgIron: 1mg

Notes

Store leftovers wrapped tightly to maintain freshness. Adjust garlic levels based on taste preference.

Tried this recipe?

Let us know how it was!

Delicious Spider Web Chocolate-Glazed Donuts for Halloween Fun

As the crisp autumn air rolls in, and pumpkins begin to dot the landscape, my thoughts inevitably turn to playful treats that spark joy in the kitchen. That’s precisely why I’m excited to share my recipe for Spider Web Chocolate-Glazed Donuts. These delightful, cake-like donuts come together in just 12 minutes, making them a swift addition to your Halloween celebrations. The appeal doesn’t stop at their ease; they also cater to various dietary needs, being adaptable for vegan and dairy-free lifestyles. Picture a feast for your eyes and taste buds, with rich chocolatey goodness paired with a whimsical white chocolate web—perfect for both kids and adults alike. So, are you ready to create some festive magic in your kitchen?

Why Are These Donuts a Must-Try?

Quick and Easy: Just 12 minutes in the oven means you can whip these up in no time, making them ideal for last-minute festivities or spontaneous cravings.

Kid-Friendly Fun: The spider web design brings an element of playful creativity, making it a fun baking project the whole family can enjoy.

Versatile for All: Whether you’re vegan or have dietary restrictions, these donuts adapt effortlessly with simple swaps, just like my other loved recipes such as Vegan Pumpkin Muffins.

Decadent Chocolate Delight: Expect a rich chocolate flavor from the dark glaze that will satisfy your sweet tooth while the white chocolate adds a fun visual appeal.

Perfect for Sharing: These donuts are a hit at any gathering, ensuring everyone leaves with a smile. Pair them with a warm drink from my cozy Hot Chocolate Recipes to make the perfect Halloween treat!

Spider Web Chocolate-Glazed Donuts Ingredients

For the Donut Batter
Sugar – Sweetness is key; feel free to swap in coconut sugar for a healthier choice.
Oil – Provides moisture; use any neutral oil like vegetable or canola.
Milk – Adds hydration; replace with almond milk for a delightful dairy-free option.
Eggs – Binds the ingredients; substitute flax eggs for a vegan alternative (1 tbsp ground flaxseed mixed with 3 tbsp water).
Cocoa Powder – Introduces rich chocolate flavor; opt for unsweetened cocoa for a balanced taste.
Self-Raising Flour – Creates structure and helps the donuts rise; for a substitute, mix 1 cup all-purpose flour with 1 tsp baking powder.

For the Glaze
Dark Chocolate – The base for the glaze; you can use milk chocolate for a sweeter taste if preferred.
White Chocolate – Essential for creating the spooky spider web design that makes these donuts so festive.

These Spider Web Chocolate-Glazed Donuts are not just treats; they’re a fun activity for the whole family, perfect for making cherished memories this Halloween. Happy baking!

Step‑by‑Step Instructions for Spider Web Chocolate-Glazed Donuts

Step 1: Preheat the Oven
Begin by preheating your oven to 350°F (160°C fan). This step is crucial as it ensures that your Spider Web Chocolate-Glazed Donuts bake evenly and rise perfectly. While the oven heats up, you can prepare your baking pans to streamline the process later.

Step 2: Mix Wet Ingredients
In a large mixing bowl, whisk together the sugar, oil, milk, and eggs until the mixture is smooth and frothy. Aim for a well-combined liquid base, which will enhance the texture of your donuts. This mixture not only adds moisture but also contributes to the deliciously rich flavor of the chocolate donuts.

Step 3: Combine Dry Ingredients
In a separate bowl, sift together the cocoa powder and self-raising flour, blending them well. This step is essential to remove any clumps and ensure an even distribution of the cocoa. It will enhance the texture of your Spider Web Chocolate-Glazed Donuts for a light and fluffy result.

Step 4: Fold Mixtures Together
Gently fold the wet ingredients into the dry mixture, being careful not to overmix. Combine until just blended, as this will keep your donuts soft and tender. The goal is to achieve a smooth batter that will rise beautifully in the oven, creating those perfect cake-like donuts you crave.

Step 5: Prepare Donut Pans
Grease your donut pans thoroughly to prevent sticking and facilitate easy removal. Fill each cavity about three-quarters full with the batter using a piping bag or spoon. This helps maintain the shape while allowing space for the donuts to rise during baking.

Step 6: Bake the Donuts
Place the filled donut pans into the preheated oven and bake for approximately 12 minutes. Keep an eye on them; they’re ready when they spring back when touched lightly. The enticing aroma filling your kitchen will be a delightful hint that Halloween treats are on the way.

Step 7: Cool the Donuts
Once baked, remove the pans from the oven and let the donuts cool for a few minutes. Then, transfer them to a wire rack to cool completely. This step is important to allow the donuts to set properly, making your Spider Web Chocolate-Glazed Donuts beautifully moist.

Step 8: Glaze the Donuts
While the donuts are cooling, melt the dark chocolate in a microwave or double boiler until smooth. Dip the tops of the cooled donuts into the chocolate glaze, ensuring a nice, even coat. This indulgent glaze will create a rich chocolate layer that perfectly complements your donuts.

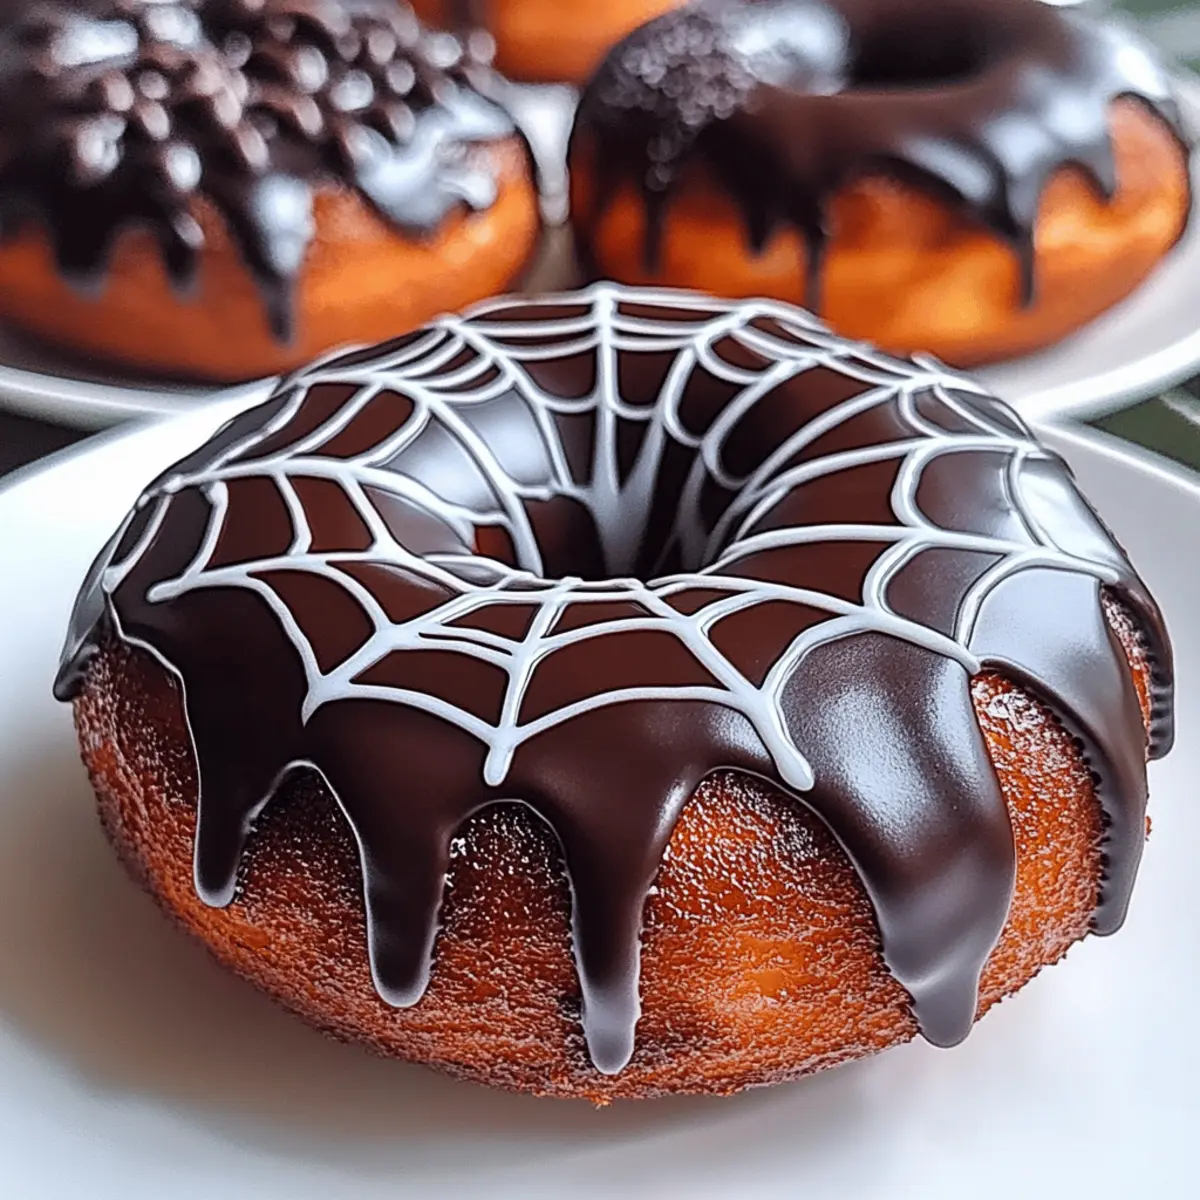
Step 9: Decorate with Spider Web
Melt the white chocolate and pour it into a piping bag. Carefully pipe spider web designs over the glazed donuts, creating that fun and festive look. This step lets your creativity shine and adds an appealing visual dimension to your Spider Web Chocolate-Glazed Donuts.

Step 10: Set the Decoration
Allow the decorated donuts to sit at room temperature for about 30 minutes to let the chocolate set properly. This waiting time ensures your spider web designs firm up, giving a striking finish to your delightful Halloween treats that everyone will love.

Spider Web Chocolate-Glazed Donuts Variations

Feel free to sprinkle your own magic on these delightful donuts, creating a treat that’s uniquely yours to savor!

  • Dairy-Free: Substitute regular milk with oat milk for a creamy texture that’s also dairy-free.
  • Vegan: Use flax eggs in place of regular eggs by mixing 1 tbsp ground flaxseed with 3 tbsp water. This simple swap keeps your donuts deliciously vegan without losing moisture.
  • Gluten-Free: To make gluten-free donuts, use a gluten-free flour blend in place of self-raising flour. This ensures everyone can enjoy the spooky goodness without worry!
  • Flavored Chocolate: Experiment with white chocolate or even caramel chocolate for the glaze to mix up the flavors. Each variation offers a deliciously sweet twist!
  • Nutty Crunch: Top your glazed donuts with crushed nuts for an added crunch. It’s a delightful textural contrast to the soft cakeiness of the donuts.
  • Spiced Kick: Add a teaspoon of cinnamon or pumpkin spice to the batter for a warm, aromatic flavor that’s perfect for Fall.
  • Seasonal Sprinkles: Decorate with colorful sprinkles or candy eyes to make your donuts even more festive! It turns these treats into a feast for the eyes, perfect for Halloween parties.
  • Chili Chocolate: For a daring twist, add chili powder to your dark chocolate for a spicy kick. This unexpected flavor will surprise and delight adventurous taste buds!

Dive into these variations and have fun mixing and matching flavors that suit your taste! For more festive inspiration, check out my Vegan Pumpkin Muffins or cozy Hot Chocolate Recipes to pair with these delicious treats!

What to Serve with Spider Web Chocolate-Glazed Donuts?

Indulging in these whimsical donuts brings a joyful sweetness that pairs perfectly with comforting accompaniments.

  • Steaming Hot Chocolate: A rich cup beautifully complements the chocolate flavor, creating a cozy indulgence perfect for chilly nights.

  • Spiced Apple Cider: This warm, spiced drink offers a fruity contrast, enhancing the chocolate richness while celebrating autumn’s flavors.

  • Vanilla Ice Cream: Creamy and cool, a scoop of vanilla ice cream balances the sweetness of the donuts, making for a delightful pairing.

  • Pumpkin Spice Latte: For a seasonal twist, this warm, spiced drink enhances the festive vibe and echoes the family-friendly nature of the treats.

  • Caramel Dipping Sauce: Drizzling or dipping these donuts in caramel elevates the flavor experience, adding a gooey sweetness that’s irresistible.

  • Fruit Salad: A fresh, vibrant fruit salad with crisp apples and juicy berries adds refreshing bites, lightening the dessert experience.

  • Whipped Cream: Topping with light, fluffy whipped cream creates a delightful texture contrast, enhancing each bite’s flavor and richness.

  • Chocolate Milkshake: A thick, creamy milkshake not only mirrors the chocolatey goodness but also creates a fun, treat-filled atmosphere for any gathering!

Storage Tips for Spider Web Chocolate-Glazed Donuts

Room Temperature: Store the donuts in an airtight container at room temperature for up to 3 days to keep them fresh and moist.

Fridge: If you need more time, they can also be refrigerated for up to a week. Just make sure they’re in a sealed container to avoid drying out.

Freezer: For longer storage, freeze the donuts for up to 2 months. Place them in a freezer-safe container with parchment paper between layers to maintain their cute spider web design.

Reheating: To enjoy them warm, simply thaw overnight in the fridge and reheat for 10-15 seconds in the microwave for a delightful treat!

Expert Tips for Spider Web Chocolate-Glazed Donuts

Mix Wisely: Avoid overmixing the batter; mixing until just combined preserves the donuts’ soft texture, resulting in perfect Spider Web Chocolate-Glazed Donuts.

Watch the Time: Keep an eye on the baking time to prevent drying out. A couple of minutes can make a big difference in achieving that moist, cake-like consistency!

Melt with Care: When melting chocolate, do it slowly to avoid overheating. Working quickly is essential for decorating; chocolate can set rapidly, so have your piping bag ready!

Layer Wisely: Store the decorated donuts with parchment paper between layers to prevent them from sticking together and ruining their cute spider web designs.

Substitution Strategies: If you’re using vegan substitutions, like flax eggs or almond milk, just remember that the texture might vary slightly but will still be delicious!

Make Ahead Options

These Spider Web Chocolate-Glazed Donuts are perfect for busy home cooks looking to streamline their Halloween festivities! You can prepare the donut batter up to 24 hours in advance; simply mix the wet and dry ingredients separately, and combine them just before baking to keep the texture light and fluffy. Additionally, the baked donuts can be stored in an airtight container at room temperature for up to 3 days; this will maintain their moistness. When you’re ready to serve, glaze them and pipe the spider web decoration. Just a few minutes of finishing touches will yield delightful, homemade treats with minimal effort!

Spider Web Chocolate-Glazed Donuts Recipe FAQs

How do I select ripe ingredients for my Spider Web Chocolate-Glazed Donuts?
Absolutely! For the best donuts, ensure your eggs are fresh and your milk is at room temperature for easier mixing. When choosing cocoa powder, opt for high-quality unsweetened cocoa for an optimal chocolatey flavor. If you’re using coconut sugar, look for granulated grains without lumps to ensure even sweetness throughout the donuts.

What’s the best way to store leftover Spider Web Chocolate-Glazed Donuts?
Very simple! Store your donuts in an airtight container at room temperature for up to 3 days. If you want them to last longer, you can refrigerate them for up to a week. Just remember to seal them well to keep that delightful moisture intact!

Can I freeze my Spider Web Chocolate-Glazed Donuts, and how?
Certainly! To freeze your donuts, first ensure they are completely cool. Then, place them in a freezer-safe container, separating layers with parchment paper to maintain their adorable spider web design. They can be frozen for up to 2 months. When you’re ready to enjoy them, thaw overnight in the fridge, then warm them up in the microwave for 10-15 seconds for the best experience.

What should I do if my donuts come out dry?
If your Spider Web Chocolate-Glazed Donuts turn out dry, it could be due to overbaking or overmixing the batter. To avoid this, keep a close eye on the baking time and pull them out as soon as they spring back when touched. For moist and fluffy donuts, mix the batter just until combined and watch those clocks!

Are these donuts suitable for people with dietary restrictions?
Absolutely! This recipe is quite versatile. You can easily adapt it for vegan diets by using flax eggs and almond milk instead of regular eggs and dairy. Additionally, this recipe can accommodate those with lactose intolerance or egg allergies, making it a delightfully inclusive treat everyone can enjoy. Just remember to always check ingredient labels for allergens if you’re serving others!

Spider Web Chocolate-Glazed Donuts

Delicious Spider Web Chocolate-Glazed Donuts for Halloween Fun

Enjoy these delightful Spider Web Chocolate-Glazed Donuts, perfect for Halloween fun and easy to make.
Prep Time 10 minutes
Cook Time 12 minutes
Cooling Time 30 minutes
Total Time 52 minutes
Servings: 12 donuts
Course: Dessert
Cuisine: American
Calories: 180

Ingredients
  

For the Donut Batter
  • 1 cup Sugar Feel free to swap in coconut sugar for a healthier choice.
  • 1/4 cup Oil Use any neutral oil like vegetable or canola.
  • 1/2 cup Milk Replace with almond milk for a delightful dairy-free option.
  • 2 large Eggs Substitute with flax eggs (1 tbsp ground flaxseed mixed with 3 tbsp water).
  • 1/3 cup Cocoa Powder Opt for unsweetened cocoa for balanced taste.
  • 1 cup Self-Raising Flour For a substitute, mix 1 cup all-purpose flour with 1 tsp baking powder.
For the Glaze
  • 1 cup Dark Chocolate You can use milk chocolate for a sweeter taste if preferred.
  • 1/2 cup White Chocolate Essential for creating the spooky spider web design.

Equipment

  • Oven
  • Mixing Bowl
  • donut pan
  • piping bag
  • Microwave or Double Boiler

Method
 

Step-by-Step Instructions
  1. Preheat your oven to 350°F (160°C fan). Prepare your baking pans.
  2. In a large mixing bowl, whisk together the sugar, oil, milk, and eggs until smooth and frothy.
  3. In a separate bowl, sift together the cocoa powder and self-raising flour.
  4. Gently fold the wet ingredients into the dry mixture until just blended.
  5. Grease your donut pans thoroughly. Fill each cavity about three-quarters full with the batter.
  6. Place the filled donut pans into the preheated oven and bake for approximately 12 minutes.
  7. Once baked, let the donuts cool for a few minutes before transferring to a wire rack.
  8. Melt the dark chocolate and dip the tops of the cooled donuts into the chocolate glaze.
  9. Melt the white chocolate and pipe spider web designs over the glazed donuts.
  10. Allow the decorated donuts to sit at room temperature for about 30 minutes to let the chocolate set.

Nutrition

Serving: 1donutCalories: 180kcalCarbohydrates: 22gProtein: 2gFat: 8gSaturated Fat: 4gPolyunsaturated Fat: 1gMonounsaturated Fat: 2gCholesterol: 30mgSodium: 90mgPotassium: 100mgFiber: 1gSugar: 10gCalcium: 2mgIron: 4mg

Notes

These donuts are a fun activity for the whole family this Halloween. Enjoy baking!

Tried this recipe?

Let us know how it was!

Cheesy Crispy Chicken Tacos That You’ll Love in 30 Minutes

The aroma of sizzling chicken and melted cheese wafts through my kitchen as I prep for dinner, and I can’t help but feel a rush of excitement. These Cheesy Crispy Chicken Tacos are a delightful game-changer that I turn to when I need a quick meal that still impresses. In just 30 minutes, you’ll have perfectly crispy tacos packed with a savory filling that brings joy to every bite. What makes this dish even better is its family-friendly, customizable nature, allowing everyone to build their taco just the way they like it. Whether you use rotisserie chicken for a speedy option or get creative with your toppings, these tacos are sure to become a staple in your home. Ready to elevate your dinner routine? Let’s dive into this recipe!

Why Are These Tacos a Must-Try?

Simplicity: This recipe can be whipped up in just 30 minutes, making it ideal for busy weeknights or last-minute dinners.

Customizable: Tailor each taco to suit your family’s tastes, whether using rotisserie or ground chicken, or opting for a veggie twist with black beans.

Crowd-Pleaser: With their crispy texture and cheesy goodness, these tacos will impress both kids and adults alike!

Healthy Option: Each taco is a balanced choice at around 350 calories, allowing you to indulge without guilt.

Versatile Pairings: Serve these flavorful tacos with fresh guacamole or zesty salsa for a delightful meal. You could also try pairing them with colorful corn and black bean salad for added nutrition.

Cheesy Crispy Chicken Tacos Ingredients

For the Chicken Filling

  • Shredded Chicken – Rotisserie or leftover chicken works best for quick meal prep.
  • Smoked Paprika – Adds depth; use regular paprika for a milder flavor if preferred.
  • Garlic Powder – Enhances dish flavors; fresh garlic may also be used for a brighter taste.
  • Onion Powder – Provides sweetness; consider fresh onions for a more aromatic profile.
  • Chipotle Chili Powder (optional) – Offers a smoky heat for those who enjoy a little spice.
  • Salsa – Keeps the chicken moist and adds layers of flavor; choose your favorite variety.

For the Tacos

  • Olive Oil – Helps crisp up the tortillas; avocado oil is a suitable substitute.
  • Corn Tortillas – Ideal for that crispy texture; flour tortillas can be used but adjust baking time.
  • Shredded Cheese – Provides gooeyness; Monterey Jack or a Mexican blend enhances flavor.

These Cheesy Crispy Chicken Tacos are not only delicious but also customizable to suit everyone’s taste buds in your family!

Step‑by‑Step Instructions for Cheesy Crispy Chicken Tacos

Step 1: Preheat Your Oven
Begin by preheating your oven to 450°F (232°C). This high temperature is essential for achieving the crispy exterior that makes these Cheesy Crispy Chicken Tacos so delightful. While the oven heats up, you can prepare your chicken filling, ensuring everything is ready for assembly.

Step 2: Prepare the Chicken Filling
In a mixing bowl, combine the shredded chicken with smoked paprika, garlic powder, onion powder, and optional chipotle chili powder for a kick. Add your favorite salsa, mixing until the chicken is well coated and each piece is flavorful. This savory mixture will be the heart of your tacos and should be ready to embrace the crispy tortillas.

Step 3: Soften the Tortillas
Take a stack of corn tortillas and wrap them in a damp paper towel. Microwave the wrapped tortillas for 30-60 seconds until they’re warm and pliable. This step is crucial to prevent cracking when you fold your Cheesy Crispy Chicken Tacos, ensuring they maintain their perfect shape.

Step 4: Assemble the Tacos
Brush one side of each warm tortilla with olive oil, then sprinkle a generous amount of shredded cheese on the unbrushed side. Spoon the prepared chicken mixture over the cheese, and finish with another sprinkle of cheese. Carefully fold each tortilla in half, encasing the savory filling and ensuring a cheesy delight inside.

Step 5: Bake for Crispy Perfection
Place the folded tacos on a non-stick baking sheet, ensuring they’re spaced apart for even cooking. Bake in the preheated oven for 16 minutes, flipping them halfway through to achieve a beautifully golden, crispy texture on both sides. You’ll know they’re done when they’re bubbling and lightly browned.

Step 6: Rest and Serve
Once the tacos are out of the oven, let them rest for about 3 minutes to allow the filling to settle, making them easier to handle. These Cheesy Crispy Chicken Tacos are now ready to be served; consider pairing them with fresh guacamole or zesty salsa for an extra punch of flavor.

Cheesy Crispy Chicken Tacos Variations

Feel free to make these tacos truly your own by experimenting with various ingredients and flavors!

  • Ground Chicken: Swap shredded chicken for ground chicken for a different texture; just cook it until browned before mixing with seasonings.
    Ground chicken offers a great alternative, soaking up the lovely spices while retaining that delightful chew.

  • Vegetarian Delight: Create a vegetarian version using black beans and corn for a hearty filling; season with taco spices to elevate flavor.
    This option not only adds protein but also provides a colorful appearance, keeping every bite exciting.

  • Spicy Kick: Spice things up with diced jalapeños or a splash of hot sauce mixed into the chicken.
    It’s perfect for those who love a fiery touch, ensuring every bite delivers a bit of zest!

  • Cheese Varieties: Replace Monterey Jack with Pepper Jack for an extra kick, or use crumbled feta for a Mediterranean flair.
    The choice of cheese can dramatically change the taste profile, bringing a new dimension to your taco experience.

  • Low-Carb Option: For a healthier twist, embrace lettuce wraps instead of tortillas for a low-carb version.
    This not only reduces calories but adds freshness, keeping your meal light and vibrant.

  • Additional Toppings: Consider adding toppings like avocado, fresh cilantro, or pickled red onions for delightful flavor bursts.
    These ingredients can make your taco not only taste better but also visually appealing, enhancing the overall dining experience.

  • Salsa Variations: Use different types of salsa, like pineapple or peach, for a sweet and tangy twist to complement the savory chicken.
    A unique salsa can bring freshness and a surprising element that delights the senses.

  • Baking Alternatives: If you prefer, you can also use an air fryer for even faster cooking; adjust temperature and time accordingly for crispier results.
    This method creates a perfectly crunchy exterior, delighting taco enthusiasts everywhere.

With these delicious variations, let your creativity shine while making these Cheesy Crispy Chicken Tacos! And while you’re at it, don’t forget to check out my recipes for Barbecue Chicken Tacos and Air Fryer Chicken Drumsticks for more inspiration!

Make Ahead Options

These Cheesy Crispy Chicken Tacos are perfect for meal prep, allowing you to enjoy quick dinners during busy weeknights! You can prepare the chicken filling (shredded chicken mixed with spices and salsa) up to 3 days in advance; simply refrigerate it in an airtight container to keep the flavors fresh. The assembled tacos can also be frozen for easy future meals—just wrap them tightly and store for up to 2 months. When you’re ready to serve, bake directly from frozen for 12-15 minutes at 375°F (190°C) to achieve the same delicious crispiness. With these make-ahead tips, you’ll enjoy restaurant-quality tacos with minimal effort!

Storage Tips for Cheesy Crispy Chicken Tacos

Fridge: Keep leftover Cheesy Crispy Chicken Tacos in an airtight container for up to 3 days to maintain their flavor and texture.

Freezer: Assemble and freeze the tacos unbaked for up to 2 months. Layer them with parchment paper to prevent sticking, and bake from frozen for a quick meal.

Reheating: For best results, reheat frozen tacos at 375°F for 12-15 minutes until heated through and crispy. Always let them rest for a few minutes before digging in!

Make-Ahead: Prepare the chicken filling up to 3 days in advance and refrigerate it, making taco assembly a breeze on busy nights.

Expert Tips for Cheesy Crispy Chicken Tacos

Warm Tortillas First: Ensure you warm your tortillas in a damp paper towel to make them pliable and prevent cracking during assembly.

Non-Stick Baking Sheet: Using a non-stick baking sheet guarantees crispy results and makes for easy cleanup.

Mind the Filling: Avoid overfilling your tacos. Too much filling can cause them to burst open while baking, resulting in a messy situation.

Double the Cheese: For extra gooeyness, don’t hesitate to sprinkle a bit of cheese between the chicken and on the outside of the tacos before baking.

Adjust Baking Time: If using flour tortillas, check them frequently and reduce baking time to prevent burning—corn tortillas handle the heat better.

Store Leftovers Correctly: Keep any leftover Cheesy Crispy Chicken Tacos in an airtight container for up to 3 days, or freeze them for convenient meals later.

What to Serve with Cheesy Crispy Chicken Tacos

Elevate your dinner experience with delightful accompaniments that enhance the flavors of your homemade tacos.

  • Fresh Guacamole: A creamy avocado dip with lime juice balances the savory chicken and adds a refreshing twist.
  • Zesty Salsa: Chunky or smooth salsa adds a punch of flavor and a burst of freshness that perfectly complements the crunchy tacos.
  • Crisp Salad: A light salad with romaine, cherry tomatoes, and a tangy dressing brings freshness and color to your meal.
  • Spicy Black Bean Soup: A warm, hearty soup adds a different texture and spicy warmth that pairs beautifully with the crispy tacos.
  • Corn and Black Bean Salad: This colorful side offers an explosion of flavors and textures, adding sweetness and a hint of lime.
  • Roasted Vegetables: Seasoned and roasted veggies enhance your meal with a deliciously caramelized flavor that contrasts nicely with the tacos.
  • Margaritas or Limeade: Refreshing drinks like these will brighten your dining experience, adding a festive spirit to taco night.
  • Churros: End your meal on a sweet note with crispy, cinnamon-sugar-covered churros for a delightful dessert that echoes the taco theme.

Cheesy Crispy Chicken Tacos Recipe FAQs

What type of chicken should I use for the filling?
Absolutely! For the Cheesy Crispy Chicken Tacos, you can use shredded rotisserie chicken for a quick prep time. Leftover cooked chicken also works well if you have it on hand. If you prefer, ground chicken is another excellent option that provides a different texture and flavor profile.

How should I store leftover tacos?
Very! You can store leftover Cheesy Crispy Chicken Tacos in an airtight container in the refrigerator for up to 3 days. Make sure they are completely cooled before sealing the container to keep their crispy texture. To reheat, pop them back in the oven for a few minutes to restore that crunch!

Can I freeze these tacos?
Yes! You can freeze assembled, unbaked Cheesy Crispy Chicken Tacos for up to 2 months. To do so, layer them between pieces of parchment paper in a freezer-safe container to prevent them from sticking together. When you’re ready to enjoy them, simply bake from frozen at 375°F for 12-15 minutes, and they’ll be delicious!

What should I do if my tacos are falling apart?
Don’t worry! If your tacos are falling apart, it could be due to overfilling. Always avoid packing too much chicken into your tacos, as it may cause them to burst when baking. If they are still too fragile after baking, you might try doubling up on the tortillas next time for added sturdiness!

Are these tacos suitable for a gluten-free diet?
Yes! If you’re looking for a gluten-free option, simply use corn tortillas instead of flour tortillas. Check labeling to ensure that the tortillas are certified gluten-free, as different brands can have varying ingredients. Enjoying these Cheesy Crispy Chicken Tacos without gluten is absolutely possible!

Cheesy Crispy Chicken Tacos

Cheesy Crispy Chicken Tacos That You'll Love in 30 Minutes

These Cheesy Crispy Chicken Tacos are a delightful game-changer that you'll love, combining simplicity and customization in a quick meal.
Prep Time 10 minutes
Cook Time 20 minutes
Resting Time 3 minutes
Total Time 30 minutes
Servings: 4 tacos
Course: Chicken
Cuisine: Mexican
Calories: 350

Ingredients
  

For the Chicken Filling
  • 2 cups Shredded Chicken Rotisserie or leftover chicken works best for quick meal prep.
  • 1 tablespoon Smoked Paprika Adds depth; use regular paprika for a milder flavor if preferred.
  • 1 teaspoon Garlic Powder Enhances dish flavors; fresh garlic may also be used for a brighter taste.
  • 1 teaspoon Onion Powder Provides sweetness; consider fresh onions for a more aromatic profile.
  • 1 teaspoon Chipotle Chili Powder Optional; offers a smoky heat for those who enjoy a little spice.
  • 1 cup Salsa Keeps the chicken moist and adds layers of flavor; choose your favorite variety.
For the Tacos
  • 2 tablespoons Olive Oil Helps crisp up the tortillas; avocado oil is a suitable substitute.
  • 8 pieces Corn Tortillas Ideal for that crispy texture; flour tortillas can be used but adjust baking time.
  • 1 cup Shredded Cheese Provides gooeyness; Monterey Jack or a Mexican blend enhances flavor.

Equipment

  • Oven
  • Microwave
  • Mixing Bowl
  • Baking Sheet
  • Paper Towel

Method
 

Step-by-Step Instructions for Cheesy Crispy Chicken Tacos
  1. Preheat your oven to 450°F (232°C).
  2. In a mixing bowl, combine the shredded chicken with smoked paprika, garlic powder, onion powder, and optional chipotle chili powder for a kick. Add your favorite salsa, mixing until the chicken is well coated.
  3. Wrap a stack of corn tortillas in a damp paper towel and microwave for 30-60 seconds until warm and pliable.
  4. Brush one side of each tortilla with olive oil. Sprinkle shredded cheese on the unbrushed side, spoon the chicken mixture over the cheese, and fold each tortilla in half.
  5. Place folded tacos on a non-stick baking sheet and bake for 16 minutes, flipping halfway through.
  6. Let tacos rest for about 3 minutes before serving. Pair with fresh guacamole or zesty salsa.
Nutrition

Serving: 1tacoCalories: 350kcalCarbohydrates: 30gProtein: 20gFat: 17gSaturated Fat: 7gPolyunsaturated Fat: 1gMonounsaturated Fat: 8gCholesterol: 60mgSodium: 560mgPotassium: 300mgFiber: 3gSugar: 3gVitamin A: 10IUVitamin C: 4mgCalcium: 25mgIron: 10mg

Notes

Avoid overfilling the tacos to prevent bursting while baking. Use a non-stick baking sheet for crispy results and easy cleanup.

Tried this recipe?

Let us know how it was!

Perfectly Rebellious Float: Refreshing No-Cook Delight You’ll Love

Summer memories flooded my mind as I sipped on an ice-cold float, the kind that transports you back to lazy afternoons under the sun. Introducing the Perfectly Rebellious Float—a no-cook delight that combines creamy vanilla ice cream with fizzy soda for an irresistibly quick and refreshing treat. In just two minutes, you can whip up this customizable dessert, making it perfect for everything from backyard barbecues to cozy movie nights at home. Not only is it a fun twist on a classic, but it’s also a crowd-pleaser that will have your friends and family coming back for seconds. Ready to dive in and explore flavor combinations that will make your taste buds dance? Let’s get started!

Why Is This Float So Irresistible?

Simplicity at its finest: With just four main ingredients, you can create this no-cook treat in minutes!

Customizable flavor: Mix and match different sodas and ice creams for a unique twist every time. From Chocolate-Orange Dream to Berry Blast, the options are endless!

Crowd-pleaser: Perfect for summer gatherings, this float is sure to impress friends and family alike. Serve alongside juicy burgers or crispy French fries for a complete dining experience.

Nostalgic delight: Each sip brings back memories of classic diners, making it not just a drink but an experience to savor.

No-fuss preparation: Say goodbye to complicated recipes and hello to refreshing fun! Want more quick recipes? Check out our Crispy Air Fryer Chicken Drumsticks for a tasty pairing!

Perfectly Rebellious Float Ingredients

For the Base

  • Vanilla Ice Cream – This creamy foundation is essential for a dreamy float; choose a high-quality version for maximum indulgence.
  • Chilled Cola or Root Beer – The fizzy counterpart that brings life to your float; make sure it’s chilled to keep everything refreshing.

For the Toppings

  • Whipped Cream (Optional) – A luscious topping that adds extra richness; coconut cream works well for a dairy-free option.
  • Maraschino Cherry (Optional) – A traditional garnish that adds a delightful touch of sweetness and color to your drink.

Get ready to impress with the Perfectly Rebellious Float, easily customizable to your taste!

Step‑by‑Step Instructions for Perfectly Rebellious Float

Step 1: Chill the Glass
Begin by placing a tall glass in the freezer for about 5 to 10 minutes. This step ensures your Perfectly Rebellious Float stays cold and refreshing. A frosty glass enhances that delightful contrast between the creamy vanilla ice cream and fizzy soda, setting the stage for a wonderfully indulgent treat.

Step 2: Scoop the Ice Cream
Once your glass is nicely chilled, take a scoop of rich vanilla ice cream, dipping the scoop in warm water beforehand for easy serving. Add one generous scoop (about ½ cup) of ice cream directly into the glass. The creamy texture will create a luscious base for the float, hinting at the delightful flavors to come.

Step 3: Add the Soda
Now for the fizzy magic! Slowly pour 200ml of chilled cola or root beer over the ice cream at a 45-degree angle. This careful pouring minimizes foaming and helps create a visually appealing layer of bubbles for your Perfectly Rebellious Float. Watch as the soda dances over the creamy ice cream, forming a heavenly combination.

Step 4: Top it Off
To elevate your float to another level, add a dollop of whipped cream on top of the fizzy soda and ice cream. If you prefer a dairy-free option, coconut cream works wonderfully as a substitute. For an extra touch of sweetness and color, crown your treat with a maraschino cherry, making it a true masterpiece worthy of any summer gathering.

Step 5: Serve Immediately
The final step is to serve your Perfectly Rebellious Float right away. Providing a straw and spoon will make it easier for everyone to enjoy this refreshing, creamy delight. Indulge in the joy this treat brings as you savor every bubbly sip and creamy bite, perfect for reliving nostalgic summer moments.

How to Store and Freeze Perfectly Rebellious Float

  • Room Temperature: Enjoy your Perfectly Rebellious Float immediately after preparation for the best experience; avoid leaving it at room temperature to maintain its delightful fizz and creaminess.

  • Fridge: If you have leftover components like scooped ice cream, store it in an airtight container in the fridge for up to 3 days. Just remember to keep the soda separate until you’re ready to enjoy another float.

  • Freezer: For pre-scooped ice cream, freeze it in individual portions for convenience. Use within 1 month for the best quality; add soda just before serving for optimal fizz.

  • Reheating: Not applicable for this dessert as it is best served cold. Simply prepare fresh for the most enjoyable experience!

Perfectly Rebellious Float Variations

Feel free to get creative with this delightful float—your taste buds will thank you!

  • Chocolate-Orange Dream: Swap vanilla ice cream for chocolate and add orange soda for a special twist. Think of a sweet chocolate-orange combination that dances upon your palate!

  • Berry Blast: Use raspberry sorbet with lemon-lime soda for a fruity touch. This refreshing alternative offers a vibrant burst of flavor that’s simply irresistible.

  • Vegan Delight: Choose coconut milk ice cream paired with natural root beer for a plant-based option that doesn’t compromise on flavor. It’s a wonderful way to enjoy a classic dessert without dairy!

  • Minty Fresh: Opt for mint chocolate chip ice cream and pour lime soda over it. This combination brings a cool freshness that’s perfect for hot summer days!

  • Caramel Craze: Combine vanilla ice cream with caramel-flavored soda for a decadently sweet experience. The rich caramel undertones will sweep you off your feet, making every sip a decadent indulgence.

  • Citrus Splash: Try lemon sorbet with sparkling water for a zesty and refreshing float. The bright citrus notes invigorate and awaken the senses in the best way possible!

  • Tropical Twist: Use coconut ice cream and pineapple soda to take your float to an island paradise. Your taste buds will be transported straight to the beach with each bubbly sip!

For even more tasty ideas, don’t miss out on pairing your float with succulent sides like Crispy Air Fryer Chicken Drumsticks or other comforting favorites!

Make Ahead Options

These Perfectly Rebellious Floats are perfect for meal prep enthusiasts! You can pre-scoop the vanilla ice cream into individual glasses and freeze them for up to 24 hours. Just make sure the glasses are airtight to prevent freezer burn. When you’re ready to serve, simply pour the chilled cola or root beer into the glasses at a 45-degree angle to minimize foaming. This technique ensures you maintain the float’s vibrant fizz and creamy texture, delivering just as delicious a treat as when prepared fresh. By prepping in advance, you’ll turn a delightful dessert into an effortless experience perfect for busy summer evenings!

Expert Tips for Perfectly Rebellious Float

  • Perfect Pouring: Slow and steady: Pour the soda gently down the side of the glass to minimize foam and ensure a perfect float experience.

  • Flavor Fusion: Mix and match: Don’t be afraid to combine different ice cream flavors and sodas to create your own signature Perfectly Rebellious Float—let your creativity shine!

  • Serve Cold: Keep it chilled: Make sure both the glass and soda are icy cold to maintain the refreshing quality of your float for longer.

  • Fresh Garnishes: Quality toppings: Use fresh whipped cream and a maraschino cherry for that classic touch, enhancing both flavor and appearance.

  • Drinkability: Right tools (optional): Provide both a straw and a spoon to your guests for the ultimate sipping and scooping experience!

What to Serve with Perfectly Rebellious Float?

Delightful summer gatherings are made even more special when you pair this frosty treat with the perfect accompaniments!

  • Juicy Burgers: The savory goodness of a grilled burger complements the sweetness of a float, creating a balanced meal.

  • Crispy French Fries: Saltiness meets sweetness with these classic fries; they’re perfect for dipping into your float!

  • Grilled Hot Dogs: A summer staple that pairs beautifully, the smoky flavors contrast wonderfully with the creamy vanilla and fizzy soda.

  • Fruit Salad: Fresh, juicy fruits add a refreshing element, enhancing the overall light and playful vibe of your meal.

  • Chocolate Chip Cookies: Indulge in nostalgia! These chewy treats paired with the float bring back memories of carefree summer days.

  • Sparkling Lemonade: The citrusy tang of lemonade heightens the fun, making each sip of the float even more refreshing and enjoyable.

Perfectly Rebellious Float Recipe FAQs

How do I select the best vanilla ice cream for my float?
Absolutely! When choosing vanilla ice cream, opt for high-quality brands that use real cream and vanilla extract. Look for options that are rich and creamy, as these will provide a luxurious base for your float. If a darker shade of vanilla cream catches your eye, it may indicate that it contains real vanilla bean, which enhances the flavor!

How should I store leftover ingredients from the float?
Very! For any leftover scooped ice cream, transfer it to an airtight container and store it in the fridge for up to 3 days. Make sure to keep the soda separate, as it will lose its fizz once opened. If you have unused cola or root beer, seal the bottle tightly and keep it in the fridge for a refreshing drink later!

Can I make my float ahead of time and freeze it?
Of course! To prepare your float ahead of time, pre-scoop the ice cream and place the scoops in individual airtight containers, ensuring they are tightly sealed. They can be kept in the freezer for up to 1 month. When you’re ready to serve, just pour your chilled soda over the ice cream for a refreshing and fizzy treat!

What should I do if my float foams over while pouring the soda?
No worries! If you notice your float foaming excessively, it’s usually because the soda was poured too quickly. Next time, pour slowly down the side of the glass at a 45-degree angle. If it foams over, use a spoon to gently push the foam down and enjoy the treat anyway—who doesn’t love a frothy top?

Is there a vegan option available for this float?
Absolutely! For a vegan-friendly Perfectly Rebellious Float, choose coconut milk ice cream or any other dairy-free ice cream you love. Pair it with a natural root beer or soda that doesn’t contain animal products. This way, everyone can enjoy this refreshing treat without dietary restrictions!

How many calories are in a serving of the Perfectly Rebellious Float?
Great question! Each serving of the Perfectly Rebellious Float contains approximately 250 calories, with around 35g of carbohydrates and 12g of fat. If you’re looking to make a lighter version, consider using lower-calorie ice cream options or reducing the amount of whipped cream on top. Enjoy every sip!

Perfectly Rebellious Float

Perfectly Rebellious Float: Refreshing No-Cook Delight You’ll Love

Enjoy the Perfectly Rebellious Float, a no-cook treat that combines creamy vanilla ice cream with fizzy soda for a refreshing dessert.
Prep Time 2 minutes
Total Time 2 minutes
Servings: 2 floats
Course: Dessert
Cuisine: American
Calories: 300

Ingredients
  

For the Base
  • 1 scoop Vanilla Ice Cream Choose a high-quality version for maximum indulgence.
  • 200 ml Chilled Cola or Root Beer Make sure it's chilled to keep everything refreshing.
For the Toppings
  • 1 dollop Whipped Cream Coconut cream works well for a dairy-free option.
  • 1 piece Maraschino Cherry A traditional garnish that adds sweetness and color.

Equipment

  • Tall glass

Method
 

Step-by-Step Instructions
  1. Chill the glass by placing it in the freezer for 5 to 10 minutes.
  2. Scoop a generous amount (about ½ cup) of vanilla ice cream into the chilled glass.
  3. Slowly pour 200ml of chilled cola or root beer over the ice cream at a 45-degree angle.
  4. Top with a dollop of whipped cream and a maraschino cherry.
  5. Serve immediately and enjoy!

Nutrition

Serving: 1floatCalories: 300kcalCarbohydrates: 45gProtein: 3gFat: 12gSaturated Fat: 7gCholesterol: 40mgSodium: 200mgPotassium: 150mgSugar: 35gVitamin A: 300IUCalcium: 150mg

Notes

Mix and match different sodas and ice creams for unique flavor combinations.

Tried this recipe?

Let us know how it was!

Savory Asian Noodle Bowls: Quick Family-Friendly Flavor Boost

As I stood in my kitchen, the aroma of ginger and garlic danced in the air, instantly transporting me to my favorite Asian noodle joint. This isn’t just any meal; it’s a bowl of comfort that features savory Asian noodle bowls inspired by the beloved potstickers we all crave. With tender rice noodles, savory ground pork (or your choice of protein), and crisp veggies coated in a harmonious ginger-soy sauce, this dish comes together in under 30 minutes—perfect for those hectic weeknights when you crave something delicious yet effortless. Plus, it’s entirely customizable, making it a breeze to adapt for any dietary preference. Ready to indulge in a wholesome meal that feels like a cozy hug? Let’s dive into this delightful recipe together!

Why Are These Noodle Bowls a Must-Try?

Quick and Easy: This recipe comes together in under 30 minutes, making it perfect for busy weeknights when time is of the essence.
Customizable Goodness: Whether you prefer ground chicken, turkey, or tofu, the options are endless, ensuring there’s something for everyone!
Flavor Packed: The savory ginger-soy sauce creates a deliciously rich experience, reminiscent of your favorite potstickers.
One-Pan Wonder: With everything cooked in one skillet, clean-up is a breeze, allowing you more time to enjoy your meal.
Family-Friendly: Kids and adults alike will love the delightful textures and flavors, making it an instant hit at the dinner table. For more unique twists, check out our Savory Turkey Patties for delightful pairing options!

Savory Asian Noodle Bowls Ingredients

For the Protein
Ground Pork – The star ingredient that adds richness; feel free to substitute with ground chicken, turkey, or crumbled tofu for a vegetarian version.
Black or White Pepper – Adds a hint of heat; adjust according to taste preferences.

For the Sauce
Gluten-Free Tamari (or Soy Sauce) – Provides the umami punch; ensure it’s gluten-free to keep this dish safe for dietary restrictions.
Chicken Broth (or Water) – Adds moisture and enhances flavor; broth is recommended for a tastier outcome.
Rice Vinegar – Gives brightness to the dish; lemon juice can work as a substitute if you need it.
Ginger Paste – Infuses warmth and depth; fresh ginger can be used if you have it on hand.
Sesame Oil – Offers a rich nuttiness; omit if it poses an allergy risk, and replace it with a neutral oil.
Red Chili Pepper Flakes (Optional) – For those who like it spicy; add according to your heat tolerance.

For the Noodles and Veggies
Rice Noodles – The foundation of this dish; you can also use thin spaghetti or ramen with adjusted cooking times.
Coleslaw Mix – A convenient mix of veggies; you can swap it for fresh cabbage, bell peppers, or baby bok choy for versatility.
Green Onions – Adds a fresh crunch; save the green parts for garnish and use the white parts in the stir-fry.
Garlic – Brings aromatic flavors; fresh minced or pressed garlic works best.

This collection of ingredients makes it easy to whip up these Savory Asian Noodle Bowls in no time, ensuring a flavorful and satisfying meal for everyone to enjoy!

Step‑by‑Step Instructions for Savory Asian Noodle Bowls

Step 1: Prepare the Ground Pork
In a medium bowl, combine the ground pork with black or white pepper and 1 tablespoon of gluten-free tamari. Mix thoroughly until the ingredients are well incorporated. Allow the mixture to rest while you gather the other ingredients, giving you a head start on those delectable Savory Asian Noodle Bowls.

Step 2: Whisk Together the Sauce
In a small bowl, whisk together the remaining tamari, chicken broth, rice vinegar, ginger paste, sesame oil, and optional red chili pepper flakes. This flavorful sauce will elevate your bowl, so make sure it’s well blended. Set aside for later use to allow the flavors to meld.

Step 3: Cook the Rice Noodles
Bring a pot of water to a boil and prepare your rice noodles according to the package instructions, typically boiling for 4-6 minutes. Once cooked, drain the noodles and rinse them under cold water to prevent sticking. Set aside and let the noodles cool while you stir-fry the pork and vegetables.

Step 4: Stir-Fry the Pork and Veggies
Heat a large wok or skillet over medium-high heat. Once hot, add the ground pork, breaking it apart with a spatula as it cooks—this should take about 4-5 minutes until browned. Next, toss in the coleslaw mix and the white parts of the green onions, stir-frying for an additional 3-4 minutes until the veggies are tender yet crisp.

Step 5: Add Garlic and Combine
Stir in the minced garlic, cooking for just one additional minute until fragrant. Then, reintroduce the cooked rice noodles along with the prepared sauce. Using tongs or a spatula, stir-fry everything together for 4-5 minutes, ensuring that each ingredient is well evenly coated and heated through. If needed, add a splash of broth to keep the mixture moist.

Step 6: Cool and Serve
Once everything is heated and well combined, remove the skillet from the heat and let the Savory Asian Noodle Bowls cool for about 10 minutes. This resting period enhances the flavor. Serve in individual bowls, garnishing with the reserved green onion tops, and indulge in a comforting meal that’s sure to please the whole family.

How to Store and Freeze Savory Asian Noodle Bowls

Fridge: Store leftovers in an airtight container for up to 4 days. This keeps the flavors fresh while ensuring the noodles remain tender.

Freezer: To freeze, portion the noodle bowls into freezer-safe containers; they will last for up to 3 months. Thaw in the fridge overnight before reheating.

Reheating: When reheating, add a splash of water or chicken broth to prevent the dish from drying out. Heat on the stove over medium-low until warmed through, about 5-7 minutes.

Ingredient Protection: For best flavor retention, store the sauce separately if you plan to freeze the bowls. Combine before serving to keep those savory Asian noodle bowls delicious.

Expert Tips for Savory Asian Noodle Bowls

  • Don’t Overcook Noodles: Follow package instructions closely to avoid mushy noodles. Properly cooked rice noodles add the perfect texture to your savory Asian noodle bowls.
  • Flavor First: Ensure your sauce is well mixed before adding it to the stir-fry. A well-balanced sauce elevates the dish and prevents bland bites.
  • Veggie Variety: Feel free to mix in extra vegetables like bell peppers or snap peas for added color and nutrition. Customize your bowl to keep it exciting!
  • Adjust Spice Levels: Start with fewer chili flakes if you’re not sure about the heat, and add more until you find your comfort zone. This personalizes your savory Asian noodle bowls.
  • Make Ahead: Prepare the sauce and chop veggies ahead of time to save precious minutes when you’re ready to cook during those busy weeknights.
  • Garnish Creatively: Top your bowl with sesame seeds, fresh cilantro, or a squeeze of lime for an extra punch of flavor and freshness.

Make Ahead Options

These Savory Asian Noodle Bowls are perfect for meal prep enthusiasts seeking to save time during busy weeknights! You can prepare the ground pork mixture and the flavorful sauce up to 24 hours in advance, storing them separately in the refrigerator to maintain their quality. Additionally, the rice noodles can be cooked ahead, rinsed, and tossed in a little oil to prevent sticking. When you’re ready to serve, simply stir-fry the pork and vegetables, then add the refrigerated noodles and sauce, heating everything through for about 4-5 minutes. This way, you can enjoy a delicious, homemade meal with minimal effort!

Savory Asian Noodle Bowls Variations

Feel free to make these noodle bowls your own with any of these delightful ideas that cater to your taste buds!

  • Protein Swap: Substitute ground pork with ground chicken, turkey, or beef for variations in flavor. Each option brings its unique taste profile to the dish.
  • Vegetarian Option: Use crumbled firm tofu or tempeh in place of meat for a hearty vegetarian twist. This switch keeps the dish delicious while accommodating plant-based diets.
  • Gluten-Free Noodles: If needed, switch traditional rice noodles with gluten-free varieties or thin spaghetti. You can enjoy the same great taste, ensuring it fits your dietary needs.
  • Veggie Boost: Add bell peppers, snap peas, or baby corn for extra color and crunch. Customize your veggie mix to make it as vibrant and nutritious as you like!
  • Spicy Kick: Increase the heat by adding fresh sliced chili or a splash of sriracha. Feel free to make it more thrilling based on your love for spice, just like in our intriguing Spicy Korean Noodles.
  • Flavor Enhancement: Mix in hoisin sauce for a touch of sweetness to your noodle bowls. It perfectly balances the savory elements and adds depth to the dish.
  • Herb Twist: Top with fresh herbs such as cilantro or Thai basil to elevate the dish with vibrant aromas and freshness. A beautiful herb garnish is the finishing touch this meal deserves!
  • Nutty Texture: Sprinkle toasted sesame seeds or crushed peanuts for an added crunch and nutty flavor, enhancing the bowl’s overall richness. This will give your meal a delightful texture contrast!

With so many adaptations available, you can easily transform these Savory Asian Noodle Bowls to suit your family’s preferences. Enjoy experimenting!

What to Serve With Quick and Easy Potsticker Noodle Bowls

Elevate your dining experience with delightful accompaniments that complement every delicious bite of your noodle bowls.

  • Steamed Broccoli: This vibrant green vegetable adds a fresh crunch, balancing the savory flavors beautifully. A drizzle of sesame oil on top ties everything together.

  • Crispy Egg Rolls: These crunchy delights provide a satisfying contrast to the soft noodles, showcasing an array of flavors in each bite. Pair with sweet and sour sauce for a delightful dip!

  • Pickled Vegetables: The tangy bite of pickled radishes or cucumbers brings brightness and cuts through the richness of the noodle bowls, awakening the taste buds and enhancing the meal.

  • Sesame Ginger Salad: A light, refreshing salad with a zesty sesame-ginger dressing adds a crisp component that perfectly complements the noodle dish. Its fresh ingredients will leave you craving more!

  • Mango Lassi: This creamy, refreshing drink will not only quench your thirst but also provide a cooling contrast to the savory flavors of the noodle bowls, creating a harmonious meal.

  • Pineapple Fried Rice: This sweet and savory side packs a flavor punch and the pineapple adds a burst of sweetness that harmonizes with the dish’s savory components, making it a delightful addition.

  • Green Tea: A warm cup of green tea adds a soothing element to your meal, balancing the savory and rich flavors while promoting relaxation.

With these pairings, your Quick and Easy Potsticker Noodle Bowls will transform into a feast that is sure to impress family and friends alike!

Savory Asian Noodle Bowls Recipe FAQs

What type of noodles work best in this recipe?
I absolutely recommend using rice noodles, as they absorb the sauce beautifully and provide a delightful texture. However, if you can’t find them, thin spaghetti or ramen can work as substitutes—just be sure to adjust the cooking time according to their package directions.

How can I store leftovers from my noodle bowls?
Store any leftovers in an airtight container in the fridge for up to 4 days. I suggest adding a splash of water or broth when reheating to keep the noodles from drying out; warm them on the stove over medium-low heat until heated through, which should take about 5-7 minutes.

Can I freeze Savory Asian Noodle Bowls?
Definitely! Portion the noodle bowls into freezer-safe containers, and they will last for up to 3 months in the freezer. When you’re ready to enjoy, let them thaw overnight in the fridge, and then heat them gently on the stove, adding a bit of liquid to restore moisture.

Are there any dietary considerations I should keep in mind?
Certainly! For gluten-free options, be sure to use gluten-free tamari instead of regular soy sauce. If you’re allergic to sesame, you can simply omit the sesame oil and replace it with a neutral oil like canola or vegetable oil. Moreover, if preparing for vegetarians, swap ground pork for crumbled firm tofu or tempeh.

How can I tell if my vegetables are fresh for the stir-fry?
Look for vibrant, crisp veggies without any dark spots or wilting. Fresh coleslaw mix should be crunchy and bright. If you’re using bell peppers, they should feel firm and have a shiny skin. Using fresh vegetables not only enhances the taste but adds nutritional value!

What can I do if my sauce turns out too salty?
If your ginger-soy sauce ends up too salty, you can balance it out by adding more broth or a splash of rice vinegar. Also, incorporating more veggies can dilute the saltiness while enhancing the dish. Enjoy experimenting—cooking is all about finding the perfect balance!

Savory Asian Noodle Bowls

Savory Asian Noodle Bowls: Quick Family-Friendly Flavor Boost

Savory Asian Noodle Bowls are a quick and customizable dish featuring tender noodles, savory protein, and crisp veggies, all in a flavorful ginger-soy sauce.
Prep Time 10 minutes
Cook Time 20 minutes
Cooling Time 10 minutes
Total Time 40 minutes
Servings: 4 bowls
Course: Dinner
Cuisine: Asian
Calories: 450

Ingredients
  

For the Protein
  • 1 pound Ground Pork Substitute with ground chicken, turkey, or crumbled tofu if desired.
  • 1 teaspoon Black or White Pepper Adjust according to taste.
For the Sauce
  • 3 tablespoons Gluten-Free Tamari (or Soy Sauce) Ensure gluten-free for dietary restrictions.
  • 1 cup Chicken Broth (or Water) Broth recommended for better flavor.
  • 1 tablespoon Rice Vinegar Lemon juice can be used as a substitute.
  • 1 tablespoon Ginger Paste Fresh ginger can be substituted.
  • 1 tablespoon Sesame Oil Omit if allergic, replace with neutral oil.
  • 1/2 teaspoon Red Chili Pepper Flakes (Optional) Add according to spice preference.
For the Noodles and Veggies
  • 8 ounces Rice Noodles Alternatively use thin spaghetti or ramen.
  • 4 cups Coleslaw Mix Can be substituted with fresh cabbage or other vegetables.
  • 2 stalks Green Onions Save green parts for garnish.
  • 3 cloves Garlic Use fresh minced or pressed garlic.

Equipment

  • Medium Bowl
  • small bowl
  • Wok or large skillet
  • pot

Method
 

Preparation
  1. In a medium bowl, combine the ground pork with black or white pepper and 1 tablespoon of gluten-free tamari. Mix thoroughly and let it rest.
  2. In a small bowl, whisk together the remaining tamari, chicken broth, rice vinegar, ginger paste, sesame oil, and red chili pepper flakes. Set aside.
  3. Bring a pot of water to a boil and cook the rice noodles according to package instructions, usually 4-6 minutes. Drain and rinse under cold water.
  4. Heat a wok or skillet over medium-high heat. Add the ground pork, cooking for 4-5 minutes until browned. Add the coleslaw mix and white parts of green onions, stir-frying for an additional 3-4 minutes.
  5. Stir in minced garlic and cook for 1 minute. Add the cooked noodles and sauce, stir-frying for 4-5 minutes until heated through.
  6. Remove from heat and let cool for about 10 minutes. Serve in bowls, garnished with reserved green onion tops.

Nutrition

Serving: 1bowlCalories: 450kcalCarbohydrates: 50gProtein: 25gFat: 15gSaturated Fat: 3gPolyunsaturated Fat: 1gMonounsaturated Fat: 1gCholesterol: 75mgSodium: 800mgPotassium: 600mgFiber: 3gSugar: 4gVitamin A: 200IUVitamin C: 15mgCalcium: 30mgIron: 2mg

Notes

Store leftovers in an airtight container for up to 4 days, or freeze in containers for up to 3 months. Reheat with a splash of water or broth.

Tried this recipe?

Let us know how it was!

Sausage Egg & Cheese Kolaches: Fluffy Breakfast Awesomeness

Fresh out of the oven, the enticing aroma of sausage, eggs, and melted cheese wafts through my kitchen, calling everyone to the breakfast table. I love making Sausage Egg & Cheese Kolaches—these soft, pillowy pastries are not only a delightful way to kick-start the day, but they also allow me to shake off the fast food routine with something homemade and heartwarming. Prepping these kolaches in advance means I can easily satisfy morning cravings or host a cozy brunch without any fuss. Plus, who doesn’t love a hassle-free, savory pastry that’s versatile enough to enjoy any day of the week? Ready to whip up a batch that will impress your family and friends? Let’s dive into this delicious recipe together!

Why Are These Kolaches So Irresistible?

Fluffy Pastry Perfection: The dough is soft, pillowy, and a delight to eat.

Savory Filling: A delicious blend of scrambled eggs, cheese, and breakfast sausage creates a mouthwatering flavor explosion.

Make-Ahead Convenience: Prep these kolaches ahead of time for a hassle-free breakfast or brunch, just like my Baked Vegetable Egg Casserole that saves time in the morning.

Versatile Options: Whether you prefer bacon or want to sneak in some veggies, the filling can be easily customized.

Perfect for Any Occasion: These are sure to impress guests at brunch or satisfy your family’s breakfast cravings, making them a delightful choice anytime!

Quick & Easy: No complicated techniques here—just a few simple steps, making them accessible for all home cooks.

Sausage Egg & Cheese Kolaches Ingredients

For the Dough

  • Raw Frozen Dinner Rolls – These serve as the base for your kolaches; look for Rhodes or a similar brand for best results.

For the Filling

  • Fully Cooked Breakfast Sausage – This adds protein and flavor; turkey sausage can be a lighter alternative.
  • Eggs – Acts as the delicious filling base; consider using egg whites for a healthier option.
  • Heavy Cream or Milk – This contributes richness to the egg mixture; substitute with non-dairy milk for a lactose-free treat.
  • Onion Powder – Optional for flavor enhancement; you can omit it if you prefer.
  • Salt – Essential for seasoning; feel free to adjust based on your taste preferences.
  • Pepper – Adds a hint of warmth; freshly ground pepper gives the best flavor.
  • Cheddar Cheese – Melts beautifully, adding creaminess; any good melting cheese, like American or mozzarella, works well too.

For the Topping

  • Everything Bagel Seasoning – This sprinkles on extra flavor and crunch; you can swap it with sesame or poppy seeds if desired.

These Sausage Egg & Cheese Kolaches are sure to be a hit at your breakfast or brunch table!

Step‑by‑Step Instructions for Sausage Egg & Cheese Kolaches

Step 1: Prepare Dough
Line a baking sheet with parchment paper and arrange 12 frozen dinner rolls, spaced one inch apart. Cover them with Saran Wrap to prevent drying out. Allow the dough to rise in a warm place for about 20 minutes, or until they become soft and puffy. This step is crucial for achieving the fluffy texture of your Sausage Egg & Cheese Kolaches.

Step 2: Cook Eggs
In a mixing bowl, whisk together the eggs, heavy cream, onion powder, salt, and pepper until well combined. Heat a non-stick skillet over medium heat and pour in the egg mixture. Stir gently until the eggs are just set but still slightly runny, as they will continue cooking later. Fold in the defrosted breakfast sausage to create the filling for your kolaches.

Step 3: Shape Kolaches
Once the dough has risen, gently flatten and stretch each roll into a 3-inch circle. Place a tablespoon of shredded cheddar cheese and 2 tablespoons of the egg and sausage mixture in the center of each circle. Be careful to leave a ¼-inch border around the edges to allow for sealing. Pinch the dough edges together firmly; if needed, wet your fingers to help seal them securely.

Step 4: Season
Pour some everything bagel seasoning into a shallow dish. Carefully dip the tops of each kolache into the seasoning, ensuring even coverage. Place the shaped kolaches back on the prepared baking sheet, spacing them at least two inches apart. Cover them with a lightly greased piece of plastic wrap and allow to rise for another 30 minutes while preheating your oven to 350°F.

Step 5: Bake
Once your oven has reached the right temperature, bake the kolaches for 15-17 minutes, or until they are golden brown on top. Keep an eye on them; you want a lovely golden color indicating they are fully baked. After removing them from the oven, let them cool on the baking sheet for about 10 minutes before enjoying these delicious Sausage Egg & Cheese Kolaches warm.

Make Ahead Options

These Sausage Egg & Cheese Kolaches are perfect for meal prep enthusiasts! You can prepare the filling (eggs, sausage, and cheese mixture) up to 3 days in advance and store it in an airtight container in the refrigerator. To make the kolaches, assemble them ahead of time and refrigerate (covered) for up to 24 hours before baking. Just remember to let them sit at room temperature for about an hour before popping them into the oven to maintain that fluffy texture. The result? Delicious, freshly baked kolaches ready to enjoy without the morning rush. You’ll love having these on hand for quick breakfasts or delightful brunch gatherings!

How to Store and Freeze Sausage Egg & Cheese Kolaches

  • Room Temperature: Keep freshly baked kolaches at room temperature for up to 2 hours, covered loosely with a kitchen towel to maintain softness.

  • Fridge: Store leftovers in an airtight container for up to 5 days, ensuring they remain fresh and ready for quick breakfasts throughout the week.

  • Freezer: Freeze unbaked kolaches by placing them on a baking sheet until firm, then transfer them to a freezer bag. They can store for up to 3 months. To bake, allow them to thaw in the fridge overnight before proceeding with the baking instructions.

  • Reheating: For best results, reheat baked kolaches in the oven at 350°F for 5-10 minutes until warmed through and soft again, preserving the delicious creamy filling.

Sausage Egg & Cheese Kolaches Variations

Feel free to get creative with these kolaches! Customizing your filling can take your breakfast game to new heights.

  • Veggie-Packed: Incorporate sautéed spinach, bell peppers, or mushrooms for added nutrition and color. Fresh veggies brighten each bite and create a delightful texture contrast.

  • Spicy Kick: Add diced jalapeños or a dash of hot sauce to the egg mixture for a fiery twist. This option is perfect for those who love a little heat with their breakfast.

  • Cheese Lovers: Swap cheddar for pepper jack or gouda to elevate the cheesy goodness. Experimenting with different melty cheeses can lead to a delightful flavor surprise in every kolache.

  • Herb-Infused: Mix fresh herbs like chives, parsley, or dill into the egg filling for a refreshing taste. A sprinkle of herbs enhances the overall flavor profile, making your kolaches feel like a gourmet dish.

  • Bacon Instead: Replace the breakfast sausage with crispy bacon for a savory crunch. The sweet, smoky flavor of bacon brings a whole new richness, pairing beautifully with the eggs and cheese.

  • Turkey Twist: Use turkey sausage or even plant-based sausage for a leaner option without sacrificing flavor. This swap allows everyone, including those seeking lighter options, to enjoy.

  • Sweet Surprise: For a fun variation, add a hint of cinnamon and swap the savory filling for scrambled eggs, sautéed apples, and cheddar. This unexpected combo can balance sweet and savory perfectly.

  • Cream Cheese Blend: Introduce cream cheese into your egg mixture for added creaminess and flavor depth. Cream cheese pairs beautifully with the sausage and adds a velvety texture, elevating each bite.

If you’re in the mood for more creative recipes, you might enjoy my Cheddar Mac Cheese or my delicious Strawberry Cheesecake Bars. The variety of flavors will leave everyone wanting more!

What to Serve with Sausage Egg & Cheese Kolaches

Warm your heart and your table with delightful pairings that create a wholesome breakfast experience.

  • Fresh Fruit Salad: A medley of vibrant seasonal fruits adds a refreshing and sweet contrast to the savory kolaches, balancing flavors beautifully.

  • Roasted Asparagus: The bright, earthy taste of roasted asparagus complements the richness of the kolaches, bringing a delightful crunch to your breakfast spread.

  • Crispy Hash Browns: Golden, crispy hash browns offer a comforting, crunchy texture that pairs perfectly with the fluffy kolaches, creating a satisfying meal. Enjoy them with a sprinkle of seasoning for extra flavor.

  • Light Green Salad: A simple mixed greens salad, dressed with a light vinaigrette, adds a fresh and crisp element, balancing the hearty kolaches on your plate.

  • Savory Yogurt Parfait: Layer Greek yogurt with granola and berries for a creamy, tangy addition that nicely contrasts the warm, savory filling of the kolaches!

  • Coffee or Tea: A rich cup of coffee or soothing herbal tea complements the flavors of the kolaches, enhancing the overall breakfast experience.

These pairings will elevate your meal, ensuring the Sausage Egg & Cheese Kolaches shine at your breakfast or brunch table!

Tips for the Best Sausage Egg & Cheese Kolaches

  • Perfectly Cook Eggs: Avoid overcooking the eggs before filling; they will continue cooking in the oven, keeping your kolaches fluffy and tender.

  • Seal Tightly: Make sure to pinch the edges of the kolaches securely. This prevents any filling leakage that could make a mess during baking.

  • Choose the Right Cheese: Use cheese with good melting properties like cheddar or mozzarella to achieve that delightful gooey texture inside your sausages egg & cheese kolaches.

  • Preheat Properly: Ensure your oven is fully preheated to 350°F before baking. This helps achieve the ideal golden-brown color on your kolaches.

  • Customize Your Fillings: Don’t hesitate to mix and match your protein or add vegetables; this keeps the recipe exciting and allows you to cater to everyone’s taste preferences!

Sausage Egg & Cheese Kolaches Recipe FAQs

What type of dinner rolls should I use for the dough?
I recommend using raw frozen dinner rolls like Rhodes or a comparable brand, as these provide the perfect dough structure for your kolaches. They rise nicely and create that soft, pillowy texture that makes these kolaches so irresistible!

How can I store leftover kolaches?
You can store your Sausage Egg & Cheese Kolaches in an airtight container in the fridge for up to 5 days. Just make sure to let them cool completely before sealing them. To reheat, simply pop them in the microwave for 20-30 seconds, or place them in a preheated oven at 350°F for a few minutes until they’re nice and warm.

Can I freeze the kolaches? What’s the best way to do it?
Absolutely! Freeze unbaked kolaches by placing them on a baking sheet until firm, which usually takes about 1-2 hours. Once frozen, transfer them to a freezer bag, where they can be stored for up to 3 months. When you’re ready to bake, thaw them overnight in the fridge, then continue with the baking instructions once they return to room temperature.

What should I do if the kolaches leak during baking?
If you experience leaks while baking, it may be due to not sealing the edges tightly enough. Make sure to pinch the dough edges together firmly before dipping in seasoning. If they still leak, consider reducing the amount of filling slightly for the next time or using a cheese that melts less aggressively to minimize leakage.

Can these kolaches be made dairy-free?
Yes, definitely! To make dairy-free Sausage Egg & Cheese Kolaches, substitute the heavy cream with a non-dairy milk, like almond or oat milk, and use a dairy-free cheese. This way, you won’t miss out on the soft and creamy filling while still accommodating dietary needs.

Are these kolaches suitable for pets?
While the ingredients are generally safe for humans, it’s best to keep your homemade kolaches away from pets, particularly because of the cheese and possible seasonings. Always consult your veterinarian regarding your pet’s specific dietary needs and restrictions.

Sausage Egg & Cheese Kolaches

Sausage Egg & Cheese Kolaches: Fluffy Breakfast Awesomeness

Delightful homemade Sausage Egg & Cheese Kolaches, perfect for breakfast or brunch.
Prep Time 50 minutes
Cook Time 17 minutes
Rising Time 30 minutes
Total Time 1 hour 37 minutes
Servings: 12 kolaches
Course: Breakfast
Cuisine: American
Calories: 220

Ingredients
  

For the Dough
  • 12 rolls Raw Frozen Dinner Rolls Look for Rhodes or a similar brand for best results.
For the Filling
  • 1 package Fully Cooked Breakfast Sausage Turkey sausage can be a lighter alternative.
  • 4 large Eggs Consider using egg whites for a healthier option.
  • 1/4 cup Heavy Cream or Milk Substitute with non-dairy milk for a lactose-free treat.
  • 1/2 teaspoon Onion Powder Optional for flavor enhancement.
  • 1/2 teaspoon Salt Essential for seasoning.
  • 1/4 teaspoon Pepper Freshly ground pepper gives the best flavor.
  • 1 cup Cheddar Cheese Any good melting cheese, like American or mozzarella, works well too.
For the Topping
  • 1 tablespoon Everything Bagel Seasoning You can swap it with sesame or poppy seeds if desired.

Equipment

  • Baking Sheet
  • Non-stick skillet
  • Mixing Bowl
  • Plastic Wrap
  • Parchment paper

Method
 

Step-by-Step Instructions
  1. Line a baking sheet with parchment paper and arrange 12 frozen dinner rolls, spaced one inch apart. Cover them with Saran Wrap to prevent drying out. Allow the dough to rise in a warm place for about 20 minutes, or until they become soft and puffy.
  2. In a mixing bowl, whisk together the eggs, heavy cream, onion powder, salt, and pepper until well combined. Heat a non-stick skillet over medium heat and pour in the egg mixture. Stir gently until the eggs are just set but still slightly runny. Fold in the defrosted breakfast sausage.
  3. Once the dough has risen, gently flatten and stretch each roll into a 3-inch circle. Place a tablespoon of shredded cheddar cheese and 2 tablespoons of the egg and sausage mixture in the center of each circle. Pinch the dough edges together firmly.
  4. Pour some everything bagel seasoning into a shallow dish. Carefully dip the tops of each kolache into the seasoning. Place the shaped kolaches back on the prepared baking sheet, spacing them at least two inches apart. Allow to rise for another 30 minutes while preheating your oven to 350°F.
  5. Bake the kolaches for 15-17 minutes, or until they are golden brown on top. After removing them from the oven, let them cool on the baking sheet for about 10 minutes before enjoying.

Nutrition

Serving: 1kolacheCalories: 220kcalCarbohydrates: 20gProtein: 10gFat: 11gSaturated Fat: 5gPolyunsaturated Fat: 1gMonounsaturated Fat: 5gCholesterol: 150mgSodium: 550mgPotassium: 150mgFiber: 1gSugar: 1gVitamin A: 500IUCalcium: 150mgIron: 1.5mg

Notes

These kolaches can be customized with different fillings and are perfect for any breakfast or brunch occasion.

Tried this recipe?

Let us know how it was!

Moist Carrot Zucchini Muffins to Delight Kids and Adults

“I can’t believe they actually love them!” I overheard my friend exclaiming in disbelief as her kids devoured another batch of Carrot Zucchini Muffins. Trust me, these delightful treats are a game-changer, perfectly crafted to turn even the pickiest of eaters into veggie enthusiasts. Packed with whole grains and naturally sweetened with maple syrup or honey, these muffins not only make for a healthy snack but also a wholesome breakfast option that you can feel good about serving. Plus, with a gluten-free variation, they cater to all dietary needs without compromising on taste or quality. So, are you ready to whip up a batch of these moist, tender muffins that are sure to brighten your mornings? Let’s dive into this flavorful adventure together!

Why Are Carrot Zucchini Muffins So Irresistible?

Deliciously Moist: These muffins are tender and moist, making every bite delightful for both kids and adults alike.

Nutritious Ingredients: Packed with whole grains and veggies, they provide a guilt-free indulgence that promotes healthy eating.

Naturally Sweetened: Using maple syrup or honey gives just the right sweetness without the need for refined sugars.

Versatile and Fun: With options like gluten-free variations and the choice of adding nuts or chocolate chips, they are customizable to suit everyone’s taste.

Easy to Make: This simple recipe means you can whip up a delicious batch in no time, just like my Zucchini Sweet Potato Skillet for busy weekday breakfasts!

Freezable Goodness: Make extras and store them for a quick snack later—perfect for those busy days when you need healthy options on hand.

Carrot Zucchini Muffin Ingredients

For the Batter

  • White Whole Wheat Flour – Offers structure and fiber; substitute with all-purpose flour for a lighter texture.
  • Baking Soda – Serves as a leavening agent, ensuring your muffins rise beautifully.
  • Cinnamon – Infuses warmth and flavor; feel free to add nutmeg for a spicier twist.
  • Salt – Enhances the overall flavor balance of the muffins.
  • Melted Butter – Brings richness and moisture; coconut oil works great for a dairy-free alternative.
  • Pure Maple Syrup or Honey – Naturally sweetens the muffins; agave syrup is an excellent vegan swap.
  • Large Egg – Acts as a binder for the ingredients; use a flax egg for a vegan option (1 tbsp ground flaxseed + 2.5 tbsp water).
  • Vanilla Extract – Lends a lovely aromatic flavor to the mix.

For the Vegetables

  • Finely Grated Zucchini – Contributes moisture and essential nutrients; no substitute necessary.
  • Finely Grated Carrot – Offers natural sweetness and vibrant color; can be swapped with grated apple for an extra sweetness boost.

For the Mix-Ins

  • Raisins – Add a burst of natural sweetness and texture; chocolate chips can be a fun alternative if desired.

Step‑by‑Step Instructions for Carrot Zucchini Muffins

Step 1: Preheat the Oven
Begin by preheating your oven to 350°F (175°C). While the oven warms up, prepare a mini muffin pan by generously spraying it with nonstick cooking spray. This will ensure that your Carrot Zucchini Muffins release easily after baking, allowing for clean and perfect muffins every time.

Step 2: Combine Dry Ingredients
In a medium bowl, whisk together 1 ½ cups of white whole wheat flour, 1 teaspoon of baking soda, 1 teaspoon of ground cinnamon, and ½ teaspoon of salt. This blend of dry ingredients will provide a flavorful base and help your muffins rise. Once mixed, set the bowl aside while you work on the wet ingredients.

Step 3: Prepare Wet Ingredients
In a large mixing bowl, combine ½ cup of melted butter, ½ cup of pure maple syrup (or honey), 1 large egg, and 1 teaspoon of vanilla extract. Whisk these ingredients together until fully blended—this mixture will add moisture and sweetness to your Carrot Zucchini Muffins, so it’s important they’re well combined.

Step 4: Mix Wet and Dry Ingredients
Gradually fold the dry flour mixture into the wet ingredients, stirring gently until just combined. Be careful not to overmix, as this can make the muffins dense. You want the batter to remain slightly lumpy, signaling that it’s ready for the delicious add-ins!

Step 5: Add Vegetables and Raisins
Once your batter is mixed, fold in 1 cup of finely grated zucchini, 1 cup of finely grated carrot, and ½ cup of raisins (or chocolate chips if you prefer). Make sure these ingredients are distributed evenly throughout the batter, as they’ll add both moisture and sweetness to your Carrot Zucchini Muffins.

Step 6: Fill Muffin Pan
Spoon the batter into the prepared mini muffin cups, filling each one about three-quarters full. This allows the muffins to rise without overflowing while baking. Take a moment to smooth out the tops for an even finish, ensuring these muffins will look as delightful as they taste.

Step 7: Bake Until Golden
Place the muffin pan in the preheated oven and bake for 15–20 minutes, or until a toothpick inserted into the center comes out clean. You’ll know they’re ready when they turn a golden brown and spring back slightly when pressed. Keep an eye on them to avoid overbaking.

Step 8: Cool and Transfer
Once baked, remove the muffin pan from the oven and let it sit for a few minutes. Then, carefully transfer the muffins to a wire rack to cool completely. This helps maintain their texture and prevents them from becoming soggy. Your delightful Carrot Zucchini Muffins are now ready to enjoy!

Expert Tips for Carrot Zucchini Muffins

  • Zucchini Care: Ensure zucchini is well-drained to avoid excess moisture, which can make muffins soggy.
  • Egg Beating: For lighter muffins, beat the egg until pale before mixing with wet ingredients; this creates a fluffier texture.
  • Mix Gently: Avoid overmixing the batter when combining wet and dry ingredients; a slightly lumpy texture is perfect for Carrot Zucchini Muffins.
  • Baking Time: Keep an eye on your muffins while baking; even a minute too long can lead to dryness and affect the overall flavor.
  • Storage Tip: Muffins can be frozen and stored in an airtight container for several months. Just thaw them overnight in the fridge for a quick snack!

Carrot Zucchini Muffins Variations

Feel free to play with these muffins and make them your own; customize these moist bites to tantalize your taste buds!

  • Nutty Delight: Add chopped walnuts or pecans for a delightful crunch and extra nutrients. It’s a fun surprise in every bite!

  • Spicy Twist: Experiment with spices like ginger or pumpkin spice to bring warmth and invigorating aromas that elevate the flavor profile.

  • Gluten-Free: Substitute white whole wheat flour with a blend of whole grain gluten-free flour for a gluten-free version that everyone can enjoy.

  • Chocolate Lovers: Swap raisins for semi-sweet or dark chocolate chips to create a rich, sweetened treat kids will devour!

  • Smooth Texture: For an ultra-smooth batter, blend the grated veggies with the wet ingredients before mixing. This makes them practically undetectable!

  • Fruit Fusion: Replace grated carrot with grated apple for a unique sweetness that adds a light, fruity touch to your muffins.

  • Coconut Version: Incorporate shredded coconut for a tropical twist that adds great texture and fiber. Just like in my Pistachio Carrot Cake, this addition can create delightful flavor combinations!

  • Cinnamon Sugar Topping: Before baking, sprinkle brown sugar and cinnamon on top of the muffins for a sweet crust that adds a beautiful, crunchy finish.

Allow your creativity to shine as you explore these variations, and don’t hesitate to try other combinations that resonate with your family’s taste! Enjoy this adventure into baking that brings joy to every bite!

Storage Tips for Carrot Zucchini Muffins

Room Temperature: Store your Carrot Zucchini Muffins in an airtight container for up to 1 week. Keep them in a cool, dry place away from sunlight to maintain freshness.

Fridge: For extended freshness, refrigerate muffins for up to 2 weeks. Be sure to use a sealed container to prevent them from drying out.

Freezer: Freeze muffins for up to 3 months. Wrap each muffin tightly in plastic wrap or place them in a freezer-safe bag to prevent freezer burn.

Reheating: To enjoy frozen muffins, thaw them in the fridge overnight and warm them in a microwave for about 15-20 seconds or bake at 350°F for 5-10 minutes until heated through.

Make Ahead Options

These delightful Carrot Zucchini Muffins are perfect for meal prep, making your mornings a breeze! You can grate and store the zucchini and carrot up to 3 days in advance in the refrigerator; just be sure to keep them in an airtight container to maintain freshness. Additionally, you can prepare the dry ingredients (flour, baking soda, cinnamon, and salt) and store them in a separate container for up to 1 week. When you’re ready to bake, simply combine the wet ingredients, mix in your prepped veggies, and proceed with filling and baking the muffin cups. This way, you’ll enjoy the same delicious quality with minimal effort, making your time in the kitchen as efficient as possible!

What to Serve with Kid-Friendly Gluten-Free Carrot Zucchini Muffins

Imagine the joy of creating a wholesome breakfast or snack spread that pairs beautifully with tender muffins, enticing everyone at the table.

  • Creamy Yogurt: A dollop of yogurt brings a tangy contrast, creating a delightful balance with the sweetness of the muffins. It dips beautifully too!

  • Nut Butter Delight: Spread almond or peanut butter on your muffin for added protein and a rich, nutty flavor that complements the moist texture perfectly.

  • Fresh Fruit Salad: A vibrant fruit salad adds a refreshing crunch and bright flavors, enhancing the muffins while boosting their nutritional profile.

  • Savory Scrambled Eggs: Serve fluffy scrambled eggs for a protein-packed meal. The savory taste contrasts the sweetness of the muffins, creating a balanced breakfast.

  • Homemade Smoothies: Blend up a refreshing smoothie, perhaps with spinach and banana, for a nutrient boost that hydrates and satisfies alongside the muffins.

  • Honey Drizzle: A light drizzle of honey over each muffin can elevate the sweetness, making them feel extra indulgent without overdoing it.

  • Herbal Tea: Enjoy a warm cup of herbal tea, like chamomile or mint, to complement the flavors of the muffins while providing a calming experience.

  • Milk or Dairy-Free Options: Serve with a glass of cold milk or a dairy-free alternative—both are classic choices that pair wonderfully with these wholesome treats.

These delightful pairings will turn your Carrot Zucchini Muffins into the centerpiece of a joyful meal, captivating the taste buds of everyone around the table!

Carrot Zucchini Muffins Recipe FAQs

How do I select ripe zucchini and carrots for my muffins?
Absolutely! When choosing zucchini and carrots, look for firm, vibrant ones without dark spots or blemishes. The skin of the zucchini should be smooth, and the carrots should feel crisp to the touch. For the best flavor, opt for freshly harvested vegetables, if possible.

What is the best way to store leftover Carrot Zucchini Muffins?
Very! For short-term storage, keep your muffins in an airtight container at room temperature for up to a week. If you want them to last longer, refrigerate them for up to 2 weeks, ensuring they’re sealed well to maintain their moisture.

Can I freeze Carrot Zucchini Muffins? If so, how?
Yes! To freeze your muffins, first, let them cool completely. Then, wrap each muffin tightly in plastic wrap or place them in a freezer-safe bag, ensuring all the air is removed to prevent freezer burn. They can be frozen for up to 3 months. When you’re ready to enjoy one, just thaw overnight in the fridge, and you’re set for a quick snack!

What can I do if my muffins turn out too dense?
Oh no! If your muffins are dense, it could be due to overmixing the batter or not enough leavening agent. Make sure to mix gently and only until combined. Additionally, check that your baking soda is fresh—an expired leavening agent can prevent muffins from rising.

Are Carrot Zucchini Muffins suitable for people with dietary restrictions?
Absolutely! This recipe not only has a gluten-free option but can also accommodate vegans by using a flax egg instead of a regular egg. As always, check for other allergens like nuts if you include those mix-ins. Each variation can be made to suit various dietary needs, making them a great snack for everyone!

How can I enhance the flavors of my Carrot Zucchini Muffins?
Certainly! You can experiment with different spices, such as adding a pinch of nutmeg or ginger, to give your muffins a unique twist. For an added crunch, consider mixing in some chopped nuts, like walnuts or pecans. Feel free to play around and find your perfect flavor combination!

Carrot Zucchini Muffins

Moist Carrot Zucchini Muffins to Delight Kids and Adults

These Carrot Zucchini Muffins are deliciously moist and packed with nutrients, making them a favorite among kids and adults alike.
Prep Time 10 minutes
Cook Time 20 minutes
Cooling Time 10 minutes
Total Time 40 minutes
Servings: 12 muffins
Course: Breakfast
Cuisine: American
Calories: 150

Ingredients
  

For the Batter
  • 1.5 cups white whole wheat flour substitute with all-purpose flour for a lighter texture
  • 1 teaspoon baking soda serves as a leavening agent
  • 1 teaspoon ground cinnamon infuses warmth; nutmeg can be added
  • 0.5 teaspoon salt enhances flavor
  • 0.5 cups melted butter coconut oil for a dairy-free alternative
  • 0.5 cups pure maple syrup or honey agave syrup is a vegan option
  • 1 large egg use a flax egg for a vegan option
  • 1 teaspoon vanilla extract
For the Vegetables
  • 1 cup finely grated zucchini no substitute necessary
  • 1 cup finely grated carrot can be swapped with grated apple
For the Mix-Ins
  • 0.5 cups raisins chocolate chips can be used if desired

Equipment

  • Mini Muffin Pan
  • Mixing bowls
  • Whisk

Method
 

Step-by-Step Instructions
  1. Preheat your oven to 350°F (175°C) and prepare a mini muffin pan with nonstick spray.
  2. In a medium bowl, whisk together the flour, baking soda, cinnamon, and salt. Set aside.
  3. In a large bowl, mix together the melted butter, maple syrup, egg, and vanilla extract.
  4. Fold the dry ingredients into the wet ingredients gently until just combined.
  5. Add the grated zucchini, carrot, and raisins to the batter, mixing until evenly distributed.
  6. Spoon the batter into the muffin cups, filling each about 3/4 full.
  7. Bake for 15-20 minutes or until a toothpick comes out clean. Allow to cool slightly before transferring to a wire rack.

Nutrition

Serving: 1muffinCalories: 150kcalCarbohydrates: 22gProtein: 3gFat: 6gSaturated Fat: 3gPolyunsaturated Fat: 1gMonounsaturated Fat: 1gCholesterol: 27mgSodium: 150mgPotassium: 120mgFiber: 2gSugar: 5gVitamin A: 450IUVitamin C: 5mgCalcium: 50mgIron: 1mg

Notes

Muffins can be frozen for up to 3 months. Thaw overnight in the fridge and warm before serving.

Tried this recipe?

Let us know how it was!