Coconut Basil Chicken: A Flavorful Recipe You’ll Love!

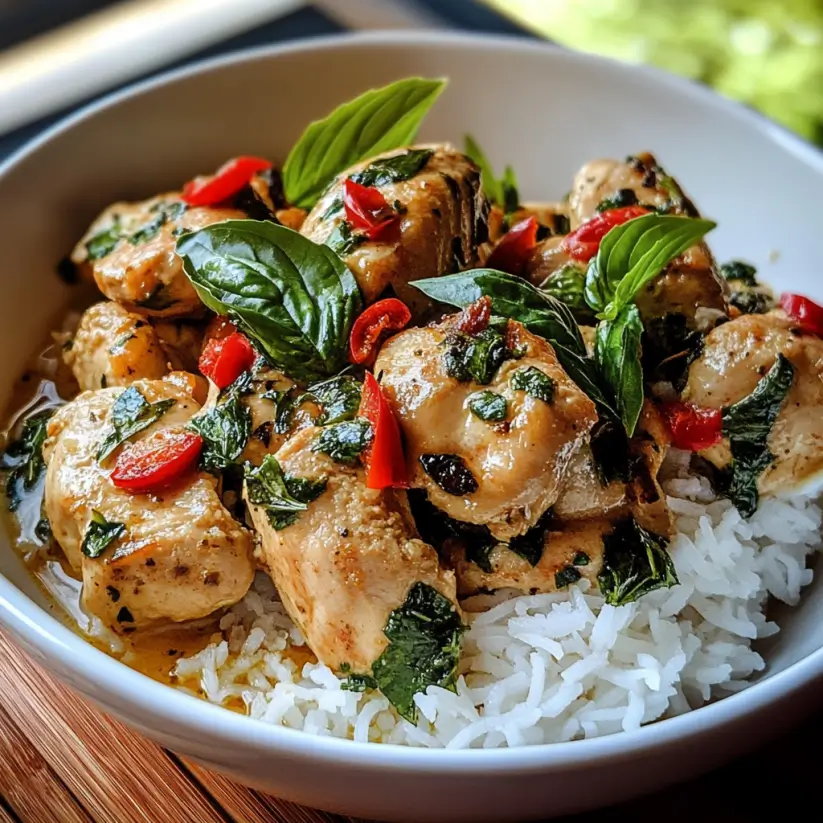
Introduction to Coconut Basil Chicken

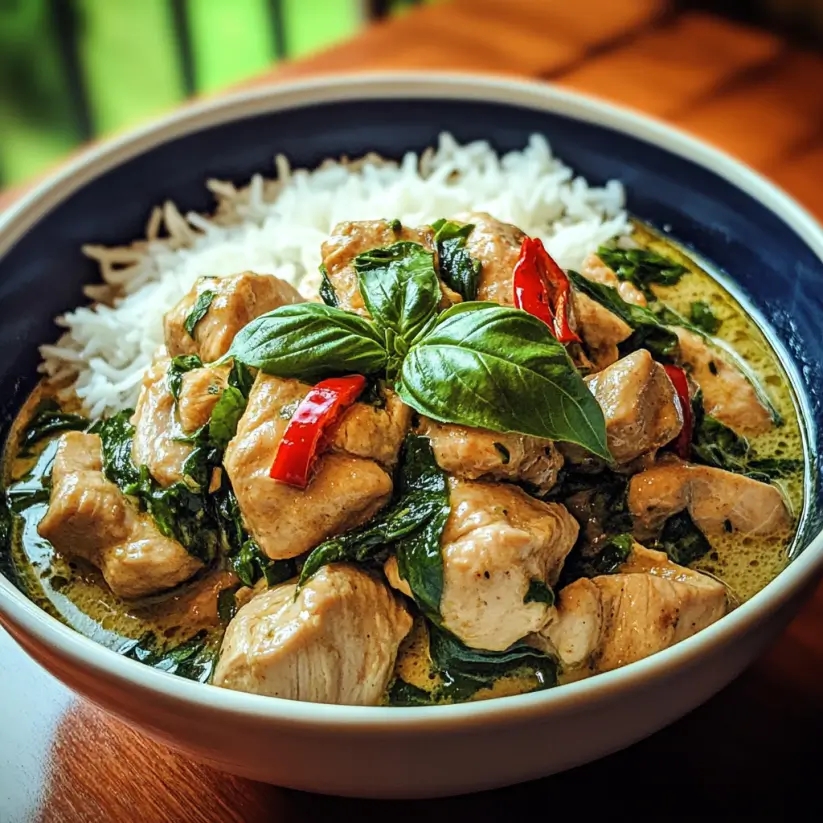
Cooking has always been my way of unwinding after a long day. One dish that never fails to bring a smile to my face is Coconut Basil Chicken. This delightful recipe combines tender chicken thighs with a creamy coconut milk sauce, infused with fresh basil, garlic, and ginger. It’s a quick solution for busy weeknights or a dish that will impress your loved ones during a weekend gathering. The vibrant flavors and comforting aroma will transport you to a tropical paradise, making every bite a mini-vacation. Trust me, once you try this, it’ll become a staple in your kitchen!

Why You’ll Love This Coconut Basil Chicken

This Coconut Basil Chicken is a game-changer for anyone who craves deliciousness without spending hours in the kitchen. It’s quick to prepare, taking just 30 minutes from start to finish. The creamy coconut milk sauce is rich and flavorful, while the fresh basil adds a burst of brightness. Plus, it’s gluten-free, making it a fantastic option for various dietary needs. You’ll love how effortlessly it transforms a simple dinner into something extraordinary!

Ingredients for Coconut Basil Chicken

Gathering the right ingredients is the first step to creating a mouthwatering Coconut Basil Chicken. Here’s what you’ll need:

  • Vegetable oil: This is your cooking base, perfect for sautéing the chicken to golden perfection.
  • Boneless, skinless chicken thighs: Tender and juicy, they soak up the flavors beautifully. You can also use chicken breasts or shrimp if you prefer.
  • Salt and black pepper: Essential seasonings that enhance the dish’s overall flavor.
  • Coconut milk: The star of the show! It adds creaminess and a hint of sweetness, making the sauce irresistible.
  • Fish sauce: A little goes a long way in adding depth and umami to the dish.
  • Brown sugar: This balances the flavors, giving a subtle sweetness that complements the coconut milk.
  • Lime juice: Freshly squeezed lime juice brightens the dish and adds a zesty kick.
  • Fresh basil leaves: Chopped basil brings a fragrant, herbal note that elevates the entire dish.
  • Garlic: Minced garlic infuses the dish with warmth and aroma.
  • Fresh ginger: Grated ginger adds a spicy, aromatic touch that pairs perfectly with the coconut milk.
  • Cooked rice: Serve this dish over rice to soak up all that delicious sauce.

For those who like a bit of heat, consider adding sliced red chili peppers or a dash of sriracha. And if you’re looking for a different protein option, shrimp works wonderfully in this recipe. You can find the exact quantities for each ingredient at the bottom of the article, ready for printing!

How to Make Coconut Basil Chicken

Now that you have all your ingredients ready, let’s dive into the cooking process. Making Coconut Basil Chicken is straightforward and fun. Follow these simple steps, and you’ll have a delicious meal on the table in no time!

Step 1: Sauté the Chicken

Start by heating the vegetable oil in a large skillet over medium-high heat. Once the oil is hot, add the bite-sized chicken thighs. Season them with salt and black pepper. Cook for about 5-7 minutes, stirring occasionally, until the chicken is browned and cooked through. This step is crucial for locking in flavor!

Step 2: Add Aromatics

Reduce the heat to medium and toss in the minced garlic and grated ginger. Sauté for 1-2 minutes until they become fragrant. The aroma will fill your kitchen, making it hard to resist sneaking a taste. These aromatics are the backbone of your Coconut Basil Chicken!

Step 3: Create the Sauce

Next, pour in the creamy coconut milk, followed by the fish sauce, brown sugar, and lime juice. Stir everything together until well combined. Bring the mixture to a gentle simmer. This is where the magic happens, as the flavors meld beautifully!

Step 4: Simmer the Dish

Let the dish simmer for about 10 minutes, stirring occasionally. This allows the chicken to absorb all those delicious flavors while the sauce thickens slightly. Keep an eye on it; you want it to be bubbling gently, not boiling furiously!

Step 5: Finish with Basil

Once the chicken is cooked through, stir in the chopped fresh basil. Cook for an additional 2 minutes until the basil wilts. This final touch adds a burst of freshness that elevates the entire dish. Trust me, you’ll want to savor this moment!

Step 6: Serve and Enjoy

Now it’s time to serve your Coconut Basil Chicken! Spoon it over a bed of cooked rice, allowing the sauce to soak in. Enjoy every bite of this flavorful dish. It’s perfect for a cozy dinner or impressing guests. Bon appétit!

Tips for Success

  • Prep all your ingredients before starting to cook. It makes the process smoother and more enjoyable.
  • Don’t rush the sautéing step; browning the chicken adds depth to the flavor.
  • Adjust the seasoning to your taste. A little extra lime juice can brighten the dish even more.
  • For a creamier sauce, let it simmer a bit longer.
  • Garnish with extra basil or lime wedges for a fresh presentation.

Equipment Needed

  • Large skillet: A non-stick skillet works wonders for easy cooking and cleanup.
  • Wooden spoon: Perfect for stirring and scraping up those delicious bits.
  • Measuring cups and spoons: Essential for accurate ingredient portions.
  • Cutting board: A sturdy surface for chopping your ingredients.
  • Knife: A sharp chef’s knife makes prep a breeze.

Variations

  • Spicy Coconut Basil Chicken: Add sliced red chili peppers or a dash of sriracha for a fiery kick.
  • Vegetarian Option: Substitute chicken with tofu or chickpeas for a plant-based twist.
  • Seafood Delight: Use shrimp or scallops instead of chicken for a seafood version that’s equally delicious.
  • Herb Infusion: Experiment with other herbs like cilantro or mint alongside basil for a unique flavor profile.
  • Low-Carb Version: Serve over cauliflower rice instead of regular rice for a healthier alternative.

Serving Suggestions

  • Rice: Serve your Coconut Basil Chicken over fluffy jasmine or basmati rice to soak up the sauce.
  • Vegetables: Pair with steamed broccoli or sautéed green beans for a colorful plate.
  • Drink: Enjoy with a refreshing Thai iced tea or a crisp lager.
  • Garnish: Top with lime wedges and extra basil for a vibrant presentation.

FAQs about Coconut Basil Chicken

As you embark on your culinary adventure with Coconut Basil Chicken, you might have a few questions. Here are some common queries that can help you along the way:

Can I use chicken breasts instead of thighs?

Absolutely! While I love the tenderness of chicken thighs, chicken breasts work just as well. Just be mindful of cooking time, as they may cook a bit faster.

Is Coconut Basil Chicken spicy?

This dish is not inherently spicy, but you can easily add heat. Consider incorporating sliced red chili peppers or a dash of sriracha to kick things up a notch!

What can I serve with Coconut Basil Chicken?

Serving this dish over rice is a classic choice. You can also pair it with steamed vegetables or a fresh salad for a balanced meal.

Can I make this dish ahead of time?

Yes! Coconut Basil Chicken can be made ahead and stored in the fridge for a couple of days. Just reheat gently on the stove before serving.

Is this recipe gluten-free?

Yes, Coconut Basil Chicken is gluten-free! Just ensure that the fish sauce you use is gluten-free, and you’re all set for a delicious meal.

Final Thoughts

Cooking Coconut Basil Chicken is more than just preparing a meal; it’s about creating a moment of joy in your kitchen. The rich, creamy sauce and fragrant basil transform a simple dinner into a delightful experience. Each bite is a reminder of the beauty of home-cooked meals, filled with love and flavor. Whether you’re sharing it with family or enjoying a quiet night in, this dish brings warmth and satisfaction. I hope you find as much joy in making and savoring this Coconut Basil Chicken as I do. Happy cooking!

Ranis

Coconut Basil Chicken: A Flavorful Recipe You’ll Love!

Coconut Basil Chicken is a flavorful dish made with tender chicken thighs cooked in a creamy coconut milk sauce, infused with fresh basil, garlic, and ginger.
Prep Time 10 minutes
Cook Time 20 minutes
Total Time 30 minutes
Servings: 4 servings
Course: Main Dish
Cuisine: Thai
Calories: 350

Ingredients
  

  • 2 tablespoons vegetable oil
  • 1 pound boneless skinless chicken thighs, cut into bite-sized pieces
  • 1 teaspoon salt
  • 1/2 teaspoon black pepper
  • 1 can 14 ounces coconut milk
  • 1 tablespoon fish sauce
  • 1 tablespoon brown sugar
  • 1 tablespoon lime juice
  • 1 cup fresh basil leaves chopped
  • 2 cloves garlic minced
  • 1 teaspoon fresh ginger grated
  • Cooked rice for serving

Method
 

  1. In a large skillet, heat the vegetable oil over medium-high heat. Add the chicken pieces, season with salt and pepper, and cook until browned, about 5-7 minutes.
  2. Reduce the heat to medium and add the minced garlic and grated ginger to the skillet. Sauté for 1-2 minutes until fragrant.
  3. Pour in the coconut milk, fish sauce, brown sugar, and lime juice. Stir to combine and bring to a gentle simmer.
  4. Let the mixture simmer for about 10 minutes, stirring occasionally, until the chicken is cooked through and the sauce has thickened slightly.
  5. Stir in the chopped basil and cook for an additional 2 minutes until the basil is wilted.
  6. Serve the coconut basil chicken over cooked rice and enjoy!

Nutrition

Serving: 1servingCalories: 350kcalCarbohydrates: 8gProtein: 25gFat: 22gSaturated Fat: 18gPolyunsaturated Fat: 4gCholesterol: 100mgSodium: 600mgFiber: 1gSugar: 5g

Notes

  • For a spicier version, add sliced red chili peppers or a dash of sriracha to the sauce.
  • Substitute chicken thighs with chicken breasts or shrimp for a different protein option.

Tried this recipe?

Let us know how it was!

Brown Sugar Glazed Salmon: A Delicious Recipe to Try!

Introduction to Brown Sugar Glazed Salmon

When I think of a meal that brings comfort and joy, Brown Sugar Glazed Salmon tops the list.

This dish is not just about flavor; it’s about creating a moment.

Whether you’re looking for a quick solution after a long day or aiming to impress your loved ones at dinner, this recipe fits the bill perfectly.

The sweet and savory glaze transforms simple salmon fillets into a culinary delight.

Plus, it’s easy to whip up, making it a go-to for busy weeknights or special occasions alike.

Let’s dive into this delicious adventure!

Why You’ll Love This Brown Sugar Glazed Salmon

This Brown Sugar Glazed Salmon is a game-changer in the kitchen.

It’s incredibly easy to prepare, taking just 25 minutes from start to finish.

The combination of sweet brown sugar and savory soy sauce creates a flavor explosion that will have your taste buds dancing.

Whether you’re a seasoned chef or a kitchen novice, this dish is sure to impress.

It’s a quick, delicious way to elevate your weeknight dinners!

Ingredients for Brown Sugar Glazed Salmon

Creating this Brown Sugar Glazed Salmon is a breeze, and it all starts with the right ingredients.

Here’s what you’ll need:

  • Salmon fillets: Fresh or frozen, salmon is the star of the show. Look for fillets that are bright in color and firm to the touch.
  • Brown sugar: This adds a rich sweetness that caramelizes beautifully during baking. Light or dark brown sugar works well.
  • Soy sauce: A savory element that balances the sweetness of the brown sugar. Opt for low-sodium if you’re watching your salt intake.
  • Dijon mustard: This adds a tangy kick, enhancing the overall flavor profile. It’s a secret weapon in many marinades!
  • Olive oil: Helps the glaze stick to the salmon and adds a touch of richness. You can substitute with melted butter for a different flavor.
  • Minced garlic: Fresh garlic brings a wonderful aroma and depth to the dish. If you’re in a pinch, garlic powder can work too.
  • Black pepper: A dash of this adds a subtle heat. Feel free to adjust based on your spice preference.
  • Salt: Just a pinch to enhance all the flavors. Remember, the soy sauce already has salt, so don’t overdo it!
  • Fresh parsley: This is for garnish, adding a pop of color and freshness to your plated dish.

For those who like to experiment, consider adding a pinch of red pepper flakes for a spicy kick.

All ingredient quantities are listed at the bottom of the article for easy reference and printing.

Happy cooking!

How to Make Brown Sugar Glazed Salmon

Making Brown Sugar Glazed Salmon is a straightforward process that anyone can master.

With just a few simple steps, you’ll have a delicious meal ready to impress.

Let’s break it down step by step.

Step 1: Preheat the Oven

Start by preheating your oven to 400°F (200°C).

This step is crucial because it ensures even cooking.

While the oven heats up, line a baking sheet with parchment paper.

This makes cleanup a breeze and prevents the salmon from sticking.

Trust me, your future self will thank you for this little effort!

Step 2: Prepare the Glaze

In a small bowl, whisk together the brown sugar, soy sauce, Dijon mustard, olive oil, minced garlic, black pepper, and salt.

Each ingredient plays a role in creating that irresistible glaze.

The brown sugar caramelizes, while the soy sauce adds depth.

Dijon mustard gives it a tangy twist, and garlic infuses a lovely aroma.

Mix until everything is well combined, and you’ll have a glaze that’s ready to shine!

Step 3: Prepare the Salmon

Now, it’s time to prepare the salmon.

Place the fillets skin-side down on the lined baking sheet.

Using a brush or spoon, generously apply the brown sugar glaze over the top of each fillet.

Make sure to cover them well; this is where the magic happens!

The glaze will create a beautiful crust as it bakes.

Step 4: Bake the Salmon

Slide the baking sheet into your preheated oven.

Bake the salmon for 12-15 minutes.

Keep an eye on it; the salmon is done when it flakes easily with a fork.

If you have a meat thermometer, aim for an internal temperature of 145°F (63°C).

This ensures it’s perfectly cooked and safe to eat.

Step 5: Garnish and Serve

Once the salmon is out of the oven, let it rest for a couple of minutes.

This helps the juices redistribute, making it even more tender.

Before serving, sprinkle some chopped fresh parsley on top for a pop of color.

It’s all about presentation, right?

Now, dig in and enjoy your delicious Brown Sugar Glazed Salmon!

Tips for Success

  • Always use fresh salmon for the best flavor and texture.
  • Don’t skip the resting time after baking; it enhances juiciness.
  • Experiment with the glaze by adding citrus zest for a fresh twist.
  • Keep an eye on the baking time; ovens can vary.
  • Pair with seasonal veggies for a balanced meal.

Equipment Needed

  • Baking sheet: A standard sheet works, but a rimmed one prevents spills.
  • Parchment paper: For easy cleanup; aluminum foil is a good alternative.
  • Mixing bowl: Any size will do for whisking the glaze.
  • Brush or spoon: For applying the glaze; a spatula can also work.

Variations

  • Spicy Brown Sugar Glazed Salmon: Add a pinch of red pepper flakes to the glaze for a fiery kick that complements the sweetness.
  • Maple Glazed Salmon: Swap out brown sugar for maple syrup for a unique twist that adds a rich, earthy flavor.
  • Herb-Infused Glaze: Mix in fresh herbs like thyme or rosemary to the glaze for an aromatic touch that elevates the dish.
  • Honey Mustard Glaze: Replace Dijon mustard with honey mustard for a sweeter, tangy flavor profile.
  • Gluten-Free Option: Ensure your soy sauce is gluten-free or use tamari for a similar taste without the gluten.

Serving Suggestions

  • Rice or Quinoa: Serve the salmon over a bed of fluffy rice or quinoa for a hearty meal.
  • Steamed Vegetables: Pair with seasonal steamed veggies like asparagus or broccoli for a colorful plate.
  • White Wine: A chilled glass of Sauvignon Blanc complements the dish beautifully.
  • Presentation: Serve on a rustic wooden board for a charming, homey feel.

FAQs about Brown Sugar Glazed Salmon

Can I use frozen salmon for this recipe?

Absolutely! Just make sure to thaw the salmon completely before cooking. This ensures even cooking and helps the glaze stick better.

What can I substitute for brown sugar?

If you’re out of brown sugar, you can use white sugar mixed with a bit of molasses. This will mimic the flavor and moisture of brown sugar quite well.

How do I know when the salmon is done cooking?

The salmon is perfectly cooked when it flakes easily with a fork and reaches an internal temperature of 145°F (63°C). A meat thermometer is a handy tool for this!

Can I make the glaze ahead of time?

Yes! You can prepare the glaze a day in advance and store it in the fridge. Just give it a good stir before using it on the salmon.

What sides pair well with Brown Sugar Glazed Salmon?

This dish goes wonderfully with rice, quinoa, or steamed vegetables. A fresh salad also complements the flavors beautifully!

Final Thoughts

Cooking Brown Sugar Glazed Salmon is more than just preparing a meal; it’s about creating a delightful experience.

The sweet and savory flavors dance together, making each bite a celebration.

Whether you’re sharing it with family or enjoying a quiet dinner alone, this dish brings warmth and satisfaction.

It’s quick, easy, and packed with flavor, perfect for any occasion.

So, roll up your sleeves, embrace the joy of cooking, and let this recipe become a staple in your kitchen.

Trust me, once you try it, you’ll be hooked!

Ranis

Brown Sugar Glazed Salmon: A Delicious Recipe to Try!

A delicious recipe for Brown Sugar Glazed Salmon that is easy to prepare and packed with flavor.
Prep Time 10 minutes
Cook Time 15 minutes
Total Time 25 minutes
Servings: 2 servings
Course: Main Dish
Cuisine: American
Calories: 350

Ingredients
  

  • 2 6-ounce salmon fillets
  • 1/4 cup brown sugar
  • 2 tablespoons soy sauce
  • 1 tablespoon Dijon mustard
  • 1 tablespoon olive oil
  • 1 teaspoon minced garlic
  • 1/2 teaspoon black pepper
  • 1/4 teaspoon salt
  • 1 tablespoon chopped fresh parsley for garnish

Method
 

  1. Preheat your oven to 400°F (200°C). Line a baking sheet with parchment paper for easy cleanup.
  2. In a small bowl, whisk together the brown sugar, soy sauce, Dijon mustard, olive oil, minced garlic, black pepper, and salt until well combined.
  3. Place the salmon fillets skin-side down on the prepared baking sheet. Brush the brown sugar glaze generously over the top of each fillet.
  4. Bake in the preheated oven for 12-15 minutes, or until the salmon flakes easily with a fork and is cooked through.
  5. Remove from the oven and let it rest for a couple of minutes. Garnish with chopped fresh parsley before serving.

Nutrition

Serving: 1filletCalories: 350kcalCarbohydrates: 10gProtein: 34gFat: 20gSaturated Fat: 3gPolyunsaturated Fat: 15gCholesterol: 70mgSodium: 500mgSugar: 10g

Notes

  • For a spicy kick, add a pinch of red pepper flakes to the glaze.
  • Serve the salmon over a bed of rice or quinoa for a complete meal.

Tried this recipe?

Let us know how it was!

Chocolate Chip and White Chocolate Chip Cookies Delight!

Introduction to Chocolate Chip and White Chocolate Chip Cookies

There’s something magical about the aroma of freshly baked cookies wafting through the house.

Chocolate chip and white chocolate chip cookies are the ultimate comfort treat, perfect for any occasion.

Whether you’re looking to impress friends at a gathering or simply want a quick solution for a busy day, this recipe has you covered.

With just a handful of ingredients and a little bit of love, you can whip up a batch that will have everyone asking for seconds.

Let’s dive into this delightful cookie adventure together!

Why You’ll Love This Chocolate Chip and White Chocolate Chip Cookies

These cookies are a dream come true for any home cook.

They come together in just 15 minutes of prep time, making them perfect for those busy weeknights.

The combination of semi-sweet and white chocolate chips creates a delightful balance of flavors that will satisfy any sweet tooth.

Plus, they’re versatile enough to be enjoyed warm from the oven or as a delightful treat later.

You’ll find yourself making these again and again!

Ingredients for Chocolate Chip and White Chocolate Chip Cookies

Gathering the right ingredients is the first step to cookie perfection.

Here’s what you’ll need for these delightful chocolate chip and white chocolate chip cookies:

  • All-purpose flour: The backbone of your cookies, providing structure and chewiness.
  • Baking soda: This little leavening agent helps your cookies rise and become fluffy.
  • Salt: A pinch enhances the sweetness and balances the flavors.
  • Unsalted butter: Softened butter adds richness and moisture, making your cookies tender.
  • Granulated sugar: This sweetener contributes to the cookie’s crisp edges.
  • Brown sugar: Packed with molasses, it adds depth and a chewy texture.
  • Vanilla extract: A splash of this aromatic essence elevates the flavor profile.
  • Large eggs: They bind the ingredients together and add moisture.
  • Semi-sweet chocolate chips: The classic choice for that rich chocolatey goodness.
  • White chocolate chips: These add a creamy sweetness that complements the semi-sweet variety.

Feel free to get creative!

You can swap in whole wheat flour for a nuttier flavor or use coconut oil for a dairy-free option.

If you’re a nut lover, consider tossing in some chopped walnuts or pecans for added crunch.

For exact measurements, check the bottom of the article where you can find everything you need for printing.

Happy baking!

How to Make Chocolate Chip and White Chocolate Chip Cookies

Baking these chocolate chip and white chocolate chip cookies is a delightful journey.

With each step, you’ll feel the excitement build as the sweet aroma fills your kitchen.

Let’s get started!

Step 1: Preheat the Oven

First things first, preheat your oven to 375°F (190°C).

While it warms up, line two baking sheets with parchment paper.

This will prevent your cookies from sticking and make cleanup a breeze.

Step 2: Mix Dry Ingredients

In a medium bowl, whisk together the all-purpose flour, baking soda, and salt.

This step is crucial; it ensures even distribution of the leavening agent.

Set this mixture aside for now.

Step 3: Cream the Butter and Sugars

In a large bowl, grab your mixer and cream together the softened butter, granulated sugar, brown sugar, and vanilla extract.

Mix until the mixture is light and fluffy.

This is where the magic begins, as the sugars dissolve into the butter, creating a sweet base.

Step 4: Add Eggs

Now, it’s time to add the eggs.

Crack them in one at a time, mixing well after each addition.

This helps to incorporate air, making your cookies light and tender.

Step 5: Combine Wet and Dry Ingredients

Gradually add the dry ingredients to the wet mixture.

Mix until just combined; overmixing can lead to tough cookies.

You want a soft dough that’s ready for the star ingredients.

Step 6: Fold in Chocolate Chips

Using a spatula, gently fold in the semi-sweet chocolate chips and white chocolate chips.

This is where the fun happens!

Make sure every bite will have a bit of chocolatey goodness.

Step 7: Shape the Cookies

Drop rounded tablespoons of dough onto the prepared baking sheets.

Space them about 2 inches apart to allow for spreading.

Trust me, you don’t want them to merge into one giant cookie!

Step 8: Bake the Cookies

Pop the baking sheets into your preheated oven.

Bake for 9 to 11 minutes, or until the edges are golden brown and the centers are set.

Keep an eye on them; every oven is a little different!

Step 9: Cool the Cookies

Once baked, remove the cookies from the oven.

Let them cool on the baking sheets for 5 minutes.

Then, transfer them to wire racks to cool completely.

This step is essential for achieving that perfect texture!

Tips for Success

  • For chewier cookies, slightly underbake them and let them sit on the baking sheet longer.
  • Use room temperature ingredients for better mixing and texture.
  • Chill the dough for 30 minutes if you prefer thicker cookies.
  • Experiment with different chocolate chip ratios for a unique flavor experience.
  • Don’t skip the parchment paper; it makes cleanup a breeze!

Equipment Needed

  • Mixing bowls: A set of various sizes is ideal; you can use any large bowl if needed.
  • Hand mixer or stand mixer: A whisk works too, but it’ll take a bit more elbow grease.
  • Parchment paper: If you don’t have it, greasing the baking sheets will do.
  • Baking sheets: Any flat, oven-safe tray will work for baking your cookies.
  • Spatula: A rubber spatula is great for folding in the chocolate chips.

Variations

  • Nutty Delight: Add ½ cup of chopped walnuts or pecans for a crunchy texture and nutty flavor.
  • Oatmeal Twist: Incorporate 1 cup of rolled oats for a heartier cookie that adds fiber.
  • Dark Chocolate: Swap semi-sweet chocolate chips for dark chocolate chips for a richer taste.
  • Peanut Butter Swirl: Mix in ½ cup of creamy peanut butter for a delicious twist on the classic recipe.
  • Gluten-Free Option: Use a gluten-free all-purpose flour blend to make these cookies suitable for gluten-sensitive friends.

Serving Suggestions

  • Pair these cookies with a glass of cold milk for the ultimate classic experience.
  • Serve warm with a scoop of vanilla ice cream for a delightful dessert.
  • For a fun twist, drizzle melted chocolate over the cookies before serving.
  • Present them on a colorful platter for a festive touch at gatherings.

FAQs about Chocolate Chip and White Chocolate Chip Cookies

Can I use different types of chocolate chips?

Absolutely! You can mix and match chocolate chips to your heart’s content. Dark chocolate, milk chocolate, or even butterscotch chips can add a unique twist to your chocolate chip and white chocolate chip cookies.

How do I store leftover cookies?

To keep your cookies fresh, store them in an airtight container at room temperature. They should stay delicious for about a week. If you want to keep them longer, consider freezing them!

Can I make the dough ahead of time?

Yes! You can prepare the dough and refrigerate it for up to 3 days. Just let it sit at room temperature for a few minutes before baking. This can enhance the flavors and make for a more enjoyable cookie experience.

What if I don’t have unsalted butter?

If you only have salted butter, you can still use it! Just reduce the added salt in the recipe to balance the flavors. Your chocolate chip and white chocolate chip cookies will still turn out great!

Can I add other mix-ins?

Definitely! Feel free to add dried fruits, like cranberries or raisins, or even coconut flakes for a tropical twist. The possibilities are endless with these cookies!

Final Thoughts

Baking chocolate chip and white chocolate chip cookies is more than just a recipe; it’s an experience that brings joy to your kitchen.

The warm, gooey cookies fresh from the oven create a sense of nostalgia, reminding us of simpler times.

Each bite is a delightful blend of flavors, making them perfect for sharing with family and friends.

Whether you’re celebrating a special occasion or just indulging in a sweet treat, these cookies are sure to bring smiles all around.

So, roll up your sleeves and let the magic of baking fill your home with happiness!

Ranis

Chocolate Chip and White Chocolate Chip Cookies Delight!

Delicious chocolate chip and white chocolate chip cookies that are perfect for any occasion.
Prep Time 15 minutes
Cook Time 11 minutes
Total Time 26 minutes
Servings: 24 cookies
Course: Dessert
Cuisine: American
Calories: 150

Ingredients
  

  • 2 ¼ cups all-purpose flour
  • 1 teaspoon baking soda
  • ½ teaspoon salt
  • 1 cup unsalted butter softened
  • ¾ cup granulated sugar
  • ¾ cup packed brown sugar
  • 1 teaspoon vanilla extract
  • 2 large eggs
  • 1 cup semi-sweet chocolate chips
  • 1 cup white chocolate chips

Method
 

  1. Preheat your oven to 375°F (190°C). Line two baking sheets with parchment paper.
  2. In a medium bowl, whisk together the flour, baking soda, and salt. Set aside.
  3. In a large bowl, using a hand mixer or stand mixer, cream together the softened butter, granulated sugar, brown sugar, and vanilla extract until light and fluffy.
  4. Add the eggs one at a time, mixing well after each addition.
  5. Gradually add the dry ingredients to the wet mixture, mixing until just combined.
  6. Fold in the semi-sweet chocolate chips and white chocolate chips using a spatula.
  7. Drop rounded tablespoons of dough onto the prepared baking sheets, spacing them about 2 inches apart.
  8. Bake in the preheated oven for 9 to 11 minutes, or until the edges are golden brown and the centers are set.
  9. Remove from the oven and let the cookies cool on the baking sheets for 5 minutes before transferring them to wire racks to cool completely.

Nutrition

Serving: 1cookieCalories: 150kcalCarbohydrates: 20gProtein: 2gFat: 7gSaturated Fat: 4gPolyunsaturated Fat: 2gCholesterol: 20mgSodium: 100mgFiber: 1gSugar: 10g

Notes

  • For a chewy texture, slightly underbake the cookies and let them sit on the baking sheet for a few extra minutes before transferring.
  • Try adding ½ cup of chopped nuts, such as walnuts or pecans, for added crunch and flavor.

Tried this recipe?

Let us know how it was!

Strawberry Basil Chicken: A Delightful Recipe Unveiled!

Introduction to Strawberry Basil Chicken

Cooking has always been a way for me to unwind after a long day. One of my favorite discoveries is the delightful combination of flavors in Strawberry Basil Chicken. This dish is not just a meal; it’s a celebration of summer on your plate. The sweetness of ripe strawberries mingles beautifully with savory chicken, creating a dish that’s both refreshing and satisfying. Whether you’re looking for a quick solution for a busy weeknight or a way to impress your loved ones at dinner, this recipe is sure to become a favorite in your kitchen.

Why You’ll Love This Strawberry Basil Chicken

This Strawberry Basil Chicken is a game-changer for your dinner routine. It’s incredibly easy to whip up, taking just 45 minutes from start to finish. The vibrant flavors will have your taste buds dancing, while the fresh ingredients make it a healthy choice. Plus, it’s versatile enough to impress guests or satisfy a family craving. Trust me, once you try it, you’ll be hooked!

Ingredients for Strawberry Basil Chicken

Gathering the right ingredients is the first step to creating a delicious Strawberry Basil Chicken. Here’s what you’ll need:

  • Chicken Breasts: The star of the dish, providing a hearty protein base. Look for fresh, high-quality chicken for the best flavor.
  • Fresh Strawberries: Their natural sweetness balances the savory chicken. Choose ripe, juicy strawberries for maximum flavor.
  • Olive Oil: This adds richness and helps the marinade cling to the chicken. Extra virgin olive oil is a great choice for its robust flavor.
  • Salt: Essential for enhancing all the flavors in the dish. A pinch goes a long way!
  • Black Pepper: Adds a subtle kick. Freshly ground pepper is always best for a more vibrant taste.
  • Garlic Powder: A convenient way to infuse that beloved garlic flavor without the fuss of fresh cloves.
  • Fresh Basil: This herb brings a fragrant, peppery note that complements the strawberries beautifully. Use it fresh for the best flavor.
  • Balsamic Vinegar: Adds a tangy depth to the marinade, enhancing the overall flavor profile.
  • Honey: A touch of sweetness that balances the acidity of the vinegar and the strawberries.
  • Feta Cheese (optional): Crumbled feta adds a creamy, salty element that elevates the dish. If you’re not a fan, feel free to skip it!

For exact measurements, check the bottom of the article where you can find everything listed for easy printing. Happy cooking!

How to Make Strawberry Basil Chicken

Creating Strawberry Basil Chicken is a straightforward process that yields delicious results. Follow these simple steps, and you’ll have a meal that’s bursting with flavor and sure to impress.

Step 1: Preheat the Oven

Start by preheating your oven to 375°F (190°C). This step is crucial because it ensures even cooking. A properly preheated oven helps the chicken cook through while keeping it juicy. Trust me, you don’t want to rush this part!

Step 2: Prepare the Marinade

In a small bowl, mix together the olive oil, salt, black pepper, garlic powder, balsamic vinegar, and honey. This marinade is the flavor powerhouse of your dish. Each ingredient plays a role: the olive oil adds richness, while the vinegar and honey balance each other perfectly. Whisk it all together until well combined.

Step 3: Marinate the Chicken

Place the chicken breasts in a baking dish and pour the marinade over them. Make sure they’re well-coated. Let them marinate for at least 15 minutes. If you have time, marinating for up to 2 hours in the refrigerator will enhance the flavor and tenderness even more. It’s worth the wait!

Step 4: Add Strawberries and Basil

Once the chicken is marinated, scatter the sliced strawberries and chopped basil over the top. This layering is key. The strawberries will release their juices as they cook, creating a sweet sauce that seeps into the chicken. The basil adds a fresh, aromatic touch that elevates the dish.

Step 5: Bake the Chicken

Now it’s time to bake! Place the dish in your preheated oven and let it cook for 25-30 minutes. Keep an eye on it, and use a meat thermometer to check for doneness. The chicken should reach an internal temperature of 165°F (75°C). This ensures it’s safe to eat and perfectly juicy.

Step 6: Add Feta Cheese

If you’re using feta cheese, sprinkle it over the chicken during the last 5 minutes of baking. The cheese will soften and add a creamy, salty element that complements the sweetness of the strawberries beautifully. It’s an optional step, but I highly recommend it!

Step 7: Rest and Serve

Once the chicken is done, remove it from the oven and let it rest for about 5 minutes before slicing. This resting period is essential. It allows the juices to redistribute, ensuring each bite is tender and juicy. Serve warm, and enjoy the delightful flavors of your Strawberry Basil Chicken!

Tips for Success

  • Always use fresh ingredients for the best flavor, especially the strawberries and basil.
  • Don’t skip the marinating step; it’s key to juicy, flavorful chicken.
  • Experiment with different fruits like peaches or mango for a unique twist.
  • Keep an eye on the chicken while baking to avoid overcooking.
  • Let the chicken rest before slicing to maintain its juiciness.

Equipment Needed

  • Baking Dish: A glass or ceramic dish works well. If you don’t have one, a cast-iron skillet is a great alternative.
  • Mixing Bowl: Any medium-sized bowl will do for mixing the marinade.
  • Meat Thermometer: Essential for checking chicken doneness. If you don’t have one, cut into the chicken to check for clear juices.
  • Whisk or Fork: Use either to mix the marinade ingredients thoroughly.

Variations

  • Peach Basil Chicken: Swap out strawberries for ripe peaches for a sweet, summery twist.
  • Mango Salsa Chicken: Use diced mango instead of strawberries and top with a fresh mango salsa for a tropical flair.
  • Grilled Version: Marinate the chicken and grill it for a smoky flavor, perfect for summer barbecues.
  • Vegan Option: Substitute chicken with firm tofu or tempeh, and follow the same marinating and baking steps.
  • Spicy Kick: Add a pinch of red pepper flakes to the marinade for a spicy contrast to the sweetness.

Serving Suggestions

  • Side Salad: Pair with a light arugula salad drizzled with lemon vinaigrette for a refreshing contrast.
  • Grains: Serve over a bed of quinoa or brown rice to soak up the delicious juices.
  • Wine: A chilled rosé complements the dish beautifully.
  • Presentation: Garnish with extra basil leaves and a sprinkle of feta for a vibrant look.

FAQs about Strawberry Basil Chicken

Can I use frozen strawberries for this recipe?
While fresh strawberries are ideal for their flavor and texture, you can use frozen strawberries in a pinch. Just be aware that they may release more moisture during cooking, which can affect the sauce consistency.

How can I make this dish ahead of time?
You can marinate the chicken a day in advance and store it in the refrigerator. Just add the strawberries and basil right before baking to keep them fresh and vibrant.

Is Strawberry Basil Chicken gluten-free?
Yes! This Strawberry Basil Chicken recipe is naturally gluten-free, making it a great option for those with gluten sensitivities.

What can I serve with Strawberry Basil Chicken?
This dish pairs wonderfully with a light salad, quinoa, or brown rice. A chilled glass of rosé also complements the flavors beautifully.

Can I substitute the chicken with another protein?
Absolutely! You can use firm tofu or tempeh for a vegan option, or even pork tenderloin for a different twist. Just adjust the cooking time accordingly.

Final Thoughts

Cooking Strawberry Basil Chicken is more than just preparing a meal; it’s about creating a moment of joy in your kitchen. The vibrant colors and delightful aromas fill your home, making it feel warm and inviting. Each bite is a celebration of sweet and savory, a reminder of summer days and shared laughter. Whether you’re enjoying it with family or impressing friends, this dish brings people together. I hope you find as much joy in making it as I do. So grab your ingredients, roll up your sleeves, and let the magic of Strawberry Basil Chicken unfold!

Ranis

Strawberry Basil Chicken: A Delightful Recipe Unveiled!

A delightful recipe combining the sweetness of strawberries with the savory flavor of chicken, enhanced by fresh basil.
Prep Time 15 minutes
Cook Time 30 minutes
Total Time 45 minutes
Servings: 2 servings
Course: Main Dish
Cuisine: American
Calories: 350

Ingredients
  

  • 2 large chicken breasts about 1 pound total
  • 1 cup fresh strawberries hulled and sliced
  • 1 tablespoon olive oil
  • 1 teaspoon salt
  • 1/2 teaspoon black pepper
  • 1/2 teaspoon garlic powder
  • 1/4 cup fresh basil chopped
  • 1 tablespoon balsamic vinegar
  • 1 tablespoon honey
  • 1/4 cup crumbled feta cheese optional

Method
 

  1. Preheat your oven to 375°F (190°C).
  2. In a small bowl, mix together the olive oil, salt, black pepper, garlic powder, balsamic vinegar, and honey to create a marinade.
  3. Place the chicken breasts in a baking dish and pour the marinade over them, ensuring they are well-coated. Let them marinate for at least 15 minutes.
  4. Scatter the sliced strawberries and chopped basil over the marinated chicken.
  5. Bake in the preheated oven for 25-30 minutes, or until the chicken is cooked through and reaches an internal temperature of 165°F (75°C).
  6. If using, sprinkle crumbled feta cheese over the chicken during the last 5 minutes of baking.
  7. Remove from the oven and let the chicken rest for 5 minutes before slicing. Serve warm.

Nutrition

Serving: 1servingCalories: 350kcalCarbohydrates: 10gProtein: 40gFat: 15gSaturated Fat: 3gPolyunsaturated Fat: 12gCholesterol: 100mgSodium: 500mgFiber: 1gSugar: 10g

Notes

  • For added flavor, marinate the chicken for up to 2 hours in the refrigerator.
  • Substitute the strawberries with peaches or mango for a different fruity twist.

Tried this recipe?

Let us know how it was!

Creamy Pumpkin Pasta: A Delicious Fall Recipe Unveiled!

Introduction to Creamy Pumpkin Pasta

As the leaves turn and the air gets crisp, there’s something magical about fall cooking. One dish that captures this season’s essence is creamy pumpkin pasta. It’s not just a meal; it’s a warm hug on a plate. Perfect for those busy weeknights or when you want to impress your loved ones, this recipe combines the rich flavors of pumpkin with the comforting texture of pasta. In just 30 minutes, you can whip up a delightful dish that’s both satisfying and nourishing. Let’s dive into this creamy goodness that will surely become a fall favorite!

Why You’ll Love This Creamy Pumpkin Pasta

This creamy pumpkin pasta is a game-changer for your fall meals. It’s quick to prepare, taking just 30 minutes from start to finish, making it perfect for busy evenings. The rich, velvety sauce envelops the pasta, creating a comforting dish that warms the soul. Plus, it’s vegetarian-friendly, so everyone can enjoy it. With its delightful flavors and ease of preparation, this recipe is sure to become a staple in your kitchen!

Ingredients for Creamy Pumpkin Pasta

Gathering the right ingredients is the first step to creating this creamy pumpkin pasta. Each component plays a vital role in building flavor and texture. Here’s what you’ll need:

  • Pasta: Choose your favorite type, like fettuccine or penne. They hold the sauce beautifully.
  • Olive Oil: A splash of this liquid gold adds richness and helps sauté the onions.
  • Onion: Finely chopped, it brings sweetness and depth to the dish.
  • Garlic: Minced garlic adds a fragrant kick that elevates the overall flavor.
  • Pumpkin Puree: Canned pumpkin is a convenient option, providing creaminess and a hint of earthiness.
  • Vegetable Broth: This adds moisture and enhances the pumpkin’s flavor, making the sauce more savory.
  • Dried Sage and Thyme: These herbs infuse the dish with warm, aromatic notes that scream fall.
  • Salt and Black Pepper: Essential for seasoning, they balance the flavors perfectly.
  • Heavy Cream: This is what makes the sauce luxuriously creamy. For a lighter option, consider using coconut milk.
  • Parmesan Cheese: Grated cheese adds a salty, nutty flavor that complements the pumpkin beautifully.
  • Fresh Parsley: Chopped parsley is a lovely garnish that adds a pop of color and freshness.

For those looking to boost the protein content, consider adding cooked chicken, turkey, or sautéed mushrooms. If you’re dairy-free, coconut milk is a fantastic substitute for heavy cream while still keeping that creamy texture. You can find the exact quantities for each ingredient at the bottom of the article, ready for printing!

How to Make Creamy Pumpkin Pasta

Now that you have all your ingredients ready, it’s time to bring this creamy pumpkin pasta to life! Follow these simple steps, and you’ll have a delicious meal on the table in no time.

Step 1: Cook the Pasta

Start by boiling a large pot of salted water. Once it’s bubbling, add your pasta. Cook according to the package instructions until it’s al dente. This usually takes about 8-10 minutes. Remember to stir occasionally to prevent sticking. When done, drain the pasta and set it aside. Don’t forget to save a cup of that pasta water; it can help adjust the sauce later!

Step 2: Sauté the Onion

In a large skillet, heat the olive oil over medium heat. Add the finely chopped onion and sauté for about 5 minutes. You want it to soften and become translucent. This step builds a flavorful base for your creamy pumpkin pasta. The aroma will start to fill your kitchen, and trust me, it’s just the beginning!

Step 3: Add Garlic

Next, stir in the minced garlic. Cook for an additional minute until it’s fragrant. Be careful not to burn it; burnt garlic can turn bitter. This step adds a lovely depth to the dish, making it even more irresistible.

Step 4: Combine Pumpkin and Spices

Now, it’s time to add the star of the show: the pumpkin puree! Pour it into the skillet along with the vegetable broth, dried sage, thyme, salt, and black pepper. Stir everything together and bring it to a gentle simmer. Let it cook for about 5 minutes. This allows the flavors to meld beautifully, creating a rich sauce.

Step 5: Stir in Cream and Cheese

Reduce the heat to low and add the heavy cream and grated Parmesan cheese. Stir until the cheese melts and the sauce becomes creamy. If it seems too thick, add a splash of that reserved pasta water to reach your desired consistency. This is where the magic happens, transforming your sauce into a velvety delight!

Step 6: Toss with Pasta

Now, add the cooked pasta to the skillet. Toss everything together until the pasta is well coated with the creamy pumpkin sauce. Cook for an additional 2-3 minutes to heat through. This step ensures every bite is packed with flavor, making your creamy pumpkin pasta truly satisfying.

Step 7: Serve and Garnish

Finally, it’s time to serve! Plate your creamy pumpkin pasta and garnish with freshly chopped parsley. This adds a pop of color and a hint of freshness. Enjoy your creation with a smile, knowing you’ve just made a comforting fall dish that’s sure to impress!

Tips for Success

  • Always taste your sauce before serving; adjust seasoning as needed.
  • Reserve some pasta water to adjust the sauce’s consistency if it thickens too much.
  • For extra flavor, consider adding a pinch of nutmeg to the sauce.
  • Don’t rush the sautéing process; it builds a deeper flavor.
  • Garnish with extra Parmesan for a delightful finish!

Equipment Needed

  • Large Pot: For boiling pasta. A Dutch oven works well too.
  • Skillet: A non-stick skillet is ideal for sautéing and simmering.
  • Colander: To drain the pasta. A slotted spoon can be a quick alternative.
  • Measuring Cups: For accurate ingredient portions. A simple kitchen scale can also help.

Variations

  • Protein Boost: Add cooked chicken, turkey, or sautéed mushrooms for a heartier meal.
  • Dairy-Free Option: Substitute heavy cream with coconut milk for a creamy, dairy-free version.
  • Spicy Kick: Incorporate red pepper flakes or a dash of cayenne pepper for some heat.
  • Nutty Flavor: Toss in some toasted pine nuts or walnuts for added crunch and flavor.
  • Vegetable Medley: Mix in sautéed spinach, kale, or roasted butternut squash for extra nutrition.

Serving Suggestions

  • Side Salad: Pair your creamy pumpkin pasta with a crisp arugula salad dressed in lemon vinaigrette for a refreshing contrast.
  • Wine Pairing: A glass of Chardonnay complements the dish beautifully, enhancing the creamy flavors.
  • Presentation: Serve in warm bowls and sprinkle extra Parmesan and fresh parsley for a stunning finish.

FAQs about Creamy Pumpkin Pasta

As you embark on your creamy pumpkin pasta journey, you might have a few questions. Here are some common queries that can help you navigate this delicious recipe:

Can I use fresh pumpkin instead of canned?

Absolutely! If you have fresh pumpkin, roast it until tender, then puree it for a fresh flavor. Just make sure to adjust the moisture content, as fresh pumpkin can be a bit drier than canned.

Is this creamy pumpkin pasta suitable for meal prep?

Yes! This dish holds up well in the fridge for a few days. Just reheat gently on the stove, adding a splash of vegetable broth or pasta water to revive the creaminess.

Can I make this recipe vegan?

Definitely! Substitute the heavy cream with coconut milk and skip the Parmesan cheese or use a vegan alternative. You’ll still enjoy a creamy texture without the dairy.

What can I serve with creamy pumpkin pasta?

Pair it with a simple side salad or some crusty bread. A light white wine, like Sauvignon Blanc, also complements the flavors beautifully.

How can I store leftovers?

Store any leftovers in an airtight container in the fridge for up to three days. Reheat on the stovetop, adding a little liquid if needed to keep it creamy.

Final Thoughts

Cooking this creamy pumpkin pasta is more than just preparing a meal; it’s about embracing the warmth of fall and sharing joy with those you love. The rich flavors and comforting textures create a dish that feels like home. Whether you’re enjoying it on a cozy weeknight or serving it at a gathering, this recipe brings smiles and satisfaction. Plus, it’s versatile enough to adapt to your taste. So, roll up your sleeves, savor the process, and let this creamy pumpkin pasta become a cherished part of your culinary repertoire. Happy cooking!

Ranis

Creamy Pumpkin Pasta: A Delicious Fall Recipe Unveiled!

A creamy and delicious pumpkin pasta recipe perfect for fall.
Prep Time 10 minutes
Cook Time 20 minutes
Total Time 30 minutes
Servings: 4 servings
Course: Main Course
Cuisine: Italian
Calories: 450

Ingredients
  

  • 8 ounces pasta such as fettuccine or penne
  • 1 tablespoon olive oil
  • 1 small onion finely chopped
  • 2 cloves garlic minced
  • 1 cup canned pumpkin puree
  • 1 cup vegetable broth
  • 1 teaspoon dried sage
  • 1 teaspoon dried thyme
  • 1/2 teaspoon salt
  • 1/4 teaspoon black pepper
  • 1/2 cup heavy cream
  • 1/2 cup grated Parmesan cheese
  • Fresh parsley chopped (for garnish)

Method
 

  1. Cook the pasta according to package instructions in a large pot of salted boiling water until al dente. Drain and set aside.
  2. In a large skillet, heat the olive oil over medium heat. Add the chopped onion and sauté for about 5 minutes, until softened.
  3. Stir in the minced garlic and cook for an additional 1 minute, until fragrant.
  4. Add the pumpkin puree, vegetable broth, sage, thyme, salt, and black pepper to the skillet. Stir well and bring to a simmer. Cook for about 5 minutes, allowing the flavors to meld.
  5. Reduce the heat to low and stir in the heavy cream and Parmesan cheese. Mix until the cheese is melted and the sauce is creamy.
  6. Add the cooked pasta to the skillet and toss to coat the pasta evenly with the sauce. Cook for an additional 2-3 minutes to heat through.
  7. Serve immediately, garnished with fresh parsley.

Nutrition

Serving: 1servingCalories: 450kcalCarbohydrates: 45gProtein: 15gFat: 20gSaturated Fat: 10gPolyunsaturated Fat: 8gCholesterol: 50mgSodium: 600mgFiber: 3gSugar: 5g

Notes

  • For a protein boost, add cooked chicken, turkey, or sautéed mushrooms to the pasta before serving.
  • Substitute the heavy cream with coconut milk for a dairy-free version while still keeping a creamy texture.

Tried this recipe?

Let us know how it was!

Composition Notebook Cupcakes: A Fun Baking Guide!

Introduction to Composition Notebook Cupcakes

There’s something magical about baking that takes me back to my childhood. The smell of chocolate wafting through the house, the excitement of licking the spoon, and the joy of sharing treats with friends. Today, I’m thrilled to share a fun twist on a classic dessert: Composition Notebook Cupcakes! Perfect for back-to-school celebrations or just a creative weekend project, these cupcakes are not only delicious but also a feast for the eyes. They’re a quick solution for busy days when you want to impress loved ones with something unique and tasty. Let’s dive into this delightful baking adventure!

Why You’ll Love This Composition Notebook Cupcakes

These Composition Notebook Cupcakes are a delightful blend of creativity and flavor. They’re easy to whip up, making them perfect for busy weeknights or last-minute gatherings. The rich chocolate cake pairs beautifully with creamy buttercream frosting, ensuring every bite is a treat. Plus, the fun design adds a playful touch that will impress kids and adults alike. You’ll love how quickly they come together and how much joy they bring!

Ingredients for Composition Notebook Cupcakes

Gathering the right ingredients is the first step to creating your masterpiece. Here’s what you’ll need for these delightful Composition Notebook Cupcakes:

  • Chocolate cake mix: The base of our cupcakes, providing that rich, decadent flavor. You can use any brand you prefer, or even make your own from scratch if you’re feeling adventurous.
  • Large eggs: Essential for binding the ingredients together and adding moisture. They help create a fluffy texture that’s hard to resist.
  • Water: This helps to activate the cake mix and ensures the cupcakes are moist. You can substitute with milk for a richer flavor.
  • Vegetable oil: Adds moisture and keeps the cupcakes tender. You can swap it with melted butter for a buttery taste.
  • Buttercream frosting: The sweet, creamy topping that brings everything together. You can use store-bought or whip up your own for a personal touch.
  • Black fondant: This is what gives your cupcakes that classic composition notebook look. It’s pliable and easy to work with, making it perfect for decorating.
  • White fondant: Used to create the lines and labels on the notebook cover. It adds a nice contrast to the black and makes your cupcakes pop.
  • Edible markers: These are the finishing touch! They allow you to add fun details and personalize your cupcakes. You can find them at baking supply stores or online.

For exact quantities, check the bottom of the article where you can find a printable version of the recipe. Now that you have your ingredients ready, let’s get baking!

How to Make Composition Notebook Cupcakes

Now that we have our ingredients ready, it’s time to roll up our sleeves and get baking! Follow these simple steps to create your own Composition Notebook Cupcakes. Each step is designed to be straightforward, ensuring you have a fun and successful baking experience.

Step 1: Preheat the Oven

First things first, preheating the oven is crucial. Set it to 350°F (175°C). This ensures that your cupcakes bake evenly and rise perfectly. A hot oven helps create that delightful dome shape we all love. Trust me, you don’t want to skip this step!

Step 2: Prepare the Cake Mix

Next, grab your chocolate cake mix and follow the package instructions. Typically, you’ll mix the cake mix with eggs, water, and vegetable oil. Stir until everything is well combined. The batter should be smooth and free of lumps. This is where the magic begins!

Step 3: Bake the Cupcakes

Now, it’s time to pour the batter into cupcake liners. Fill each liner about two-thirds full to allow room for rising. Place them in the preheated oven and bake for 18-20 minutes. You’ll know they’re done when a toothpick inserted in the center comes out clean. The aroma of chocolate will fill your kitchen, and it’s simply irresistible!

Step 4: Cool the Cupcakes

Once baked, remove the cupcakes from the oven and let them cool in the pan for about 5 minutes. Then, transfer them to a wire rack to cool completely. This step is essential! If you frost them while they’re warm, the frosting will melt away, and we want those beautiful cupcakes to shine.

Step 5: Frost the Cupcakes

When the cupcakes are completely cool, it’s time to frost! Use a spatula or a piping bag to apply the buttercream frosting evenly on top. Don’t be shy—make it as thick or as thin as you like. The frosting is the canvas for your creative notebook design!

Step 6: Create the Fondant Notebook Cover

Roll out the black fondant on a clean surface. Aim for about 1/8 inch thick. Use a sharp knife or a pizza cutter to cut rectangles that will fit on top of your cupcakes. This will mimic the cover of a composition notebook. It’s easier than it sounds, and the results are worth it!

Step 7: Add Details with White Fondant

Now, take the white fondant and roll it out as well. Cut thin strips to create the lines on the notebook cover. You can also cut out small shapes for labels. This is where you can get creative! The contrast between the black and white will make your cupcakes pop.

Step 8: Decorate with Edible Markers

Grab your edible markers and let your imagination run wild! Use them to add fun details, like doodles or even names on the labels. This is a great way to personalize each cupcake. Plus, it’s a fun activity if you have kids helping out in the kitchen!

Step 9: Assemble the Cupcakes

Finally, place the fondant pieces on top of the frosted cupcakes. Gently press them down to ensure they stick. And there you have it! Your Composition Notebook Cupcakes are ready to impress. Serve them at your next gathering, and watch everyone’s faces light up with delight!

Tips for Success

  • Always preheat your oven for even baking.
  • Let the cupcakes cool completely before frosting to avoid melting.
  • Use a piping bag for a professional-looking frosting finish.
  • Keep fondant covered to prevent it from drying out while you work.
  • Experiment with different flavors of cake mix and frosting for variety.

Equipment Needed

  • Oven: Essential for baking. A toaster oven can work for smaller batches.
  • Mixing bowls: Use any size you have on hand; even a large pot can do the trick.
  • Whisk or electric mixer: A whisk is great for a workout, but an electric mixer saves time.
  • Cupcake liners: Standard liners work well; silicone liners are reusable and eco-friendly.
  • Rolling pin: A wine bottle can substitute if you don’t have one!

Variations

  • Flavorful Cake Mix: Swap the chocolate cake mix for vanilla, red velvet, or even funfetti for a colorful twist.
  • Gluten-Free Option: Use a gluten-free cake mix to make these cupcakes suitable for those with dietary restrictions.
  • Vegan Version: Replace eggs with flaxseed meal and use plant-based milk and oil for a delicious vegan treat.
  • Different Frosting: Try cream cheese frosting or whipped ganache for a unique flavor profile.
  • Custom Fondant Colors: Use colored fondant to match school colors or themes for special occasions.

Serving Suggestions

  • Pair with Milk: A classic glass of cold milk complements the rich chocolate flavor perfectly.
  • Presentation: Arrange cupcakes on a colorful platter for a festive look.
  • Side Treats: Serve with fruit skewers or mini cookies for a fun dessert table.
  • Theme Parties: Use school-themed decorations to enhance the back-to-school vibe.

FAQs about Composition Notebook Cupcakes

Can I use a different cake mix for these cupcakes?

Absolutely! While chocolate cake mix is a classic choice, feel free to experiment with vanilla, red velvet, or even funfetti. Each flavor brings its own unique twist to your Composition Notebook Cupcakes.

How do I store leftover cupcakes?

To keep your cupcakes fresh, store them in an airtight container at room temperature for up to three days. If you need to keep them longer, consider refrigerating them, but be aware that the fondant may become a bit firmer.

Can I make these cupcakes ahead of time?

Yes! You can bake the cupcakes a day in advance. Just frost and decorate them on the day you plan to serve them for the best presentation. This way, you can enjoy the fun of decorating without the last-minute rush!

What if I don’t have fondant?

If fondant isn’t your thing, you can use colored icing or even chocolate to create the notebook design. Just pipe the lines and labels directly onto the frosted cupcakes for a simpler approach.

Are these cupcakes suitable for kids?

Definitely! These Composition Notebook Cupcakes are a hit with kids. They can help with decorating, making it a fun family activity. Plus, who wouldn’t love a cupcake that looks like a school notebook?

Final Thoughts

Creating Composition Notebook Cupcakes is more than just baking; it’s about sparking joy and creativity in the kitchen. Each step, from mixing the batter to decorating with fondant, is an opportunity to bond with family or unleash your inner artist. These cupcakes are perfect for celebrating milestones, back-to-school events, or simply indulging in a sweet treat. The smiles on faces when they see these delightful creations are priceless. So, roll up your sleeves, gather your loved ones, and dive into this fun baking adventure. You’ll not only make delicious cupcakes but also lasting memories!

Ranis

Composition Notebook Cupcakes: A Fun Baking Guide!

A fun and creative guide to making composition notebook cupcakes that are perfect for back-to-school celebrations or any occasion.
Prep Time 30 minutes
Cook Time 20 minutes
Total Time 50 minutes
Servings: 12 cupcakes
Course: Dessert
Cuisine: American
Calories: 250

Ingredients
  

  • 1 box of chocolate cake mix
  • 3 large eggs
  • 1 cup of water
  • 1/2 cup of vegetable oil
  • 1 cup of buttercream frosting
  • Black fondant
  • White fondant
  • Edible markers

Method
 

  1. Preheat the oven to 350°F (175°C).
  2. Prepare the chocolate cake mix according to the package instructions.
  3. Pour the batter into cupcake liners and bake for 18-20 minutes.
  4. Allow the cupcakes to cool completely.
  5. Frost the cooled cupcakes with buttercream frosting.
  6. Roll out the black fondant and cut it into rectangles to resemble the cover of a composition notebook.
  7. Use white fondant to create the lines and label on the notebook cover.
  8. Decorate the fondant with edible markers for added detail.
  9. Place the fondant pieces on top of the frosted cupcakes.
  10. Serve and enjoy your creative composition notebook cupcakes!

Nutrition

Serving: 1cupcakeCalories: 250kcalCarbohydrates: 35gProtein: 3gFat: 10gSaturated Fat: 3gPolyunsaturated Fat: 5gCholesterol: 30mgSodium: 150mgFiber: 1gSugar: 20g

Notes

  • Make sure the cupcakes are completely cool before decorating.
  • Edible markers can be found at baking supply stores.
  • Feel free to customize the flavors of the cake mix and frosting.

Tried this recipe?

Let us know how it was!

Blackened Salmon Tacos with Avocado Crema Delight You!

Introduction to Blackened Salmon Tacos with Avocado Crema

There’s something magical about a meal that brings people together, and these Blackened Salmon Tacos with Avocado Crema do just that. Whether it’s a busy weeknight or a weekend gathering, this dish is a quick solution that never fails to impress. The smoky, spicy salmon paired with the creamy avocado crema creates a flavor explosion that dances on your taste buds. Plus, it’s a fun way to enjoy a healthy meal without sacrificing taste. Trust me, once you try these tacos, they’ll become a staple in your kitchen!

Why You’ll Love This Blackened Salmon Tacos with Avocado Crema

These Blackened Salmon Tacos with Avocado Crema are a game-changer for any home cook. They come together in just 25 minutes, making them perfect for those hectic evenings. The bold flavors of the blackened salmon paired with the cool, creamy avocado crema create a delightful contrast that’s hard to resist. Plus, they’re versatile enough to please everyone at the table, from the spice lovers to the health-conscious eaters!

Ingredients for Blackened Salmon Tacos with Avocado Crema

Gathering the right ingredients is the first step to creating these mouthwatering Blackened Salmon Tacos with Avocado Crema. Here’s what you’ll need:

  • Salmon fillets: Fresh salmon is the star of this dish, providing a rich source of protein and omega-3 fatty acids.
  • Olive oil: This helps the spices adhere to the salmon and adds a touch of healthy fat.
  • Smoked paprika: It gives the salmon that signature smoky flavor, enhancing the overall taste.
  • Garlic powder: A must-have for adding depth and a savory kick to the spice mix.
  • Onion powder: This complements the garlic and adds a subtle sweetness.
  • Cayenne pepper: For those who like a bit of heat, this spice brings the fire!
  • Dried oregano: A classic herb that adds an earthy flavor, balancing the spices.
  • Salt and black pepper: Essential for seasoning, enhancing all the flavors in the dish.
  • Tortillas: Choose between corn or flour, depending on your preference for a soft or slightly chewy texture.
  • Shredded red cabbage: This adds crunch and a pop of color, making your tacos visually appealing.
  • Diced tomatoes: Fresh tomatoes bring juiciness and a refreshing taste to each bite.
  • Fresh cilantro: A sprinkle of this herb adds brightness and a burst of flavor.
  • Avocado: The star of the crema, it provides creaminess and healthy fats.
  • Sour cream: This adds tanginess to the avocado crema, balancing the richness.
  • Lime juice: A squeeze of lime brightens the flavors and adds a zesty finish.

For those looking to spice things up, consider adding sliced jalapeños or a drizzle of hot sauce on top of your tacos. If salmon isn’t your thing, grilled shrimp or chicken can be great substitutes. You can find the exact quantities for each ingredient at the bottom of the article, ready for printing!

How to Make Blackened Salmon Tacos with Avocado Crema

Creating these Blackened Salmon Tacos with Avocado Crema is a straightforward process that will have you feeling like a culinary rock star. Follow these simple steps, and you’ll be enjoying a delicious meal in no time!

Step 1: Prepare the Blackening Spice Mix

Start by gathering your spices. In a small bowl, mix together the smoked paprika, garlic powder, onion powder, cayenne pepper, dried oregano, salt, and black pepper. This blend is what gives the salmon its bold flavor. Make sure to stir well until everything is evenly combined. The aroma will be intoxicating!

Step 2: Season the Salmon

Next, take your salmon fillets and pat them dry with paper towels. This step is crucial for achieving that perfect sear. Brush both sides of the salmon with olive oil, ensuring it’s well-coated. Now, generously sprinkle the blackening spice mix over the salmon, pressing it in gently. You want every bite to be packed with flavor!

Step 3: Cook the Salmon

Heat a large skillet over medium-high heat. Once it’s hot, carefully place the seasoned salmon fillets in the skillet. Cook for about 4-5 minutes on each side. You’re looking for a nice char and for the salmon to be cooked through. When it flakes easily with a fork, it’s ready! Remove it from the heat and let it rest for a few minutes.

Step 4: Make the Avocado Crema

While the salmon is resting, it’s time to whip up the avocado crema. In a blender or food processor, combine the ripe avocado, sour cream, lime juice, and a pinch of salt. Blend until smooth and creamy. This luscious sauce will add a delightful richness to your tacos!

Step 5: Warm the Tortillas

To enhance the texture of your tacos, warm the tortillas. You can do this in a dry skillet over medium heat for about 30 seconds on each side or pop them in the microwave for a few seconds. Warm tortillas are pliable and will hold all your delicious fillings without tearing.

Step 6: Assemble the Tacos

Now comes the fun part! Flake the cooked salmon into bite-sized pieces. Take a warm tortilla and place a portion of salmon in the center. Top it with shredded red cabbage, diced tomatoes, and fresh cilantro. Finally, drizzle the creamy avocado crema over the top. Your tacos are ready to be devoured!

Tips for Success

  • Always pat the salmon dry before seasoning for a better sear.
  • Let the blackening spice mix sit for a few minutes to enhance the flavors.
  • Use a non-stick skillet to prevent the salmon from sticking.
  • Don’t skip the resting time for the salmon; it helps retain moisture.
  • Experiment with toppings like pickled onions for an extra zing!

Equipment Needed

  • Skillet: A non-stick skillet works best, but any heavy-bottomed pan will do.
  • Spatula: A fish spatula is ideal for flipping the salmon without breaking it.
  • Blender or Food Processor: Essential for making the creamy avocado crema.
  • Measuring Spoons: For accurate spice measurements.

Variations

  • Spicy Blackened Salmon: Add more cayenne pepper or a dash of hot sauce to the spice mix for an extra kick.
  • Vegetarian Option: Substitute the salmon with grilled portobello mushrooms or marinated tofu for a plant-based twist.
  • Fish Tacos: Try using other fish like tilapia or mahi-mahi for a different flavor profile.
  • Gluten-Free Tortillas: Use corn tortillas to keep the dish gluten-free while still enjoying the same great taste.
  • Avocado Crema Variations: Add fresh herbs like basil or dill to the avocado crema for a unique flavor.

Serving Suggestions

  • Side Dishes: Pair your tacos with a refreshing corn salad or cilantro-lime rice for a complete meal.
  • Drinks: Enjoy with a cold Mexican lager or a zesty margarita to complement the flavors.
  • Presentation: Serve on a colorful platter with lime wedges and extra avocado crema for dipping.

FAQs about Blackened Salmon Tacos with Avocado Crema

Can I use frozen salmon for these tacos? Absolutely! Just make sure to thaw it completely before seasoning and cooking. Frozen salmon can be just as delicious when prepared correctly.

What can I substitute for avocado in the crema? If you’re not a fan of avocado, you can use Greek yogurt or a cashew cream for a similar creamy texture. Just add a bit of lime juice for that zesty kick!

How can I make these tacos spicier? For an extra kick, add more cayenne pepper to the spice mix or top your tacos with sliced jalapeños or a drizzle of your favorite hot sauce.

Can I prepare the avocado crema in advance? Yes! You can make the avocado crema a few hours ahead. Just store it in an airtight container to keep it fresh. A little extra lime juice can help prevent browning.

What sides pair well with Blackened Salmon Tacos? These tacos go great with a side of corn salad, black beans, or even a light cucumber salad. They balance the richness of the salmon beautifully!

Final Thoughts

Cooking these Blackened Salmon Tacos with Avocado Crema is more than just preparing a meal; it’s about creating moments. The vibrant colors and bold flavors bring life to your table, making every bite a celebration. Whether you’re sharing them with family or enjoying a quiet night in, these tacos are sure to impress. Plus, the ease of preparation means you can focus on what really matters—enjoying good food and great company. So, roll up your sleeves, dive into this recipe, and let the deliciousness unfold. You won’t regret it!

Ranis

Blackened Salmon Tacos with Avocado Crema Delight You!

Delicious blackened salmon tacos topped with creamy avocado crema, perfect for a flavorful meal.
Prep Time 15 minutes
Cook Time 10 minutes
Total Time 25 minutes
Course: Main Course
Cuisine: Mexican
Calories: 420

Ingredients
  

  • 1 pound salmon fillets
  • 2 tablespoons olive oil
  • 1 tablespoon smoked paprika
  • 1 teaspoon garlic powder
  • 1 teaspoon onion powder
  • 1 teaspoon cayenne pepper
  • 1 teaspoon dried oregano
  • 1 teaspoon salt
  • 1/2 teaspoon black pepper
  • 8 small corn or flour tortillas
  • 1 cup shredded red cabbage
  • 1/2 cup diced tomatoes
  • 1/4 cup chopped fresh cilantro
  • 1 avocado
  • 1/4 cup sour cream
  • 1 tablespoon lime juice

Method
 

  1. In a small bowl, mix together the smoked paprika, garlic powder, onion powder, cayenne pepper, oregano, salt, and black pepper to create the blackening spice mix.
  2. Pat the salmon fillets dry with paper towels and brush both sides with olive oil. Generously coat the salmon with the blackening spice mix.
  3. Heat a large skillet over medium-high heat. Once hot, add the salmon fillets and cook for about 4-5 minutes on each side, or until the salmon is cooked through and has a nice char. Remove from heat and let rest for a few minutes.
  4. While the salmon is resting, prepare the avocado crema. In a blender or food processor, combine the avocado, sour cream, lime juice, and a pinch of salt. Blend until smooth and creamy.
  5. Warm the tortillas in a dry skillet or microwave for a few seconds until pliable.
  6. Flake the cooked salmon into bite-sized pieces. Assemble the tacos by placing a portion of salmon on each tortilla, then top with shredded cabbage, diced tomatoes, and fresh cilantro.
  7. Drizzle the avocado crema over the top of each taco and serve immediately.

Nutrition

Serving: 1tacoCalories: 420kcalCarbohydrates: 20gProtein: 30gFat: 25gSaturated Fat: 4gPolyunsaturated Fat: 21gCholesterol: 70mgSodium: 800mgFiber: 5gSugar: 2g

Notes

  • For added heat, consider adding sliced jalapeños or a drizzle of hot sauce on top of the tacos.
  • Substitute the salmon with grilled shrimp or chicken for a different protein option.

Tried this recipe?

Let us know how it was!

Coconut Salmon Curry: A Delicious Recipe You Must Try!

Introduction to Coconut Salmon Curry

There’s something magical about a dish that warms your soul and fills your kitchen with delightful aromas. Coconut Salmon Curry is just that—a creamy, flavorful meal that’s perfect for busy weeknights or impressing guests. I remember the first time I tried a coconut curry; it was like a tropical vacation on my plate. This recipe is not only easy to whip up, but it also brings a burst of flavor that will have everyone asking for seconds. Whether you’re a seasoned chef or a kitchen novice, this Coconut Salmon Curry is a dish you won’t want to miss!

Why You’ll Love This Coconut Salmon Curry

This Coconut Salmon Curry is a game-changer for your dinner routine. It’s quick to prepare, taking just 30 minutes from start to finish, making it perfect for those hectic evenings. The creamy coconut milk melds beautifully with the spices, creating a rich flavor that dances on your palate. Plus, it’s packed with nutritious ingredients, ensuring you’re not just feeding your hunger but also nourishing your body. Trust me, this dish will become a staple in your kitchen!

Ingredients for Coconut Salmon Curry

Gathering the right ingredients is the first step to creating a delicious Coconut Salmon Curry. Here’s what you’ll need:

  • Coconut oil: This adds a rich, tropical flavor and helps sauté the aromatics.
  • Onion: Diced onion provides a sweet base that enhances the overall flavor.
  • Garlic: Minced garlic brings a punch of flavor and aroma to the dish.
  • Fresh ginger: Grated ginger adds warmth and a hint of spice, elevating the curry.
  • Curry powder: A blend of spices that gives the dish its signature flavor.
  • Ground turmeric: This not only adds color but also a subtle earthiness.
  • Coconut milk: The star of the show, providing creaminess and a hint of sweetness.
  • Vegetable broth: This adds depth and richness to the curry base.
  • Fish sauce: A little goes a long way in enhancing umami flavors.
  • Brown sugar: Balances the spices and adds a touch of sweetness.
  • Salmon fillets: Fresh salmon is the main protein, offering a buttery texture.
  • Cherry tomatoes: These add a burst of freshness and acidity.
  • Spinach leaves: A nutritious addition that wilts beautifully into the curry.
  • Salt and pepper: Essential for seasoning to taste.
  • Fresh cilantro: For garnish, adding a pop of color and freshness.
  • Lime wedges: A squeeze of lime brightens the dish and enhances flavors.

For those looking to spice things up, consider adding a chopped jalapeño or a pinch of red pepper flakes when sautéing the onions. If you want to make it a complete meal, serve the curry over cooked rice or quinoa for added texture and flavor. Exact measurements for these ingredients can be found at the bottom of the article, ready for printing!

How to Make Coconut Salmon Curry

Step 1: Sauté the Aromatics

Start by heating the coconut oil in a large skillet over medium heat. As the oil melts, it releases a delightful aroma that sets the stage for your Coconut Salmon Curry. Add the diced onion and sauté for about 5 minutes until it becomes soft and translucent. Then, stir in the minced garlic and grated ginger, cooking for an additional minute. This step is crucial; the aromatics create a flavorful foundation for the entire dish, making your kitchen smell heavenly!

Step 2: Add Spices

Next, it’s time to bring in the spices! Sprinkle in the curry powder and ground turmeric, stirring them into the onion mixture. Cooking the spices for just a minute allows their flavors to bloom, enhancing the overall taste of your curry. This brief sautéing step is essential; it transforms the spices from mere ingredients into the heart of your Coconut Salmon Curry.

Step 3: Create the Base

Now, pour in the creamy coconut milk and vegetable broth, followed by the fish sauce and brown sugar. Stir well to combine all the ingredients, ensuring the flavors meld together beautifully. This mixture will form the rich base of your curry. Bring it to a gentle simmer, allowing the ingredients to harmonize. The coconut milk adds a luscious creaminess, while the fish sauce introduces a savory depth that makes this dish truly irresistible.

Step 4: Cook the Salmon

It’s time to add the star of the show—salmon! Gently place the bite-sized salmon pieces and halved cherry tomatoes into the simmering sauce. Cook for about 5-7 minutes, or until the salmon is cooked through and flakes easily with a fork. This step is key; you want the salmon to absorb all those wonderful flavors while remaining tender and juicy.

Step 5: Finish with Spinach

Finally, stir in the fresh spinach leaves and let them wilt for about 2 minutes. This not only adds a vibrant color but also boosts the nutritional value of your Coconut Salmon Curry. Season with salt and pepper to taste, adjusting the flavors to your liking. With this last step, you’re just moments away from enjoying a delicious, homemade meal!

Tips for Success

  • Prep all your ingredients before starting to cook. It makes the process smoother and more enjoyable.
  • Don’t rush the sautéing of the aromatics; it builds a flavorful base for your curry.
  • Use fresh salmon for the best texture and taste; frozen can work, but it may alter the flavor.
  • Adjust the spice level to your preference by adding more curry powder or fresh chilies.
  • Serve immediately for the best flavor and texture; reheating can change the consistency.

Equipment Needed

  • Large skillet: A non-stick skillet works well, but any large pan will do.
  • Wooden spoon: Perfect for stirring and ensuring nothing sticks.
  • Measuring cups and spoons: Essential for accurate ingredient portions.
  • Knife and cutting board: For chopping vegetables and salmon.

Variations

  • Vegetarian Option: Substitute salmon with chickpeas or tofu for a plant-based twist that still packs a protein punch.
  • Spicy Kick: Add chopped jalapeños or a teaspoon of red pepper flakes to the sauté for an extra layer of heat.
  • Different Proteins: Try shrimp or chicken instead of salmon for a different flavor profile while keeping the same creamy base.
  • Herb Infusion: Experiment with fresh herbs like basil or mint for a refreshing twist on the traditional curry.
  • Low-Carb Version: Serve over cauliflower rice instead of regular rice for a lighter, low-carb meal.

Serving Suggestions

  • Serve the Coconut Salmon Curry over fluffy jasmine rice or quinoa for a hearty meal.
  • Pair with a crisp green salad dressed in a light vinaigrette to balance the richness.
  • A cold, refreshing beer or a glass of chilled white wine complements the flavors beautifully.
  • Garnish with extra cilantro and lime wedges for a vibrant presentation.

FAQs about Coconut Salmon Curry

Can I use frozen salmon for this recipe?

Yes, you can use frozen salmon, but fresh salmon will yield the best texture and flavor. If using frozen, make sure to thaw it completely before cooking to ensure even cooking.

What can I substitute for coconut milk?

If you’re looking for a substitute, you can use almond milk or cashew cream for a lighter option. However, keep in mind that the flavor will differ slightly from the rich creaminess of coconut milk.

How can I make this Coconut Salmon Curry spicier?

To add some heat, consider incorporating chopped jalapeños or a pinch of red pepper flakes when sautéing the onions. You can also increase the amount of curry powder for a bolder flavor.

Can I make this dish ahead of time?

While it’s best enjoyed fresh, you can prepare the curry base ahead of time and store it in the fridge. Just add the salmon and spinach when you’re ready to serve for the best results.

What sides pair well with Coconut Salmon Curry?

This dish pairs wonderfully with jasmine rice or quinoa. A light salad or steamed vegetables can also complement the rich flavors of the curry, making for a balanced meal.

Final Thoughts

Cooking Coconut Salmon Curry is more than just preparing a meal; it’s an experience that brings joy and warmth to your kitchen. The vibrant colors, enticing aromas, and rich flavors create a feast for the senses. Each bite transports you to a tropical paradise, making it a perfect dish for family gatherings or cozy nights in. Plus, the ease of preparation means you can enjoy this culinary adventure without spending hours in the kitchen. I hope this recipe becomes a cherished part of your cooking repertoire, bringing smiles and satisfaction to your table for years to come!

Ranis

Coconut Salmon Curry: A Delicious Recipe You Must Try!

A delicious and creamy Coconut Salmon Curry that is easy to make and packed with flavor.
Prep Time 10 minutes
Cook Time 20 minutes
Total Time 30 minutes
Servings: 4 servings
Course: Main Course
Cuisine: Asian
Calories: 350

Ingredients
  

  • 2 tablespoons coconut oil
  • 1 medium onion diced
  • 3 cloves garlic minced
  • 1 tablespoon fresh ginger grated
  • 1 tablespoon curry powder
  • 1 teaspoon ground turmeric
  • 1 can 14 ounces coconut milk
  • 1 cup vegetable broth
  • 1 tablespoon fish sauce
  • 1 tablespoon brown sugar
  • 1 pound salmon fillets cut into bite-sized pieces
  • 1 cup cherry tomatoes halved
  • 1 cup spinach leaves
  • Salt and pepper to taste
  • Fresh cilantro for garnish
  • Lime wedges for serving

Method
 

  1. In a large skillet, heat the coconut oil over medium heat. Add the diced onion and sauté for about 5 minutes until softened.
  2. Stir in the minced garlic and grated ginger, cooking for an additional minute until fragrant.
  3. Add the curry powder and ground turmeric, stirring to coat the onions evenly. Cook for another minute.
  4. Pour in the coconut milk and vegetable broth, followed by the fish sauce and brown sugar. Stir well to combine.
  5. Bring the mixture to a gentle simmer, then add the salmon pieces and cherry tomatoes. Cook for about 5-7 minutes, or until the salmon is cooked through and flakes easily with a fork.
  6. Stir in the spinach leaves and cook for an additional 2 minutes until wilted. Season with salt and pepper to taste.
  7. Serve the curry hot, garnished with fresh cilantro and lime wedges on the side.

Nutrition

Serving: 1servingCalories: 350kcalCarbohydrates: 8gProtein: 30gFat: 22gSaturated Fat: 18gPolyunsaturated Fat: 4gCholesterol: 70mgSodium: 600mgFiber: 2gSugar: 5g

Notes

  • For a spicier kick, add a chopped jalapeño or a pinch of red pepper flakes when sautéing the onions.
  • To make it a complete meal, serve the curry over cooked rice or quinoa for added texture and flavor.

Tried this recipe?

Let us know how it was!

Shaved Asparagus Salad with Burrata and Prosciutto is divine!

Introduction to Shaved Asparagus Salad with Burrata and Prosciutto

When I think of spring, my mind drifts to vibrant colors and fresh flavors, and nothing captures that essence quite like a Shaved Asparagus Salad with Burrata and Prosciutto. This dish is a delightful way to celebrate the season, combining the crispness of asparagus with the creaminess of burrata and the savory touch of prosciutto.

Whether you’re looking for a quick solution for a busy day or a dish to impress your loved ones, this salad fits the bill perfectly. It’s light, refreshing, and takes just minutes to prepare, making it an ideal choice for any occasion.

Why You’ll Love This Shaved Asparagus Salad with Burrata and Prosciutto

This Shaved Asparagus Salad with Burrata and Prosciutto is a game-changer for your meal rotation.

It’s incredibly easy to whip up, taking only 15 minutes from start to finish.

The combination of flavors is simply divine—crunchy asparagus, creamy burrata, and salty prosciutto create a symphony in your mouth.

Plus, it’s a light dish that won’t weigh you down, making it perfect for warm days or casual gatherings.

Ingredients for Shaved Asparagus Salad with Burrata and Prosciutto

Creating a Shaved Asparagus Salad with Burrata and Prosciutto is all about using fresh, quality ingredients. Here’s what you’ll need:

  • Fresh asparagus: Look for firm, bright green stalks. They should snap easily when bent, indicating freshness.
  • Burrata cheese: This creamy delight adds a rich texture. If you can’t find burrata, fresh mozzarella is a great substitute.
  • Prosciutto: Thinly sliced, this Italian ham brings a savory, salty flavor that complements the salad beautifully.
  • Olive oil: A good quality extra virgin olive oil enhances the salad’s flavor. It’s worth splurging a little here.
  • Lemon juice: Freshly squeezed lemon juice brightens the dish and balances the richness of the cheese.
  • Salt and pepper: Essential for seasoning, these staples elevate the flavors of the ingredients.
  • Fresh basil leaves: These fragrant leaves add a pop of color and a burst of flavor. You can also use arugula for a peppery twist.
  • Shaved Parmesan cheese: This adds a nutty flavor and a touch of elegance to the salad.

For those who want to experiment, consider adding toasted pine nuts or walnuts for extra crunch.

All ingredient quantities are listed at the bottom of the article for easy reference and printing.

How to Make Shaved Asparagus Salad with Burrata and Prosciutto

Making a Shaved Asparagus Salad with Burrata and Prosciutto is a breeze.

Follow these simple steps, and you’ll have a stunning dish ready in no time.

Let’s dive in!

Step 1: Shave the Asparagus

Start by trimming the tough ends off the asparagus.

Using a vegetable peeler, shave the asparagus into thin ribbons.

If your asparagus is on the thicker side, slice it very thinly instead.

Place the shaved asparagus in a large bowl.

This step is crucial; the thinner the ribbons, the more tender they’ll be.

Step 2: Prepare the Dressing

In a small bowl, whisk together the olive oil, lemon juice, salt, and pepper.

This dressing is simple yet flavorful, enhancing the salad without overpowering it.

Drizzle the dressing over the shaved asparagus and toss gently to combine.

Make sure every piece is coated; it makes a world of difference!

Step 3: Assemble the Salad

On a serving platter, arrange the dressed asparagus in a beautiful mound.

Take your time here; presentation matters!

The vibrant green of the asparagus will pop against the white burrata.

Step 4: Add Burrata and Prosciutto

Tear the burrata into pieces and place it on top of the asparagus.

The creamy texture will melt into the salad, creating a luscious experience.

Next, drape the prosciutto slices over the salad.

The salty, savory notes of the prosciutto balance the creaminess of the burrata perfectly.

Step 5: Garnish and Serve

Sprinkle the shaved Parmesan cheese and fresh basil leaves over the top.

These final touches add flavor and a touch of elegance.

Serve immediately for the best taste and texture.

This Shaved Asparagus Salad with Burrata and Prosciutto is not just a dish; it’s an experience!

Tips for Success

  • Choose asparagus that is bright green and firm for the best flavor.
  • Use a sharp vegetable peeler for even, thin ribbons.
  • Let the salad sit for a few minutes after dressing to enhance the flavors.
  • Experiment with different cheeses or nuts for a unique twist.
  • Serve the salad immediately for the freshest taste and texture.

Equipment Needed

  • Vegetable peeler: Essential for shaving the asparagus. A mandoline can also work for uniform slices.
  • Large bowl: For mixing the salad. A mixing bowl or even a salad spinner can do the job.
  • Small bowl: For whisking the dressing. Any bowl will suffice, even a coffee mug!
  • Serving platter: To present your salad beautifully. A large plate works just as well.

Variations

  • Nutty Crunch: Add toasted pine nuts or walnuts for an extra layer of texture and flavor.
  • Herb Infusion: Experiment with different herbs like mint or dill for a fresh twist.
  • Vegan Option: Substitute burrata with a creamy cashew cheese or avocado for a plant-based version.
  • Grilled Asparagus: For a smoky flavor, grill the asparagus before shaving it.
  • Fruit Addition: Toss in some sliced strawberries or peaches for a sweet contrast to the savory elements.

Serving Suggestions

  • Pair this salad with a crisp white wine, like Sauvignon Blanc, to enhance the flavors.
  • Serve alongside grilled chicken or fish for a complete meal.
  • For a stunning presentation, use a wooden board or slate platter.
  • Accompany with crusty bread to soak up the delicious dressing.

FAQs about Shaved Asparagus Salad with Burrata and Prosciutto

Can I make this salad ahead of time?

While this Shaved Asparagus Salad with Burrata and Prosciutto is best enjoyed fresh, you can prepare the asparagus and dressing in advance. Just toss everything together right before serving to keep the ingredients crisp and vibrant.

What can I substitute for burrata cheese?

If burrata isn’t available, fresh mozzarella is a fantastic alternative. It won’t have the same creamy texture, but it will still provide a delicious flavor that complements the salad beautifully.

Is this salad suitable for a vegetarian diet?

Yes! This salad is vegetarian-friendly, as it features fresh vegetables and cheese. Just be mindful of the prosciutto if you’re serving it to strict vegetarians; you can easily omit it or replace it with a plant-based protein.

How do I store leftovers?

If you have any leftovers, store them in an airtight container in the fridge. However, keep in mind that the asparagus may lose its crunch, so it’s best to enjoy this salad fresh.

Can I add other vegetables to this salad?

Absolutely! Feel free to get creative. Thinly sliced radishes, cucumbers, or even cherry tomatoes can add extra flavor and color to your Shaved Asparagus Salad with Burrata and Prosciutto.

Final Thoughts

Creating a Shaved Asparagus Salad with Burrata and Prosciutto is more than just preparing a meal; it’s about embracing the joy of fresh ingredients and simple pleasures.

Each bite offers a delightful contrast of textures and flavors, making it a memorable dish for any gathering.

Whether you’re enjoying it on a sunny patio or sharing it with friends, this salad brings a touch of elegance to your table.

So, roll up your sleeves, gather your ingredients, and let this vibrant salad brighten your day.

Trust me, your taste buds will thank you!

Ranis

Shaved Asparagus Salad with Burrata and Prosciutto is divine!

A refreshing Shaved Asparagus Salad topped with creamy burrata and savory prosciutto, perfect for a light meal or appetizer.
Prep Time 15 minutes
Total Time 15 minutes
Servings: 4 servings
Course: Salad
Cuisine: Italian
Calories: 320

Ingredients
  

  • 1 pound fresh asparagus trimmed
  • 8 ounces burrata cheese
  • 4 ounces thinly sliced prosciutto
  • 2 tablespoons olive oil
  • 1 tablespoon lemon juice
  • Salt and pepper to taste
  • Fresh basil leaves for garnish
  • 1/4 cup shaved Parmesan cheese

Method
 

  1. Using a vegetable peeler, shave the asparagus into thin ribbons. If the asparagus is thick, you can also slice it very thinly. Place the shaved asparagus in a large bowl.
  2. In a small bowl, whisk together the olive oil, lemon juice, salt, and pepper. Drizzle the dressing over the shaved asparagus and toss gently to combine.
  3. On a serving platter, arrange the dressed asparagus. Tear the burrata into pieces and place it on top of the asparagus.
  4. Drape the prosciutto slices over the salad.
  5. Sprinkle the shaved Parmesan cheese and fresh basil leaves over the top. Serve immediately.

Nutrition

Serving: 1servingCalories: 320kcalCarbohydrates: 4gProtein: 14gFat: 28gSaturated Fat: 10gPolyunsaturated Fat: 18gCholesterol: 40mgSodium: 600mgFiber: 1gSugar: 2g

Notes

  • For a twist, try adding toasted pine nuts or walnuts for extra crunch.
  • You can also substitute the burrata with fresh mozzarella for a different flavor profile.

Tried this recipe?

Let us know how it was!

Apple Cider Cheesecake: A Delightfully Creamy Recipe

Introduction to Apple Cider Cheesecake

As the leaves turn and the air gets crisp, there’s something magical about the flavors of fall. One of my favorite ways to embrace this season is with a slice of apple cider cheesecake. This creamy dessert captures the essence of autumn, blending the warmth of spices with the sweetness of apple cider. Whether you’re looking to impress guests at a gathering or simply treat yourself after a long day, this recipe is a delightful solution. It’s easy to make and even easier to enjoy, making it the perfect addition to your fall dessert repertoire.

Why You’ll Love This Apple Cider Cheesecake

This apple cider cheesecake is a game-changer for your dessert table. It’s not just about the taste—though, trust me, it’s heavenly. The ease of preparation means you can whip it up even on a busy weeknight. Plus, the rich, creamy texture paired with the warm spices will have everyone asking for seconds. It’s a comforting slice of fall that brings smiles and warmth to any gathering.

Ingredients for Apple Cider Cheesecake

Gathering the right ingredients is the first step to creating your apple cider cheesecake masterpiece. Here’s what you’ll need:

  • Graham cracker crumbs: These form the base of your crust, providing a sweet and crunchy texture.
  • Unsalted butter: Melted butter binds the crumbs together, adding richness to the crust.
  • Granulated sugar: A touch of sweetness enhances both the crust and the filling.
  • Cream cheese: The star of the show! It gives the cheesecake its creamy, smooth texture.
  • Vanilla extract: This adds a warm, aromatic flavor that complements the apple cider beautifully.
  • Eggs: They help set the cheesecake, giving it structure and a rich mouthfeel.
  • Apple cider: The key ingredient that infuses the cheesecake with that delightful fall flavor.
  • Ground cinnamon: A classic spice that brings warmth and depth to the dessert.
  • Ground nutmeg: Just a pinch adds a hint of earthiness, enhancing the overall flavor profile.
  • All-purpose flour: This helps stabilize the filling, ensuring a perfect texture.

For those looking to elevate the flavor, consider adding a tablespoon of caramel sauce to the batter. If you want a spiced crust, a teaspoon of ground cinnamon mixed into the graham cracker crumbs can do wonders. You can find all the exact measurements at the bottom of the article, ready for printing!

How to Make Apple Cider Cheesecake

Creating your apple cider cheesecake is a rewarding experience. Follow these simple steps, and you’ll have a delicious dessert that captures the essence of fall. Let’s dive in!

Step 1: Preheat the Oven

Start by preheating your oven to 325°F. This step is crucial because it ensures even baking. A properly preheated oven helps the cheesecake set correctly, giving it that perfect creamy texture.

Step 2: Prepare the Crust

In a medium bowl, combine the graham cracker crumbs, melted butter, and sugar. Mix until everything is well blended. The mixture should resemble wet sand. Next, press this mixture firmly into the bottom of a 9-inch springform pan. Make sure it’s even; this will be the foundation of your cheesecake.

Step 3: Bake the Crust

Pop the crust into the oven and bake for about 10 minutes. You’ll know it’s done when it’s lightly golden and fragrant. Once baked, remove it from the oven and let it cool completely. This cooling step is essential before adding the filling.

Step 4: Make the Cheesecake Filling

In a large mixing bowl, beat the softened cream cheese with the granulated sugar until smooth and creamy. This step is vital; a well-mixed filling ensures a silky texture. Take your time here—no one likes a lumpy cheesecake!

Step 5: Add Flavorings

Now, add the vanilla extract and mix until combined. Then, add the eggs one at a time, mixing well after each addition. In a separate bowl, combine the apple cider, ground cinnamon, ground nutmeg, and flour. Gradually add this mixture to the cream cheese blend, ensuring everything is well incorporated.

Step 6: Pour and Bake

Carefully pour the cheesecake filling over the cooled crust in the springform pan. Spread it evenly with a spatula. Bake for 50-60 minutes, or until the center is set but still slightly jiggly. This slight jiggle is a sign of a perfectly baked cheesecake!

Step 7: Cooling Process

Once baked, turn off the oven and let the cheesecake cool inside with the door slightly ajar for about an hour. This gradual cooling helps prevent cracks. After that, refrigerate the cheesecake for at least 4 hours, or overnight if you can wait. Chilling is key to achieving that rich, creamy texture.

Tips for Success

  • Make sure your cream cheese is at room temperature for easy mixing.
  • Don’t skip the cooling step in the oven; it helps prevent cracks.
  • Use a water bath for extra moisture while baking, if desired.
  • For a smoother filling, blend the mixture until completely lump-free.
  • Top with whipped cream and a sprinkle of cinnamon for a beautiful presentation.

Equipment Needed

  • 9-inch springform pan: Essential for easy removal of the cheesecake. A regular cake pan can work, but it may be harder to serve.
  • Mixing bowls: Use a large bowl for the filling and a medium one for the crust.
  • Electric mixer: A hand mixer or stand mixer makes beating the cream cheese a breeze.
  • Spatula: Perfect for spreading the filling evenly over the crust.
  • Measuring cups and spoons: Accurate measurements are key to a successful cheesecake.

Variations

  • Caramel Apple Cider Cheesecake: Swirl in some caramel sauce into the filling for a rich, sweet twist.
  • Gluten-Free Option: Substitute graham cracker crumbs with gluten-free cookies or almond flour for a gluten-free crust.
  • Vegan Version: Use vegan cream cheese and flax eggs to create a plant-based cheesecake that everyone can enjoy.
  • Spiced Pumpkin Addition: Mix in a half cup of pumpkin puree for a delightful pumpkin-apple fusion.
  • Nutty Crust: Add crushed pecans or walnuts to the graham cracker crust for an extra crunch and flavor.

Serving Suggestions

  • Pair your apple cider cheesecake with a dollop of freshly whipped cream for added richness.
  • A drizzle of caramel sauce on top enhances the fall flavors beautifully.
  • Serve with a side of spiced apple cider or a warm cup of coffee.
  • Garnish with thin apple slices or a sprinkle of cinnamon for a lovely presentation.

FAQs about Apple Cider Cheesecake

Can I make apple cider cheesecake ahead of time?

Absolutely! In fact, making it a day in advance allows the flavors to meld beautifully. Just be sure to refrigerate it properly to keep it fresh.

What can I use instead of cream cheese?

If you’re looking for a lighter option, you can try using Greek yogurt or a vegan cream cheese alternative. Just keep in mind that the texture and flavor may vary slightly.

How do I store leftover cheesecake?

Store any leftovers in an airtight container in the refrigerator. It should stay fresh for about 3-5 days, but trust me, it’s hard to resist finishing it sooner!

Can I freeze apple cider cheesecake?

Yes, you can freeze it! Wrap the cheesecake tightly in plastic wrap and then in aluminum foil. It can last up to 2 months in the freezer. Just thaw it in the fridge before serving.

What’s the best way to serve apple cider cheesecake?

For a delightful presentation, serve it chilled with a dollop of whipped cream and a sprinkle of cinnamon. A drizzle of caramel sauce adds an extra touch of indulgence!

Final Thoughts

Creating this apple cider cheesecake is more than just baking; it’s about embracing the flavors of fall and sharing joy with those you love. Each slice offers a creamy, spiced delight that warms the heart and brings smiles to the table. Whether it’s a cozy family dinner or a festive gathering, this dessert is sure to impress. The process is simple, yet the results are nothing short of spectacular. So, roll up your sleeves, gather your ingredients, and let the aroma of apple cider and spices fill your kitchen. You won’t regret it!

Ranis

Apple Cider Cheesecake: A Delightfully Creamy Recipe

A creamy and delicious apple cider cheesecake that combines the flavors of fall with a rich, smooth texture.
Prep Time 20 minutes
Cook Time 1 hour
Total Time 4 hours 20 minutes
Servings: 8 servings
Course: Dessert
Cuisine: American
Calories: 350

Ingredients
  

  • 1 ½ cups graham cracker crumbs
  • ½ cup unsalted butter melted
  • 2 tablespoons granulated sugar
  • 16 ounces cream cheese softened
  • 1 cup granulated sugar
  • 1 teaspoon vanilla extract
  • 3 large eggs
  • 1 cup apple cider
  • 1 teaspoon ground cinnamon
  • ½ teaspoon ground nutmeg
  • 1 tablespoon all-purpose flour

Method
 

  1. Preheat the oven to 325°F.
  2. In a medium bowl, combine the graham cracker crumbs, melted butter, and 2 tablespoons of sugar. Mix until well combined.
  3. Press the mixture firmly into the bottom of a 9-inch springform pan to form the crust. Bake for 10 minutes, then remove from the oven and let cool.
  4. In a large mixing bowl, beat the softened cream cheese with 1 cup of sugar until smooth and creamy.
  5. Add the vanilla extract and mix until combined.
  6. Add the eggs one at a time, mixing well after each addition.
  7. In a separate bowl, combine the apple cider, ground cinnamon, ground nutmeg, and flour.
  8. Gradually add this mixture to the cream cheese mixture, blending until smooth and well combined.
  9. Pour the cheesecake filling over the cooled crust in the springform pan.
  10. Bake for 50-60 minutes, or until the center is set and slightly jiggly.
  11. Turn off the oven and let the cheesecake cool in the oven with the door slightly ajar for about 1 hour.
  12. Once cooled, refrigerate the cheesecake for at least 4 hours or overnight before serving.

Nutrition

Serving: 1sliceCalories: 350kcalCarbohydrates: 25gProtein: 6gFat: 24gSugar: 25g

Notes

  • For a richer flavor, consider adding a tablespoon of caramel sauce to the cheesecake batter.
  • You can also top the cheesecake with whipped cream and a sprinkle of cinnamon before serving for an extra touch.
  • If you prefer a spiced crust, try adding 1 teaspoon of ground cinnamon to the graham cracker crust mixture.

Tried this recipe?

Let us know how it was!